David G.
-
Posts
11,326 -
Joined
-
Last visited
Content Type
Profiles
Forums
Events
Gallery
Everything posted by David G.
-

1:16 Gunze Sangyo 1937 Rolls-Royce Phantom III Sports Saloon
David G. replied to Anglia105E's topic in WIP: Model Cars
A great color choice for the interior. It just feels... "British" If I may David, I'd like to share a pointer on the tool kit. If I were to paint that, I would start with a base of silver lacquer. Once that had dried, I would spray a suitable flat green acrylic over the silver lacquer. I would then use some of those Tamiya cotton buds, the small pointed ones. Moisten them with whatever acrylic thinner is designed to work with the flat green paint and carefully remove the paint from the tools revealing the silver undercoat. The other colors for the tool handles, springs, etc. could then be dabbed in with more acrylic paint. I hope you find this bit of unsolicited advice helpful. Regards, David G. -
What a fun build! I love watching you pull all this together; all the cool details you add. David G.
-
Wow, excellent custom mods! The quad headlights give the Merc a more sinister look. I can't decide if I like the original orange version or the white rebuild better. David G.
-
Do You Create A Backstory For Your Builds?
David G. replied to oldcarfan's topic in General Automotive Talk (Trucks and Cars)
Thank you kindly David. It's the one build that I'm most proud of. David G. -
I remember having some difficulty with the inner fender well on mine. I don't remember if it was the issue you identified or something different. What I do remember is that they had something to do with the body not fitting down on the chassis properly. I think they affected how the interior tub fit into the body shell. On mine, I never did get the body and chassis to mate properly. Thanks for keeping us up to date on this build Jim. David G.
-
It looks like you're off to a good start Greg. That chopped top looks cool. I think mine started as the AMT kit. No chopped top but it came with some customization extras.
-
Hello Everybody! It's time for the next update on the great Surf Shark ambulance conversion. The foiling and chrome trim is done! I'll paint the door handles during final assembly. Now for a quick test fit with all the bells and whistles. I still plan on adding an antenna, I just need to decide where I want to place it. I ordered this from Auto World. Had I known that AMT had one of these in the works I'd have waited and not gone through all the effort to convert the Surf Shark back into an ambulance. Ah, well. I plan to use some of the ambulance features from this kit to finish off the Surf Shark conversion. Then I'll probably build this one as a hearse. Thanks for taking the time to look and please feel free to comment. David G.

-
Nicely done! David G.
-
Great color combination, excellent detail and assembly! Beautifully done! David G.
-
Do You Create A Backstory For Your Builds?
David G. replied to oldcarfan's topic in General Automotive Talk (Trucks and Cars)
Not usually. But if something I build needs an explanation, I'll usually come up with a reason I built it the way I did. A good example is the 1958 Chevy Proton. A fictional nuclear powered concept car. Here's the explanation I came up with: "Explanation of Chevy Proton Power Systems. If I remember correctly, at the time I was thinking of how much horsepower it would take to move a 1956 Chevy Nomad with two fifty-gallon tanks of water and a lead shielded reactor added. According to my research a 1956 Chevy Nomad wagon, on which this car is based, weighed a little more that 3,000 lbs. To that we add 100 gallons of distilled water (8lbs. per gallon for 400lbs) and associated storage tanks and plumbing which I estimated at an additional 100lbs. For the powerplant itself, I just swapped out the weight of a Chevy 283 engine and automatic transmission at an estimated 750lbs. total. Together and that adds up to an additional 1,250lbs. more than the stock '56 Nomad or about 4,300lbs. My 1971 Delta 88 weighed just a little less than that and got along just fine with about 300 horsepower at about 445 lb-ft of torque. I figured all that in horsepower because I live in the USA. To convert to gigawatts, we should first convert the horsepower rating to kilowatts. Horsepower is not really a set standard but more of a range which is roughly 1hp to .75kW which works out to about 225kW. In GW that's a disappointing 0.000225 GW. I think Doc Brown has me beat." ***** That's about as detailed as I ever got. Cheers, David G.
-
Thanks for taking the time to take and post photos of this amazing build Randy. It's always a pleasure to see it back on the boards. David G.
-
Found in a warehouse.
David G. replied to NOBLNG's topic in Model Trucks: Pickups, Vans, SUVs, Light Commercial
A great idea well executed! David G. -
A beautiful build! David G.
-
Great work on the decals. David G.
-
Another Joker-Mobile, maybe? ? Go for it! David G.
-
1:16 Gunze Sangyo 1937 Rolls-Royce Phantom III Sports Saloon
David G. replied to Anglia105E's topic in WIP: Model Cars
Seeing all this brings a smile to my face David. Except those sink marks on the doors, no smile there. At least they're easily remedied and well within the normal scope of model building. Also, I had no knowledge of the swiveling mascot. It makes perfect sense upon consideration, I hadn't had any reason to consider it. It would seem that I've learned something new today, thanks for that! David G. -
Excellent work on the wire loom! I attempted that and it got the better of me, well done! David G.
-
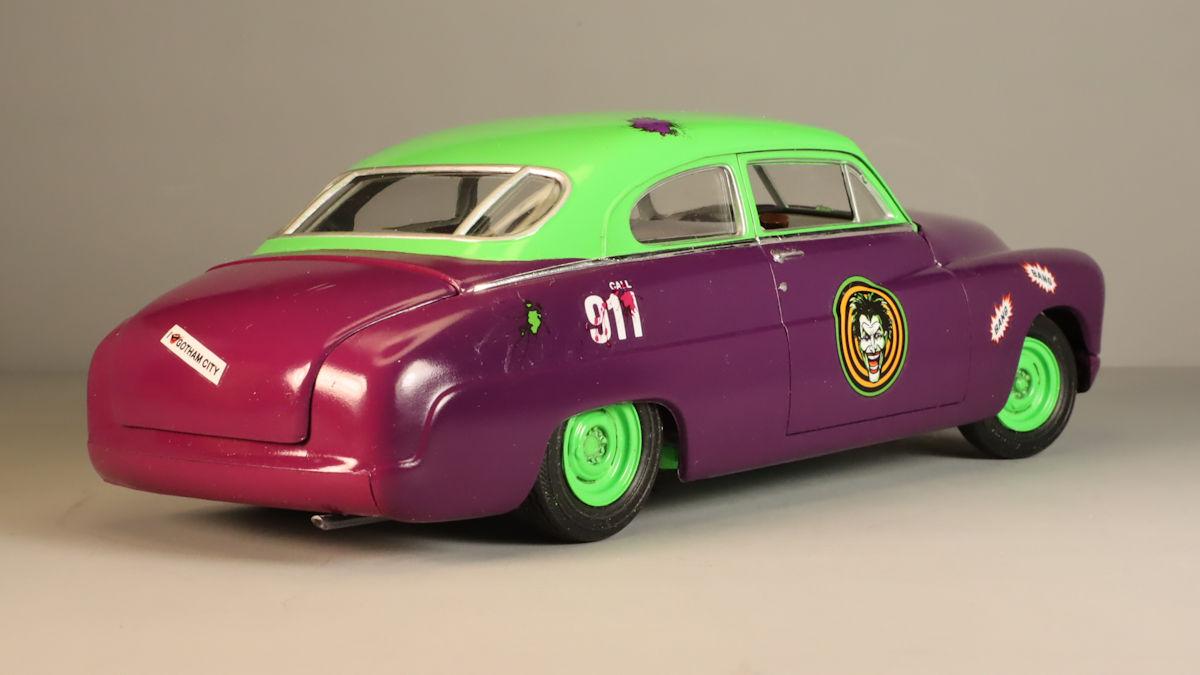
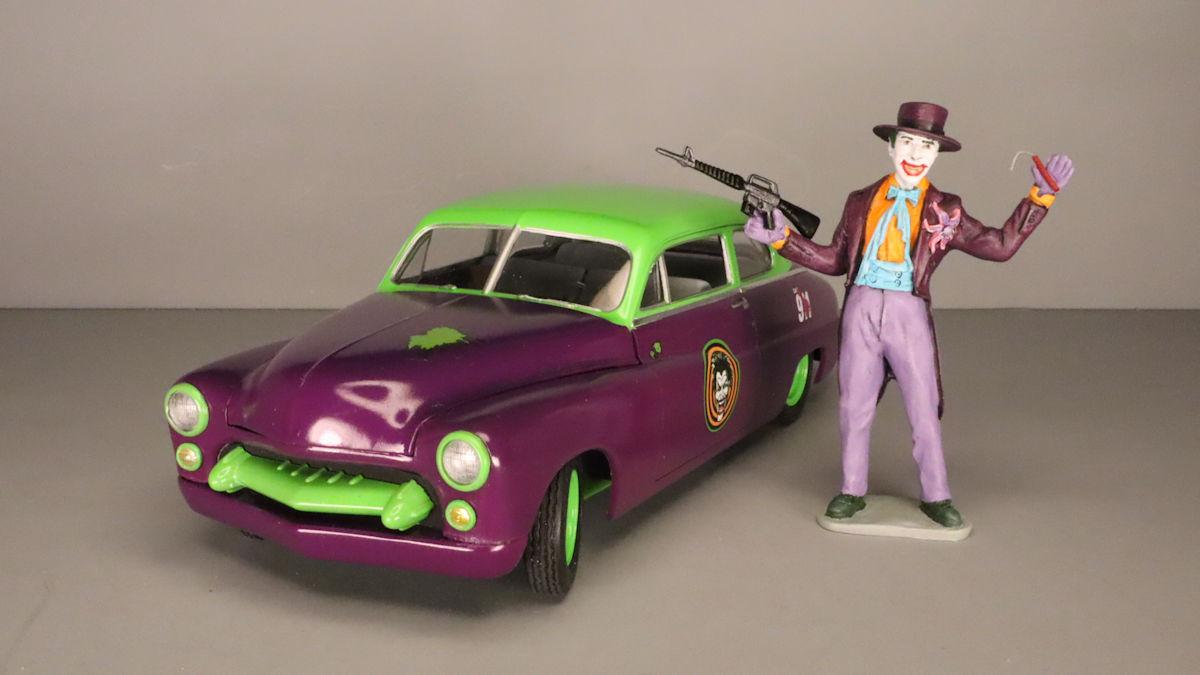
Hello Everybody! Like many of us in this community, I've been building model cars off and on for many years. And for those of us who have been building for longer than we may want to admit, there are certain builds that are so iconic and so popular that they are almost obligatory- cliche' even. Most commonly: 1957 Chevrolet Bel Air 1932 Ford (Deuce) Coupe 1940 Ford Coupe Chevrolet Corvette (any kind or year) And of course, the 1949 Mercury. Certainly, there are other famous makes and models that deserve recognition but this thread is going to be about the iconic 1949 Mercury. This beautiful automobile is heralded by many as the pinnacle of post-war automotive design and styling. It lends itself well to the imaginations of customizers and hotrodders alike. I've seen some fabulous versions of the '49 Mercury built by this community's members and I thought it would be great to have one location where those delightful builds can be shared and admired by all. So if you have a '49 Mercury of any kind you wish to share, please feel free to post it here. If you're in the process of building one, feel free to post your progress photos here. If you haven't built one yet, what are you waiting for? I'll start things off with one of mine. So here it is, The '49 Mercury Joker-Mobile. Go ahead, call 911. He loves the attention! TNT, a tire iron and a Tommy Gun What more does a psycho need? And of course, Mr. J. really loves his new ride! I'm looking forward to see what this talented community has to offer when it comes to the '49 Mercury. David G.
-
Nice tutorial. Once one sees the process it all seems so simple. Time consuming, but simple. David G.
-
Paint and detail are fantastic, stunning work Bob! David G.
-
1:16 Gunze Sangyo 1937 Rolls-Royce Phantom III Sports Saloon
David G. replied to Anglia105E's topic in WIP: Model Cars
In my builds I always consider getting the wheels mounted and all of them touching the ground a tipping point. It's no longer just a collection of parts in progress, it's a model of a motor vehicle. "Foursquare and firm" as the saying goes. Great work so far David! David G. -
Cool! David G.
-
And it looks like he's holding on for dear life! Fabulous detail painting on the figure. David G.
-
Excellent chassis and engine detail, love the color too! Great work so far Bob. David G.
-
Nice work on the Rat Fink and distributor. It looks like the masking work for the paint took some patience. David G.