David G.
-
Posts
11,326 -
Joined
-
Last visited
Content Type
Profiles
Forums
Events
Gallery
Everything posted by David G.
-
Sorry to learn of your Covid infection Jim, I hope you can recover quickly. The nice thing about a kit like this is that anything you do to it will likely be an improvement! I always find your builds entertaining and educational, l can't wait to see what you do with this one. David G.
-
Sorry to learn of your Covid infection Jim, I hope you can recover quickly. The nice thing about a kit like this is that anything you do to it will likely be an improvement! I always find your builds entertaining and educational, l can't wait to see what you do with this one. David G.
-
Great work on this one so far Jeremy! That grille is going to look great. I can't wait to see how the vinyl top works out. David G.
-

1:16 Gunze Sangyo 1937 Rolls-Royce Phantom III Sports Saloon
David G. replied to Anglia105E's topic in WIP: Model Cars
Nice work so far on the engine David. I think connecting all those wires would drive me buggy. I believe I'd rather foil the chrome trim on a '59 Chrysler Imperial! David G. -
Removing and replacing the chrome trim seem to be the perfect way of addressing the fit issued between the hood and body. Great call Jim! David G.
-
It's nice seeing this one back on the bench! David G.
-
Nicely done! I'll have a look for it in the "Under Glass" section. David G.
-
I admire your patience and attention to detail Roger, not to mention your building skills. For me, the research and planning can be as much fun as the build itself. David G.
-
Wow, it's like putting together a 3D puzzle in which you have to make all the pieces yourself! ? It definitely has that stretched Funny Car profile. Impressive work! David G.
-
Hello Everybody! Thank you all for your informative responses, I now have much of the information that I need. I placed my order this morning, thanks for the link @yh70! Having the free shipping really helps as I need to keep an eye on my expenses! @Bills72sj I remember watching you build your wonderful diorama. Seeing what you did with the steel plate in the base and using magnets as you did struck me as pure genius and is part of the inspiration to start using magnets in my builds where it's suitable. @StevenGuthmiller Following you builds and seeing your use of magnets for the hood hinges is mostly what I was referring to when I mentioned using magnets for hoods and trunks. There has to be a way of using magnets to do for trunk lids something similar to what you do with hoods. I have a couple of builds that I would have liked to be able to display with the trunk opened or closed. Without the use of a stick as a prop. To me, using a prop just kind of breaks the whole image. Thank you all for taking the time to respond, I now have 300 mini magnets on the way to me. Which at my rate of building should be more than a life-time supply. I may have more questions once they get here but until then, thanks. David G.
-
Thank you Rich. Thanks Carl. I think they look better than the ones in the kit. David G.
-
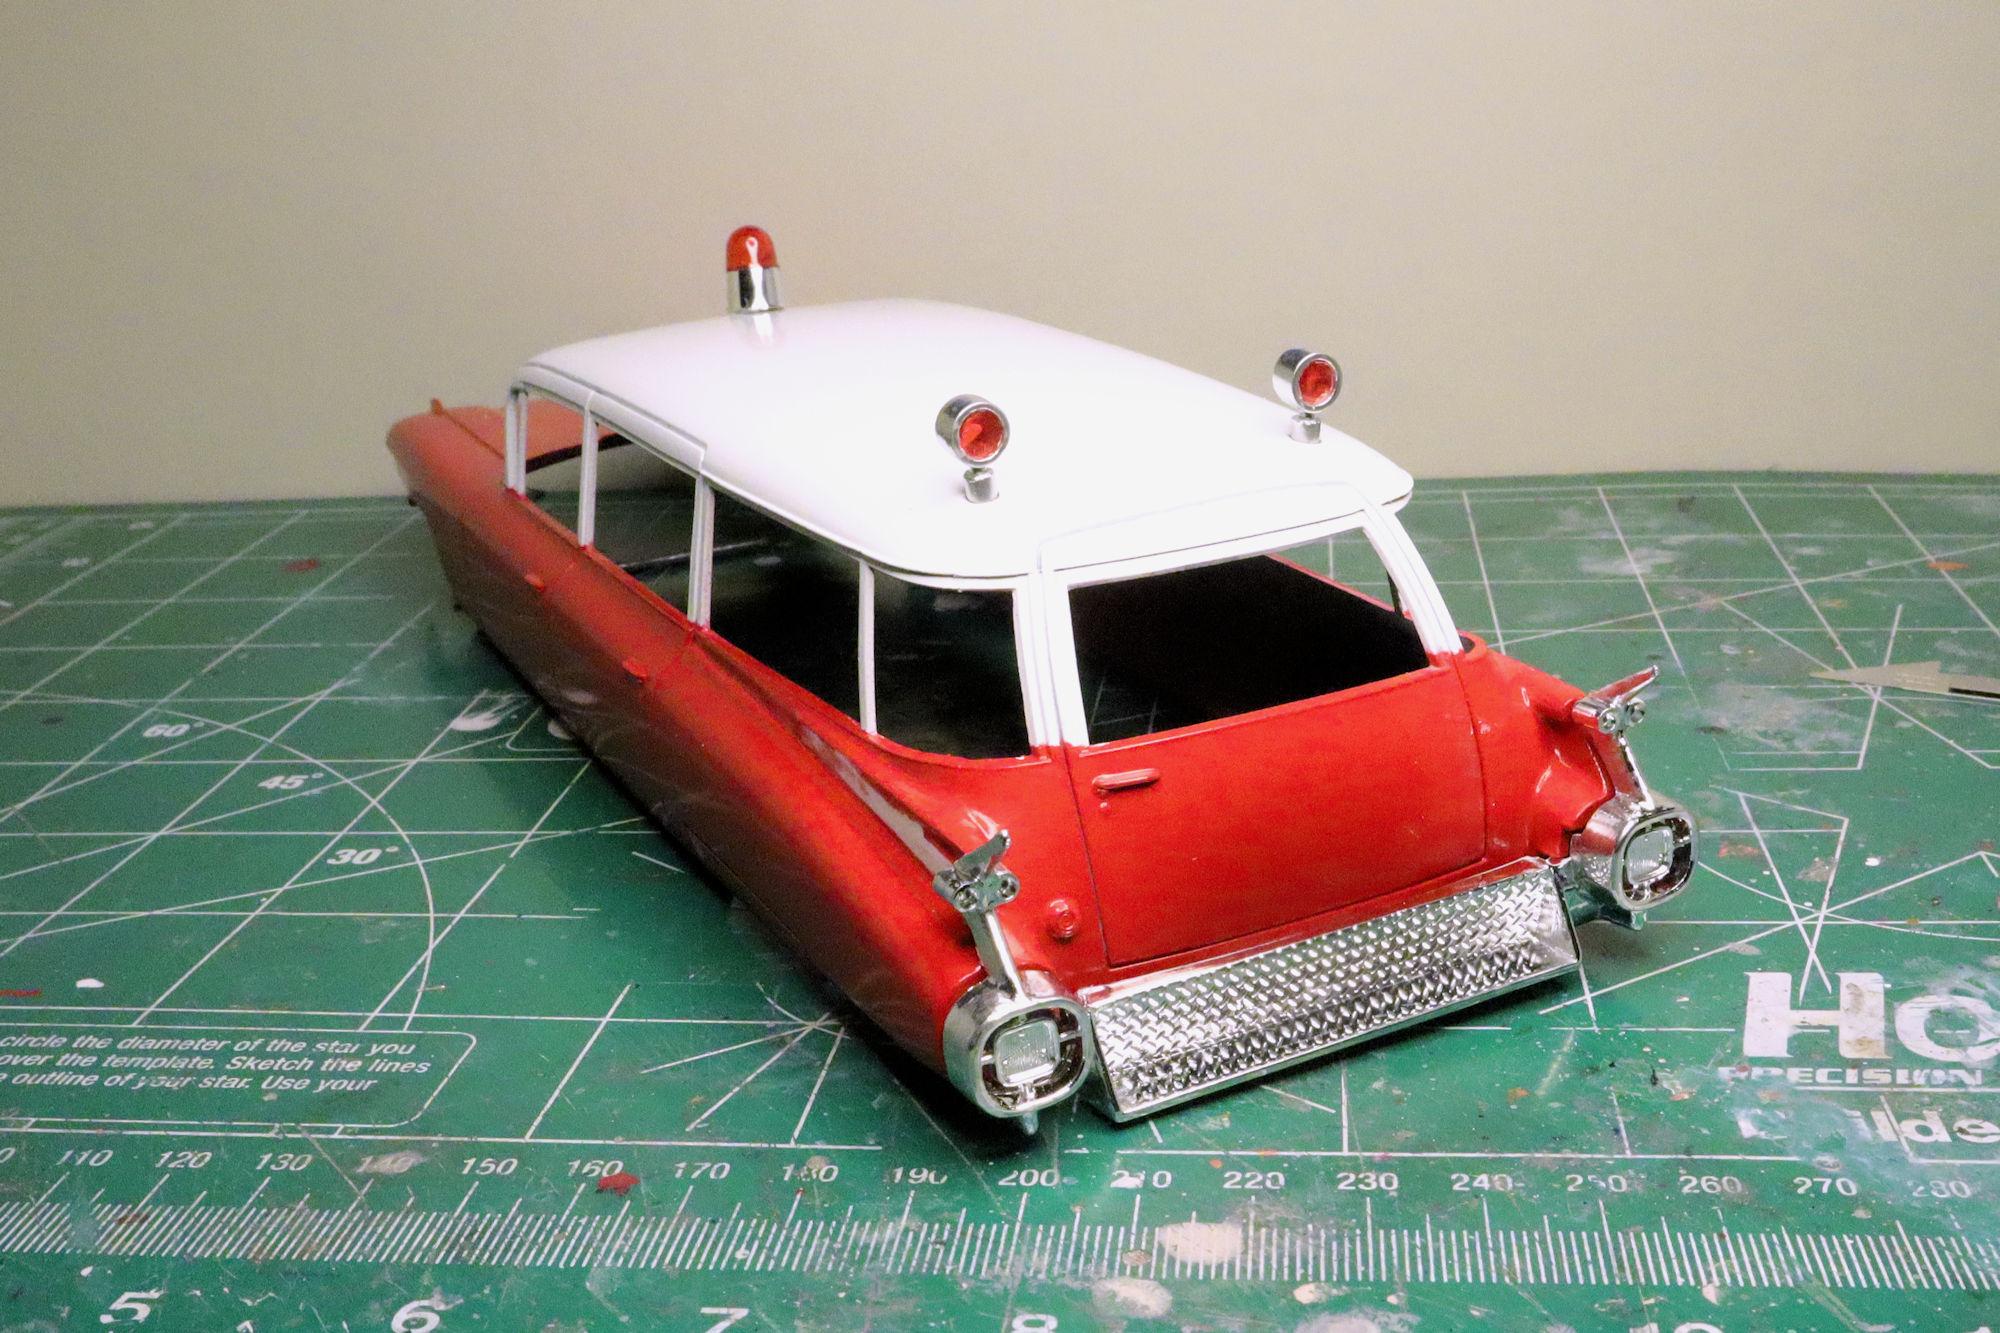
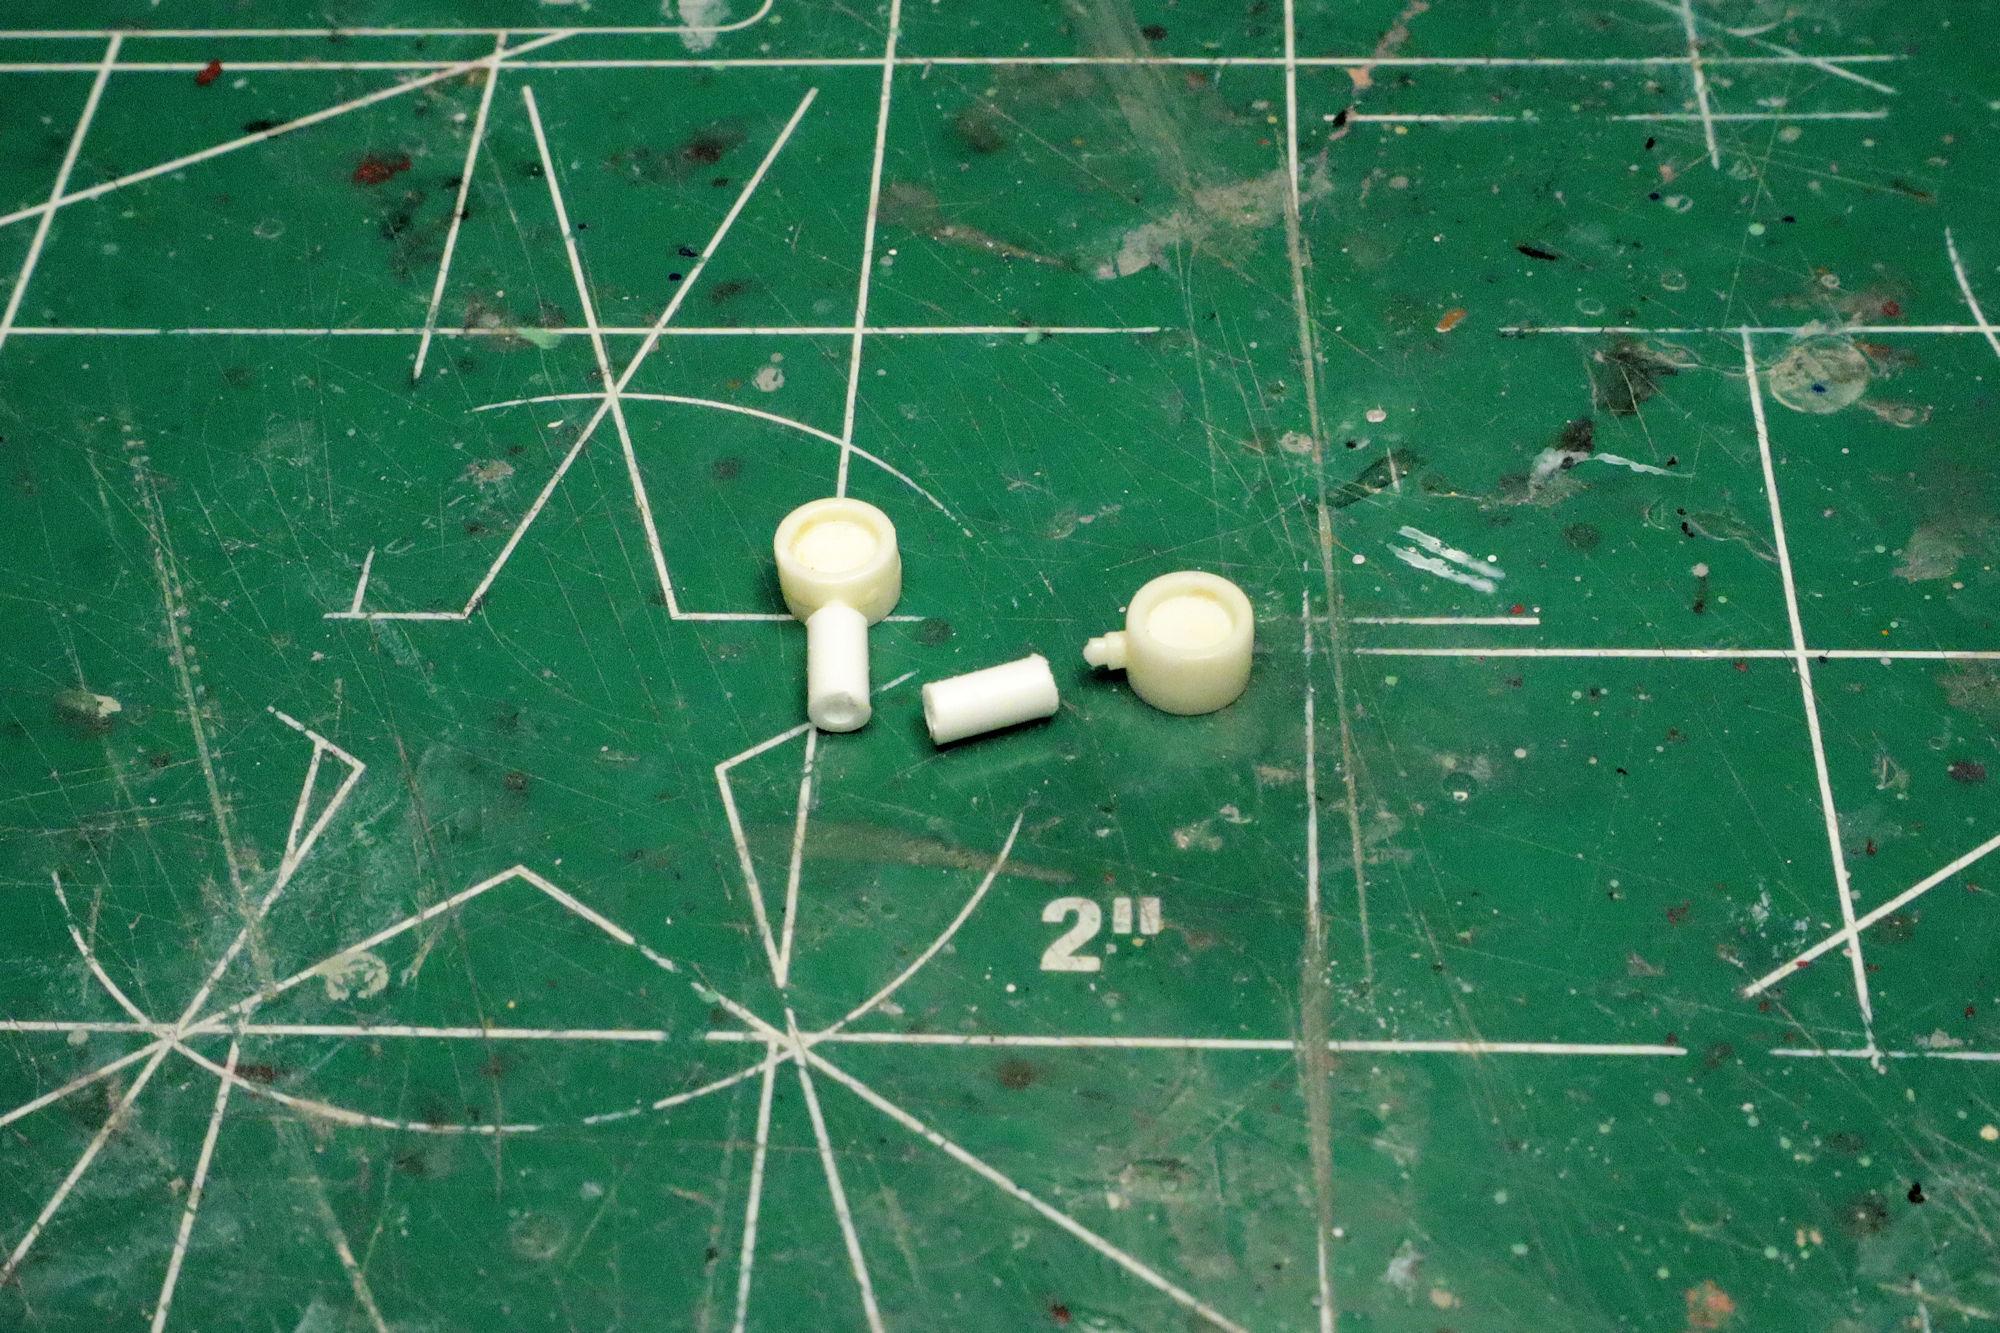
Hello Everybody! As promised, here's another update on the Surf Shark ambulance conversion. These are the lollypop lights I plan to mount on the rear part of the roof. I've stripped the chrome coating and cleaned them up. They are being mounted in styrene tubing to allow them to be placed in the holes that were already in the roof. Rather than try to blend the tubing with the roof I'll probably chrome the tubing too and allow it to serve as a base for the lamps. The lollypop lights have had some Rustoleum Chrome paint applied and I've added a set of red lenses from the parts box. Of course, this calls for a test fit. I think I like it. As always, thanks for taking the time to look and please feel free to post any opinions, evaluations or other comments you may have. David G.

-
Hello Everybody! I've noticed that many builders in this community use micro magnets to assist with holding doors and trunks shut and properly positioned on their builds. I'd like to start doing this too and I need some information regarding type, size, strength, and best types of magnets to use. I also need a US based supplier. I've done a little research so I know that the magnets are not expensive for what I think I need ($6.95 per 100 3mm) but shipping is a killer in the $7 to $10 range. ? Does Lowe's or Home Depot carry these? I could also use some pointers on proper and effective uses. Thanks to you all, David G.
-
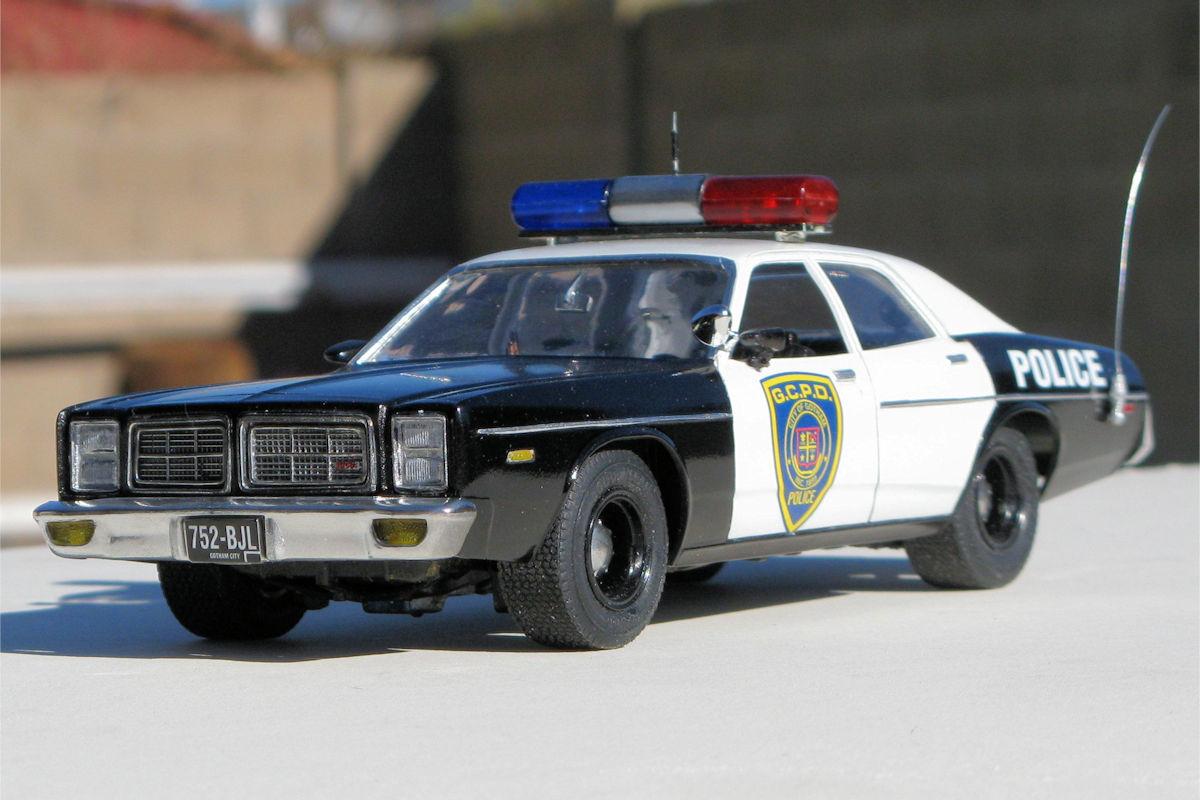
That looks great! The wheels work very well with the body lines on this one. The kit does build up nicely despite its shortcomings. I had the GCPD version and built it as such. Yes, I did notice that they both have the same license plate! David G.
-
Great looking color and a fabulous job cleaning up the rear panel! David G.
-
Great looking engine! David G.
-
Wow Jim, this is the kit that just keeps on giving. Giving surprises. Giving disappointments. And giving problems in general. You seem more than capable of addressing these and I'm sure that the end result will be worth all the time and effort. David G.
-
1:16 Gunze Sangyo 1937 Rolls-Royce Phantom III Sports Saloon
David G. replied to Anglia105E's topic in WIP: Model Cars
Hi David. What a fabulous find! It couldn't have fallen into better hands. I can't wait to see you work your magic with this kit. I will be eagerly following along on this build. David G. -
Mercedes-Benz 450 SLC 5.0 (Esci/Italeri, 1/24 scale)
David G. replied to Tommy124's topic in Model Cars
A very nice build in spite of all the difficulties. David G. -
Holy cow Bob, what a tremendously unfortunate turn! I sure can understand your need to step back for a while, I've had to walk away a number of times myself. Sometimes it's the better choice to make. You do some really great work Bob so try not to let this one bad break hang with you for too long. I have a saying for times like this: "Each kit I build is really only practice for the next one!" It's got me through some rough builds. And of course there are some builds that I just never went back to - as least not yet. David G.
-
Thanks Bob, I'm pretty happy with it myself. David G.
-
Hello Everybody! Just another quick update to let you all know that I'm still here plugging away at this. I've officially entered what I call the "Thousand and One Details" phase of the build. That's the phase of the build in which all the small ancillary parts like mirrors, door handles, antennas and other trim items get prepped, painted and sometimes even built prior to final installation. Here I'm getting the side mirrors ready for their installation by drilling their bases out and adding a bit of wire to each to serve as a pin to hold them more securely to the doors on which they will be mounted. The doors will also be drilled to accommodate the pins. I know this wasn't much of an update but I should have more photos ready in a couple of days. David G.
-
Duplicate post, please delete.
-
I'm well enough Si, thanks for asking. And a happy New Year to you too. I was just curious about the time you've invested as I'm sure it's quite a lot. Some years ago I set up a spread sheet in Excel to keep track of my build projects and the time I spend on them. This was back when I had many more commitments than I do now and I needed help managing my time. I've always been fascinated with charts, graphs, tables and other means of information management so I've kept up with the data tracking even though I probably no longer need to. I've learned that most of my builds take between forty to sixty hours from start to finish, I usually try to commit to three or four hours per week to building. The build with the longest time into it is my Chevy Proton with 171 hours total spread over an eight year period. Here's a link to the build thread if you're interested. I agree. Being a member of this community does provide a certain inspiration to keep on with a build. It almost gives one a sense of responsibility or duty to the group, rather like having an audience to play to. In any case, I'm certainly glad that you've kept at with this one. It certainly has to be one of the most, if not the most detailed Star Destroyer built. I would suggest trying to contact George Lucas to let him know if it when it's done but he no longer seems to care about Star Wars. ? After nearly half a century who could blame him? Regards, David G.
-
It's coming along nicely. David G.