David G.
-
Posts
11,326 -
Joined
-
Last visited
Content Type
Profiles
Forums
Events
Gallery
Everything posted by David G.
-
Fabulous looking work so far! You have a great idea for making distributors, I may have to try it sometime. thanks for sharing it. David G.
-

My first WIP here; '70 Dodge Challenger T/A, Parts
David G. replied to Roadrunner's topic in WIP: Model Cars
Dang! That came out great! David G. -
Thank you Mathias. David G.
-
Hello Everybody! I was able to get a little more done on the Superbird over the weekend. I got the engine bay detail painted. That's as much as I'm going to do with it. I did get more than this done but it's not finished to a point where I can post it yet. Hopefully soon. As always, thanks for looking and please feel free to comment. David G.

-
Who doesn't love a mock-up? Let's see yours!
David G. replied to Belairconvertable's topic in WIP: Model Cars
Hello Everybody! Here's an initial mockup on the Rolls-Royce I'm currently working on. David G.
-
Following your build is like watching a magic trick in slow motion François. There's always something amazing going on that I don't quite understand but find captivating. David G.
-
The floor / chassis looks great! David G.
-
My first WIP here; '70 Dodge Challenger T/A, Parts
David G. replied to Roadrunner's topic in WIP: Model Cars
Whatever was wrong with it, it looks correct now. David G. -
That looks great! Nice accent roof color. I may have to get some of that New and Improved BMF. The last stuff I received from them a couple of years ago is horrible! It doesn't cut well, is difficult to work and I have to add PVA to get it to stick. David G.
-
1962 Rolls Royce Silver Cloud II by Minicraft Models: WIP
David G. replied to David G.'s topic in WIP: Model Cars
Thank you Carl, It's great to hear from you. I hope you're well. David G. -
Very clever and extremely well executed! David G.
-
Amazing work! Set in the diorama as it is, I thought I was looking at the car that inspired the model, not the model itself. Absolutely astounding! David G.
-
1950 Chevrolet 3100 Pickup
David G. replied to Zippi's topic in WIP: Model Trucks: Pickups, Vans, SUVs, Light Commercial
I'm curious to see how the front ride-height plays out with the adjustments you made. David G. -
My first WIP here; '70 Dodge Challenger T/A, Parts
David G. replied to Roadrunner's topic in WIP: Model Cars
The wheels and mirror look great Kevin! David G. -
1962 Rolls Royce Silver Cloud II by Minicraft Models: WIP
David G. replied to David G.'s topic in WIP: Model Cars
Thank you for your kind comment Pierre. There are a couple more repairs that I'm considering but the other features you mentioned will remain as they are. As much as I enjoy building, I also enjoy completing. Completing maybe even a little more. Thank you Greg, I appreciate that. Excellent call on the wipers David! They look as if they were meant to be there. I am considering adding an aerial and rearview mirror... and a set of wing-mounted mirrors... and effecting a couple of other casting repairs. Maybe. But the wipers and door handles will remain as they are. They are... sufficient. This particular kit was issued in a left-hand drive configuration. I would have preferred a proper RHD model. I also would have preferred not to spend twenty or thirty hours correcting casting errors on a thirteen-piece kit. But, as we say "It is what it is." Again, thank you very much David for all your help and direction with this kit. David G. -
My first WIP here; '70 Dodge Challenger T/A, Parts
David G. replied to Roadrunner's topic in WIP: Model Cars
Hi Kevin, I use Tamiya TS-80 Flat Clear. It's a lacquer. Just a quick, light coat is usually enough. Cheers, David G.
-
You've been making some spectacular accomplishments with this build. You have impressive engineering and building skills I'm just happy when I can get all four wheels to touch the ground simultaneously. David G.
-
My first WIP here; '70 Dodge Challenger T/A, Parts
David G. replied to Roadrunner's topic in WIP: Model Cars
The tires look good. I usually use Tamiya flat clear on mine and it works pretty well. David G. -
1962 Rolls Royce Silver Cloud II by Minicraft Models: WIP
David G. replied to David G.'s topic in WIP: Model Cars
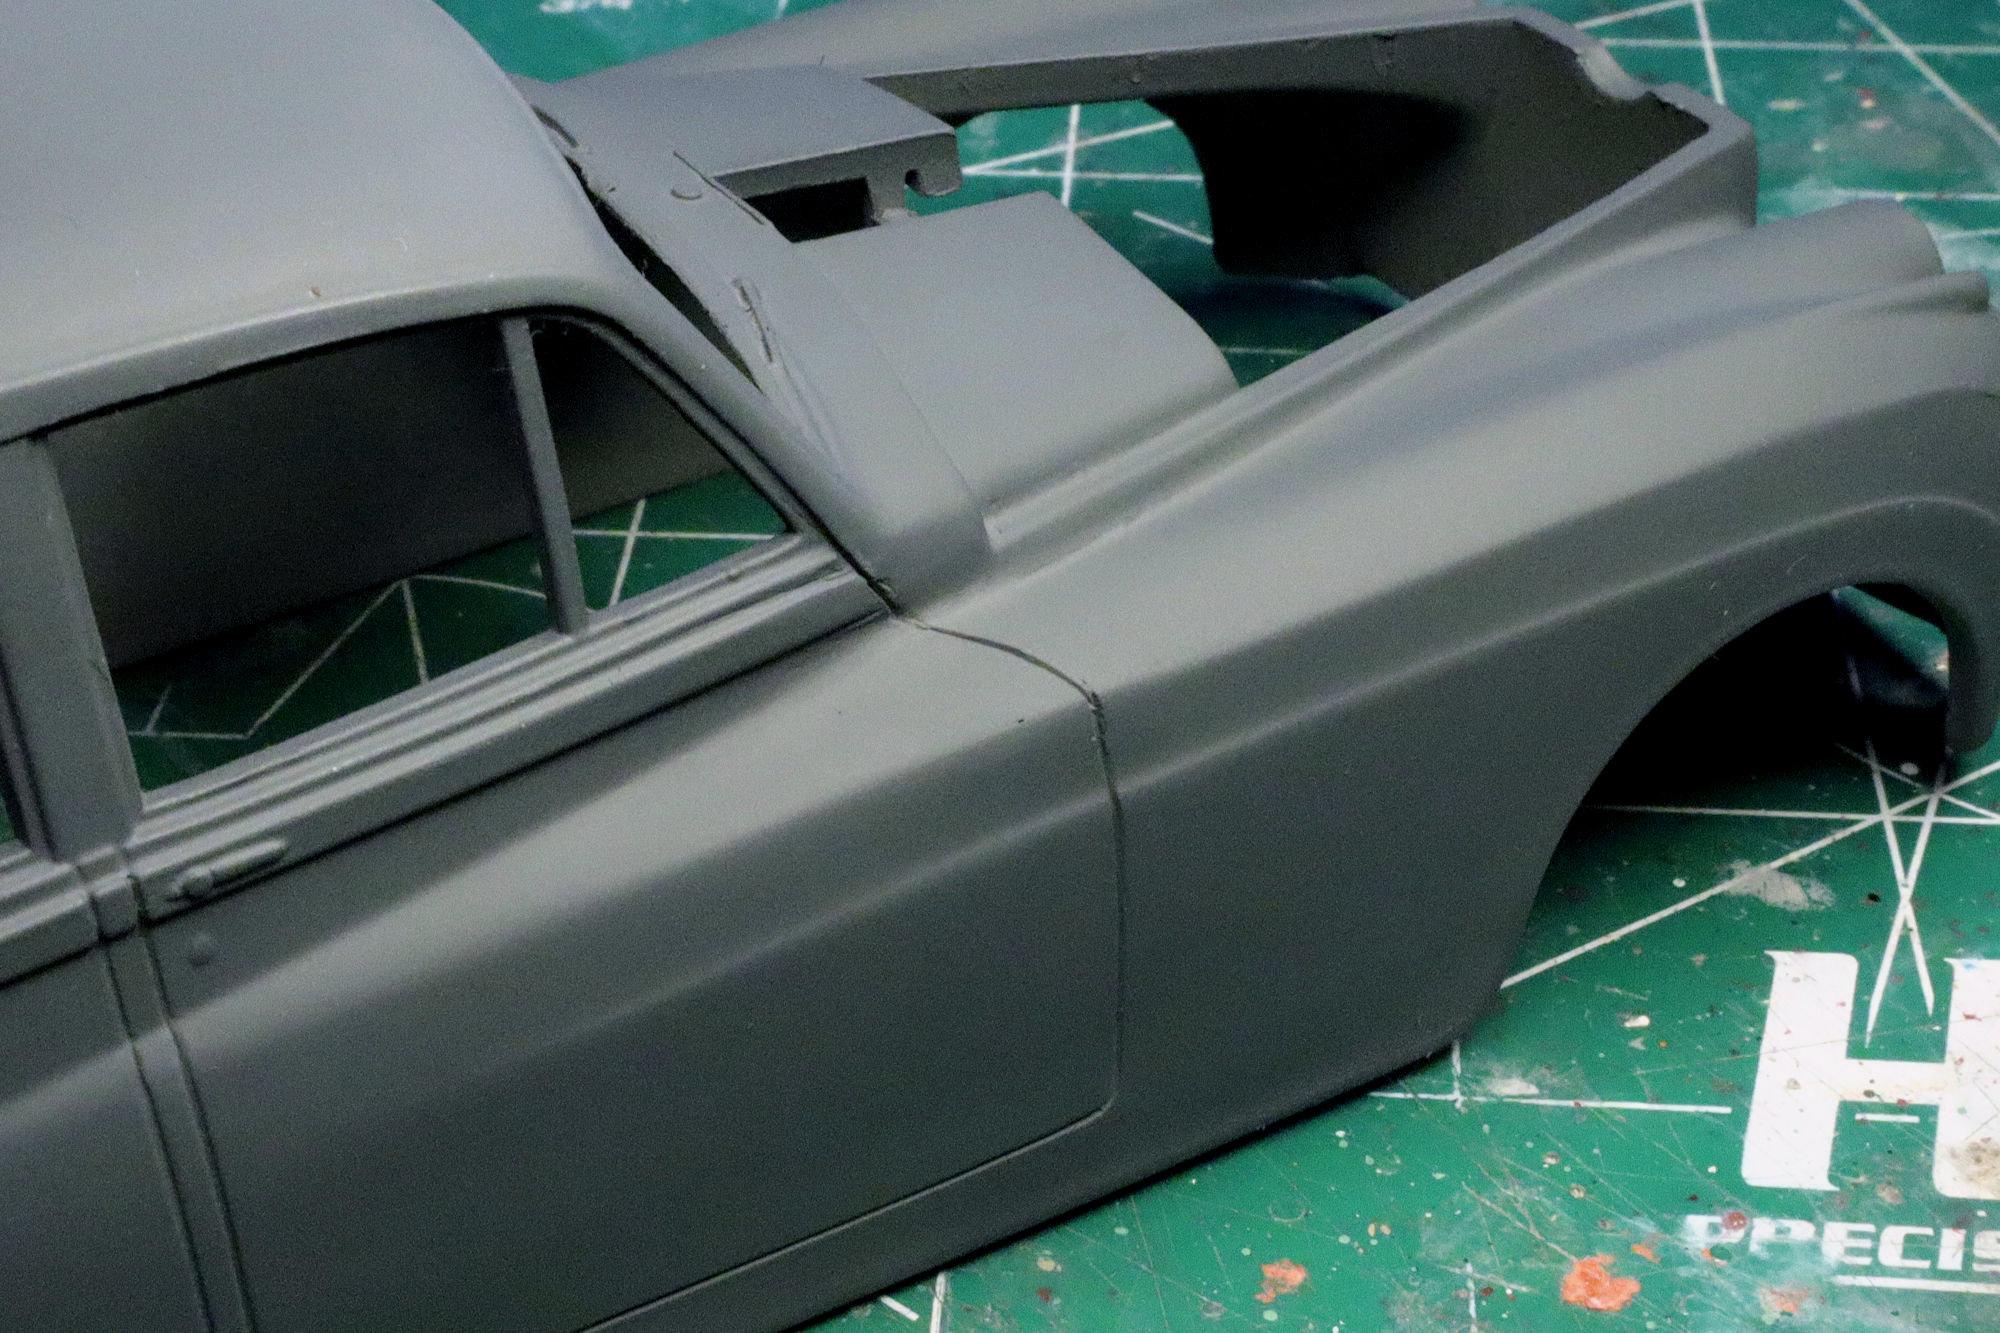
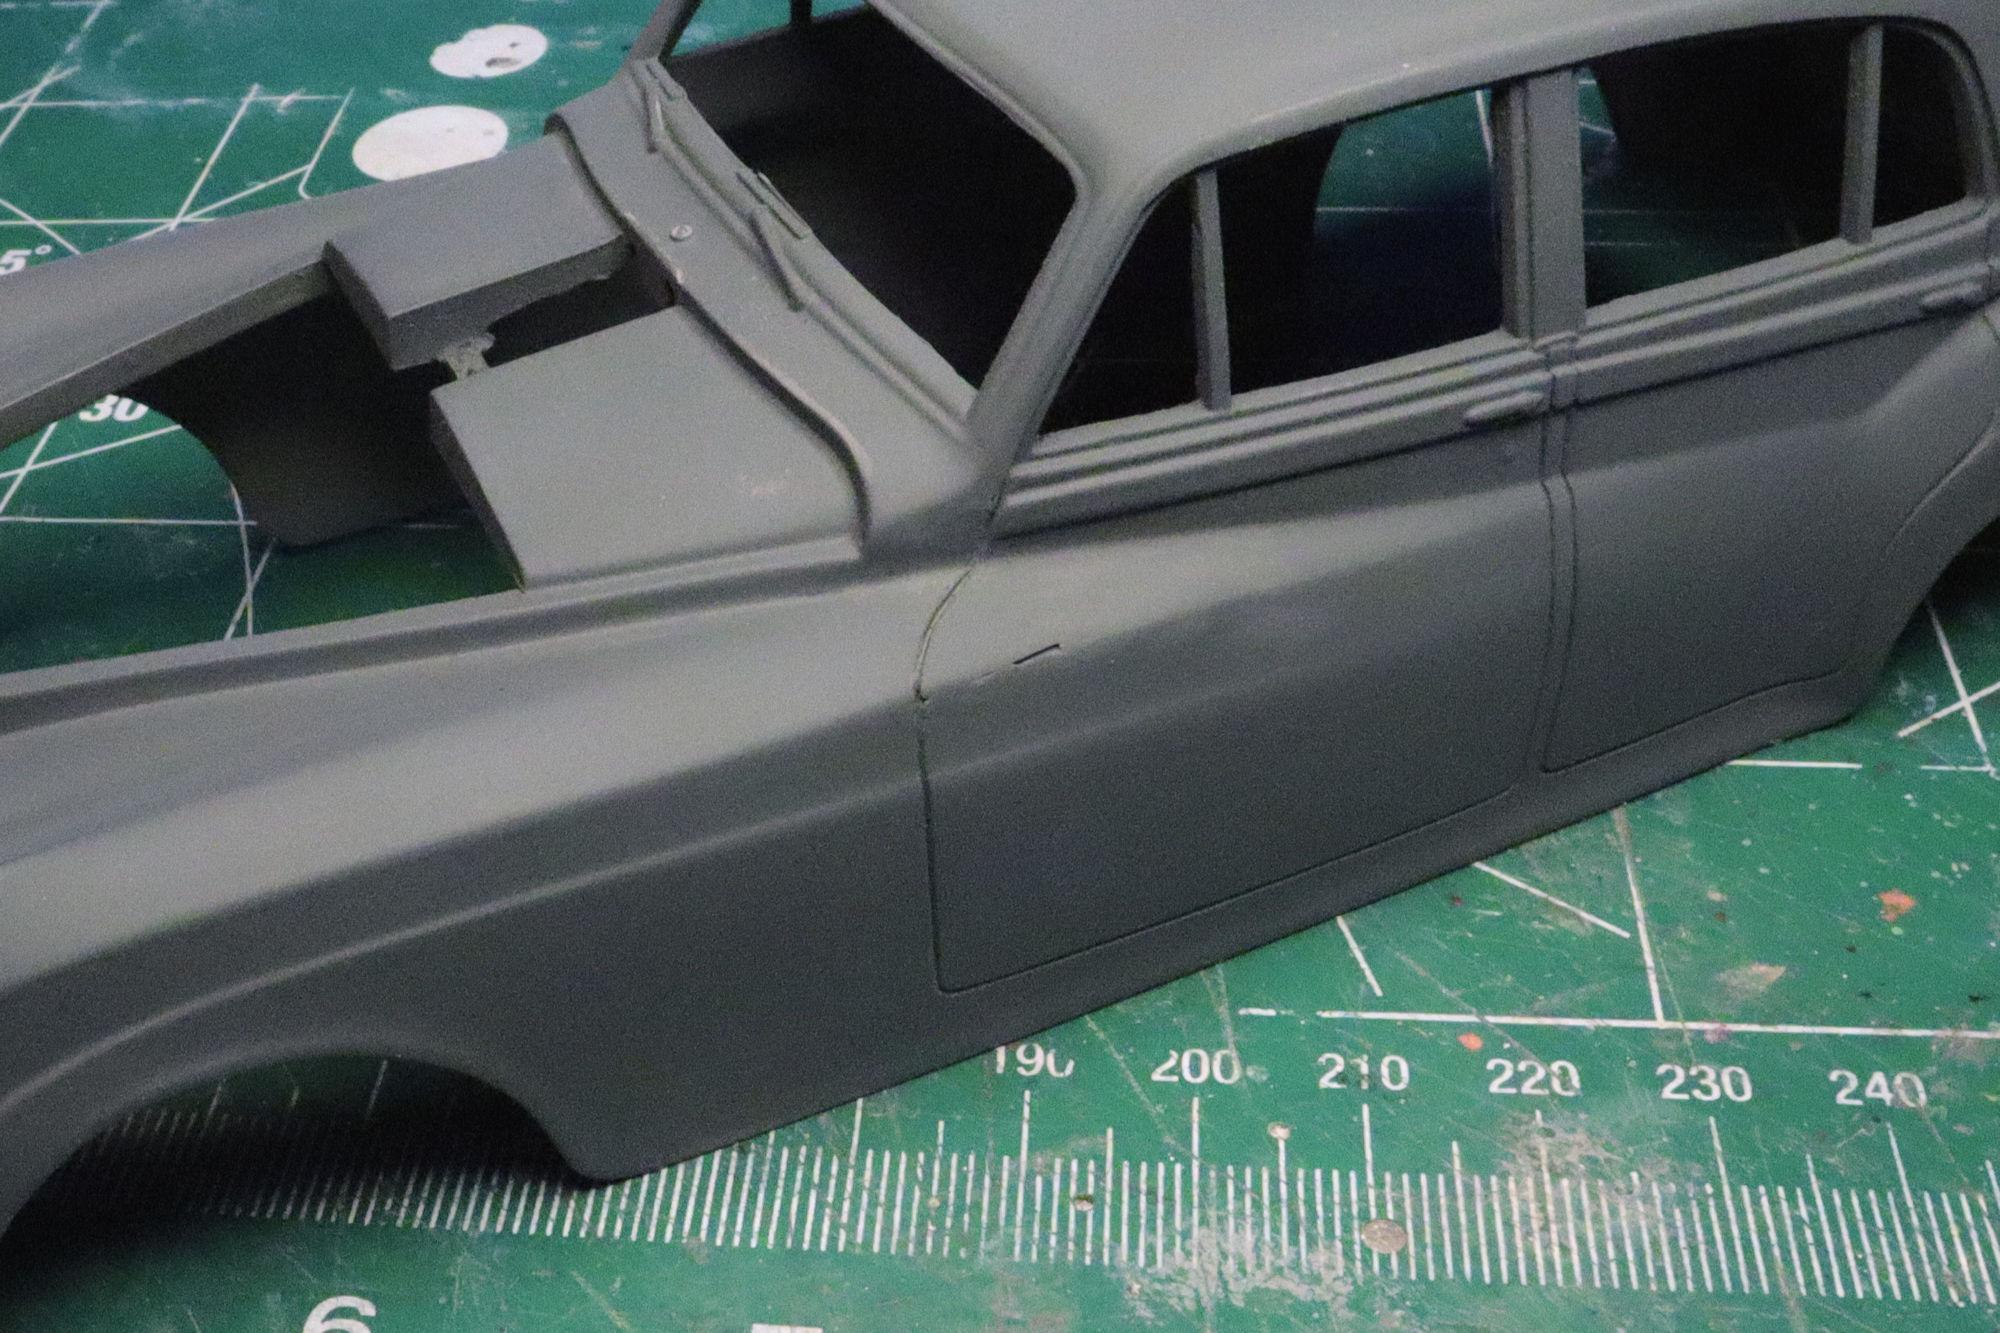
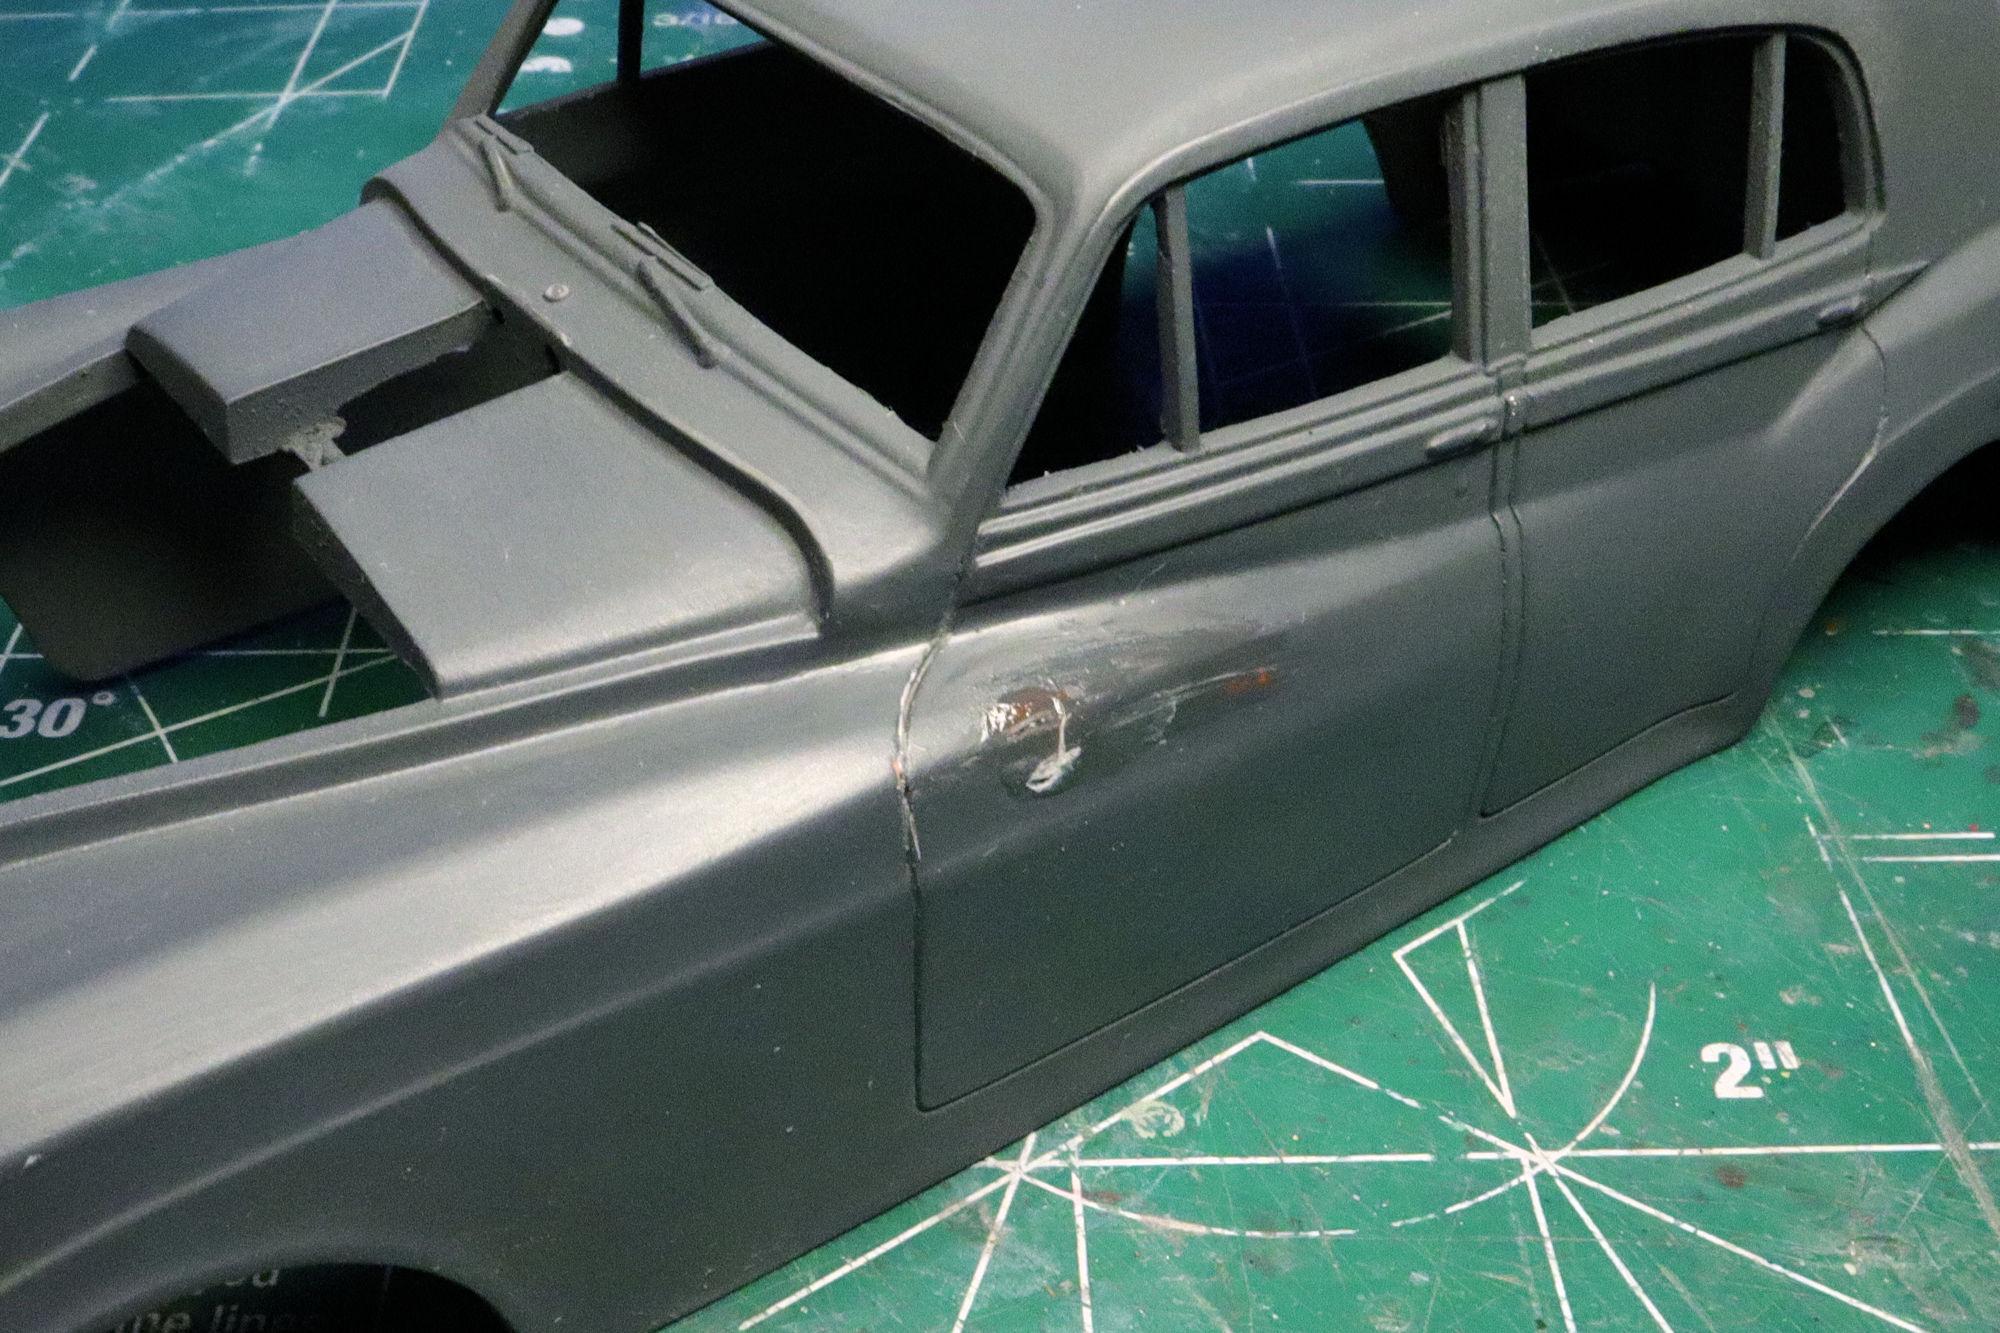
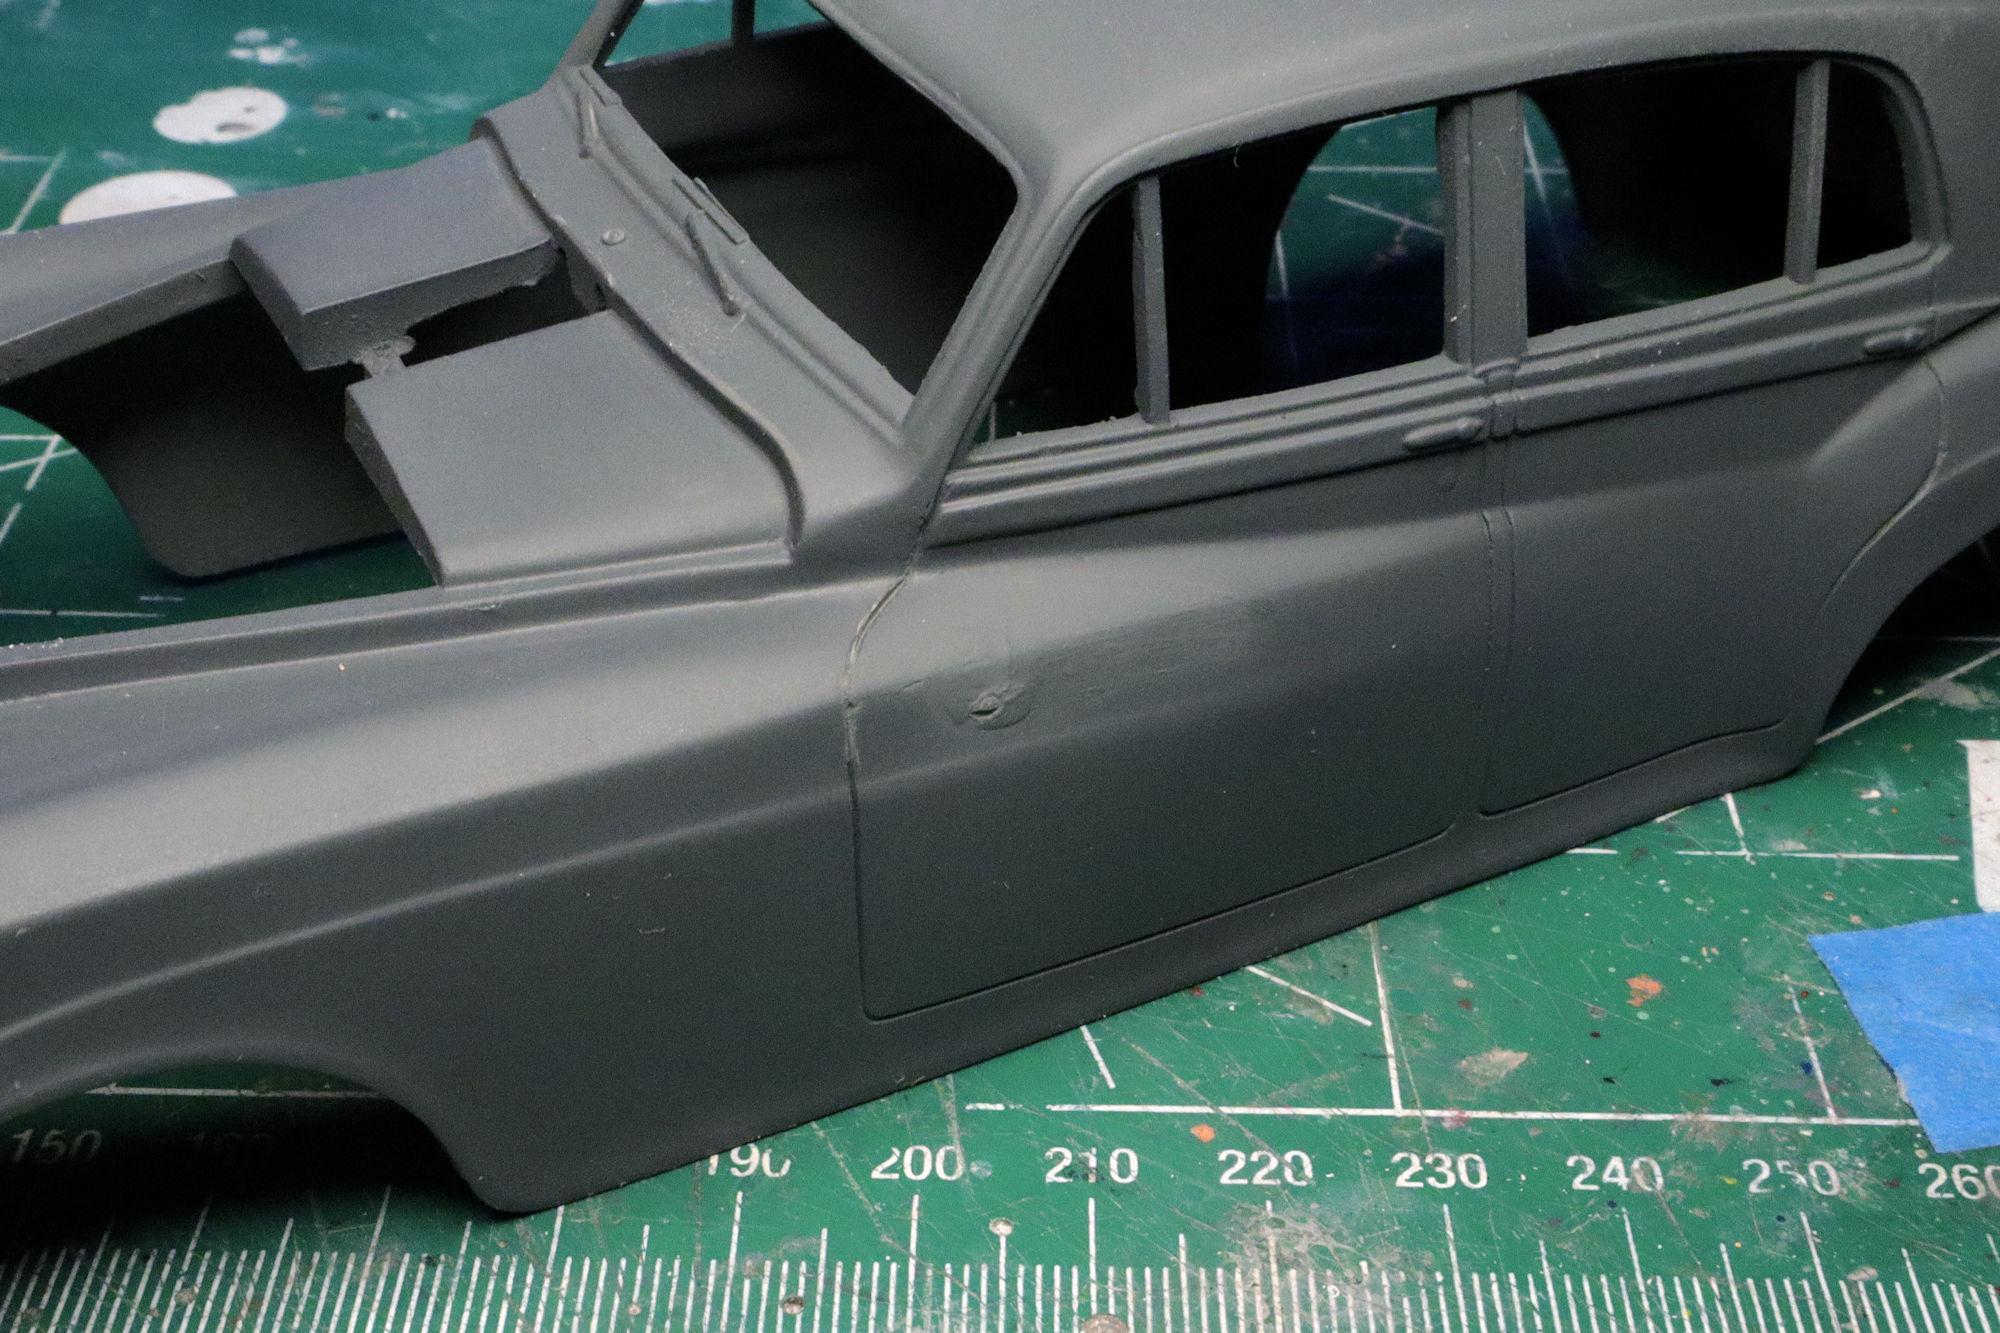
Hello Everybody! Here is another update on the Rolls-Royce Silver Cloud II. I'm calling this side done. I've sprayed this different primer because I want something darker under the gold to give it some depth. This side however is still giving me problems. There is a void under the styrene sheet I used to build up the area and the glazing putty just has not been doing the job of filling it. I'd use some putty to fill the gap, only for the gap to reappear during the next round of sanding. I suspected that this might happen but I had to try anyway. I decided that it was time to break out the CA and fill that gap for good. I would drip a drop on the gap, give capillary action a few seconds to work its magic, swipe off any excess with a cotton swab, then repeat the process until the gap had wicked in all the CA it could hold. I then dripped a final small drop on the gap and used some accelerant to cure it all. The bit of fuzz is from one of the passes with the cotton swab. It should sand off quite easily. A quick spritz of primer shows where the sanding and back-filling need to be done. It looks like I took care of that gap though. As always, thanks for stopping by to look and please feel free to post a comment or two. David G.
-
Thank you David, I appreciate your kind comments. David G.
-
1962 Rolls Royce Silver Cloud II by Minicraft Models: WIP
David G. replied to David G.'s topic in WIP: Model Cars
Thank you David , I certainly appreciate the advice and information you've provided thus far. And I thank you for your offer to provide more. Thank you Joe. For such a simple kit, it sure has presented me with some challenges. Thanks again, David G. -
Hello Everybody! I managed to get a couple of build sessions in and here's what I accomplished. The iconic beak for the Superbird Is painted, assembled and ready for decals. On the lower section, the directions suggest that the transparent driving light covers should be painted flat black. I guess they're supposed to match the grille. During my research, it seemed to me that most of the Superbirds I saw had driving lights visible behind the covers. I just couldn't let it go that easily so I painted the light sockets behind the covers with Molotow chrome and did a little detail painting on the covers framing them in flat black. I also highlighted the mesh covers with a little flat black dry-brushing. It's a pretty fine mesh so it doesn't show that well. As always, thanks for taking the time to look and please feel free to comment. David G.
-
Thank you David. I wish I could take credit for making the vinyl top but it was already cast on the model and all I did was paint it. But I am pleased with the way that bit turned out. Thank you. As for the paint, I usually try to allow a week, or at least the better part of one. Living in the desert Southwest things tend to dry rather quickly and I've worked Tamiya lacquer in as little as two days. Among all the model car kits available to build, I tend to favor almost anything from the 1930's up through the 1970's depending on my mood at the time. I also occasionally build aeronautical, naval, space and fantasy & science fiction models too. I really don't like to limit myself. If something appeals to me, I'll build it. That's why I named my FaceBook profile "Model Cars, Mostly". It's what i build. Thanks again, David G.
-
1962 Rolls Royce Silver Cloud II by Minicraft Models: WIP
David G. replied to David G.'s topic in WIP: Model Cars
Thank you very much David. In case you haven't guessed, I've adopted you as my expert on this particular build and I value your feedback and opinions on this topic tremendously. It truly is a beautiful machine and I'm beginning to feel I can do it justice through this build. Thanks again, David G. -
Very cool! David G.