David G.
-
Posts
11,326 -
Joined
-
Last visited
Content Type
Profiles
Forums
Events
Gallery
Everything posted by David G.
-
Thanks Donato, I appreciate that. I'm hoping to bet some bench time today or tomorrow. David G
-
Fabulous progress on this one Kevin! I certainly believe the body can be saved. You do seem to have the skills required, it's just a matter of time and energy. But what isn't? David G.
-
Hi John. Fabulous work so far, I've enjoyed watching this build come together. The problem you had with mating the body to the chassis looks similar to the one I experienced when I built my 1960 Impala. That slot in the front of the door card is supposed to receive the windshield glass. Unfortunately due to the age and wear of the molds, the windshield glass had become way too thick to fit. My solution was to cut out the slot in the door card and some of the dashboard to accommodate the overly thick glass. Thanks again John for taking the time to share your build with us. I've really been enjoying following along. David G.

-
Nice build, good color! David G.
-

1950 Chevrolet 3100 Pickup
David G. replied to Zippi's topic in WIP: Model Trucks: Pickups, Vans, SUVs, Light Commercial
Beautiful detail on this one Bob! The engine wiring and interior paint look great! The seat looks like leather. I think the sun visor is a great idea. I like that there are so many types to choose from. I'm partial to the ones that look like a bill from a ballcap. David G. -
5600 International
David G. replied to Gary Chastain's topic in Model Trucks: Big Rigs and Heavy Equipment
Dang, that's one pretty truck! Lots of good detail, excellent color combination. David G -
Thank you so much Jeremy. I hope to get some time at the bench this weekend. David G.
-
Thank you so much for looking in Chaz, and thank you for your kind comment. I hope to have this one done soon. David G.
-
Thank you Shawn. Yes, the decals are a two-part application and their use is a bit on the tricky side, at least they were for me. Luckily multiple sets are provided. Thank you Carl, I appreciate your kind words. I'm hoping to have it done soon too. David G.
-
Thank you Keith. The decals do look good, don't they. David G.
-
Thanks for the update Si. It's nice knowing that you're still out there. It will be phenomenal when it's finished. David G.
-
Great choice of color, the details and build look fantastic! David G.
-
1962 Rolls Royce Silver Cloud II by Minicraft Models: WIP
David G. replied to David G.'s topic in WIP: Model Cars
Hello Everybody! Here's a small update on the Rolls. On the actual car there are little chrome trim rings around the directionals. Using some strip styrene, I decided to try to replicate these on the model. Just to add a little bump to the detail level. I think they came out pretty well, the painting will tell. That's all for now. As always, thanks for taking the time to look and please feel free to comment. David G.
-
Thanks Greg, I appreciate that. David G.
-
It looks fabulous Andy! The added details are way over the top and very well done. And honestly, most casual viewers will not notice the chip unless you point it out to them. Which if you're anything like me, you're almost certain to do. David G. David G.
-
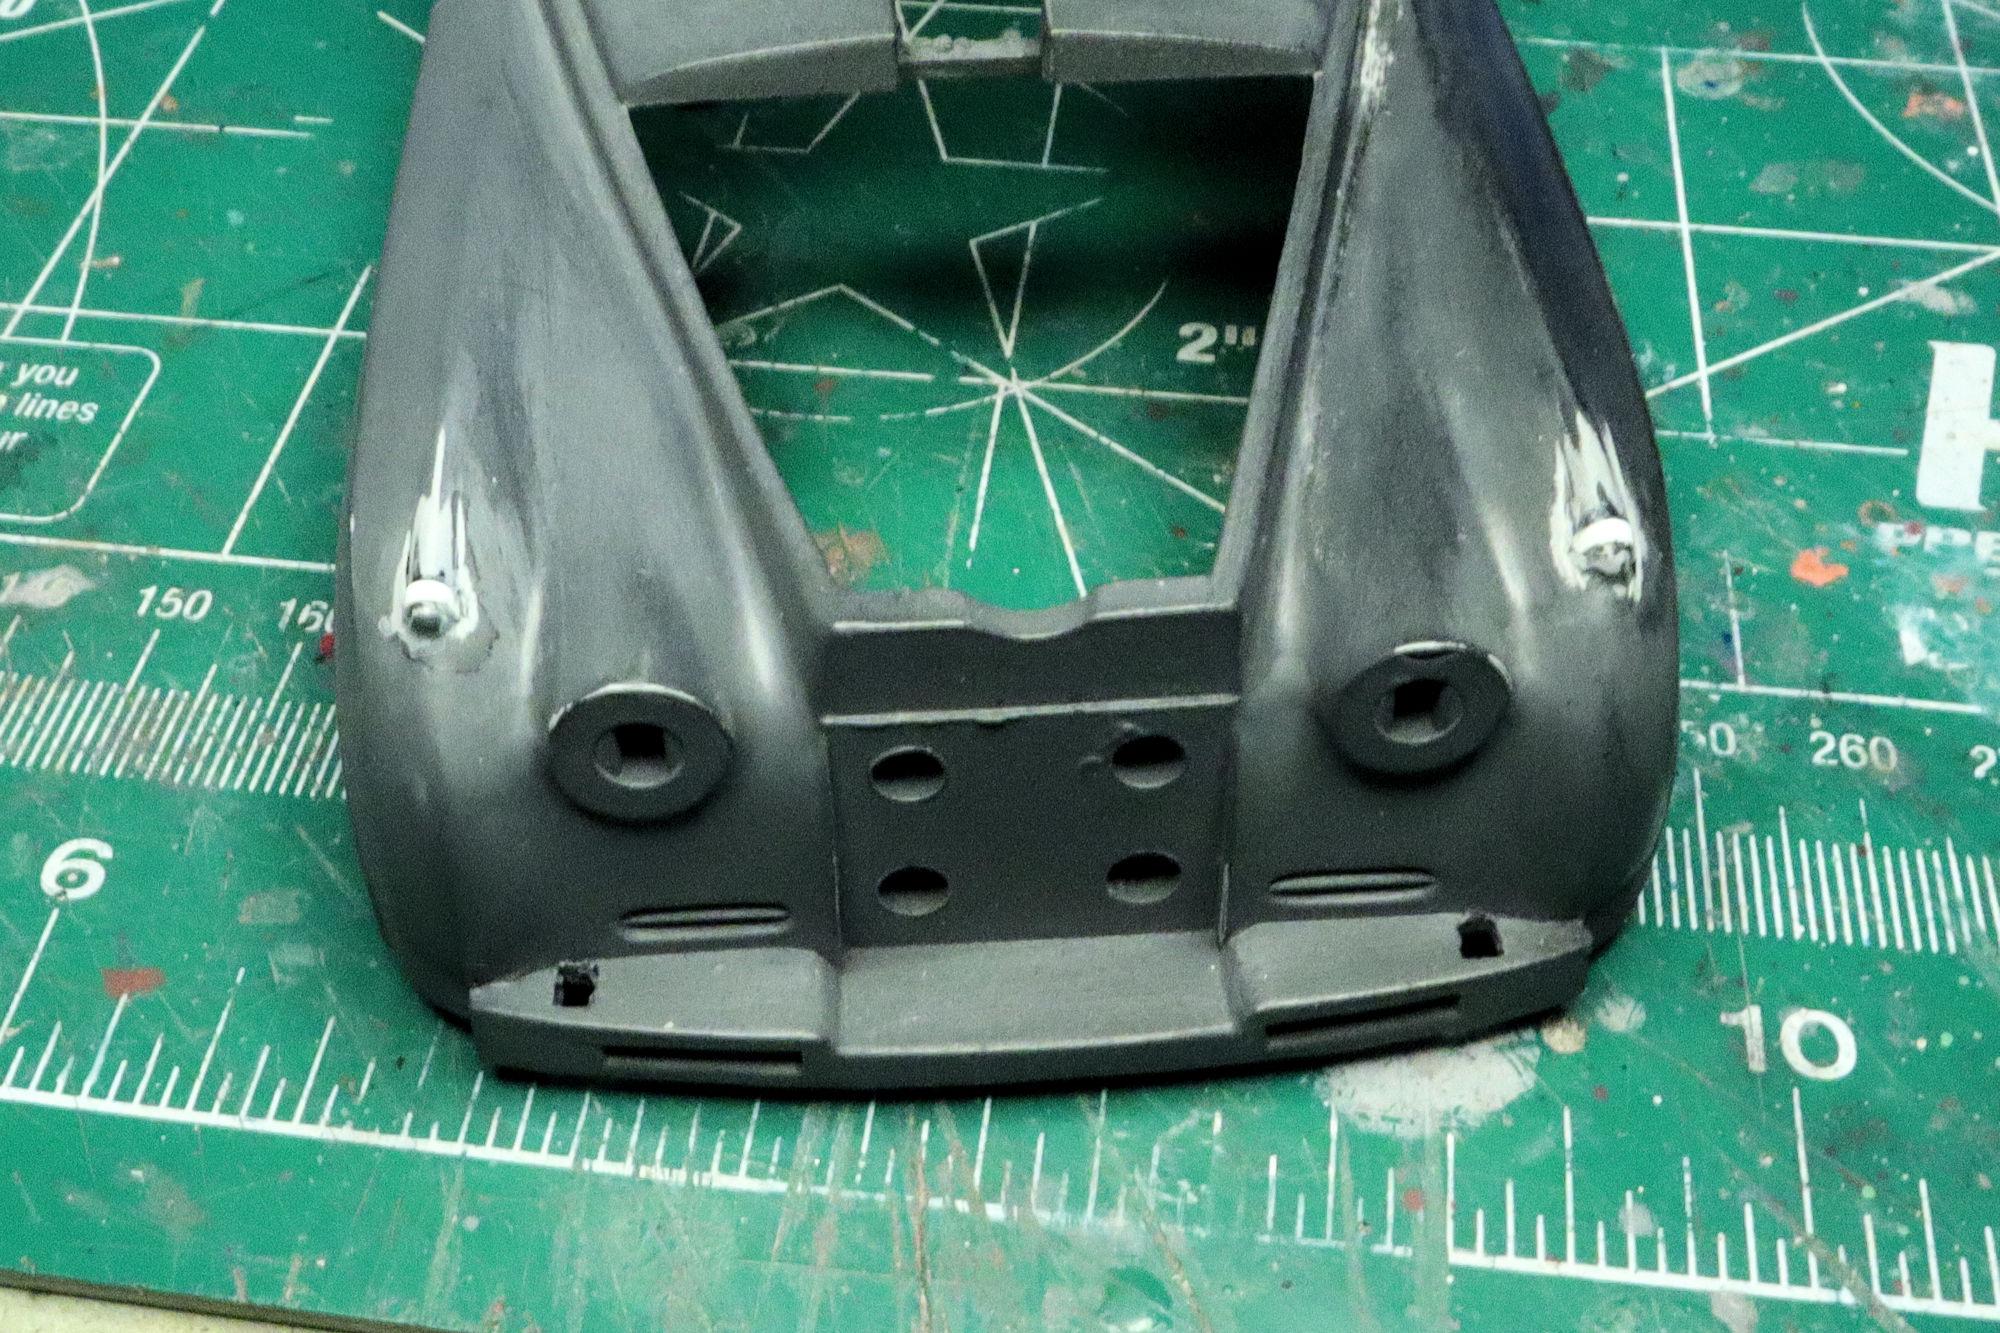
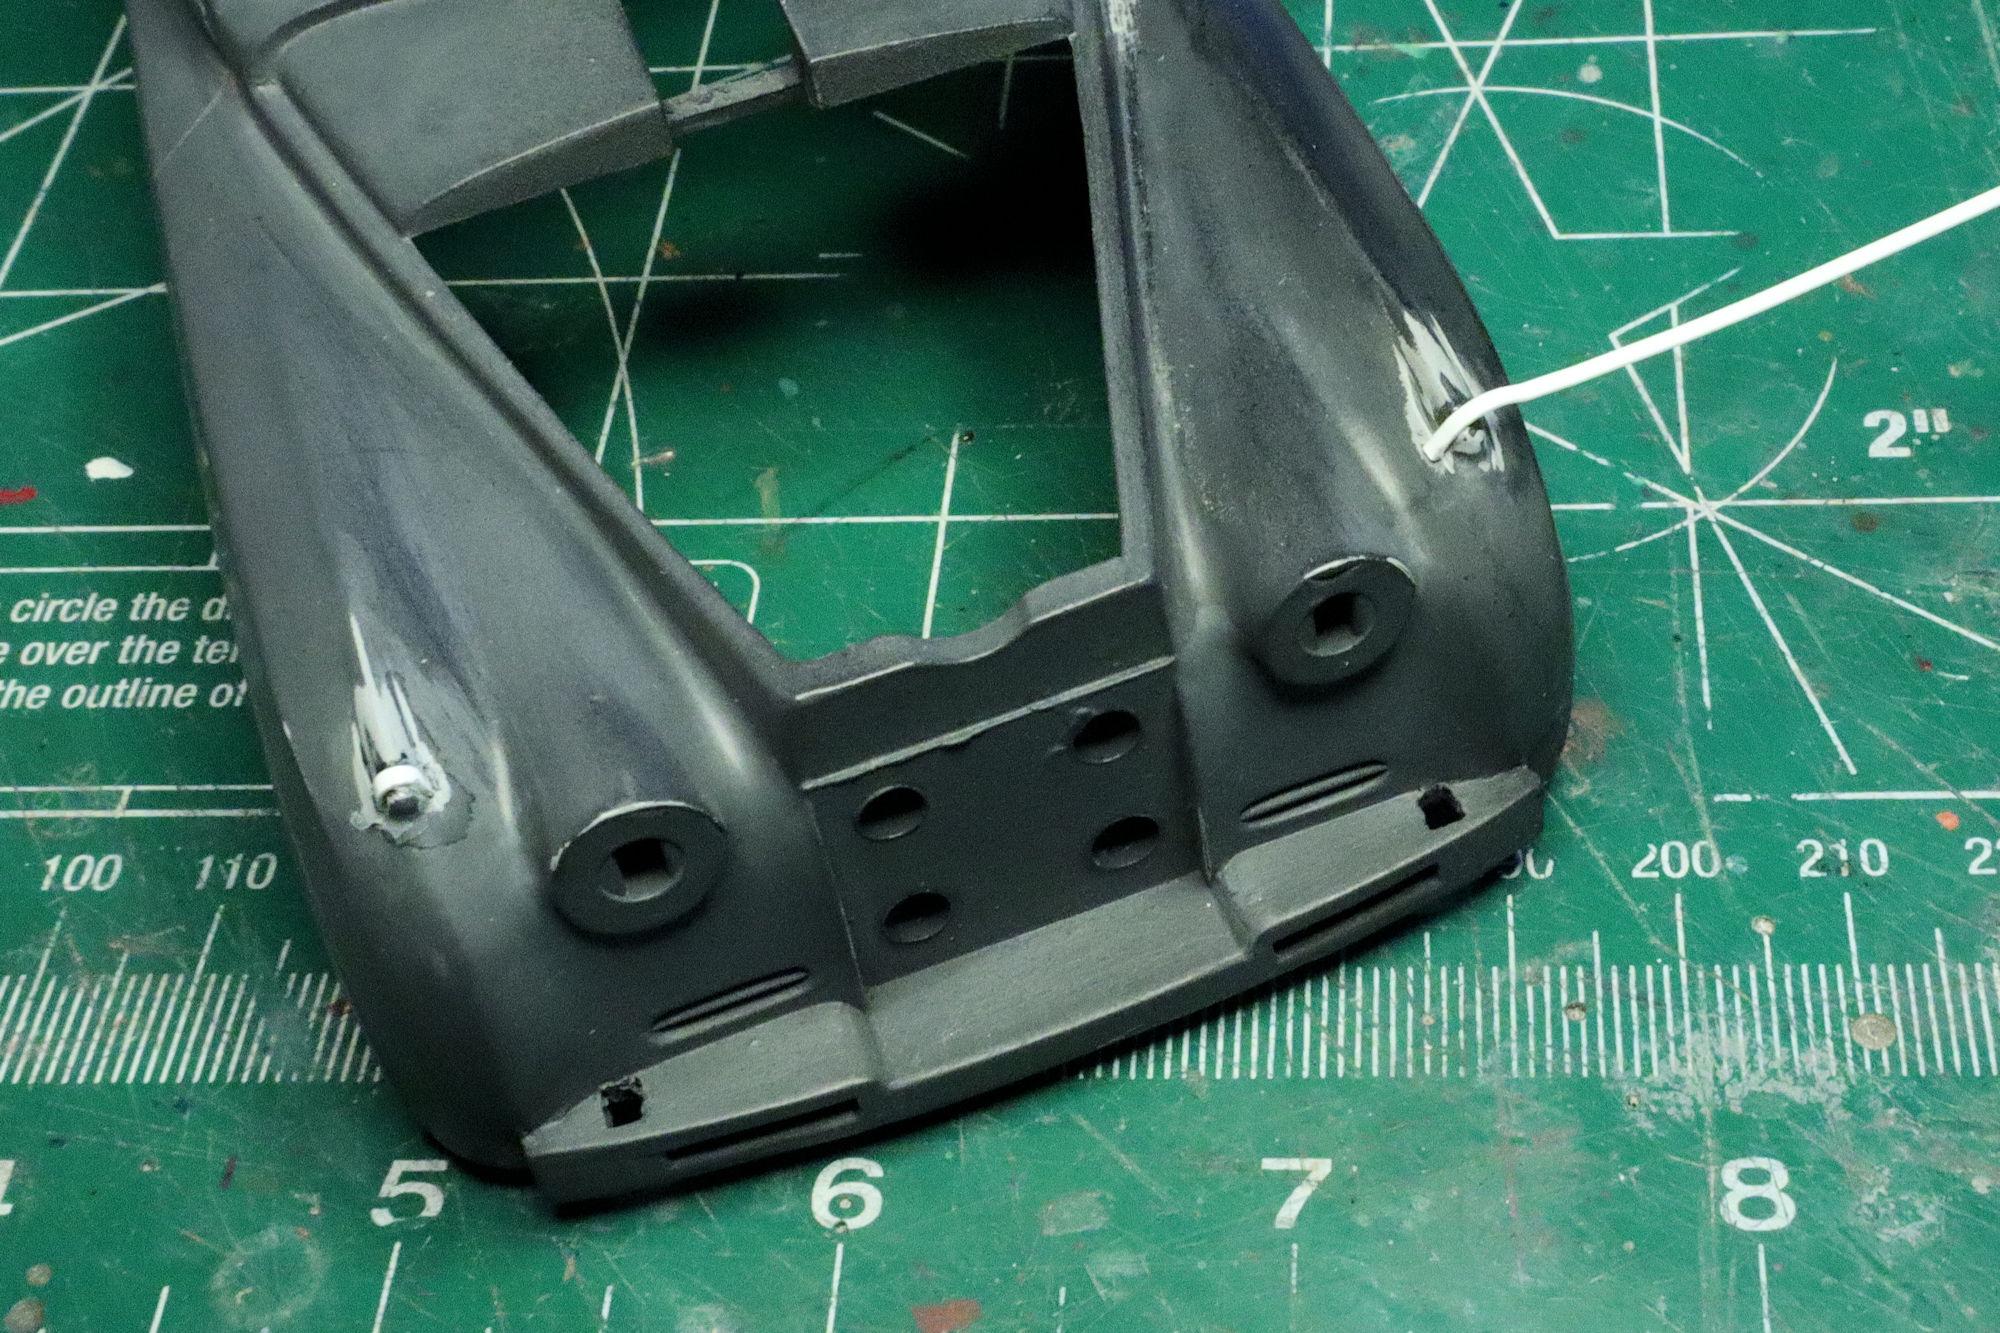
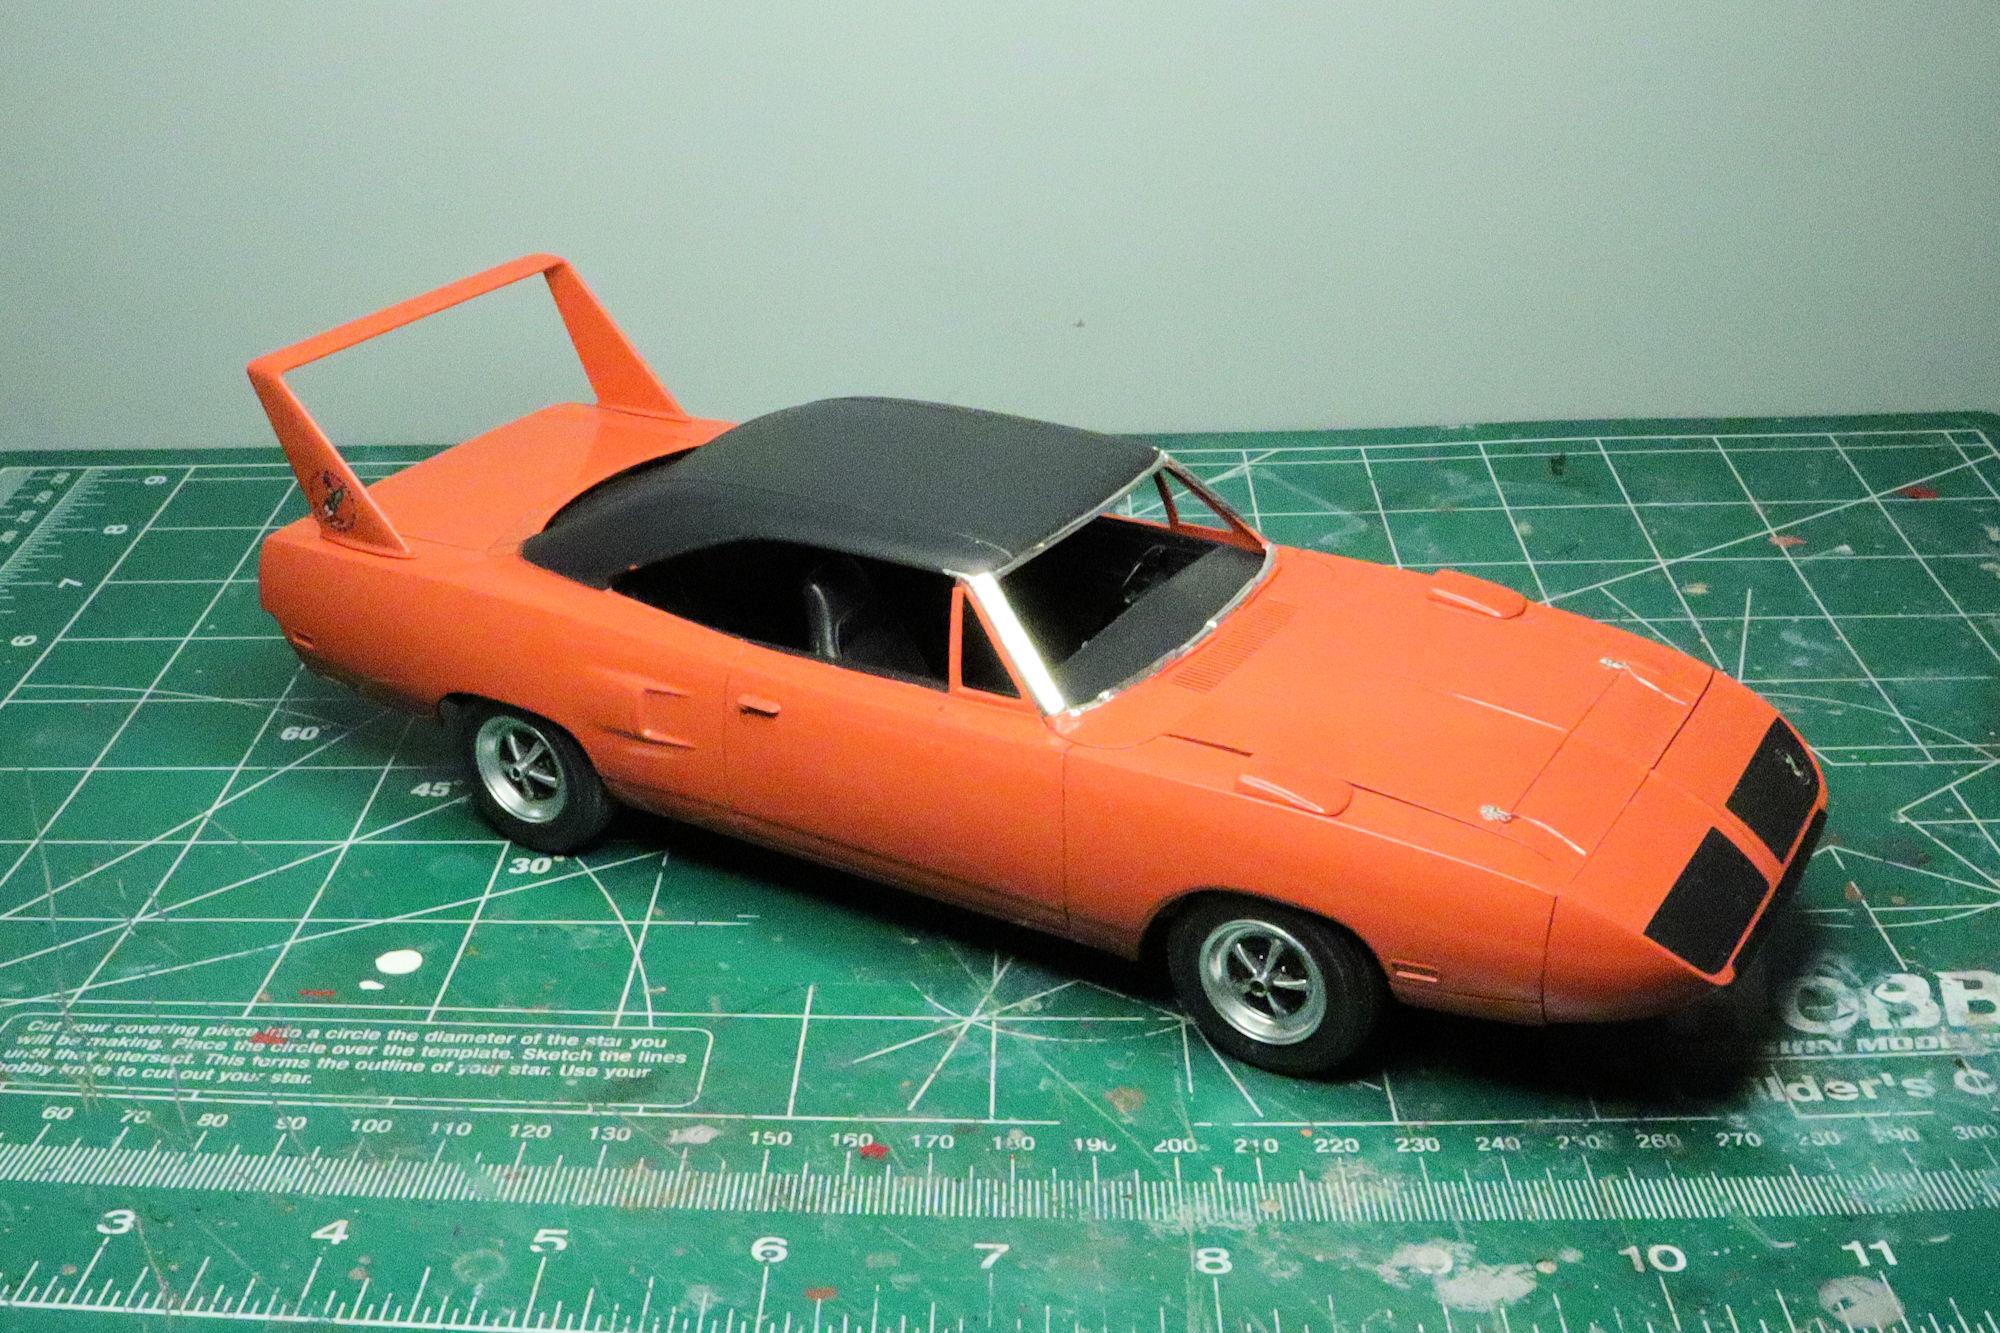
Hello Everybody! It's time for another update. I managed to get about half of the foil work done and some of the decals placed in this session. The two part Roadrunner decals, while fiddly and a little frustrating came out quite well. The beak badge was also a two part decal with the white base under the main decal. I trimmed the white circle a little undersized, or so I thought. A little bit of it shows from under the black decal on top, but it's not bad. As always, thanks for taking the time to look and please feel free to comment if one feels the desire to do so. David G.
-
Fabulous work on this! David G.
-
Looks good so far! David G.
-
1950 Chevrolet 3100 Pickup
David G. replied to Zippi's topic in WIP: Model Trucks: Pickups, Vans, SUVs, Light Commercial
Looking good Bob! Tamiya Gunmetal, Light Gunmetal and Metallic Black are great accent colors. I use them often. David G. -
My first WIP here; '70 Dodge Challenger T/A, Parts
David G. replied to Roadrunner's topic in WIP: Model Cars
Wow, this one has been quite the challenge, I admire your perseverance! There are two sayings that I have in my signature line: "Model builders, we're problem solvers who create our own problems to solve!" "Each kit I build is really only practice for the next one!" They've kept me going through some rough builds. David G. -
It looks like you've nailed the colors on this. I lake the shifter solution you came up with. Is it just my perception or do those front seats look too narrow? David G.
-
I know what you mean! Sometimes I select my next project by how much BMF and chrome paint I'm in the mood to deal with. David G.
-
I'm impressed by all the detail work you've done with this build. Everything looks great! David G.
-
Good colors for the interior! David G.
-
Cool build so far! I really like the color. And the rollbar and clutter you've added. David G.