mrmike
-
Posts
5,326 -
Joined
-
Last visited
Content Type
Profiles
Forums
Events
Gallery
Everything posted by mrmike
-
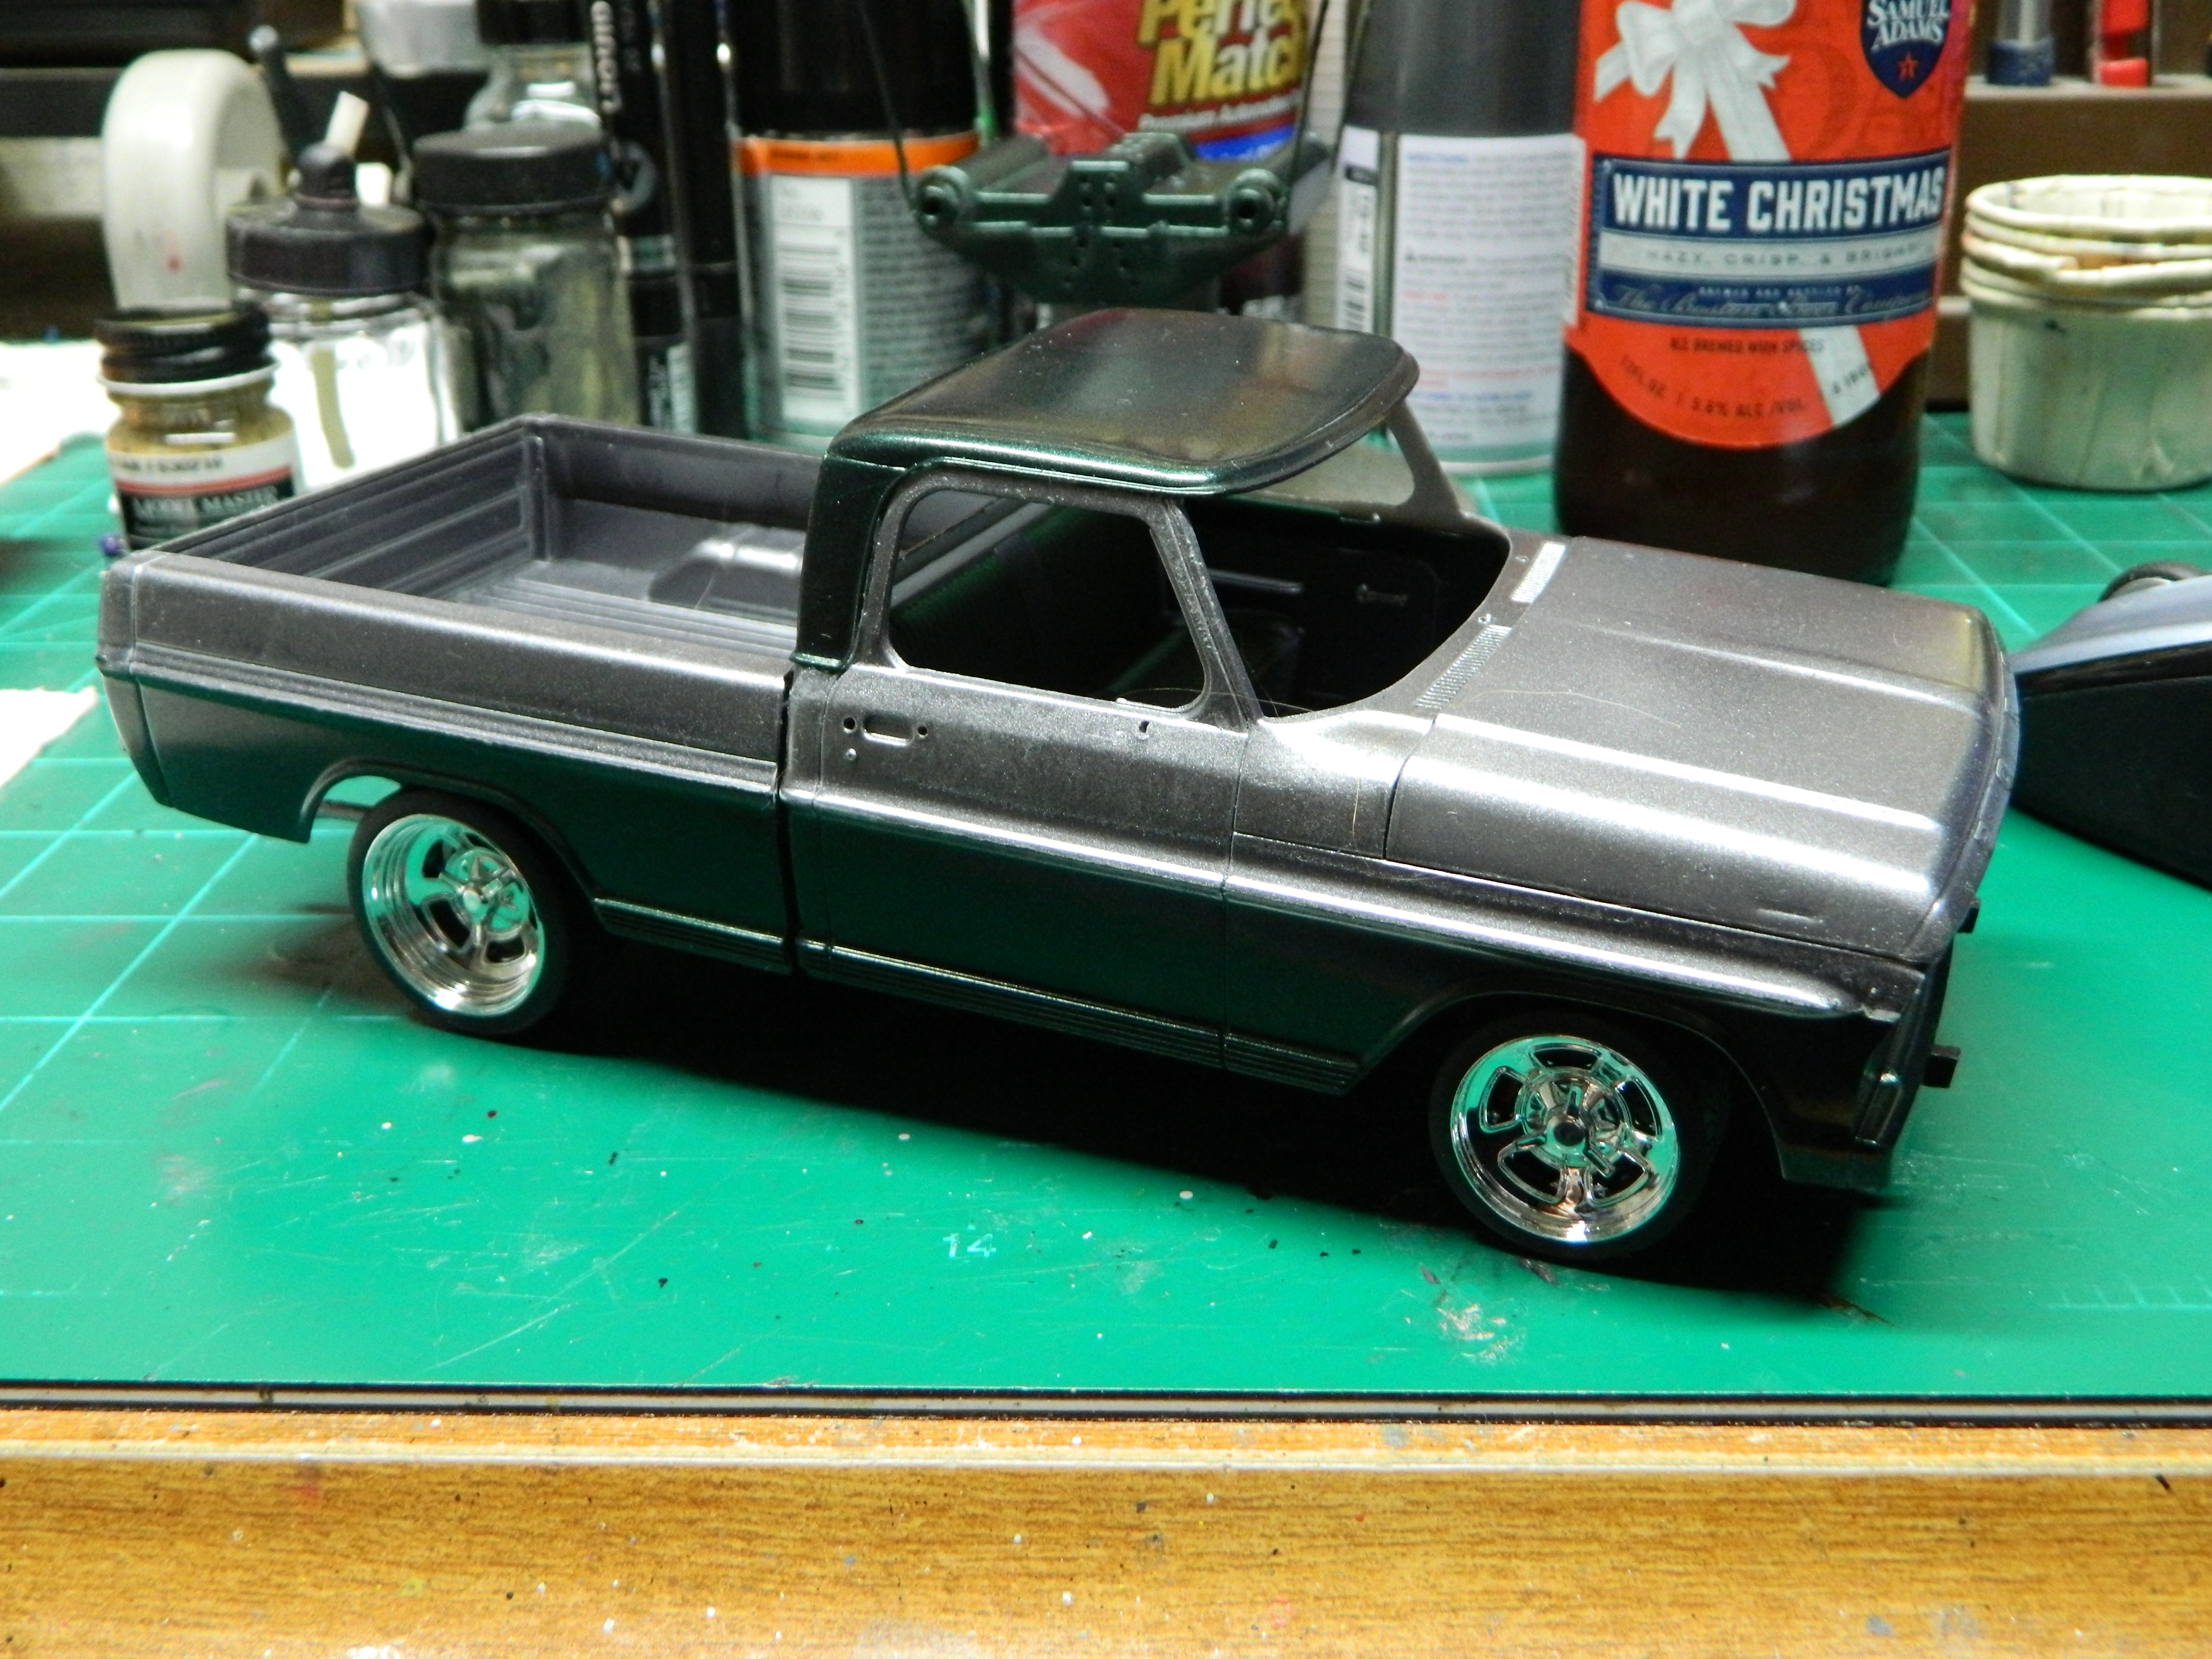
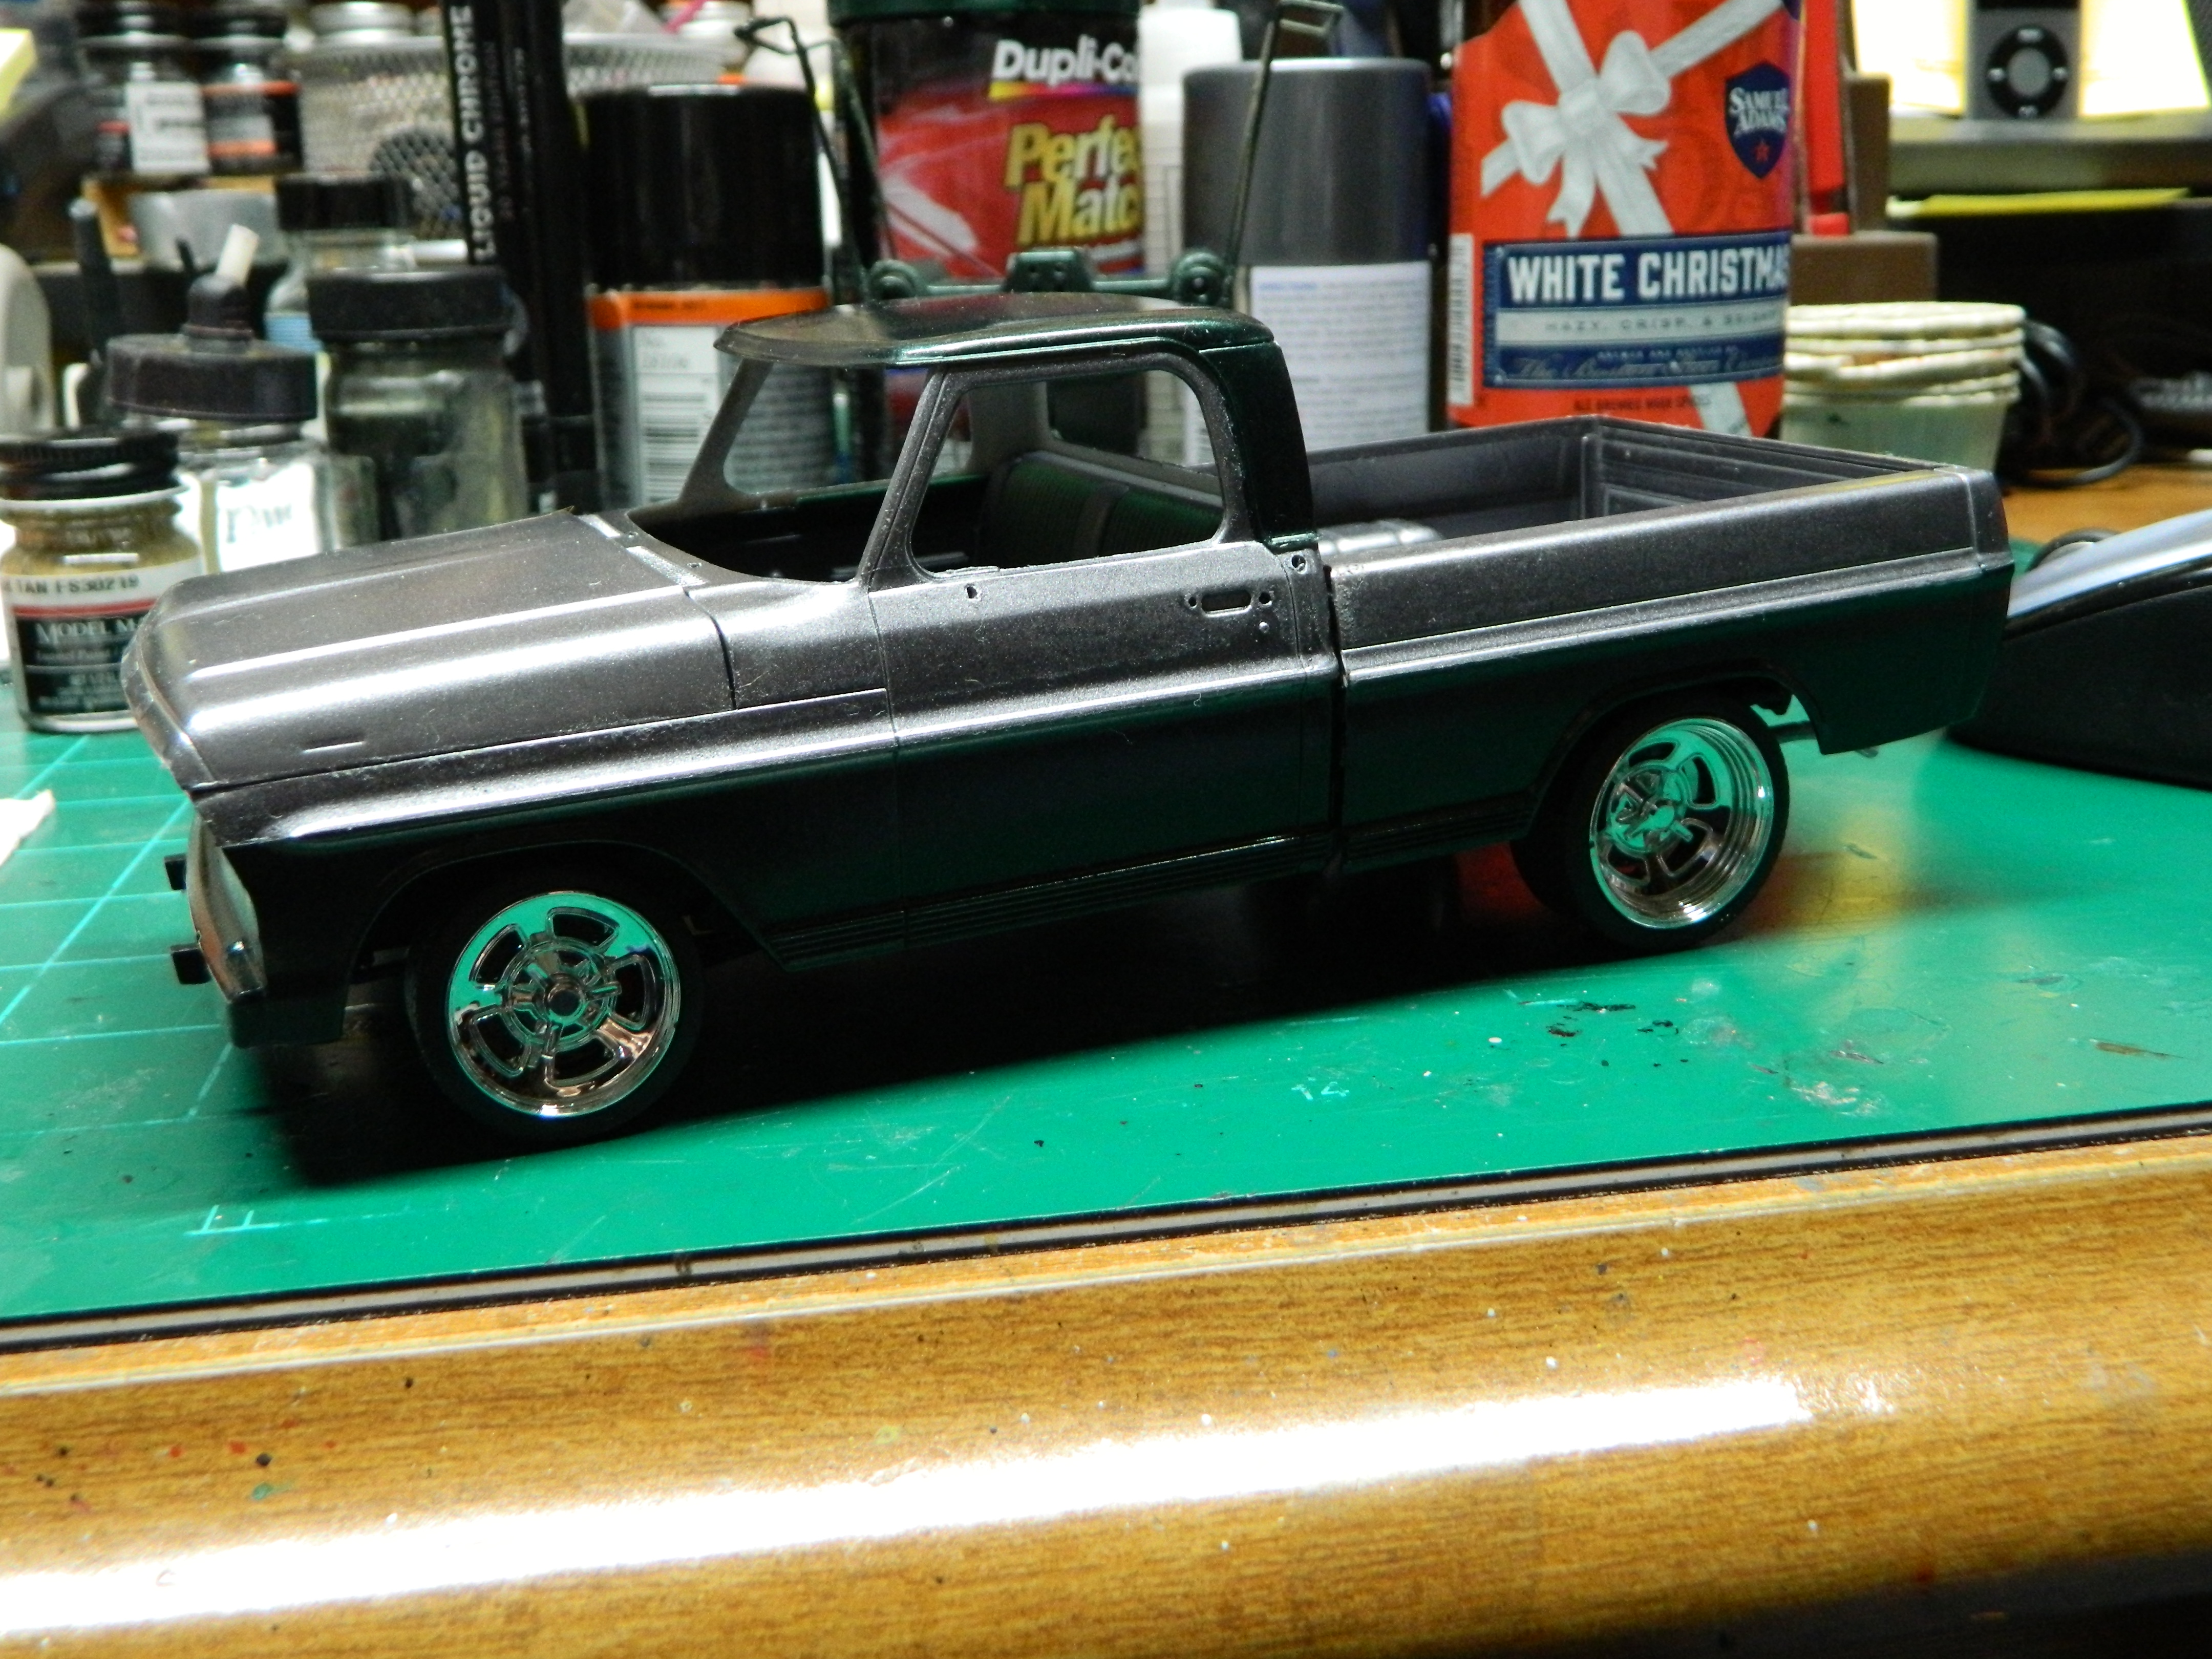
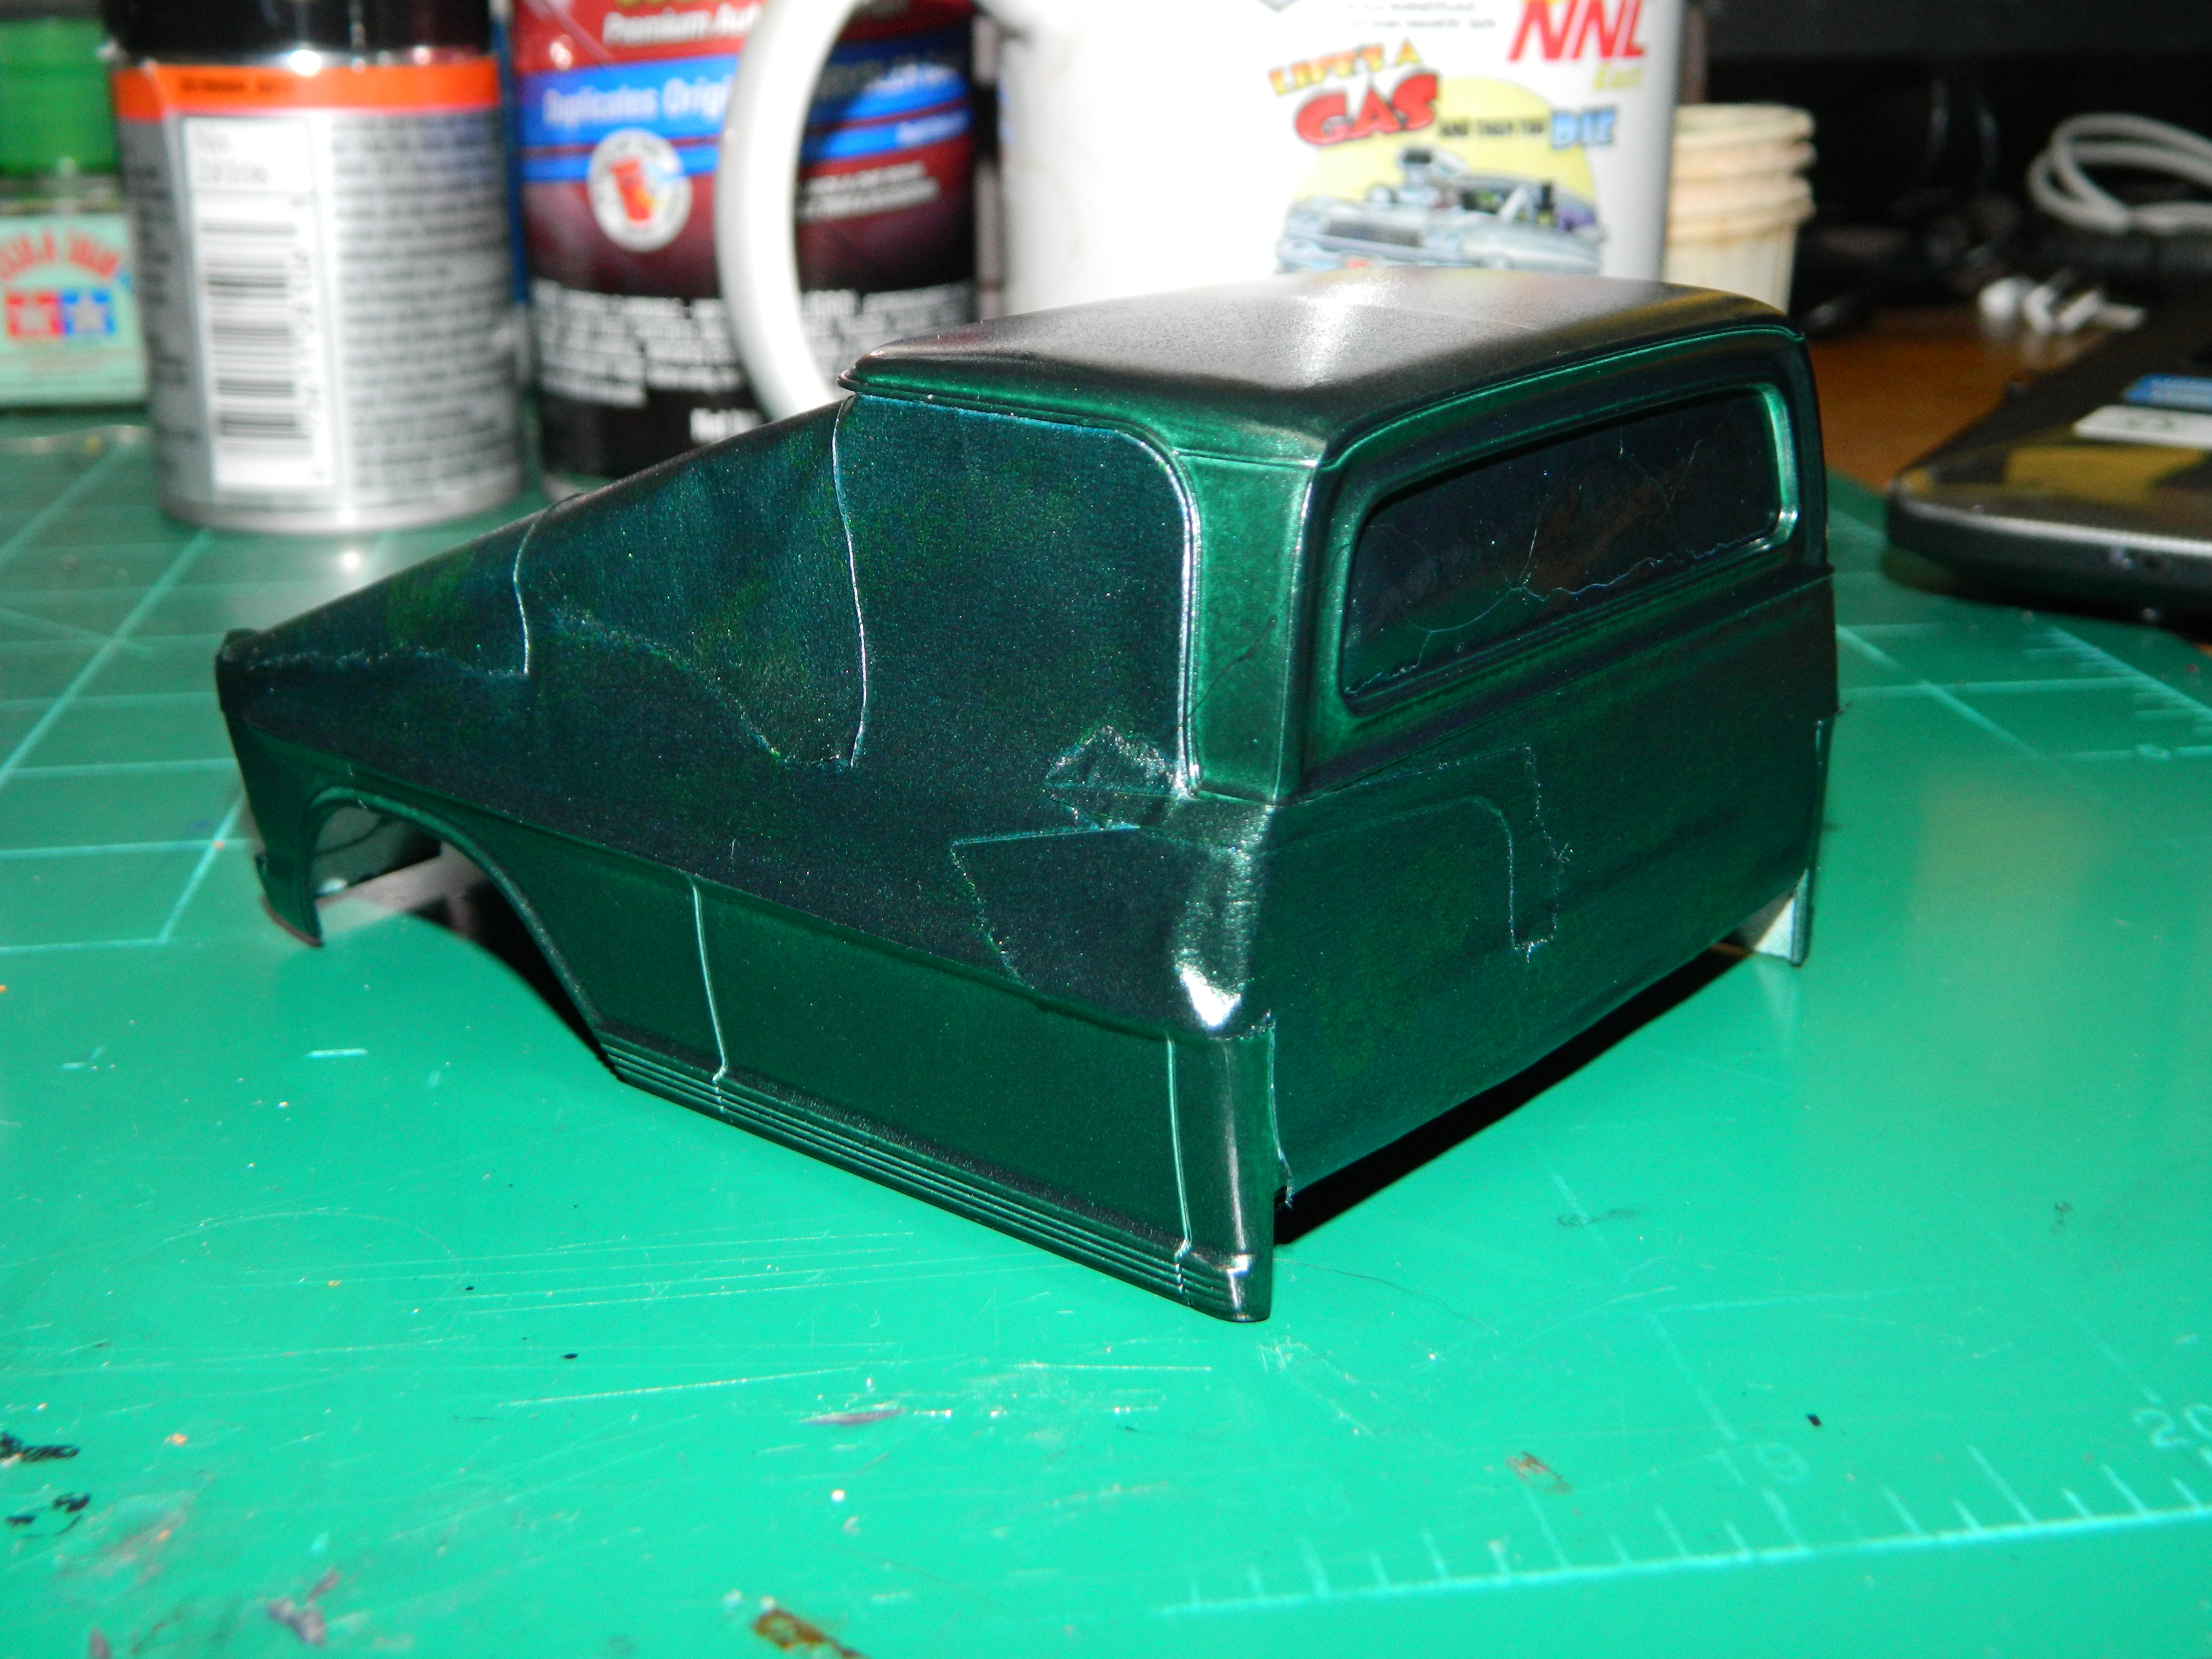
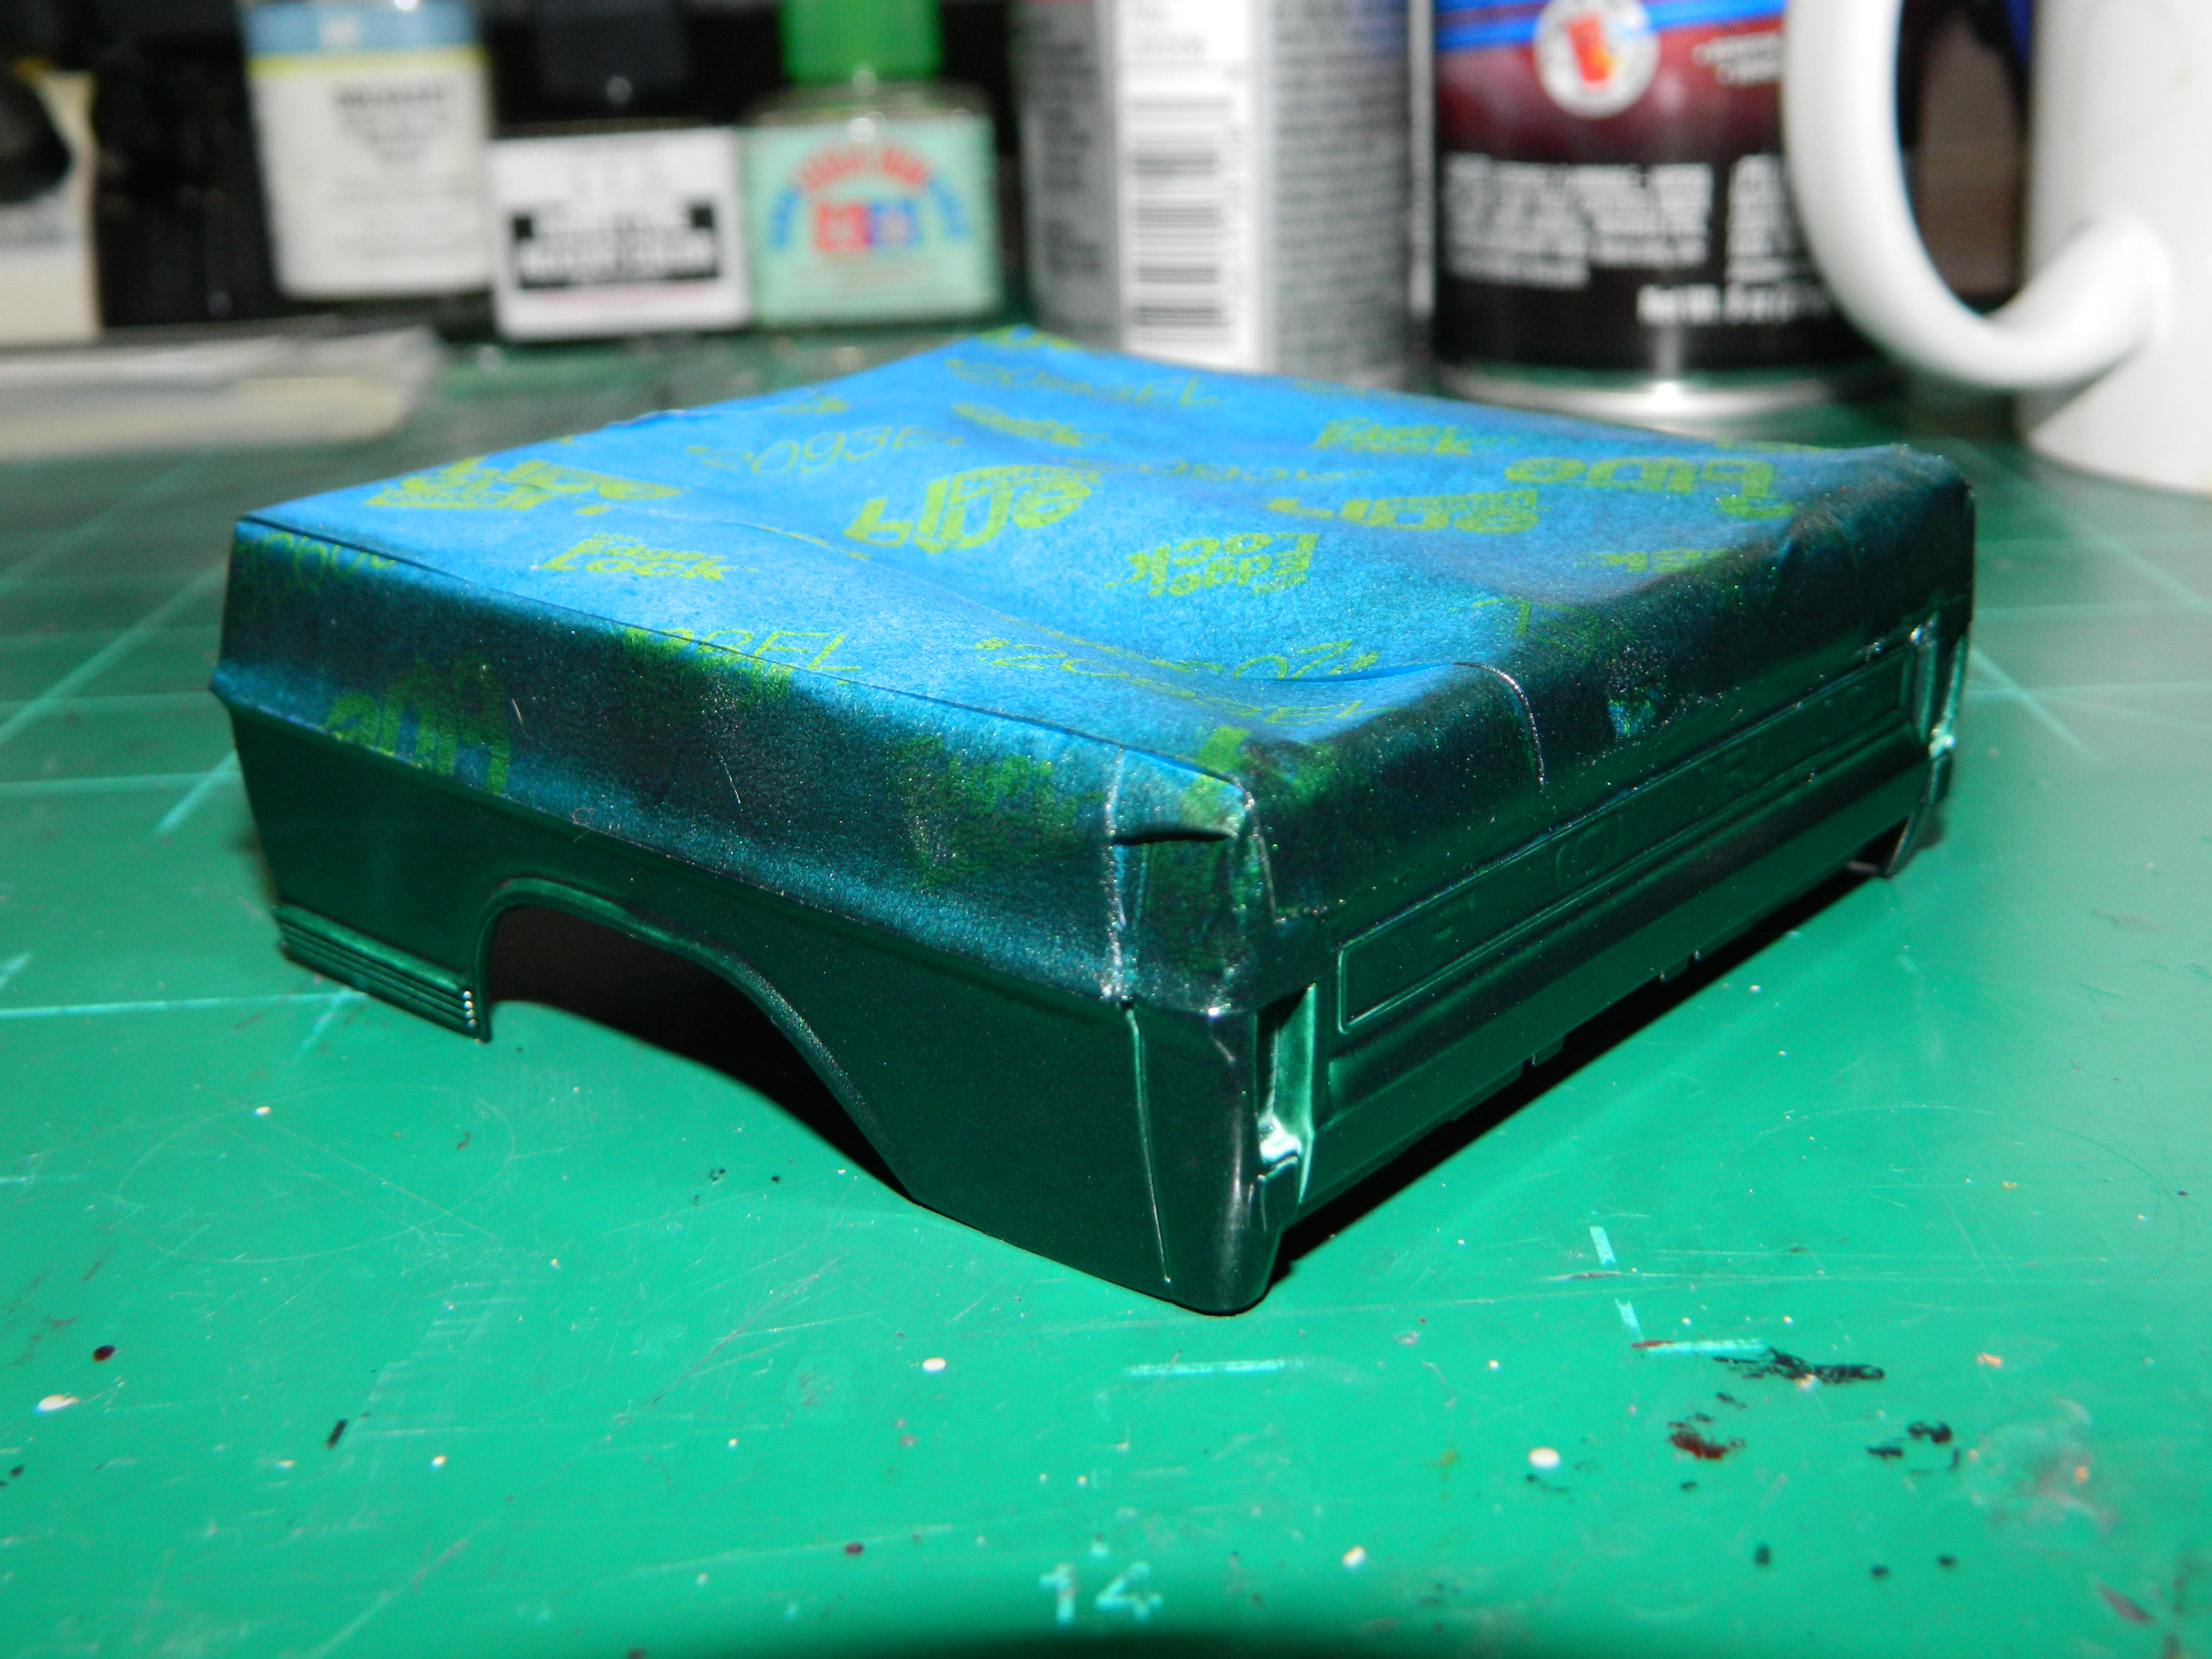
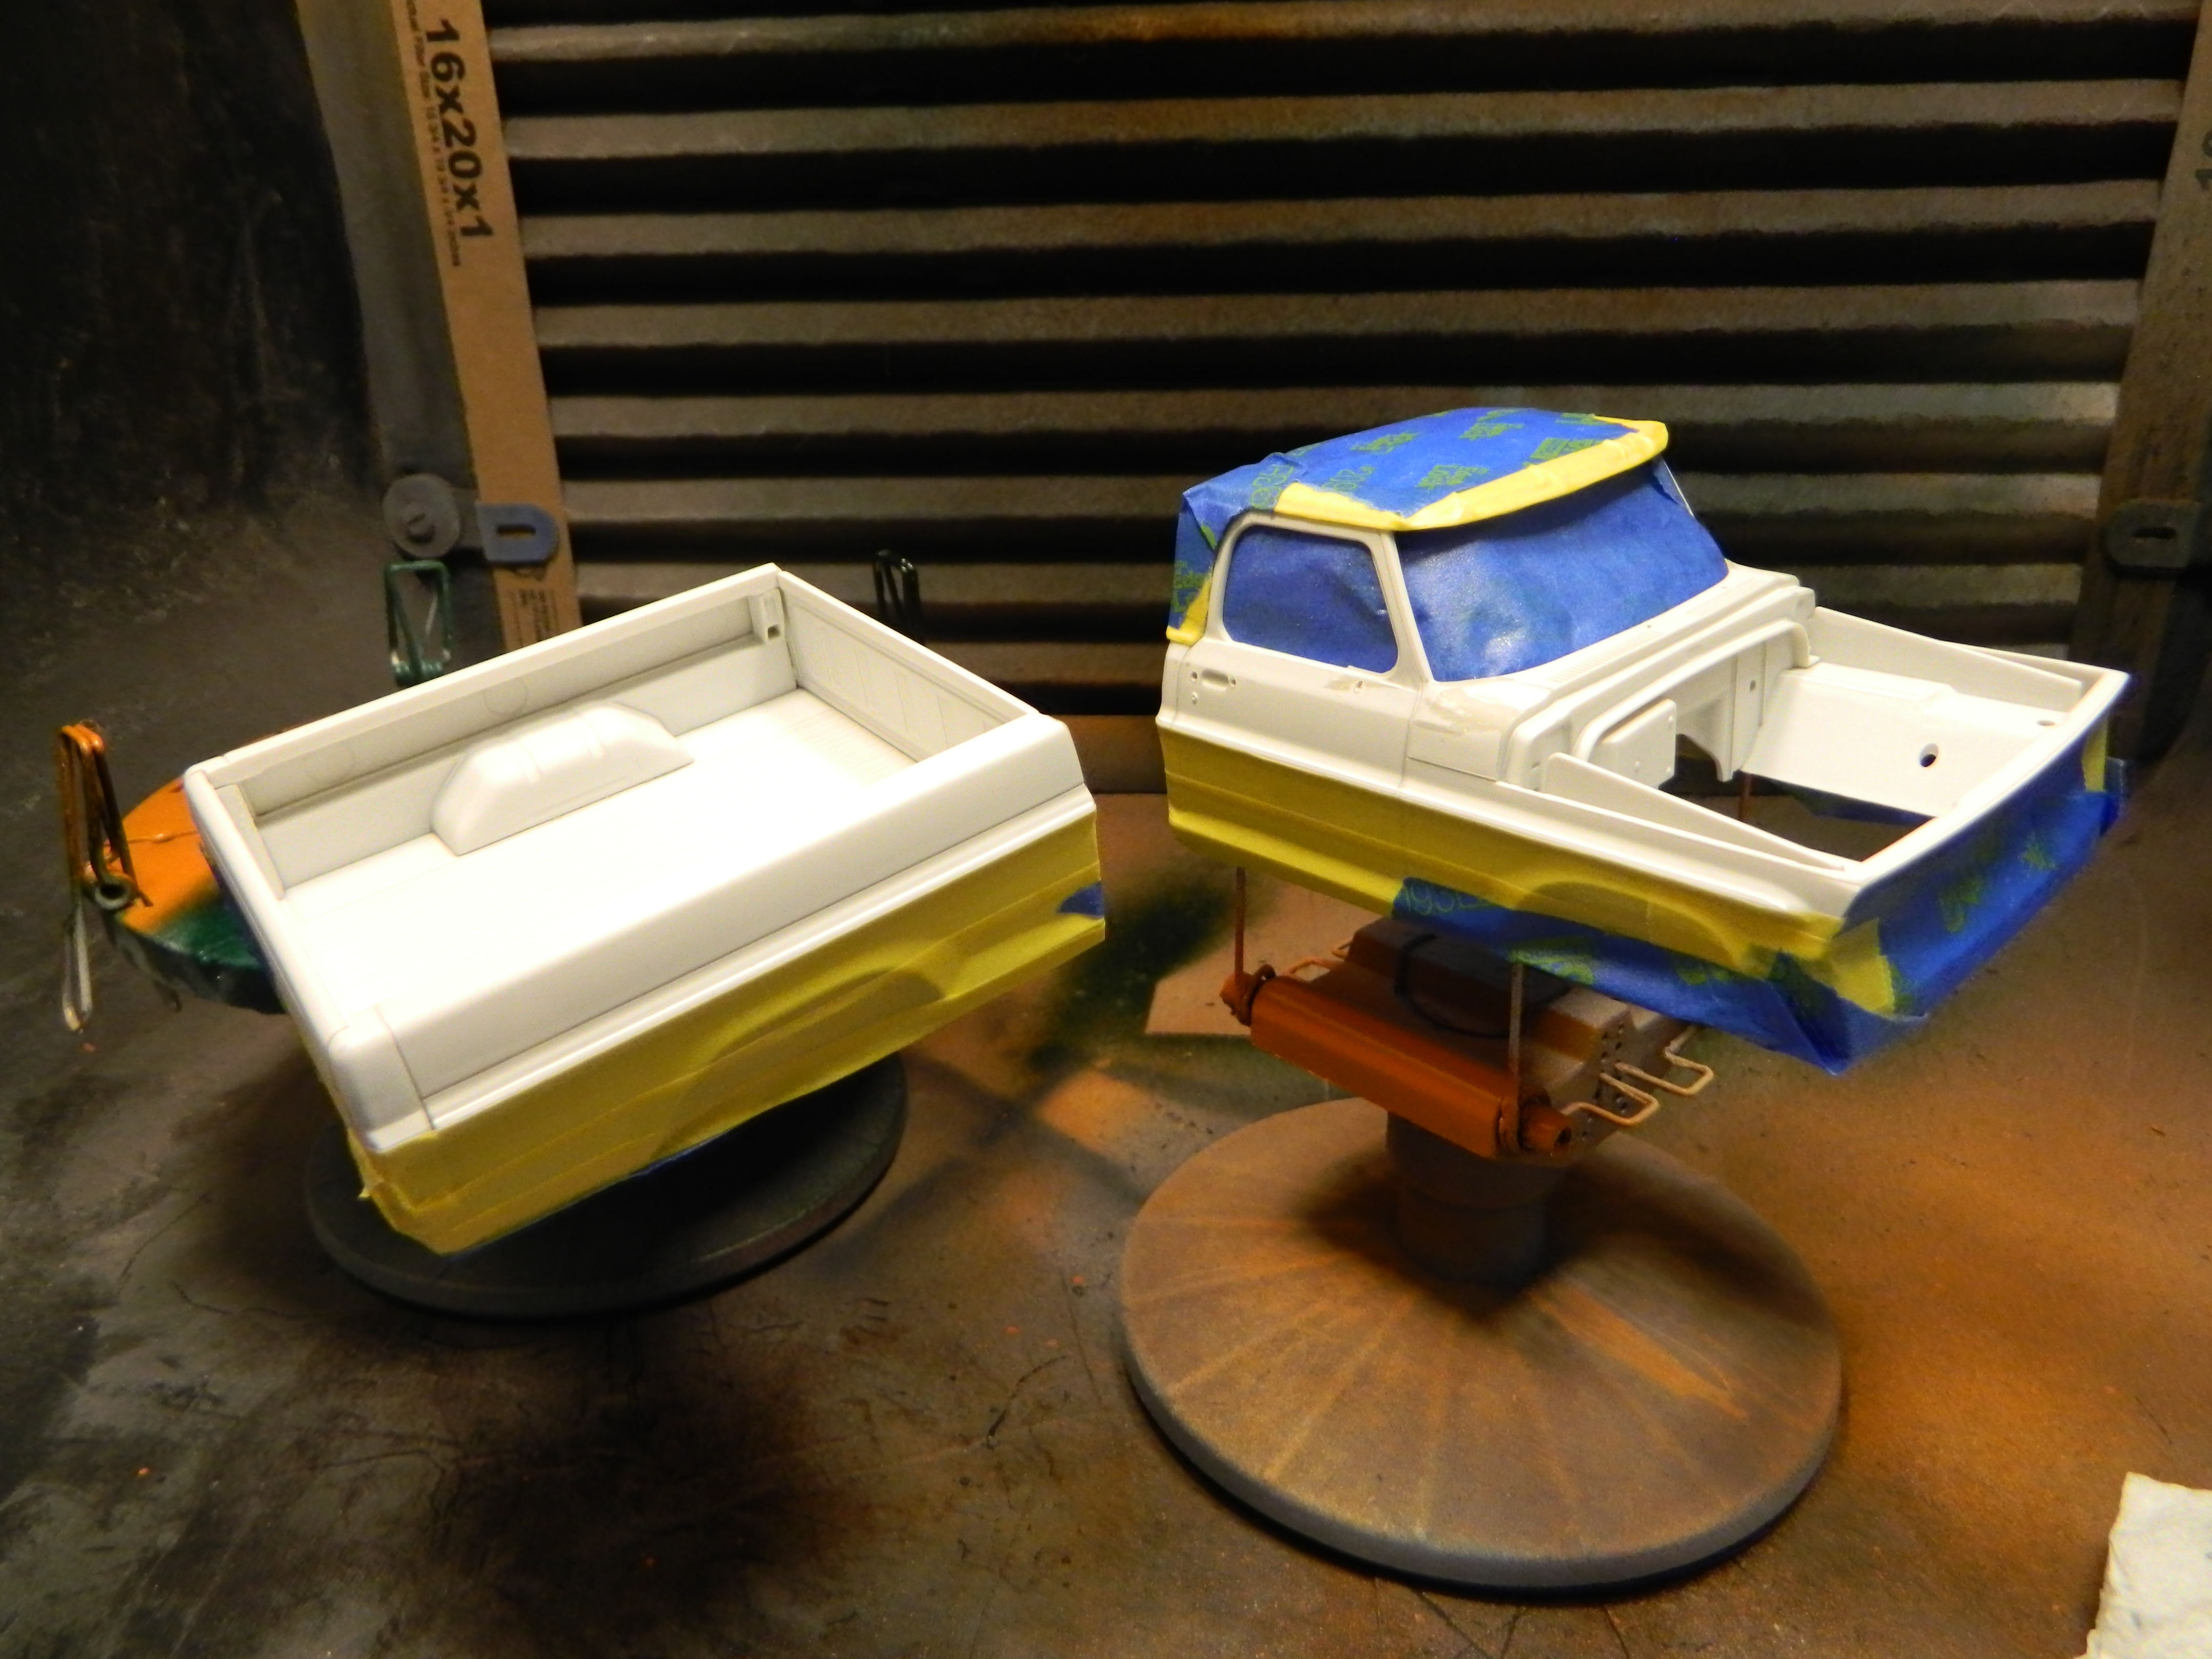
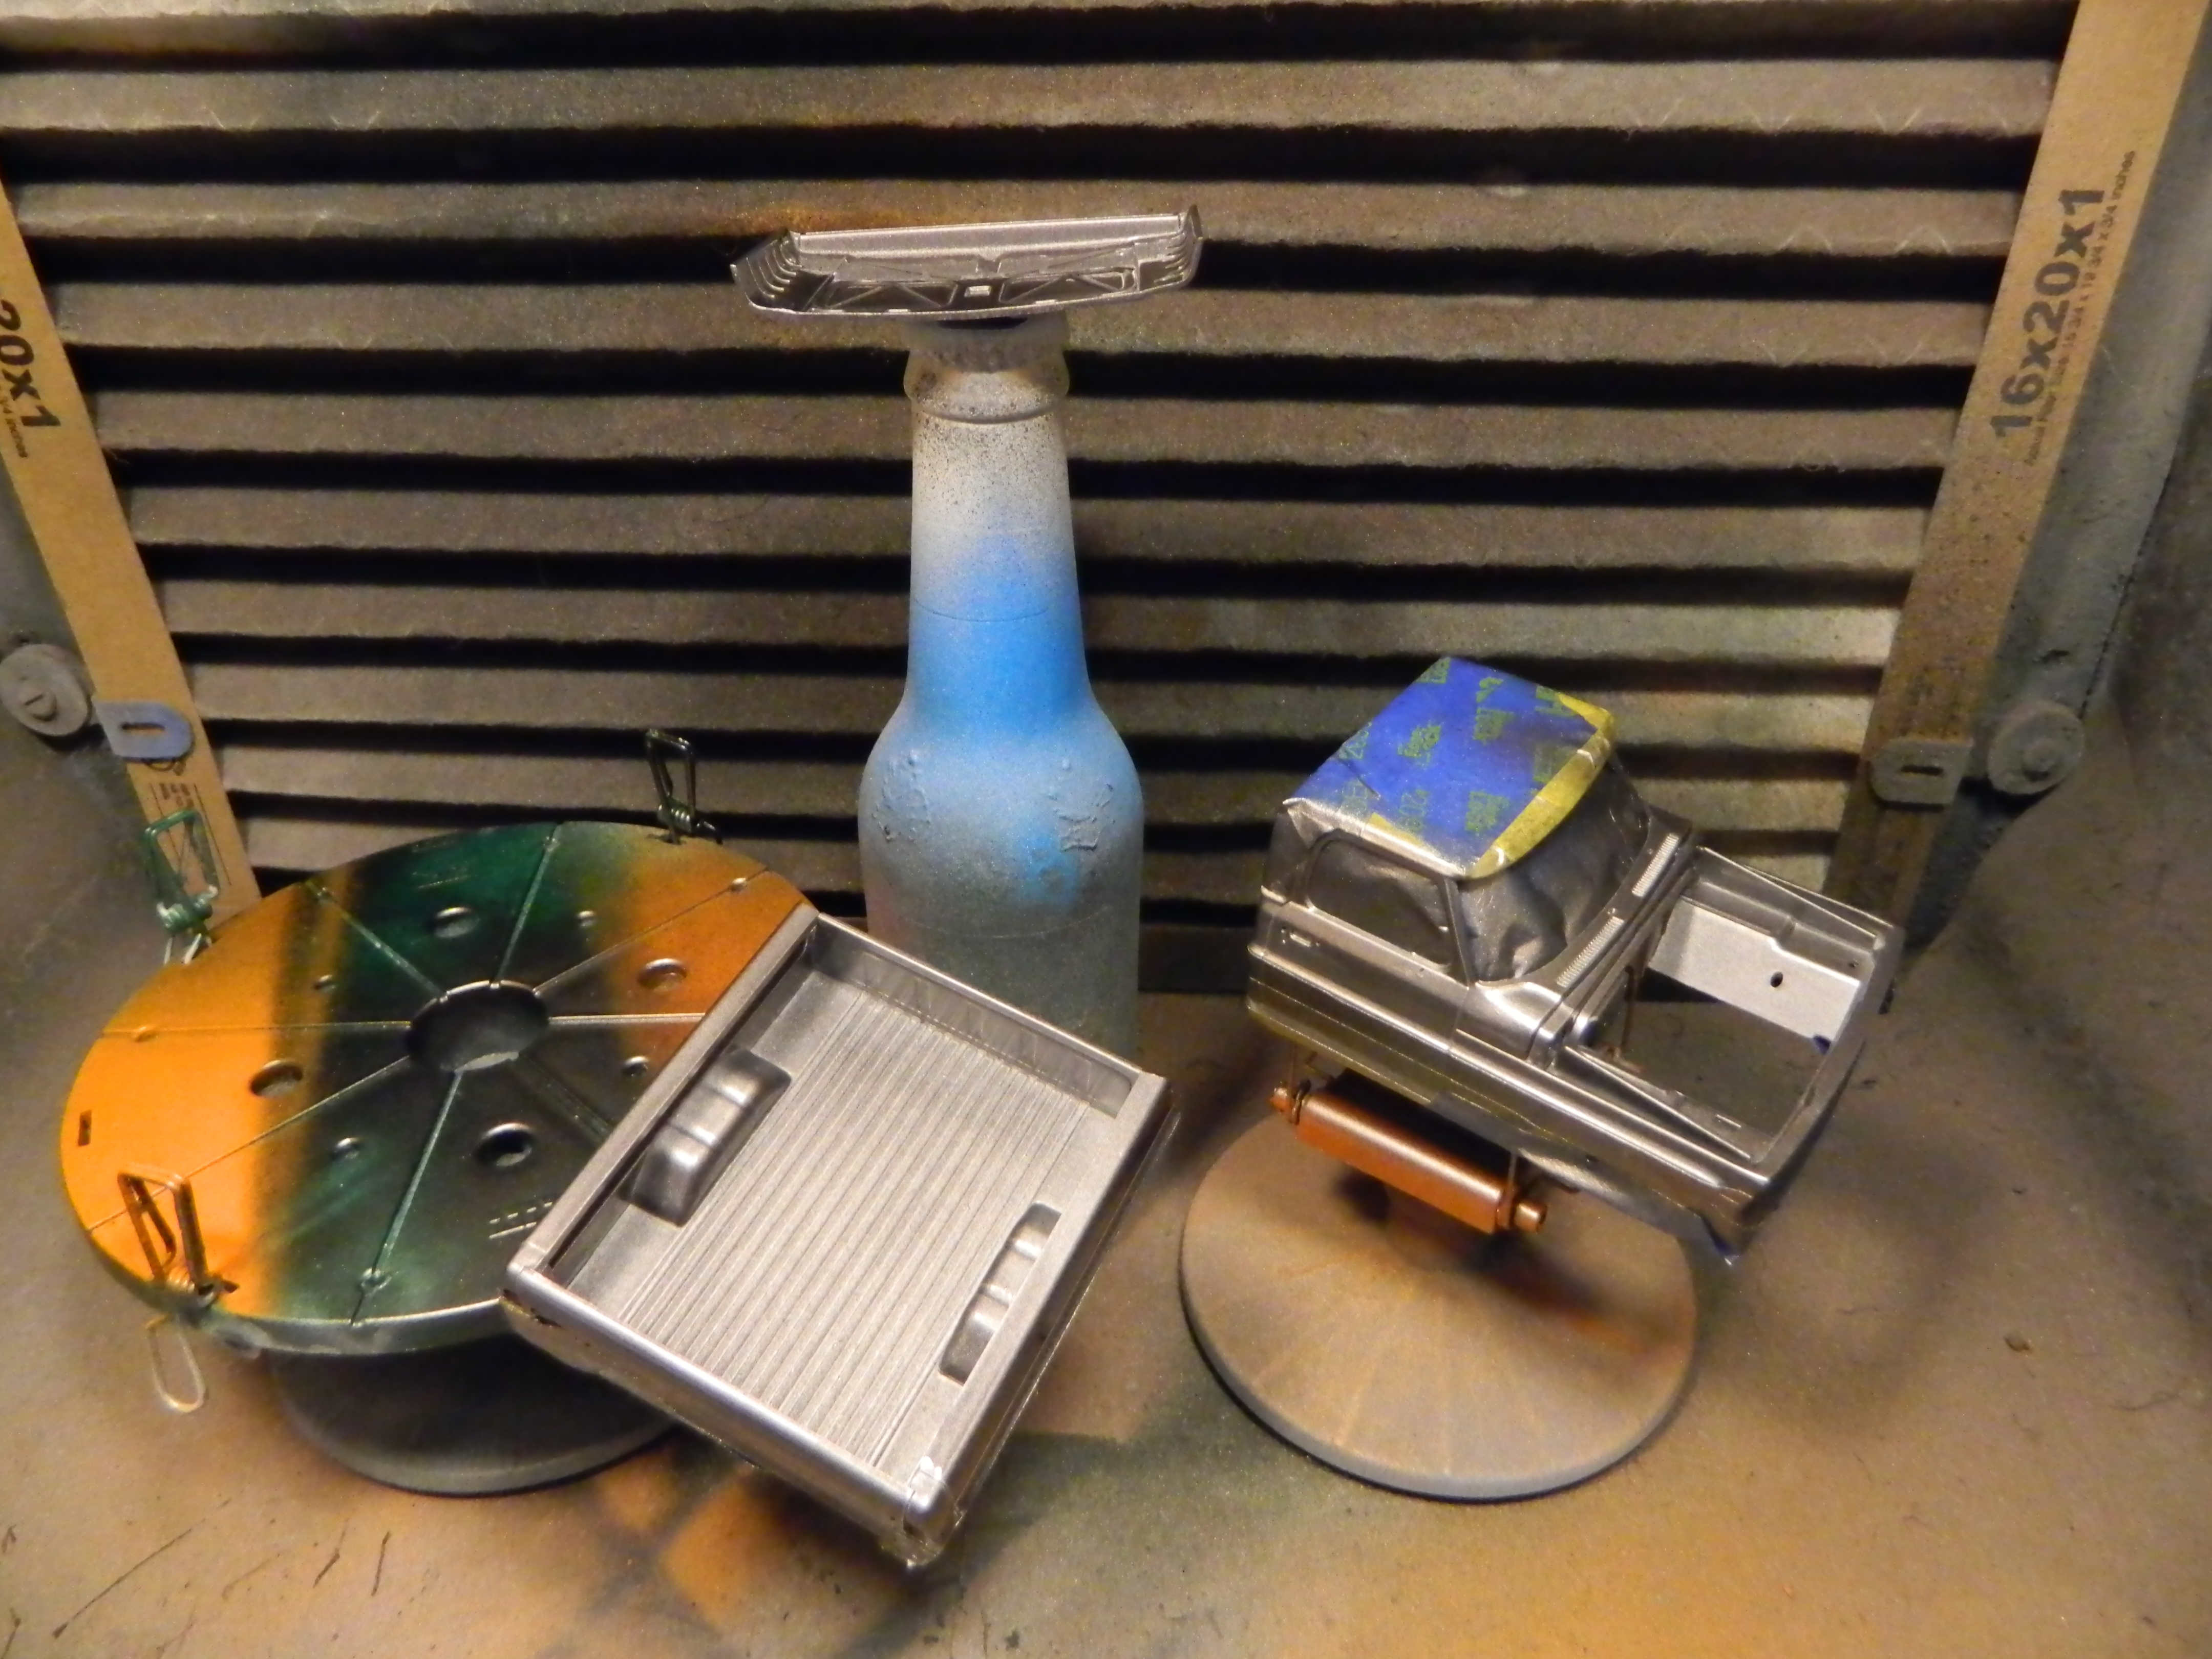
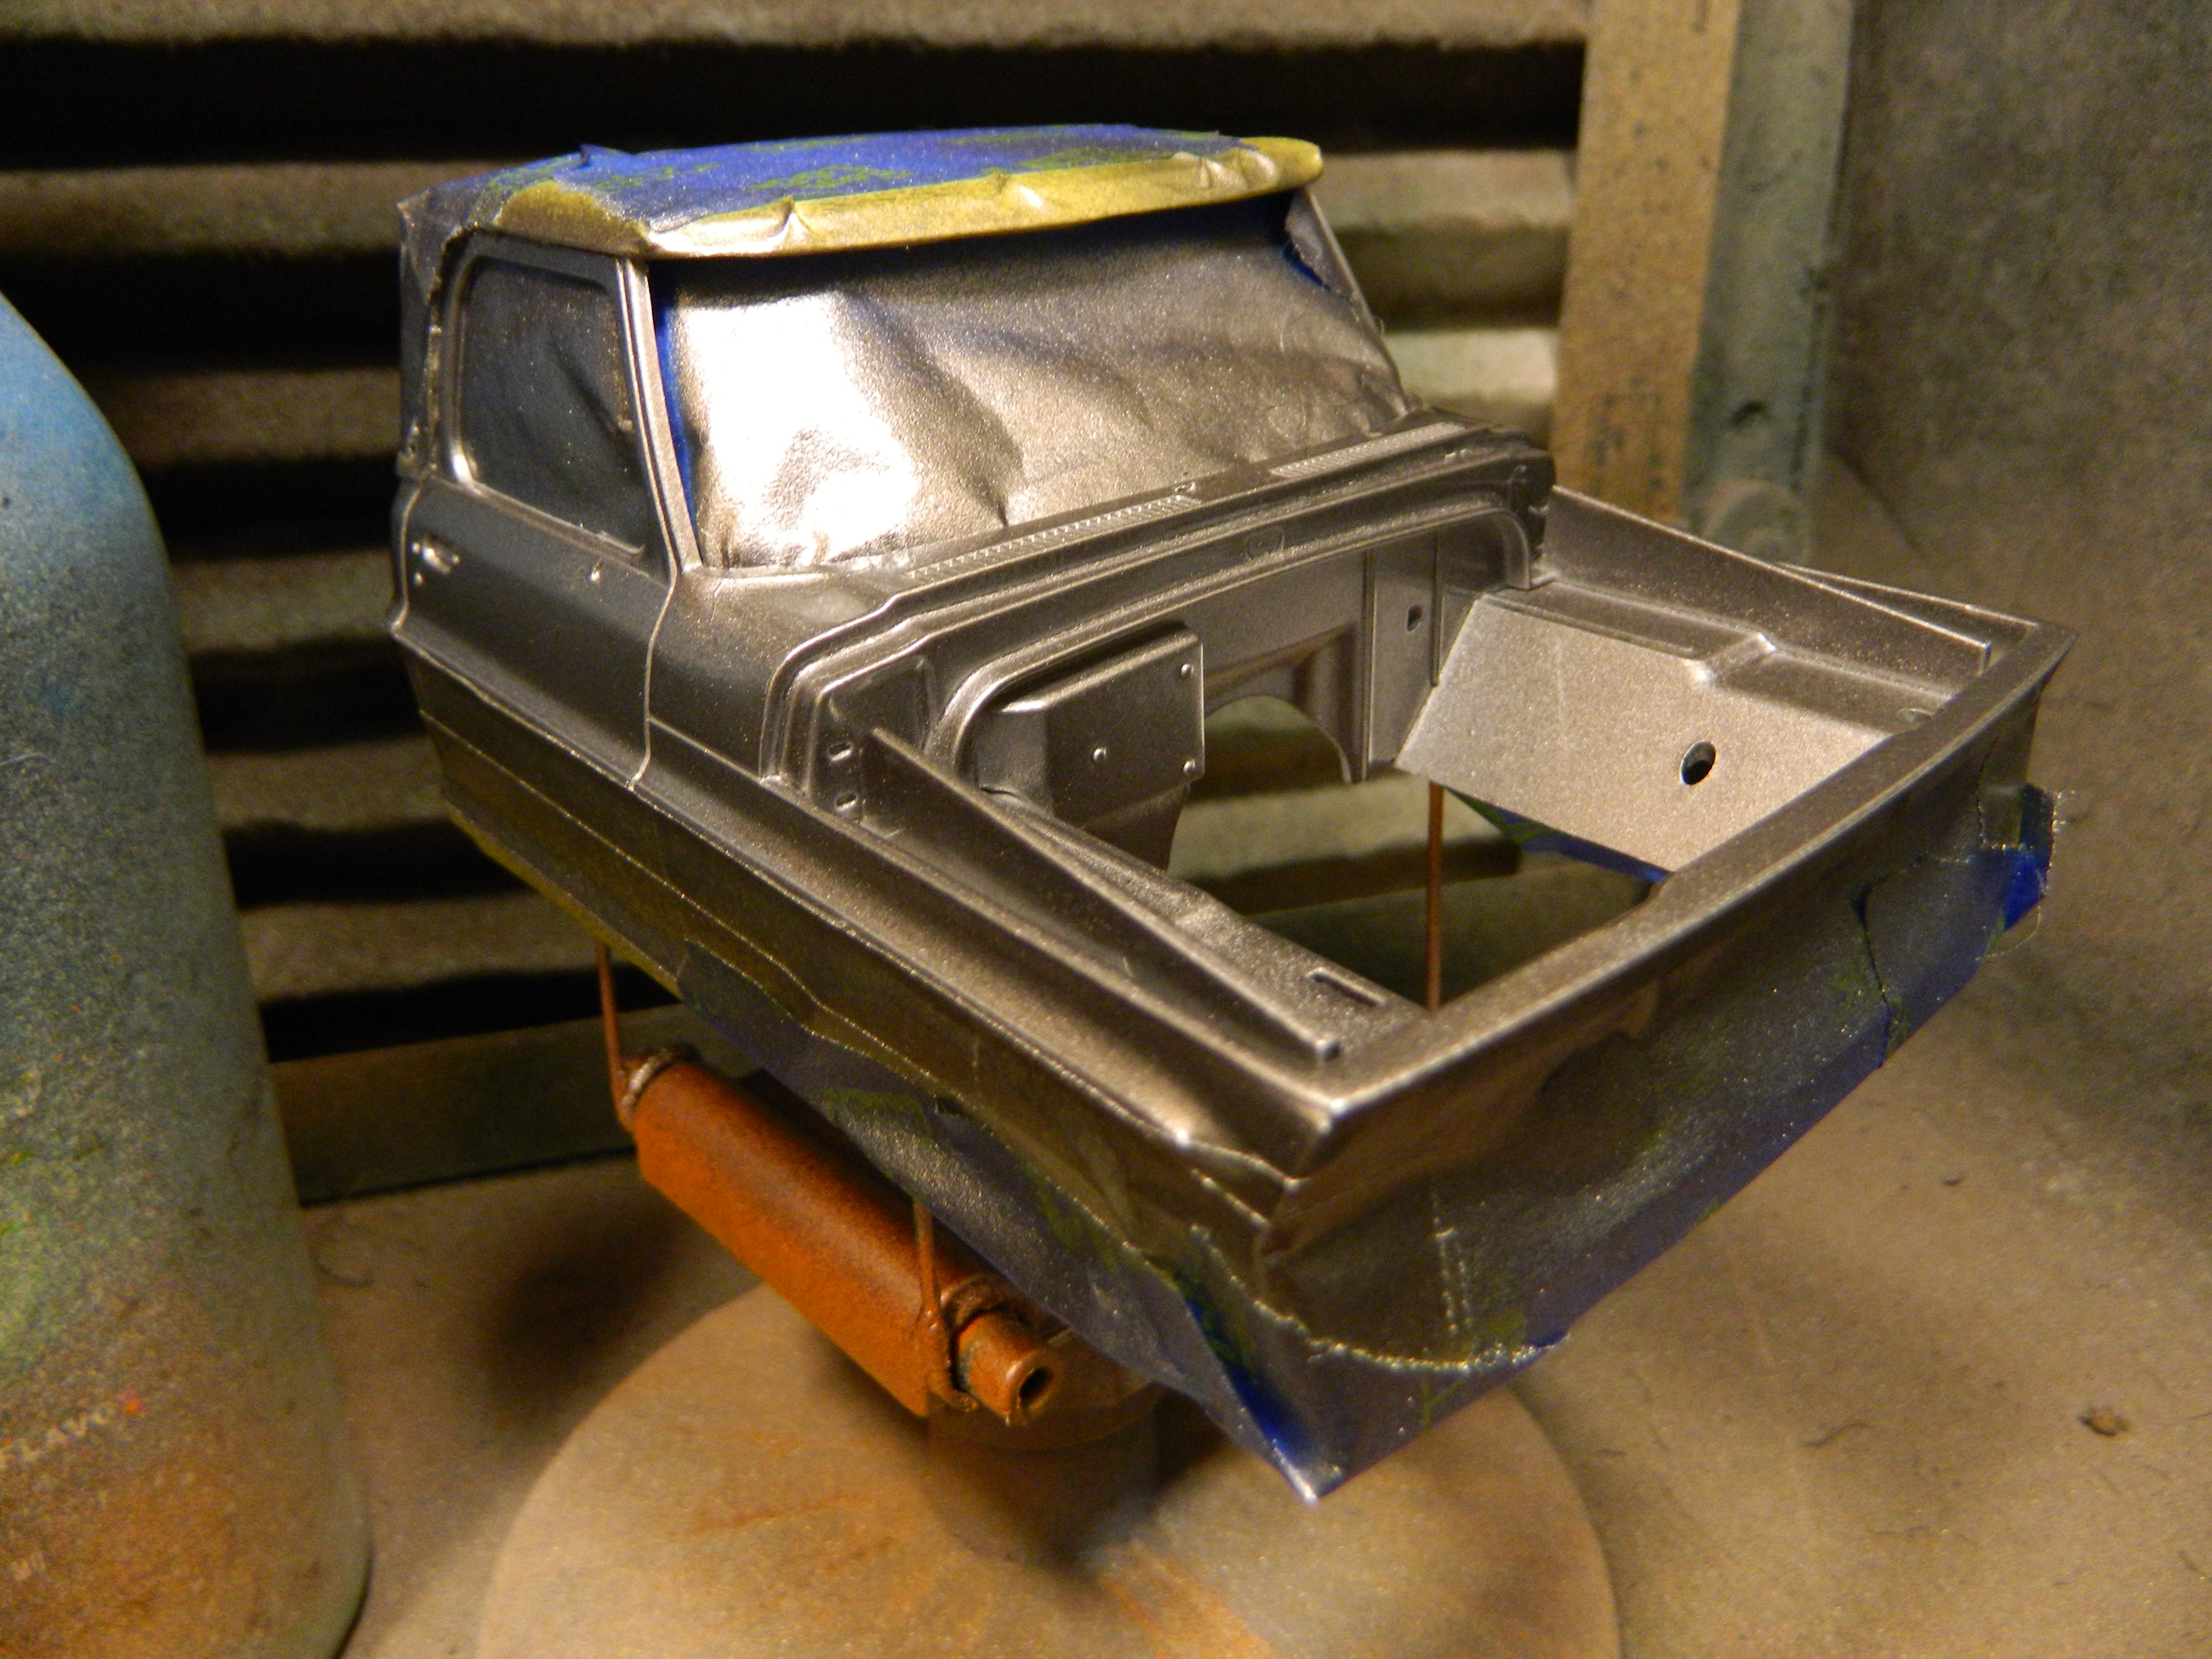
 I fired up the paintbooth this morning and added another coat of Dupli-Color Forest Green Pearl to the roof. Because of the humidity, the paint blushed on part of the roof, but that polished out by rubbing a terrycloth towel on it. The join line on the roof is barely visible, but once I add several coats of gloss clear to the body, it'll probably come back. When you consider all the problems I have had with these Moebius kits, I don't think I'll be buying anymore. I do have other Moebius kits in the stash, but I'll build them when I want to and it'll be a while before I do. Moebius has a long way to go before they can be considered a good kit manufacturer by me. Right now, they are way down on the list! I removed the tape and mockup the body with the interior, chassis, and bed. Looks good so far, but it has been a lot of extra work! More to come...
-
Thank you, Joe!
-
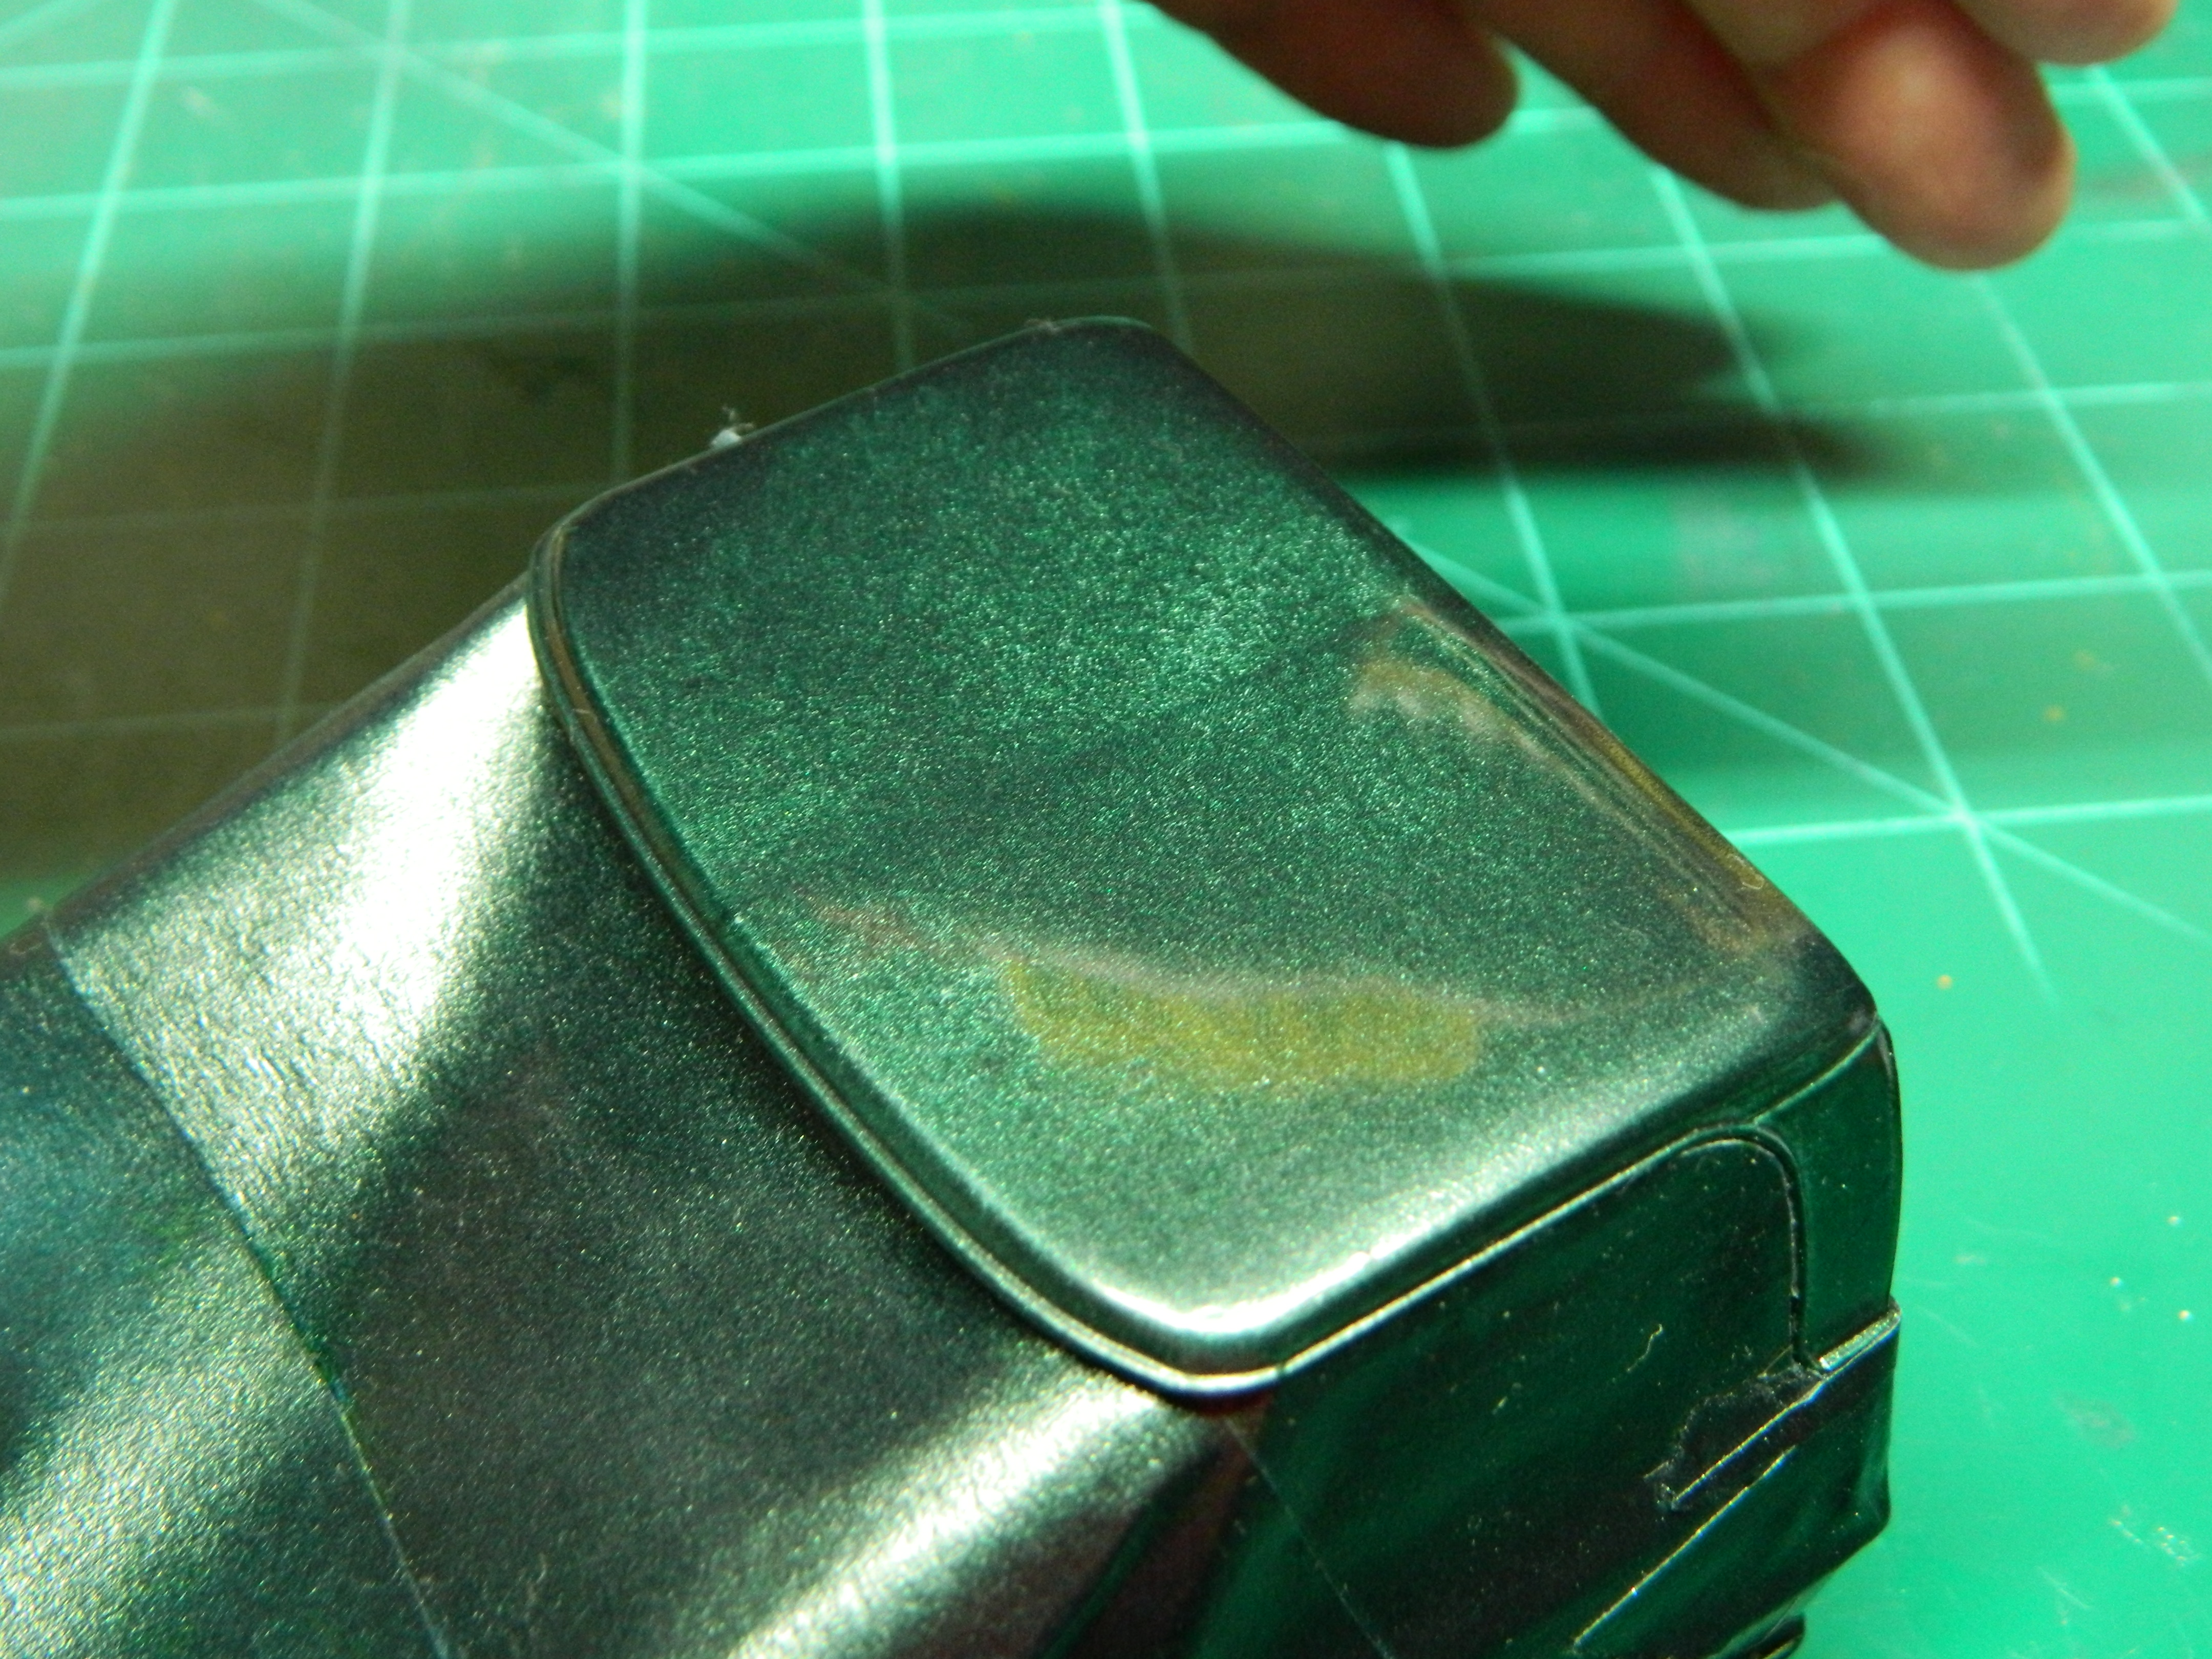
Thanks Keith! I am hoping for the same result with mine after all the sanding and polishing I've done. It looks like where the plastic had joined itself after filling the mold and maybe not enough plastic was pushed into the mold. I don't know if that was the issue and I am not an expert on mold filling.
-
Thank you Curtis, Jeff, and Tyler!
-
Well, enough of the wetsanding and polishing. I used my hand to block the reflection of the background so I could show you the line on the roof. I think this is where the plastic joined after filling the mold. Now it's back into the paintbooth for another coat of paint that I hope will cover the line and the high spots where the paint was sanded and polished. I unmasked the bed and other than the white line along the top of the tailgate emblem, it came out good! Hopefully, a fine paintbrush and some Tamiya Light Gun Metal will take care of that white line. Other than seat belts, the interior is done. More to come...
-
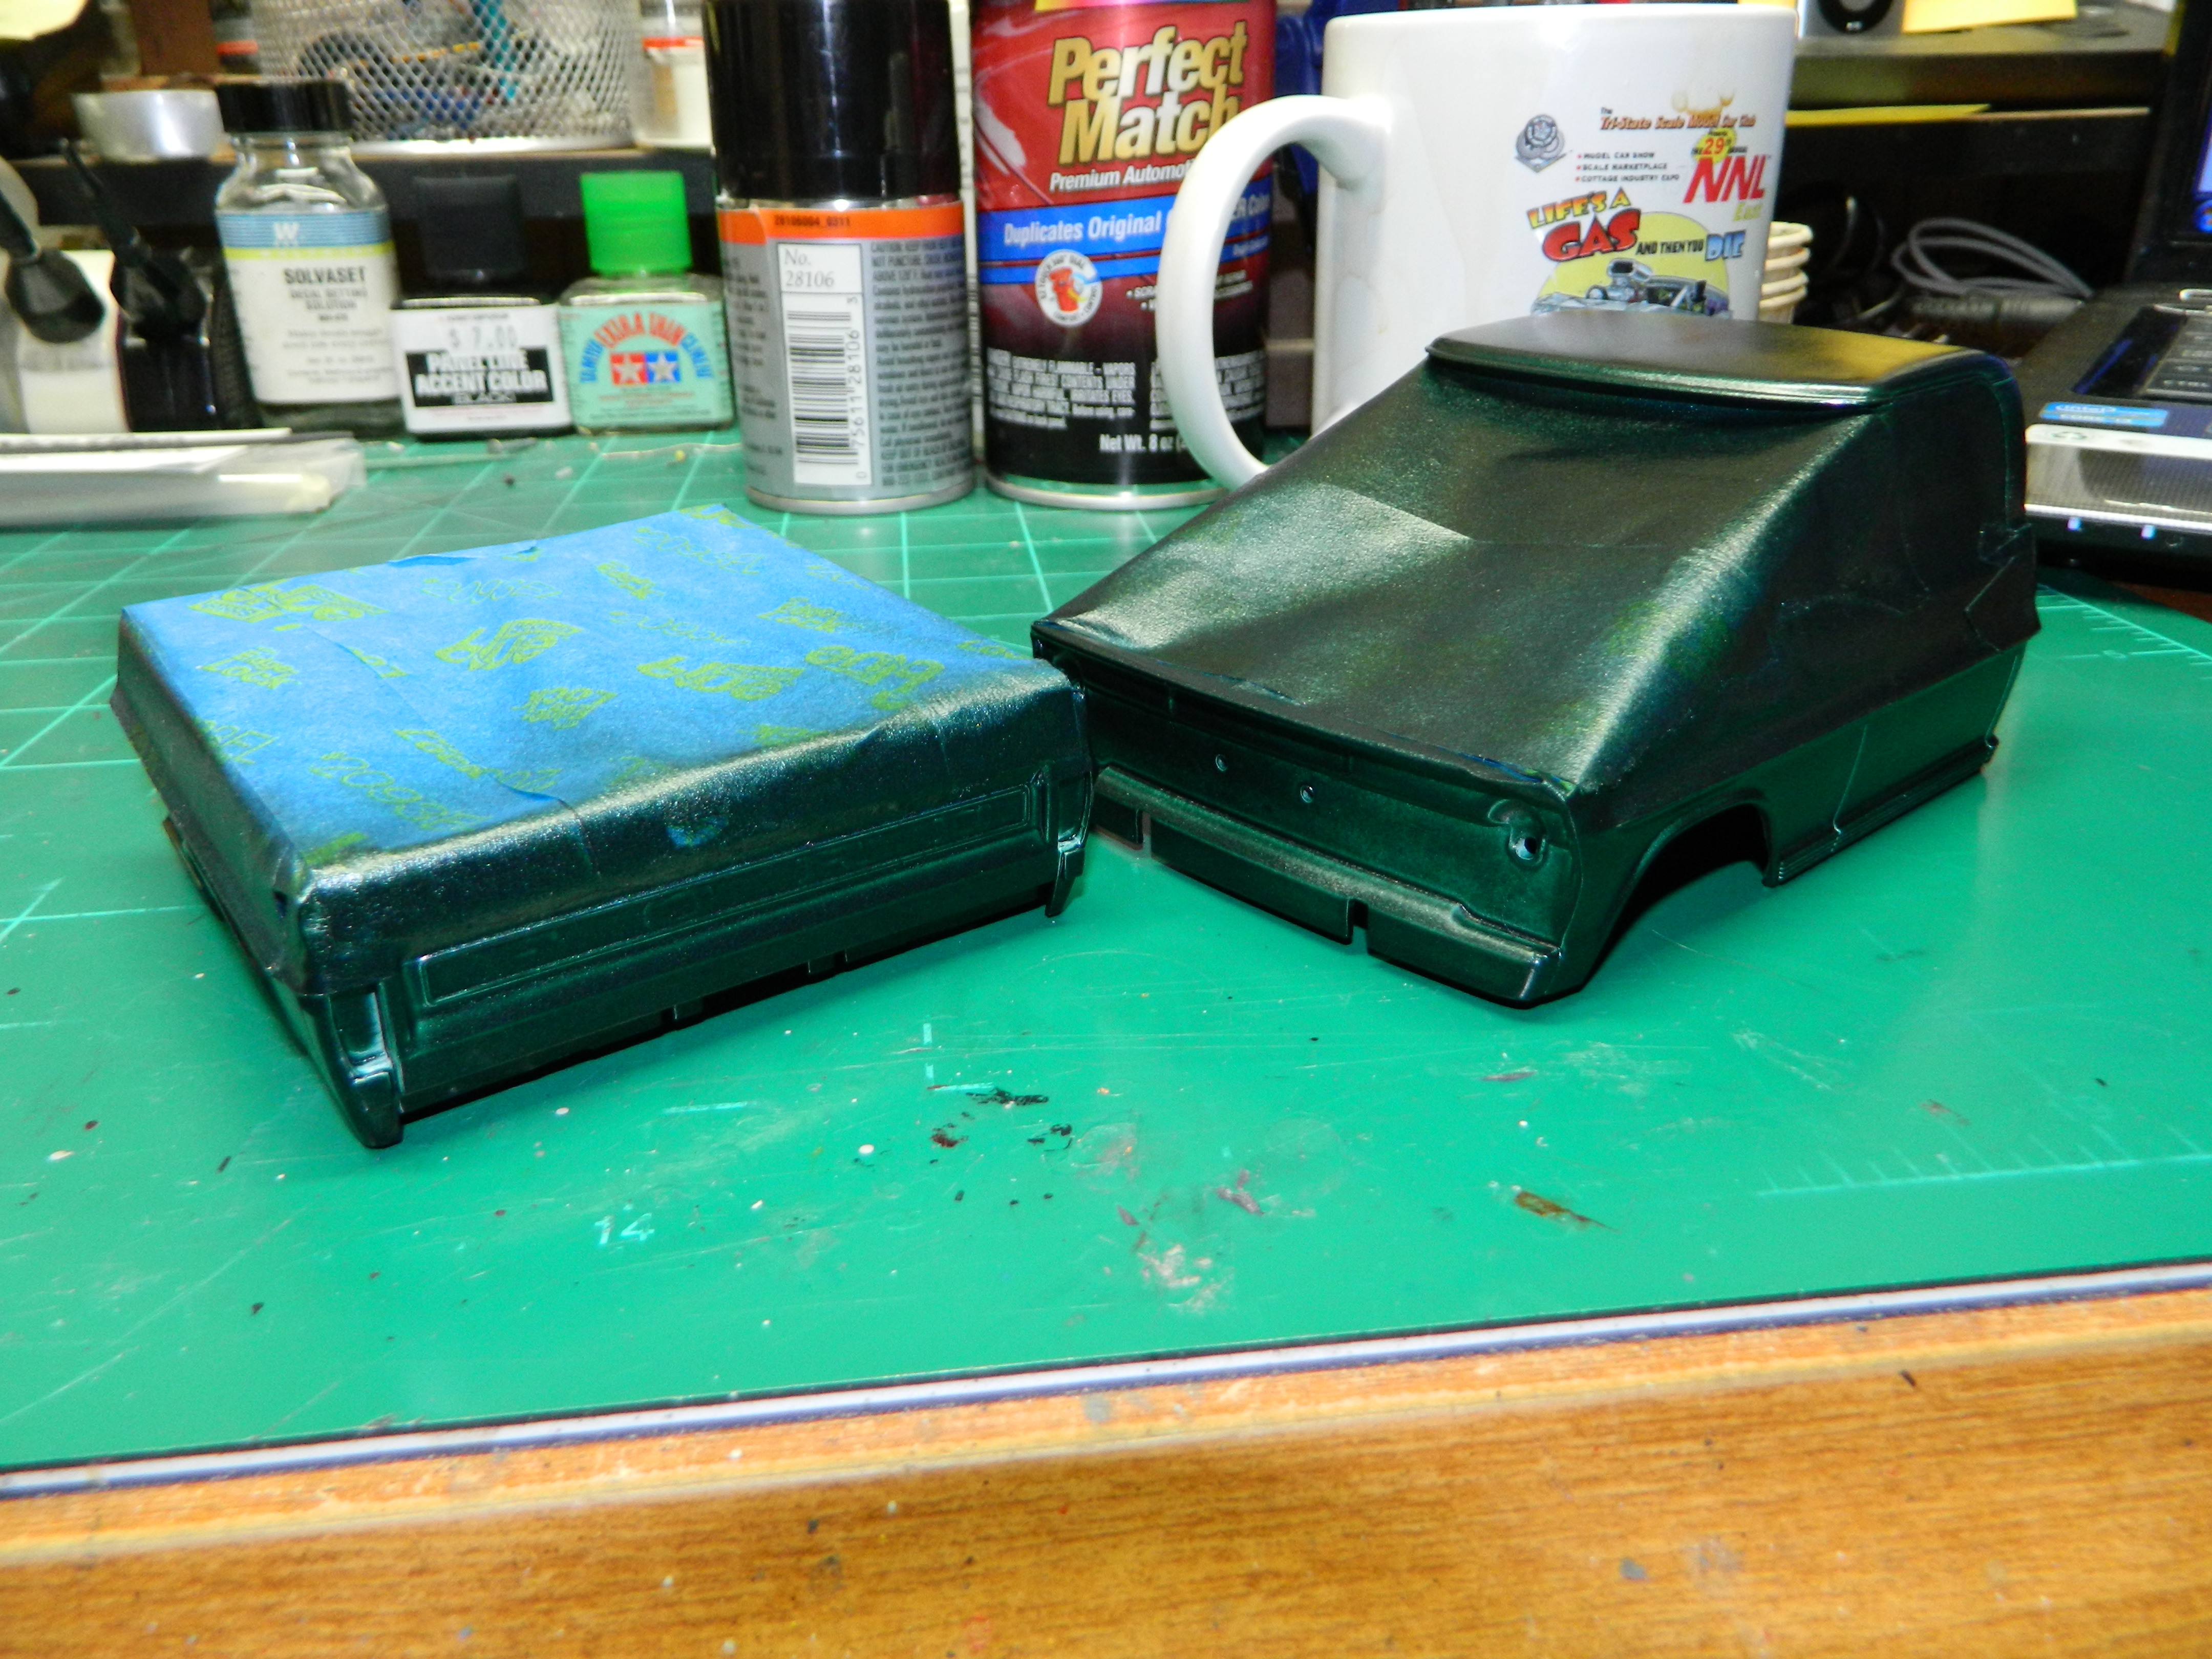
I painted the second color on the F-100 yesterday and then threw the cab and bed into the dehydrator for five hours.. I may have painted the roof a little too heavily to start with as there is a line down the center of the roof. The plastic may have crazed a bit, so wet sanding is in order here. More to come...
-
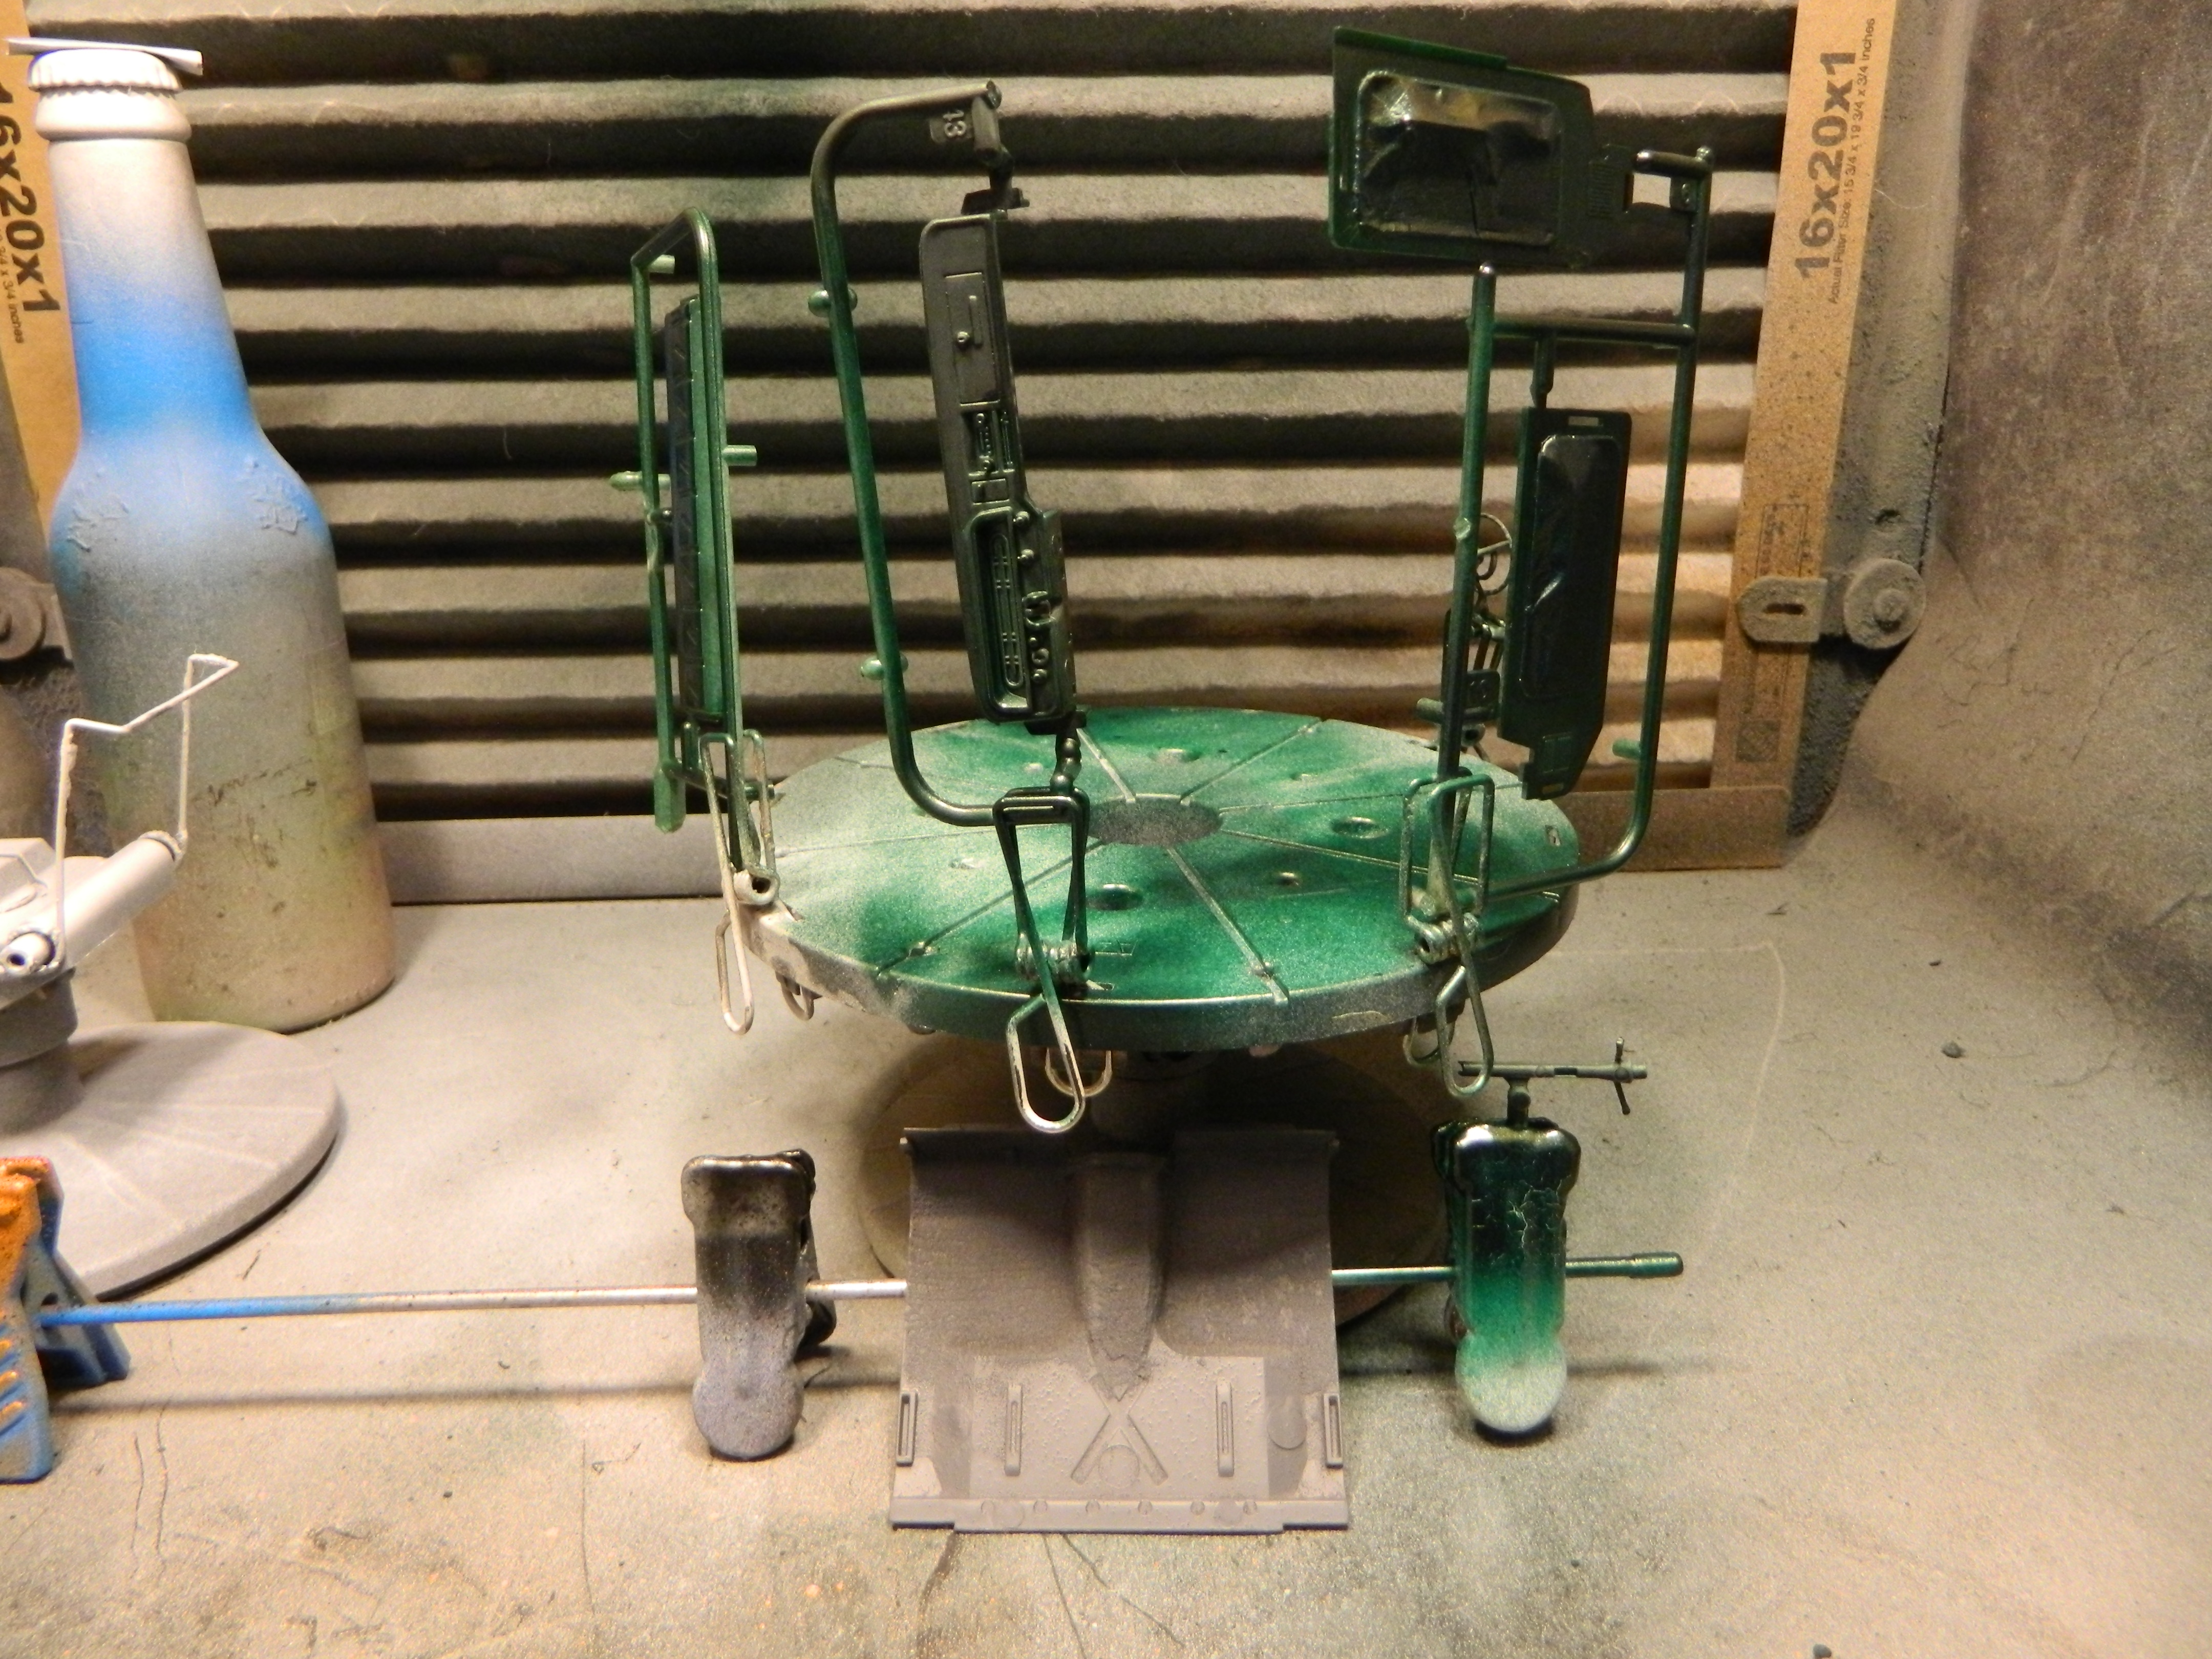
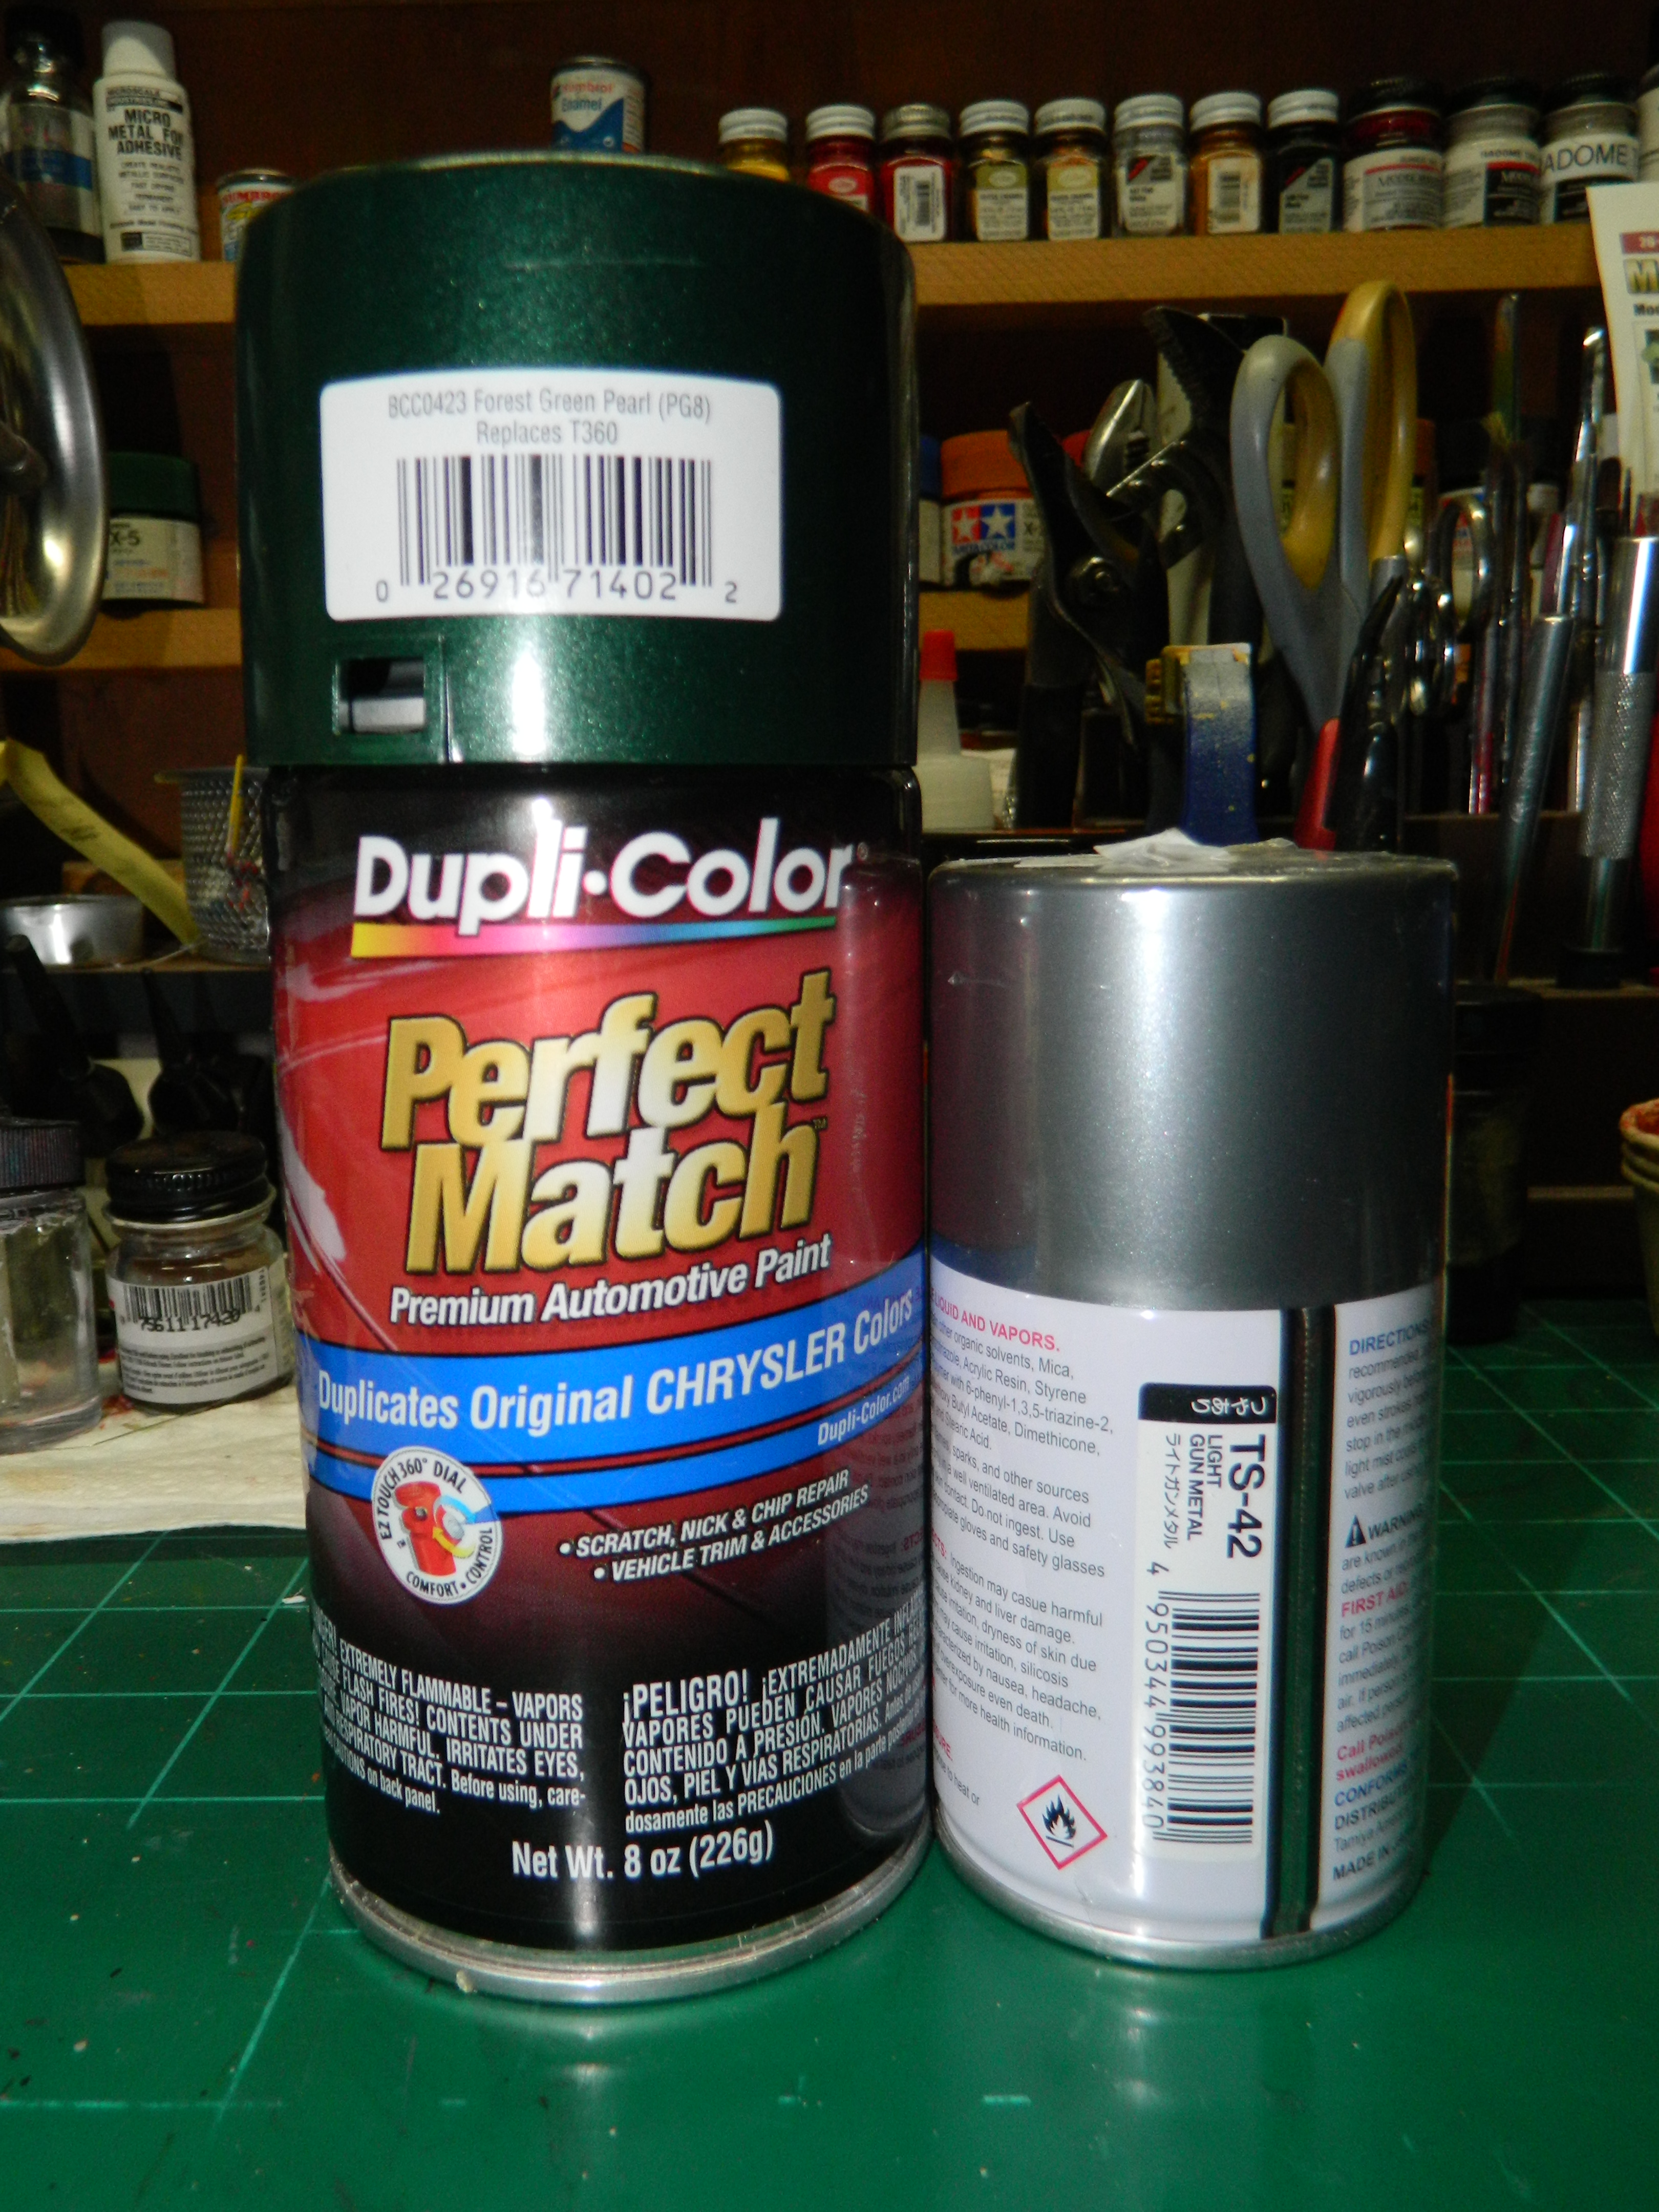
This was an hour of masking the cab and the bed. I hope it was worth it! This was three mist coats and 1 wet coat of Tamiya TS-42 Light Gun Metal all in about 25 minutes. Into the dehydrator and when this is dry, I'll re-mask and shoot the Dupli-Color Forest Green Pearl. More to come...
-
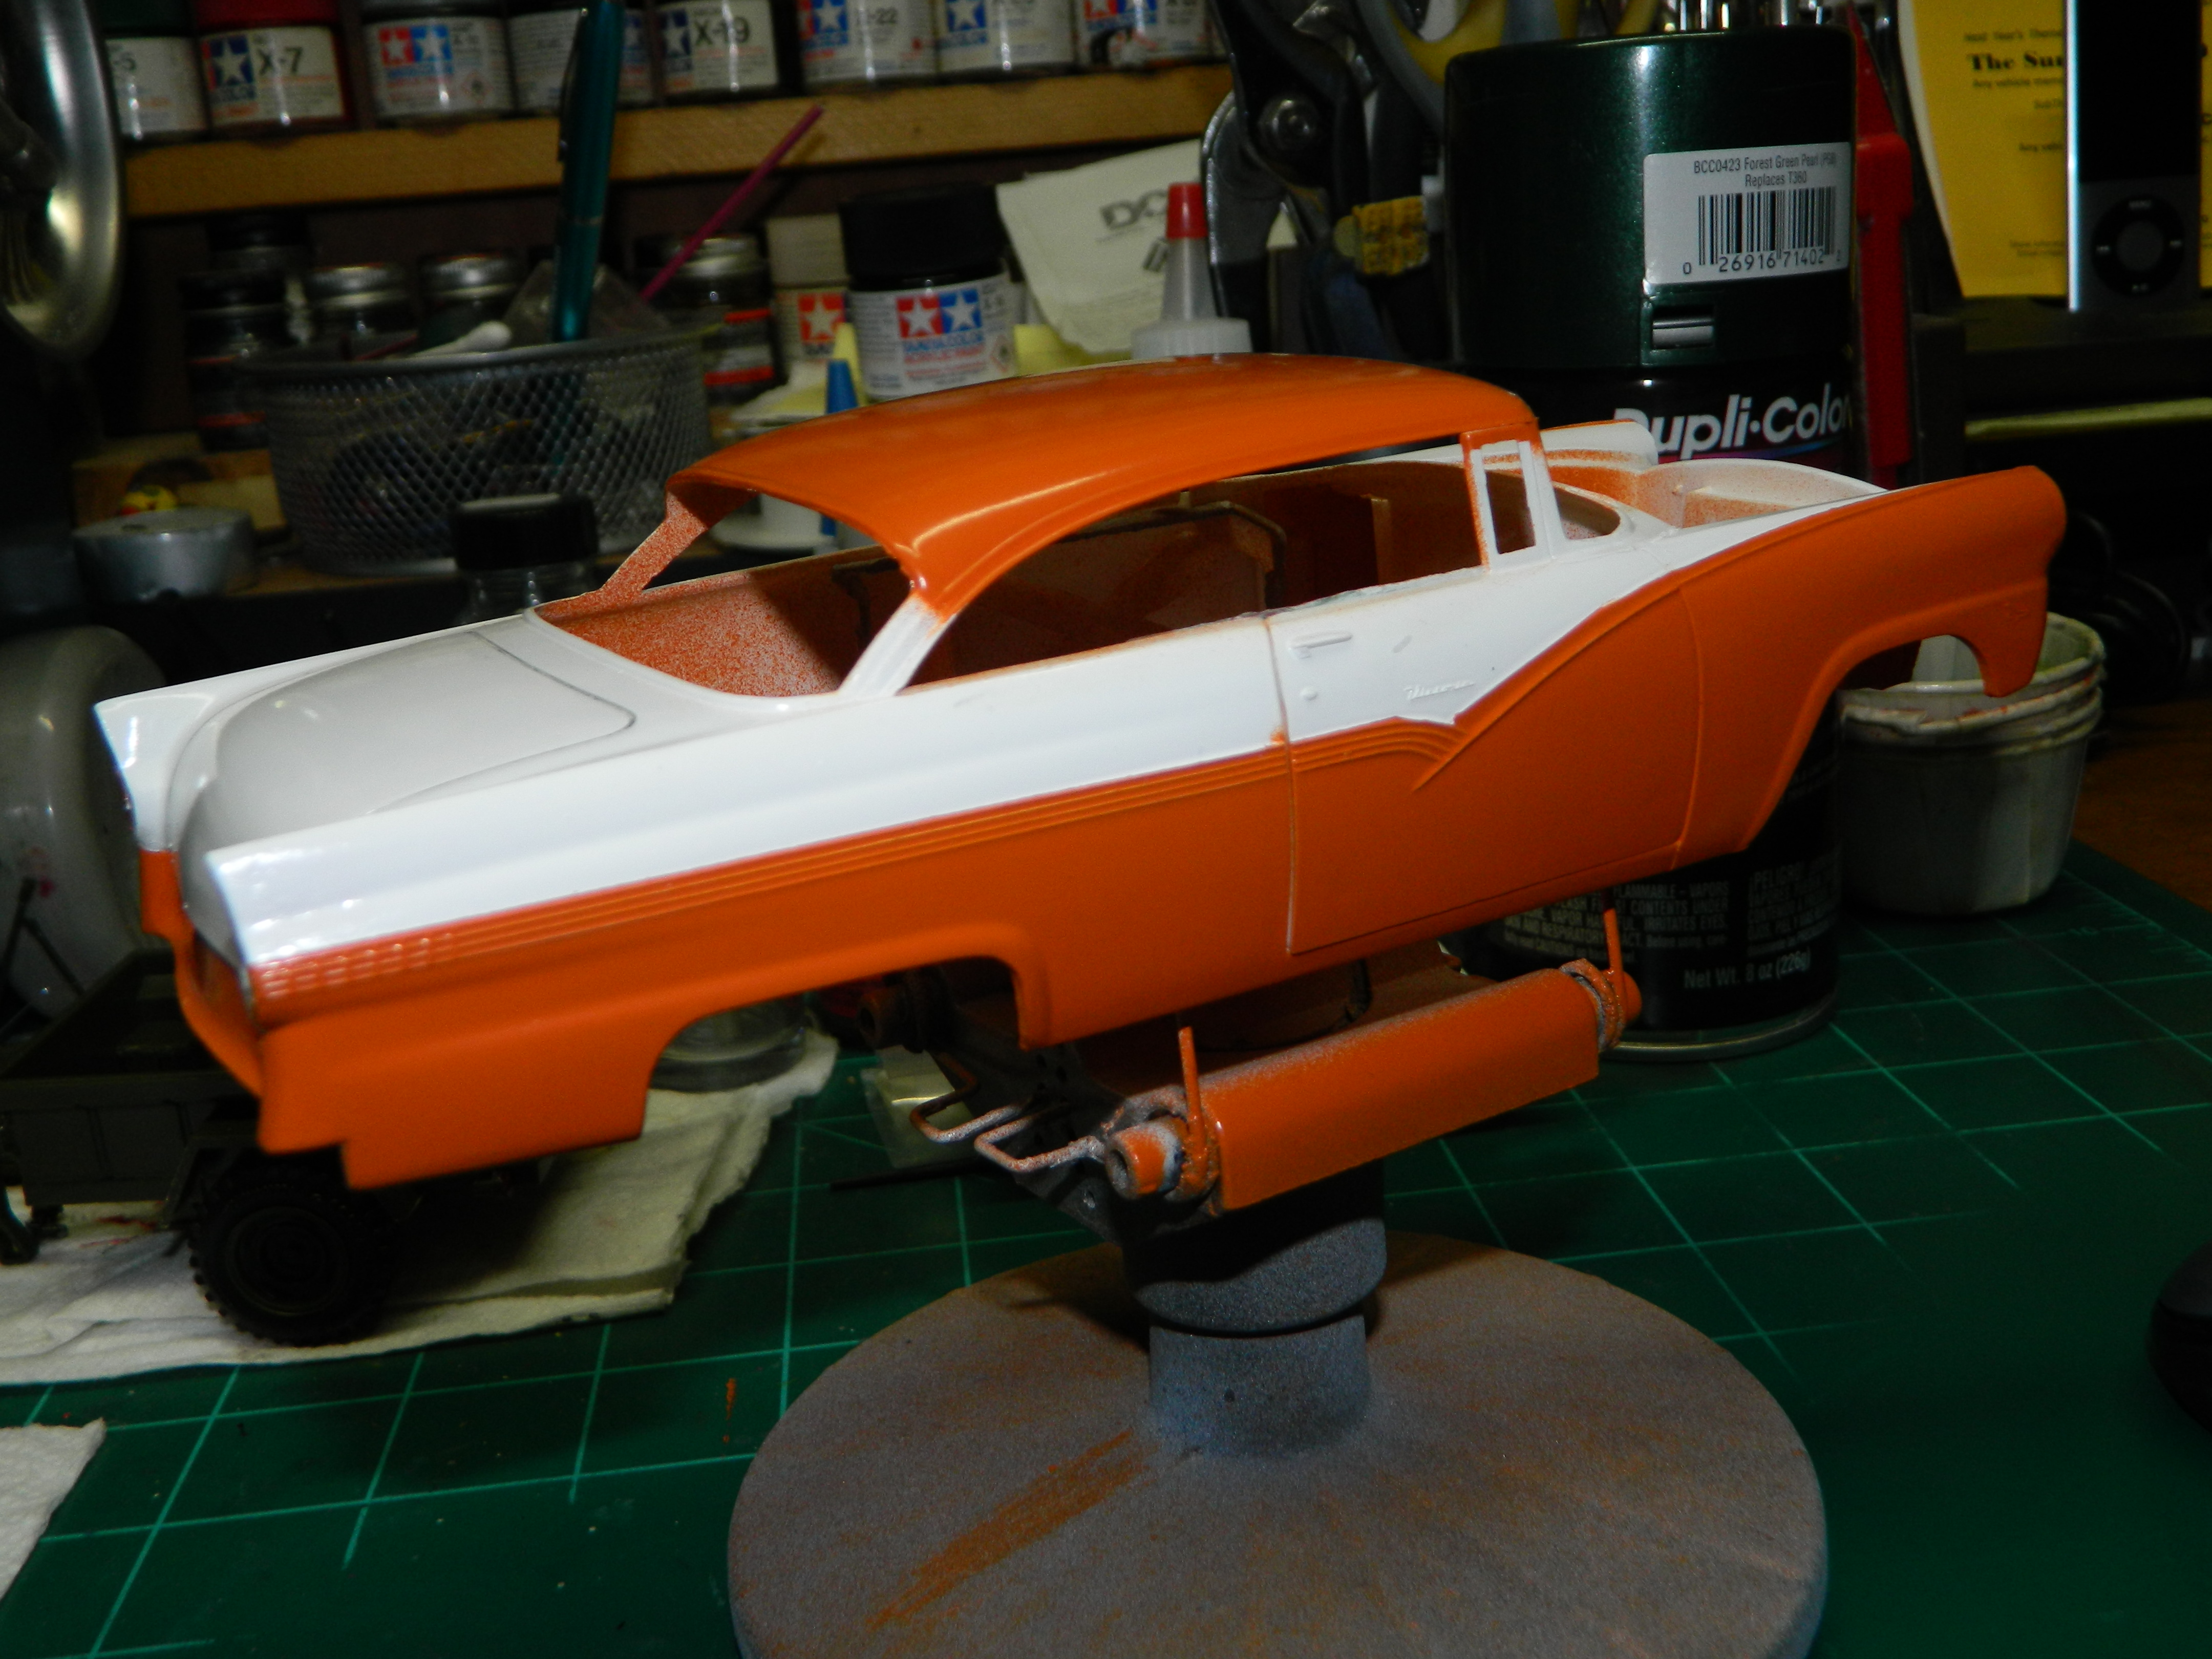
I finally got the Fairlane painted in two-tone Go-Mango and white. I need to do some cleanup here and there, but it's not bad. I haven't decided if the engine bay will be Go-Mango or white, so this is how it is sitting right now. Lots left to do on this one. And, I still have to foil it and clearcoat it, too! More to come...
-
Thank you Tom! I have the seat belt buckles from Model Car Garage and I am using some black ribbon that I found here at the house.
-
Thank you Mark! I'm in the midst of making seat belts and it is not an easy task. I may have to come up with some sort of jig to help me make them.
-
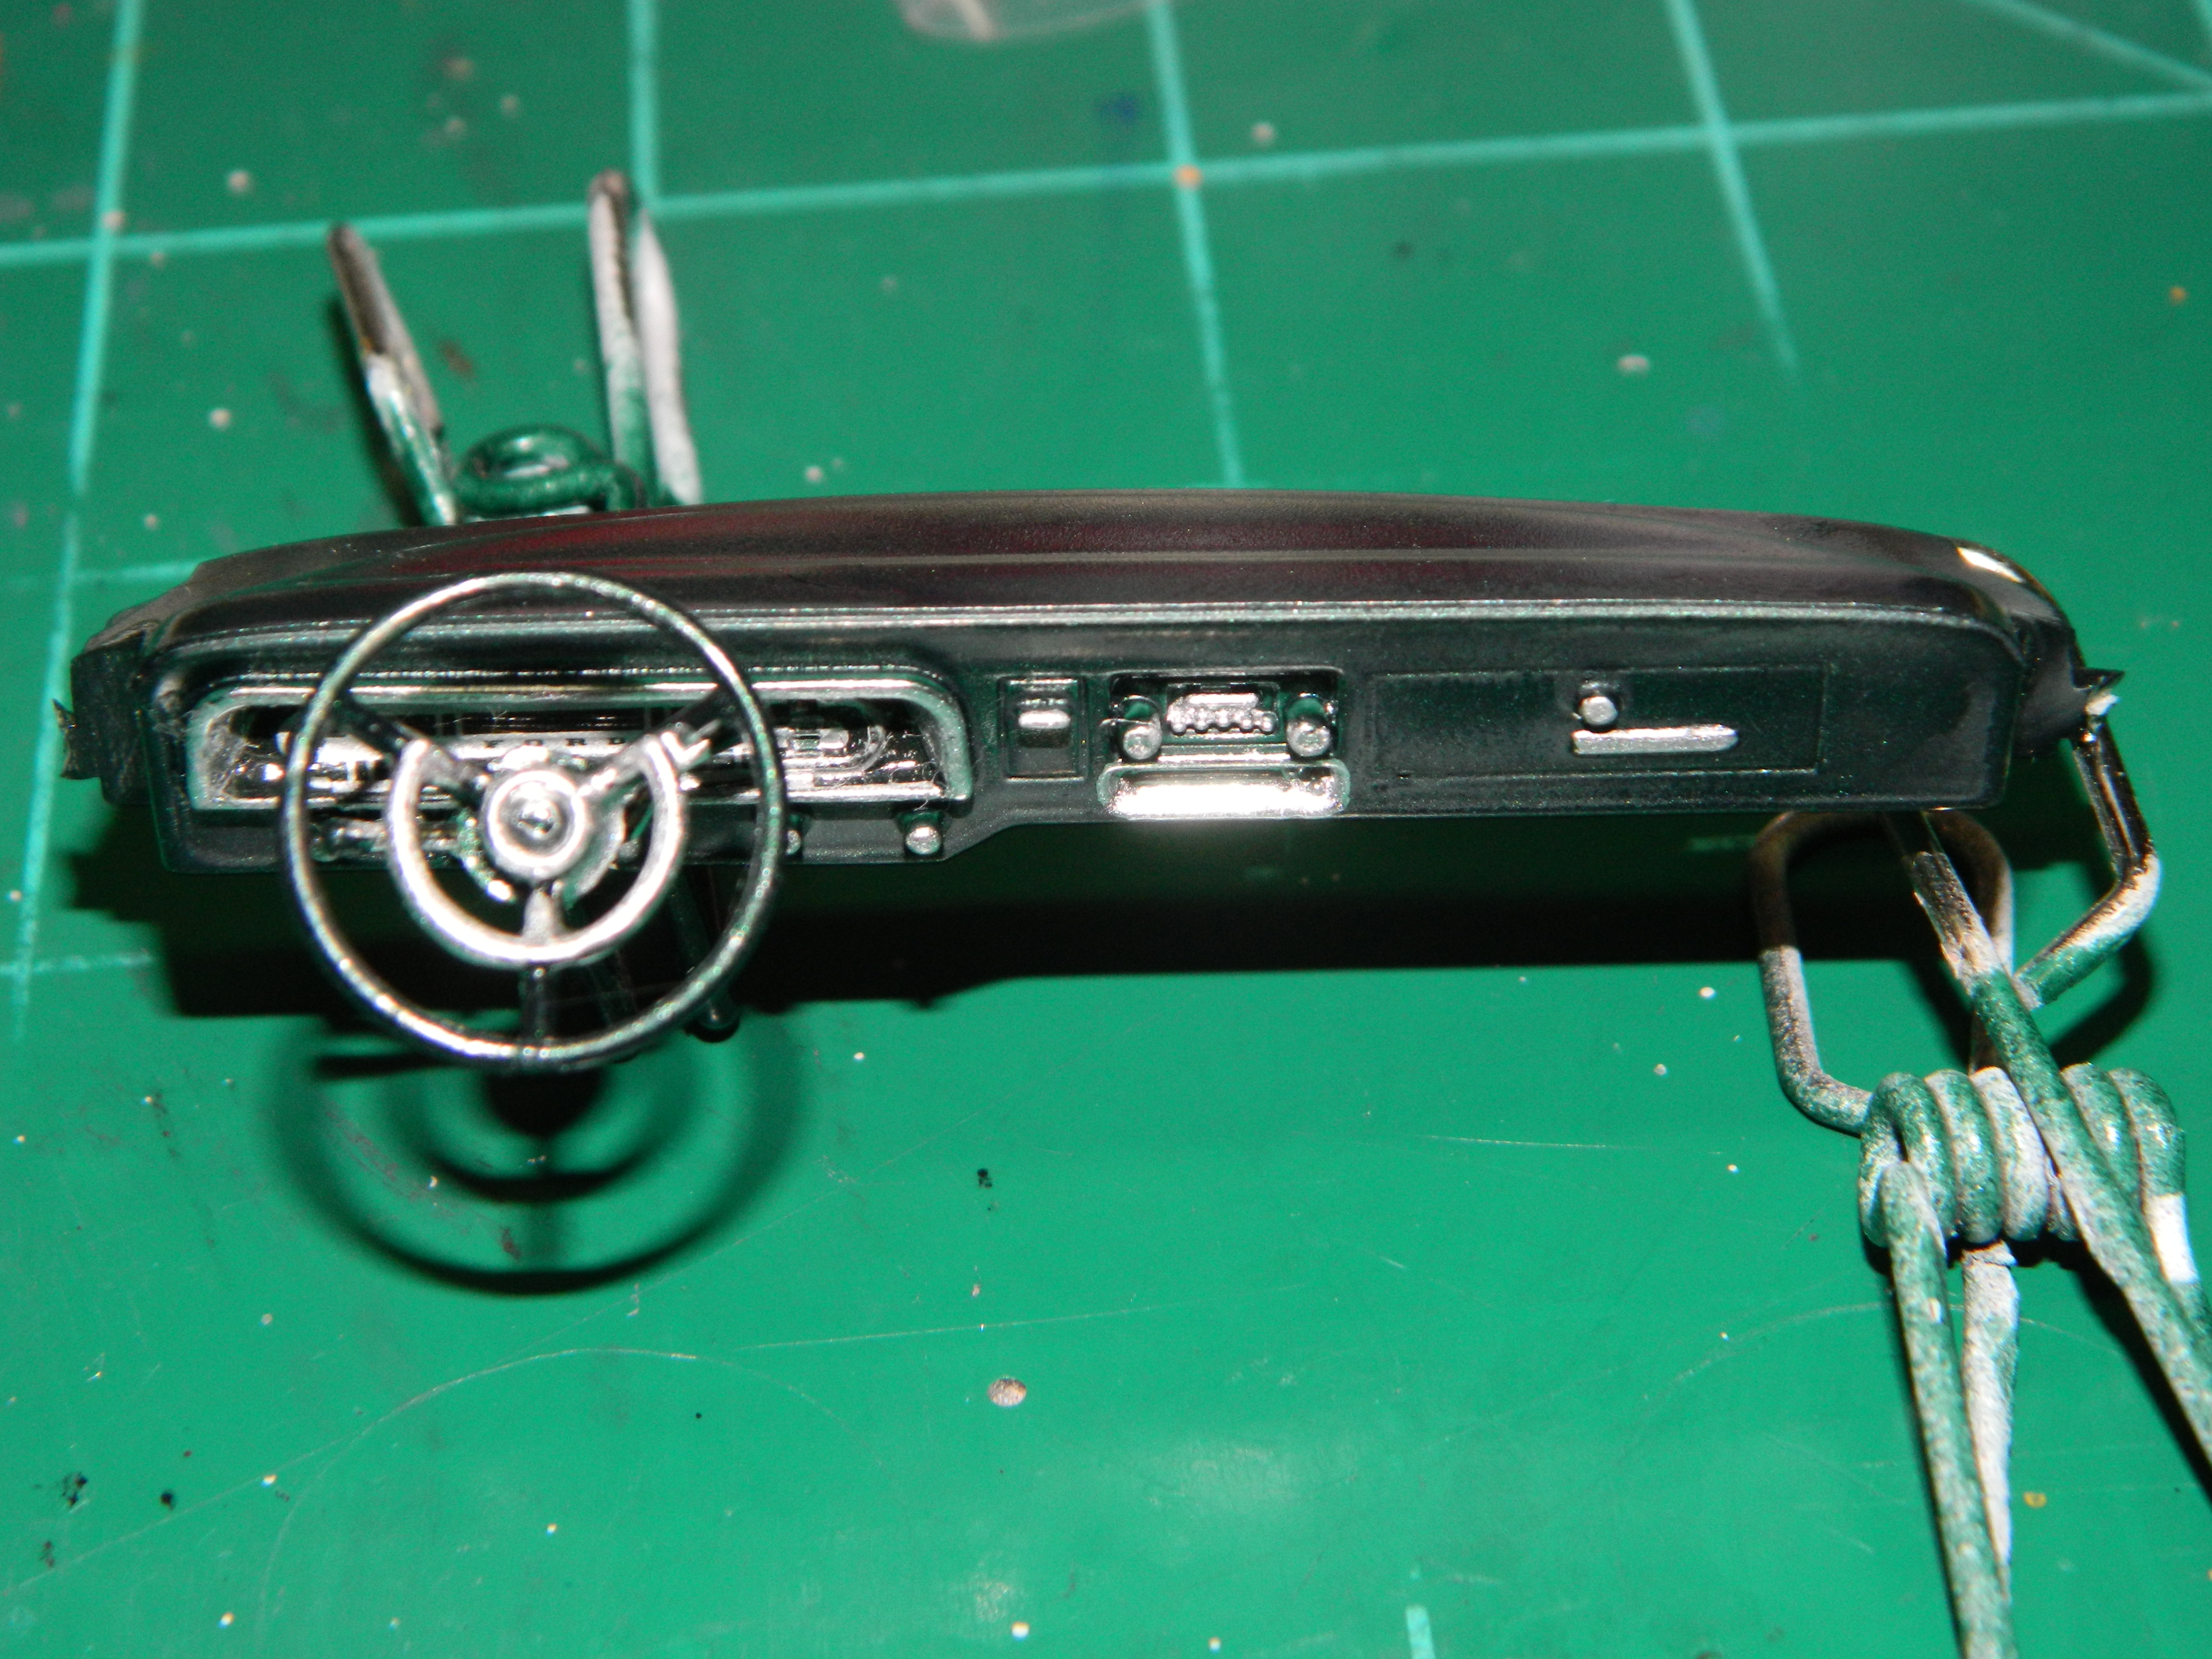
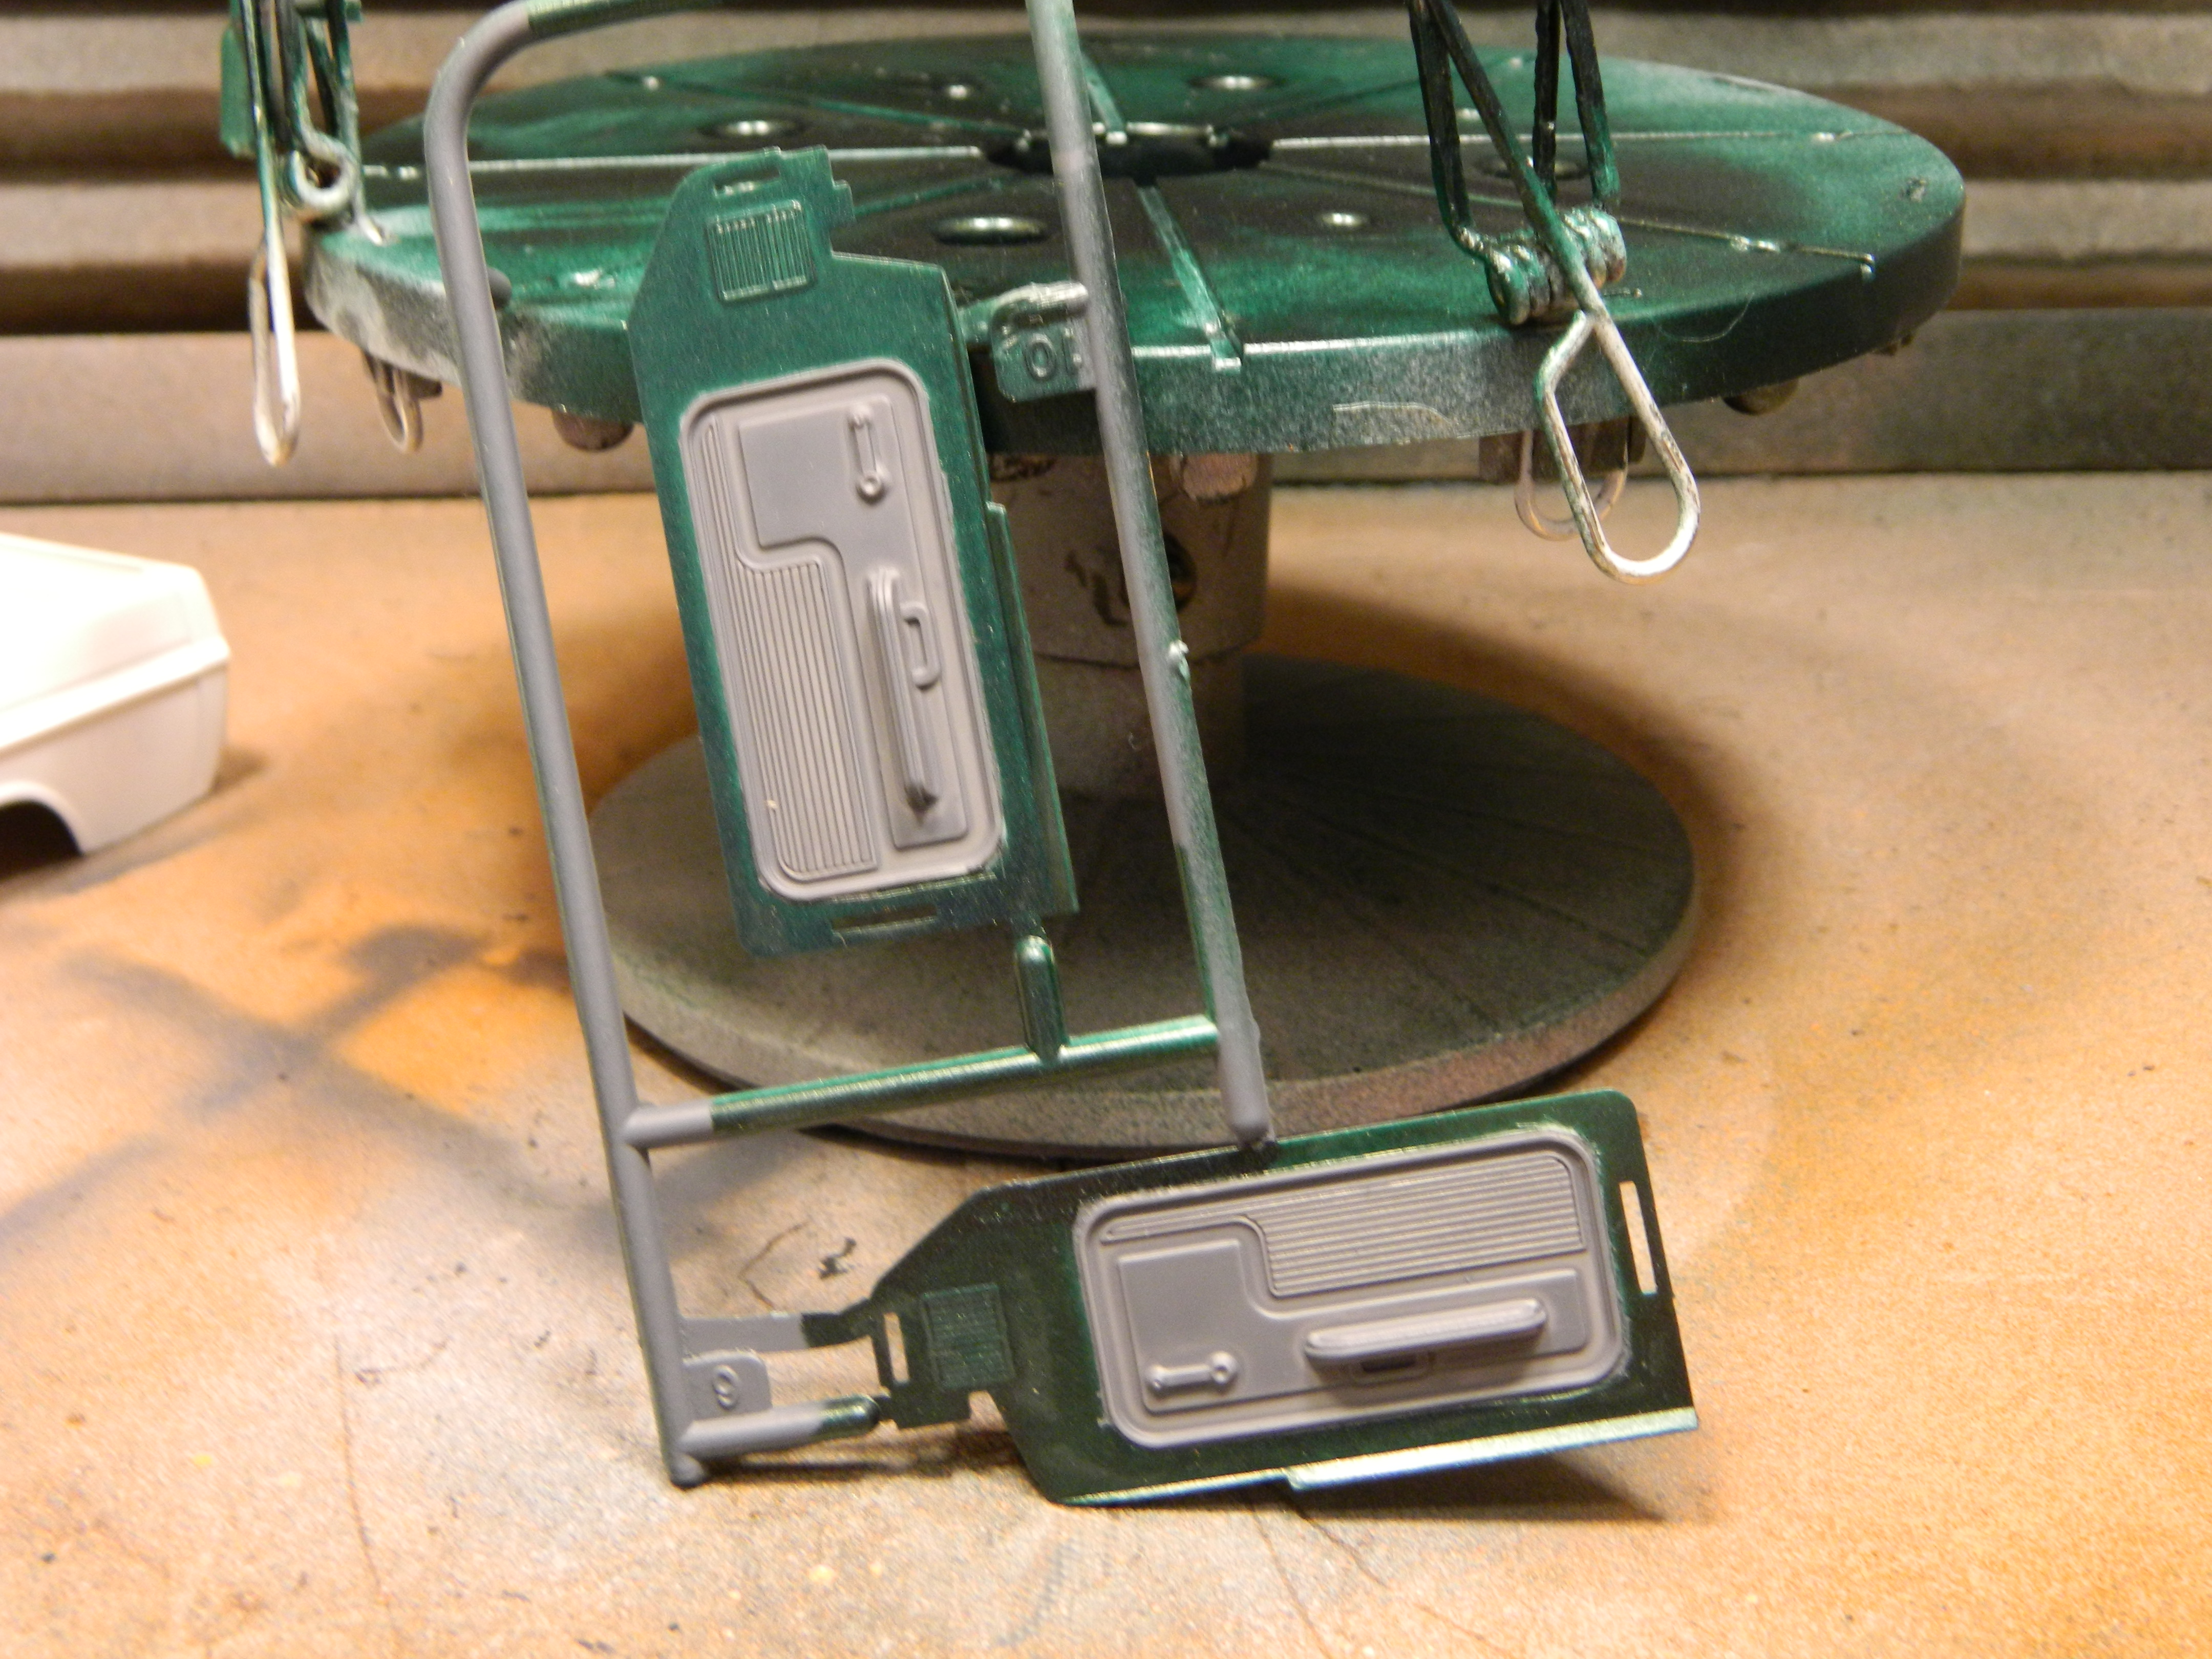
A little more work done on the Sport Custom today. The dash and the steering wheel was painted, detailed, and decaled. The side panels were painted in Forest Green Pearl and Gunship Grey. I started assembly of the interior, but stopped so I can add the seat belts without any obstructions. More to come...
-
Your links do not work.
-
Your links do not work.
-
Thank you Carl! Yes, I am adding Model Master Go-Mango to the roof and the bottom below the chrome molding.
-
Thank you Guido!
-
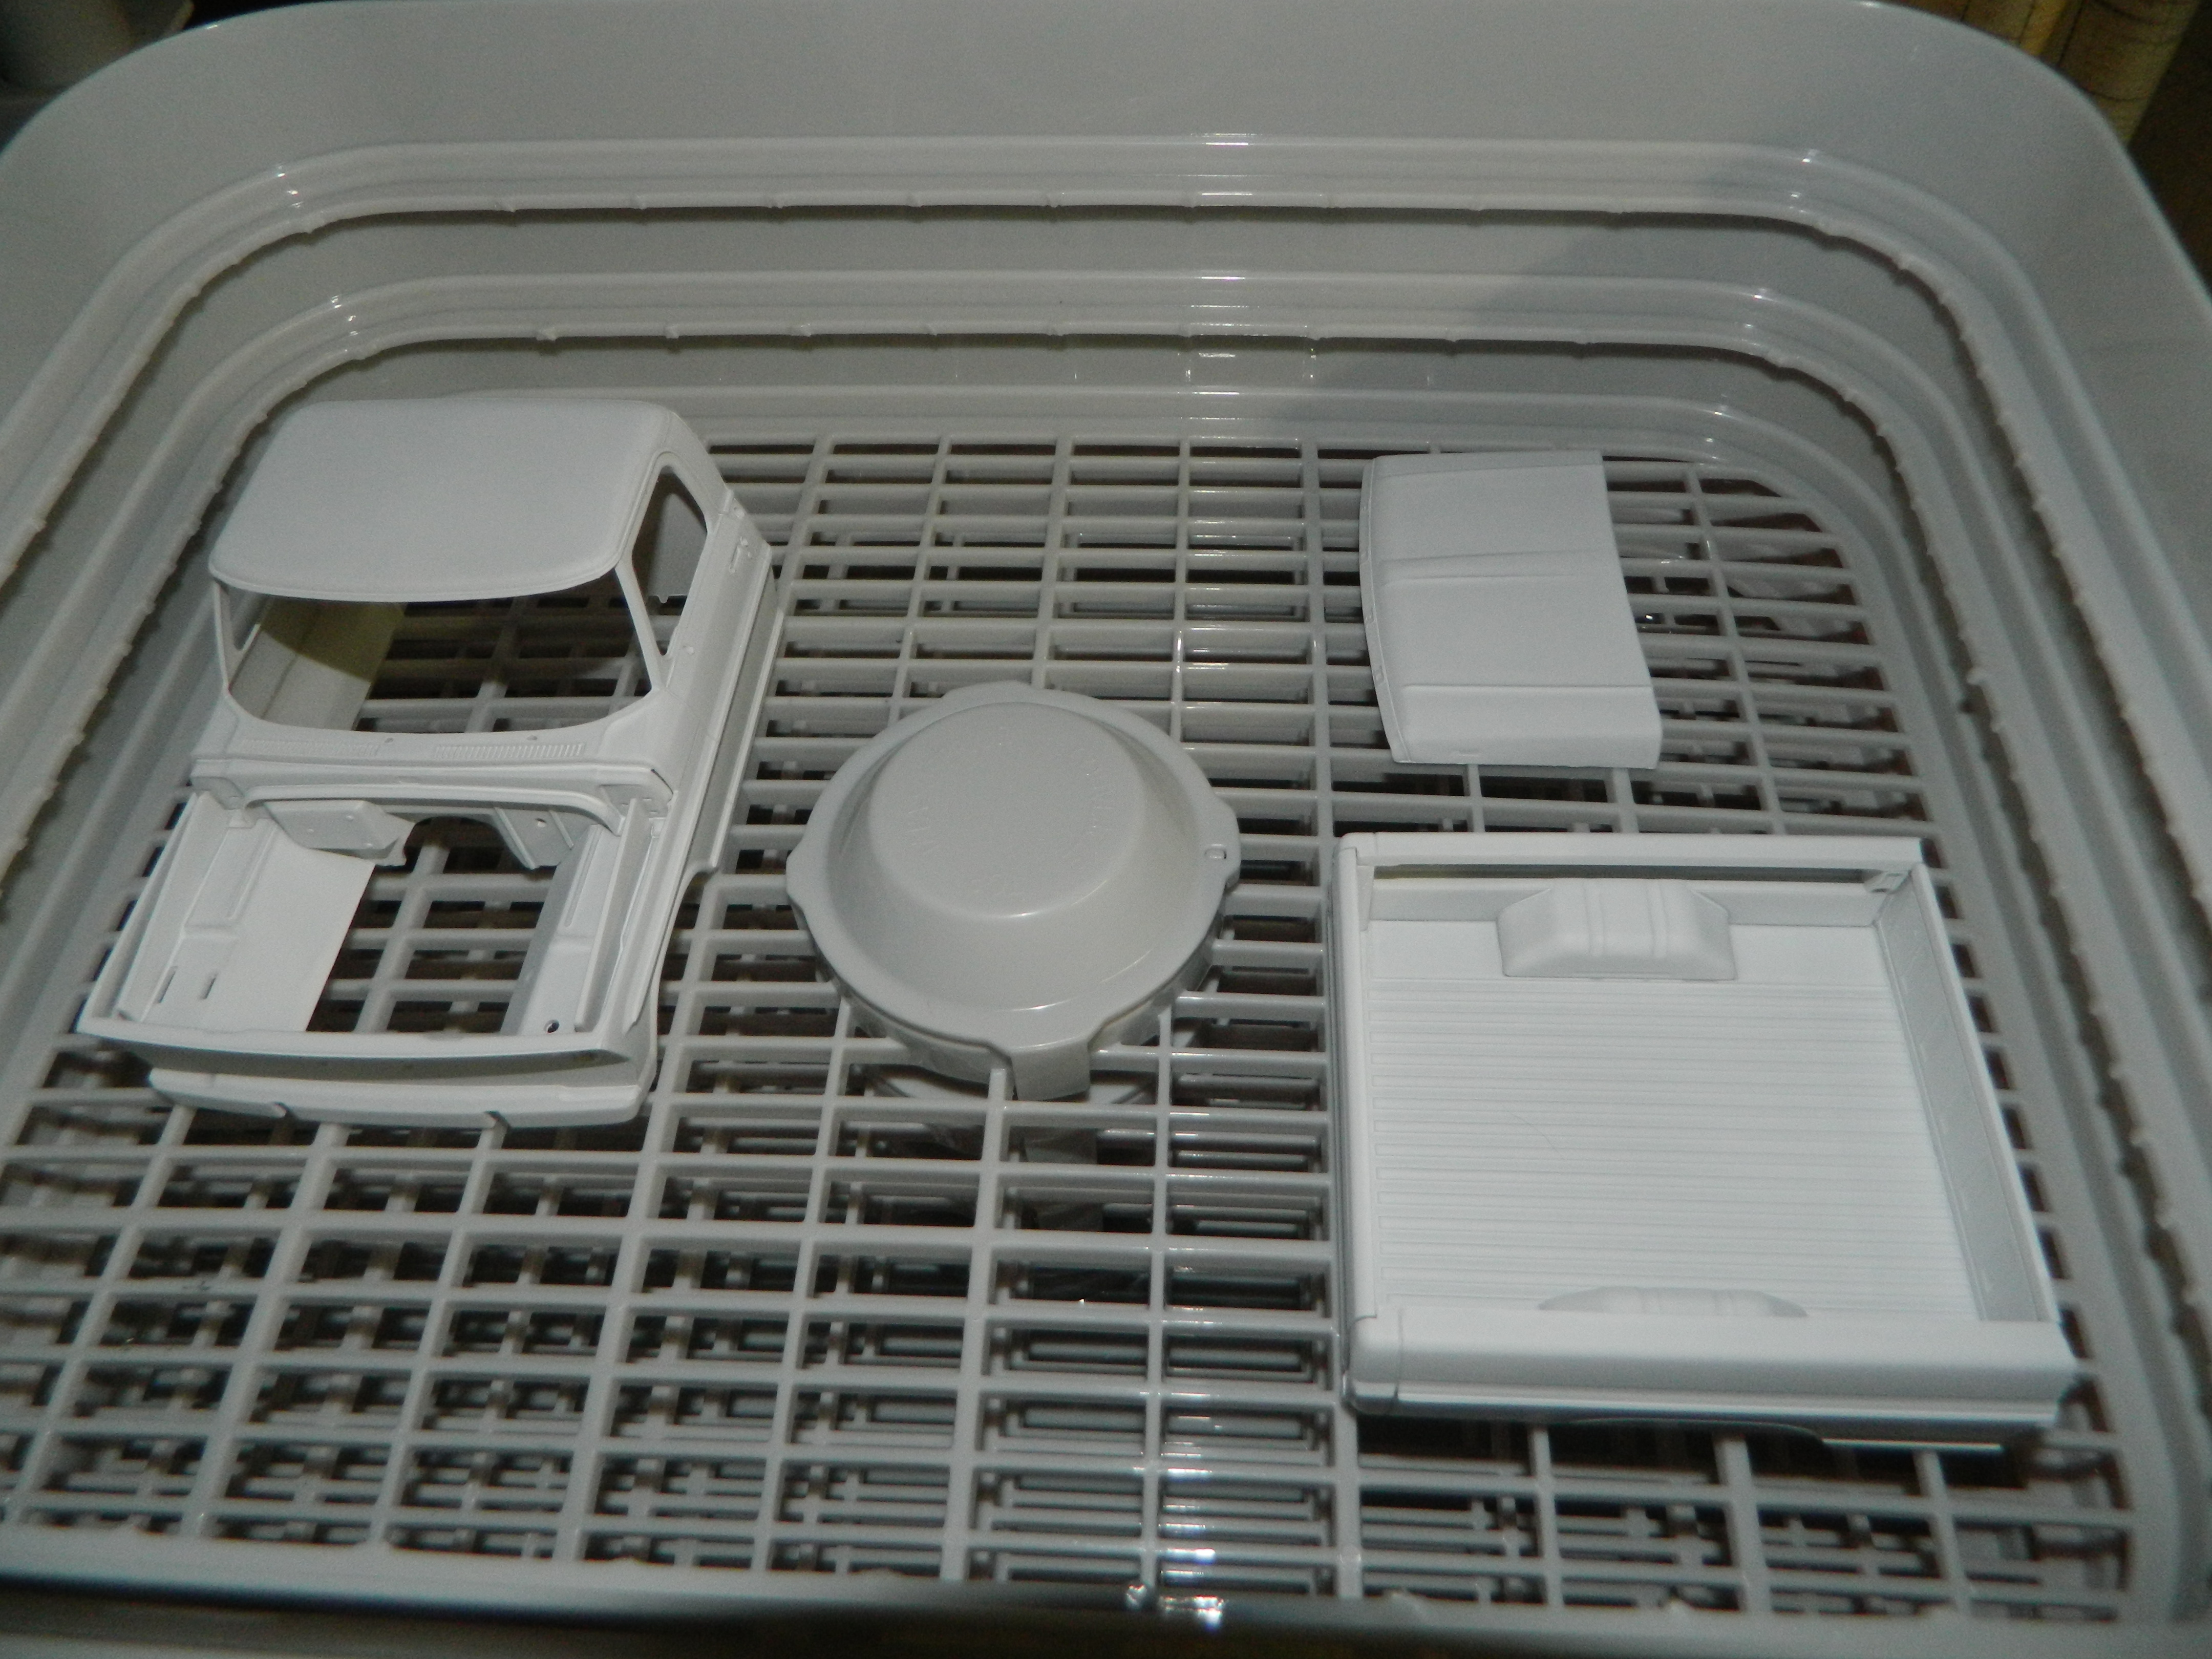
Since I had my paintbooth up and running yesterday, I went and added two more coats of Tamiya TS-26 Pure White to the body and hood, then I tossed them both into the dehydrator for four hours at 105 degrees. Next up is some wet sanding to remove some trash that got into the paint along the way. More to come...
-
Zimmer aftermark wheels
mrmike replied to Chevy II's topic in General Automotive Talk (Trucks and Cars)
This will help you! https://www.facebook.com/steven.zimmerman.35/media_set?set=a.10200861029743686.1073741825.1102622756&type=3 -
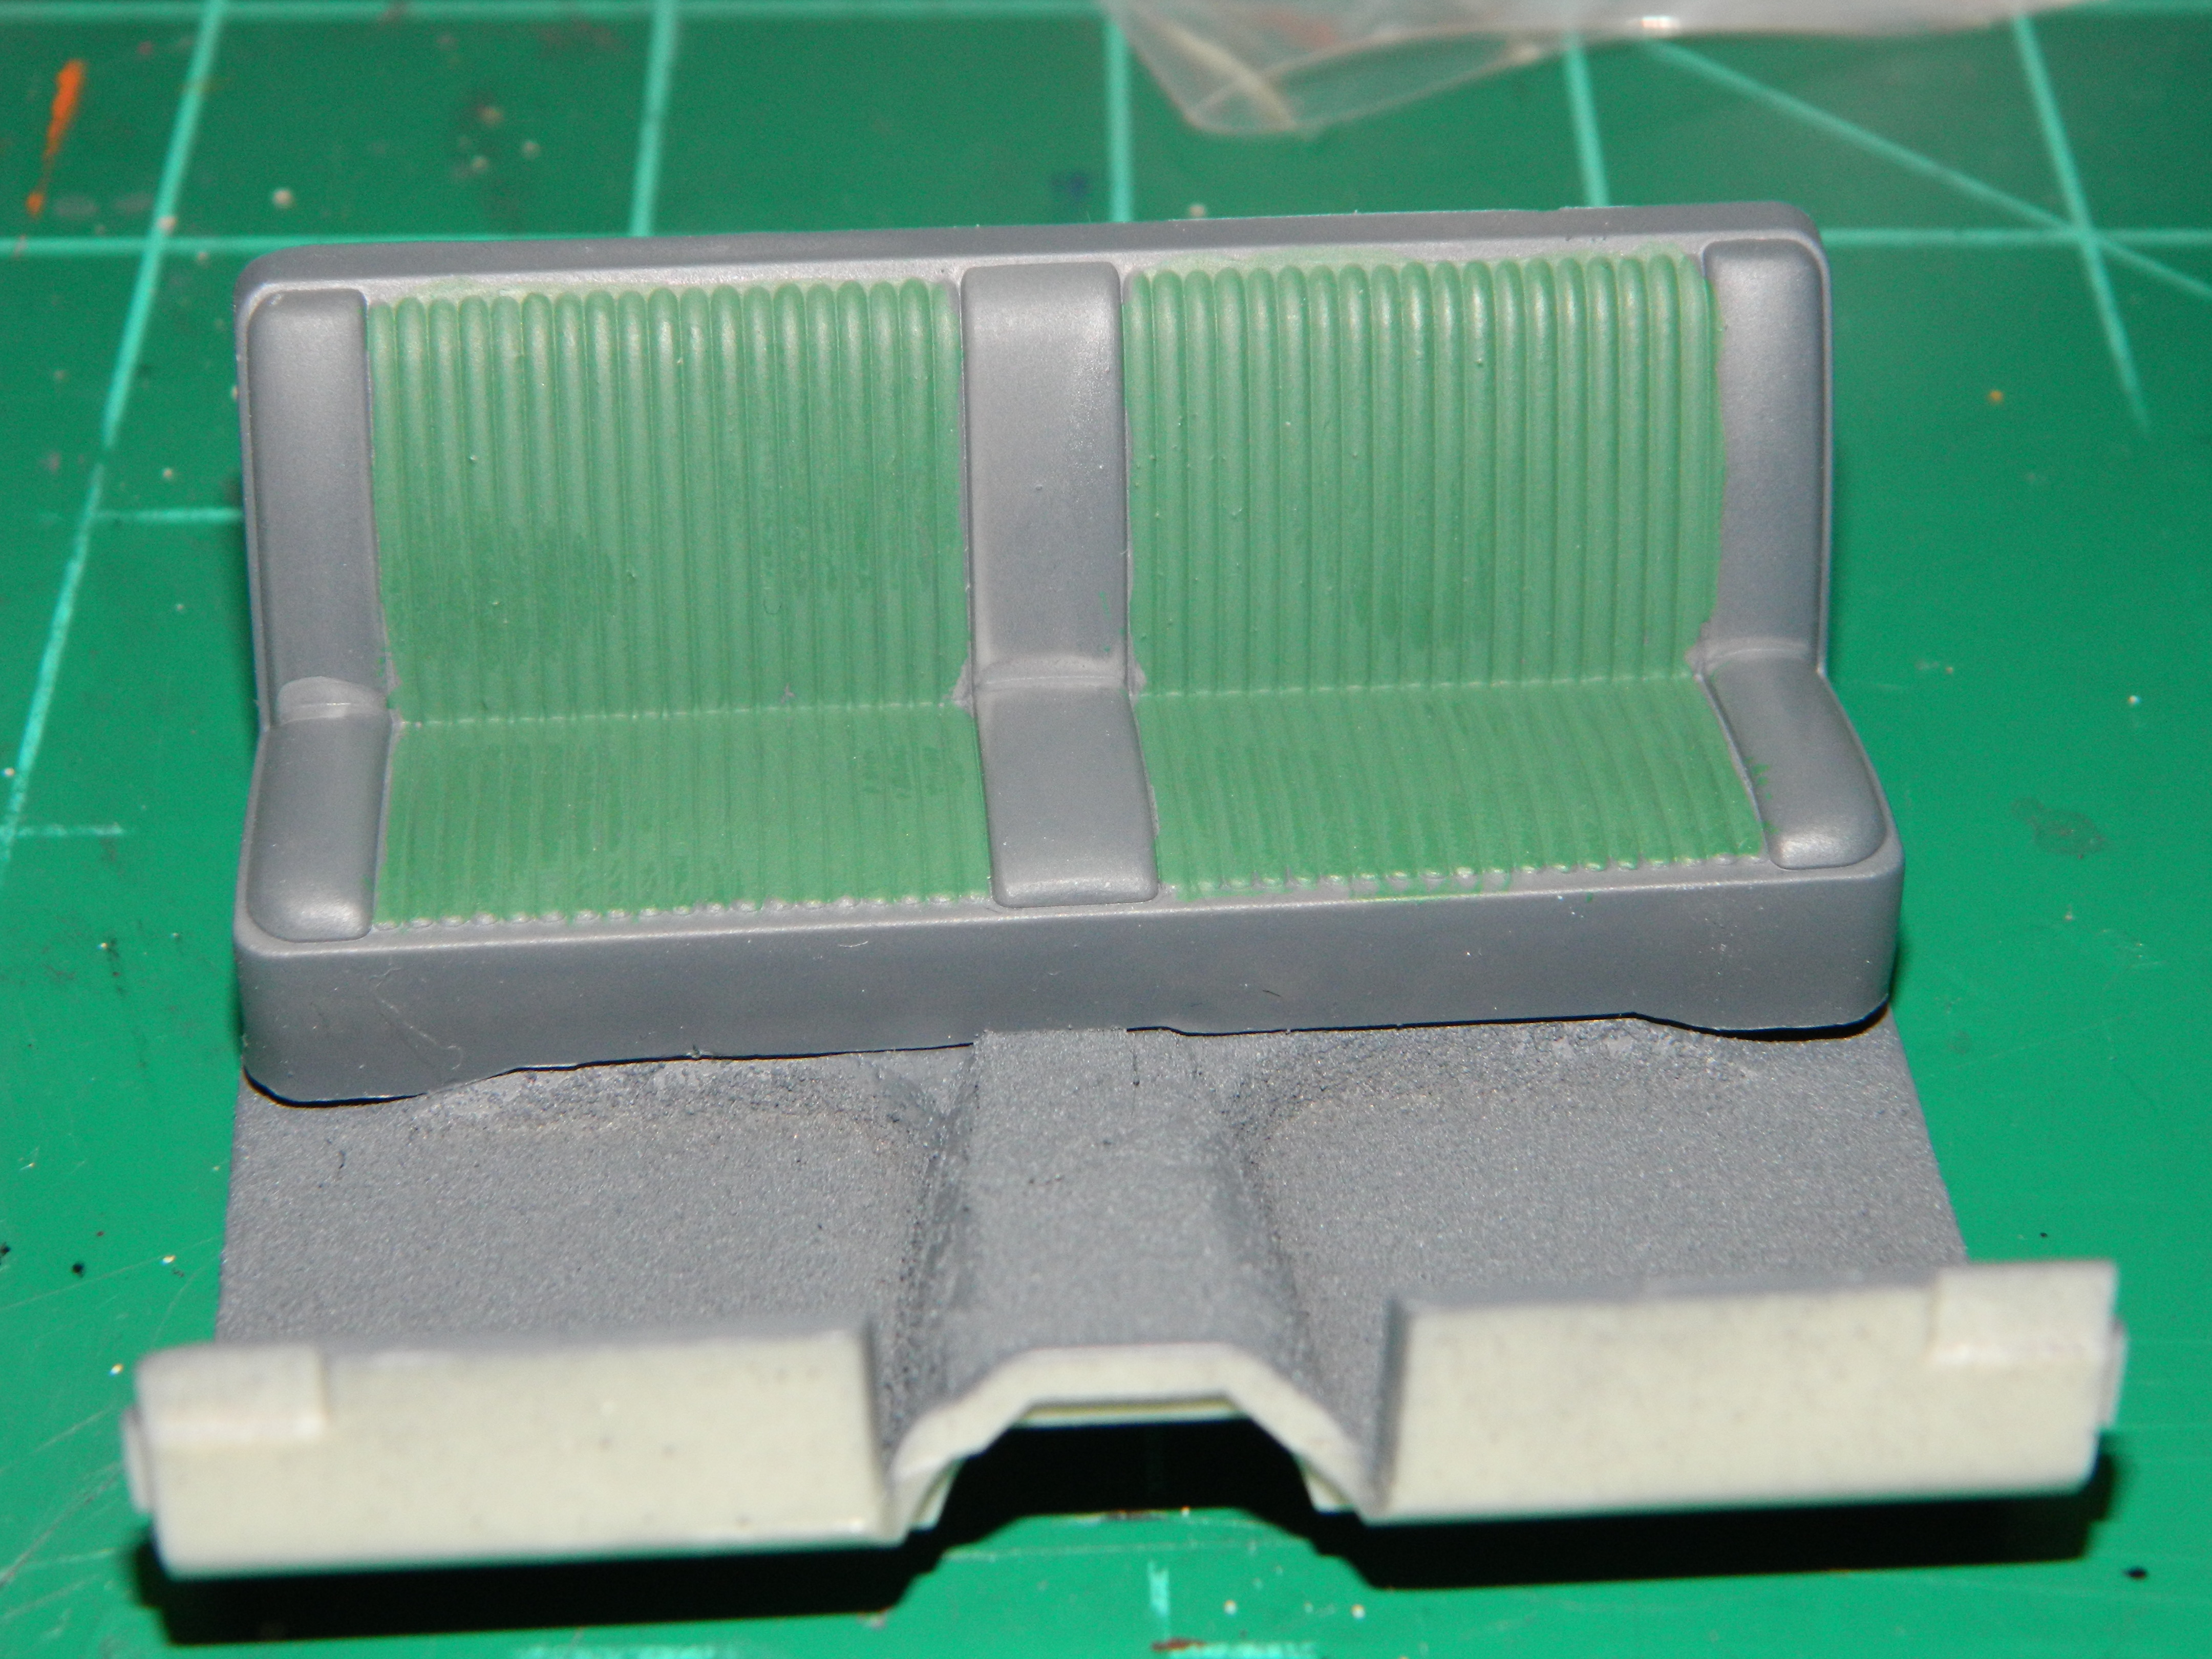
I painted the bench seat this afternoon. Tamiya TS-48 Gunship Grey and Polly Scale So. Sylvan Green. I like the color combination! While the paintbooth was up and running, I painted the floor with Tamiya TS-48 Gunship Grey and the rest of the interior panels with Dupli-Color Forest Green Pearl. The body, hood, and bed was primed and tossed into the dehydrator for four hours. I will masked the body and paint the two-tone color combination of Dupli-Color Forest Green Pearl and Tamiya TS-42 Light Gun Metal. More to come...
-
Looks really great, Marcos! This is the first model of the Bullitt Mustang that sits at the proper ride height like the original did in the movie. All the others I have seen sit too low. How did you modify the suspension?
-
This is looking great Jonathan! I have the same kit in the stash. I was going to use the Prior Design kit from C1 Models, but now I am having second thoughts about it. I may have to look for some aftermarket wheels for this kit though and I do like the lowering process that you used. Looking forward to more progress from you on this!
-
Scale Model Community Discord!
mrmike replied to ziP's topic in General Automotive Talk (Trucks and Cars)
I don't need no stinkin' chat room! -
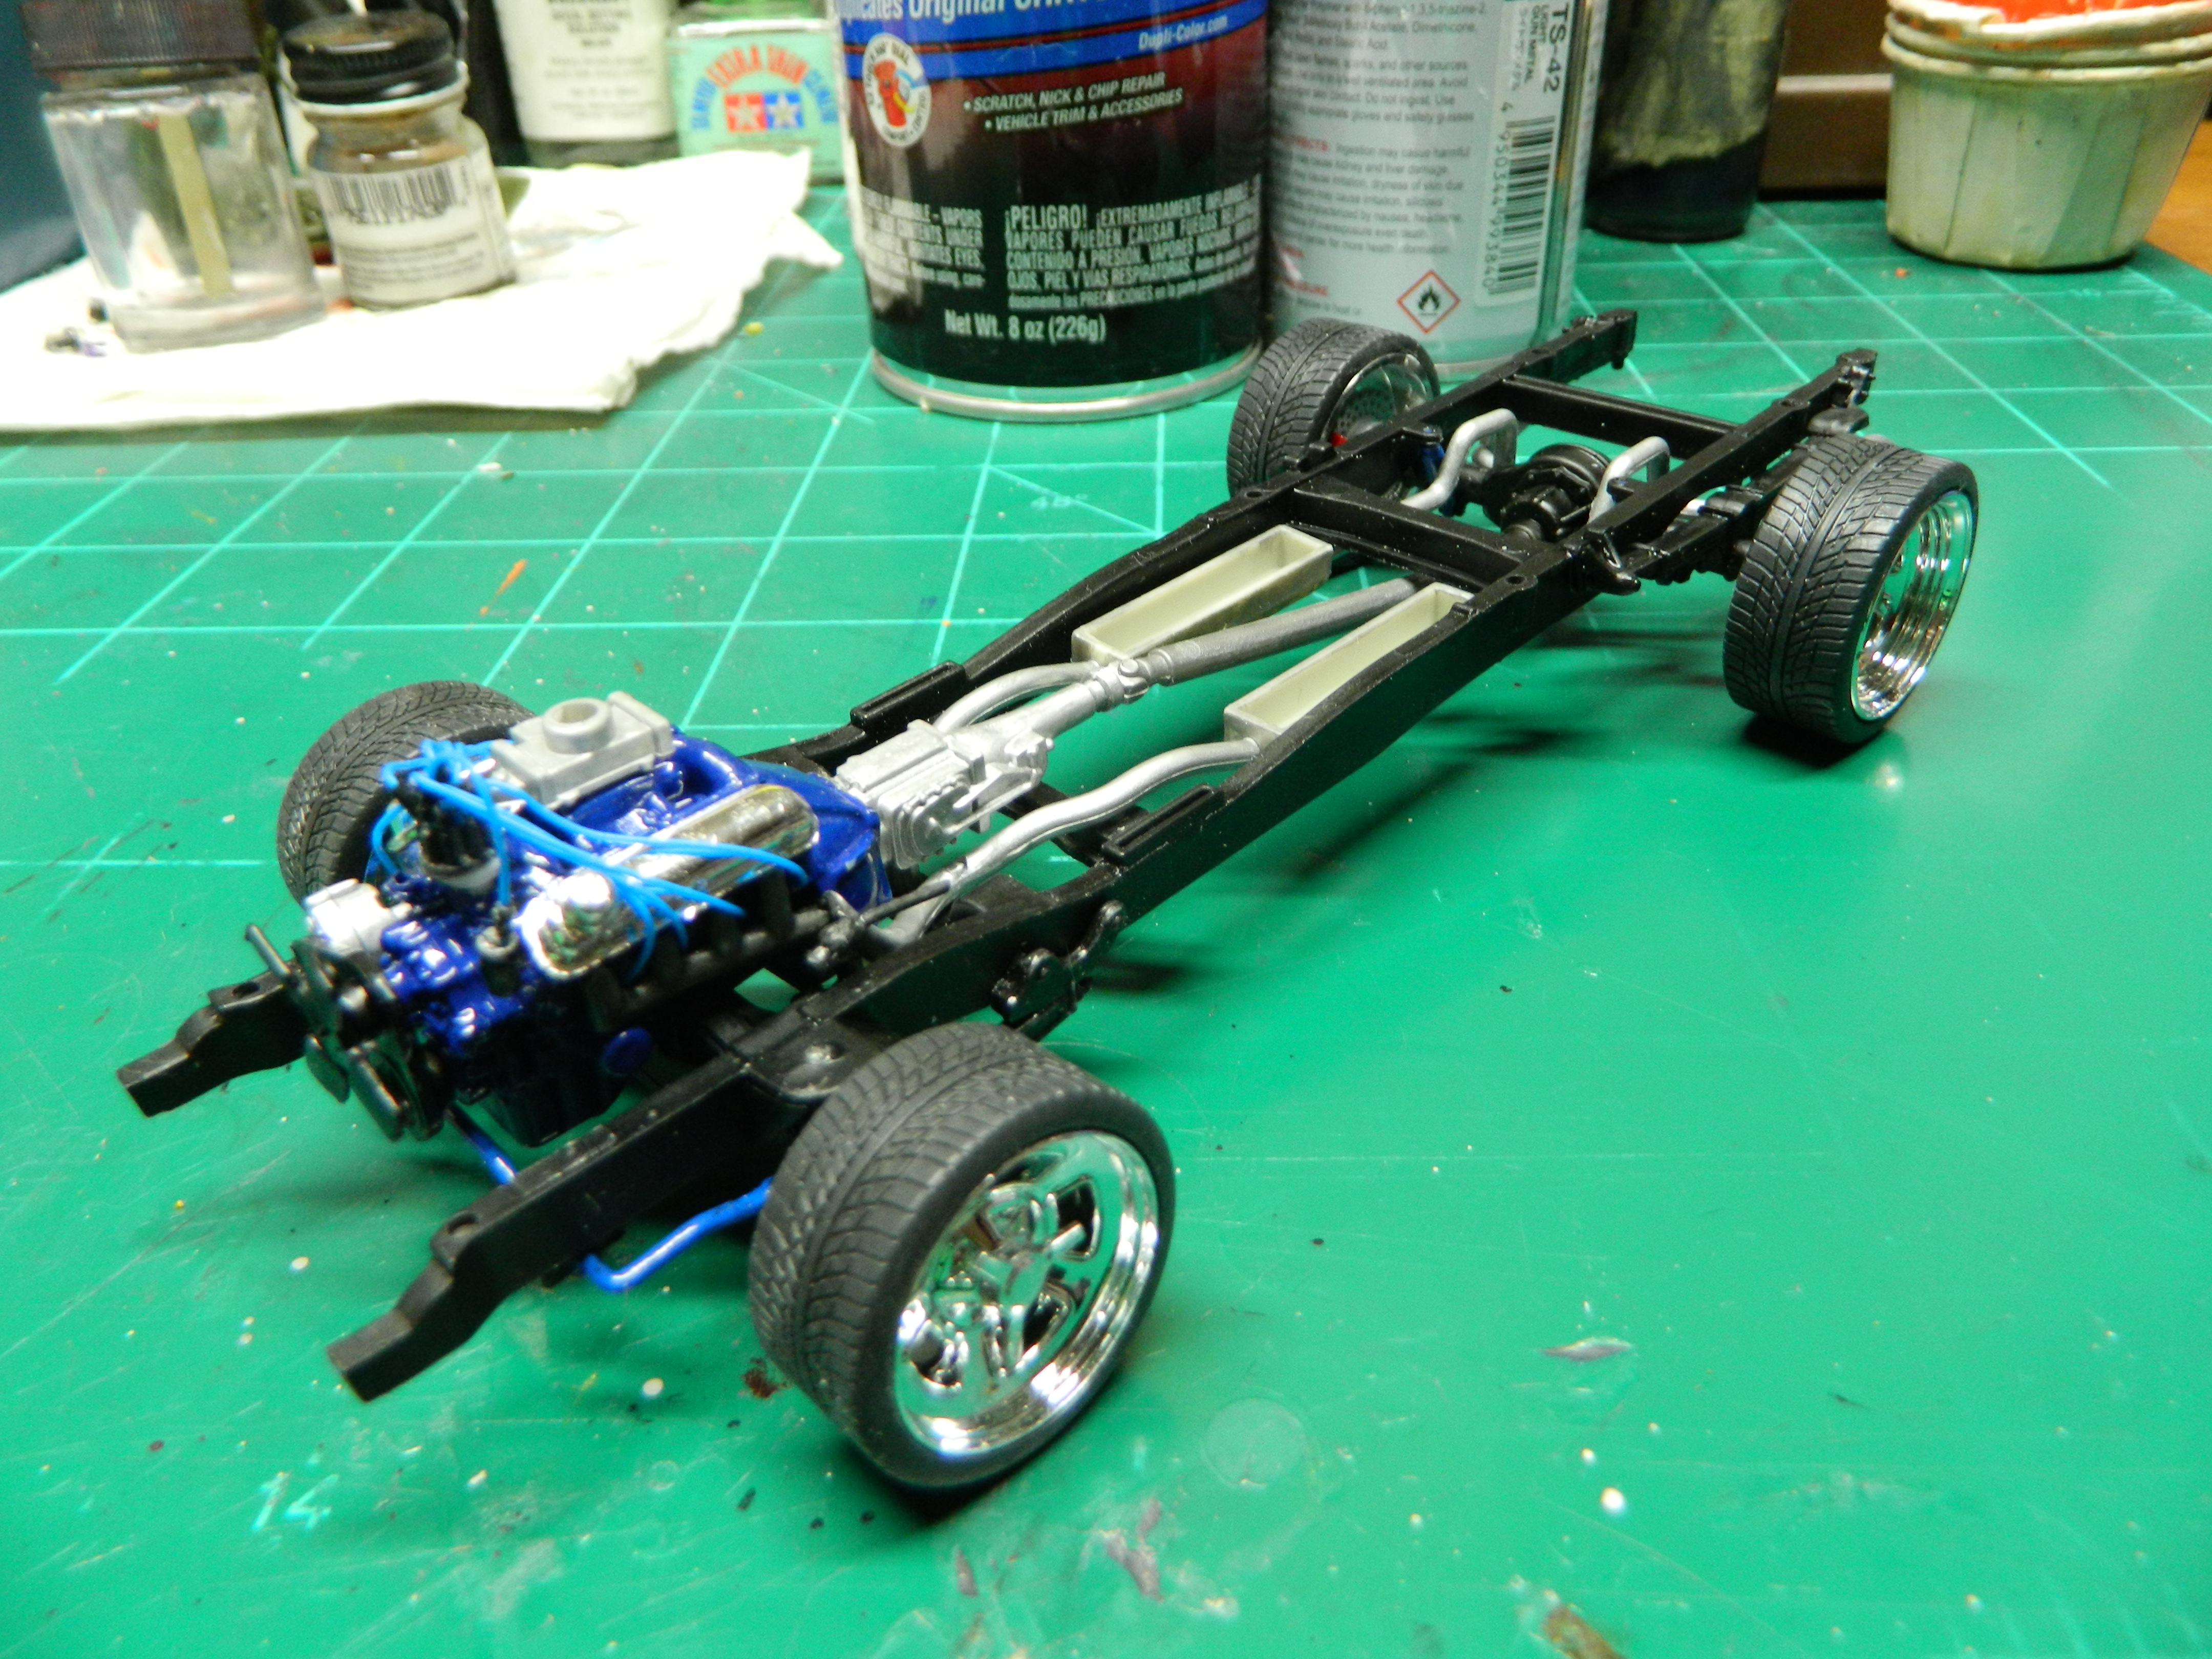
I worked on the F-100 yesterday afternoon and I started to think about the colors I have chosen. They may be fine for a stock F-100, but this is more of a modified truck. These are my colors now...Dupli-Color Forest Green Pearl for the roof and lower body and Tamiya TS-42 Light Gun Metal for the hood and upper fenders, bed, and tailgate. I finished wiring the engine and building the chassis. The engine is wired in the correct firing order. More to come...
-
Thanks Curtis! I just love an old school rake! Get the nose down and the butt up in the air! While the current trend is to "lay frame" or lower the entire vehicle, it does become an issue in a parking lot with speed bumps, or as they say in Texas...armadillos!
-
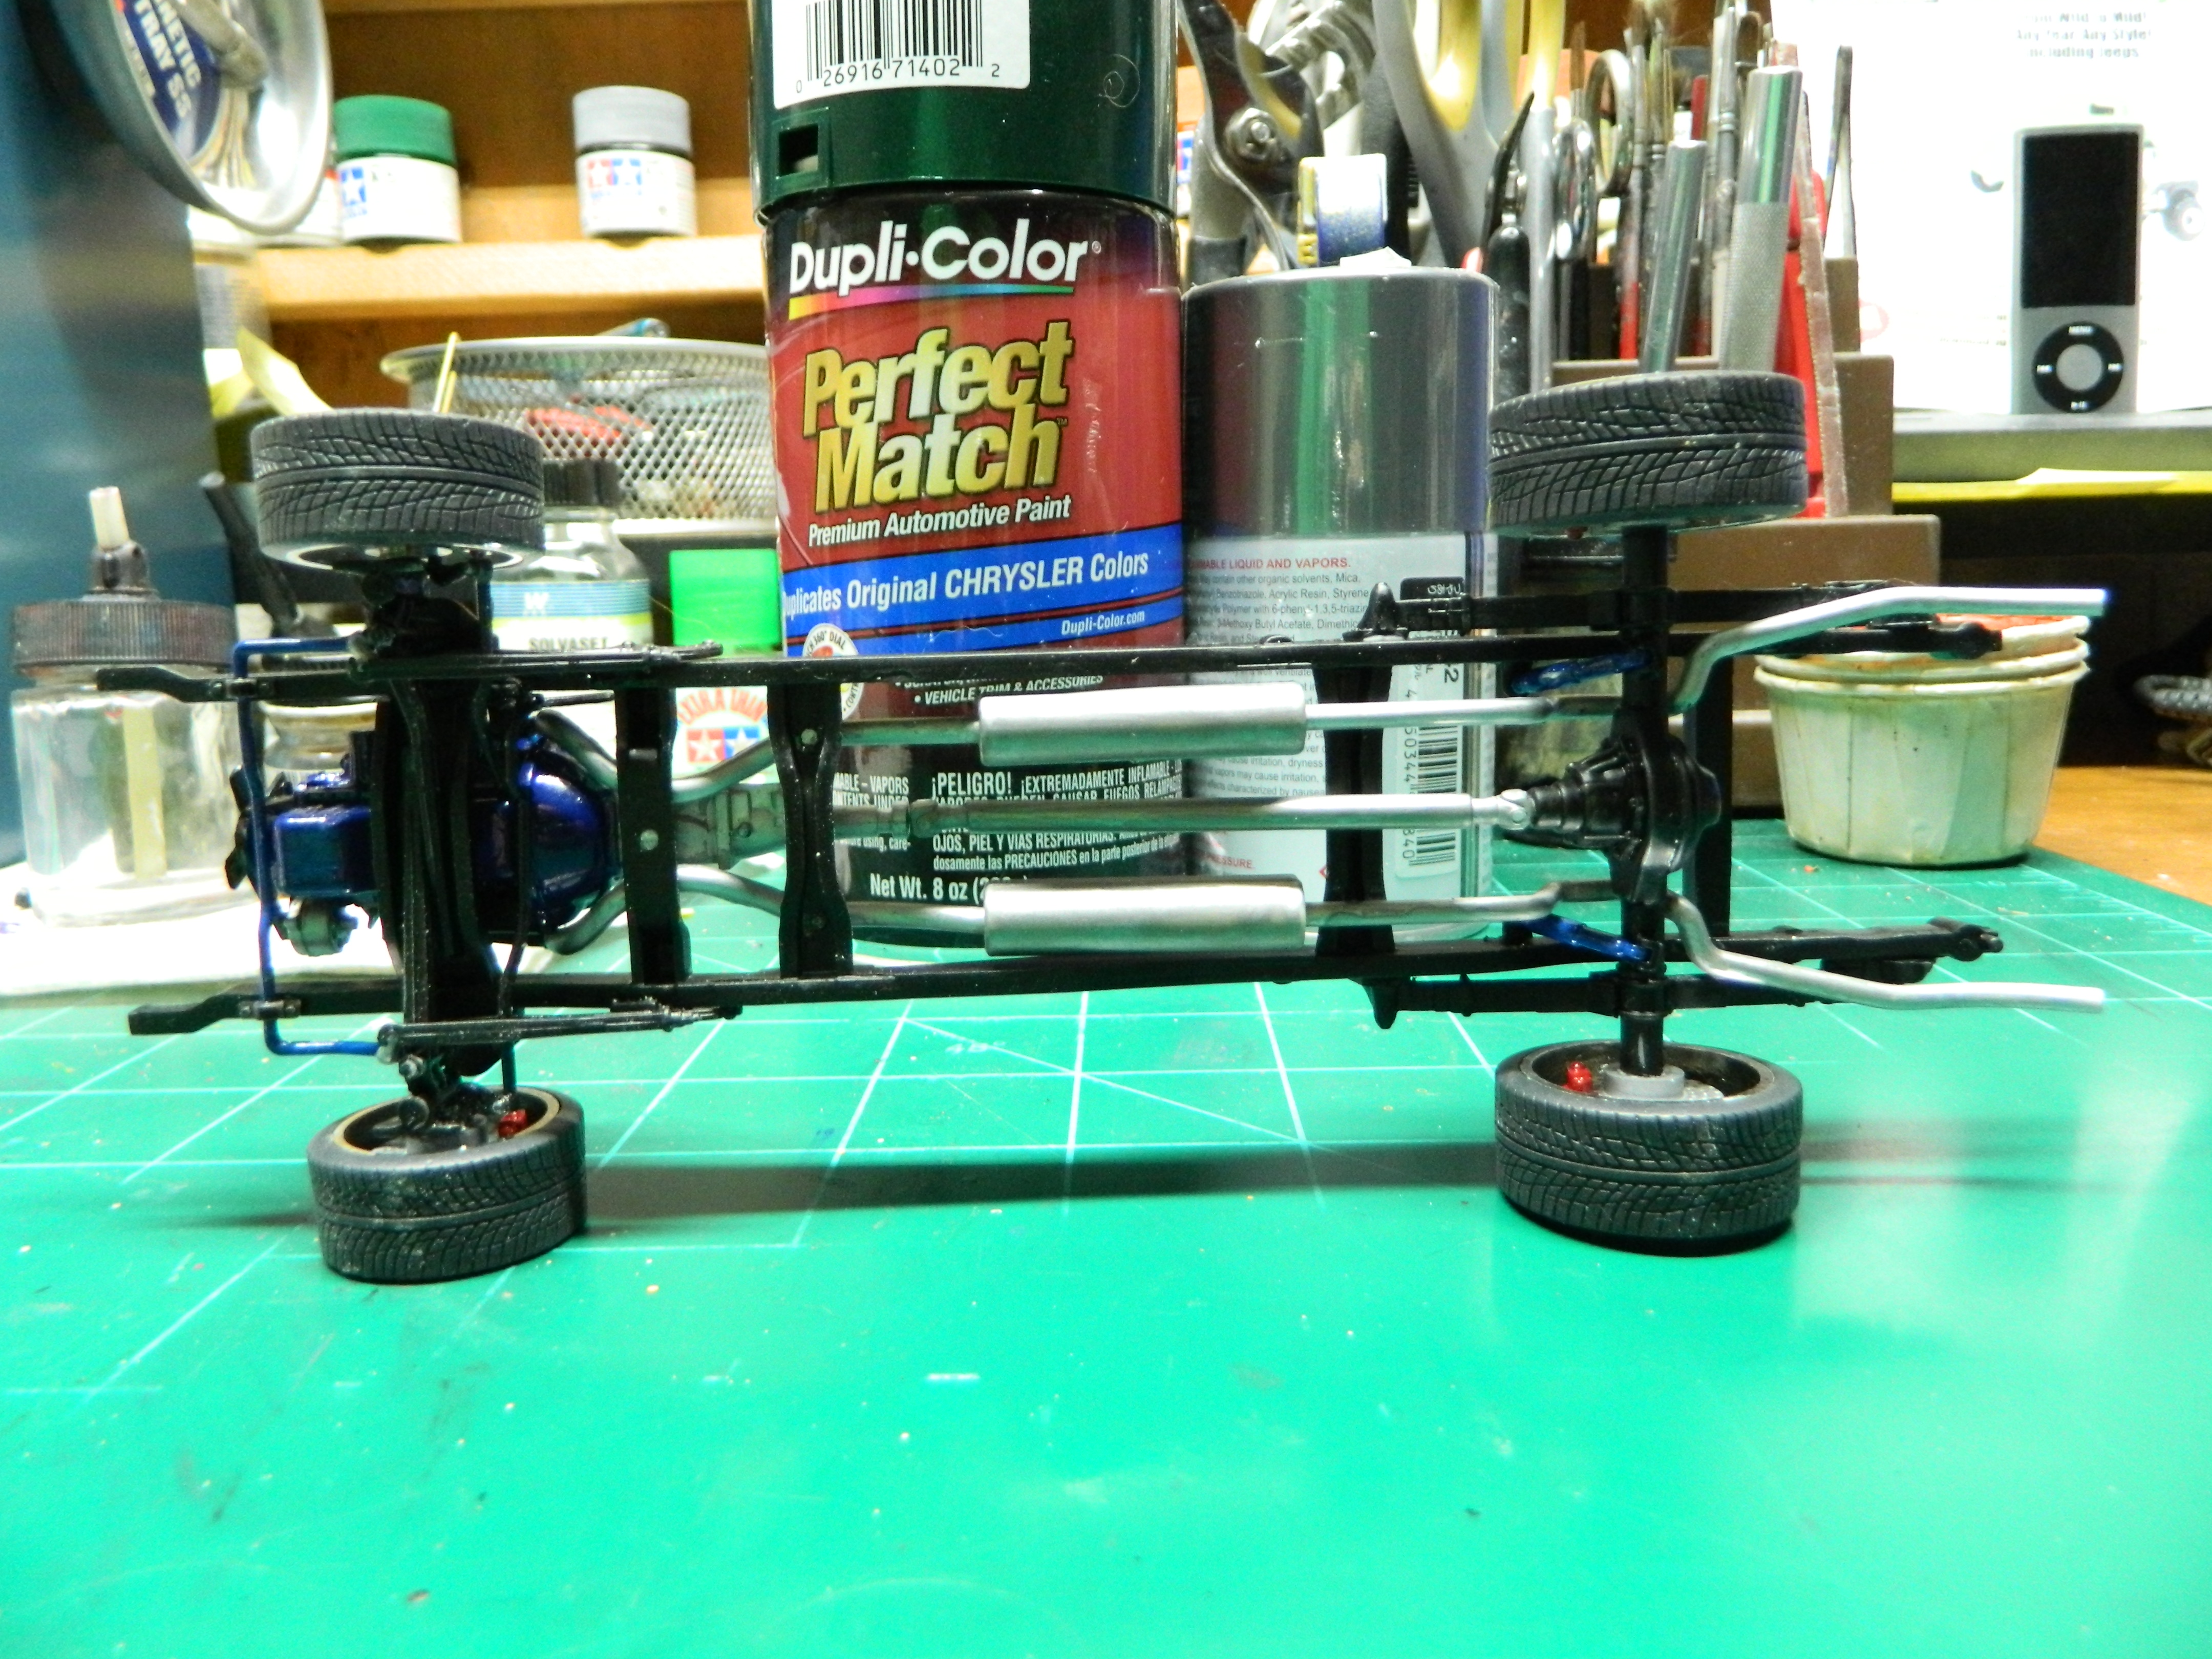
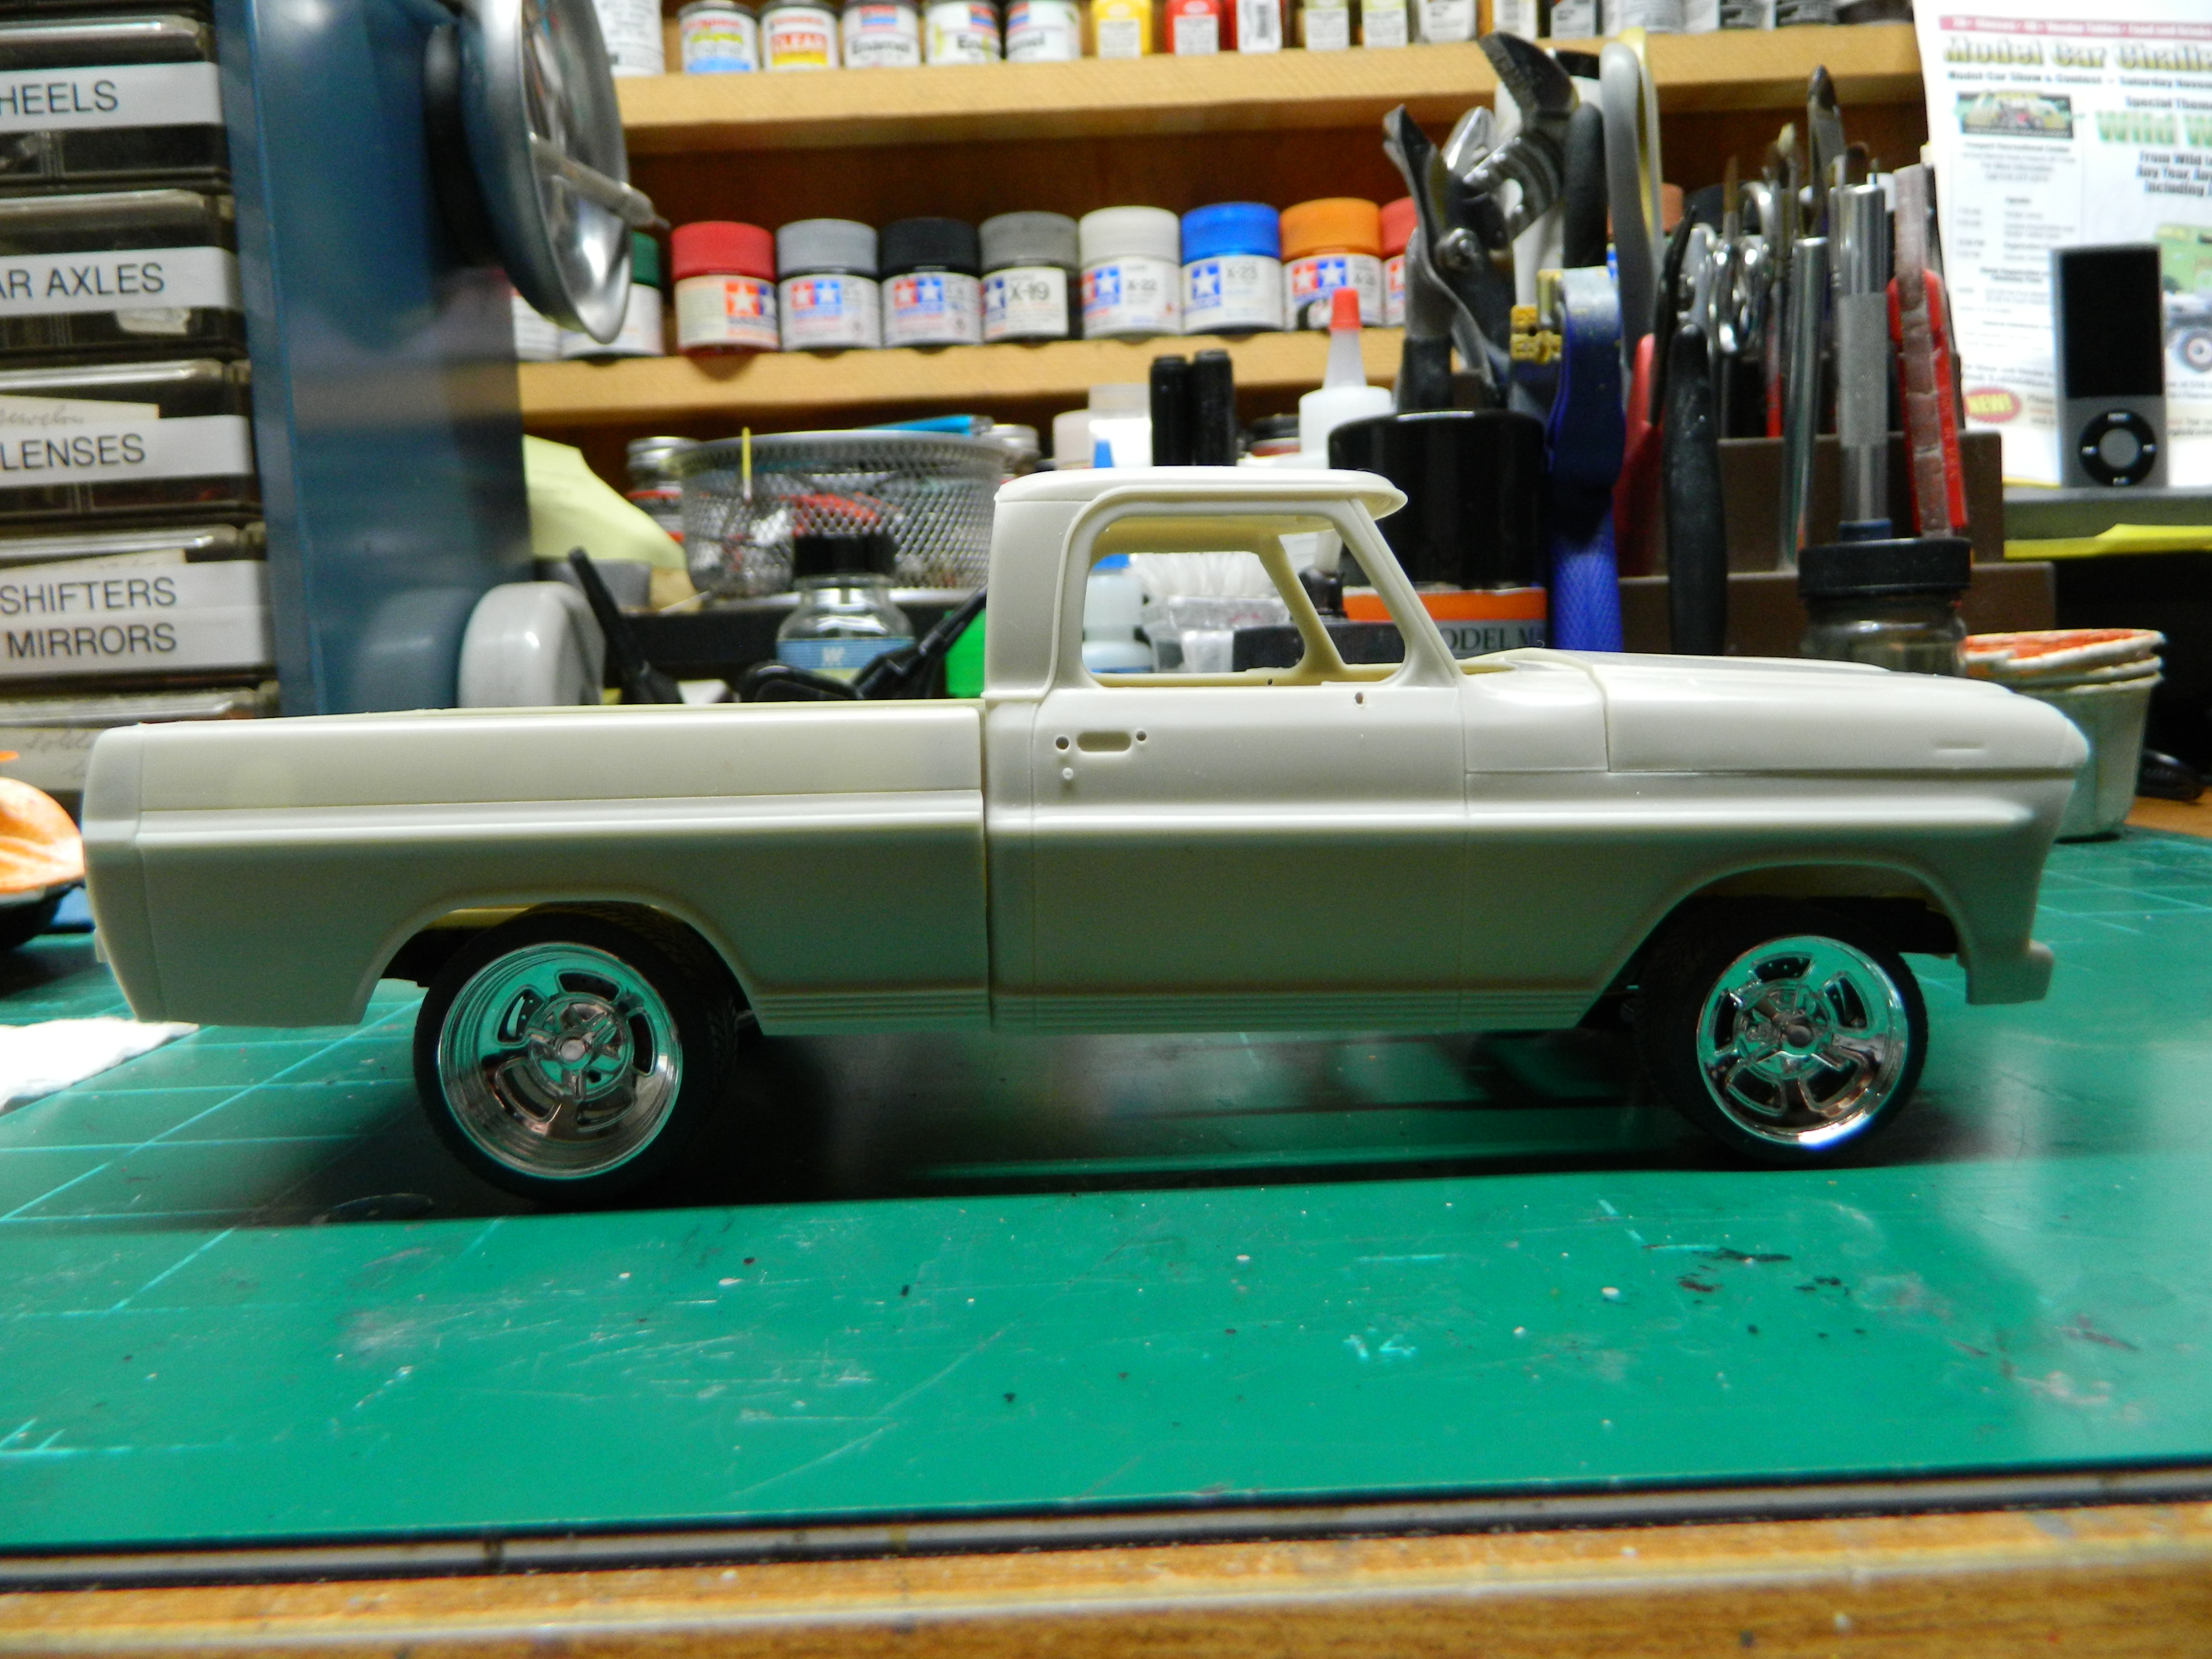
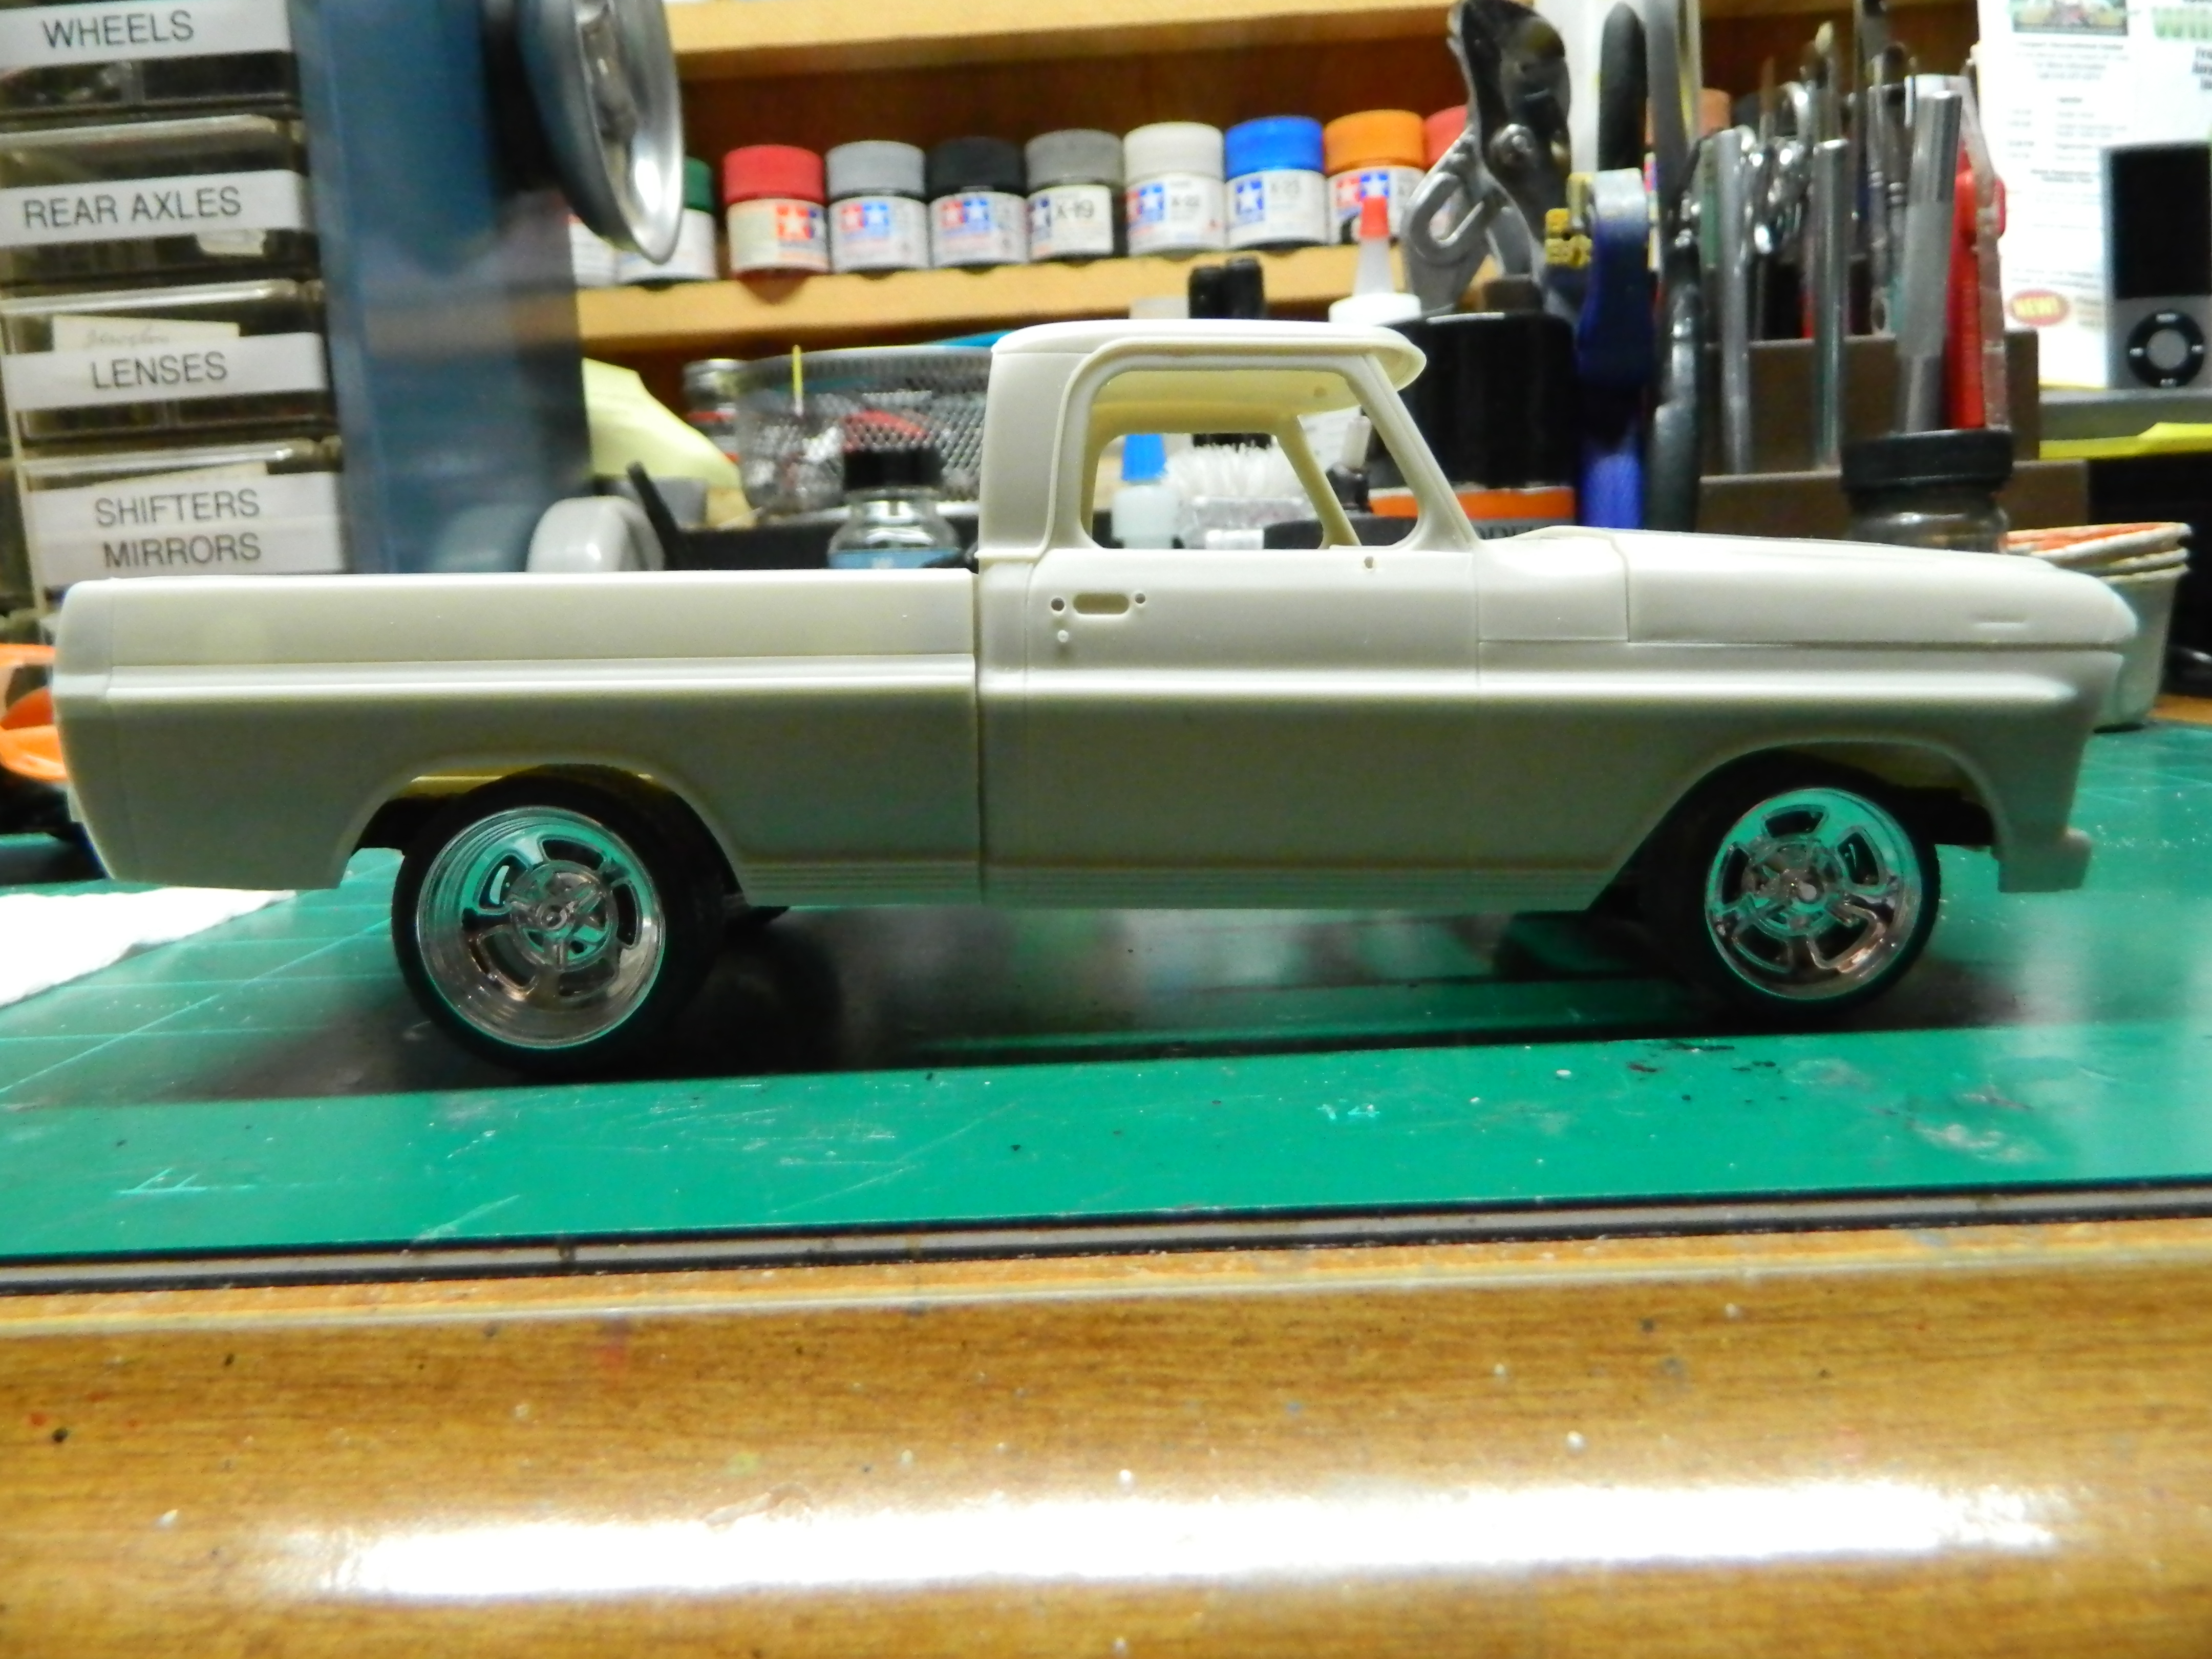
Last night I assembled the front and rear suspensions. This morning I added the wheels and tires to the suspensions and mocked up the body to check the stance and I didn't like it. The front wheels stuck out and the nose was too high. I decided to cut off the spindles and raise them higher on the I Beam. Another mocked up and this is much better! An old style rake that I really like and the wheels and tires are tucked in under the fenders! Now to clean up the modification I just made. More to come...
-
Cade's County Jeep CJ-5
mrmike replied to mrmike's topic in Model Trucks: Pickups, Vans, SUVs, Light Commercial
Thanks Mark! The series lasted only one season and was cancelled by CBS.