wisdonm
-
Posts
1,172 -
Joined
-
Last visited
Content Type
Profiles
Forums
Events
Gallery
Everything posted by wisdonm
-
Doc, do you decant 7480S to mix P-X in or does it dry too fast? If not 7480S, which clear do you mix P-X in?
-
 You might as well download a photo editor. You are going to have to crop and re-size pixs anyway. A good free one is IrfanView. http://www.irfanview.com/ Another advantage to using a program like this is it can automatically adjust the colors in your pix by relating it to white. In IrfanView you would click on the Image menu and then select Auto Adjust Colors. If that doesn't do it for you, there is also a manual Color Corrections button where you can manually change colors, brightness, contrast, and more. You will eventually need a photo editor, so you might as well stop wasting time and do it now. Oh by the way, the type of light bulbs you use can change your colors also.
 -
Best opening scene from a movie ever!
wisdonm replied to Pete J.'s topic in General Automotive Talk (Trucks and Cars)
Cool Hand Luke. Still makes me smile. -
What's the record?
-
You can sand them down with 1000-2000 then polish just like any other plastic. But it's just plain faster and easier to make a more realistic window out of clear plastic that you find laying around the house, bubble pack, or bakery dept of a store. Make a tape pattern from the inside. Cut the plastic a little bigger. Test fit, bend if necessary, test fit some more. Start gluing from one end. Do in sections, if curved.
-
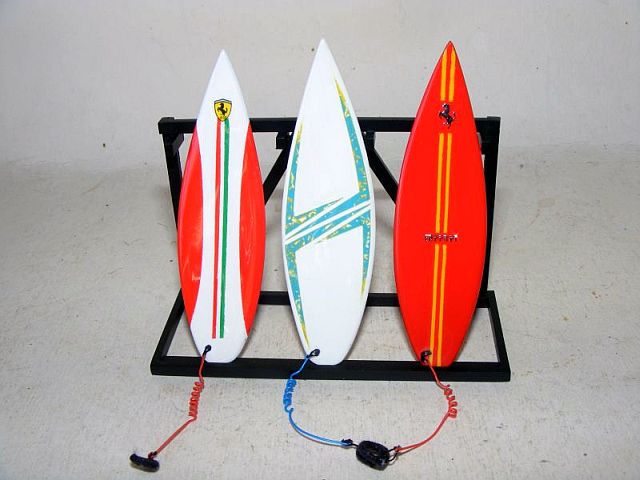
Summer Time When the Surfin's Easy & The BBQs are Smokin'
wisdonm replied to Dr. Cranky's topic in Model Cars
I had thought of making my 39 Sports Wagon a surfin wagon. That will be another version. My mate in Australia made these surfboards for me. They are in transit right now. I am a Kansas City Barbeque Society certified contest judge. Tomorrow I go on safari to judge, and eat, BBQ Friday and Saturday.
-
Hippie, that's the way I look at golf. When you count strokes, I'm what I call a value golfer.
-
I did once for this build. http://www.modelcarsmag.com/forums/index.php?showtopic=39079&st=0 I was asked why more people didn't build model cars?The three most frequent answers are 1) it takes too much time, 2) they're too hard, and 3) they cost too much. Let's take a look at my Working Lights Supporter's Project build. I know everone's situation is different. This is just an example of what I did. Excuse #1. It takes too much time. I was on the road from Nov. 14 thru Jan. 12, so I didn't have much time to complete a build. In fact, I only had 19 days. It took 14 days from start to finish. I've heard of decent builds taking even much less time. Nobody says that you have to build the most complicated kit you can find. I knew my time restraint and used a kit I knew I could finish in the remaining time available. Excuse #2. They're too hard. Once again, nobody says that you have to build the most complicated kit you can find. Either build something just slightly out of your comfort zone, or build within that zone and add a few extra details. I had no Idea how to work with LED lights. But I did some research, read what others were posting, and then did a little experimentation. That is how you learn and improve your skills. Excuse #3. They cost too much. Here again, a kit's cost can be quite low if you are flexible. If you are going to modify it, rummage sale and partially started kits can be quite inexpensive. I am always looking for cheap kits. If I find something under $5, I will usually buy it, wether I think I will build it or not. You can always donate it to someone who will. This is a list of what I used and what it cost to build my Mach 5. Like most of us, I do have some things on hand already and won't be counted in the cost. These things I already had were, a partial can of grey primer, silver paint, flat black paint, semi-flat black paint, 4 stick pins, two-part Bondo spot putty, #400 sand paper to sand the Bondo and prep the body for primer, two emery boards - one to scrub in the tires and one to reshape parts of the body, a piece of aluminum tube, some wrapping wire (model sized spark plug wire), super glue (50 cents a tube at WallyWorld), some self sticking medical tape, and various tools. The things purchased specifically for this build were: Jada Mach 5 kit. On sale for $4.98. Testors one coat lacquer in Lime Ice spray paint. Bought at Hobby Lobby with 40% discount coupon for $3.00. Ocean Cruise acrylic paint was bought at WallyWorld for 97 cents. Five 3-packs of LED x-mas replacement bulbs were bought at Menards for $1.19 each, for a total of $5.95. One 9 volt battery at the dollar store for $1. For a grand total of $15.90. About the price of seeing a movie. In other words, a project doesn't have to take a lot of time, be overly difficult, or very expensive. Just thought I'd share these numbers with you, in case anyone was interested.
-
I painted the body and trim with Rustoleum Hunter's Green. When that was cured, I assembled everything. This is my '39 Sports Wagon.
-
Here's Das Bug. Mr. Hobby kit. Chopped 4", lowered 4", rotated front axle, custom exhaust.
-
Crazed over feedback
wisdonm replied to MAGNUM4342's topic in General Automotive Talk (Trucks and Cars)
I recently had two buyers claim that they did not receive their order. I did not question their claims, at least not to them. Then I resent their orders and even included a little extra for their troubles. Guess what. Neither of them left any feedback. And I still believe they did receive their original orders. Sadly, they let these people breed. -
I don't believe it is a direct fit under any specific kit. But it would be a great chassis for many resin (ie. Flintstone) bodies.
-
I like this chassis. I will be using it as a reasonably priced donor in the future, especially if I need air bags. The front sway bar and steering shaft are not mounted yet. The kit comes with a nice set of big and littles, but it won't be apparent because of the fender skirts. Here it is in a coat of Rustoleum Almond. Sorry, it's not as exotic or flashy as the other builds, but I think it suites the classic lines of this build in an understated kind of way.
-
I mocked up the suspension. I found that the ends of the shock absorbers had to be enlarged so that they could fit on the mounting pins. Upon looking at the kit shock (far right) I thought, maybe I could make it look better. So, I whacked off the rod end of the kit shock and added a piece of fish hook (second from right). Even the eye of the size 6 fish hook was too small for the mounting pins, so they had to be enlarged. From previous experience, I know that fish hooks are made of hardened steel. If you try to drill the eyelet, bend the hook, and even cut it, you will have trouble. You have to anneal (soften) the hook before you can work with it. I held the hook in a paper clip (far left) and heated it with a butane lighter until everything was cherry red. Let it cool by itself. This will only take a few seconds. Once it is annealed, it can be easily drilled, bent, and cut. The annealing process also burns off the gold colored plating. While in the holder, I cleaned the hook up with a piece of ScotchBrite. Cut off the kit shock rod end, after measuring it's length. Then drill a hole in the shock body for the new rod end (fish hook) to be inserted. Adjust the length, glue, if necessary, and you're done. Then came the wheels and tires. They are a nice set of big n littles. The tire treads were buffed, the wheels striped, and valve stems added. The valve stems are pieces of mechanical pencil lead that are super glued into holes drilled into the wheels. I then foiled the brake rotors. They look much better in person.
-
Thank you mark for showing the step by step for basic tape work. Now Luke, by any chance, do you have step by step pixs of your fabulous work? I especially in interested in how you do that over and under work. Someone please show how this is done. TIA
-
Another work of art, Mr. Lombardo. At first, I thought those were reference pixs.
-
Time to work on the interior. Been working on the dash for some time. The original dash is a 1990 Corvette dash, seen in the lower part of the first pix. It's OK, but I thought I'd try something different. I'm going to use the dash from a Dodge Sidewinder show truck. I think it carries the front end styling. It was too wide, so it had to be narrowed. I couldn't just cut the ends off, so I had to section it in two places. I used the steering column and pedal assembly from the original Wagon Rod kit. The steering wheel is from a watch. I think it looks period correct. The flip down central navigation/infotainment center cover/drink holder is made from a leftover piece of the original grill. The knobs are painted period ivory. At the bottom of the second pix you will also see some floor mats that I made. I used embossing powder for the first time to flock the floors and door trim. I think it's much more in scale than traditional flocking powder.I didn't have to paint it. The color is called Walnut, and Michaels was closing out big containers for $1.48 The side panels had 11" cut from the bottom edge. The seat bottoms had 3" removed from the bottom.
-
Bondo/body filler is not the same. Those are way harder to work with than epoxy putty which is like clay, not mud.
-
This is not as big a deal as some would have you think. Get some two-part epoxy putty. J-B Weld in auto sections, plumber's putty (cheaper) in the plumbing depts. Knead some together and shape it like clay. Use tools or a wet finger. It will stick to darn near anything, even when wet. Workable for about 10 minutes, like a rock in a half hour. Then just sand or machine as needed.
-
I made a license plate out of regular paper with a piece of transparent tape over it. You can also see parts for my hood hinge. This pix shows how the hood hinge functions. When open, the hood stands vertically, giving complete access to the engine. When closing the hood, the hood is rotated horizontally and the hinges pivot on the cross bar until they face backwards and nestle alongside the engine air intake. Here's a few pixs of the power-train, a '94 Chevy LT5 and Brog-Warner 5 speed manual. The engine is a 405HP 349 cubic inch, all aluminum, DOHC, 32 valve, and electronically fuel injected V-8. This is the first time I've used wire separators. With my eyes and fingers it was a major accomplishment. Also drilled the power steering pulley. It still fits nicely under the 11 inch lower hood.
-
...add real lighting?
wisdonm replied to fastbackfiero's topic in Model Building Questions and Answers
These two links will tell you almost everything you will need to know. http://www.modelcars...rt&fromsearch=1 http://www.briansmod...d/571692/page/1 -
Scribed the new door lines. I made tail lights from sprue. Not the prettiest, but they match the head lights and dash. They are just pressed into place. Looks like they should be pressed in further. The tail lights look better pushed back into the body. Next I made wheel spats from flat styrene and super glued them into place. Finally, I made new B pillars. I glued two strips of quarter round onto a styrene sheet. The two pieces of quarter round were separated by an exacto blade, since I use a blade to make the panel lines. These were cut to length and installed with super glue.
-
Temporarily reunited the floor pan and body . Next I cut the fire wall to fit. It is less than half it's original height. After some clearancing I got the floor pan to fit for the first time. That piece on the side is what was cut off of the fire wall. 11 scale inch section and a little off the top. First pix of hood and grill in place.
-
Here is a pix of the mold and master. After spending time cleaning up my mold, I was ready to proceed. I mixed up some resin and cast a part. Now came the moment of truth. Thankfully it opened up OK. Sadly the body was less than appealing. The body texture is quite ruff. Like fiberglass without gel coat in many places. I believe the reason for this is that I used the last of some resin that I probably bought five or six years ago. In fact the polymer was crystallizing in the bottle. So the next step was to use some resin that I had recently purchase, but had never used. More surprises. This resin is a translucent green. Not at all what I expected. It seems like resin for fiberglass or 1-minute epoxy. The container says it's for models. It is very thin and easily gets into every nook and cranny. The second body looks very good, if a little weird. I thought the acid test would be if the hood fit into the slots next to the fenders. It fit very well on the first try. Now I can make all the Sports Wagon/hearses that I want. Gotta go. I have a model to build.
-
Sad News - Caroll Shelby
wisdonm replied to martinfan5's topic in General Automotive Talk (Trucks and Cars)
Thanks Carroll for your wonderful cars.