Exotics_Builder
-
Posts
3,641 -
Joined
-
Last visited
Content Type
Profiles
Forums
Events
Gallery
Everything posted by Exotics_Builder
-

Revell 1966 Pontiac GTO - Final Build of 2021
Exotics_Builder replied to Exotics_Builder's topic in Model Cars
I did find a minoir glitch when waxing that I need to fix (or just let be) -

-
Just got a chance to get photos of the finished kit. See it in Under Glass-Model Cars
-
E-Tron GT is interesting
-
My Christmas gift to myself arrived just a couple of days late. I am still not too sure about the front grille changes BMW did, but the M3 is a darn good auto.
- 39,276 replies
-
- 1
-

-
- johan
- glue bombs
- (and 1 more)
-
Update 5 – Enough on the engine I’m calling it done on the engine detail. Need to paint the transmission and glue to the chassis. Looking at the model, I do not think it would be worth adding lines from the power steering pump to the gear box and add any lines from the alternator and starter. Then again, it is a manual transmission and there is clutch fork or linkages to any pedals. Anyway, some pix of the engine before placing in the chassis (and yes, there is a non-working dip stick included).
-
Cosworth Vega!
Exotics_Builder replied to George Bojaciuk's topic in Car Aftermarket / Resin / 3D Printed
Nice!!! -
Cosworth Vega!
Exotics_Builder replied to George Bojaciuk's topic in Car Aftermarket / Resin / 3D Printed
Wheels and engine would a great start for that. Definitely on my radar. Now for decals, etc. -
Call me crazy...roof swap on '53 Vicky
Exotics_Builder replied to customline's topic in WIP: Model Cars
I would tend to agree with you. An interesting concept though, regardless of roof -
Have not yet been to that event. Hopefully things will open up more. We just moved back to Washington state about 4 months before COVID hit. Be nice to see.
-
Thank you. So, you are on Vancouver Island. Been awhile since I've been to Nanaimo or Victoria. But just a couple of hundred miles south of you.
-
Update 4 – A bit more progress I sanded out the grill section from the back and then applied the Model Car Garage PE grill set. Glued the lights in and ran some paint in the “slot” between the grill and the bumper. It is quite evident on the 1:1 car but the chromed single piece grill and bumper of the kit means you need to do some extra steps (if it matters to you). Just need to cut it from the sprue and touch up the chrome and grill inserts and this part is ready for assembly. Started the engine detailing. Ran the fuel lines and linkage for the tri-carb setup plus started wiring the distributor. In this model, I am using the Replica and Miniatures of Maryland distributor that includes vacuum advance. I added the wires to the distributor caps and got cylinder routing order through the first loom. I’d say about 50% done on the engine at this point.
-
My original 68 Z/28 came with that type of exhaust. So, it may have been model/engine specific. I'd have to see if I have any references
-
At last night's SABA Christmas Party, I got this in the gift exchange Plus, I have gotten these over the last few weeks
- 39,276 replies
-
- 1
-

-
- johan
- glue bombs
- (and 1 more)
-
1/25 AMT 1962 Buick Special Wagon Retrospective
Exotics_Builder replied to Casey's topic in Car Kit News & Reviews
Got one unbuilt down in the stash. And just got the 63 Nova Wagon. Now, which to build first?
-
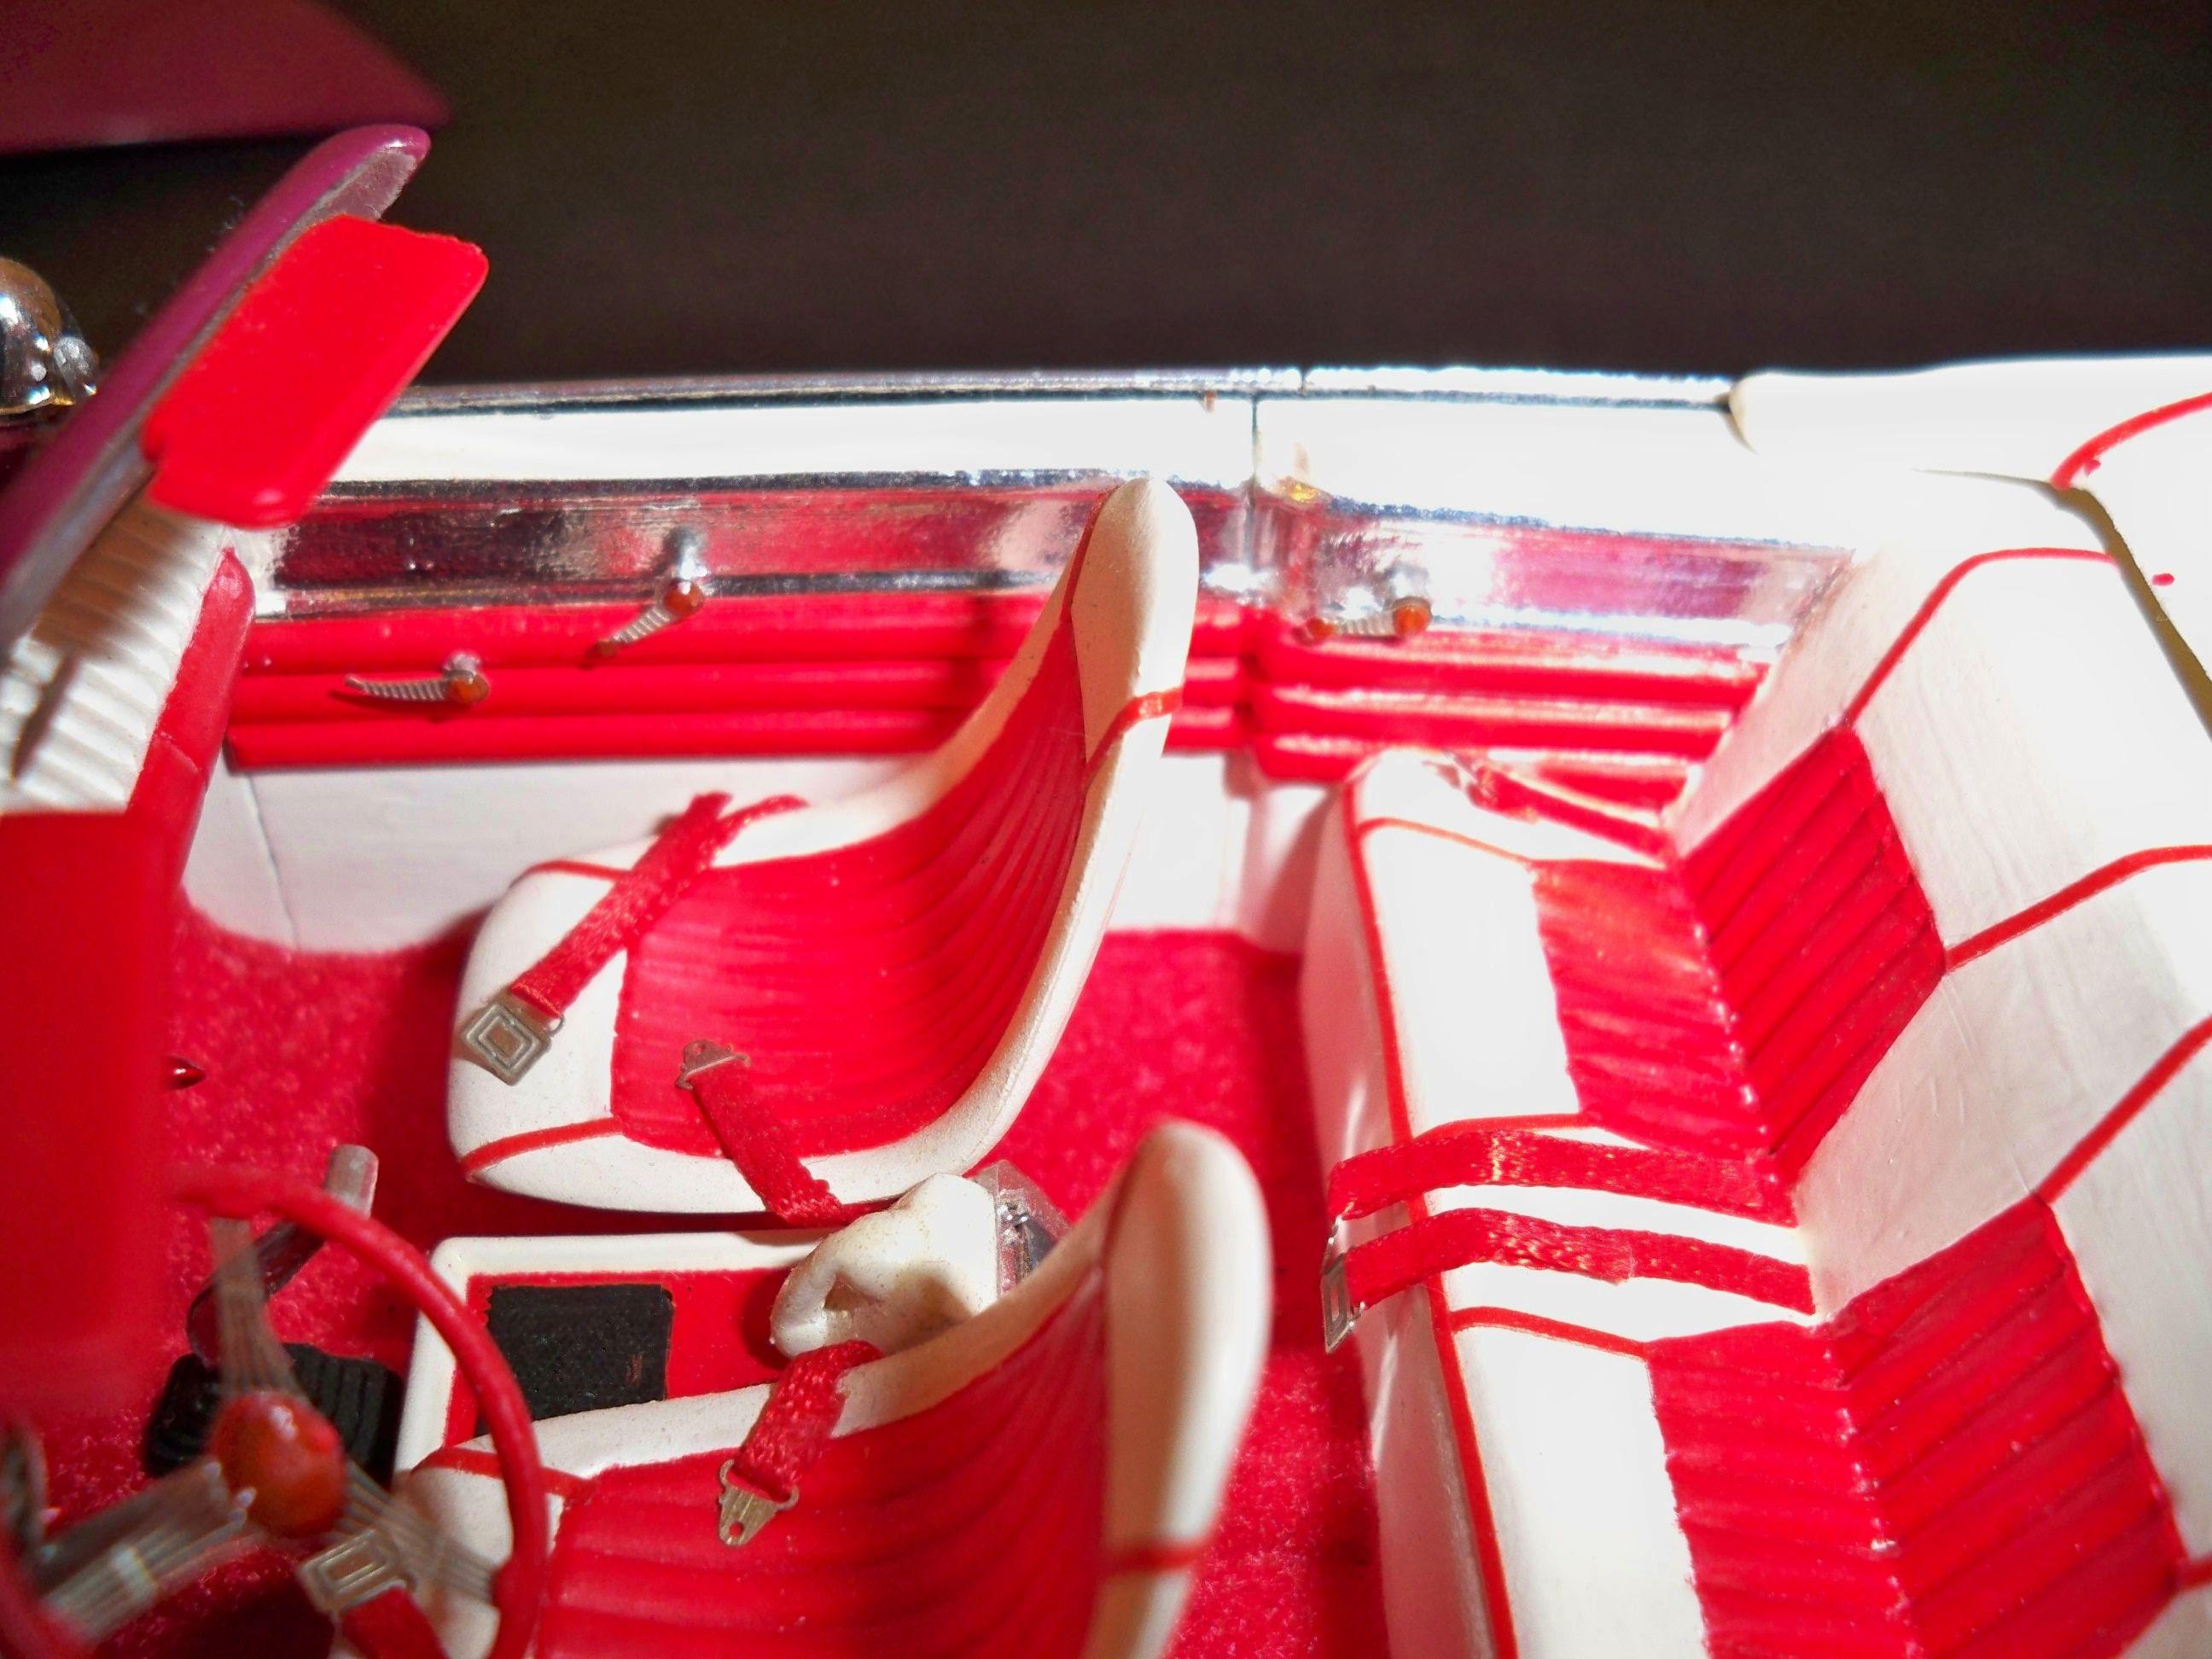
Getting Closer. Working on engine detail, painting the engine compartment and wheel wells, polishing out body followed by BMF, laying out emergency brake, final assembly and polish/wax.
-
Precisely
-
Remember, in 1/25 scale, 1 mm is approximately 1 inch (close enough in this case). So, it doesn't take much build up to get a door handle spacing or window crank to stand proud. To stand off a door handle about 2 inches would need roughly 7/64 inch spacing. So, think that out in planning your layout. And be patient.
-
They build the part up dimensionally. You wind up positioning the parts to get a ferule and knob in some cases. It takes a steady hand. Detail Master also now sells stand offs for handles. The other part of this is removing existing handles/cranks molded into the door cards (if they are there). An example:
-
This was done about 20 years ago with a Detail Master Set. At the time, there was no base for them, so I drilled a hole and inserted a styrene rod about the same size. Some ferules are now available as an option.
-
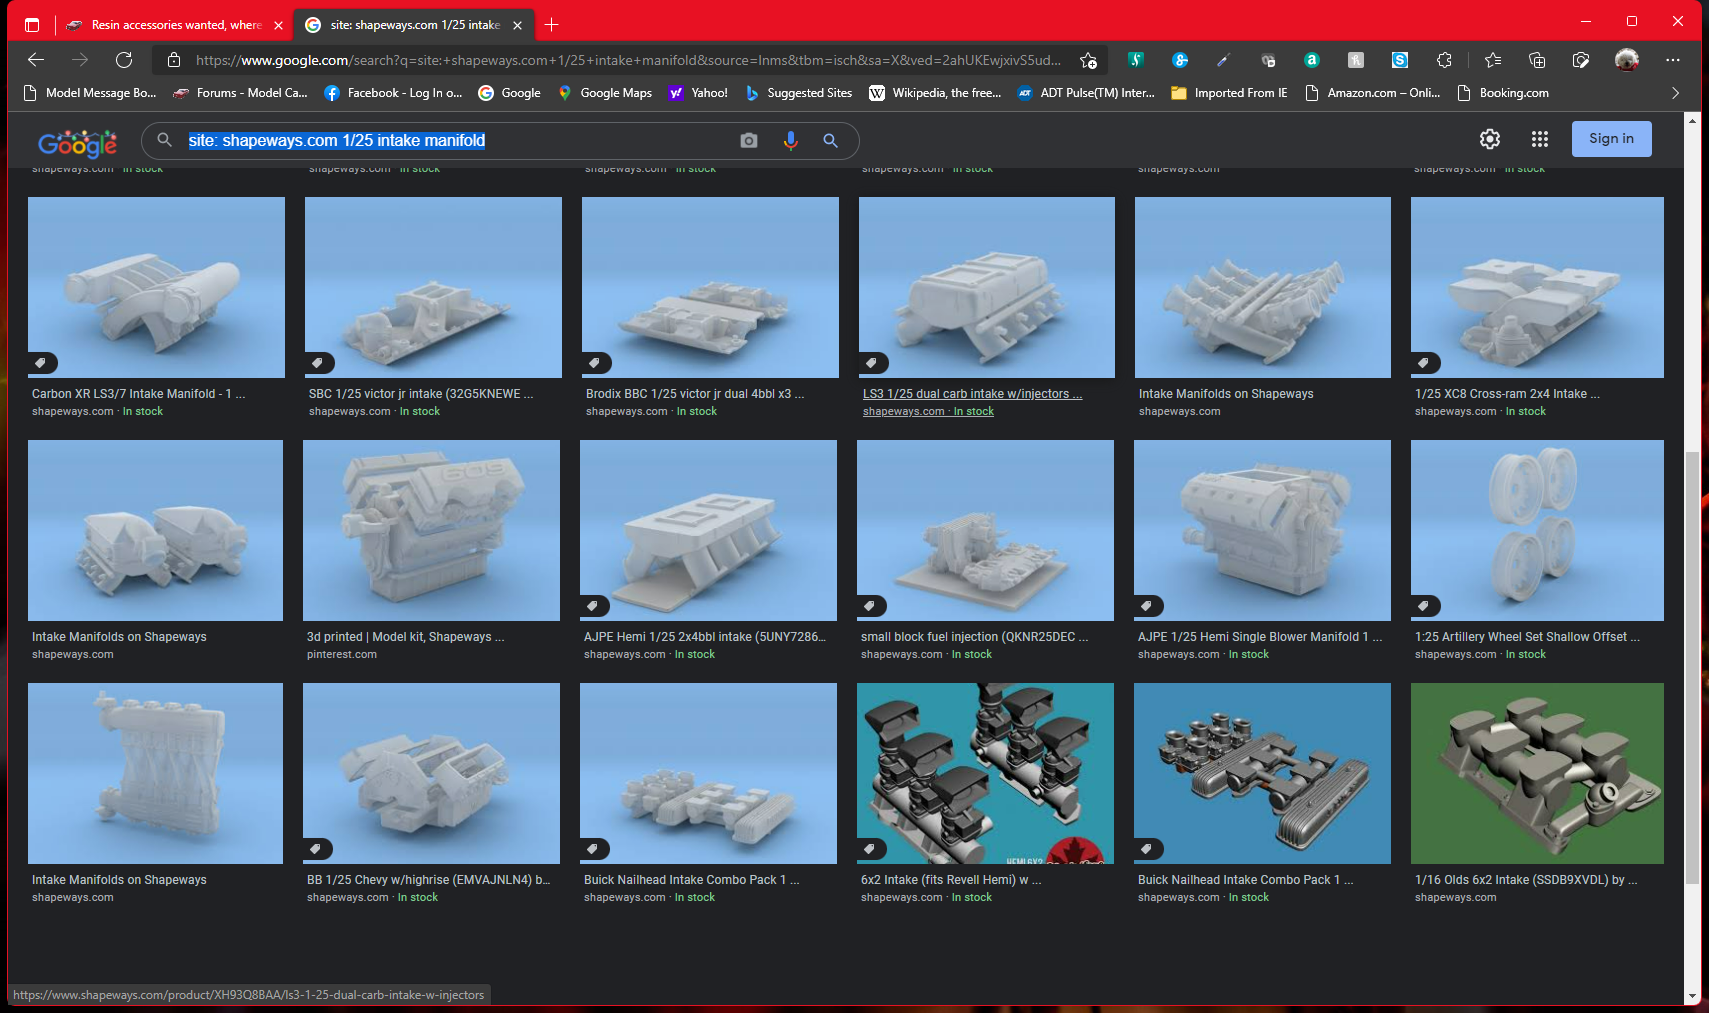
regarding Shapeways, I've had better luck using this type of search criteria "site: shapeways.com 1/25 intake manifold" where I start the search with the site: shapeways.com then add the scale and the item description. It is not perfect, but better than their search feature
-
Built that one when it first came out in the late 70's. Not a bad kit for the time.
-
Also look for Hobby Gear diorama sets
-
-
Old decals: How to deal with them?
Exotics_Builder replied to conchan's topic in Model Building Questions and Answers
Tamiya makes Decal solvent (regular and Strong) as well as a decal cement. MIG makes a decal preset and solvent (1 and 2) as well.
.JPG.4ddcd73990e0f300ff506e0d9ee206e0.JPG)
.JPG.525f9886c59c0cc0d89b5b1d24fab151.JPG)
.JPG.aa85ac74a723985bf78c9406b5d0f71c.JPG)
.JPG.d19d22abe9e57c2c415bf8dee9aabc3f.JPG)
.JPG.34d124e71edab50fd94e9d2f5a8f1d22.JPG)
.JPG.d2357a13d109e6749a21a885c3c7614d.JPG)
.JPG.2e63e0799b36b6336e4da4cae3d779f4.JPG)
.JPG.542d338822f554feef0b86eb28a45b33.JPG)
.JPG.06ec5b98bfa2677cdcd4fdb966a30e89.JPG)
.JPG.51f70532a471ff4bf8acdb2331e579e3.JPG)
.JPG.74bda0af9b8359560bf5c10e29a38d89.JPG)
.JPG.d5e69eb8ea3be6bd5e5484bacd7141e2.JPG)

.JPG.7d9ca41089bf04d613e36f66952cf56c.JPG)
.JPG.cd7d4cc8f0f8045f4135a180561e3b59.JPG)
.JPG.6f72129c8d35077b19e69d6579f6bb26.JPG)
.JPG.dac5afc86ed71754afddaab4a061e847.JPG)
.JPG.267a23280e35ea56f7527375a14aea29.JPG)
.JPG.dfc850d13a4e3c13760c14aaadb658df.JPG)
.JPG.063367b65ca9a036d7530c886a03737a.JPG)
.JPG.e139989edea544785a856f5ee06a0dac.JPG)


.JPG.1826368c15be2e0c5ec248ad37aa5235.JPG)
.JPG.6be4890d2cb4321e14061ca1289b5fae.JPG)
.JPG.6d29f9fedd038ad9f7644ad75bfeded3.JPG)
.JPG.71ef1c60e86195fa568592d5adc4fd5d.JPG)