Cool Hand
-
Posts
2,087 -
Joined
-
Last visited
Content Type
Profiles
Forums
Events
Gallery
Everything posted by Cool Hand
-
While applying BMF to the Camaro, also got some on this build.
- 766 replies
-
- 2
-

-
- stalled builds
- quick builds
- (and 2 more)
-
Appreciate the input Jim, I dont use clear on my Tamiya TS-14 black paint jobs, so im not willing to use anything other than wax to remove the residue. Yes always had some residue left behind. but no where near as much as the current batch. I can deal with the situation, just requires way more clean up. Appreciate the kind words. My eyes and hands arent what they use to be, so I now pre- scribe all the trim on my builds. Tedious work but makes foiling so much easier to be precise. Yes I remember reading about the supply issues, and used some of the batch that was available during that period. Im glad it is still available and is the best option for model cars, but as you said shame its not what it once was. Yes I use Tamiya TS Lacquer, but as I mentioned to Jim, at the moment not willing to use anything other than a wax or compound to remove the residue. But I will keep your suggestion of the lighter fluid in my mind and test it out one day. For now the wax has worked, just requires more effort than usual. The sheet of foil is enclosed in the folded paper and the info is printed on the inside
-
Current batch of BMF is certainly not the quality product it once was. Sure it adhere's very well and it's a far better product than the recent Chrome batch that everyone complained about. This just frustrates me to no end, having to remove glue residue that the supposedly "New Improved" leaves behind after trimming and removing excess foil. If you know me, I do a lot black paint jobs. And most would know what its like dealing with black. Previously I could use a very small amount wax and wipe of any glue residue, now it requires a bit of elbow grease to get it removed and fingers crossed I dont get excessive scratches during the clean up process Also the adhesive does not smooth out after burnishing like it use to. Now your left with a texture in the foil surface finish. Very annoying. And now it comes in zip lock bag, personally I prefer the paper envelope Rant over.
-
 Still having fun with the small stuff for now.
 -
Been a minute since I worked on the 69 Camaro. Quick polish with Tamiya fine and finish compounds and applied some BMF.
- 766 replies
-
- 4
-
-
- stalled builds
- quick builds
- (and 2 more)
-
So glad I decided to keep up with the times and get a 3D printer, Phrozen Sonic Mighty 8K Now I can print my own wire wheels with low profile tyres. The 3D file is personal design and was gifted to me from my mate SlowlysModels.
-
Done well mate, look forward to seeing the panel van build.
- 20 replies
-
- 1
-
-
- holden hq.
- dda
- (and 2 more)
-
How do you paint glass tint without masks?
Cool Hand replied to conchan's topic in Model Building Questions and Answers
-
I was having same problems as everyone else, but can now confirm using the http does solve the issues. Using Windows 11 and Chrome.
-
Finally have a progress update with this build. Got some colour and clear applied to the body and started painting all the other parts. Paint is from one of the other suppliers here in Australia.
- 766 replies
-
- 2
-
-
- stalled builds
- quick builds
- (and 2 more)
-
Good to see a progress update Brock, keep at it mate.
- 20 replies
-
- 1
-
-
- holden hq.
- dda
- (and 2 more)
-
Who doesn't love a mock-up? Let's see yours!
Cool Hand replied to Belairconvertable's topic in WIP: Model Cars
Applied some Alclad Chrome to the bumpers,grill and head light surrounds for the Holden HQ Kingswood Lowrider. -
And another build ive been working on, Holden HQ sedan Street Machine. Also seen else where in the mock up thread.
- 766 replies
-
- 3
-
-
- stalled builds
- quick builds
- (and 2 more)
-
Holden Panel Van ive been working on that has been seen else where in the mock up thread.
- 766 replies
-
- 5
-
-
- stalled builds
- quick builds
- (and 2 more)
-
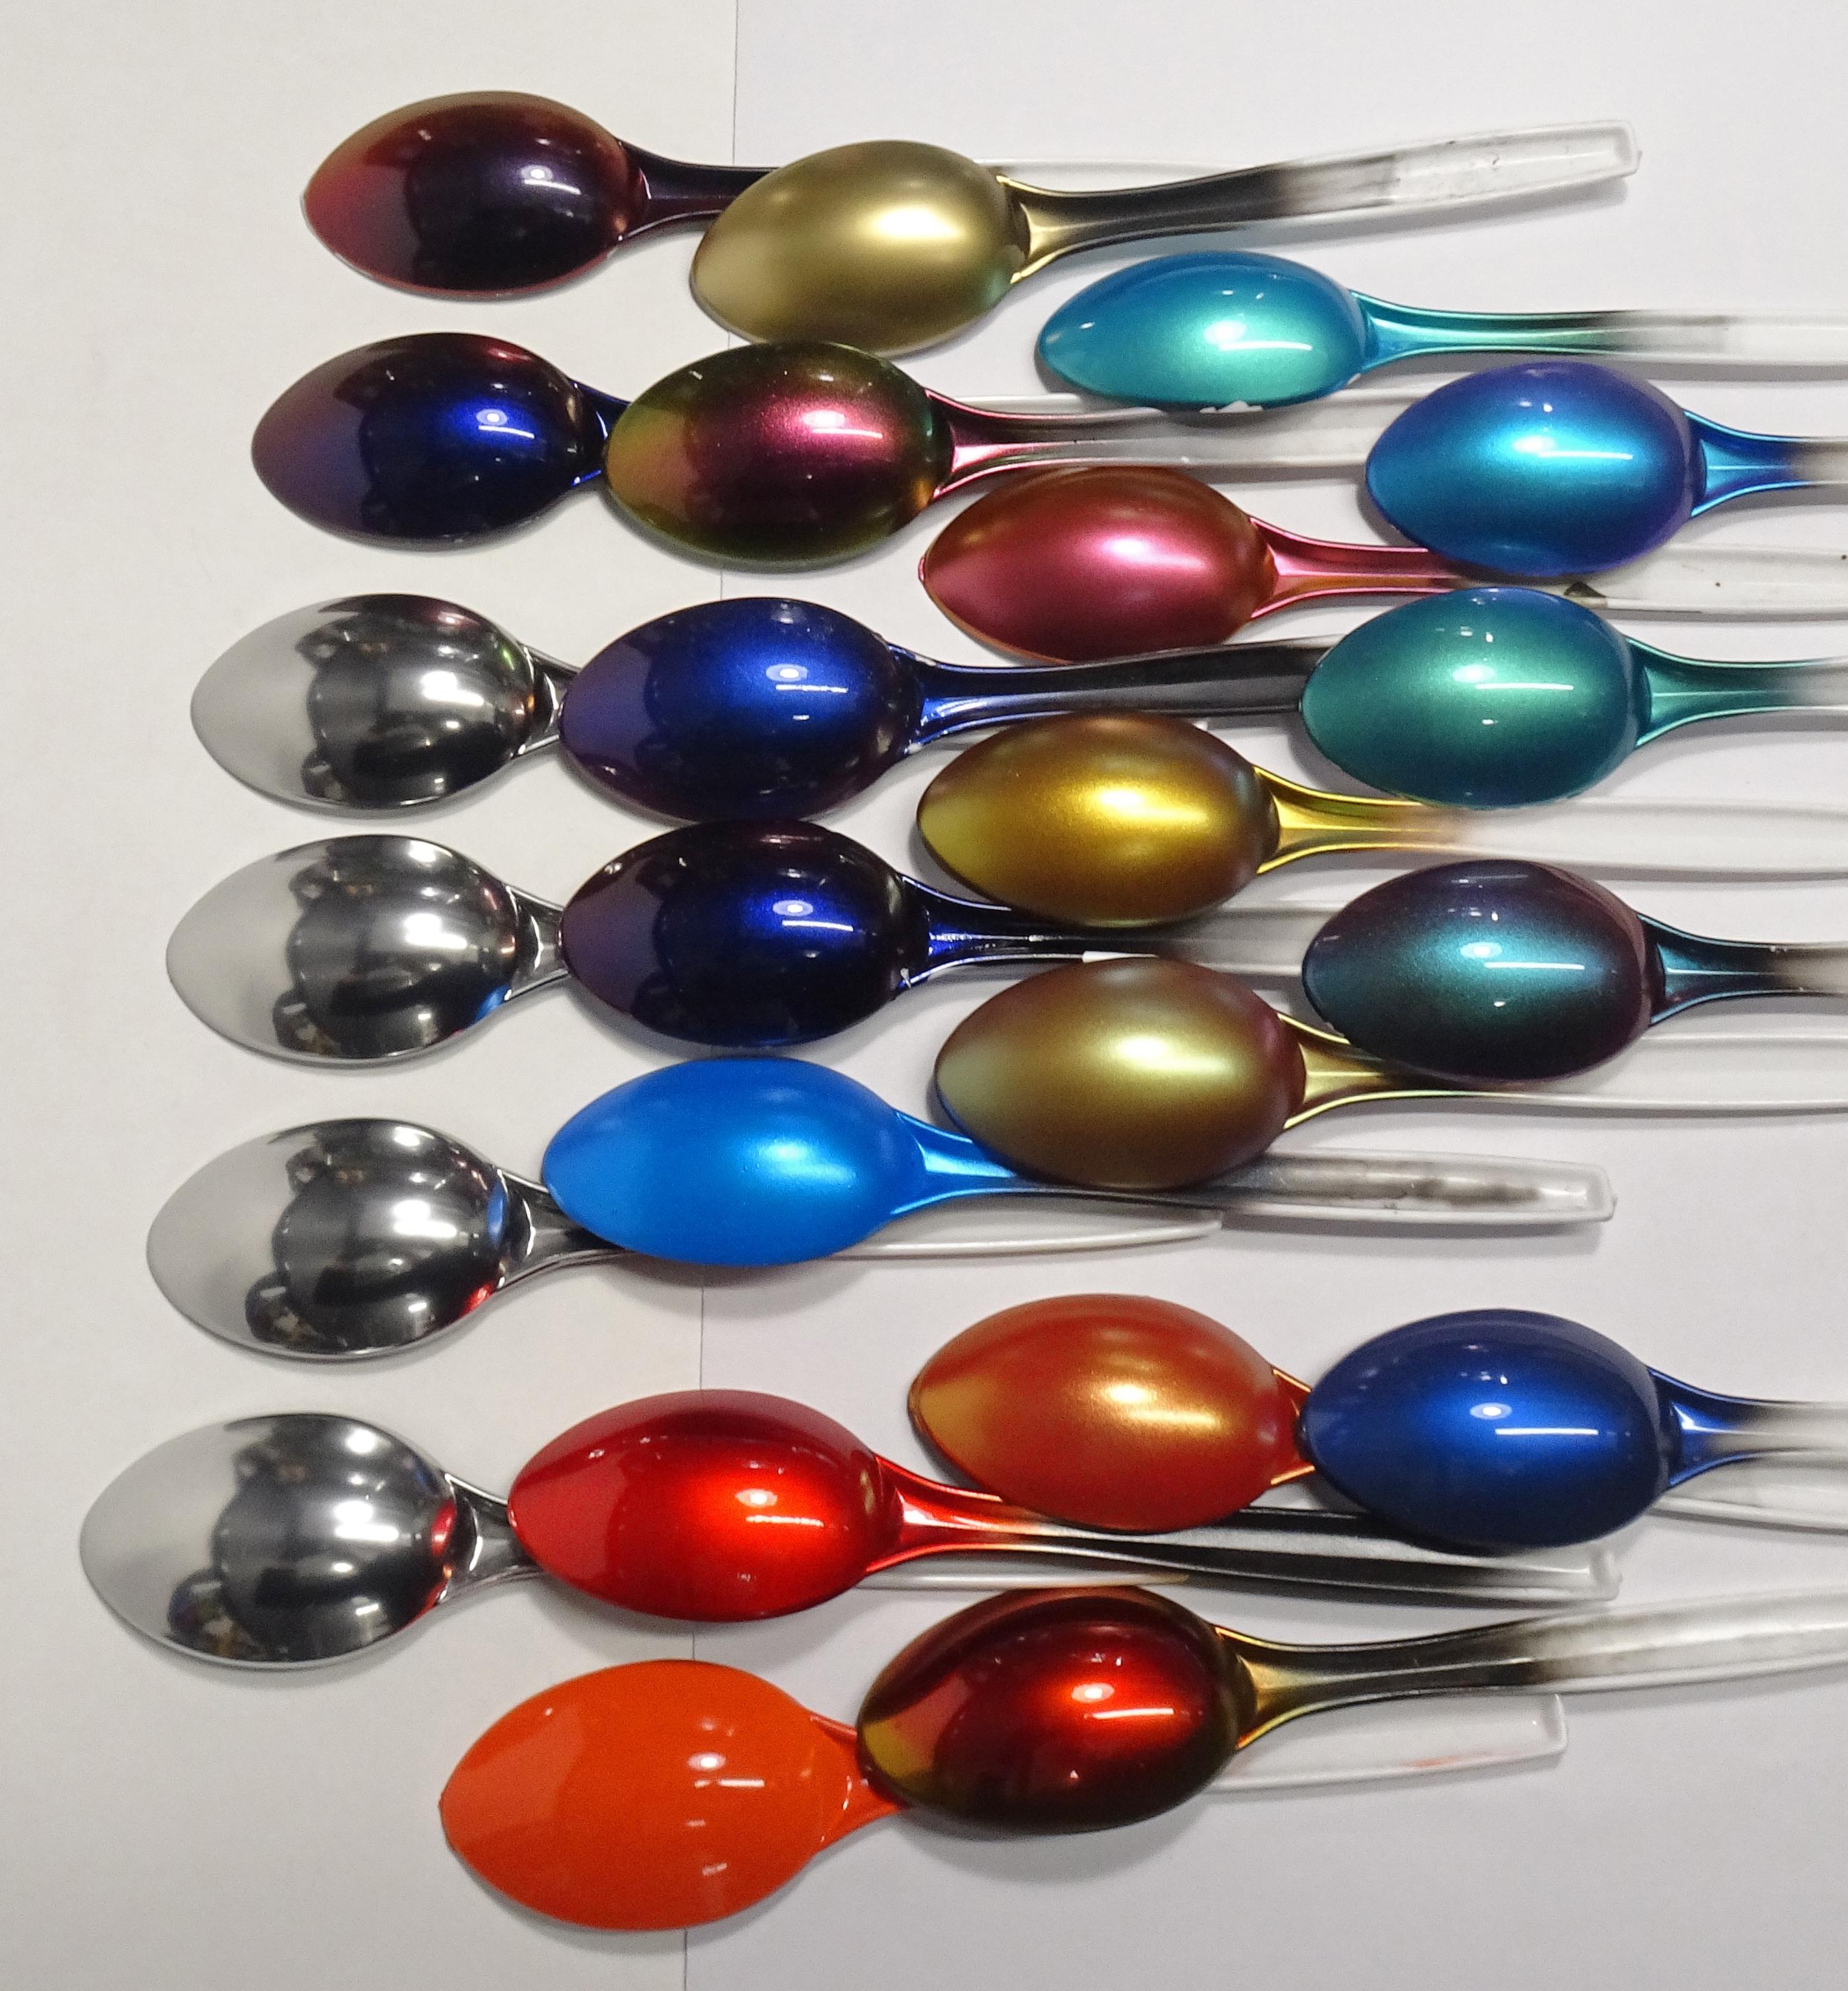
Ha ha, interesting idea for a thread. I do the same always testing on spoons first. To check the colour and to dial in the air pressure and airbrush. Also to get a feel for how the pearls layer up with each coat.

-
Been a minute, applied some colour to the HQ Kingswood Lowrider.
- 766 replies
-
- 3
-
-
- stalled builds
- quick builds
- (and 2 more)
-
Squirrel cage fan ??
-
Who doesn't love a mock-up? Let's see yours!
Cool Hand replied to Belairconvertable's topic in WIP: Model Cars
Just checking how the wheels look whilst preparing body. -
How do I know what Tamiya paint I have?
Cool Hand replied to Milo's topic in Model Building Questions and Answers
Like I mentioned if you do a google image search for Tamiya Mica Blue, you will find many examples showing how different base coats can change the tone from light to dark. This thread is a good example, which I found in a search. https://www.modelcarsmag.com/forums/topic/24632-help-on-paint-color/ -
Who doesn't love a mock-up? Let's see yours!
Cool Hand replied to Belairconvertable's topic in WIP: Model Cars
Very happy to have another Australian kit available, How could I not slam it on some Pegasus wire wheels -
How do I know what Tamiya paint I have?
Cool Hand replied to Milo's topic in Model Building Questions and Answers
A few Tamiya options that are close to the 1:1 example you posted. TS-64 Dark Mica Blue. TS-50 Mica Blue over black base. TS-51 Racing Blue over a black base. A google image search of above colors will show examples. -
(DDA Collectibles) Holden Torana Street Custom's
Cool Hand replied to Cool Hand's topic in Diecast Corner
Another version. -
Something different. New release from DDA collectibles. Supposedly going to be released as a plastic kit Q1 next year. 1:24 Scale.
-
Excellent clean build, I like it. Good job with all the detailing. Nailed the style perfectly. Its the first custom slammed blown version I have seen built oob, certainly great inspiration for other's.