Rockford
-
Posts
1,944 -
Joined
-
Last visited
Content Type
Profiles
Forums
Events
Gallery
Everything posted by Rockford
-
 You could move in once you're finished, sell the house. I suppose this is where the car modellers win, you don't need a warehouse to display them.
 -
Workover R.D.
Rockford replied to Jürgen M.'s topic in WIP: Model Trucks: Big Rigs and Heavy Equipment
Well done! I can imagine the hood would be awkward because there's so many different planes you've got to accommodate. I know what it's like from trying to form a sunvisor on anything but a 352 Pete because it's just a straight box cab shape. You cracked it though! -
I don't remember this truck but I think I've only seen Convoy once or twice, and it was a long time ago too. It'll be interesting to watch this.
-
Restoration project
Rockford replied to cdntrucking's topic in WIP: Model Trucks: Big Rigs and Heavy Equipment
Great looking combination. I do like the classic stripes. Great restoration job. -
Fire investigation unit
Rockford replied to Firebuilder's topic in WIP: Model Trucks: Big Rigs and Heavy Equipment
Impressive stuff! -
1/32 Mack F700
Rockford replied to The Brush's topic in WIP: Model Trucks: Big Rigs and Heavy Equipment
That is very tidy and very innovative! Well done. -
I'm a trailerholic
Rockford replied to Rockford's topic in WIP: Model Trucks: Big Rigs and Heavy Equipment
When I looked at this post I found about 30 pictures! Sorry men, I've performed a photo cull. Not sure what happened but I've found Google Photos is bundling pictures in threes and fours and when I've picked a picture to load it's loading the whole bundle. That's my excuse anyway!!!! Acting stupid has got me out of trouble a few times. ? -
Peterbilt 379 RV
Rockford replied to vincen47's topic in WIP: Model Trucks: Big Rigs and Heavy Equipment
Just the engine is a masterpiece! -
I'm a trailerholic
Rockford replied to Rockford's topic in WIP: Model Trucks: Big Rigs and Heavy Equipment
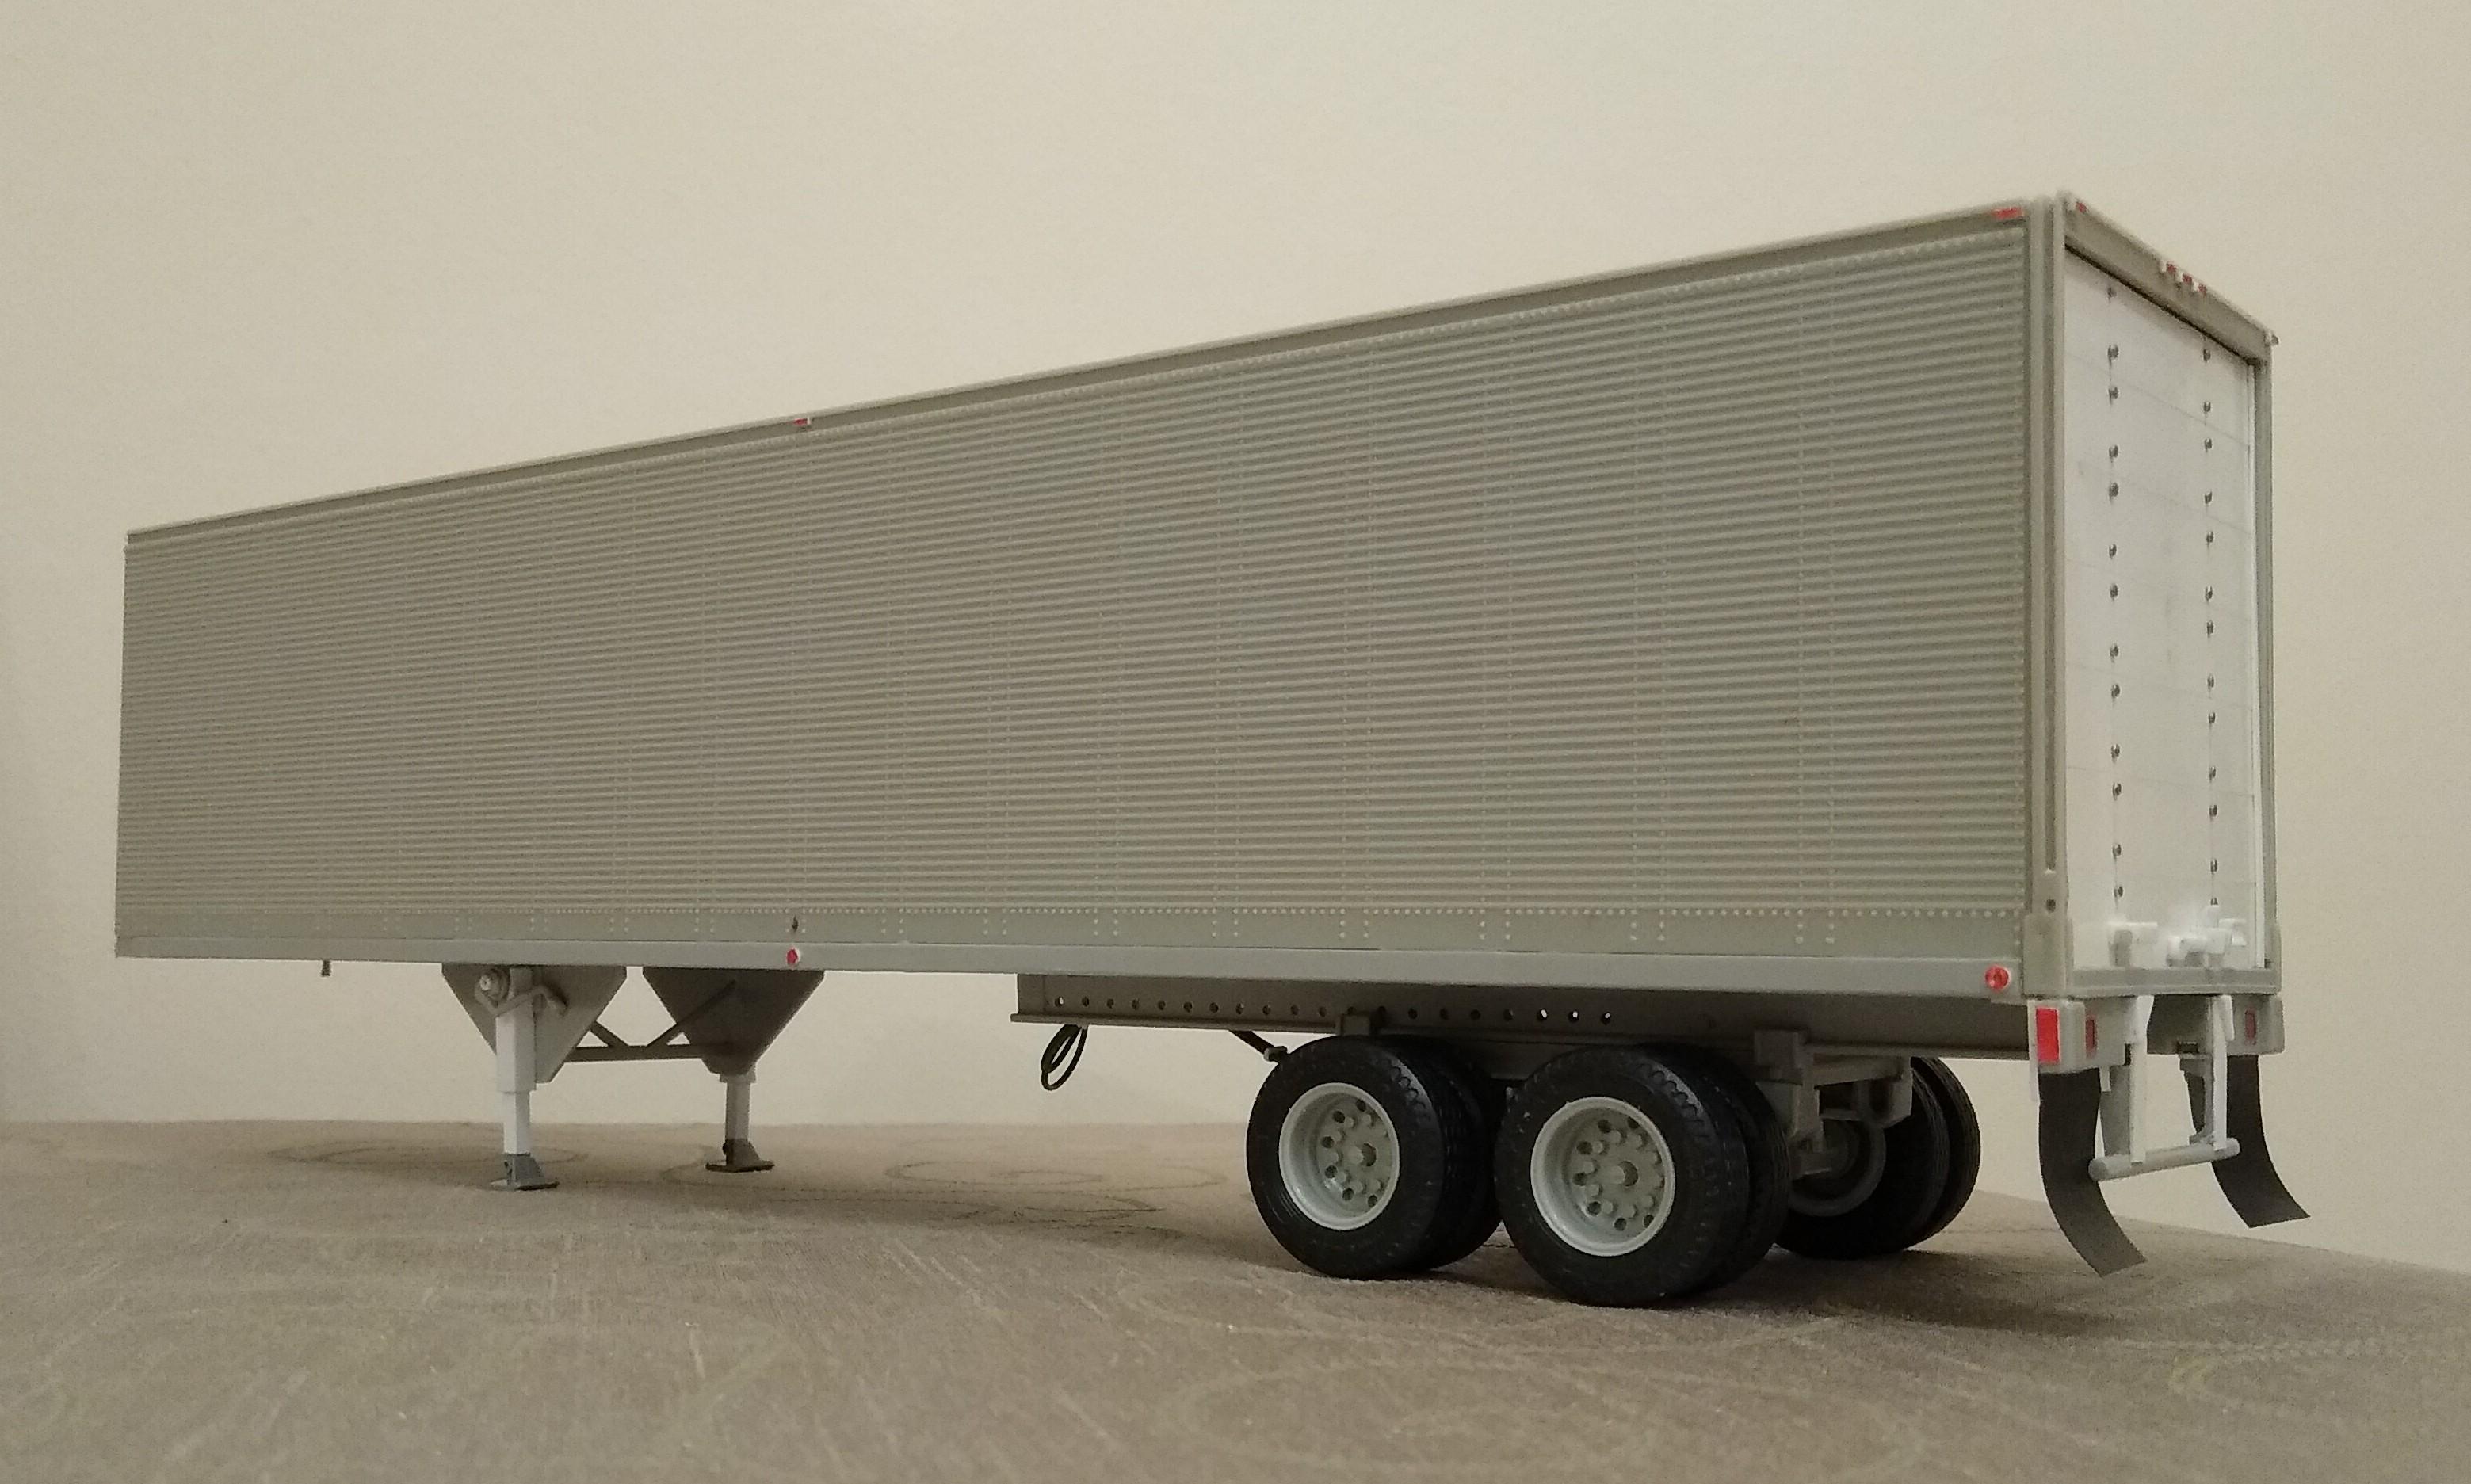
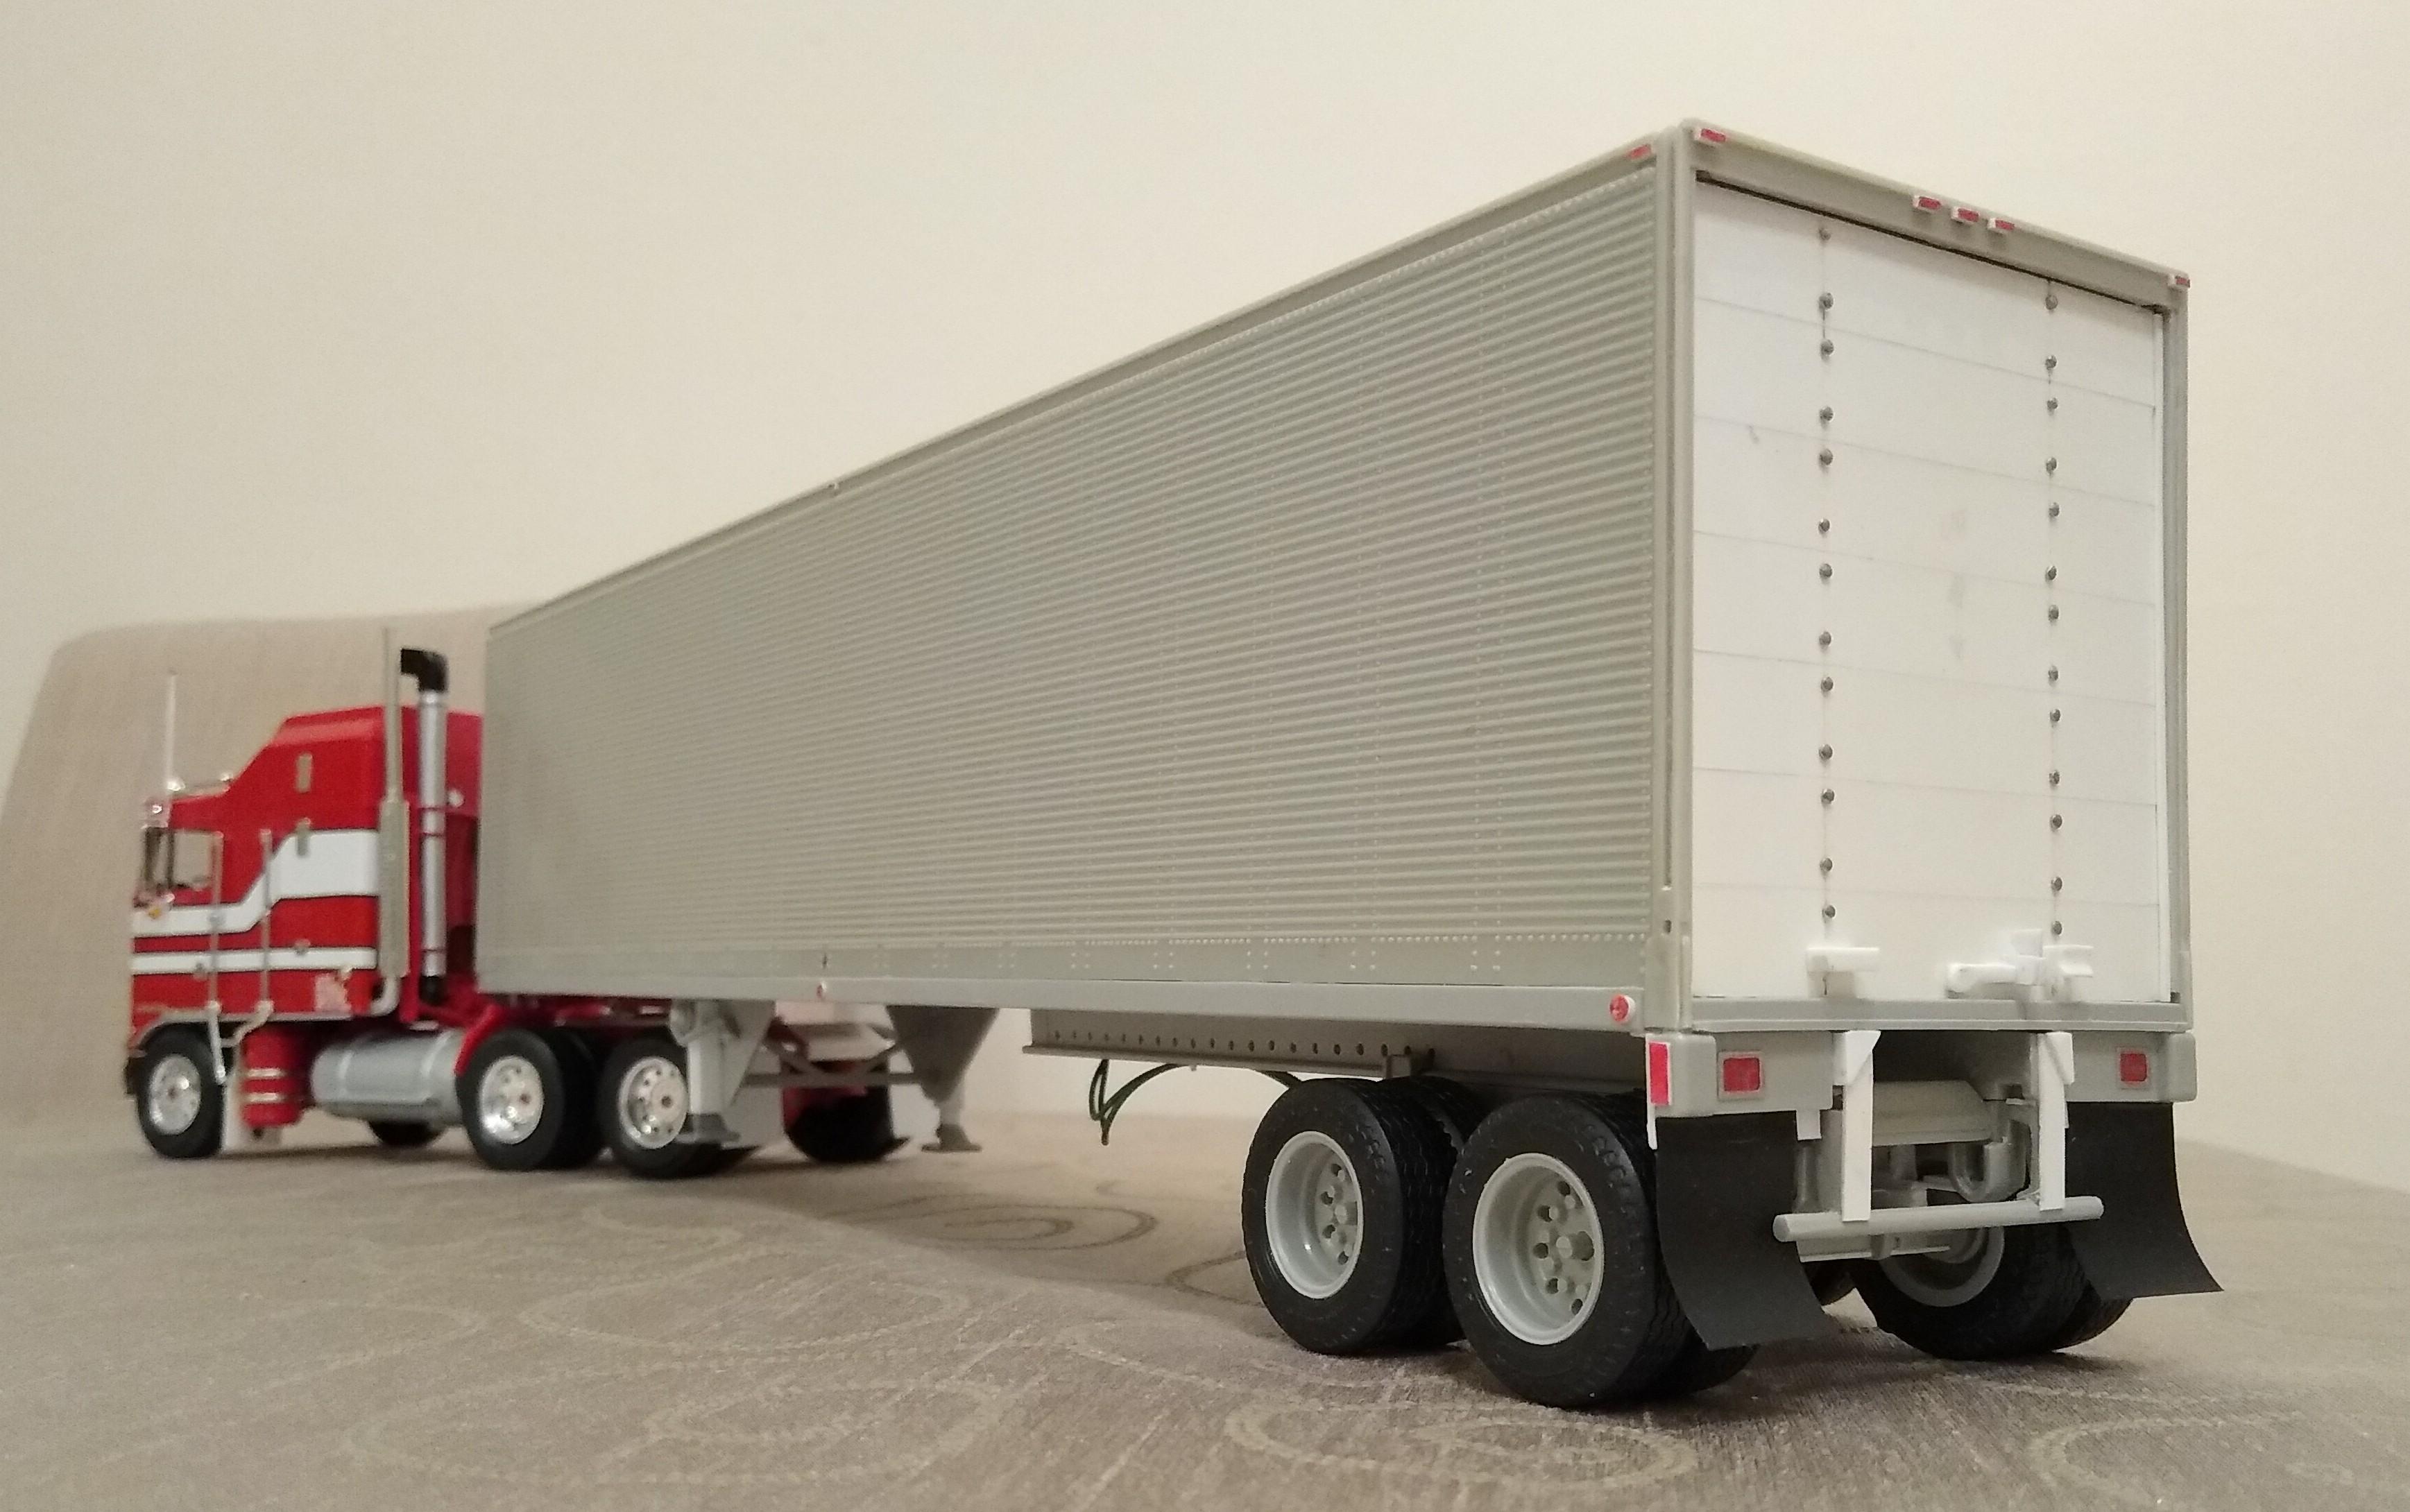
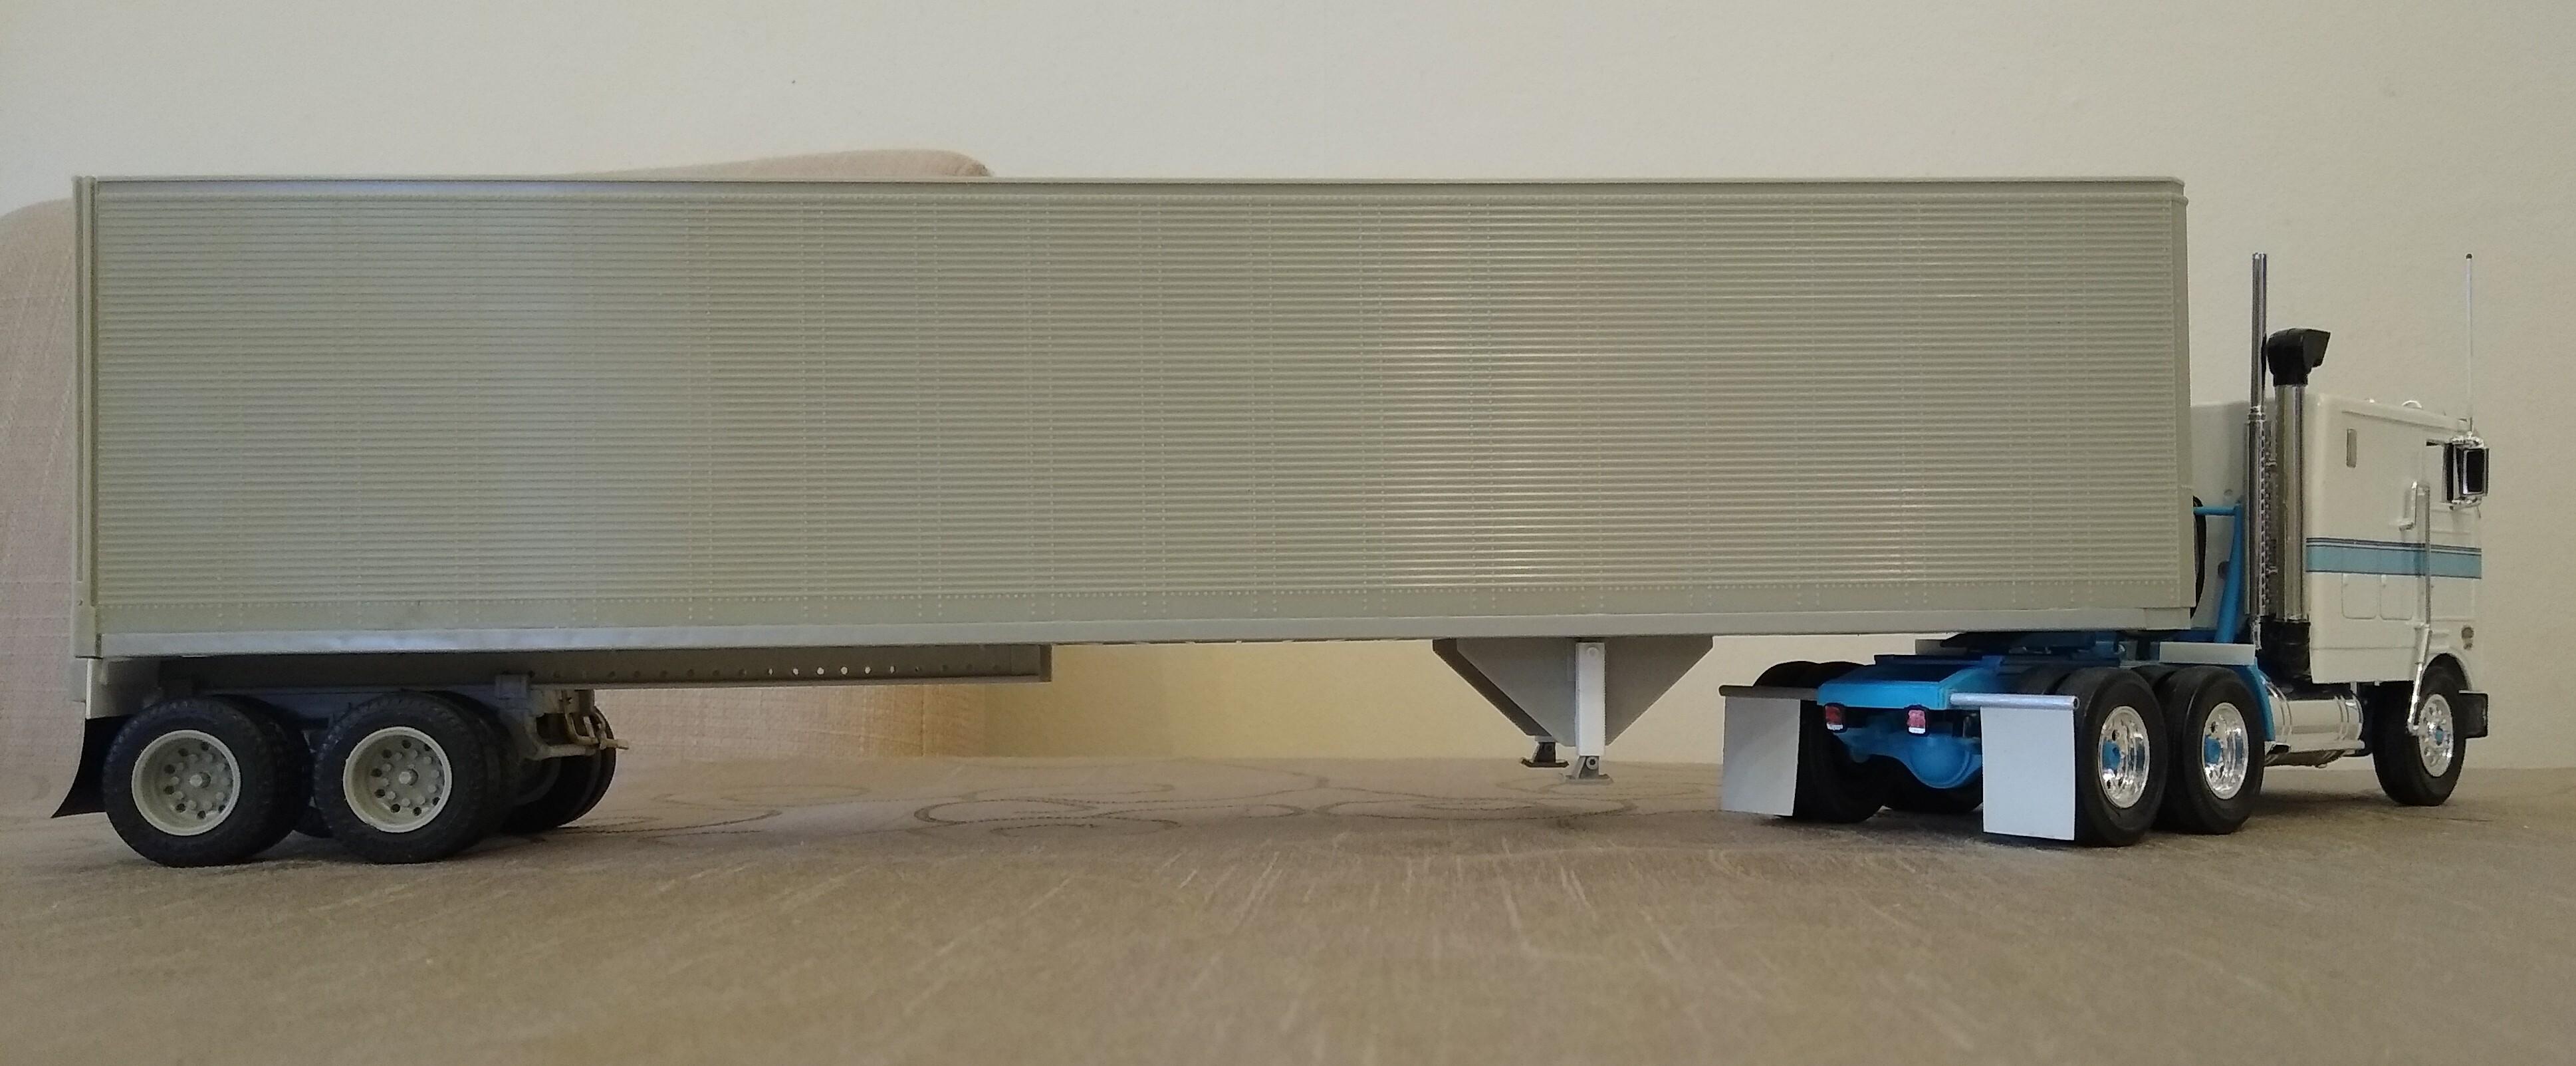
Got this kit to the paint stage today. Added air hoses for the sliding tandems and a load of marker lights. I can't resist colouring the marker lights, even before paint. I'm happy with this kit now, it's hard work but it looks great id you put the effort in. I'll now have to wait until spring to paint. I mustn't open anymore boxes until afterwards.
-
International 4300 tractor
Rockford replied to Gary Chastain's topic in WIP: Model Trucks: Big Rigs and Heavy Equipment
I'm sure you'll do a great job. This is a real sturdy looking kit. I made one many years ago and thought ERTL did such a good job on it, the contrast to the AMT stuff. Things actually fitted together like a..... Kit! -
Nice history Len, and you've got a lot to keep you busy in the near future. I've got about 500yrs of building to do to finish my stash.
-
Hi from Templeton California
Rockford replied to William Chun's topic in Welcome! Introduce Yourself
Welcome, really nice builds. Like the Steve Magnante style build. Hope he's going to be ok. -
Hello from the Pacific Northwest
Rockford replied to Joe McDonald's topic in Welcome! Introduce Yourself
I've got family in Vancouver, Canada, I know there's more than one! -
Some great cars there, and excellent weathering. Welcome aboard.
-
Hello from county durham
Rockford replied to southern_northerner's topic in Welcome! Introduce Yourself
Hiya Shaun from wet rainy Liverpool. Everyone's welcome here, even us Scousers! So far I've only nicked ideas. -
Alaskan Hauler(ish)
Rockford replied to Chris K's topic in WIP: Model Trucks: Big Rigs and Heavy Equipment
Looks good, boxes and tanks look really clean, should make a big difference to the finished job. -
Big Rig Mock up’s
Rockford replied to Pete68's topic in WIP: Model Trucks: Big Rigs and Heavy Equipment
That's a truck you could cuddle! -
Big Rig Mock up’s
Rockford replied to Pete68's topic in WIP: Model Trucks: Big Rigs and Heavy Equipment
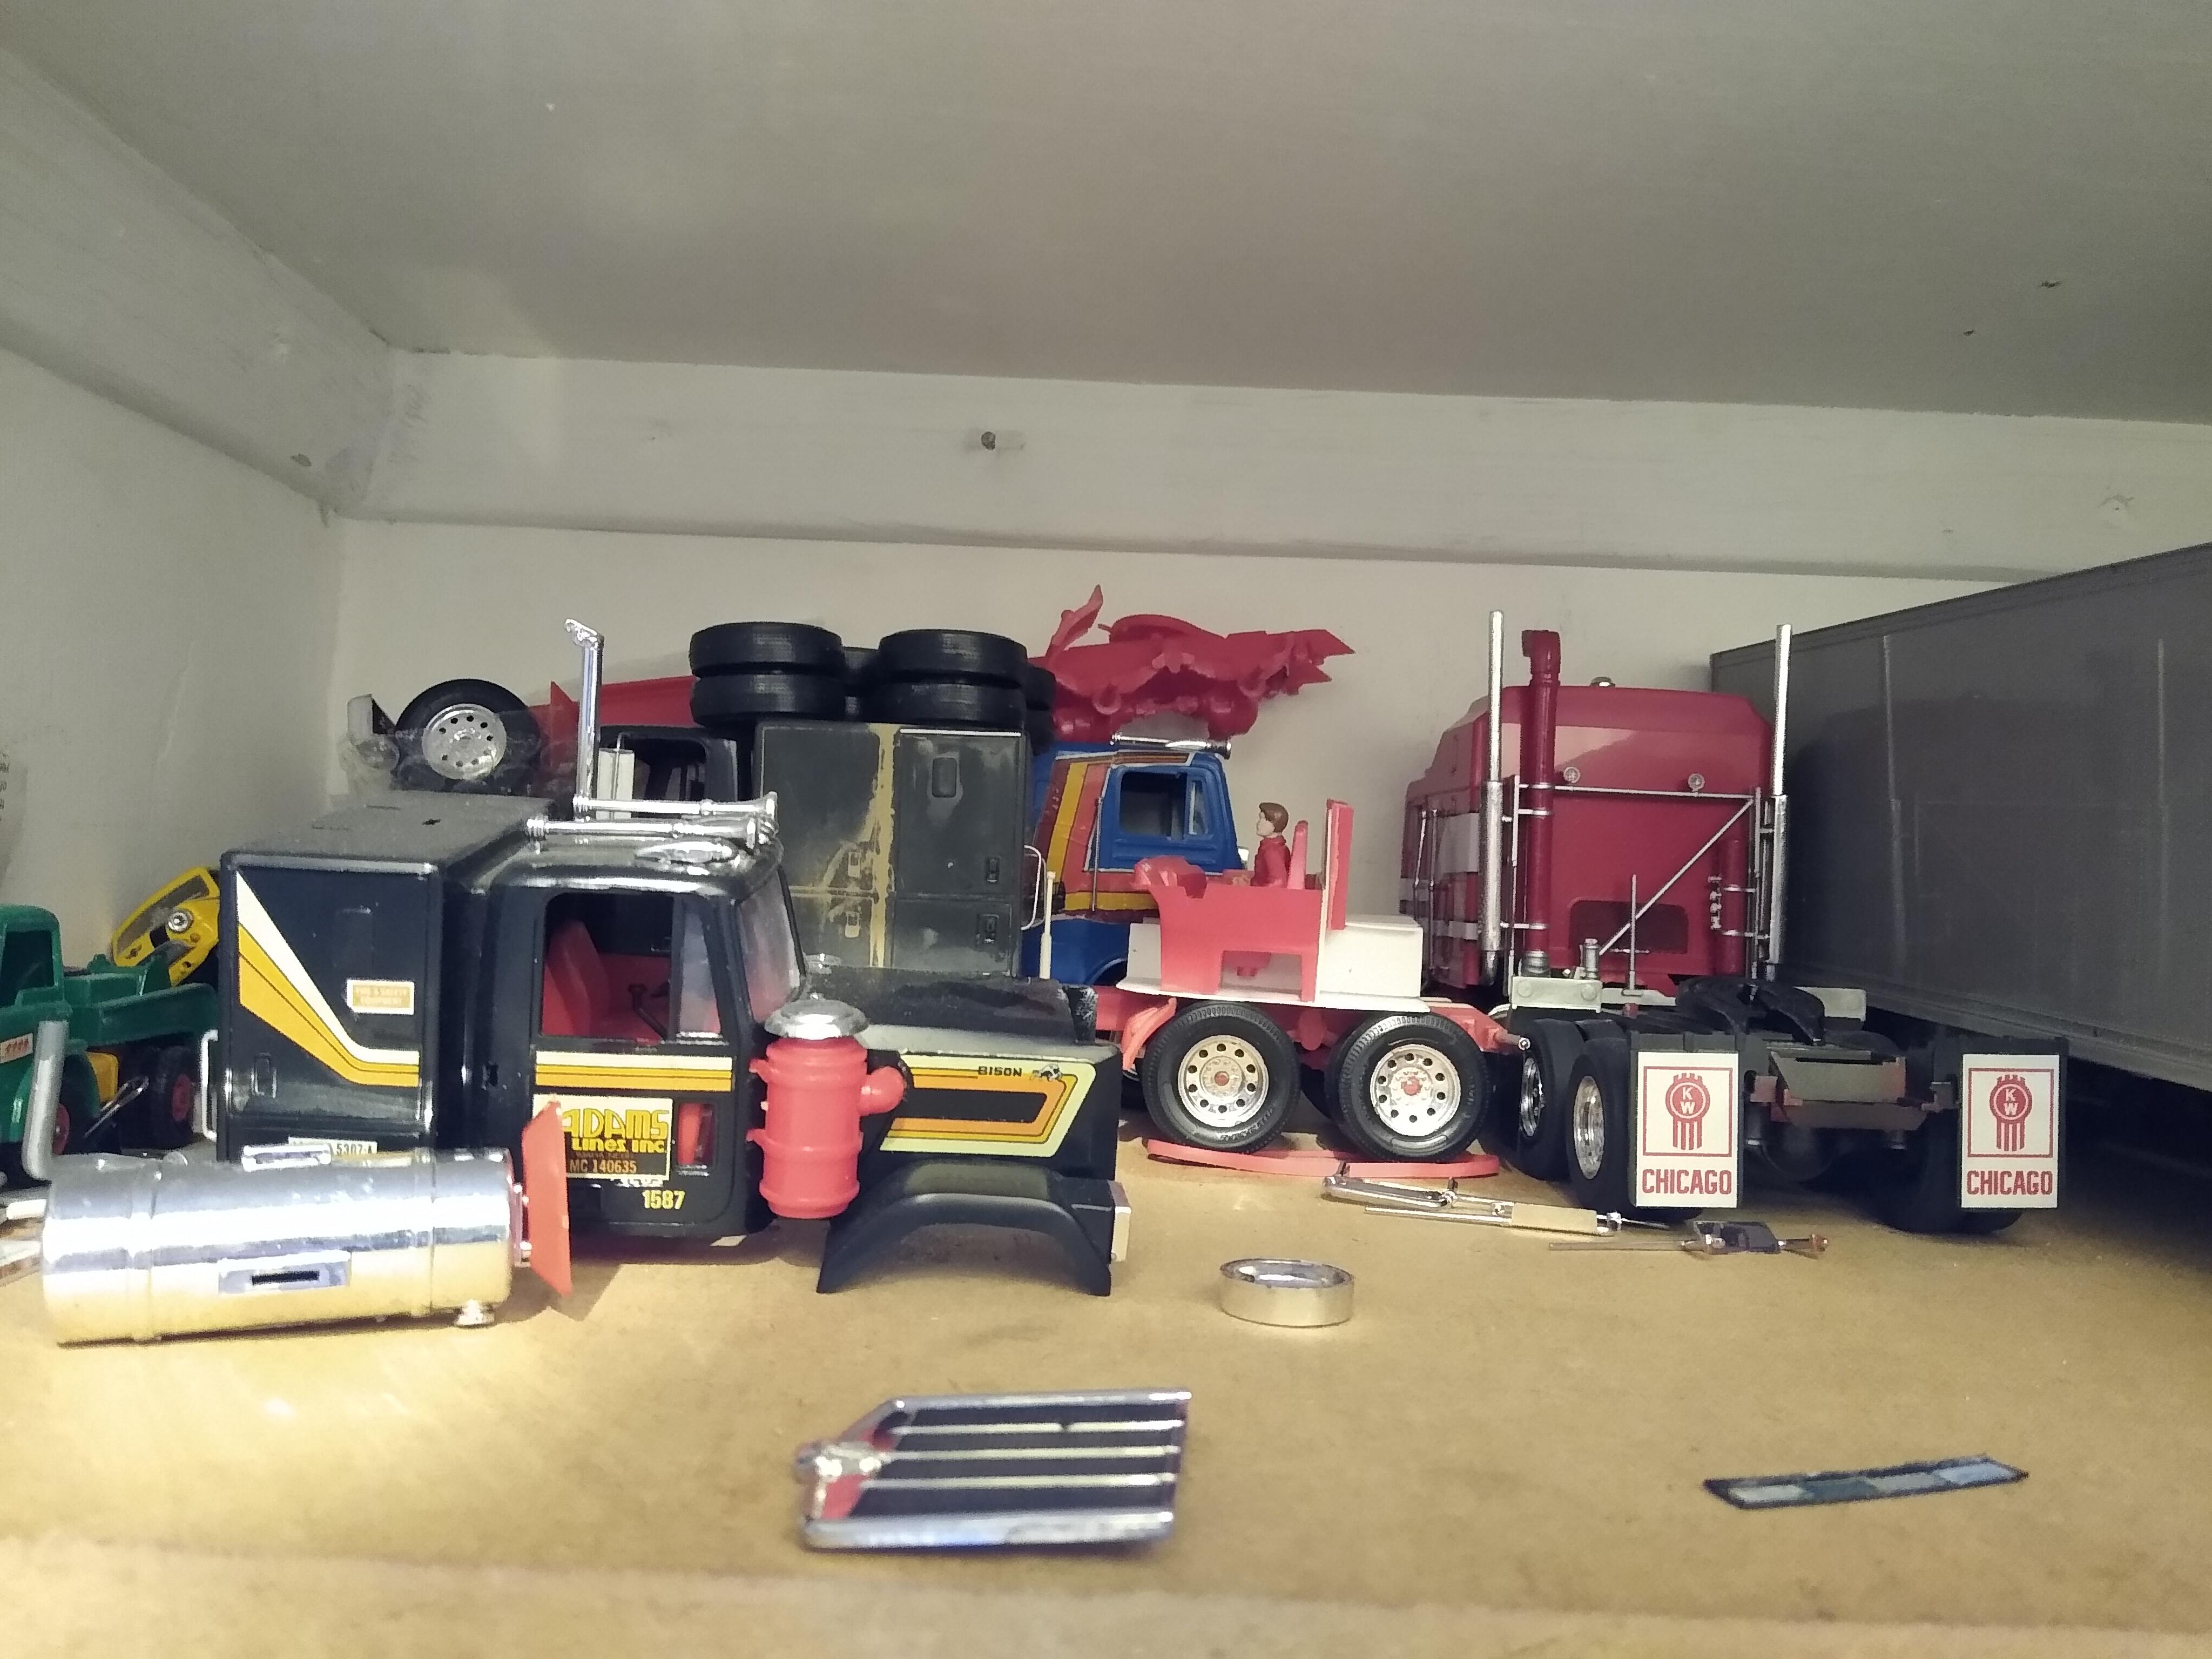
This isn't a mock-up, more of a mockery. Here's my 1/32 scrapyard with projects awaiting. There's three snappers bought as stock builds off eBay, a Chevy Bison, a K100 Aerodyne and a Freightliner cabover. Amongst the mess is my Bison double sleeper from a WIP on here. They will eventually get done.
-
I'm a trailerholic
Rockford replied to Rockford's topic in WIP: Model Trucks: Big Rigs and Heavy Equipment
Thanks mate, this kit is so frustrating but looks so good. If things in this hobby were still affordable I would get some better [bigger] wheels and tyres for it but I have to make do with what's given to me. -
I'm a trailerholic
Rockford replied to Rockford's topic in WIP: Model Trucks: Big Rigs and Heavy Equipment
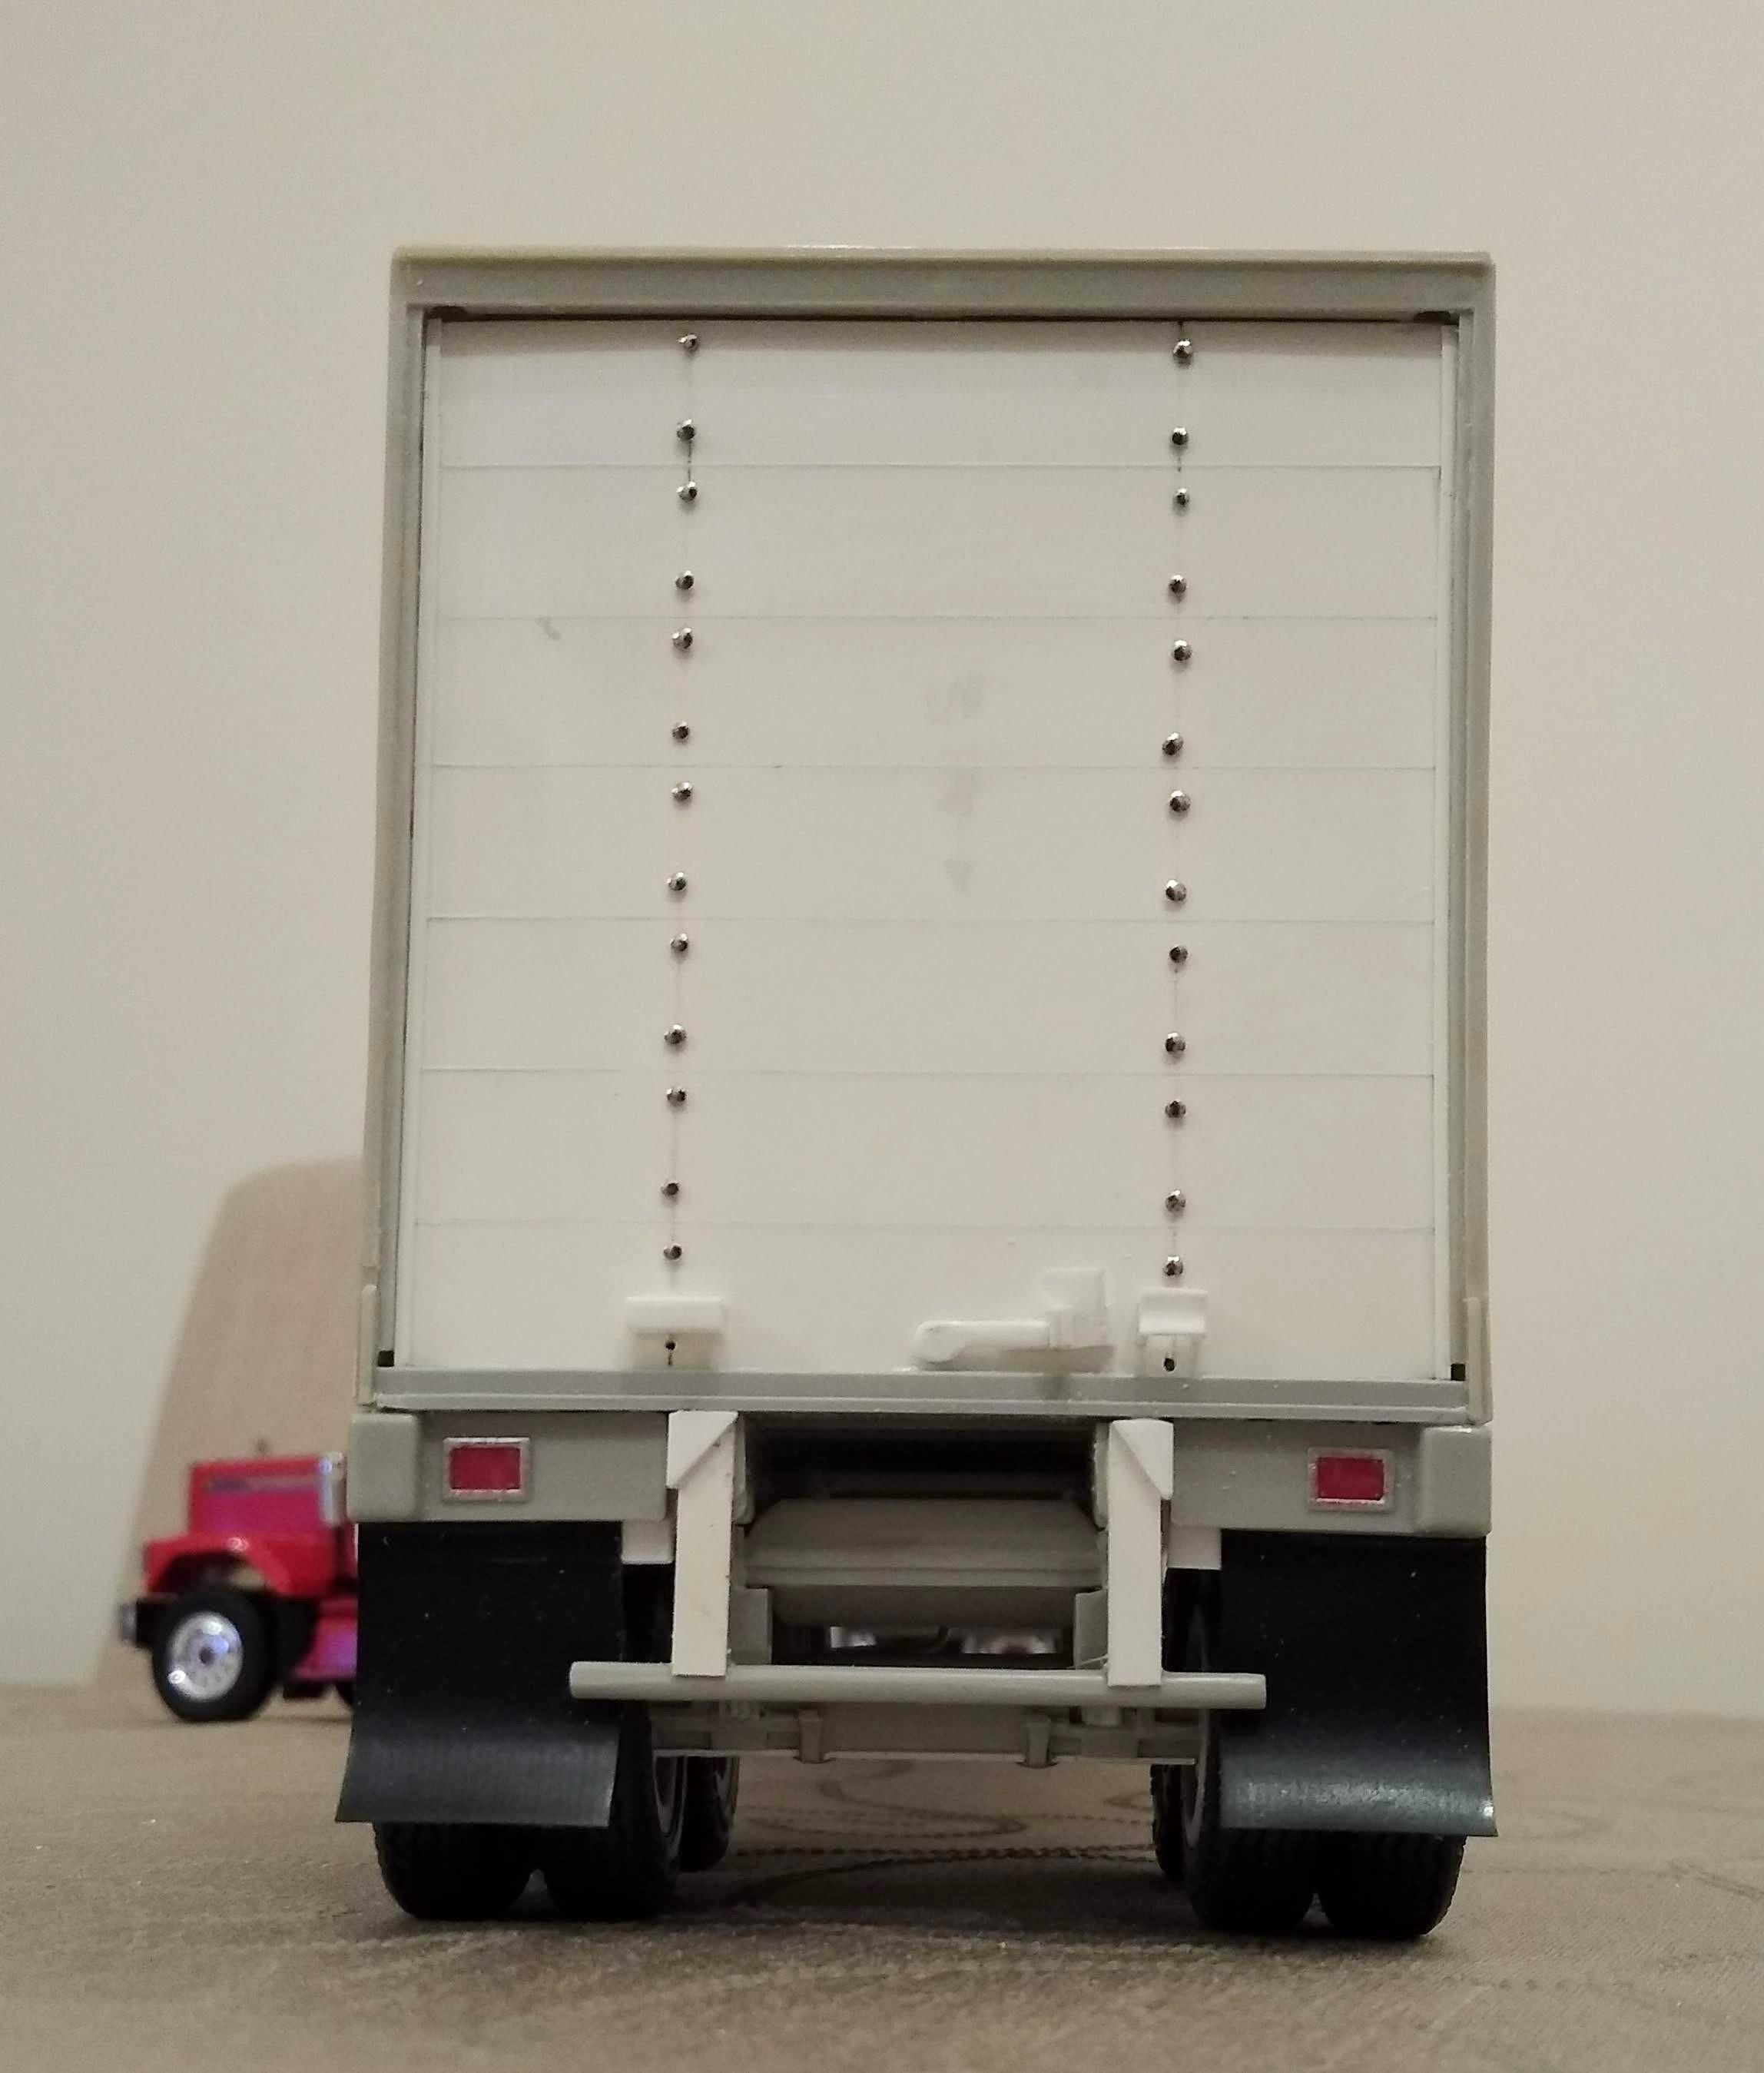
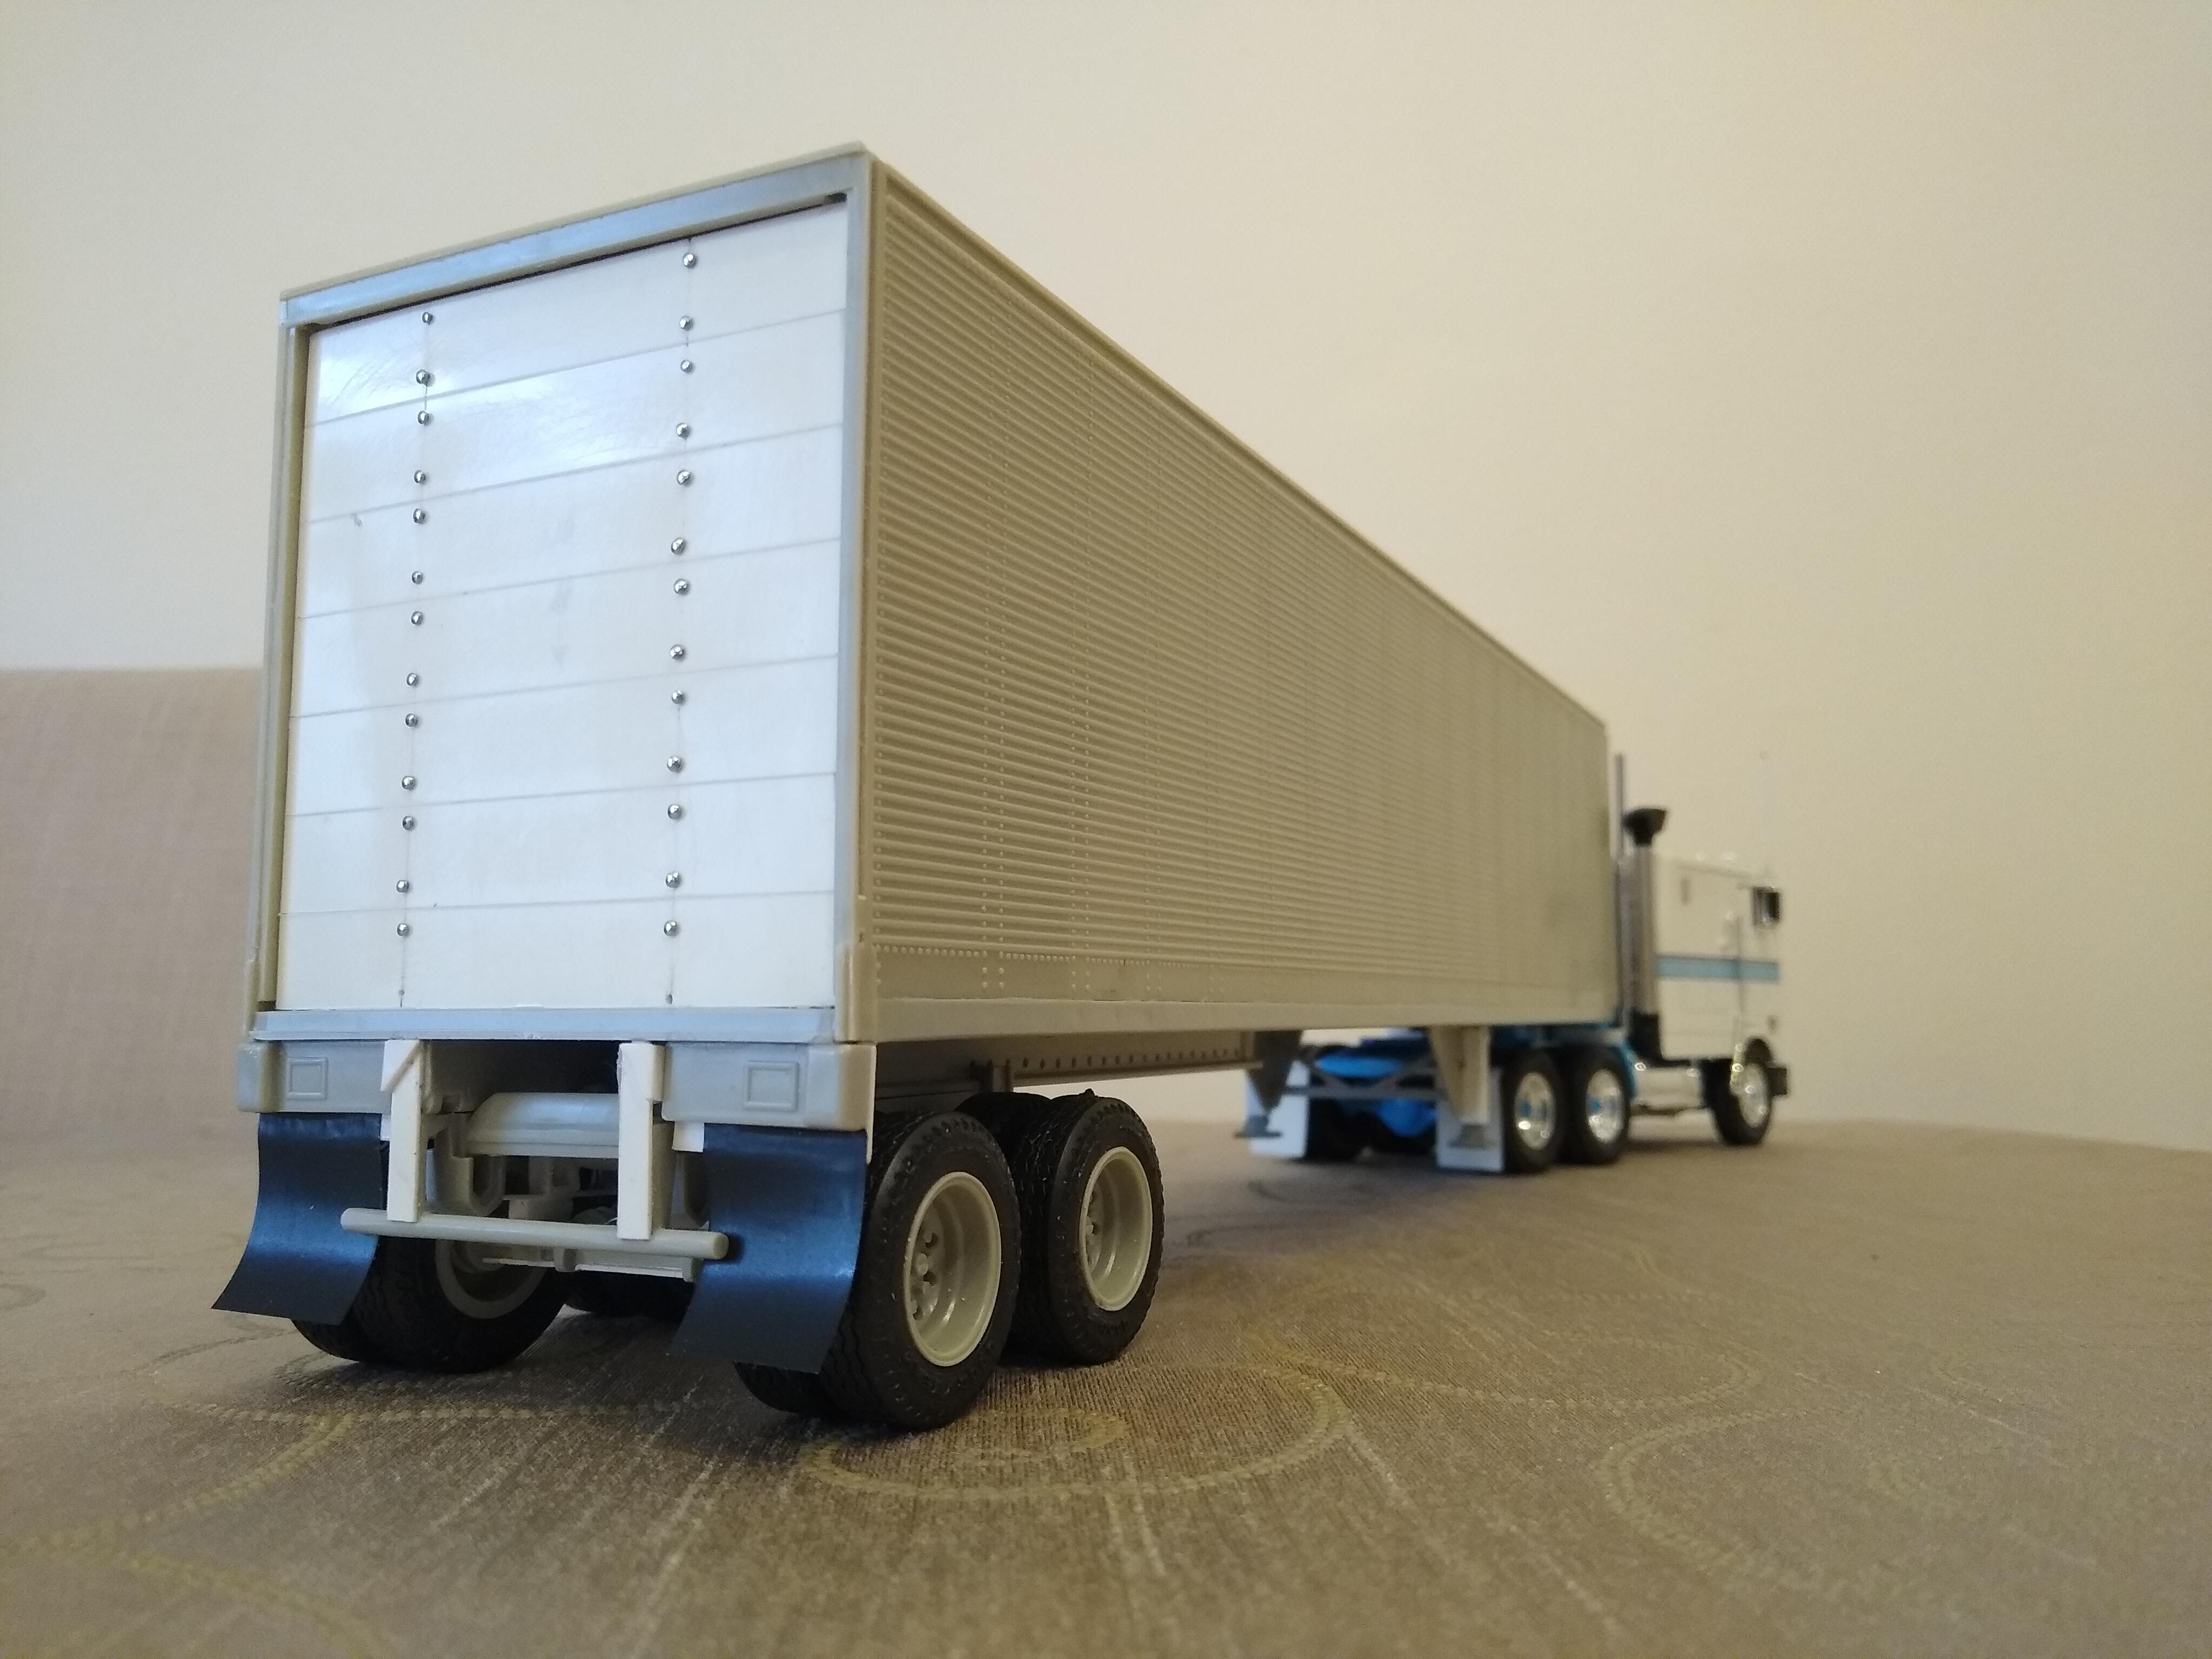
Thanks mate, pales into insignificance next to your stuff. 8 is indeed the problem number because if it falls over it becomes:- which is the mathematical symbol for infinity - and then I'll never get out of this mess!!!!!! I need to get back on with some of my older jobs, my Google photos is reminding of some from a year ago that are still patiently waiting on the shelf. The shelf looks like a scrapyard at the moment. Anyway I carved a lock handle and added channels either side. I also dressed the rear of the slide rails using 5mm right angle and some strip cut from sheet to look like the real thing. The kit pieces make a poor attempt at this. I couldn't resist colouring in the rear lights
-
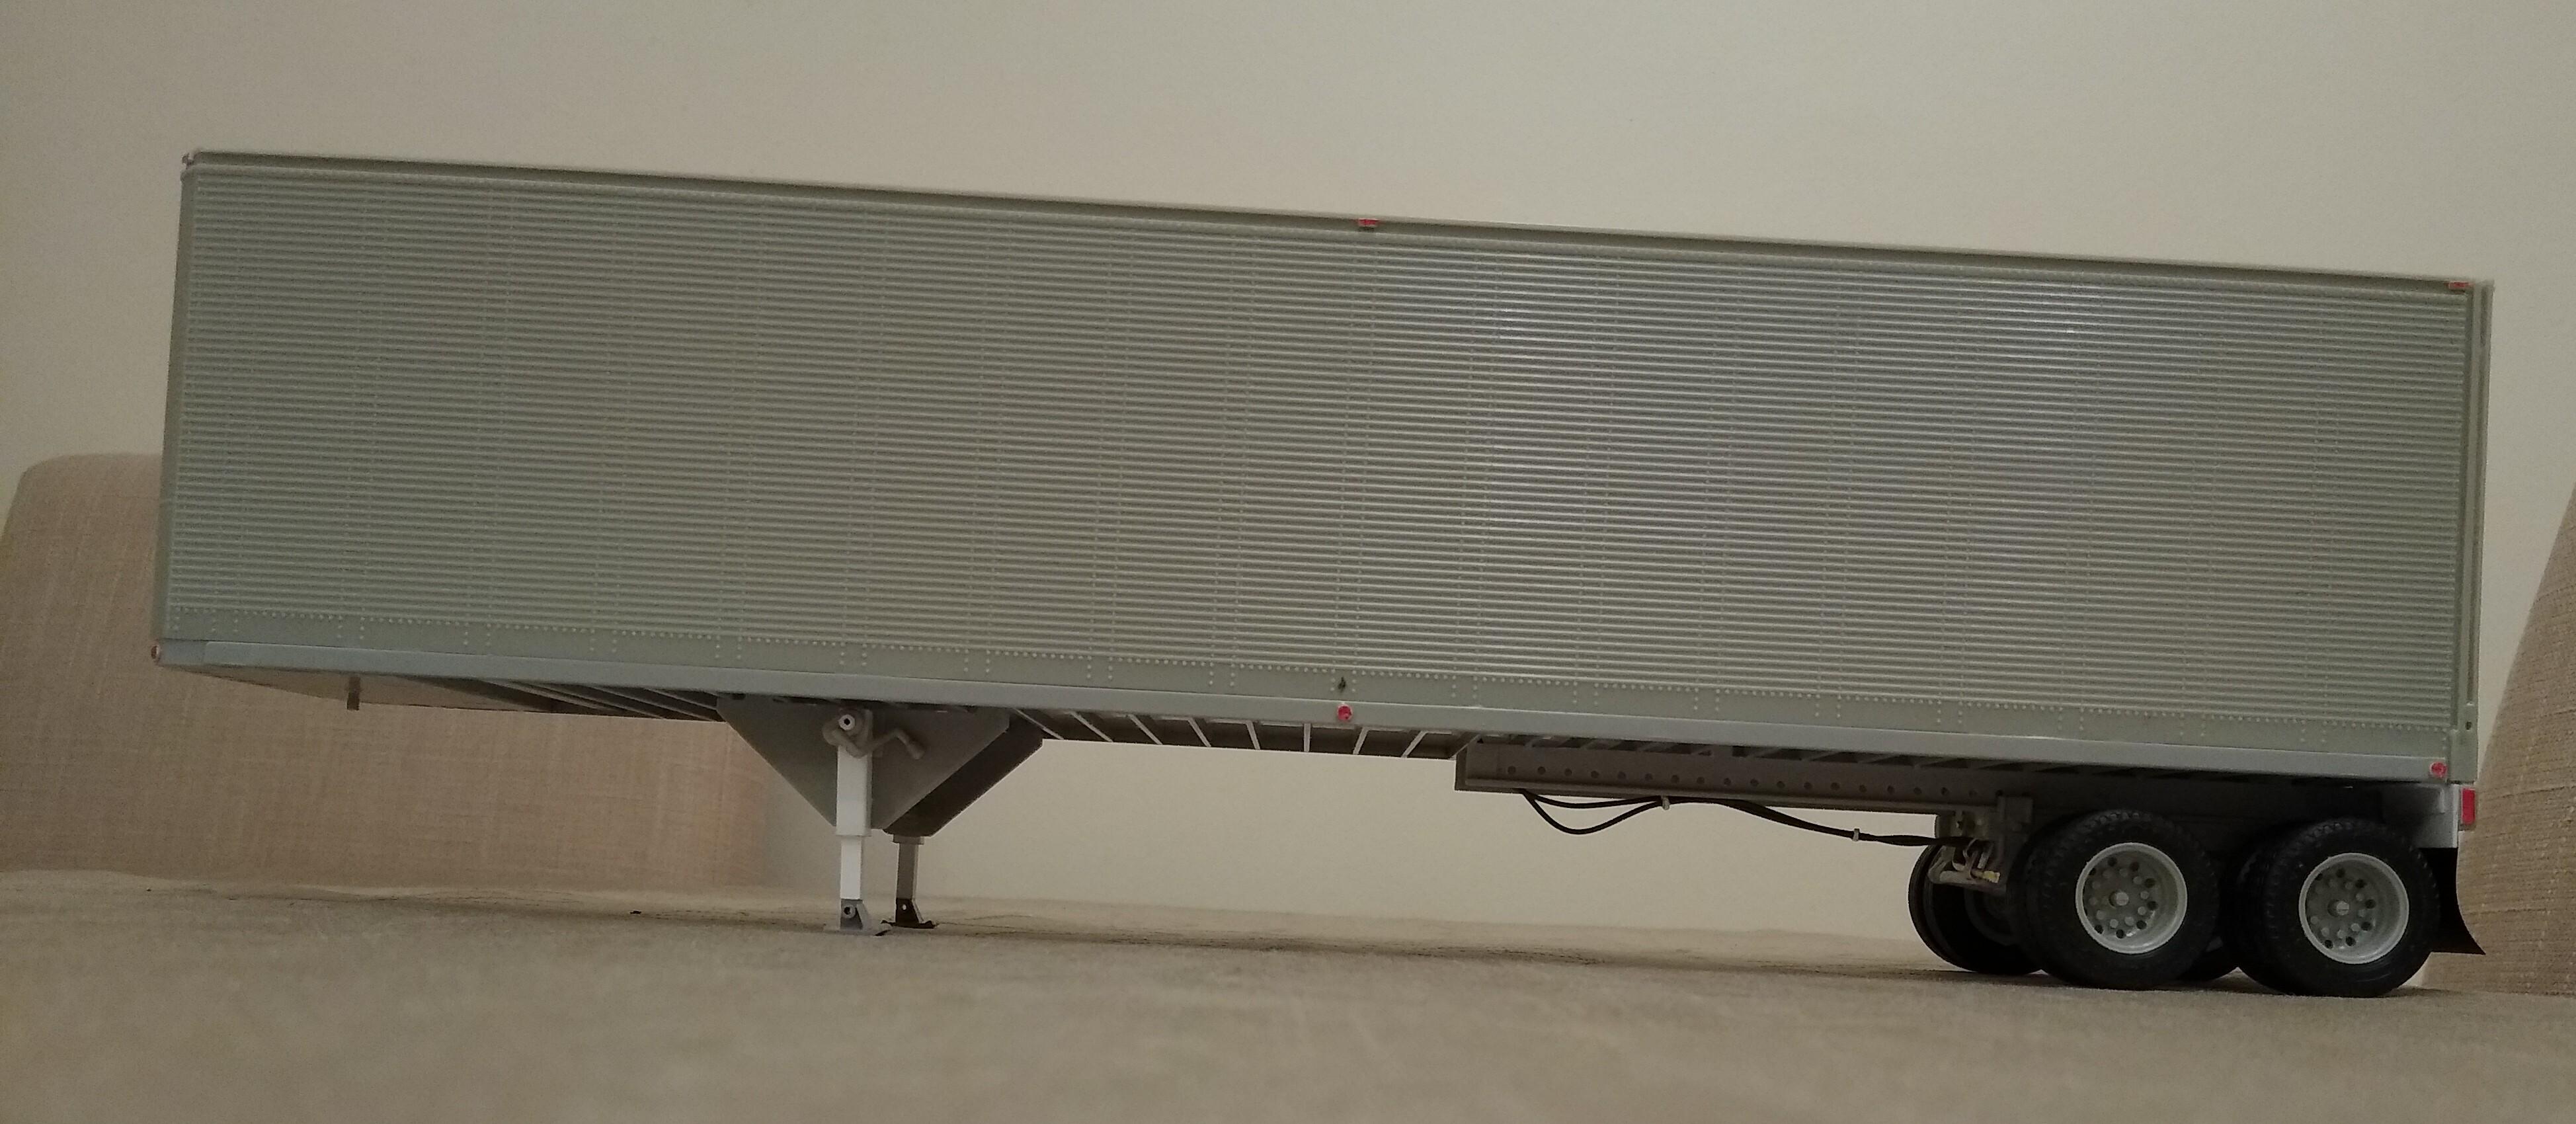
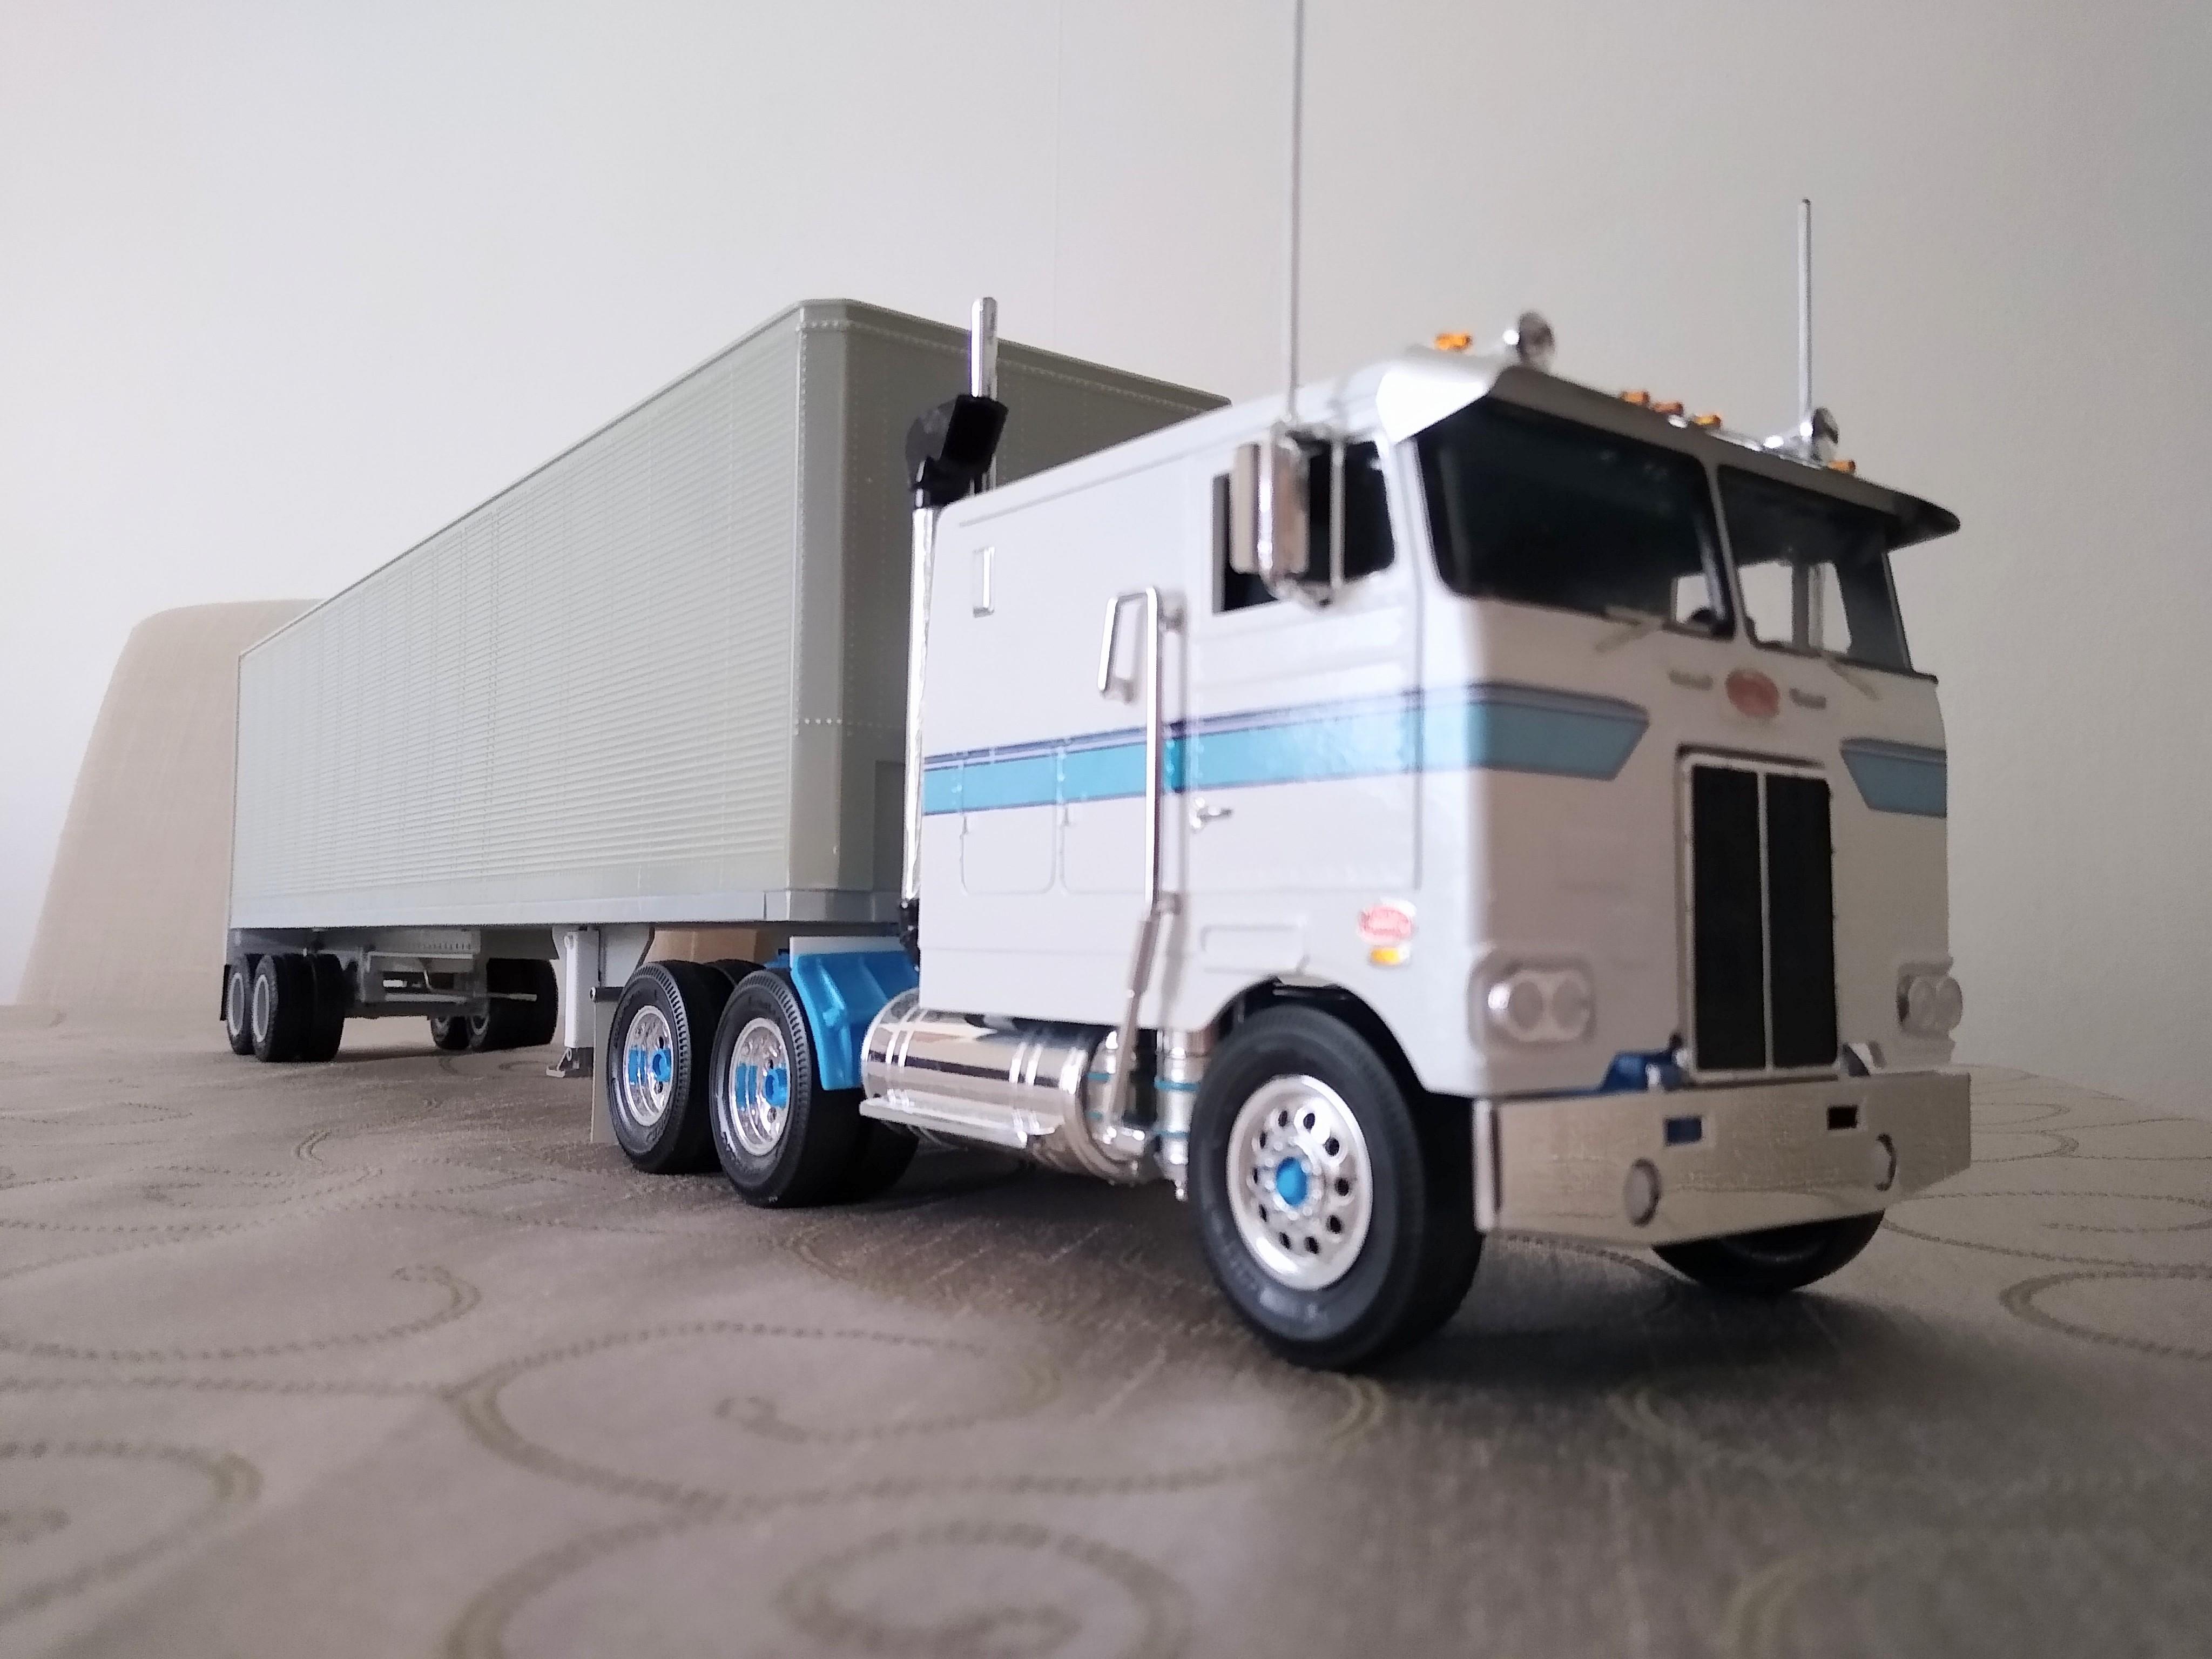
I can't explain why I did this but I opened the box and couldn't stop myself. It's another AMT Trailmobile Snap kit. I've already got about 8 projects on the go, I used to be one at a time! The rear suspension has fought me every step of the way on this. Rather than just move the axles closer to correct the appearance I decided to shorten the subframe too, what a nightmare. Nothing is straight on the rear tandems, from the slide rails to the axles, there's, half a mil difference on the axles alone. Had to fab a roller shutter door because I need the doors for one of the reefer versions I've got, one has a short shot on the door. I just scored a piece of sheet to form the slats and added straight pins for coachbolts. At least it's sitting square now. I've got to stop opening boxes though.
-
For some reason this posted twice. Please see "I'm a trailerholic"
-
- 1
-

-
Ryder IH Loadstar Box Truck
Rockford replied to DRIPTROIT 71's topic in WIP: Model Trucks: Big Rigs and Heavy Equipment
Another abused unsung hero of the road. Long gone but not forgotten. Great job mate. -
AMT "Miller" GMC Astro 95
Rockford replied to Goodwrench3's topic in WIP: Model Trucks: Big Rigs and Heavy Equipment
Yes, it's mainly the front pinion angling down that hurts the trained eye, like looking at a left hand thread, just not comfortable with it. -
AMT "Miller" GMC Astro 95
Rockford replied to Goodwrench3's topic in WIP: Model Trucks: Big Rigs and Heavy Equipment
You're right about the torque arms, you can see the rear axles are splayed outwards at the top so that the pinion angle is pointing downwards. Not right.