Rockford
-
Posts
1,944 -
Joined
-
Last visited
Content Type
Profiles
Forums
Events
Gallery
Everything posted by Rockford
-

3 Class 8 lowboys
Rockford replied to Amtronic's topic in Model Trucks: Big Rigs and Heavy Equipment
Excellent stuff! -
Payhauler based coal truck/trailer
Rockford replied to Amtronic's topic in Model Trucks: Big Rigs and Heavy Equipment
Nice work. Where on earth can you display it? It must be massive! -
Good work being done here. This thing makes my snappers look easy!
-
T800 Kenworth Wrecker.
Rockford replied to Gary Chastain's topic in WIP: Model Trucks: Big Rigs and Heavy Equipment
That looks like a beautiful moulding. You're suffering the modeller's curse of too many projects at once. I've always tried to limit myself to one at a time, that's why I've got about six on the go at present. I can only try. -
De-Aerodyned K100
Rockford replied to Rockford's topic in WIP: Model Trucks: Big Rigs and Heavy Equipment
I used the gull-wing front bumper from this kit on the W900 I'm doing so I needed a bumper for this kit. A piece of "I" beam filled the bill with one side flattened off. I used the gull-wing to mark out the tow bracket holes and drilled at each corner to open them out. Then I drilled the auxiliary lamp holes starting at 1mm and using every step size up to 4.5mm. it meant drilling about 20 holes but it stops the piece being distorted. I'm really pleased with the result.
-
De-Aerodyned K100
Rockford replied to Rockford's topic in WIP: Model Trucks: Big Rigs and Heavy Equipment
Had another chance to work on the K100 today. Trimmed the rear of the chassis, added mudflaps. Remounted my fuel tank brackets and mocked it all up. Even got my cab to tilt, though that causes more problems than it's worth, engine etc... I'll use the Monogram battery box and air filter housing, they're a much better job than the AMT.
-
De-Aerodyned K100
Rockford replied to Rockford's topic in WIP: Model Trucks: Big Rigs and Heavy Equipment
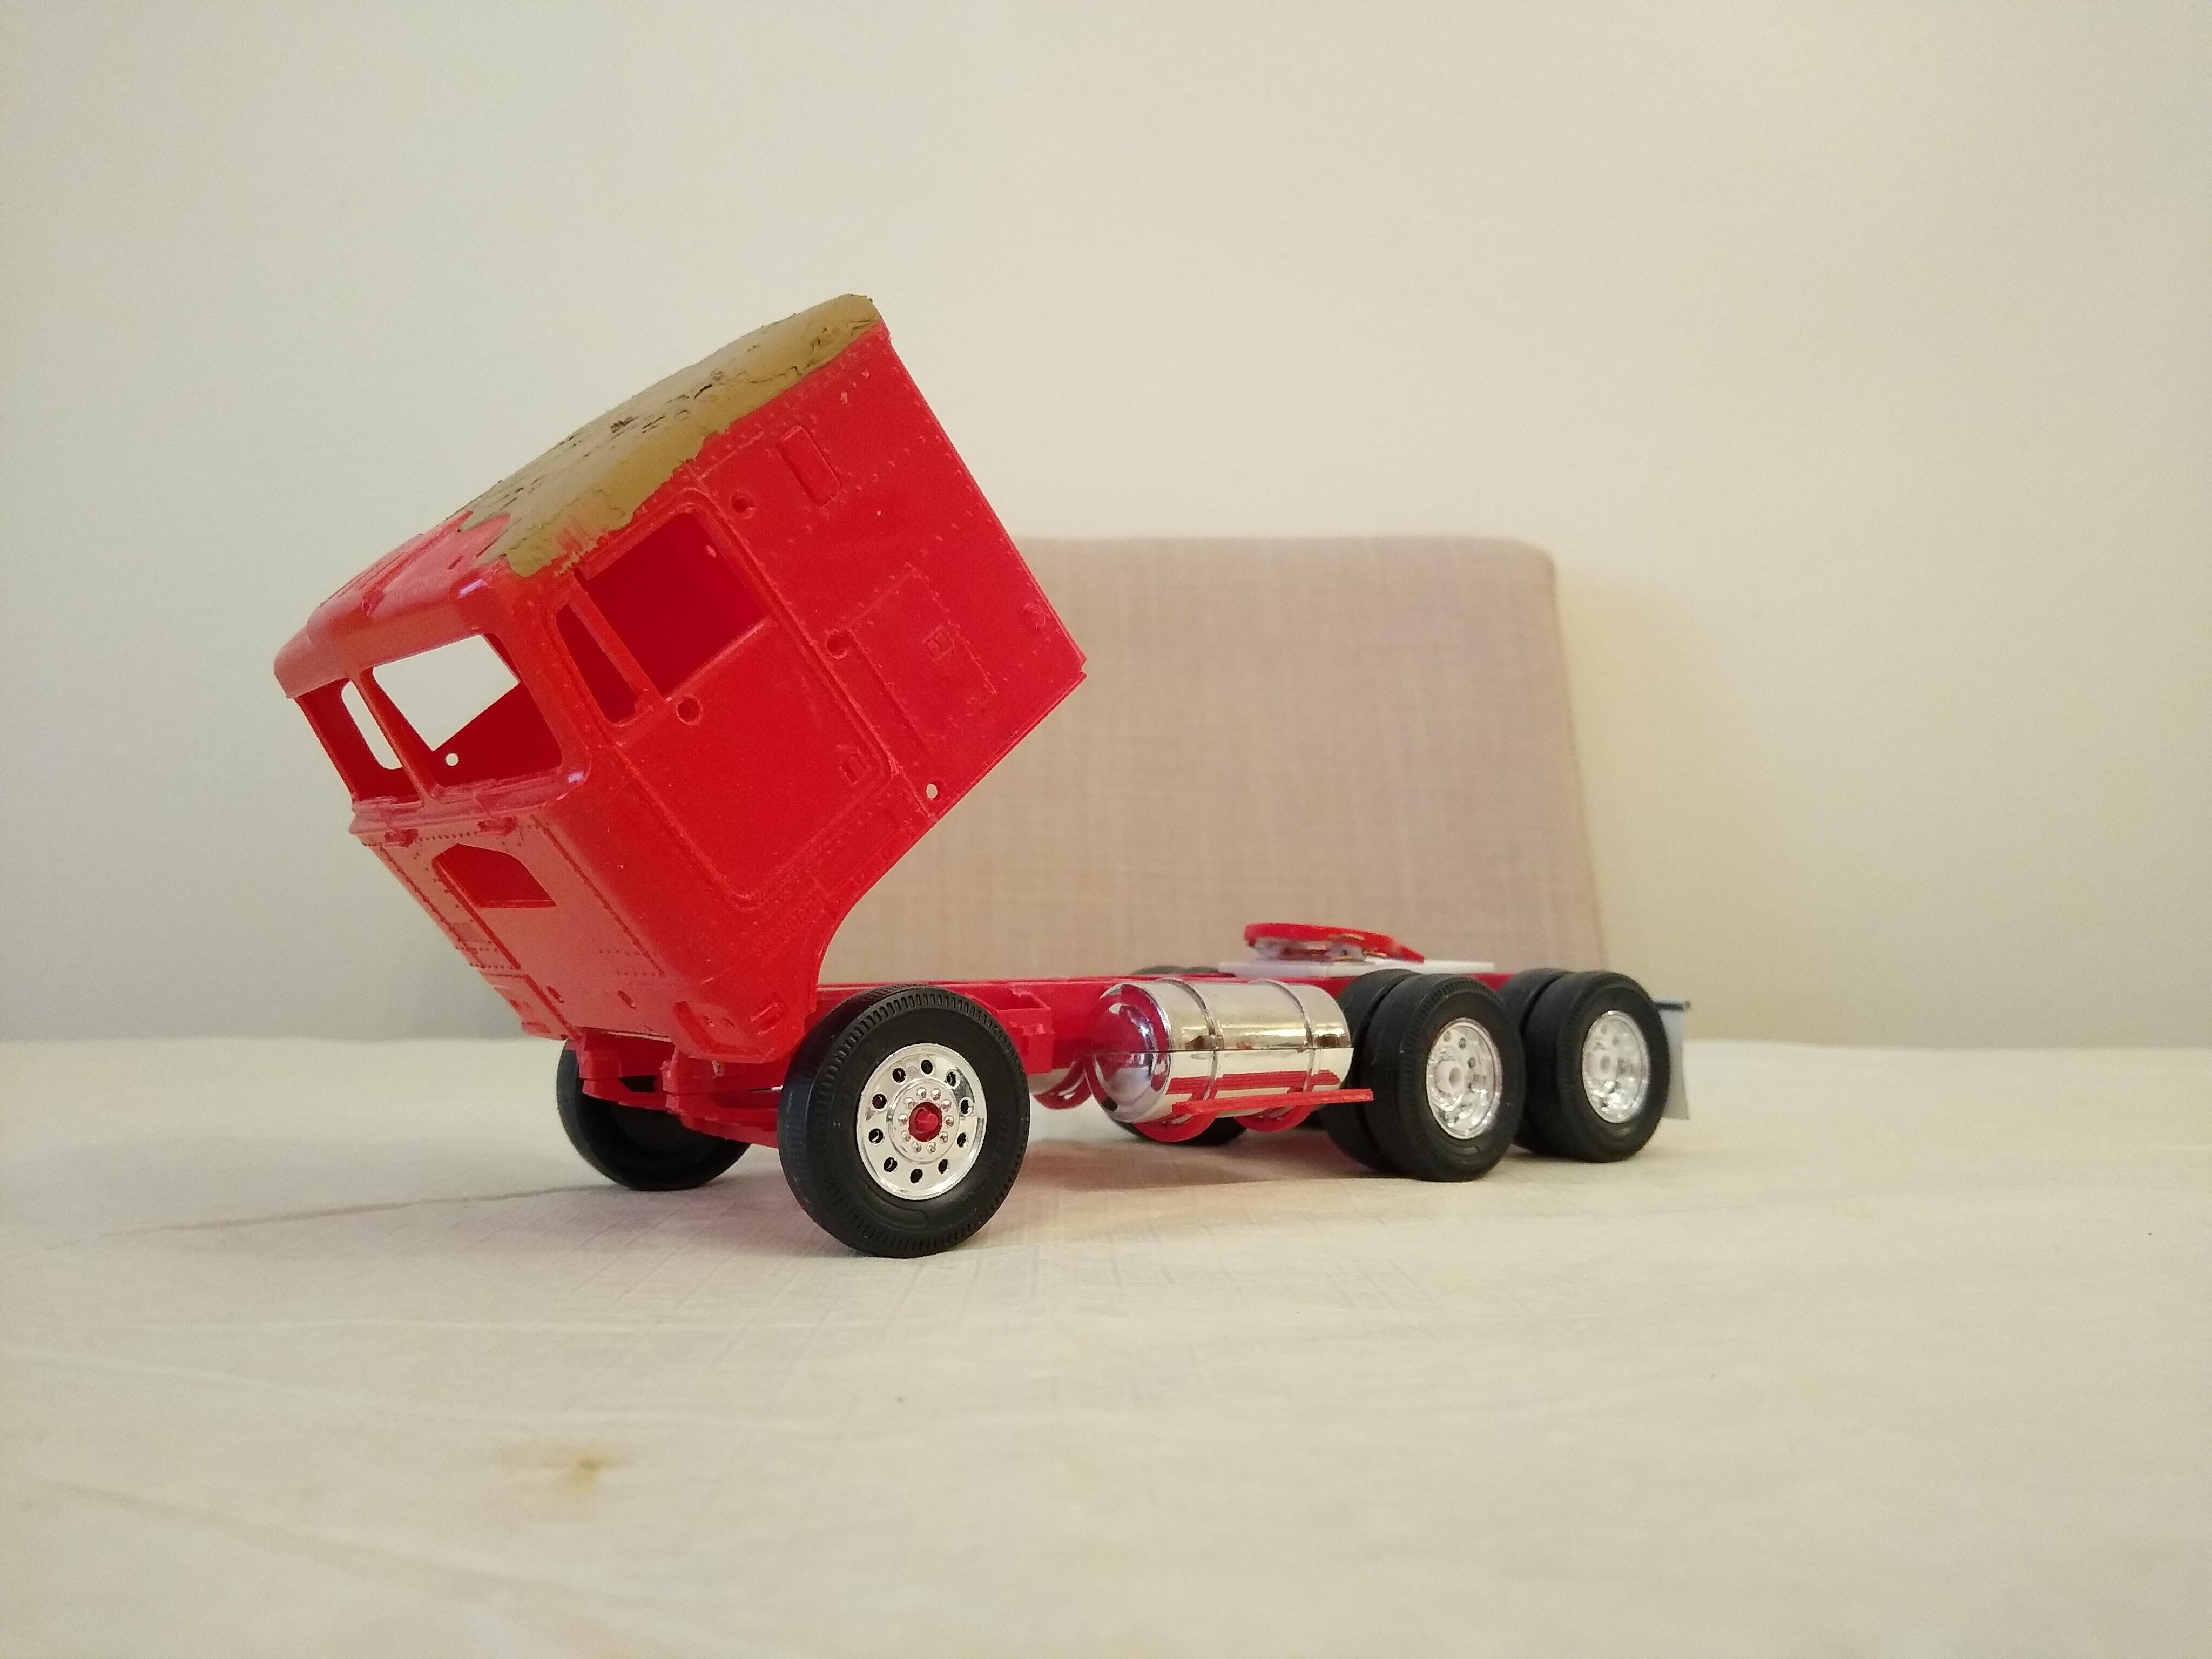
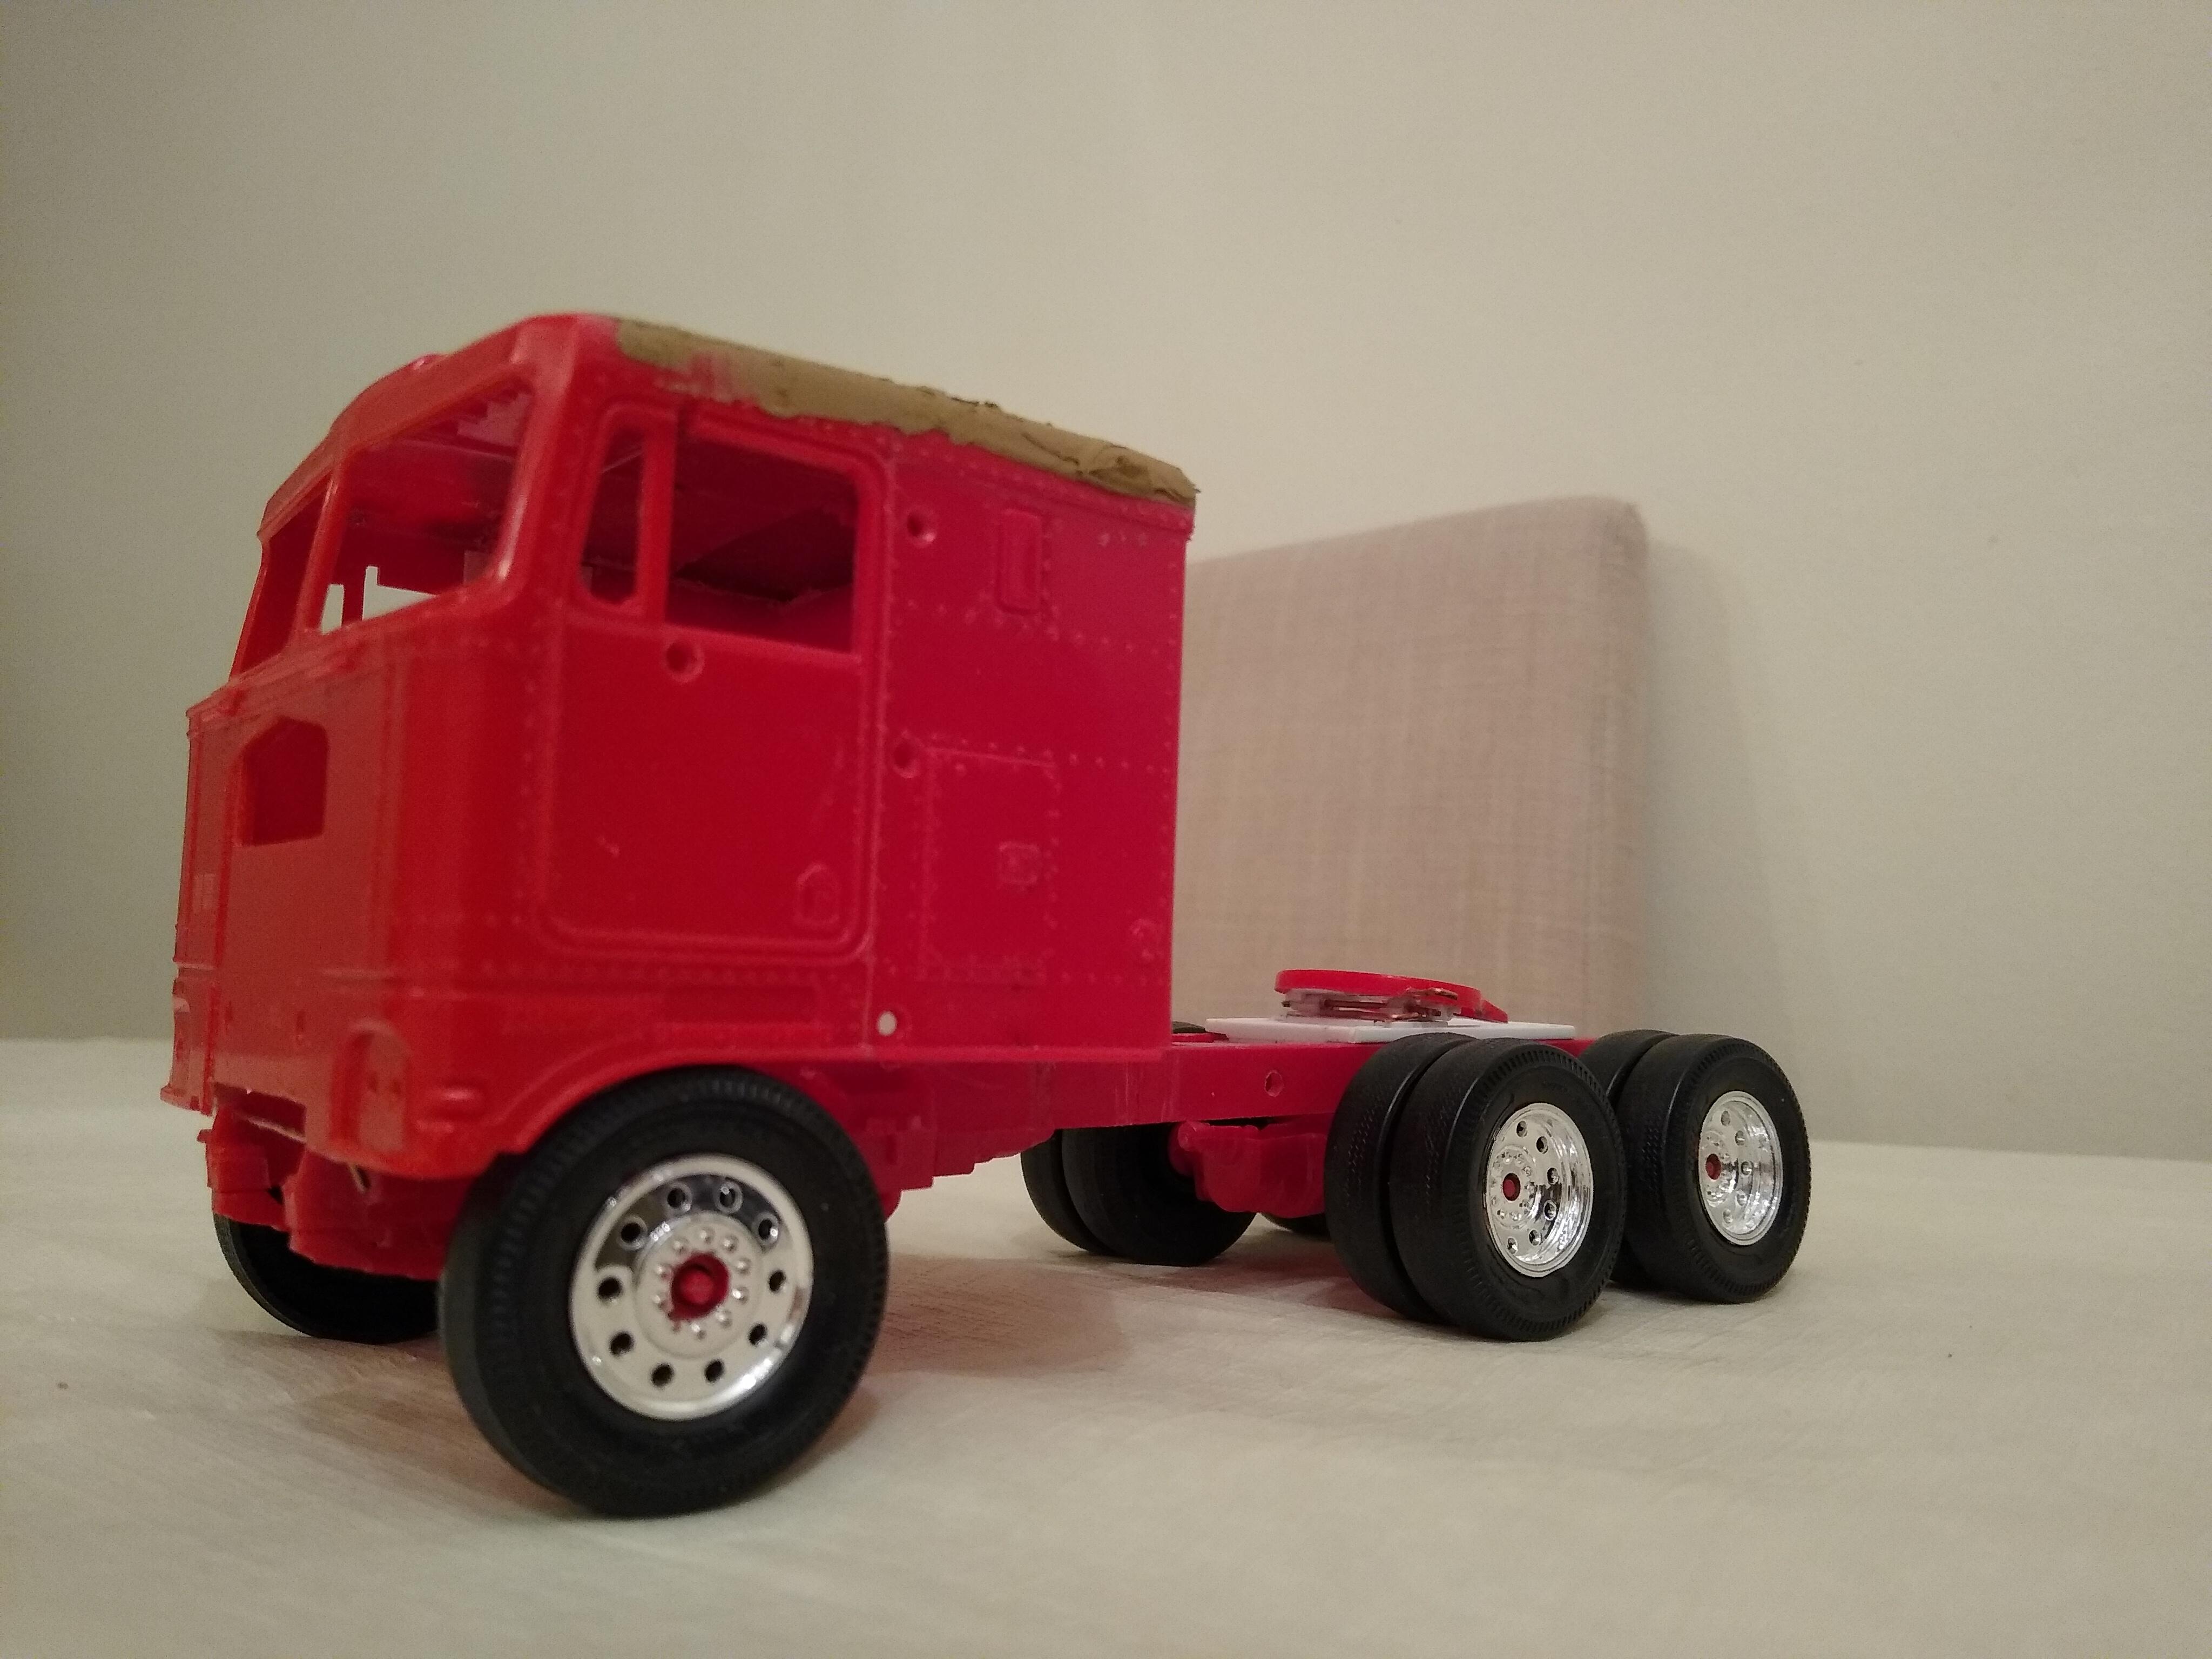
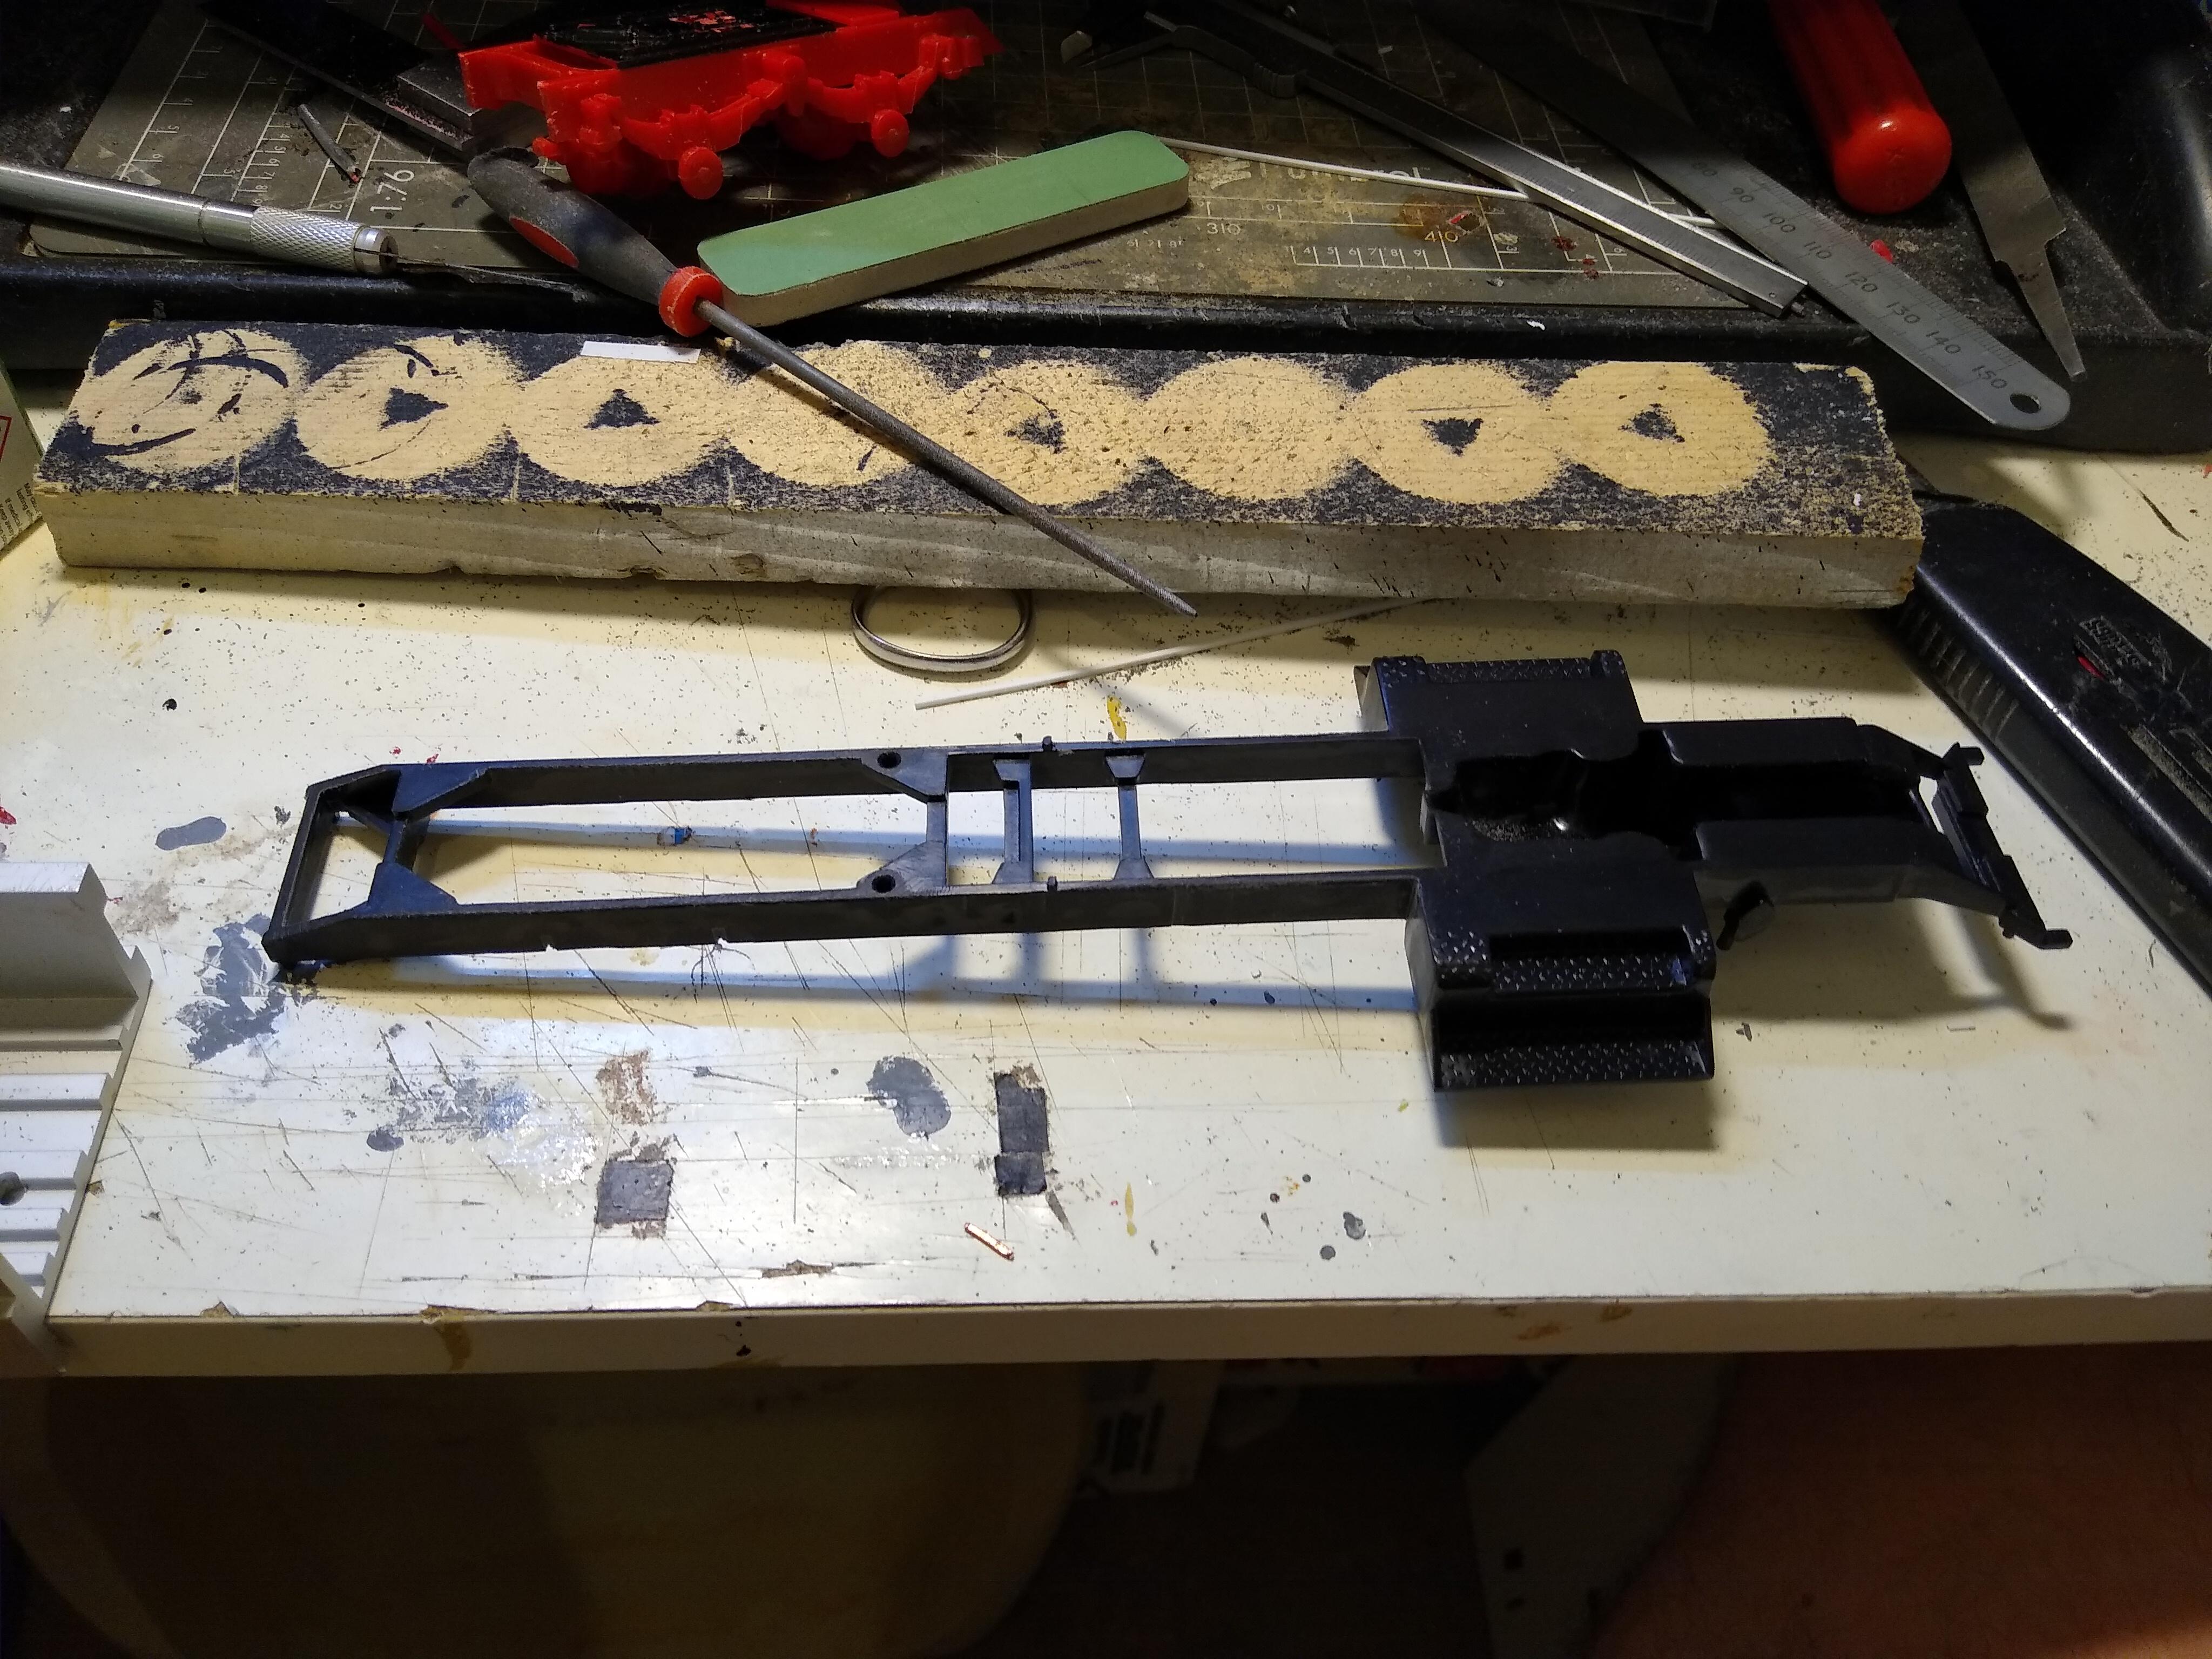
Ended up using bits of both the T600 and the Aerodyne cap to make up a roof cap for the cab. I wanted to keep it all red otherwise I'd have used card stock. Then slathered some filler over it and will leave it to set fully for a week. Shortened the chassis by 23mm, would have made it more but I want to use the KW tanks that come with the kit. Fabbed some cab hinges and quickly drilled the chassis and used some wire for a hinge so I may possibly be able to have a tilting cab.
-
De-Aerodyned K100
Rockford replied to Rockford's topic in WIP: Model Trucks: Big Rigs and Heavy Equipment
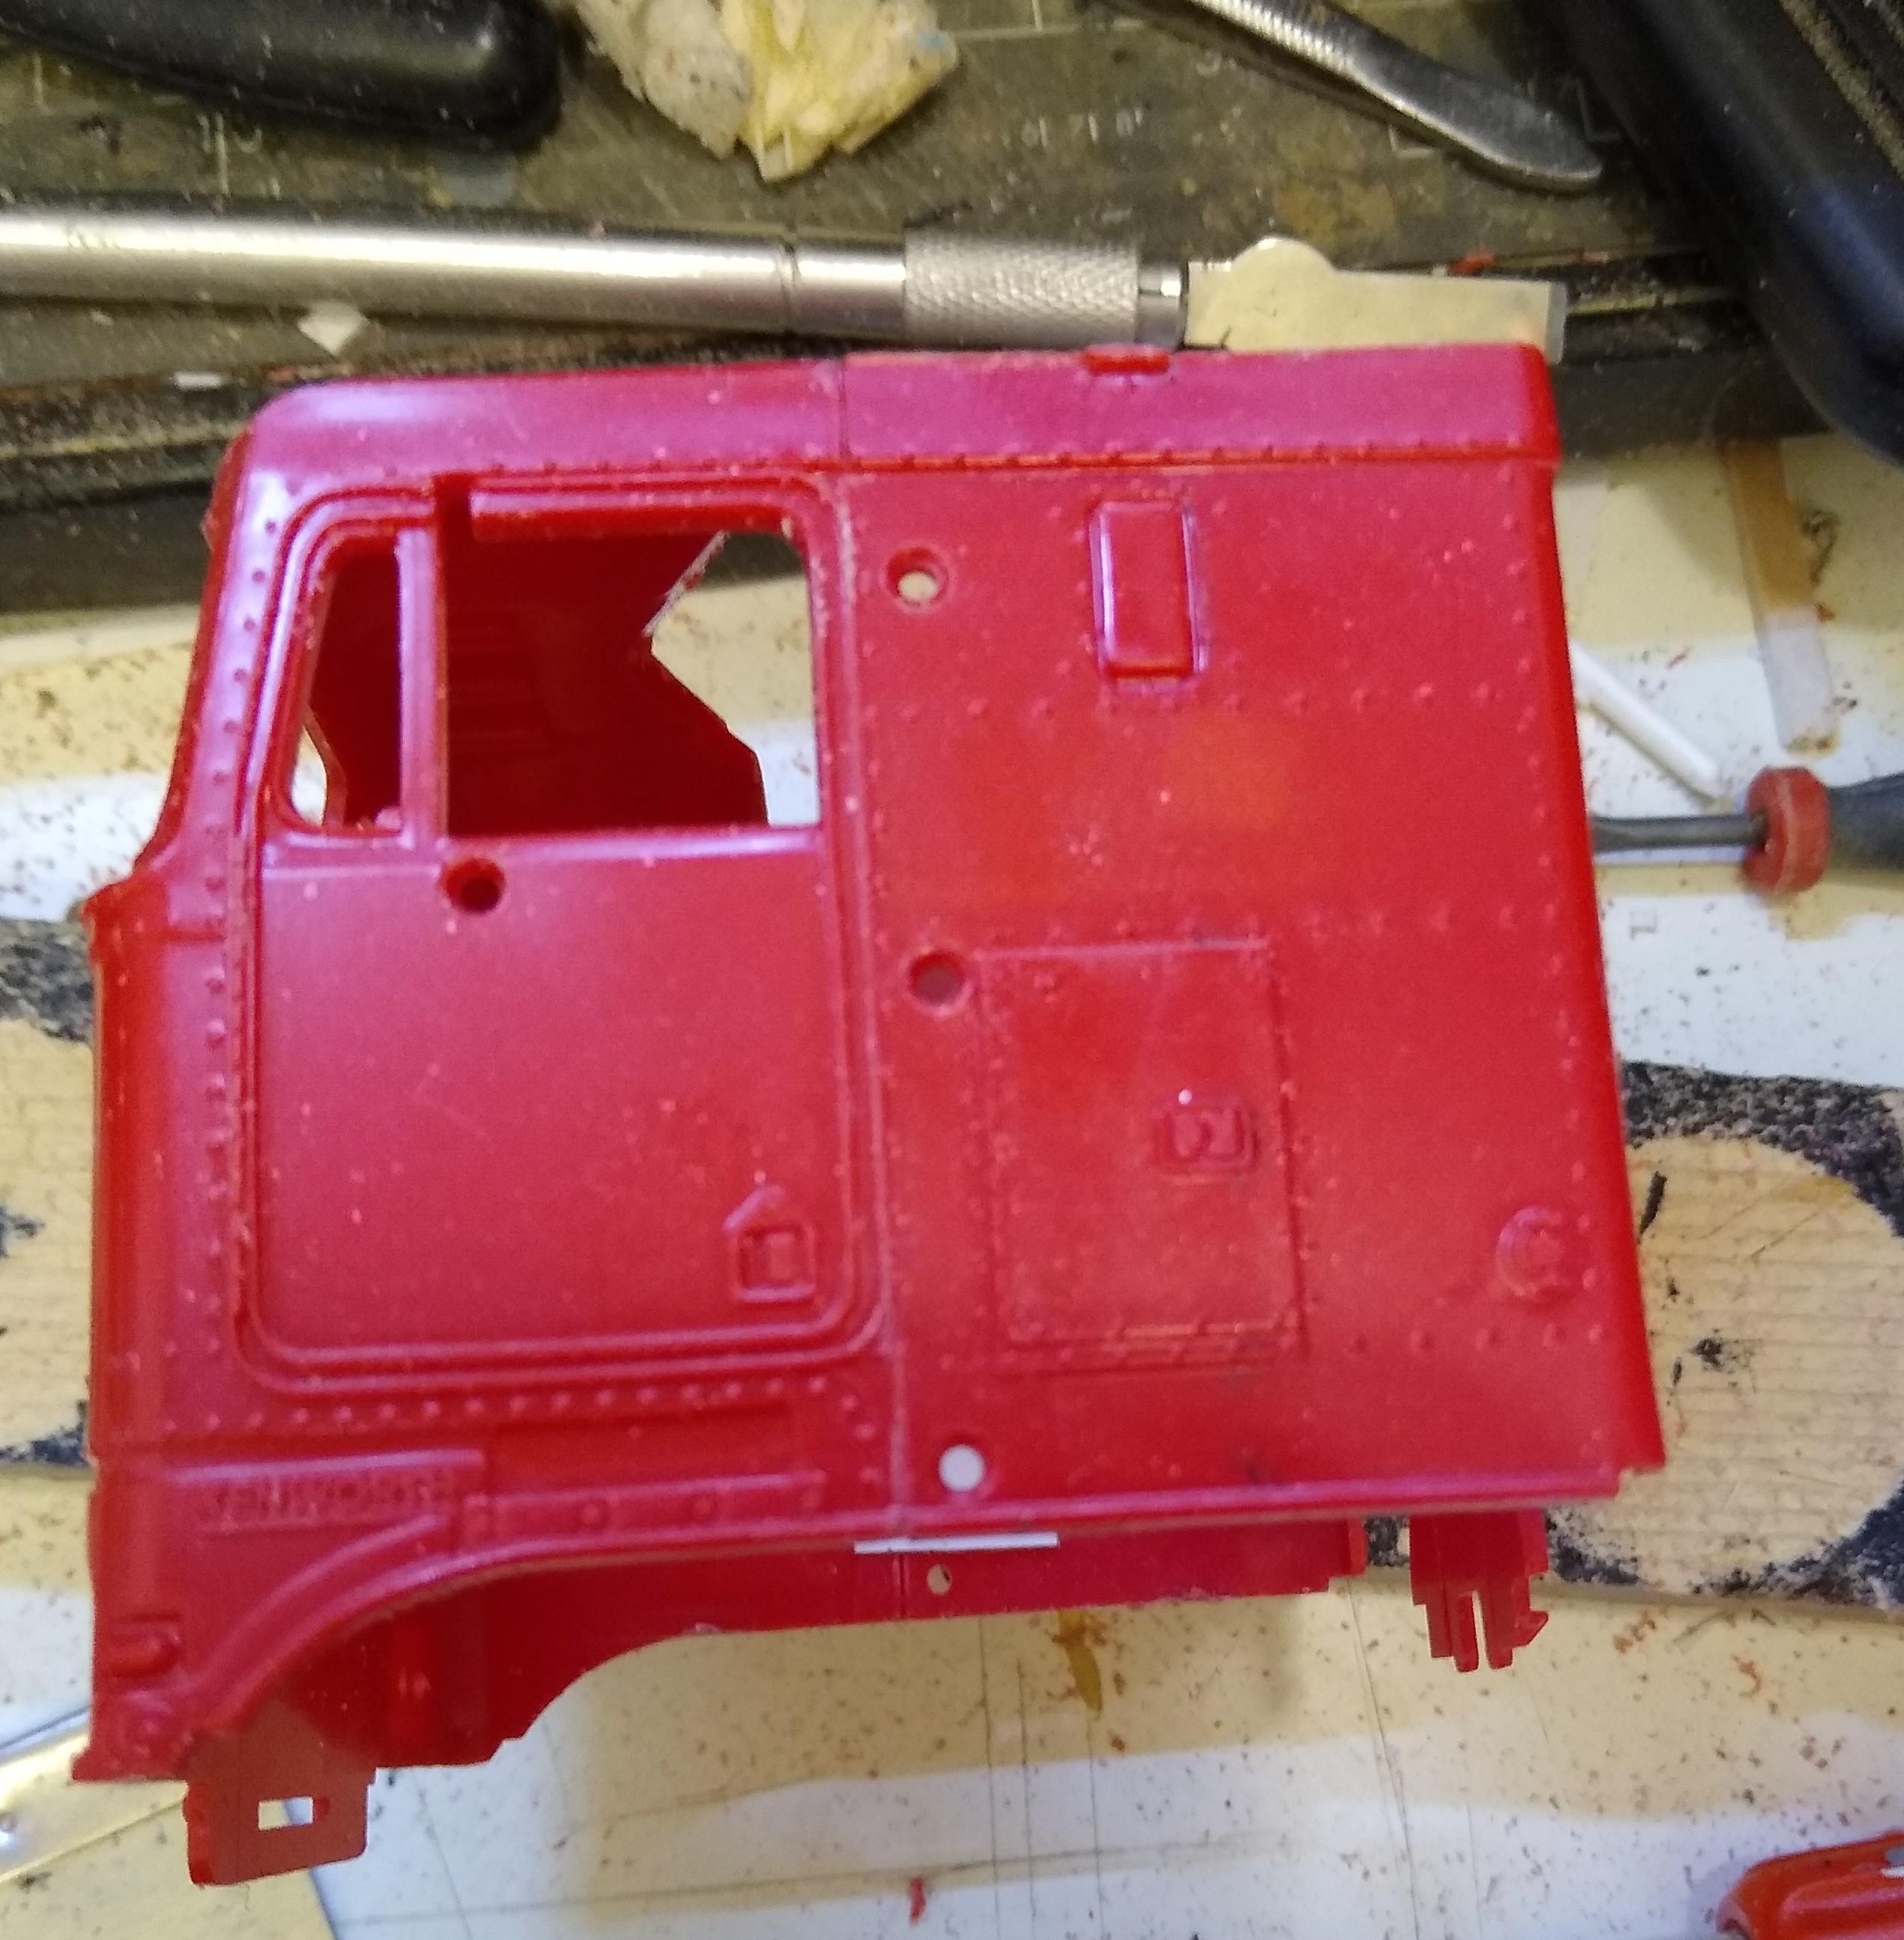
I've decided to drop the T600 sleeper idea and will use the centre section of the top panel on the Aerodyne cap I cut off.
-
De-Aerodyned K100
Rockford replied to Rockford's topic in WIP: Model Trucks: Big Rigs and Heavy Equipment
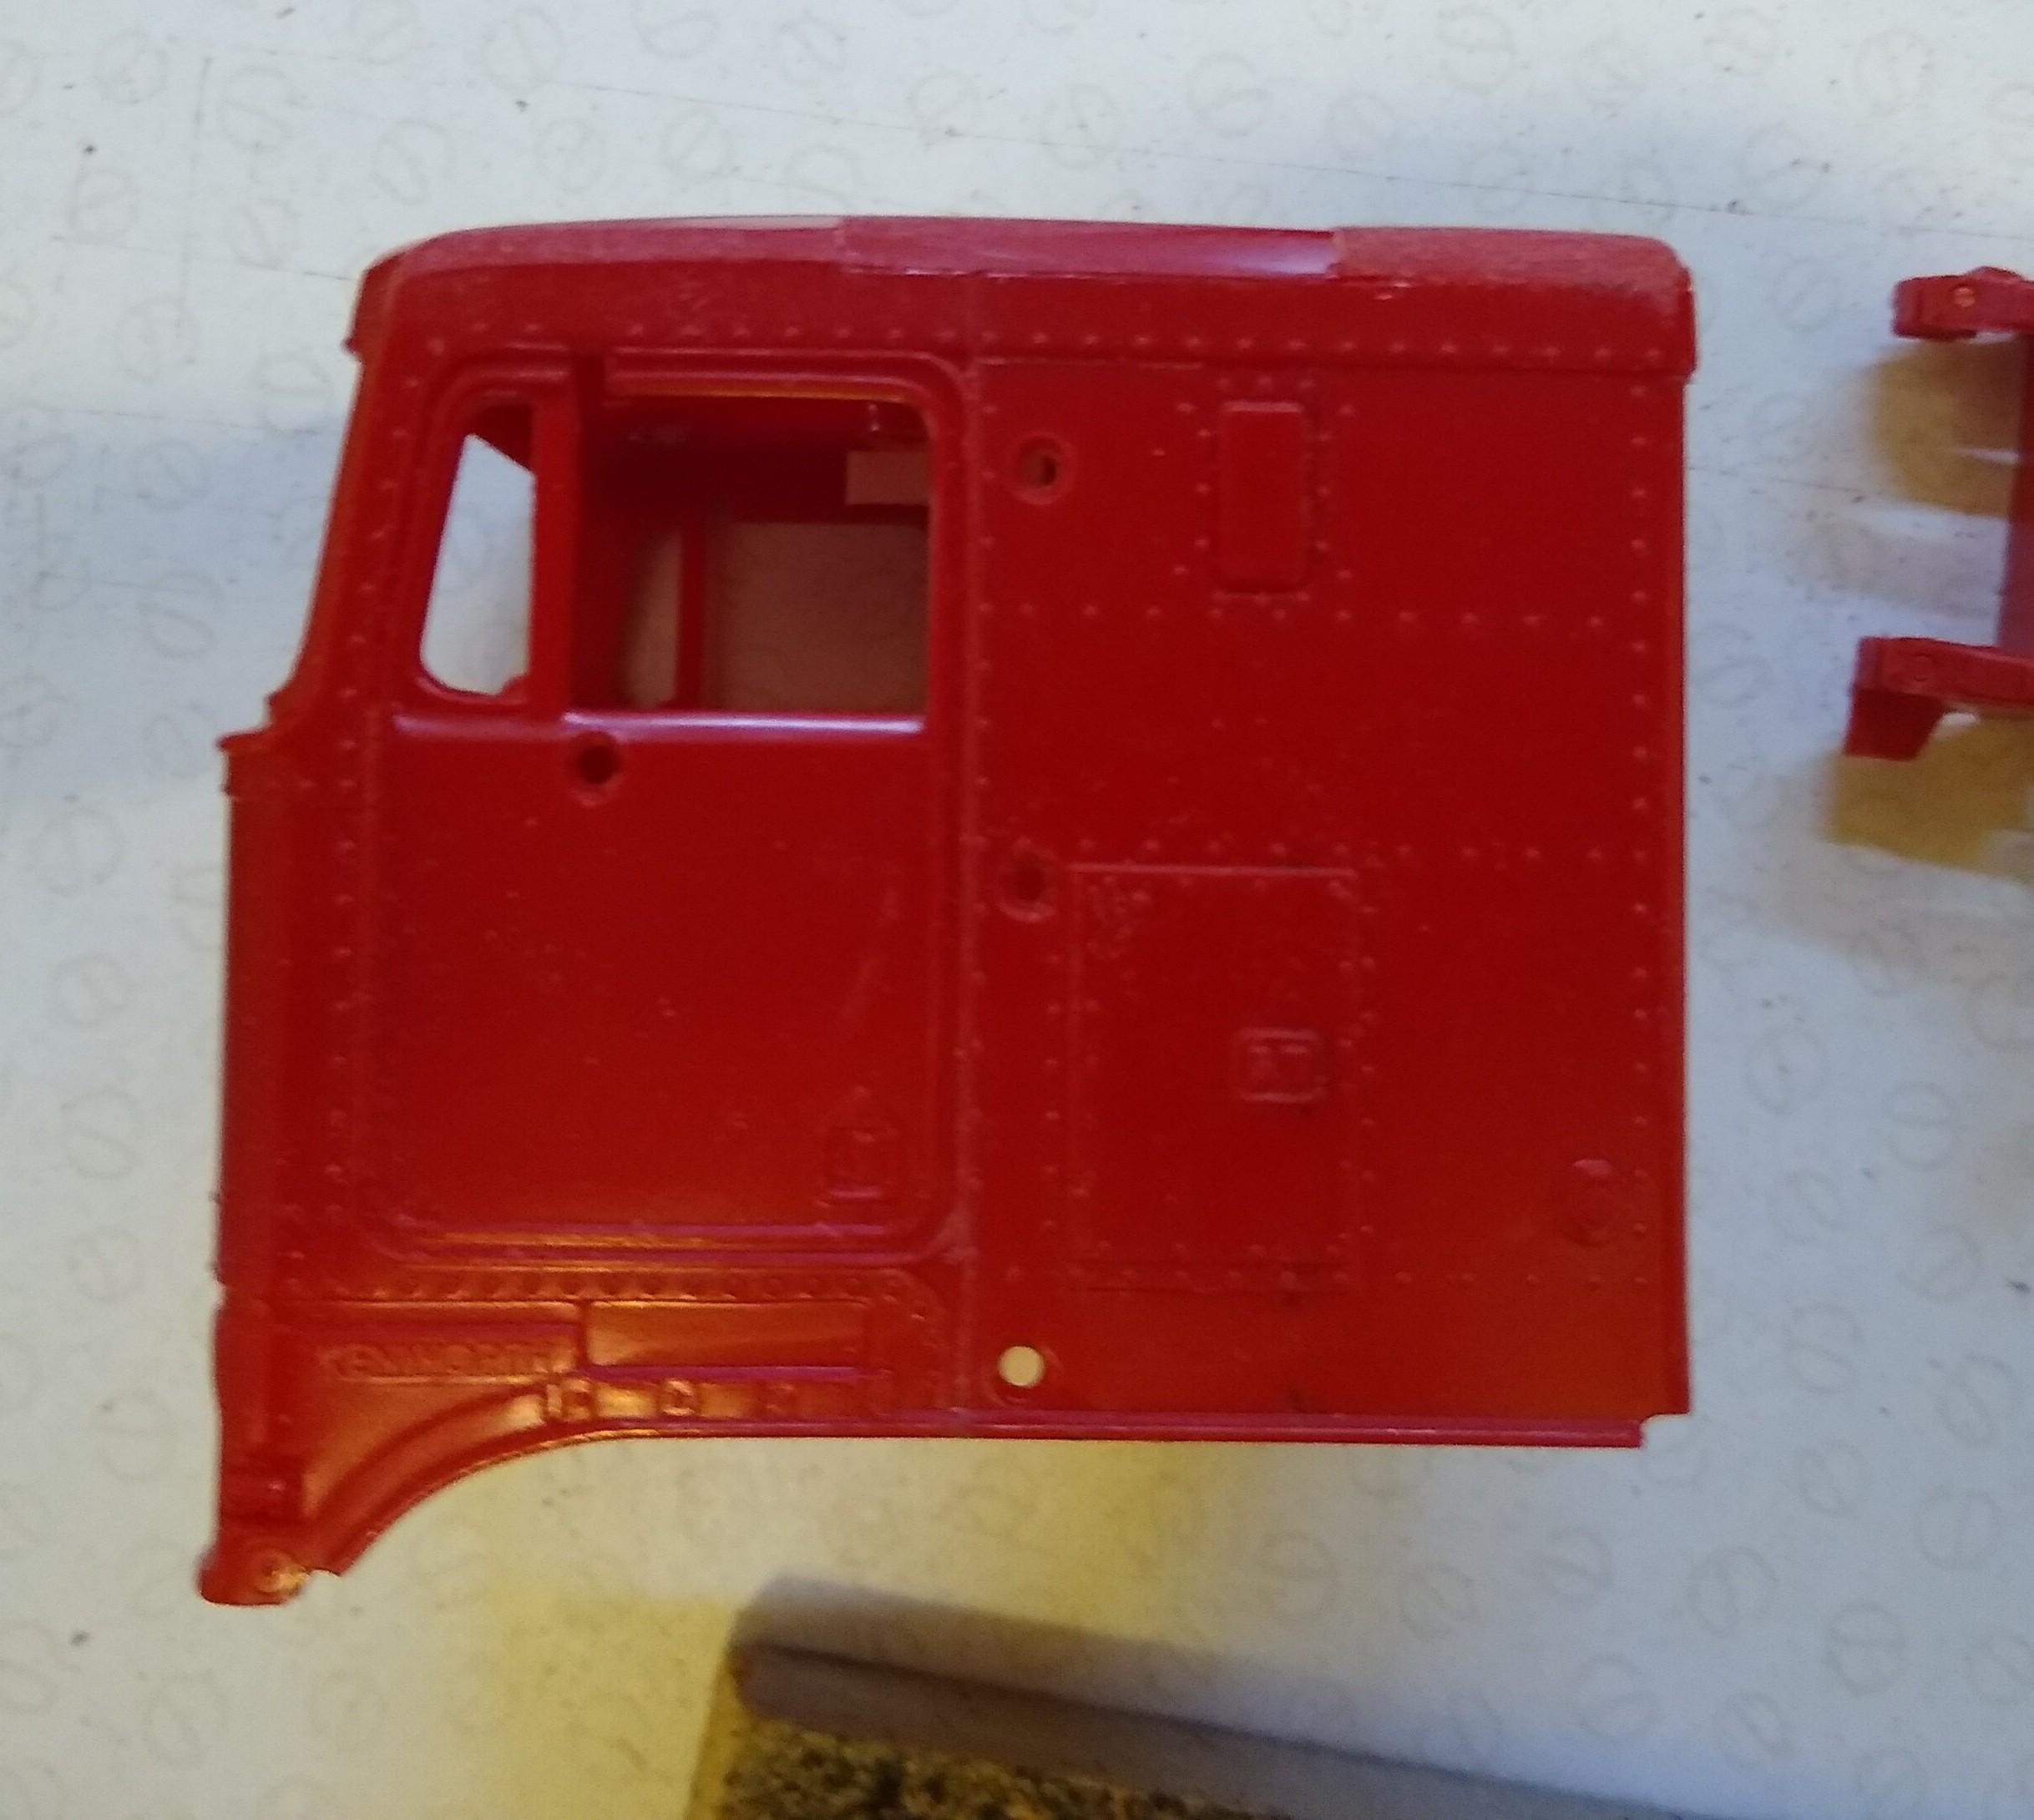
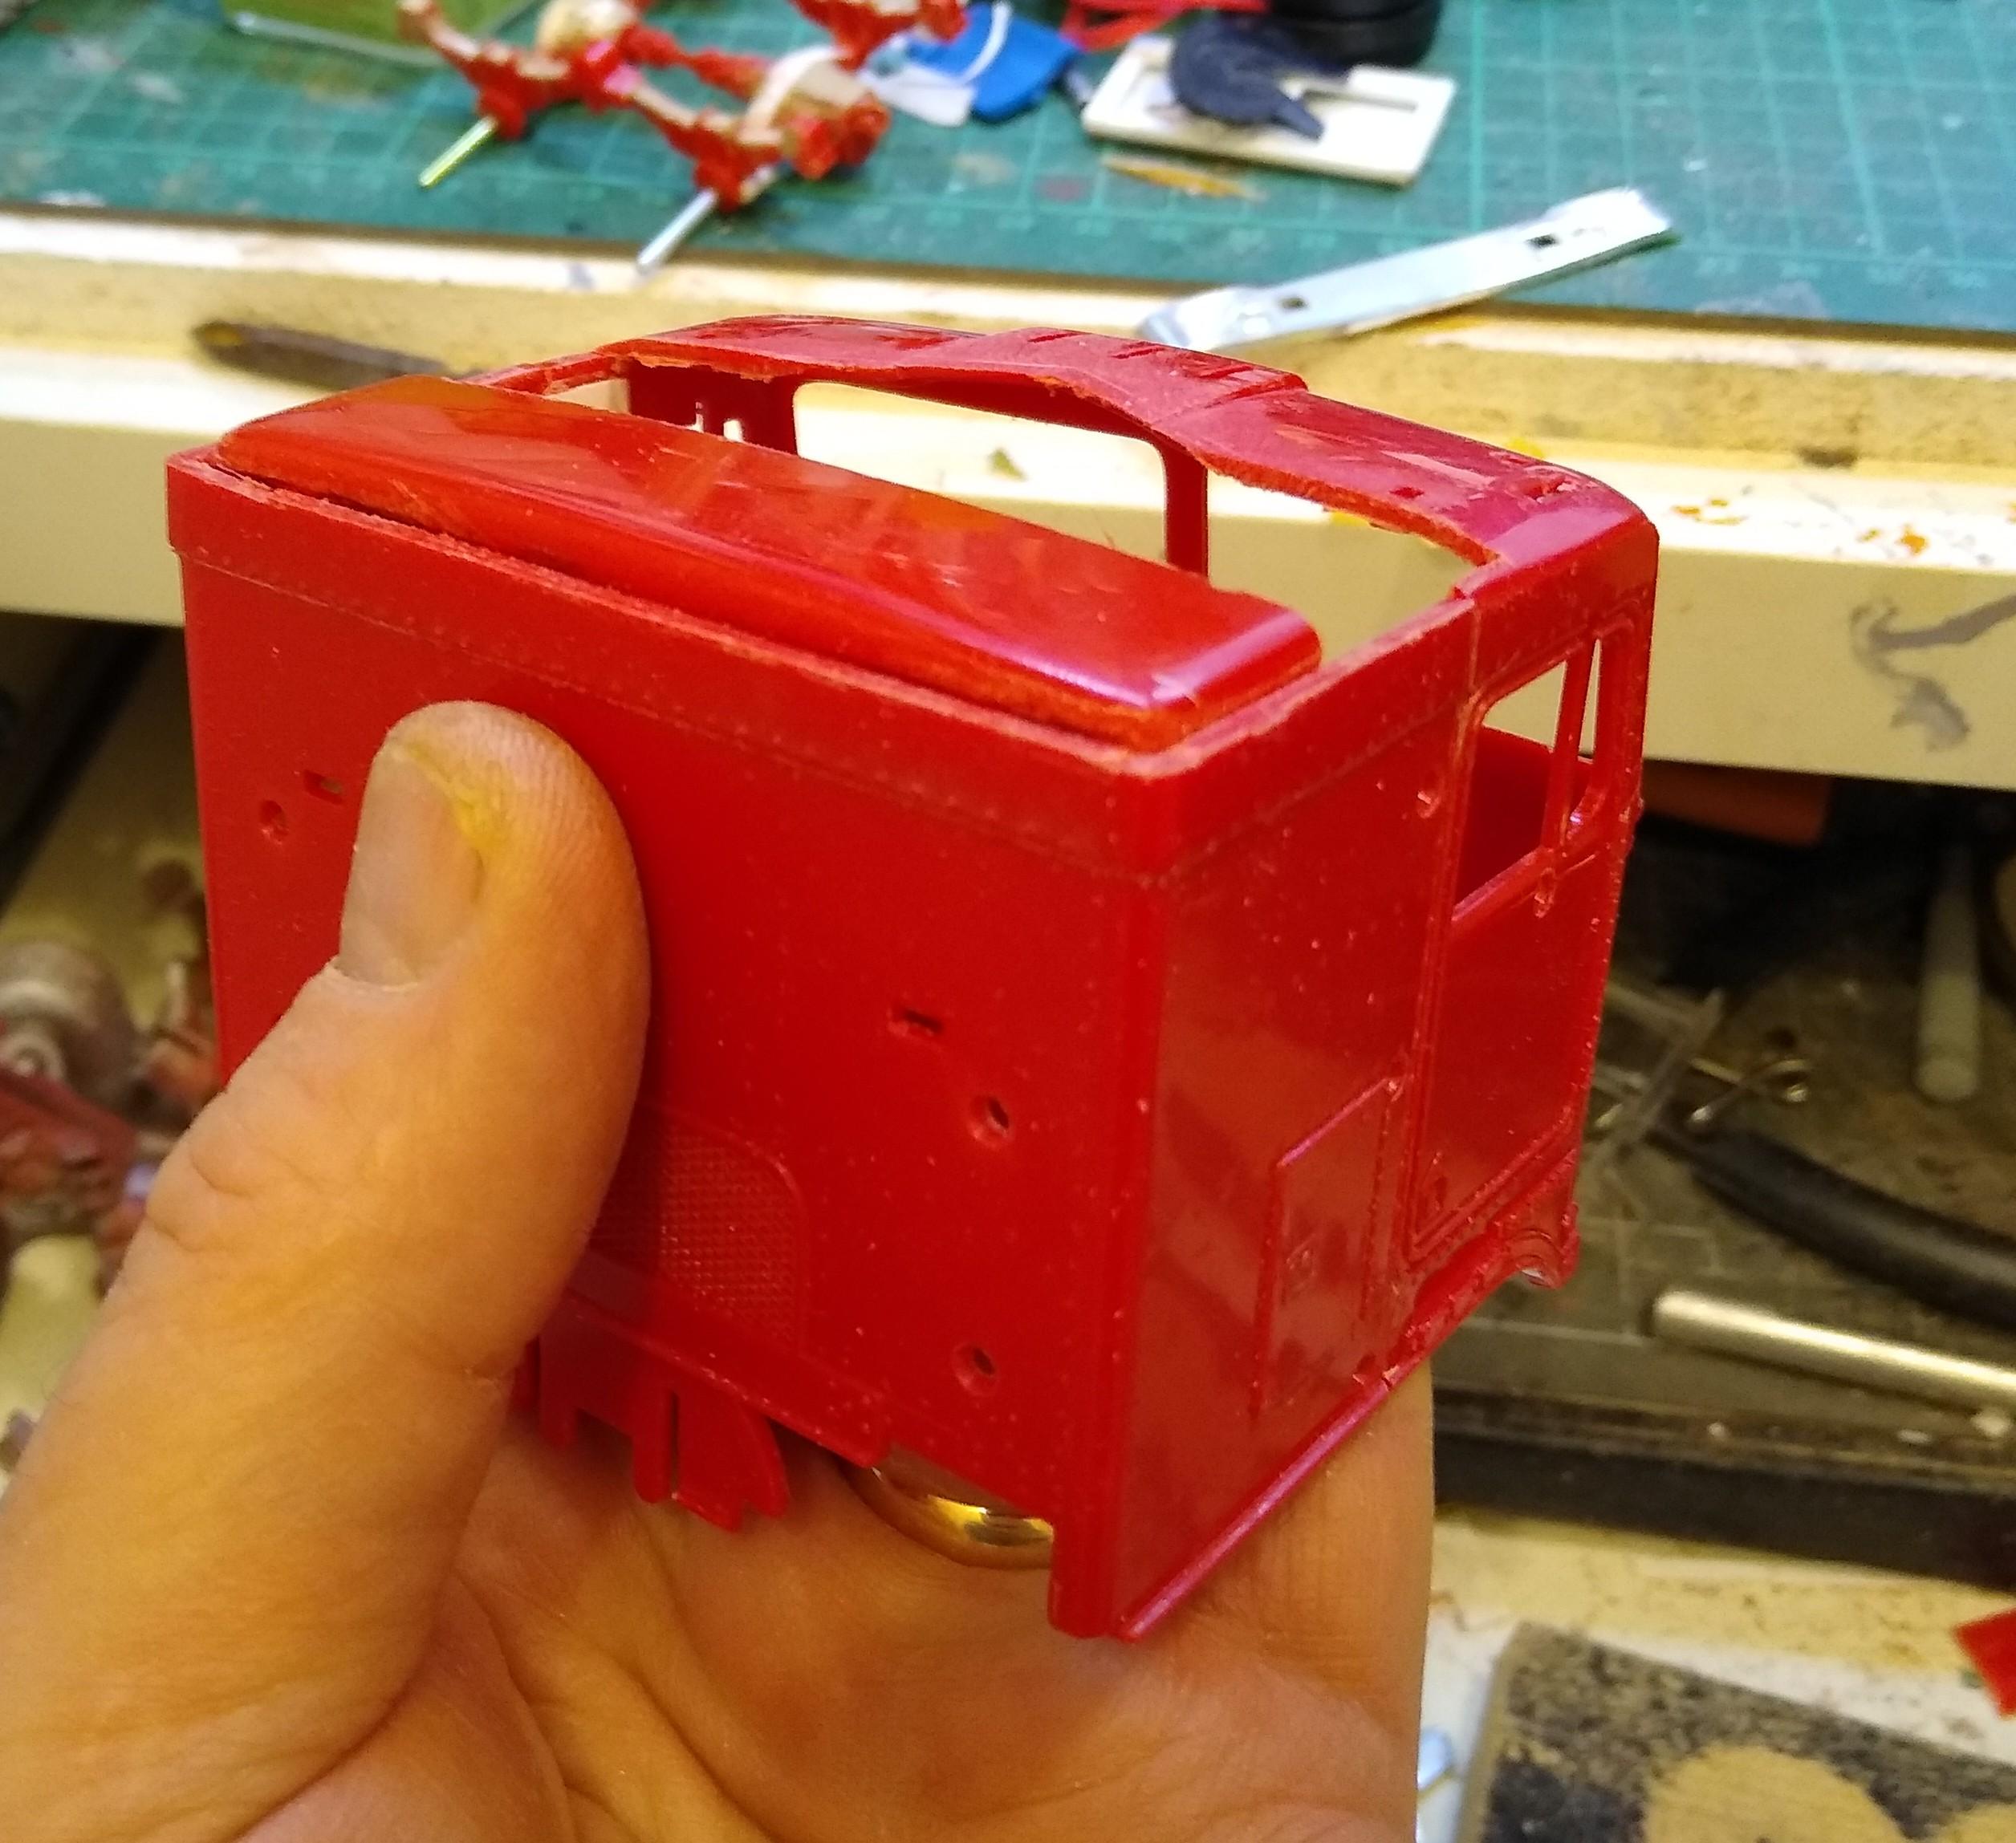
Scary day today. Had to take my saw to the cab. I'm not a great bodywork man but I'm committed to this. I decided to make the cut right on the rear door frame, partly because it seemed right but also because the door frame would mask the joint except for the top and bottom ends, so minimal filling and sanding. Also the grab rail would be over it, further hiding it. Then I've only got the roof to sort. Made the cut, seems to have come out ok. I've got two scrap T600 cabs so I'm going to try to use the rear half of one sleeper roof to form the rear of the new roof, but I'll have to widen it slightly. Then I can carry the shape across with some of the old Aerodyne roof cap. That's the plan anyway.
-
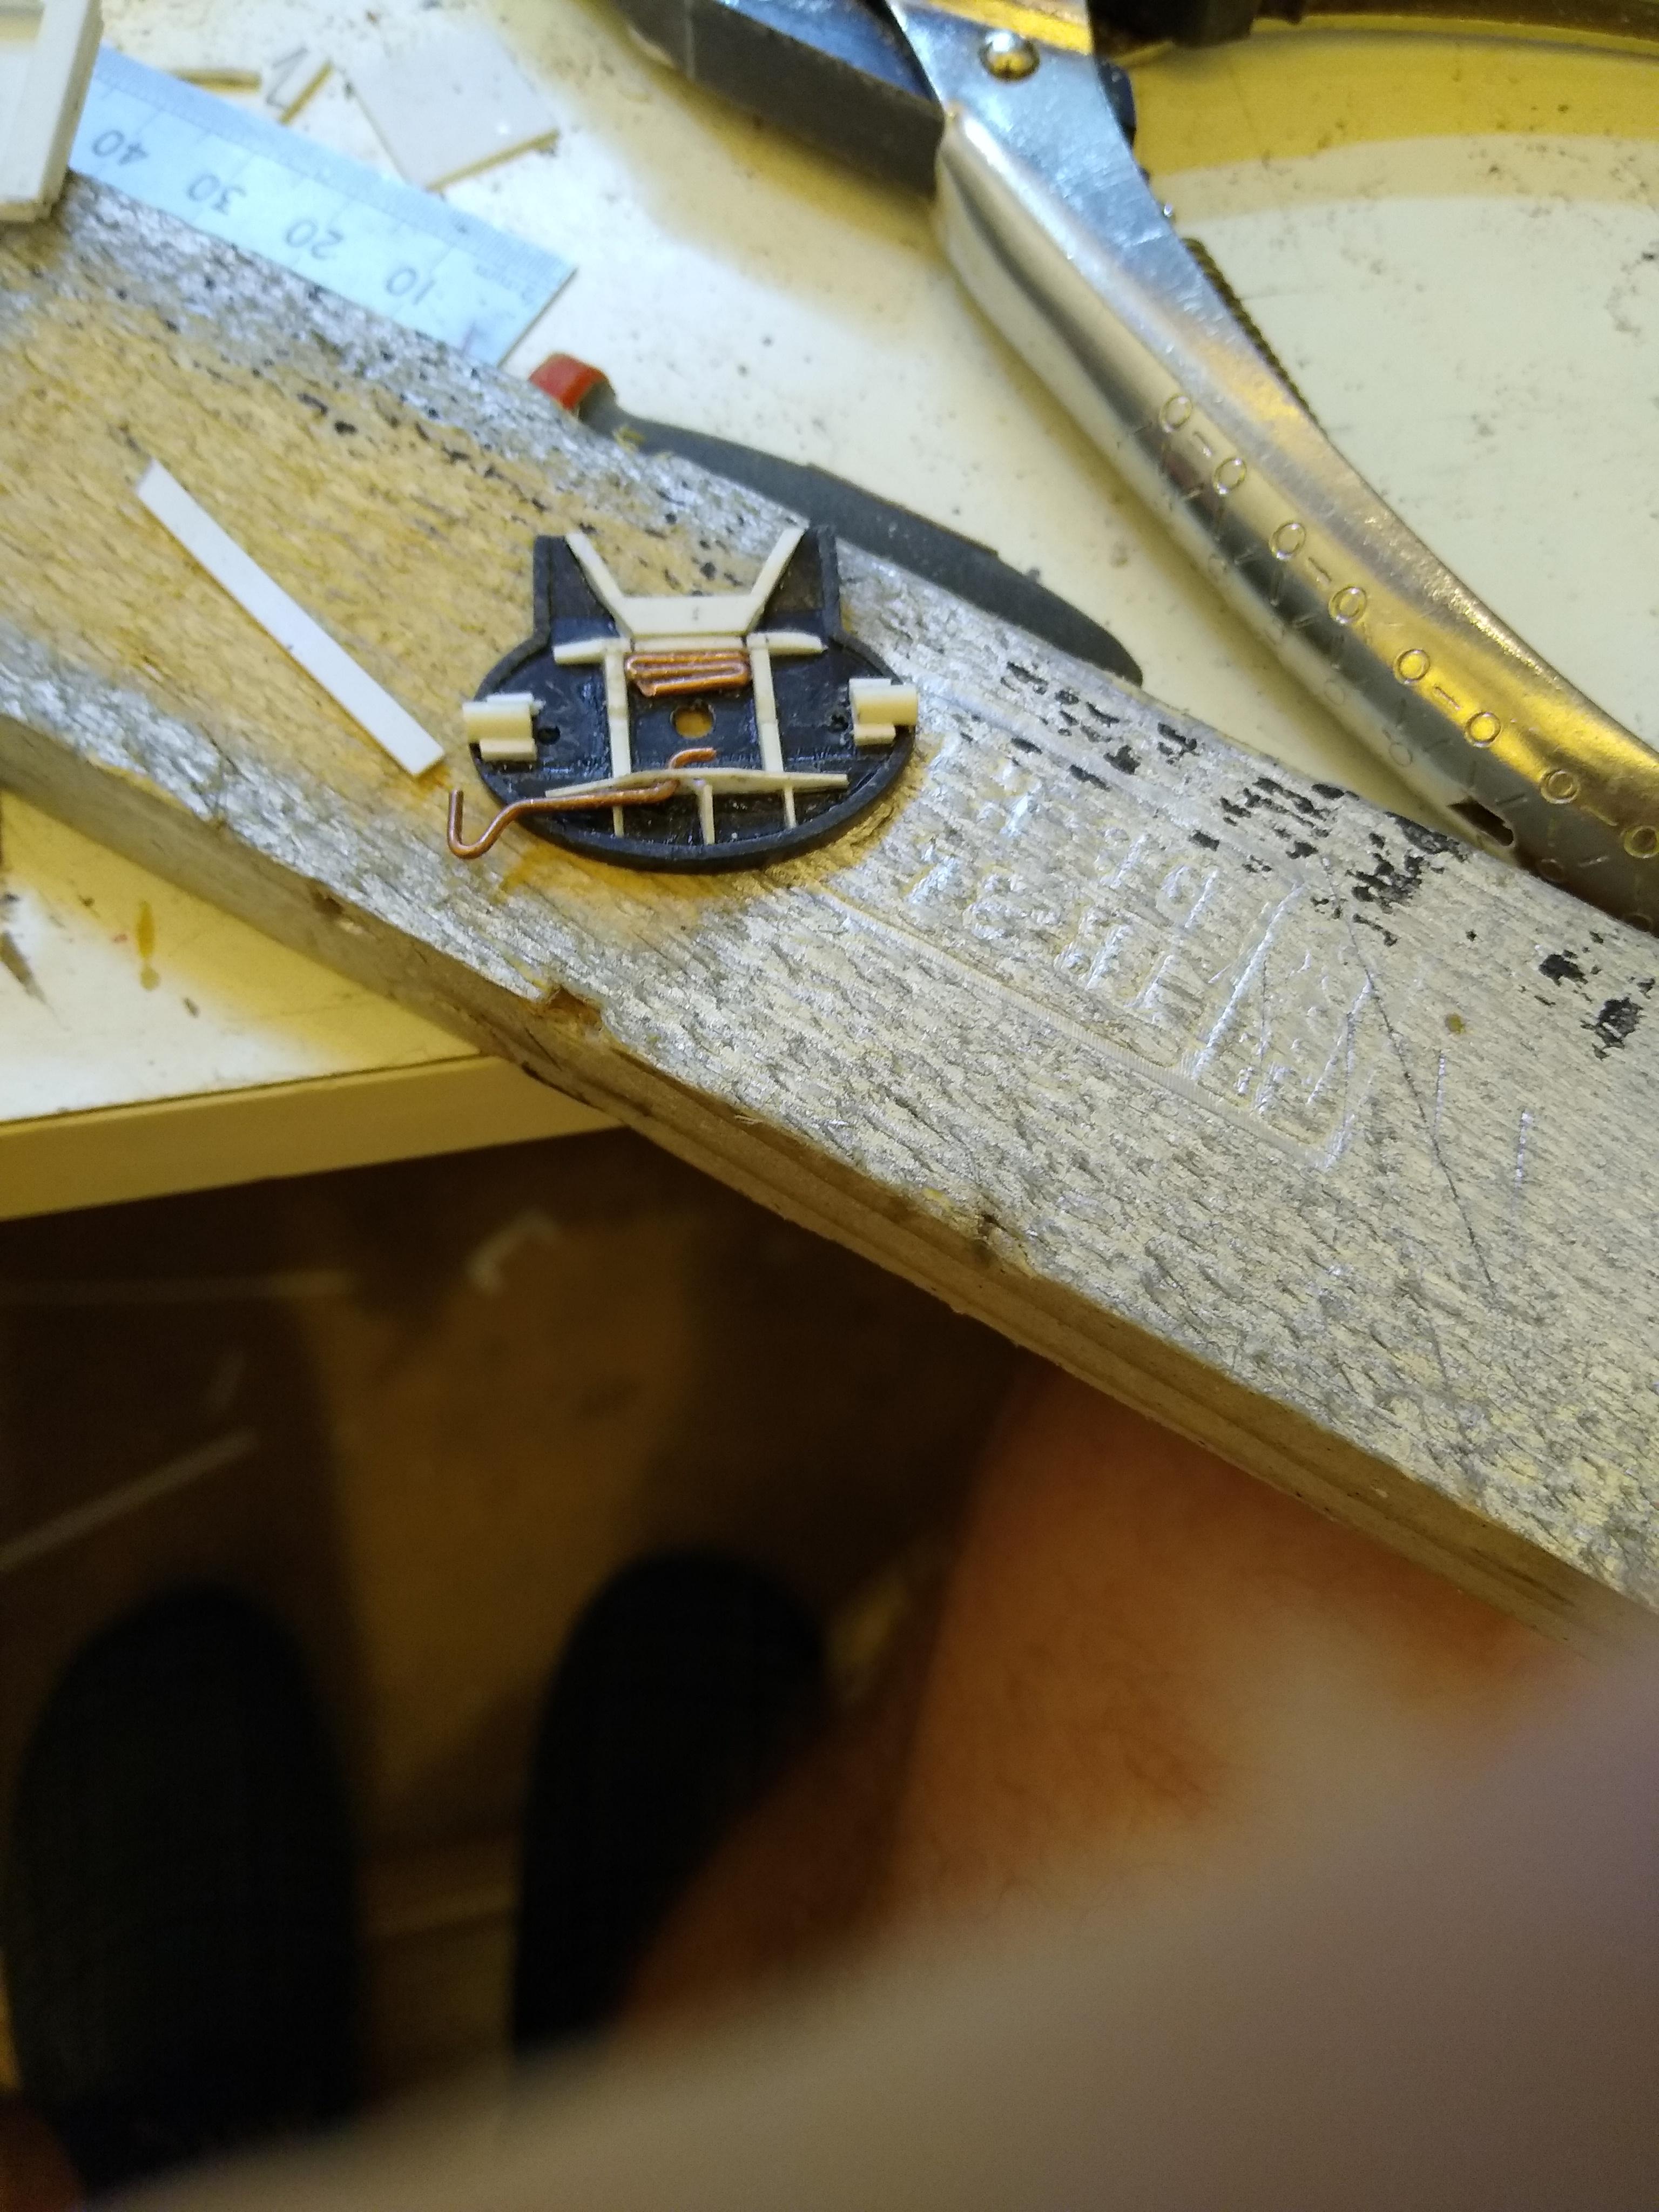
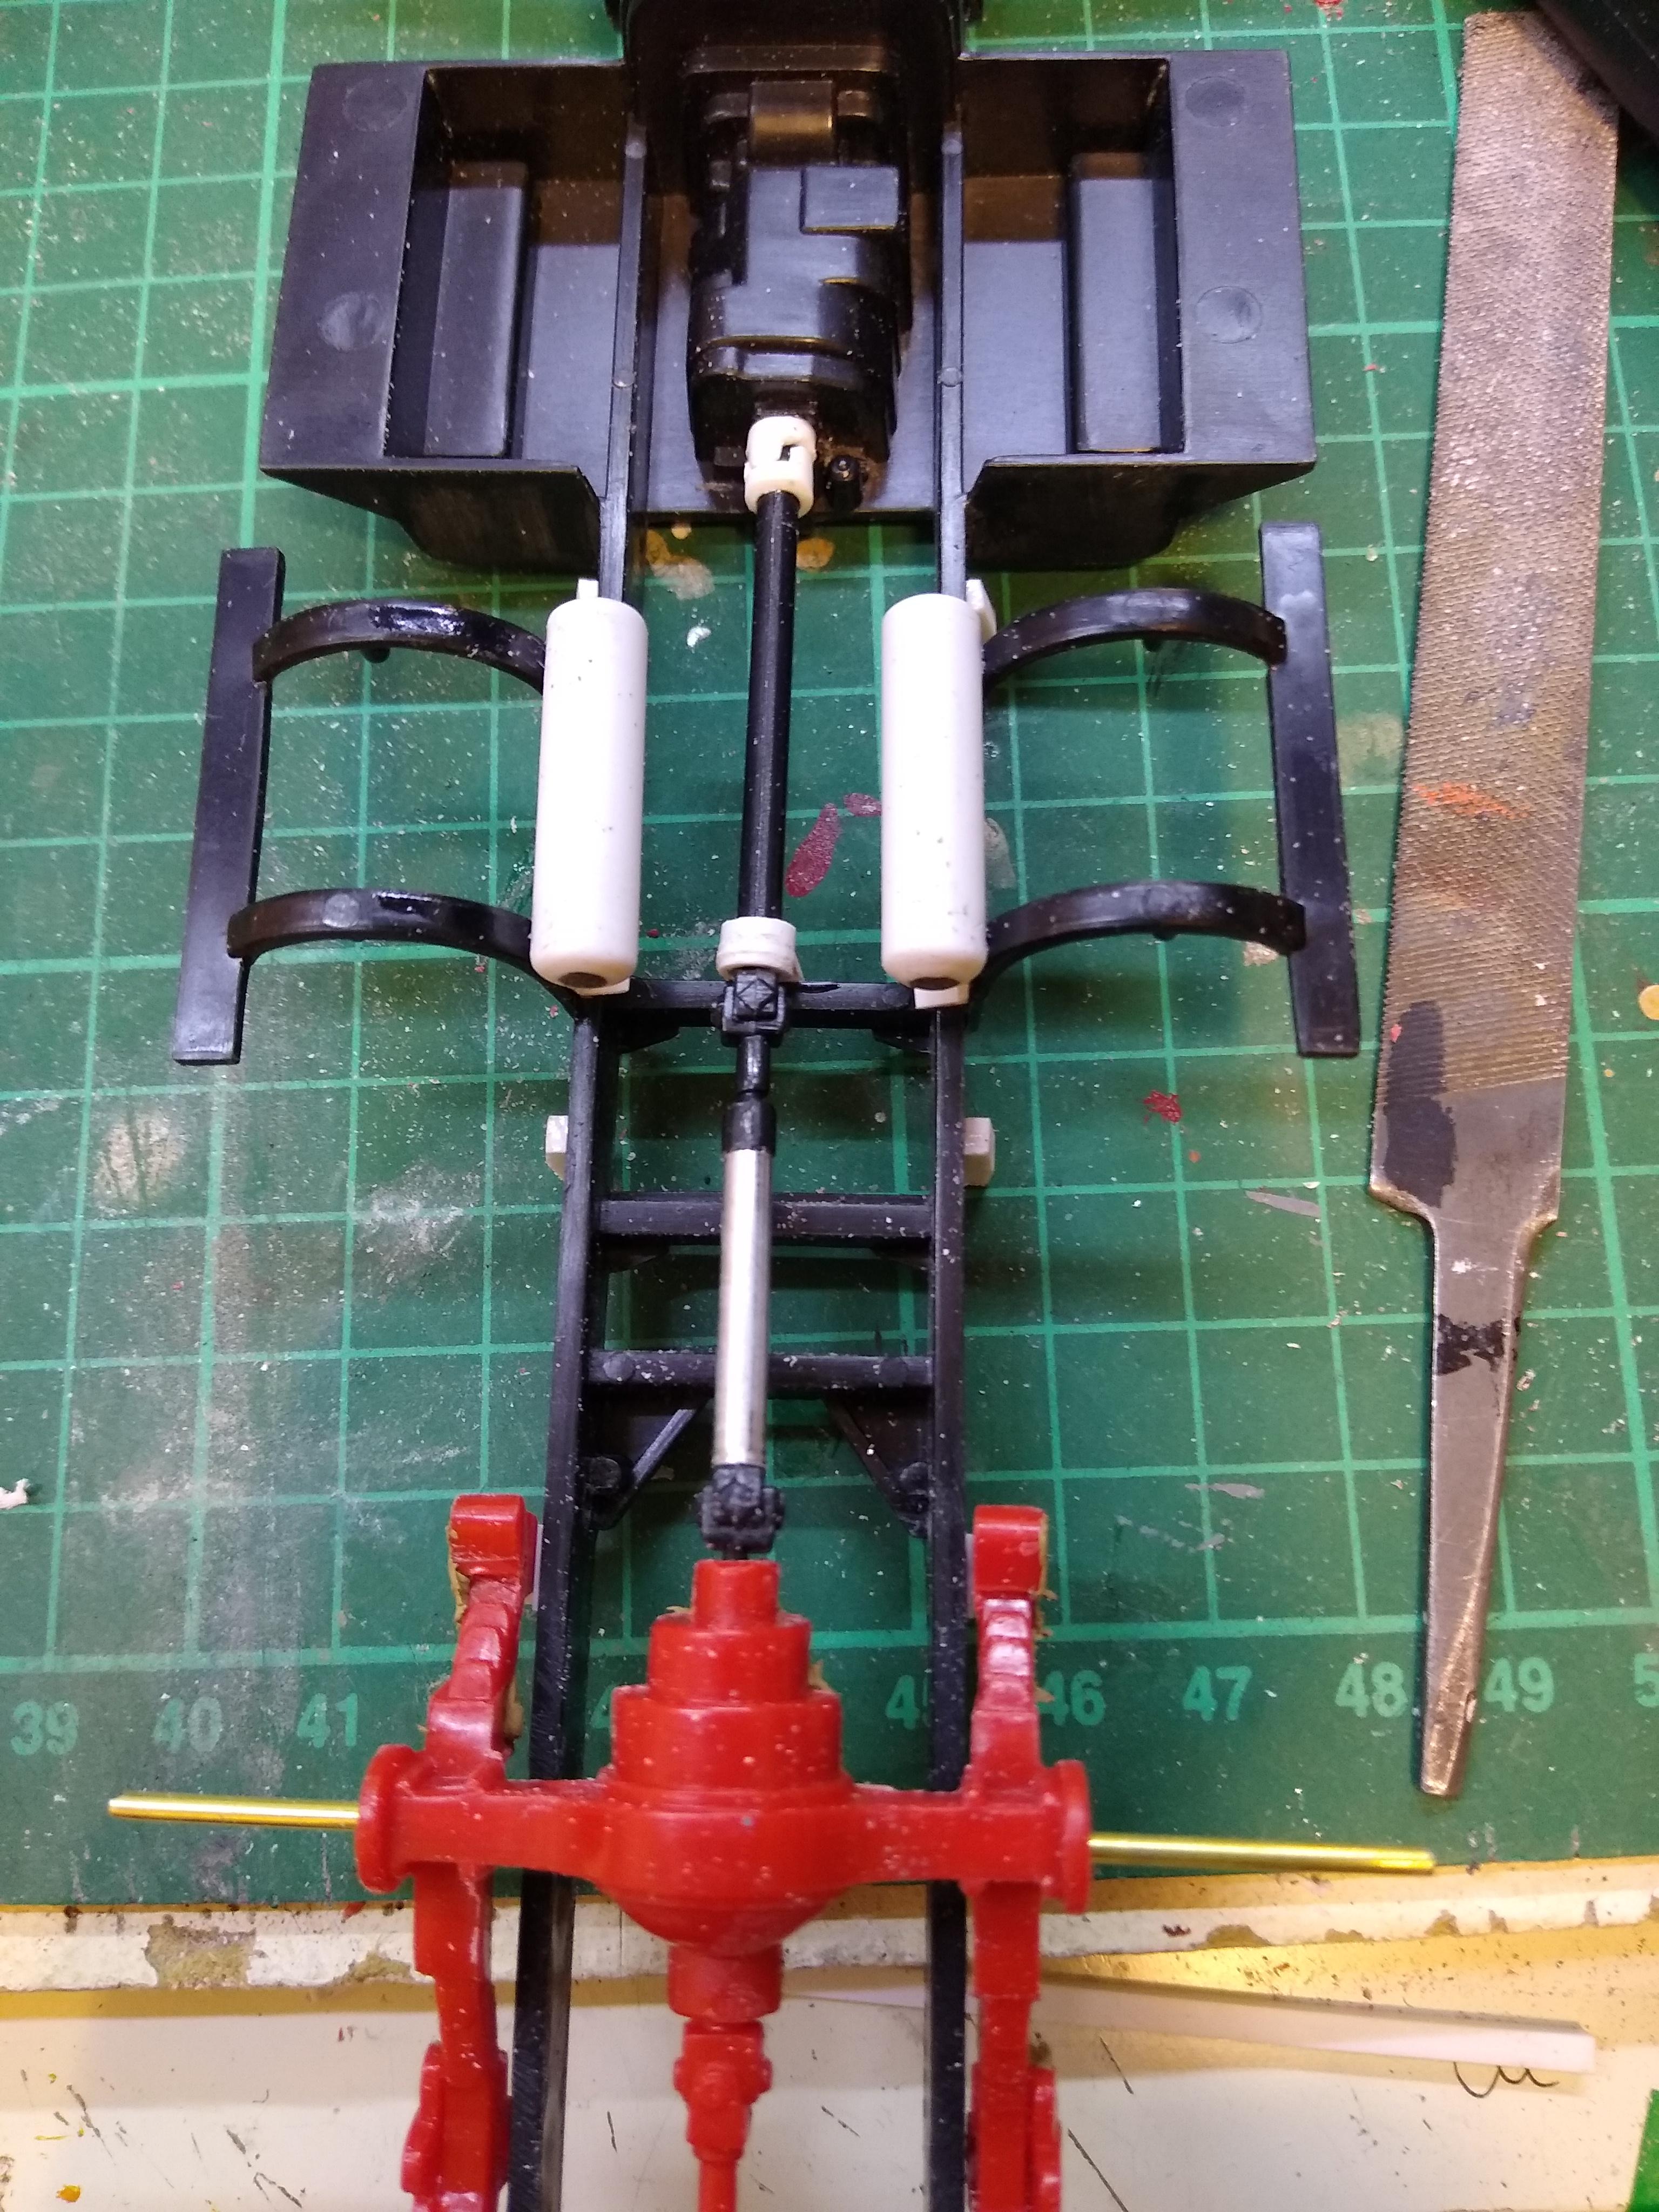
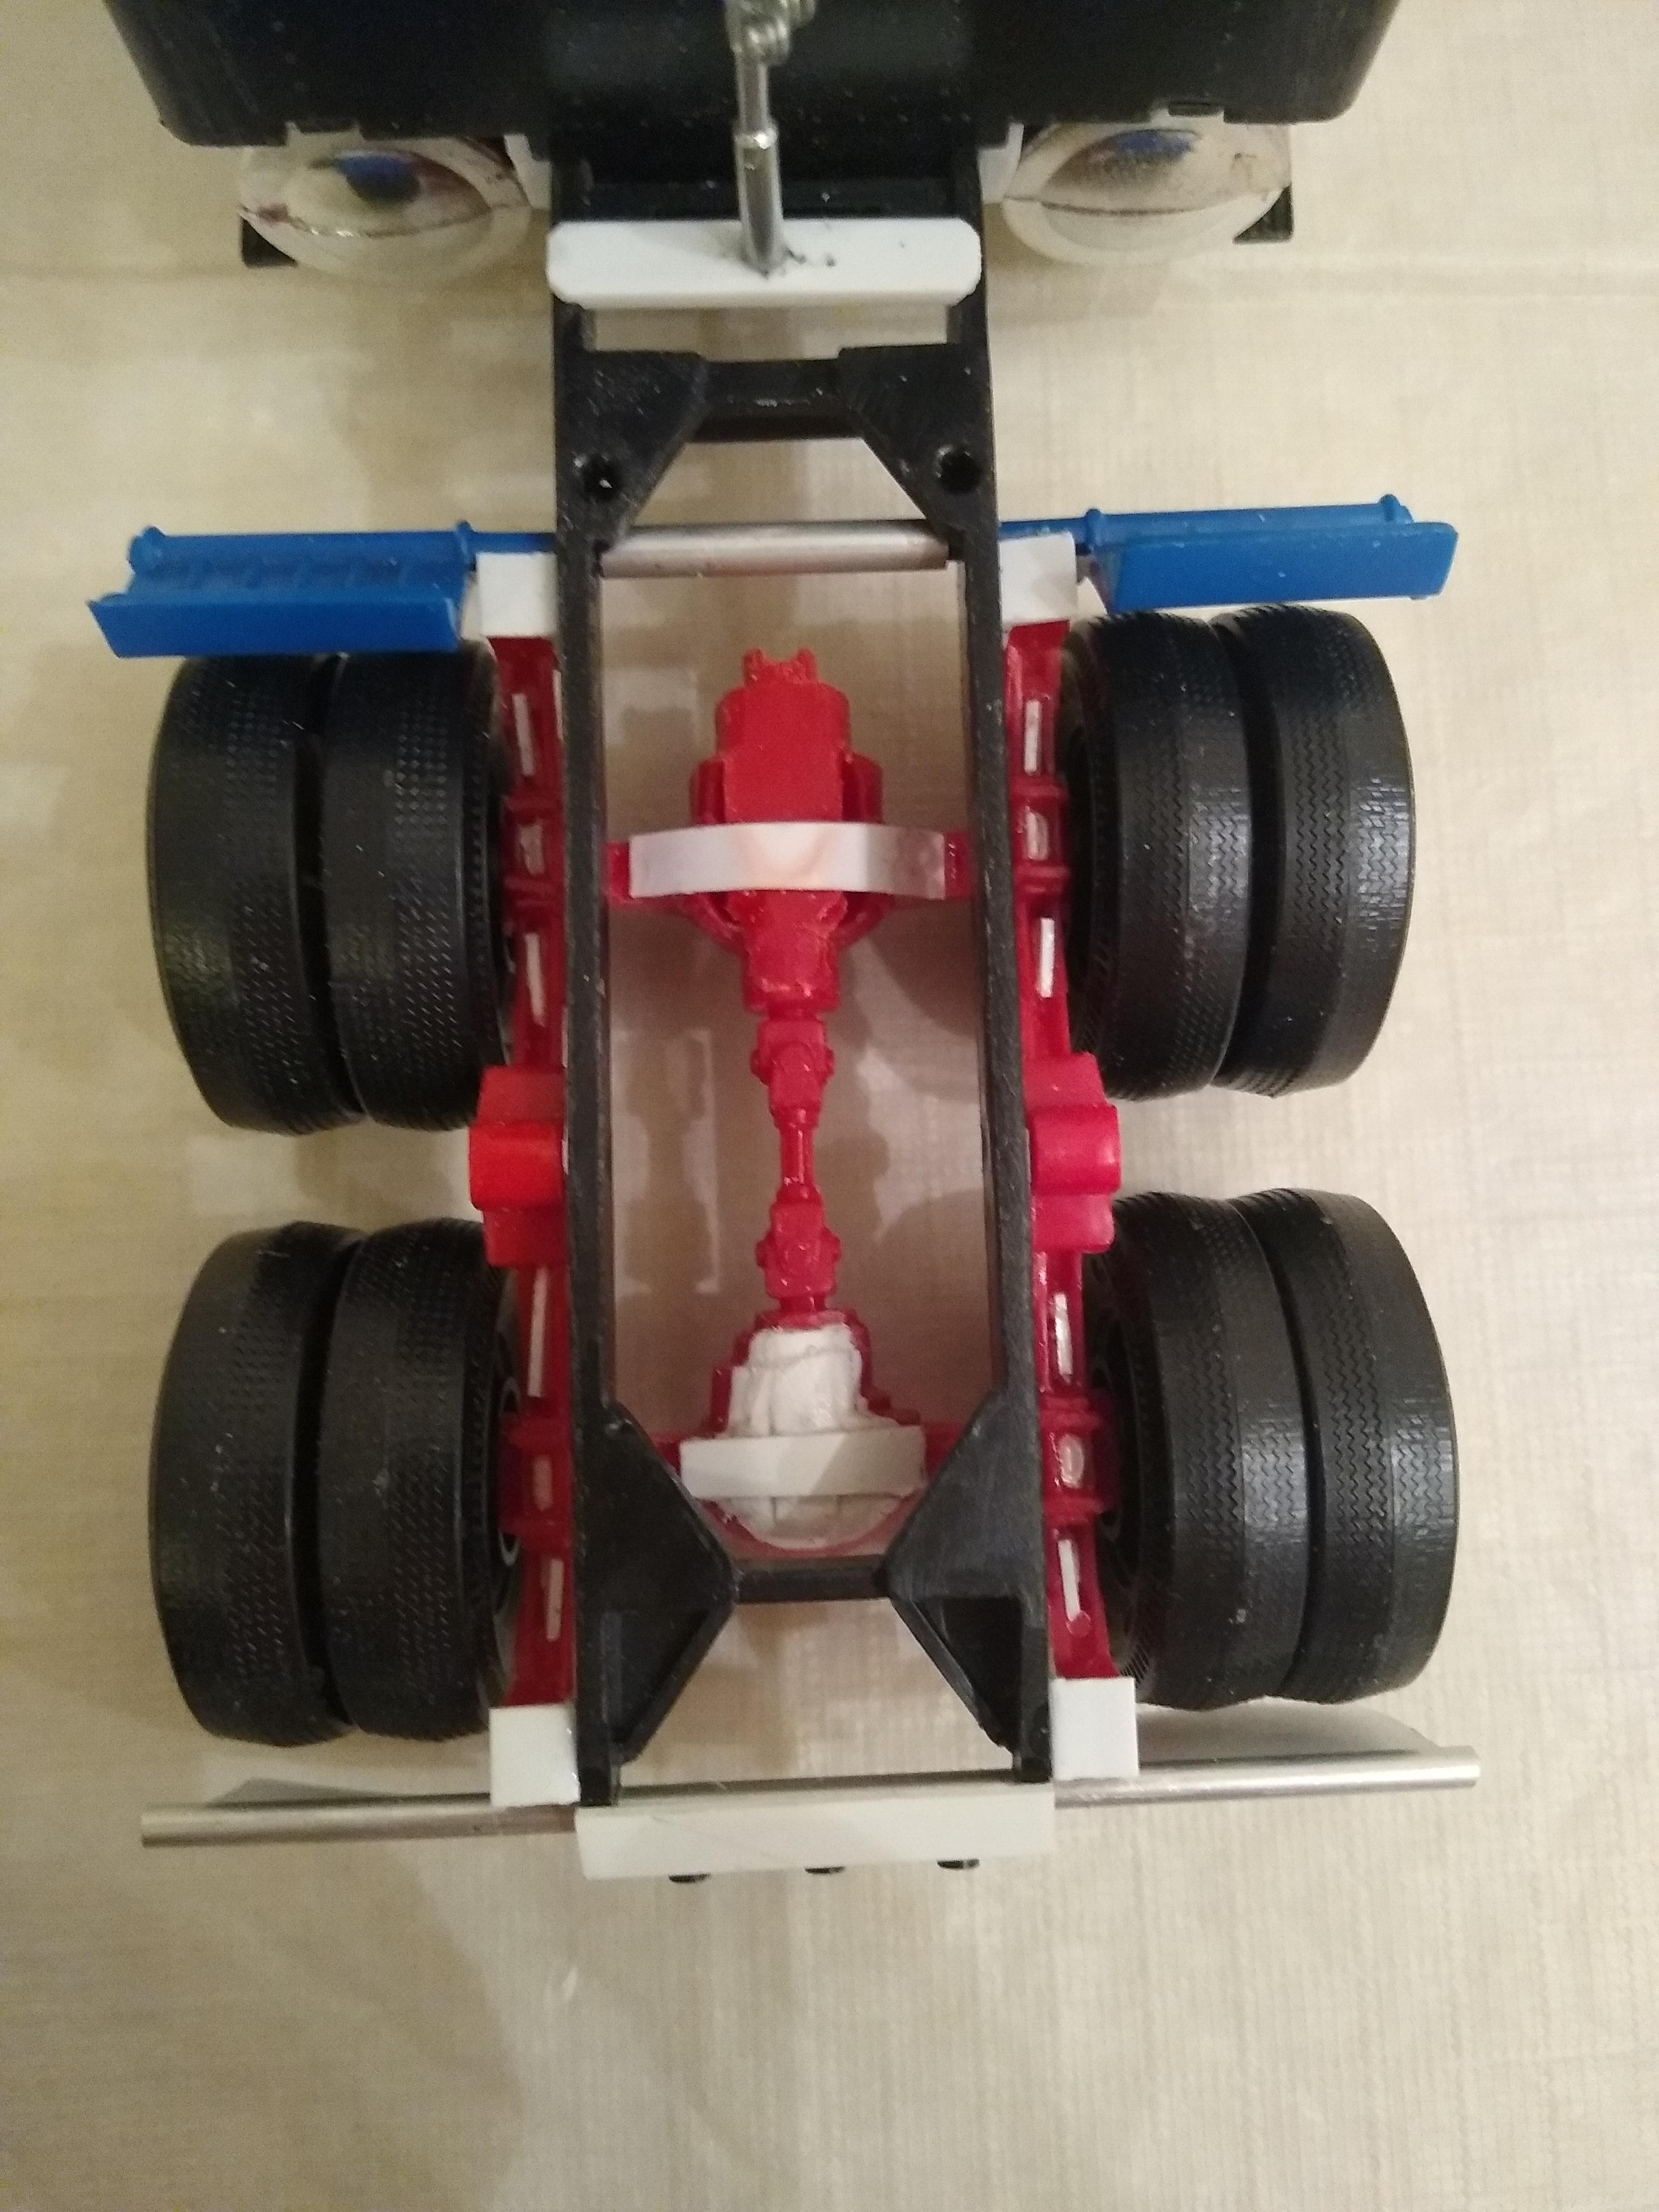
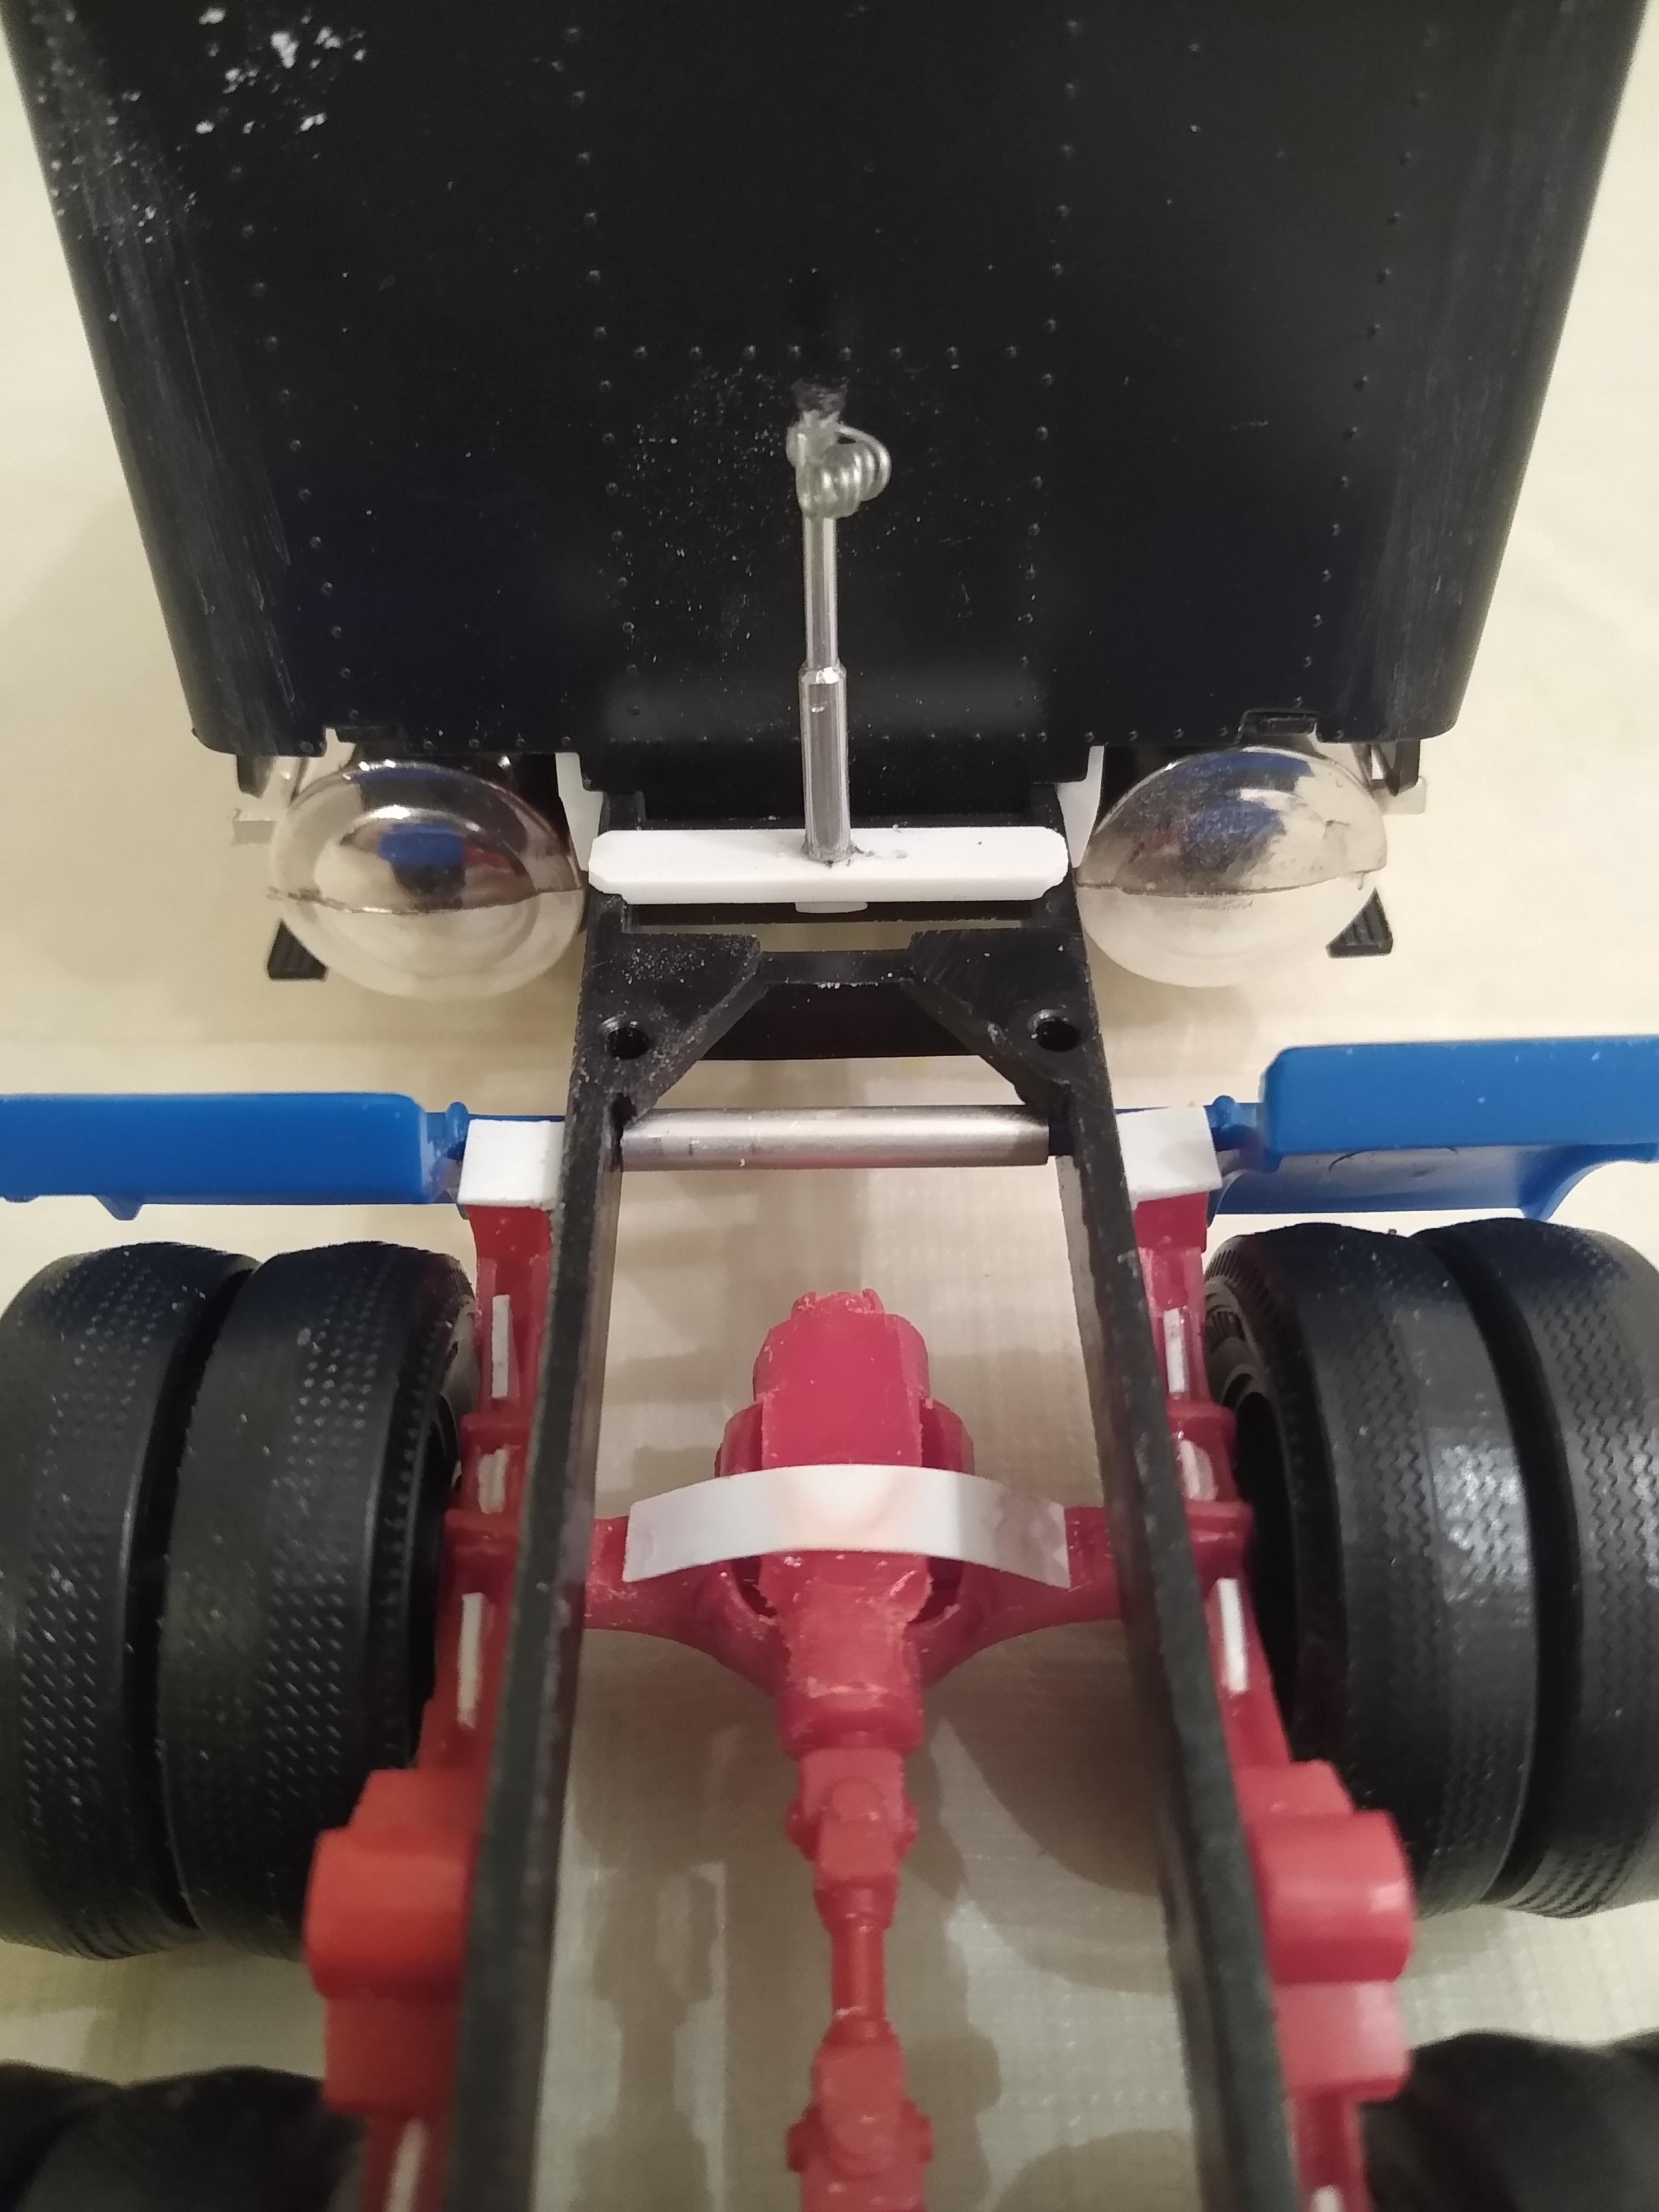
Not much done today other than add brake chambers to the rear tandems and some underside details on the fifth wheel. You can see the copper wire snake o had to add to get it to fall backwards every time. The pull handle made it front heavy.
-
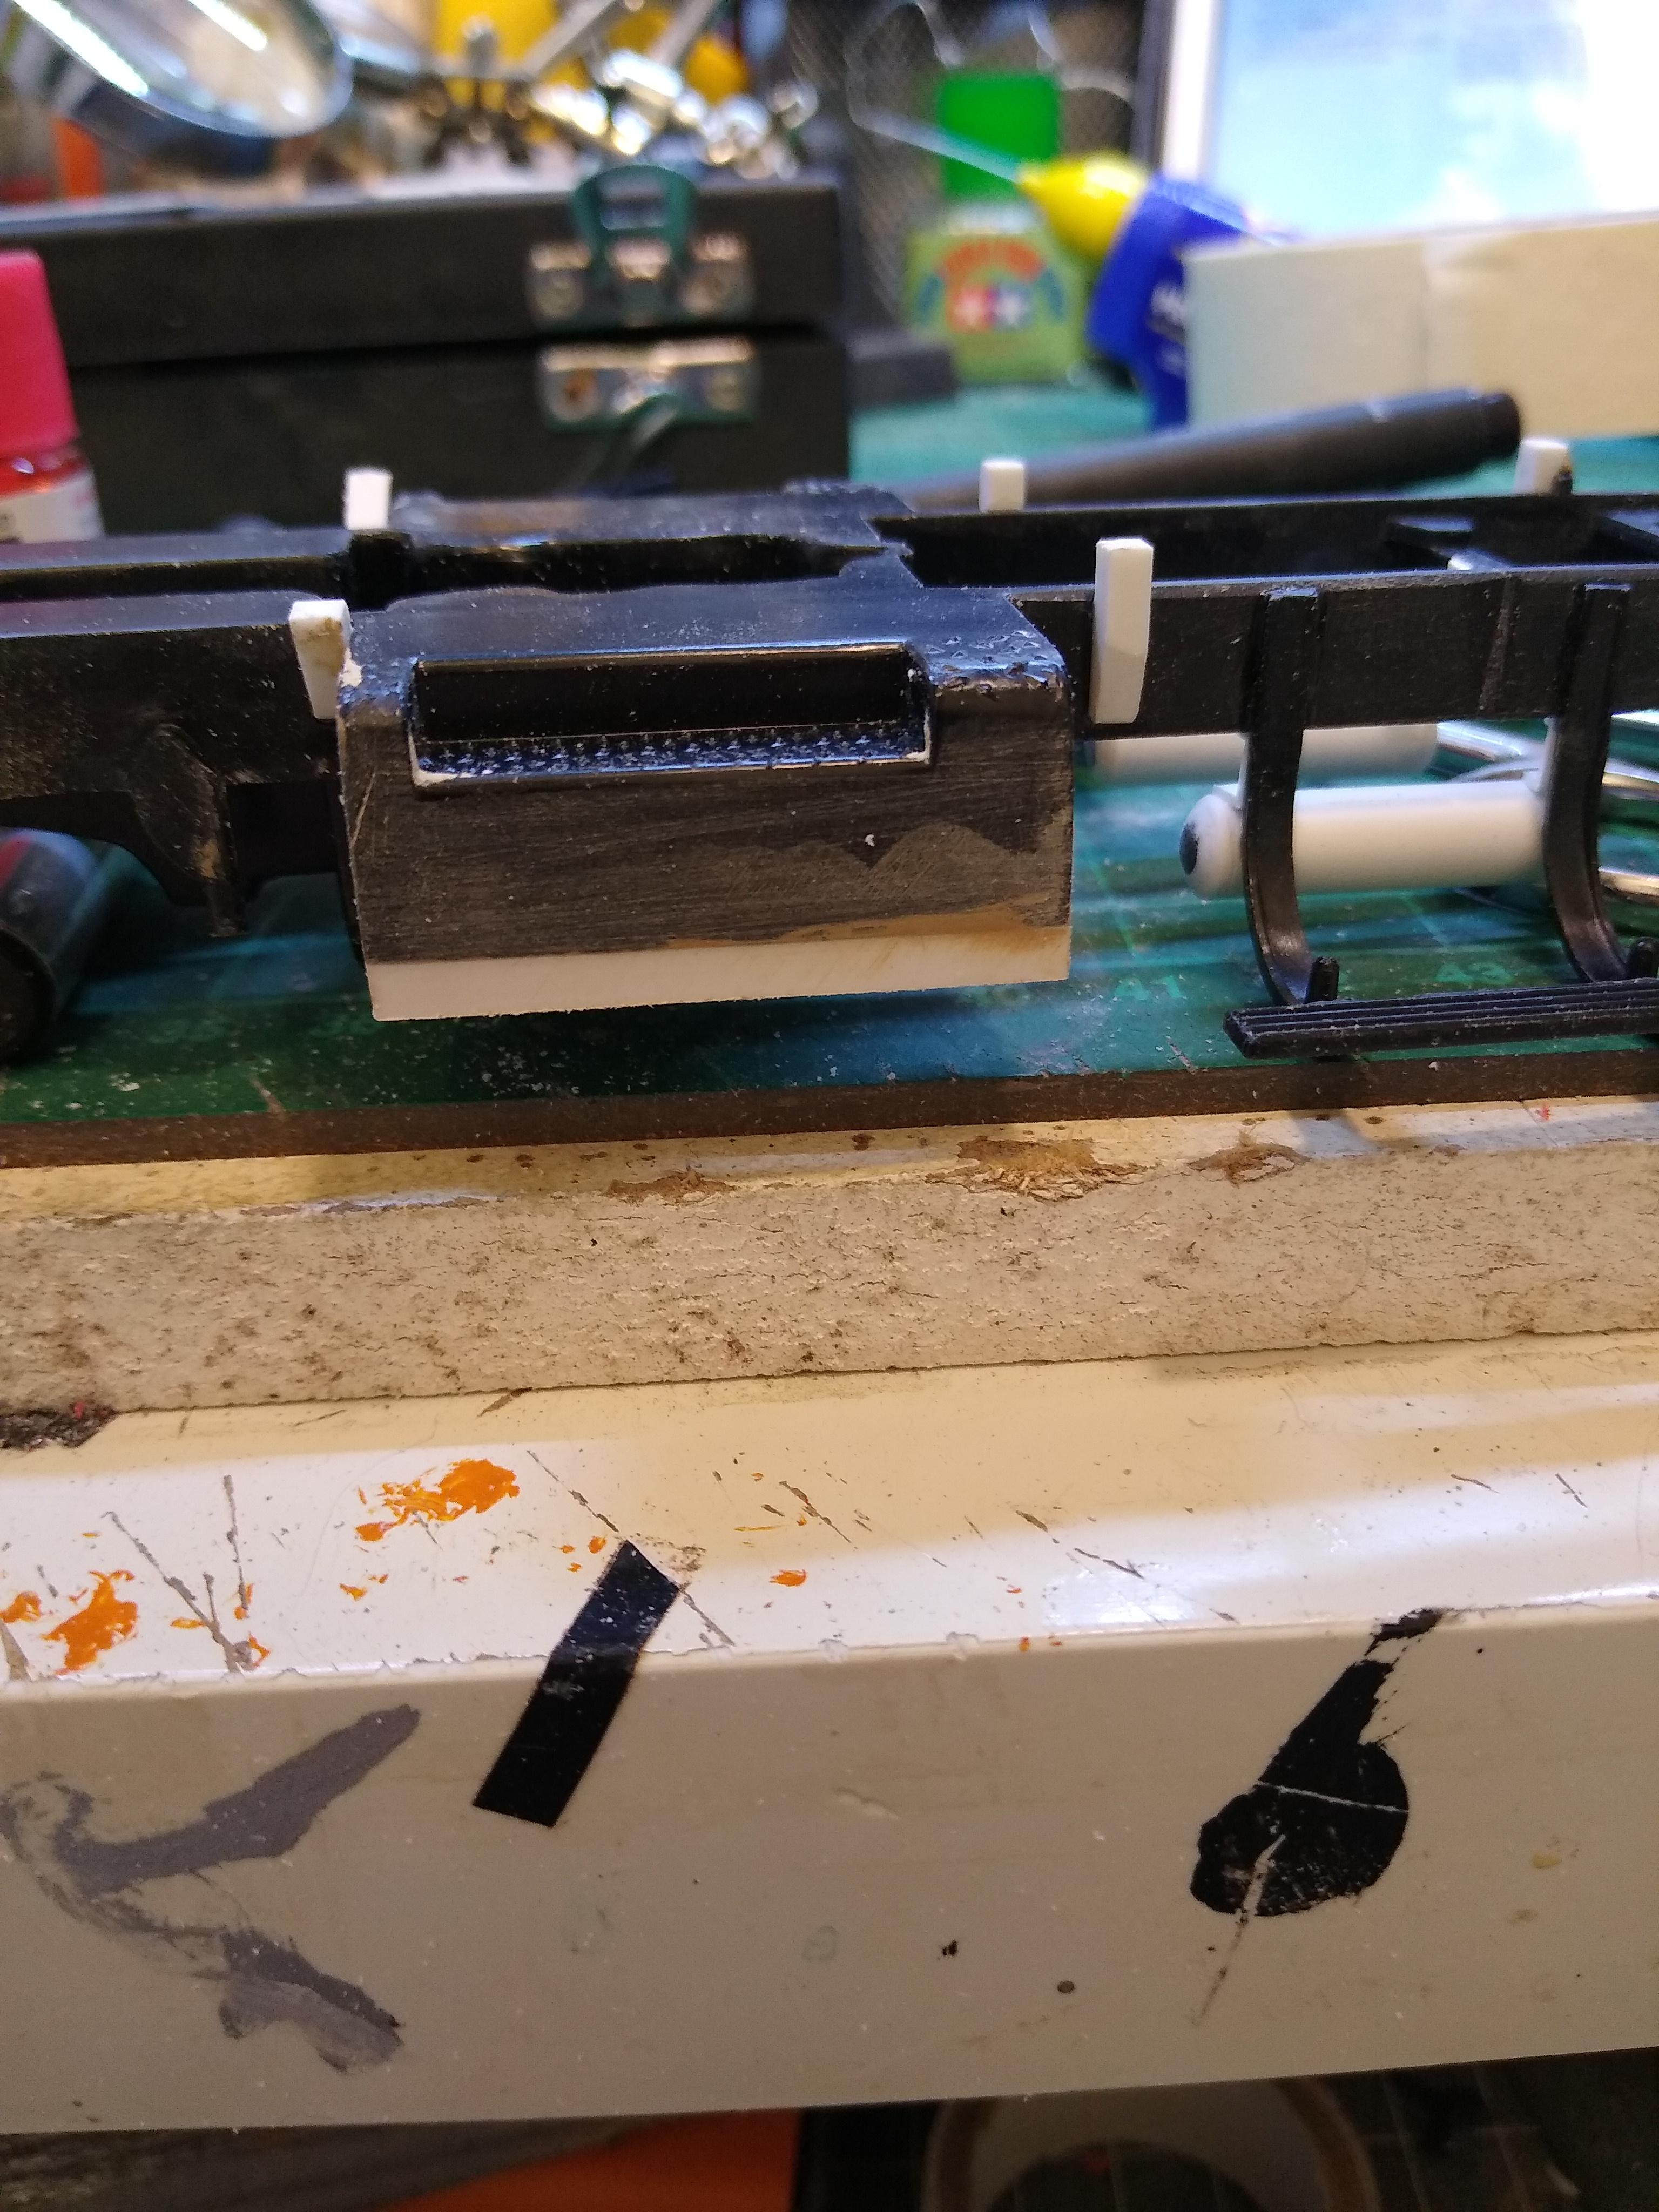
I was having breakfast this morning and pondering my KW. It just didn't look right, what is it? Battery boxes! They're far too shallow. Looking at photos of the truck in the original KW brochure I worked out it needed about 5mm added. The diamond plate detail doesn't carry over on to the front of the box so I was not worried about losing detail. I cut the bottom step off each side with a hobby knife and added some 5mm square tube. Once it was set, I realised I'd added too much and it needed to come out at about 3mm so I had to take a hacksaw to my work. Painful but successful. Added the bottom step back on and shaped a piece of square rod into the triangular extension on the top step. Overall, the look is so much more correct to the eye.
-
Nice workaday Louisville. Unsung hero.
-
BRGB Kenworth Alaskan Hauler
Rockford replied to k100's topic in WIP: Model Trucks: Big Rigs and Heavy Equipment
That rear suspension looks like a lot of work but should look good when it's finished. Great job so far. -
Gmc General brgb2023
Rockford replied to 53gmc's topic in WIP: Model Trucks: Big Rigs and Heavy Equipment
Nice rig, they were a great looking truck Generals. The fellow with the pickup looks impressed too! You need a nice van trailer behind that now. -
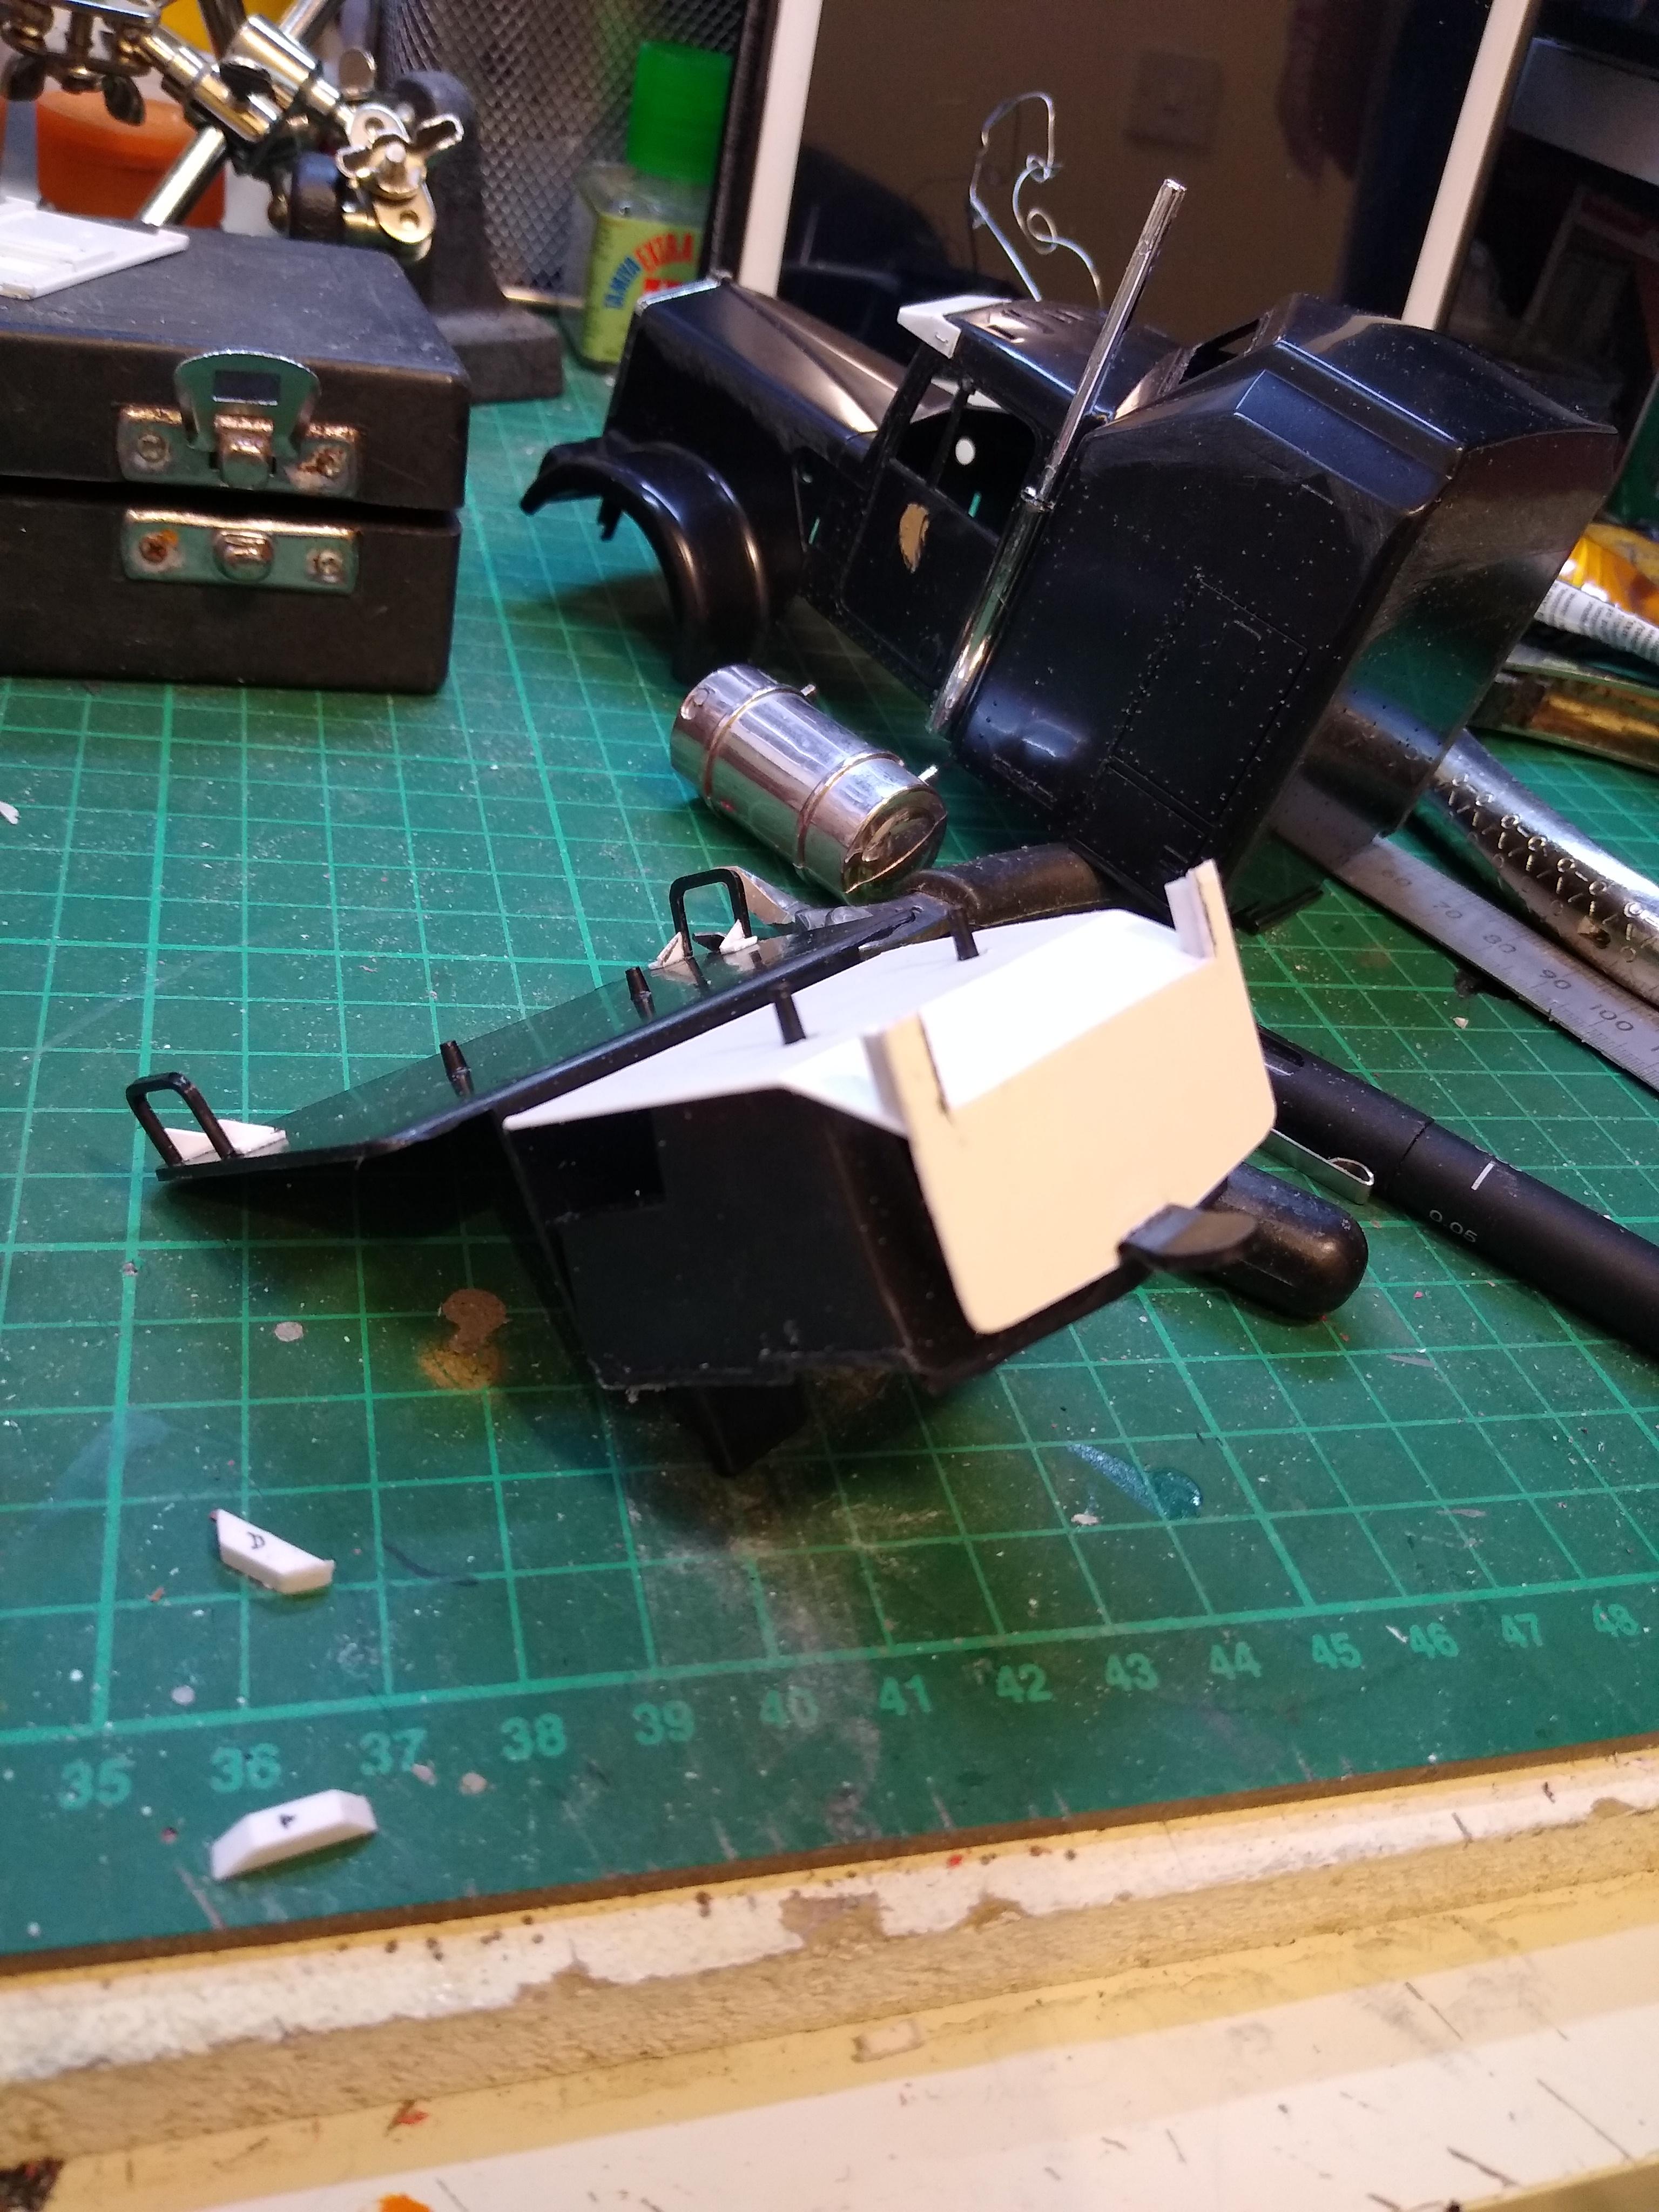
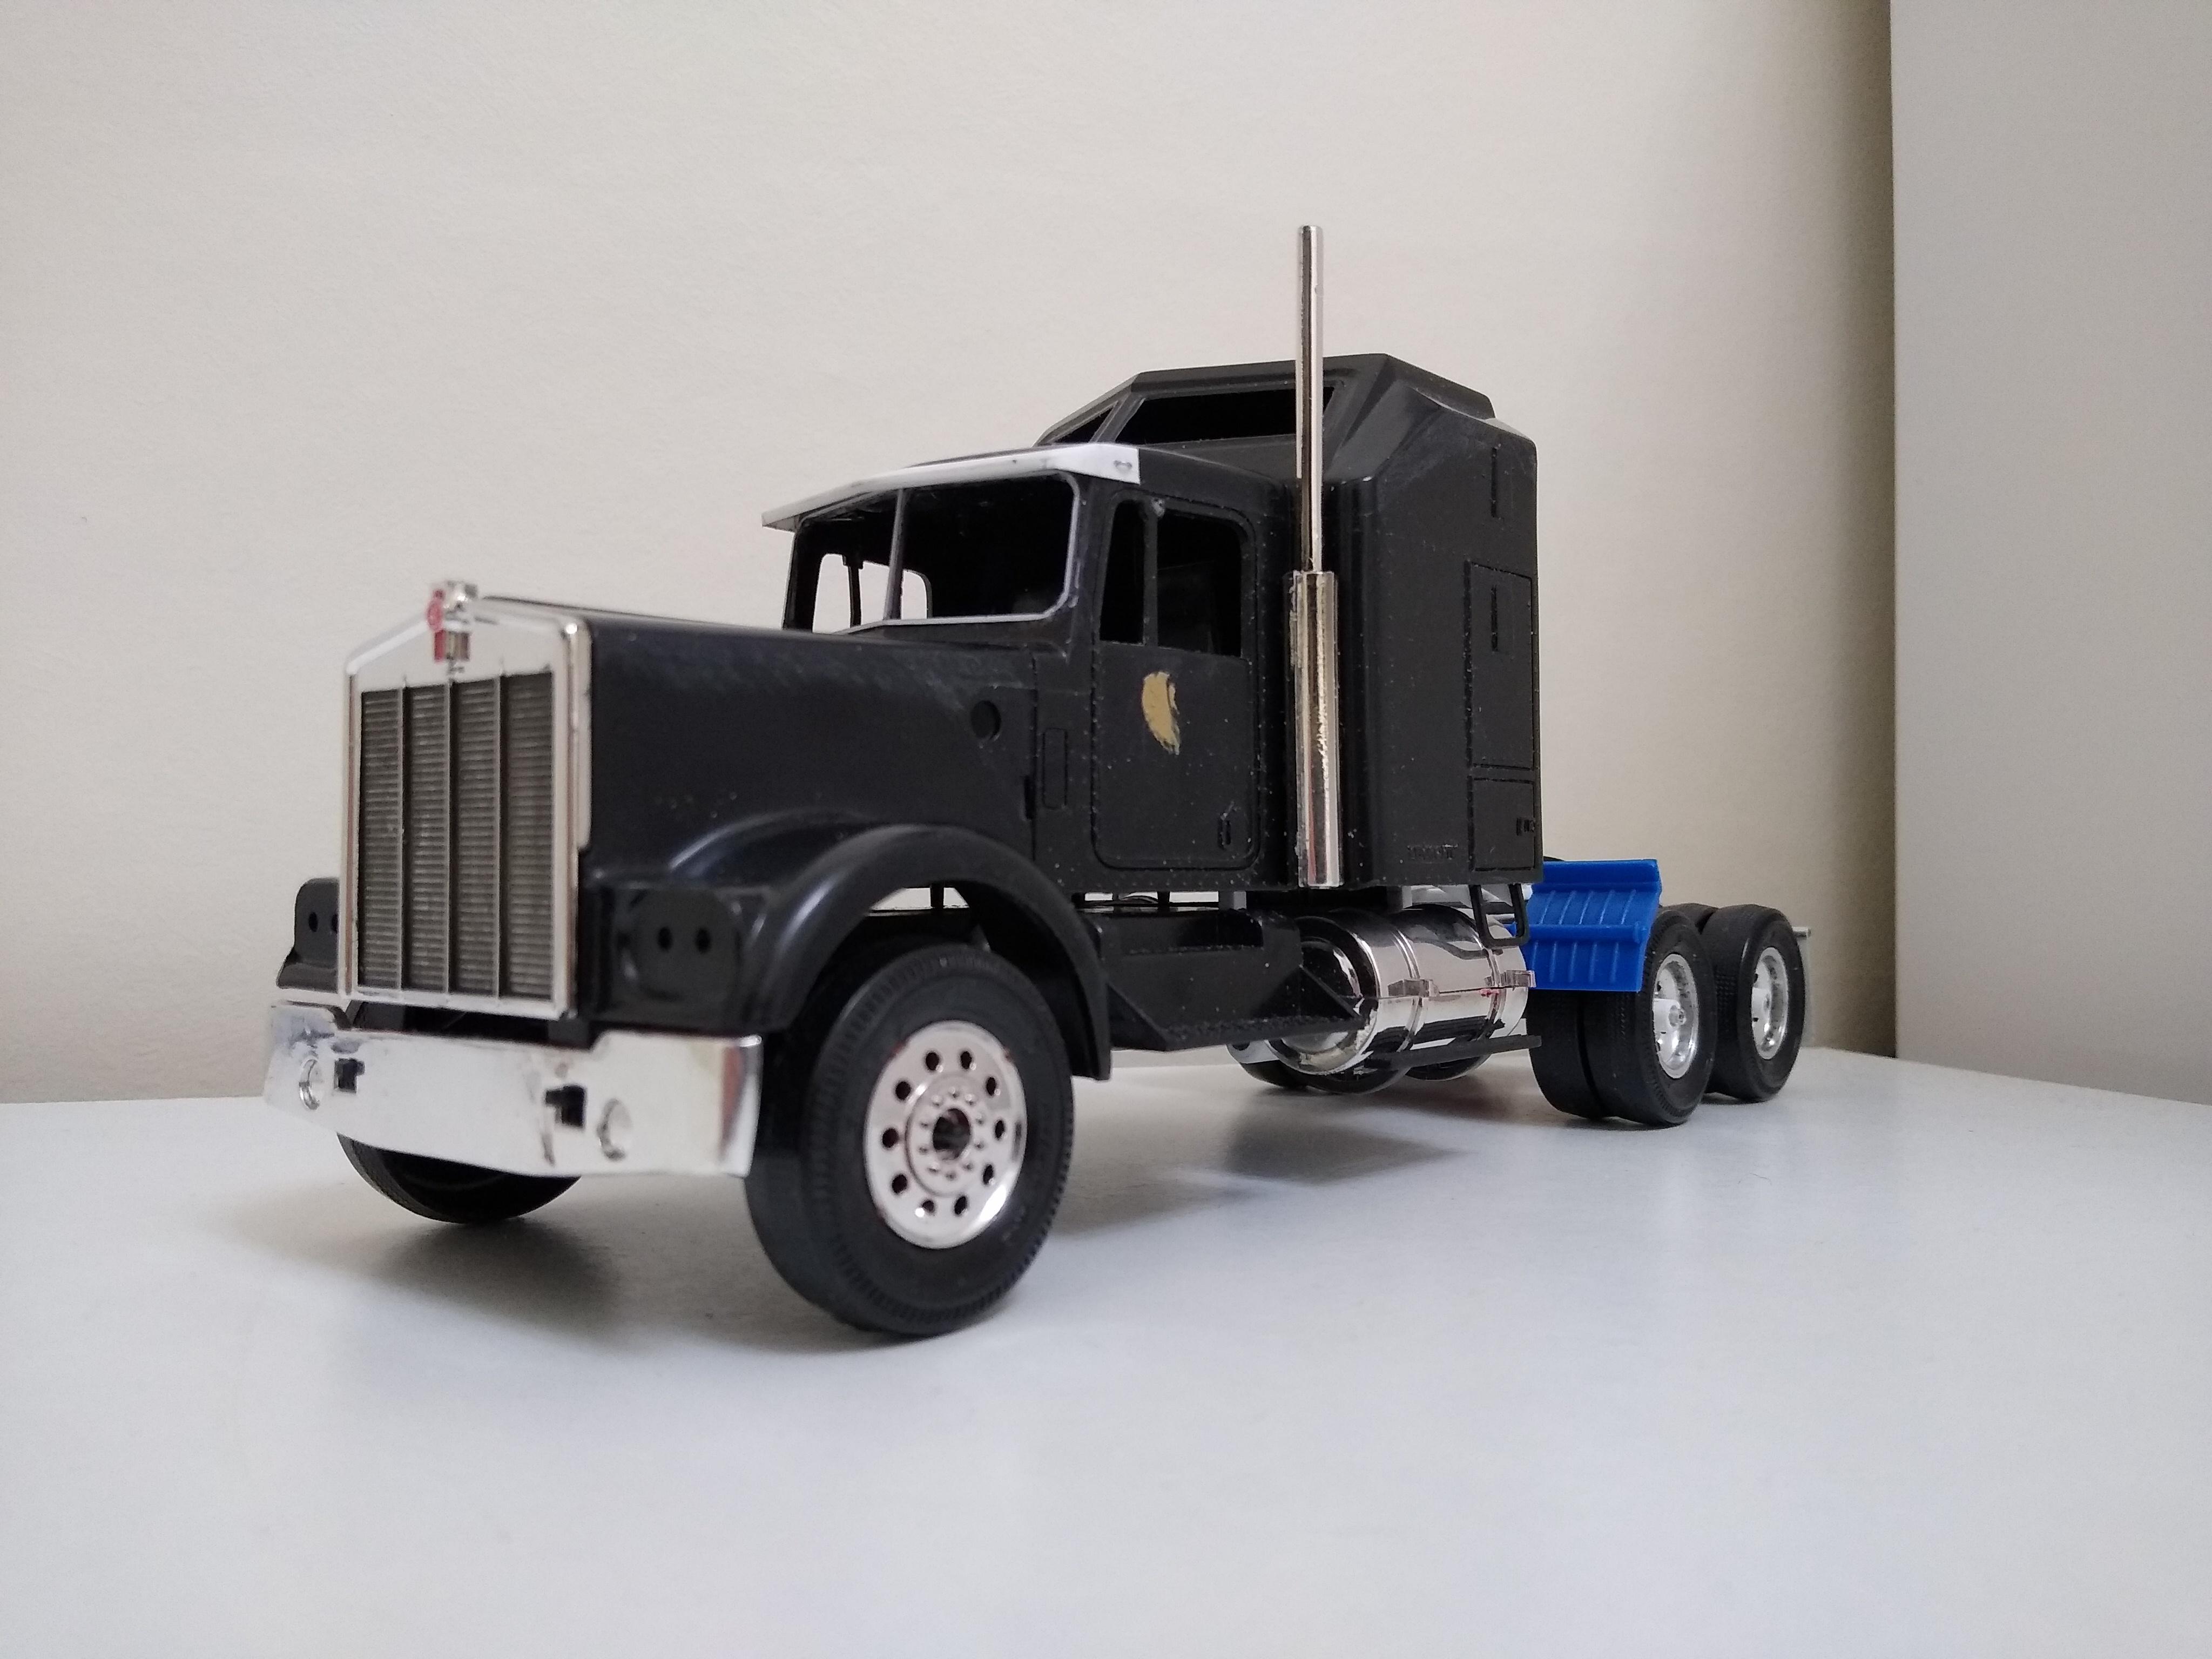
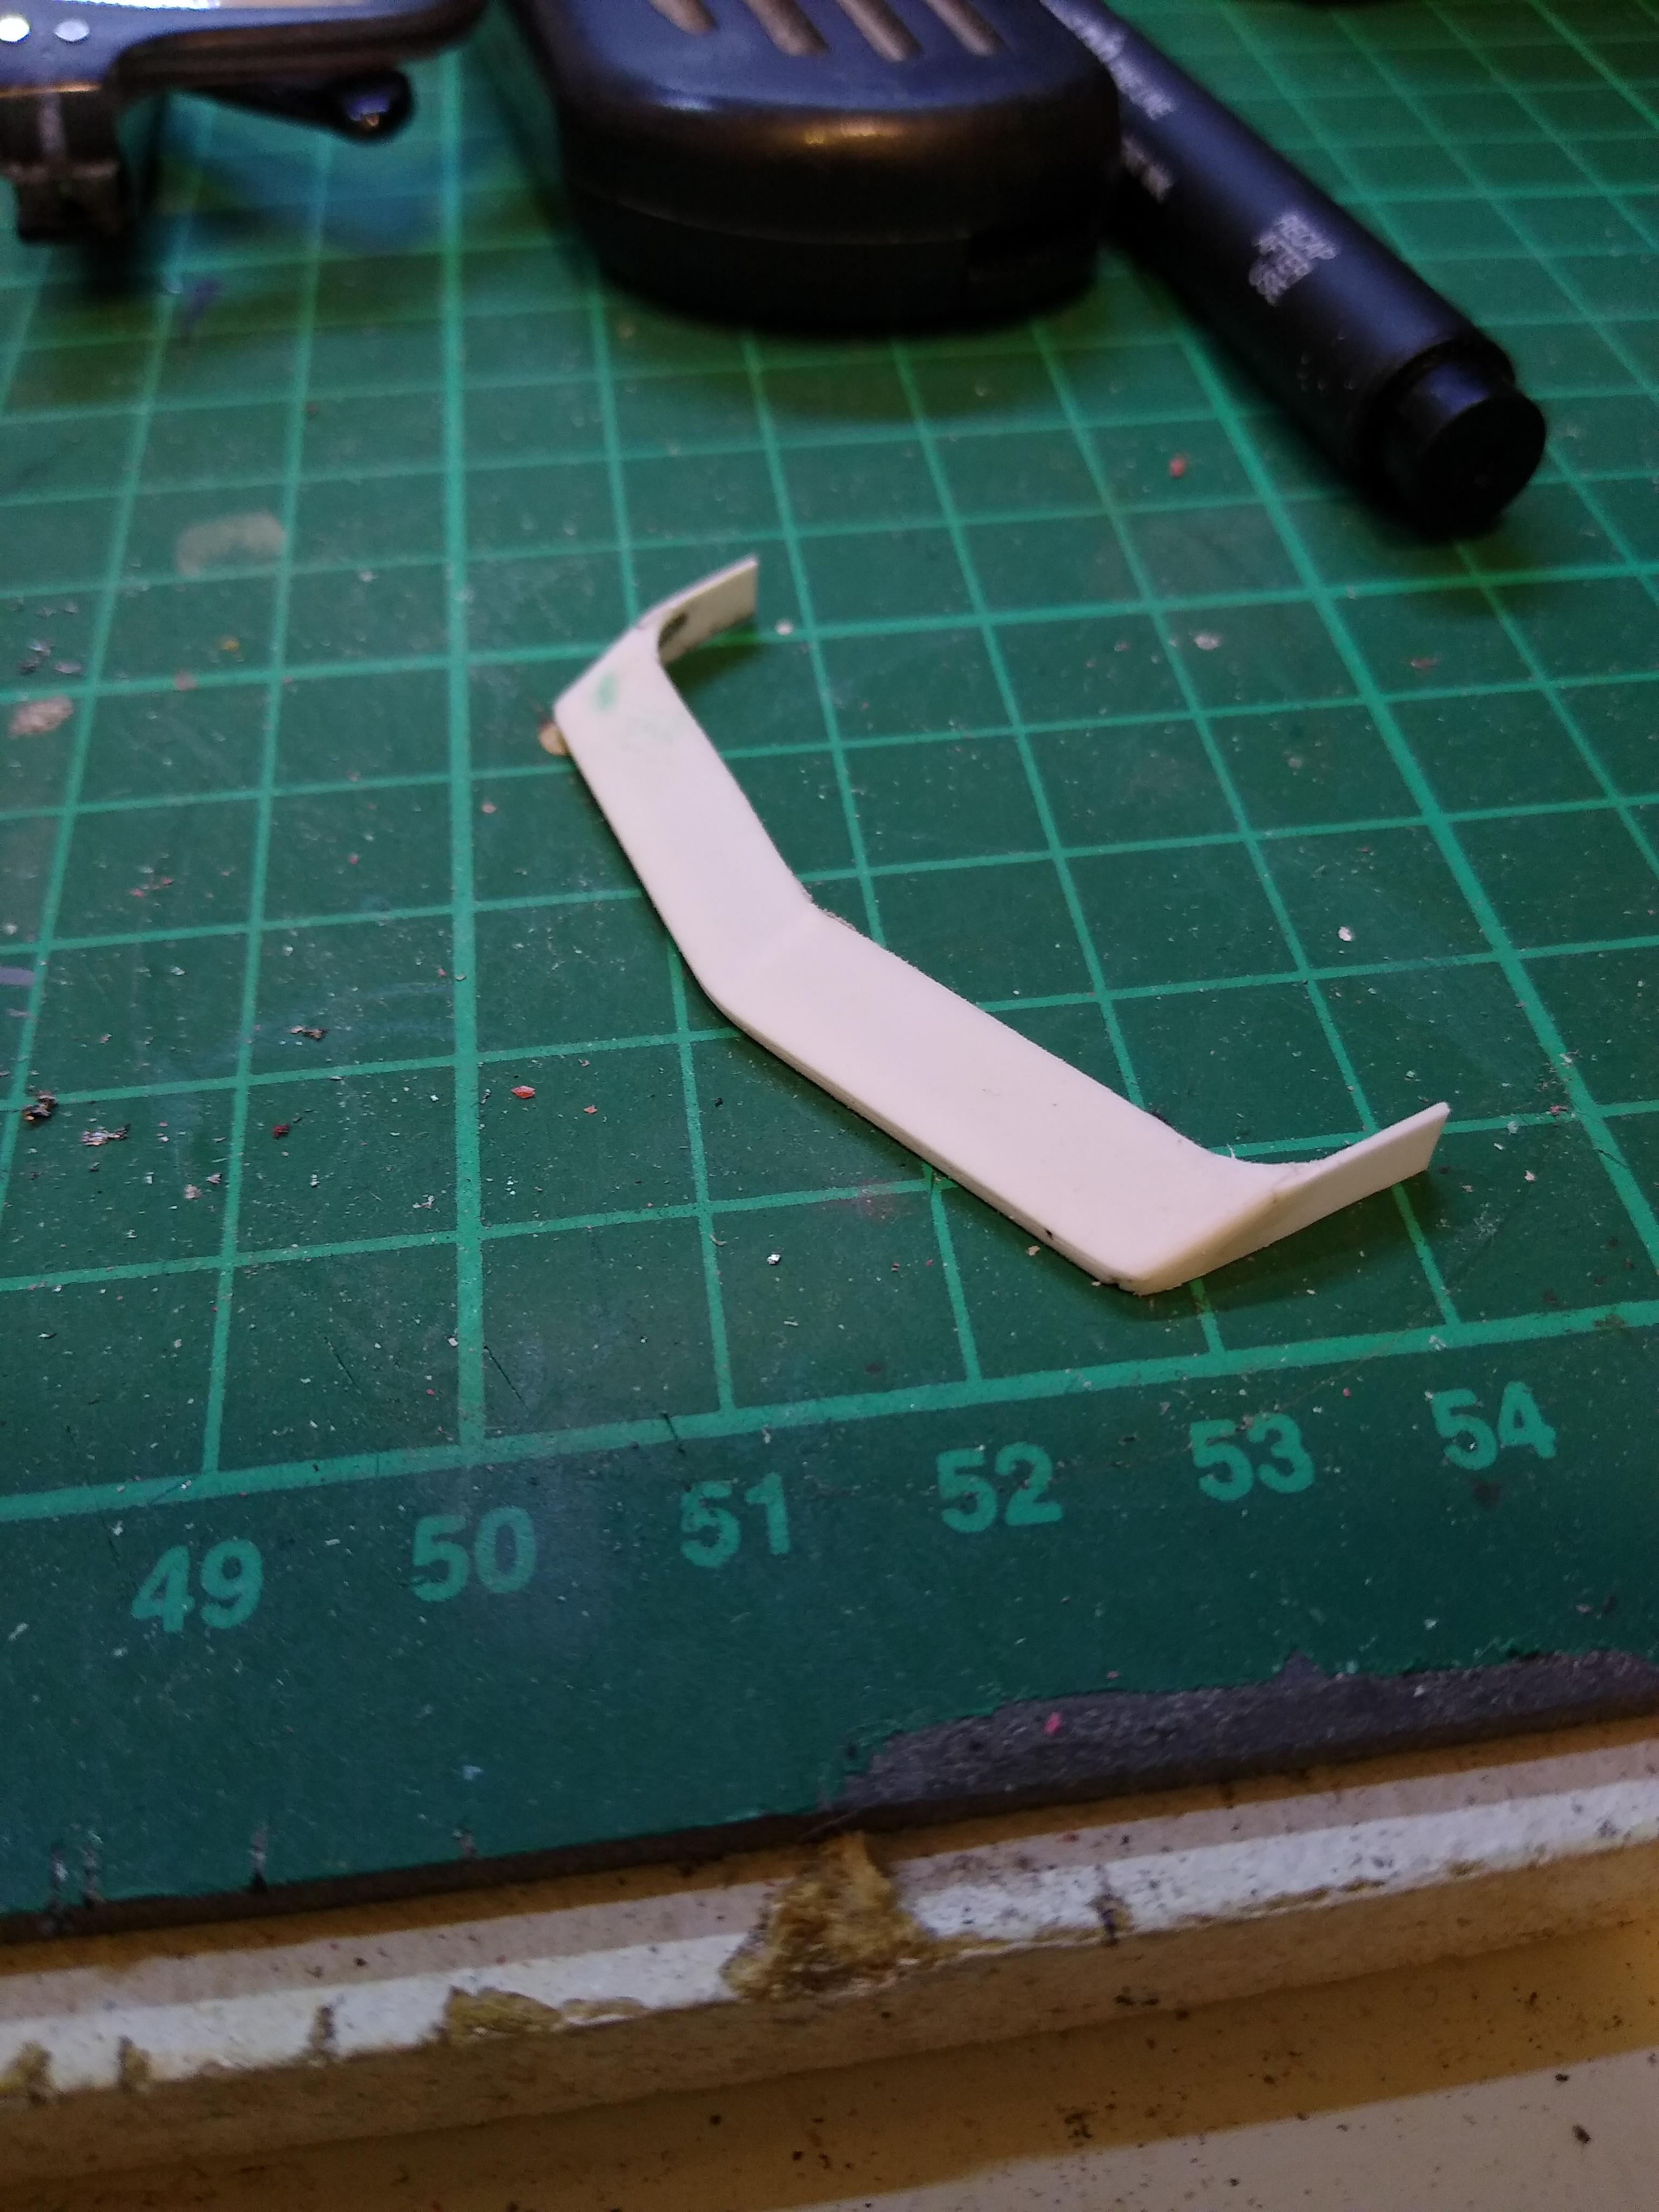
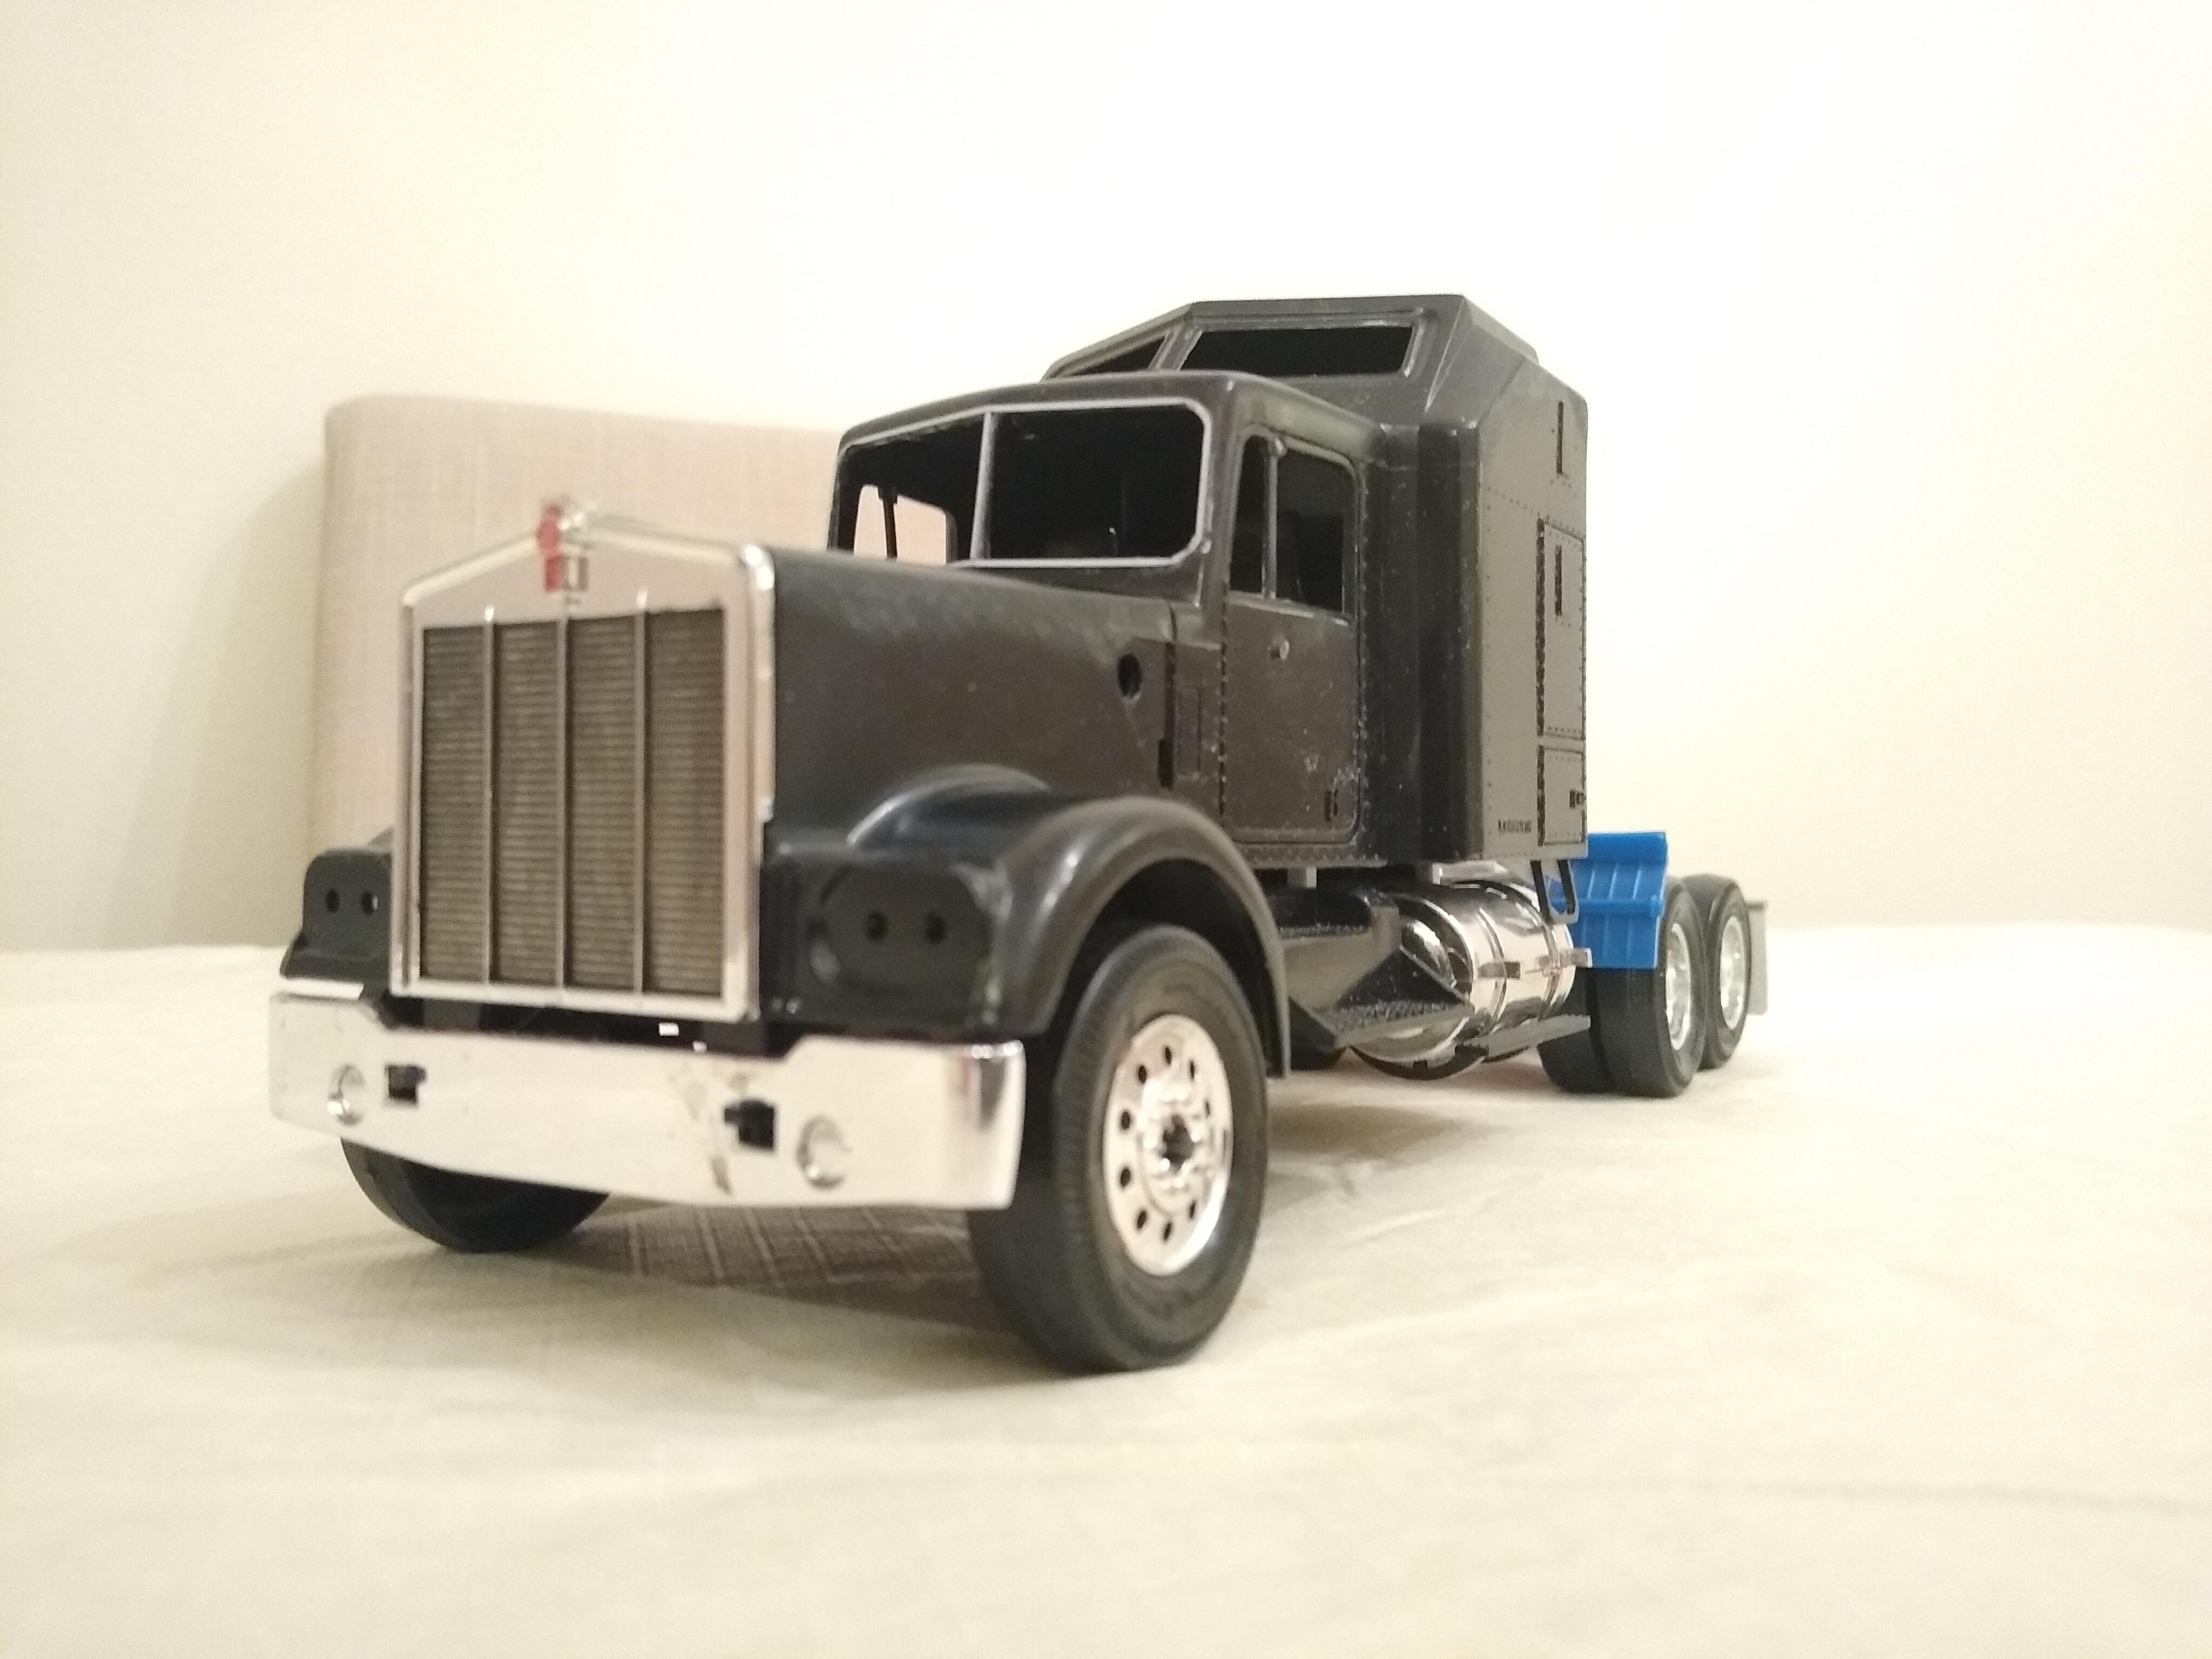
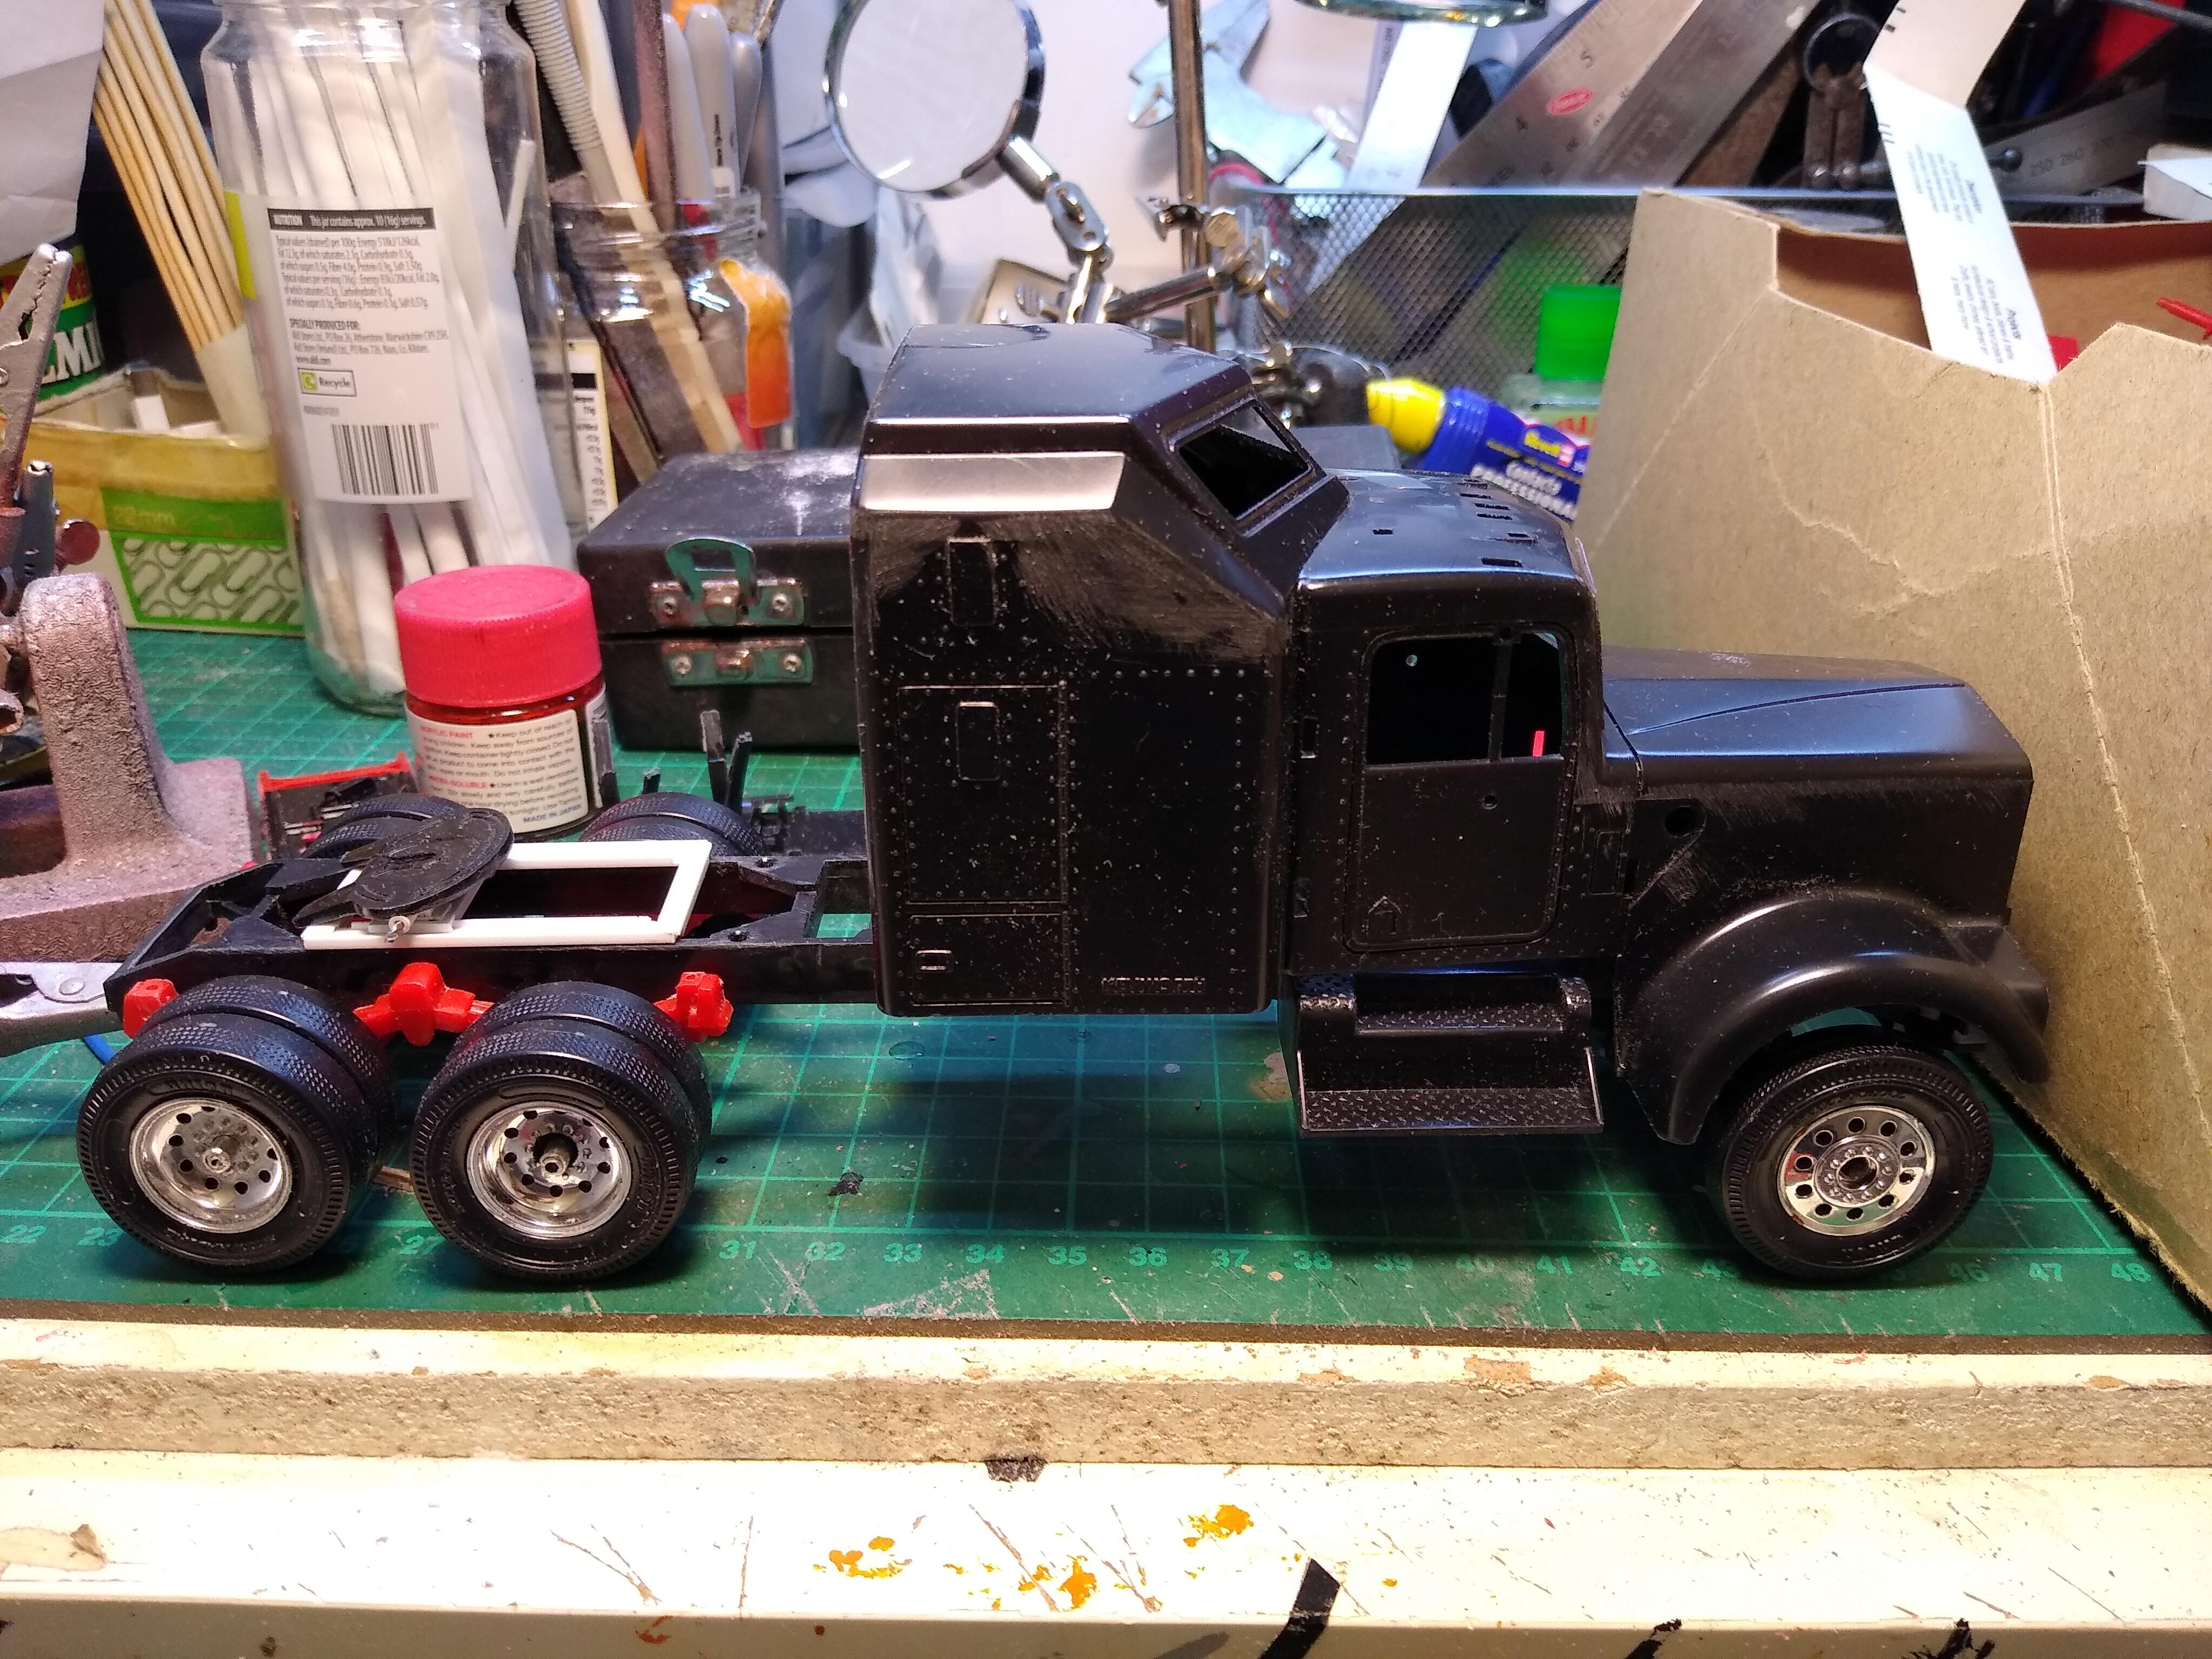
Got off to a slow start this weekend. Wanted to make a proper-looking KW visor for the cab. Custom ones are easy, you just bend a piece of aluminium, but try as I may I couldn't for the life of me get the shape of the factory visor out of ali. I ended up building one out of plastic stock pieces and there's NINE pieces in this one visor. I'm very pleased with the result though, looks right. Also built a two piece propshaft with a centre bearing, air tanks mounted on the fuel tank brackets, a cab floor and firewall. I jammed a kit exhaust stack on just for show, sits right against the cab wall and doesn't look right at all.
-
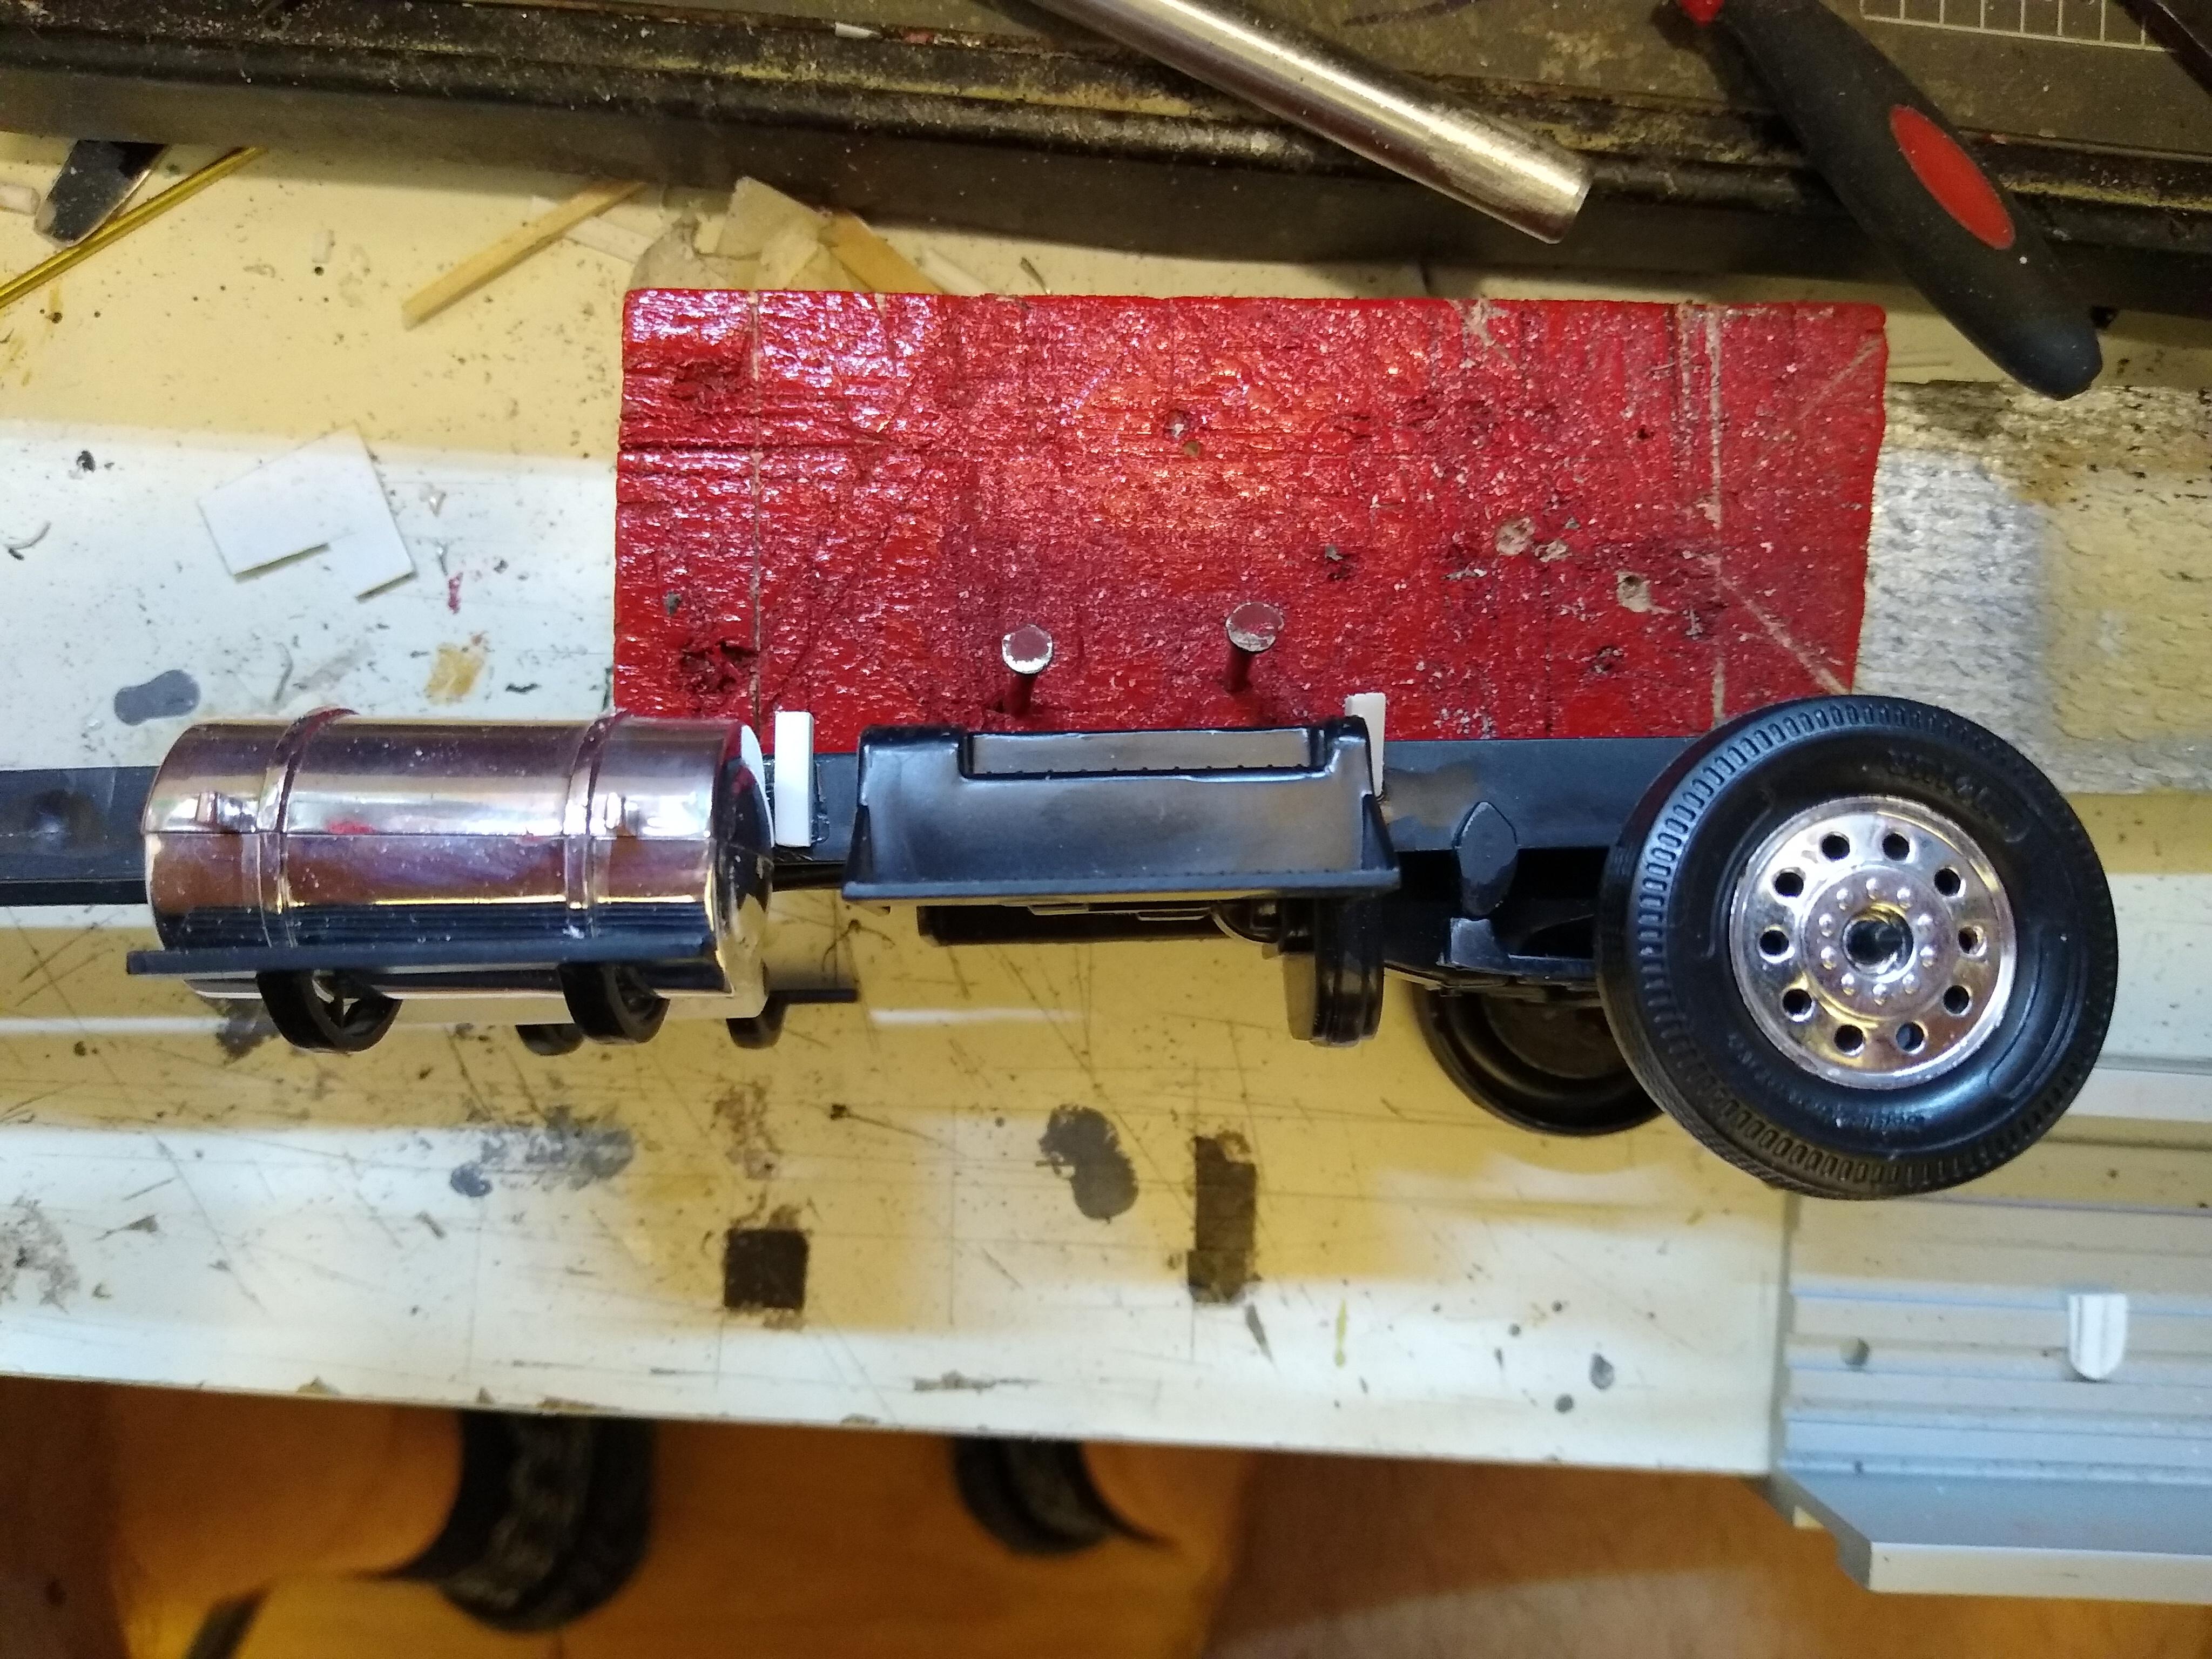
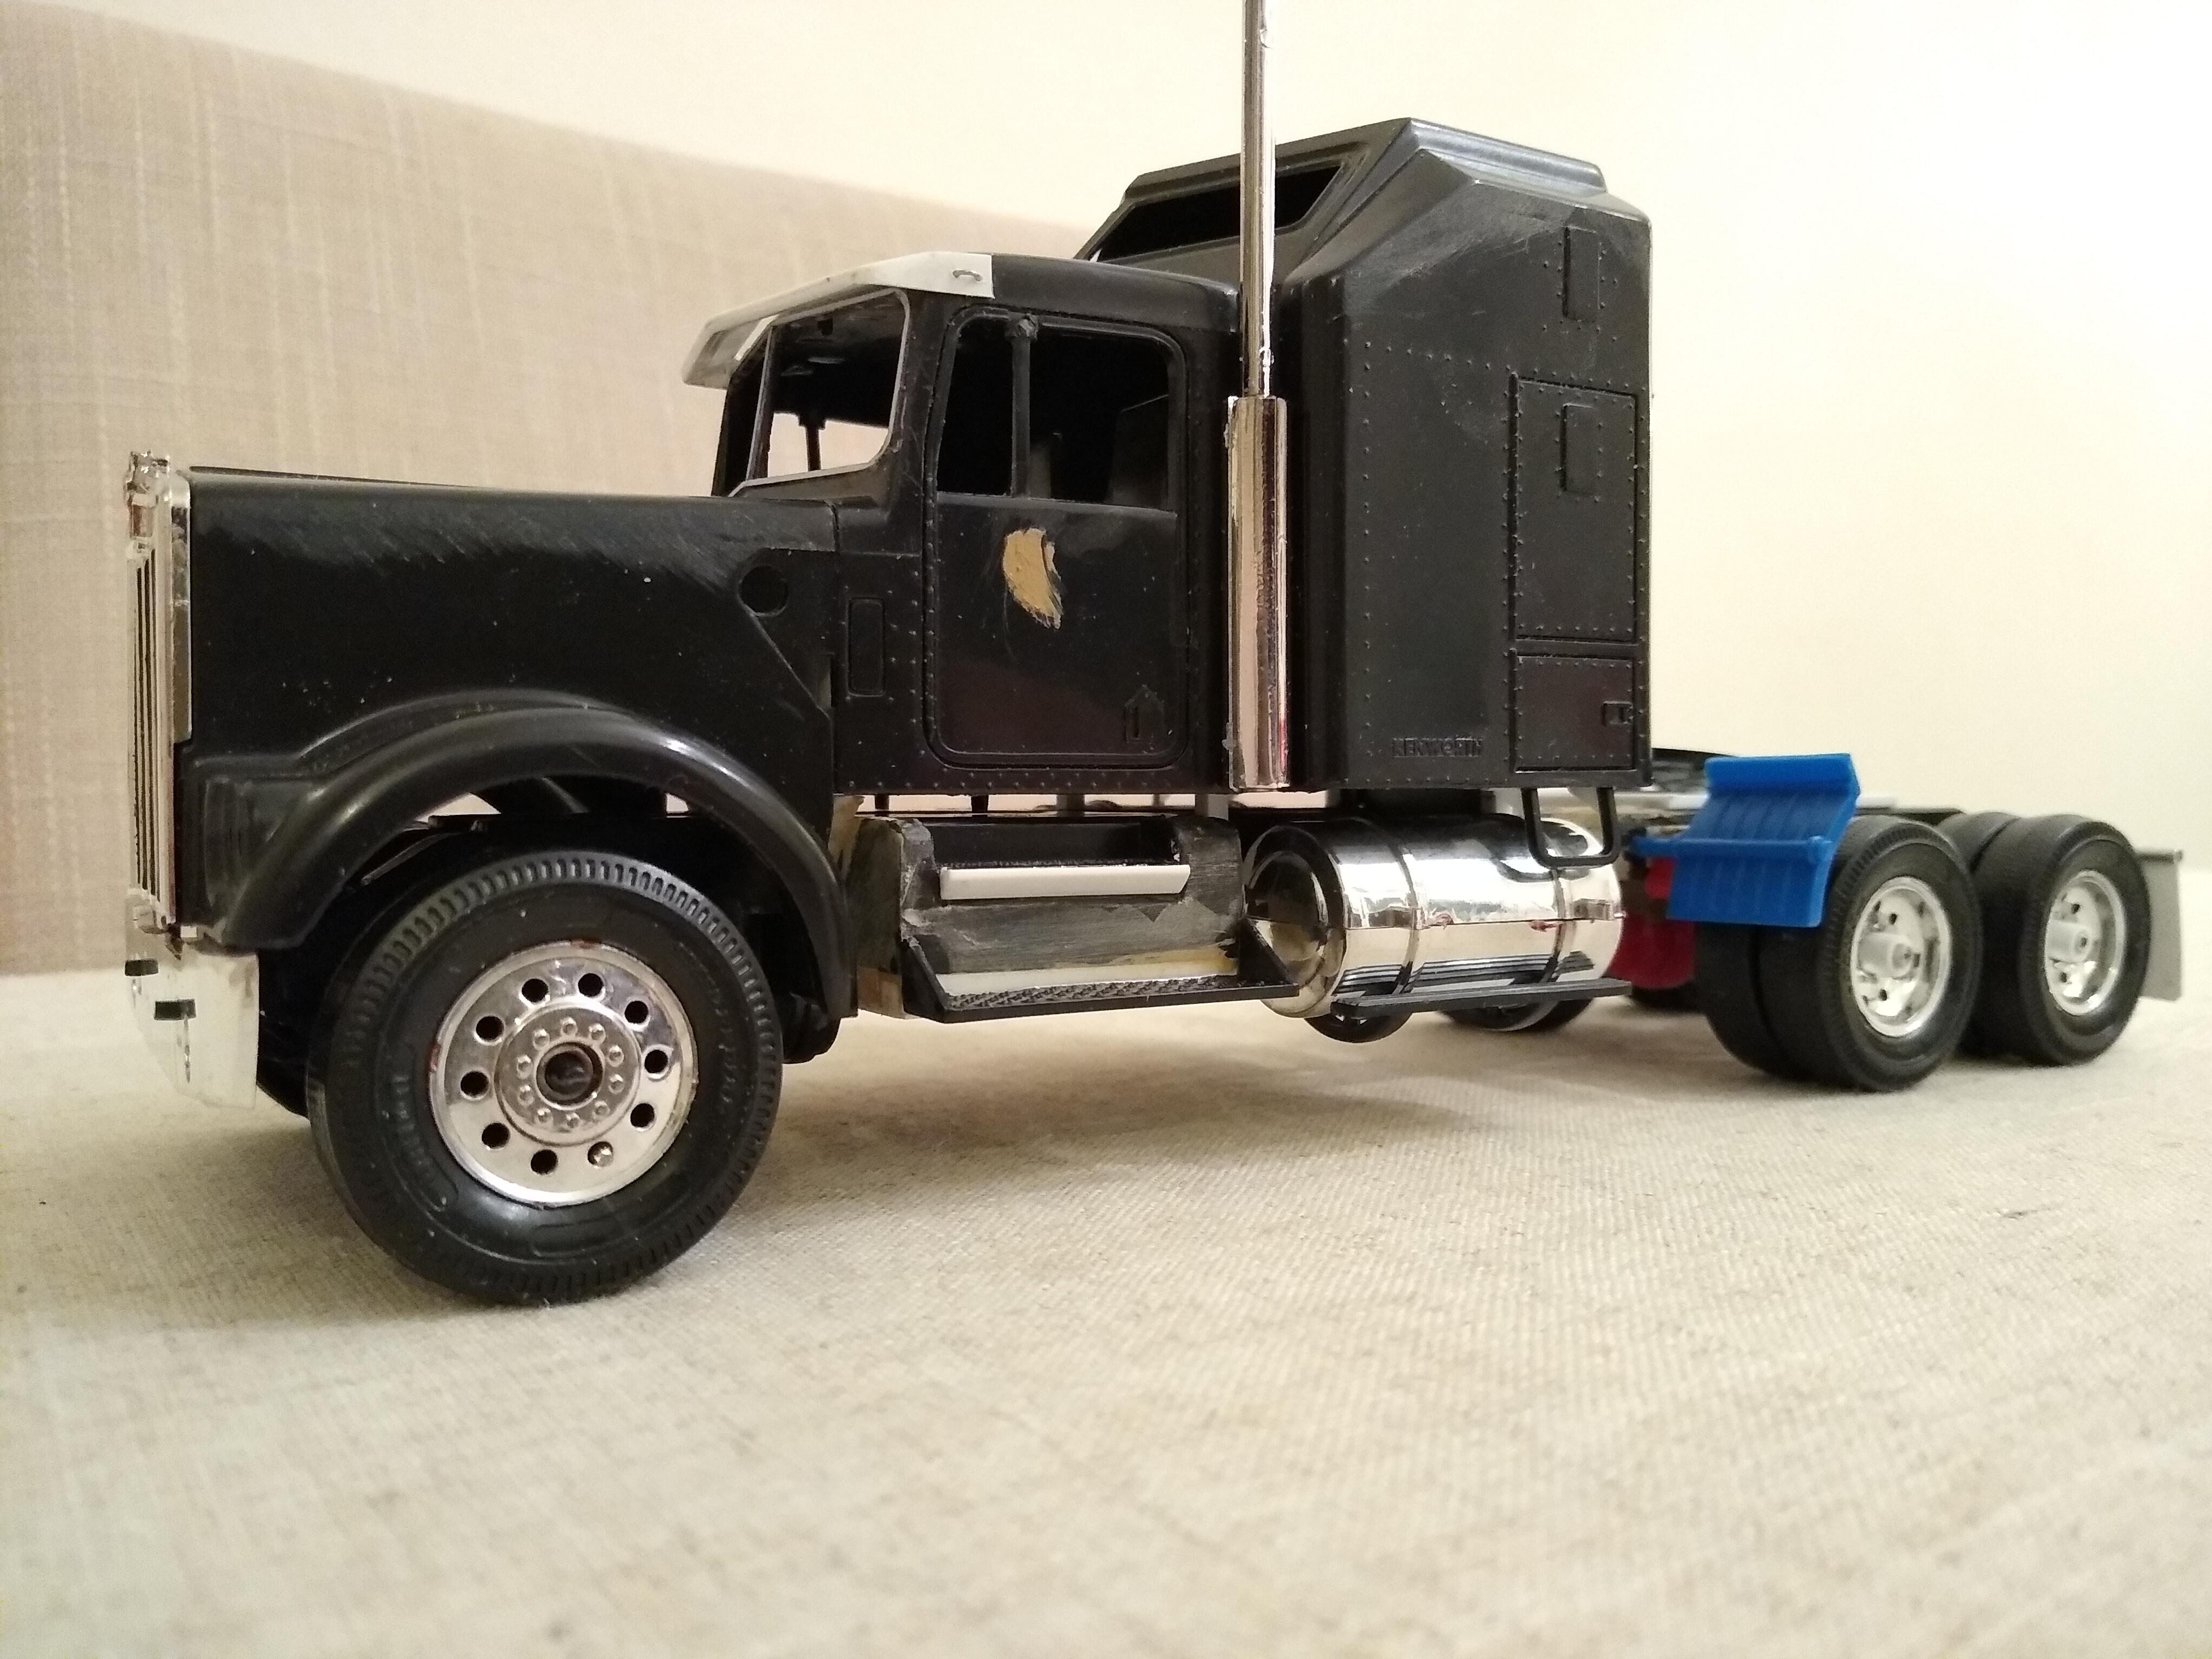
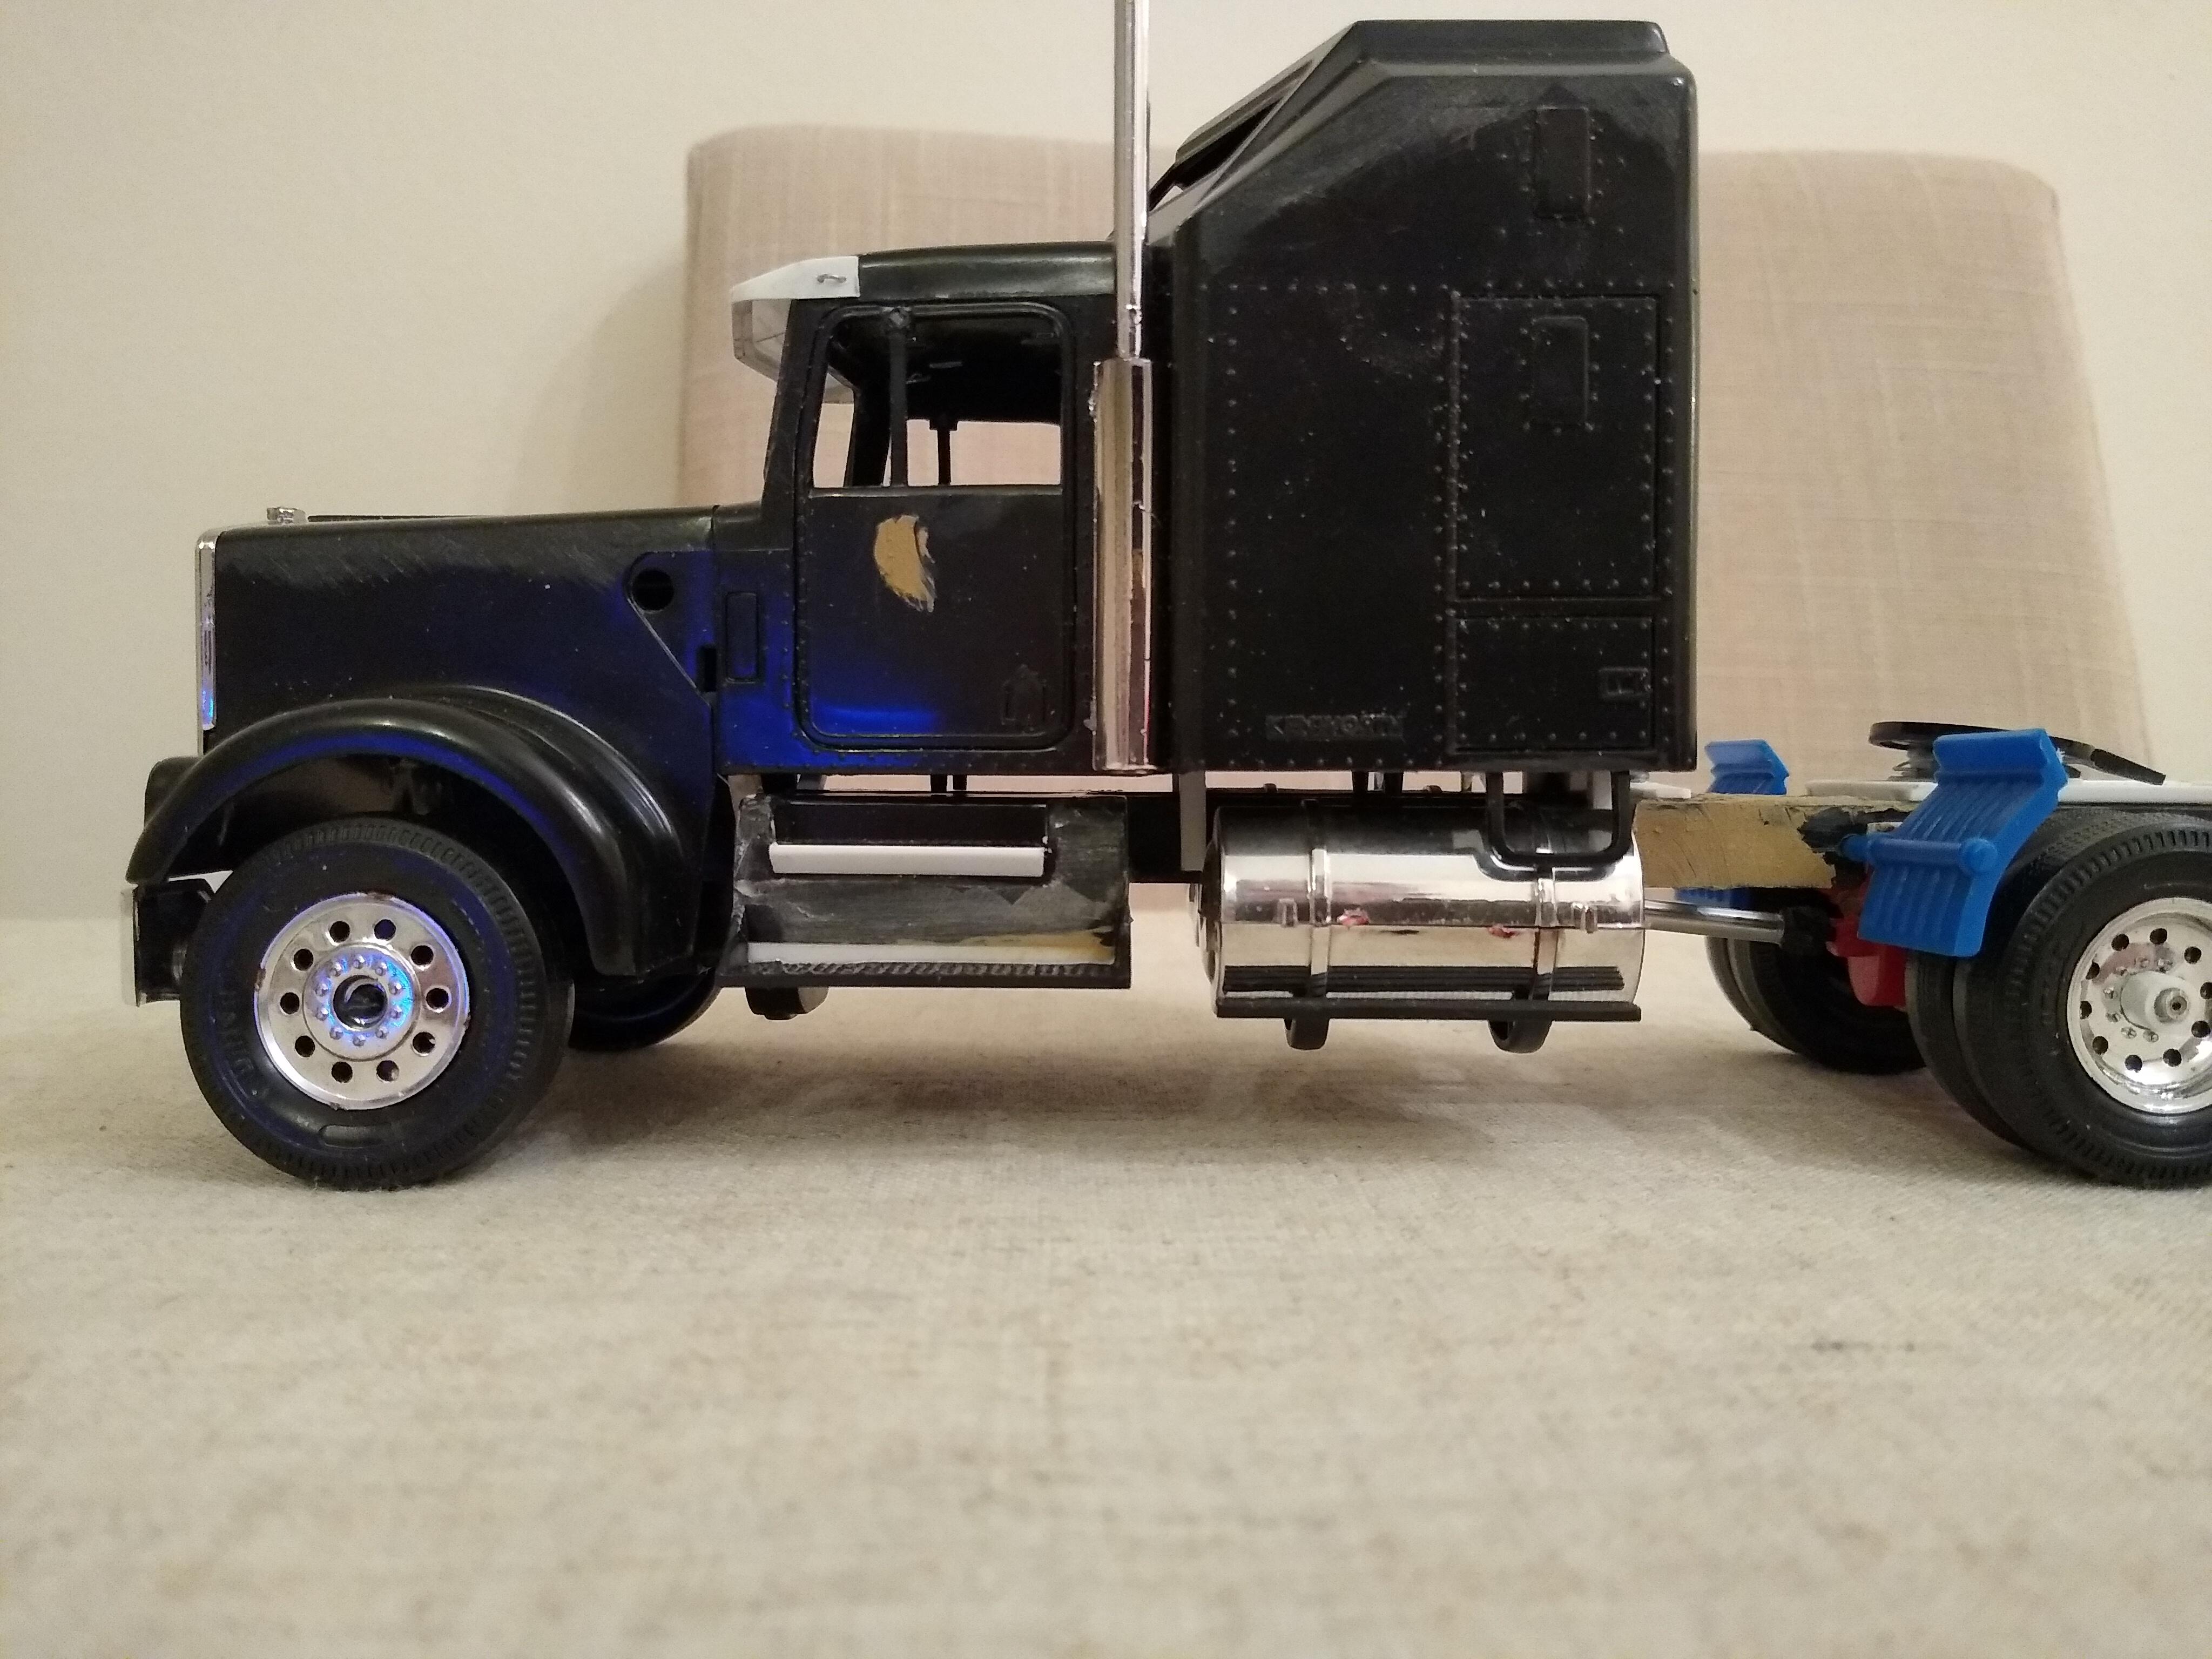
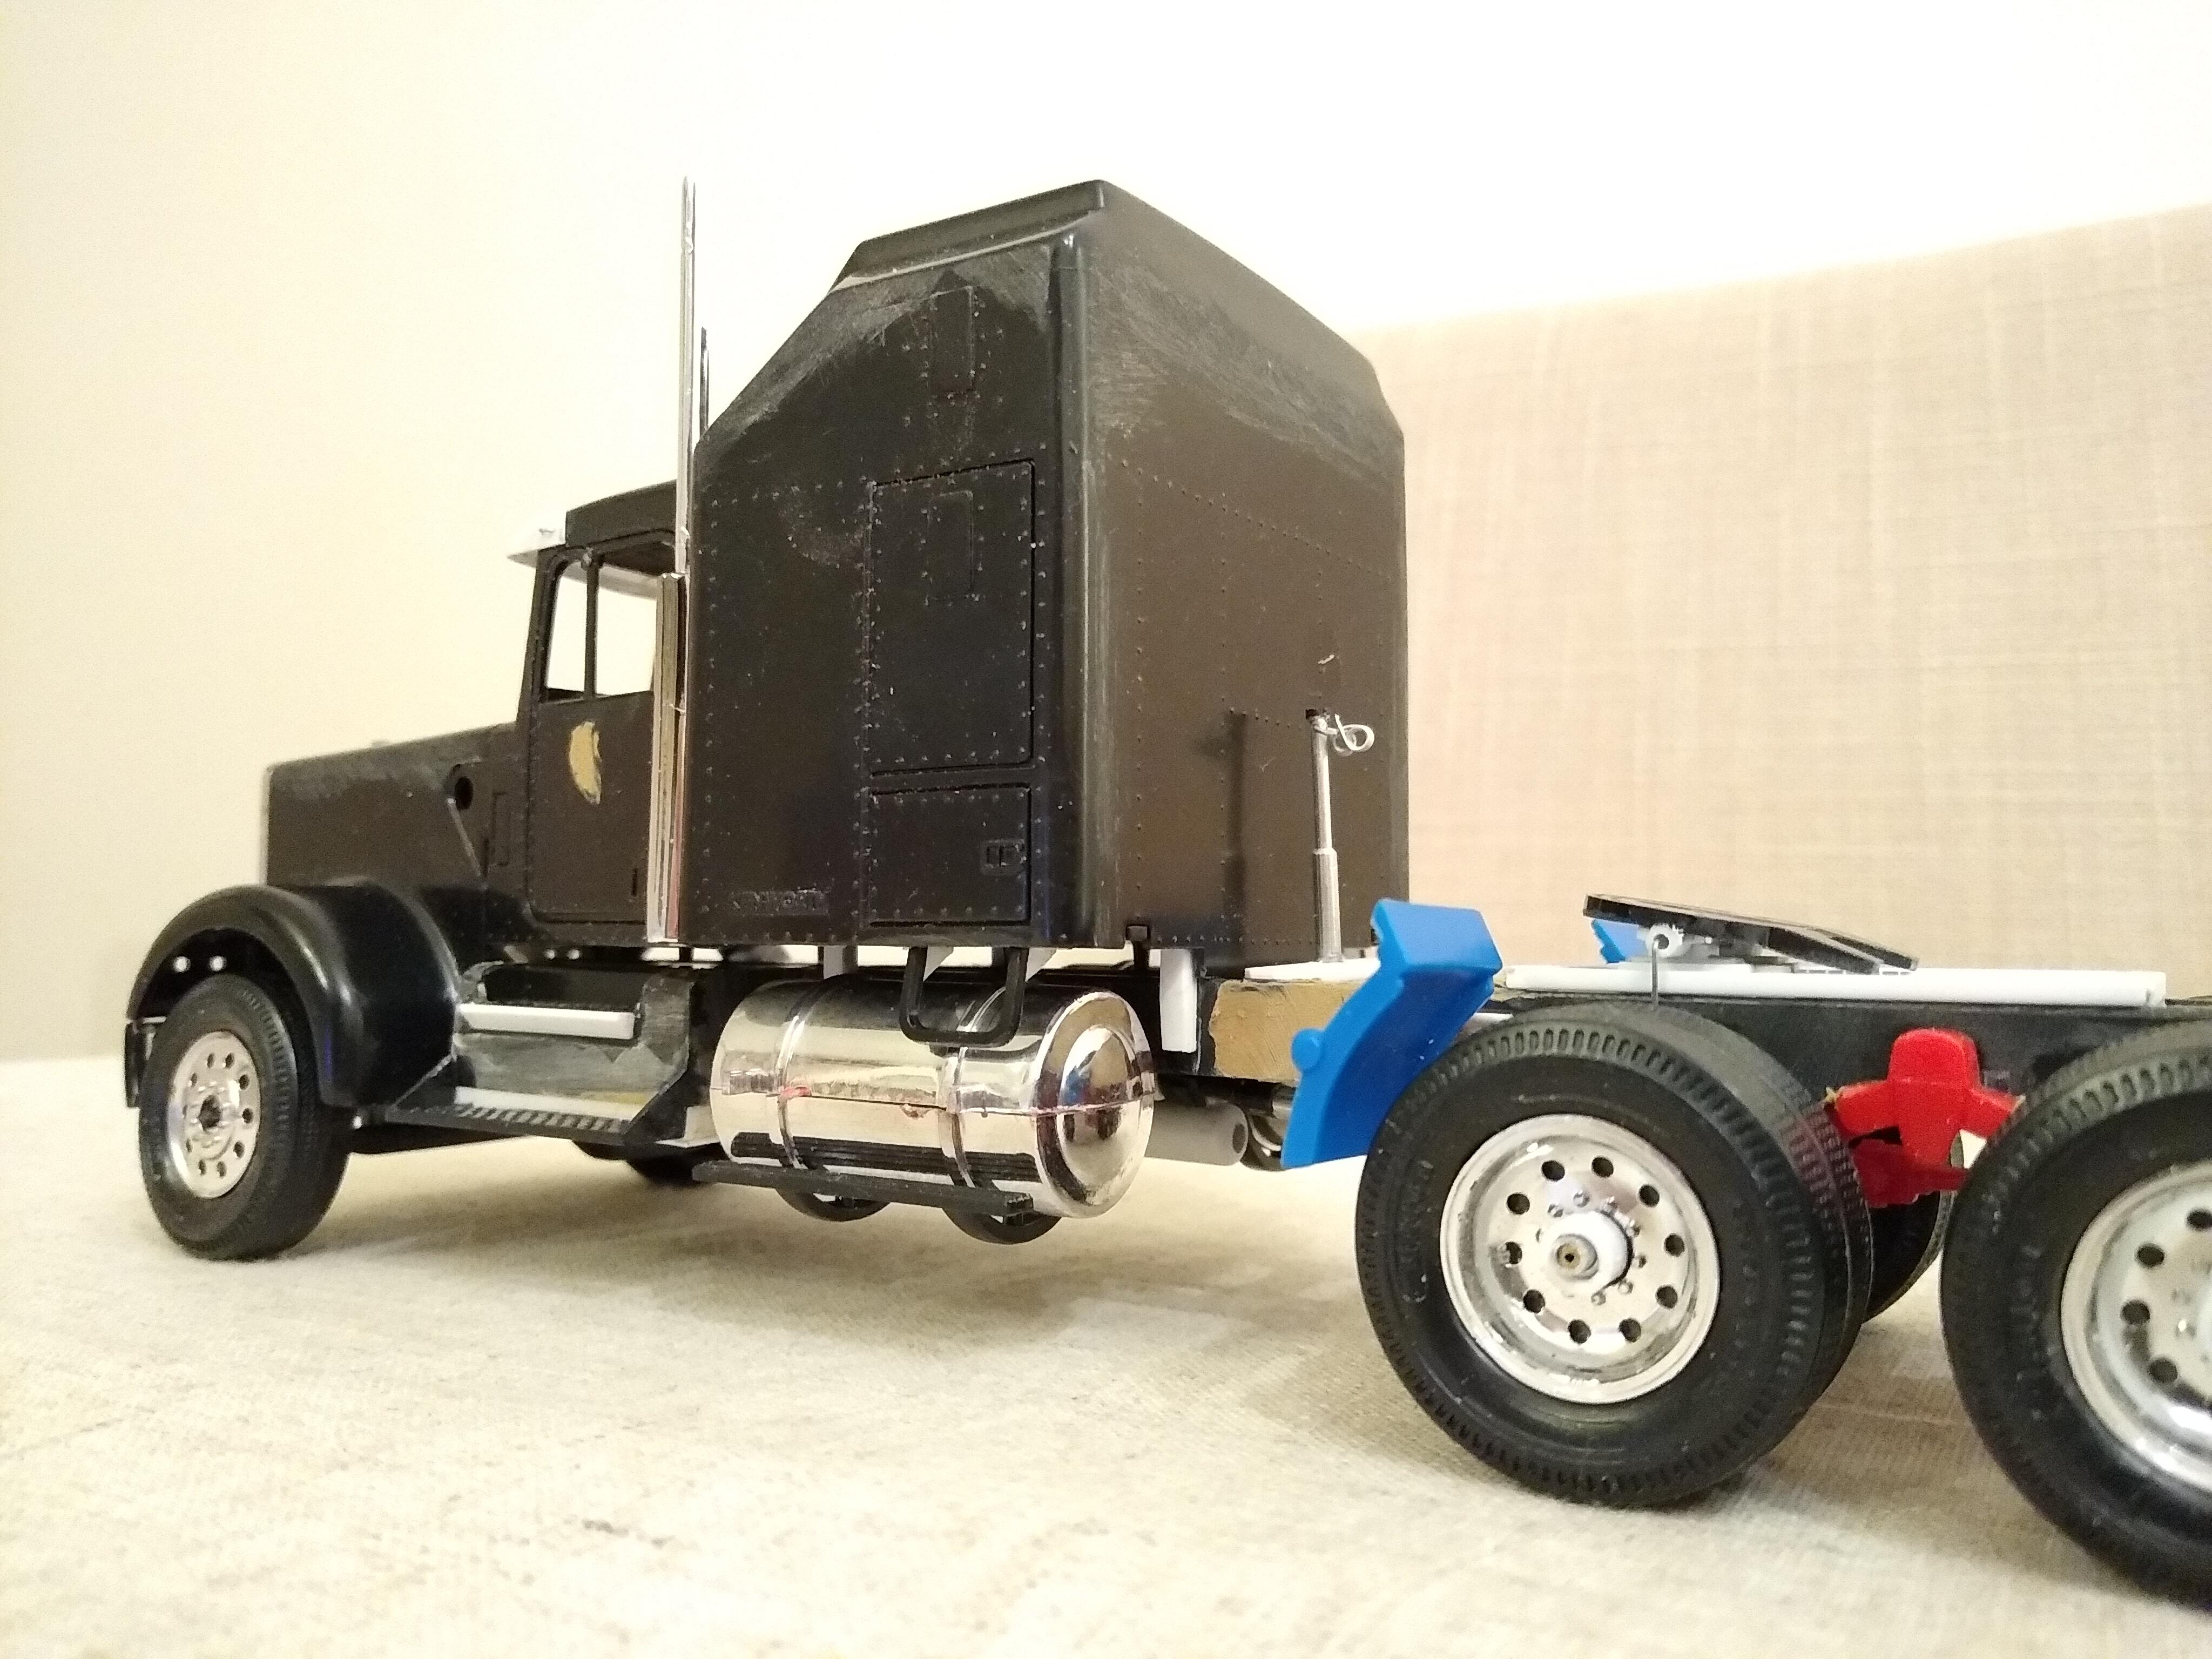
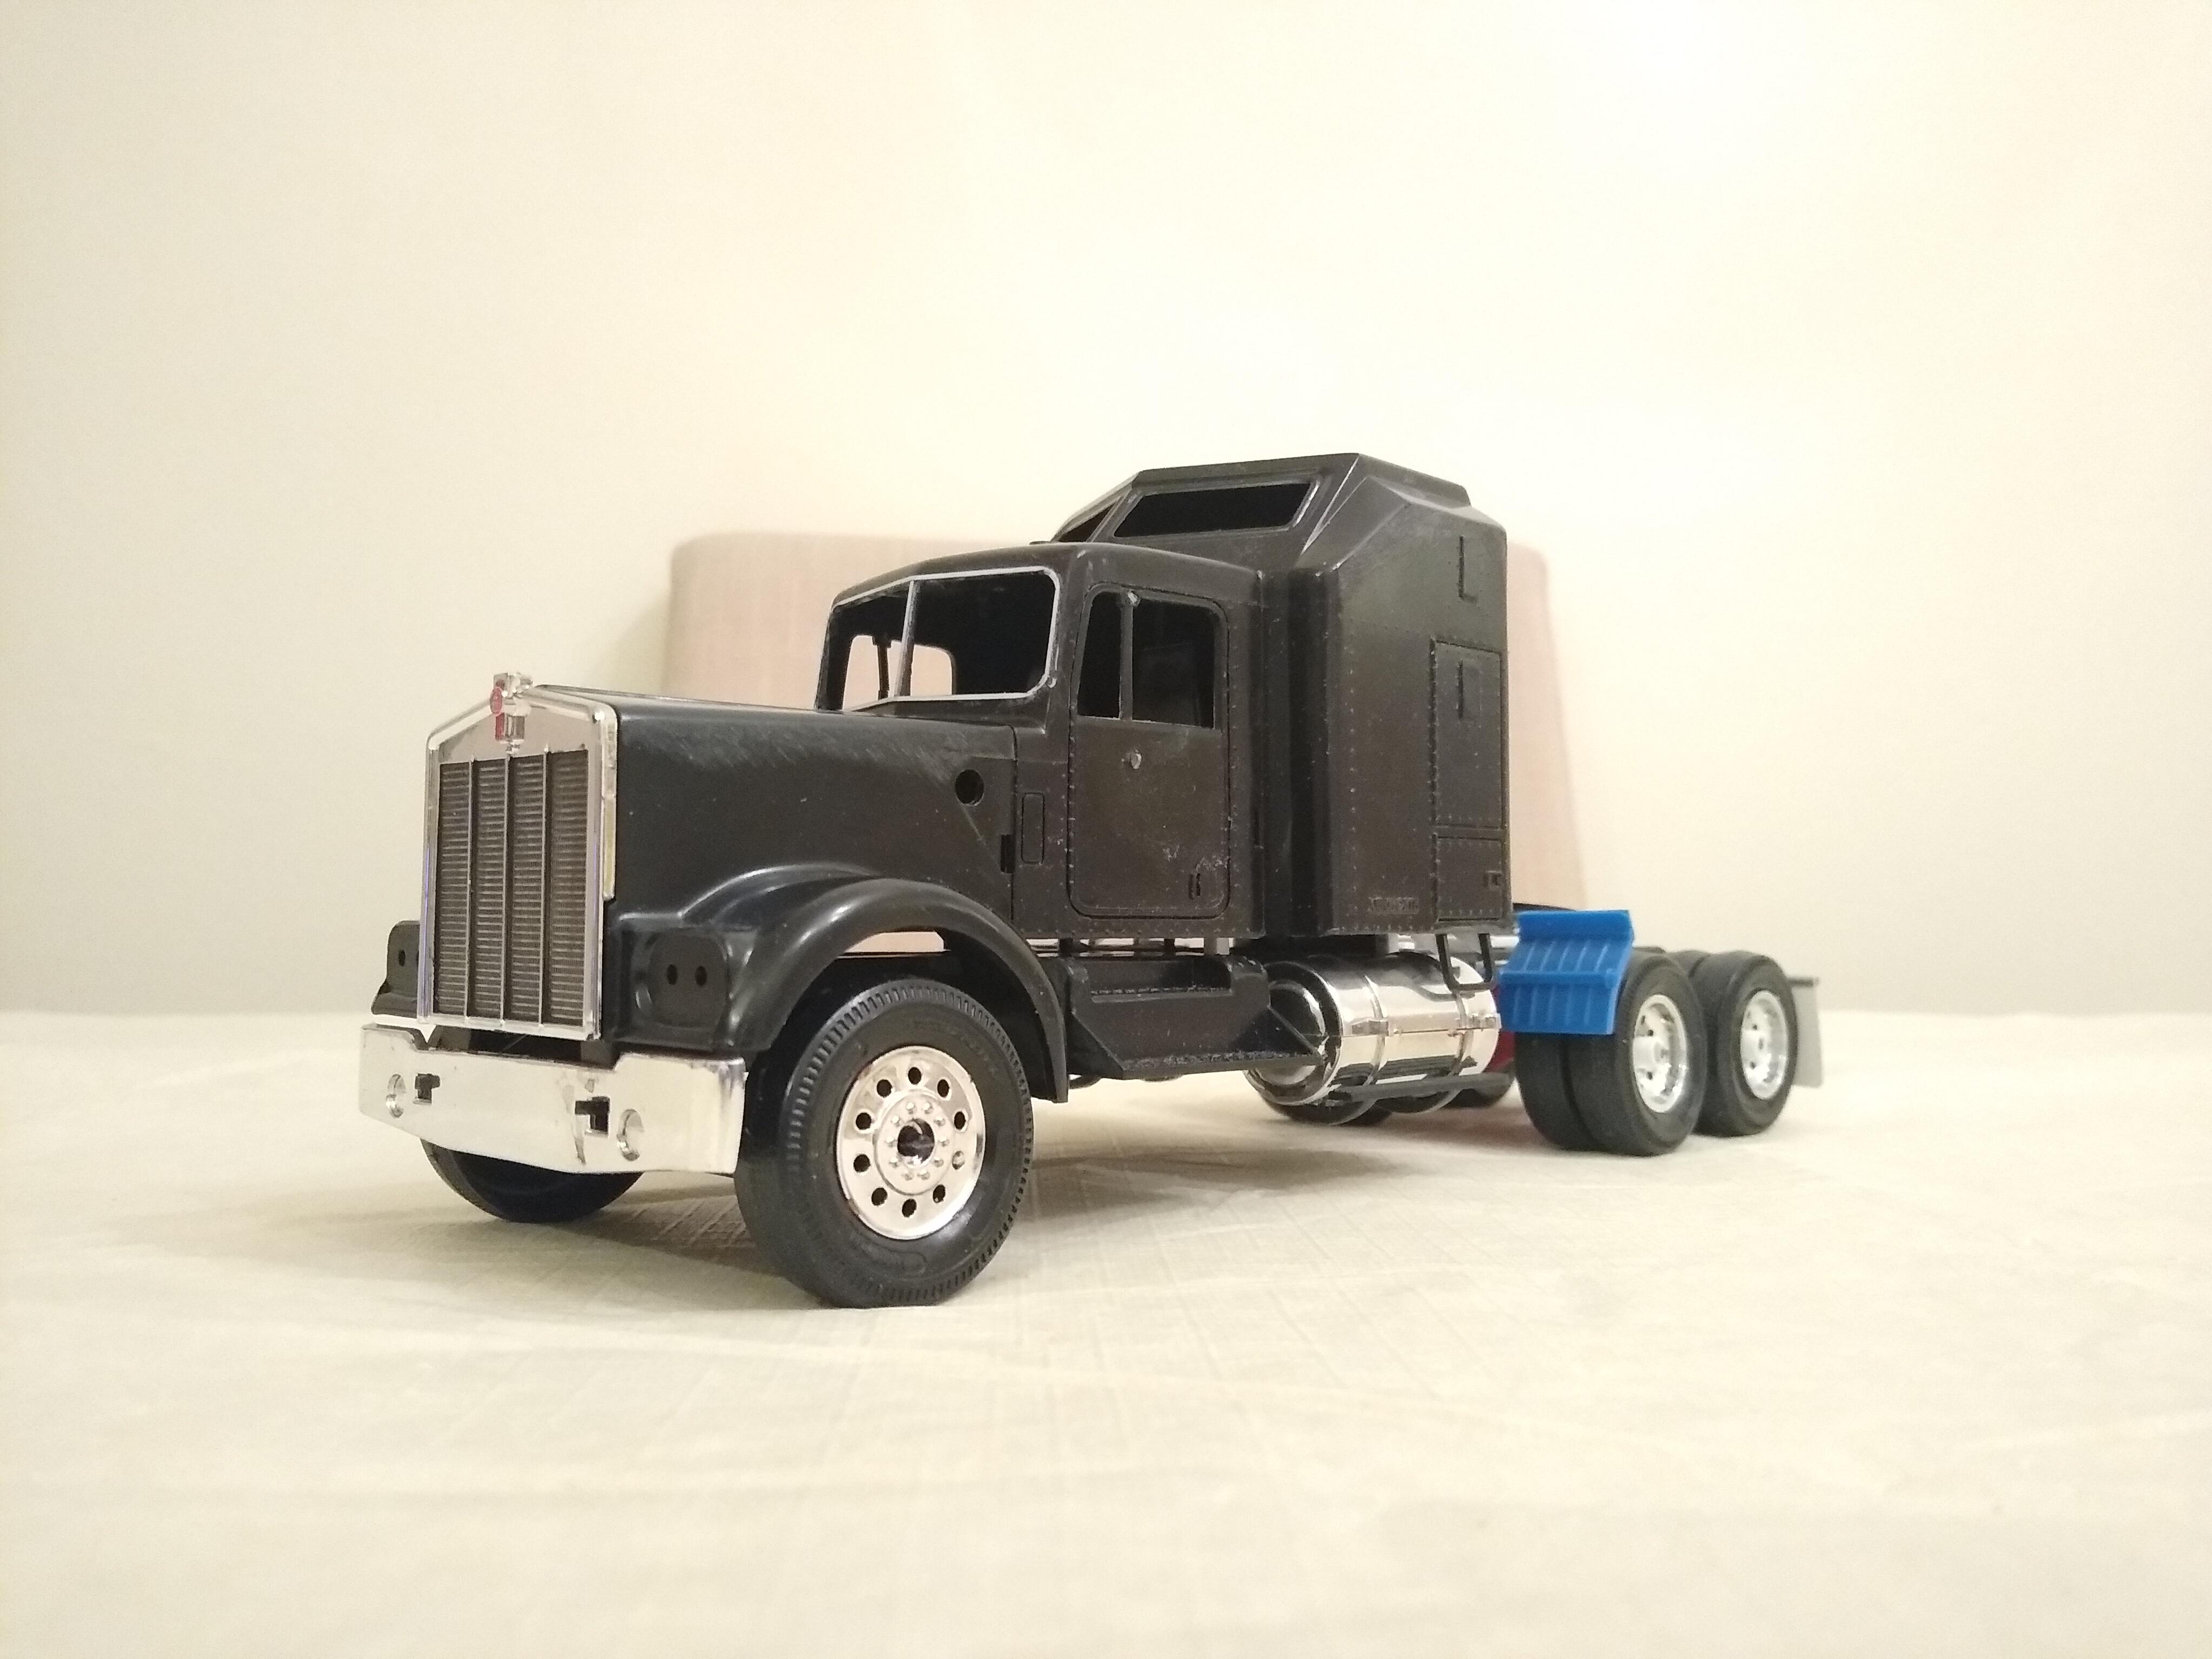
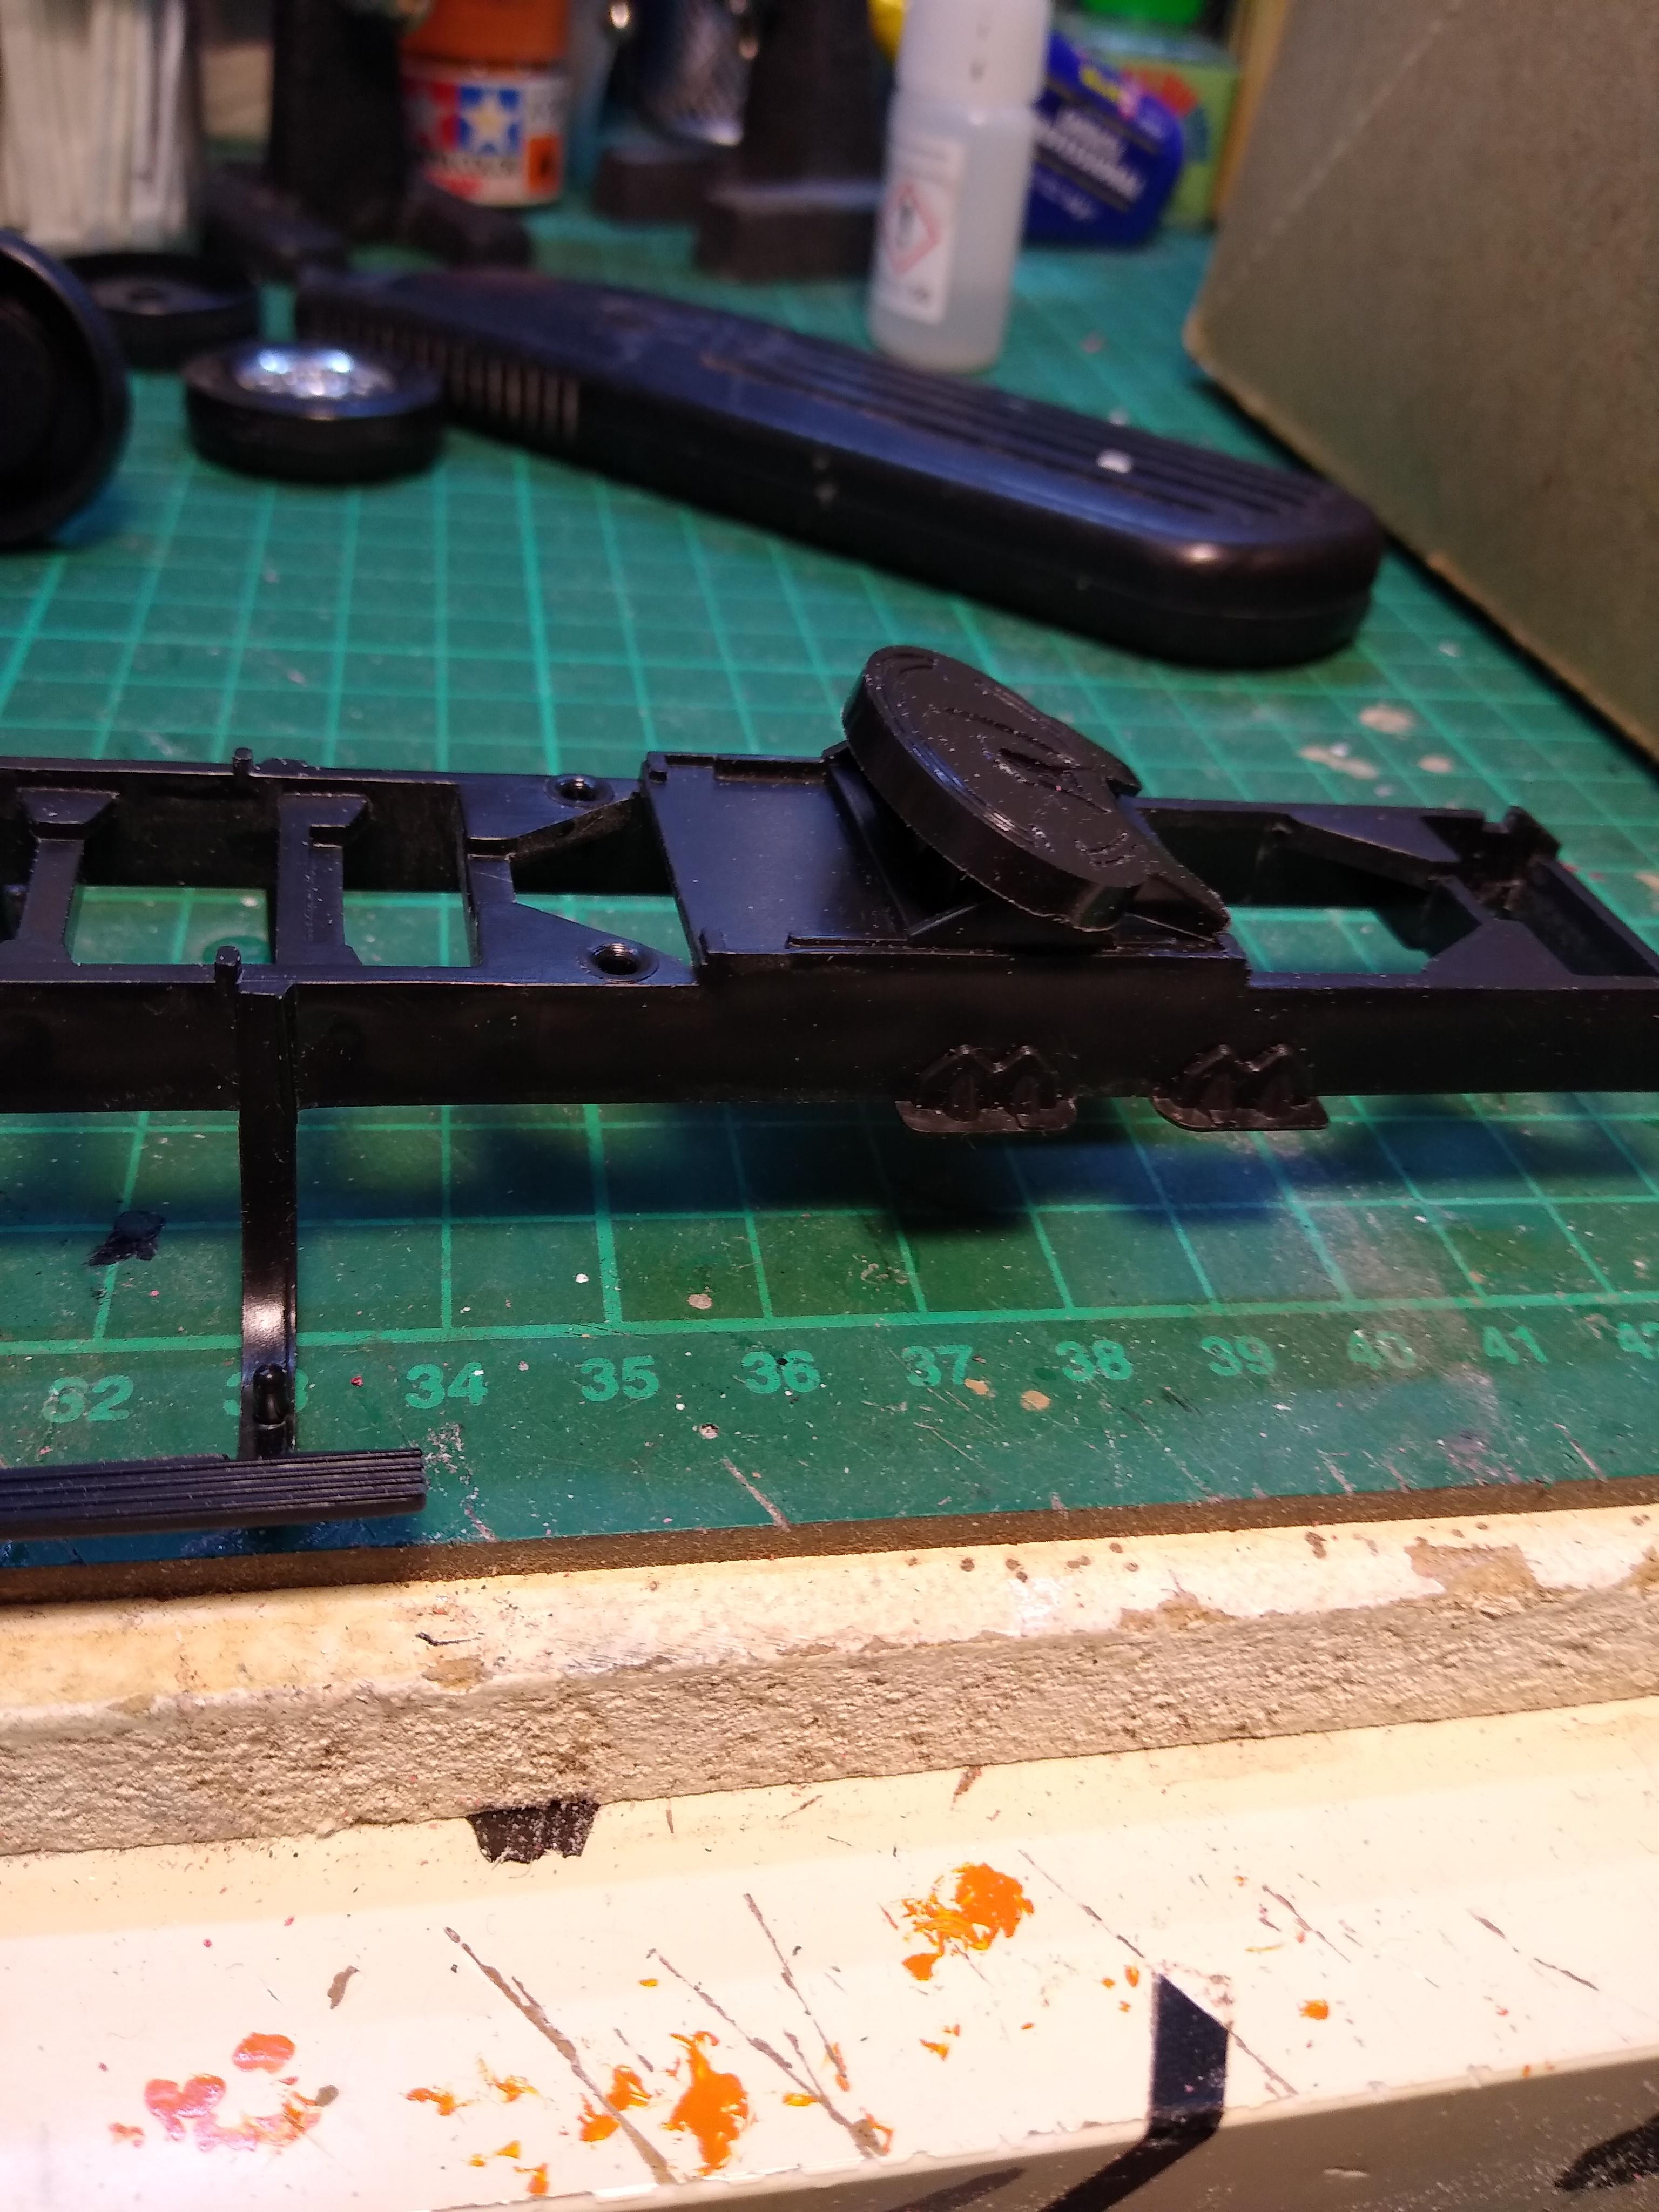
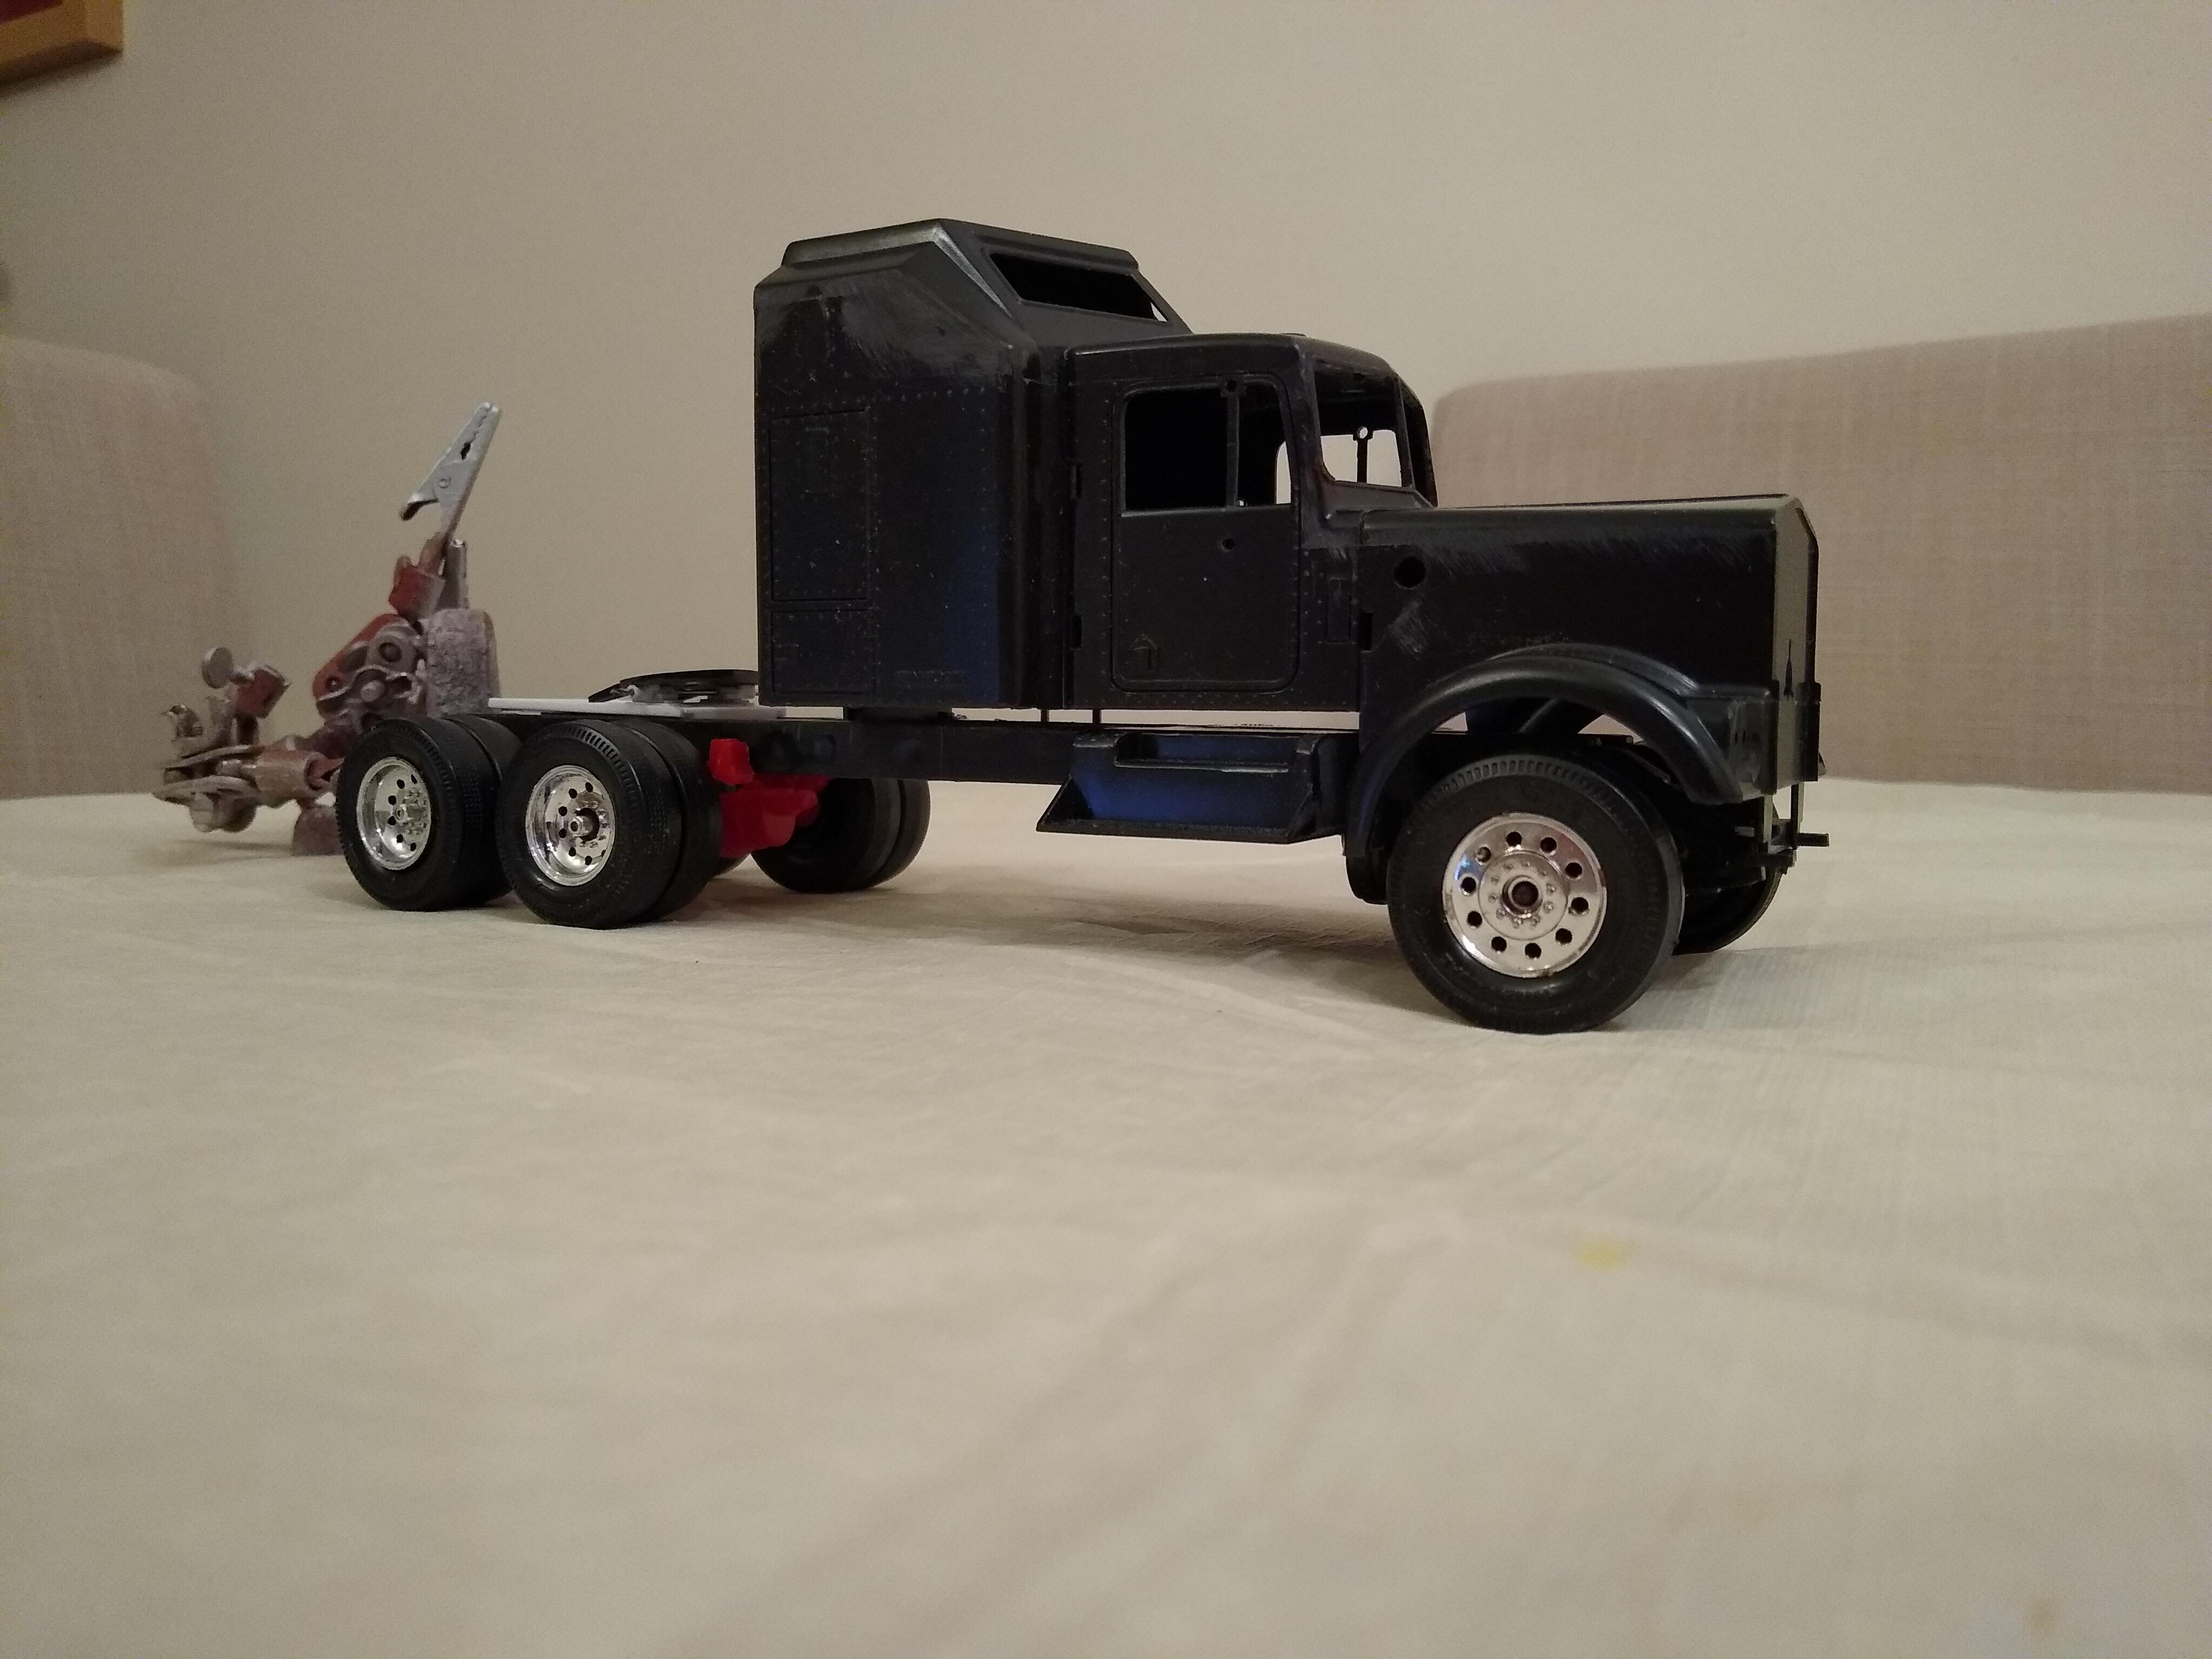
Did a bit today. Used ali tube to form a pogo stick. Drilled the mount ready to accept the hoses. The 5th wheel plate will hide the tube for the quarter fenders. Did some filling and shaping on the rear axles. It takes a few goes to make them look credible, I just use whatever shrapnel is on the bench and fits, then some filler to smooth it off. Fabbed sleeper mounts so I can cut the tab off the back wall when I'm ready. Made a closing panel across the rear of the chassis to hide the tube for the mudflaps. Filled the mirror mount holes in the door because they're just wrong. I filed sprue down to the right size and plugged the holes. I'll fill them too of course. Test fitted the Monogram gull-wing front bumper, and it transforms the look of the truck. I realise now that you could make a credible Movin'On truck out of this kit with a bit of work. When I first opened this kit I was horrified with the execution of it, but a bit of work has made look like a proper W900. The basic dimensions are spot on. I just hope I don't ruin it! I'm actually toying with the idea of opening the hood and building an engine from scratch. I'm not sure though.
-
2023 BRGB salvage Kenworth K100 kit
Rockford replied to Chu's topic in WIP: Model Trucks: Big Rigs and Heavy Equipment
Interesting, I've never heard this before. How did it need fixing? Is the Revell version any better do you know? Going to be an interesting job. -
It's a credit to you that it looks so clean and sharp. Any misalignment in those windows would stand out like a sore thumb. I don't know how you do it, I can't seem to cut a straight line anywhere.
-
Thanks sir. I'm not the greatest fan either but it's a space and cost thing for me. I'd much rather build the classic AMT kits that I had when I was a kid but I've not got any room, let alone the £60 per kit. So, I've learned to enjoy doing the many, many mods required to make the 1/32 kits look credible, it's a challenge that keeps me absorbed.
-
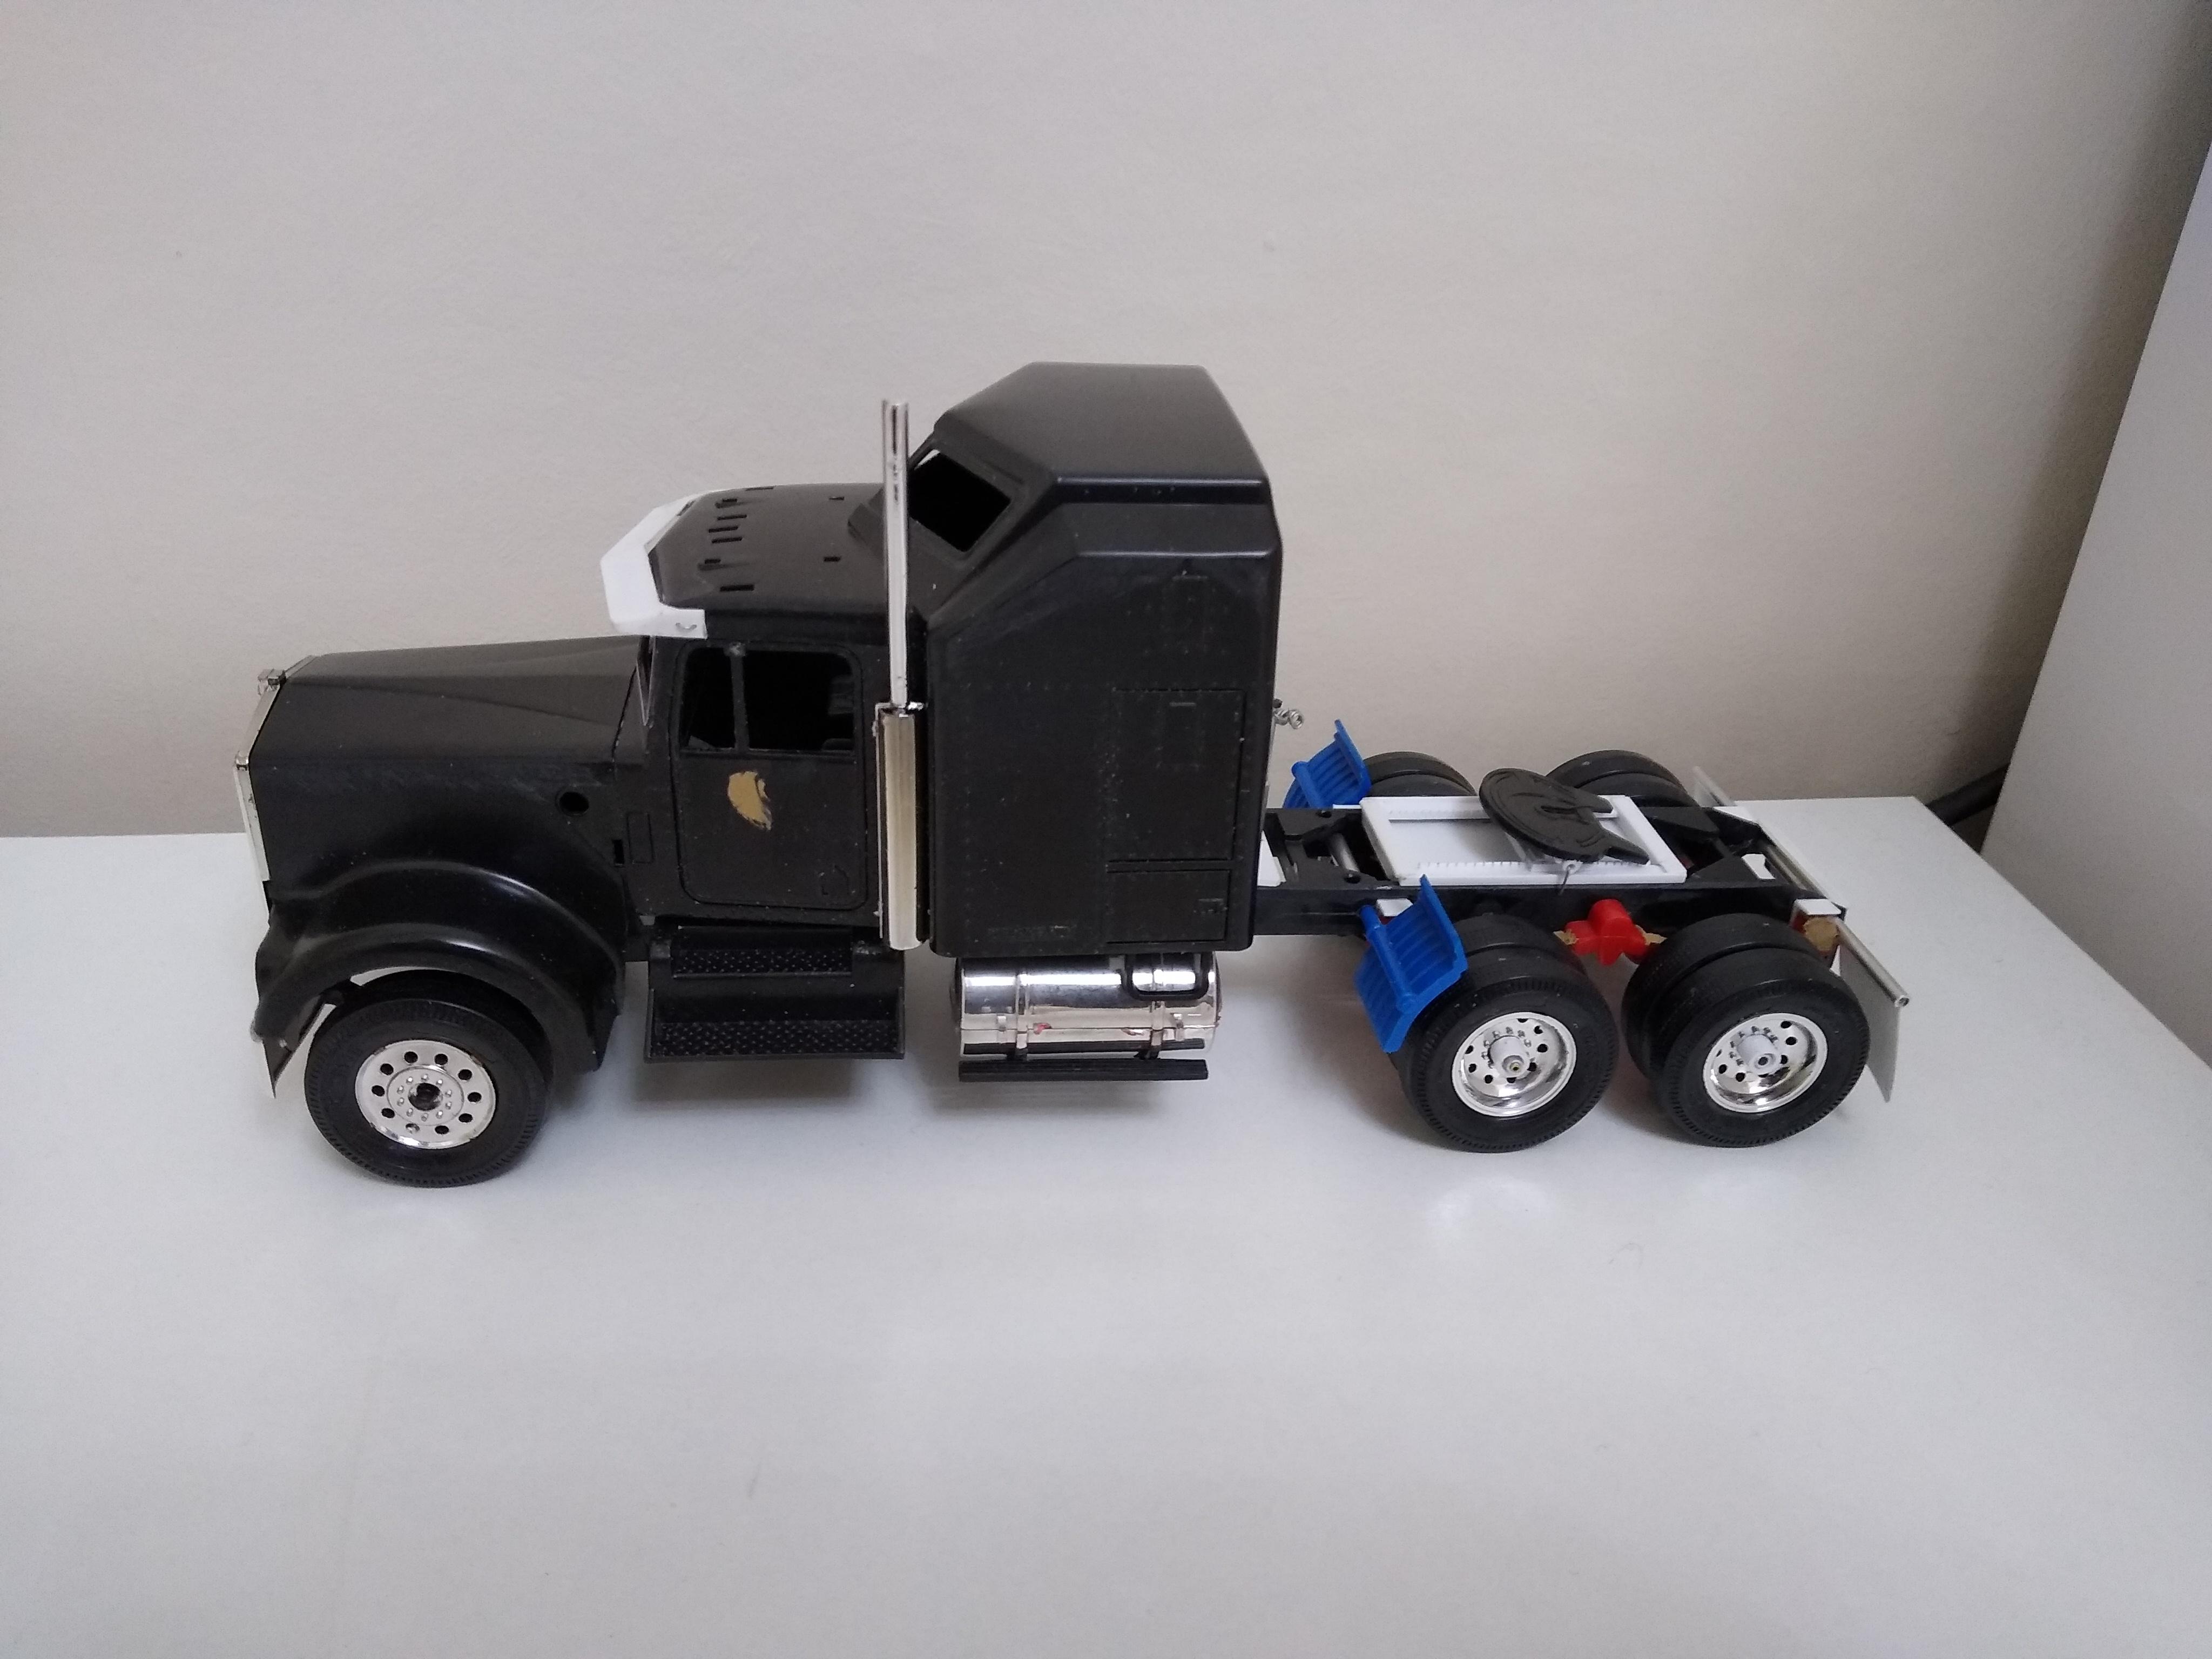
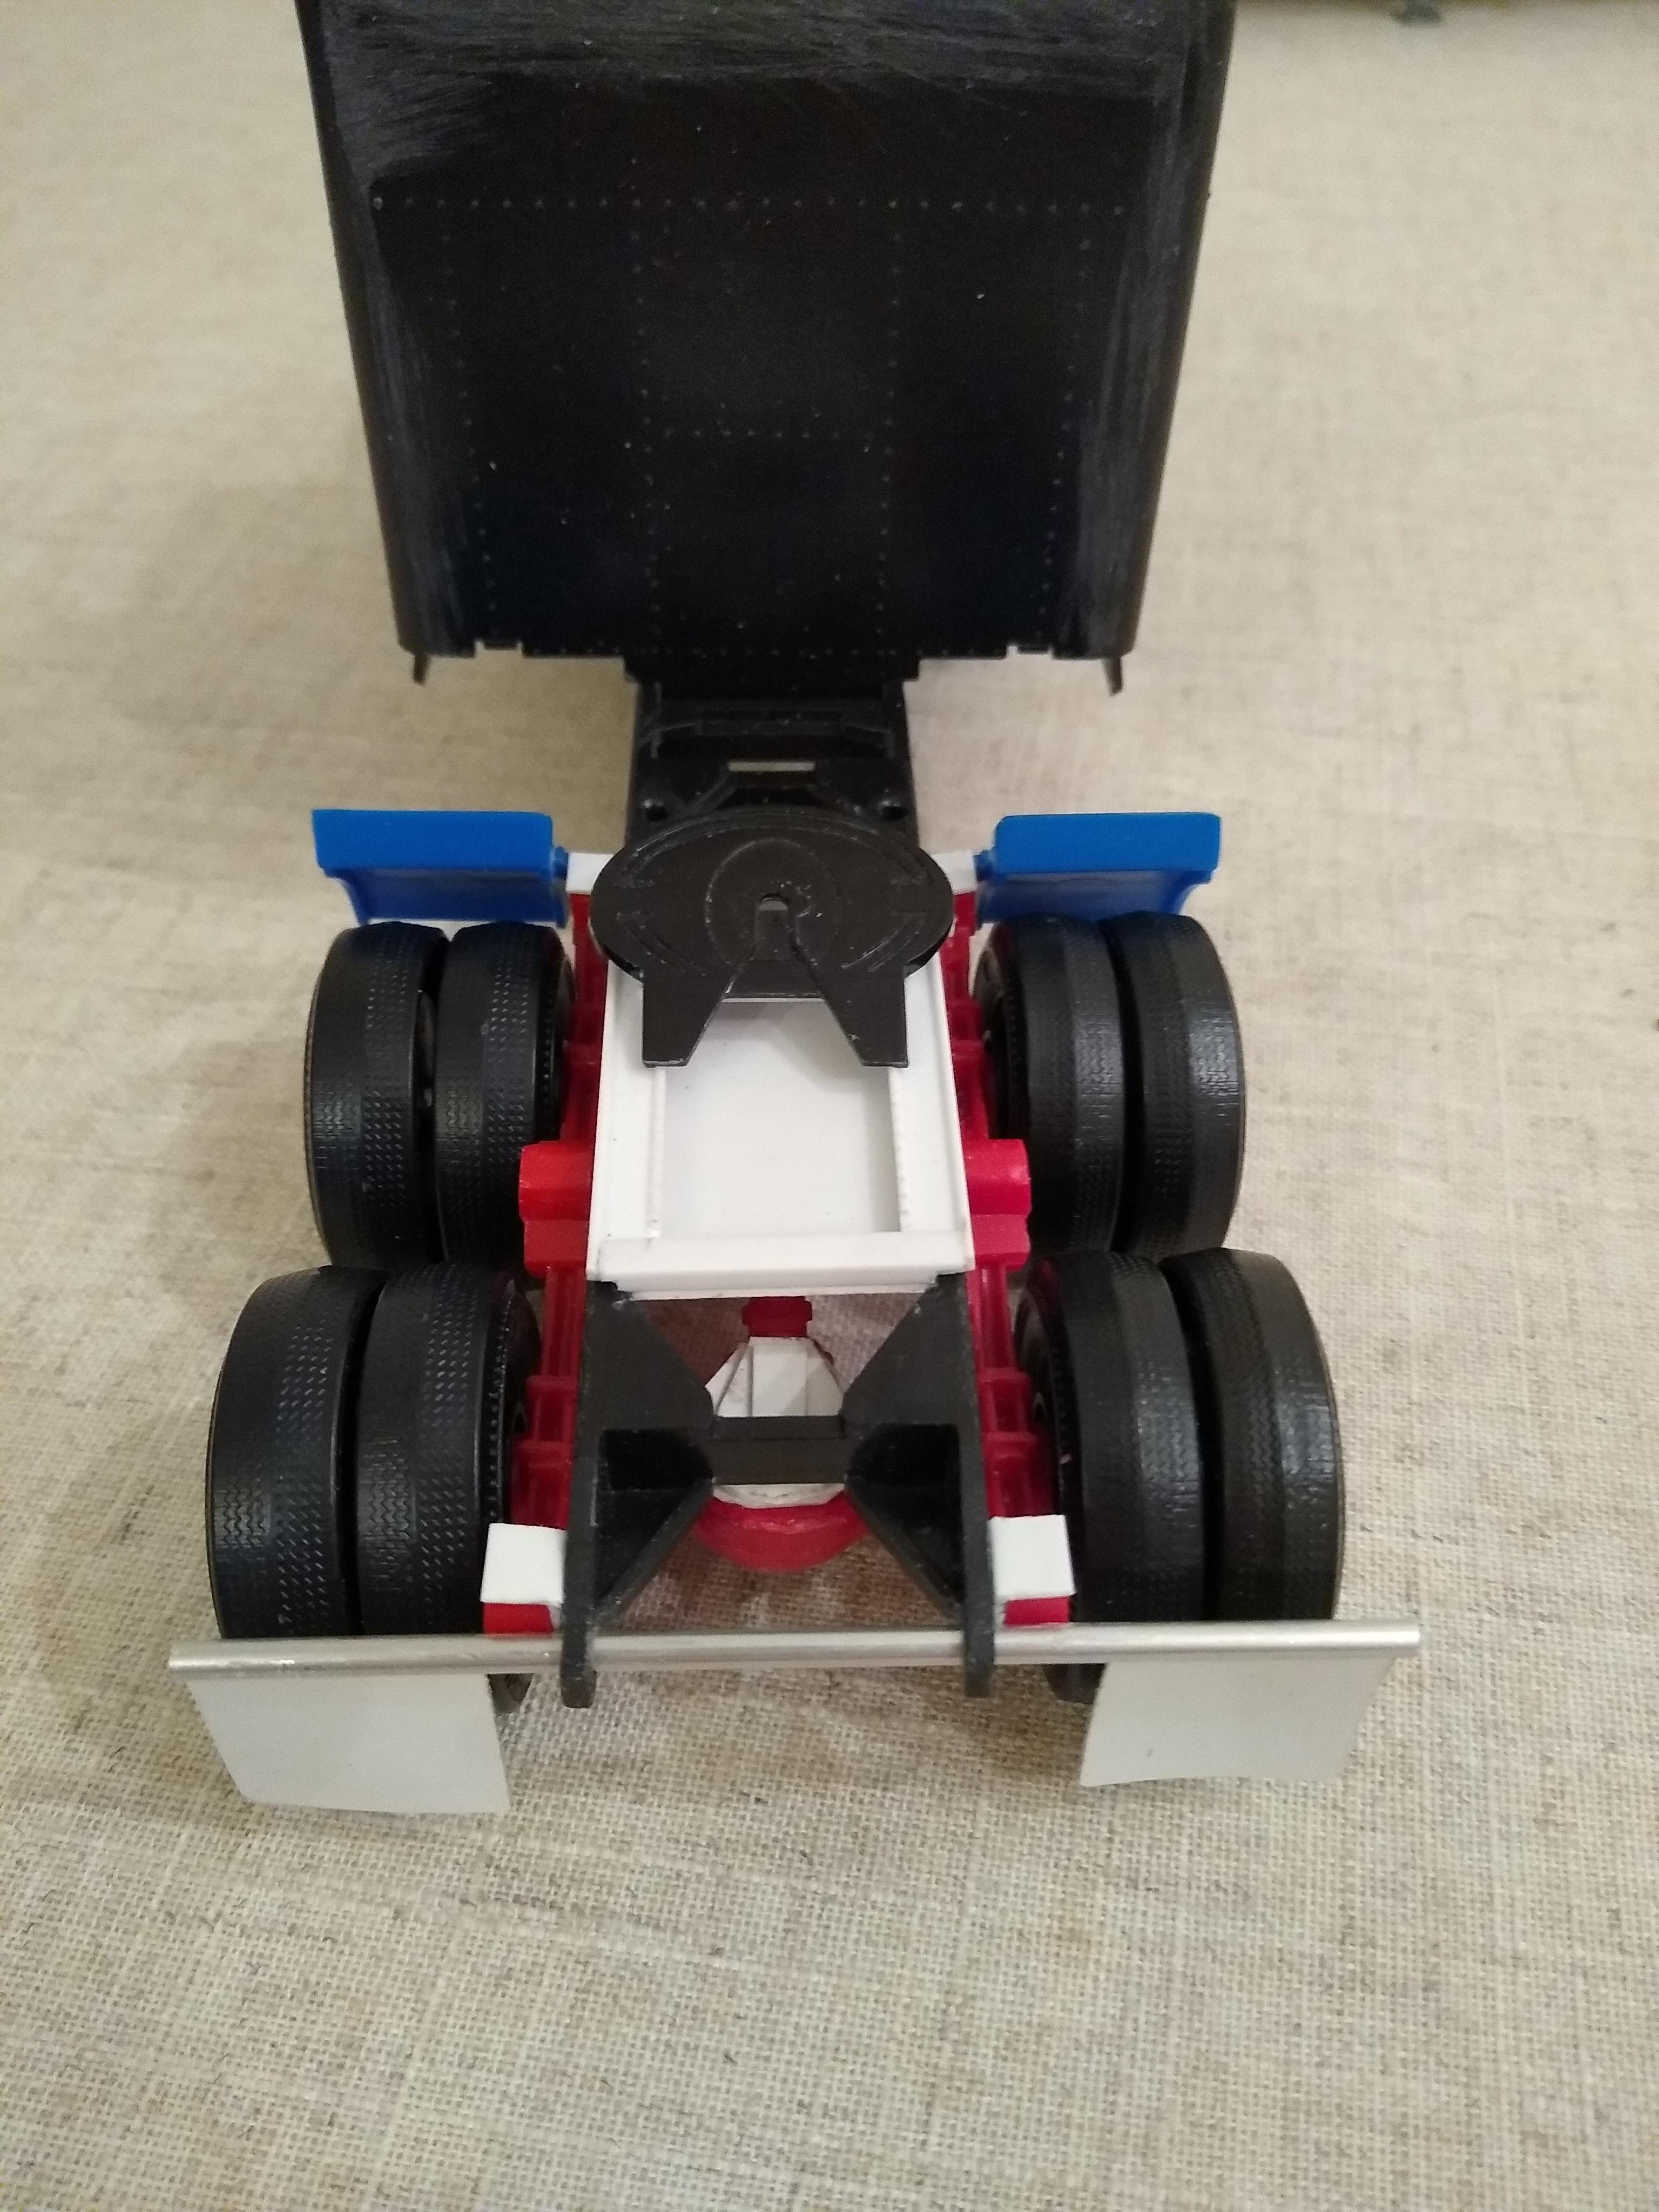
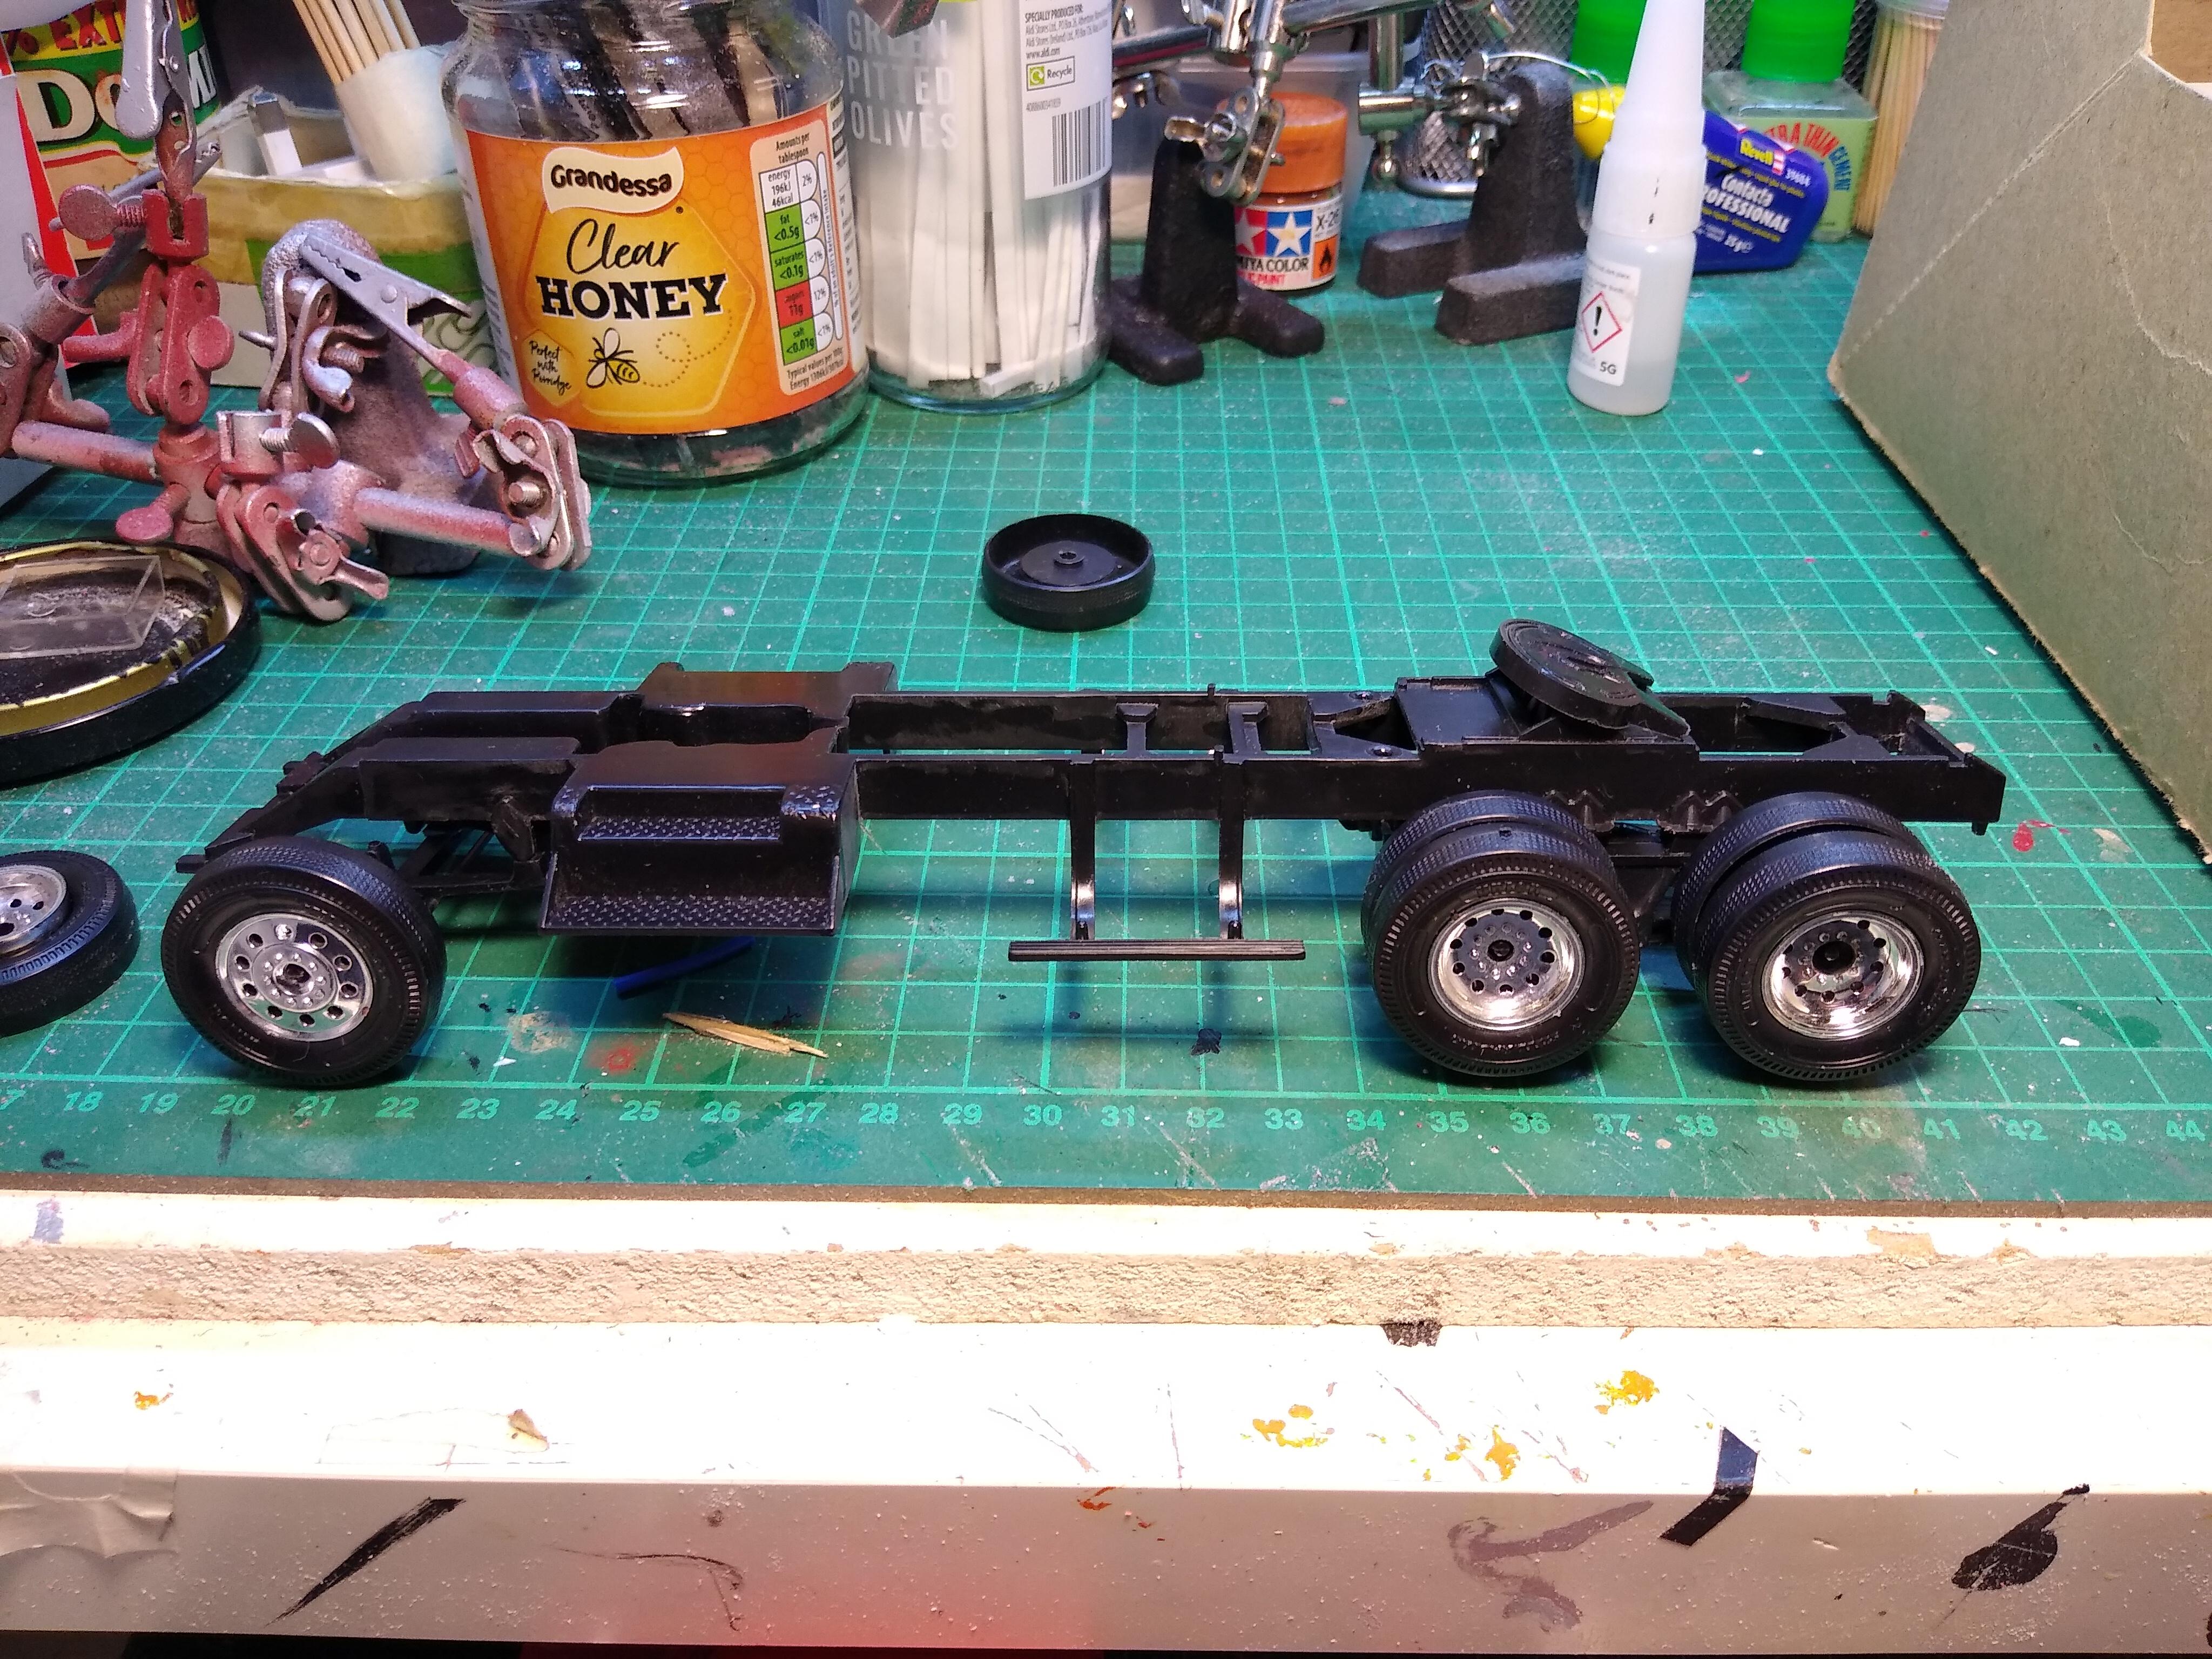
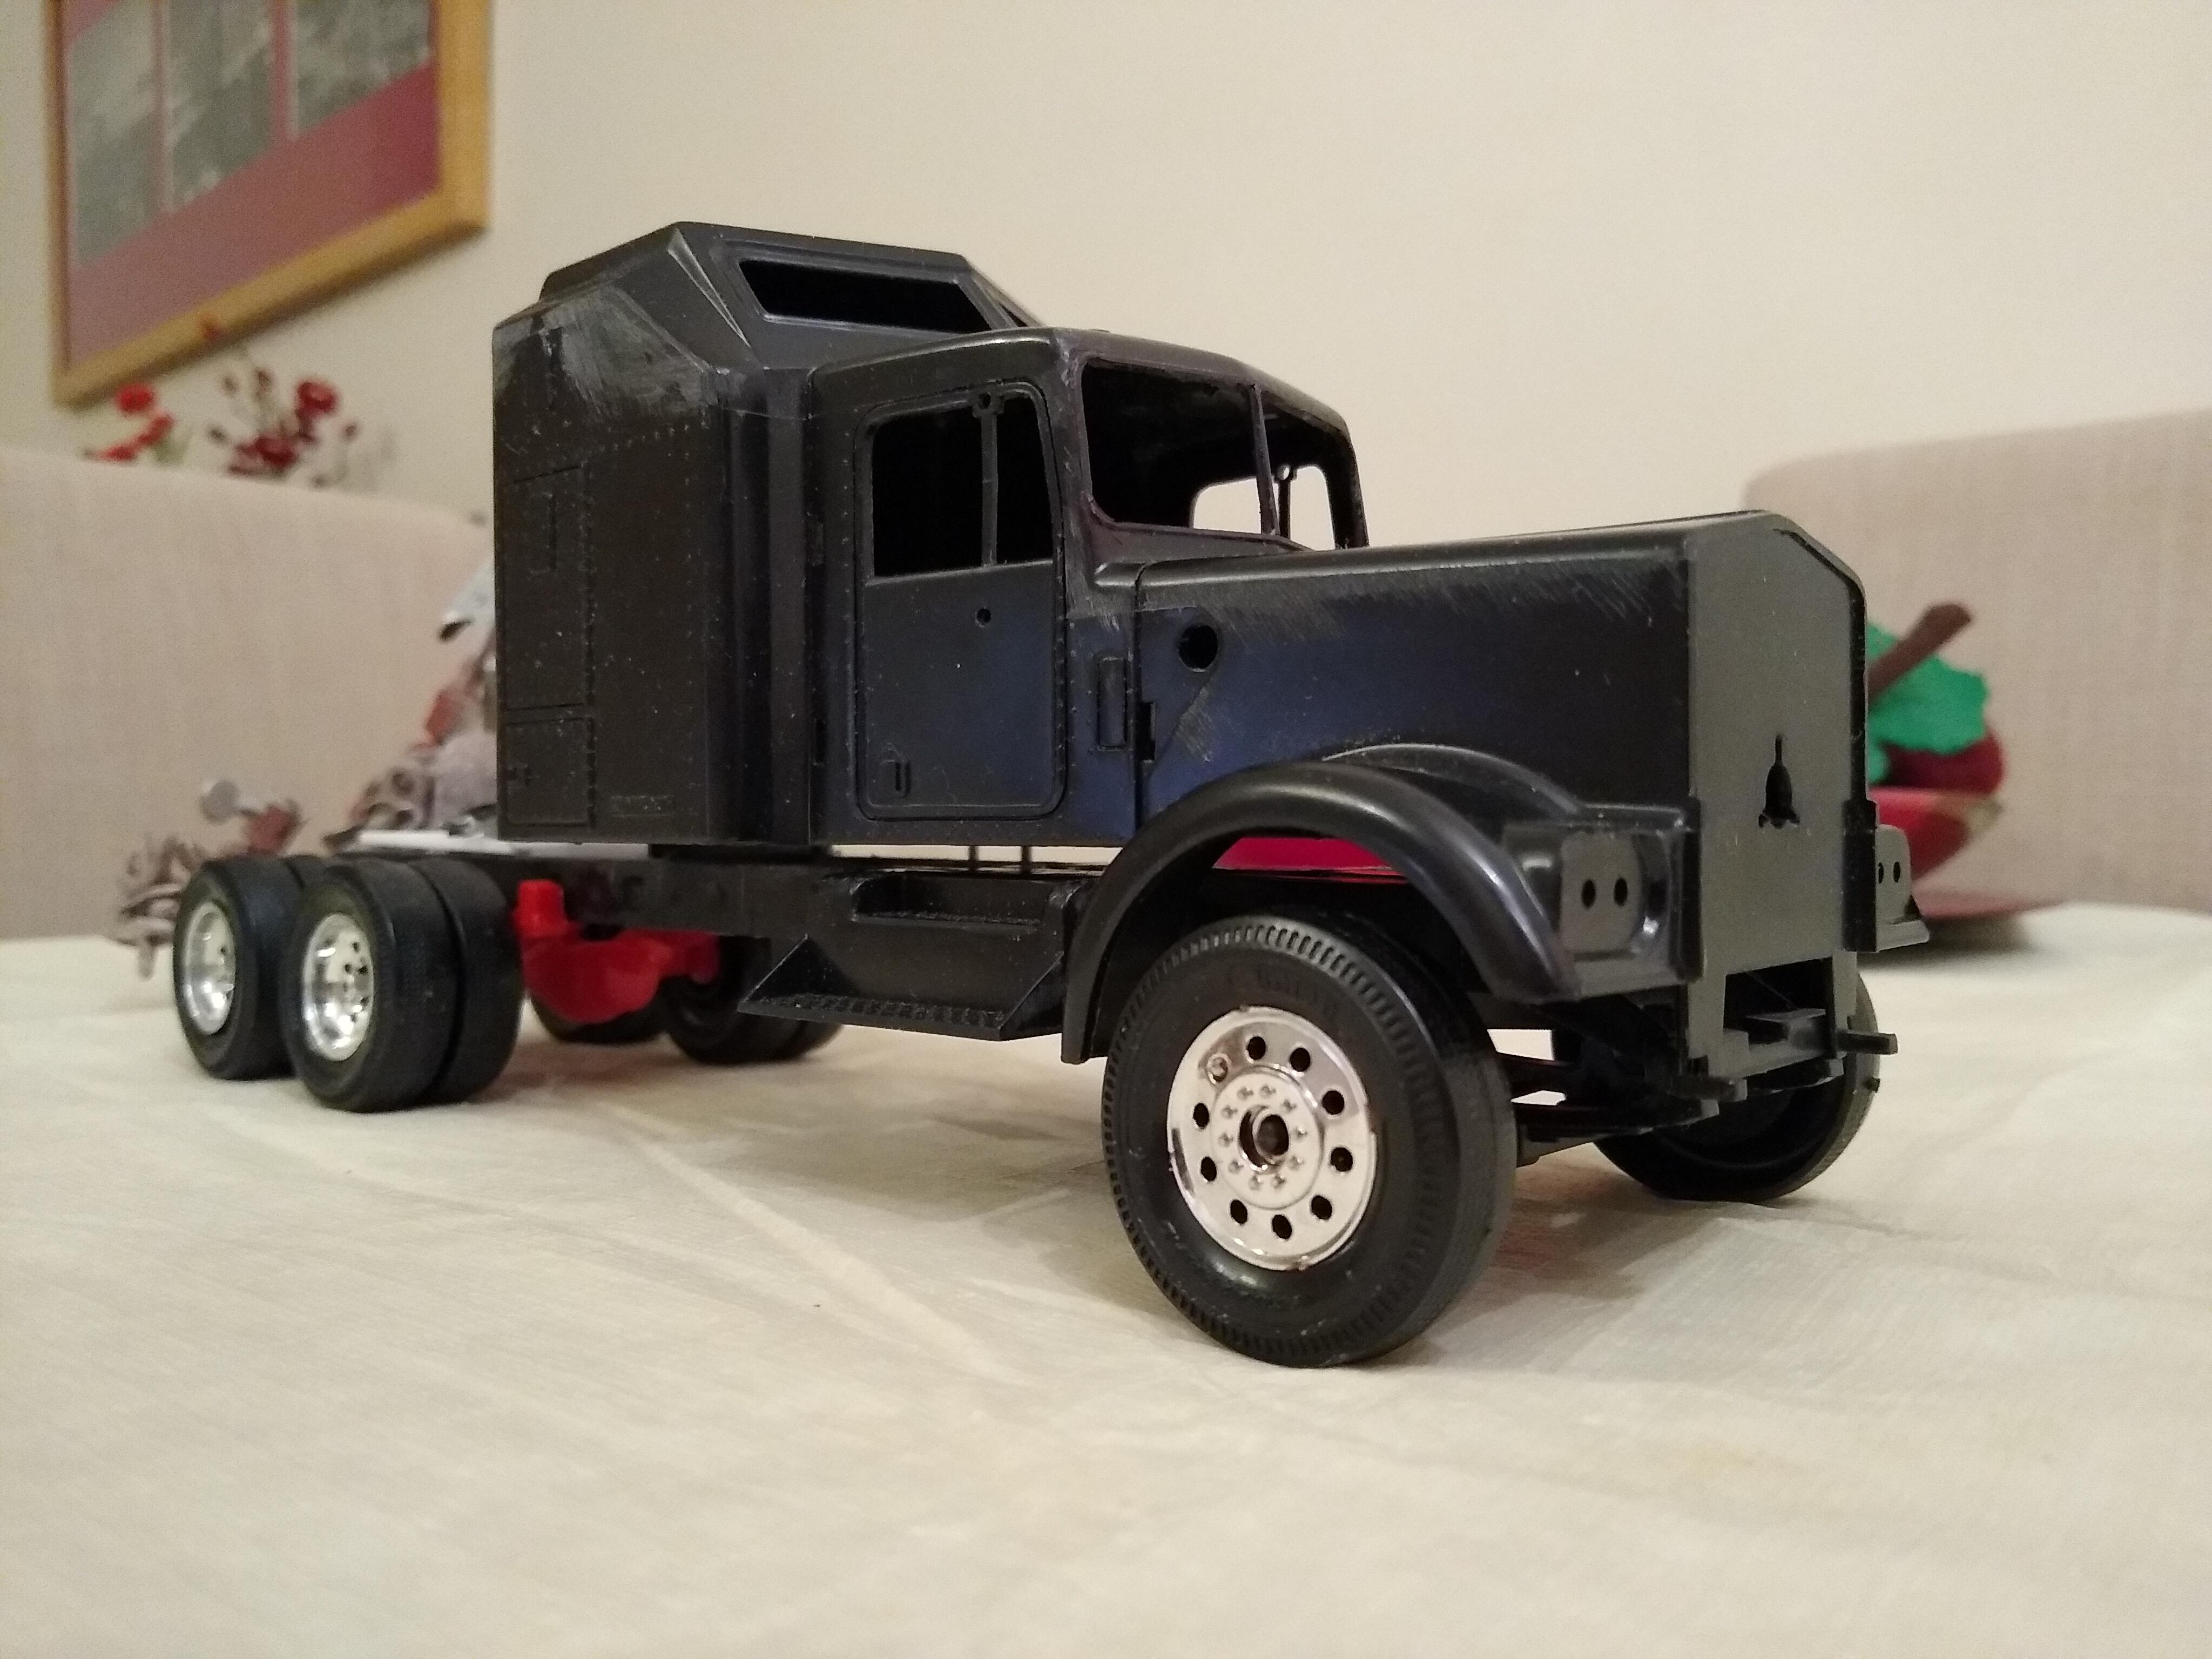
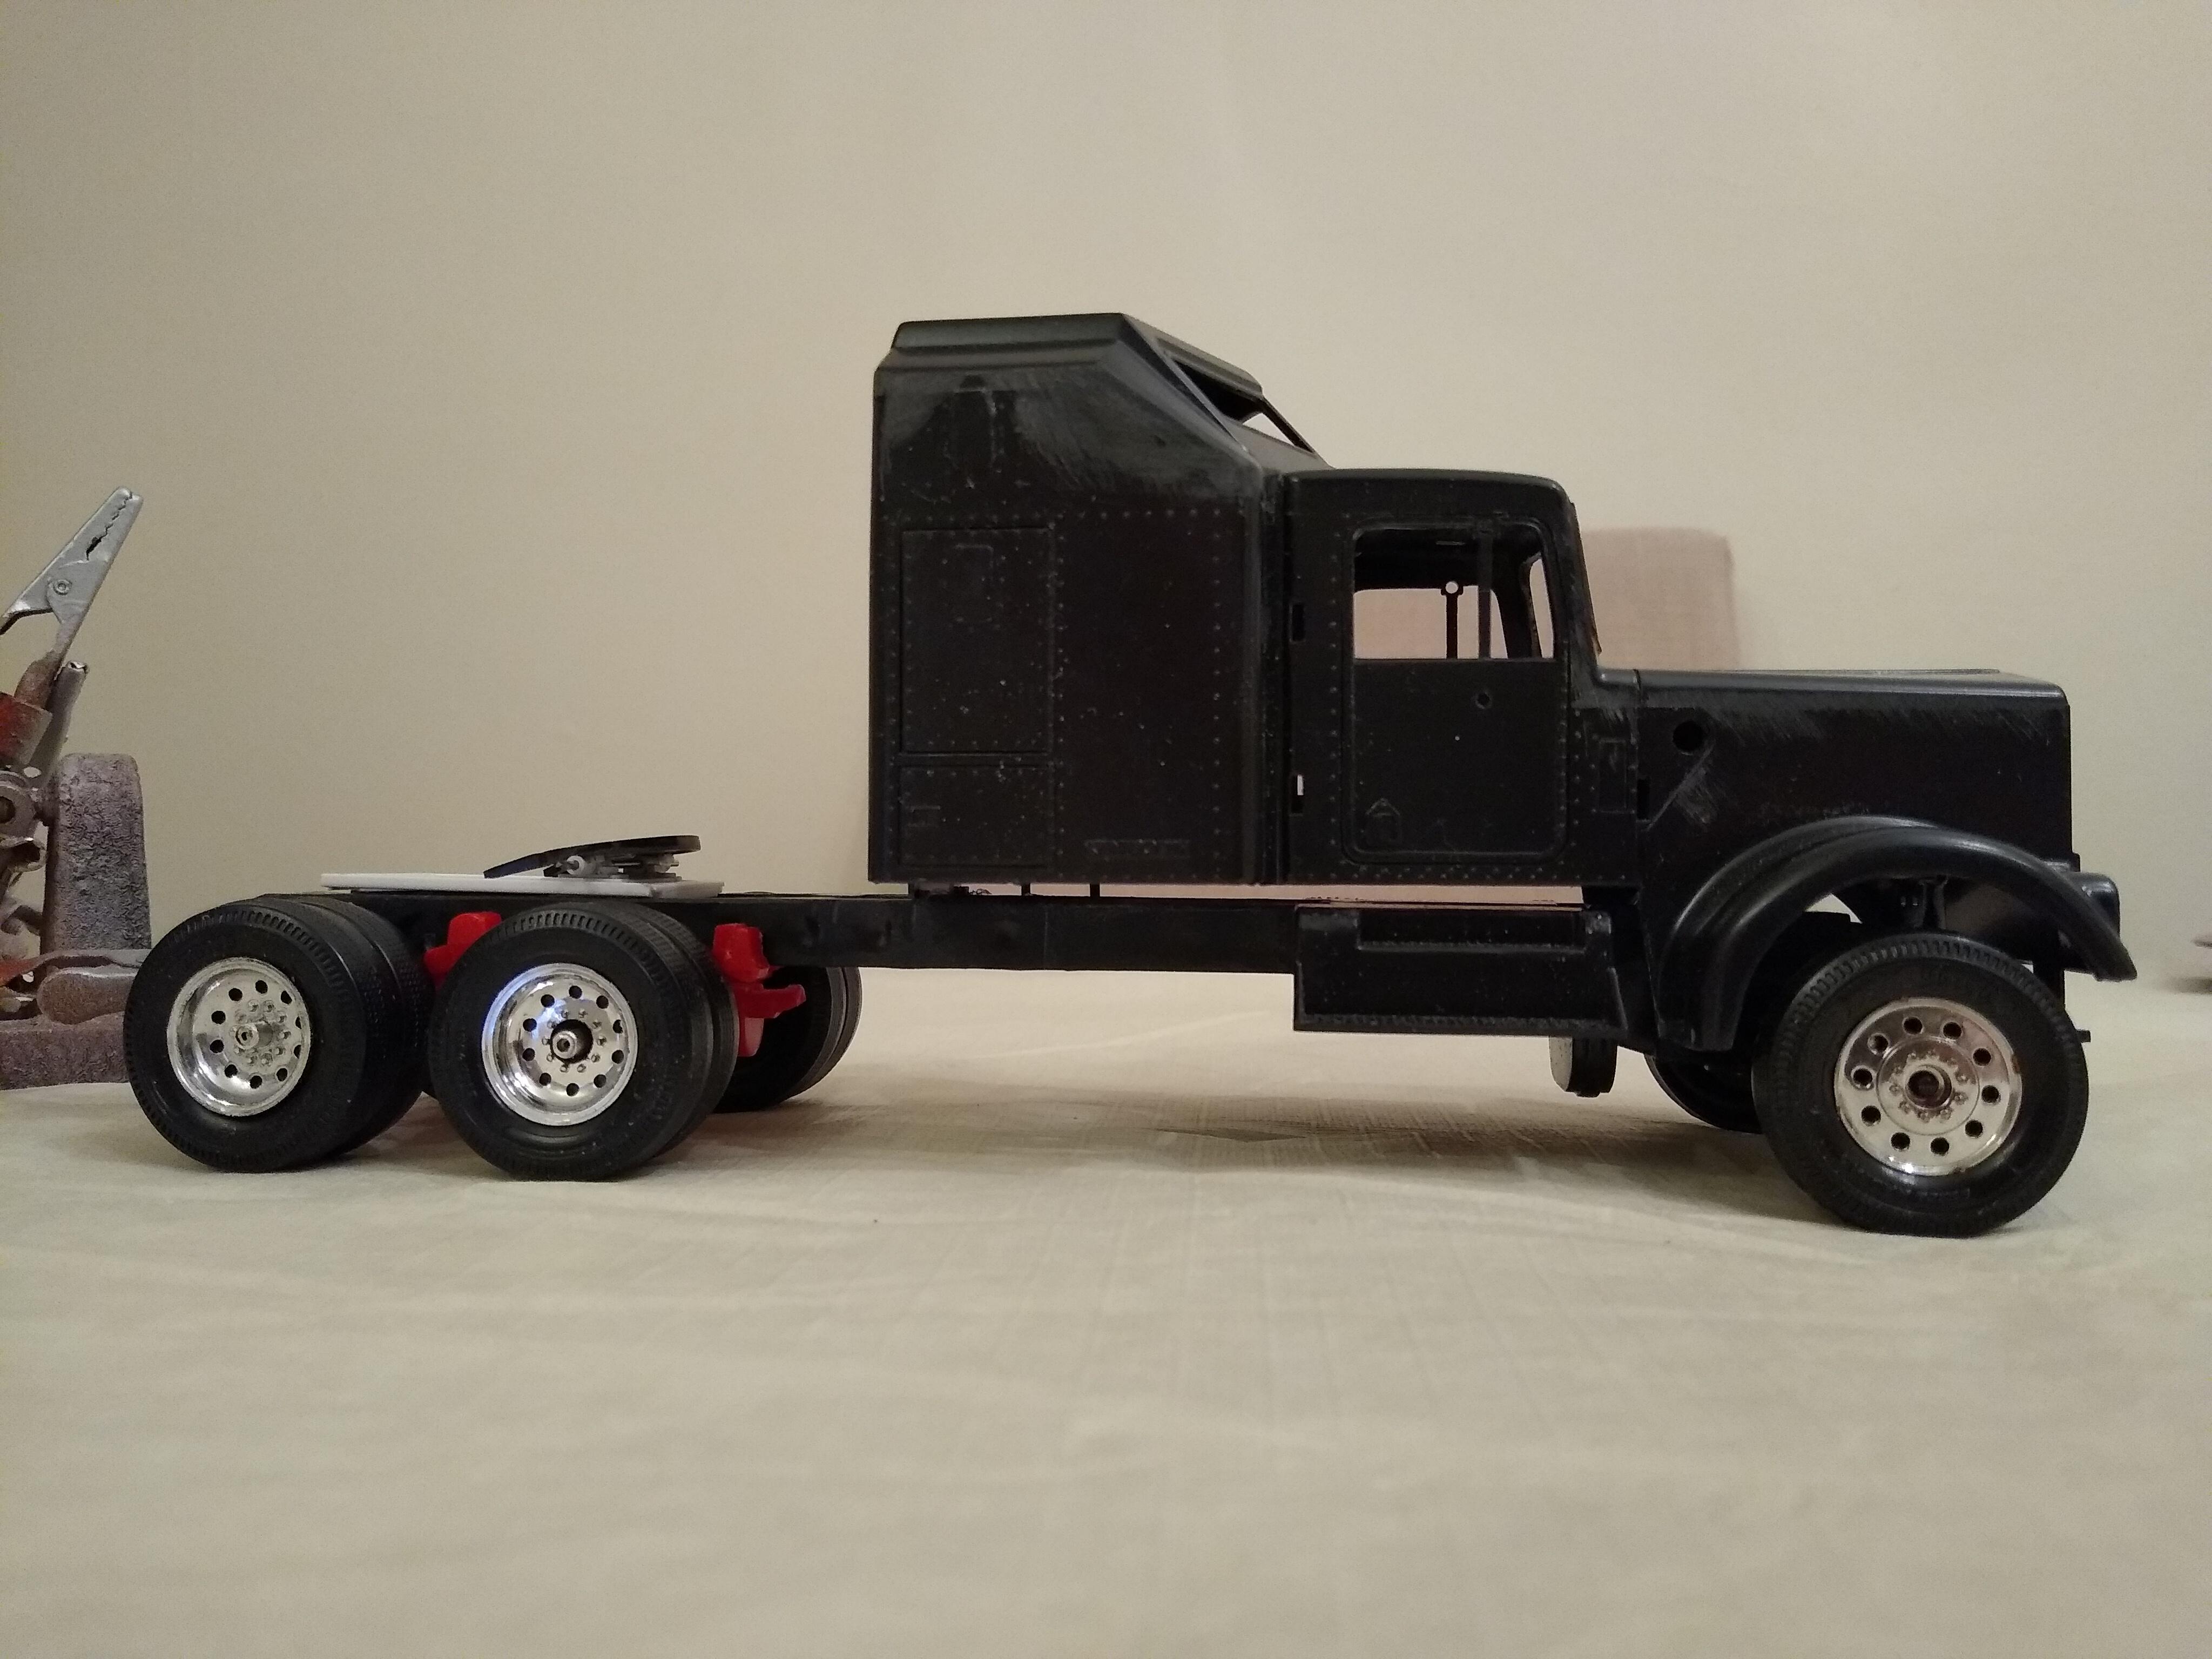
Next step was mudflaps because that would determine where the tandems sat. Drilled the chassis and did my usual aluminium tube and electrician's tape. I cut four pieces of 90 degree angle and sat them on the suspension hangars. They'll act as supports while I work on the chassis. Added quarter fenders from the Monogram Freightliner cabover. Finished the sliding 5th wheel off. Couldn't work with the AMT bumper so used the one off the Monogram K100, looks much better. Cut the sleeper steps off and fitted them to the cab floor with braces like the original, looks better and is much stronger. Finished the windshield rubbers, look good, just need a little rounding out, I'll do that when I'm rubbing the cab down. Looks more like a W900 now.
-
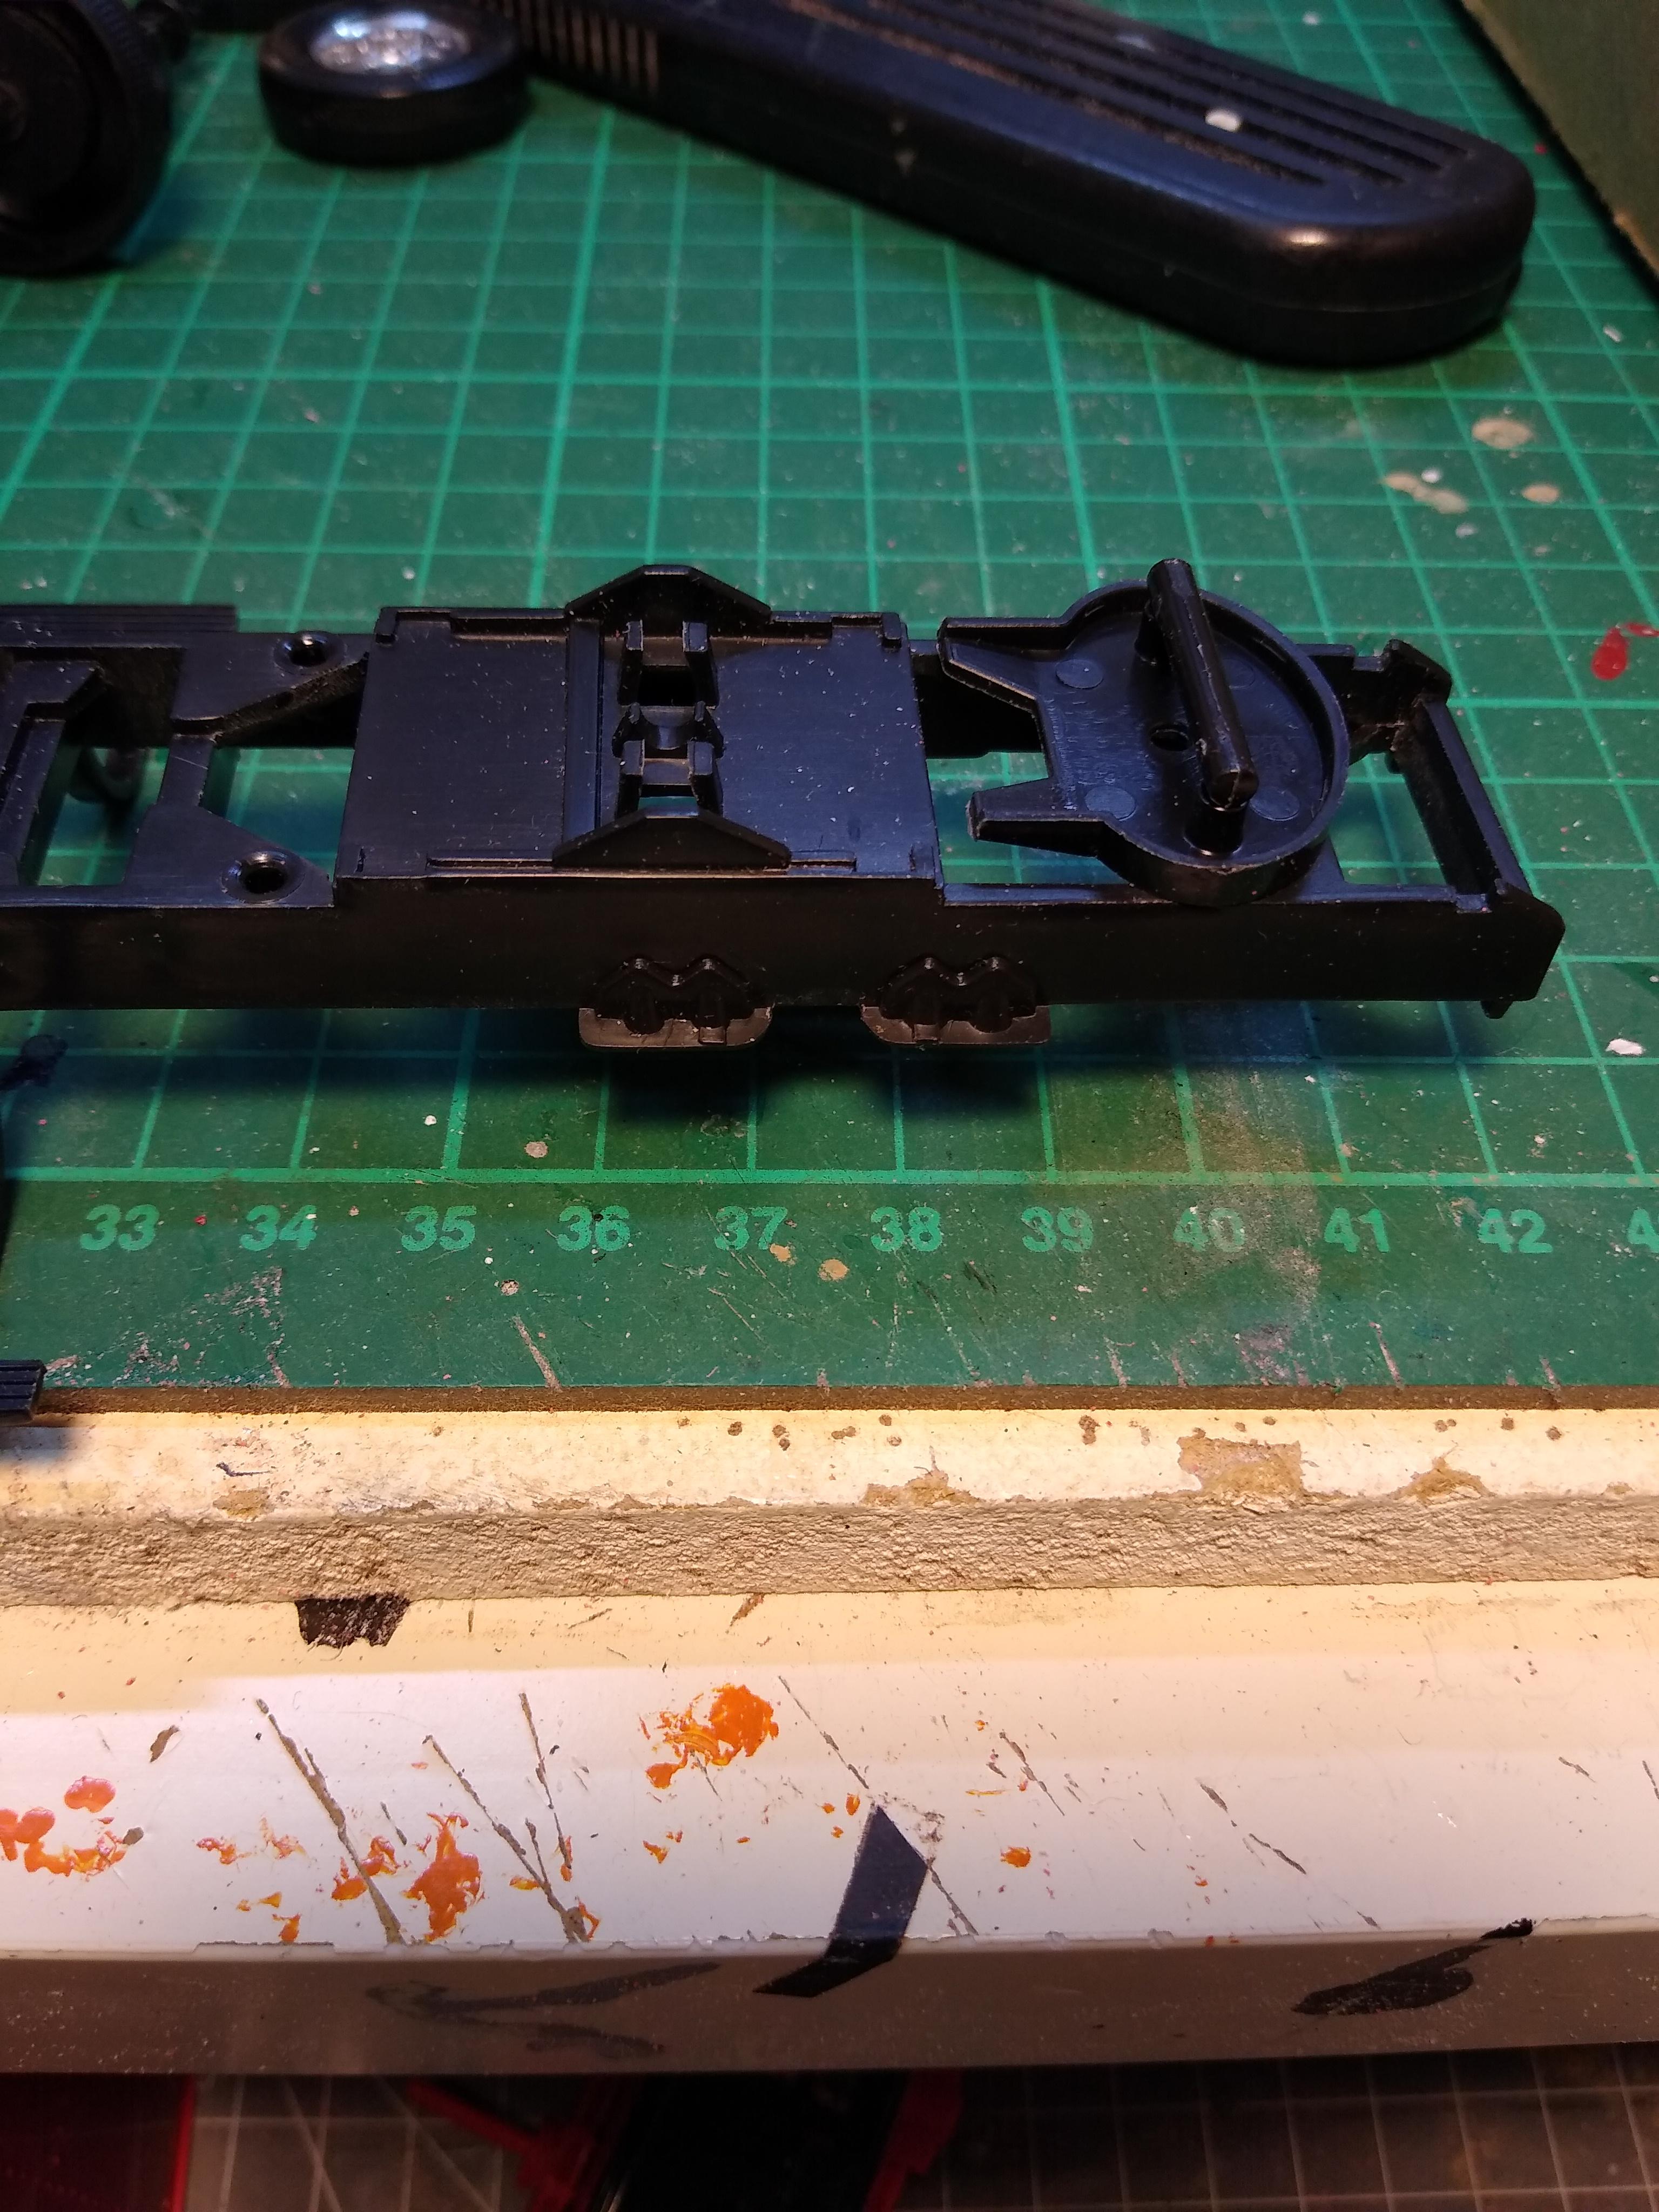
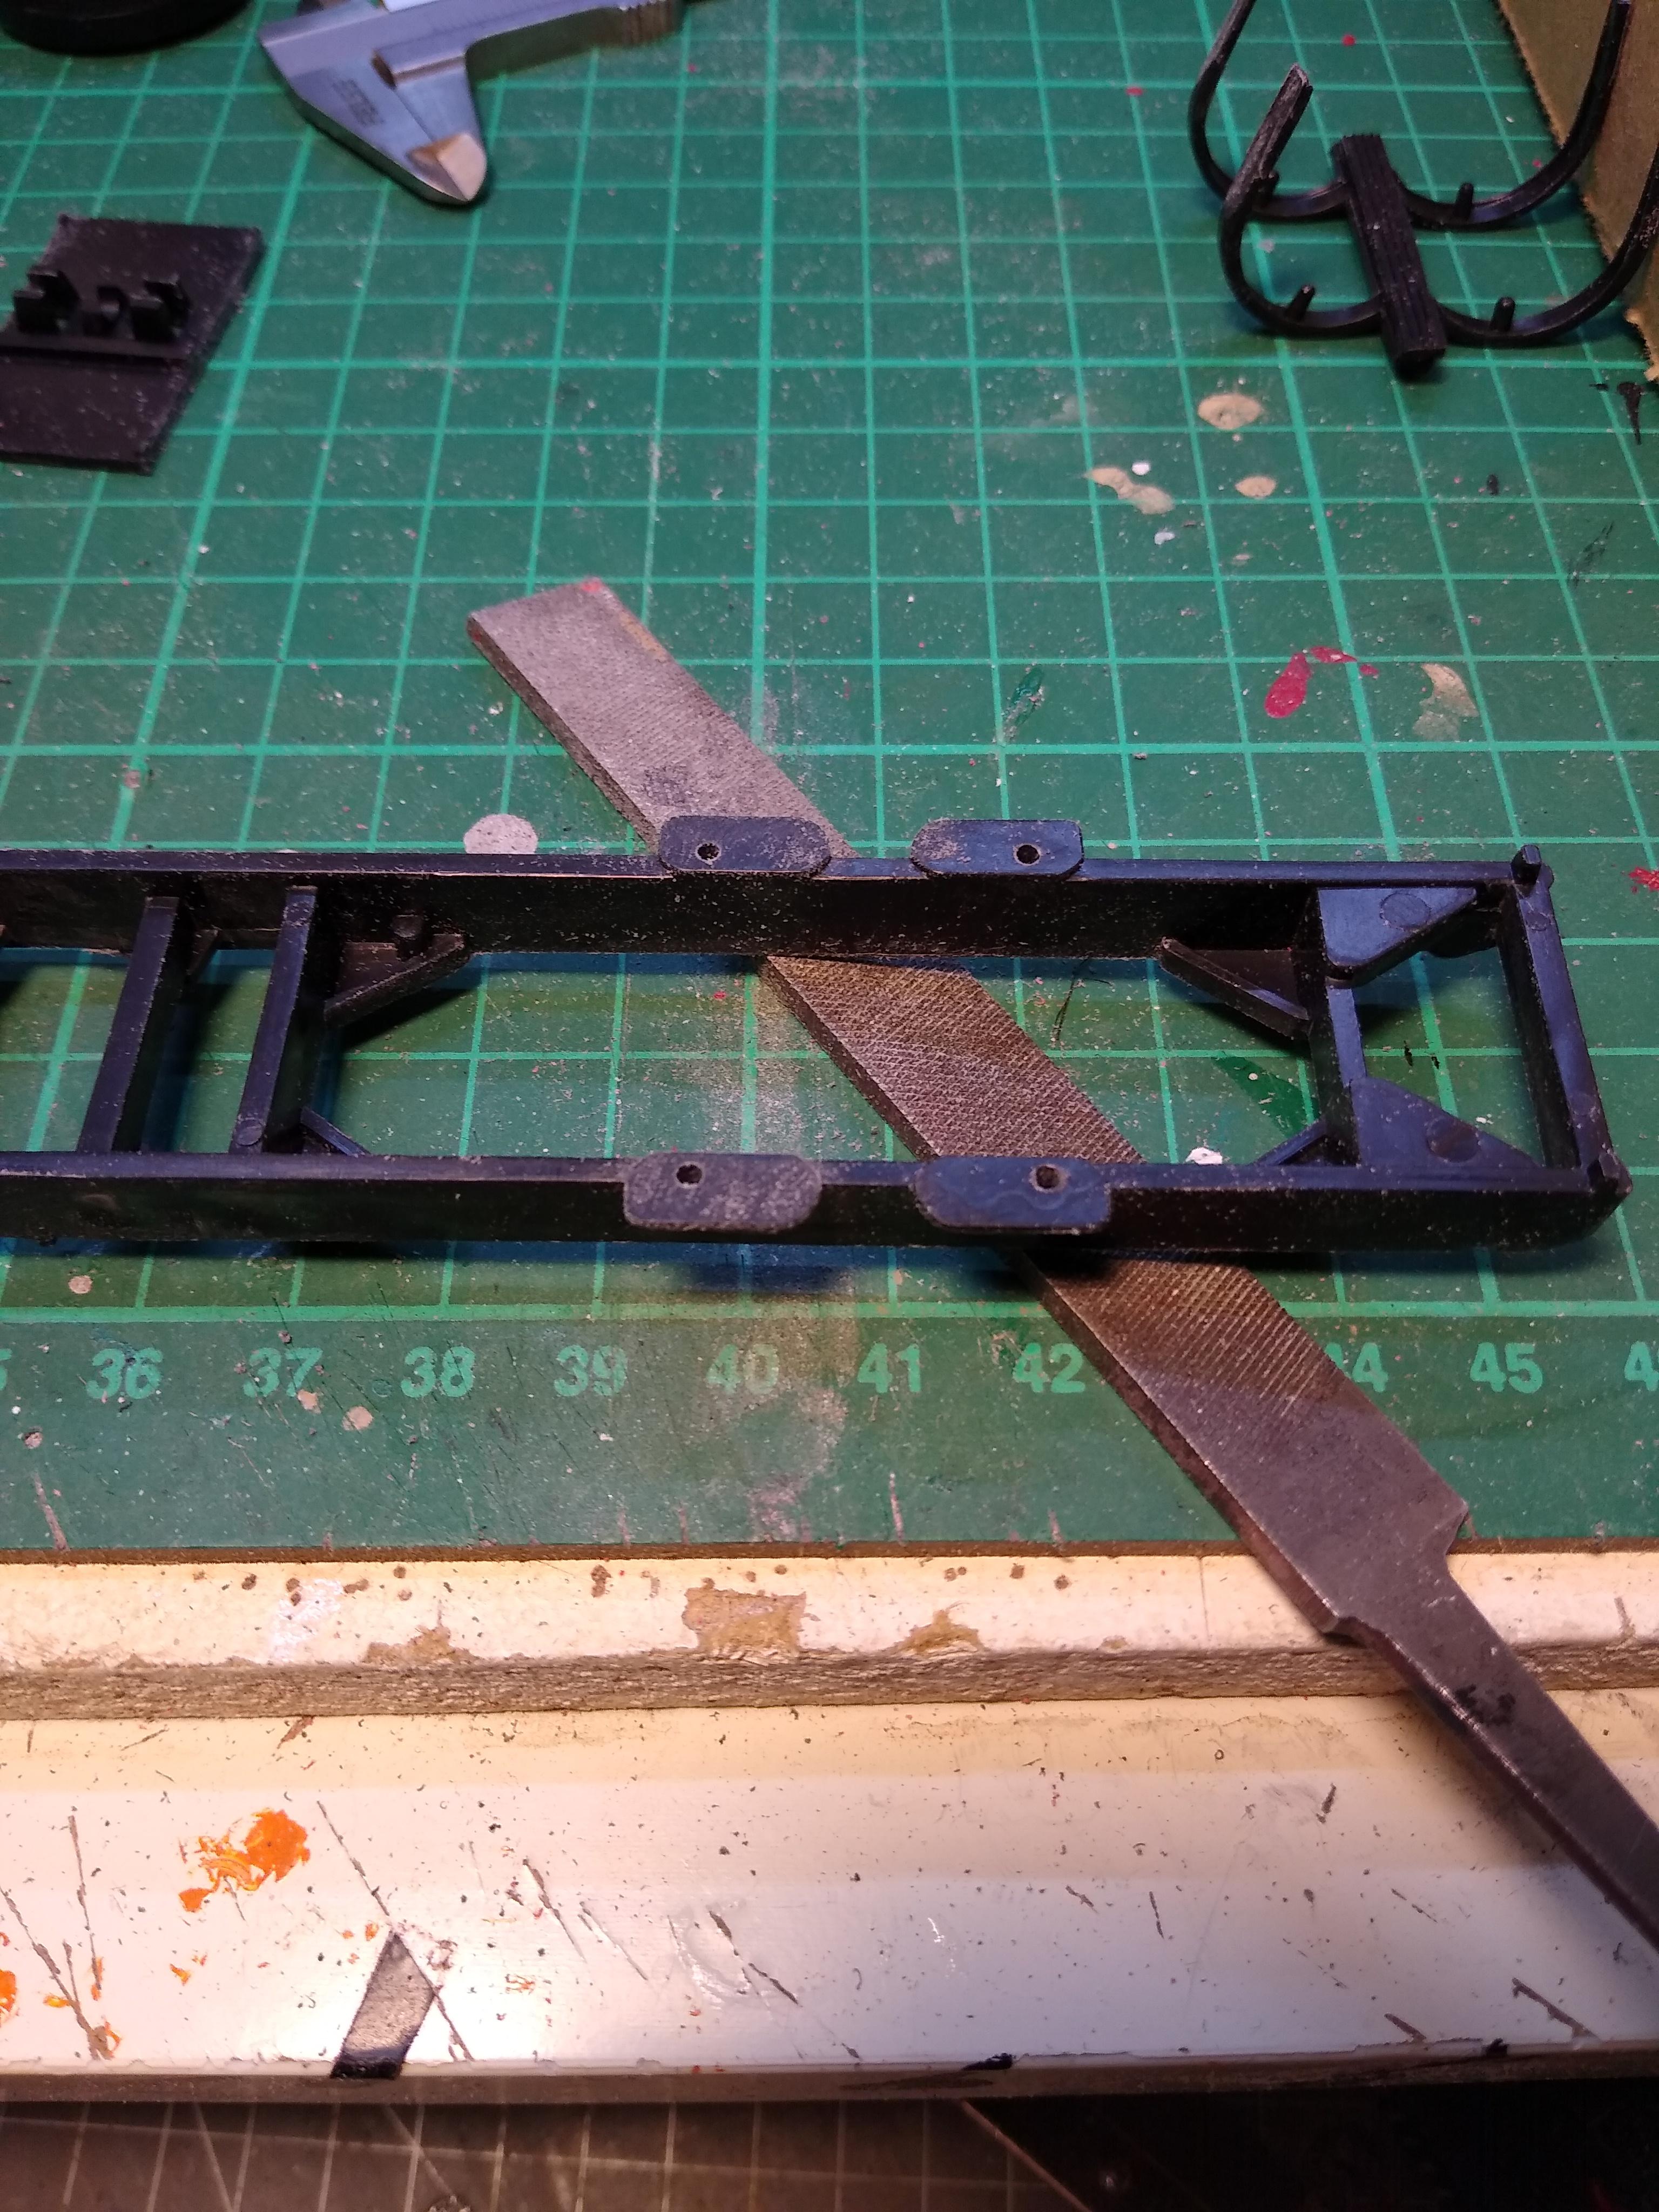
Had an opportunity to get stuck into the KW. Had to sort out the awful 5th wheel setup. The 5th wheel itself is an excellent rendition of a Holland cast unit but the mounting is poorly executed. Built a sliding unit as per my AMT K100. Works great and is 3mm lower than the kit setup. I'll add a little cast bracing underneath the plate for realism. Reshaped the chassis rear end. Cut off the fuel tank brackets to move them forward so that they're centralised under the sleeper. Removed the suspension mounts for the rubber suspension. Freed the Reyco steel spring suspension from the Monogram chassis and will set it backwards rather than trim the end off the rails.
-
That's impressive stuff!
-
Looks factory! What did you use for filling the joint?
-
Looks great that mate, you can see the difference the wheels make. Thanks for the inspiration.
-
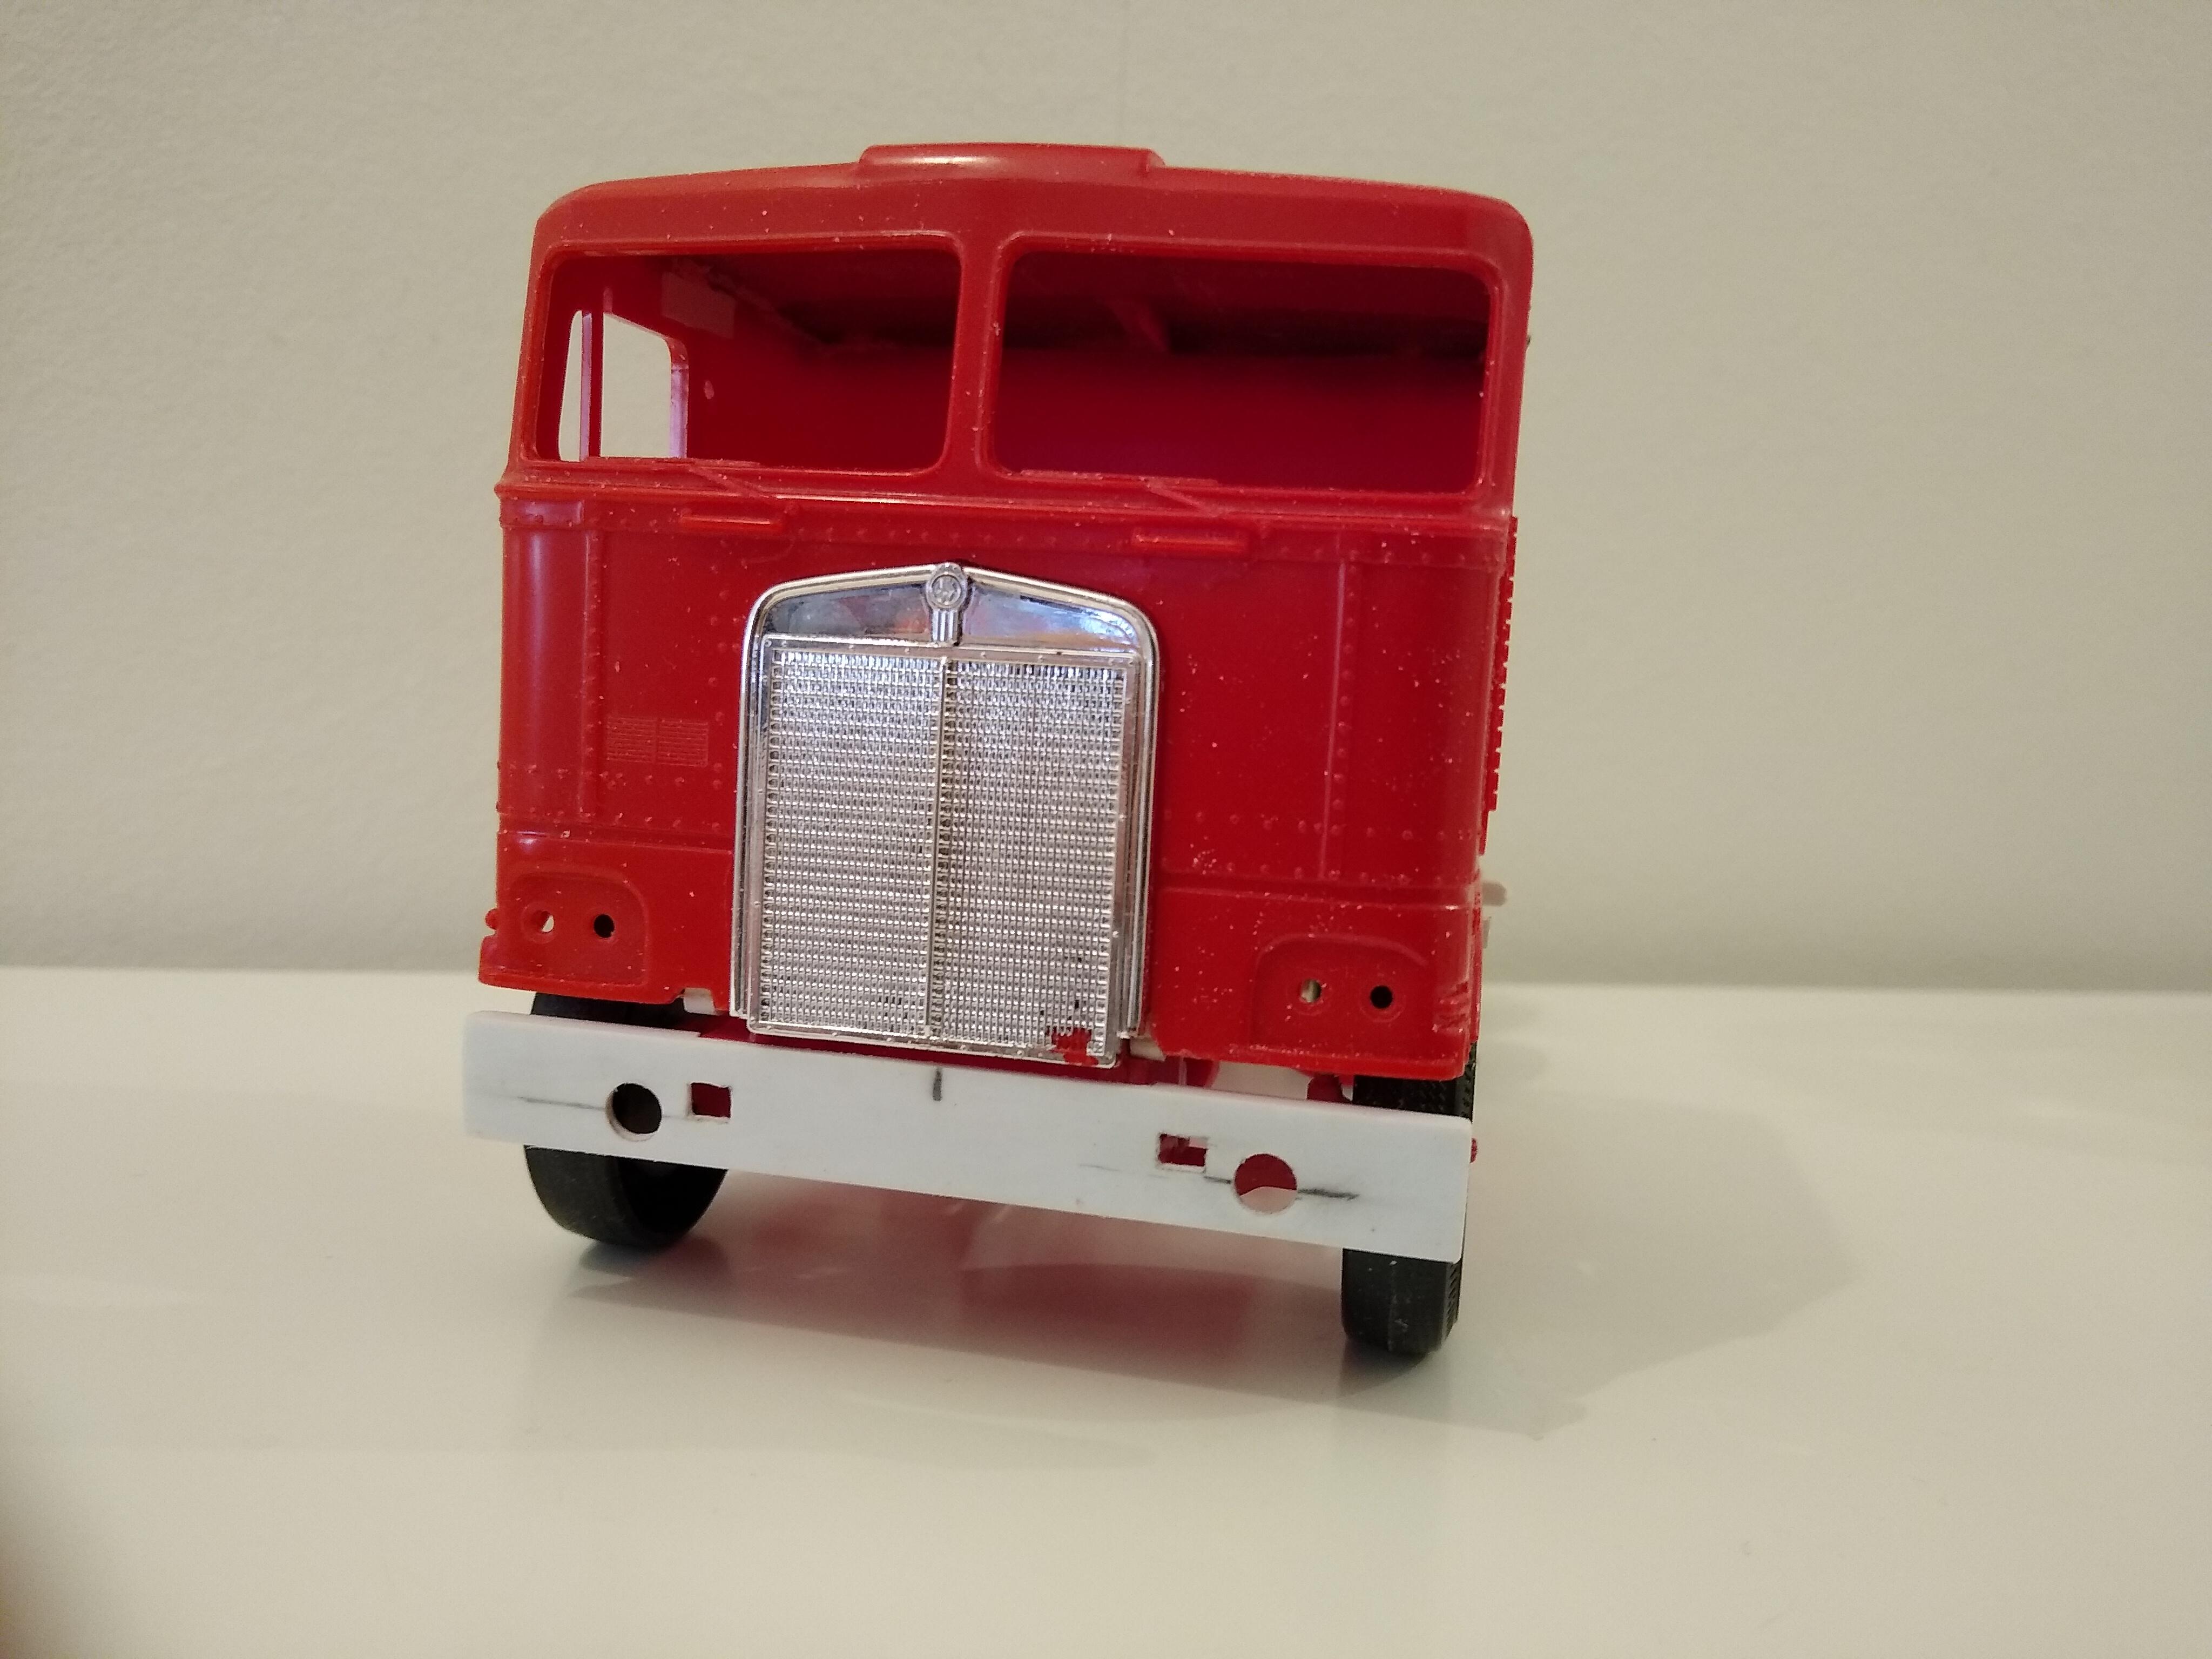
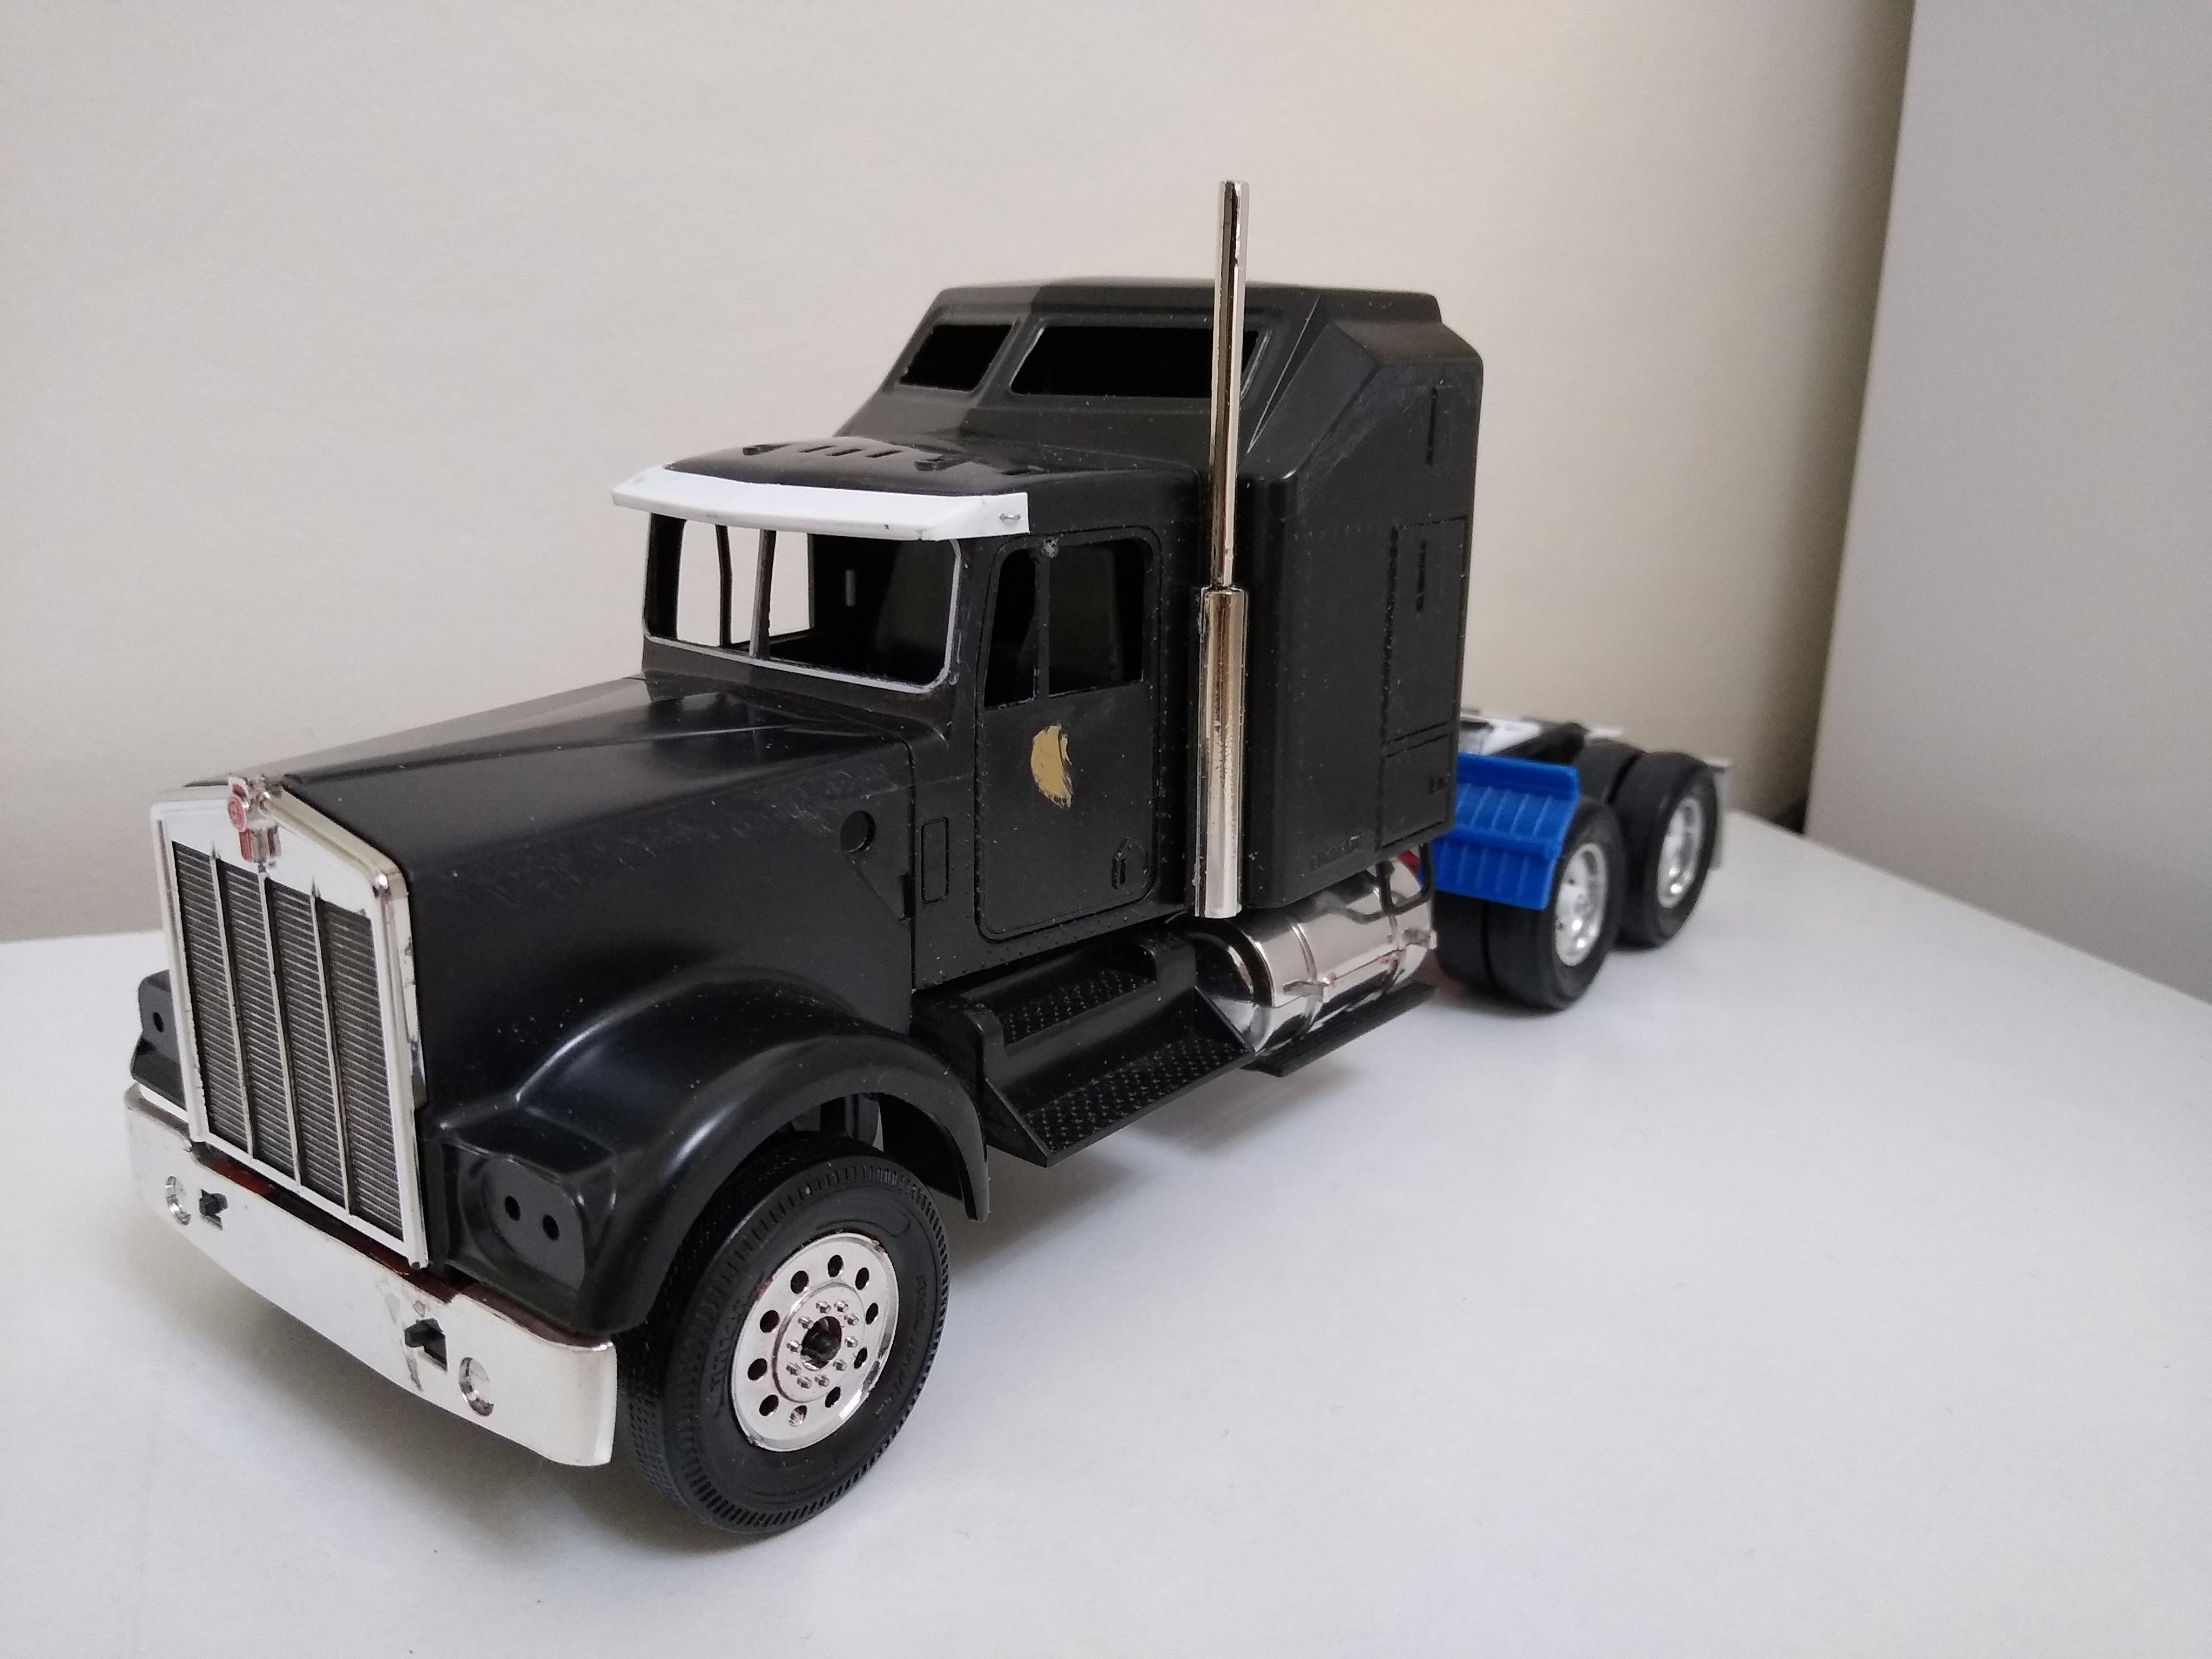
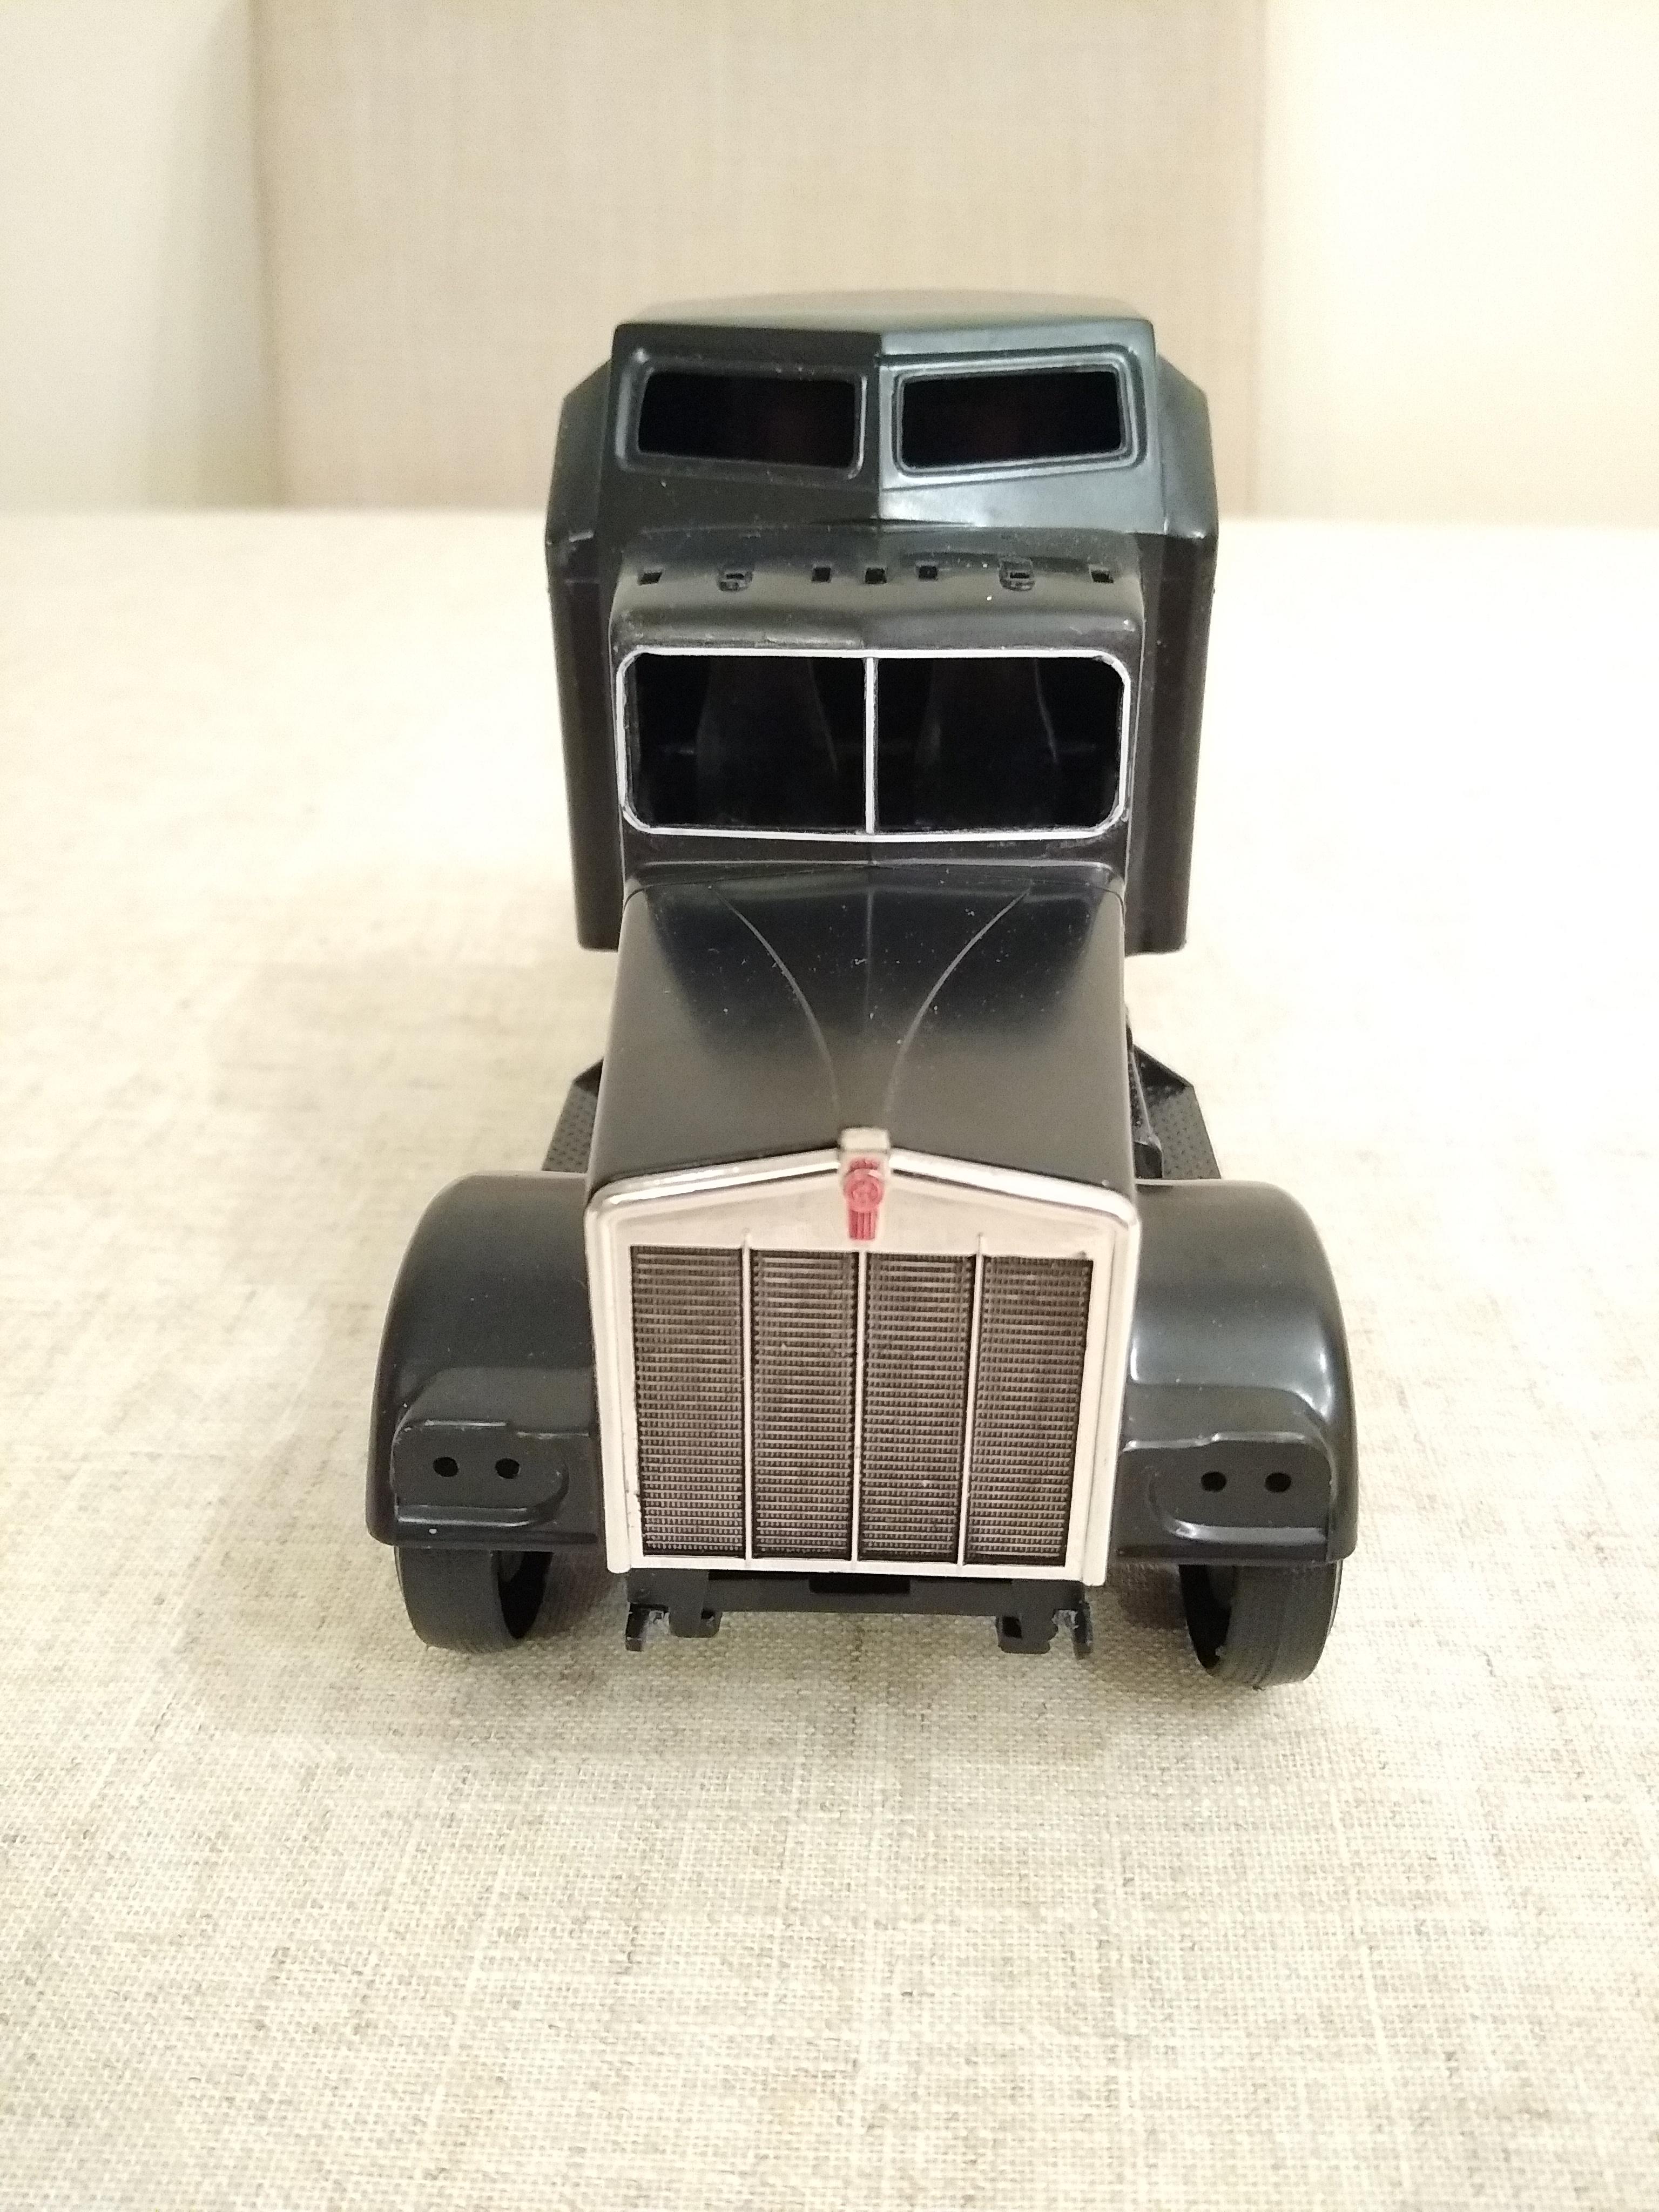
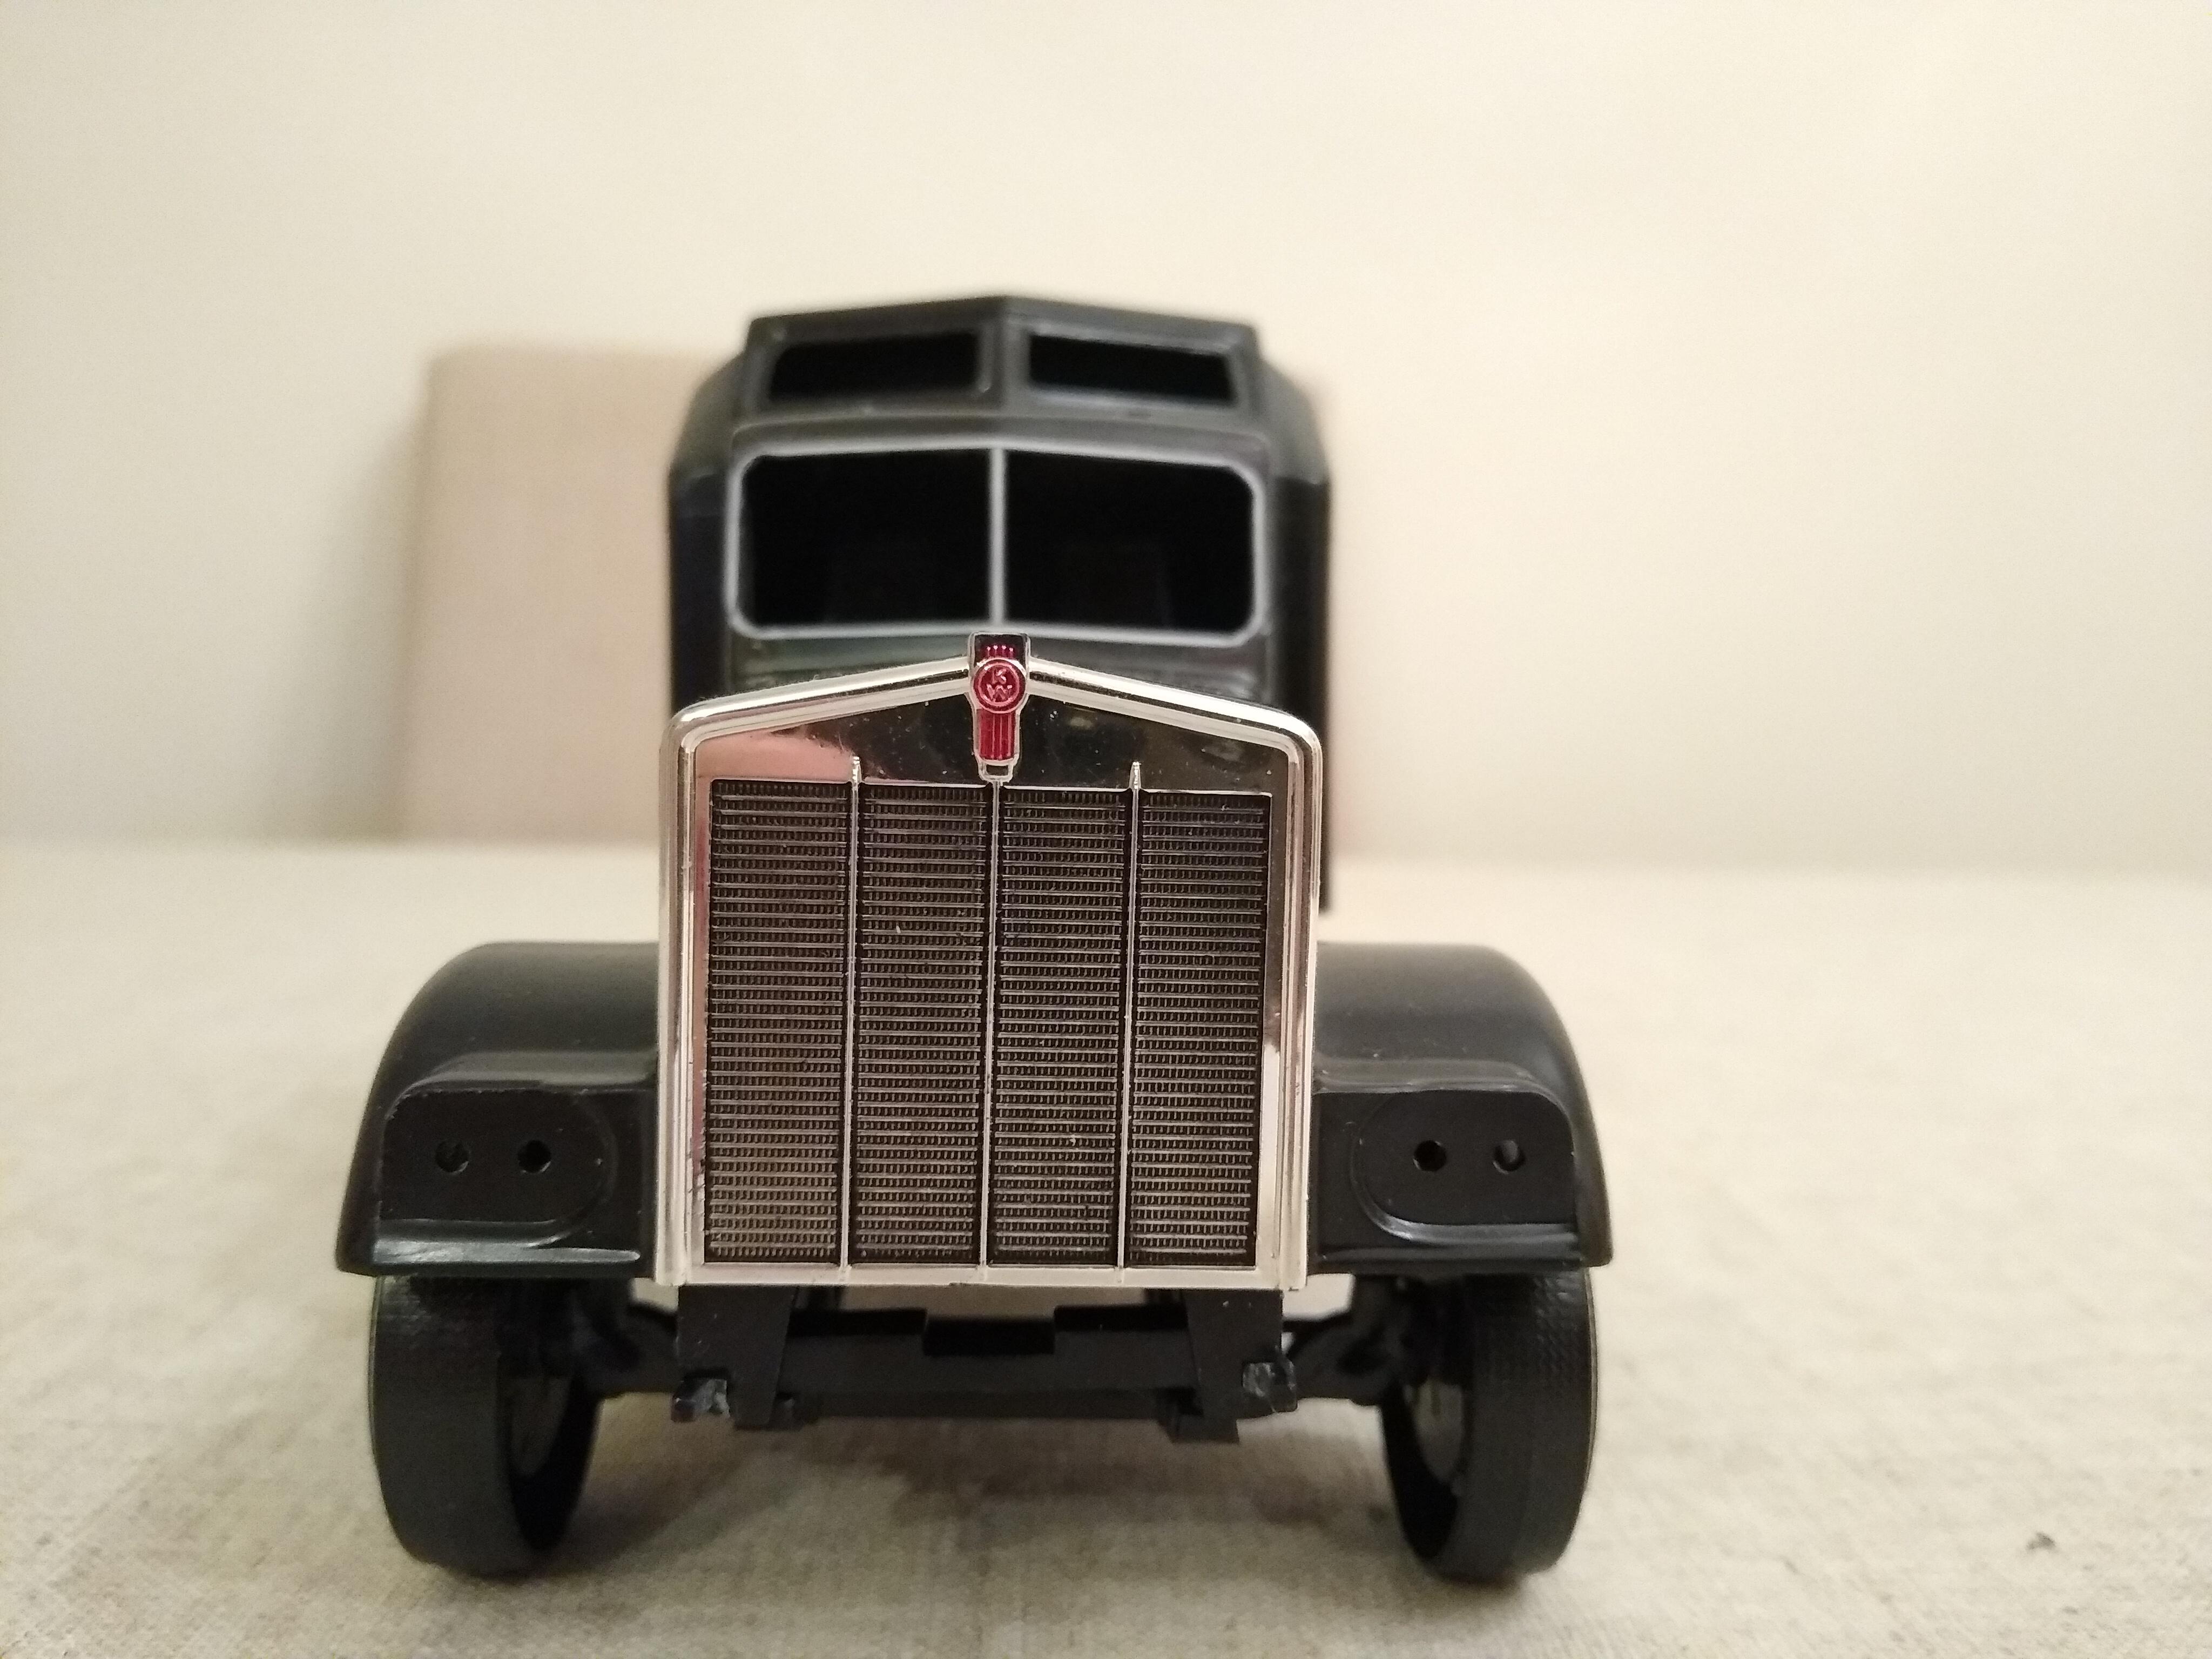
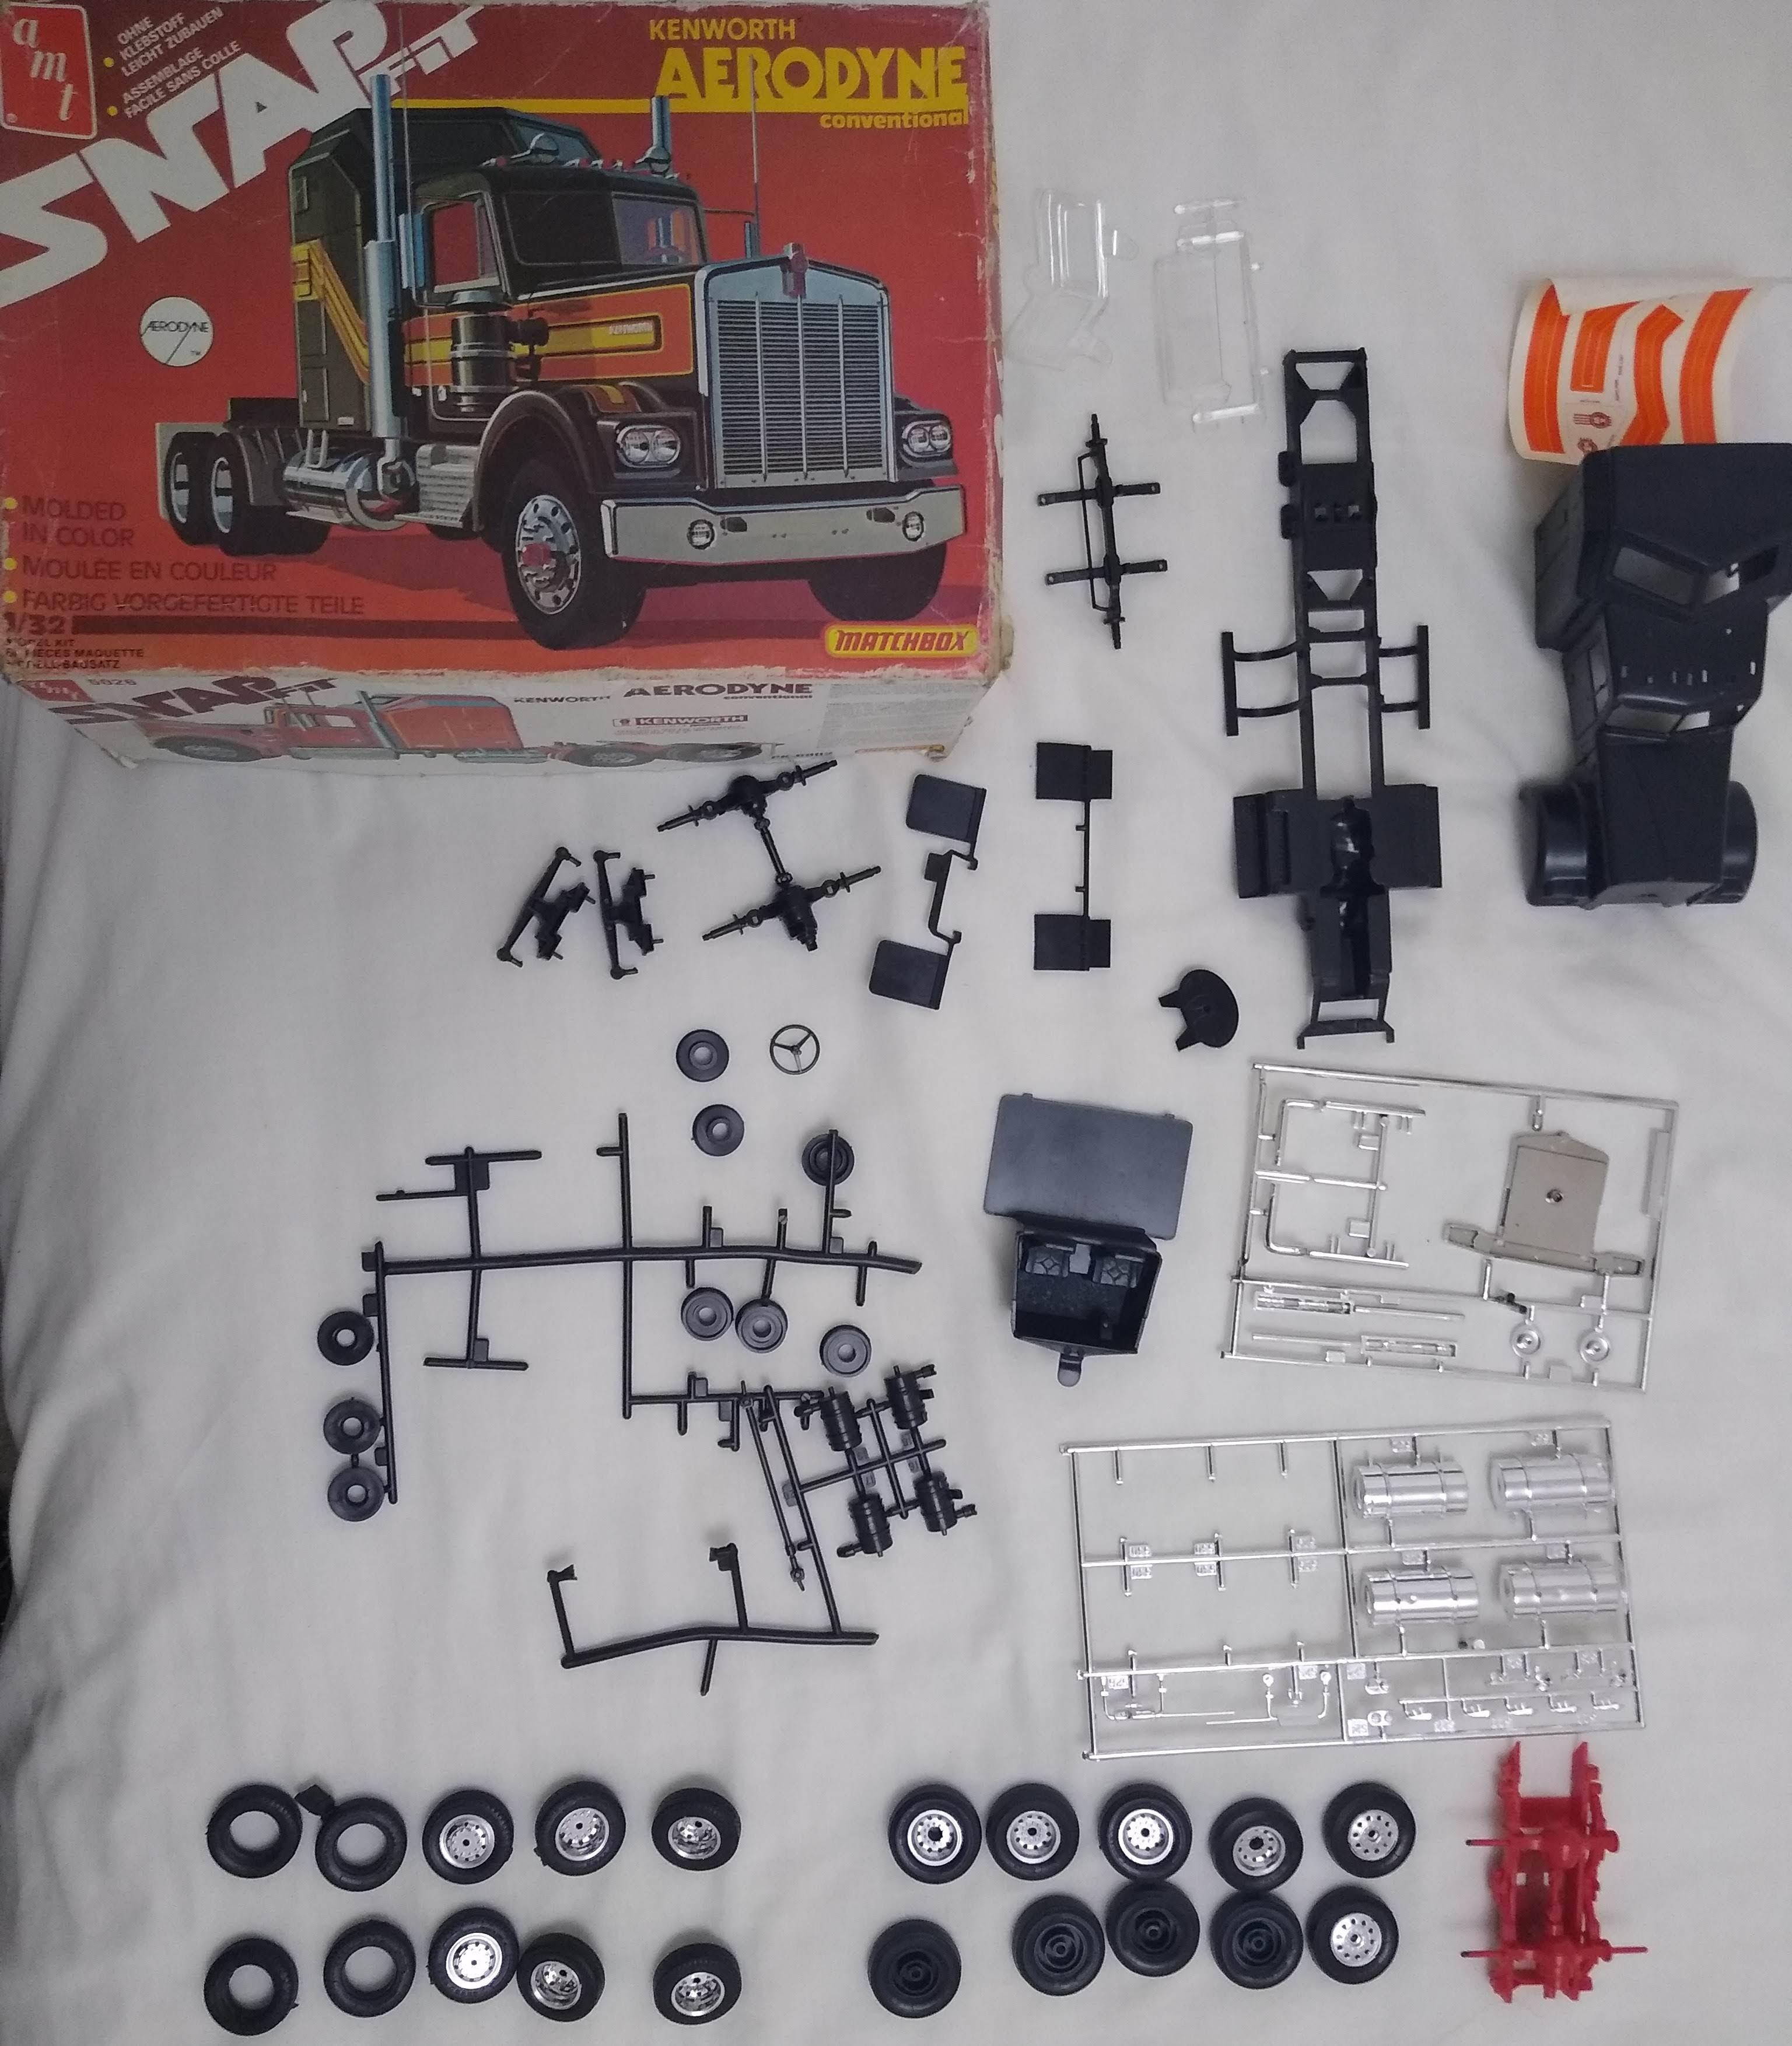
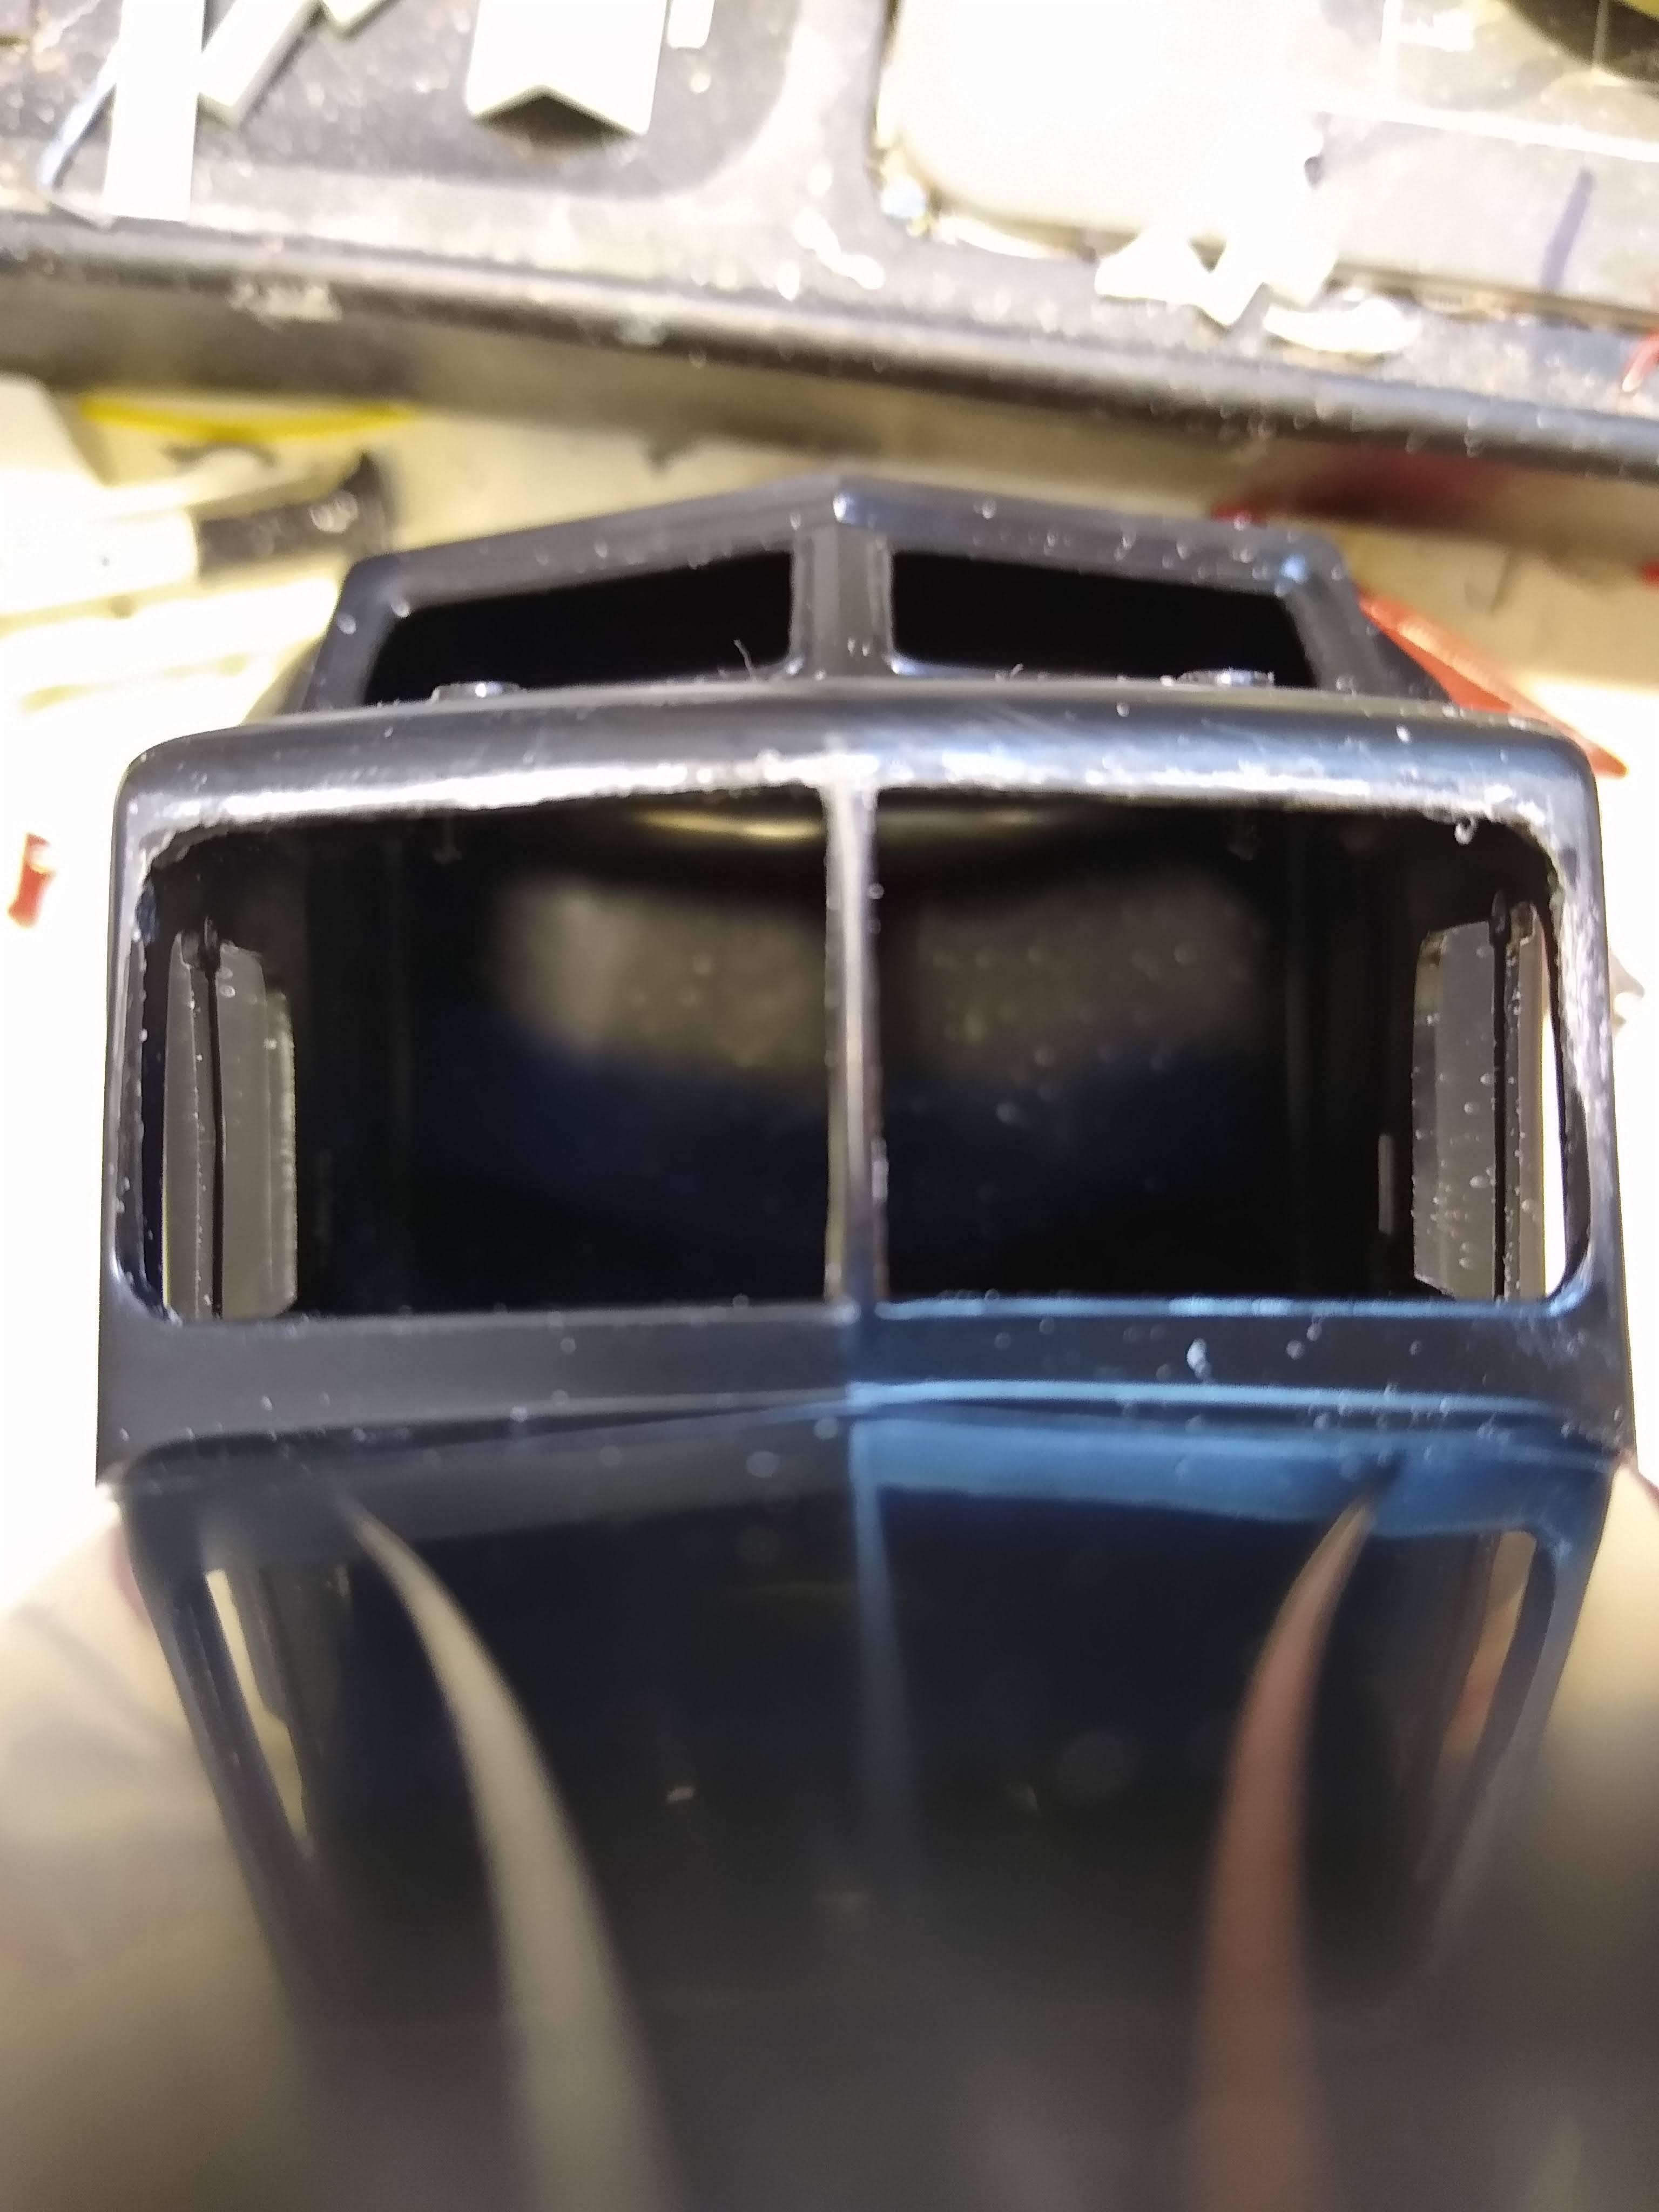
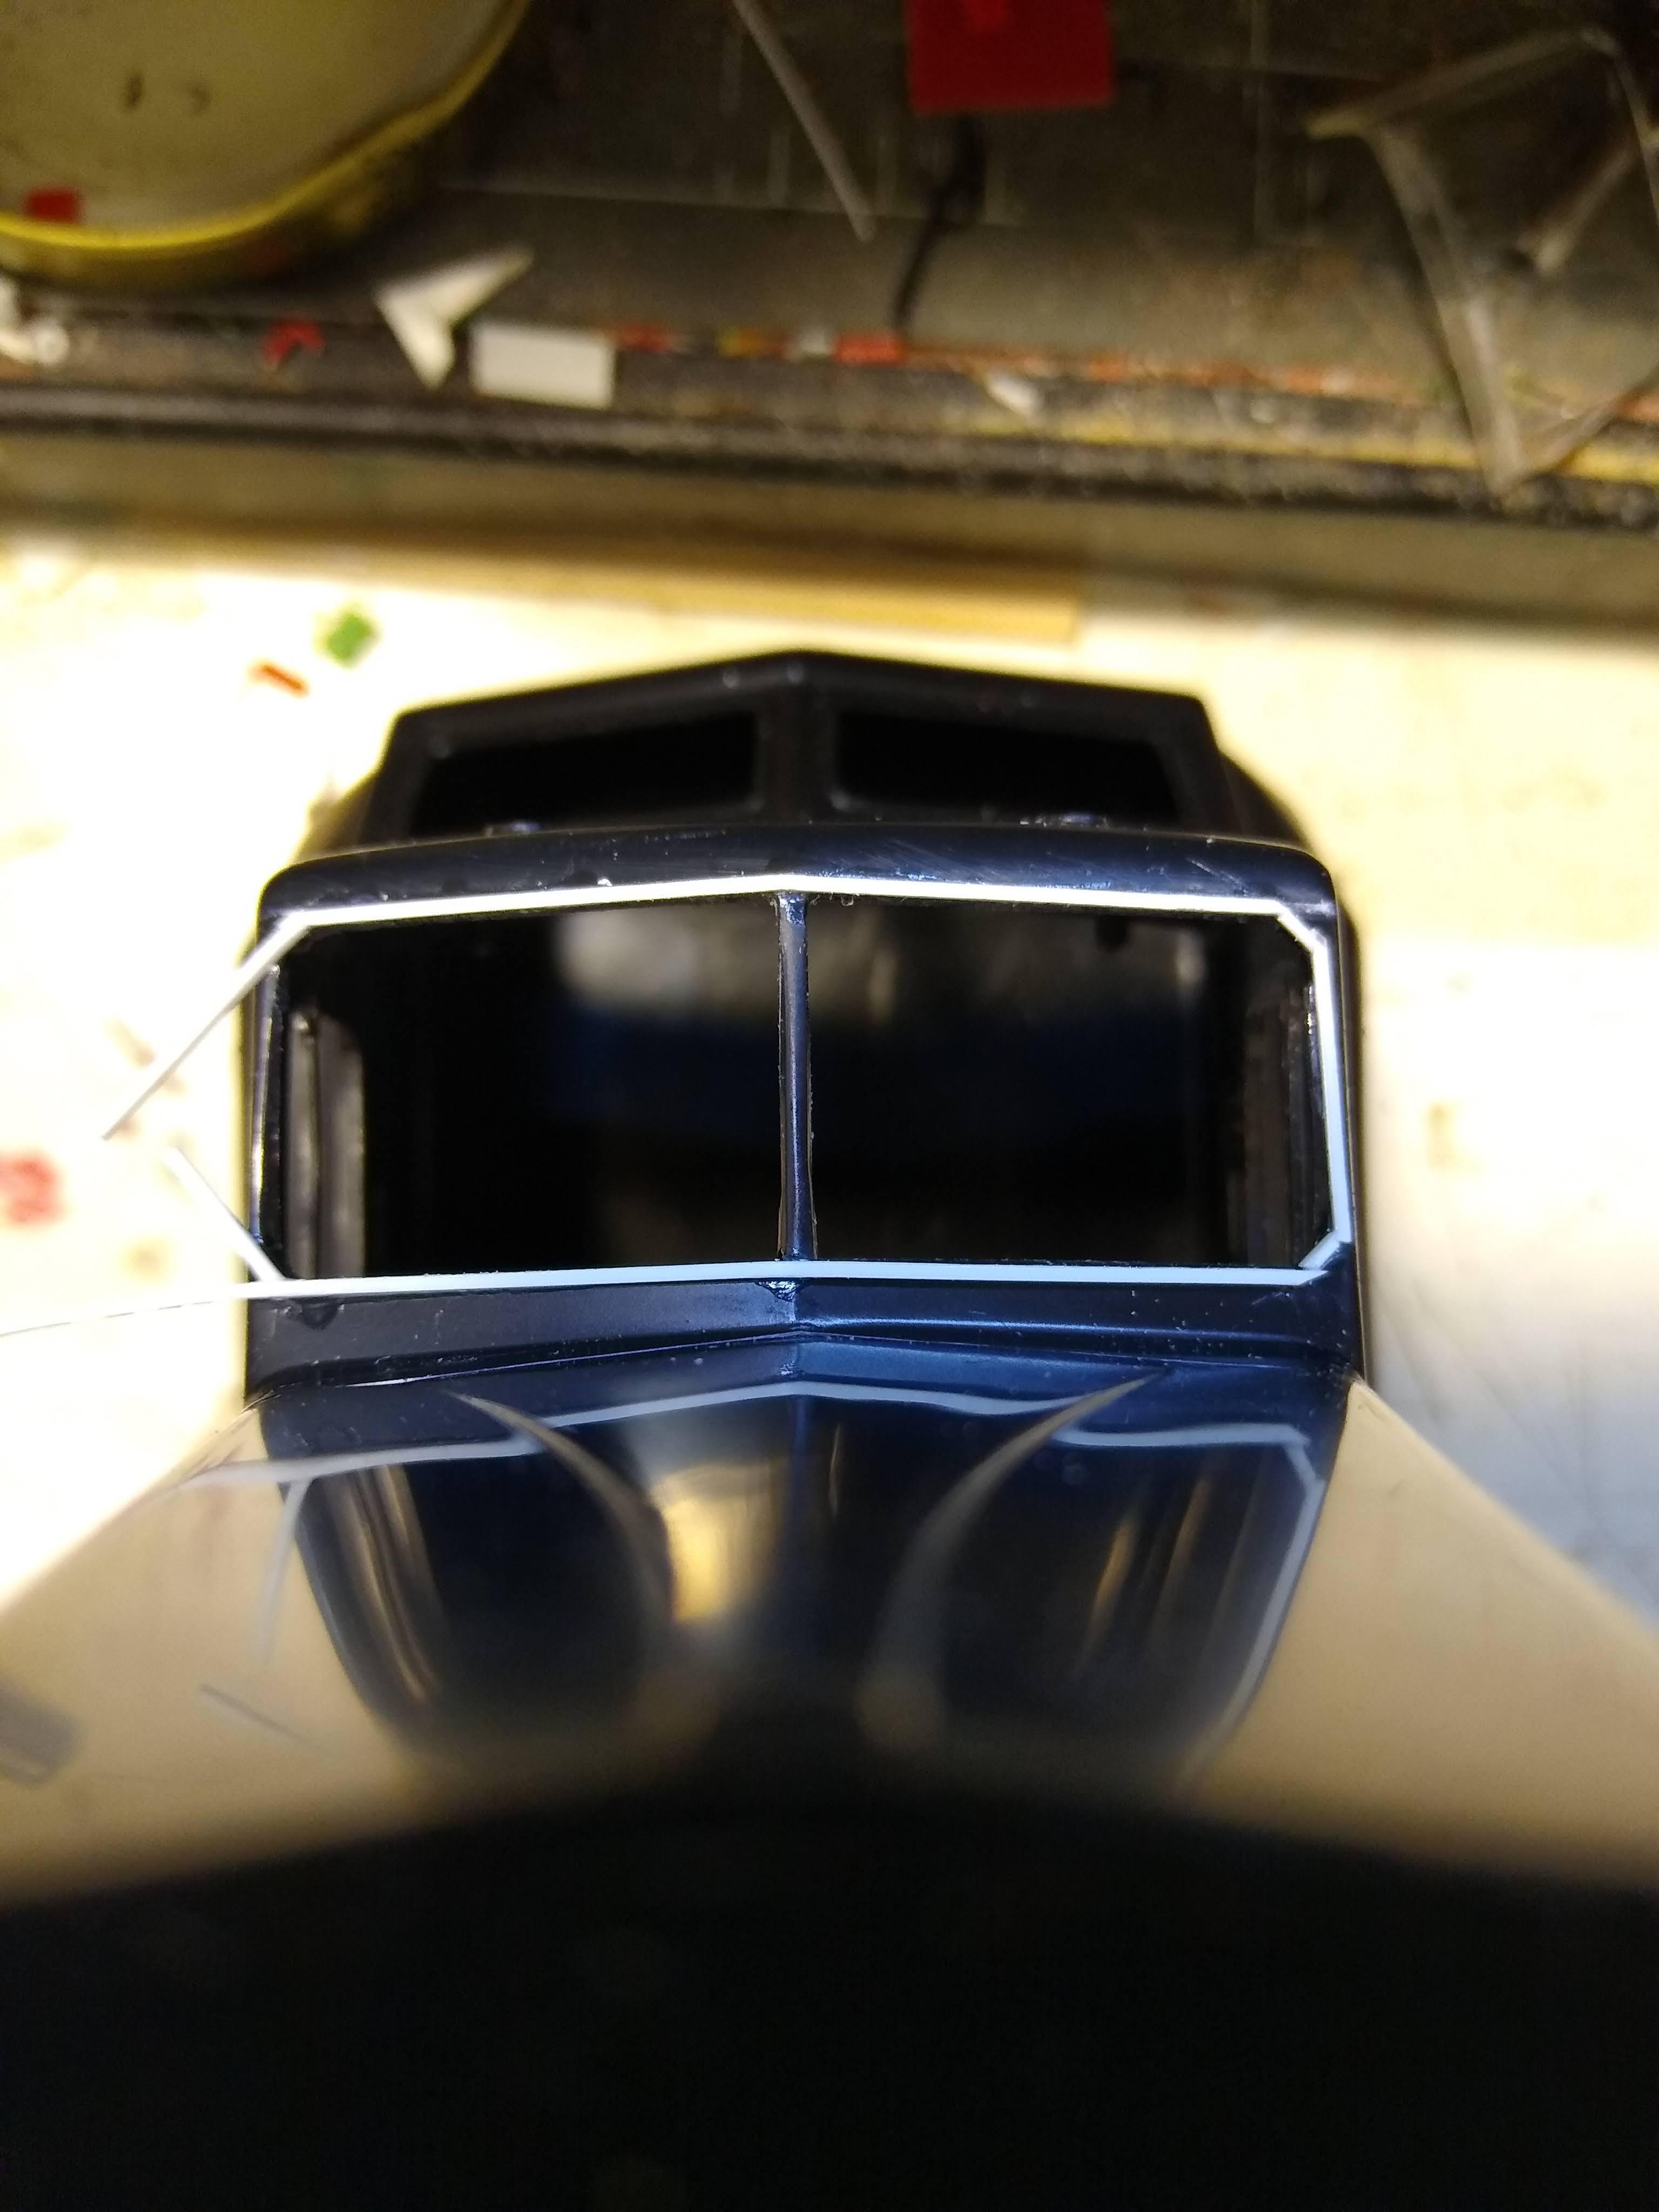
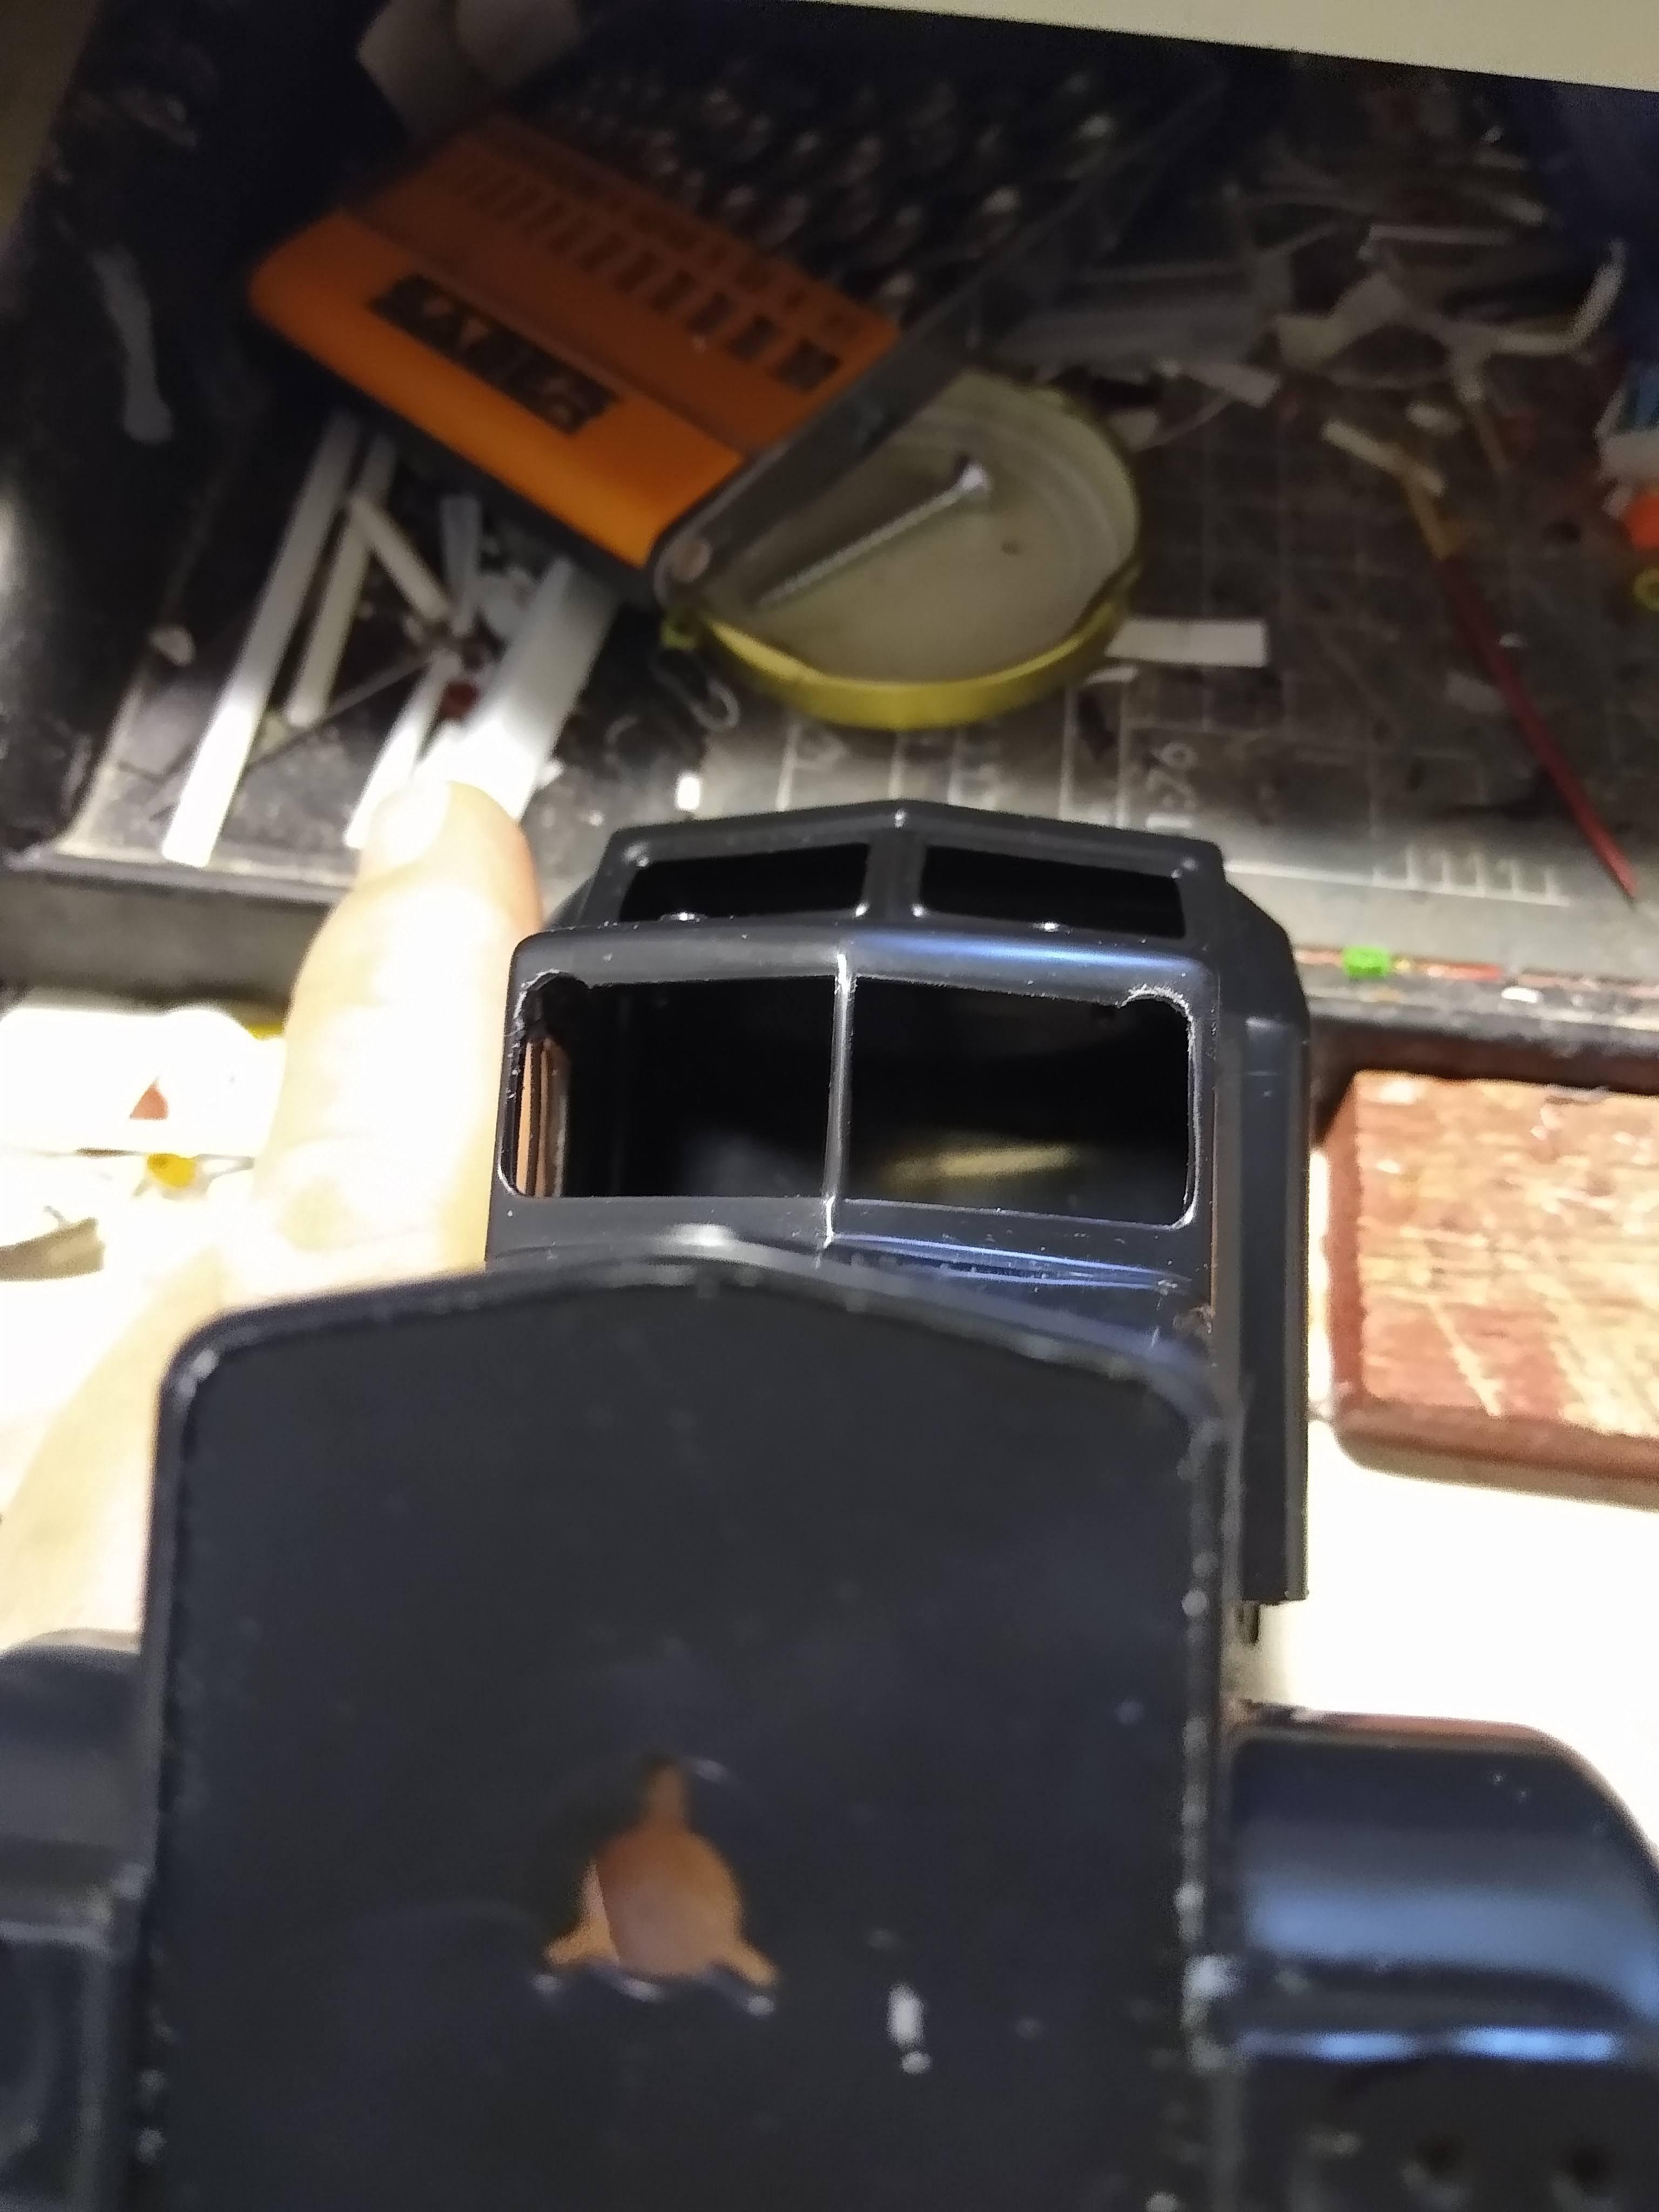
This is my offering for the GB. It's your usual AMT mix of the good and the bad. Paint and colour schemes seem a long way off, there's just a big list of things to fix first. I decided to go for this rather than the Monogram kit because the overall proportions are better. If you look at the Monogram the cab greenhouse is far too big and the wheels are dwarfed in the massive front fenders. The wheels on the AMT don't look right but that can be fixed by adding Monogram wheels. Also, the AMT has two air cleaners, the Monogram only one. The fuel tanks are more accurate on the AMT whereas the Monogram are just their generic renditions. How far I intend to go with this is unknown at this point, let's just say my usual adjustments. First off the front windows are the wrong shape [square at the top outer corners!] and have no seal detail around them and that's one of the main things that identifies a W900 for me, so I shaped the top of the openings with a round file and added the "rubber" using 1mm square strip and shaping it at the corners. I tried shaping the strip gradually but I found the adhesive caused it to crack and tear so I opted for the sections at angles and will shape them. I'll double up at the corners to give me space for the arc.