Rockford
-
Posts
1,944 -
Joined
-
Last visited
Content Type
Profiles
Forums
Events
Gallery
Everything posted by Rockford
-

1964 Pontiac Bonneville Convertible.
Rockford replied to StevenGuthmiller's topic in WIP: Model Cars
As with all your builds, I'm speechless. Absolute craftsmanship! -
Thanks gents. I still can't stop looking at it now.
-
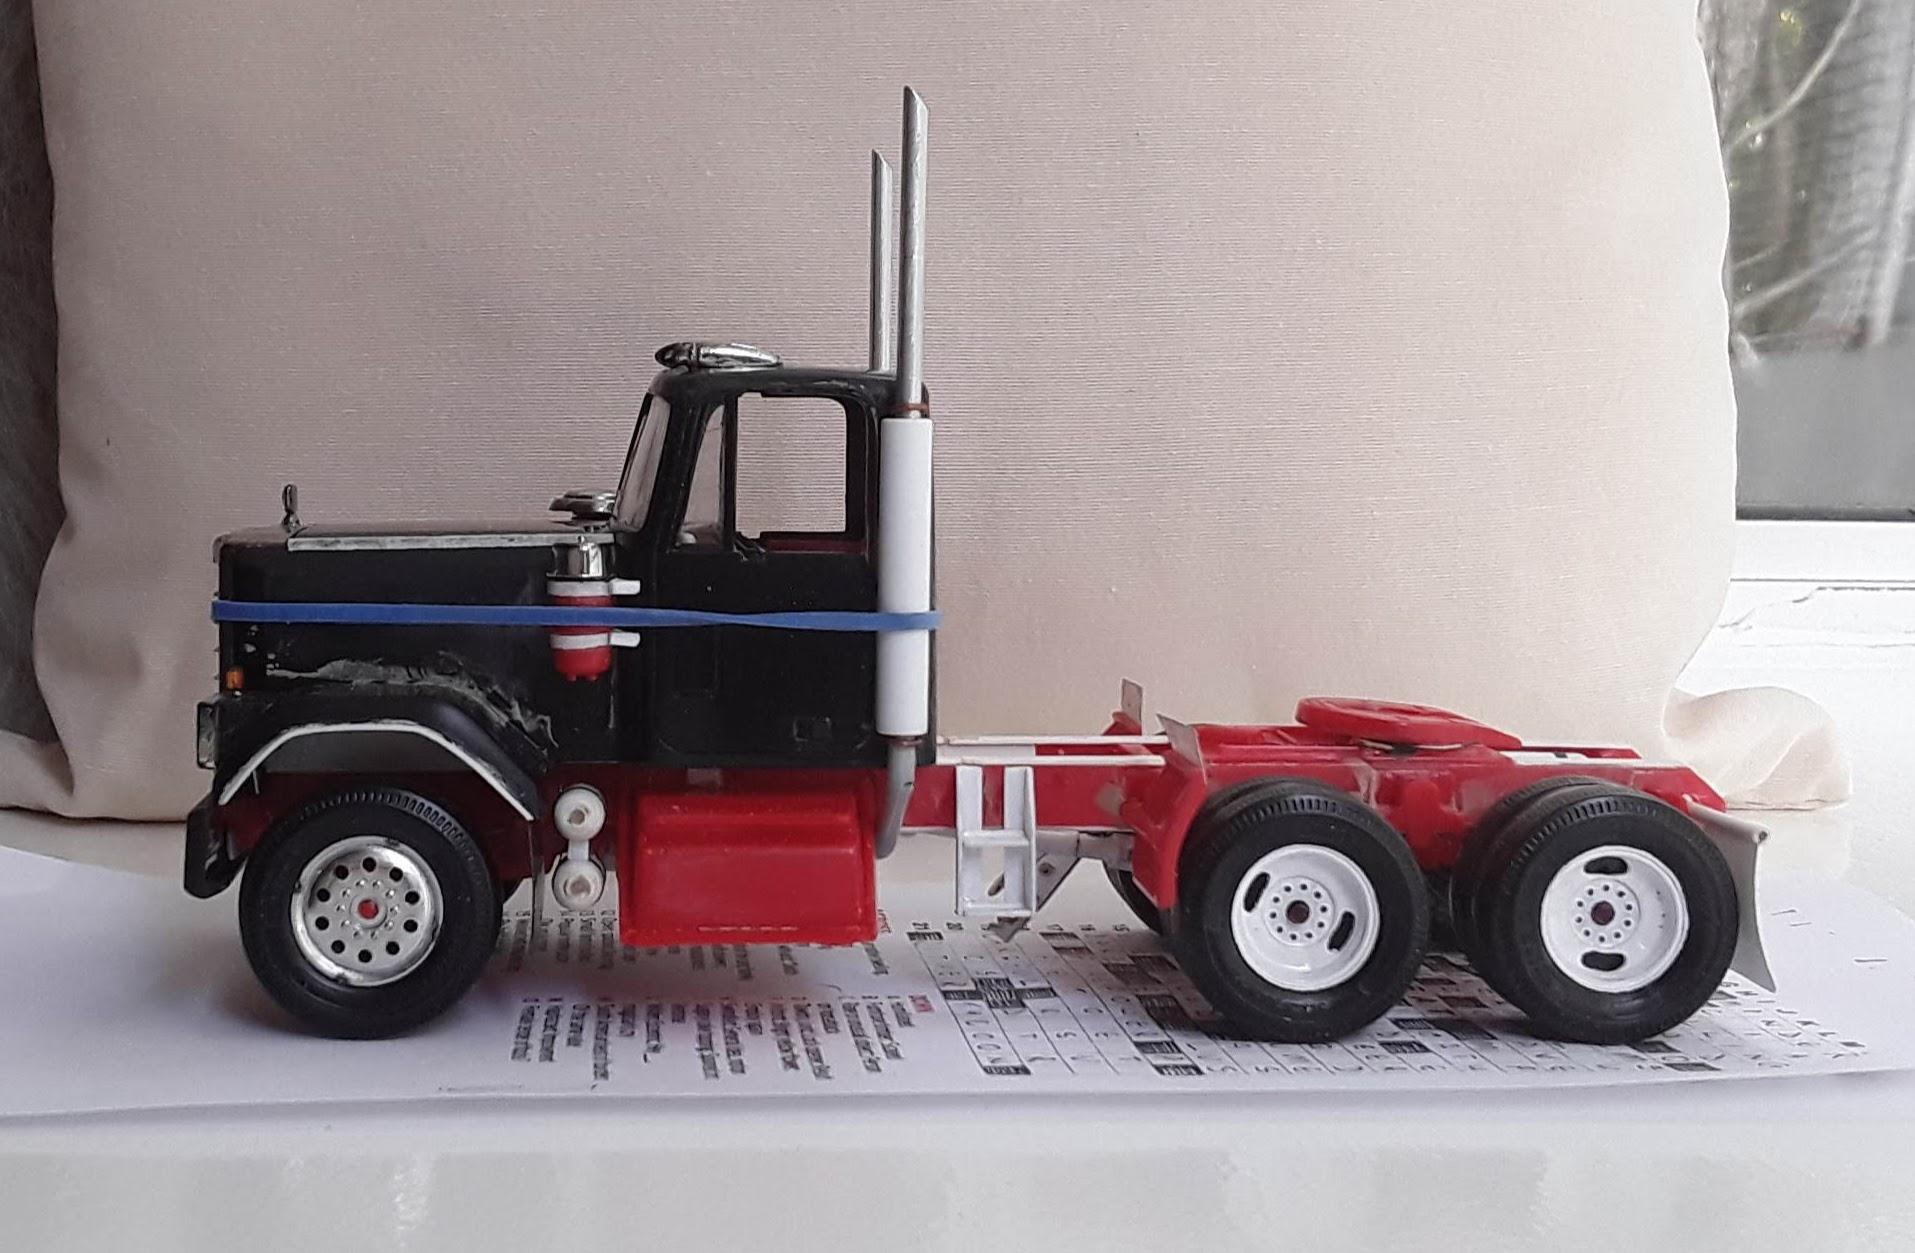
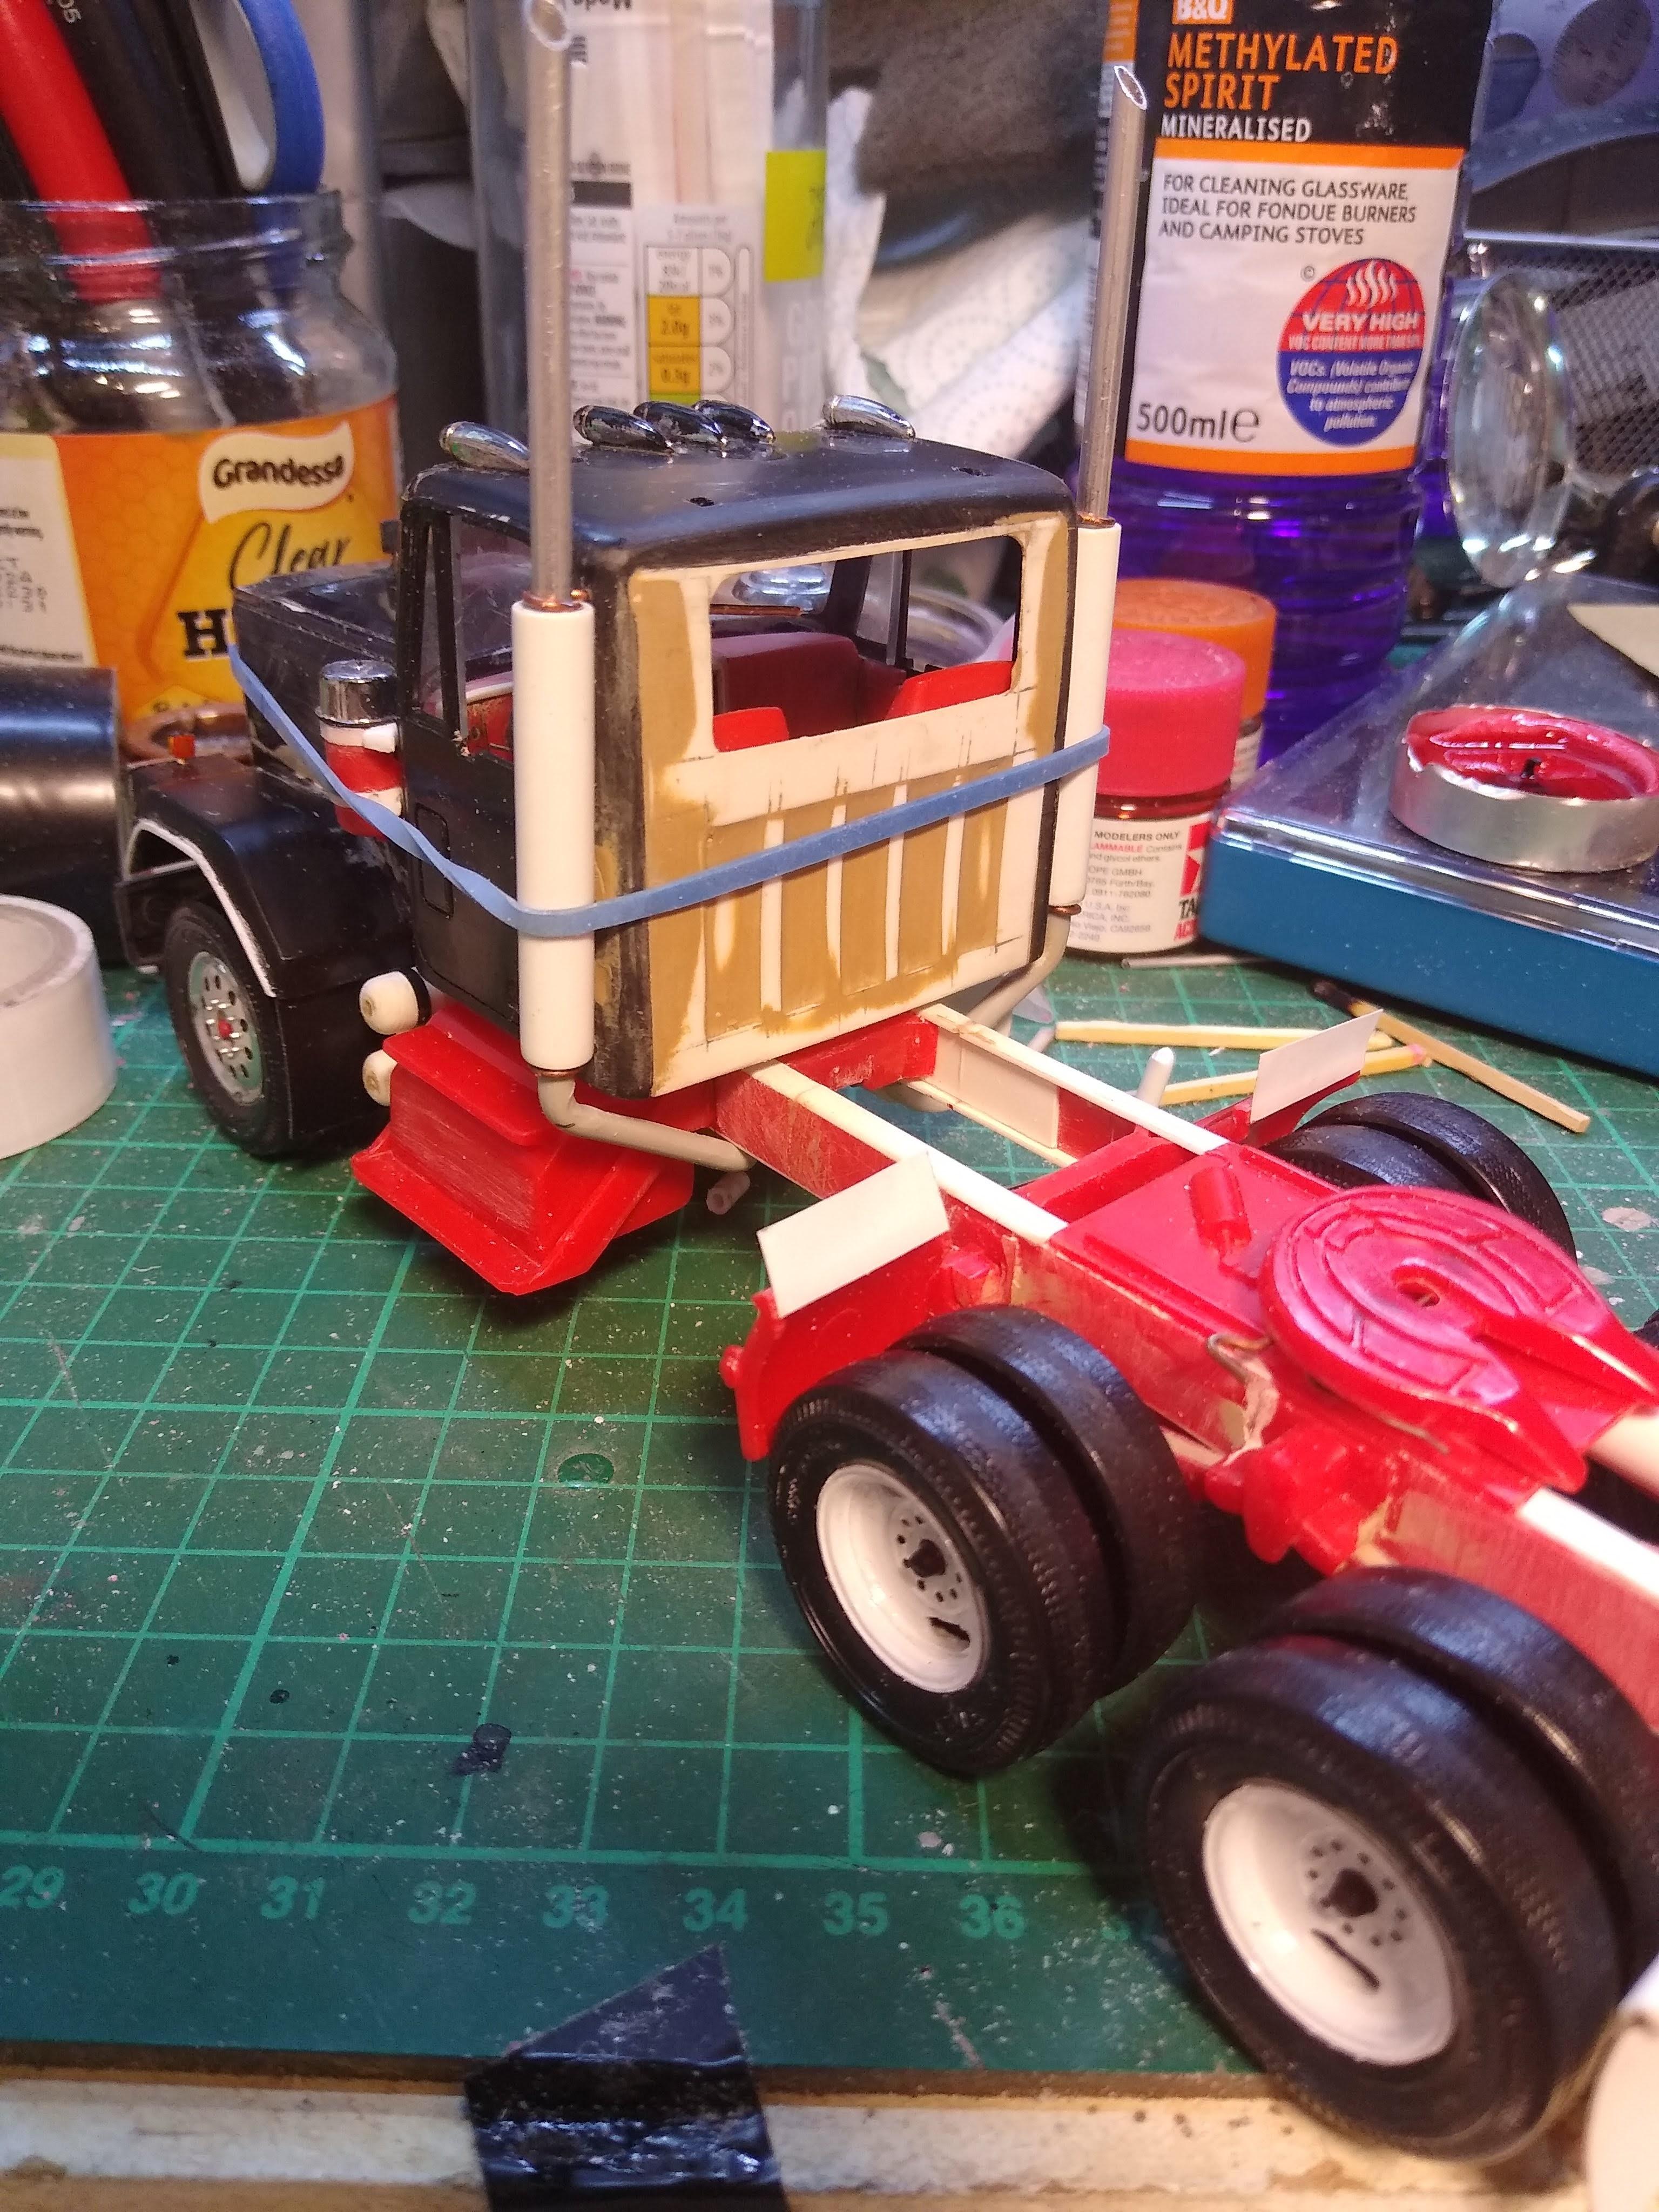
2× Chevy Bison
Rockford replied to Rockford's topic in WIP: Model Trucks: Big Rigs and Heavy Equipment
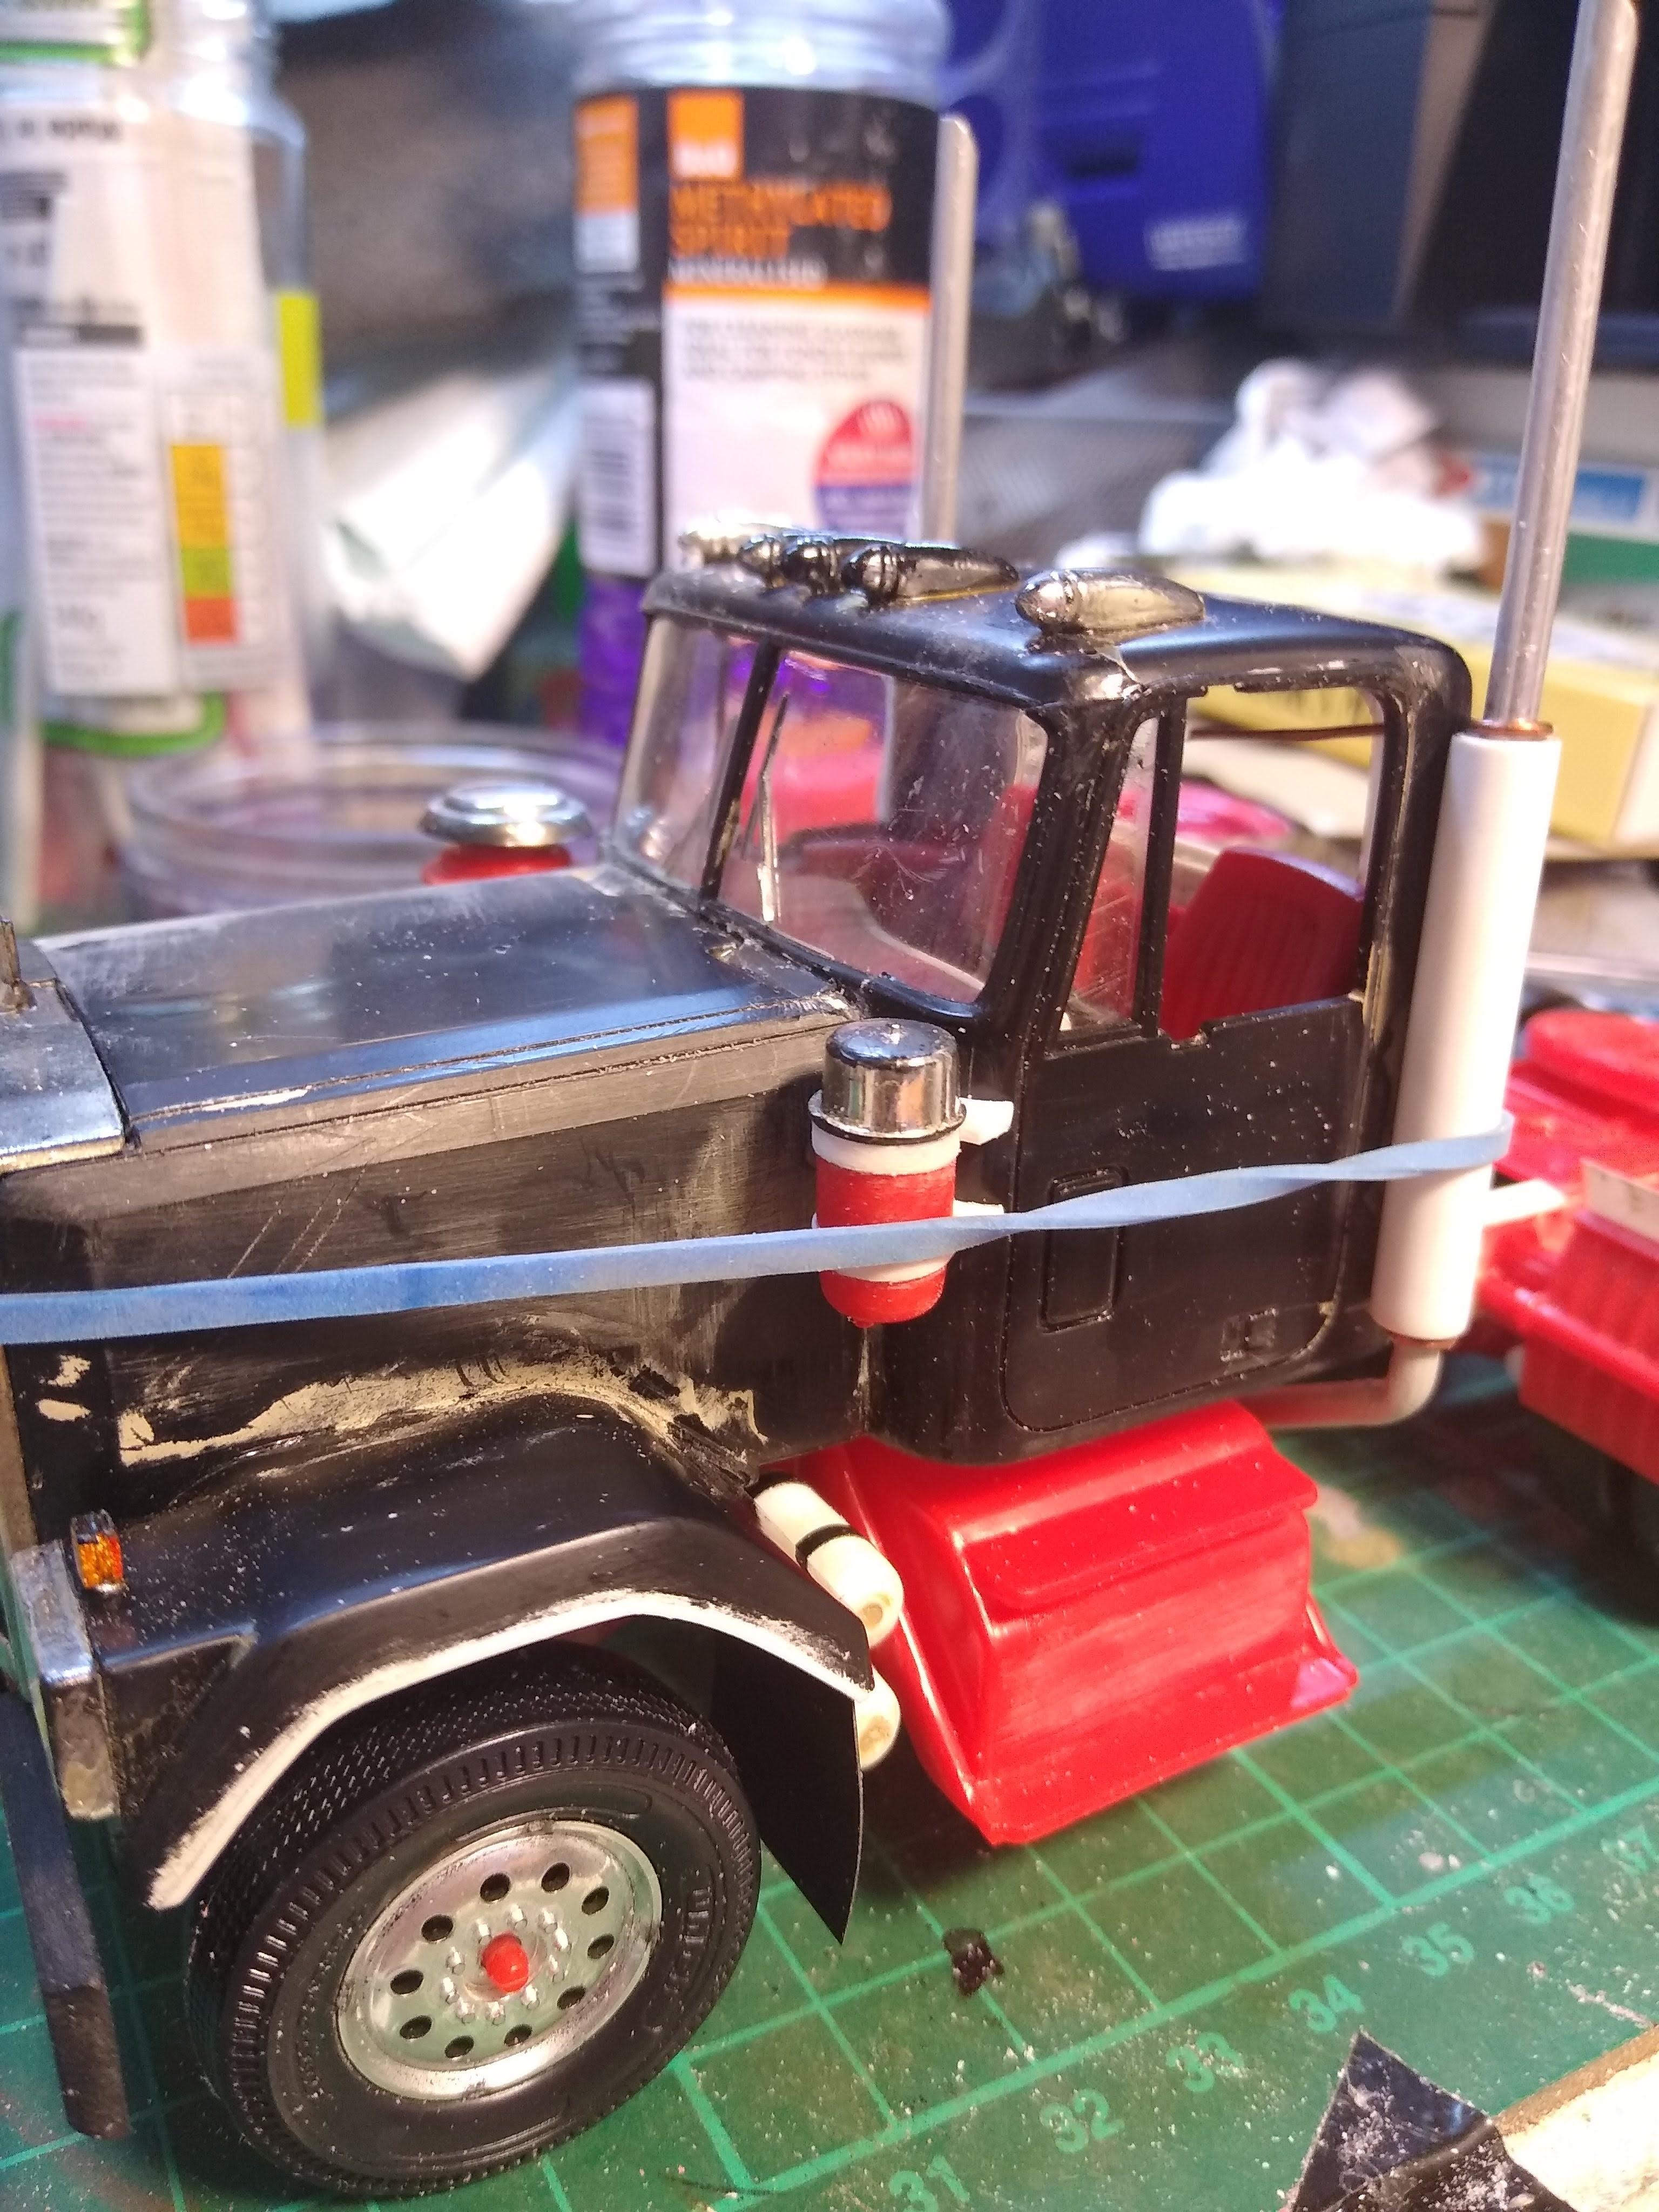
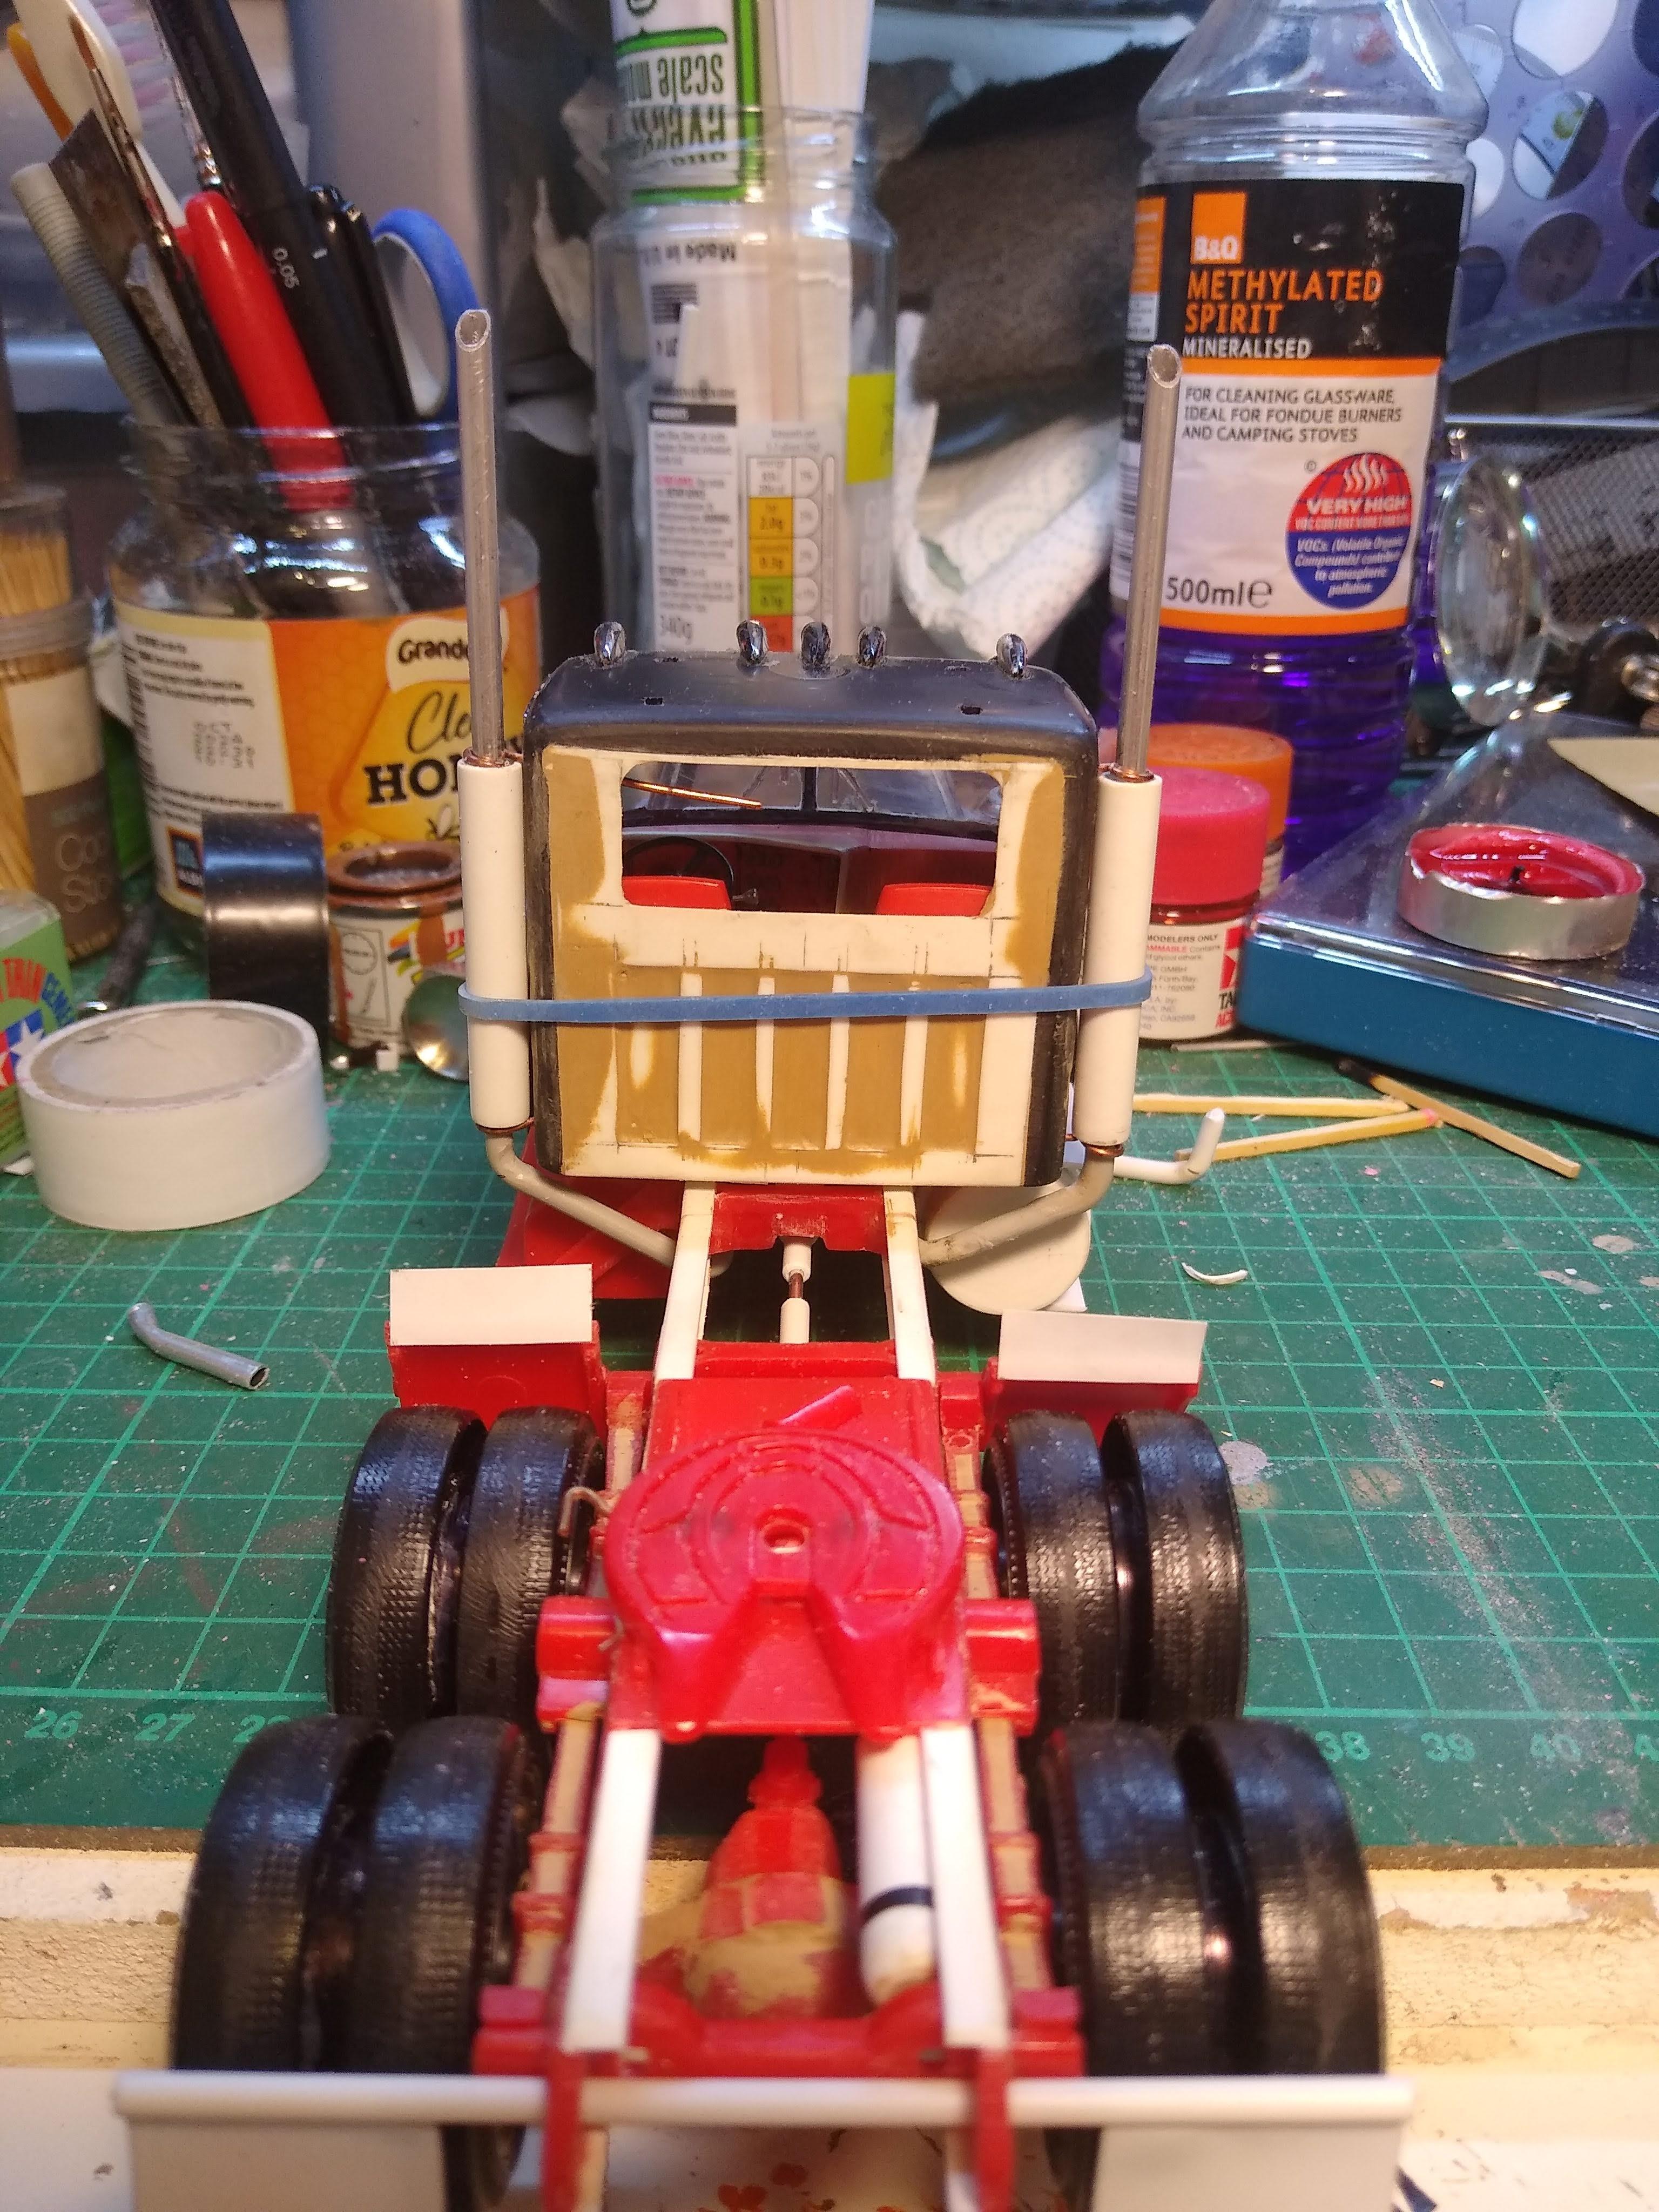
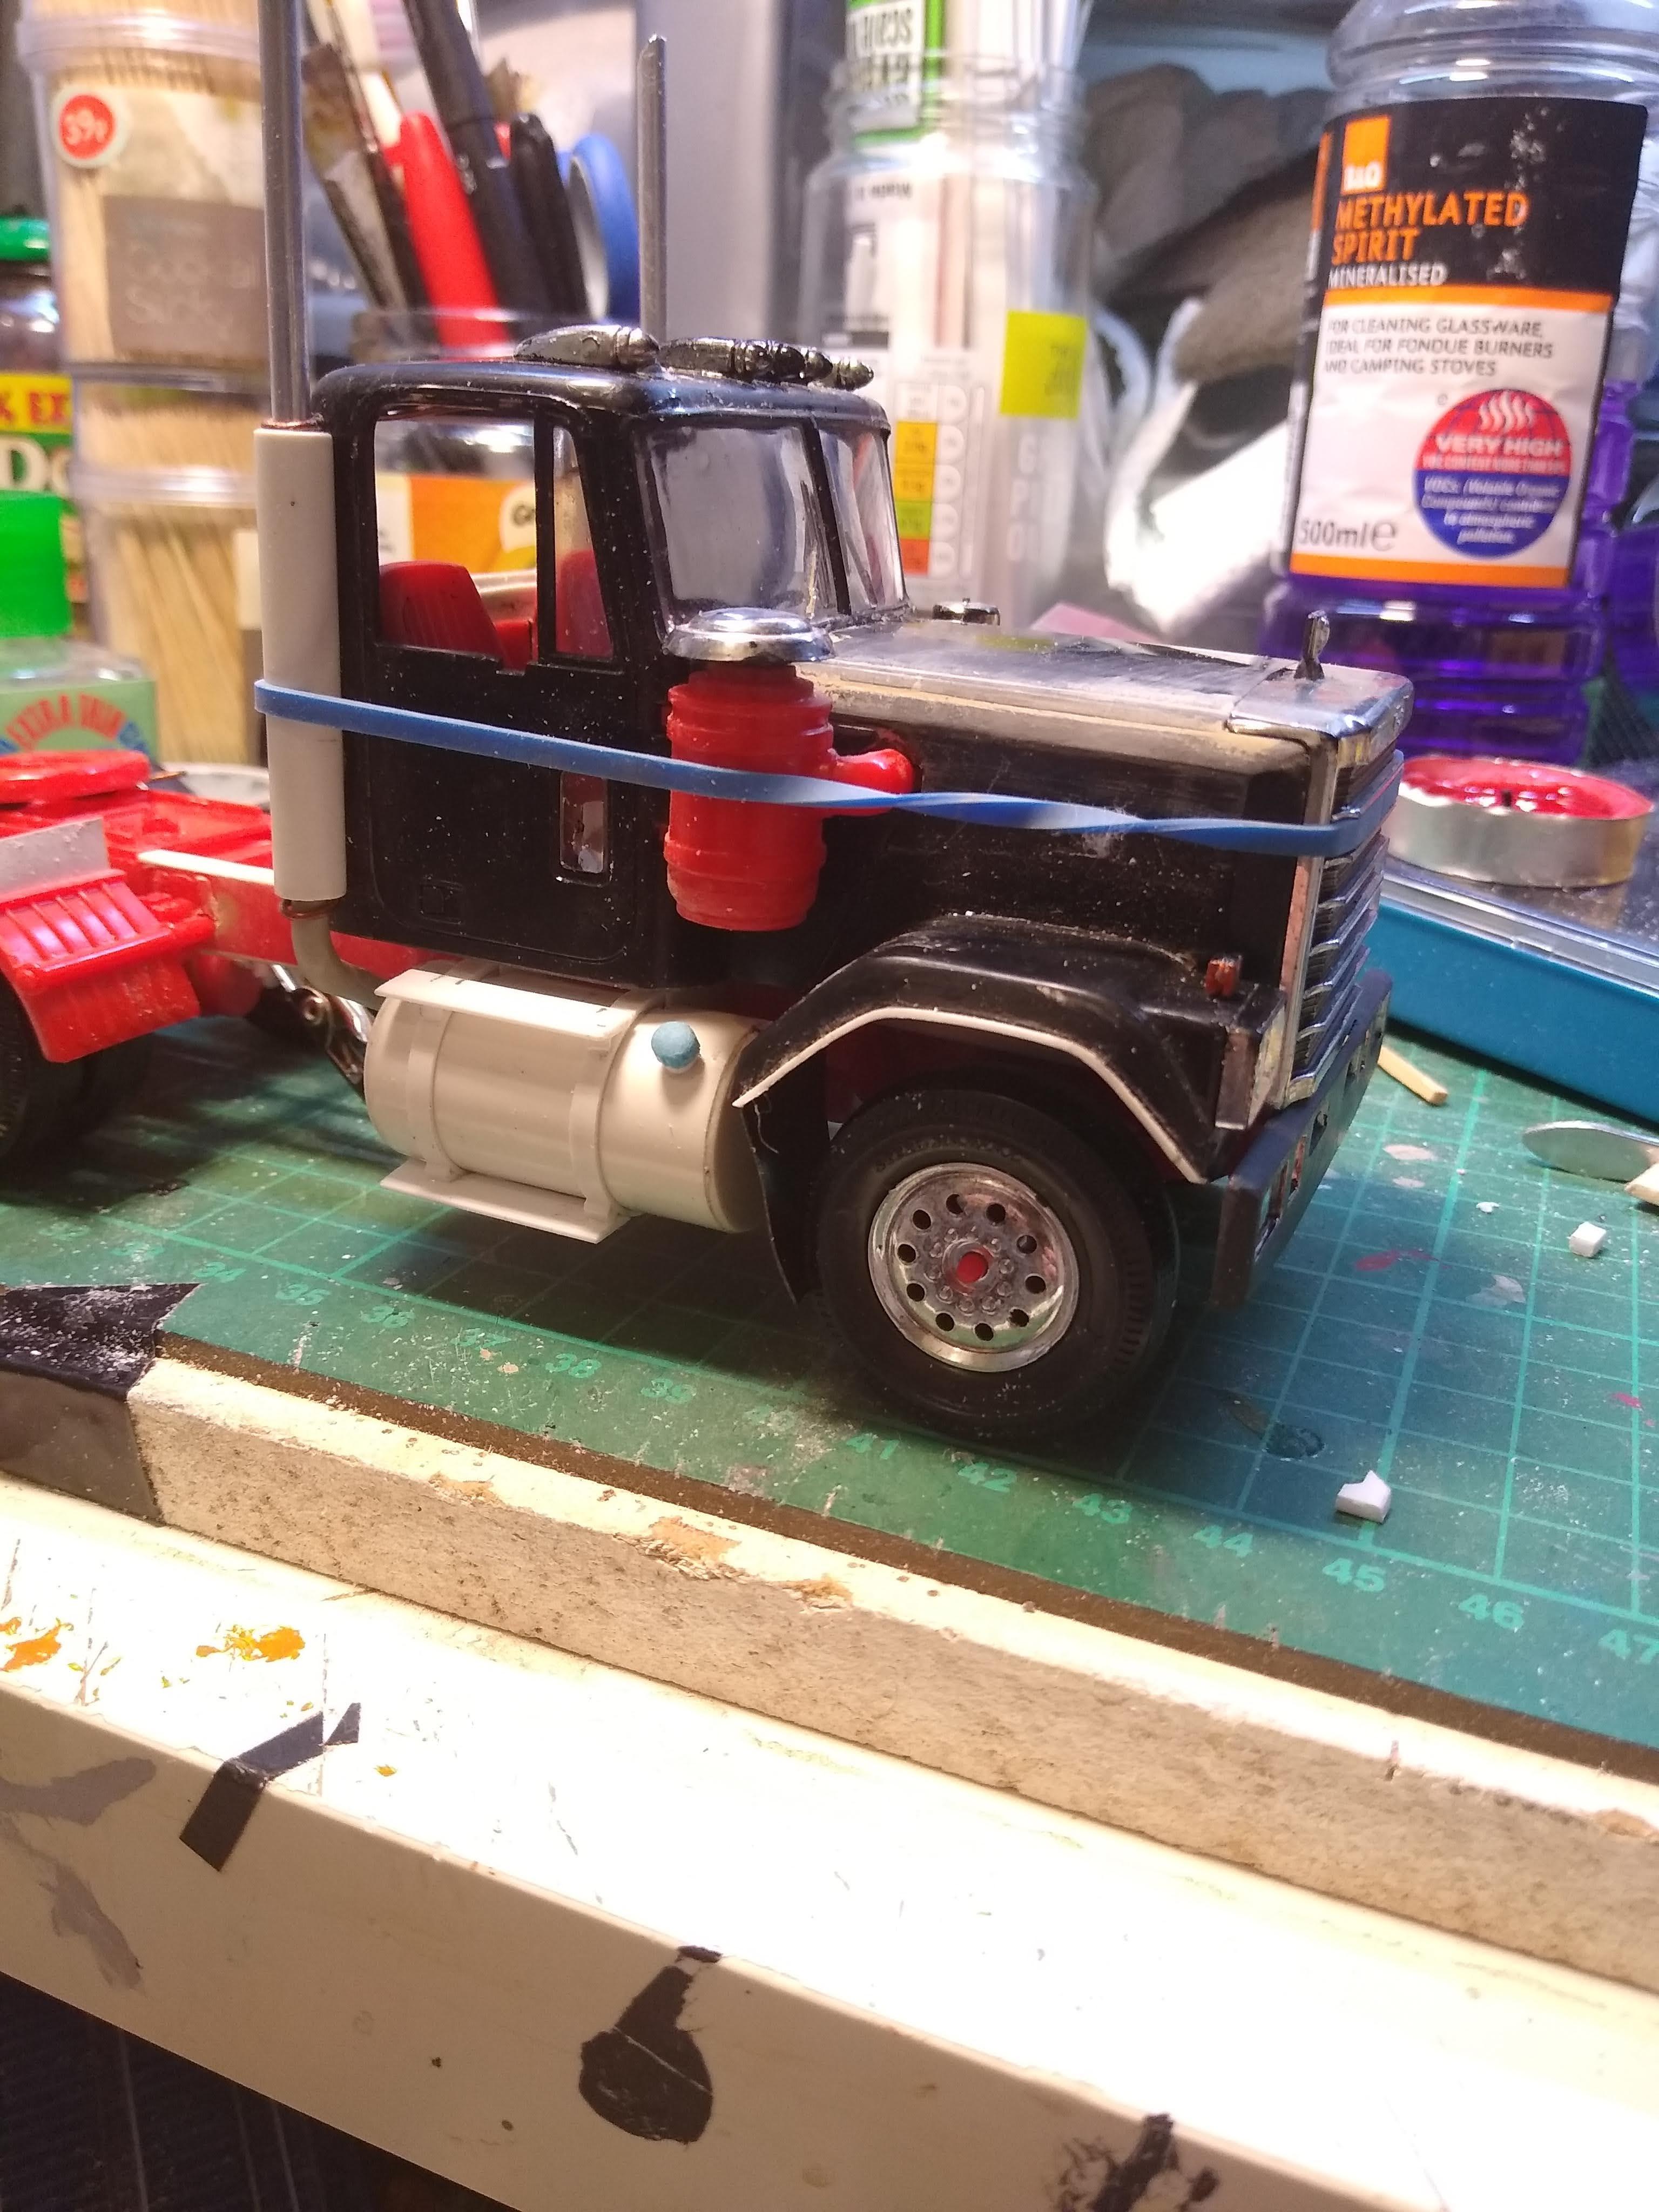
Not much to report this week because I sliced the top of my right index finger open on a tuna fish tin. Very disabling, just trying to handle a knife and fork is murder. I drew a pair of eyes on and I've got a new friend! So I piped up the brake chambers and built a set of steps for the chassis out of stock angle. I think it's looking just right this truck.
-
2× Chevy Bison
Rockford replied to Rockford's topic in WIP: Model Trucks: Big Rigs and Heavy Equipment
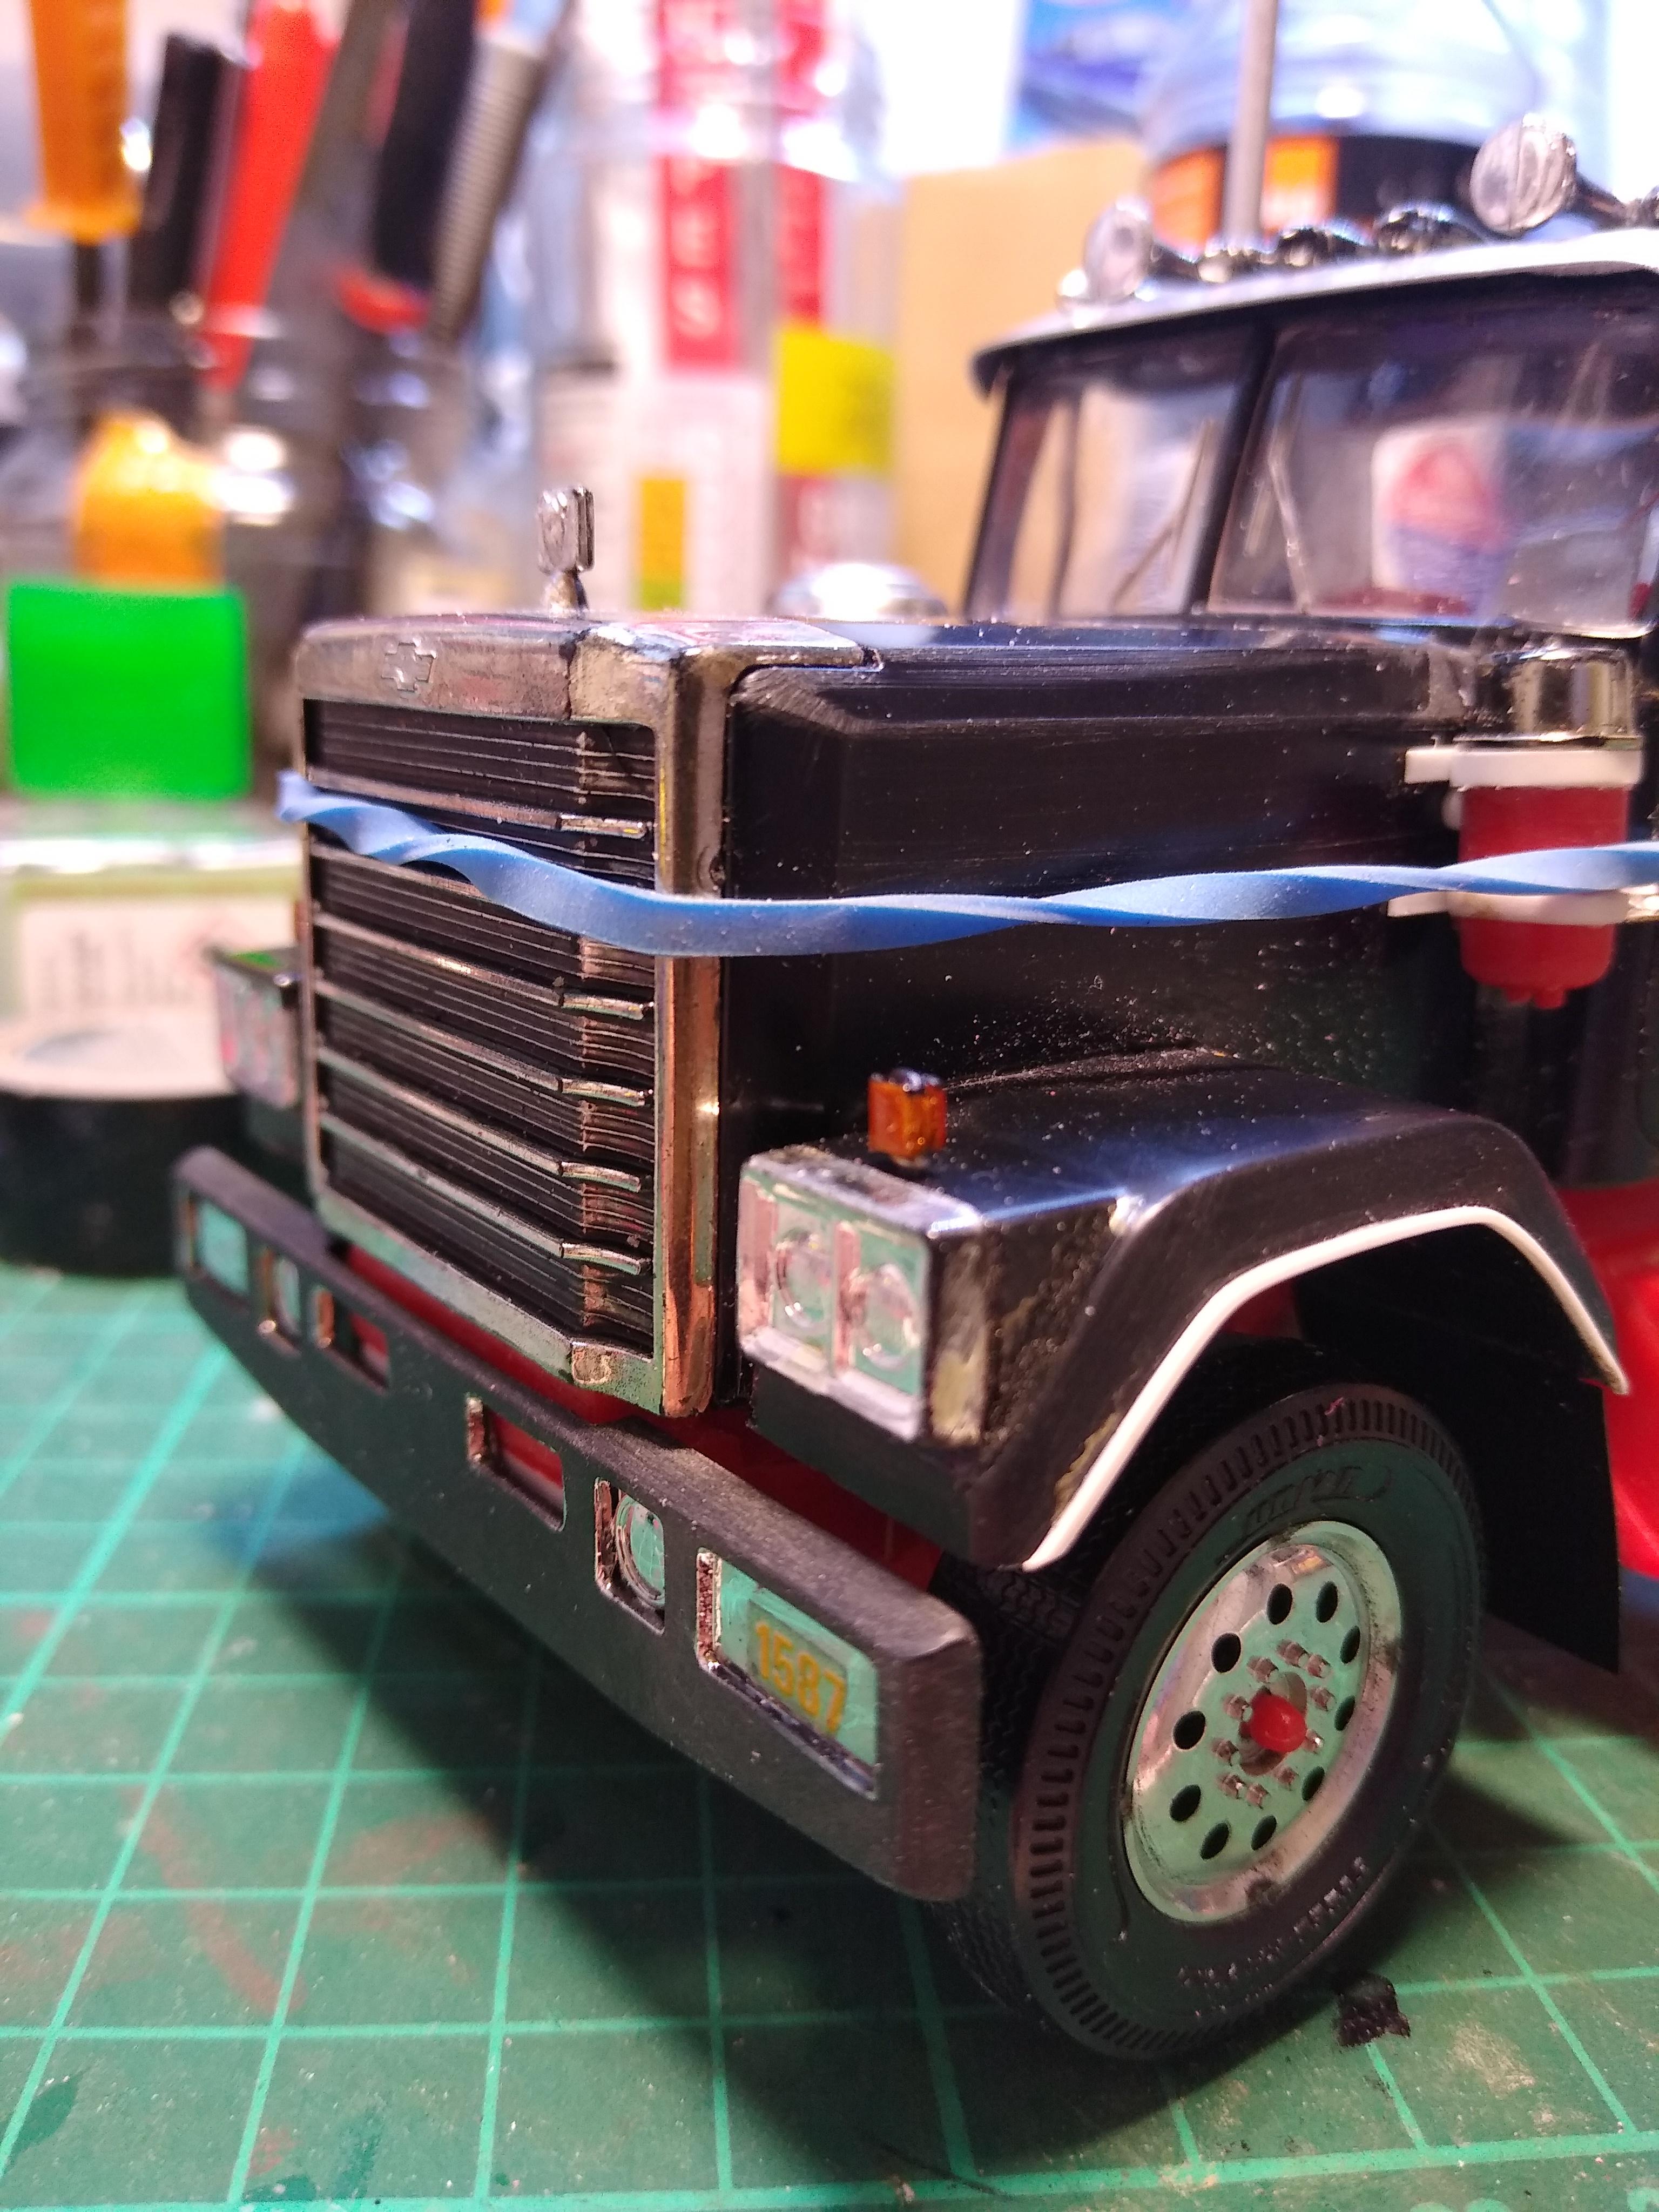
Ben thanks for that, I'm quite pleased with my tank method. No I can't settle fully with either of the 1/32 wheels, though the Monogram look better from a distance due to their bigger size. Such a shame about the AMT pieces, if only they'd used their calculator properly. I have seen the Aoshima pieces on eBay but I can't justify the prices they're commanding. I've managed to make what I'm stuck with look acceptable to myself so I'll just carry on with them. I'll use the AMT ones on trailers I think. I suppose if you're doing your flagship kit then they might be worth it though. Look forward to seeing your Superliner finished. -
2× Chevy Bison
Rockford replied to Rockford's topic in WIP: Model Trucks: Big Rigs and Heavy Equipment
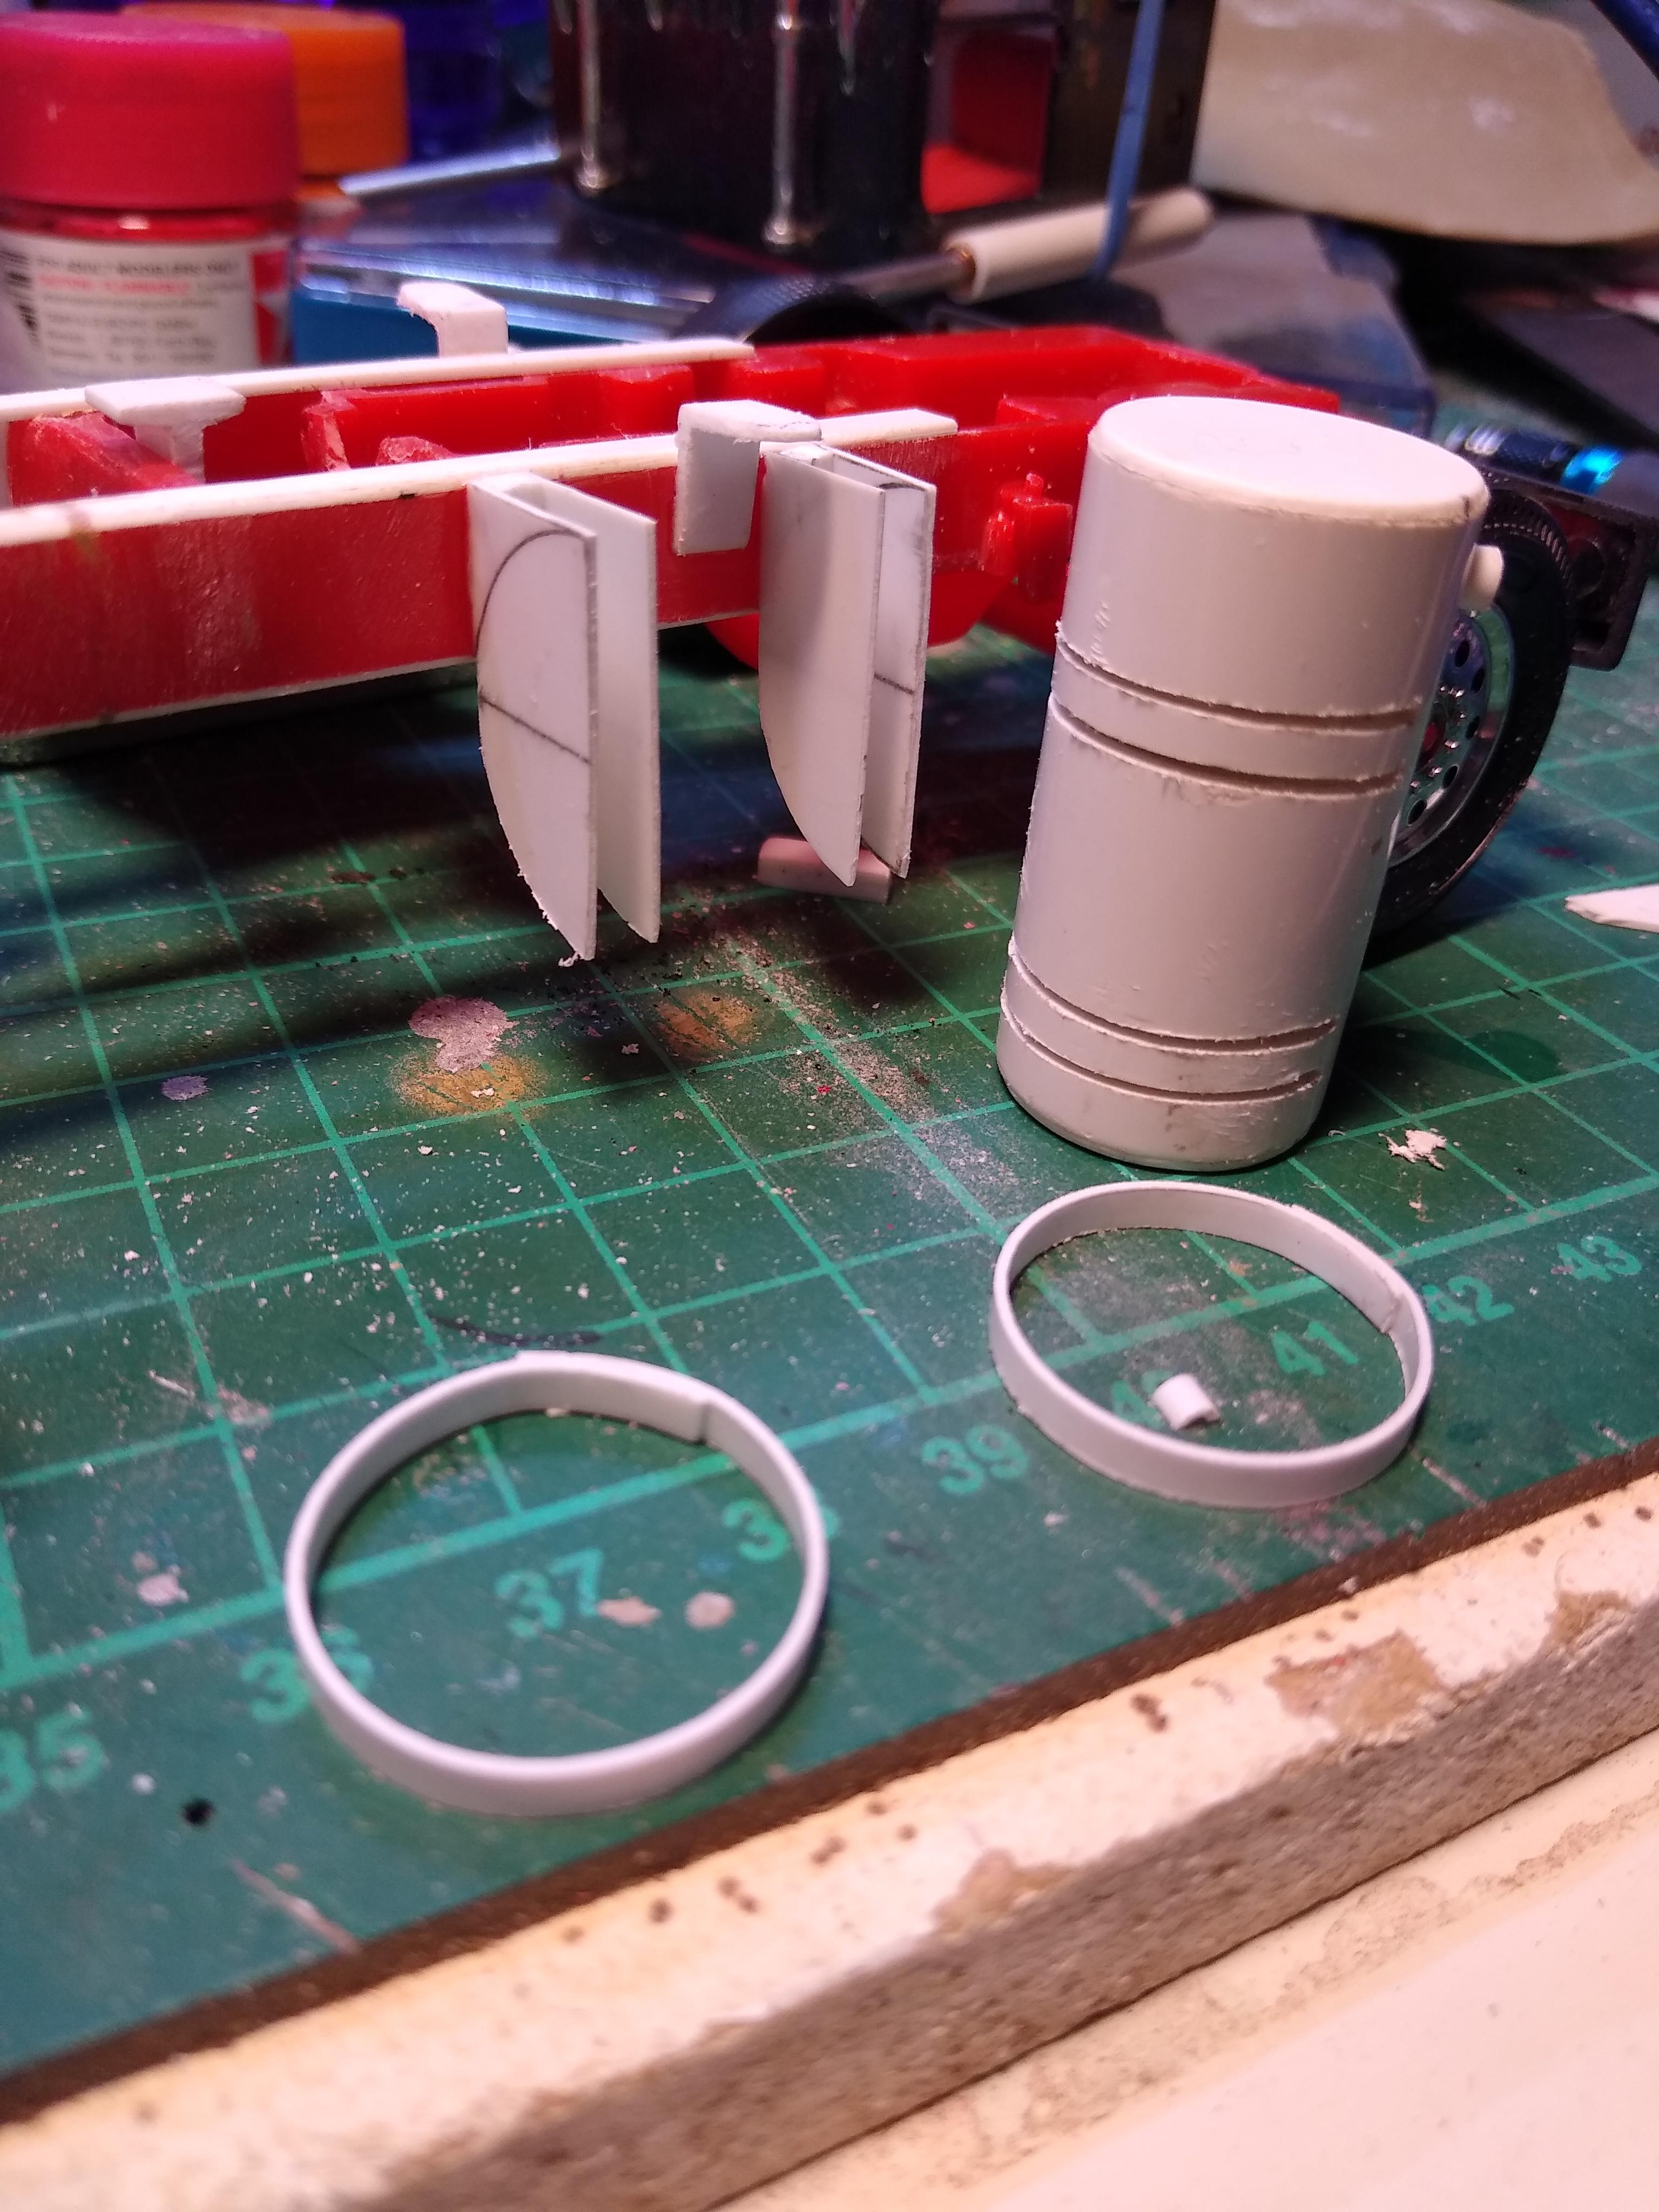
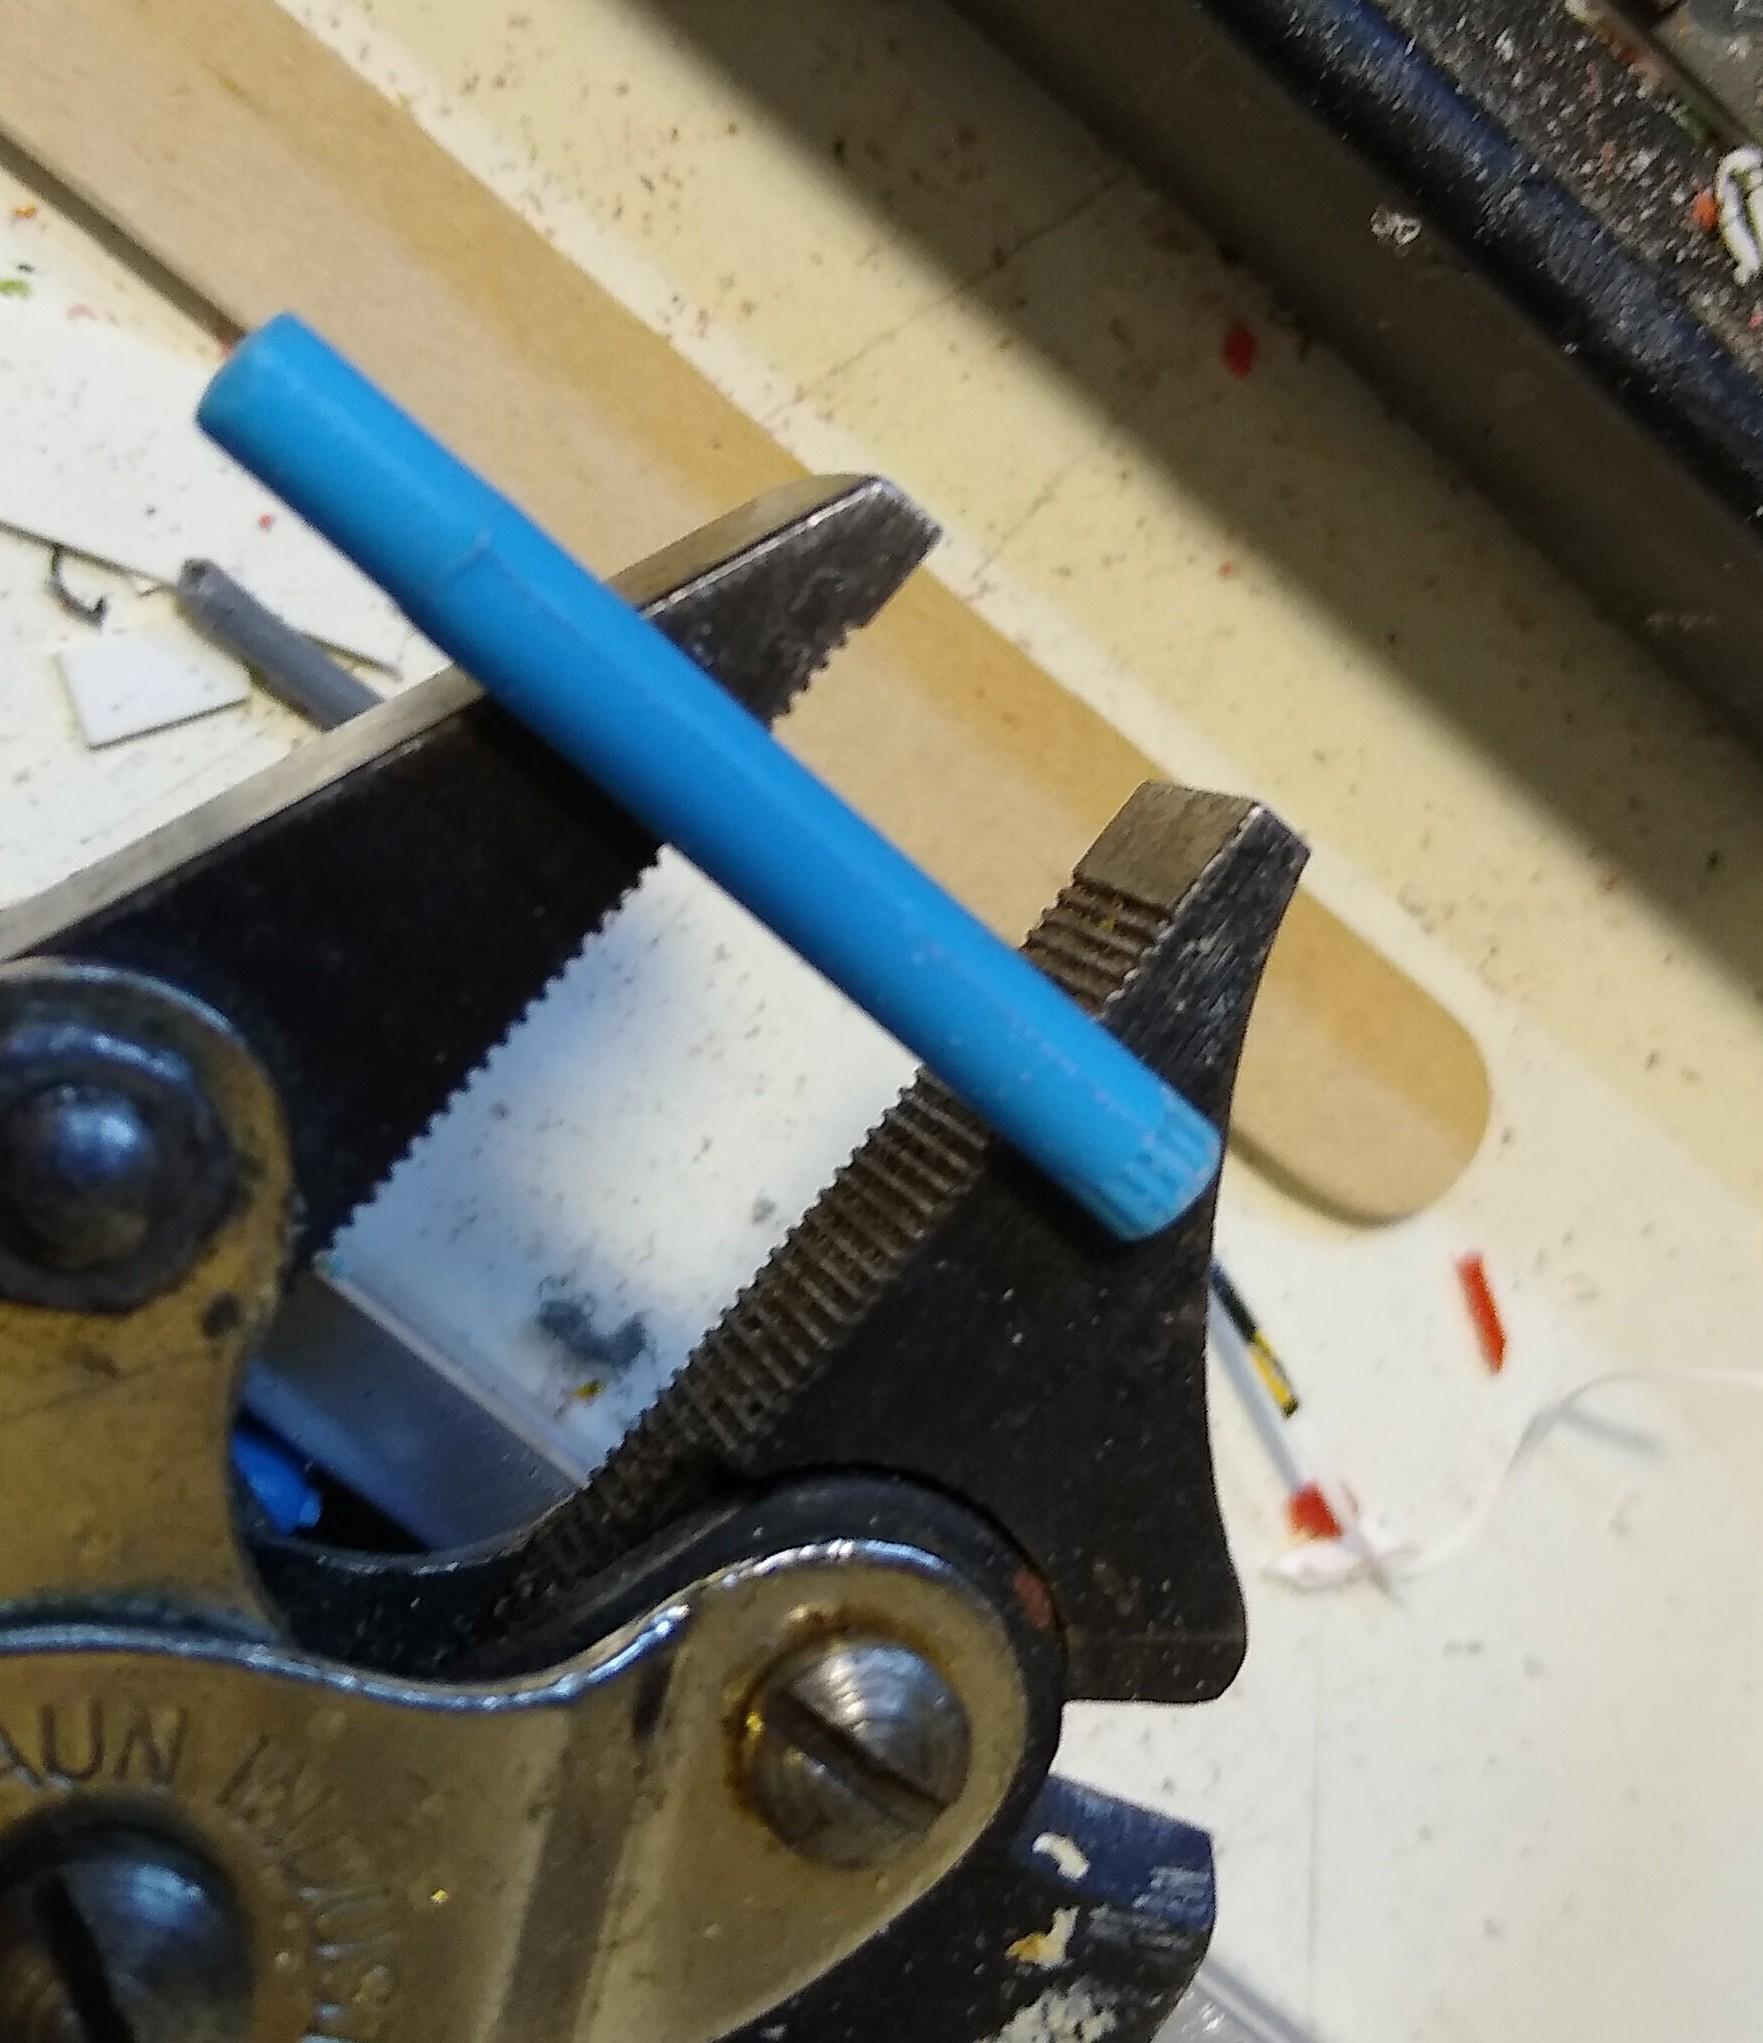
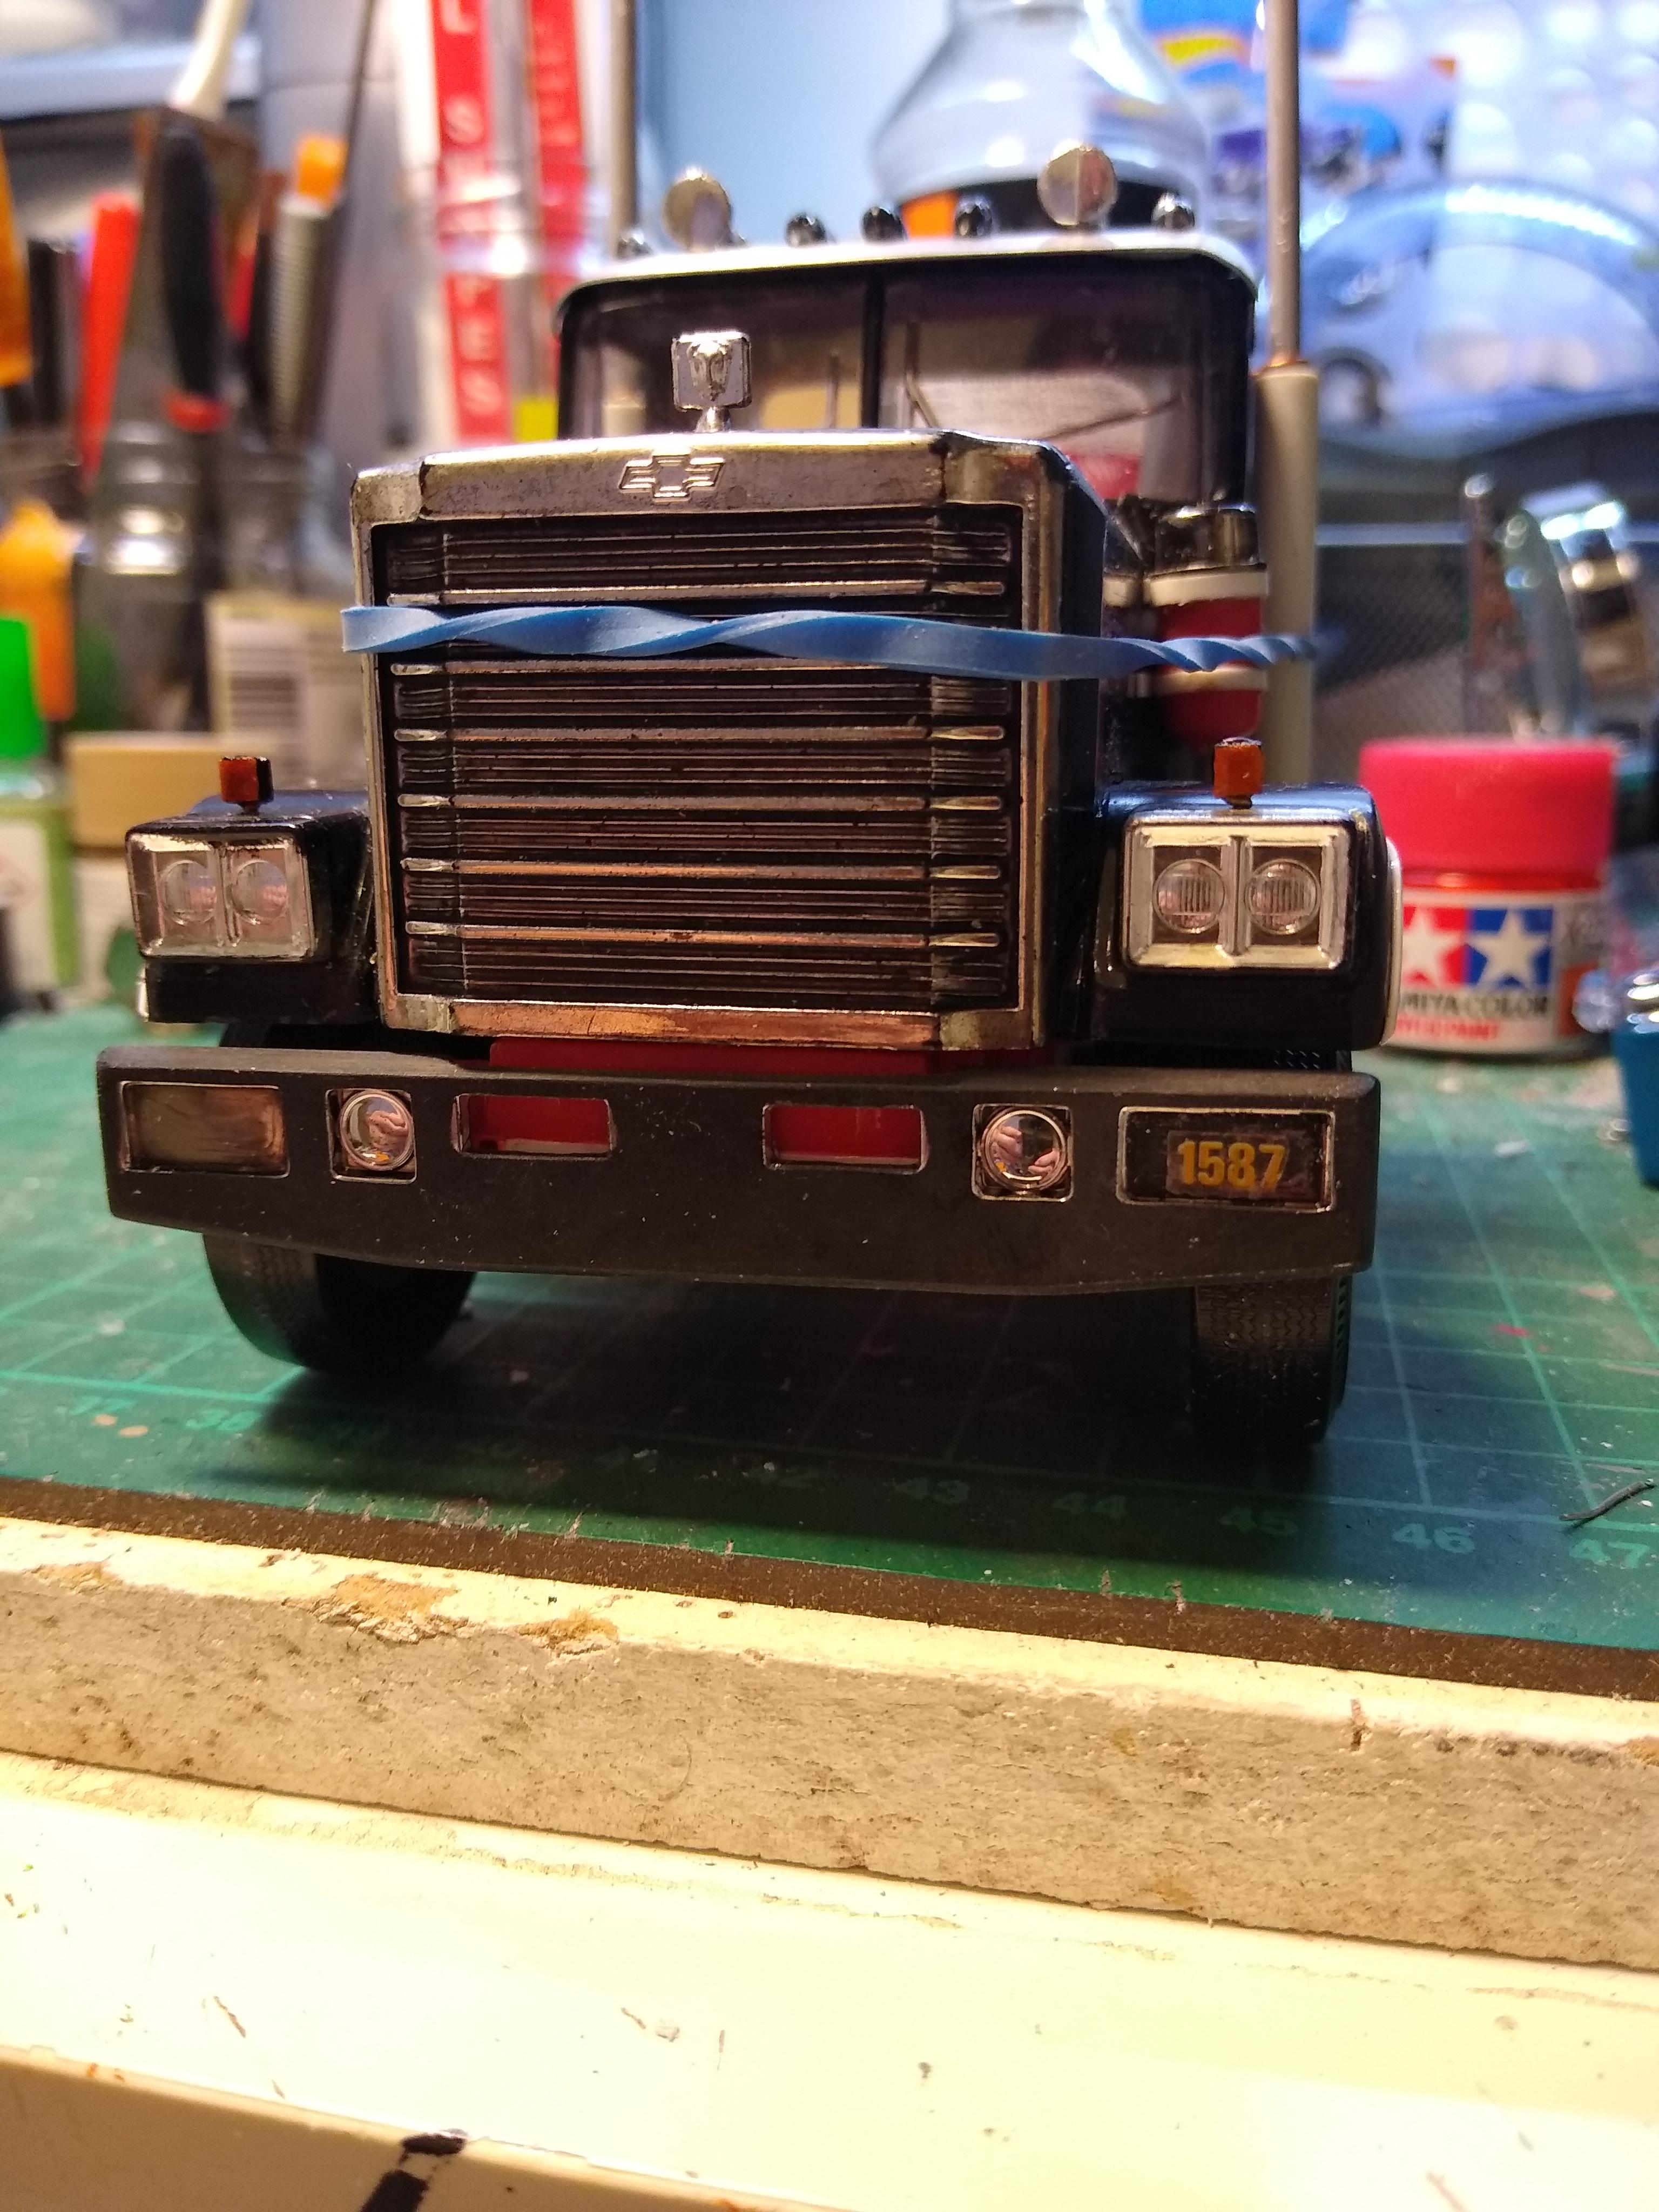
Not a lot achieved today, but pleased with what I've done. I reduced the air filter, cutting it below the lower band and shortening the bottom piece. Modified the luberfiner brackets because the way I had them they would have been bolted through the hood and the cab, wouldn't work, and I don't know why I didn't notice when I first did it. I'm most pleased with the exhaust piping now. I moved the battery box forwards as well as the fuel tank which allowed me to put simple pipes in that go below the chassis rail to some imaginary Y-pipe. Looks so much better. Piping is sprue bent up over a candle. Looks good. Tried forming a new visor out of aluminium, NIGHTMARE!!!!!! Still filing and fillting the pig after an hour. Such a complex shape its almost impossible to get something that will fit.
-
Thanks Rick. I still can't believe I built a trailer that looks like a trailer and not a stick with some wheels on it. The wheels and tyres are AMT 1/32 pieces. The tyres are excellent the wheels are dire, 10 hole featureless rubbish. They took a lot of work to look credible. The sad part is that the tyres are too small and can ruin the look of a kit if you don't reposition the axles for the correct spacing. I used them here because at the far end of the trailer your eye doesn't notice the difference between the two sizes, Monogram to AMT. I considered using them on a tractor but they look ridiculous in the wheel arches etc... on a trailer there's little for the eye to use for proportion. Such a shame because I love the tyres.
-
2× Chevy Bison
Rockford replied to Rockford's topic in WIP: Model Trucks: Big Rigs and Heavy Equipment
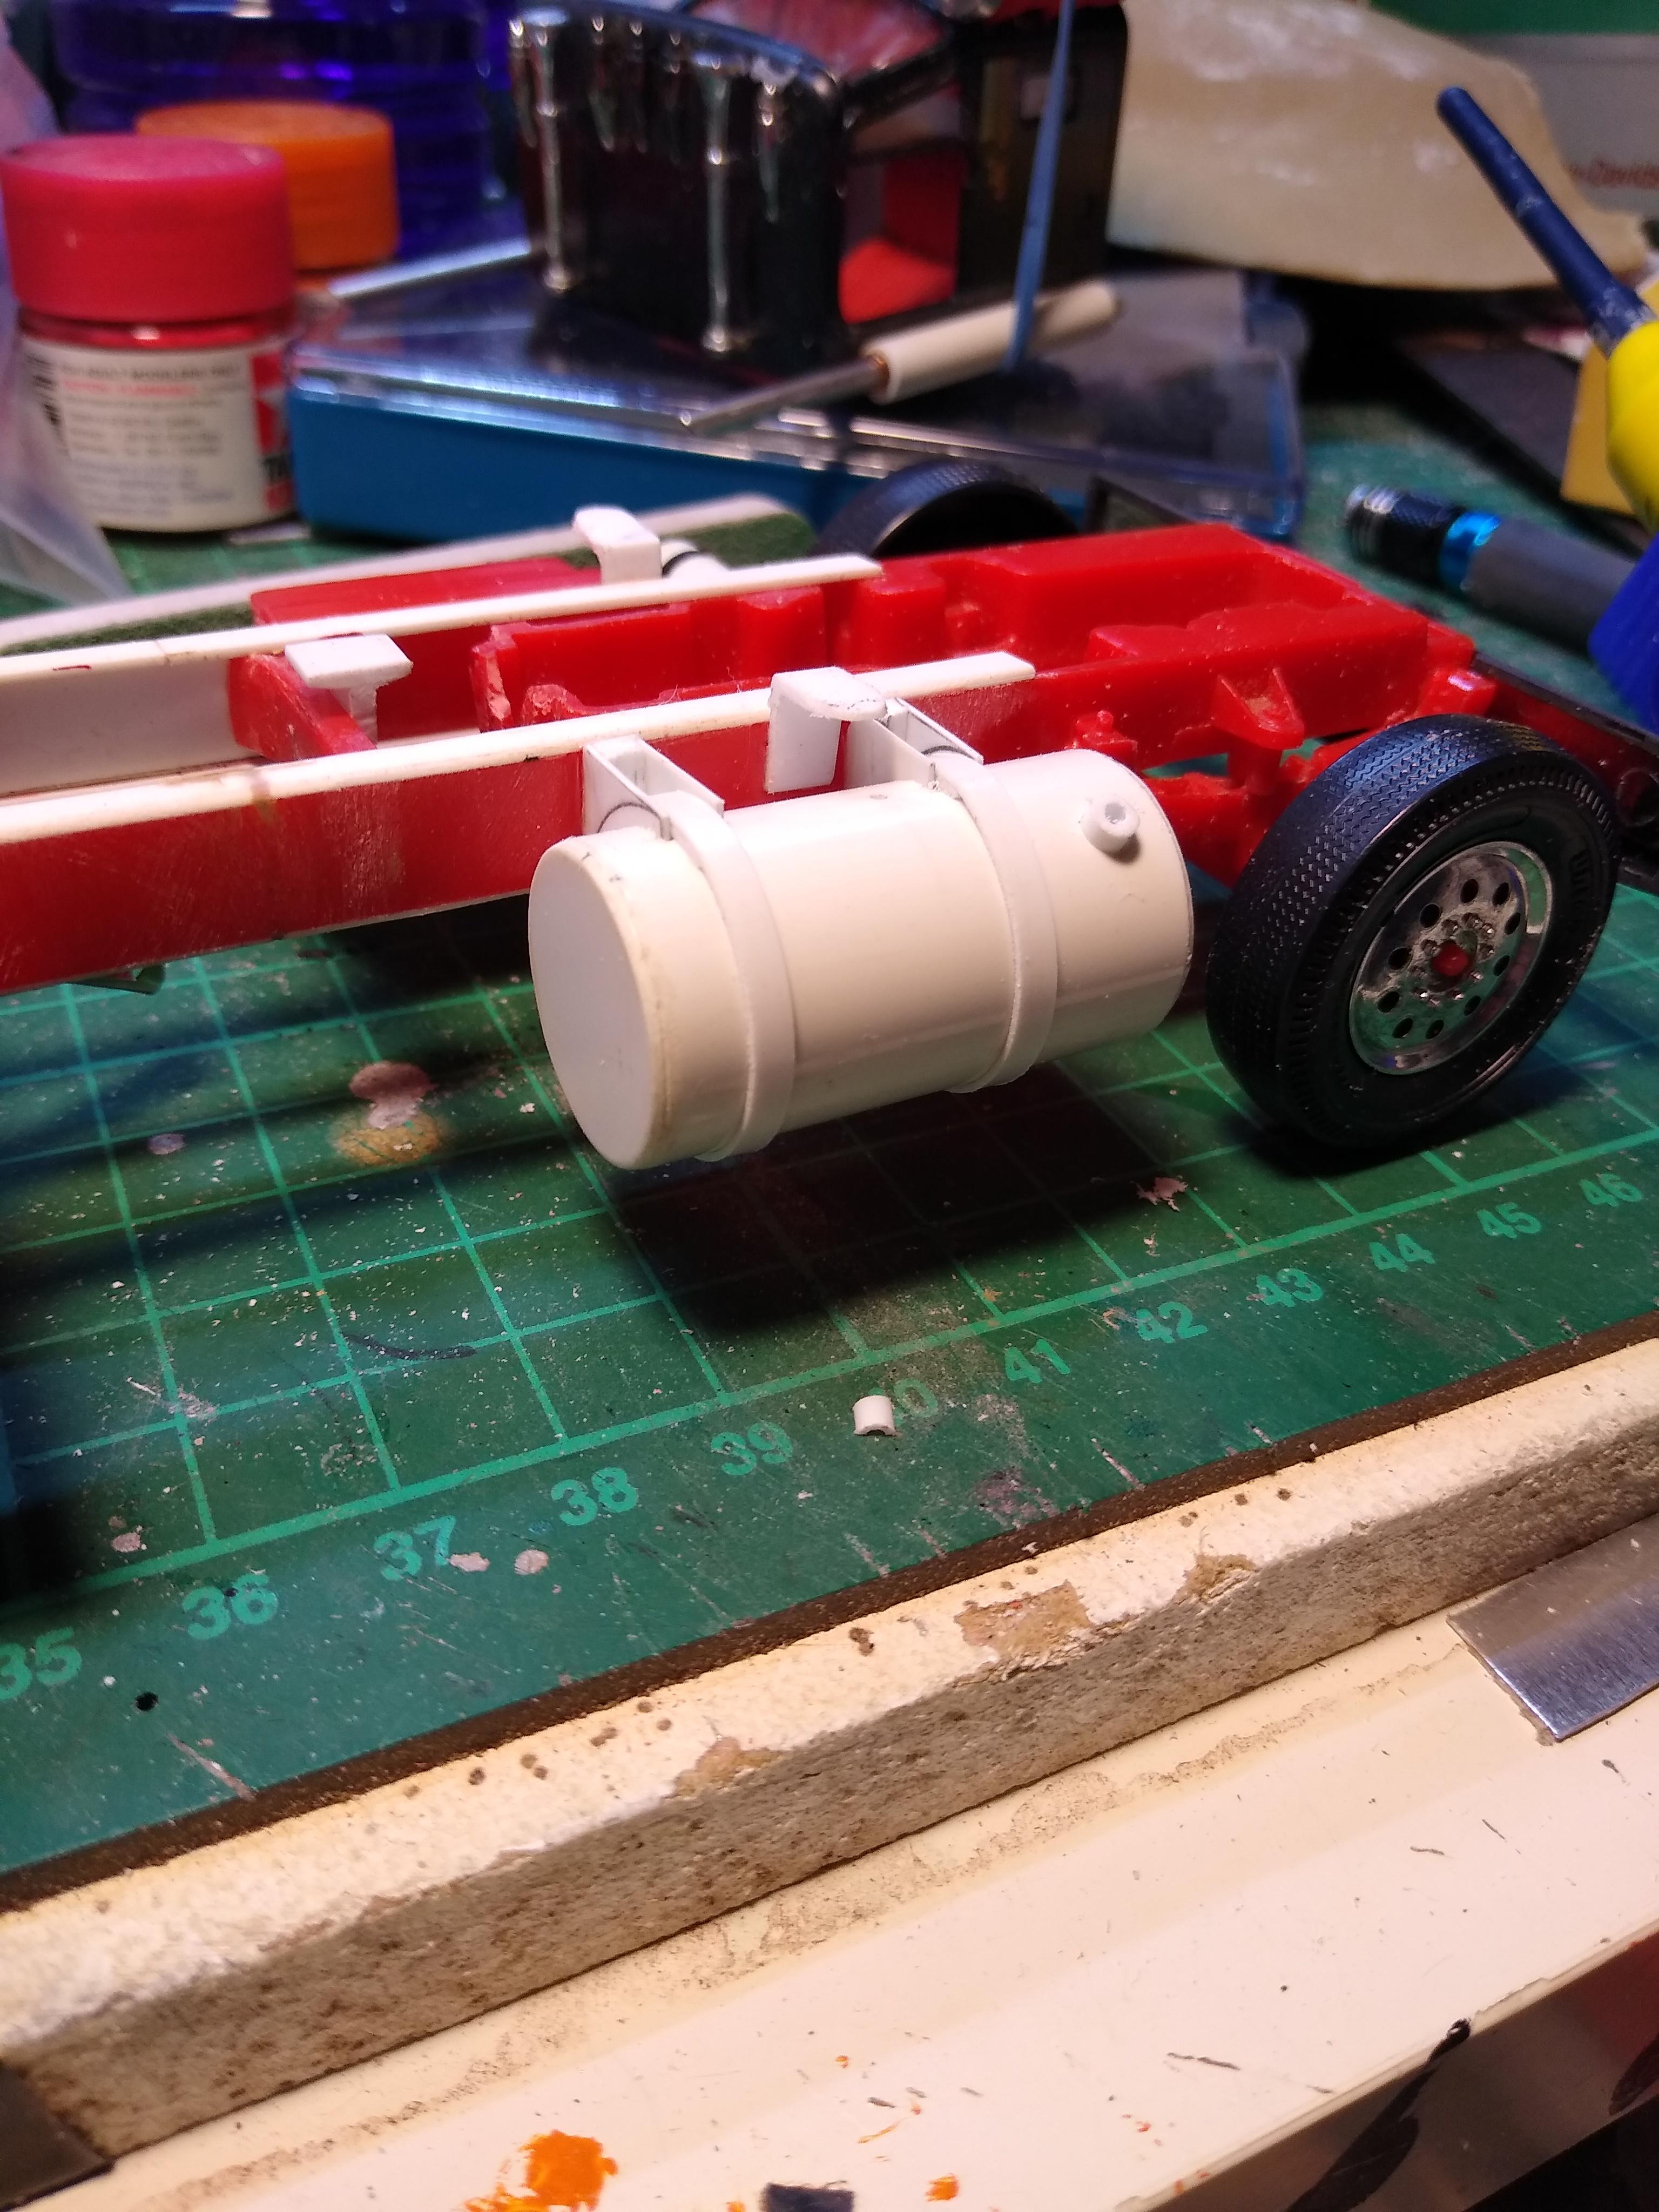
I looked at the photo of the exhaust pipes I bent up and I wasn't happy. They're all over the place, mainly because of the fuel tank, it's too far rearward and that's because I left the kit brackets in place because I'm lazy and it was just in the wrong place. So I made myself a shorter one of my electric conduit tanks and brackets. Added steps and made a fuel cap out my old friend chubby sprue. I ribbed the edge of the cap by squeezing it gently in a pair of pliers so the teeth marked it. Looks ok. So after a week's worth of work I'm further behind than was when I started. But now I can route the exhaust straight under the cab with a simple elbow.
-
Gents, I've got to make a bit of an apology here, I never thanked you for your kind comments about my trailer. My brain's a bid scrambled nowadays since I got COVID in Feb of this year and I keep forgetting to do things. It's getting better but I'm still missing stuff. So thanks very much for your observations on my flatbed. I'm very proud of it, l look back at my work and I really don't know how I did it!
-
2× Chevy Bison
Rockford replied to Rockford's topic in WIP: Model Trucks: Big Rigs and Heavy Equipment
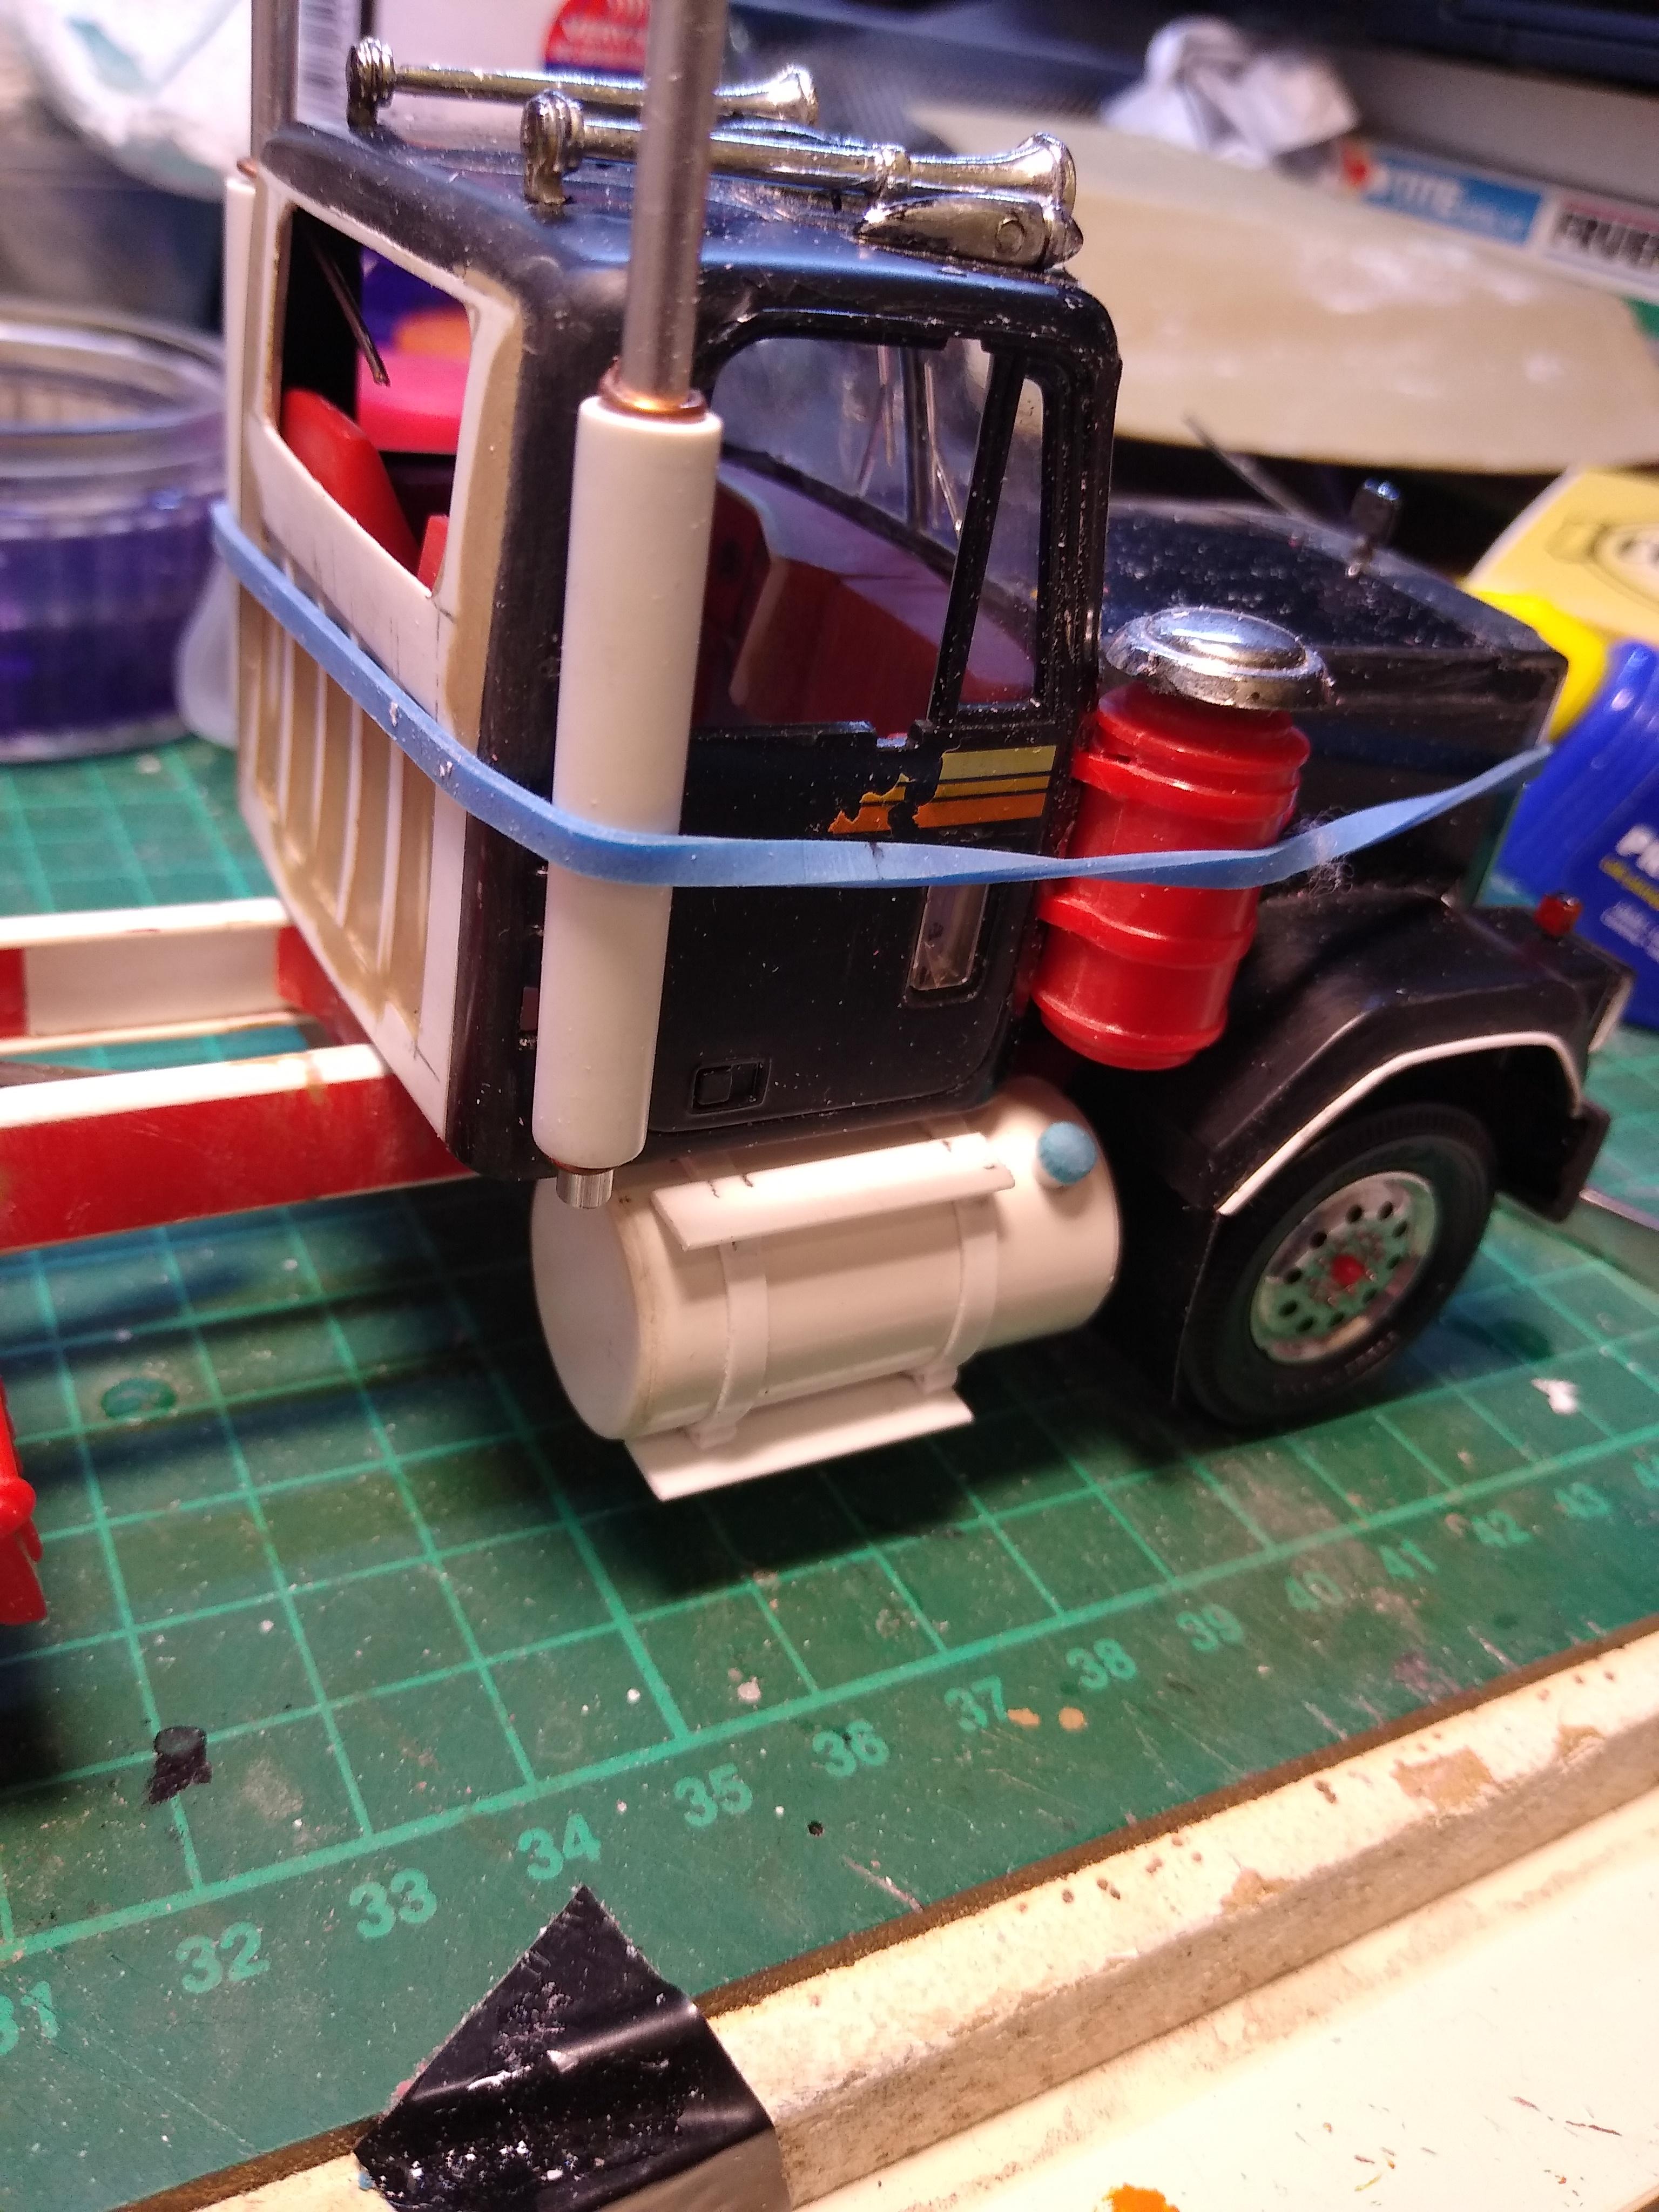
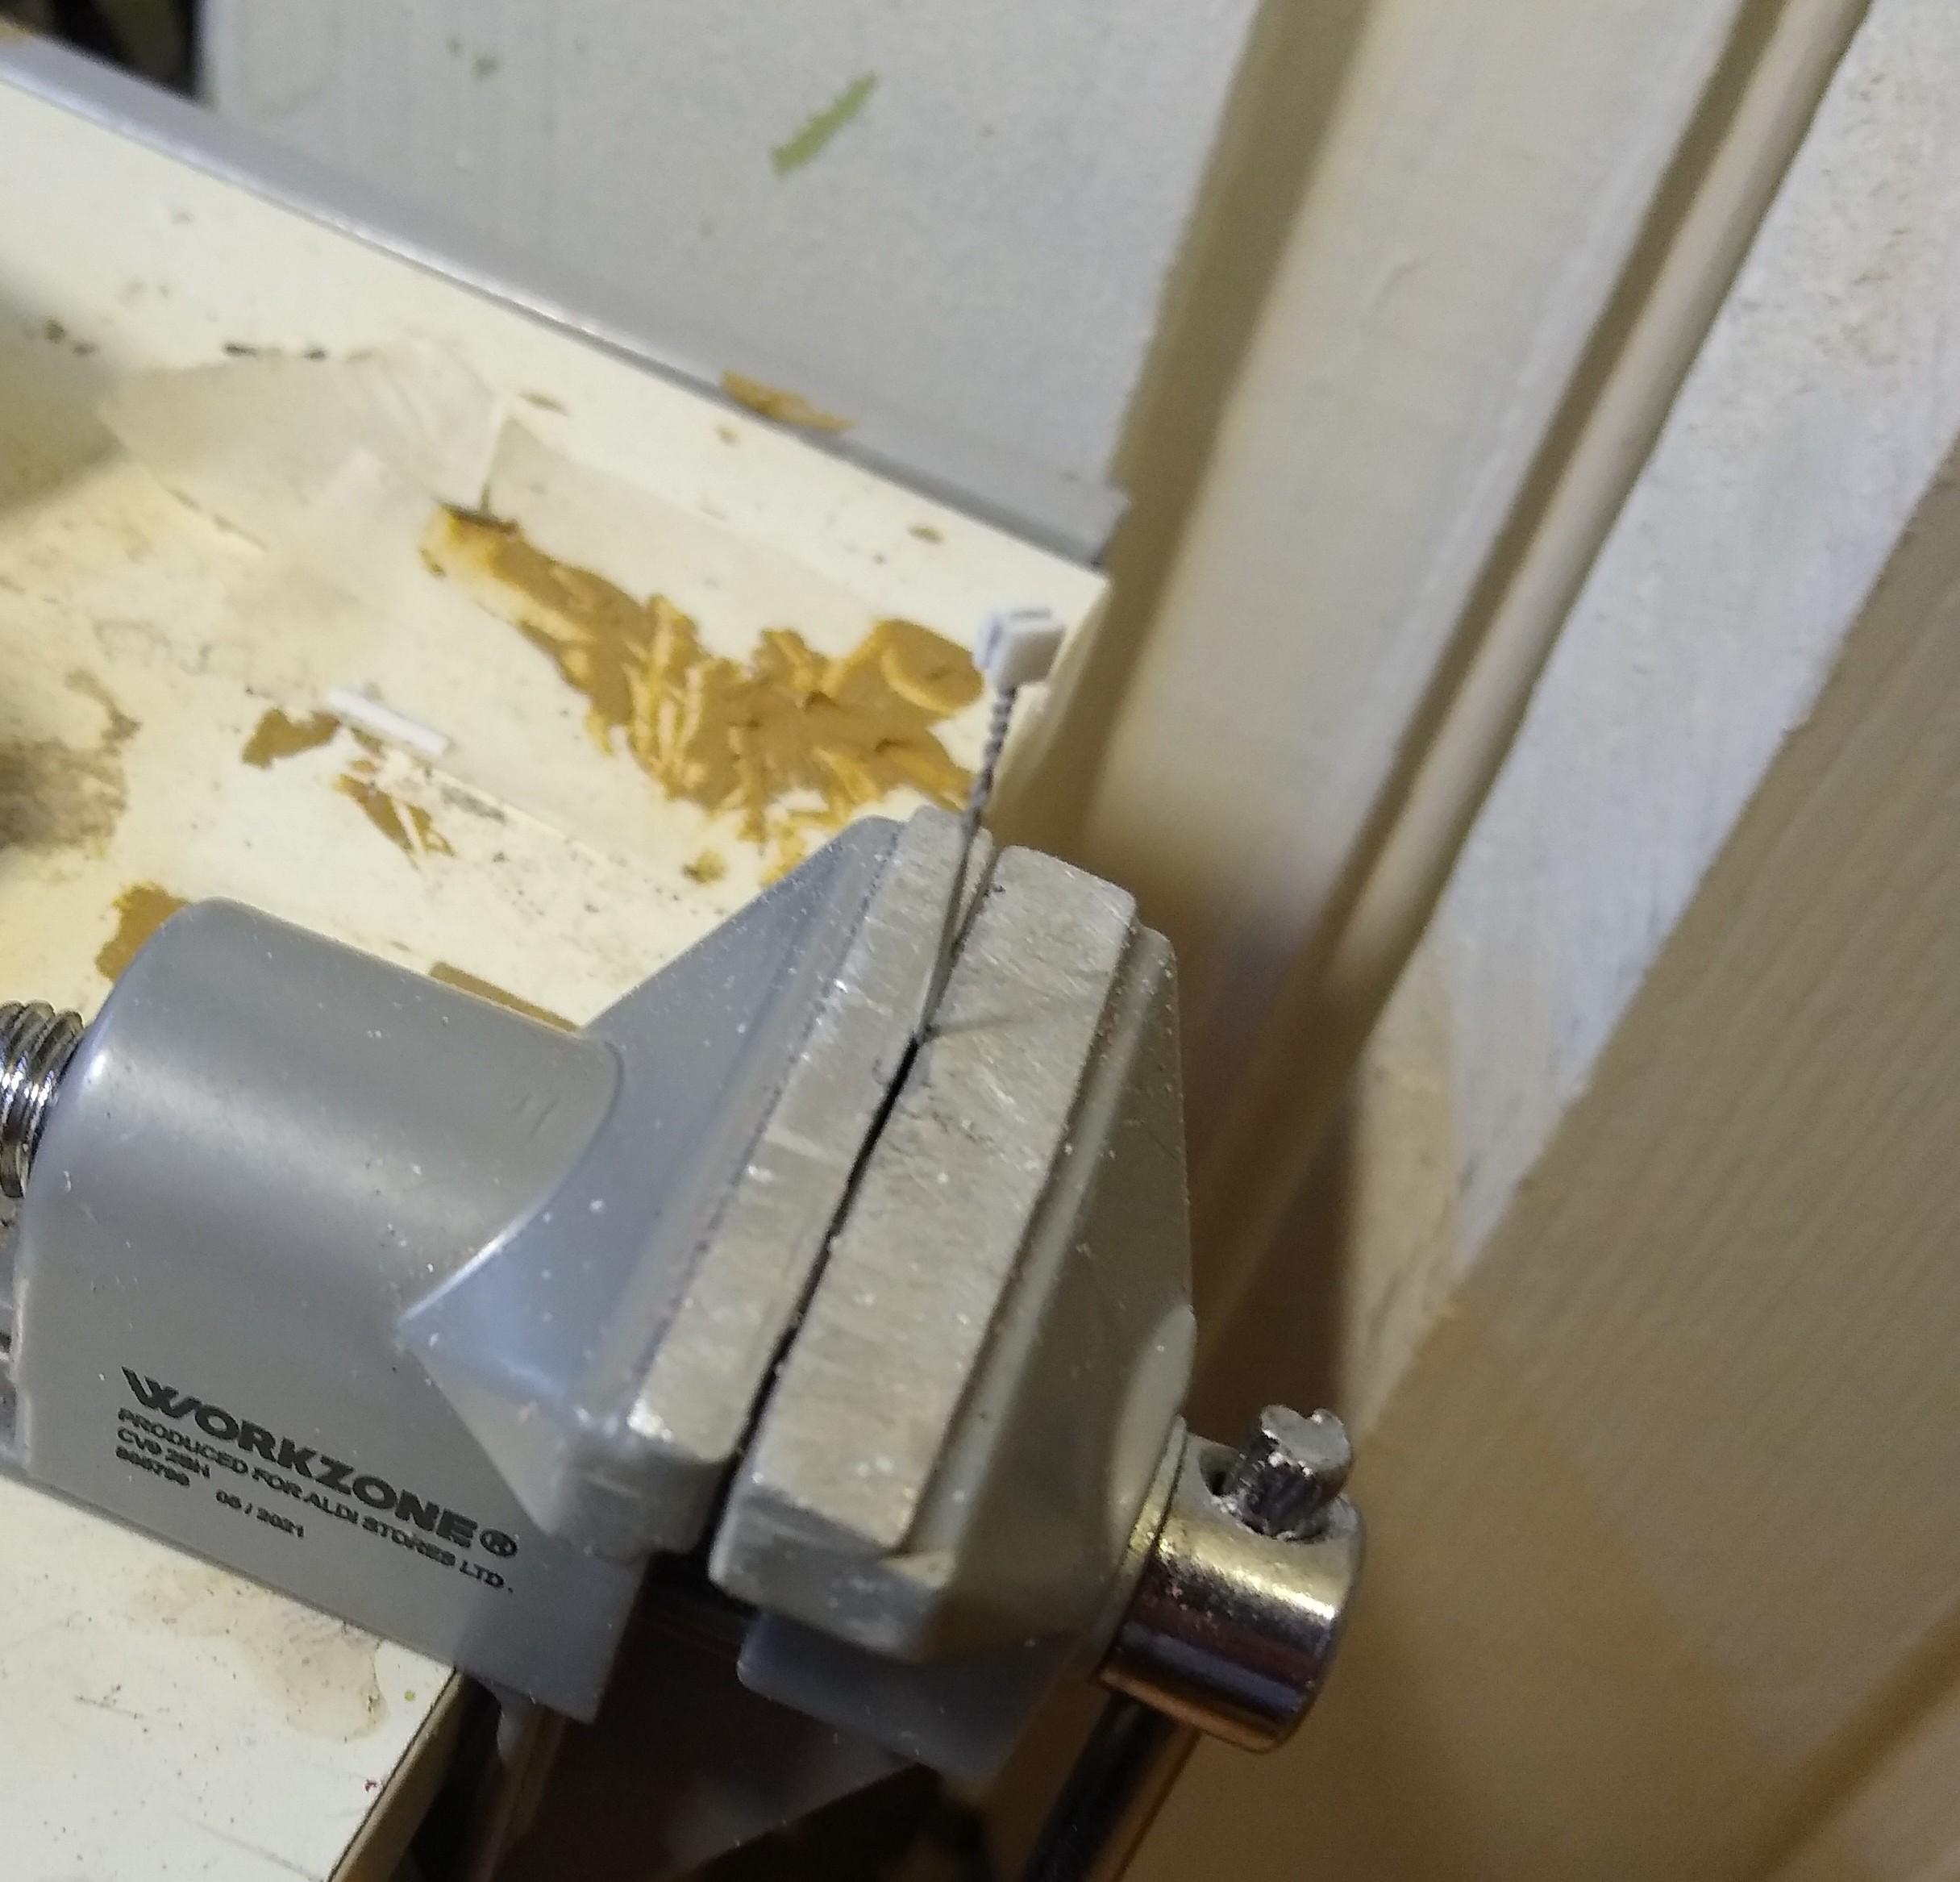
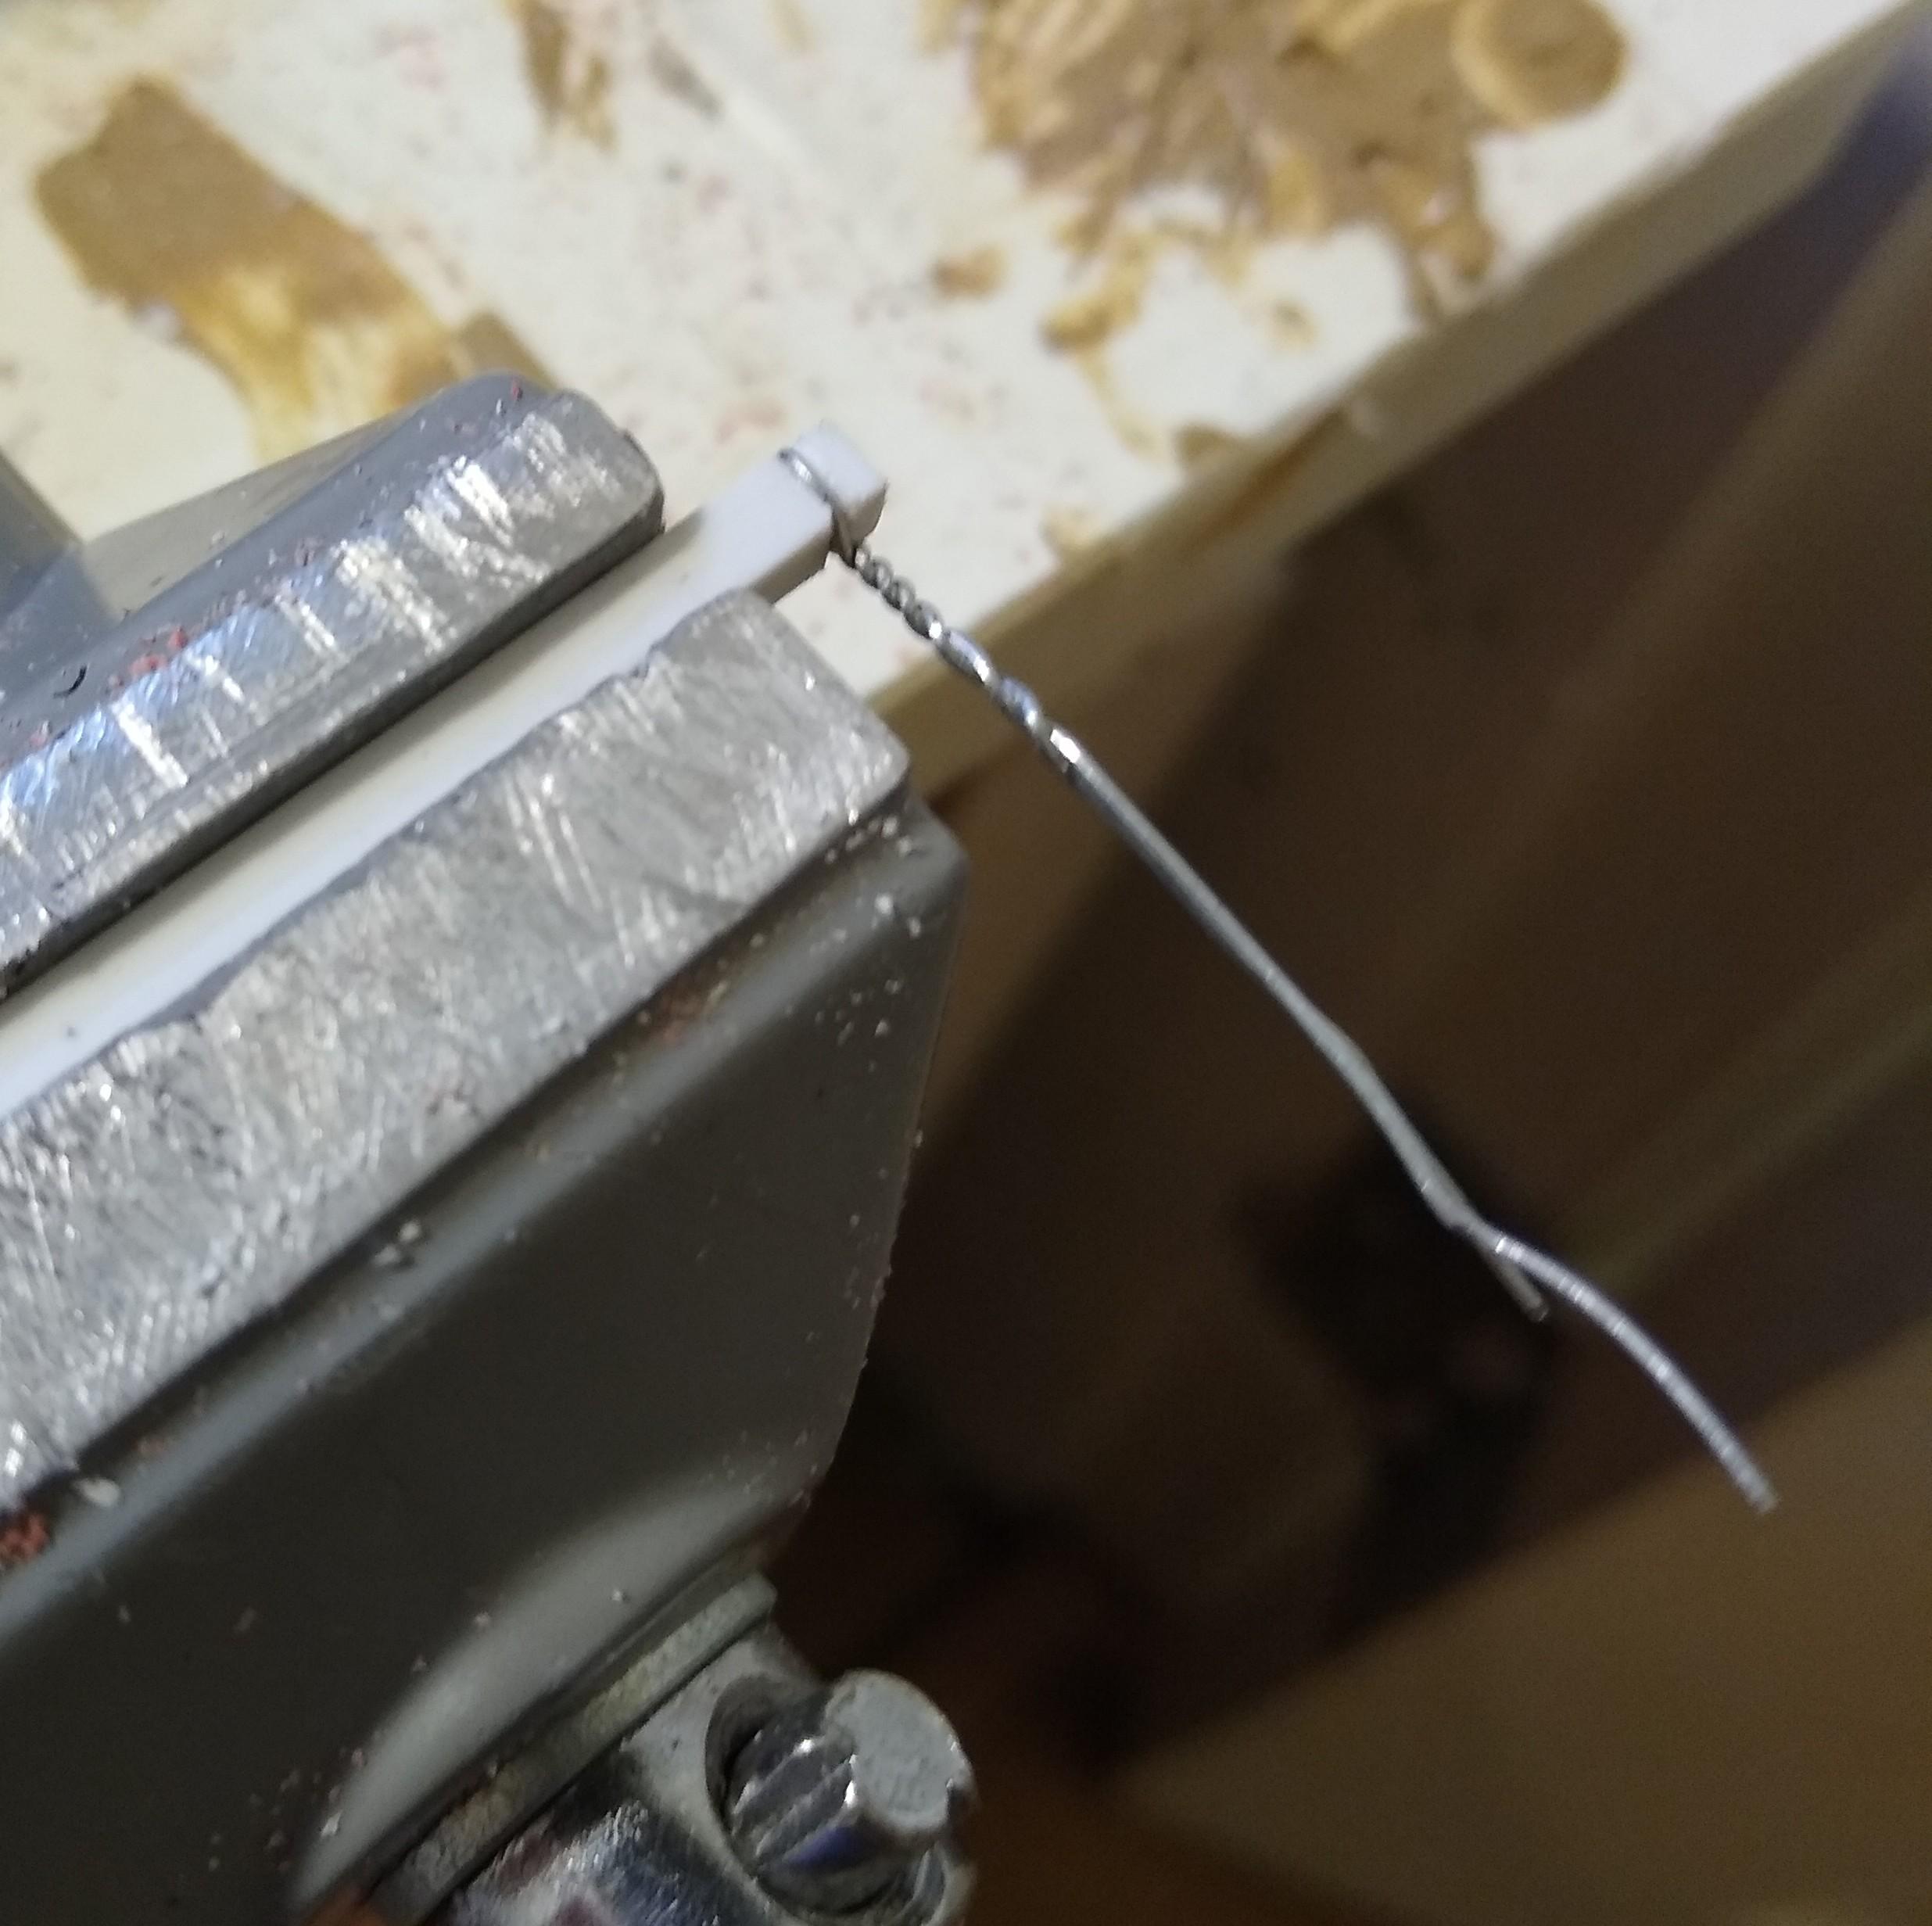
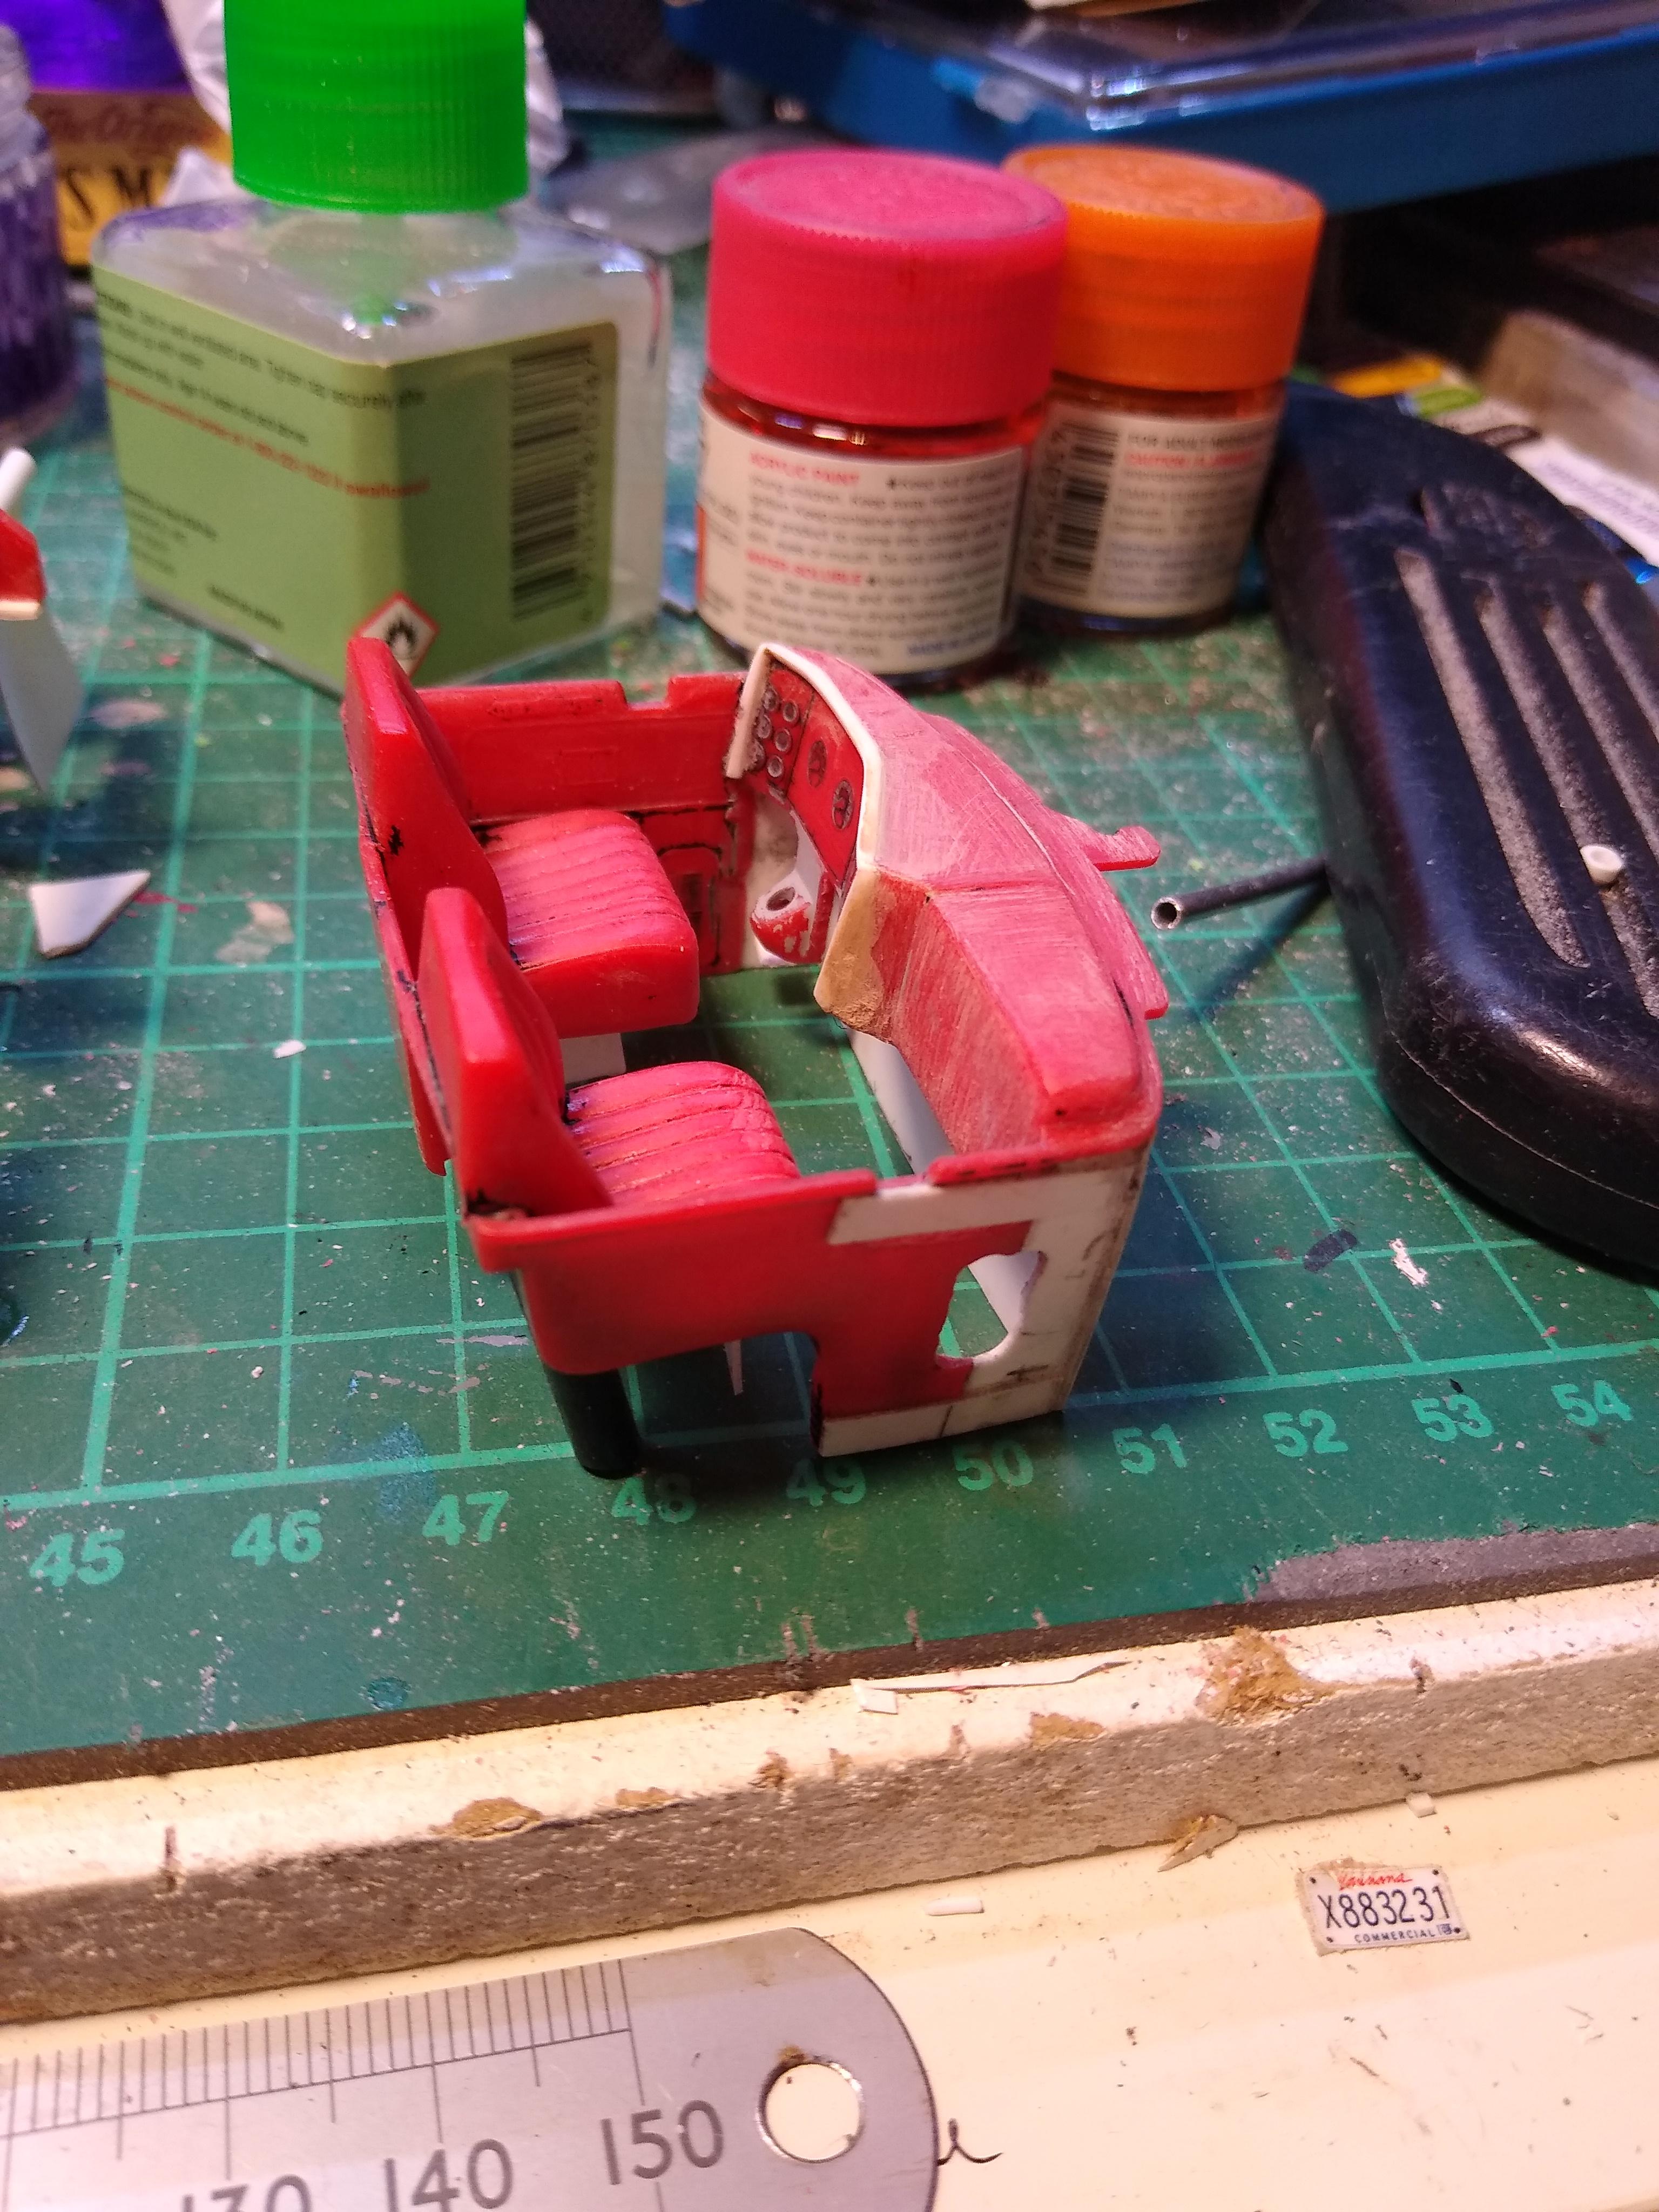
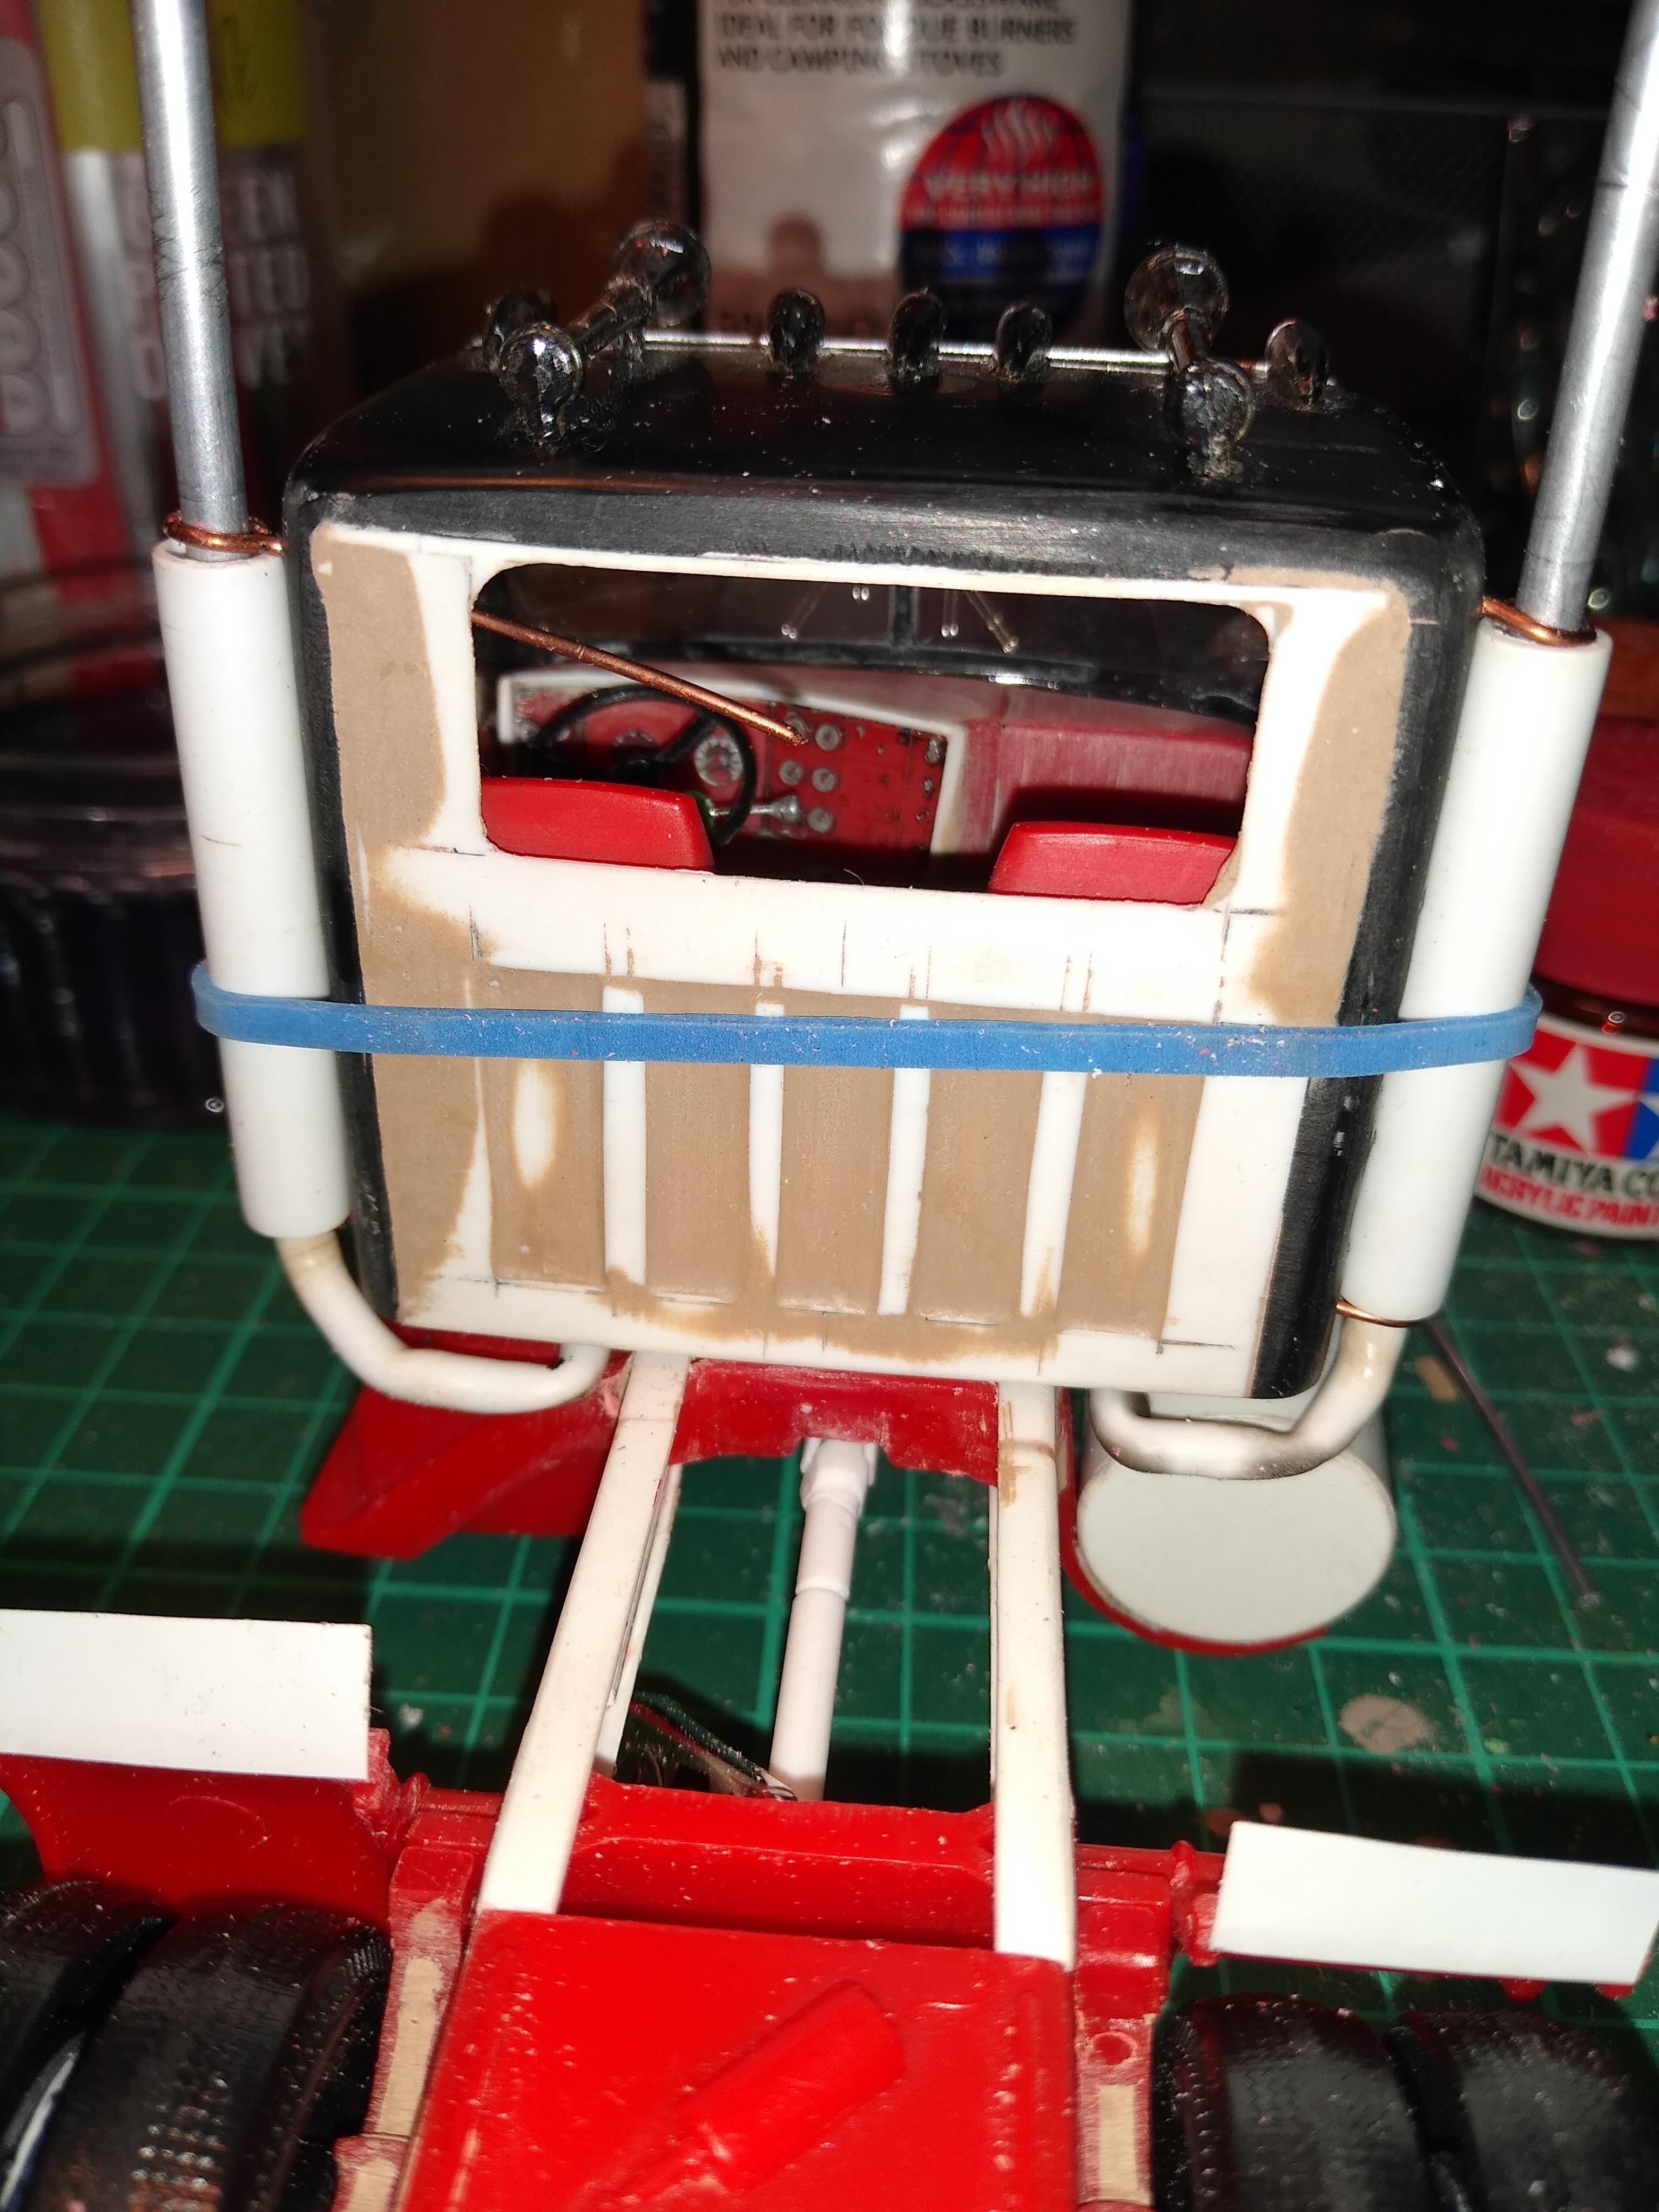
Been doing little fiddly bits on the Bison daycab lately. Did my usual rectification to the hollow rear diffs and added brake chambers. Bent up some exhaust pipes up to the mufflers and stacks. Used hollow plastic tube and a candle. Sat the interior tub in methylated spirit to remove the black paint. Then added a rim across the top of the dashboard. Made some can mounts. On the real truck there's the little amber and red parking/direction light. I was thinking of just gluing a square piece on the fender but it just wouldn't look right. The real thing sits on a little podium. I used a similar method to that I used on the Pete 352 only using square rod. I cut a shallow groove around it, wrapped wire around it and made a pigtail for attachment. Once cut from the length I just thinned it down with a sanding stick. Painted it chrome silver then used clear orange and red accordingly. Drilled a hole in the fender. Once fitted, they look ok and are fairly robust.
-
Tires. Which Would You Choose?
Rockford replied to StevenGuthmiller's topic in Model Building Questions and Answers
I'd say narrows. Too wide looks looks out of place, more from the late 50's. -
Peterbilt 352
Rockford replied to Rockford's topic in WIP: Model Trucks: Big Rigs and Heavy Equipment
Gator It wasnt a mess, it was a form of torture!!! However, the pain is all forgotten now I have it the way i wanted it. Thanks for your kind comments. Indeed thanks to everyone for your encouragement over this and my other projects. Steve -
Thanks very much, I have to say I am so glad I finally got it the way I first intended. The stripe issue was gnawing away at me.
-
Peterbilt 352
Rockford replied to Rockford's topic in WIP: Model Trucks: Big Rigs and Heavy Equipment
Thanks gents, I'm really pleased with it, the stripes just make it. We will never see the likes of them again. -
Peterbilt 352
Rockford replied to Rockford's topic in WIP: Model Trucks: Big Rigs and Heavy Equipment
Thanks for hanging on until the end and for your encouragement over the months gents. You must have thought it was never going to be finished, I know I did. -
Thanks Jim, thanks for sticking with it over the months.
-
Well these Snaptite kits fall together you know. ?
-
Italeri Peterbilt 378
Rockford replied to TruckerAL's topic in Model Trucks: Big Rigs and Heavy Equipment
Three weeks!? It'd be three years for me. Looks fantastic. -
This is the look I was trying to achieve and I'm quite satisfied that I did. Just found the picture where I mocked up my first draft that I cut out of paper. Can't you tell I'm chuffed!?
-
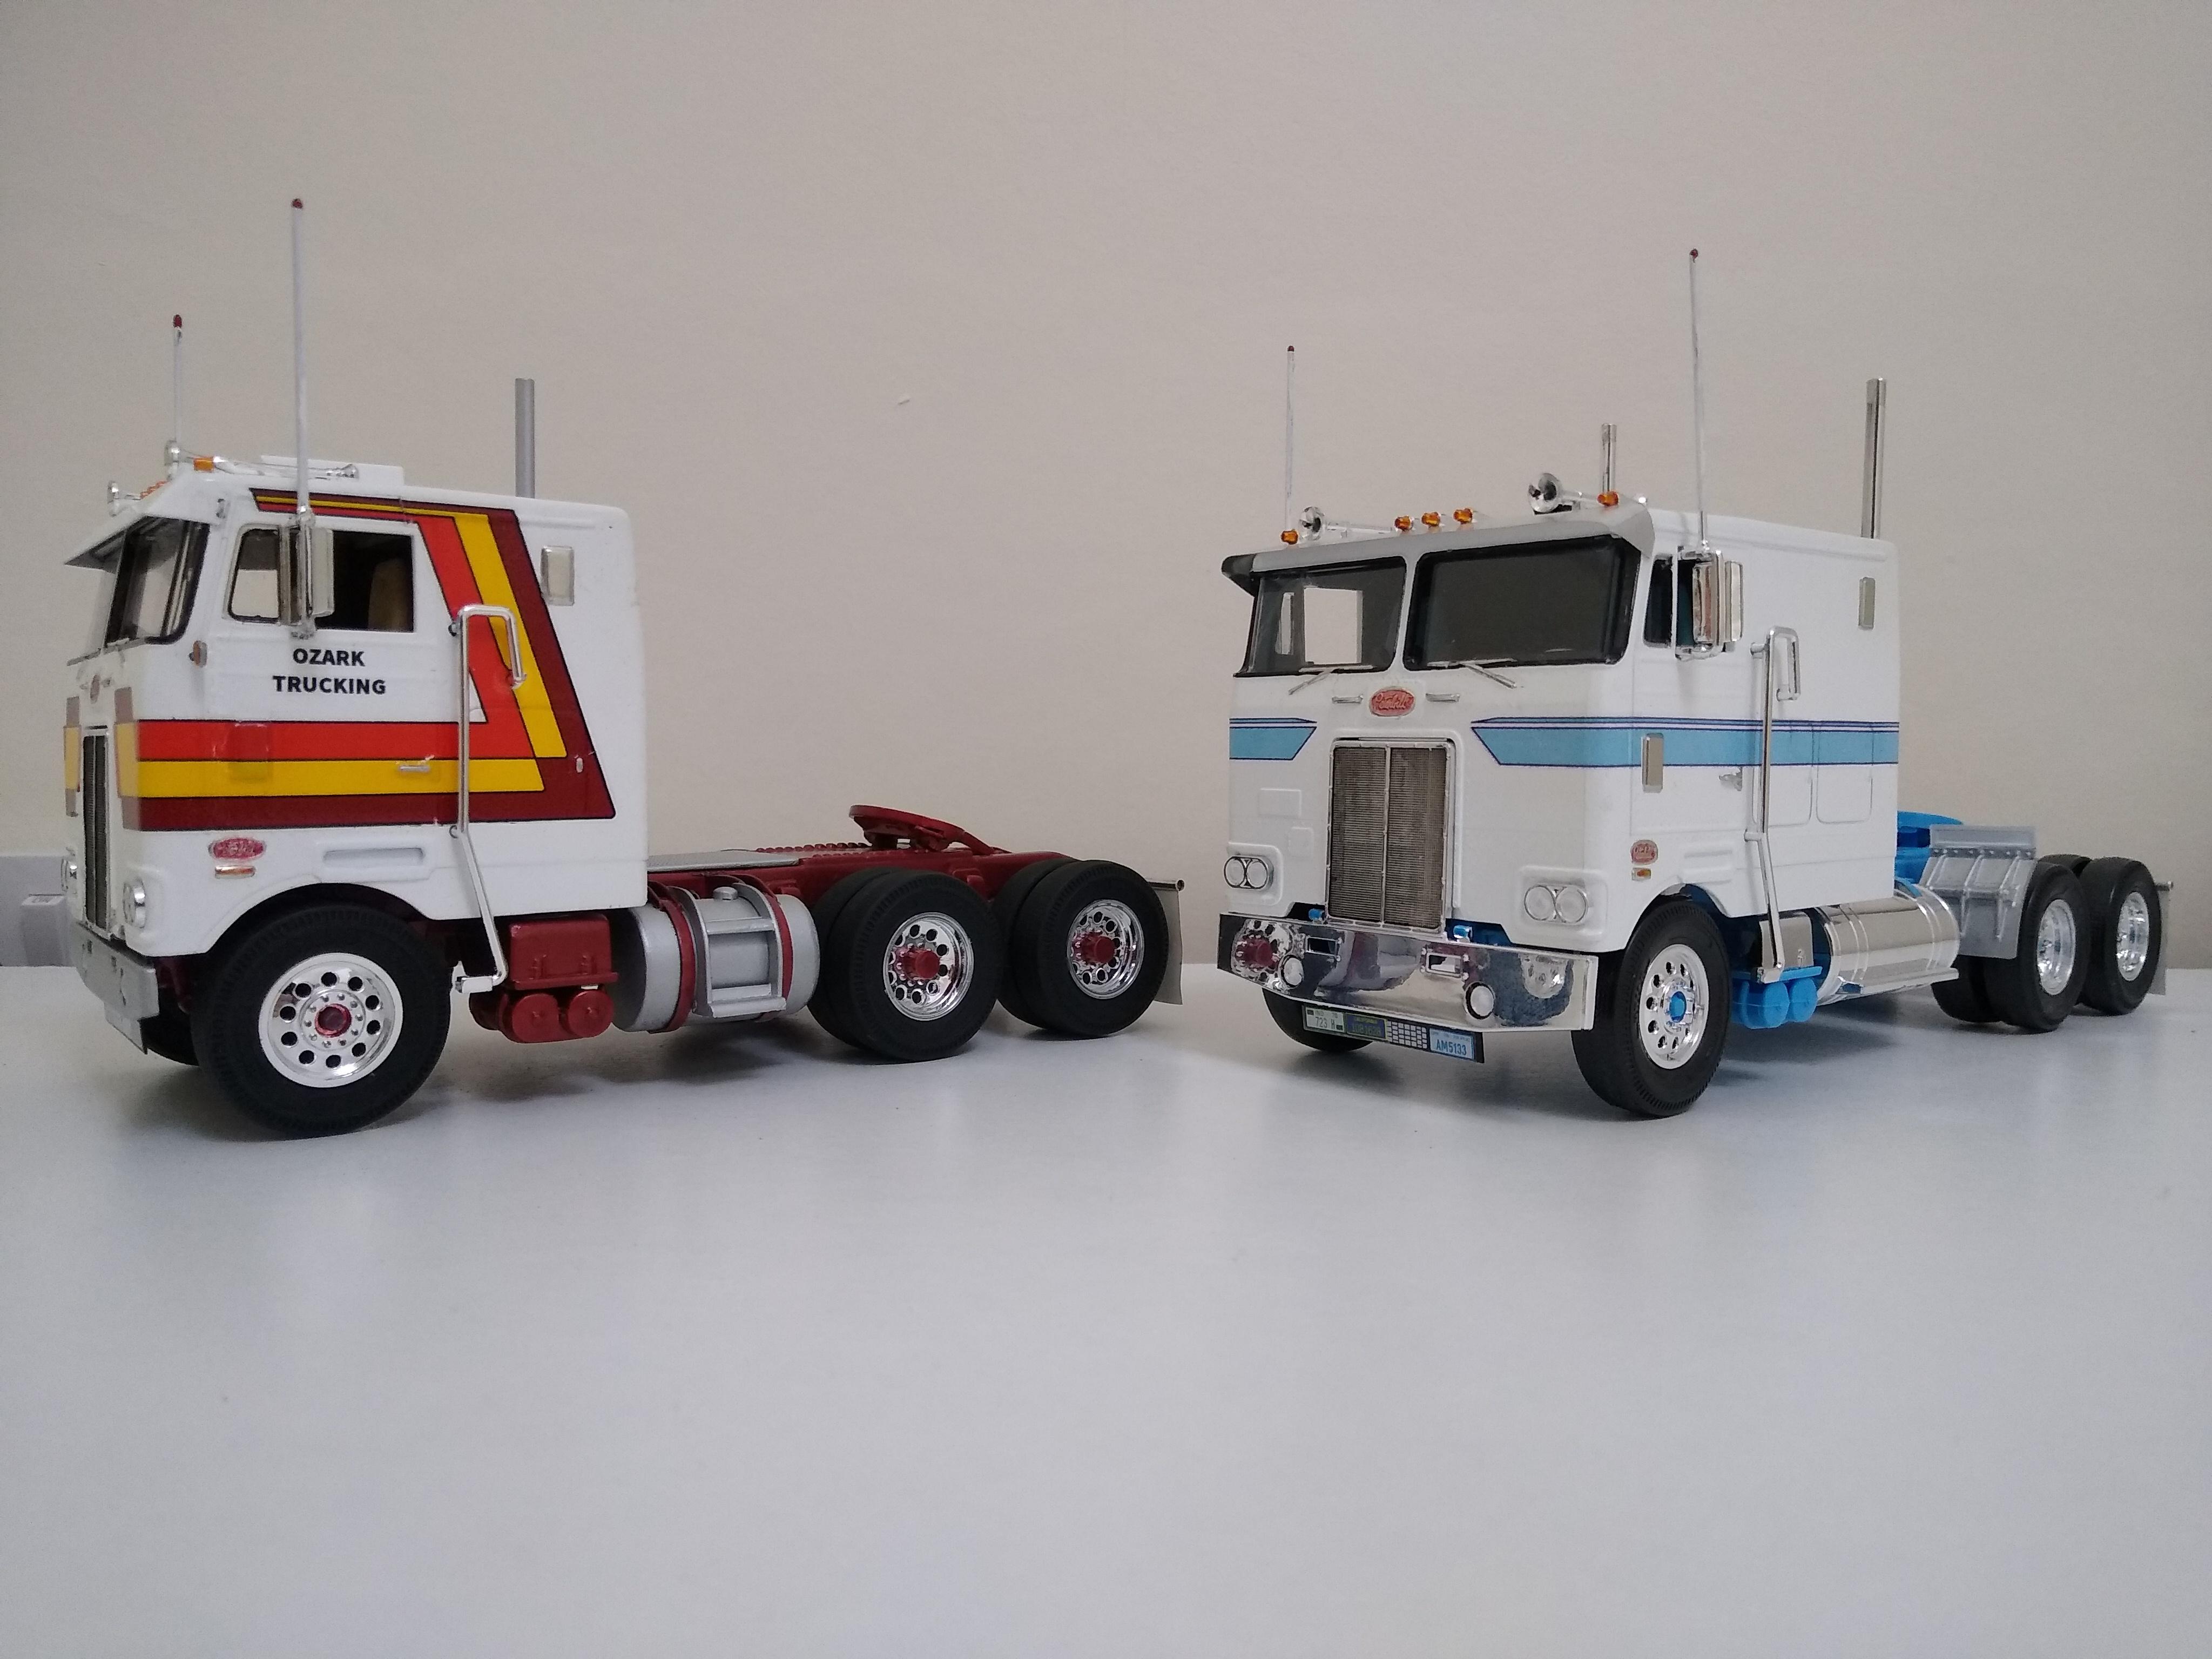
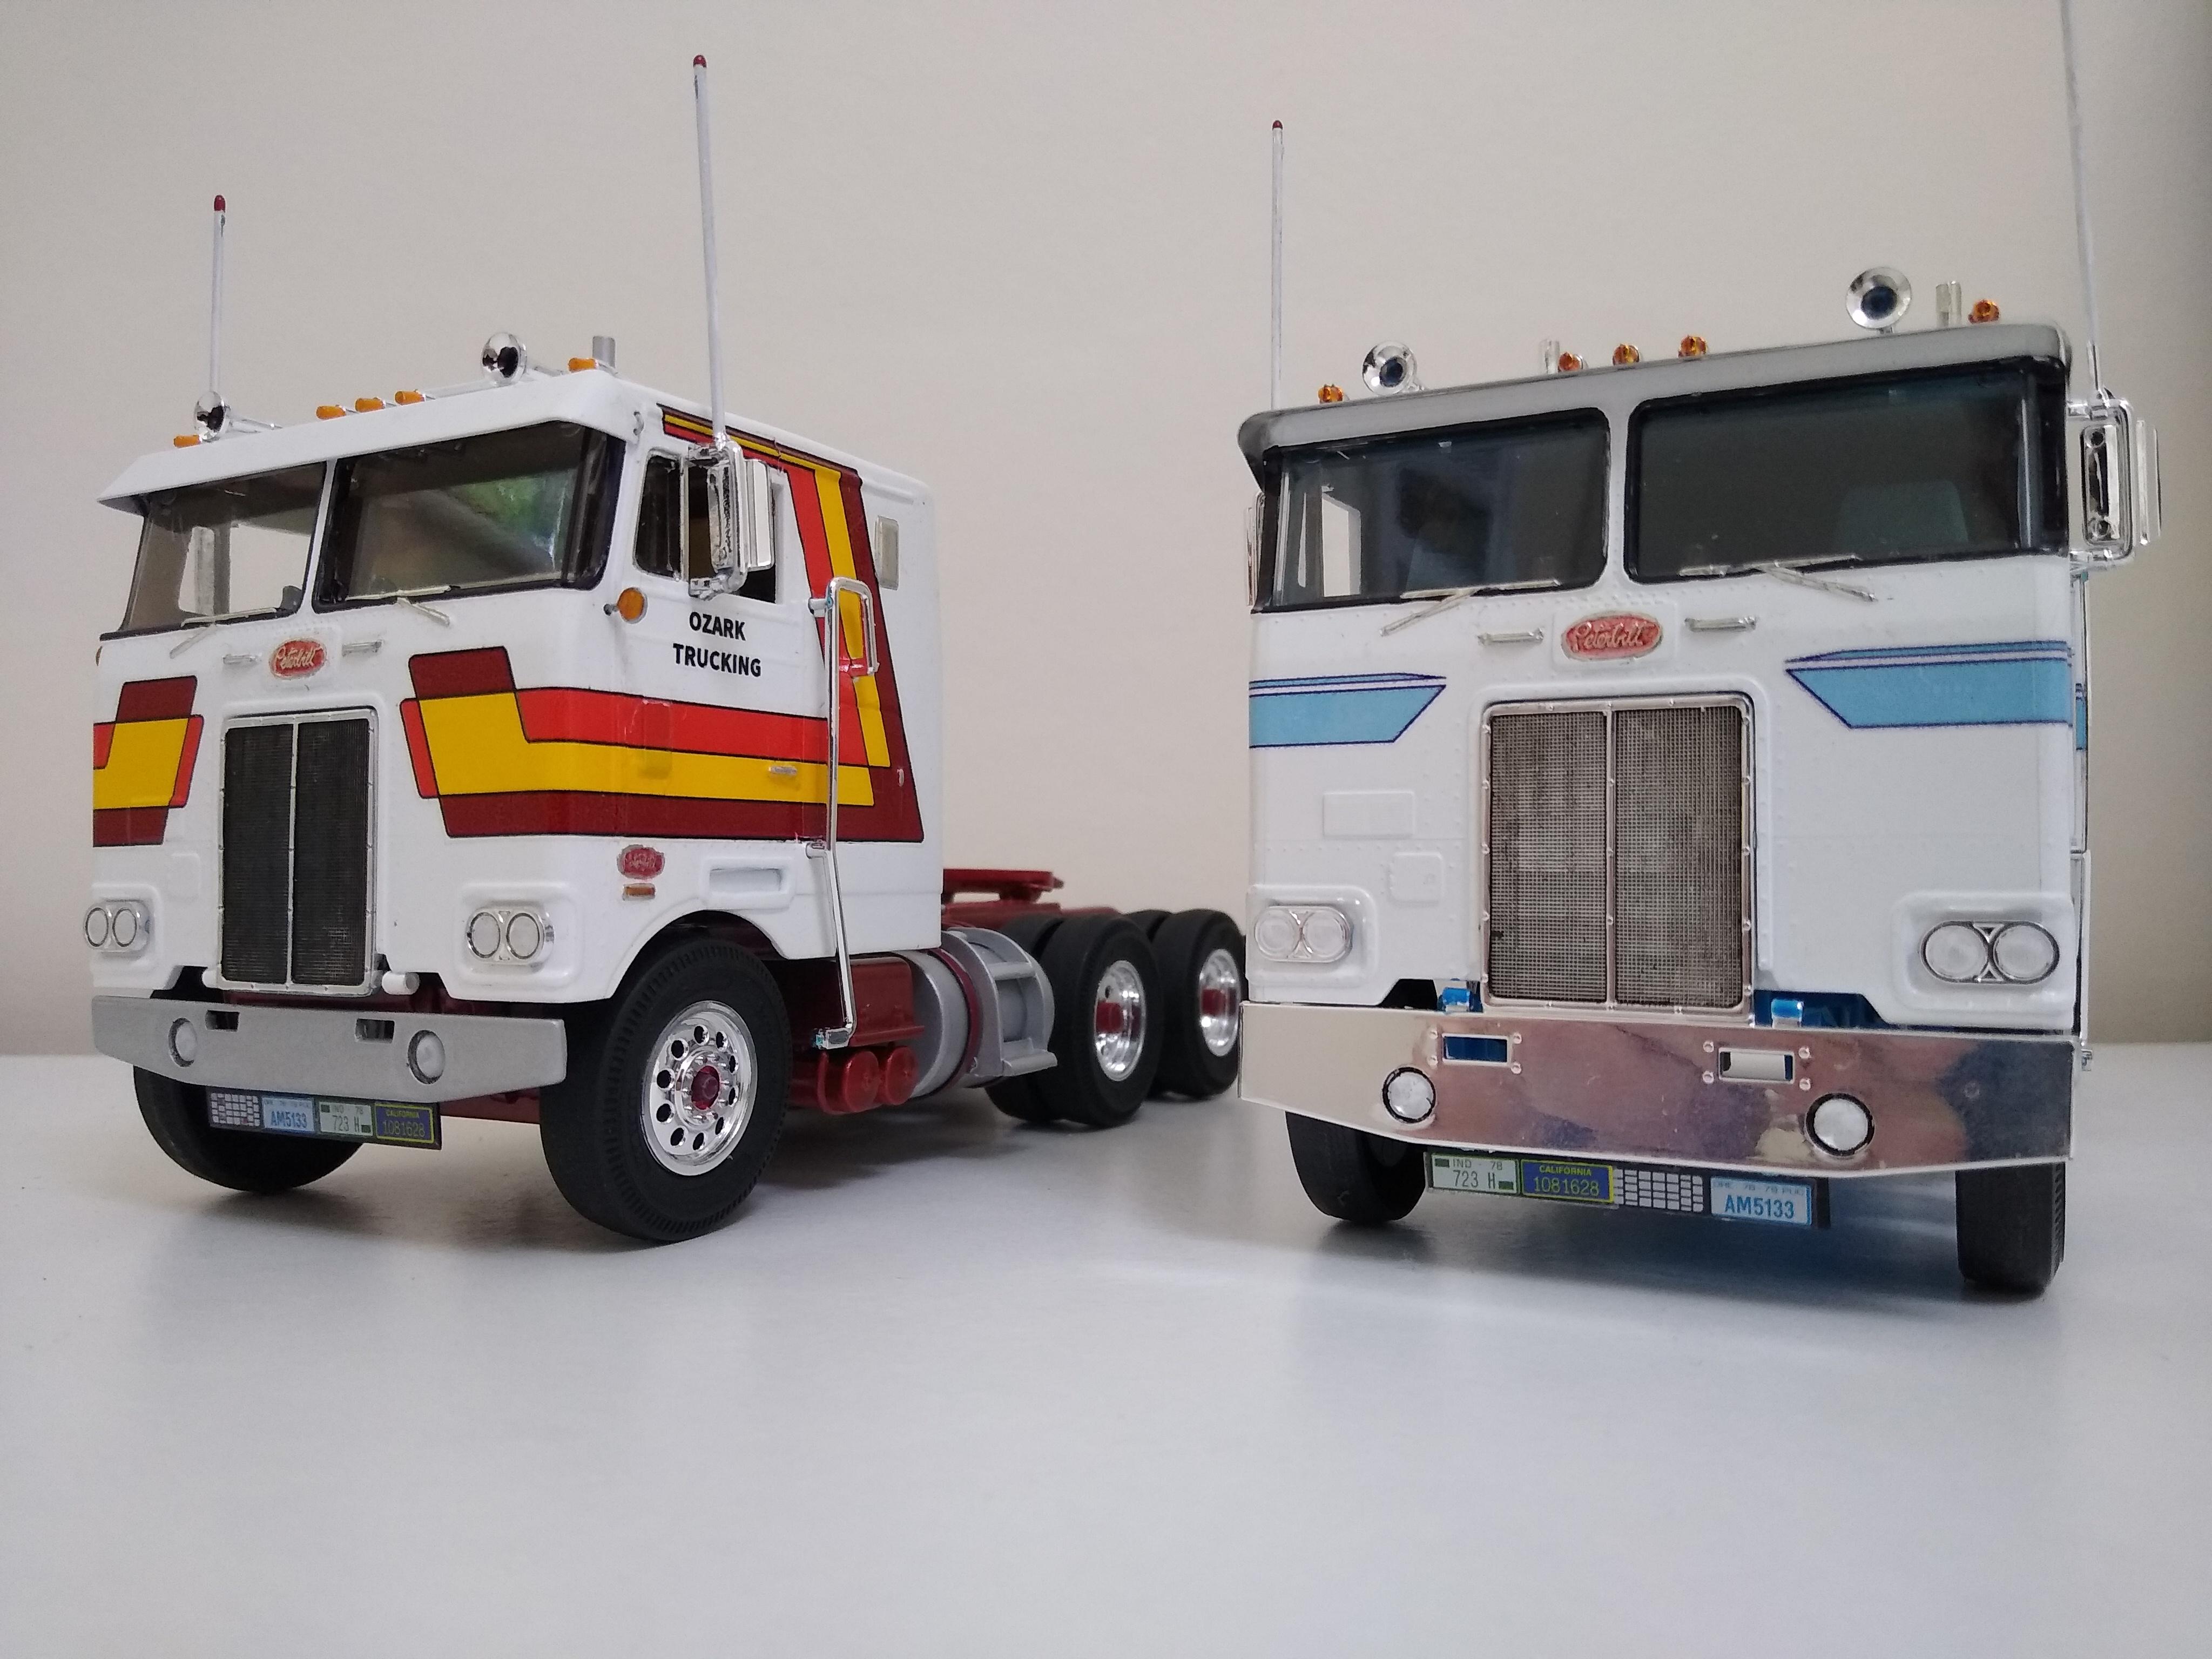
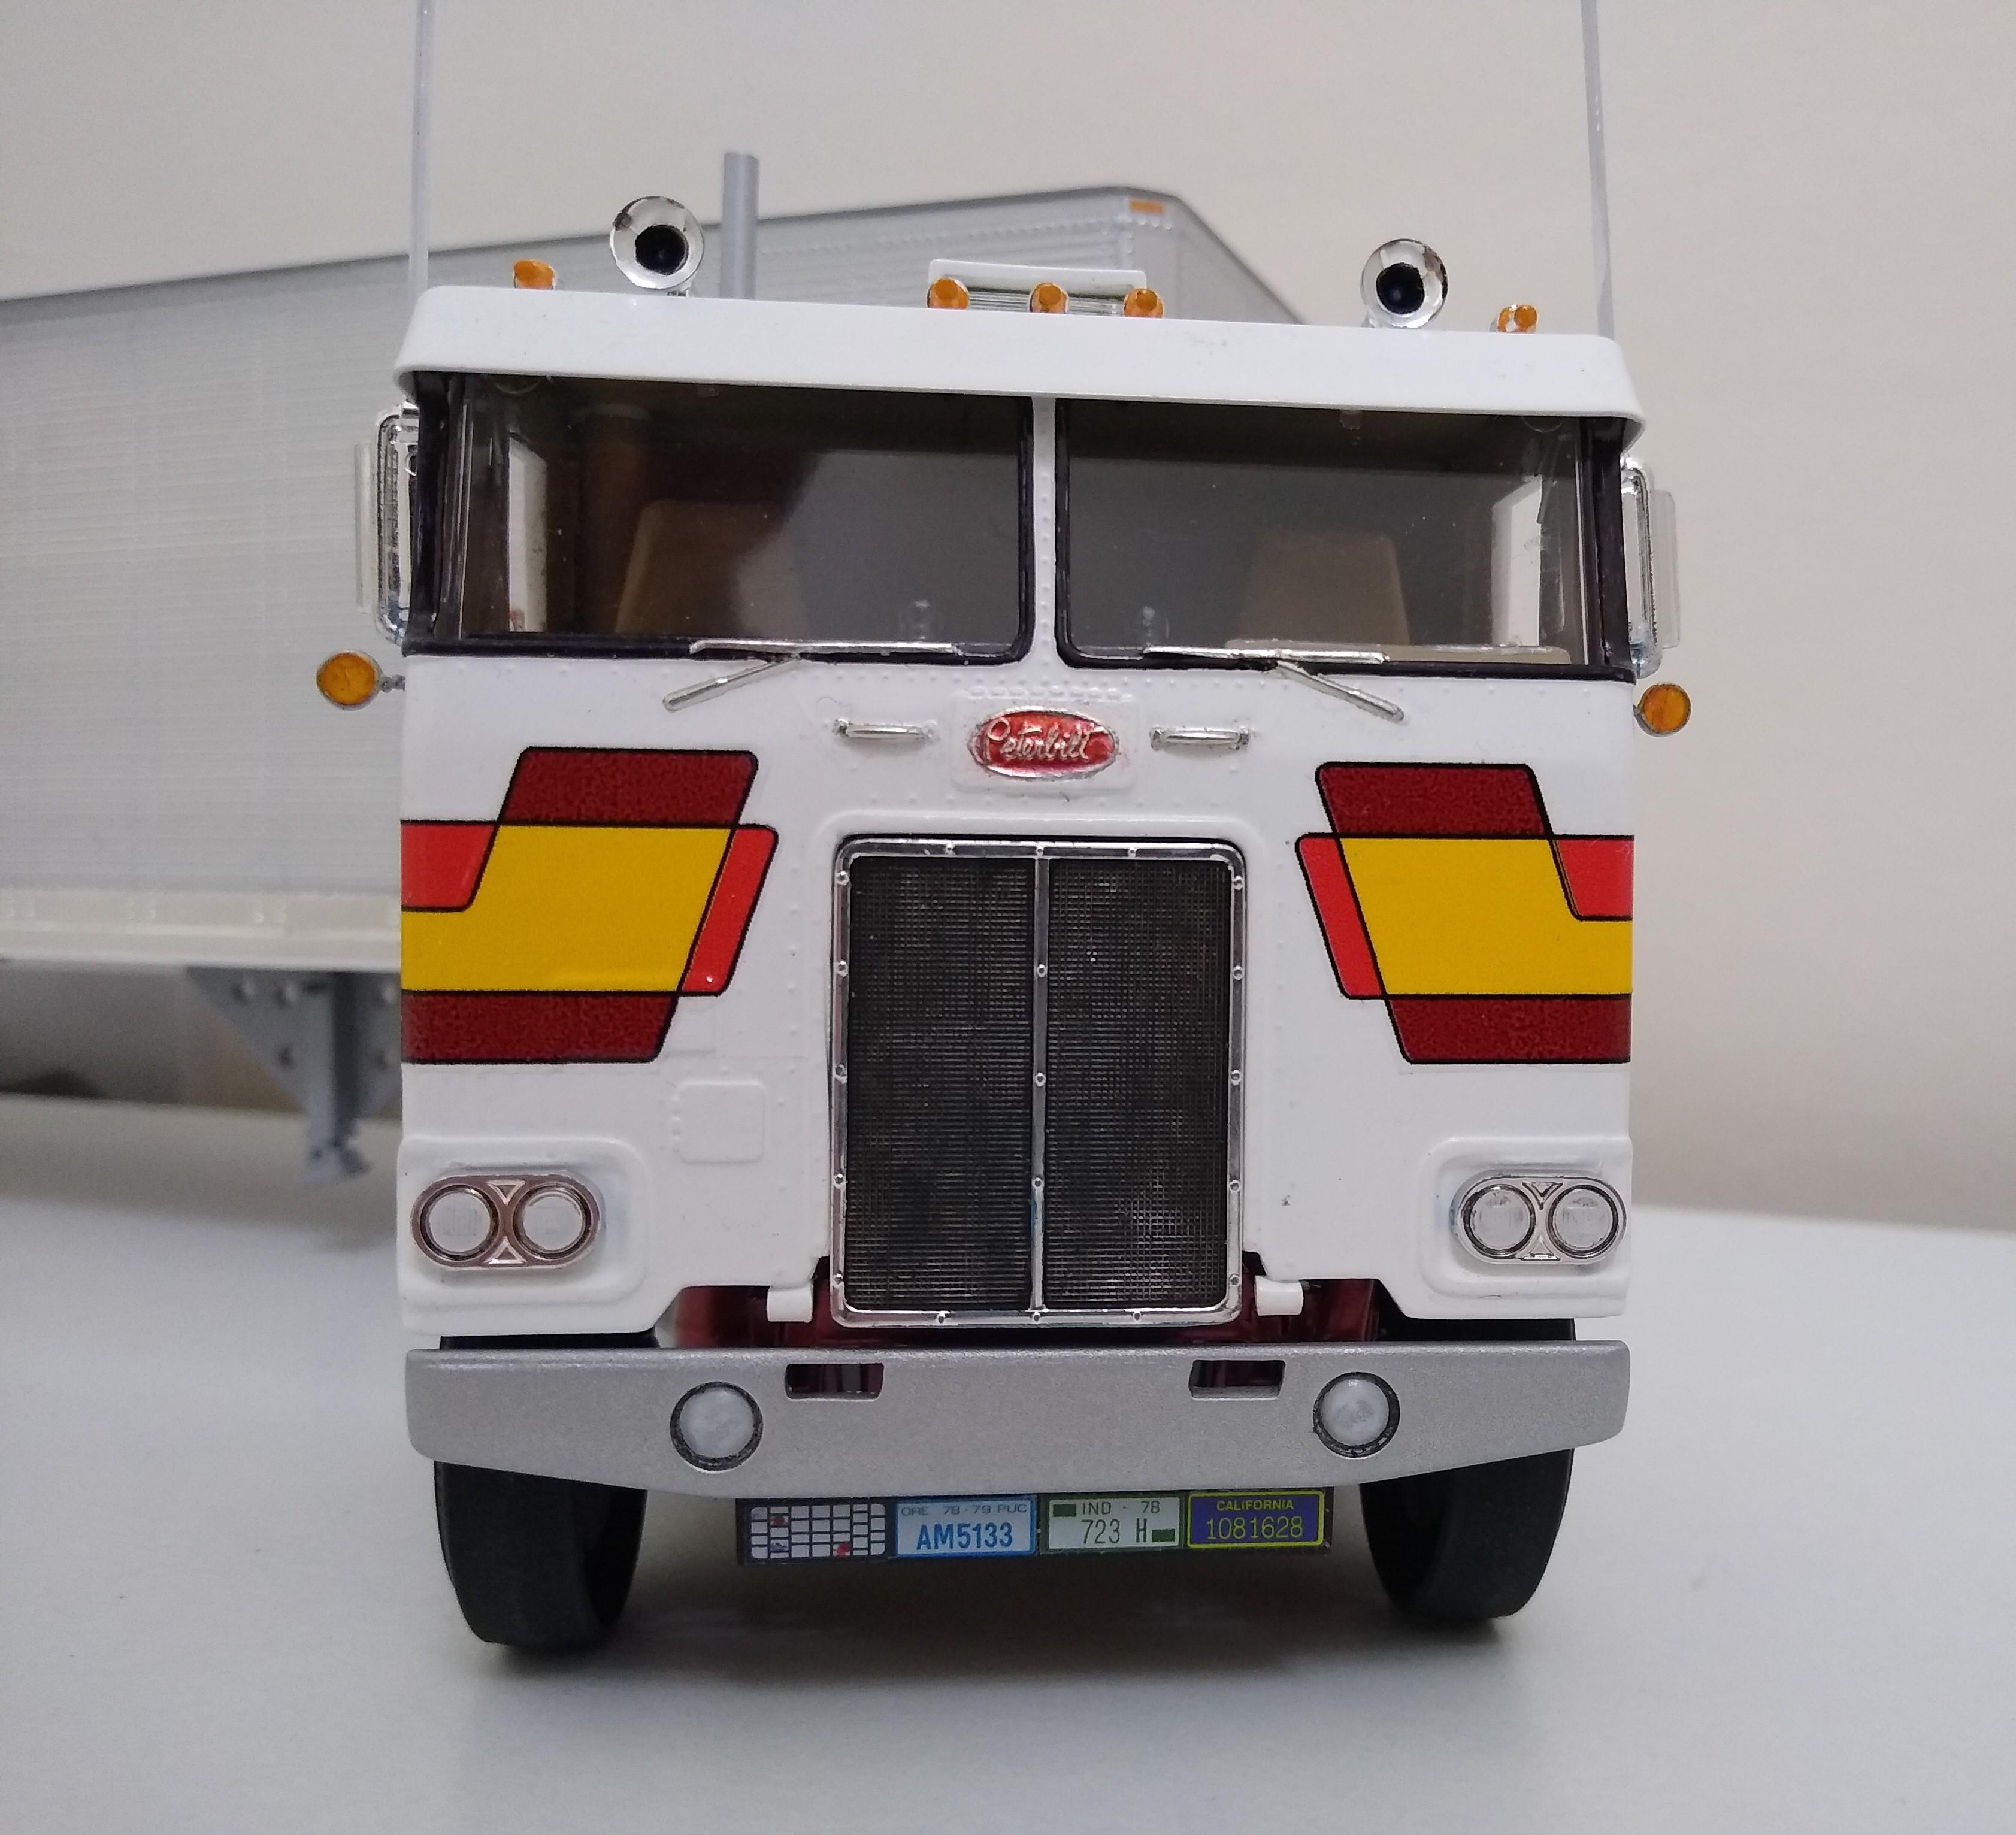
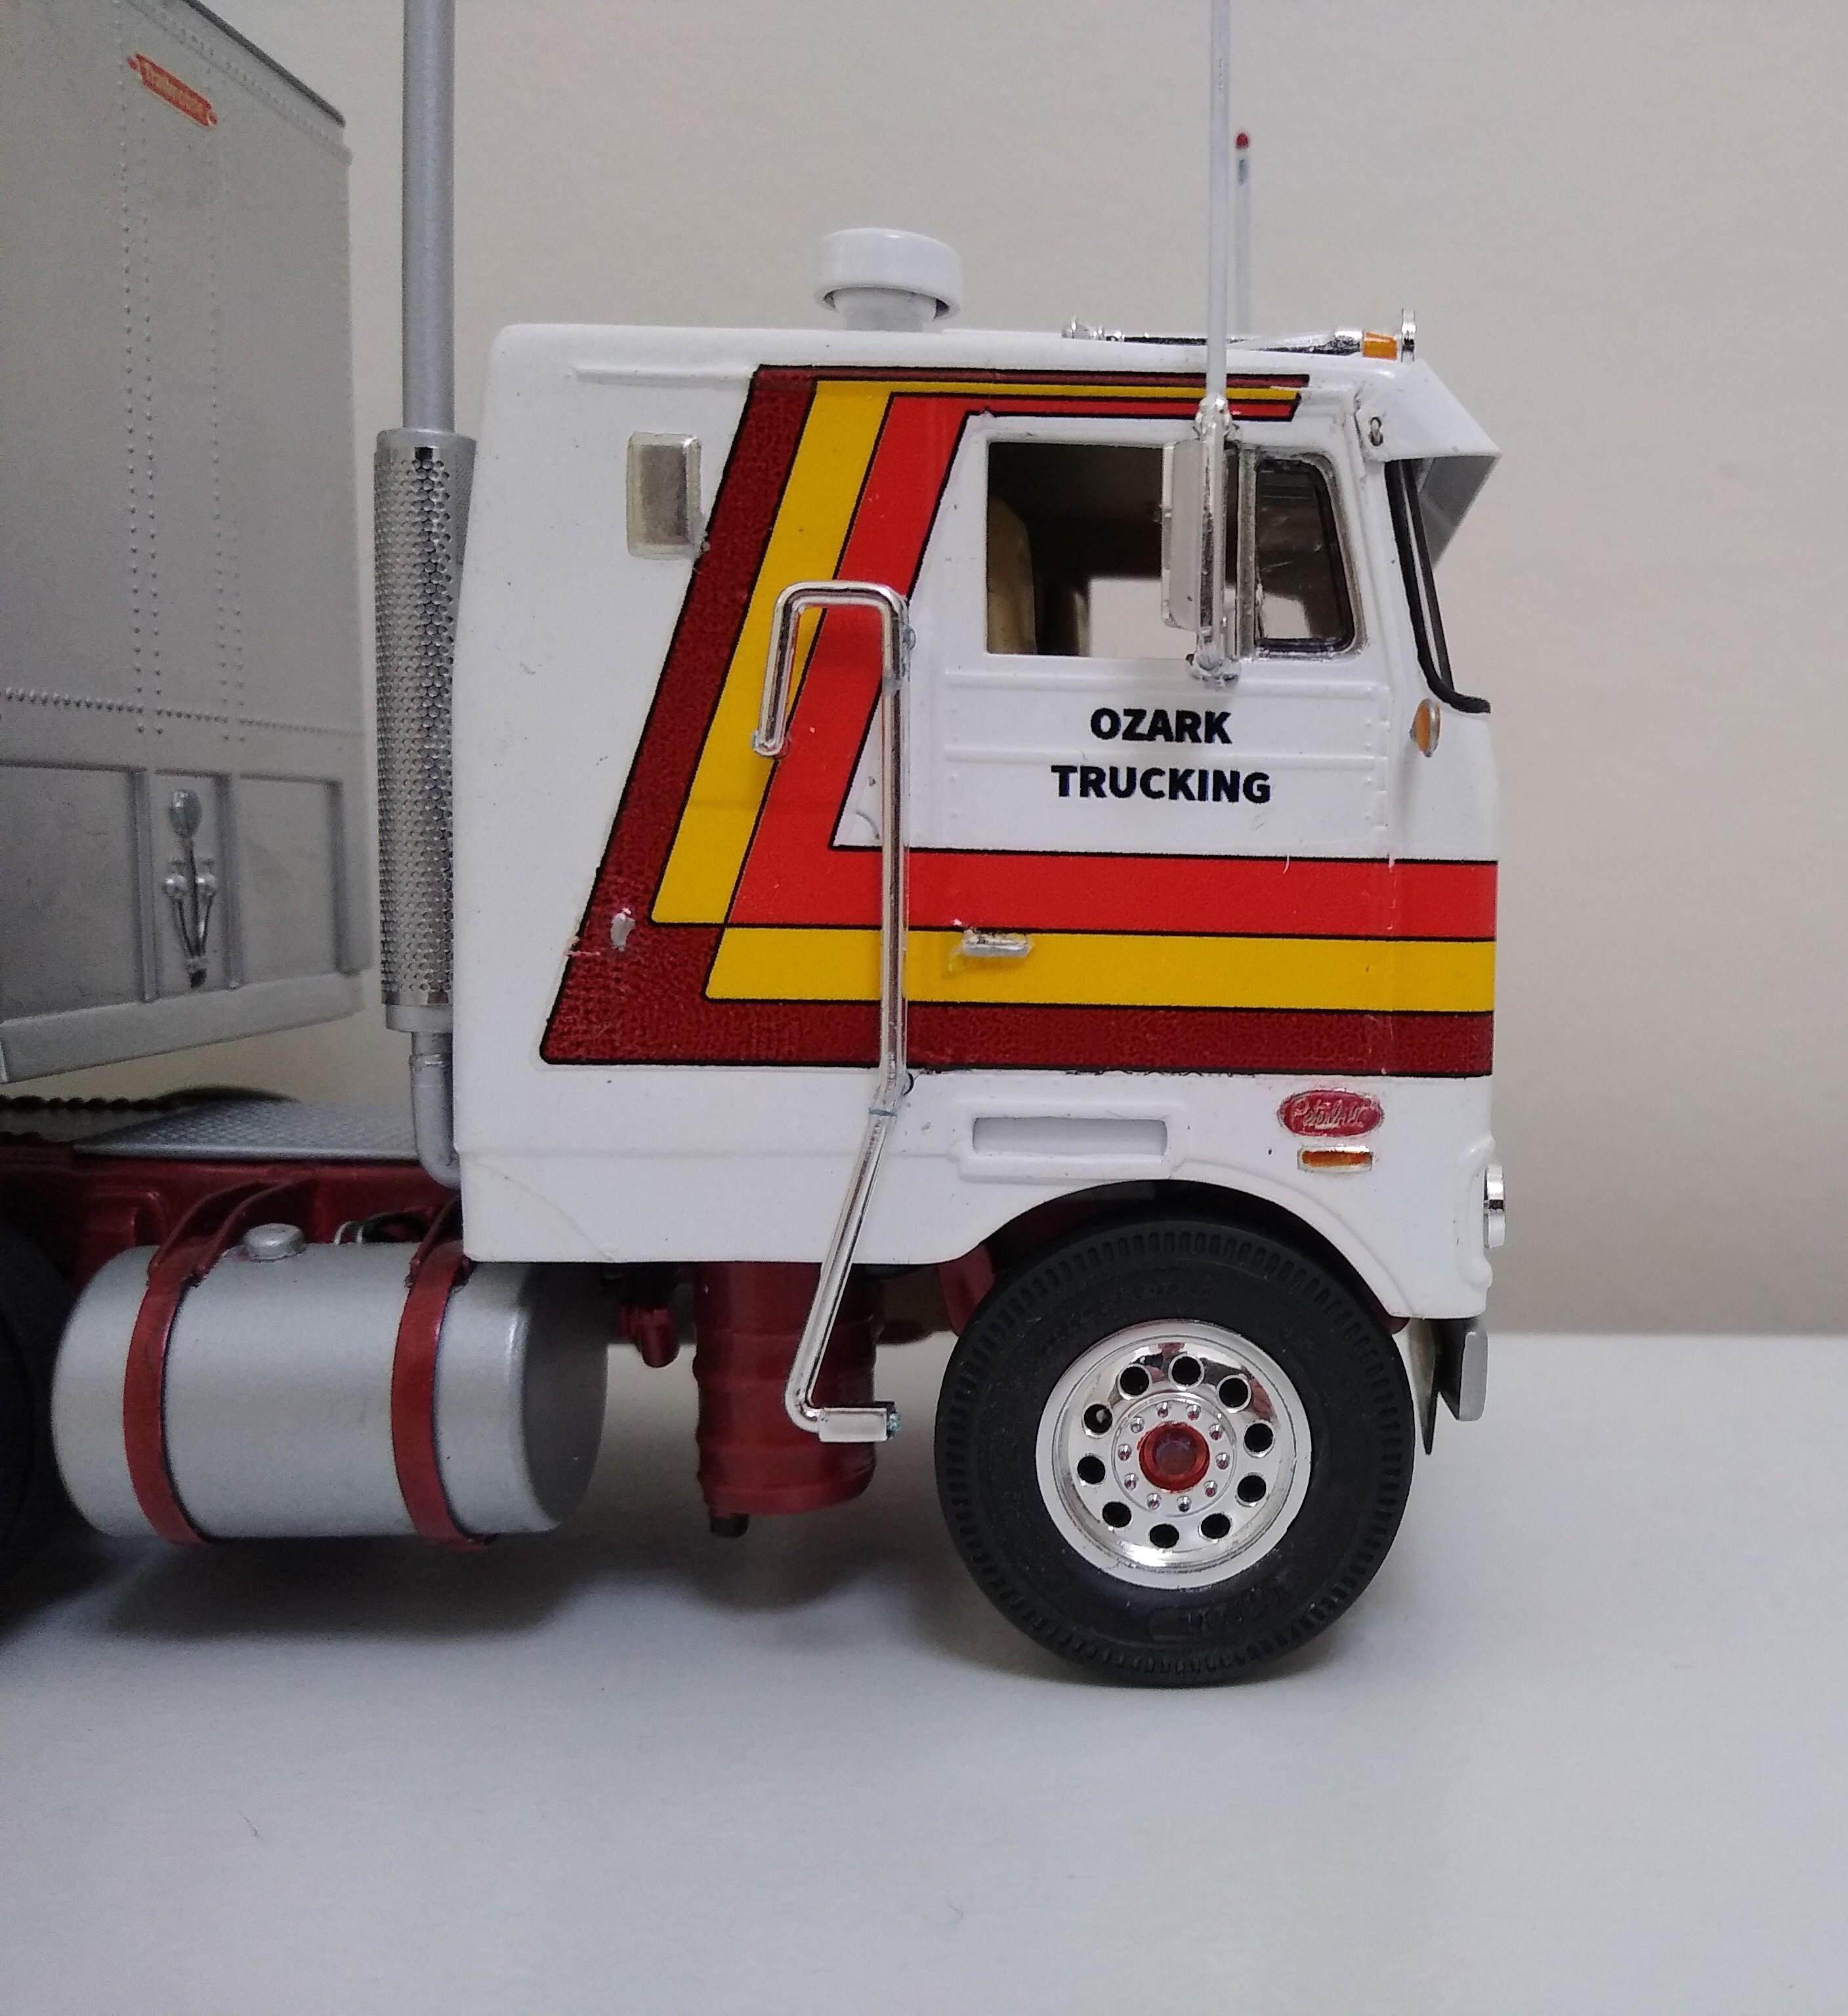
This time it really is done! Well, I don't know why or how but another set of Winslow stripes from the same piece of decal paper as the other two sets went on almost perfectly this time. I know I'd given up but I was so gutted over my 352 not having stripes I just tried again. It worked brilliantly. They're not perfect, but they're good enough for me. So here's Ozark Trucking's Peterbilt 352 Pacemaker with Winslow stripes. I'm so happy with the results. He's on a run from Tucson to Tucumcari, then Tehachapi to Tonopah (great song that...). I've put it next to a pretty box stock 352 of the same kit. Some of the differences are obvious, others not so. It's been a very satisfying project with a very pleasant result.
-
Peterbilt 352
Rockford replied to Rockford's topic in WIP: Model Trucks: Big Rigs and Heavy Equipment
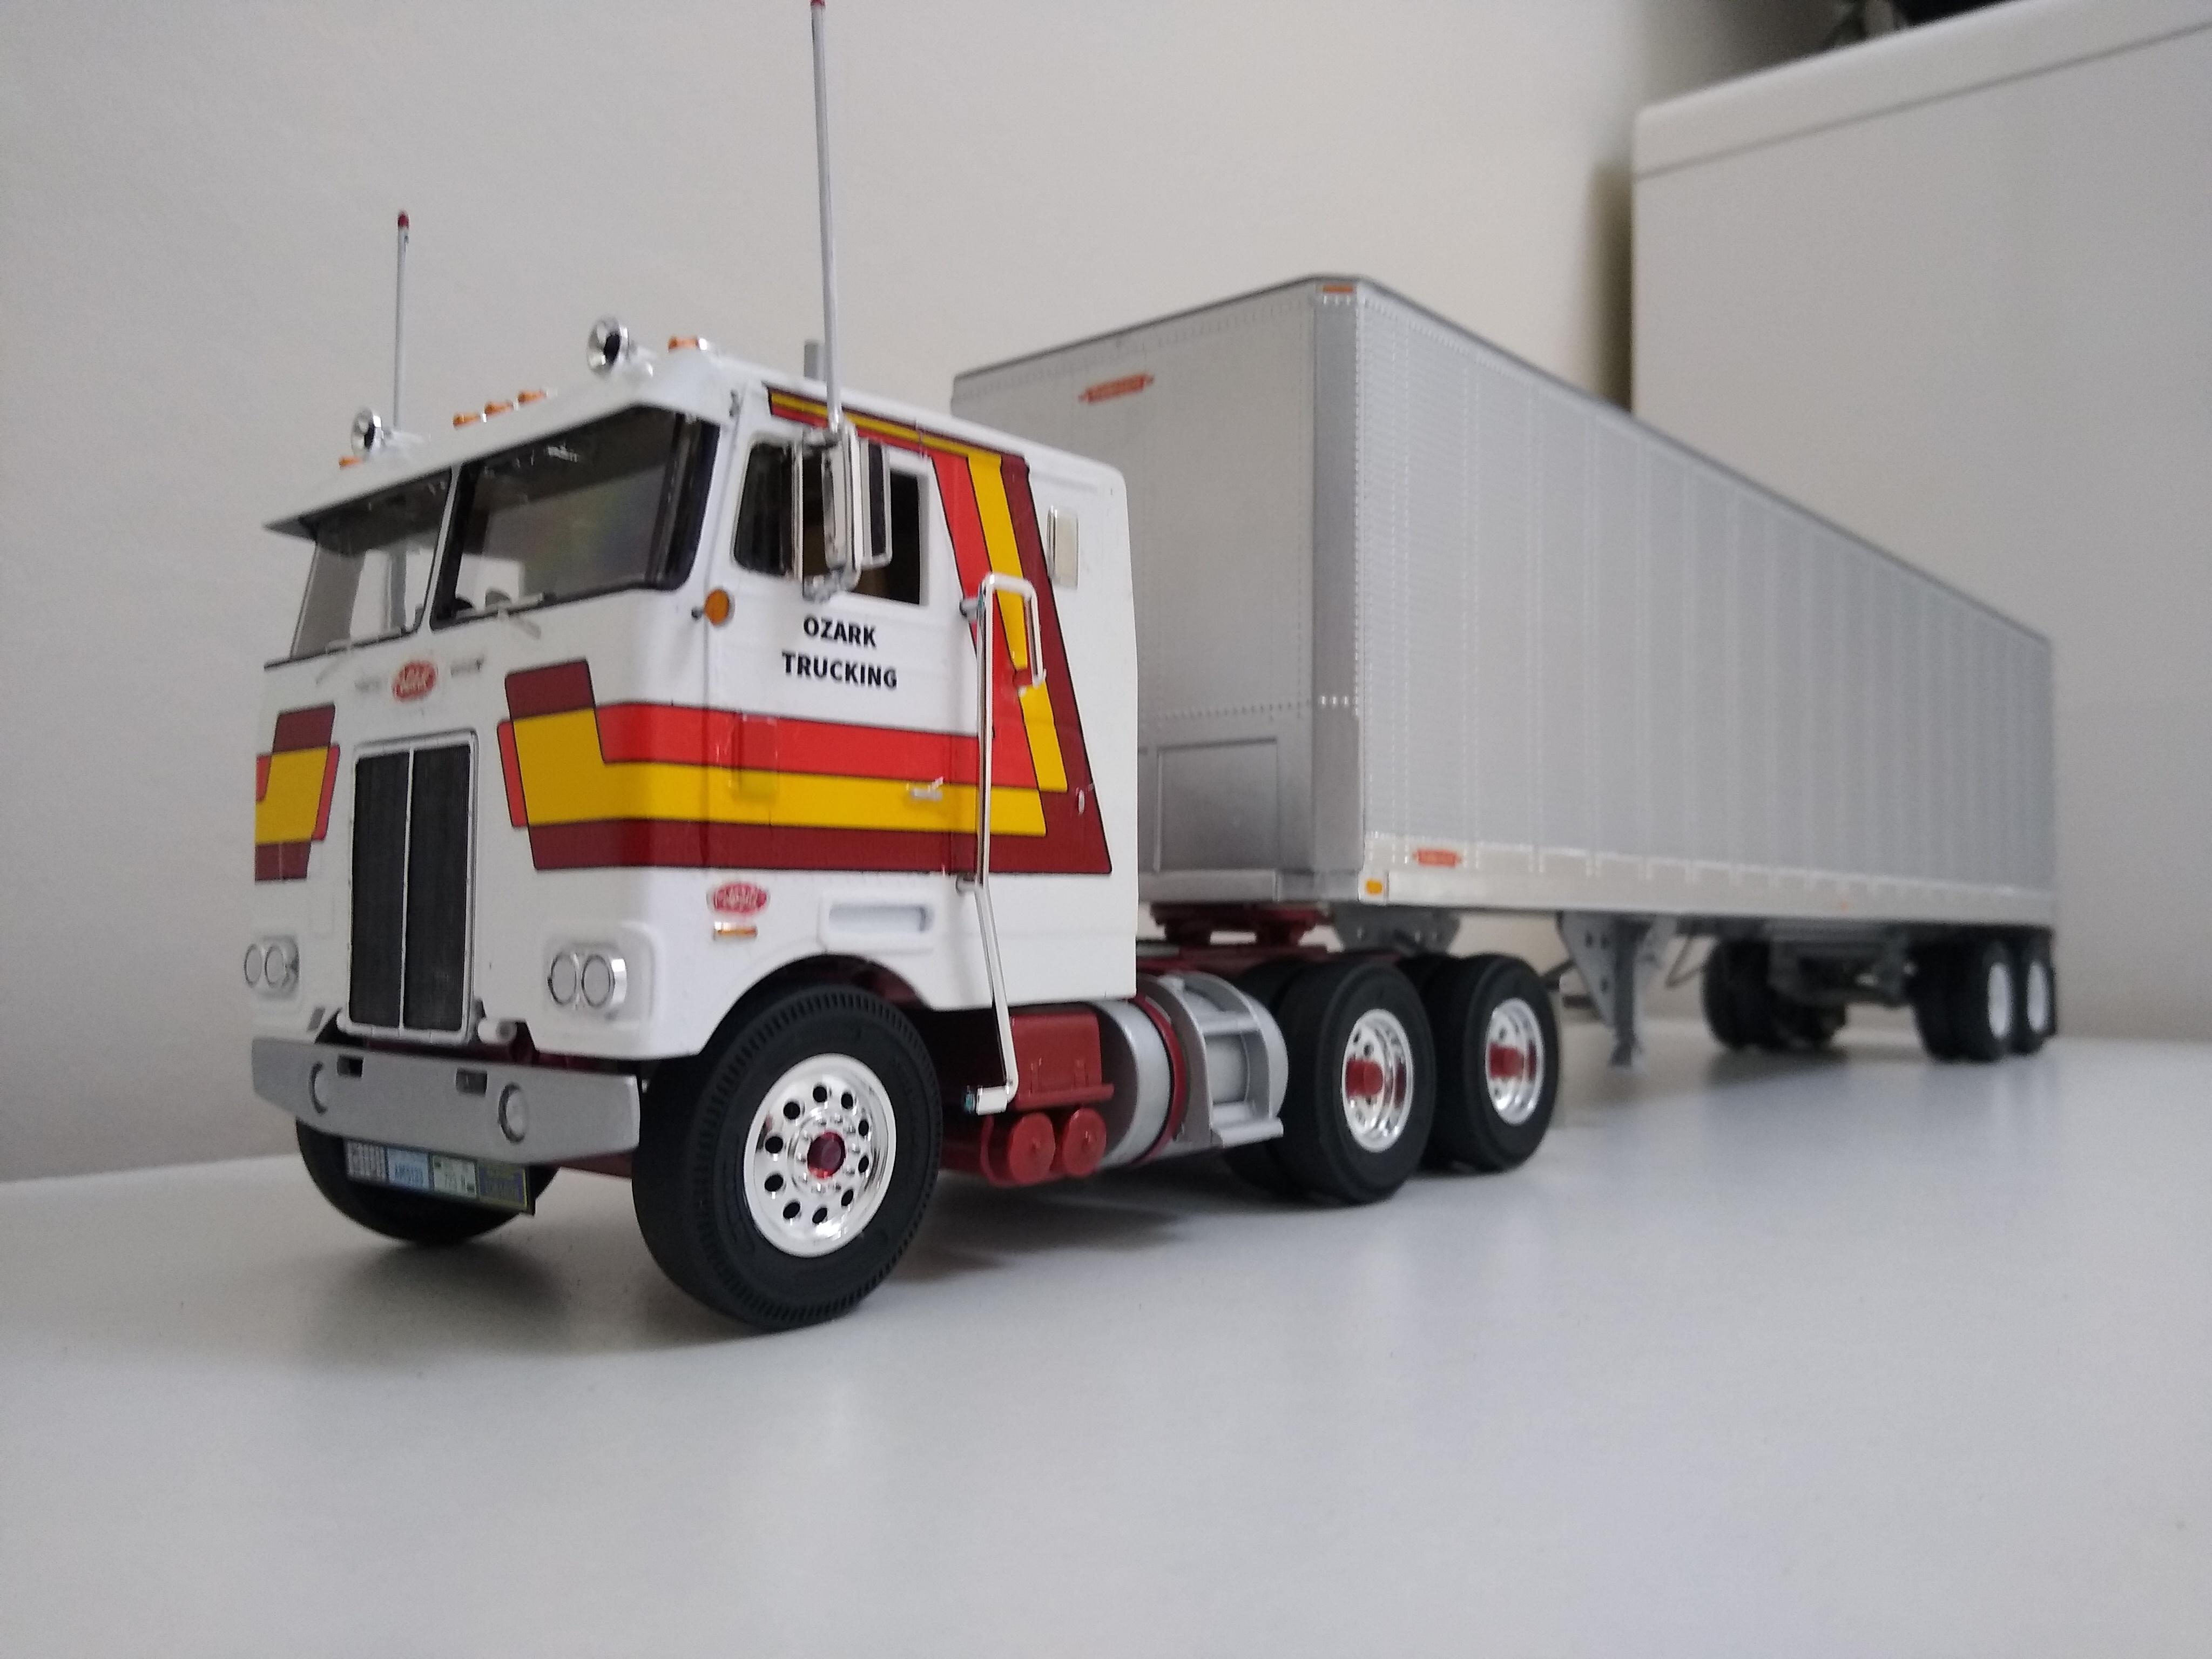
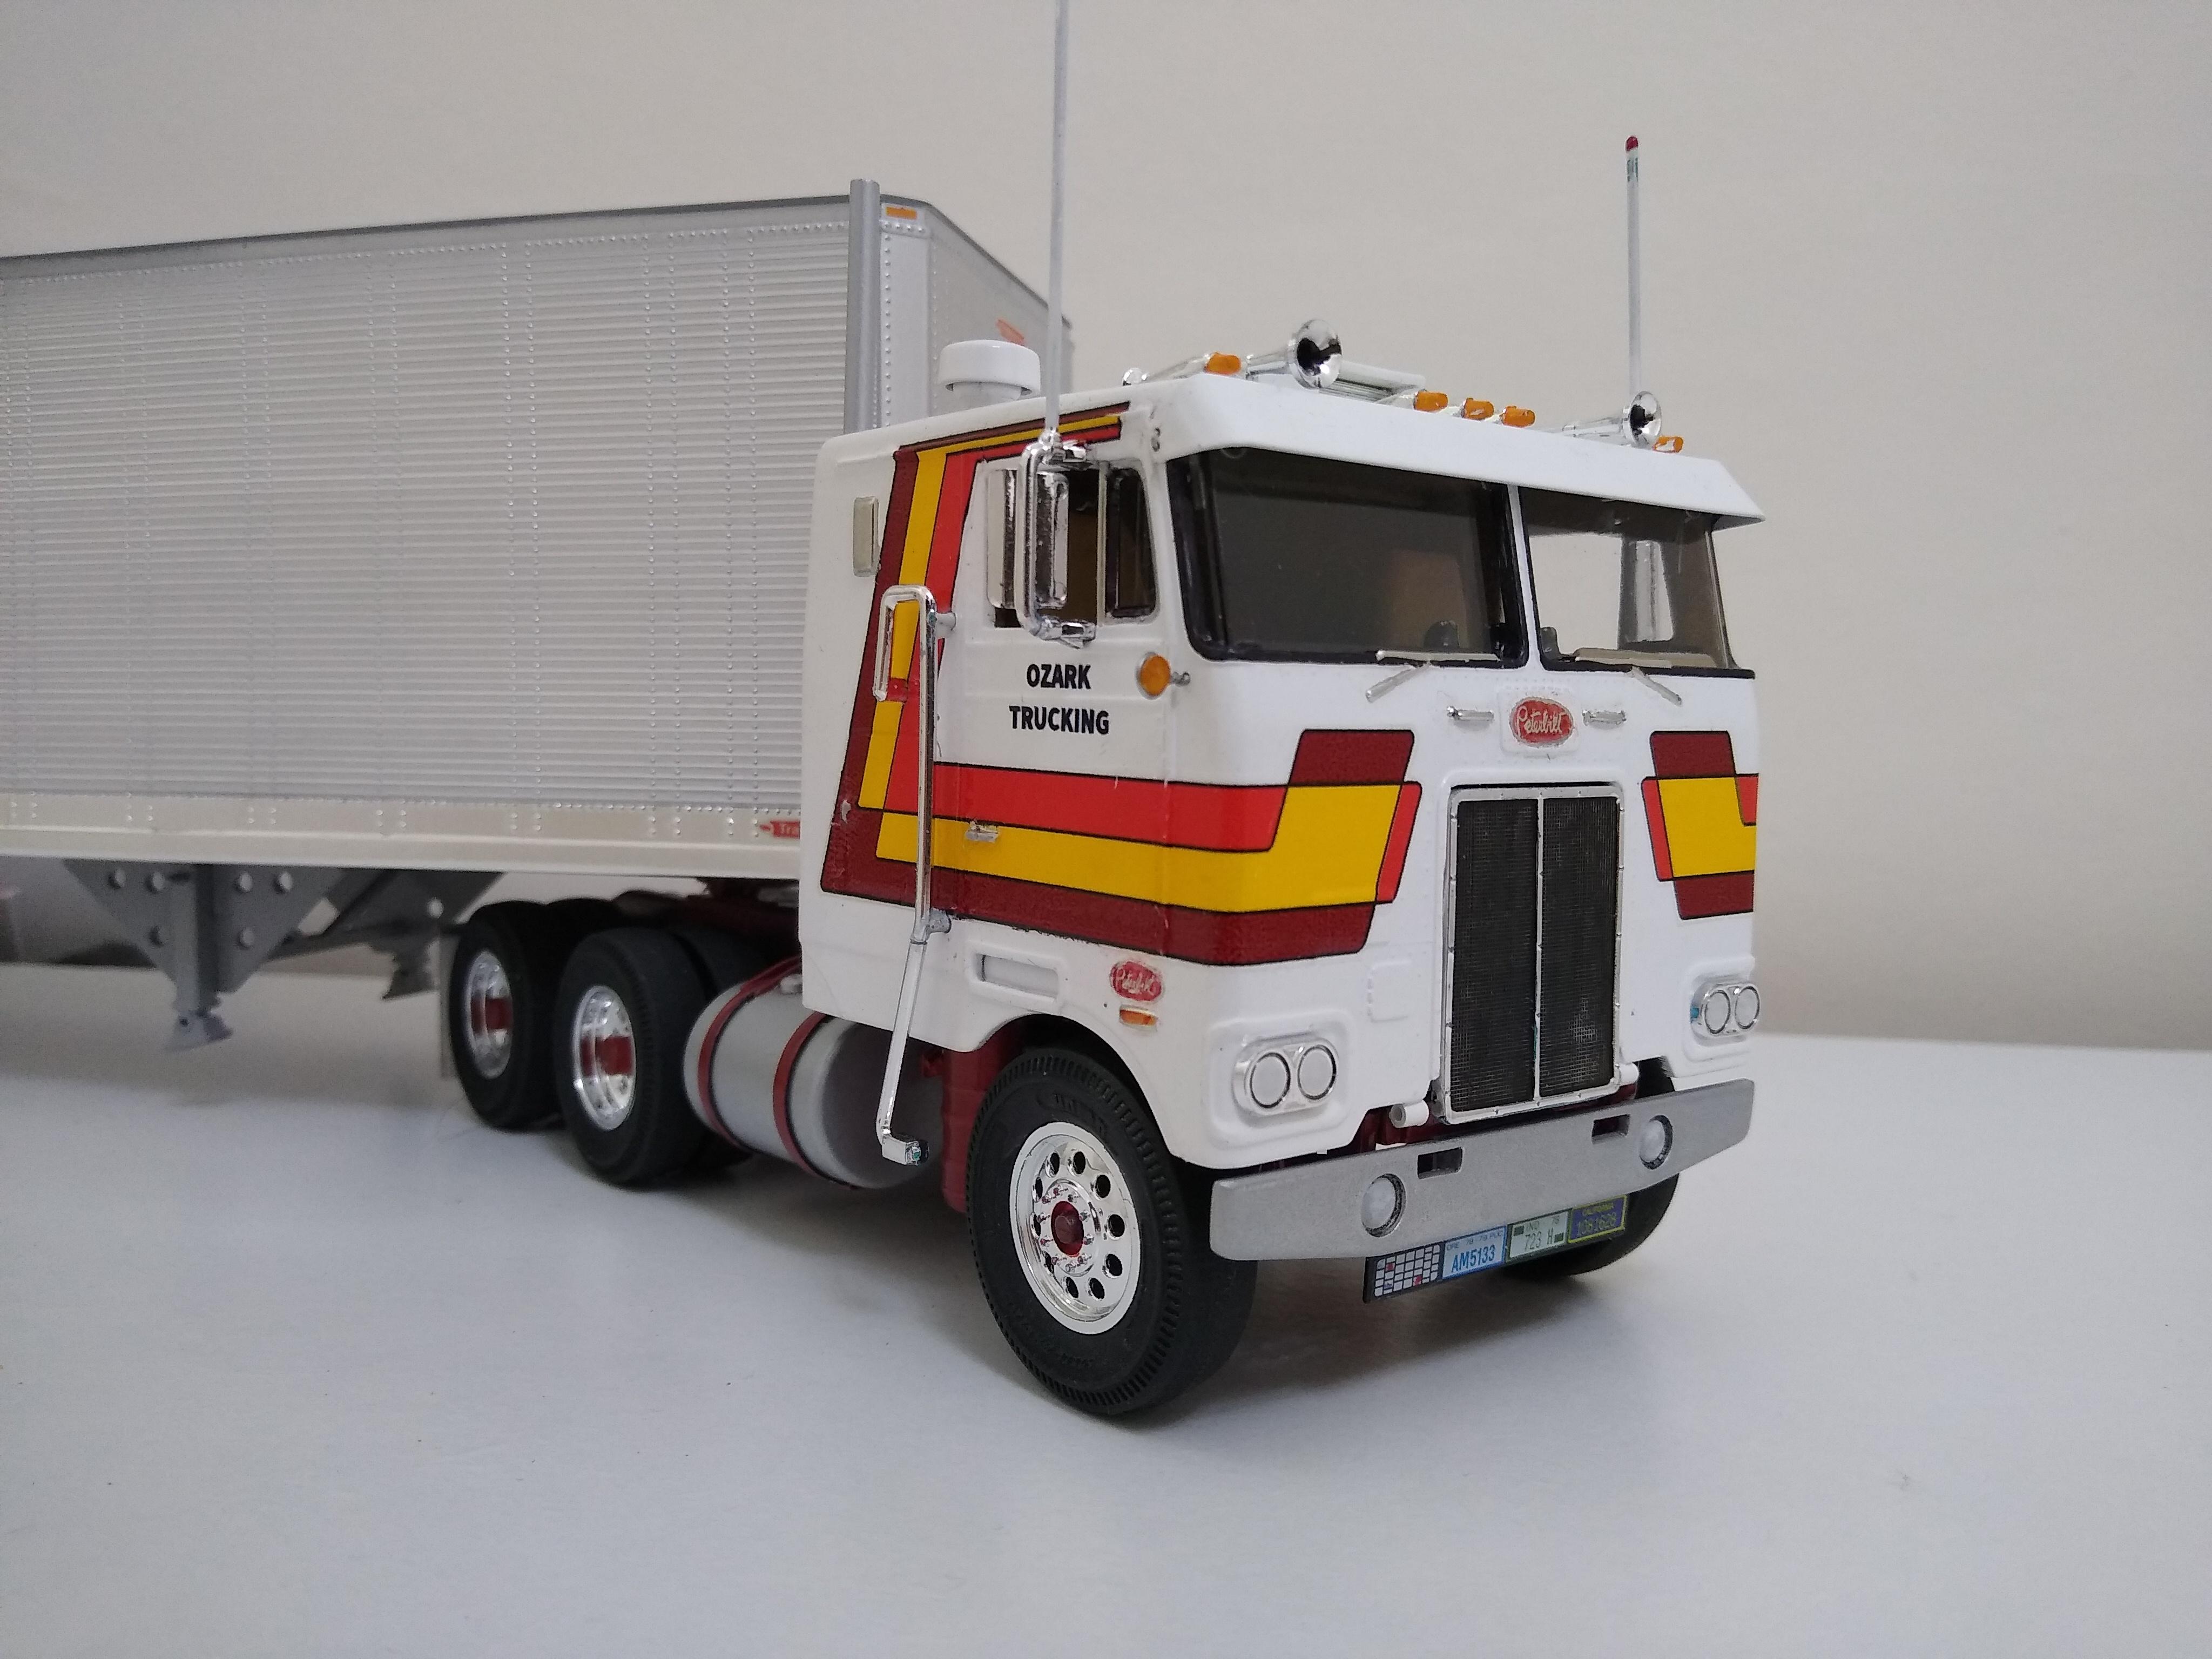
I CAN'T BELIEVE IT!!!!!!!!!!!! I clear coated the set of stripes I printed at the same time as the last ones (so these are the third set). Gave it two coats, same as the rest, put them in water and they just worked pretty much perfectly! They probably didn't lay down quite as well as kit decals might, but maybe that's my nervousness after all the problems, making me a little over cautious. The lower stripe mimics the chassis colour pretty well and so ties the theme together. Anyway, I now have a Peterbilt 352 with Winslow stripes all of my own making. I'm so pleased with how things turned out. It's not perfect but it will do me. Little things like being able to see the Cummins through in the doghouse, the single stack and the internal air intake just make it for me. It's been 11 months in the making. Here he is with my favourite trailer, the AMT dry van.
-
Peterbilt 352
Rockford replied to Rockford's topic in WIP: Model Trucks: Big Rigs and Heavy Equipment
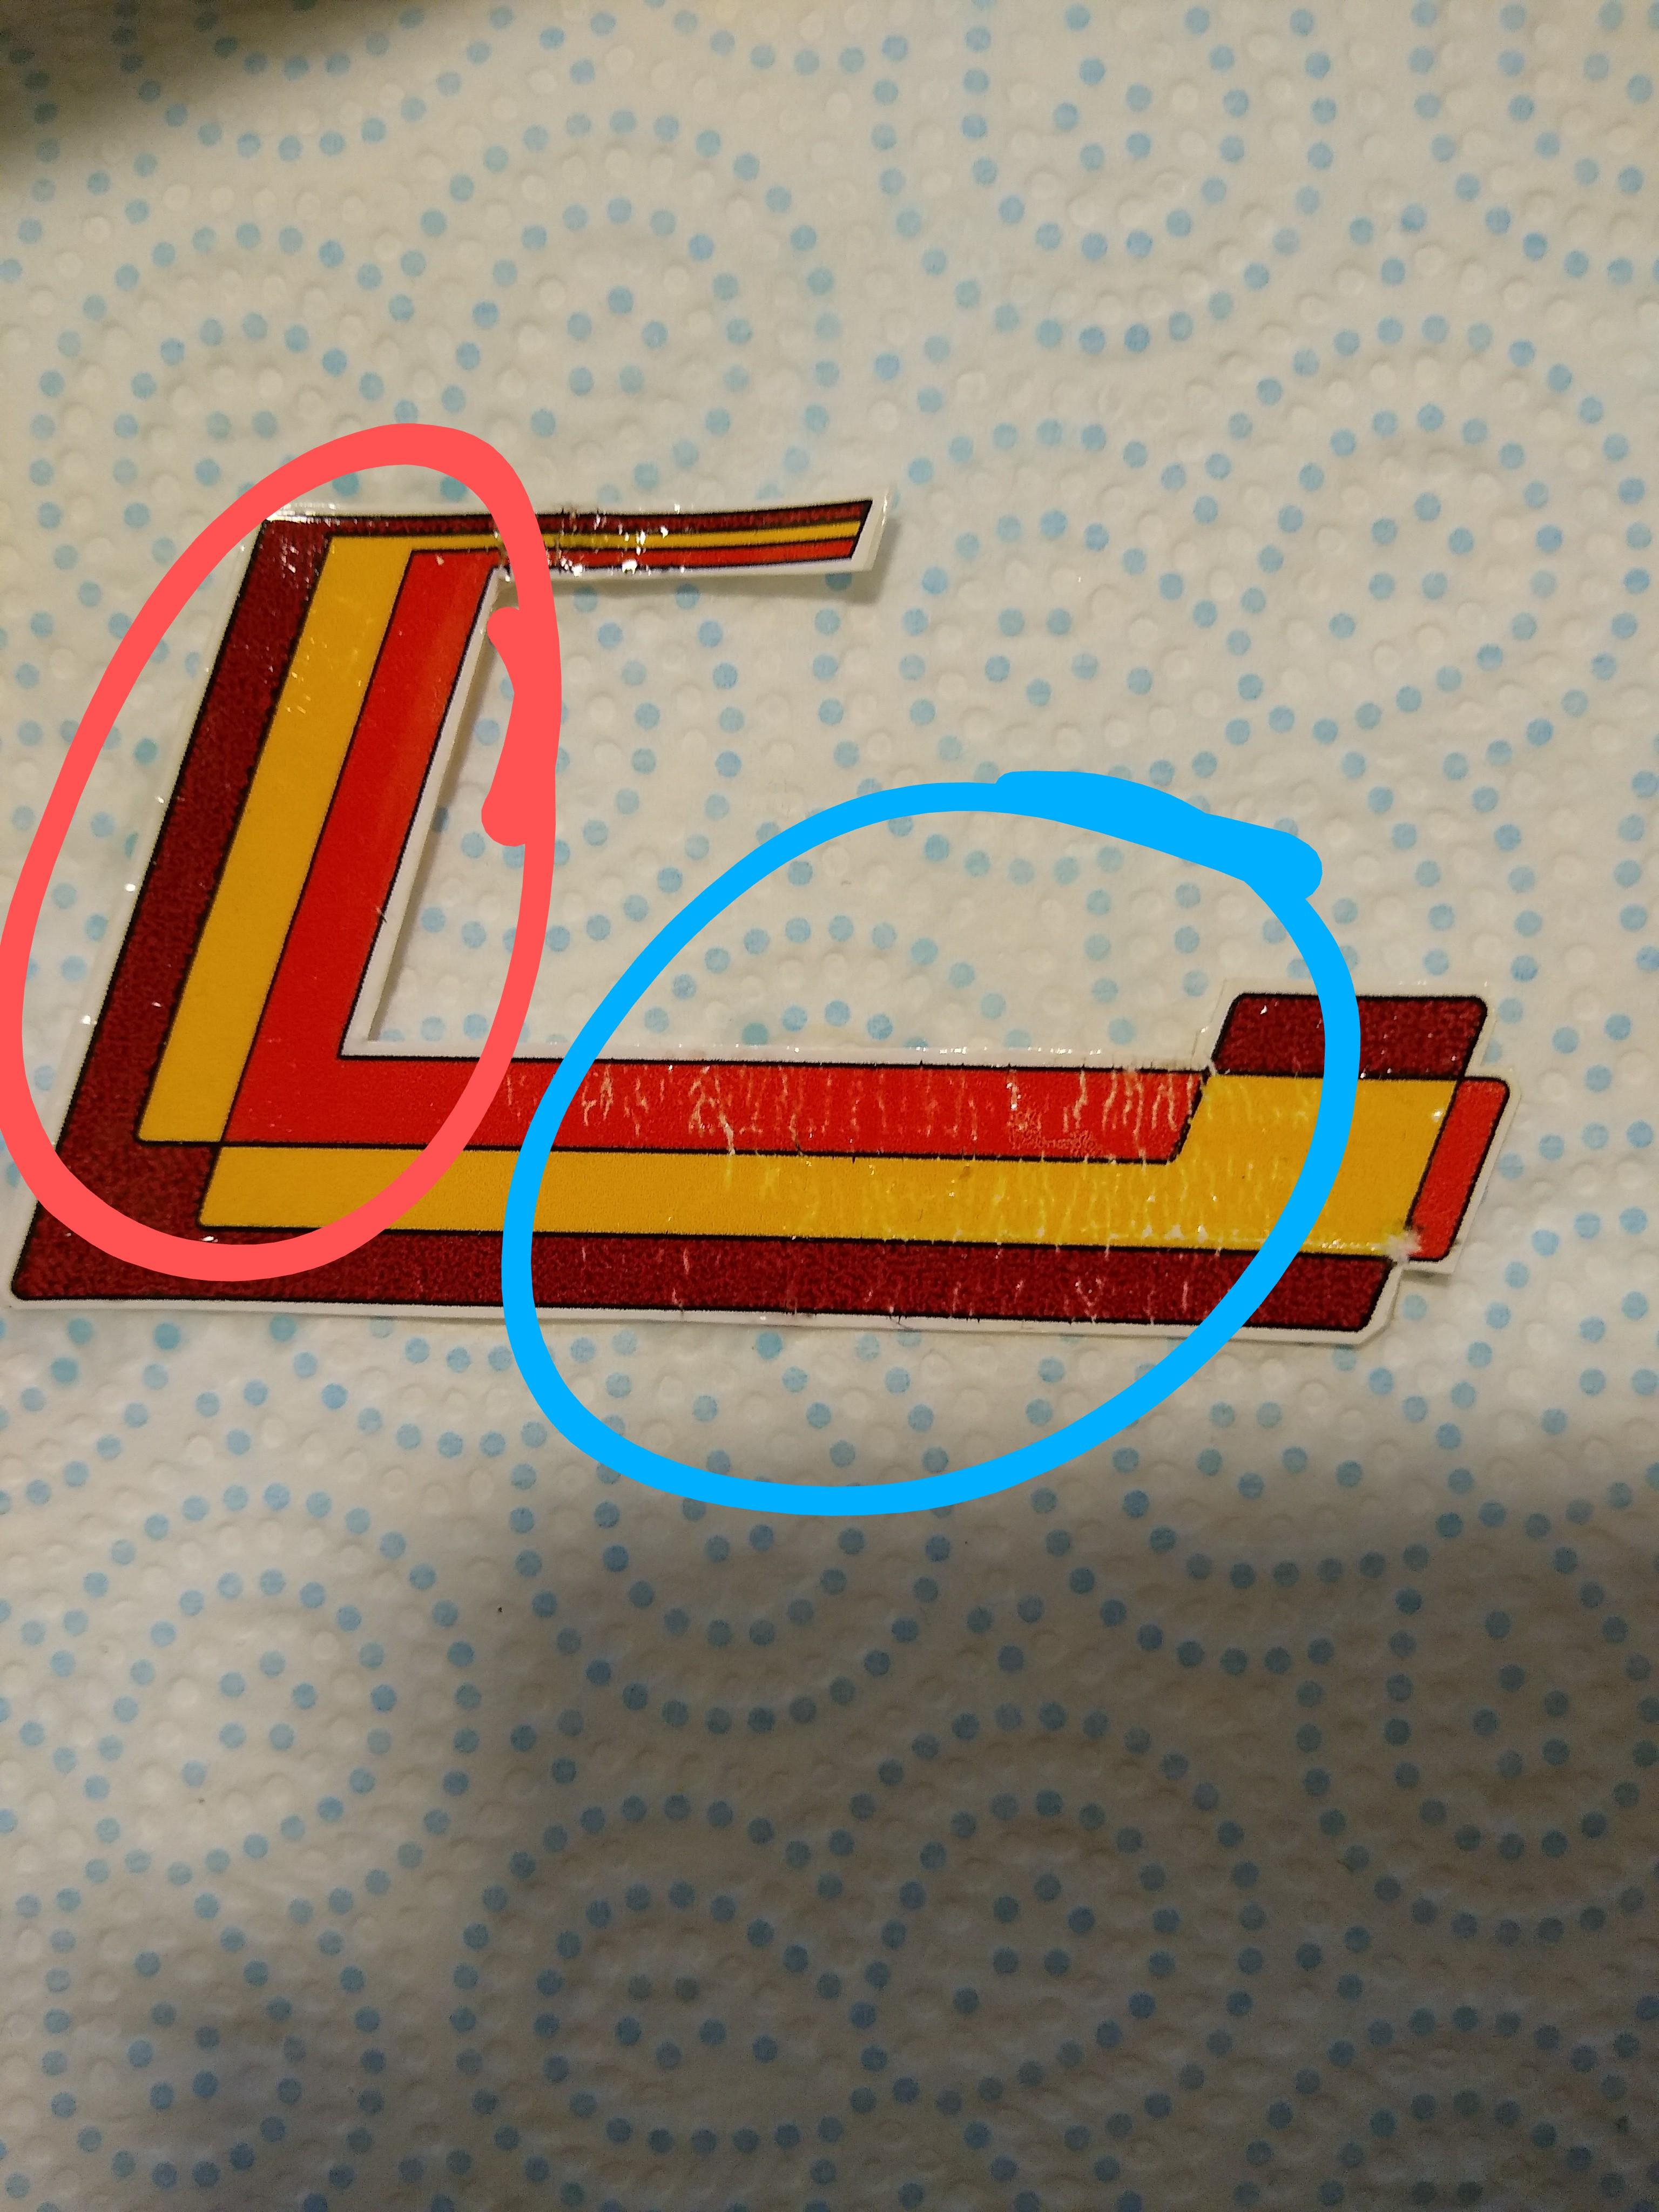
Sorry Clayton, didn't mention it above but dutifully done, two coats, applied to two sets of stripes and still they crack up. That's what is so galling about the situation, and that's why I reckon the paper's shot, like the film I'm printing on to is cracked through being bent or stored incorrectly. Otherwise, why would half of the decal be perfect (circled red) and the other half disintegrate (blue circle) ? ?
-
GMC General Wrecker
Rockford replied to Warren D's topic in WIP: Model Trucks: Big Rigs and Heavy Equipment
That's a great looking truck. You're doing great work here. -
An admirable project. That's small! I'd be scared of dropping it and losing it. I seem to spend 50% of my modelling time looking for things I've dropped.
-
Ponsse Elephant 1/25 (forwarder)
Rockford replied to PierreR89's topic in WIP: Model Trucks: Big Rigs and Heavy Equipment
Interesting subject. I've done similar to diecast cars, adding plug wires etc...