mr moto
-
Posts
1,348 -
Joined
-
Last visited
Content Type
Profiles
Forums
Events
Gallery
Everything posted by mr moto
-
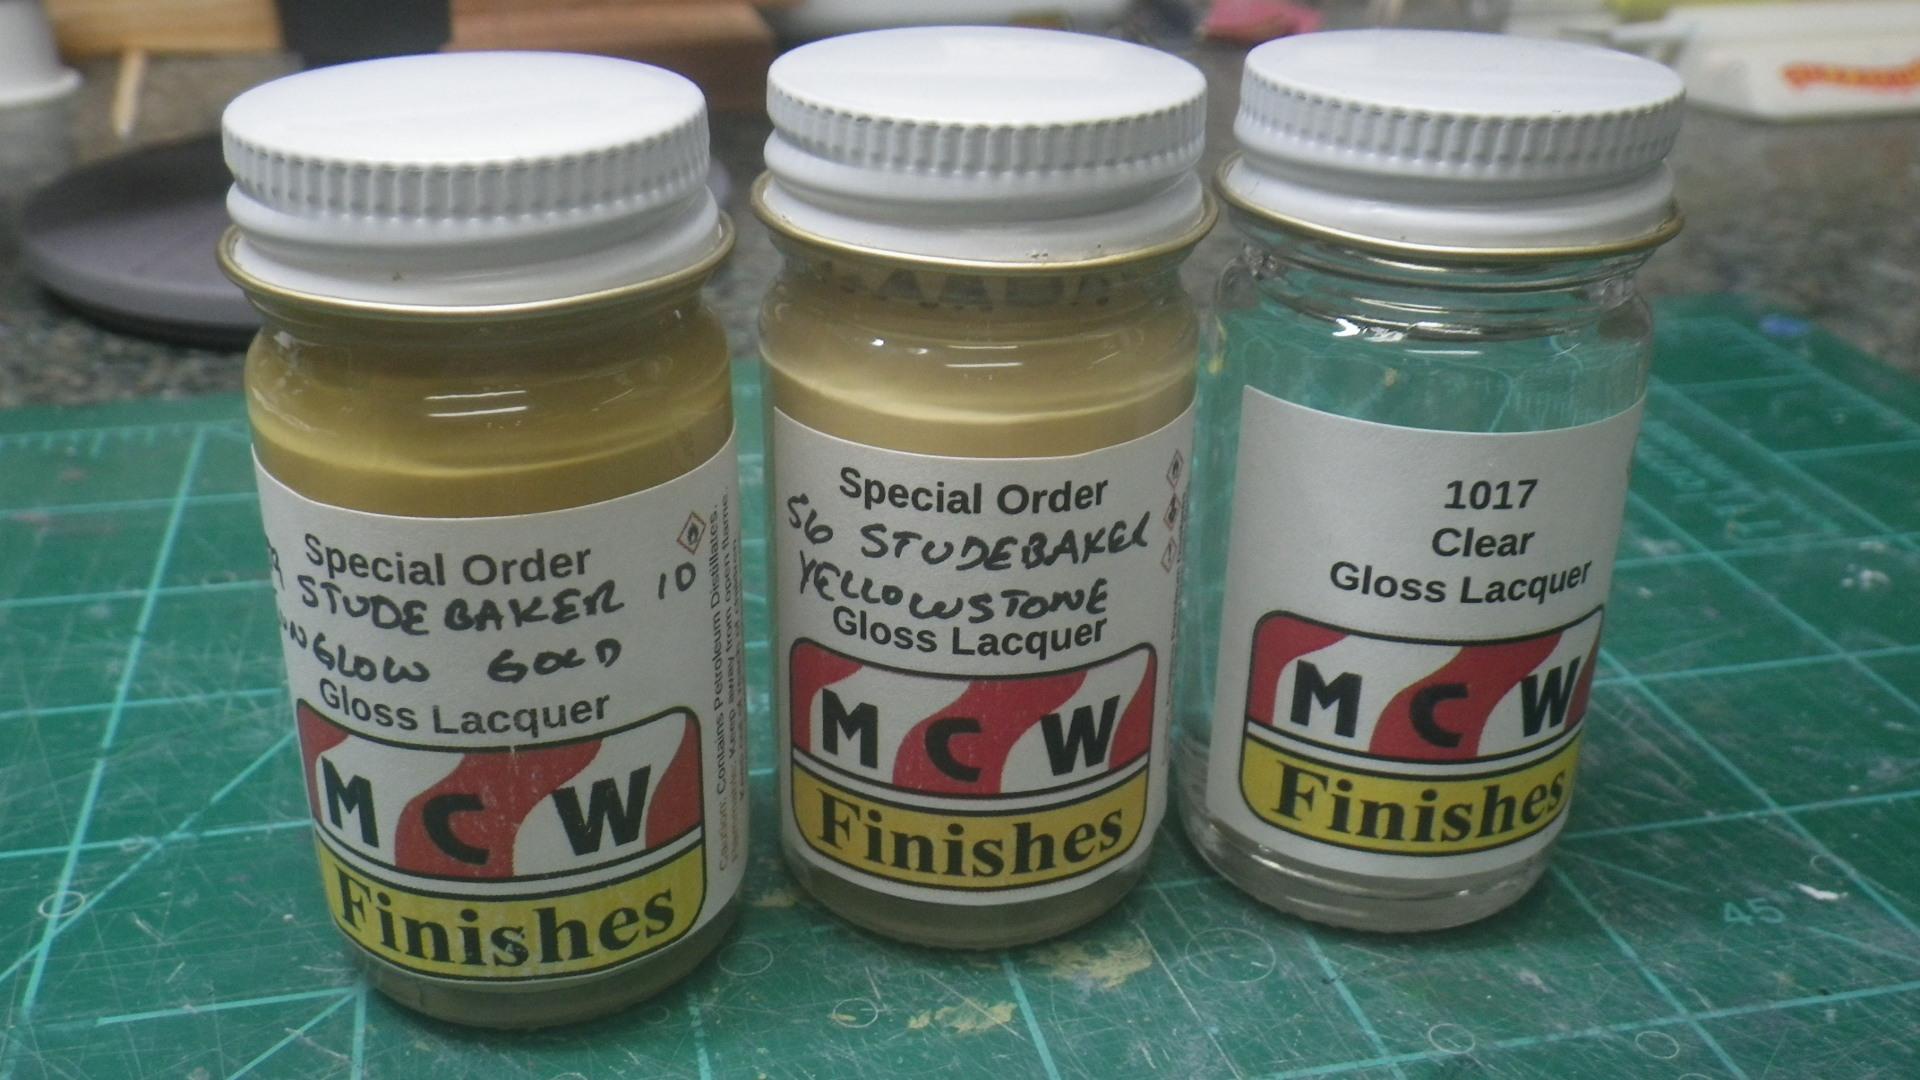
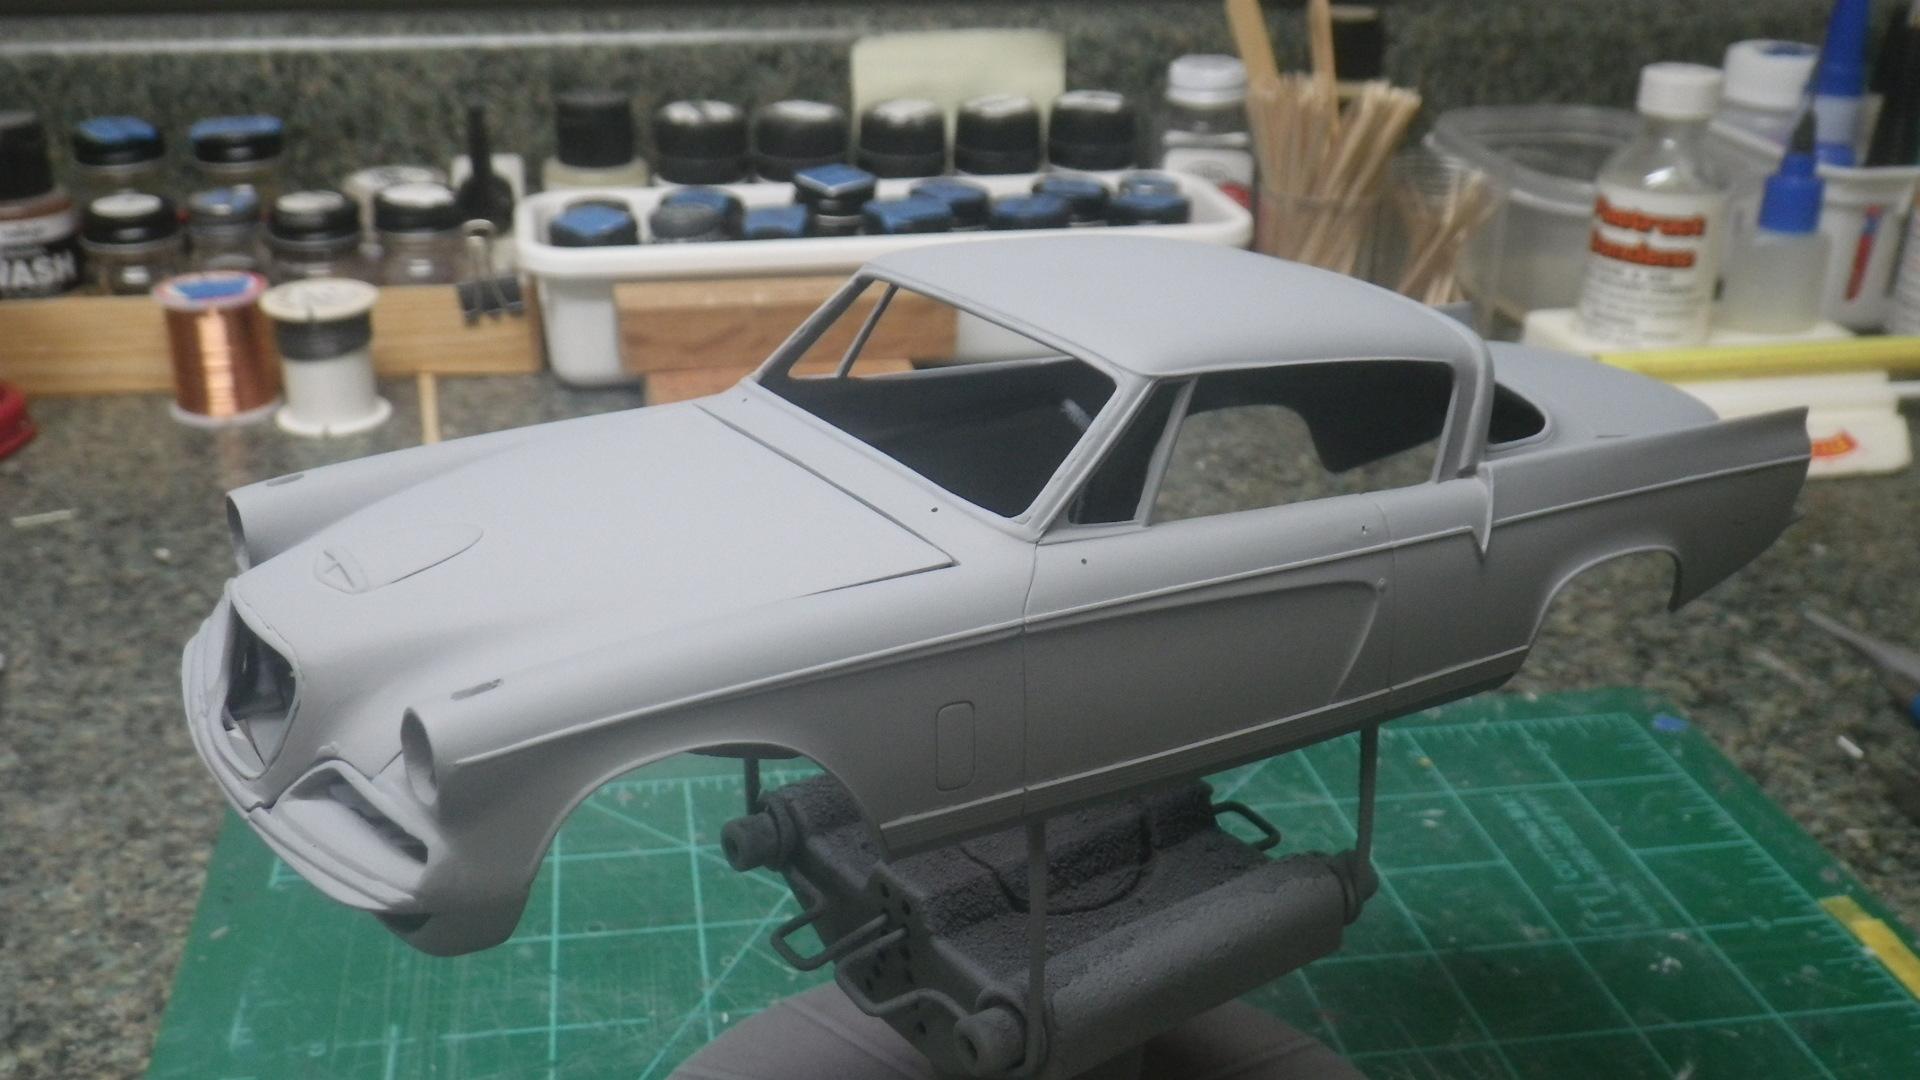
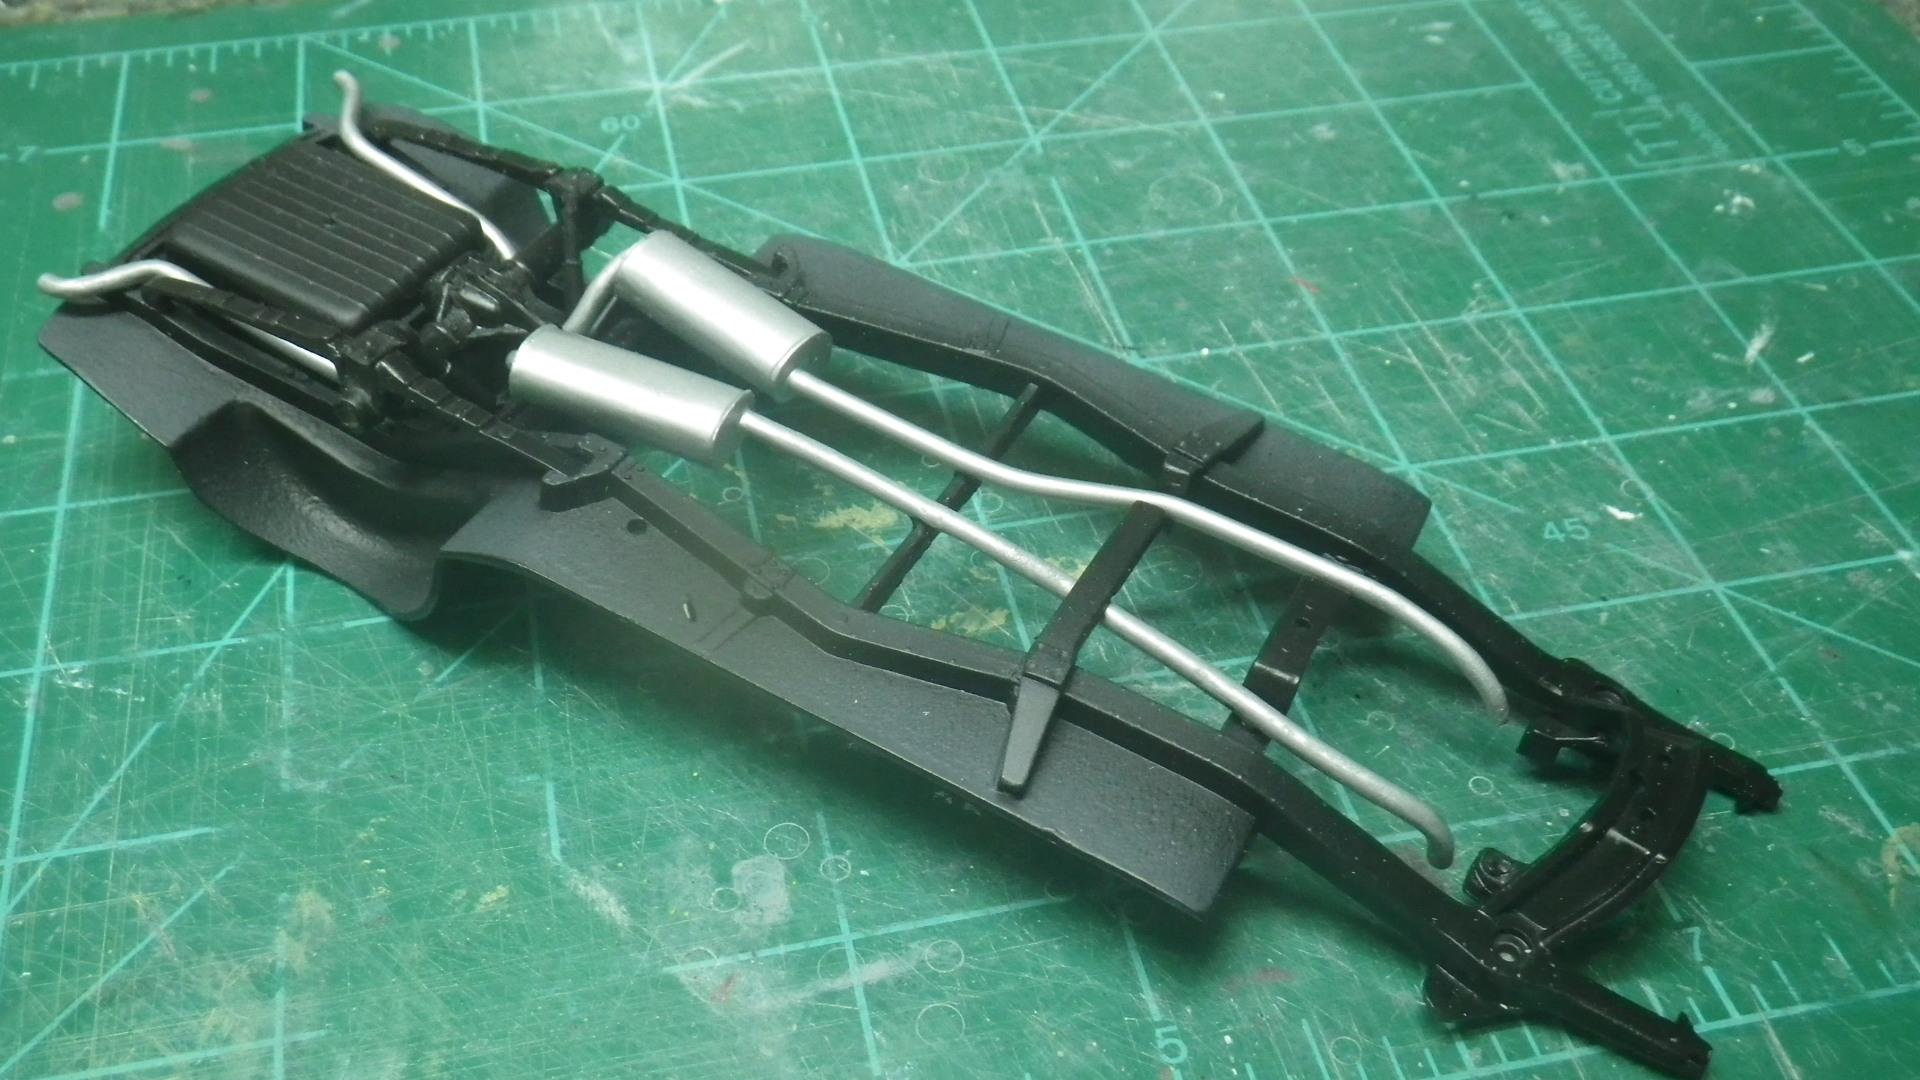
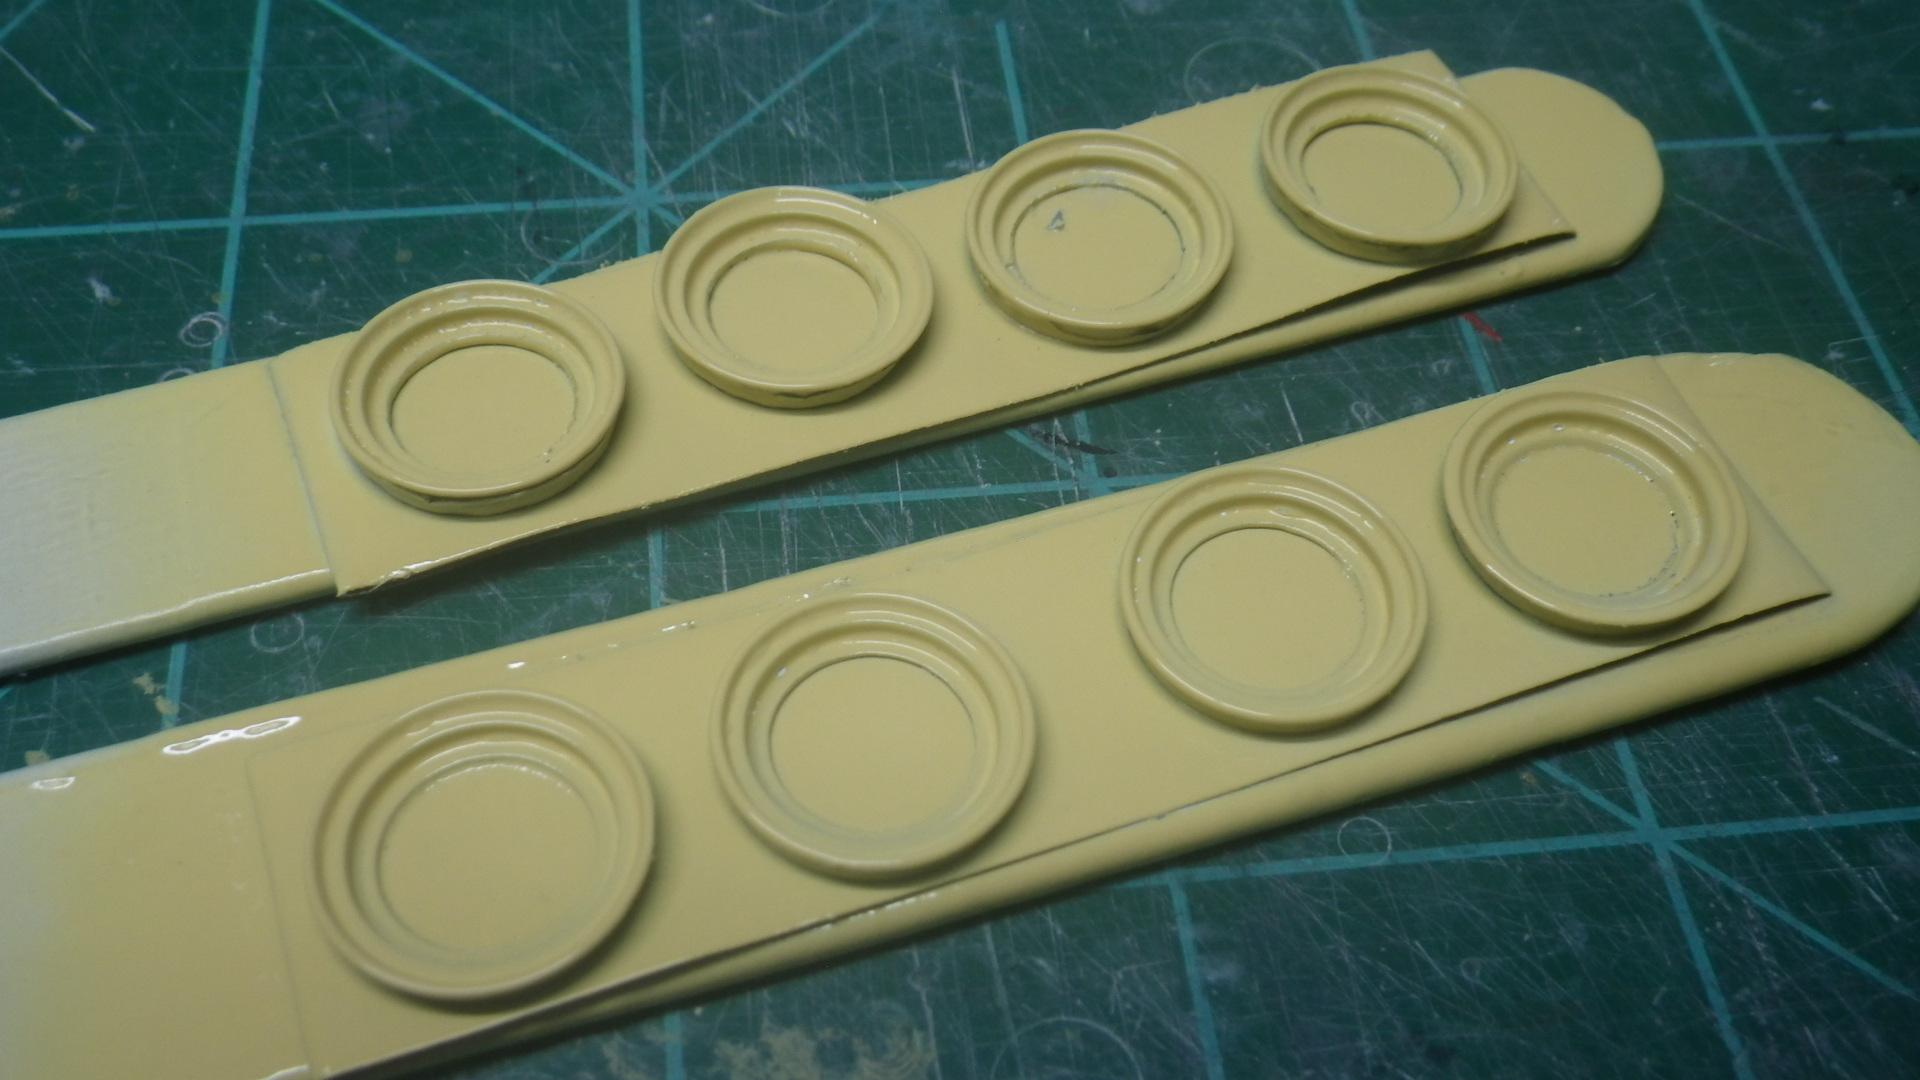
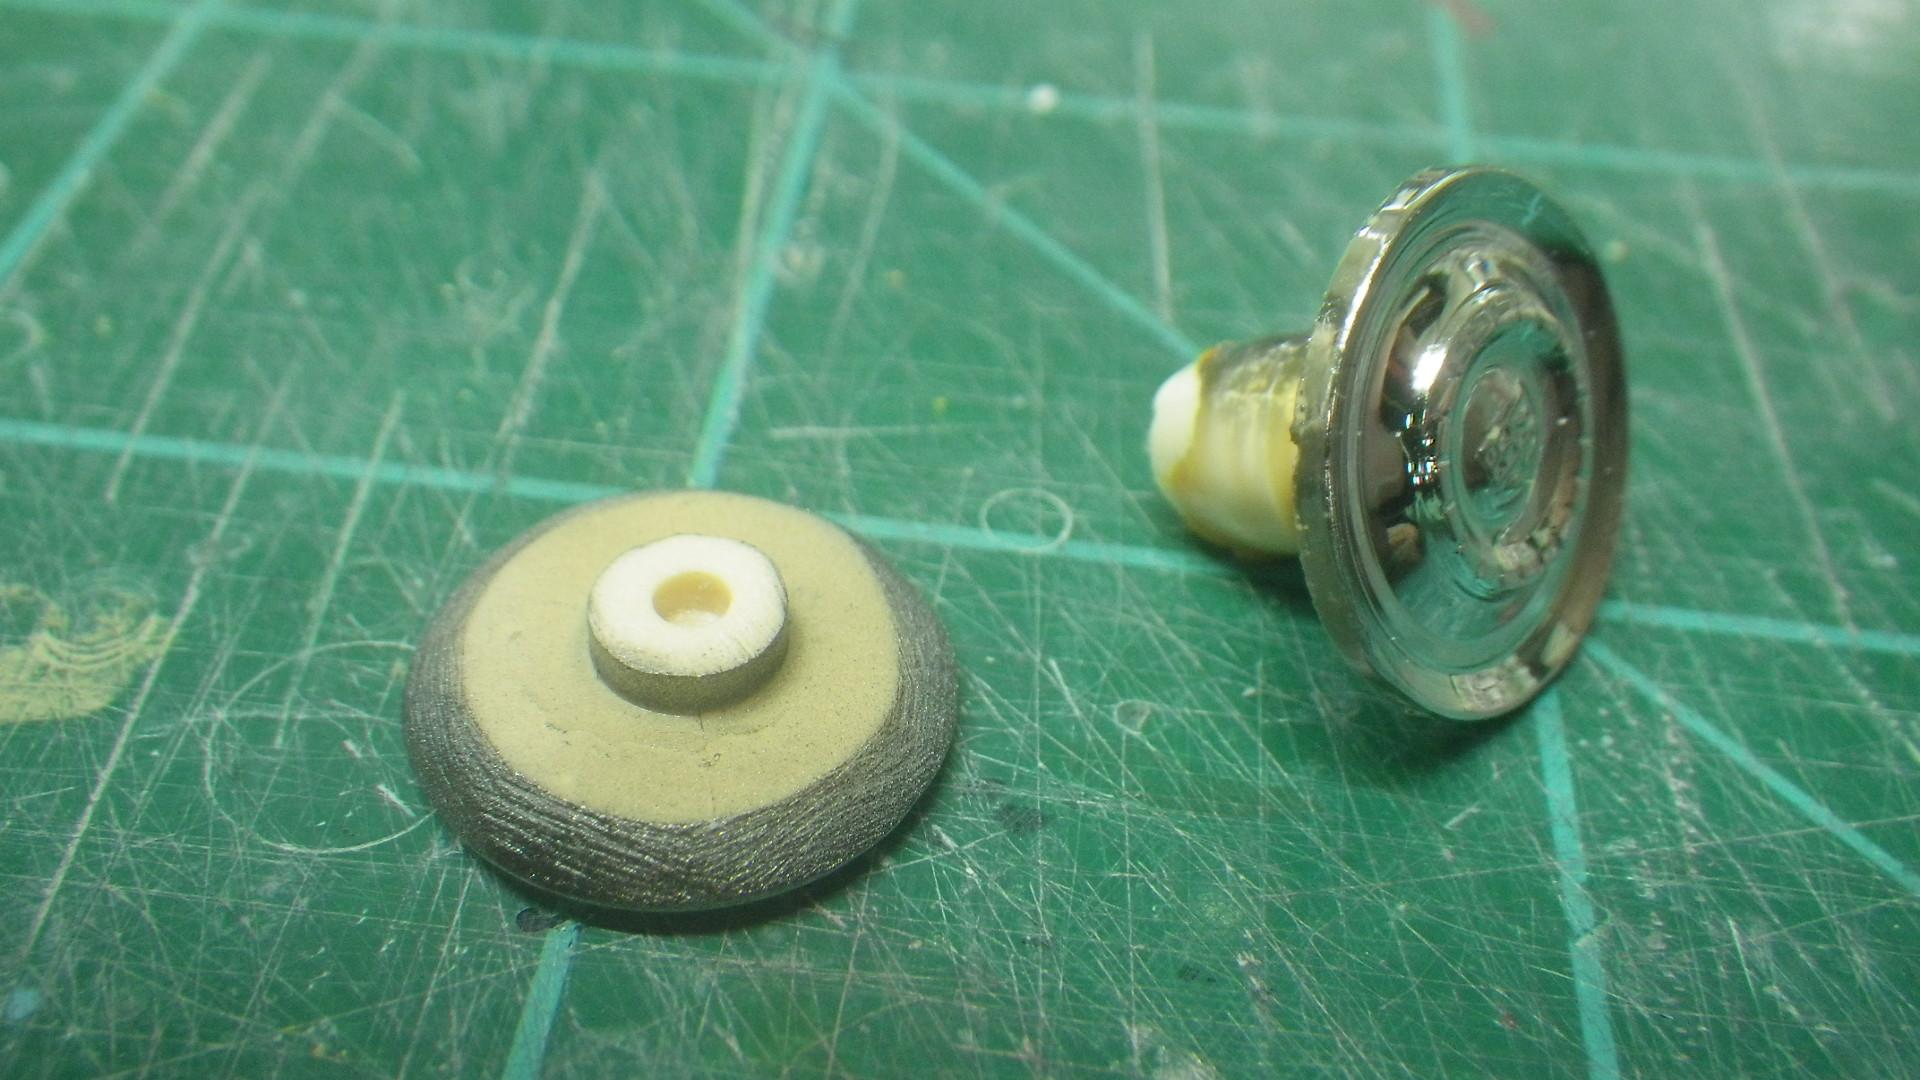
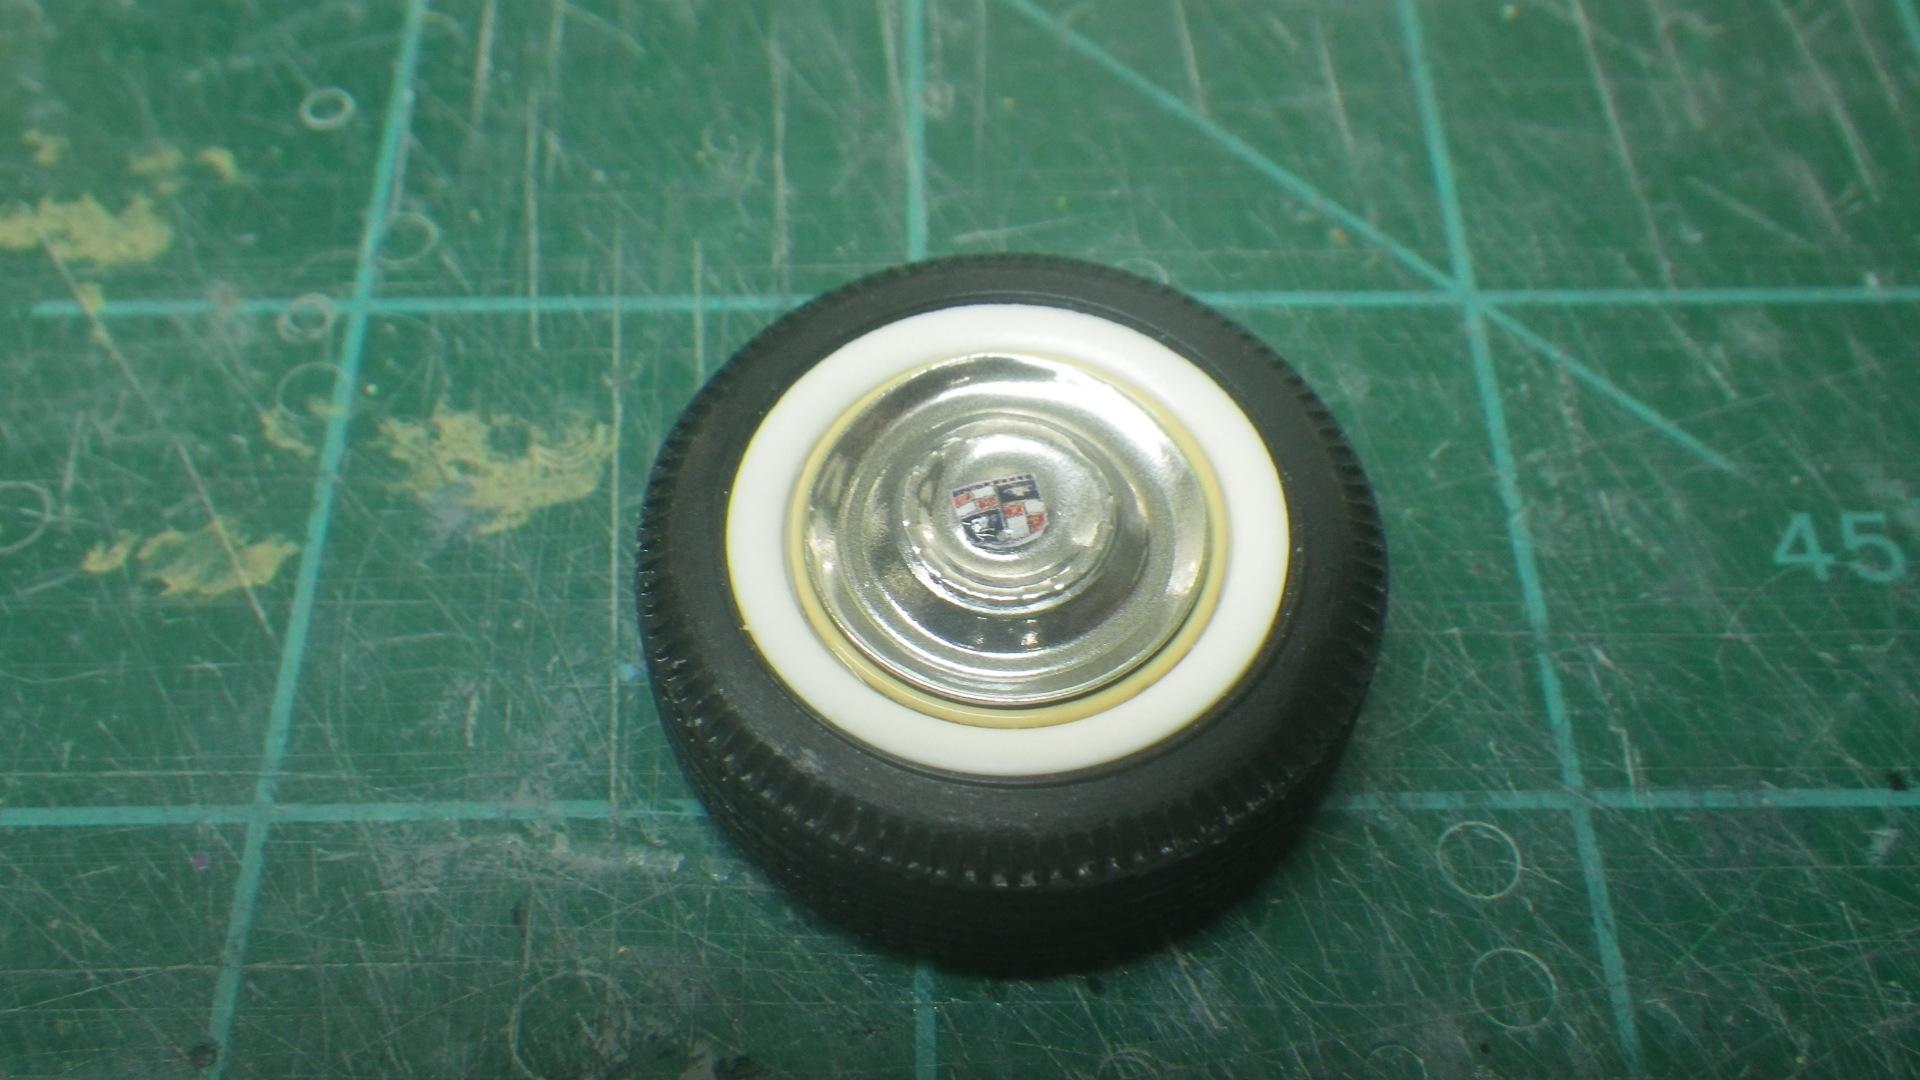
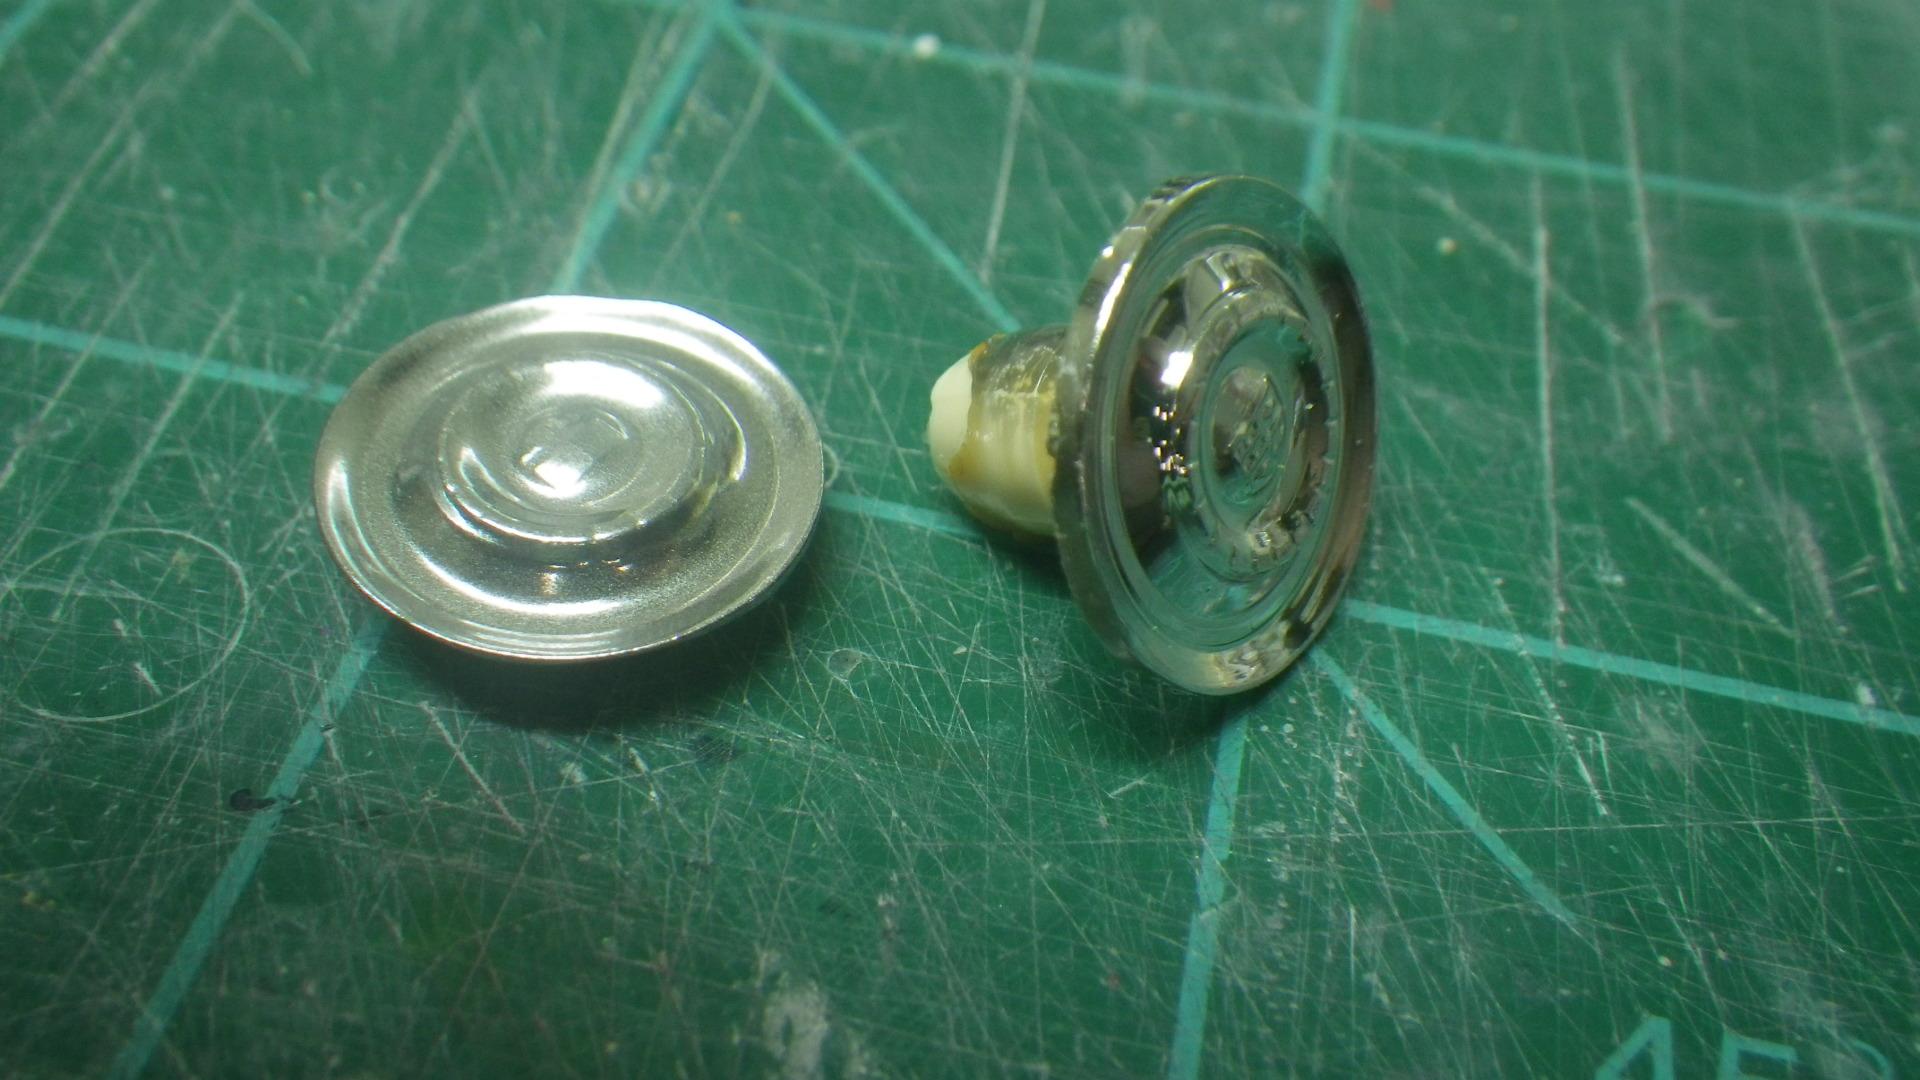
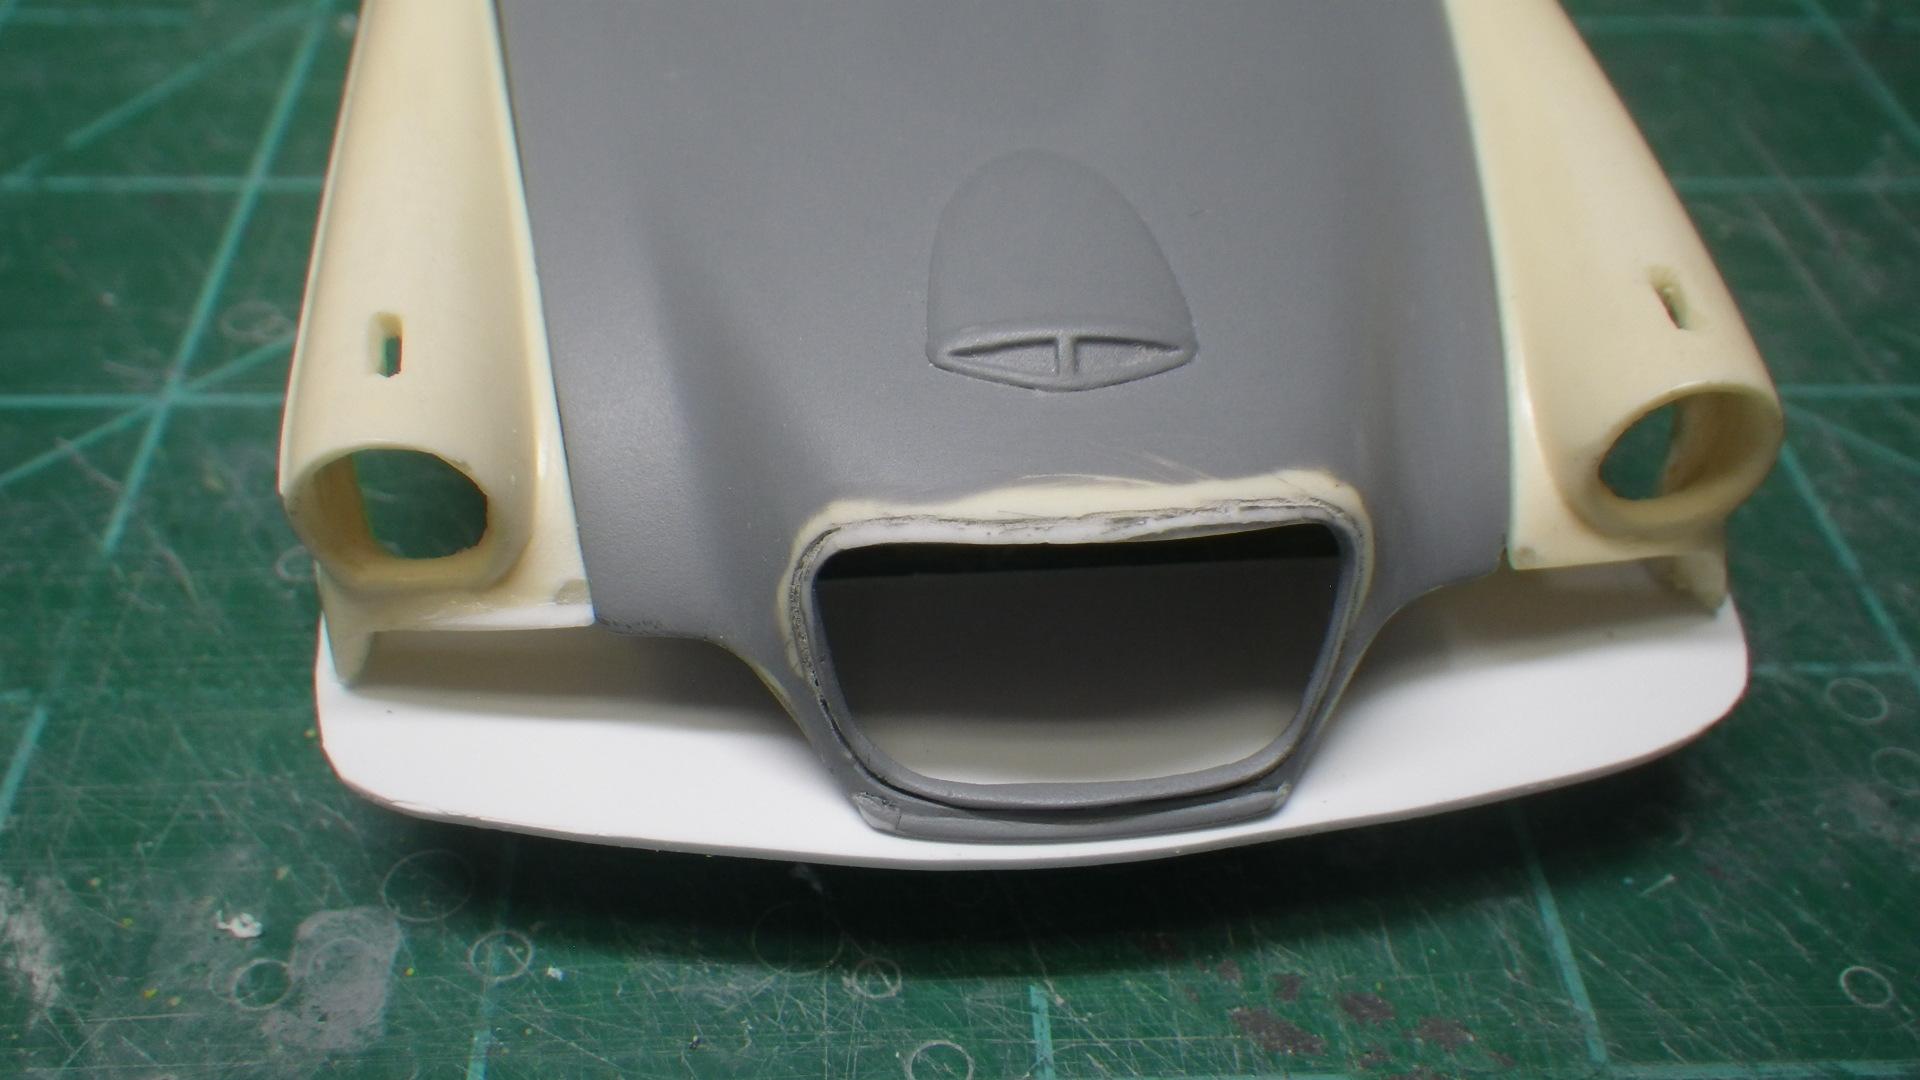
As promised, I'm back with another update. At this point, the build is starting to look like something that you could call a model car - it's about time! After completing the front end plastic surgery the body was finally ready for primer and after a good post-primer looking over I was amazed that it didn't reveal any major problems. There was just one little easy-to-fix flaw on a corner of the hood and It was looking like this: And then - just in the nick of time - this showed up in the mailbox. MCW is great for providing hard-to-find factory colors (like the ones that Studebakers came in). I've never used their clear before but if it's as good as their other paints it'll be great. The paint scheme I've chosen wasn't on of the most popular but It's one of the most mid-1950's-ish paint jobs I can imagine. Those bright, splashy, multi-color paint schemes were almost exclusive to the mid 50's. This one has the rather poetic name of "Sunglow over Yellowstone." I saw a photo of a 56J painted this way on the net and knew it had to be. In the meantime, the chassis was coming along to the point of having the exhaust and rear axle installed. The chassis is just basic kit assembly from here on. The wheel halves have been painted Yellowstone as the factory would have done: Notice that these are 8 wheel halves but they're all inside wheel halves. Four of them are styrene from the donor kit and four are resin. I needed to do that because the only correct wheel covers available were Modelhaus repops of some ancient AMT promo wheels and they were just a little too small diameter to mount in the tires (Modelhaus #428 medium wide whites). The solution was to use inside wheel halves on the outside too and taper the edges of the wheels to nestle down in them. The promo wheels also had a long neck that had to be cut down. Here's a comparison of before and after: It's all for the good, though. Doing it that way allows the painted edge of the wheels to show just as they do in 1:1. So I'm pretty pleased with it. That's all the progress so far. I'll be back when there's more to show!

-
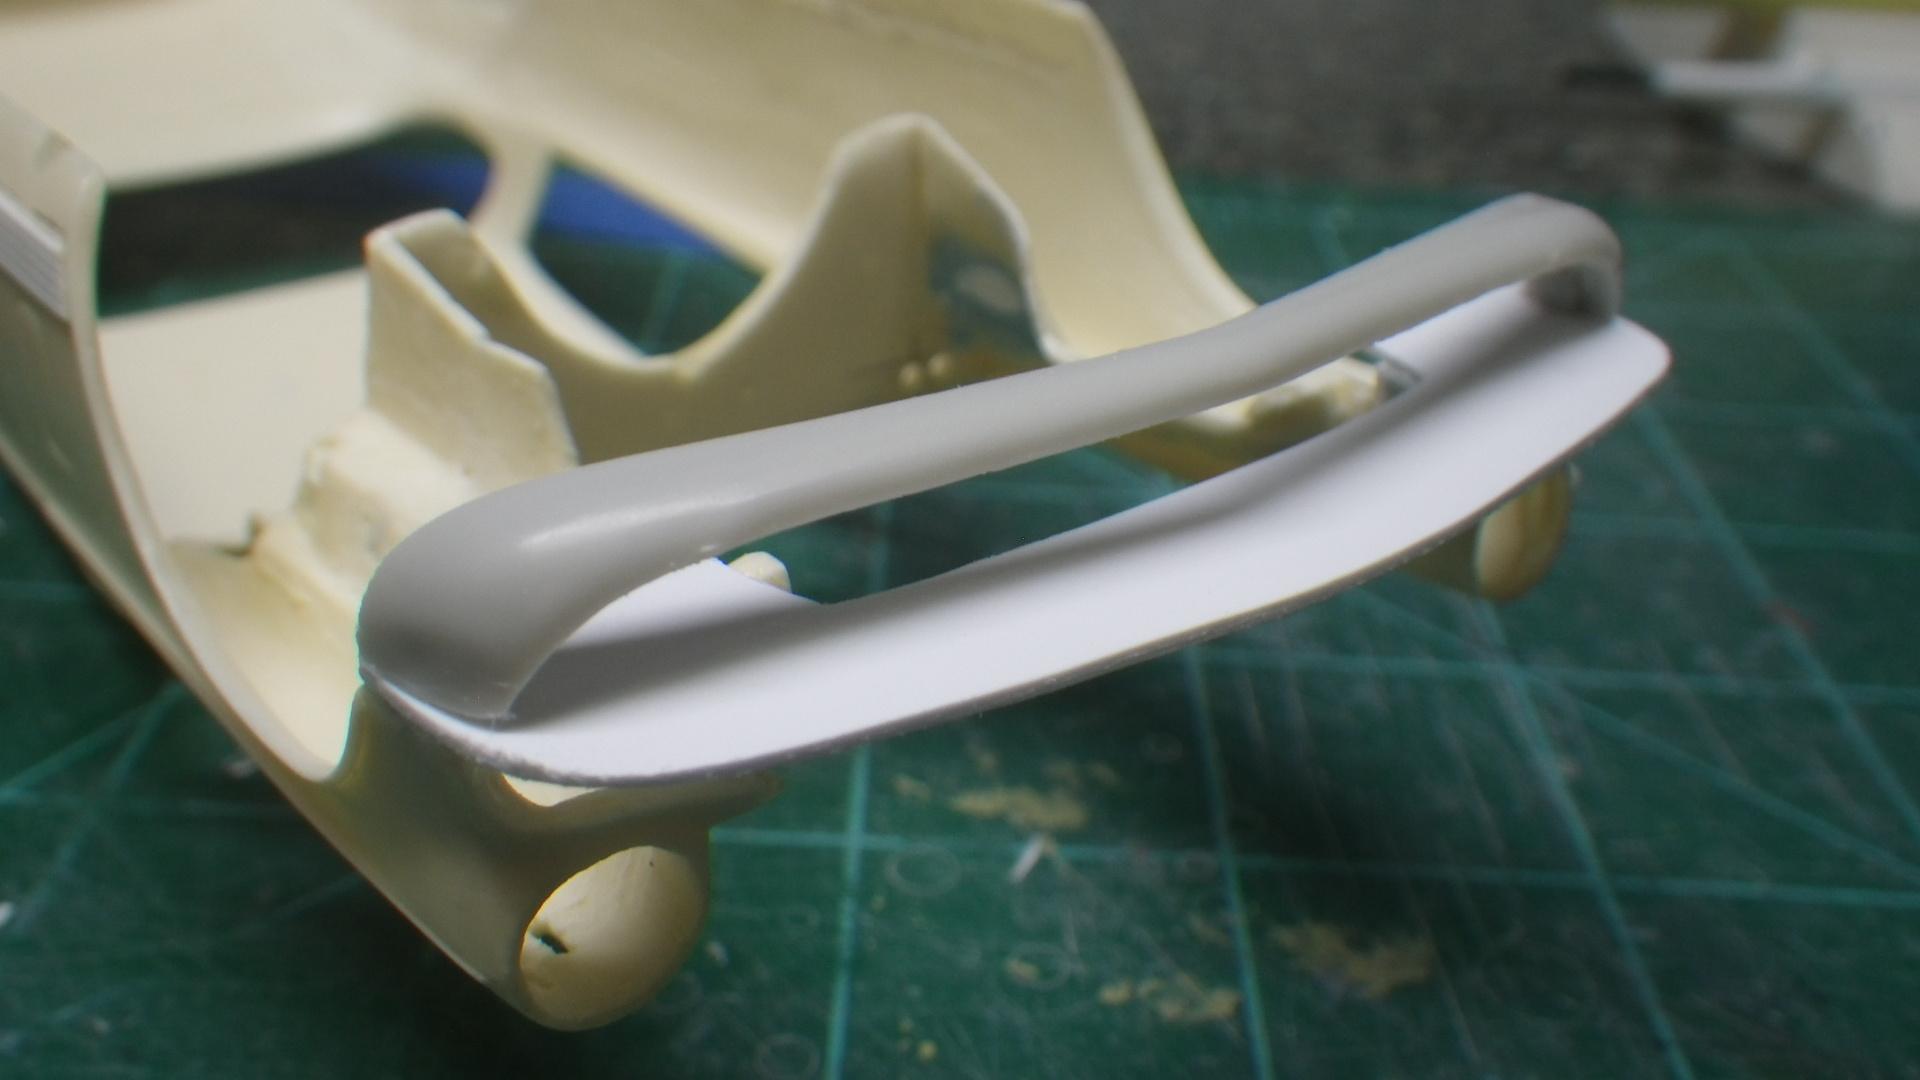
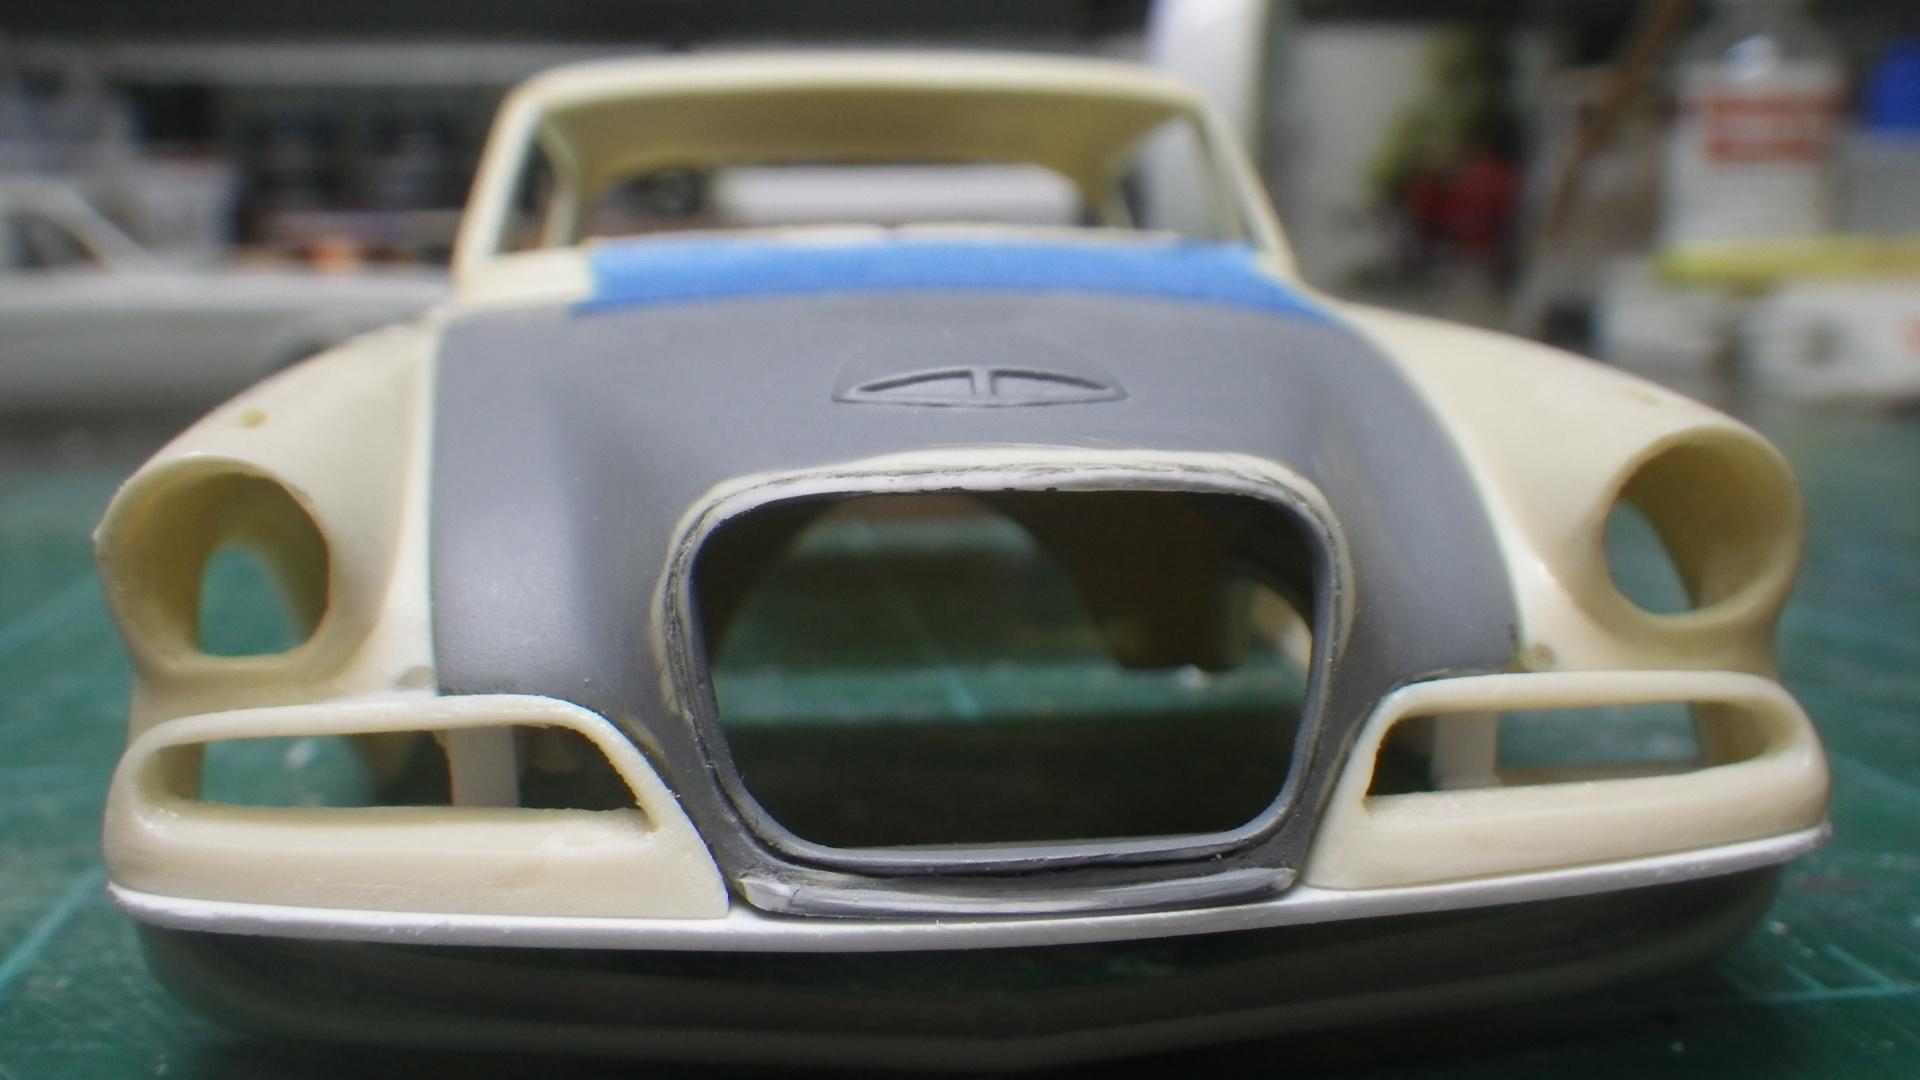
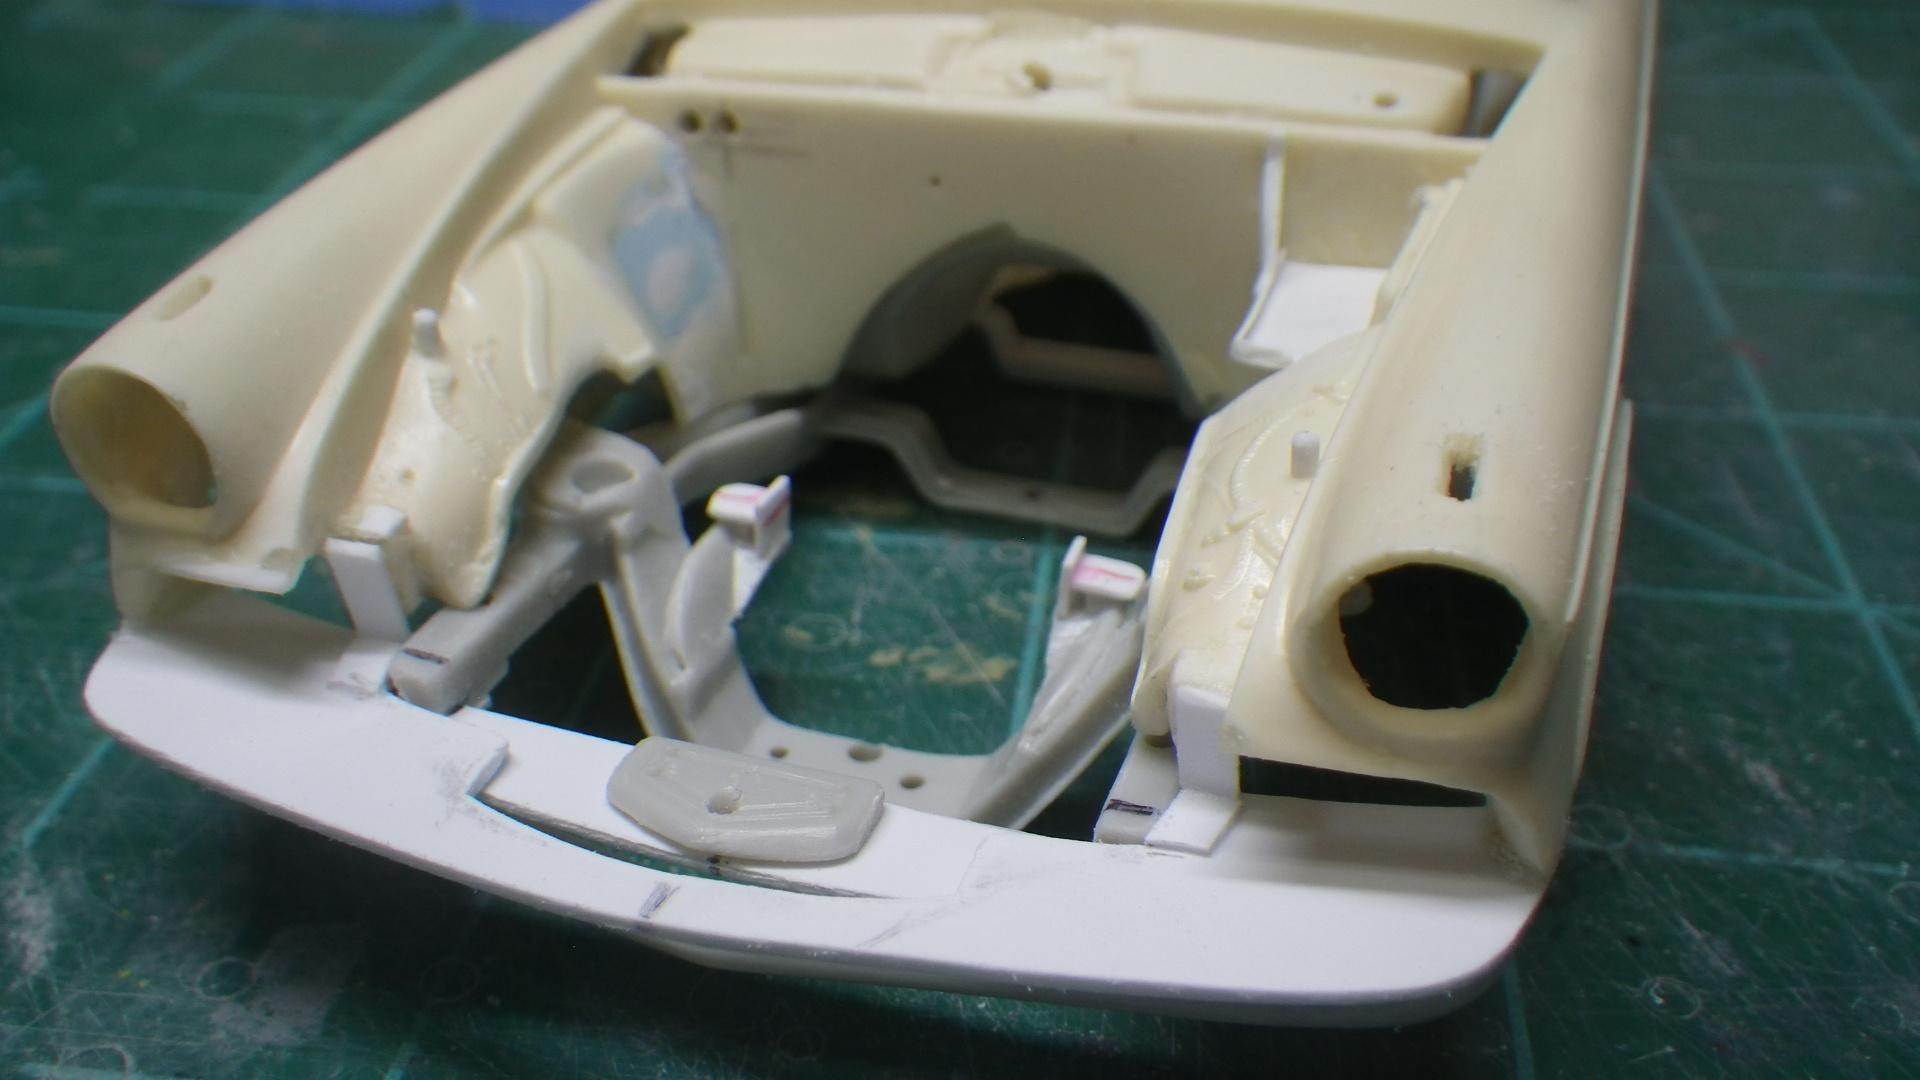
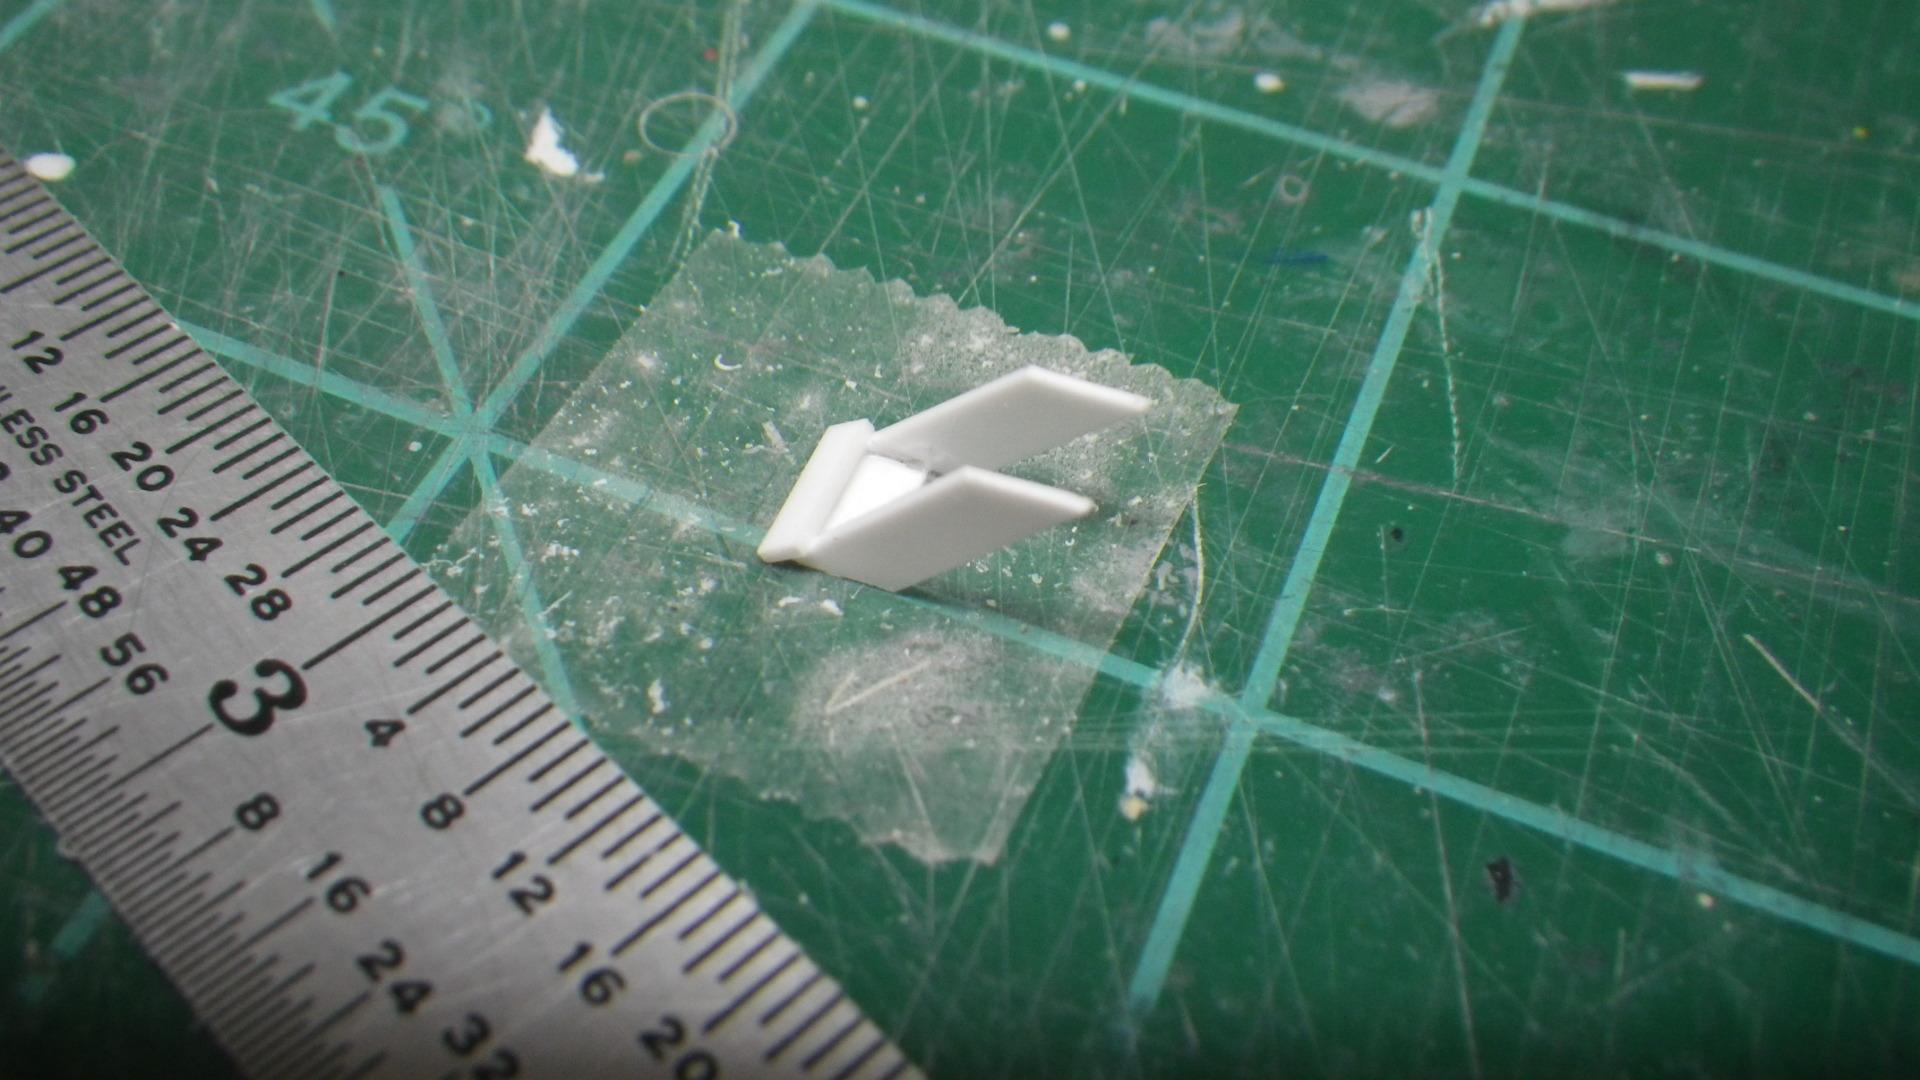
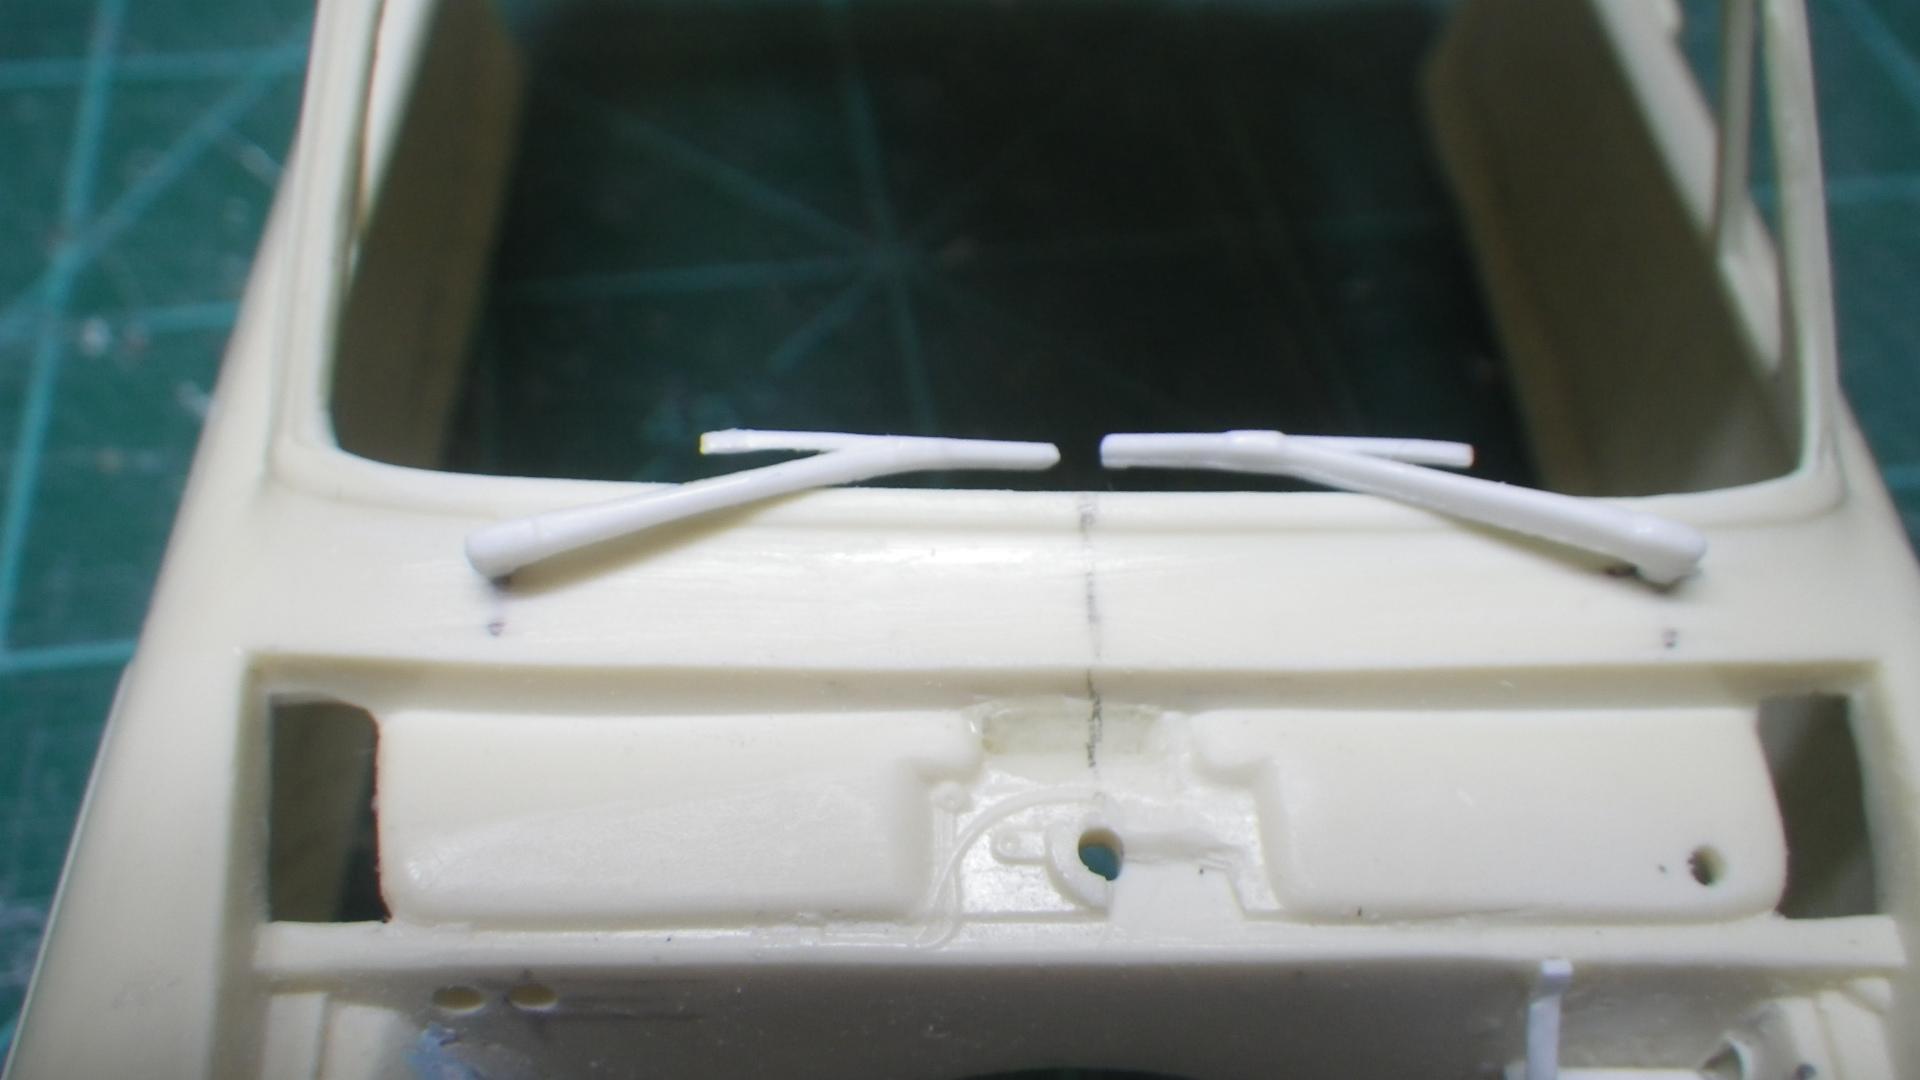
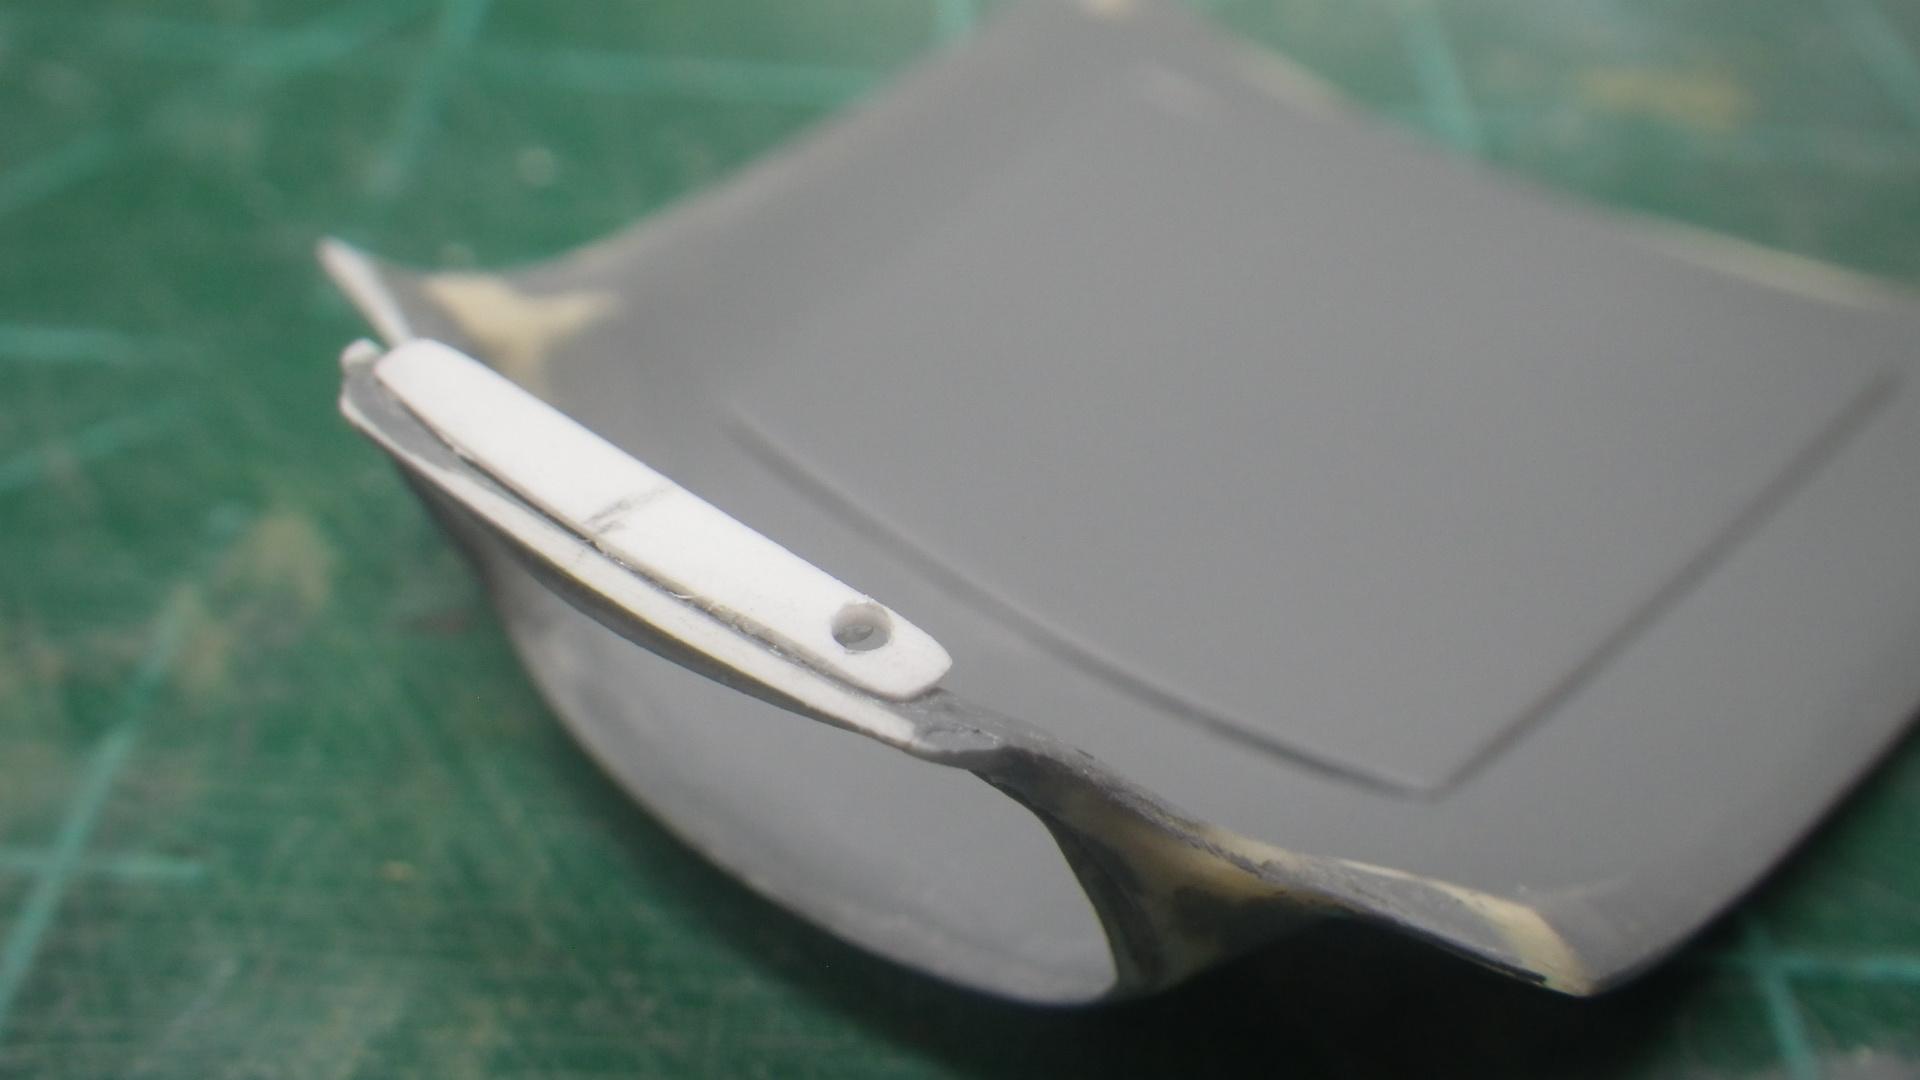
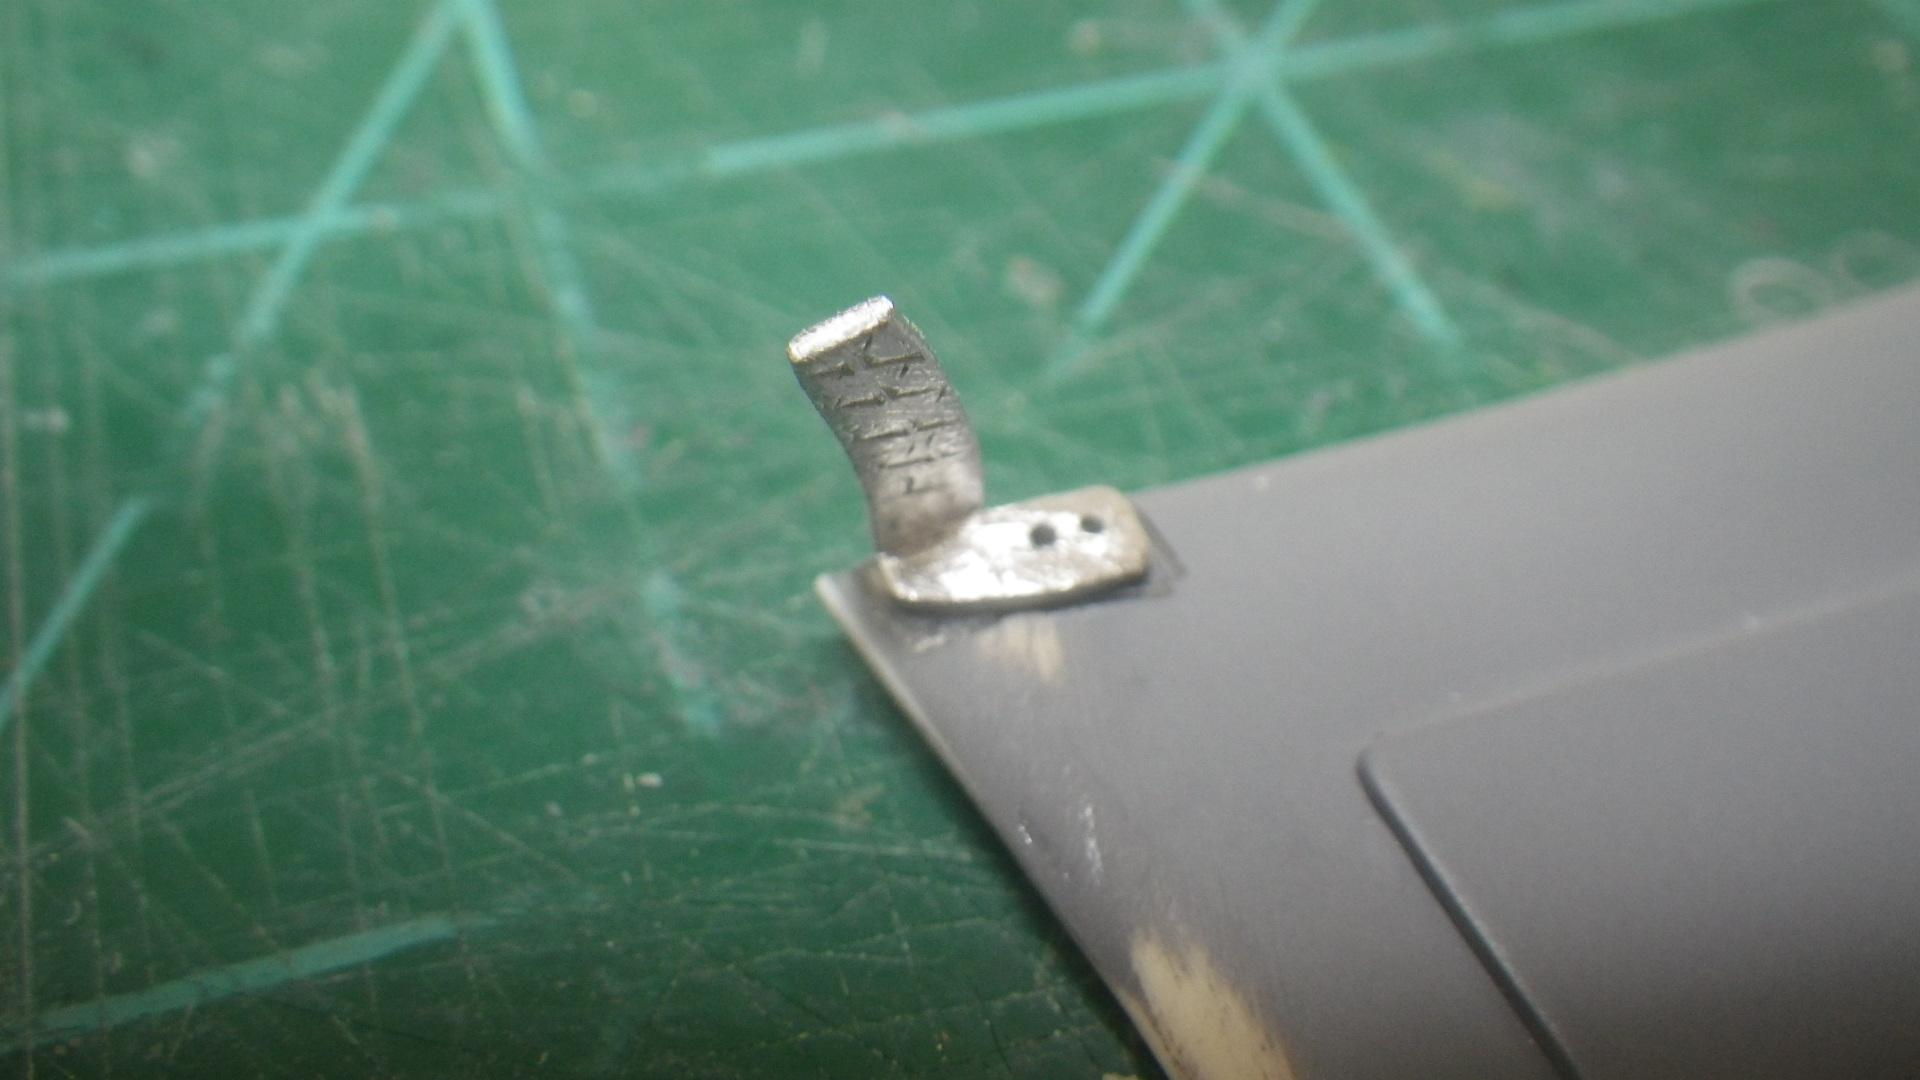
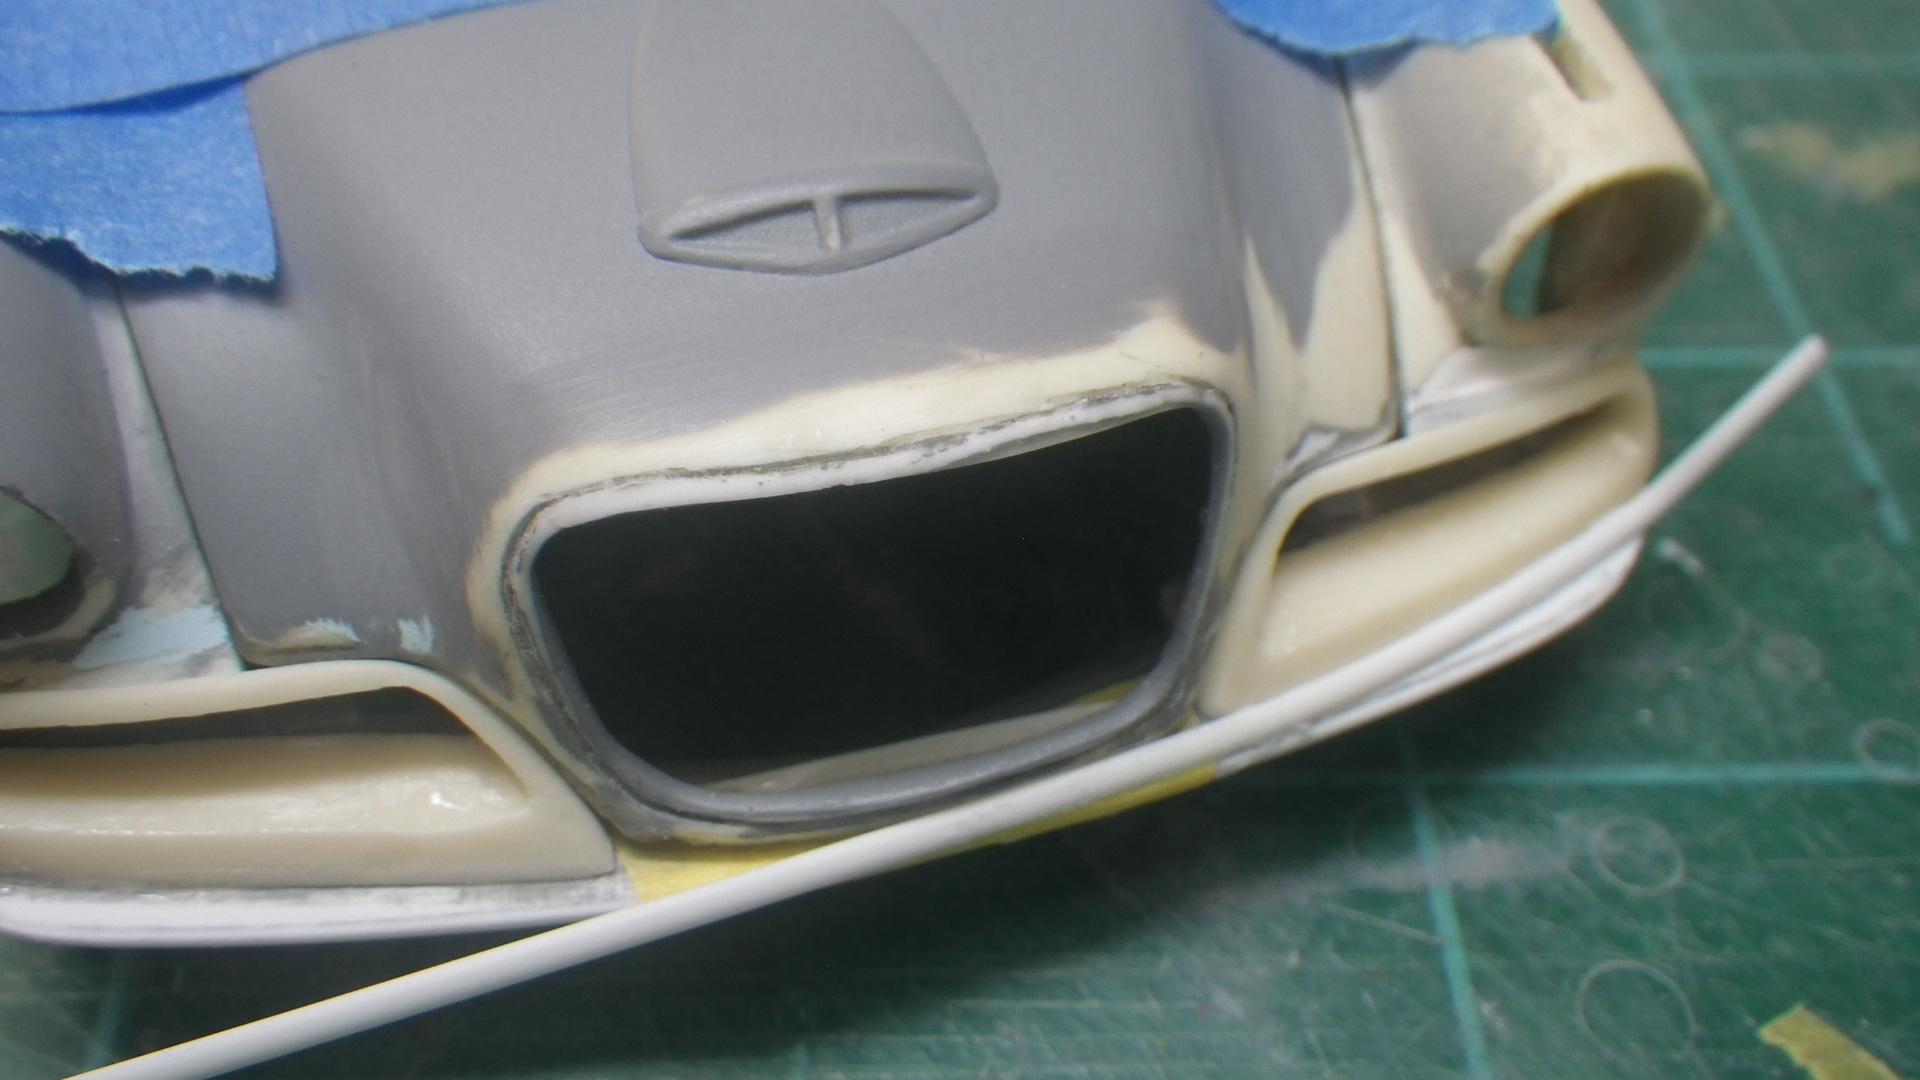
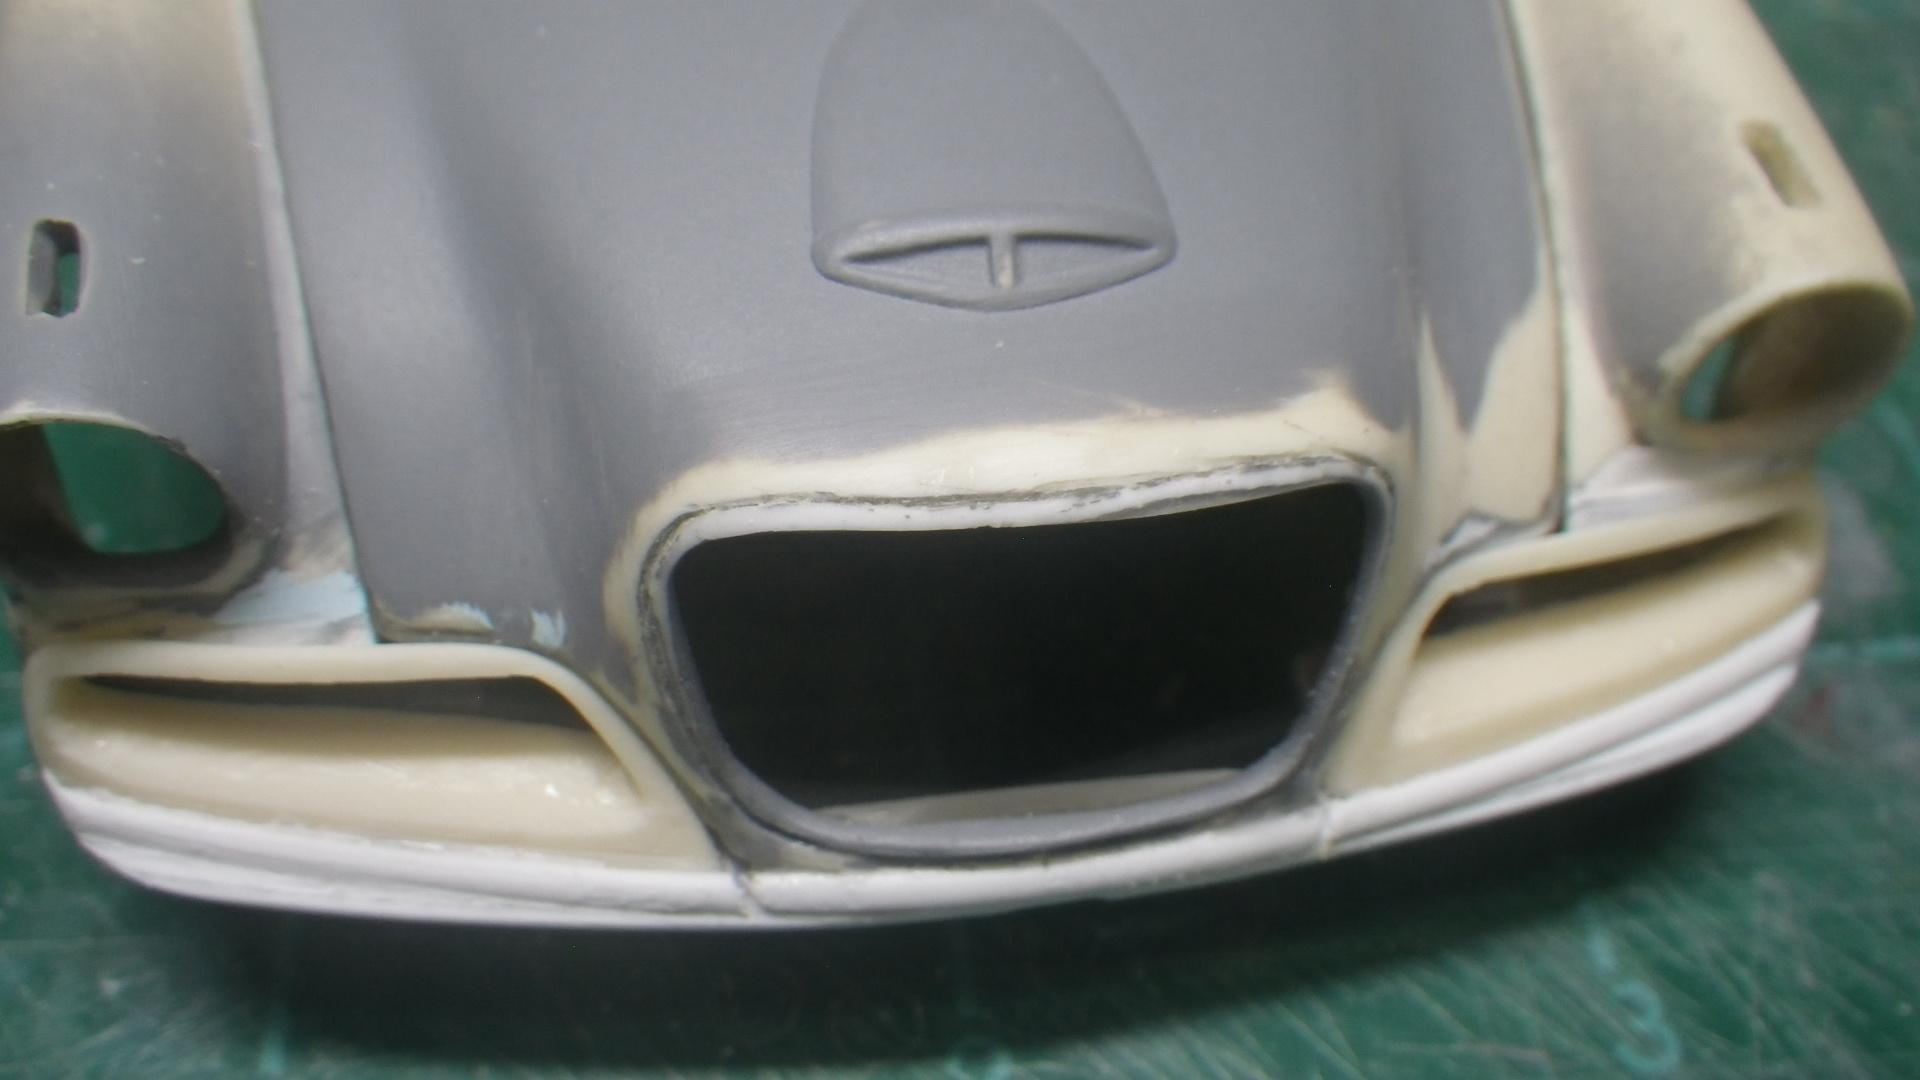
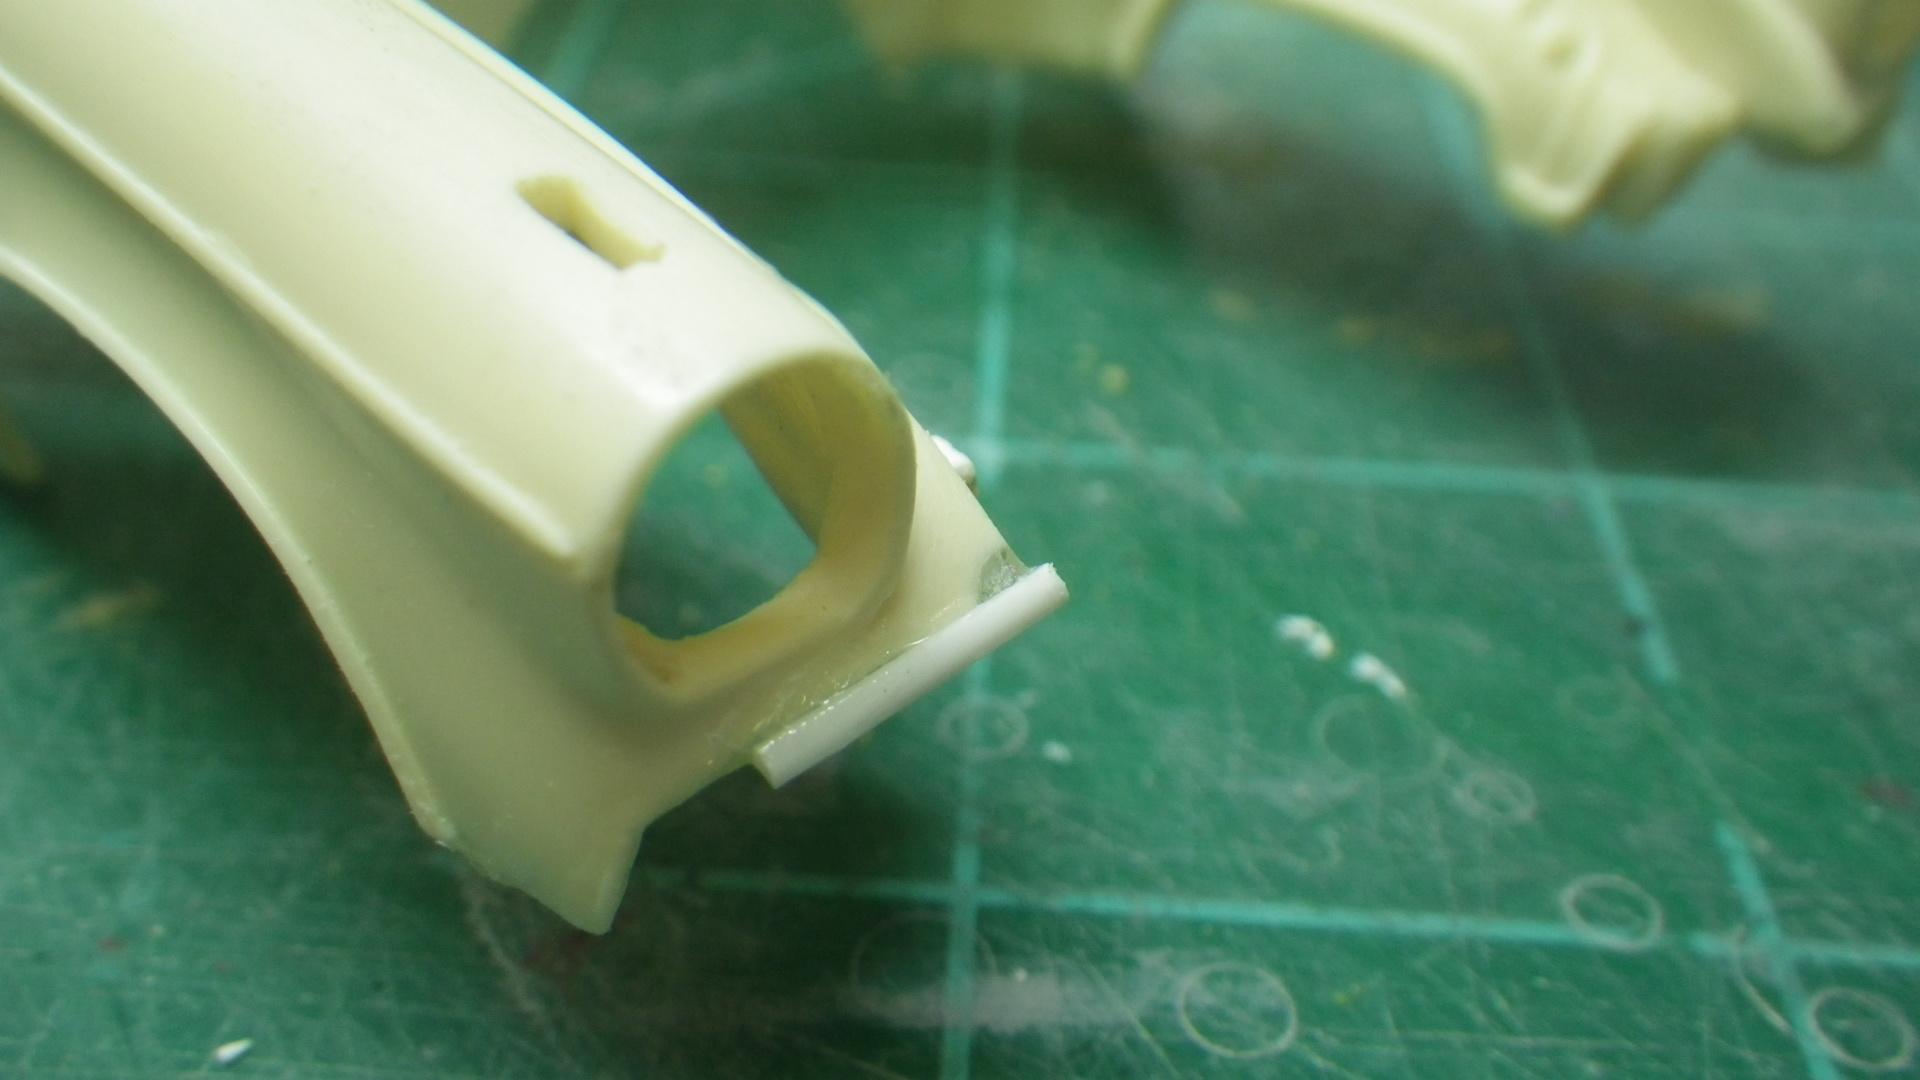
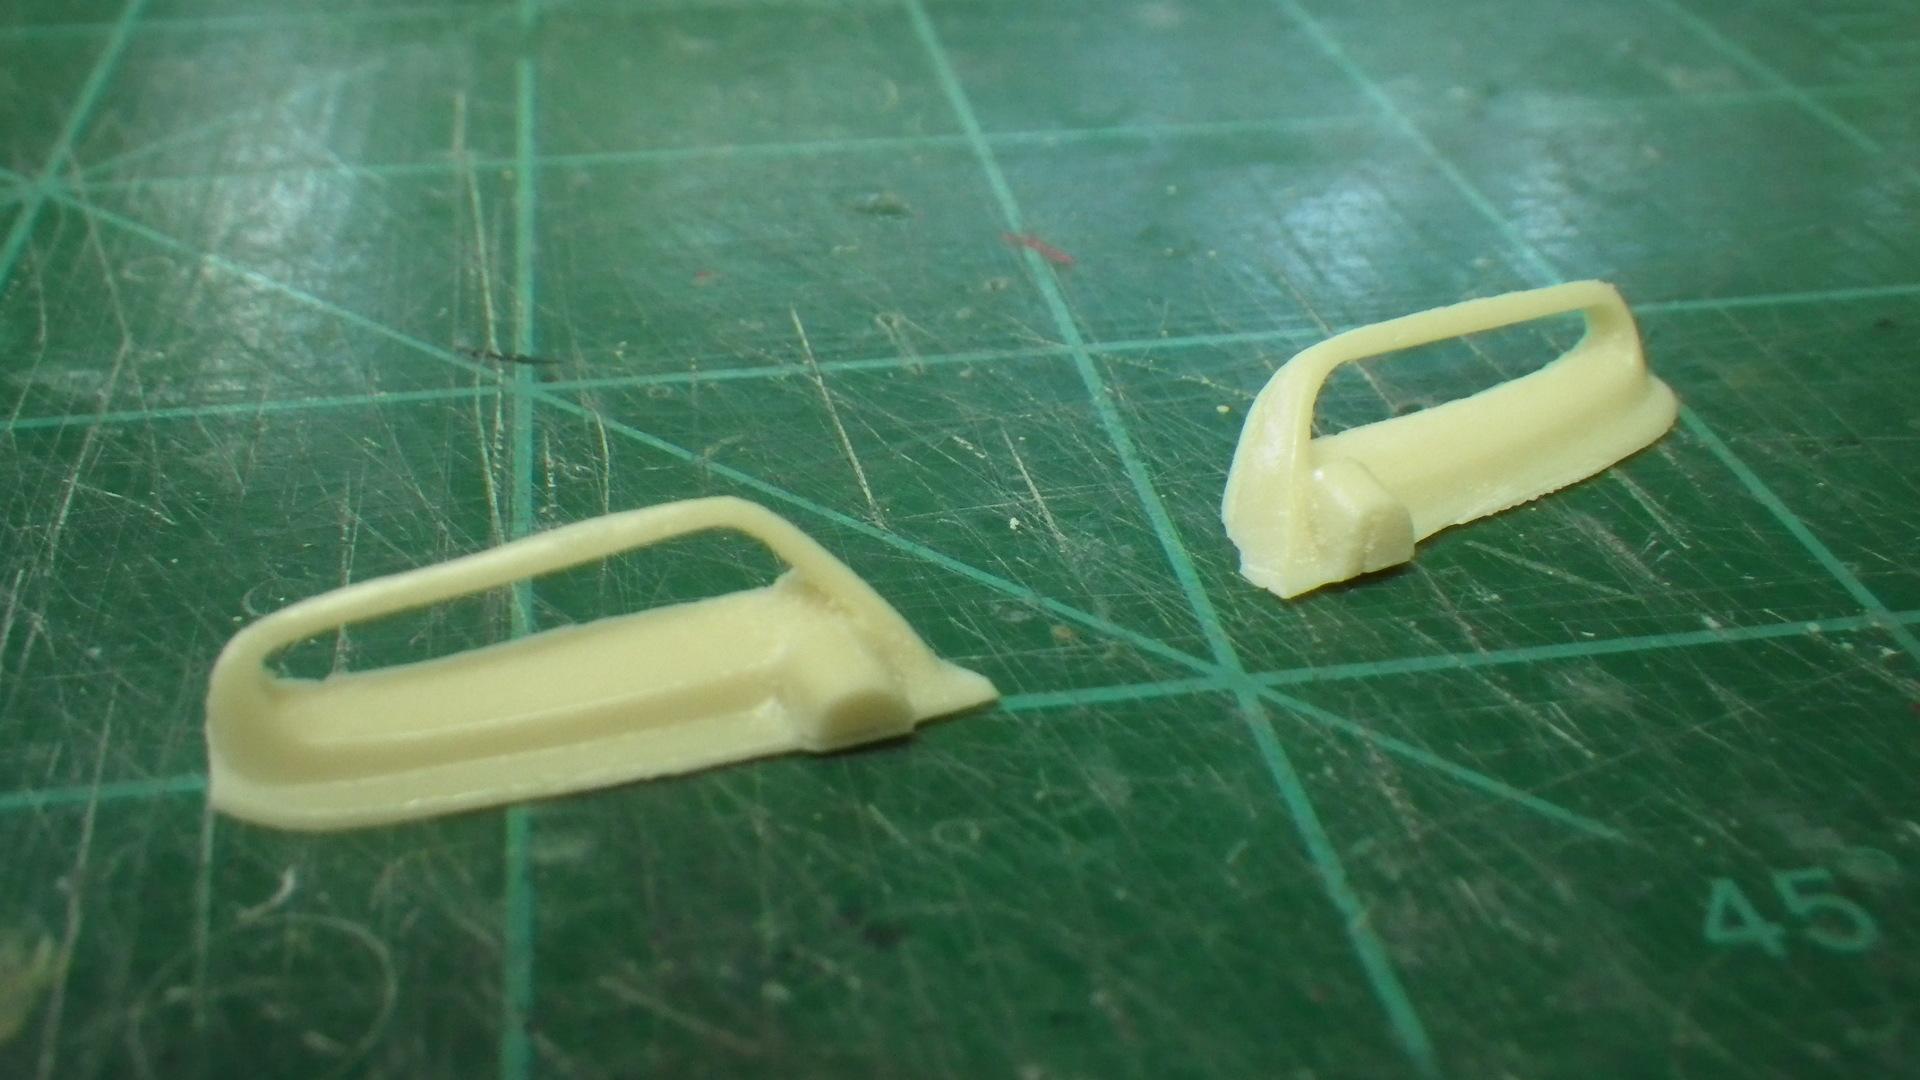
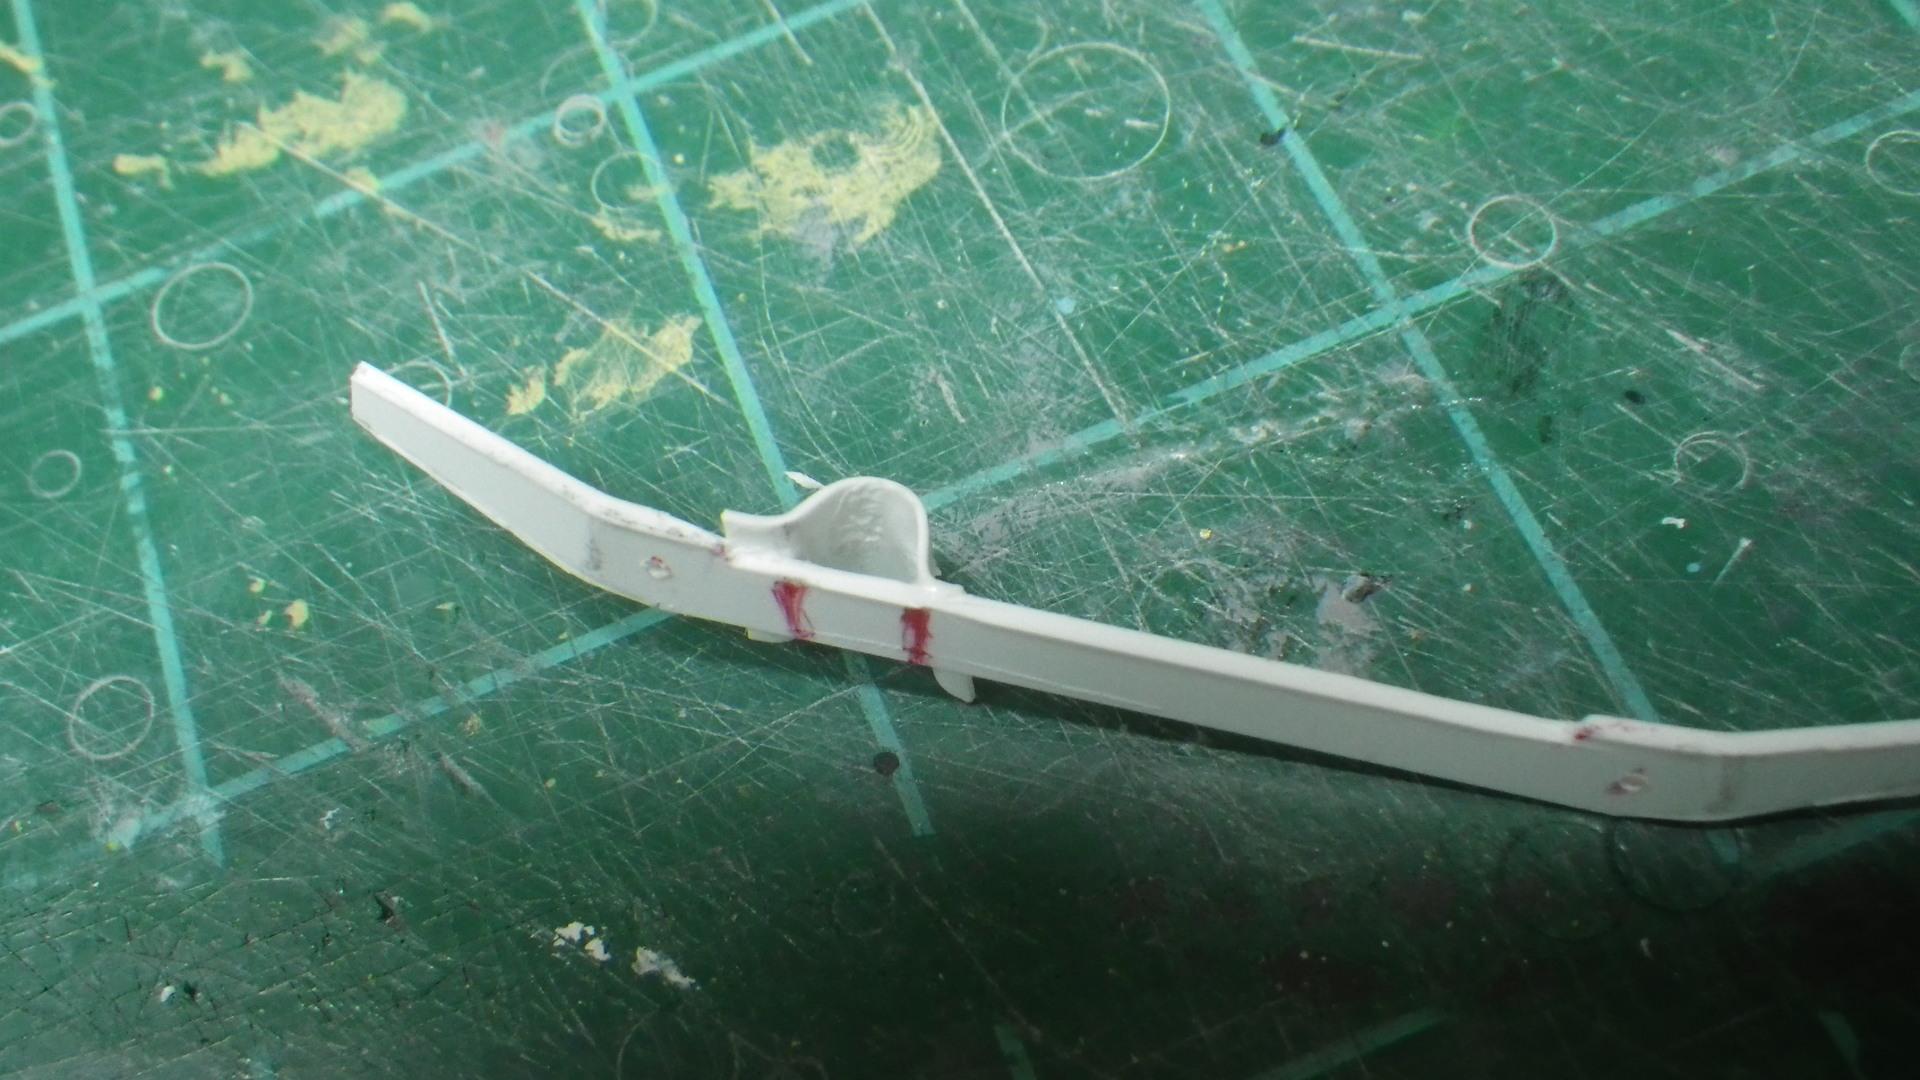
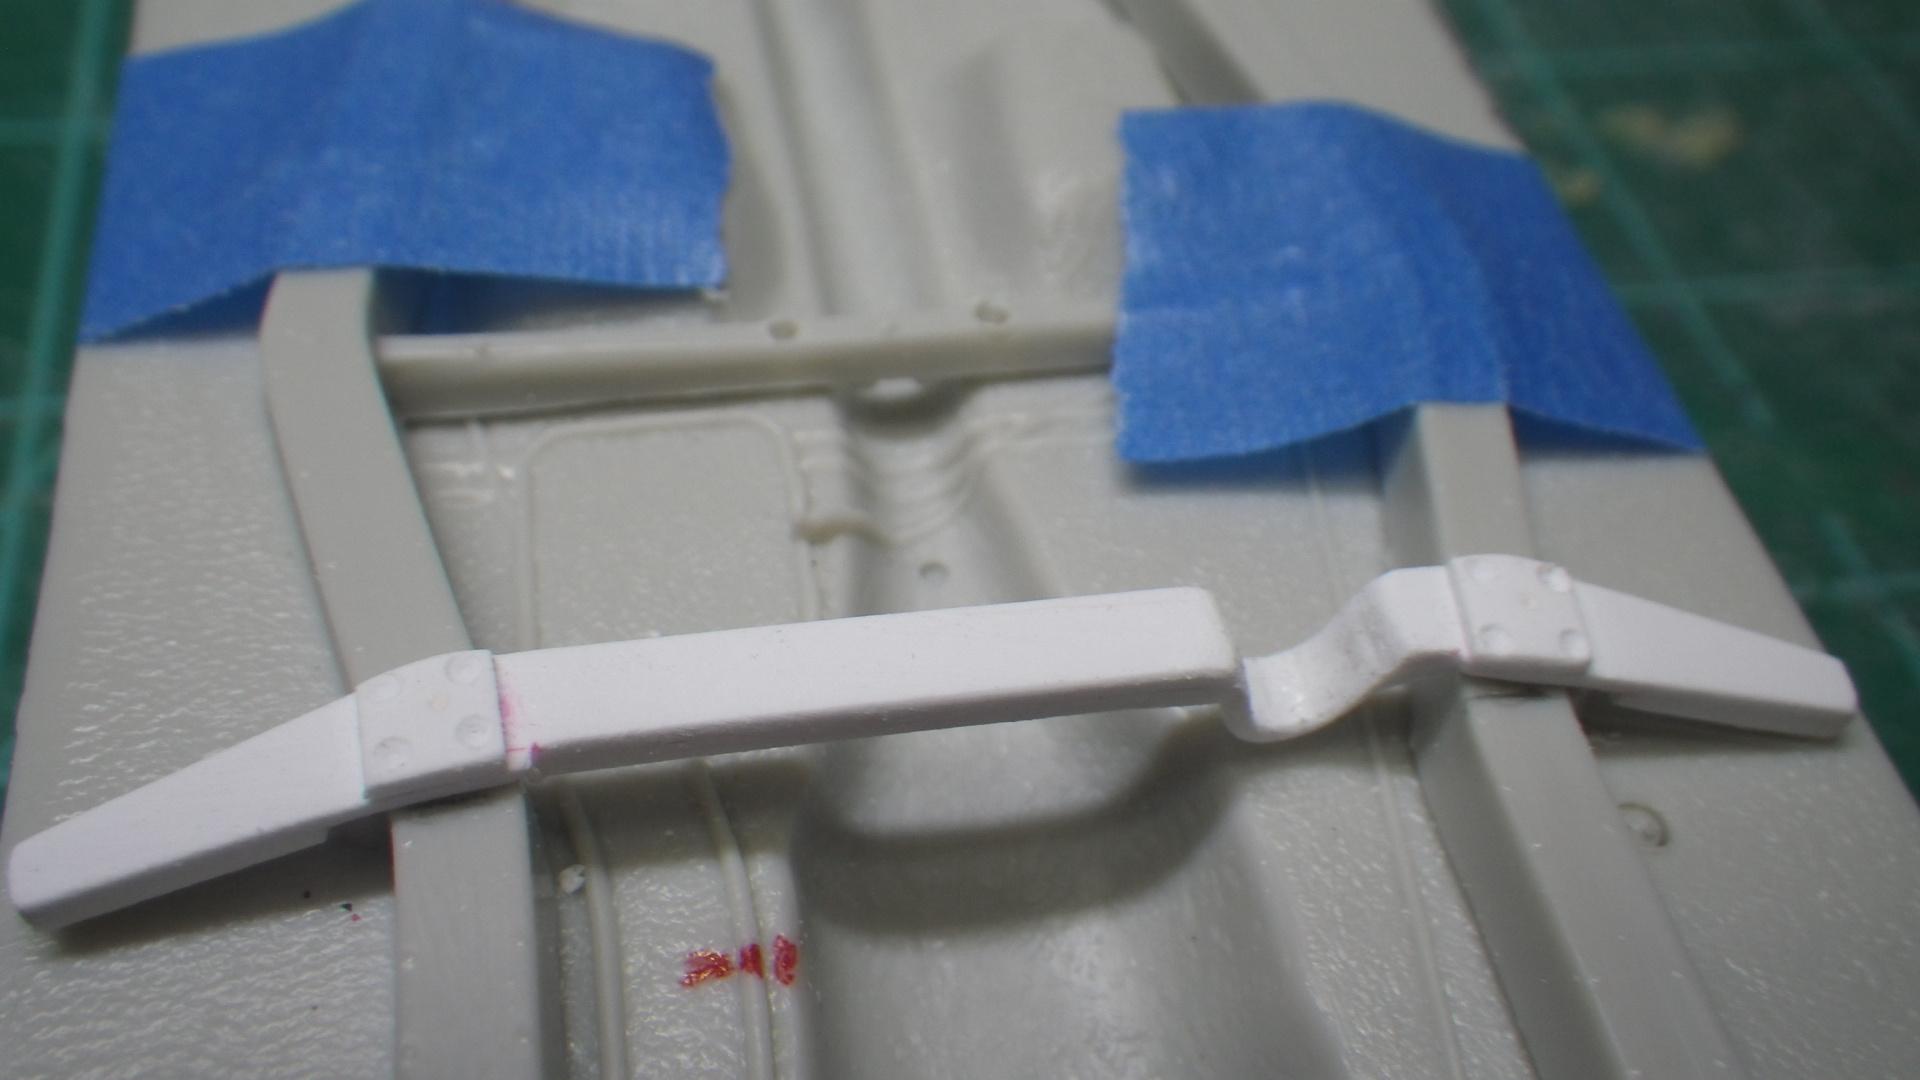
Finally getting around to a new update! Continuing work on the front end rebuild: Added the lower pan from the '53 Stude kit. And then the resin side grill openings. I don't know what to call this piece but it holds the strike plate for the hood latch that i removed from the '53 donor kit. Later I decided to remove it from the chassis and attach it to the apron I made earlier to simplify painting color separation in the future. This little bit is a reinforcement that ties together the apron and the lower pan. Quarter round Evergreen was bent in place to create what will become the chrome trim piece across the front end. It was glued in place all the way across and then cut open so the hood can be raised. The hood rests on this little plate when closed. The hole in the corner will accept the support rod to hold the hood open. I made these very simple hinges for the hood. That downward leg will have a small hole in it to accept a pin (installed after the hood is on the body) that keeps the hood attached to the body. This type of hinge doesn't swing smoothly like some more sophisticated styles but it allows the model to be displayed with hood open or closed and it doesn't take up much room. The area between the dashboard and the firewall is very cramped on this car. The separate wipers are a big upgrade from what was molded into the resin body. These aren't the ones I'll actually be using - found some that are better proportioned. That's it for right now but I have some more stuff to post later today or tomorrow.
-
I'm thinking that mini '32 is actually an Austin Bantam. Yes, no?
-
Your '64 was one elegant looking ride!
-
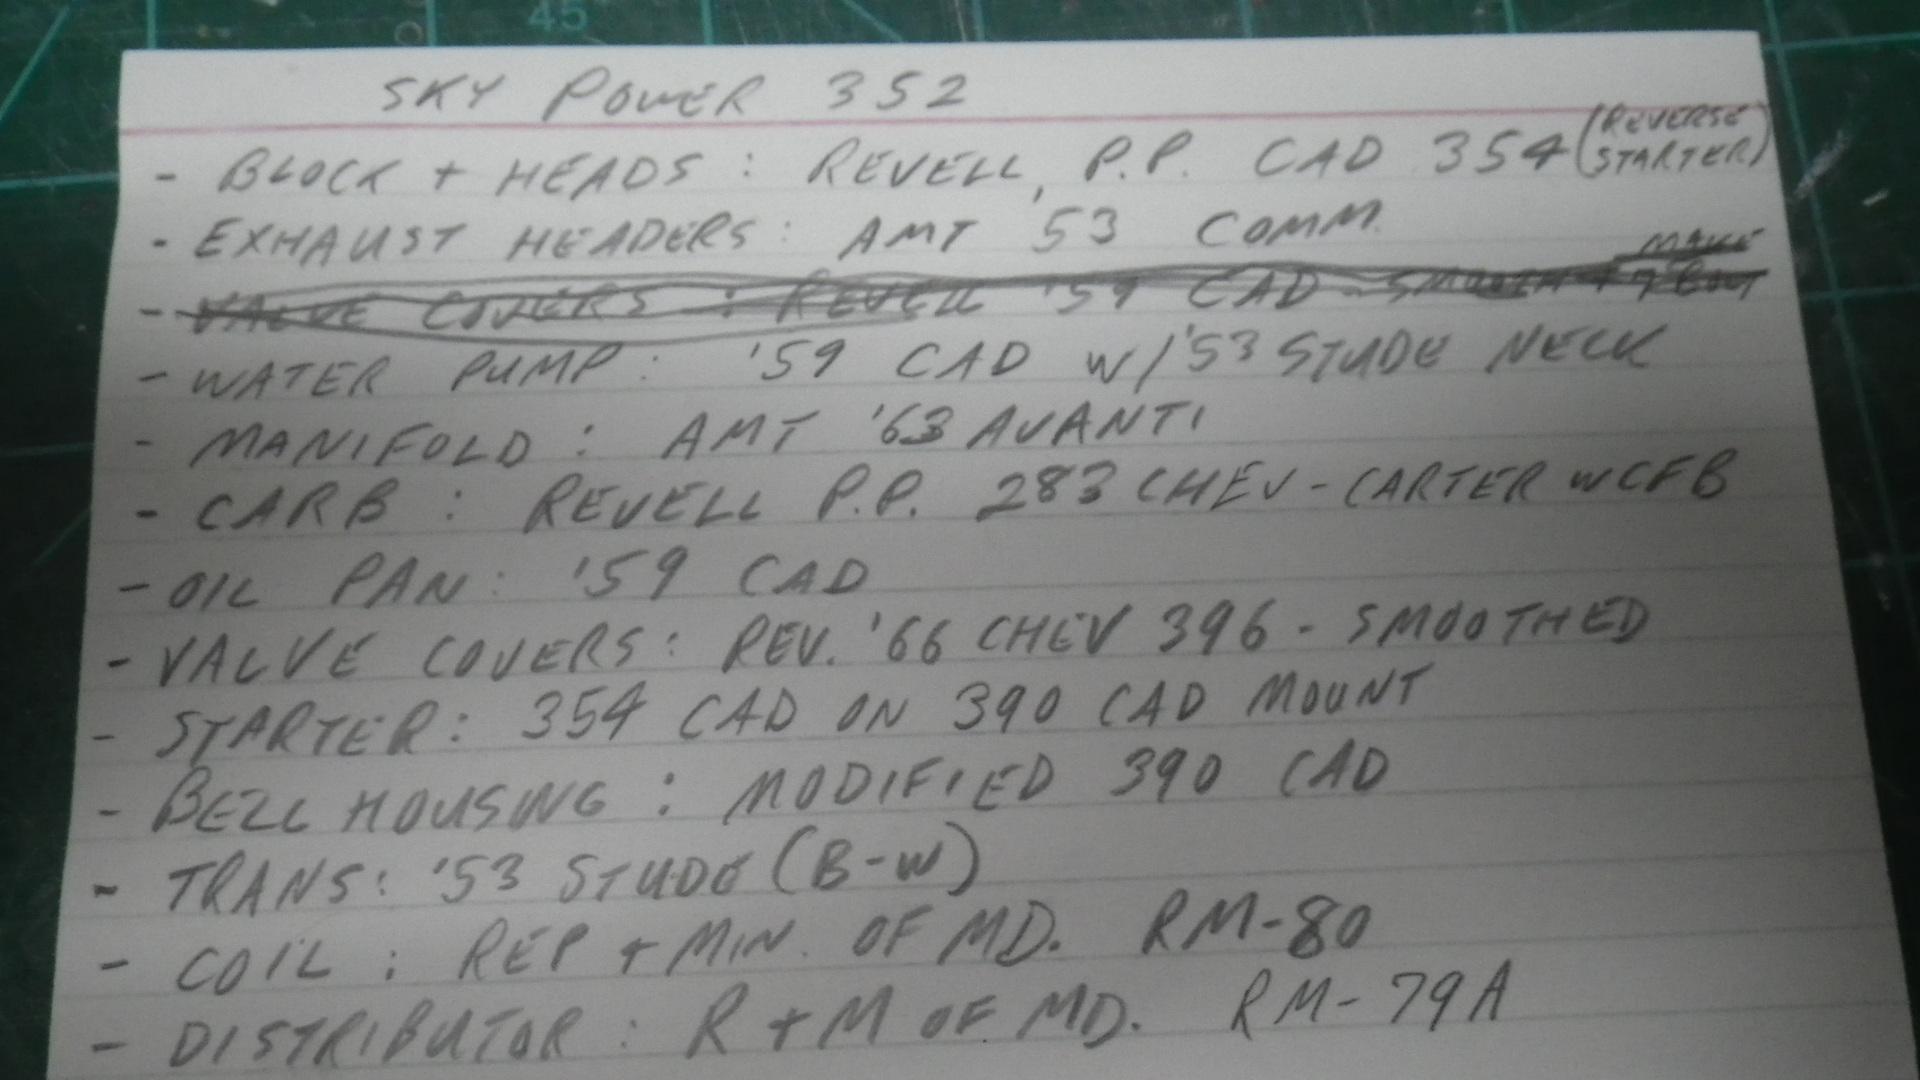
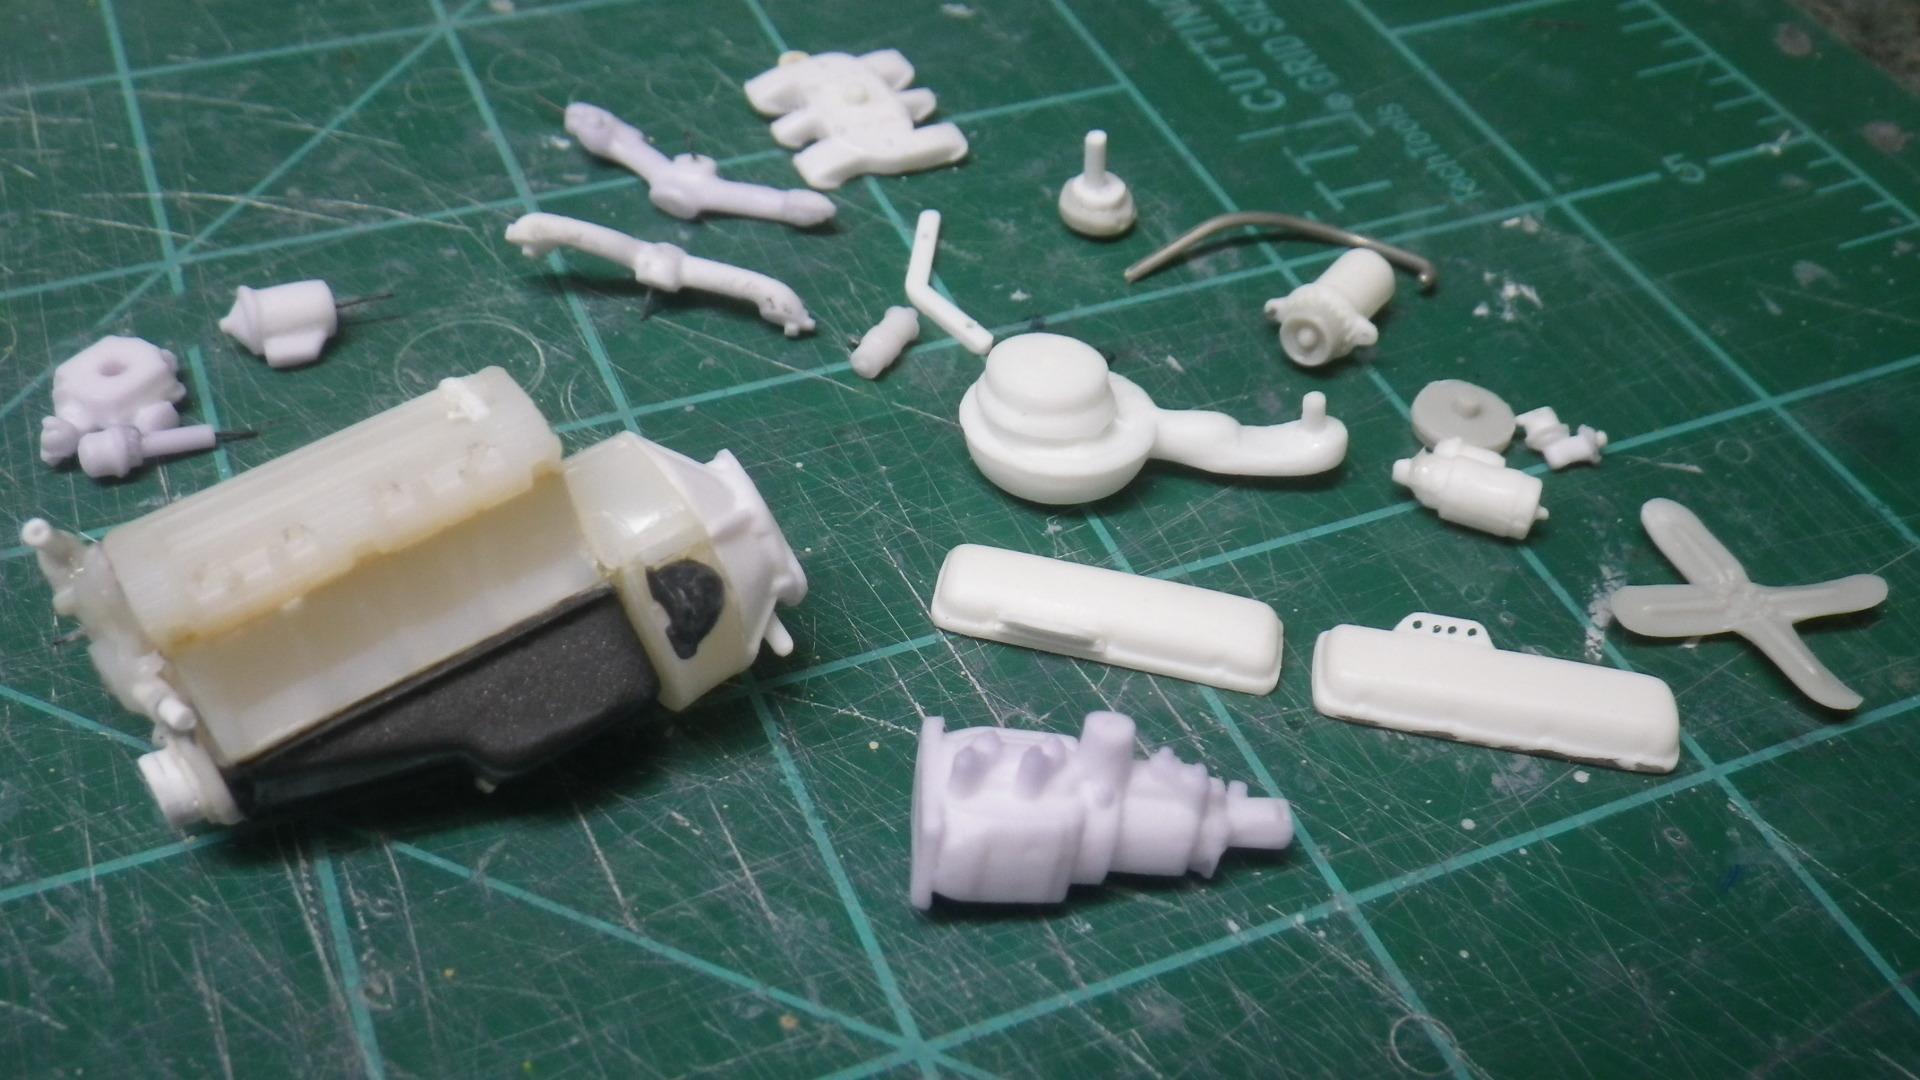
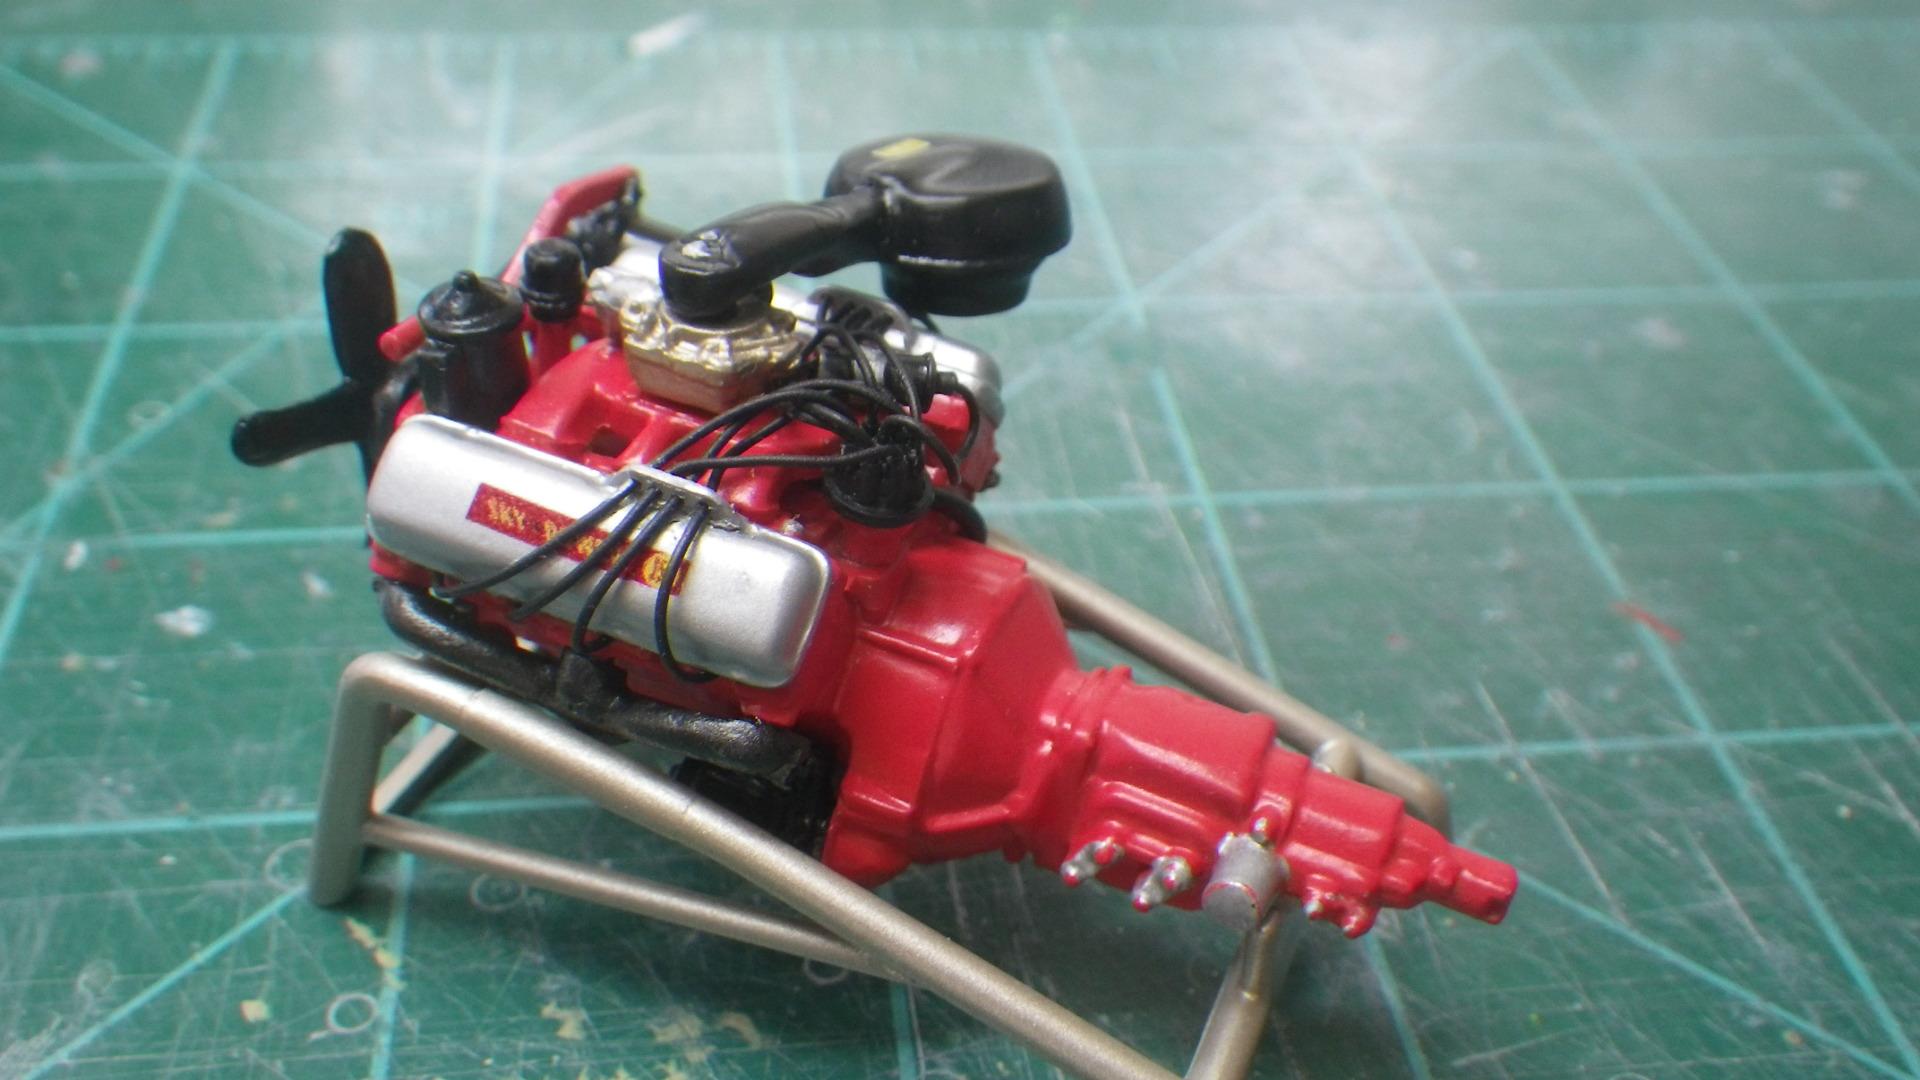
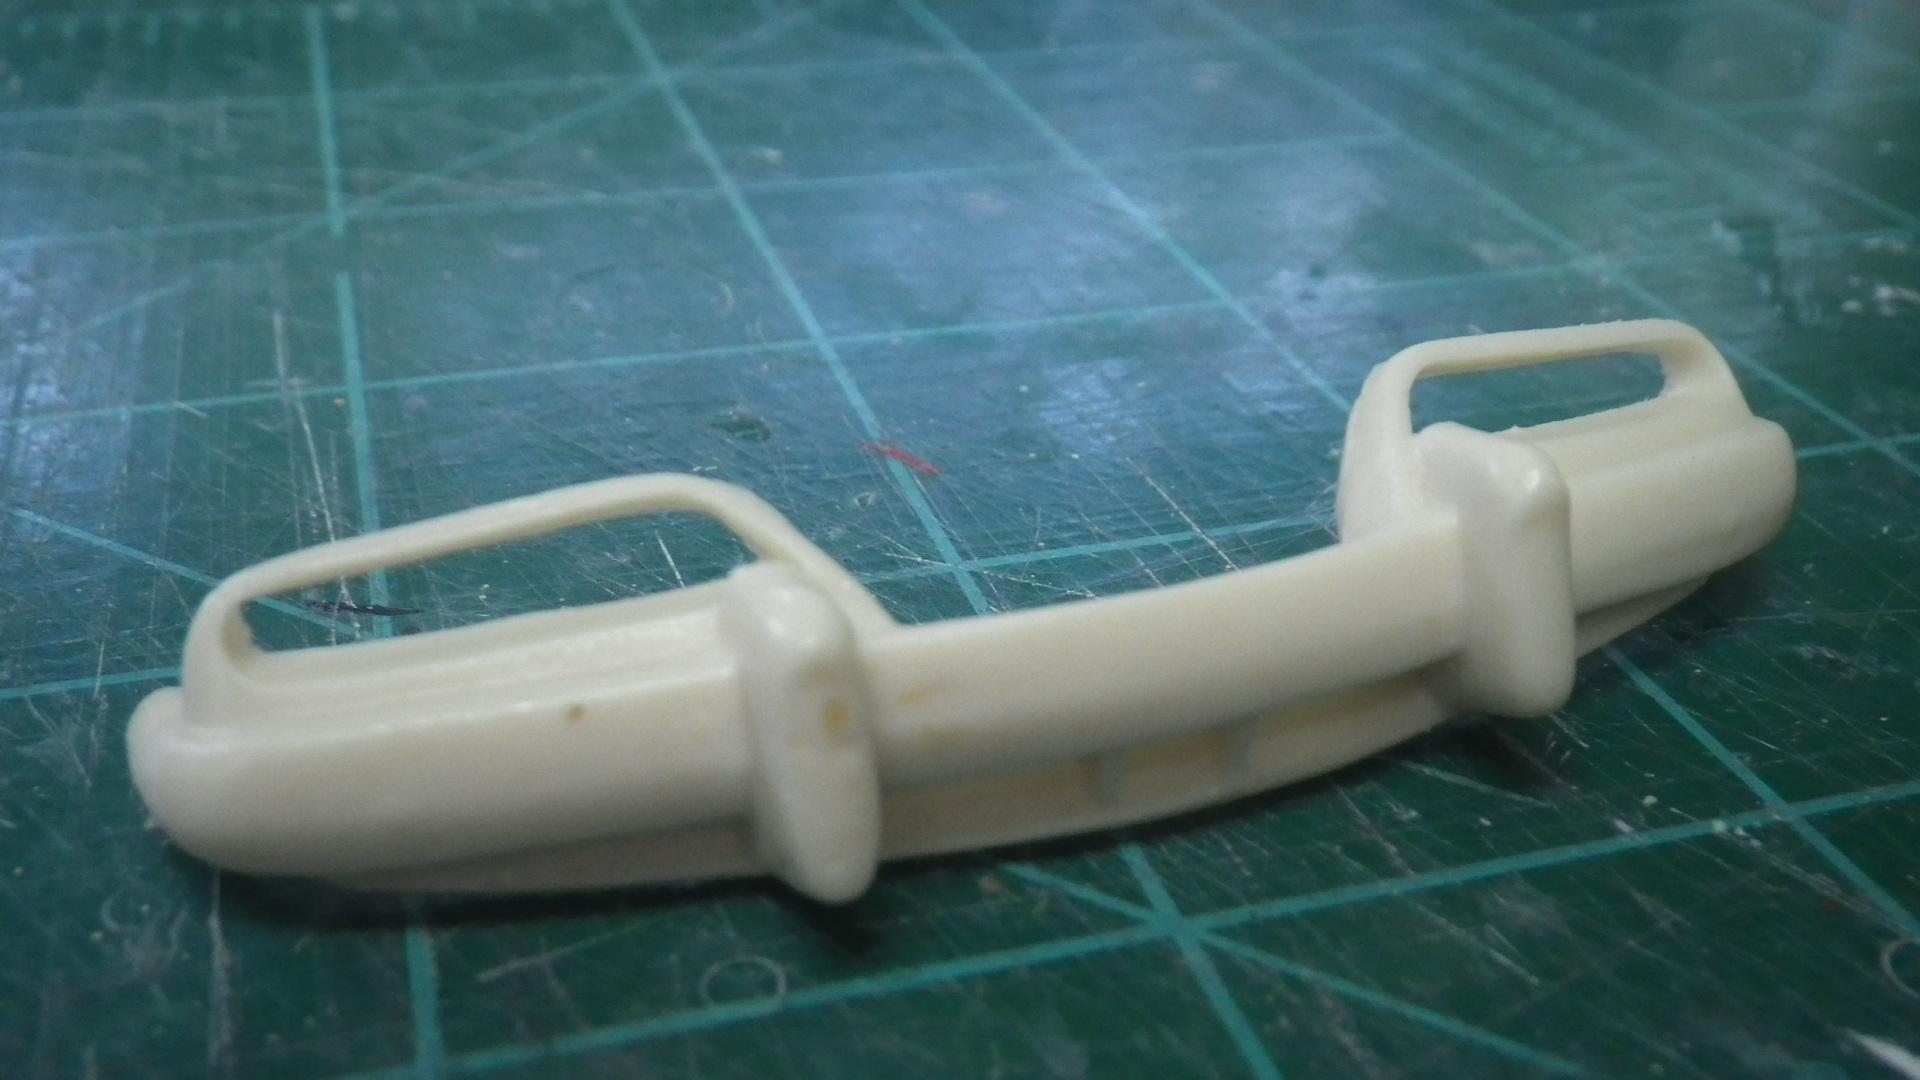
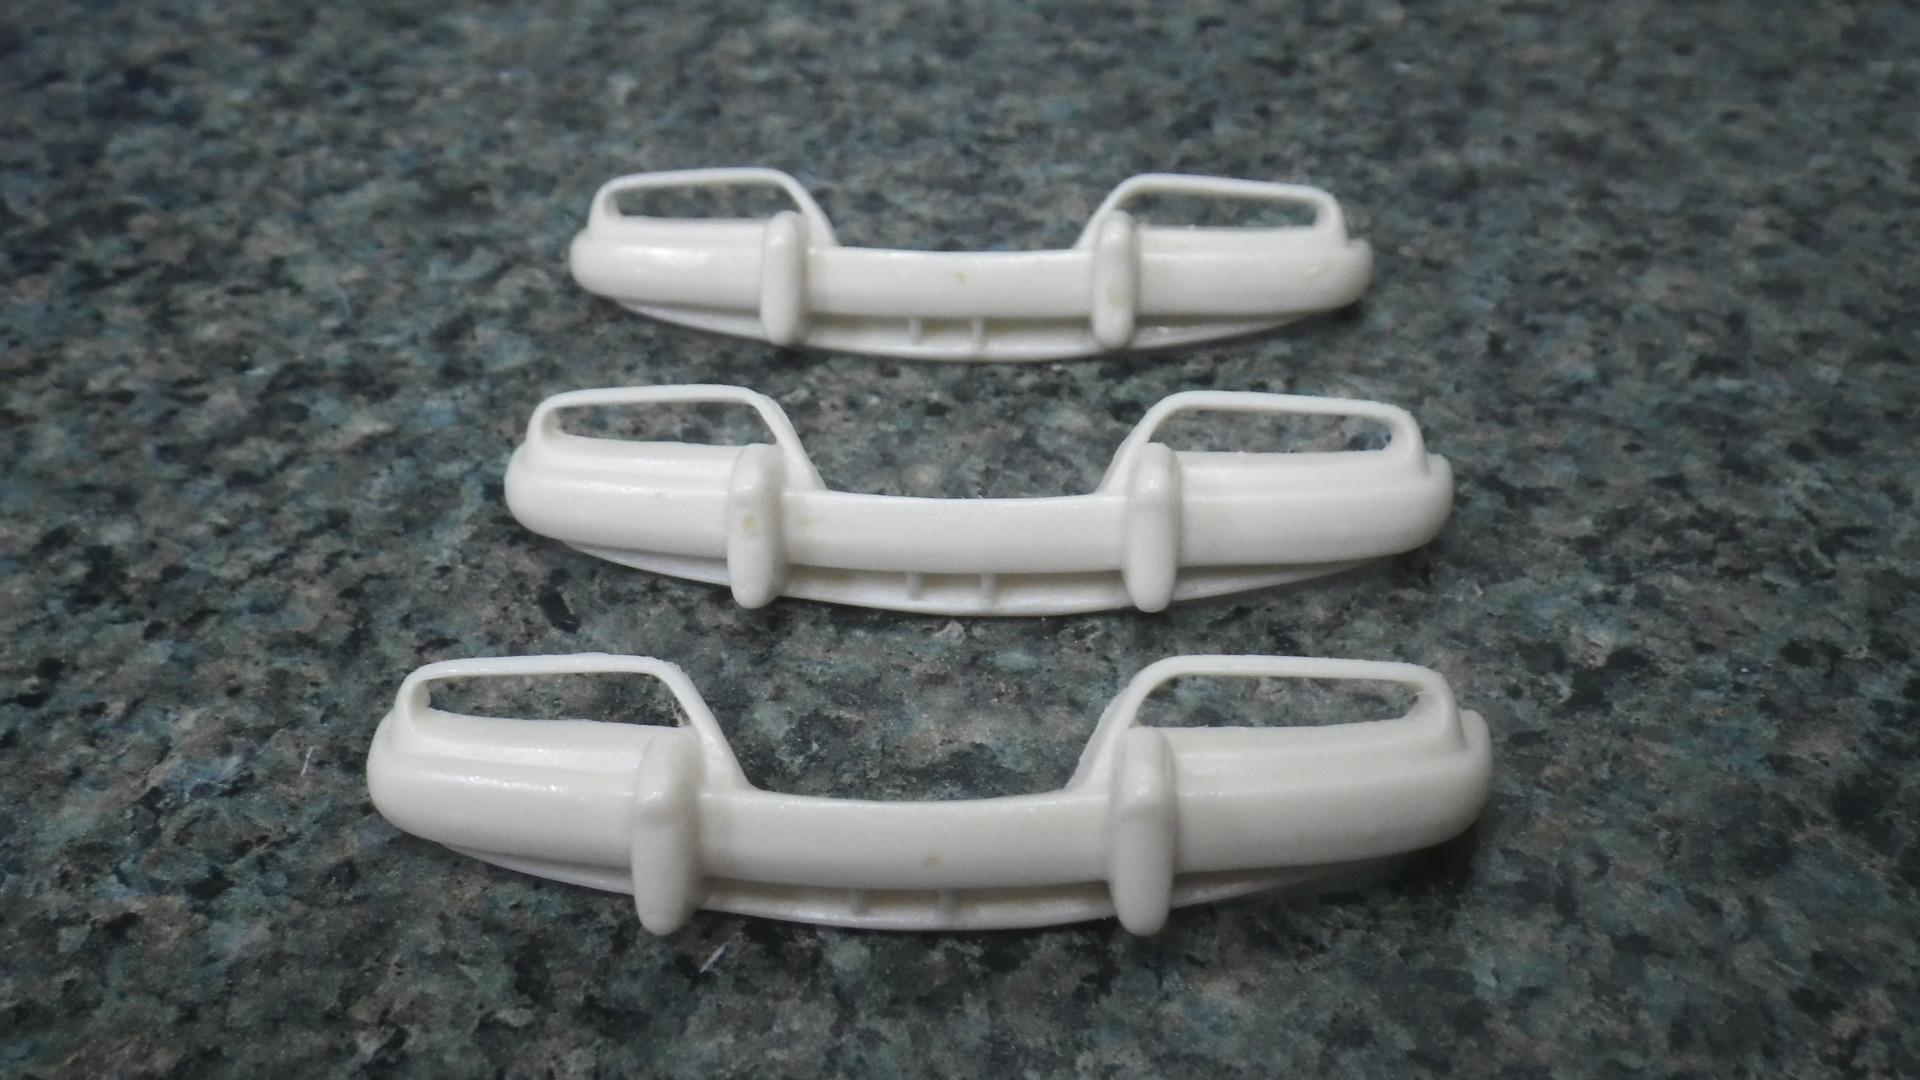
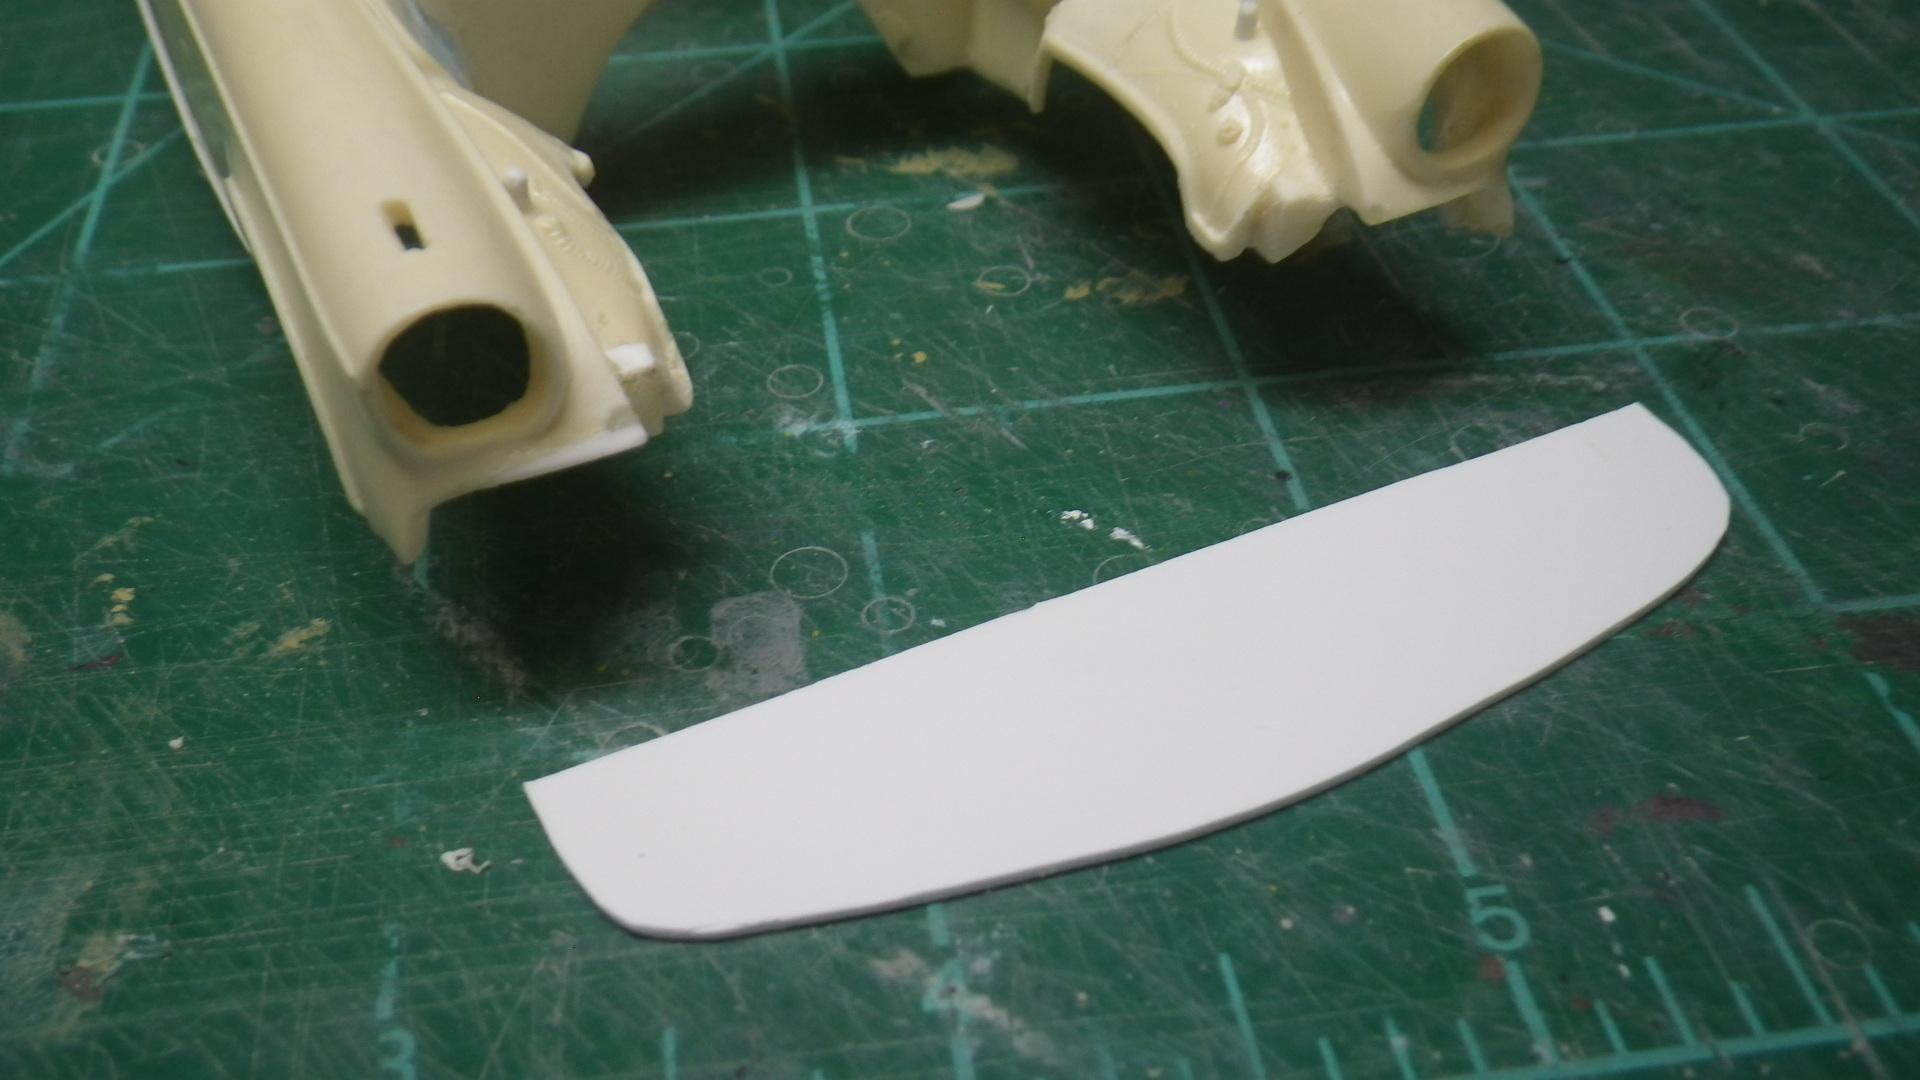
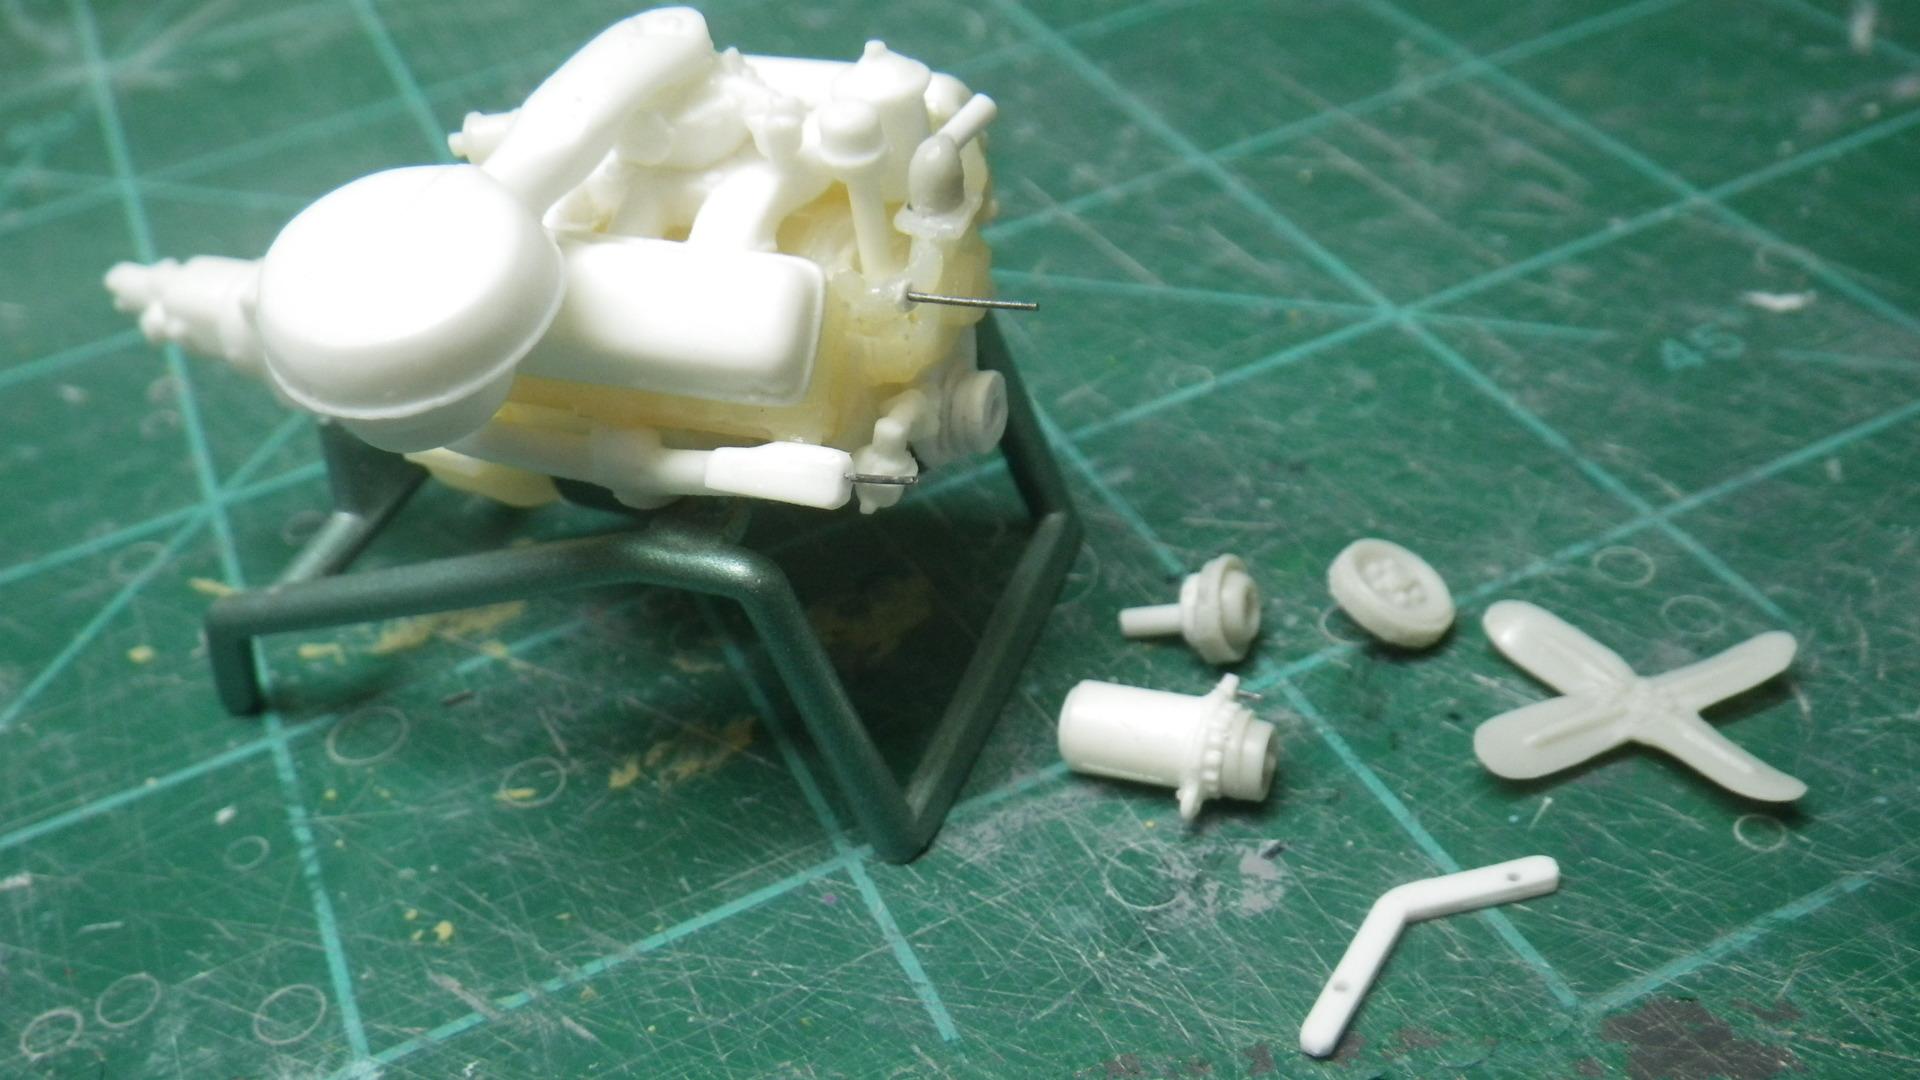
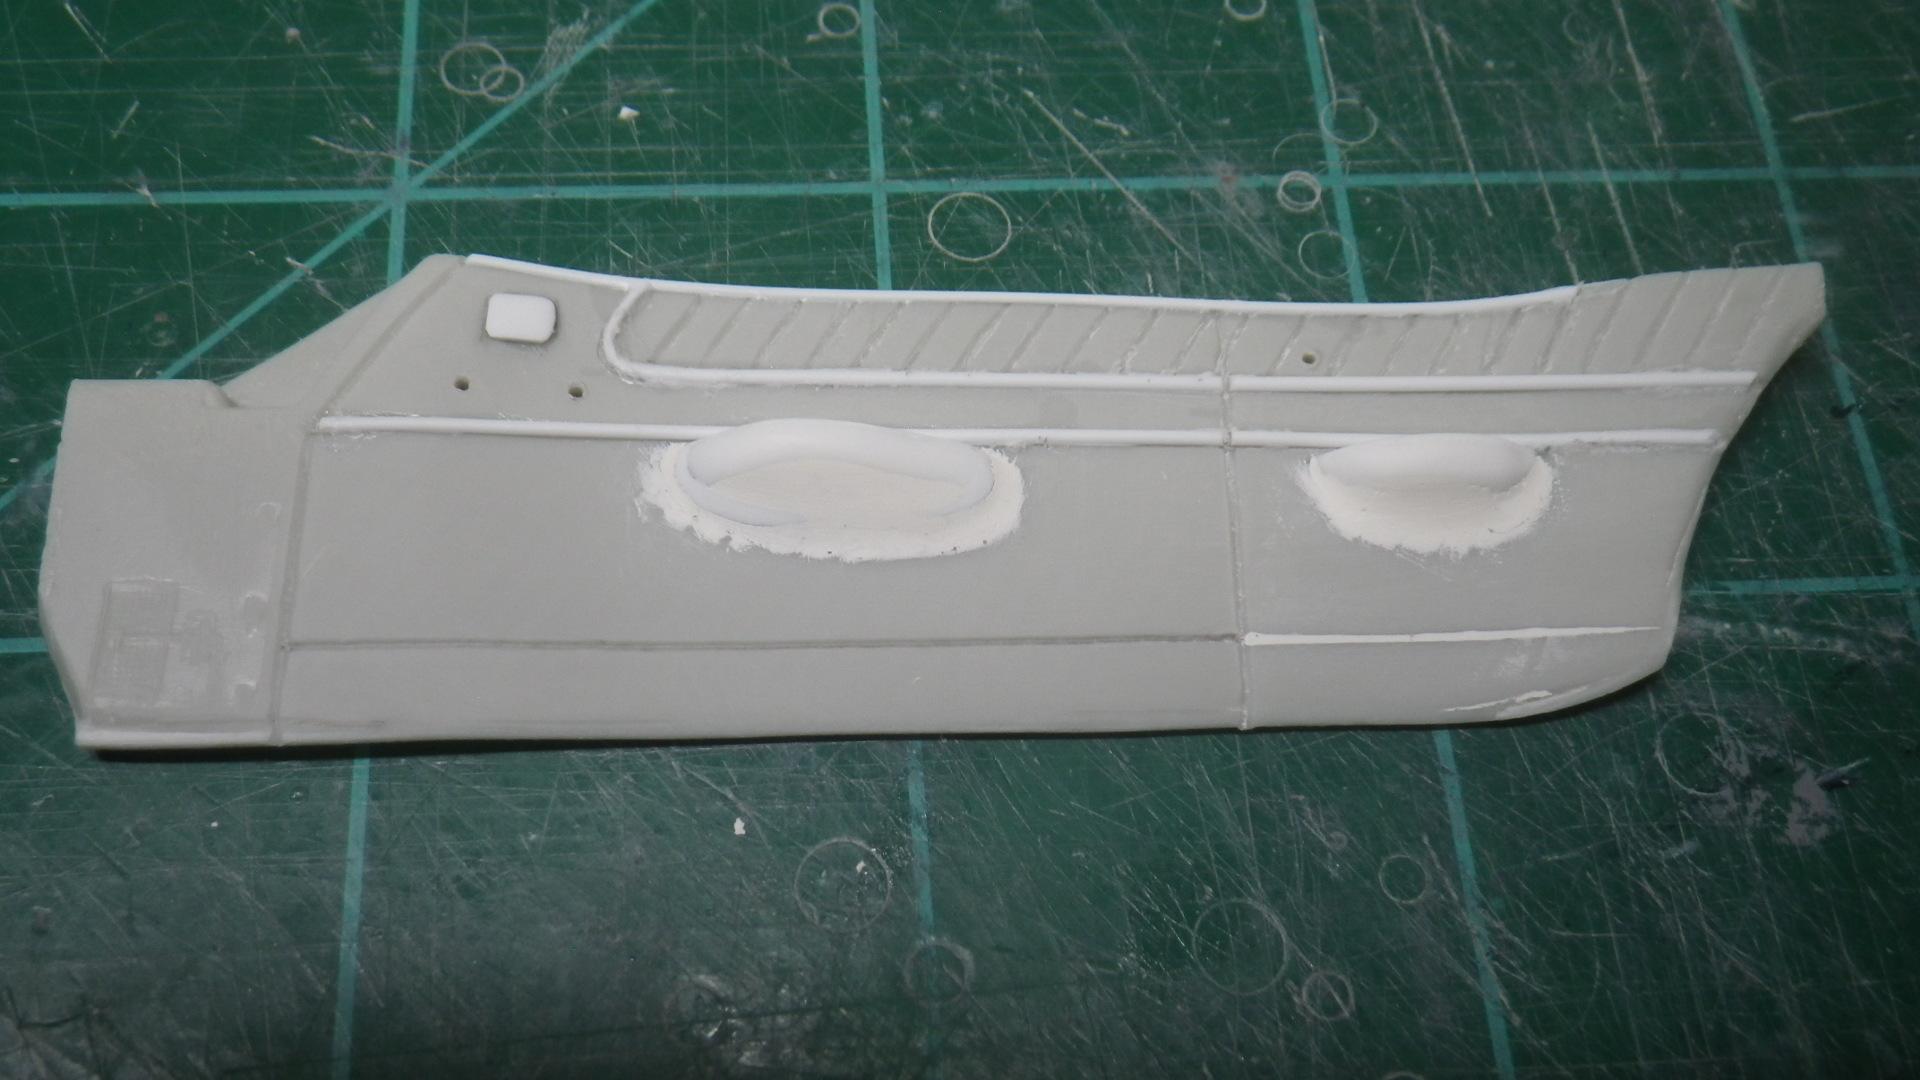
That was a fun side trip thru Packard Hawks, etc.! BTW, when I said that the toilet seat was not optional that may have been putting it a bit too strong. What it was was "standard" - that's the way the factory was building them. But Studebaker (and by extension post-merger Packard) was well known for honoring almost any reasonable special request from a buyer. That said, it may have been deleted by request on a few cars. So after getting the chassis brace and dual exhaust fitted with the engine mock-up the time was right to do the engine. After studying photos of the big block Packard V8 here's is the "secret sauce" that I came up with: All the temporary glue joints were undone so it could be painted, re-assembled and detailed. A lot of the pieces are resin copies of parts from kits that i already had. I copied them so they would still be available to build those kits and, besides, I might want to build another Sky Power 352 someday. I don't seem to have any photos from the construction process but this is how it came out - just needing a little bit of touch up work at that point. The air cleaner is a scratch built item and the owner of a real 56J that I contacted through the Studebaker Drivers Club forum went out to his garage and got dimensions for me. I can't give the members of the SDC enough compliments for their willingness to help! The color is my own mix of "Sky Power red". There's no record of the exact original formula and the color on restored cars varies quite a bit but it's always a vivid red and according to the Authenticity Guide it should be leaning toward orange. The fan belt is made from black Chart-Pak drafting tape and it came in that width - no slicing necessary. The resin body treats the front end as a sort of gaping hole to be filled by a one piece side grill, bumper, lower pan assembly: You can also see a little styrene filler piece to be used to re-angle the grill opening. Anyway, the build deserved something better so I made some resin copies of the bumper unit so they could be cut apart, trimmed down and incorporated into a more realistic front end. I tied it together with this little styrene apron that will provide a base to build a new front end structure. It's starting to look better already!
-
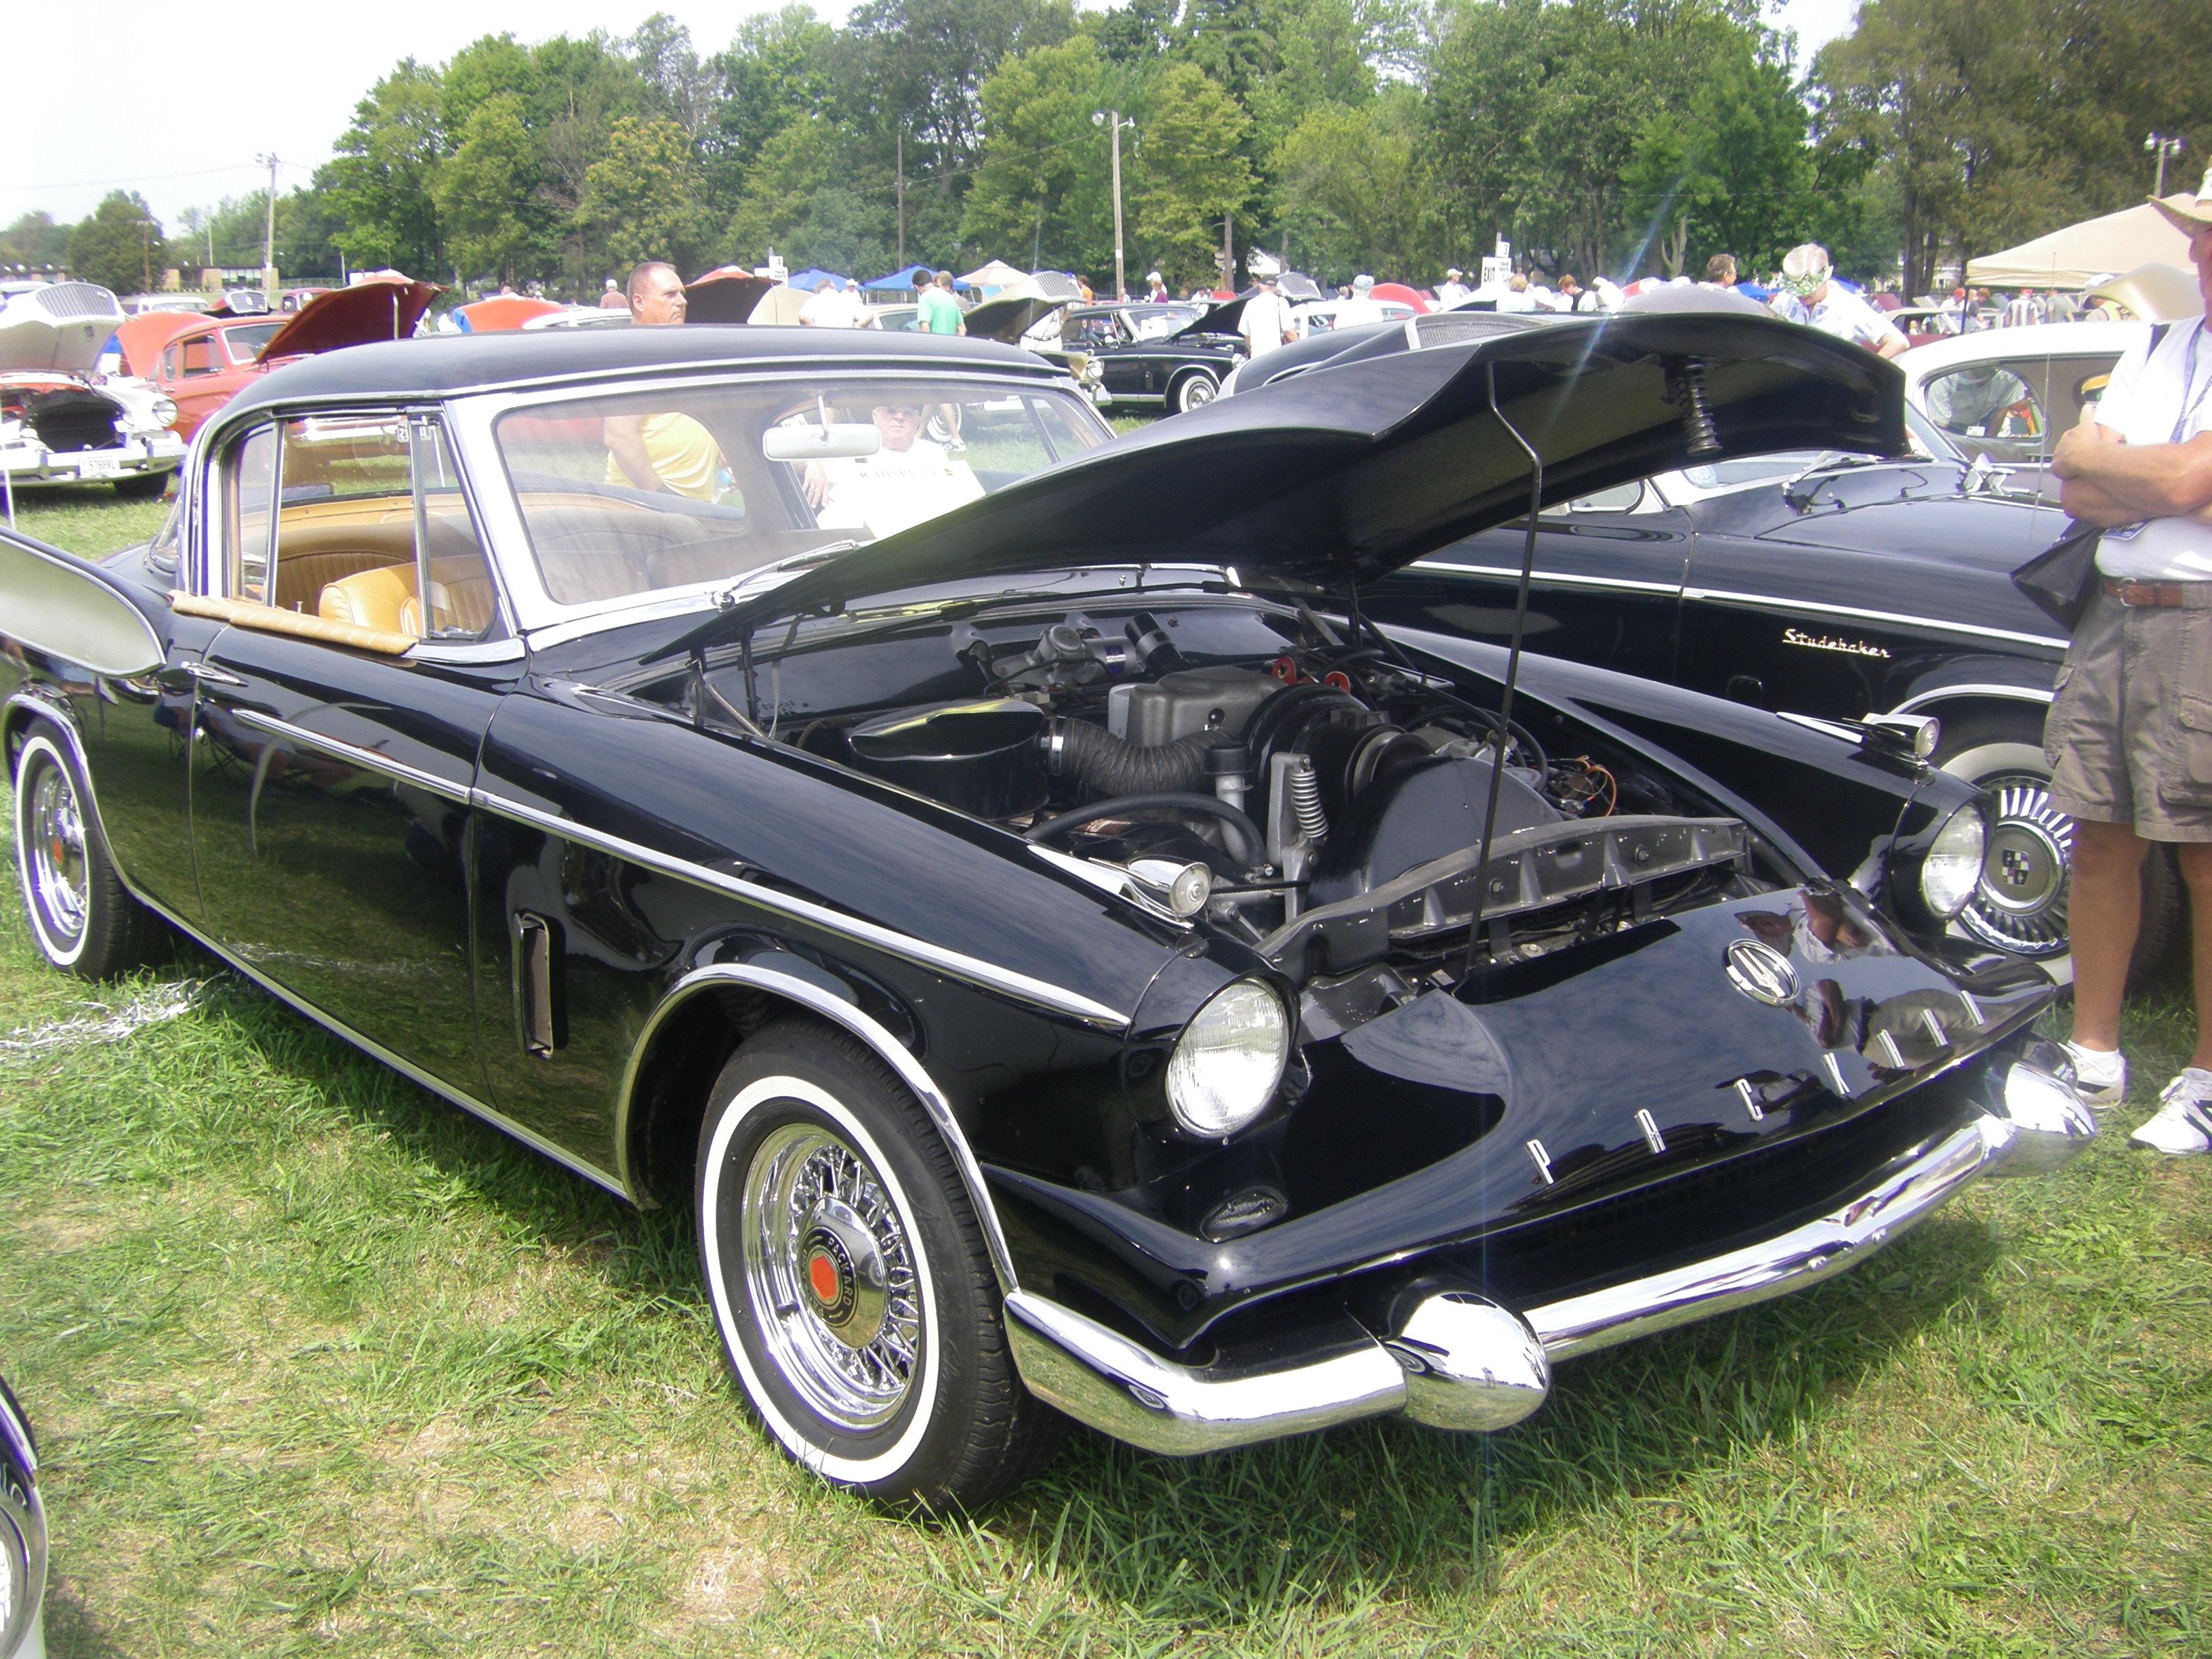
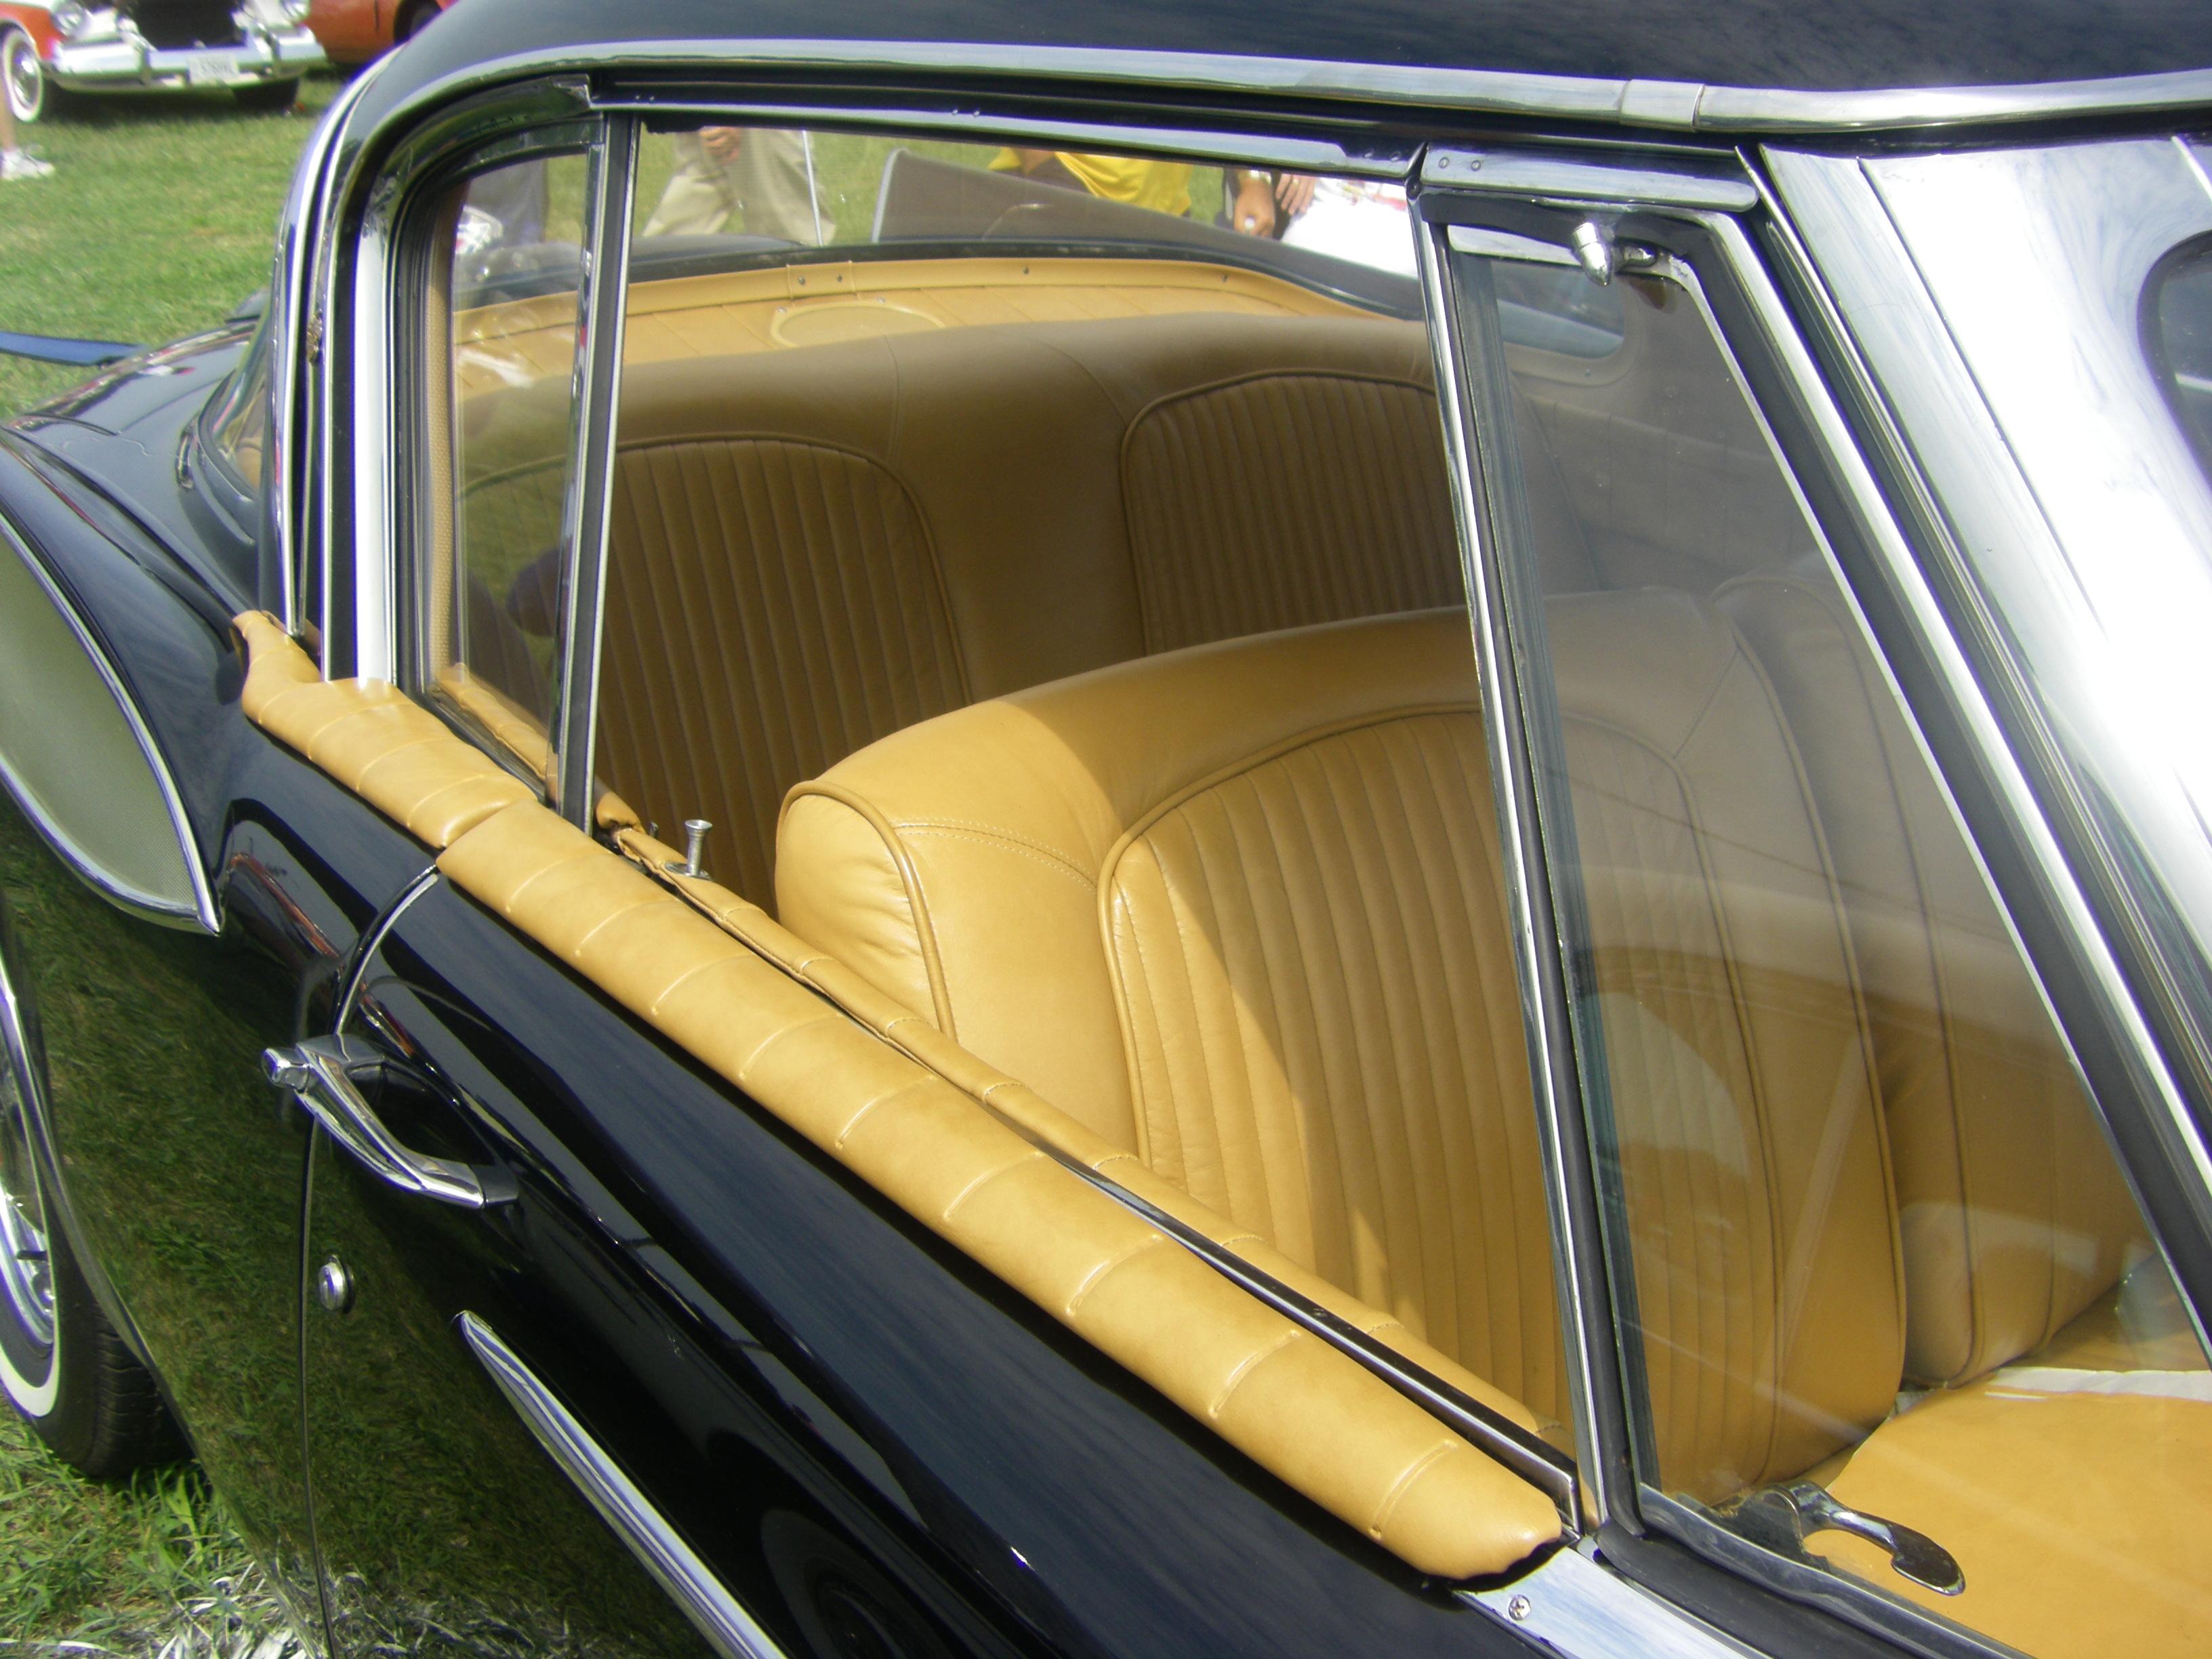
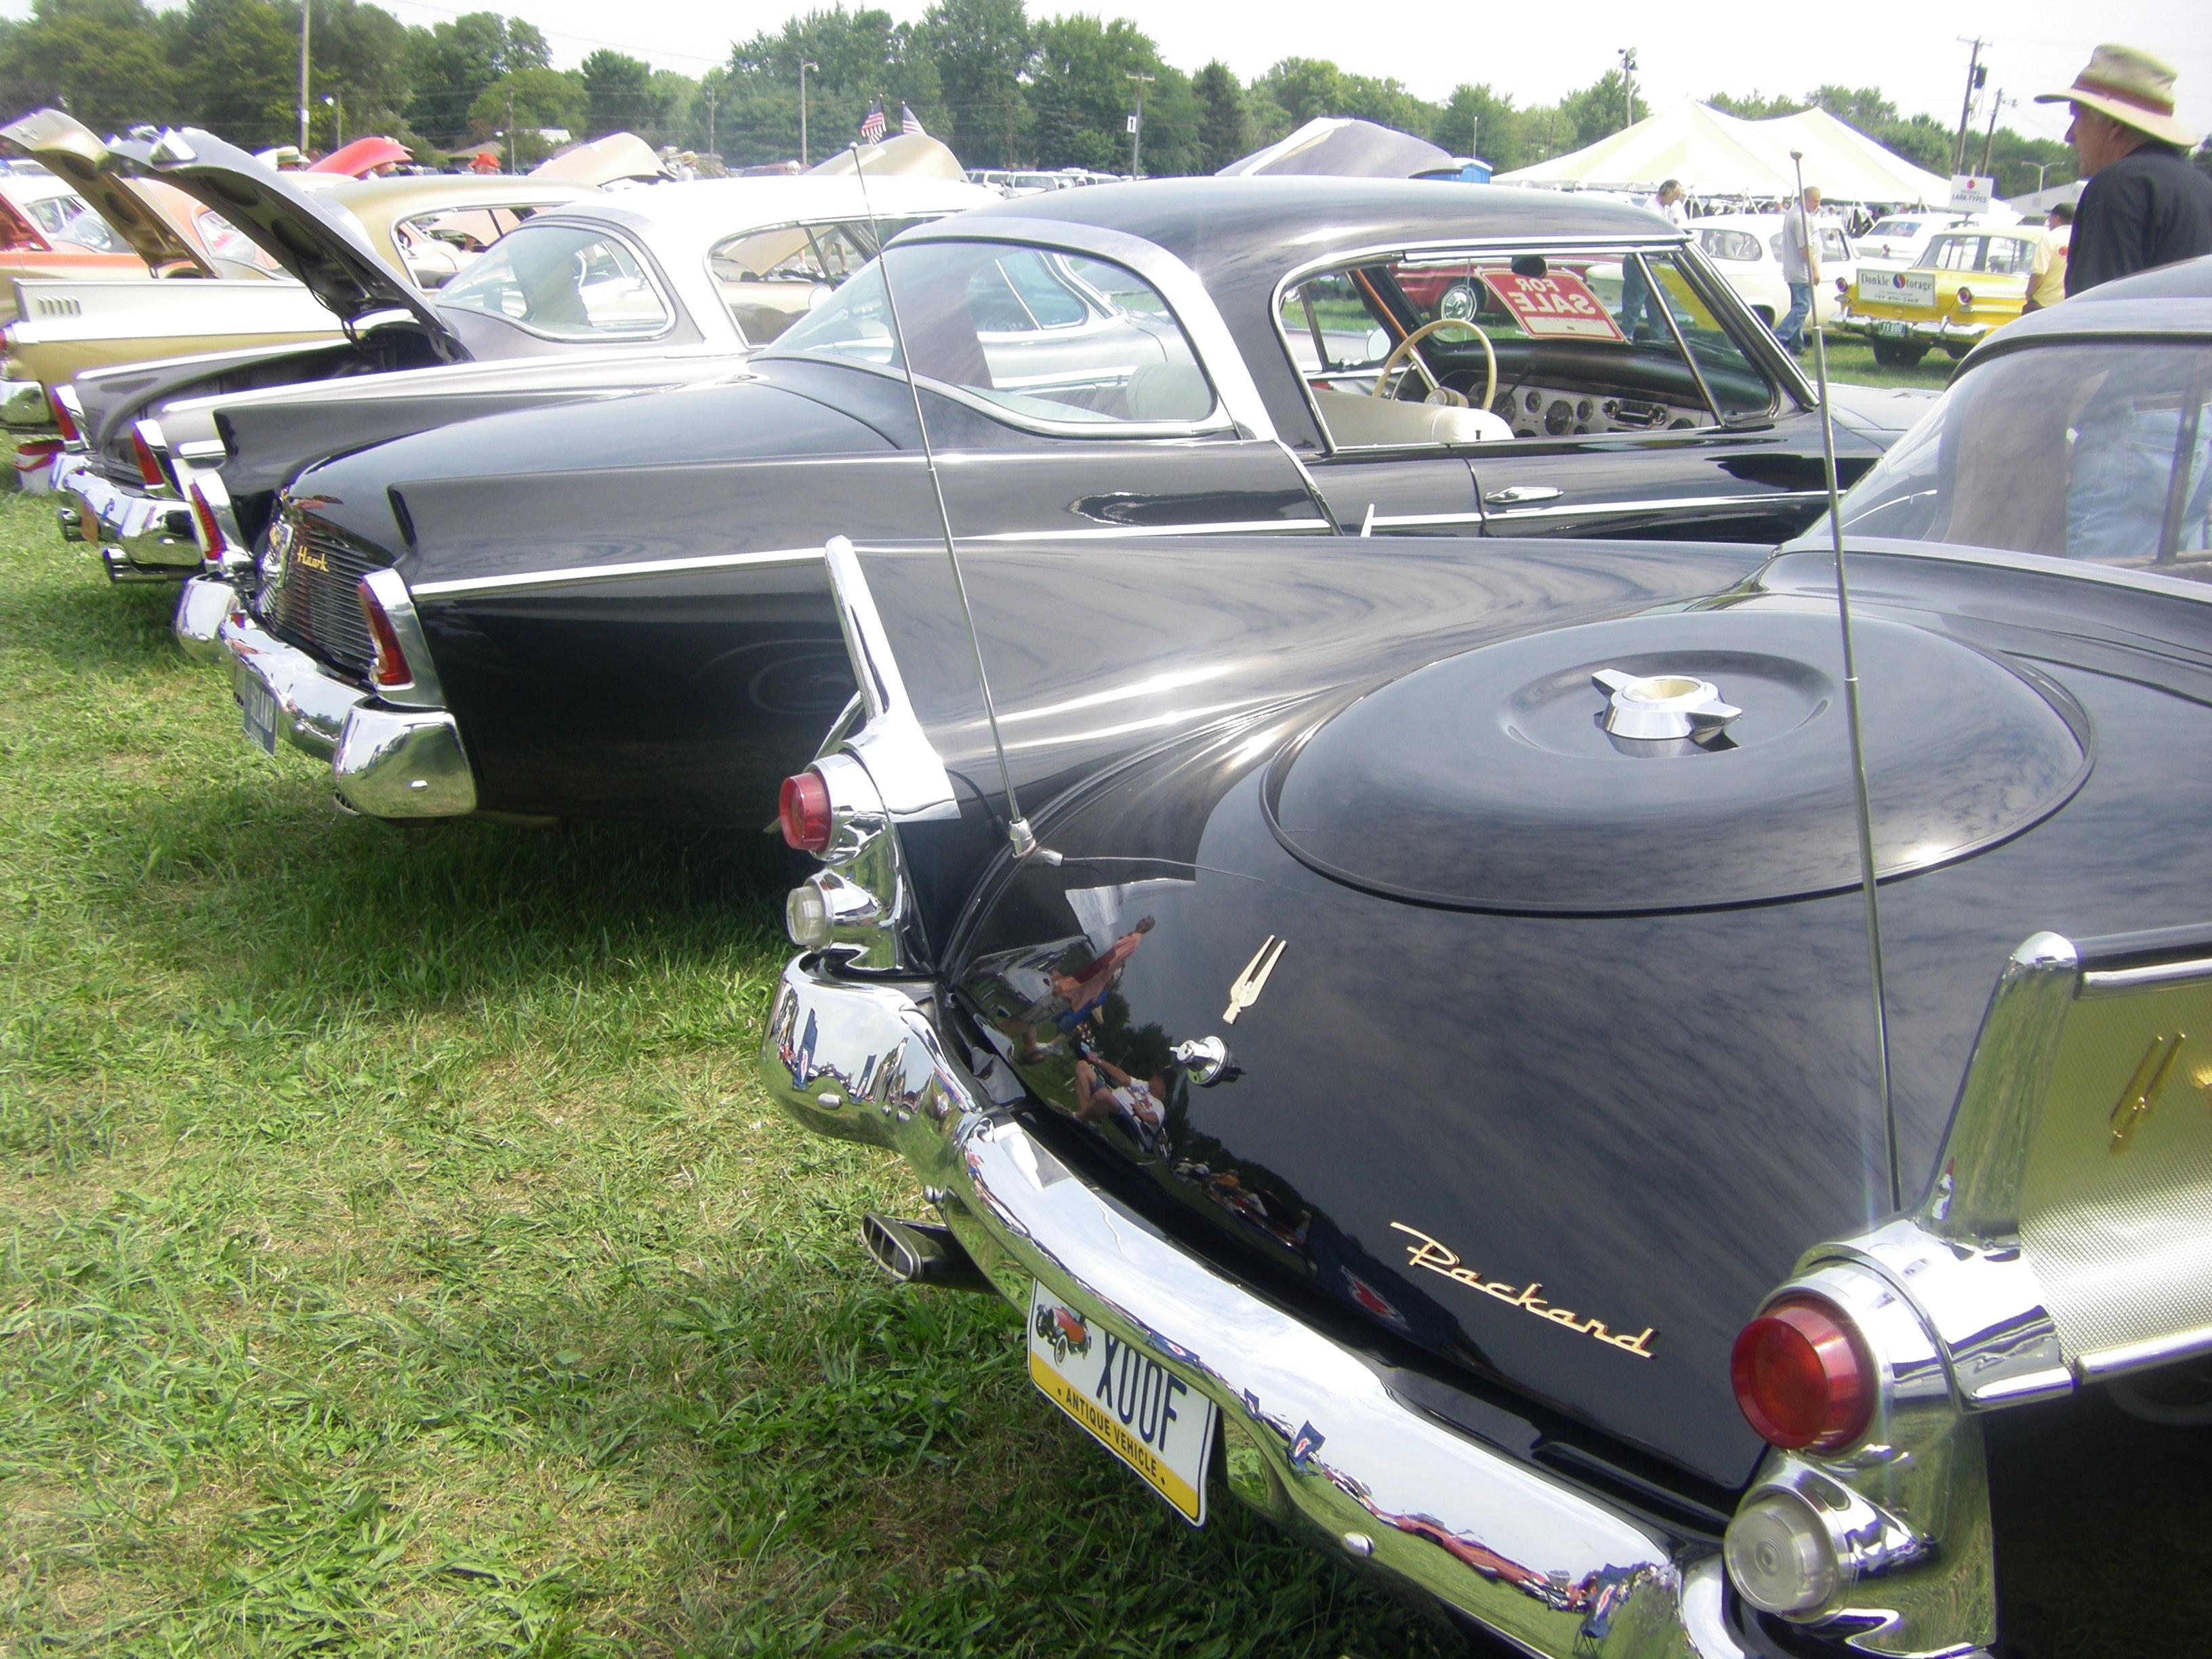
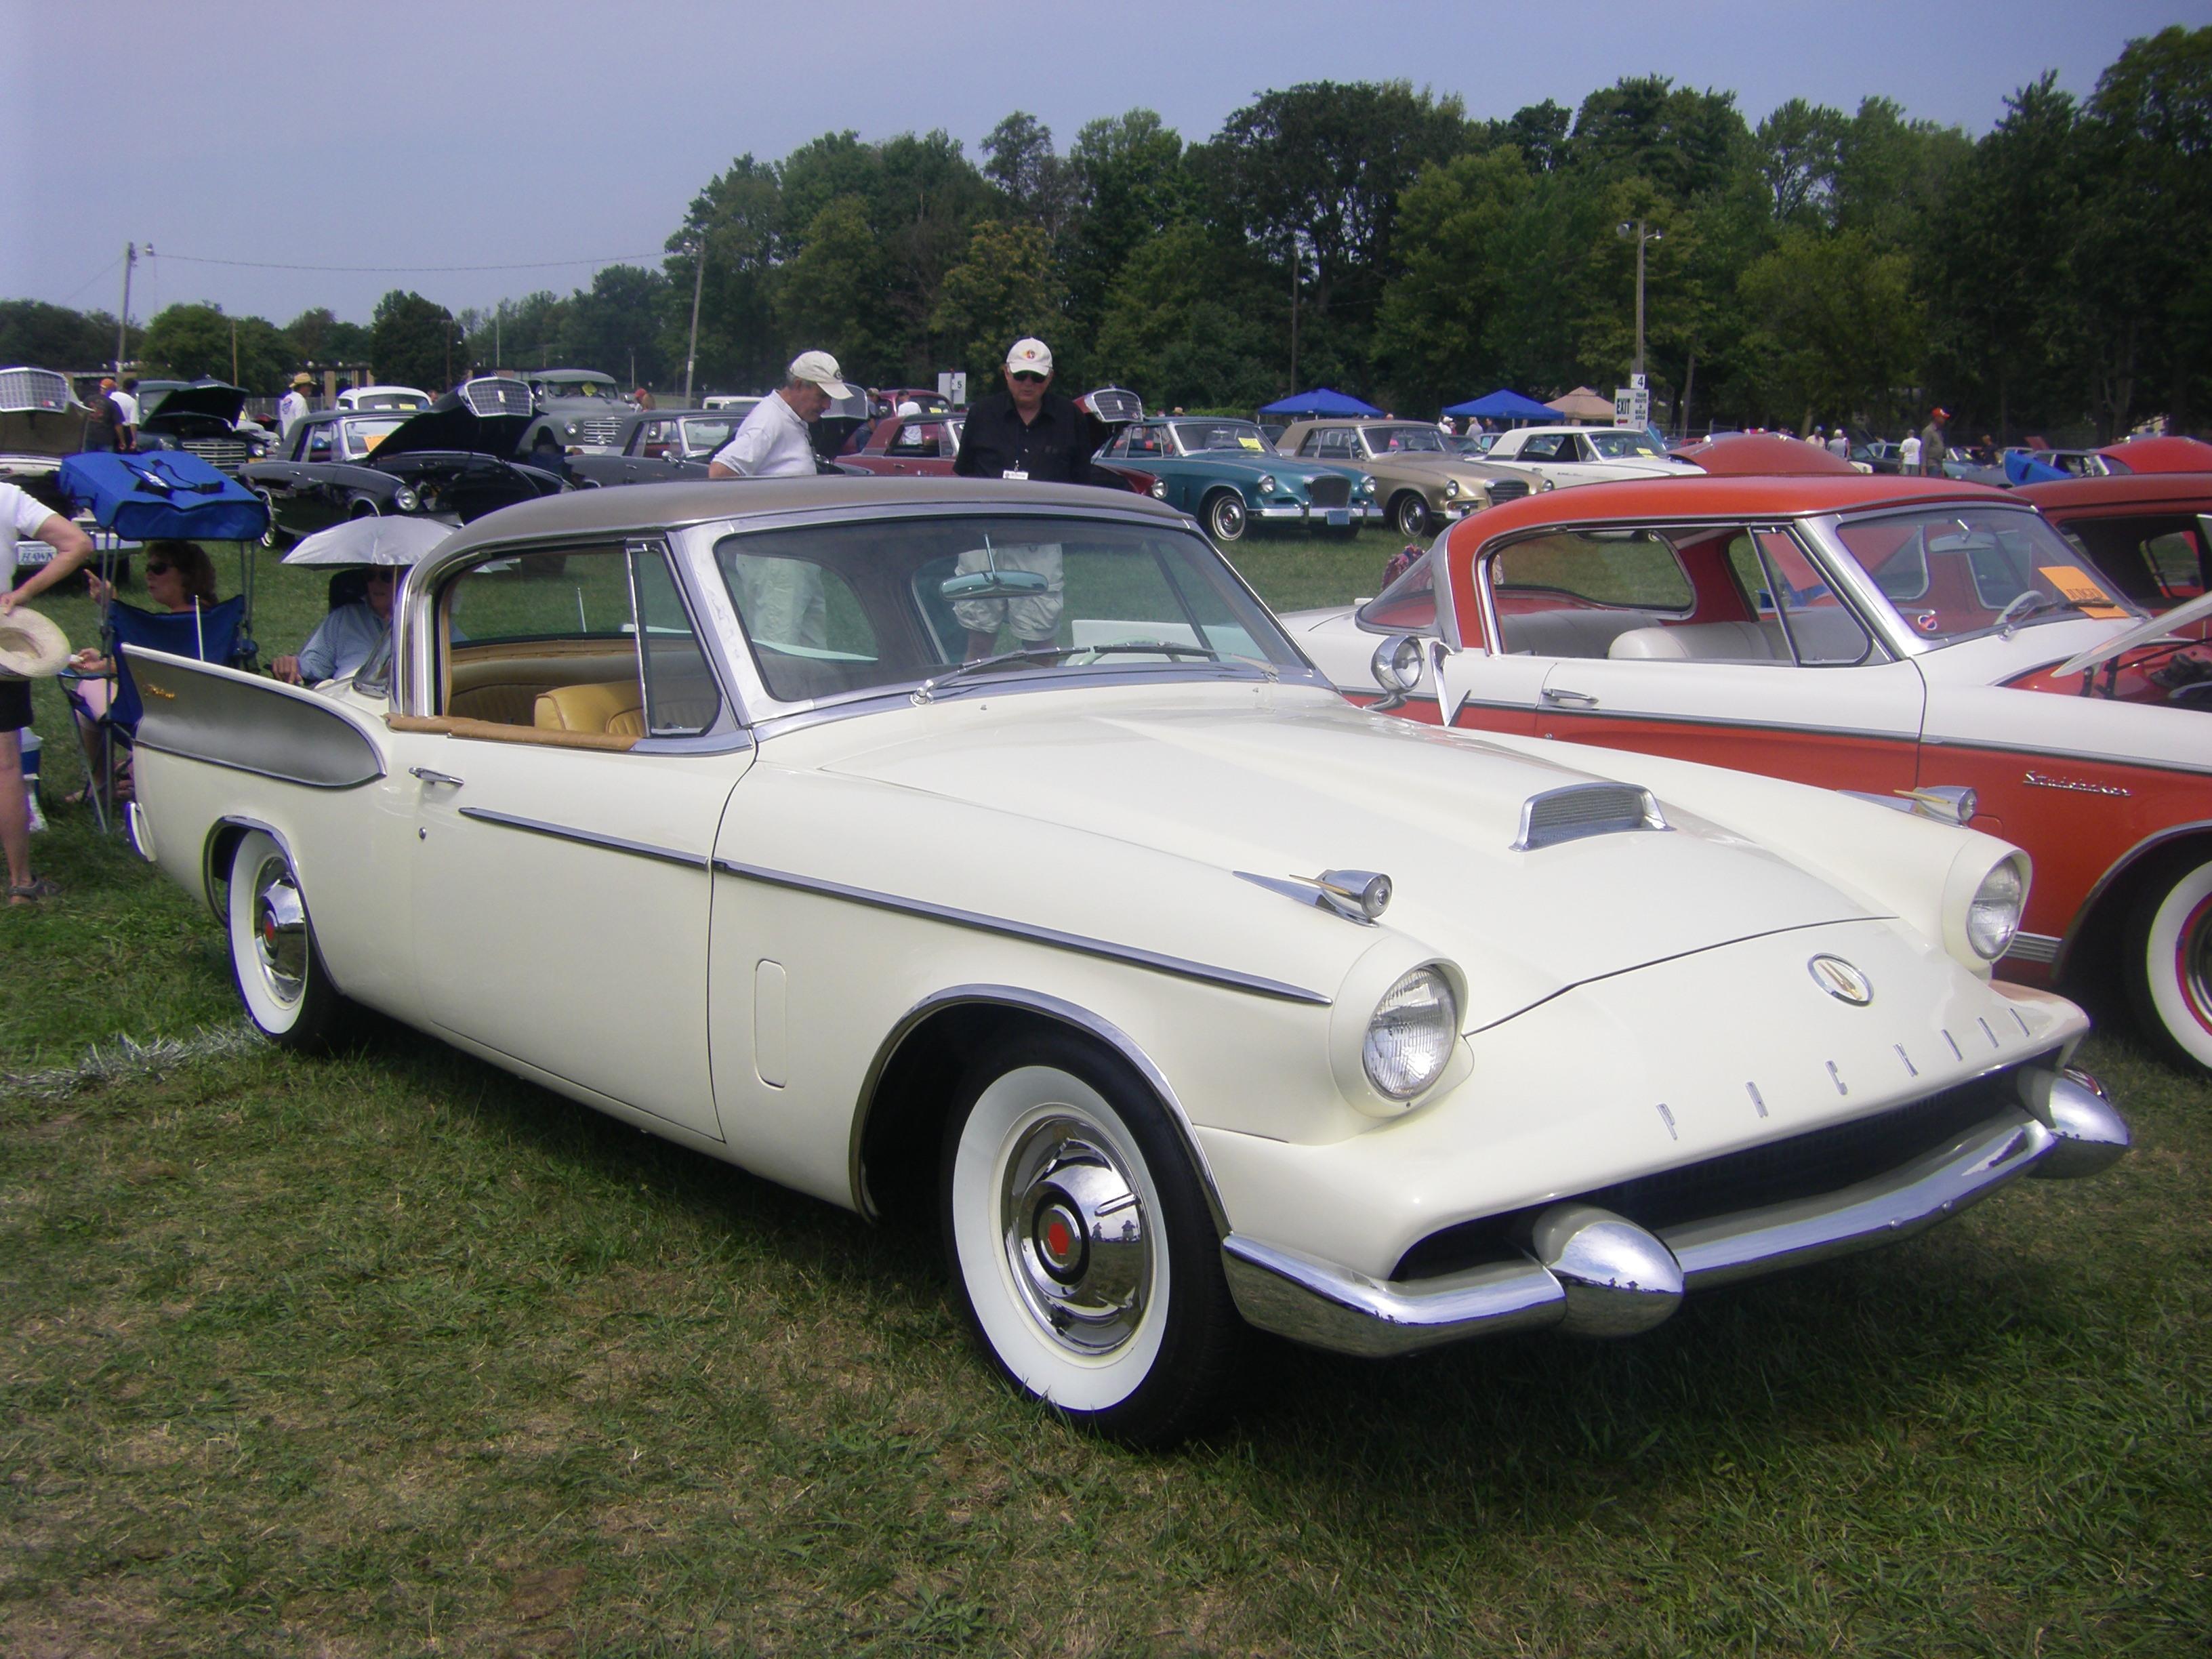
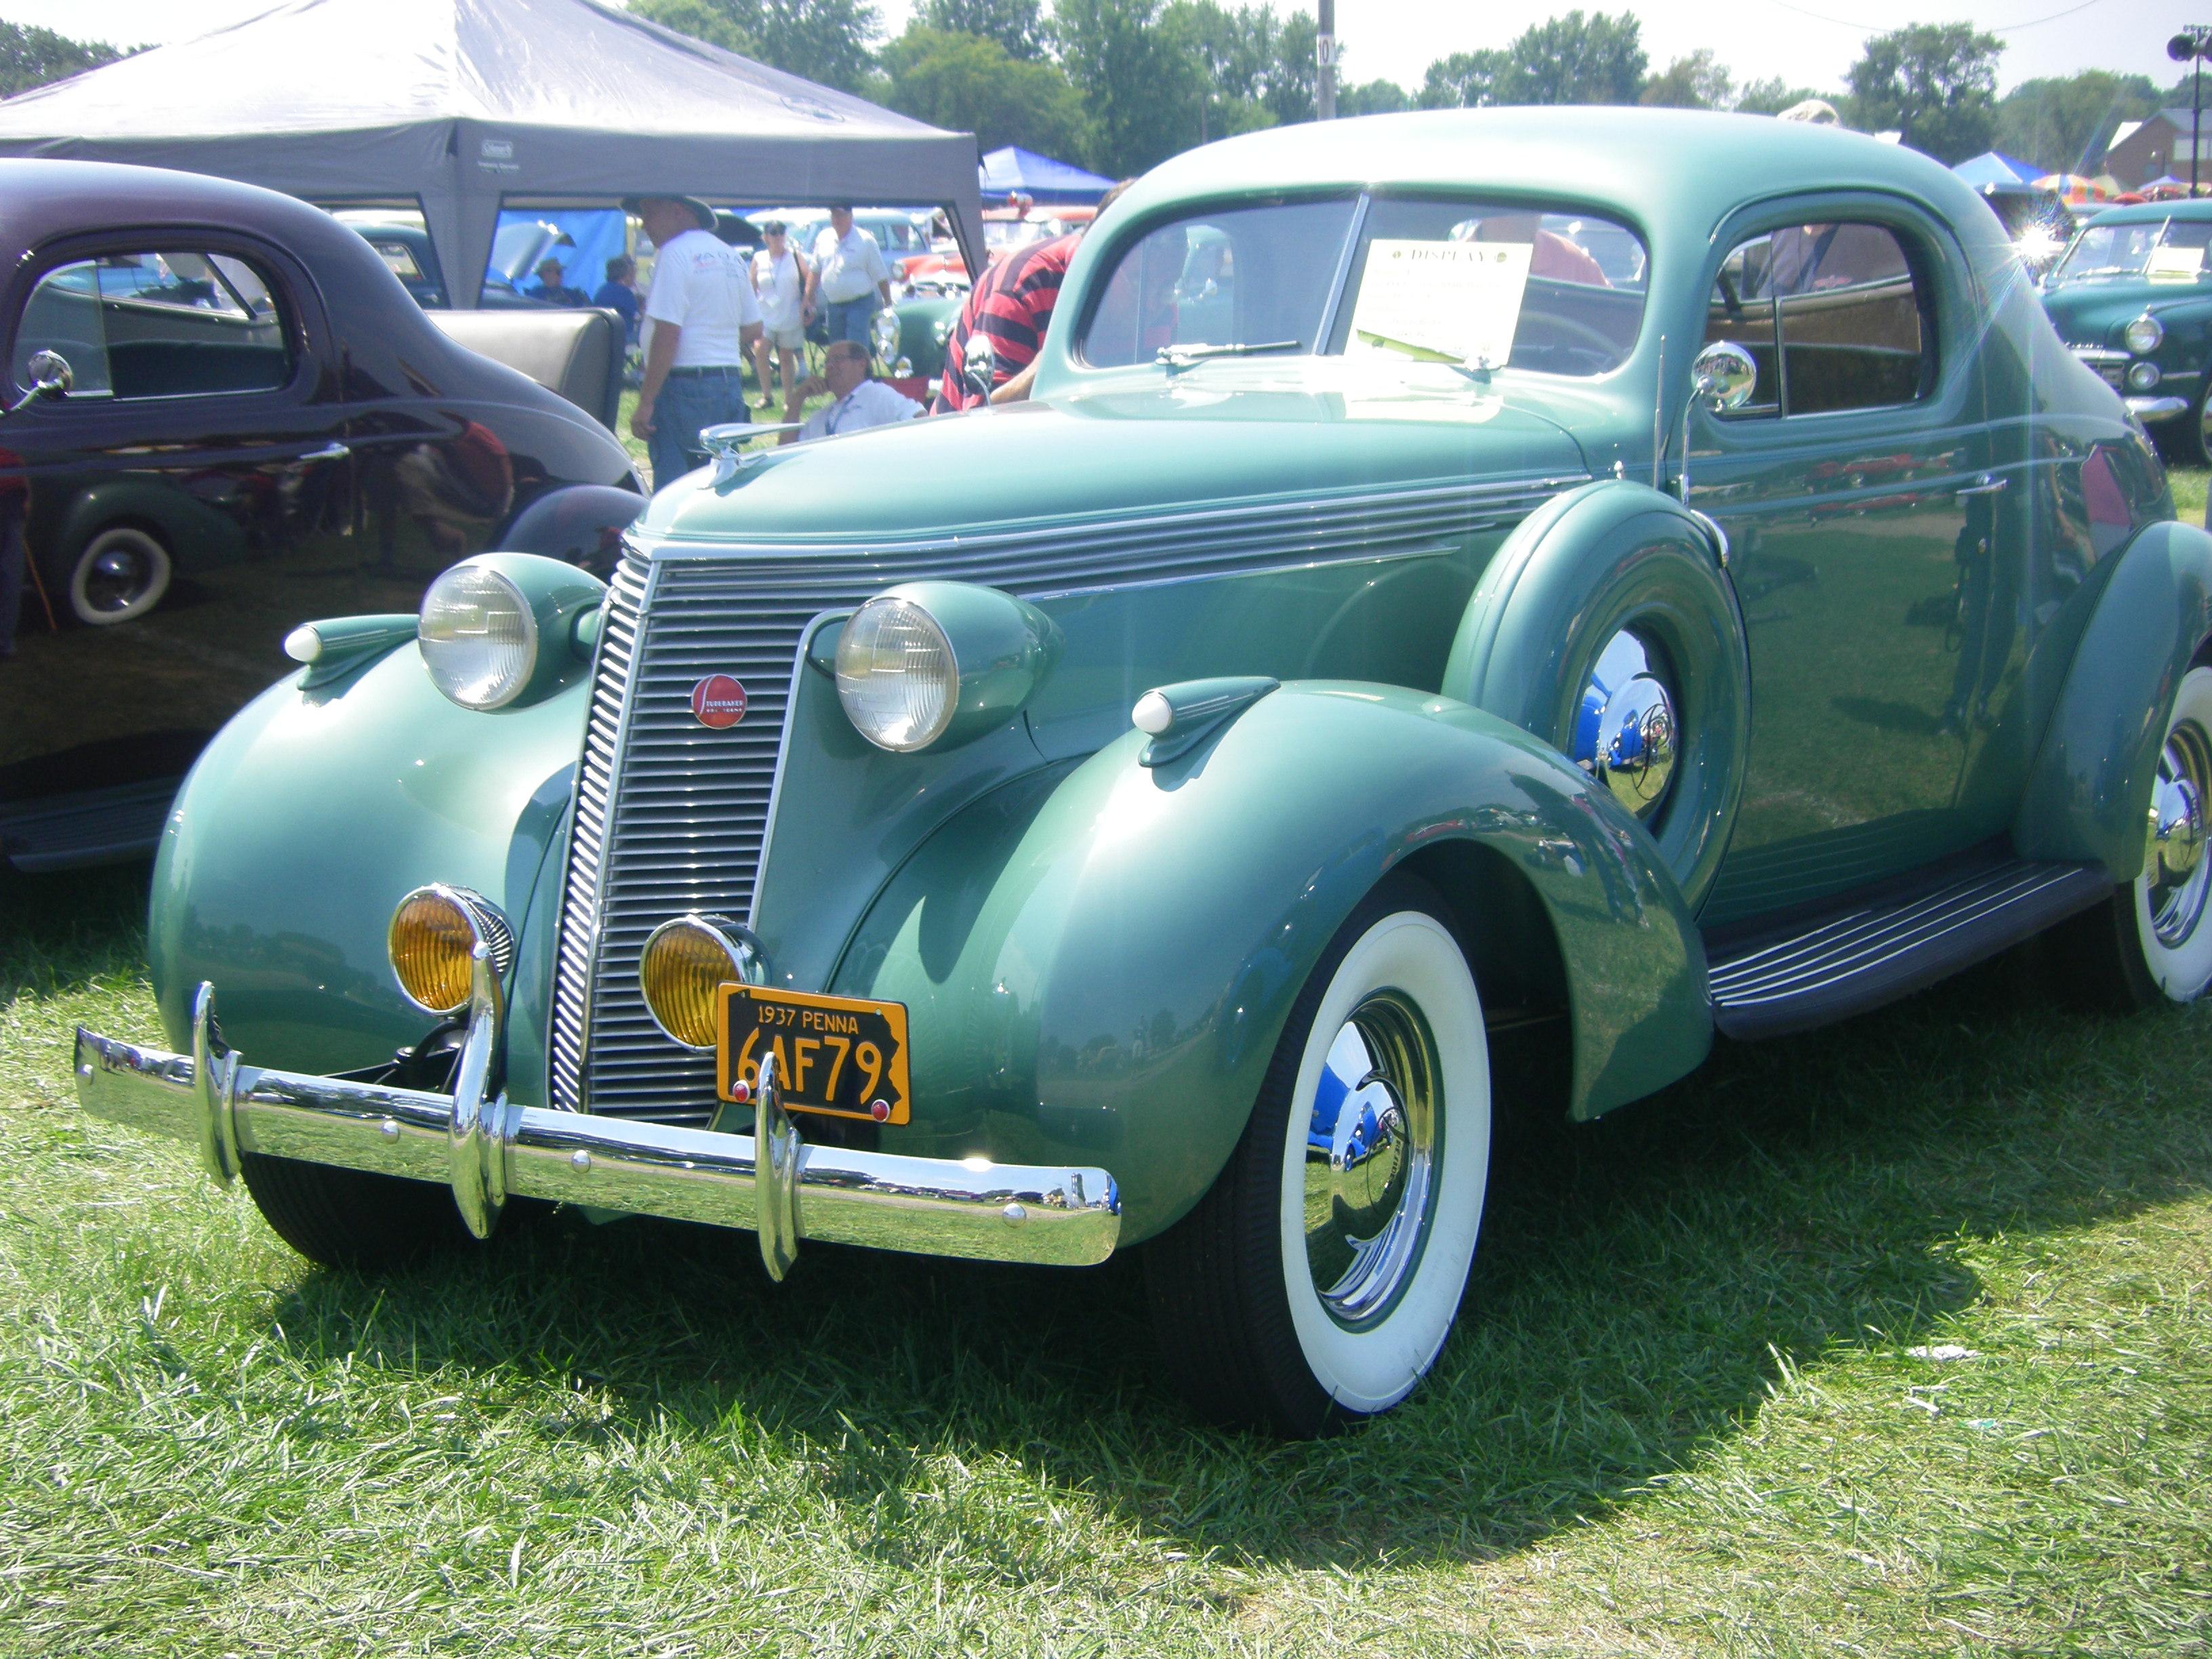
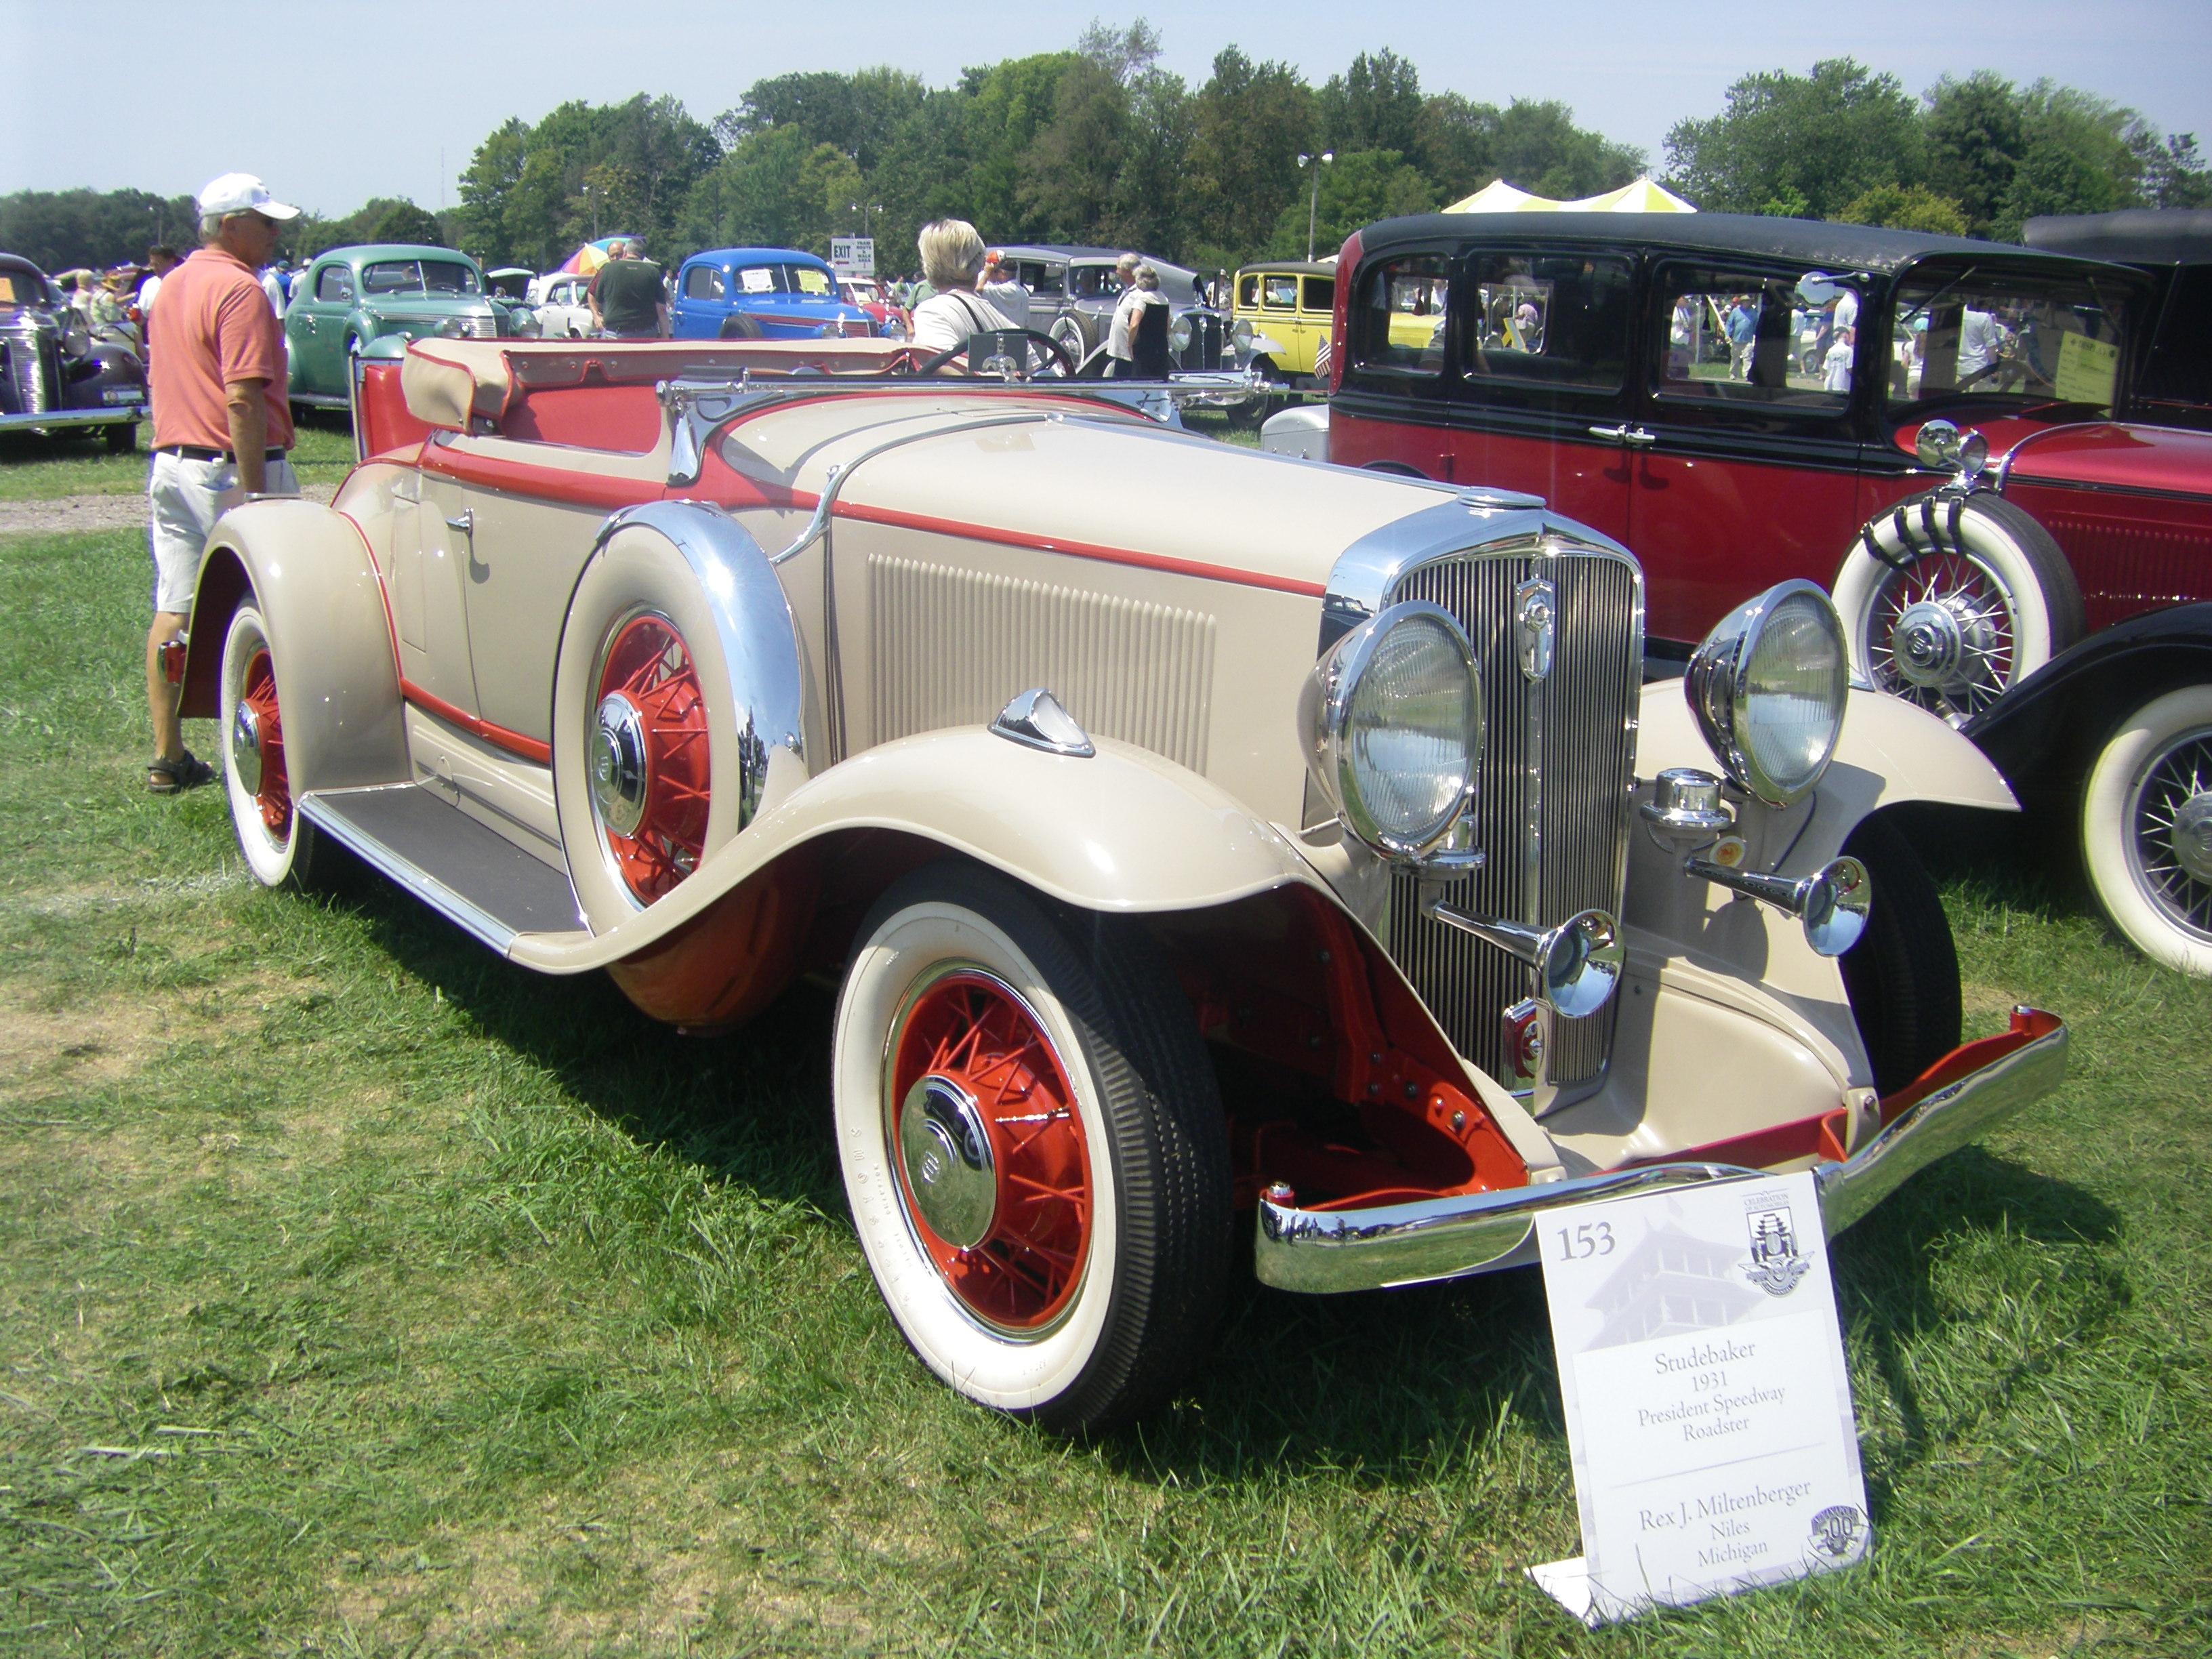
As part of my deep dive Stude-a-mania, I attended the 2012 Studebaker Drivers Club International Meet in South Bend, Ind. and took literally hundreds of pictures. The concours event at the fairgrounds featured an unbelievable number of Hawks of all kinds as well as other Studes all the way back to wagon days. Here are a few views of Packard Hawks. Note that in the background there is a sea of other Hawks filling the Hawk display area. This a great event to attend. Studebakers virtually take over downtown South Bend for several days and the Studebaker National Museum is not to be missed either. BTW, the toilet seat was not optional like it was on Chrysler products of the time. A few bonus photos:
-
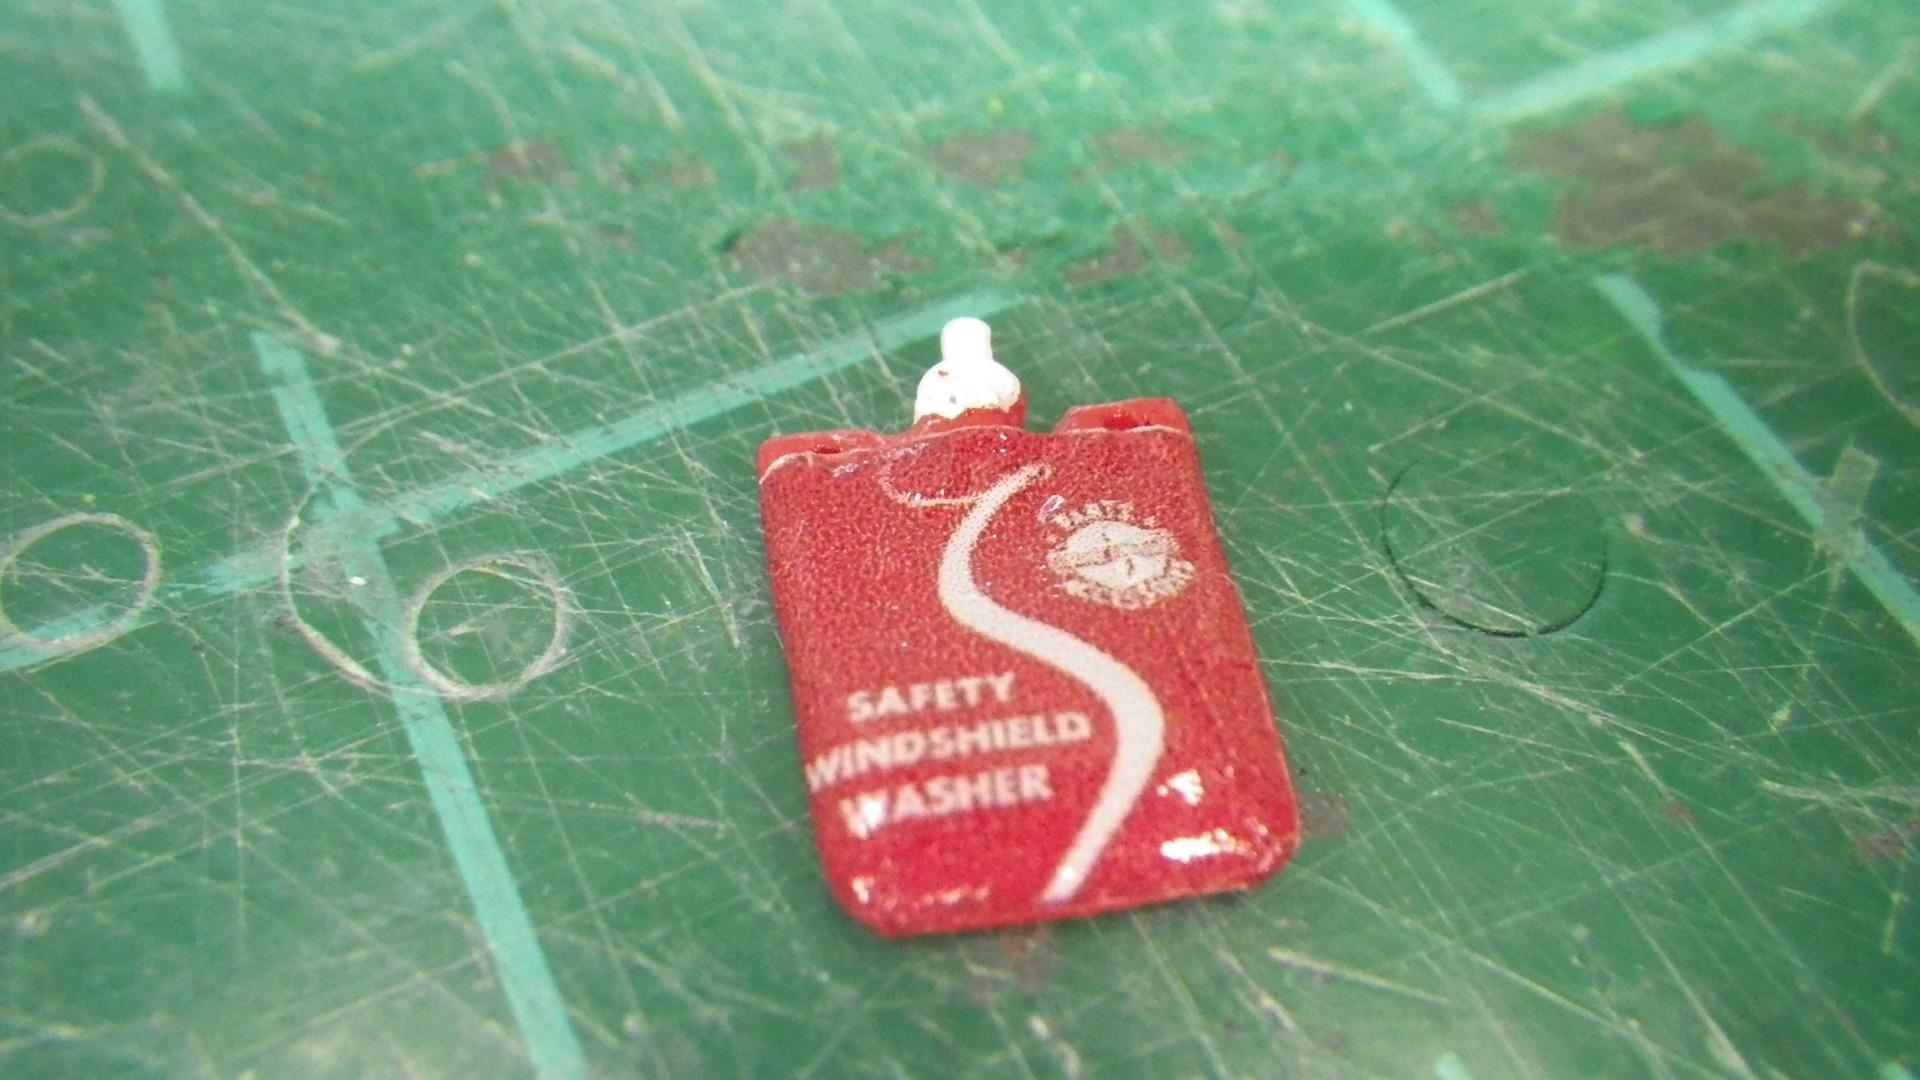
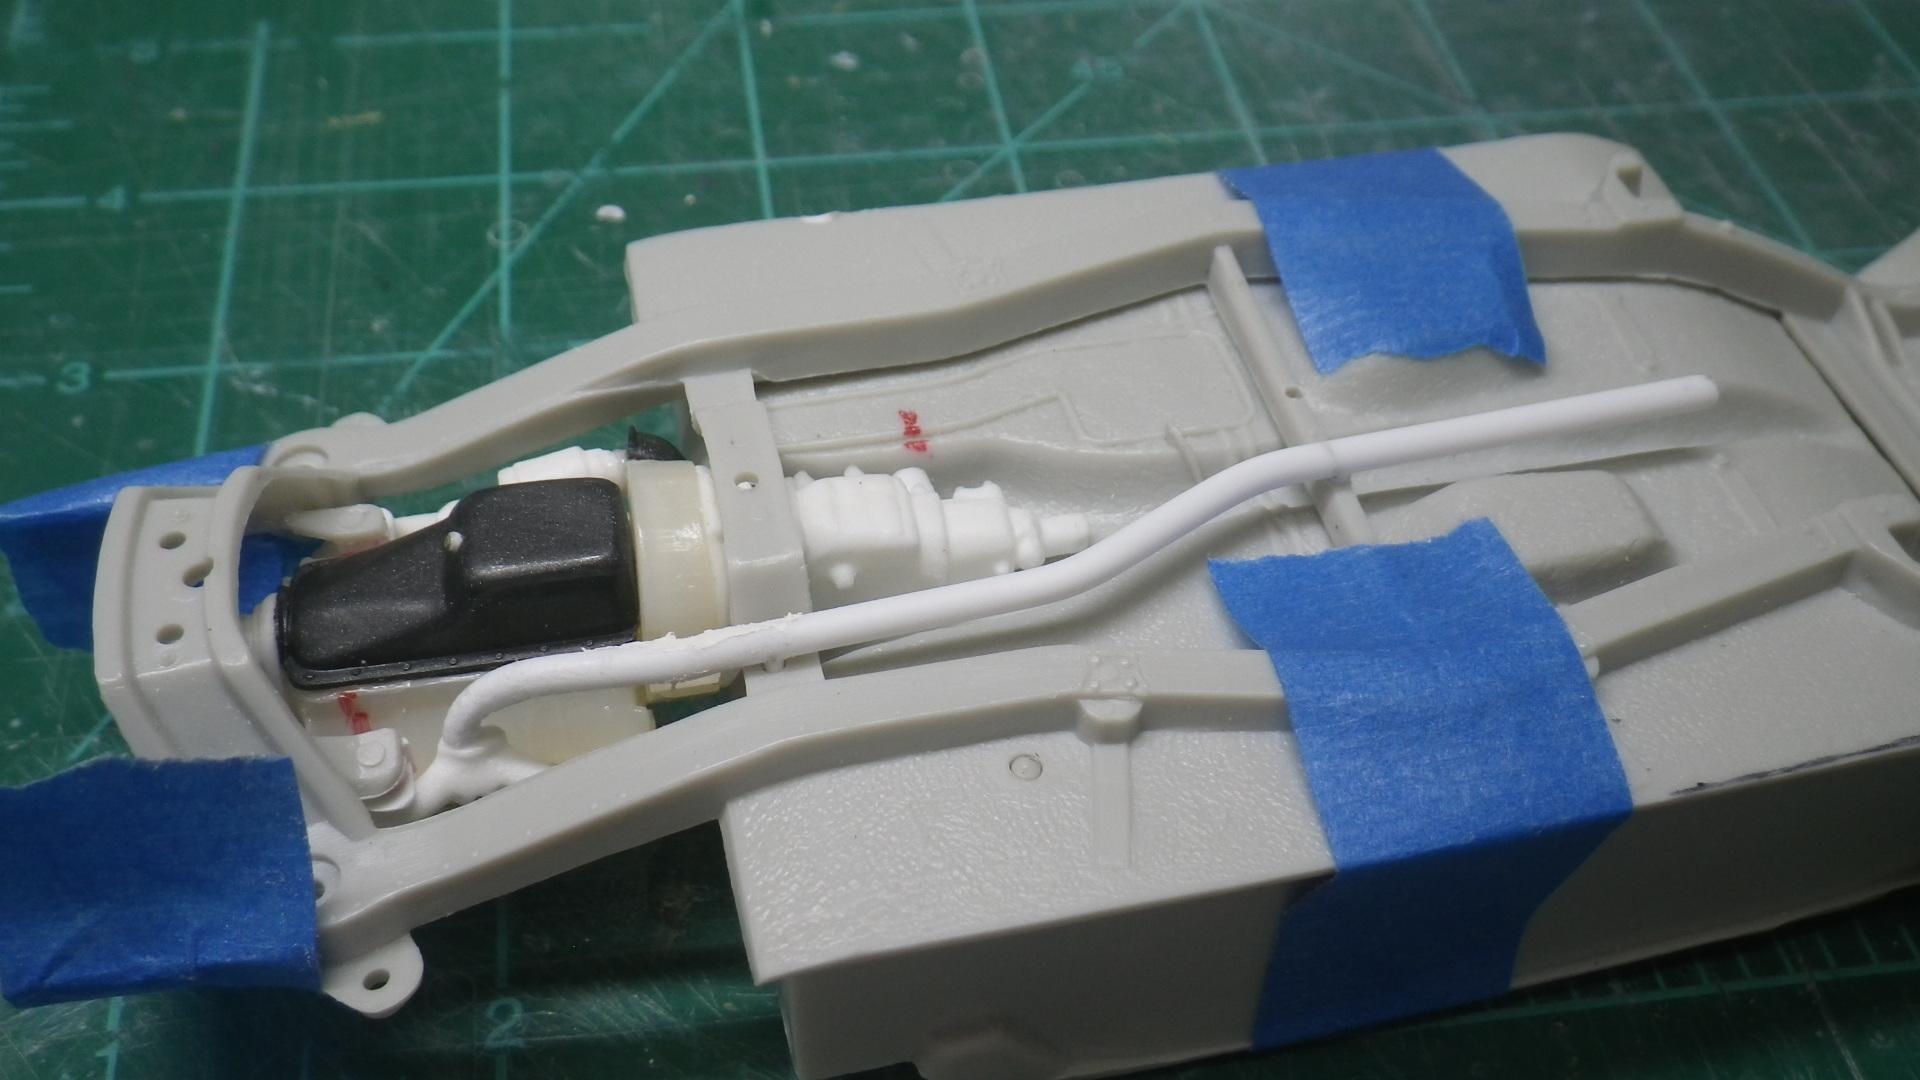
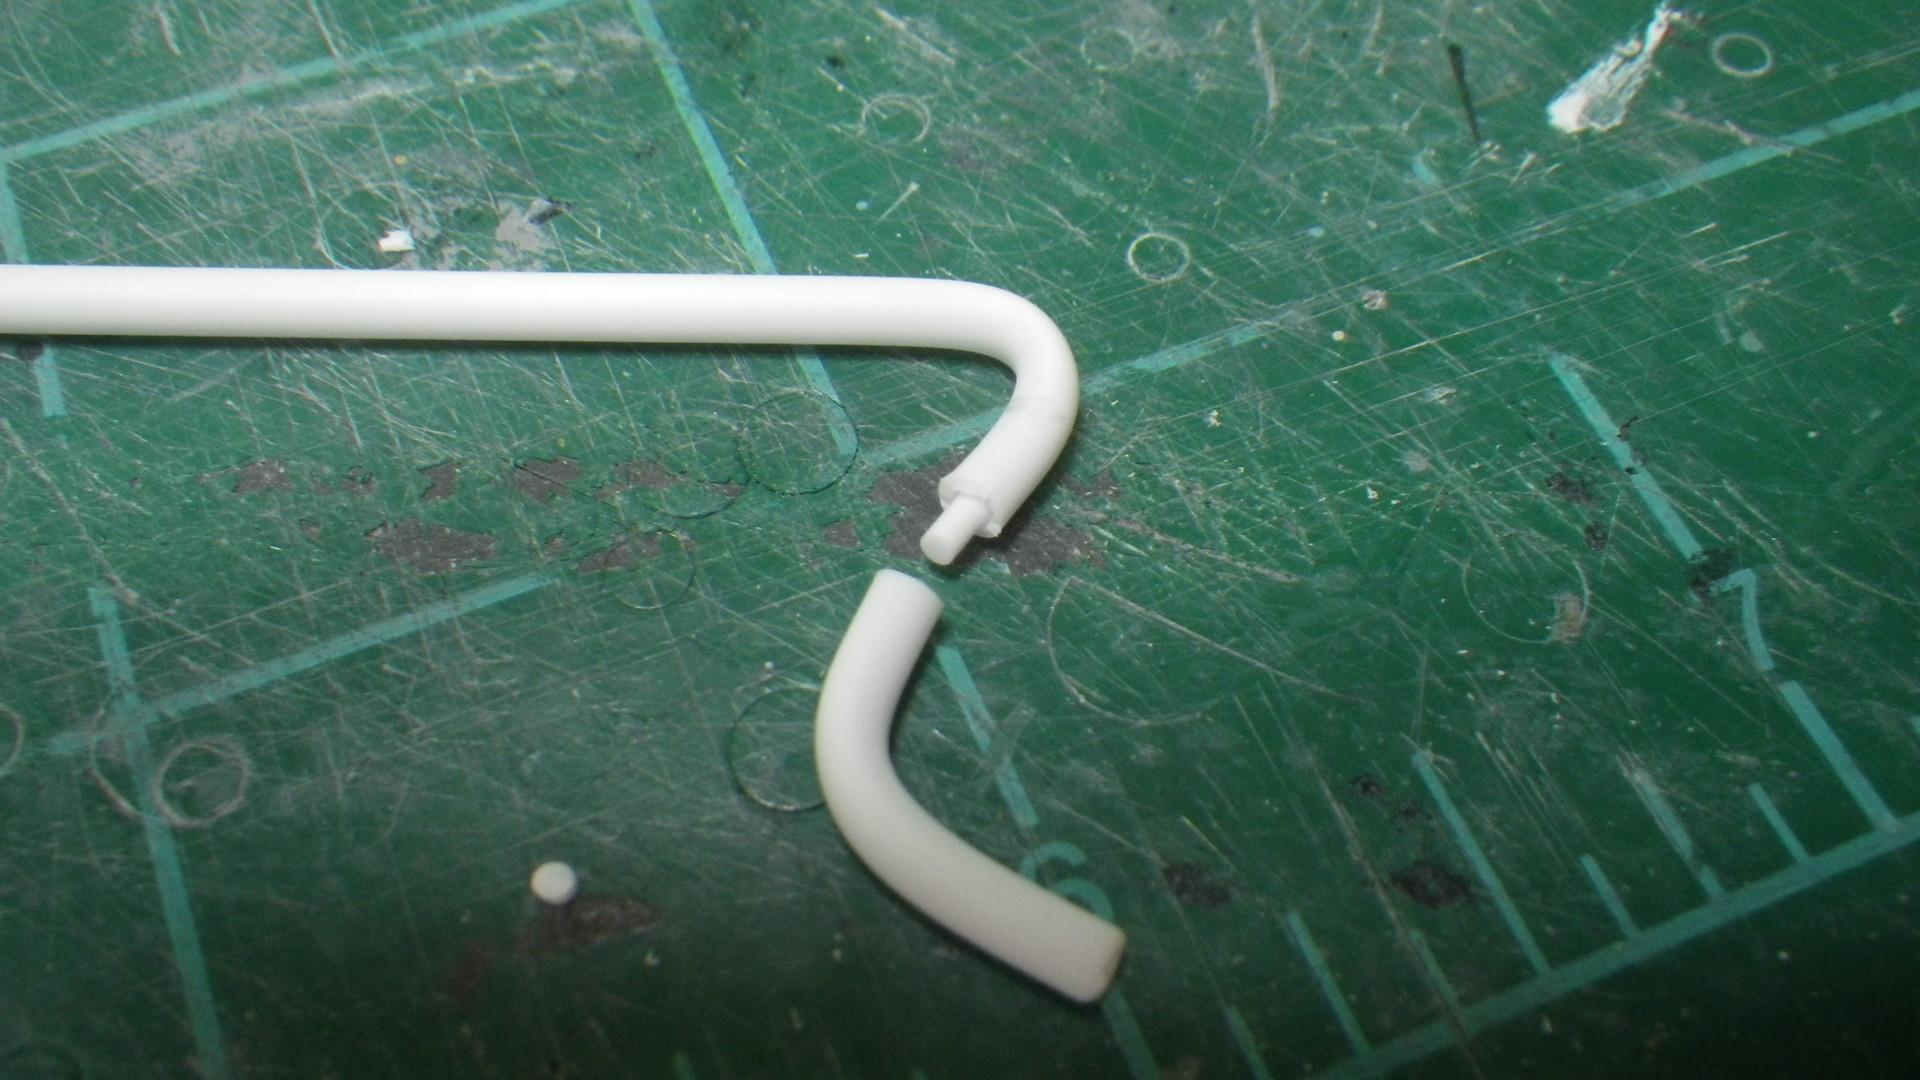
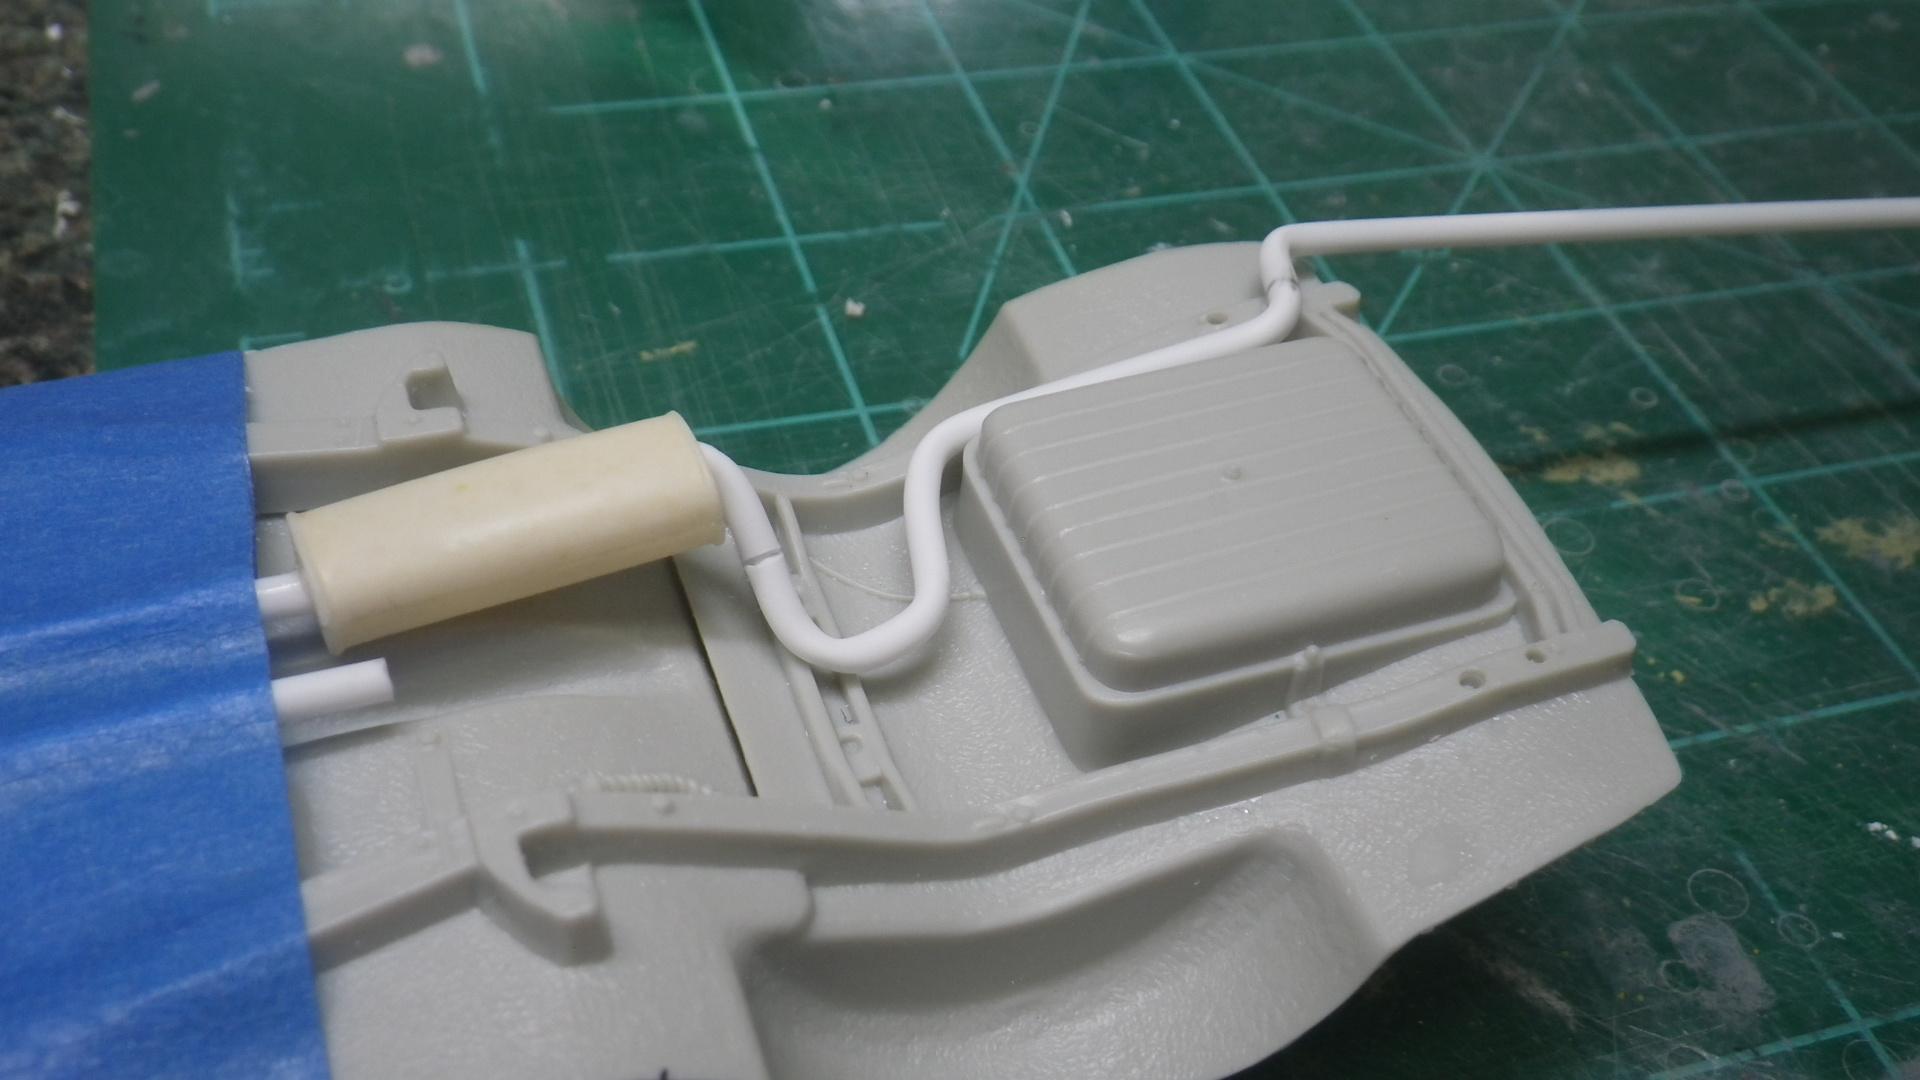
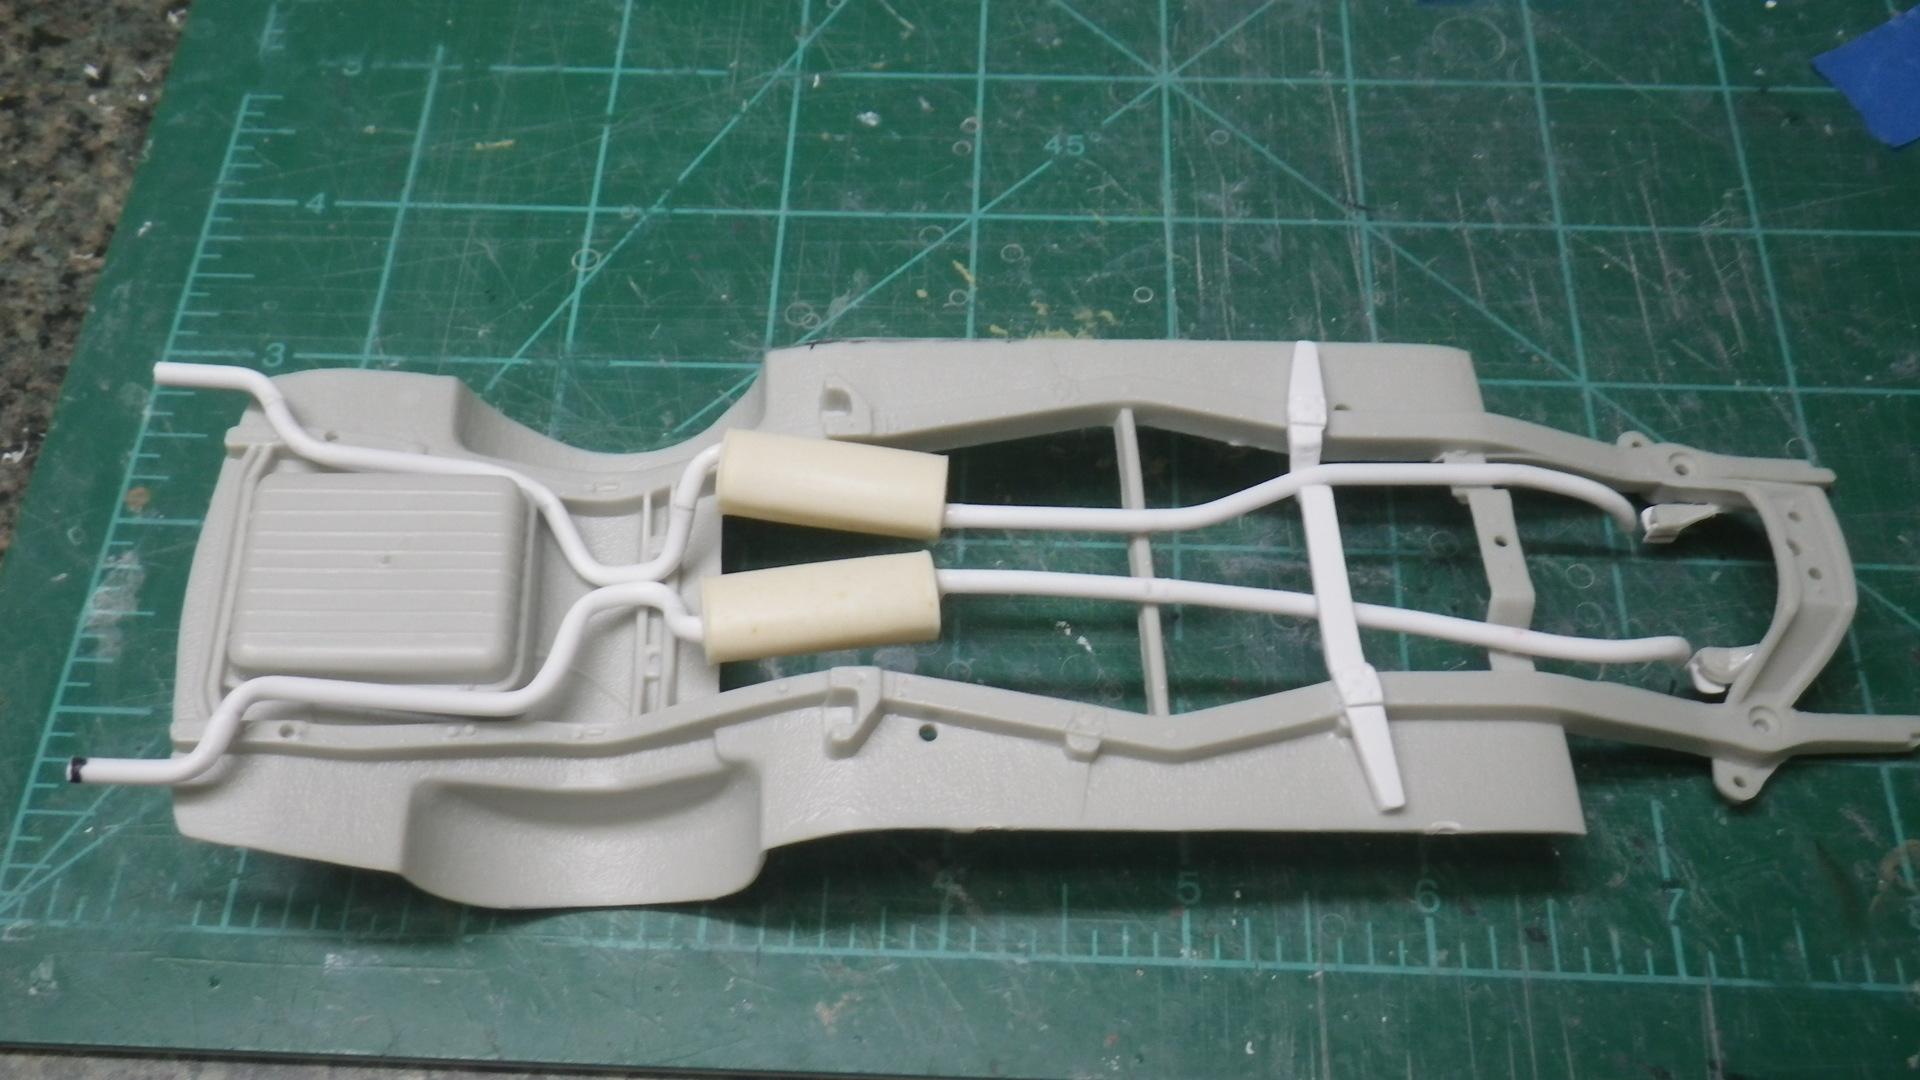
Time for a new installment of the 56J build and thanks for following! Here comes a couple of minor details but some of my favorites to include on Stude builds. The windshield washer bag appears on almost all postwar Studes (if they had the optional washer) so I've made these several times in the past. The bag itself is my resin re-pop of an old JoHan part and it gets decorated with a homemade decal. Most of my images (maybe all?) for under hood Studebaker decals come from the on-line catalog of Studebaker International, a parts supplier to the 1:1 Studebaker community. This build also requires a battery upgrade since the '53 donor kit includes a 6 volt battery but by 1956 Studebaker had stepped up to 12 volt along with most of the rest of the auto industry. They always used Willard batteries as standard equipment (though some later ones were labelled Studebaker) so that's a cool detail to include on these builds. A battery tray upgrade is also needed and on this car the washer bag actually hangs on the battery hold-down frame. At this point, the engine was mostly temporarily assembled so it could be test fitted to the chassis. More about the engine itself later. The 56J requires a dual exhaust system, unlike the donor kit, and I decided to fab one up from Evergreen styrene. It's amazing how much bend you can put into 3/32" styrene tube just with finger pressure if you take it slow. When more bend was needed I used heat from a little coffee mug warmer - kind of like a mini hotplate. The exhausts were made in sections so a slip-up on one section wouldn't ruin the whole thing and then connected with plastic pins. The 56J (and all Hawks from then on)also has an extra frame brace. It has an unusual shape so one pipe passes above and the other passes below the brace. I think that allows room for the engine to twist under acceleration torque without either pipe hitting the brace. I think that will do it for now but there's more to come!
-
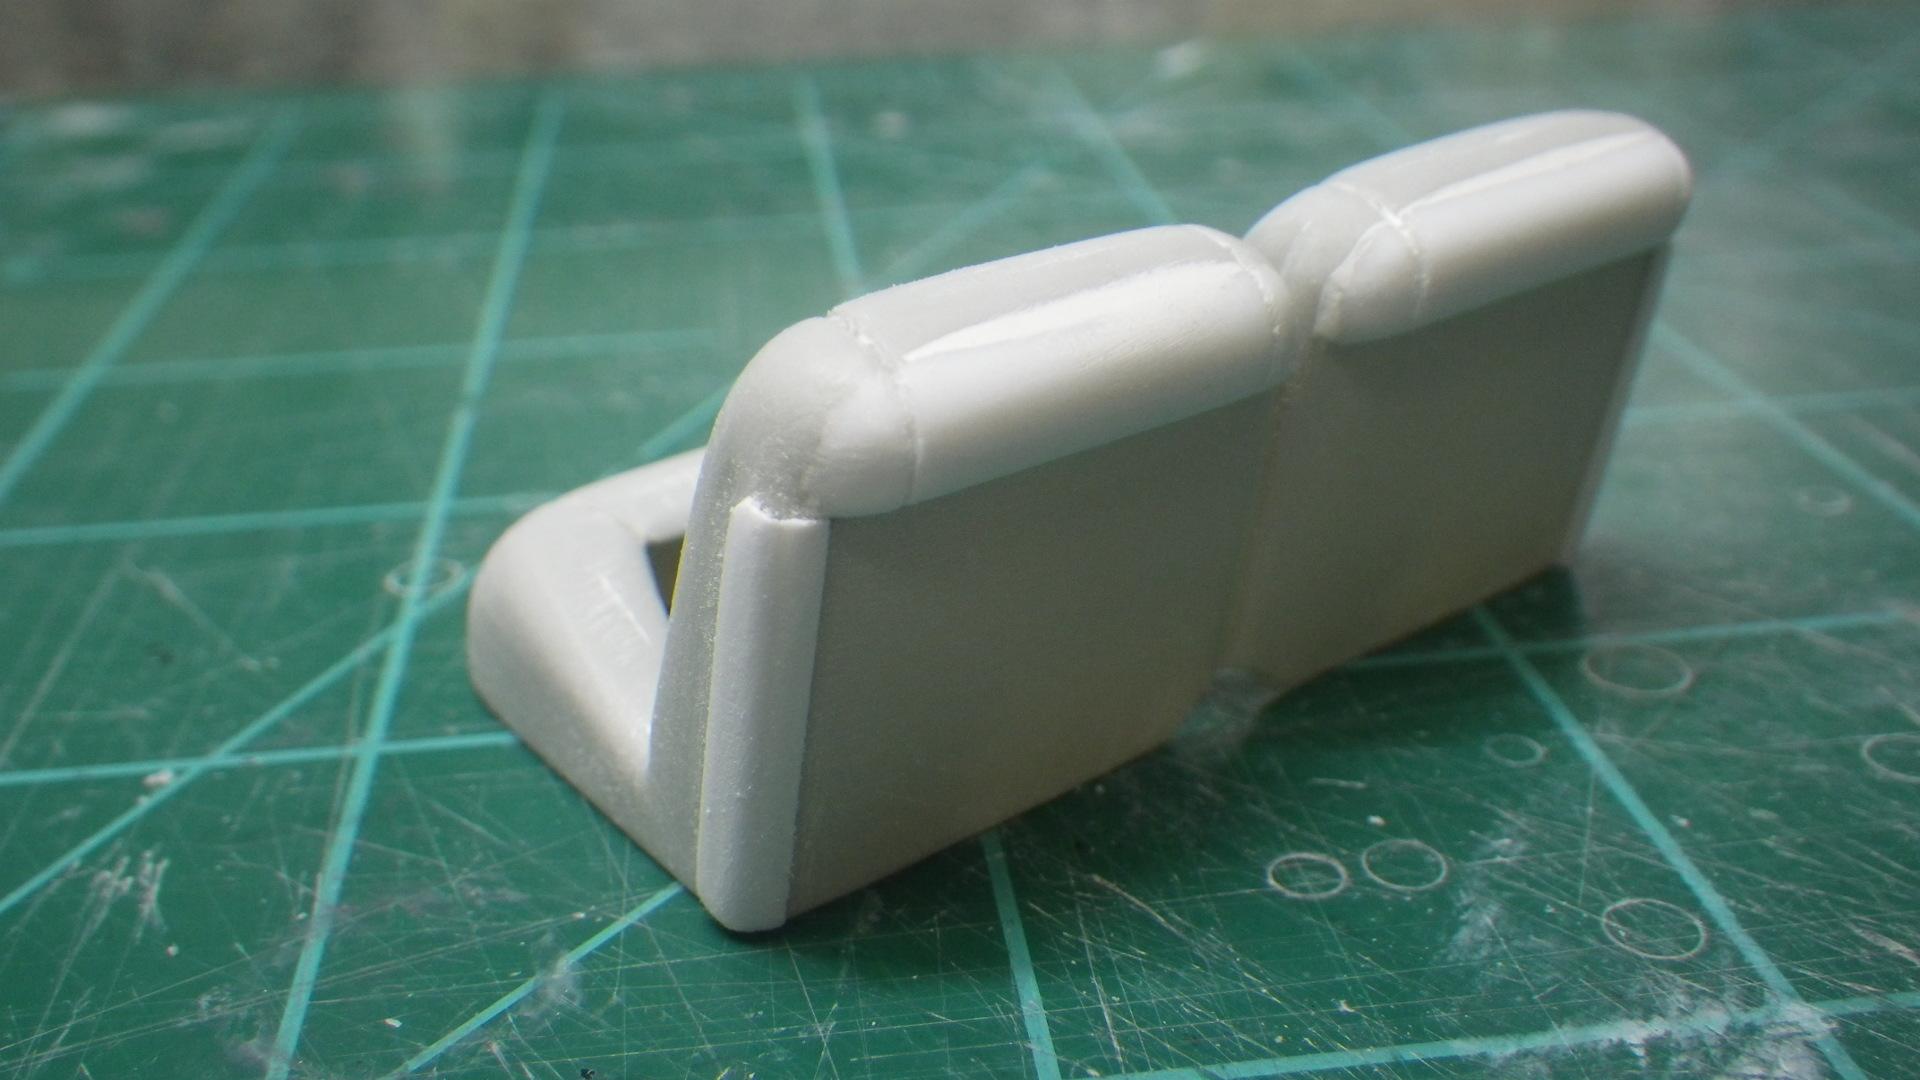
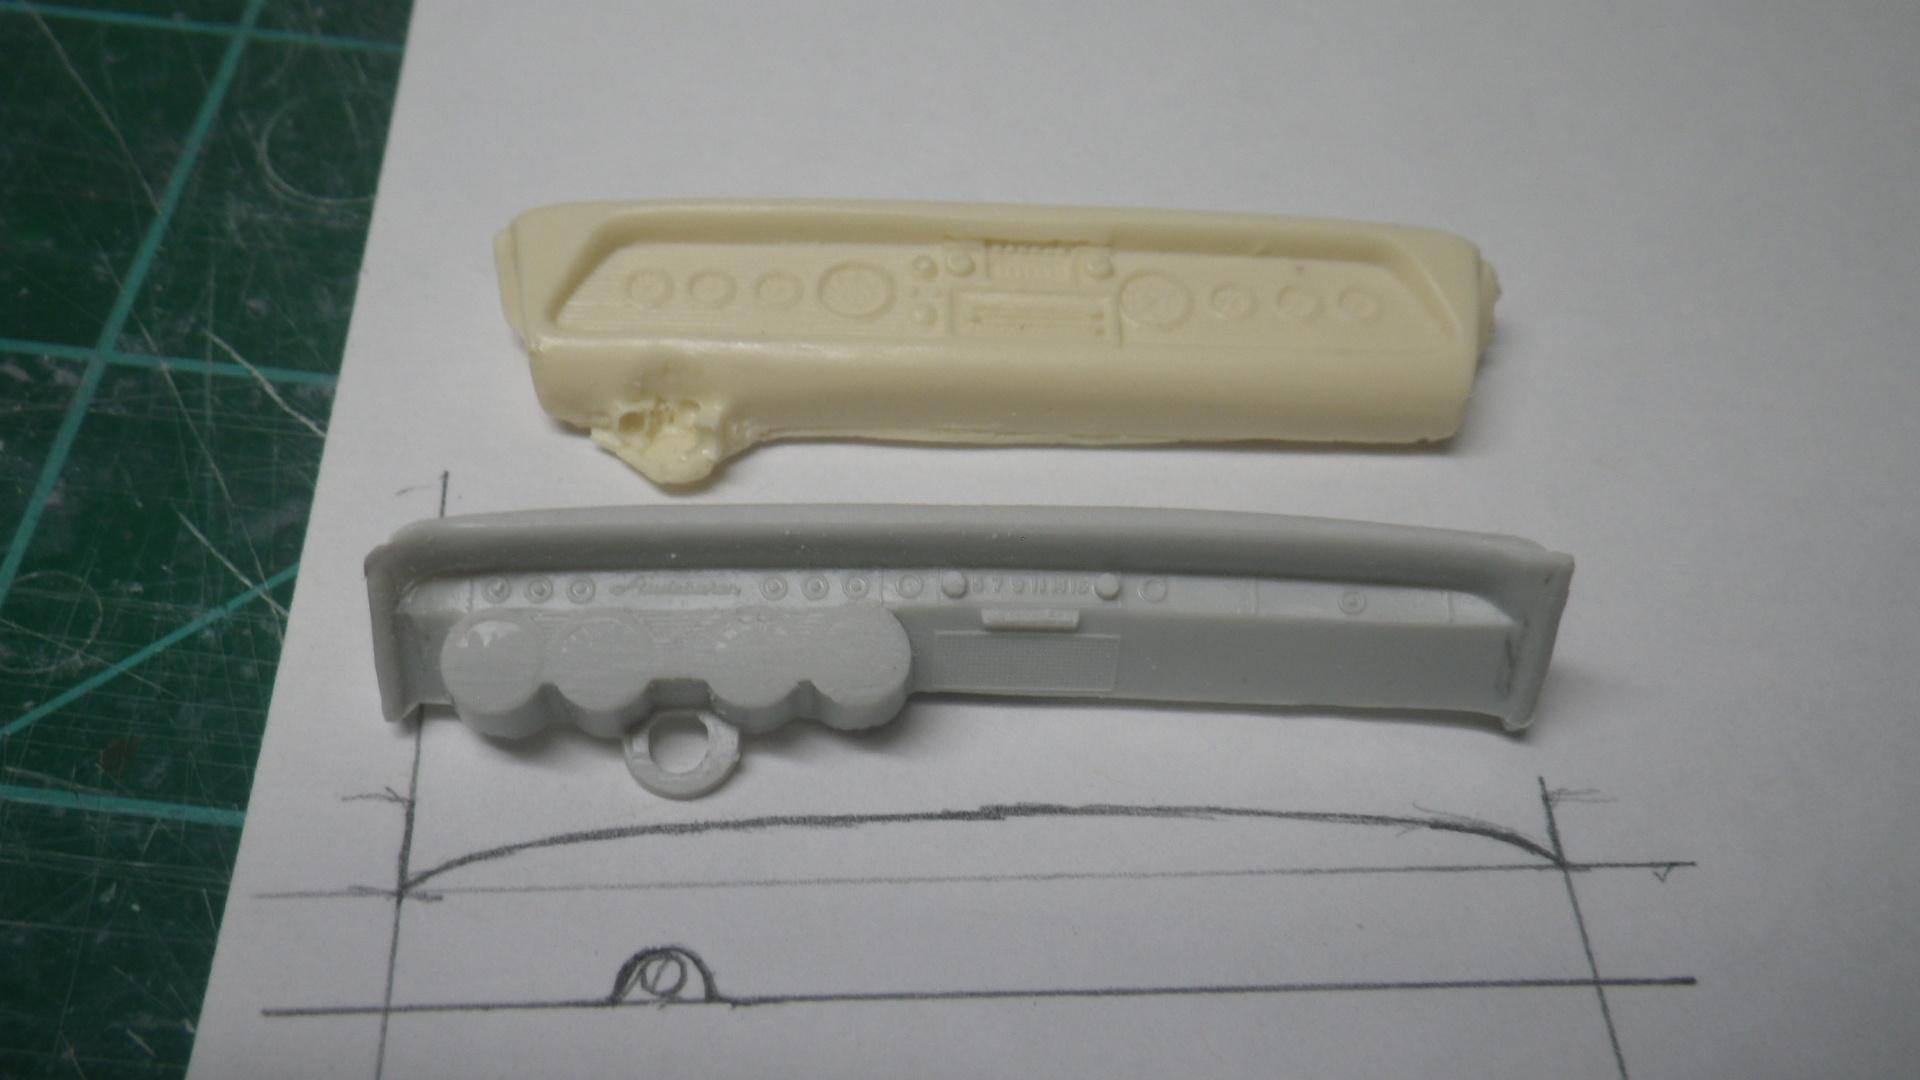
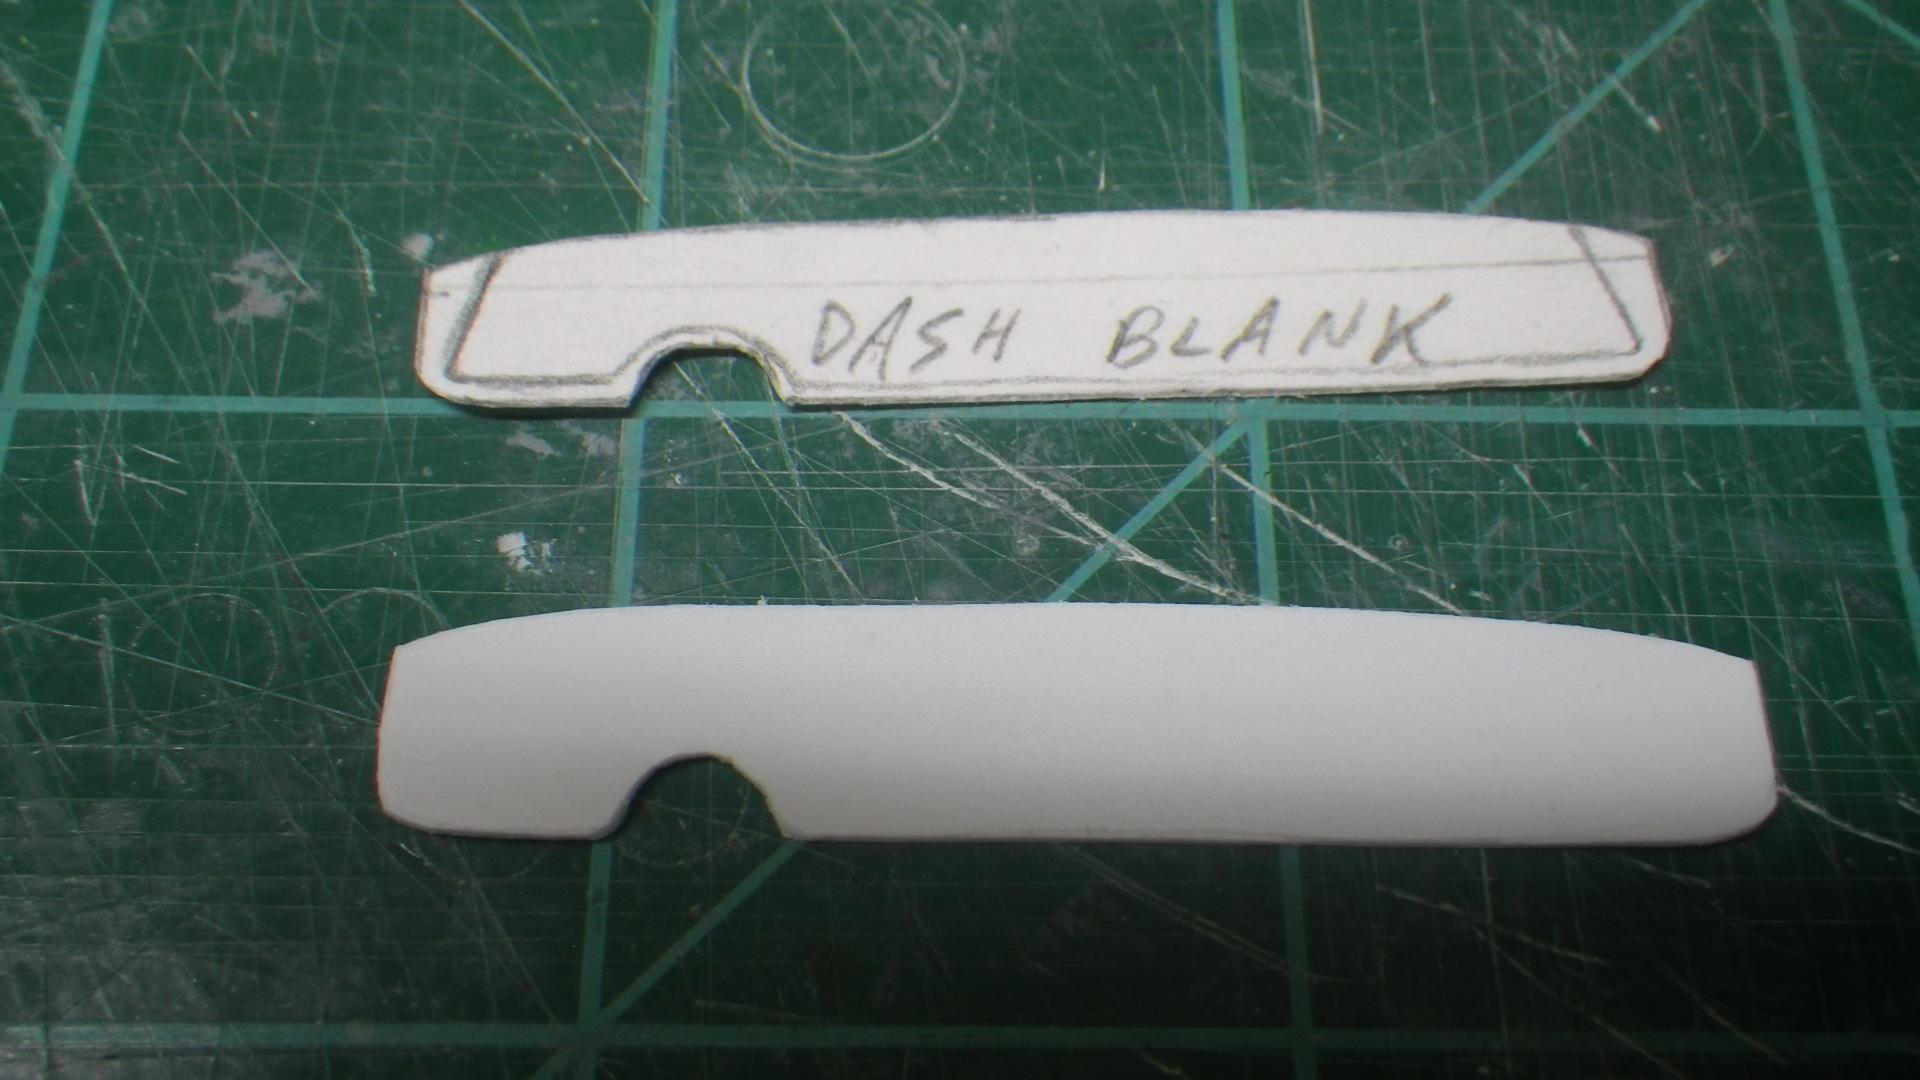
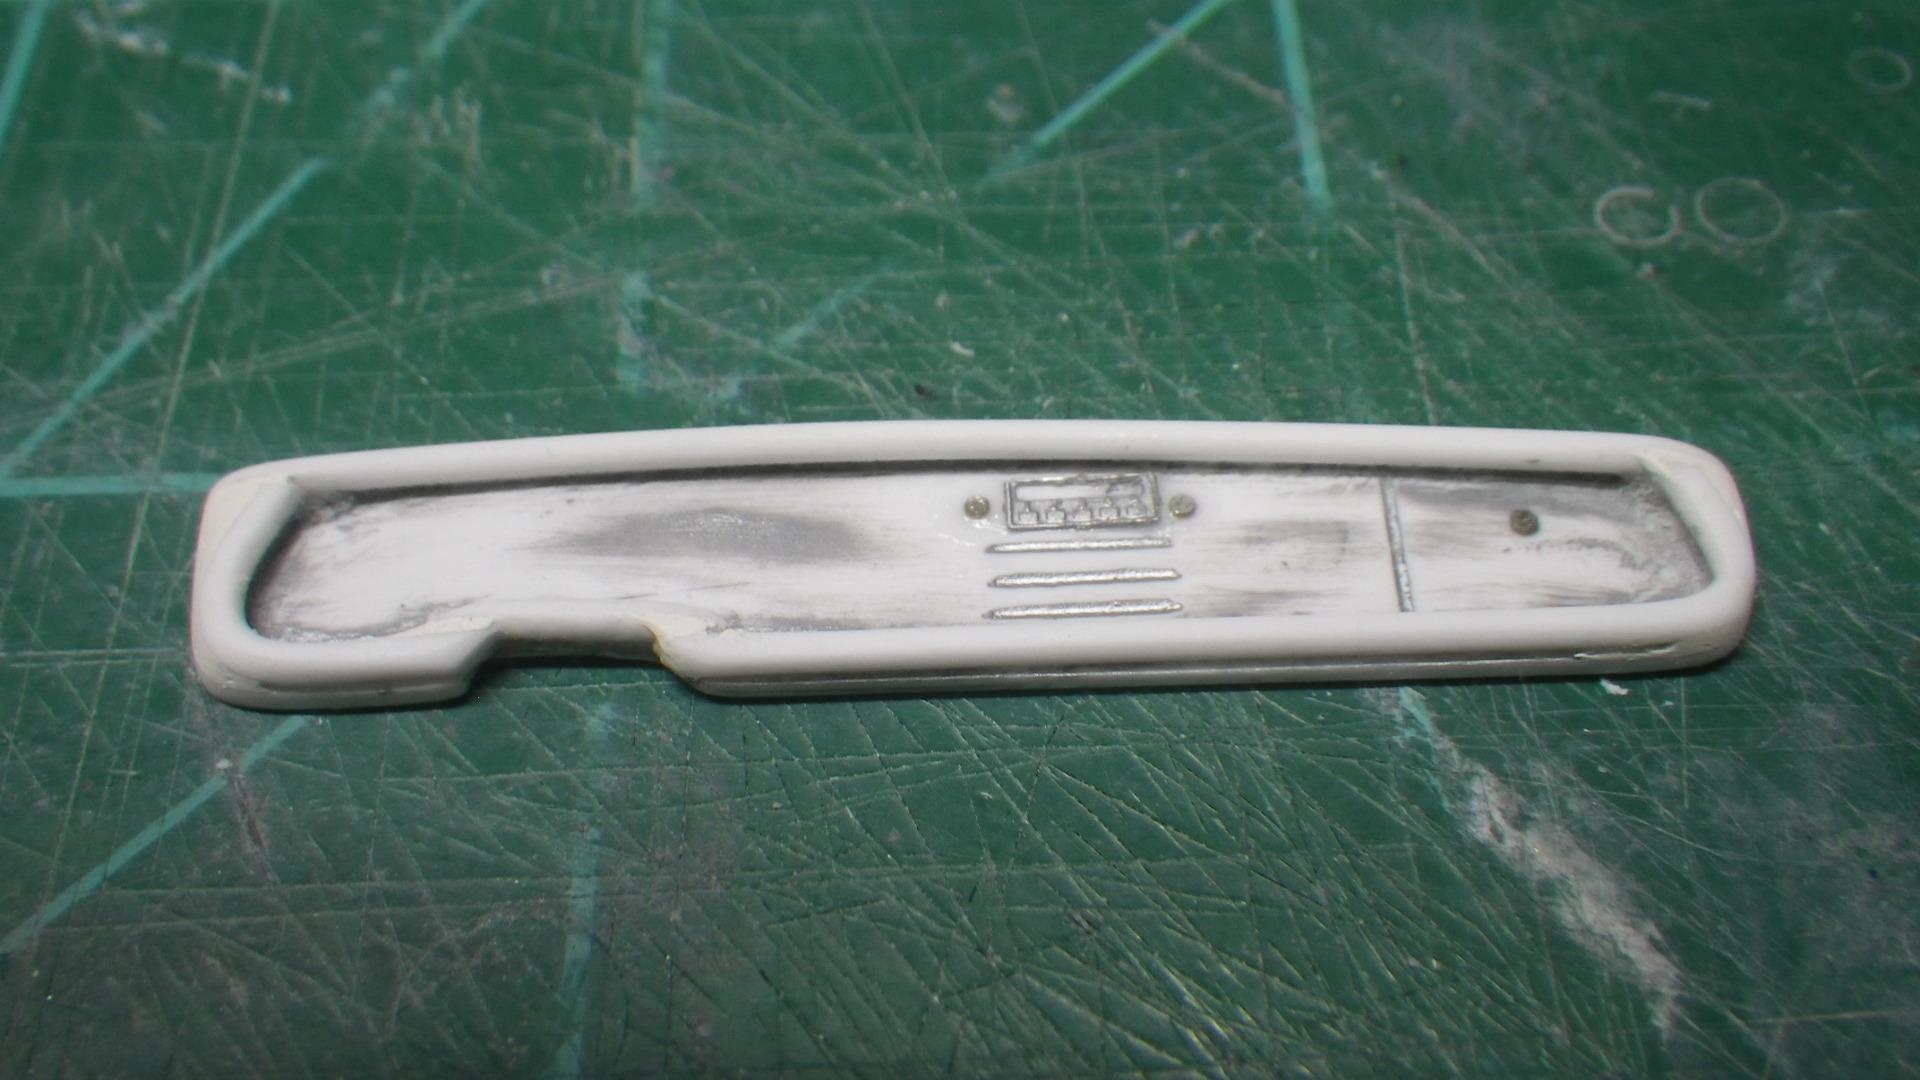
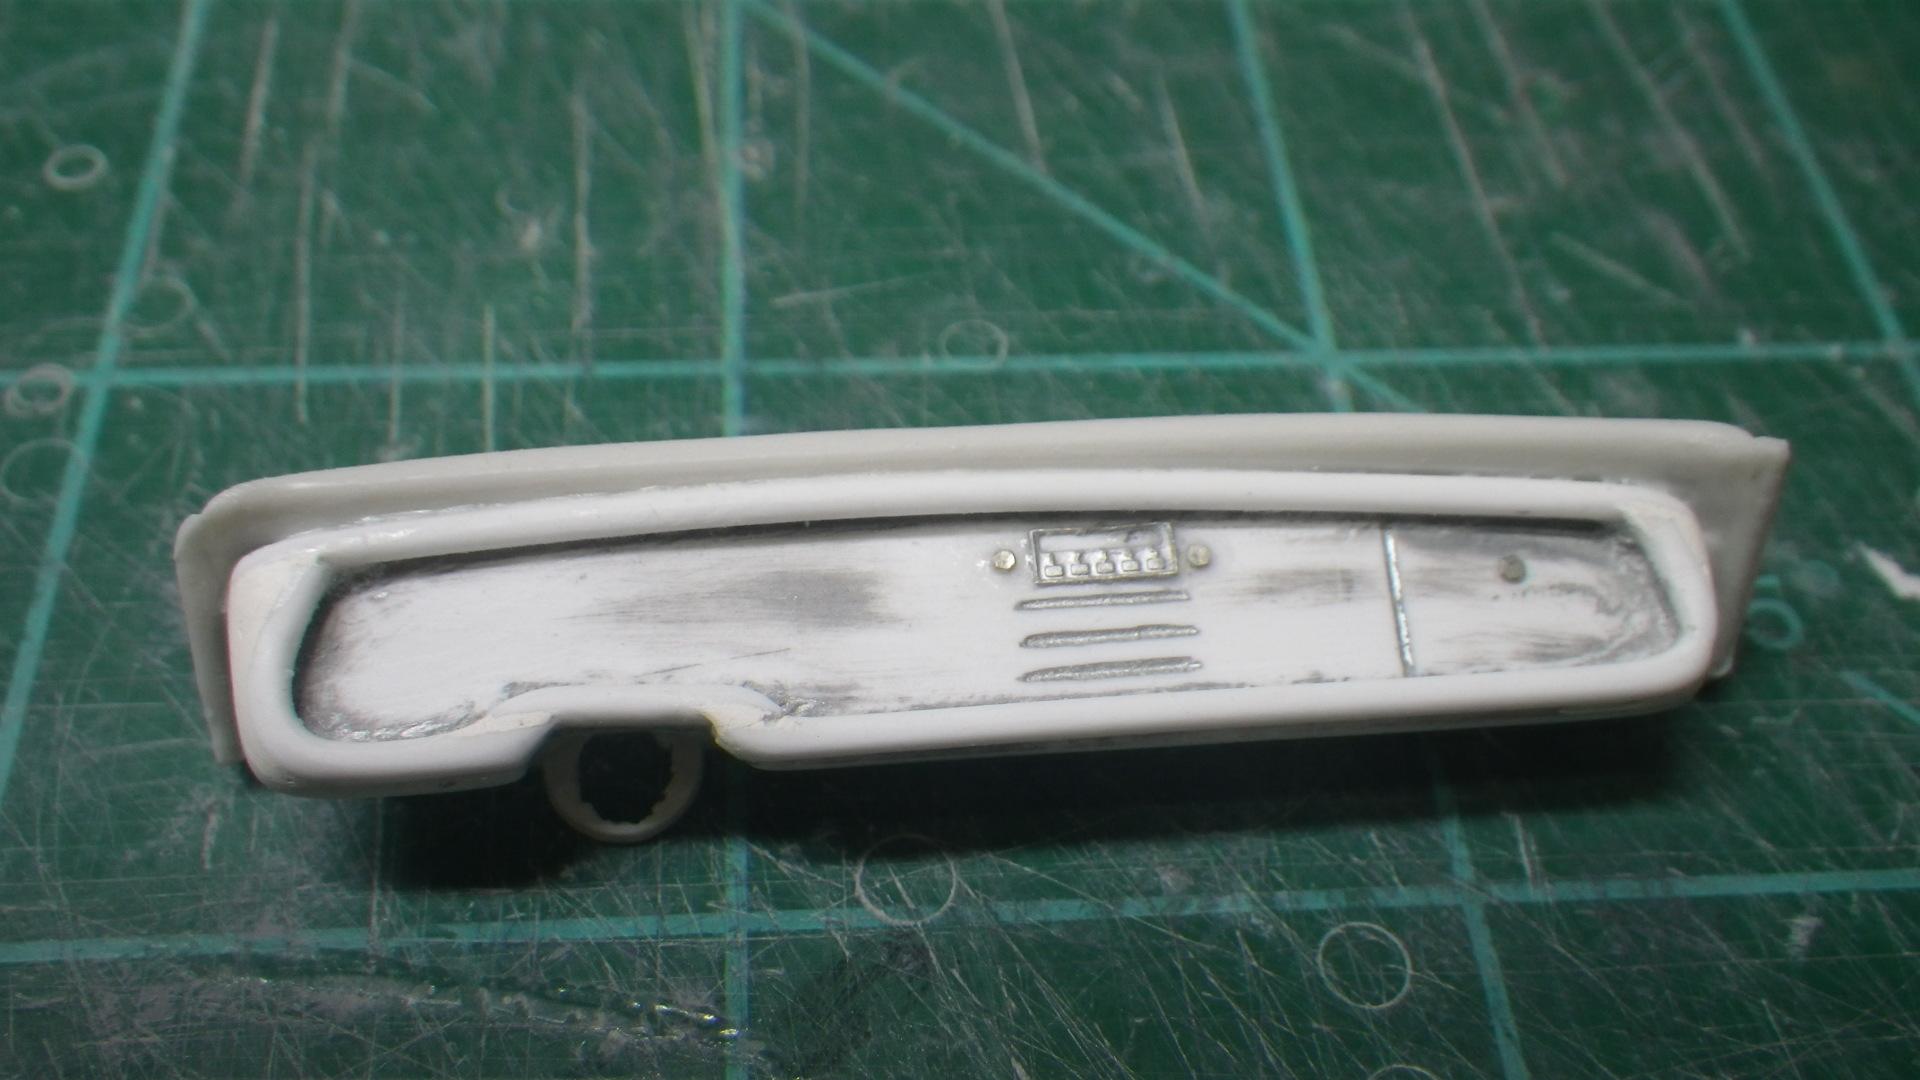
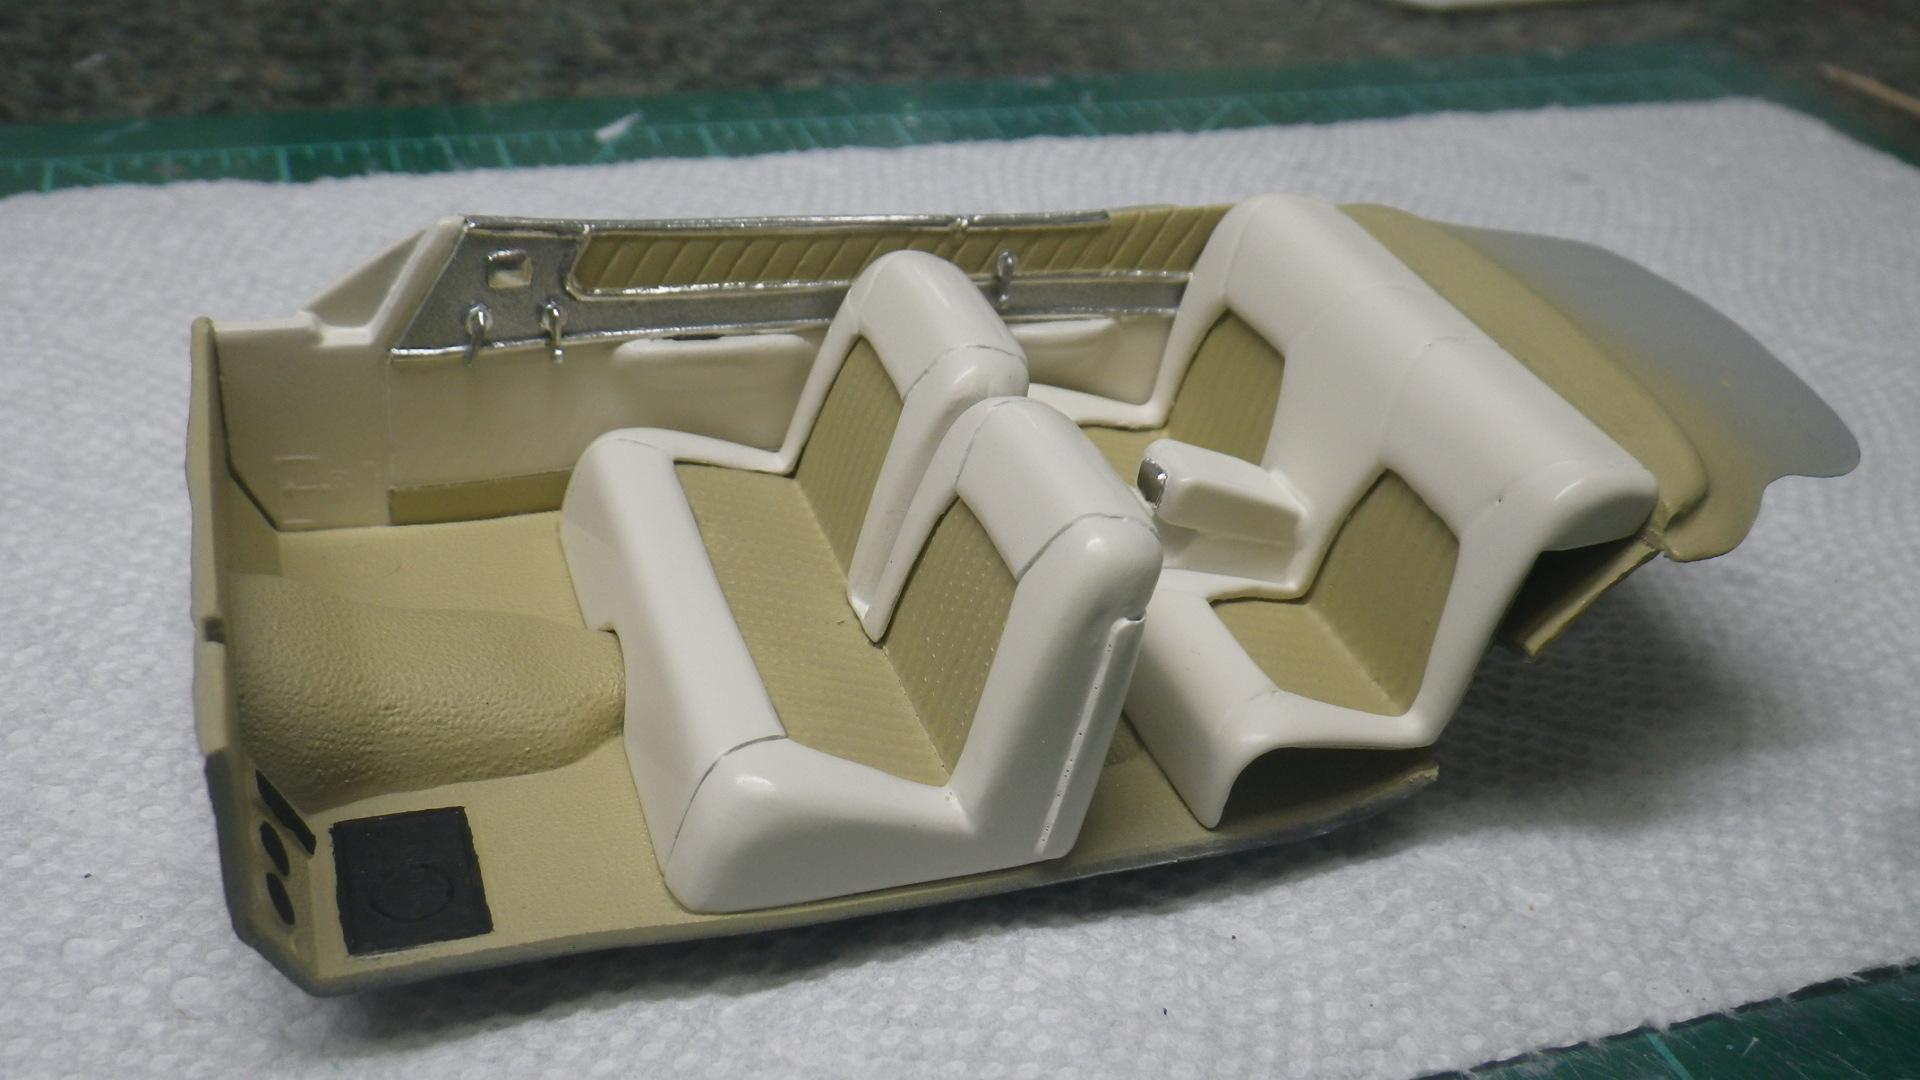
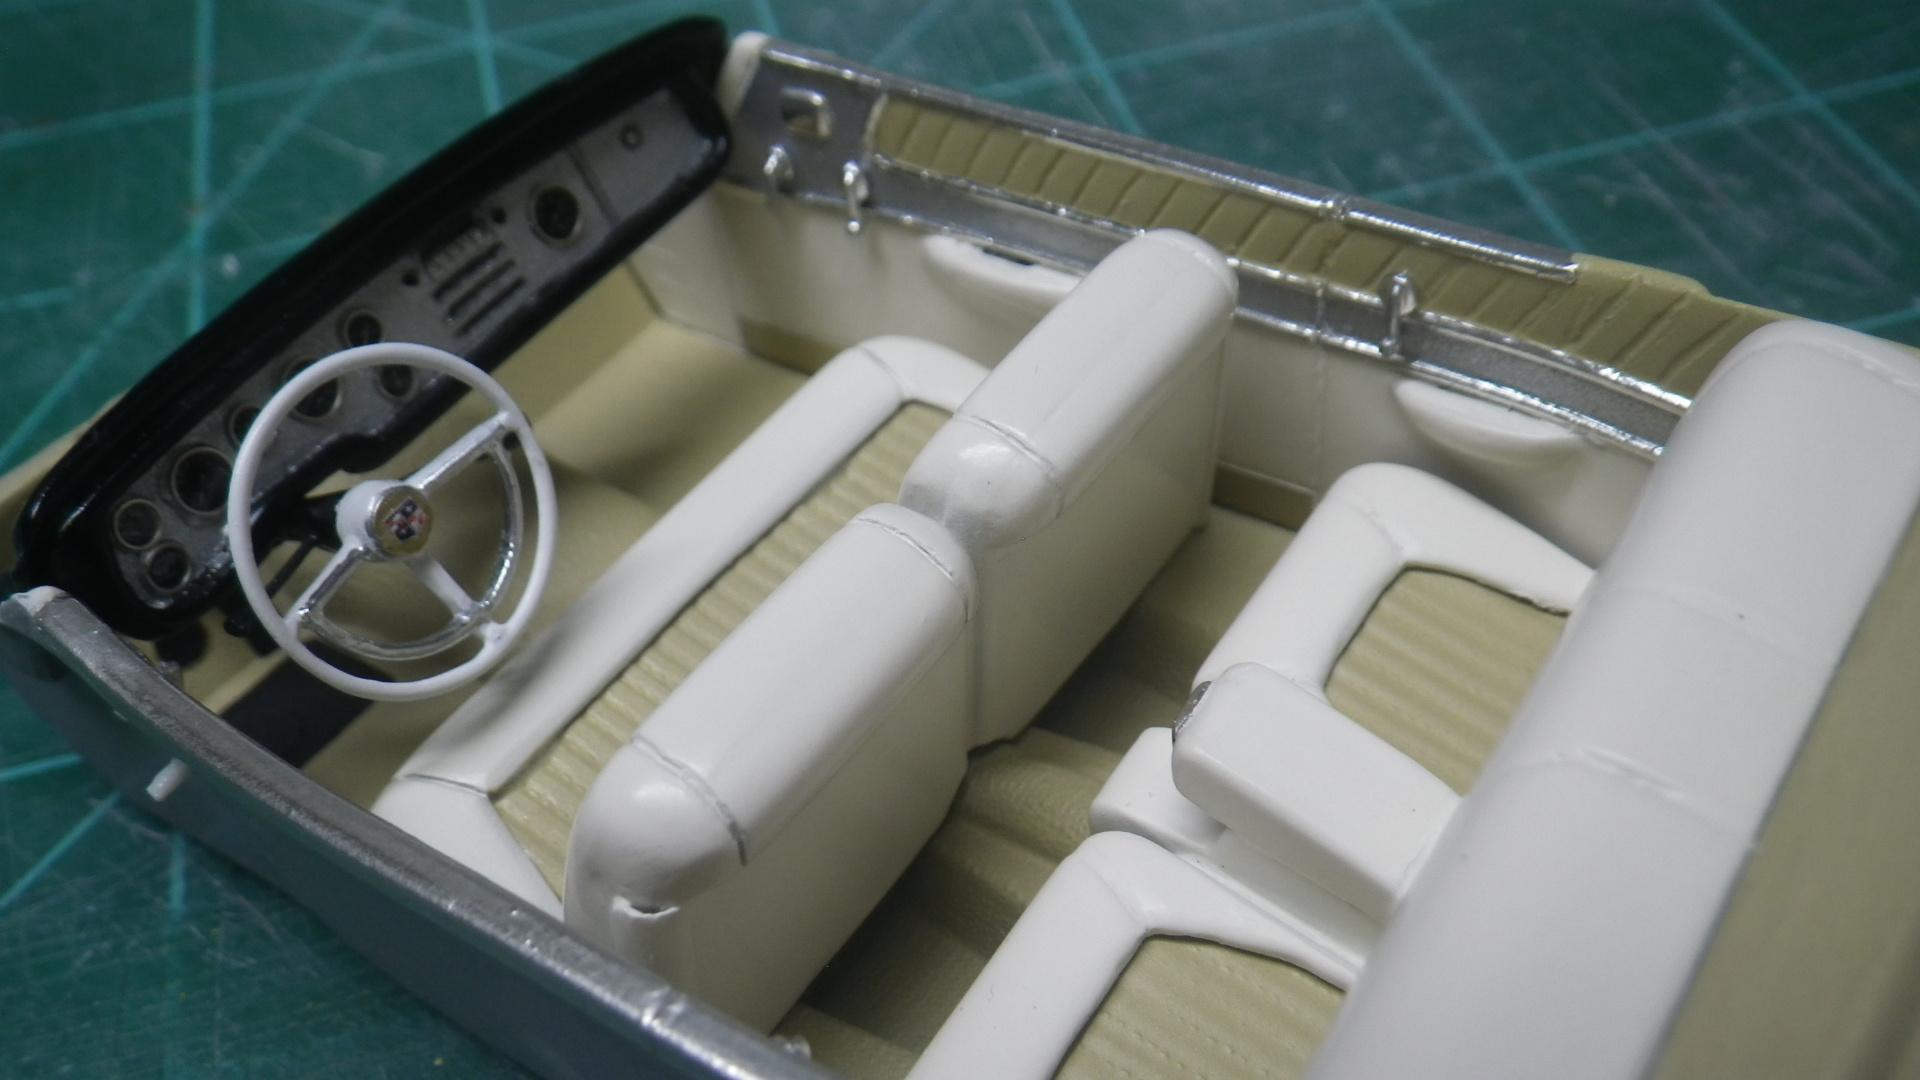
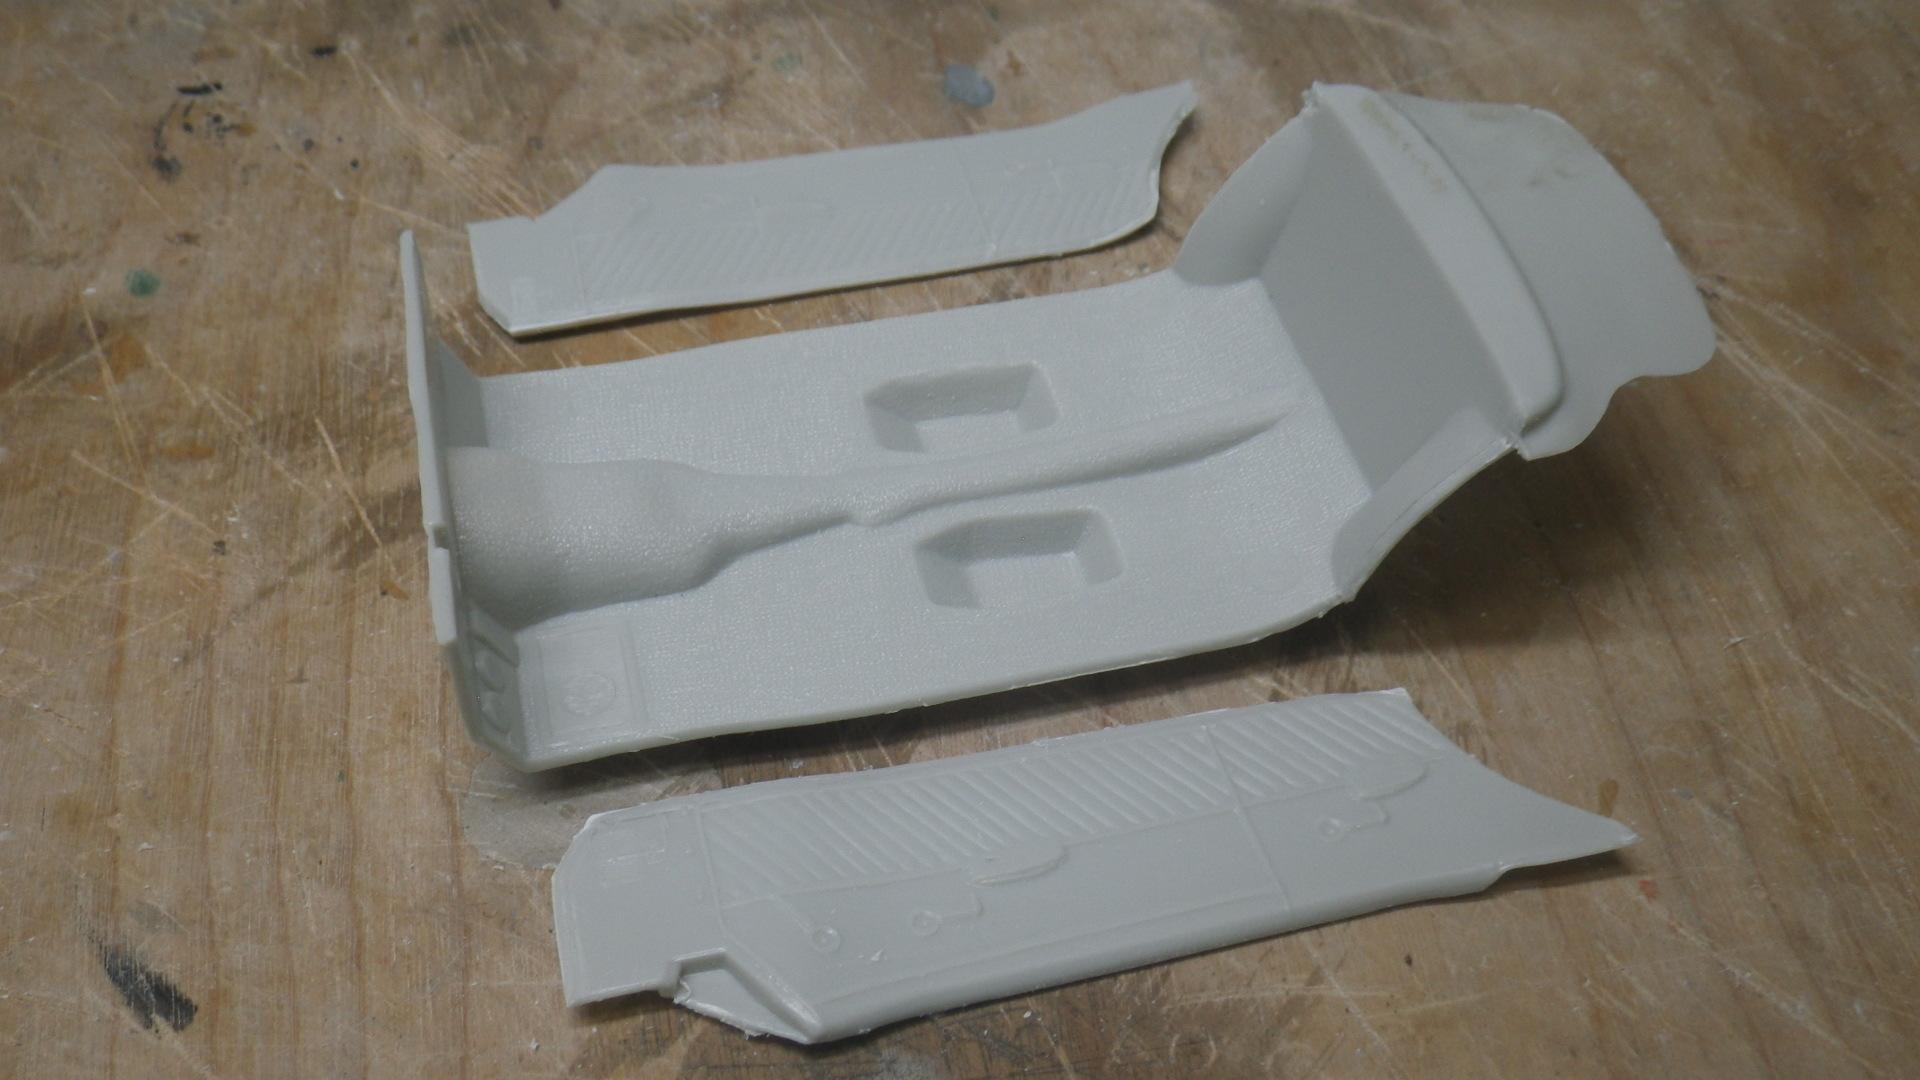
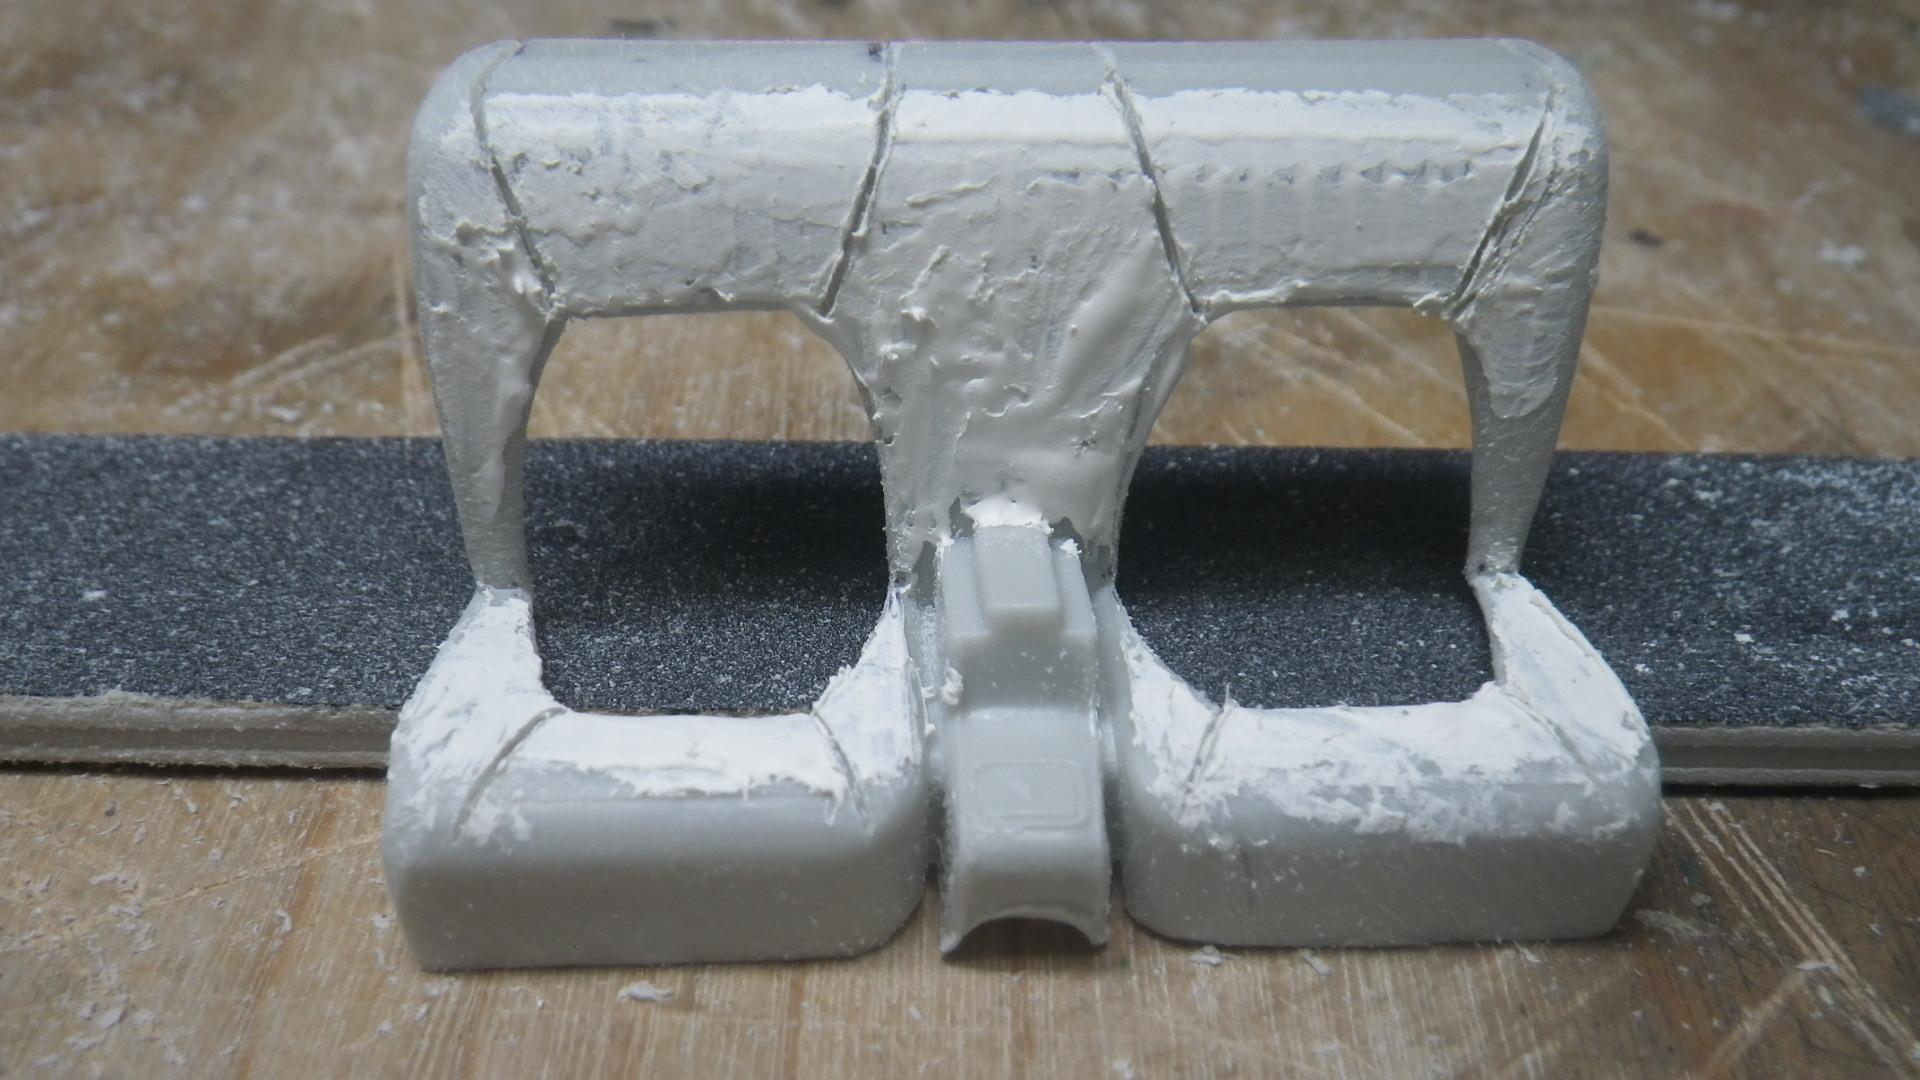
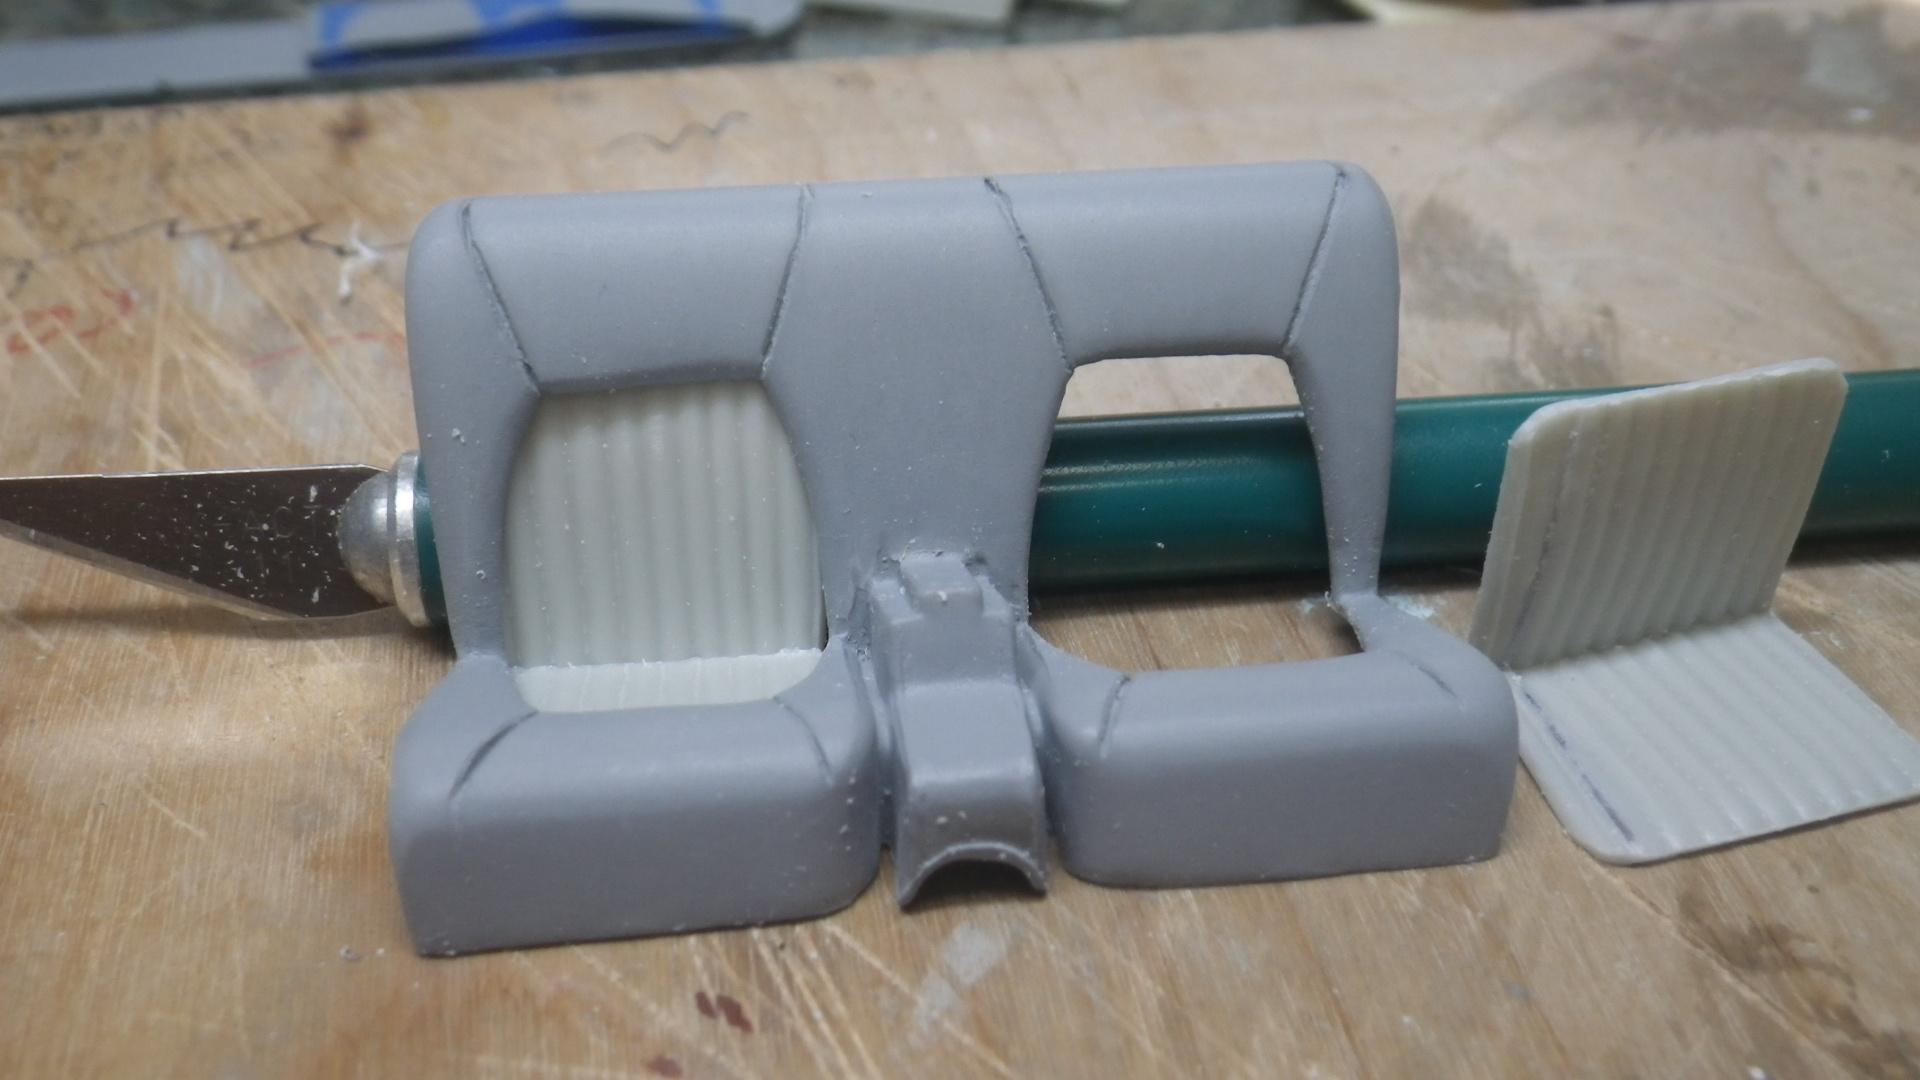
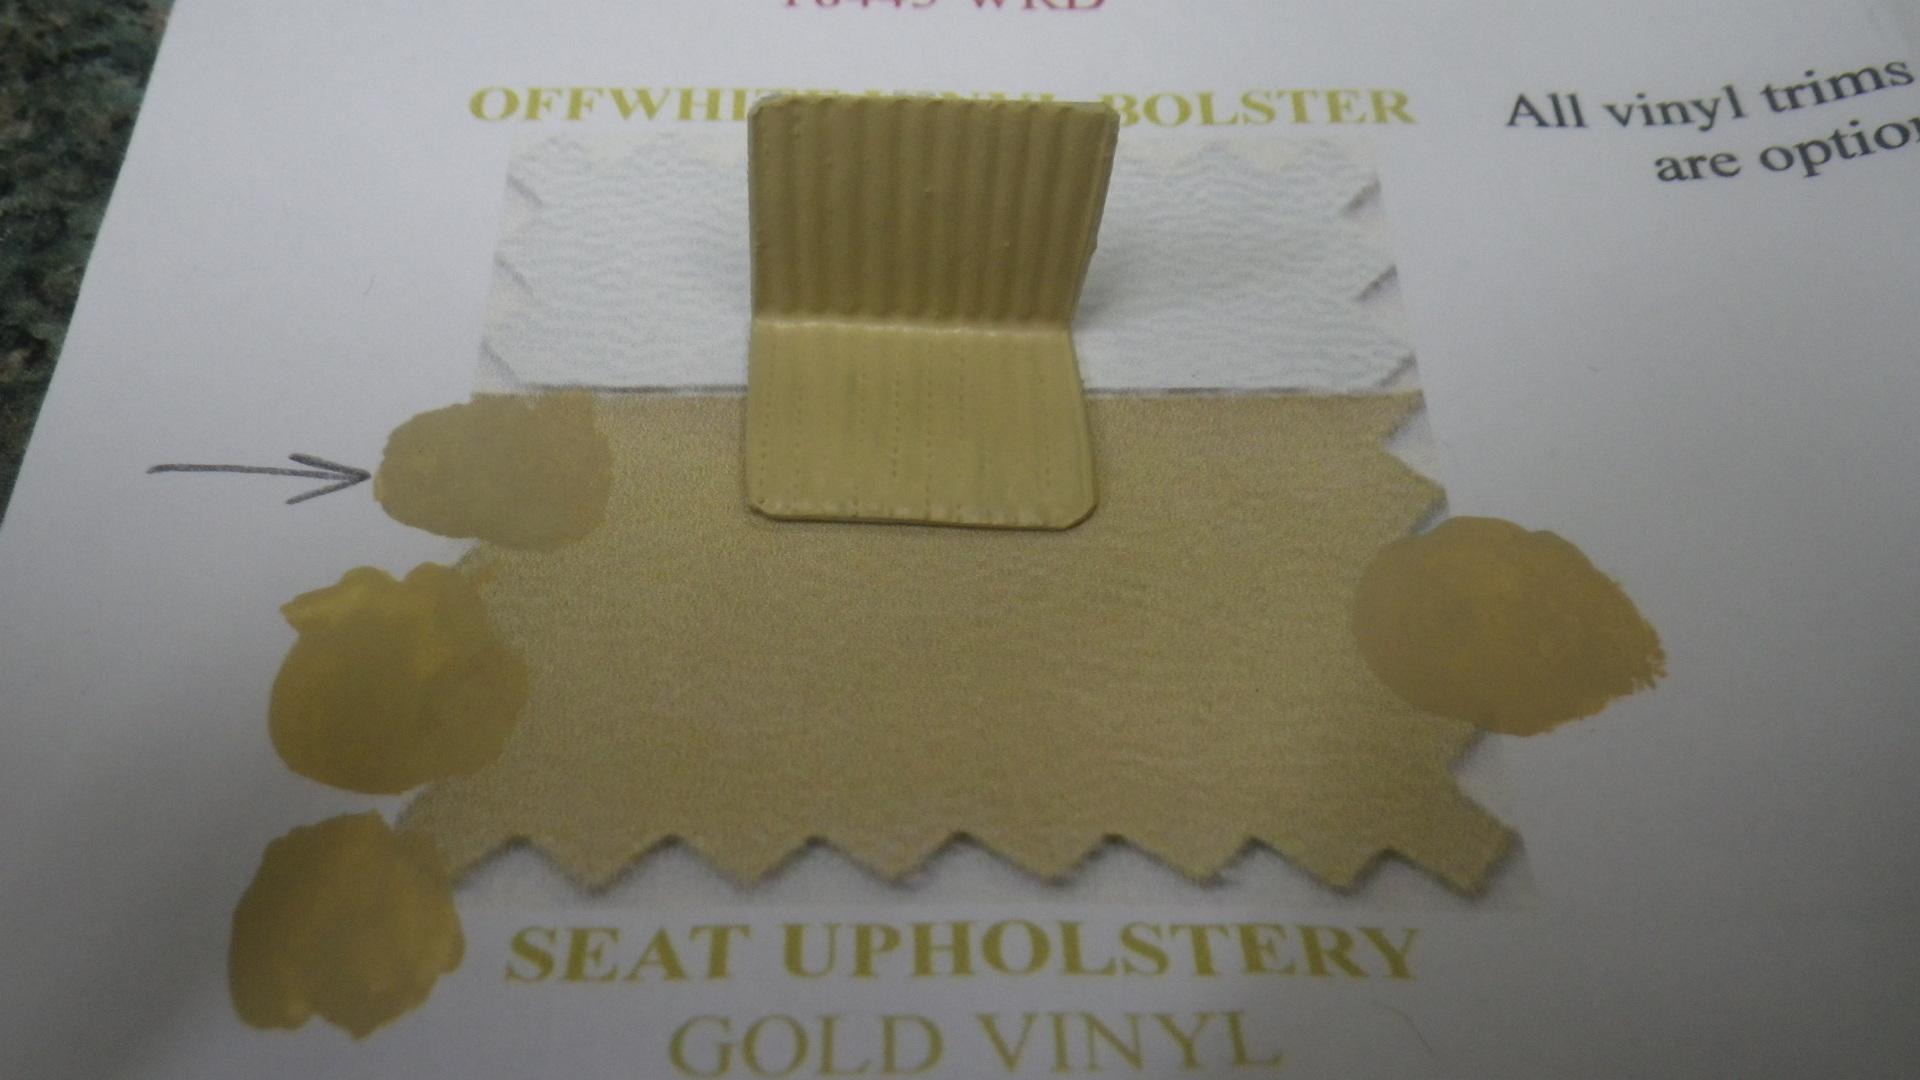
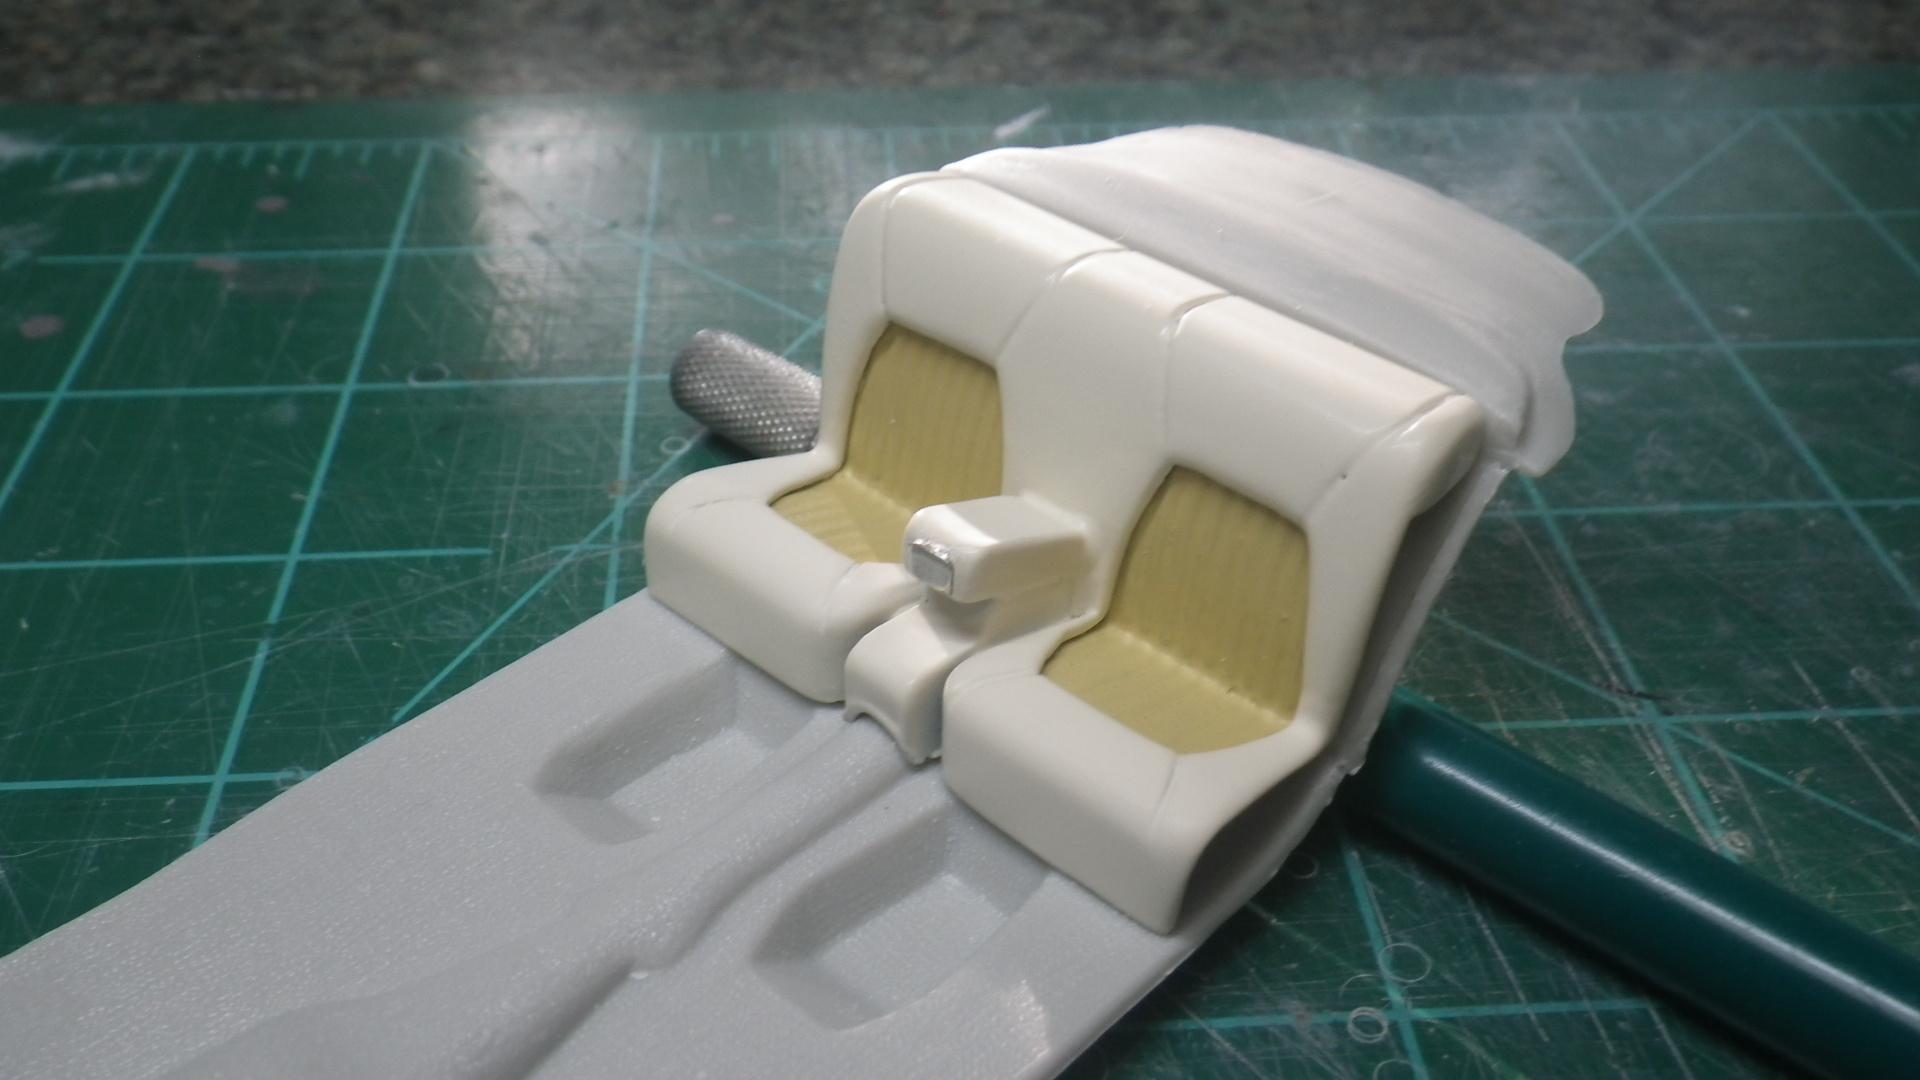
Hi again! Thanks, thanks, thanks to everybody for the appreciative comments! I didn't know Studebakers were so popular but they've been special to me for my entire life. There's no particular personal or family connection but they just seem fascinating in a way that other cars are not. Next installment - still bringing you up to the present time. As of right now in real time, the interior and engine are actually finished and waiting for installation and I'm currently working on the chassis. So, the front seat was done much like the rear one but also needed some contour enhancement on the back side. Then it was time to make the dashboard. The R&R dash (at the top in the next photo) was right in a lot of ways but totally wrong in others so I decided to make a new overlay that would go on top of the AMT '53 dashboard. And that was it for the interior. Another installment soon.
-
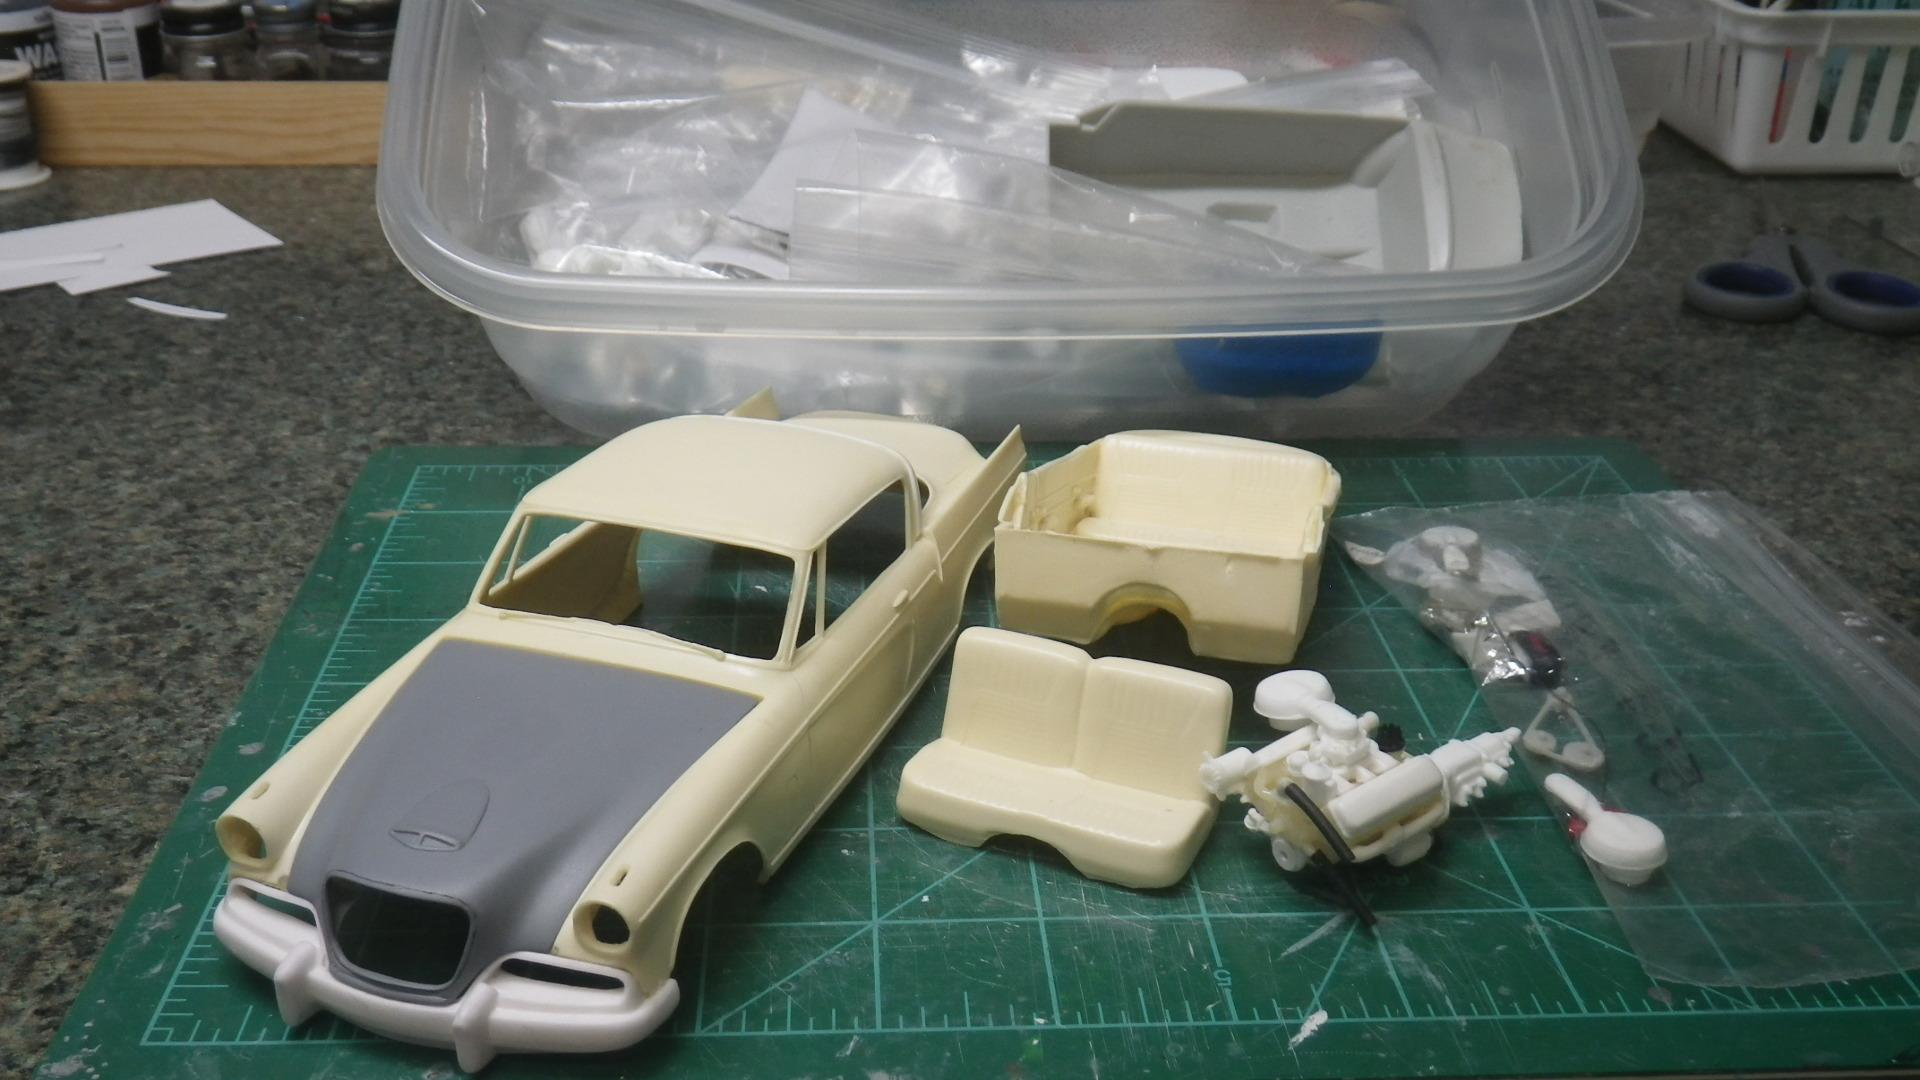
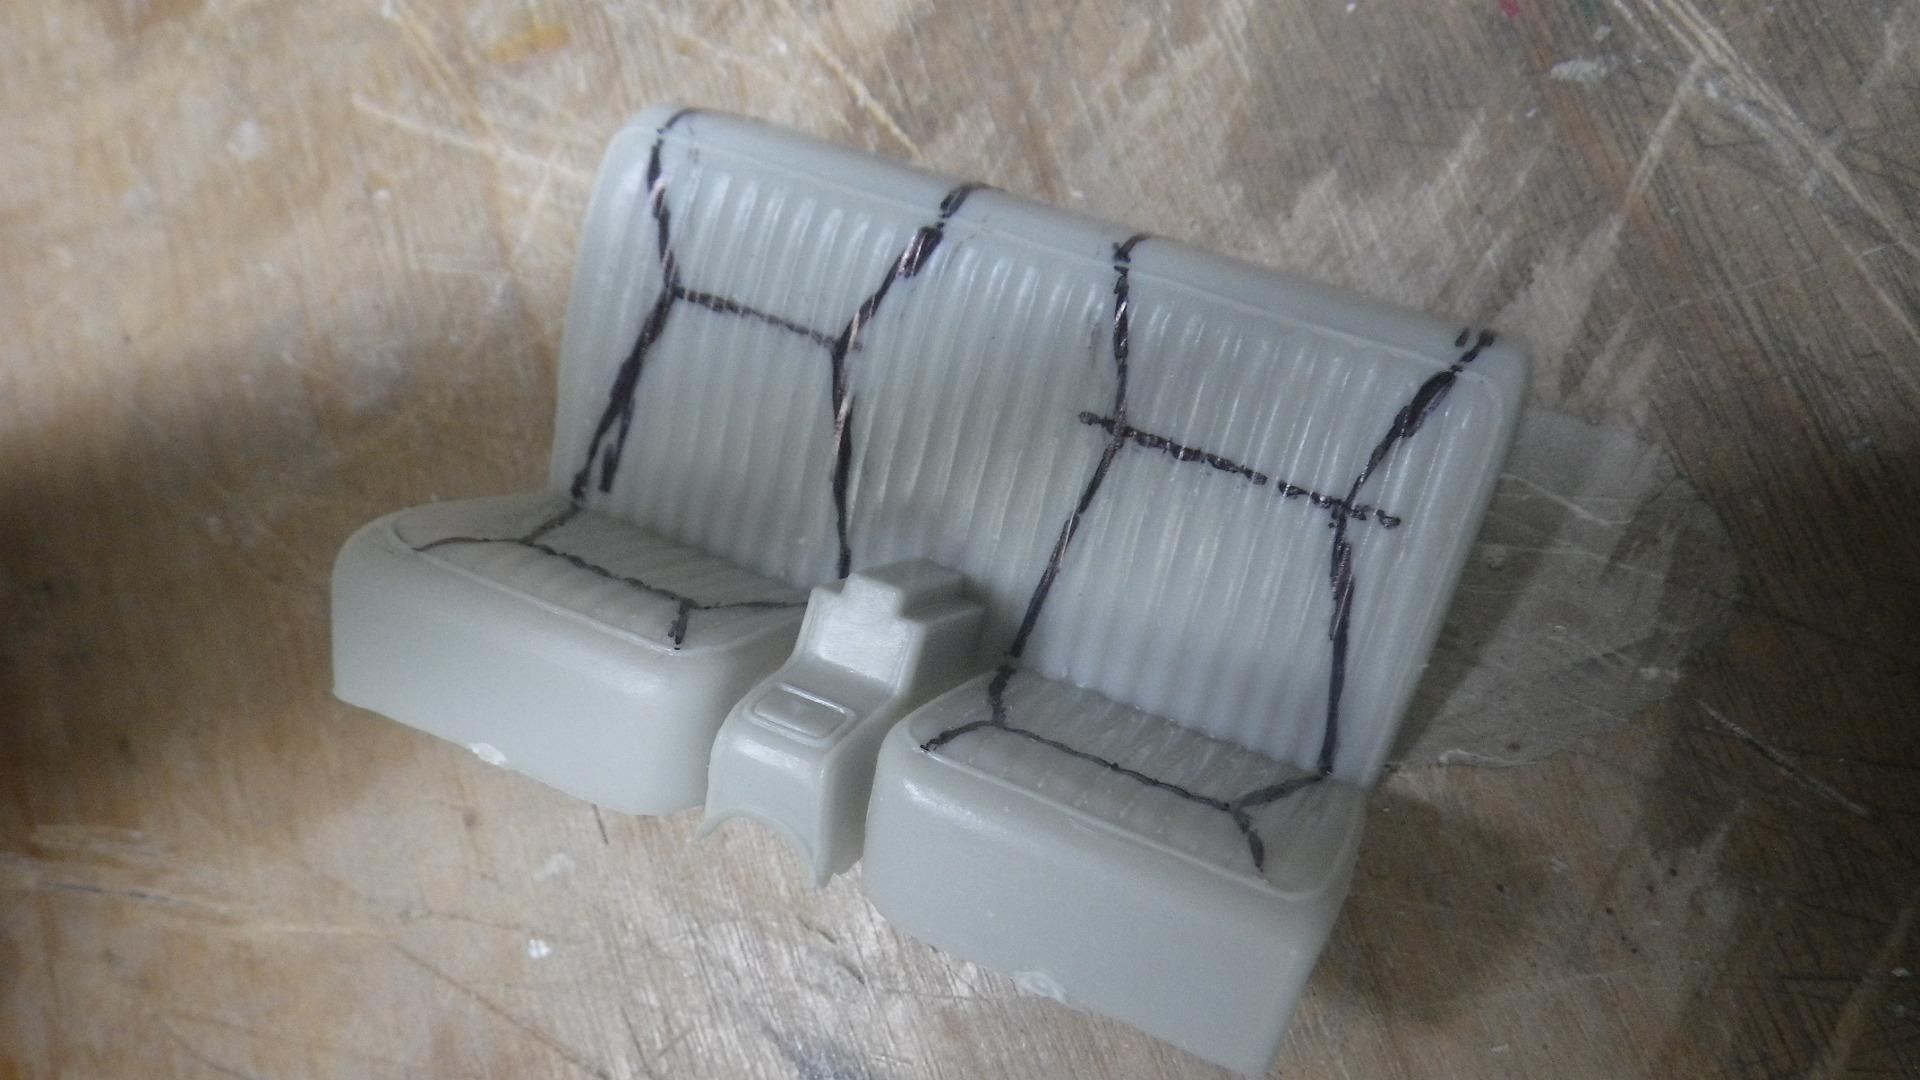
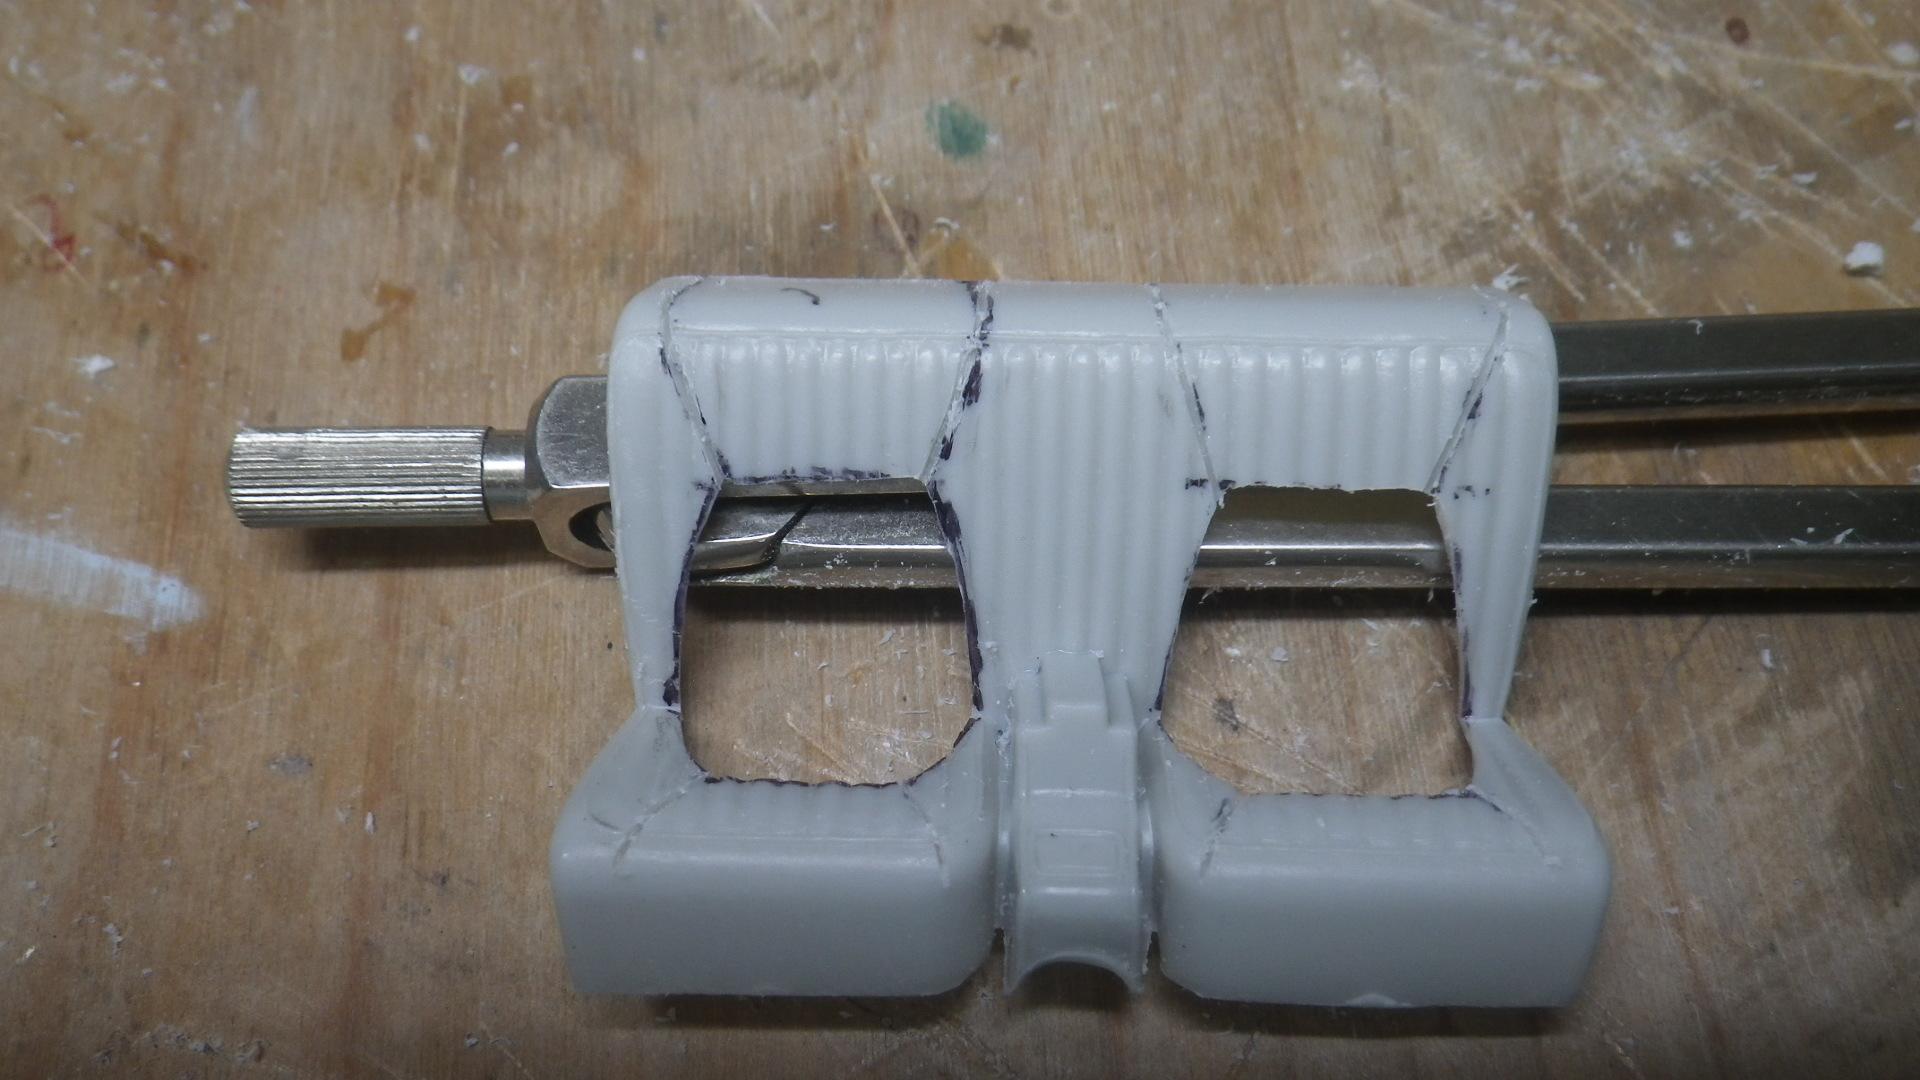
I don't usually do WIP threads but since this is such a long term project it seems to deserve one. This build started about 10 years ago! After working on it for a while I found that my skills were being overwhelmed and life was putting a lot of demands on me also so I just set it aside to have a break. Before long that break had stretched out to 10 years but it's finally back under way. I don't plan to post any photos from the "old days" - just the recent work - and mostly let the photos do the talking with maybe a brief comment added as needed and I'll start a new post every ten or so pictures so they don't take too long for viewers to load. In the Studebaker world, the '56 Golden Hawk is usually referred to as a 56J. That was Studebaker's internal code for it. Most of my references came from the on-line Studebaker community which is large and has always been very supportive and helpful. The documentation for these cars is amazing and I frequently referred to the 168 page (!) Authenticity Guide that you can find right here: https://www.1956goldenhawk.com/manuals/56ghauth.pdf Here's what came out of storage: That's an R&R resin body with some improvements made already and more to come and a "Frankenstein" engine made to be a reasonable replica of the Packard V-8 (Stude called it a Sky Power 352) that powered the 56J plus bits and pieces from a '53 Starliner donor kit. That was in June of this year so now we'll start catching up to the present time. I decided that the R&R interior was unacceptable so work began on modifying the '53 interior to suit. Another post will be coming soon - still not caught up to present.
-
Great responses about making clear lenses! I was thinking there would be an aftermarket source where everyone was getting them but now I see that there's a lot of possibilities. I'll be trying some of those methods. Thanks, everyone!
-
To those of you who use the "drill out" method, where do you get your clear lenses?
-
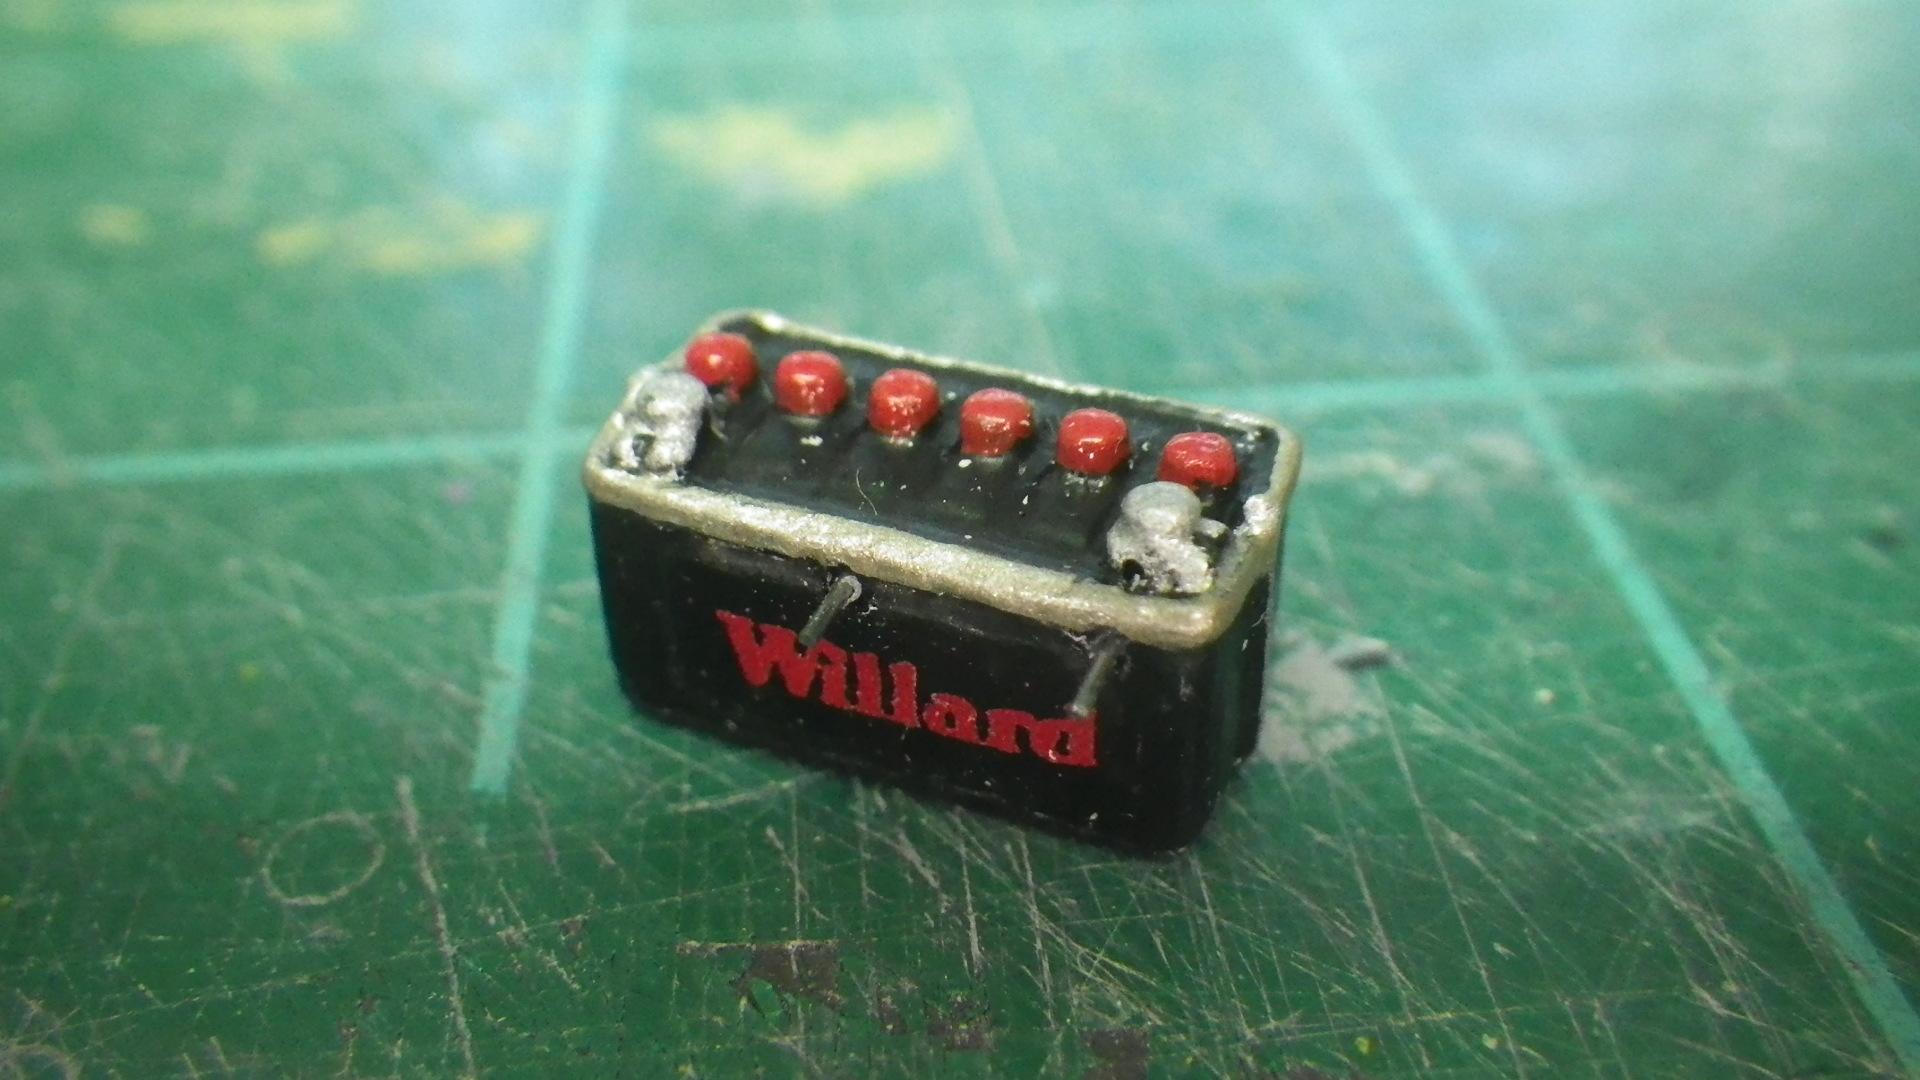
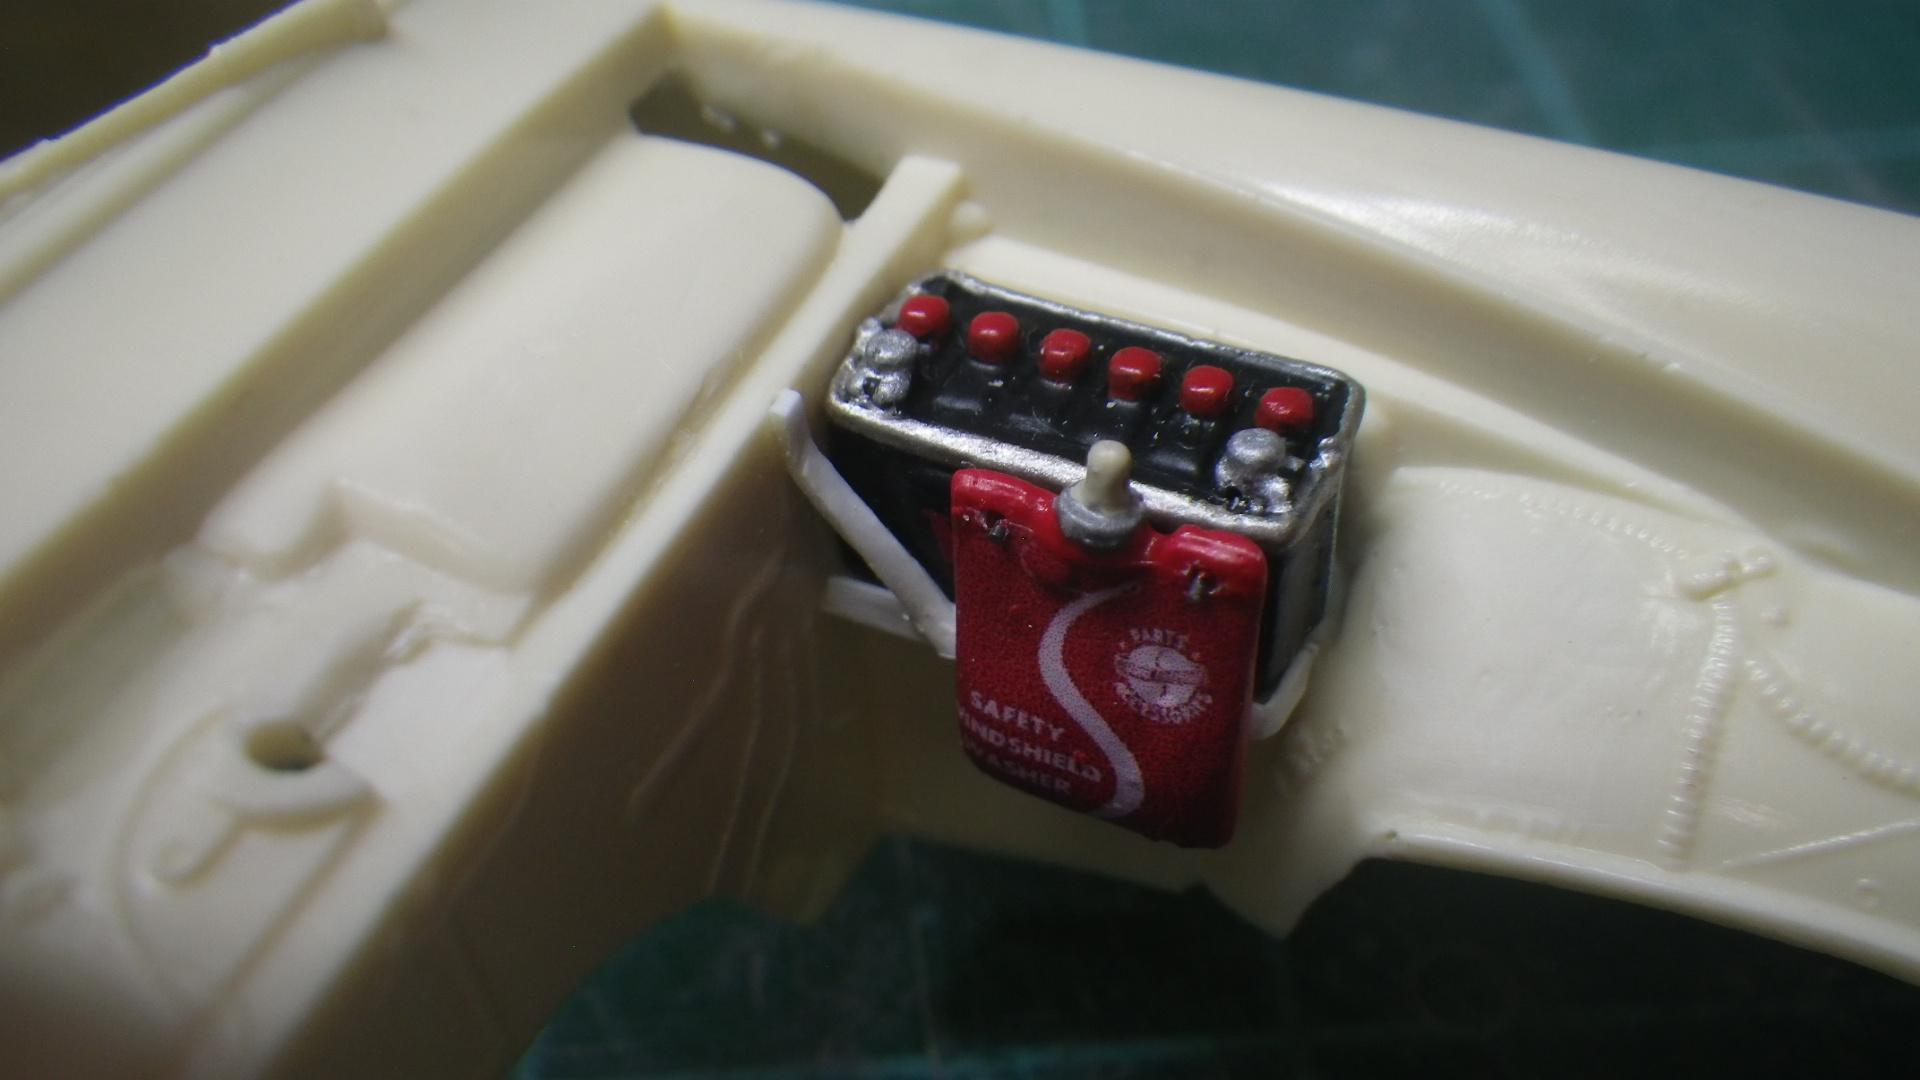
OUTSTANDING!!! That's arriving in style when you pull up in that.
-
That's a great build. Beautifully executed. Congrats!! I'm loving all the CRAZY 60's style customs that are showing up!
-
Fabulous! What a great idea. Customing a custom. You have a great eye for that style and the work is top notch.
-
Duplicolor primer is so good that there's no reason to try the paint over something else. I use their primer under everything.
-
Data base on the history of kits ?
mr moto replied to Jon Haigwood's topic in Model Building Questions and Answers
In 1959 Johan made kits of the current year Dodge and Plymouth. AMT/SMP made a '59 Imperial and Revell had an older year Chrysler New Yorker in 1/32 scale. -
Thank you everybody. I'm still here and still building. Haven't made any real customs in a while but that may be changing soon! I remember you , Luiz. I hope you built something really nice with that '62 Plymouth!
-
I find that the Tamiya acrylics are far better than the old Testors lacquers. They brush on smooth and thin.
-
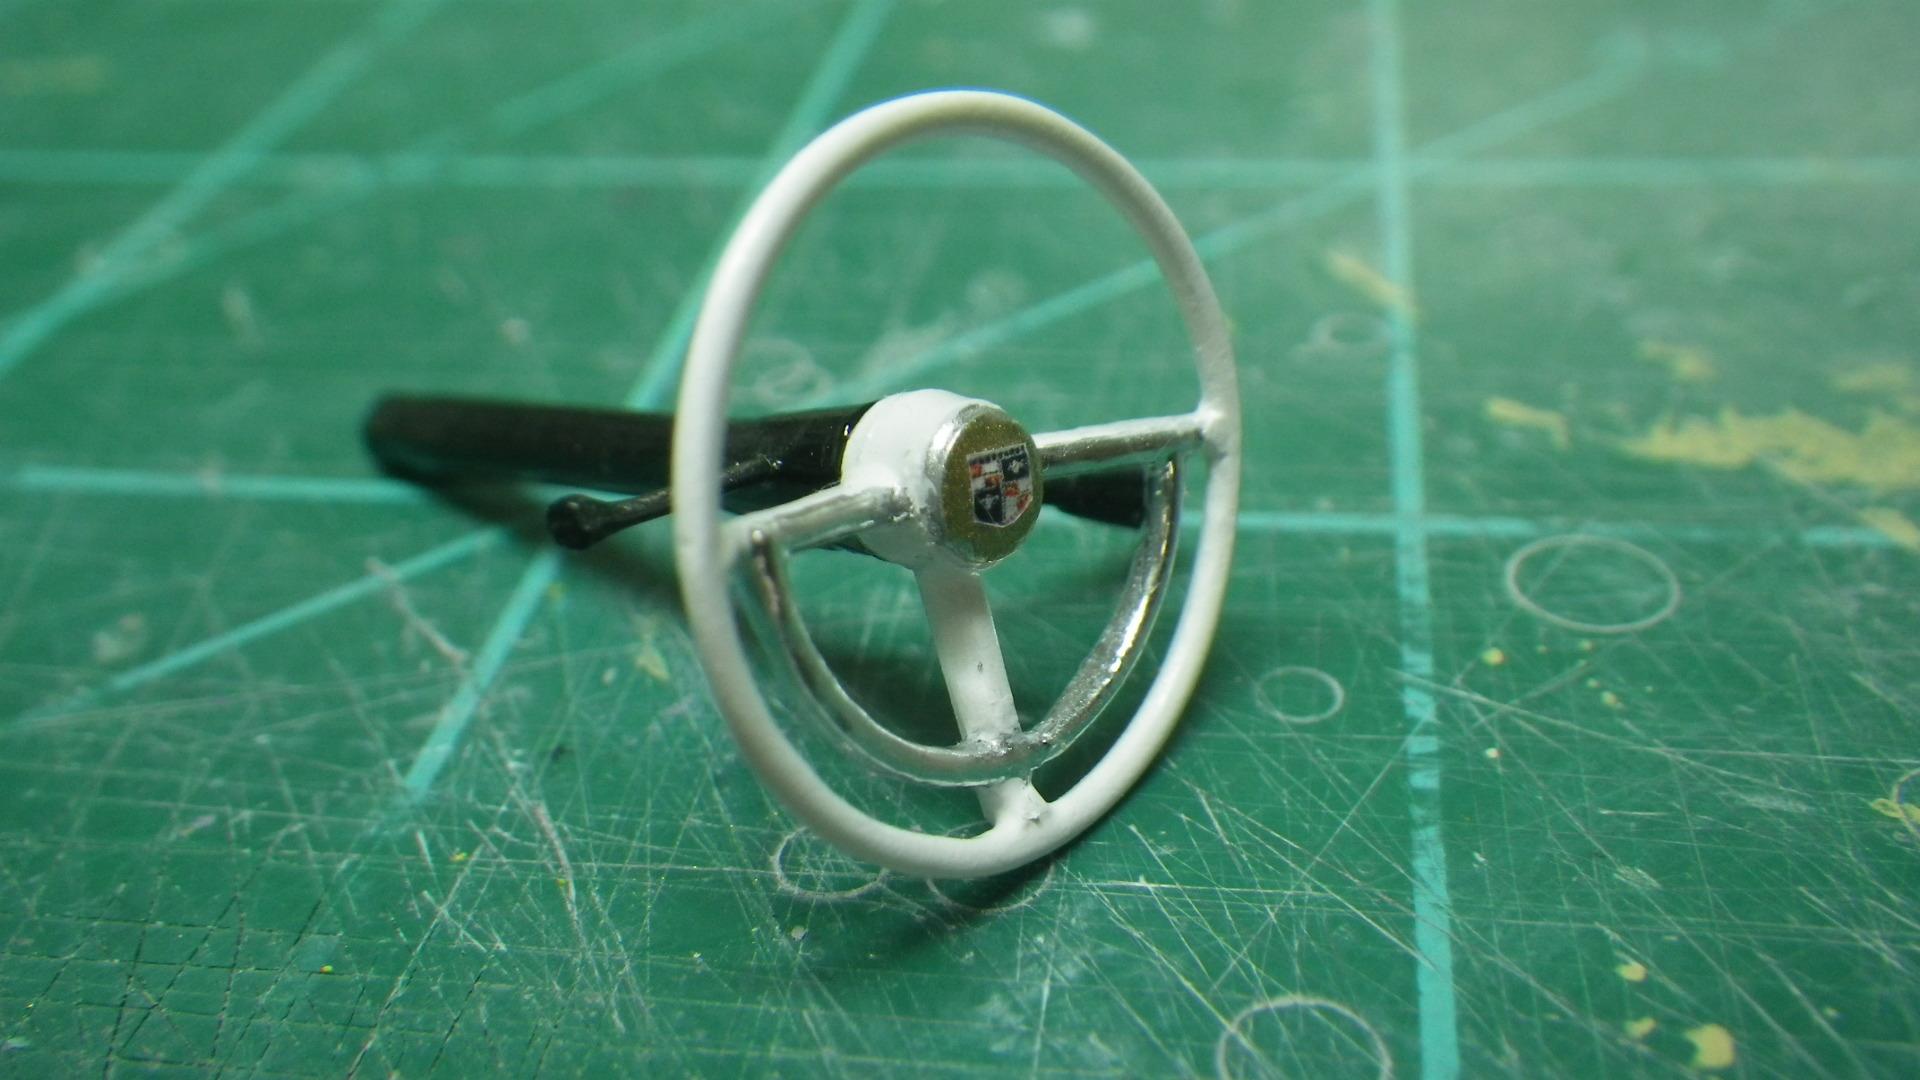
The fins are indeed from scratch - just Evergreen styrene sheet, .04 I think. Their shape was inspired by the 1960 Dodge. The windshield is the stock part from the kit. It was made into a wraparound by moving the "A" pillars back so that the vent panes became a part of the windshield. For the rear window, I used the stock window as filler for the roof contour, cut a new opening, and then used a piece of clear acetate for the new window. All the customizing was done as simply as possible. I searched for photos of the interior but there aren't any from the construction and it didn't really work to try and get a good photo through the side window. I can tell you that it has four bucket seats. They're all alike and are the custom seats that come in the '53 Stude kit and there's a full length console in between made from two of the kit's custom consoles. It also has a 1960 Plymouth steering wheel that came from Modelhaus - my absolute favorite wheel for a custom. Thanks to everyone who posted comments. Pretty amazing to see this interest after such a long time.
-
Seriously???!!!!!!
mr moto replied to Classicgas's topic in General Automotive Talk (Trucks and Cars)
You just don't appreciate surrealism! -
This is a surprise seeing this thread come back to life! I'll have to dig deep and see if I have any interior photos but it sounds like I didn't even have my own camera back then.
-
Wow! That is true model building and fabulous work by any standard. I'm currently reviving a Studebaker Golden Hawk project that was started in 2011 so I understand the types of challenges that you faced but your build would be much more of a case of starting from scratch. You've set the bar very high. Truly excellent.
-
If lacquer never dries neither does any other paint. Rubbing a finish with lacquer thinner is not a realistic test of whether or not a paint has dried. It will remove any other paint that I have ever used including two part epoxies. Lacquer thinner will even completely dissolve styrene.
-
1959 Chevy impala 1/32 early 60’s style bellflower cruzer GSeeds
mr moto replied to gseeds's topic in Model Cars
WOW! It was super impressive before I found out it was the 1/32 kit. Incredible work. -
The alternate method you're suggesting should work fine. There are as many ways to chop tops as there are model builders. However, it looks to me like you did a great job this time!