Codi
-
Posts
2,675 -
Joined
-
Last visited
Content Type
Profiles
Forums
Events
Gallery
Everything posted by Codi
-
For us modellers here it's like our own Sports Illustrated Swimsuit edition. Nice pics. cheers, tim
-

64 Dodge D100 Pickup Pro Street
Codi replied to AmericanMuscleFan's topic in WIP: Drag Racing Models
? Now that's some mighty fine machining and overall scratch-building right there. This truck is a treat to the eyes to see come together. cheers, tim -
Joe, I KNEW there was a reason I started on the engine first on my build. This is a great tutorial on the areas that need addressed on this kit and I really like the way you're addressing them. Thanks and I look forward to your progress, you're off to a flying start. cheers, tim
-
Hi Hakan, agreed...I've got pics of the Holman Moody nascar pan / setup but I fortunately came across the actual pan/setup for the Boss 494 Can-Am engine which was pretty cool. The engine will have the required water pump / fan as per Pro Stock regs in the day but it will also have the unique Can-Am dry sump. I think you're gonna like it. cheers
-
Hi Kenneth, Saw the title of your thread and remembered building a plastic kit of this ship. One of the most beautiful that ever sailed IMO. Nothing compared to your of course and I want to say how much I like yours and the efforts you're putting forth. Good luck on the rest of it. cheers, tim
-
le couronne
Codi replied to Ken Gilkeson's topic in WIP: All The Rest: Motorcycles, Aviation, Military, Sci-Fi, Figures
Love this build Ken. A beautiful ship. cheers, tim -
Great thread JC. So many interesting cars posted....I can't pick a favorite but the "Singers" are insane. cheers, tim
-
HAPPY NEW YEAR EVERYONE !! Took some time away from the bench and now it's back at it. I'd like to acknowledge and reply to some of the recent comments/replies. Dave (comp1839) Yeah, I thought about doing the heads too right away but one of the challenging parts I've attempted to make is up next. The water pump / gear cover. You'll understand in a week or so when I post pics of it (if it goes well of course) The fab list is pump, then the dry sump pan & pump, then the heads, manifold and the Dominators. Saw the most recent posts of your car and what you're doing on it......NICE is all I can say. Lorne, thank you for checking it out and the sentiment. Those are some fantastic builders you've referenced and I'm sincerely flattered. Hope you like the rest of this one. Jason & Ron.......thank you too for noting the cars progress. Joe, I replied to your PM. Thanks for checking out my Maverick and I'll certainly be following yours.
-
64 Dodge D100 Pickup Pro Street
Codi replied to AmericanMuscleFan's topic in WIP: Drag Racing Models
Hi Francis......first I want to say thanks for the kind compliment you paid me. That's some mighty fine company you've lumped me in with and I appreciate it. Like everyone else that's commented on your build, it's simply fantastic. I've learned some things already from your posts and love the way you're documenting it. GREAT WIP no matter type of model you're building. Nice machining skills you have there too sir. Looking forward to any and all of your posts and like others would love to see some of your past builds too. Cheers, Tim -
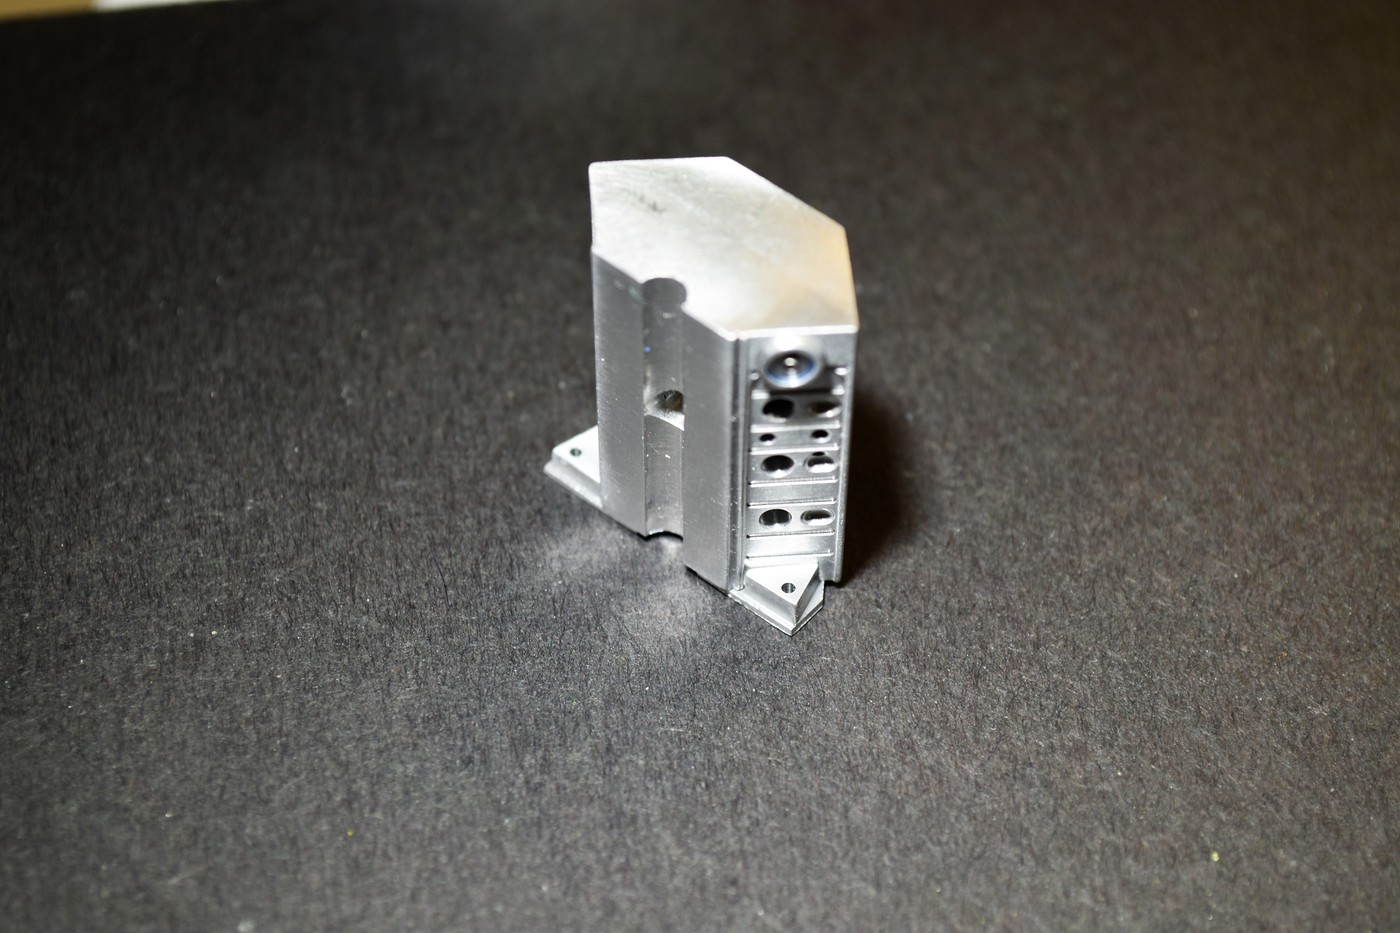
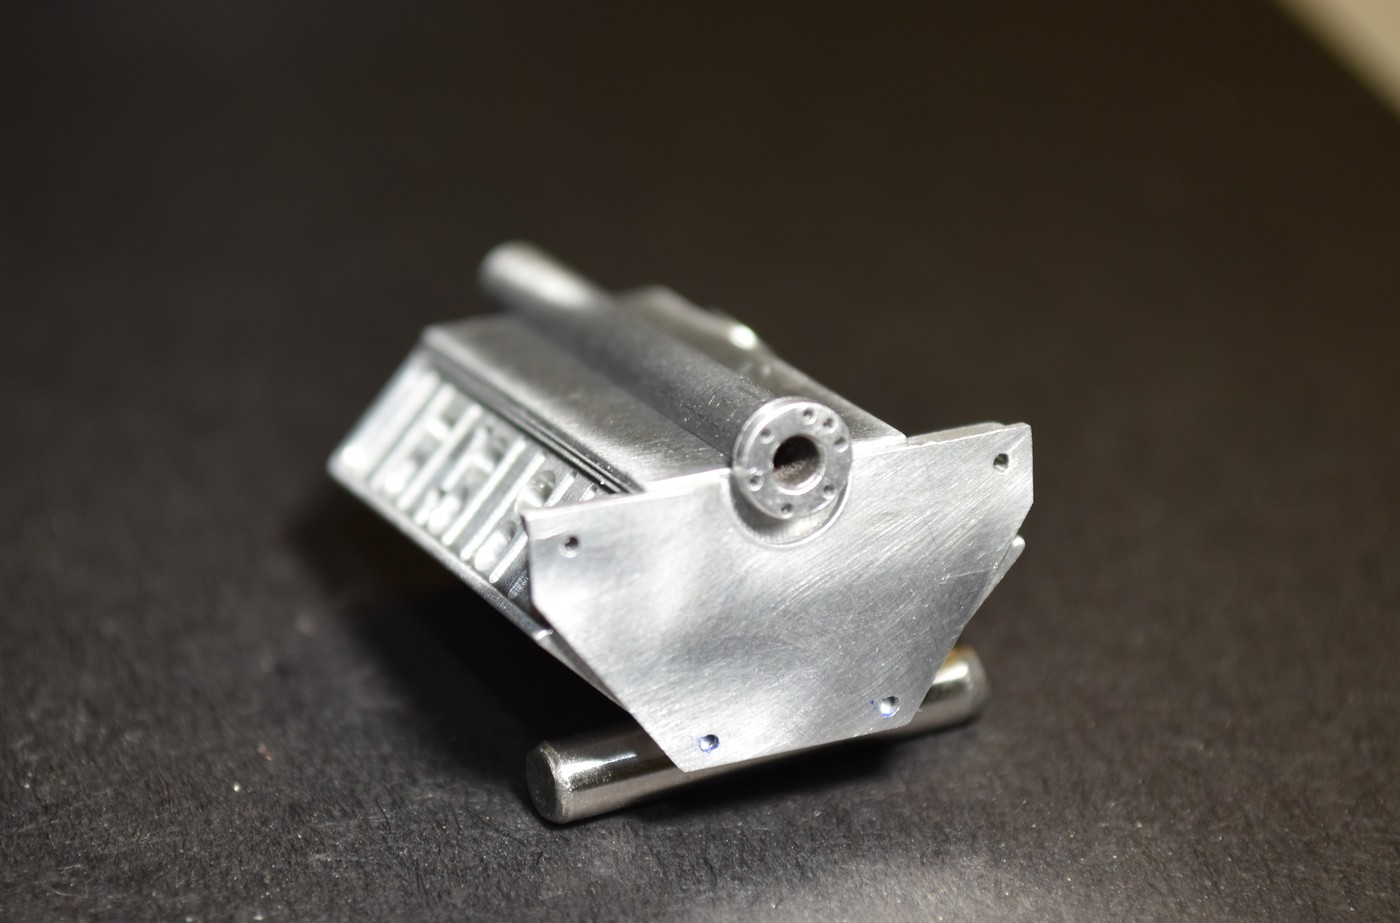
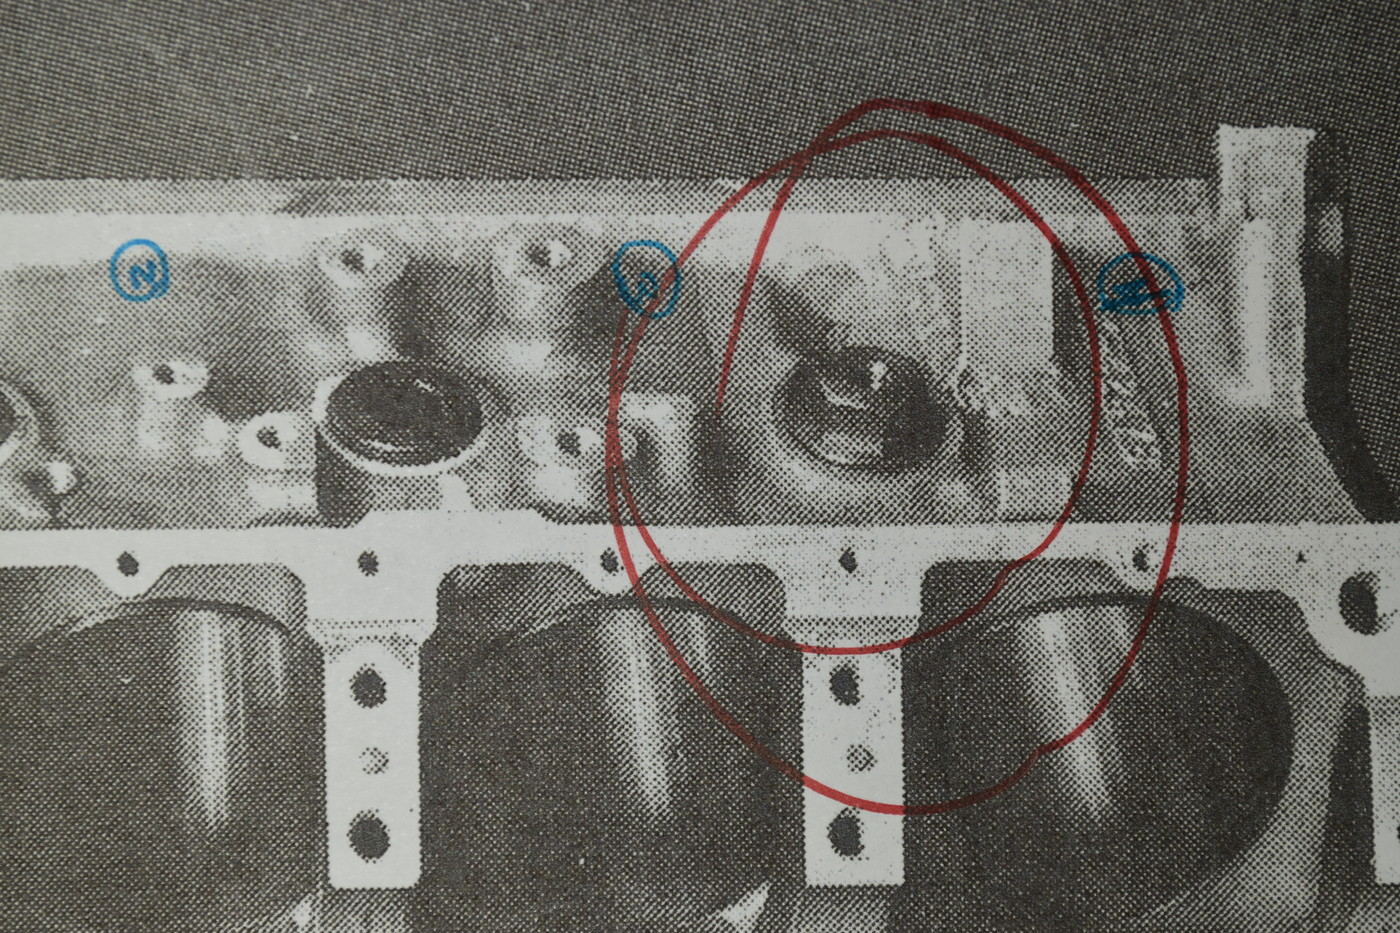
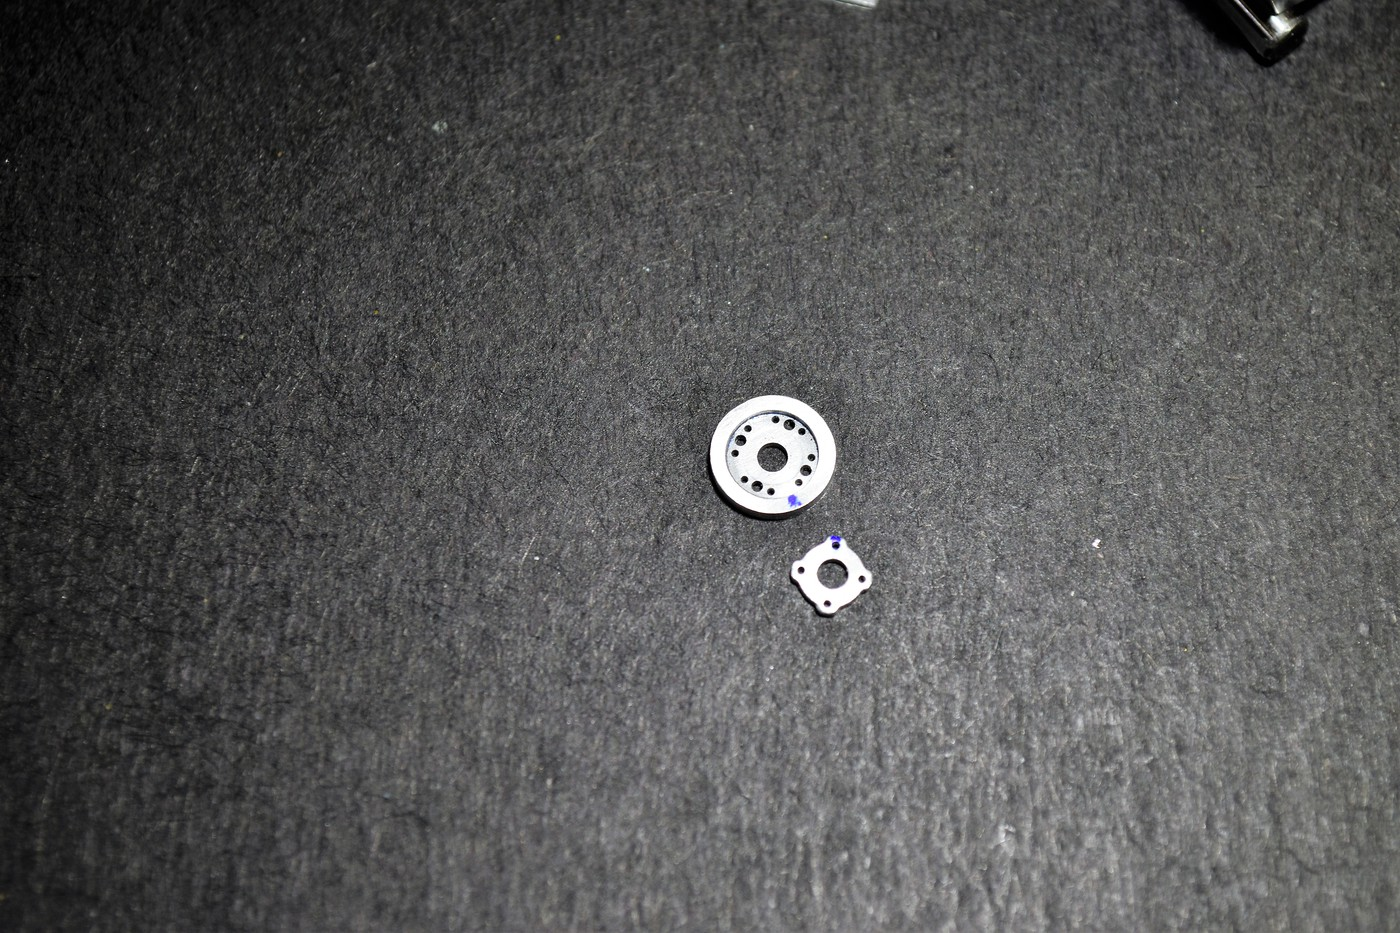
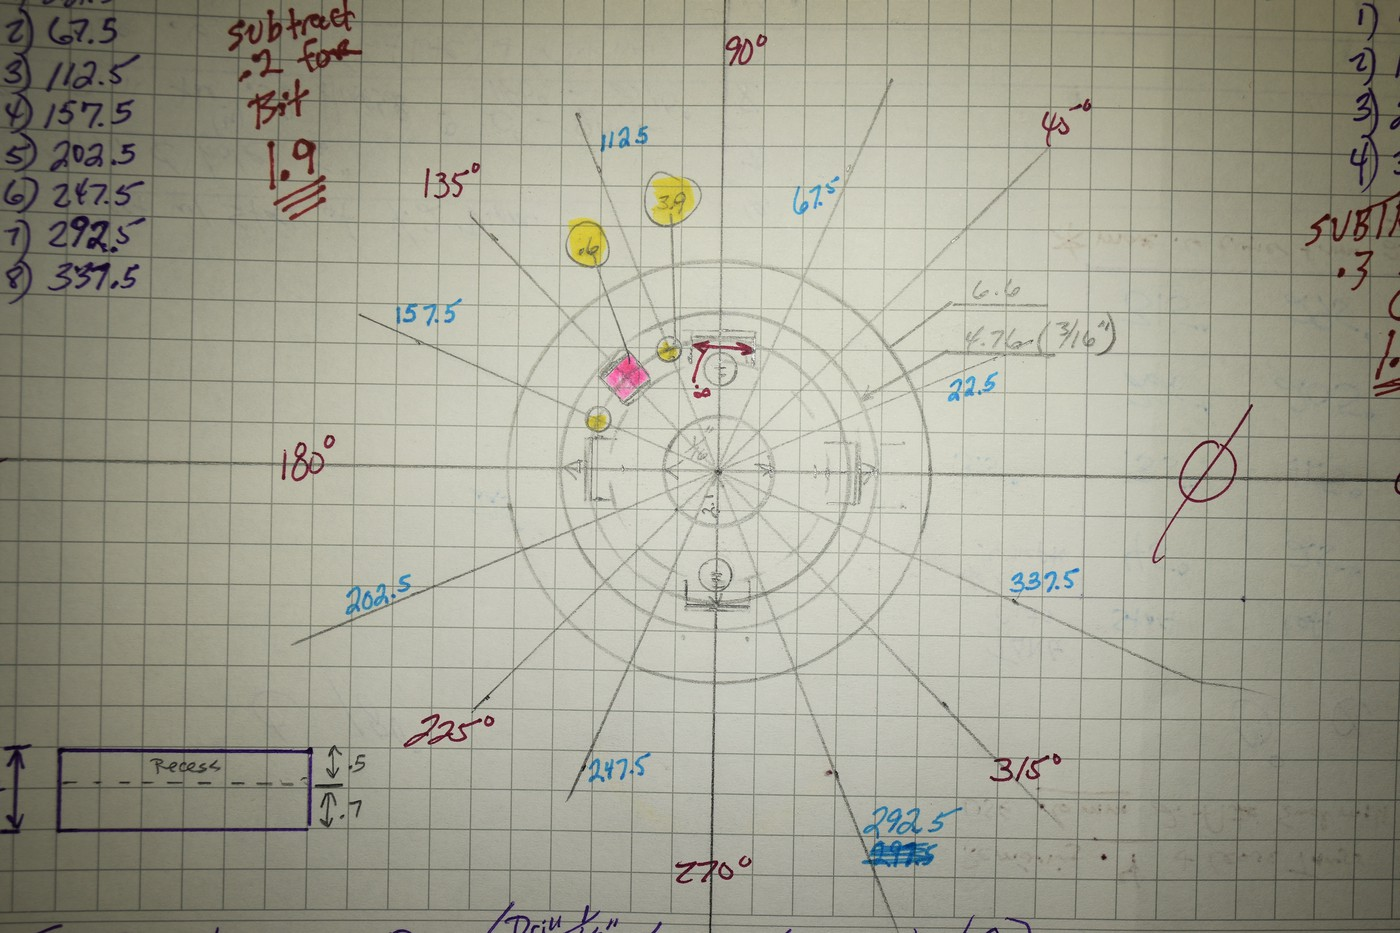
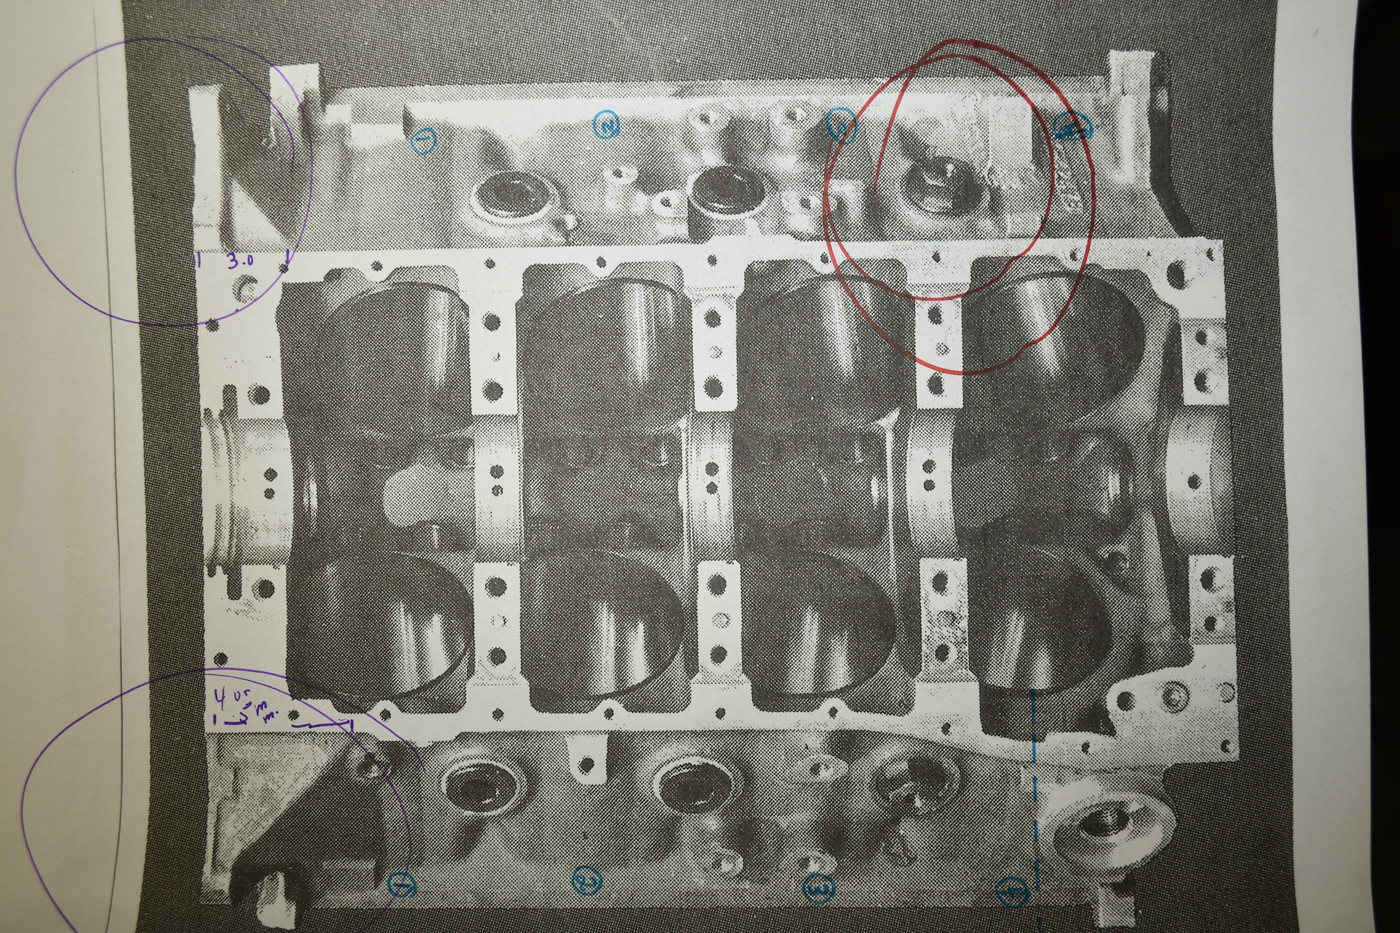
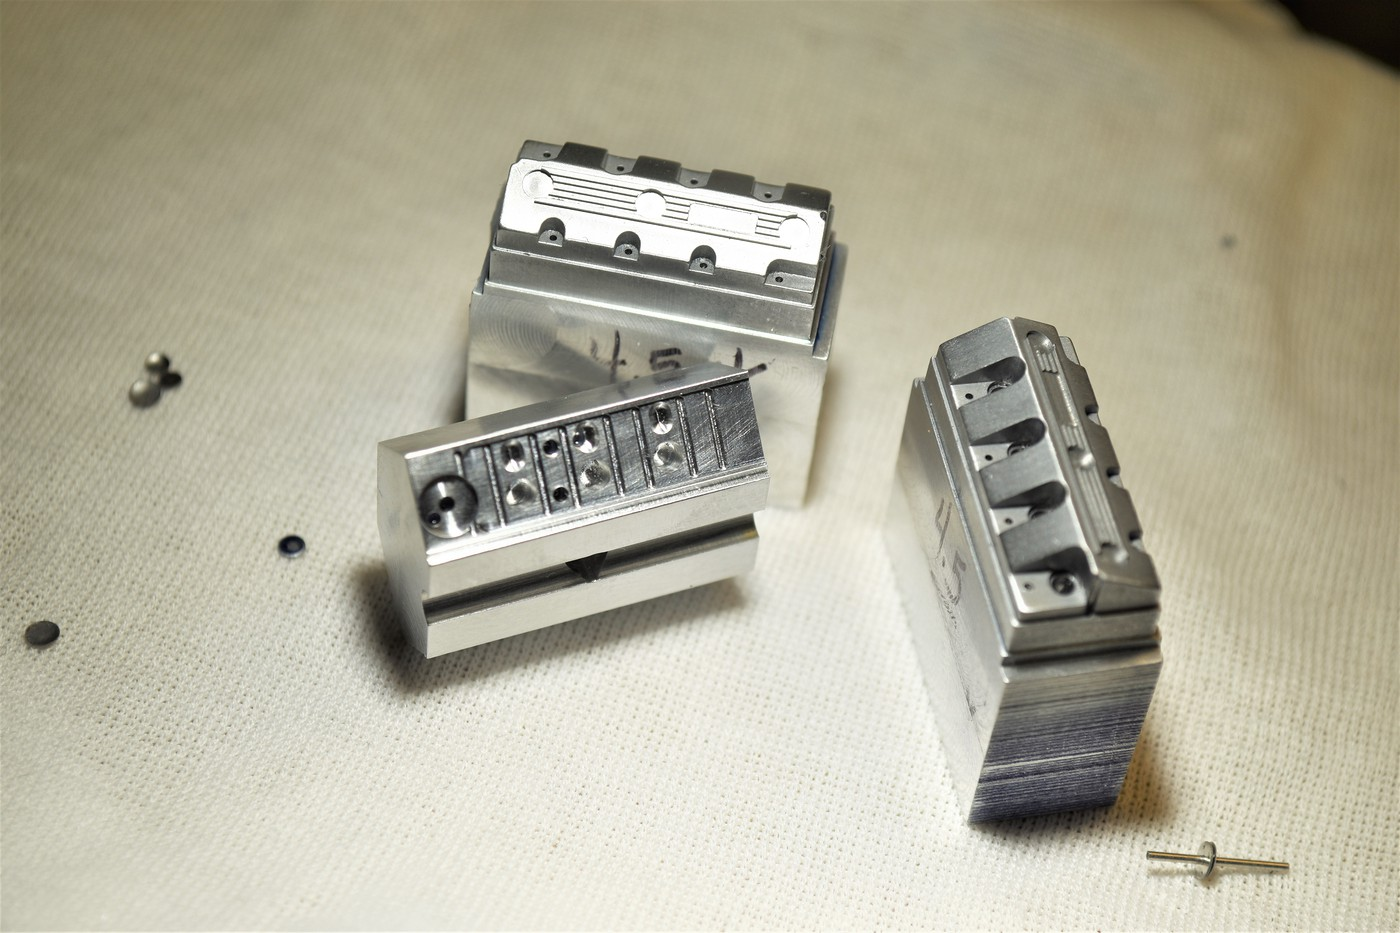
Thank you Niko & Hakan for posting both your comments and insights. Sorry for the mixed order of pics I'm sharing. The 1st pic is of the rear motor plate and block "flanges" as I call them along with the machined oil filter housing. I'll mill a bit off the front of the drivers side to mimic the actual block and you'll see some further detail later. More pics below. The next 2 pics show an actual alum. 494 block with the screw in freeze plugs. I'll be doing all 6 in the style of the one circled. This pic is the crank/flywheel flange. This pic shows the drawing for the crank damper that I machined in 2 pieces. I couldn't post the pic (file is still to big) of the completed unit but the smaller piece fits inside the larger one as an fyi. The diameter of the finished damper is 6.6mm. To those that celebrate it, MERRY CHRISTMAS and to everyone else a HAPPY HOLIDAYS! May the season bring the best it has to offer to each and everyone! Tim

-
Hey Pete, the finish was just dremel soft polishing wheel for metal & 0000 steel wool. I agree, it does look pretty cool in person . Thanks for checkin' in. Hi Chris, I have pics of the alum. block when they it nascar and they show it with a couple different options. None were brass however. I'll share more as I detail it for sure. cheers Bob, always appreciate the acknowledgements. My plan is to display the engine on a stand (think a shop stand) with the engine being prepped for install. Only oil lines run......... Hakan, I get that.........it's not for everyone, but it's something that I do enjoy even though it's a slow process for me. I still believe I can have this build completed by September NEXT year. Time will tell. Cheers
-
Appreciate the sentiments you've shared Brad. Still slow at what I do but still plugging away at this one. Dave, I couldn't machine a simple bracket plate for that motor. I'll let you do the big boy stuff while I sit in the corner and play with my toys. ? Cheers !
-
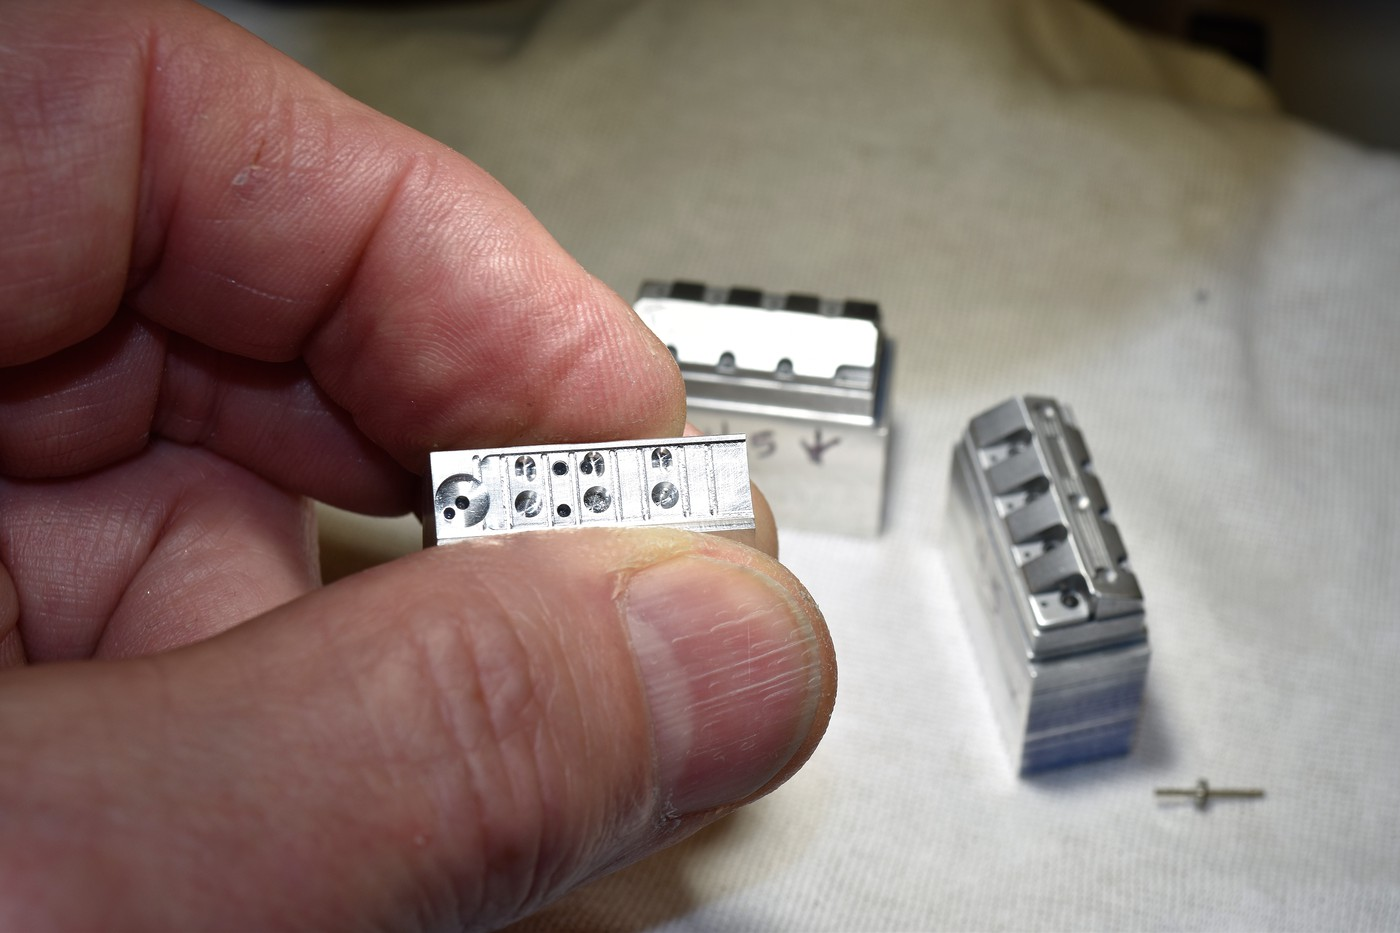
Hello everyone, I got the block and water pump/cam cover drawn up and started machining the block. I know that back in the day the blocks were cast aluminum but I wanted the look of alum so I'm machining it and will buff/polish and or media blast it for a proper look when done. The block is about 2/3 done. I have to add motor mount, freeze plug and oil housing detail among other odds and ends. The lower portion of the block on the passenger side needs done next but the two sides are a bit different so getting this look right has been more challenging than the Donovan engine in the Bantam. Took me the better part of a day just to machine the lower portion of the block you see below. Hope everyone had a Happy Thanksgiving. Cheers, Tim
-
Thanks John. Patiently waiting on your next updates. Working on the block and waterpump/cam cover as we speak. I like the renderings and hopefully it'll transfer to metal. Cheers NYLIBUD, thanks but no thanks.
-
First let me say simply "grazi" Luca for posting here and sharing your talents. The photos / explanations you've shared are simply phenomenal. I love to scratch build but this is talent beyond anything I possess. Will certainly follow along as you progress. Cheers, Tim
-
nicely done.........like that detail you put on the rear of the drivers "shield".........cheers
-
Nice nice build. cheers, tim
-
Hi Mark, did you use caswells "Blacken-it"........just curious as I bought it but not used it yet. I like the look ALOT! cheers
-
Mad mad skills. Loved the rims / wheels but seeing these new 3D renderings are just head shaking. Some real talent you have sir. cheers
-
Kurt - coming from a fellow machinist.........that's very high praise. many thanks. Chris, Ray, Wayne & Bob.....thanks so much too.....Dave (comp1839) has given me some more great info (dimensions) that give me the green light to do a bit more for this engine than originally intended. Not going to share what just yet but as I make progress on each of the key pieces, I'll certainly share. Shawn - If you go back a page you'll see my reply to a similar question. I think it will be of some help to you. Cheers, Tim
-
Would love to see pics of this car outside in the sun. That paint is great. cheers
-
A lot of imagination to bring that manifold to life Kurt. Like seeing the process. For the Ford script, are you going to try to replicate that too? It would be very cool if you could pull that off somehow too. cheers, tim
-
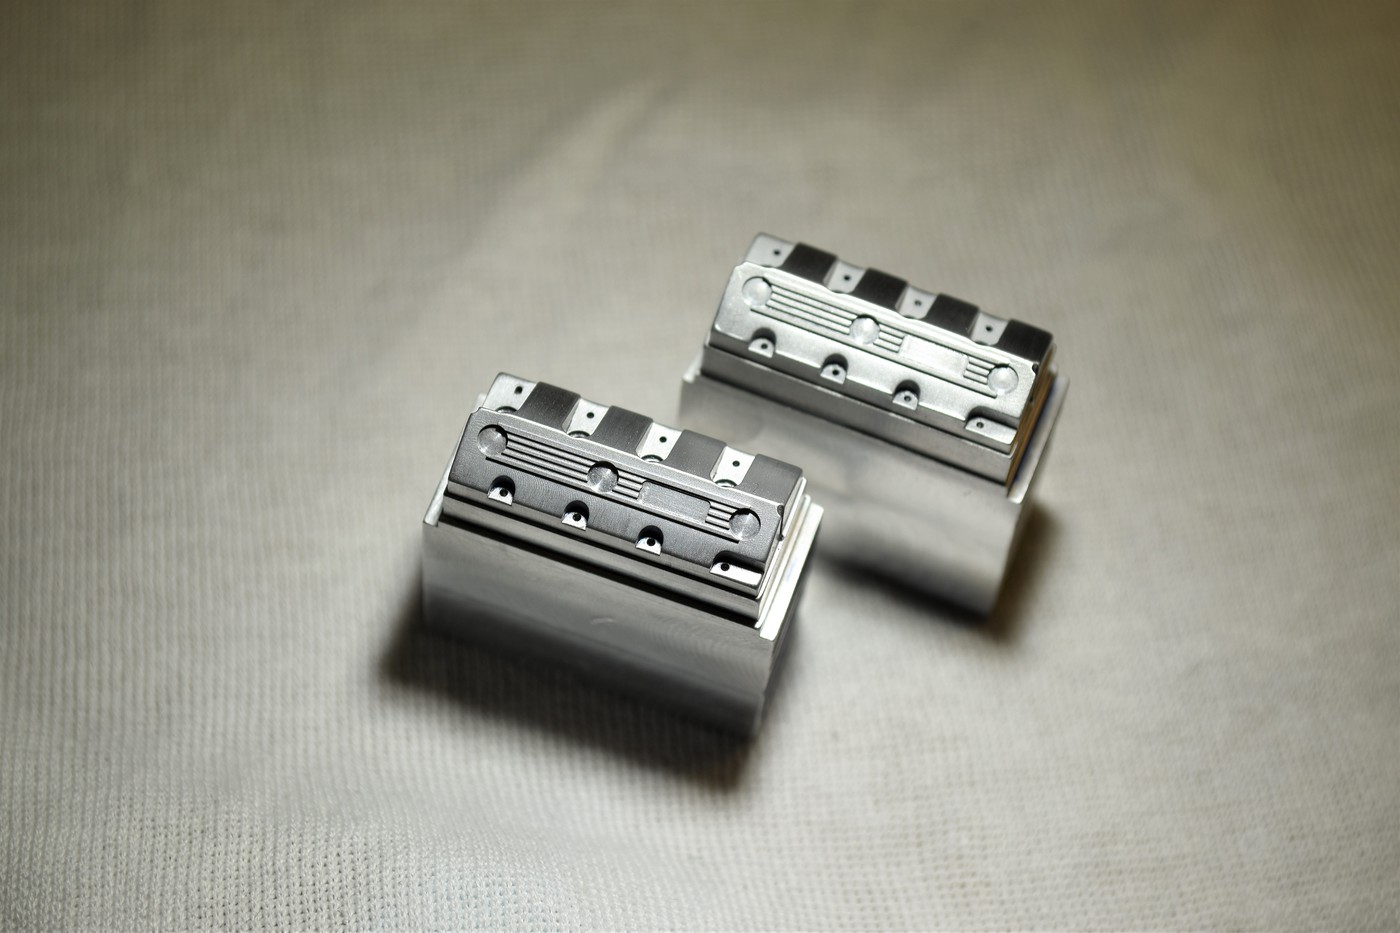
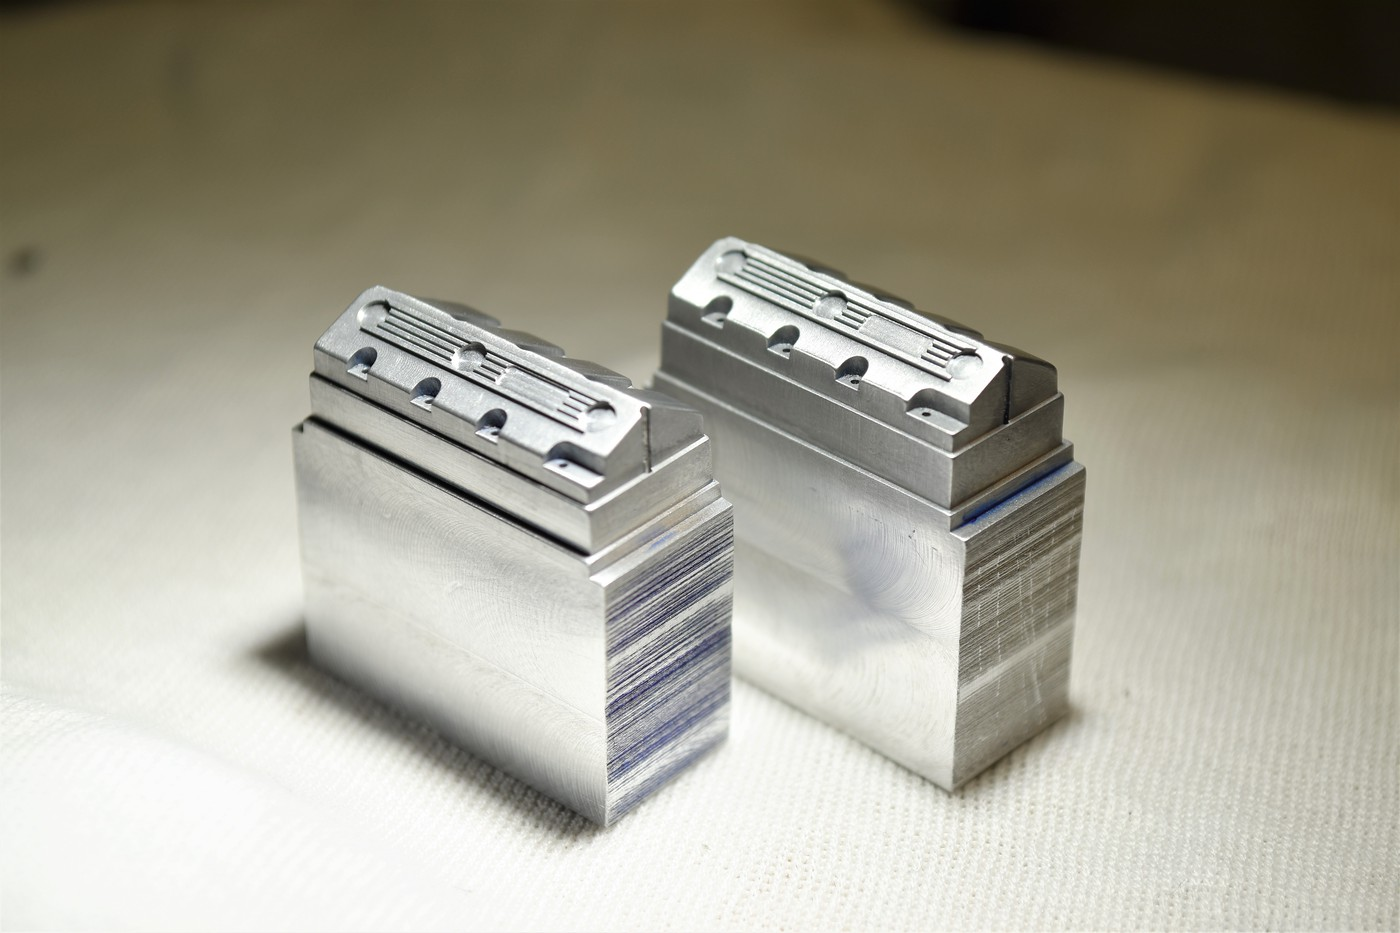
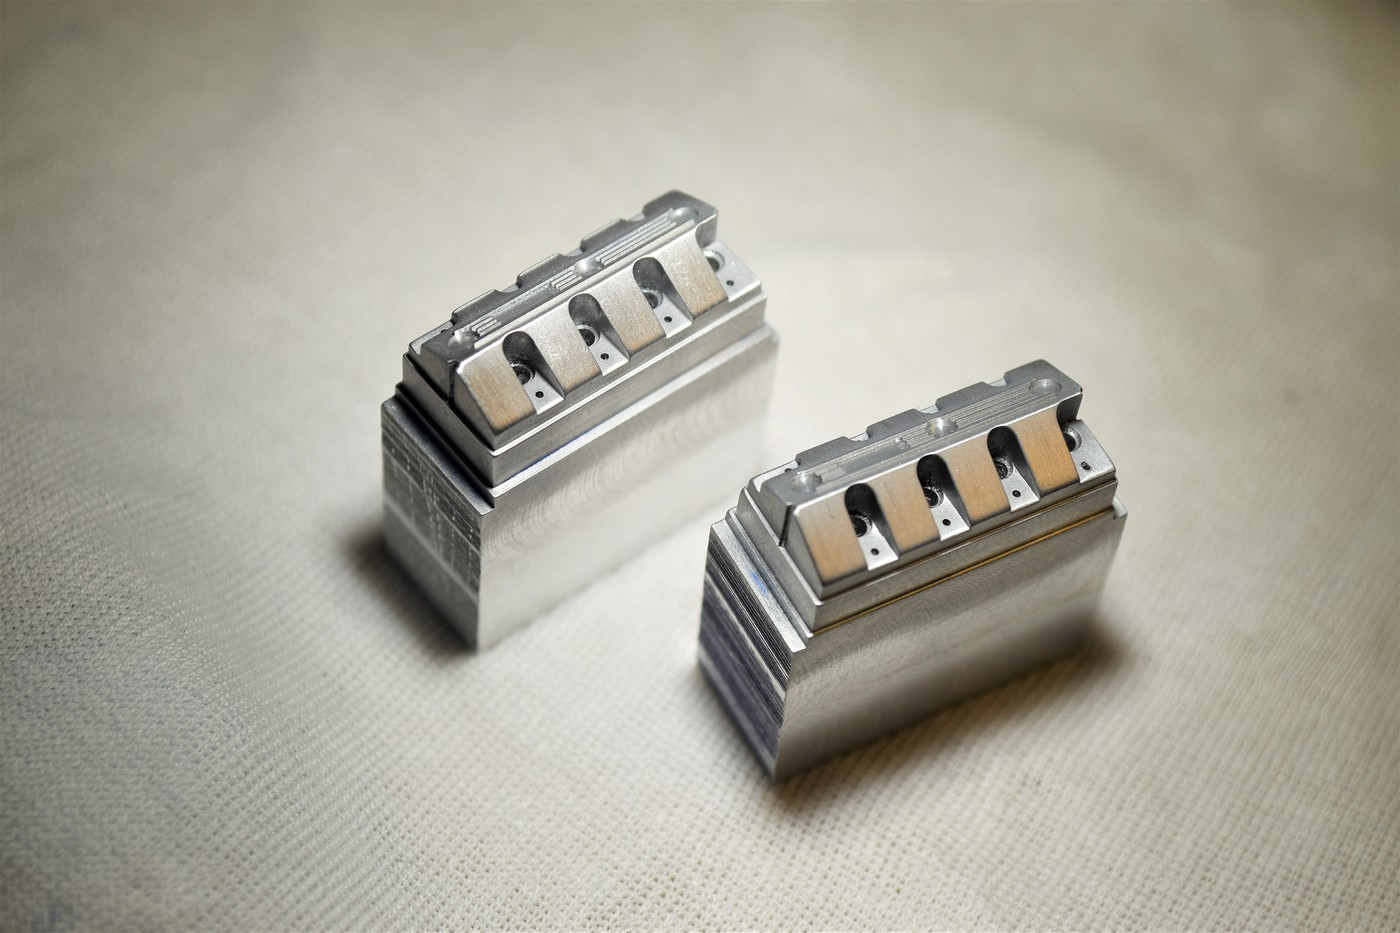
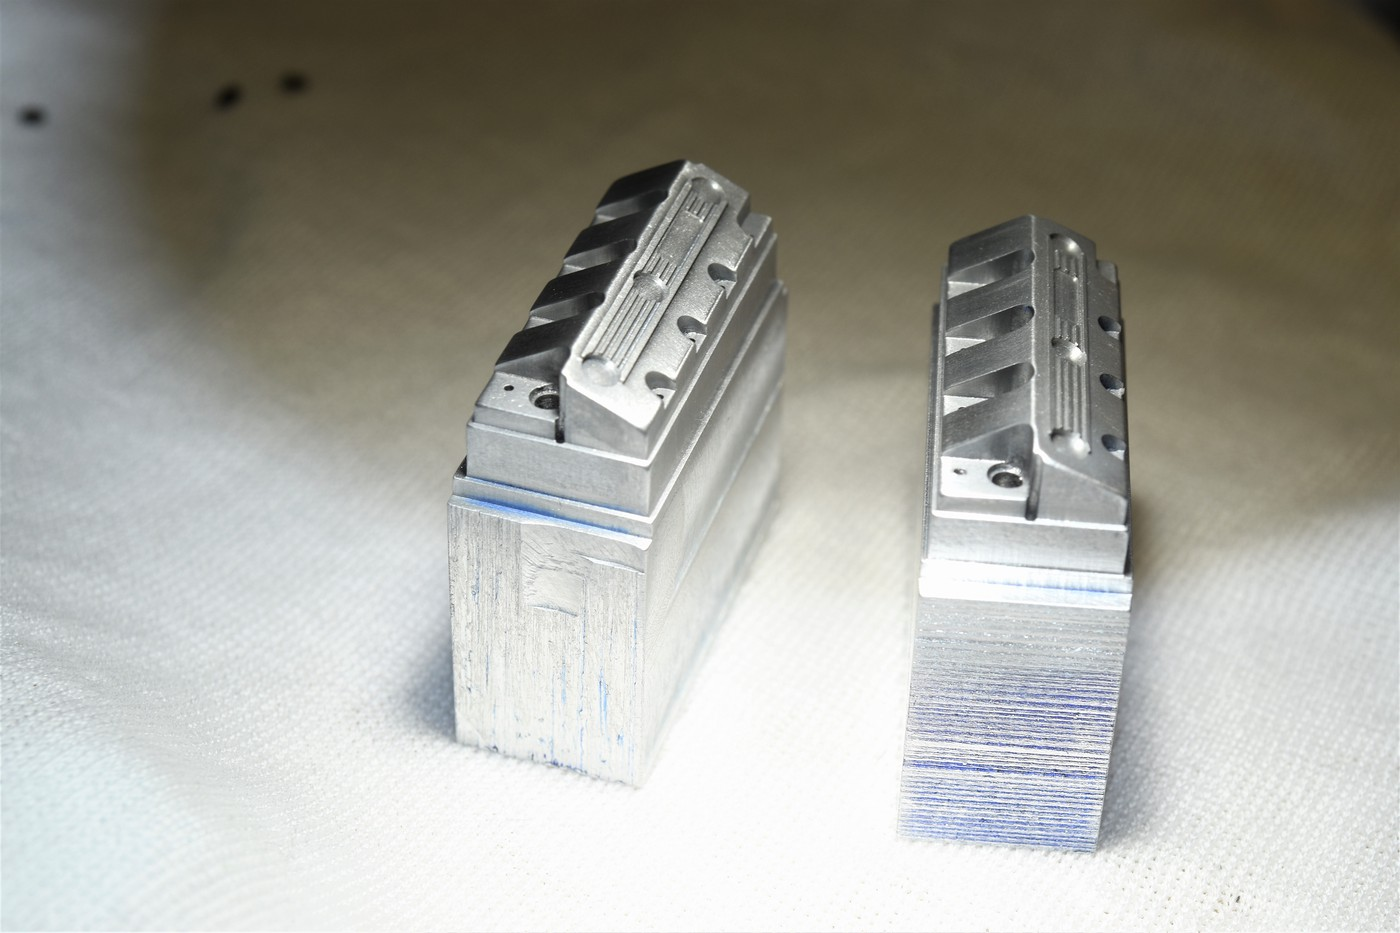
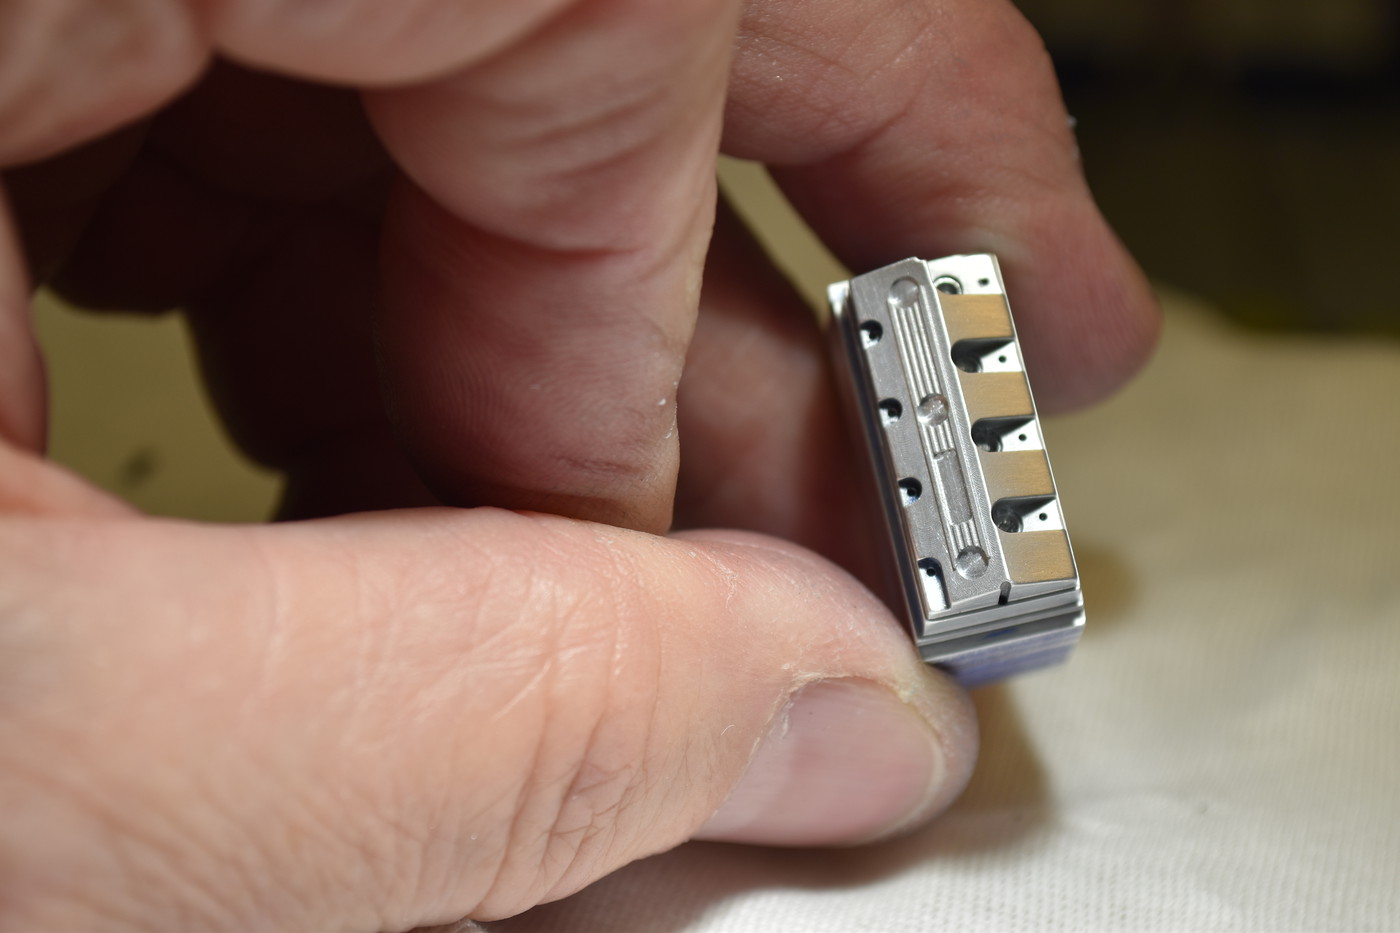
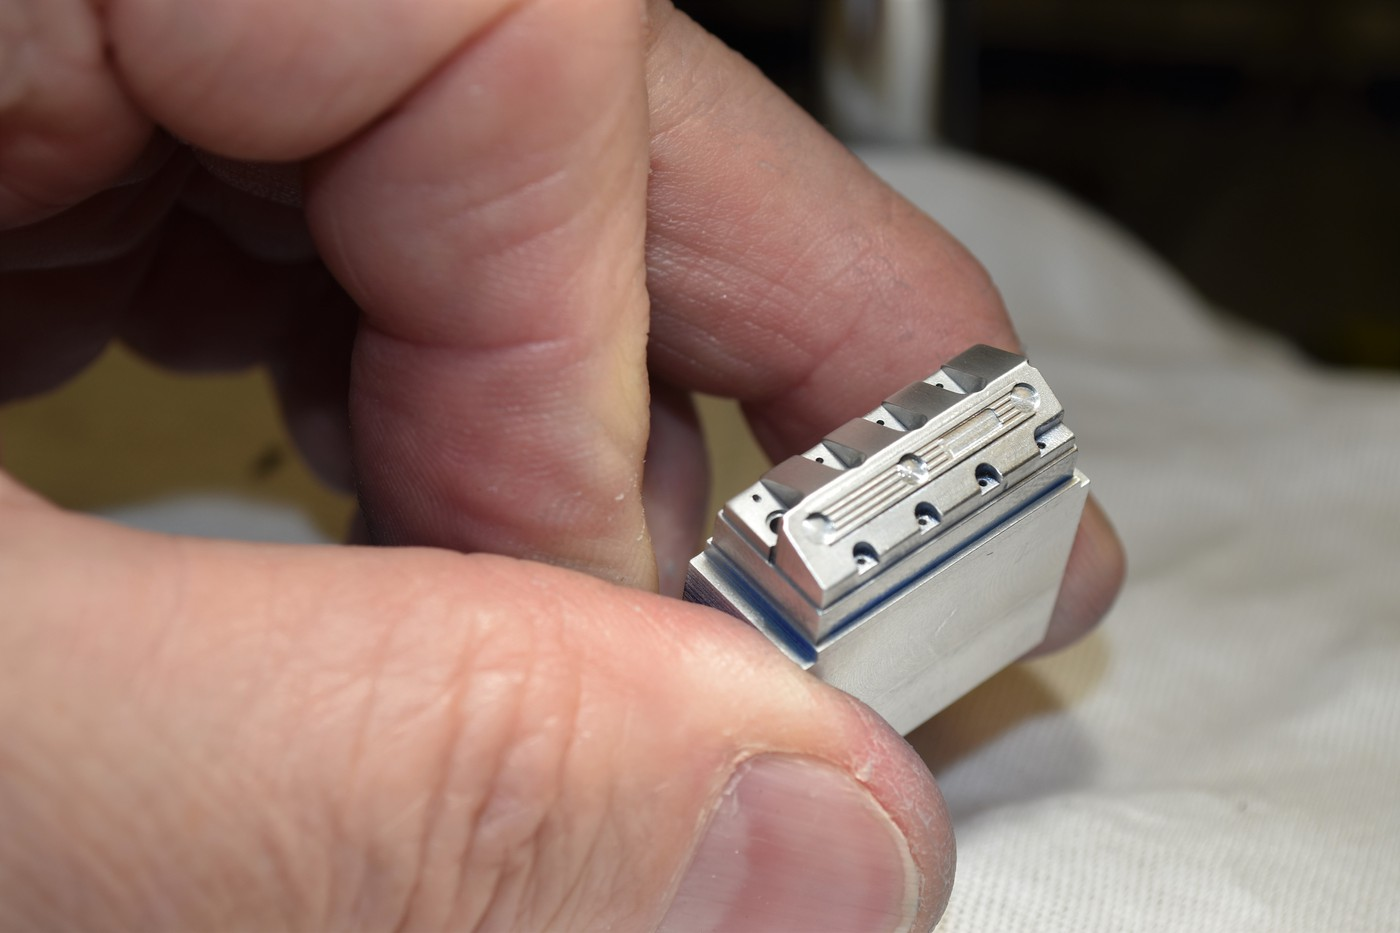
Thank you Claude & Mike........making a pair is time consuming. 8 hours to make 1. yup, I admit that. Dave, well, I've not been doing this for a bit but I think these are better than my Donovan valve covers. Thanks as always! Kurt, agreed, after getting them done, it would be a shame to have to do that to them. It's still going to be the 494 Alum. Can-Am motor all the same. Thanks too1 Well Doug, you stumped me but I learned something today. I never even heard of magetic polishing. Looked it up and it seems really intriguing. I used 0000 Steel wool and my dremel with a polishing wheel. The pair are done other than parting them off, some minor shaping, adding the bolts and they're finished. Cheers to all that are following along. tim
-
well Dave. 1 down, 1 to go. Thanks again for the info you shared. These things are complicated (at least for me) to figure out and machine. Just got to part this one off but I'm going to get started right away on its twin before I forget what the heck I did. ? I was intending on doing the experimental 16 plug heads Wayne Gap was developing but after getting the top part cut in, I didn't want to mess it up by adding more holes etc. to it. I liked the singular plug look better.
-
Thanks fellas for all your contributions. At this point I'm now set on what I'm doing for the build and have the info I need......well, I might have to ask Dave if he might have some "numbers" possibly but other than a few odds and ends, I'm now ready to get on with this. Next week if all goes well I'll have a pretty accurate set of aluminum valve covers to share and this will be off and running. Its been some time since I've sat at the mill and even though I'm shakin' off some rust, its fun to get back to it. Till next week, cheers, tim