Codi
-
Posts
2,675 -
Joined
-
Last visited
Content Type
Profiles
Forums
Events
Gallery
Everything posted by Codi
-

1:20 Studio 27 WR3 Keke's ride
Codi replied to Belugawrx's topic in Other Racing: Road Racing, Salt Flat Racers
Just WOW Bruce. I remember that car/paint scheme. What a fantastic looking car. You did her proud. cheers, tim -
Striking good looks. Congrats to you for a really clean build. The paint is exquisite. cheers, tim
-
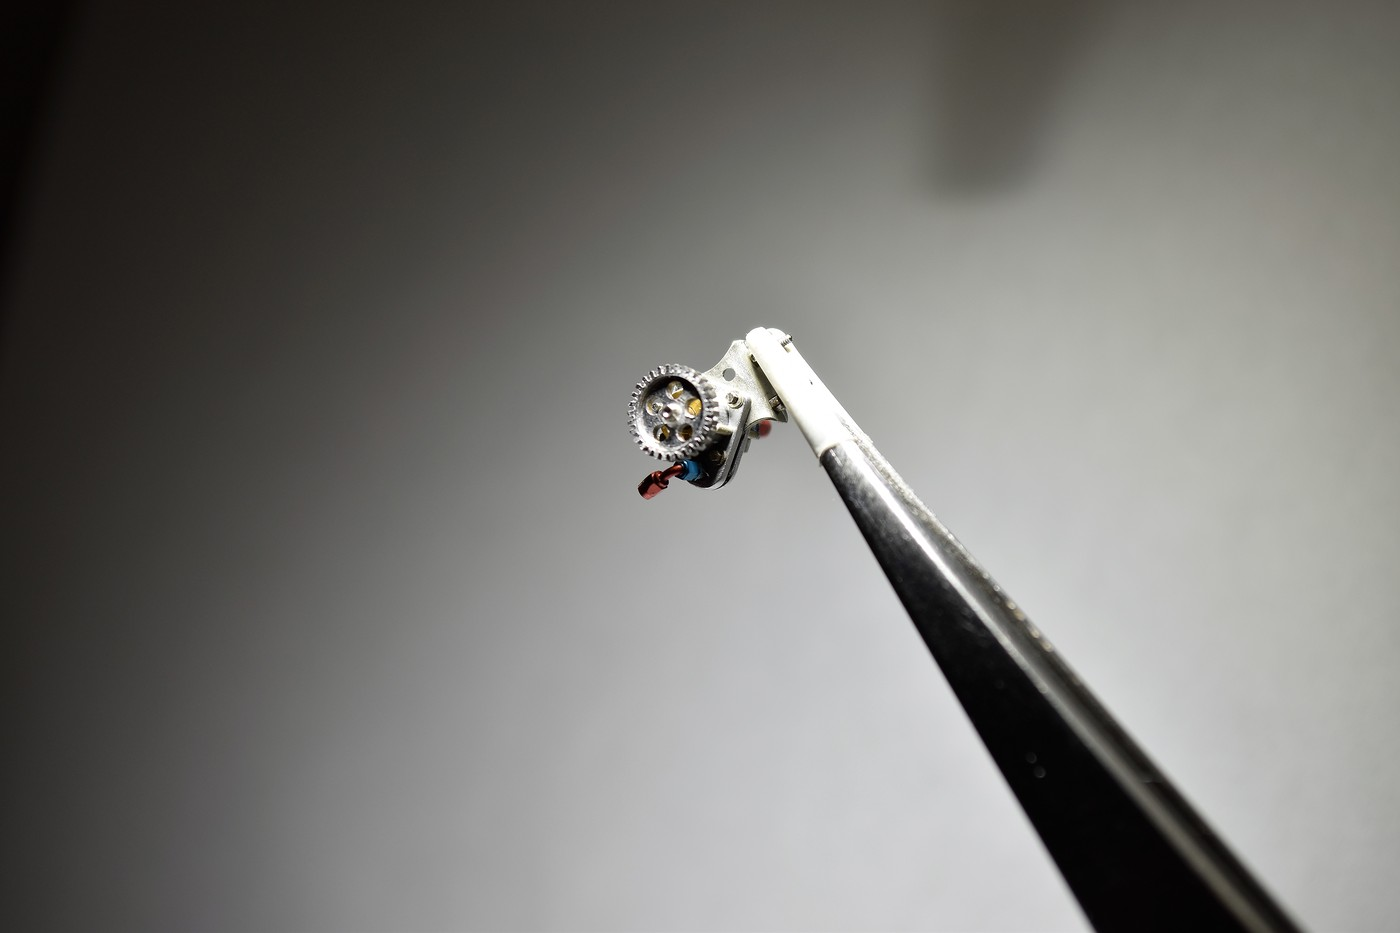
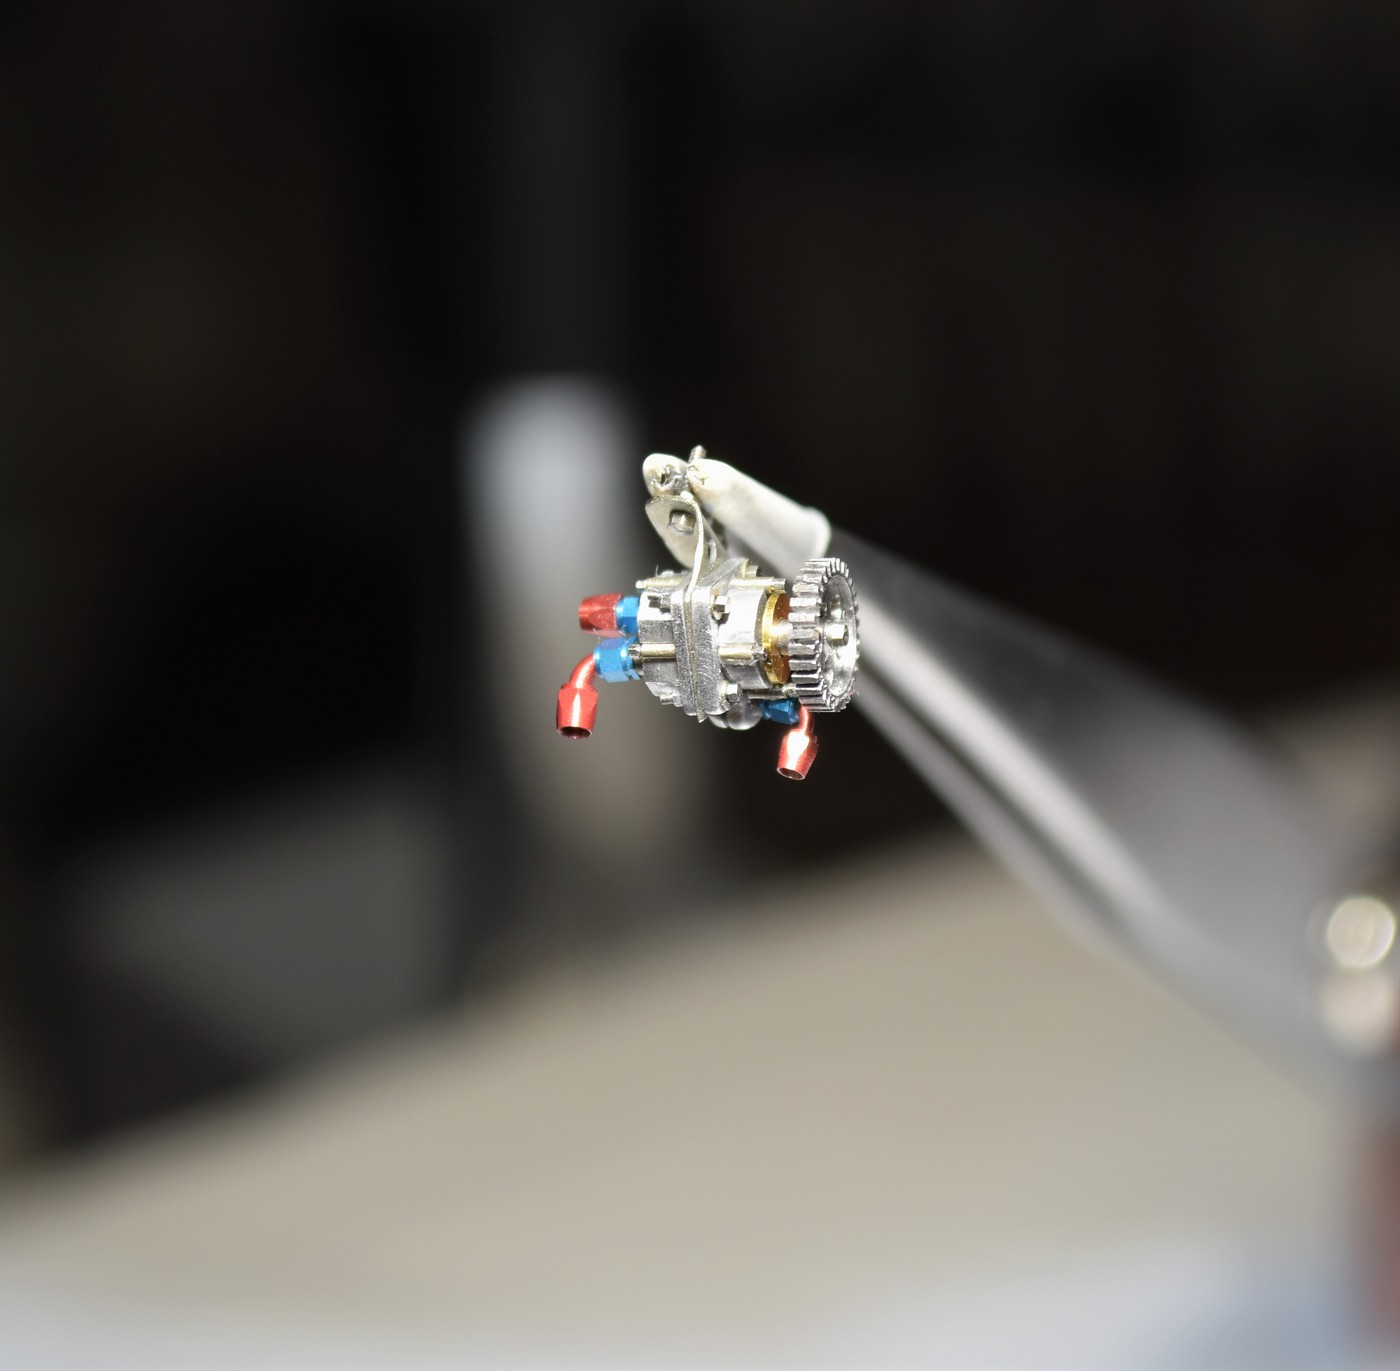
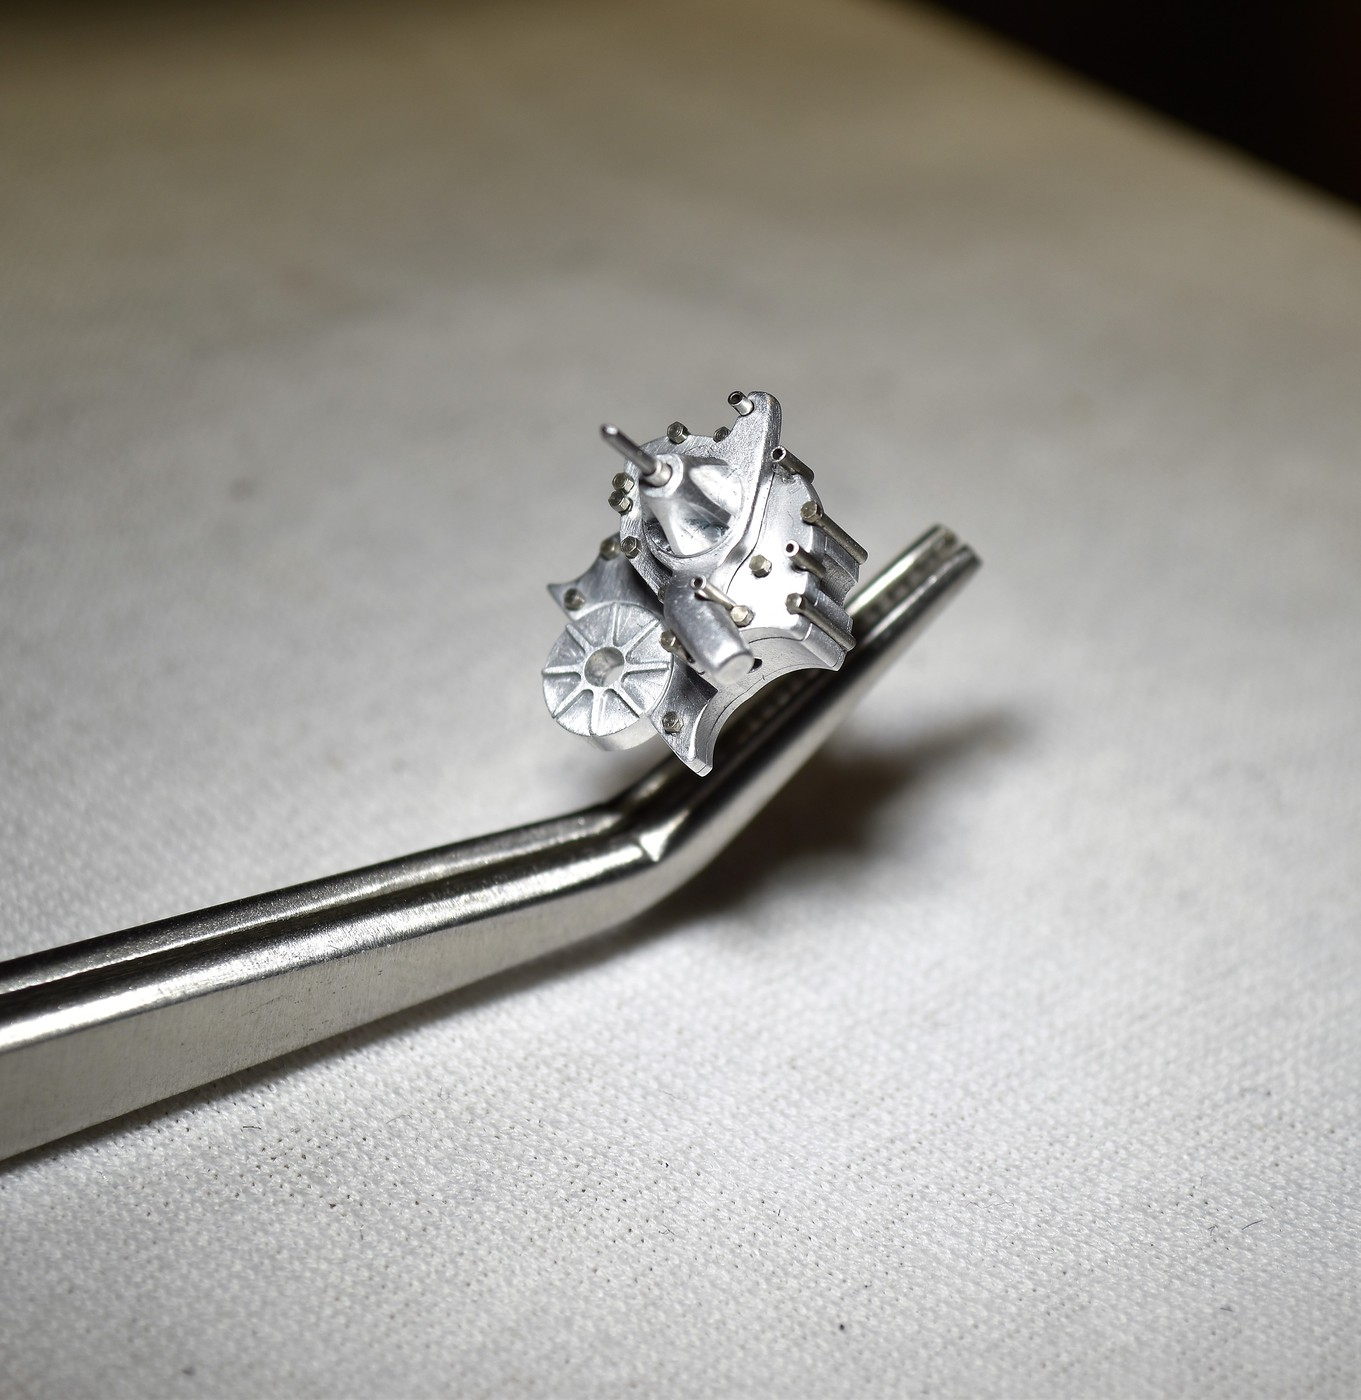
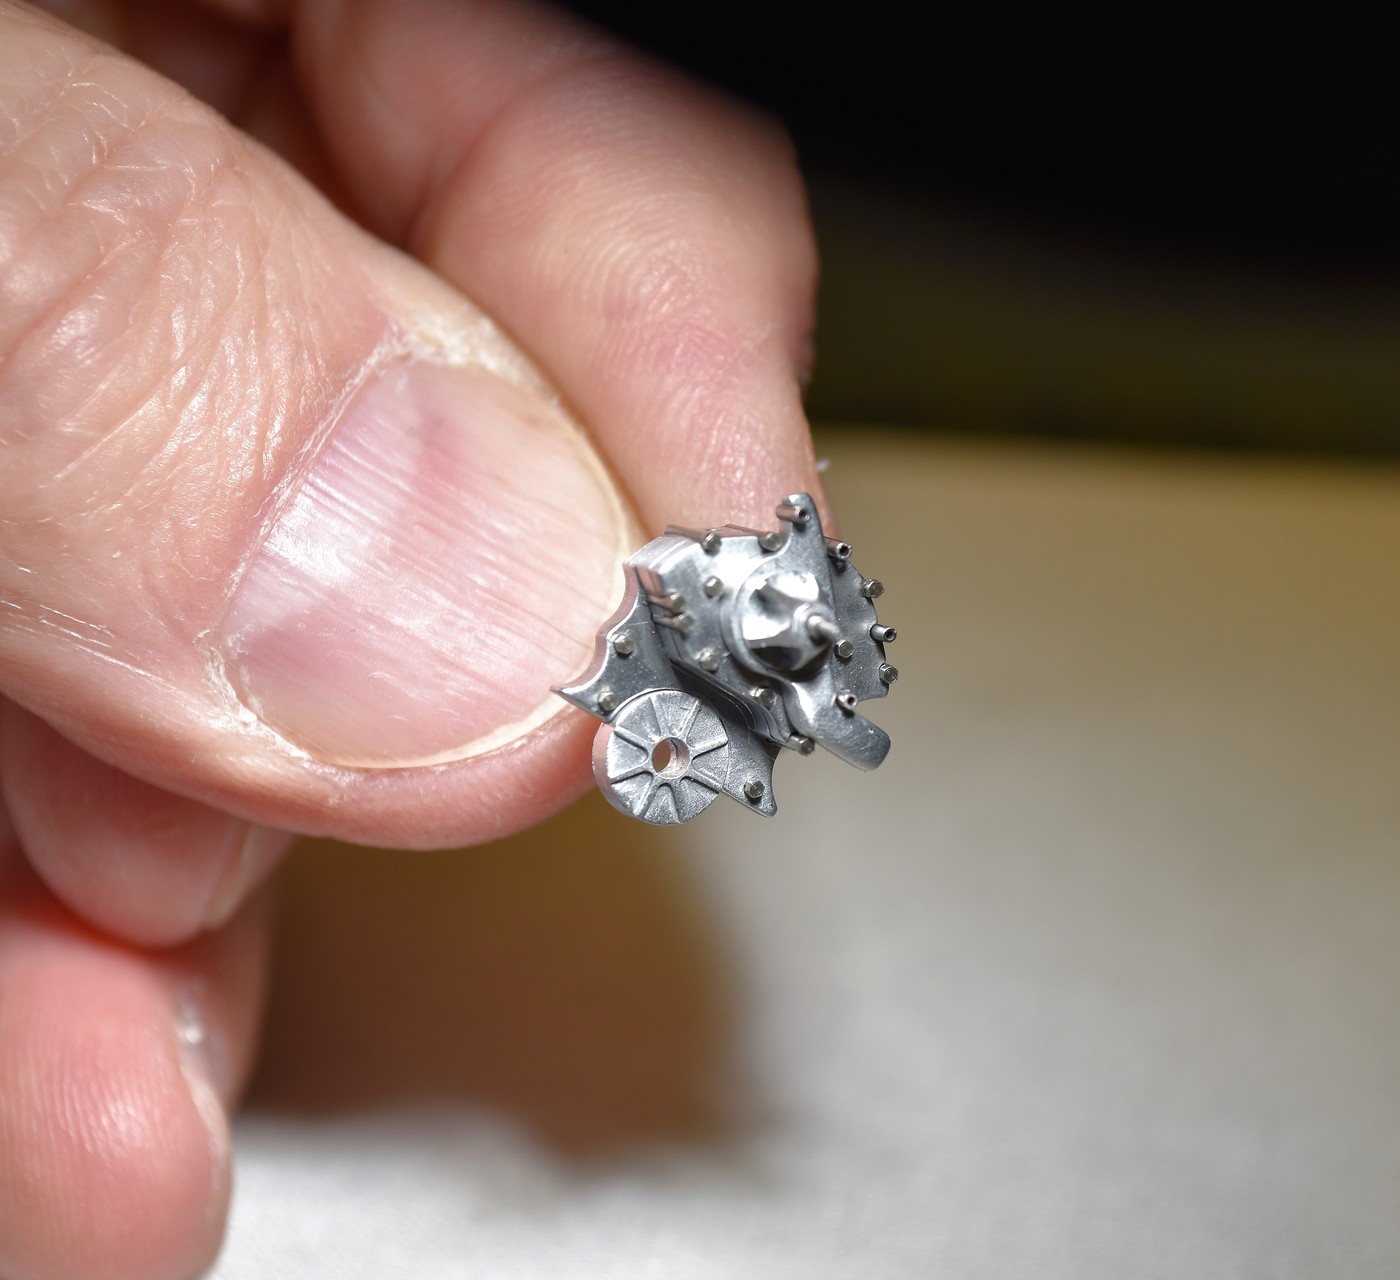
Hey JC, I had read something along those lines earlier. Chevy and Mopar protested their use in drag racing as they swore Ford had developed or was using some sort of fuel injection when they first appeared. Got the dry sump pump done. It was a headache. I know now what I'm in for when I attempt to make the carbs now. In this piece there is a grand total of 58 pieces counting the bracket, pieces I machined and every last nut, bolt and washer. Machined the gear itself out of steel for the contrast in color/look. Got a few things to address on the block and then I'm onto the heads finally. cheers, tim The gear itself is not affixed permanently as of yet. I'll do that after the entire assembly is installed on the engine.

-
64 Dodge D100 Pickup Pro Street
Codi replied to AmericanMuscleFan's topic in WIP: Drag Racing Models
That steering rack turned out pretty slick Francis. Been a while since I've checked out your updates.....it's looking very sharp. cheers, tim -
So I had to peek to see what insanity Eric has taken on now. What an imagination AND execution of an idea. This is too cool for school as we used to say years ago. That paint you shared is crazy and I'd love to see how you replicate something like it. cheers, tim
-
Dann........so now you tease us by saying you shot 1 more coat of clear and you're 100% happy finally. And no pics for us to enjoy. I thought the paint was great before. Share a pic of the paint when you update again please. It's gotta be gorgeous. cheers, tim
-
Fantastic Kurt. I've been remiss in checking out your progress. I love the result and absolutely learned some tricks along the way from your descriptive. Congrats on a great car. tim
-
Love this thread as I've said before and always enjoy the newest posts. Thanks JC, tim
-
Thanks Dave.......NHRA had banned these as of 1973 I'm told. But since my car is being setup for a weekend of match races.........well............
-
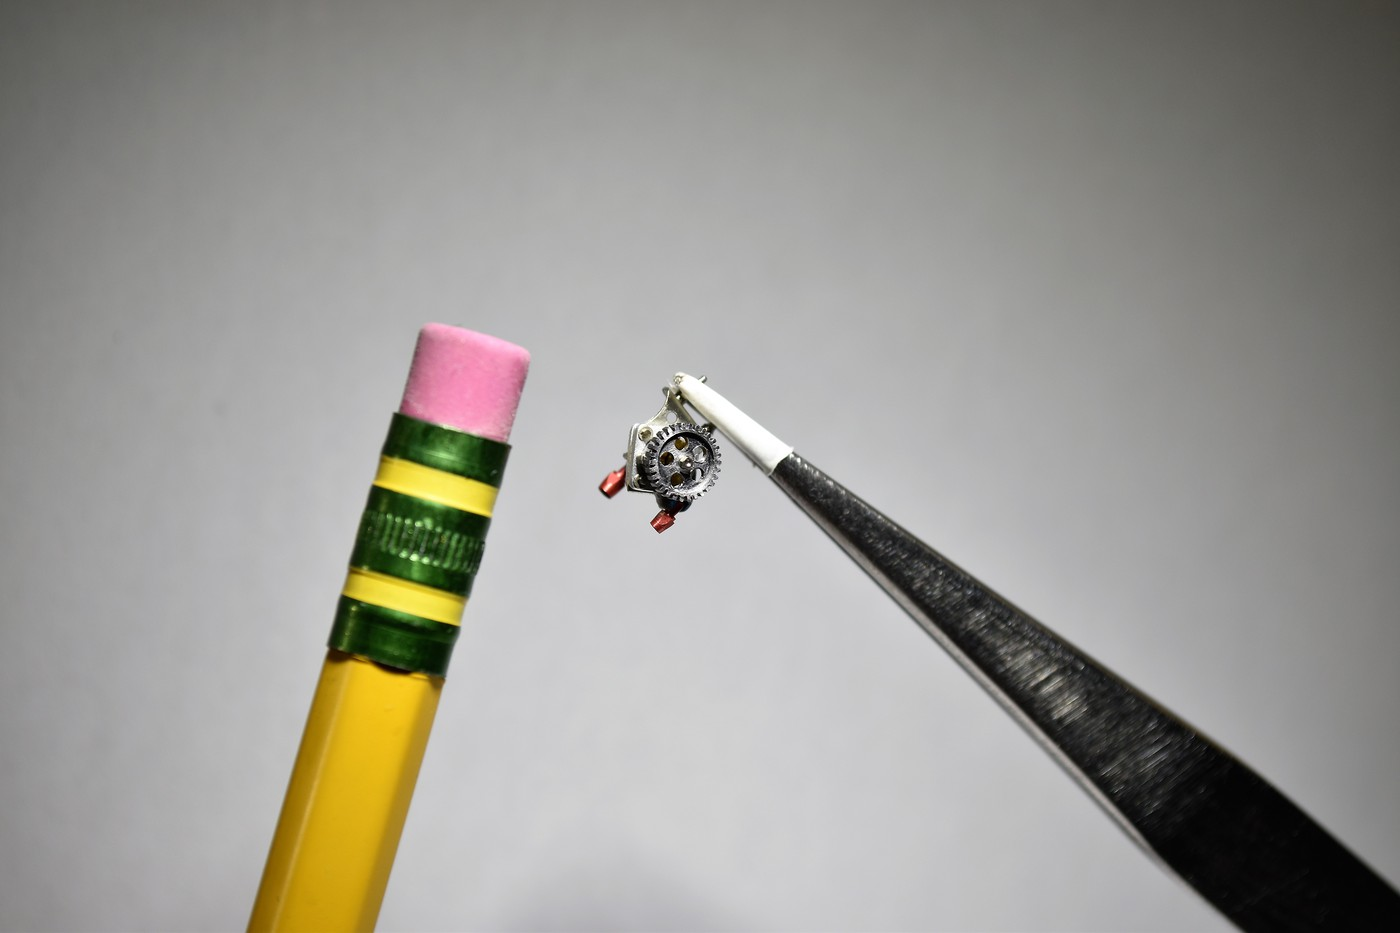
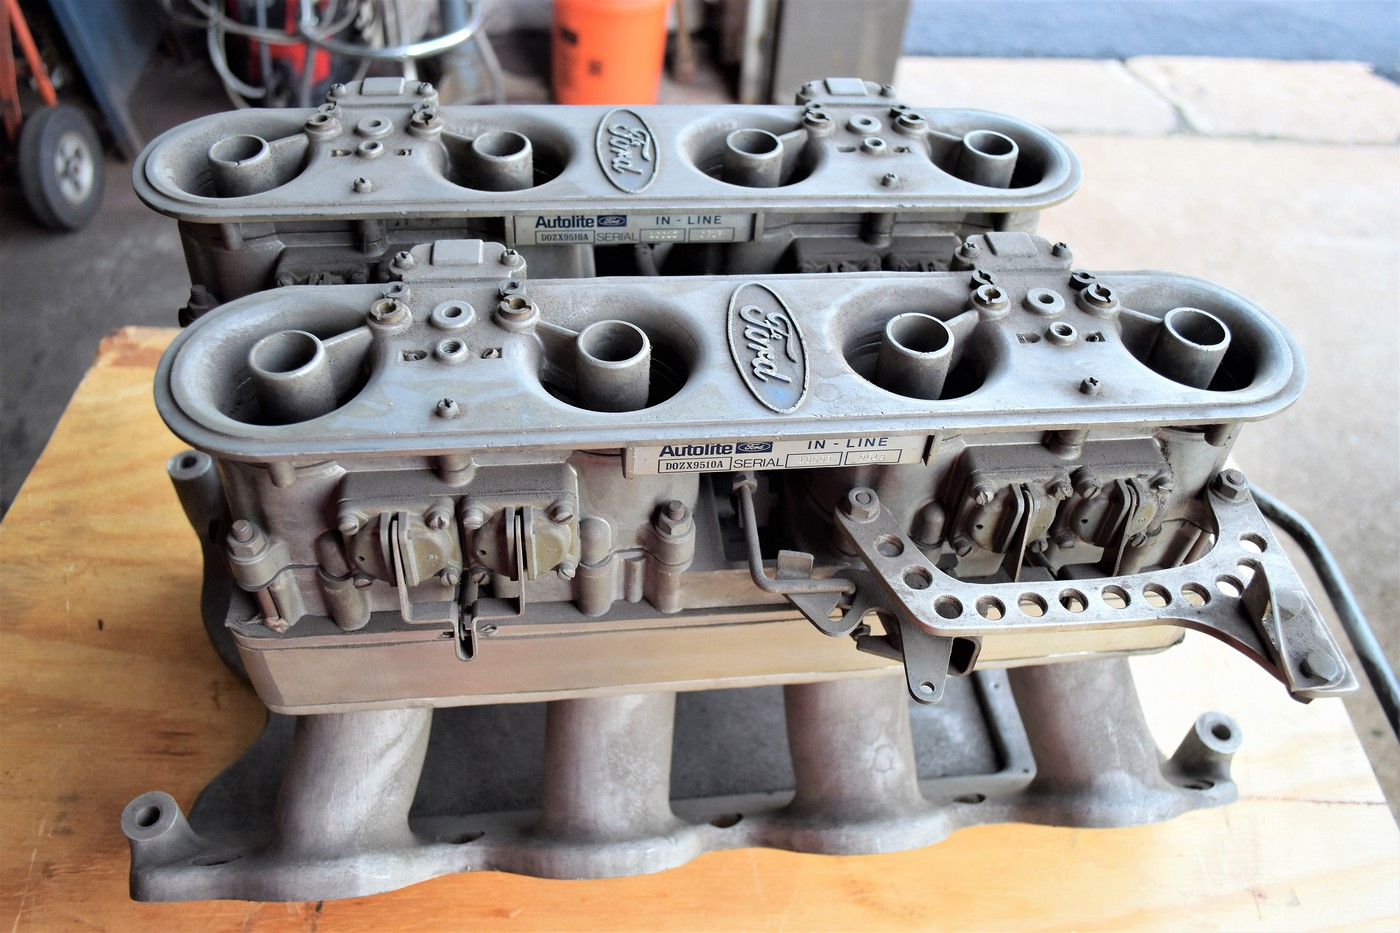
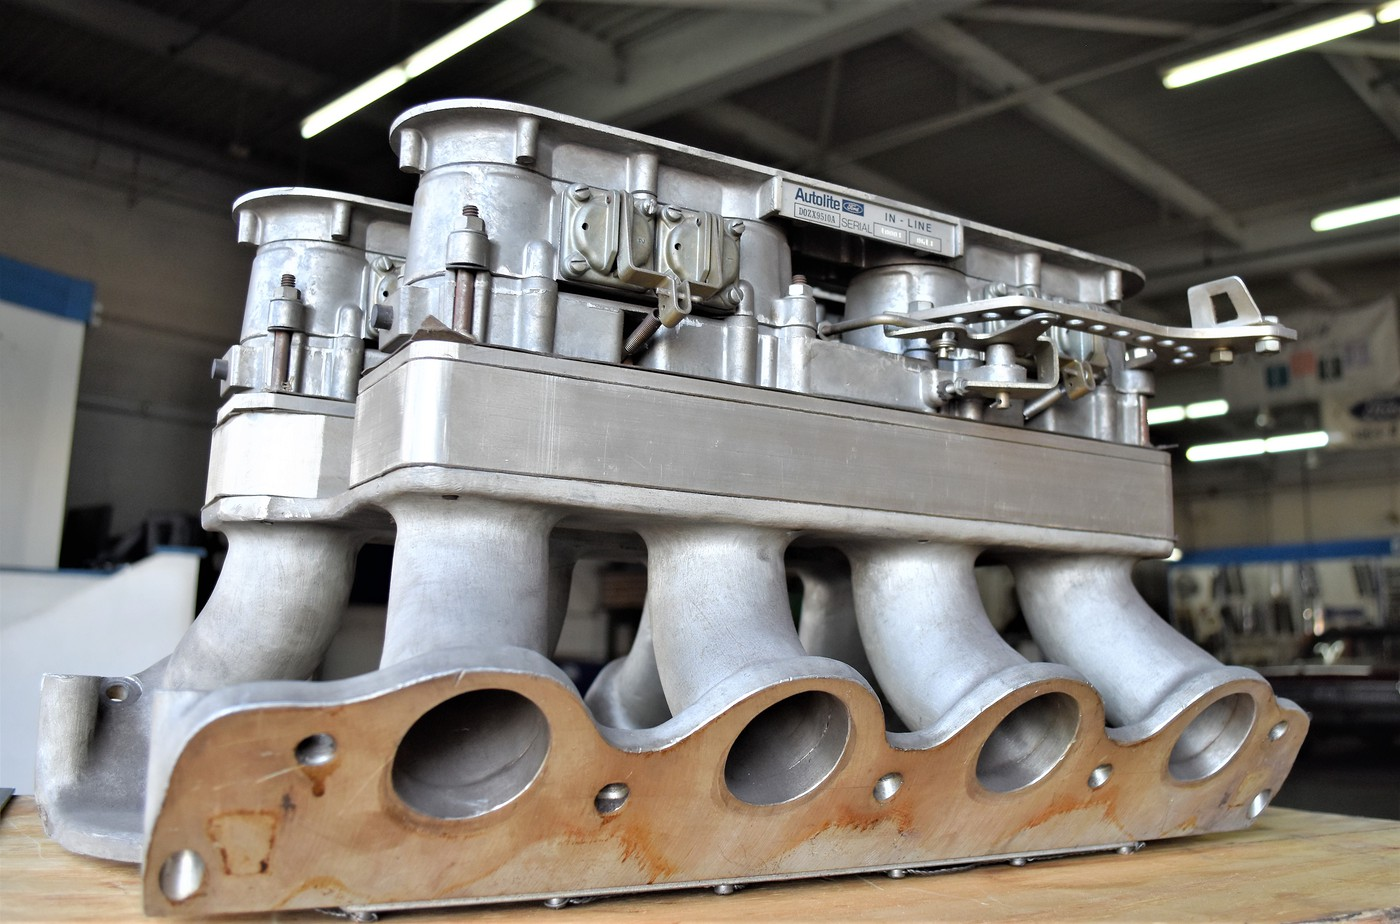
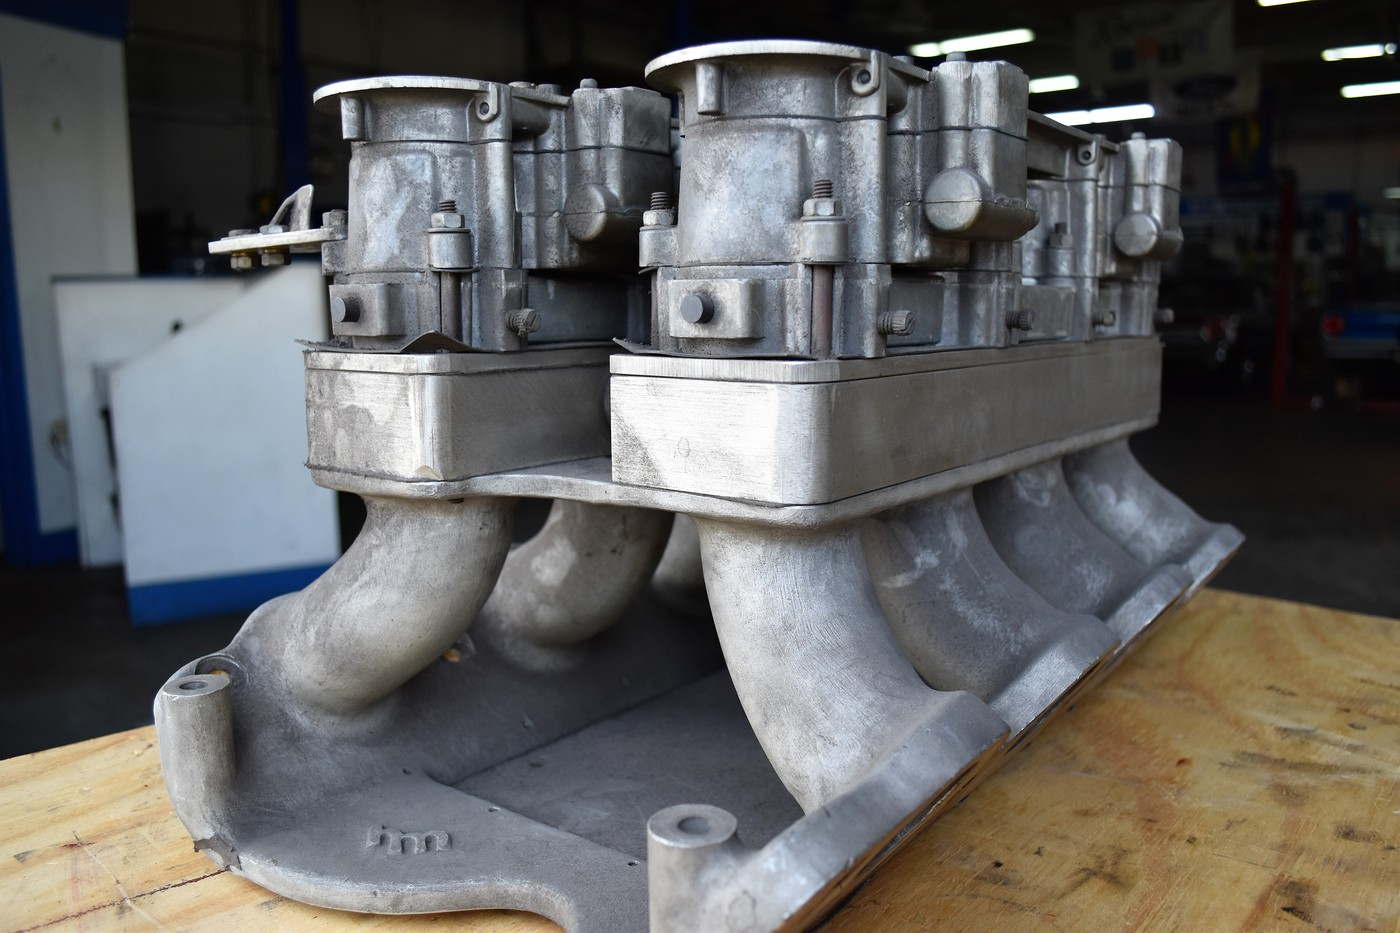
Thank you everyone for your previous posts & comments. I'm almost done with the dry sump pump.....size of a pencil eraser with more than 45 components. a day or 2 and I'll post pics. Today I had the opportunity to meet a gentleman that had an original (he raced it) Boss 429 custom Holman Moody manifold with twin Autolite in-line 4 barrel carbs. Took many pics and learned a LOT..........was also fortunate enough to get actual measurements which will help when I attempt to machine em'. Out of deference to his privacy, I'll just repeat myself that he was a true gentleman and a huge help. A real honor to have met him. a few pics of the kit. cheers, tim
-
So well done. Congrats on a nice clean build. cheers, tim
-
Thanks guys. To answer the question about parting off, I use a slit saw unless parting off round stock when I use my lathe. Oil pan is done other than putting in the .4mm bolts. You can see the holes drilled on the back half for the drain plug and the dry sump lines unfortunately. Next up is a reasonable facsimile of the dry sump pump and the gears for it. In the pics I'm holding everything together as nothing has been glued together as yet. Cheers, tim
-
Pete, ah, you caught that huh? Pretty effective actually. I had an end mill grab just a little too much one time and lets just say that it created a bit of "excitement" when it did. Better safe than sorry right? Thanks for sharing Brad, I don't visit there much but now I most certainly will. cheers, tim
-
That paint is gorgeous, mile deep. Nice build sir. cheers, tim
-
Hey there Brad, appreciated.......btw, what are YOU working on as of late? Time for another altered perhaps? J.C. (AFX) thanks sir........the planning (research and coming up with the rendering) was the most time consuming part. I've gotta be nuts the time I put into this little piece. cheers Tom (Brutalform) glad you came across the thread and hope you stop by again in the future. Francis, as you know all to well, the drawings / prep are everything, not counting the bolts and tubes, there are 5 different pieces making it up and I've still got to make the fuel pump extension. Thanks too !!! Dave....thanks man, you taught me most of what I know and I can't say how much that matters. cheers!!!! Daniel (Straightliner) time and practice will get you there. I do admit you have to have some patience too. My kids suffer because I use up my patience quota on the mill and have little left for them. ?
-
I've always admired your work Martin. Nice to see this thread you've just started. Cheers, tim
-
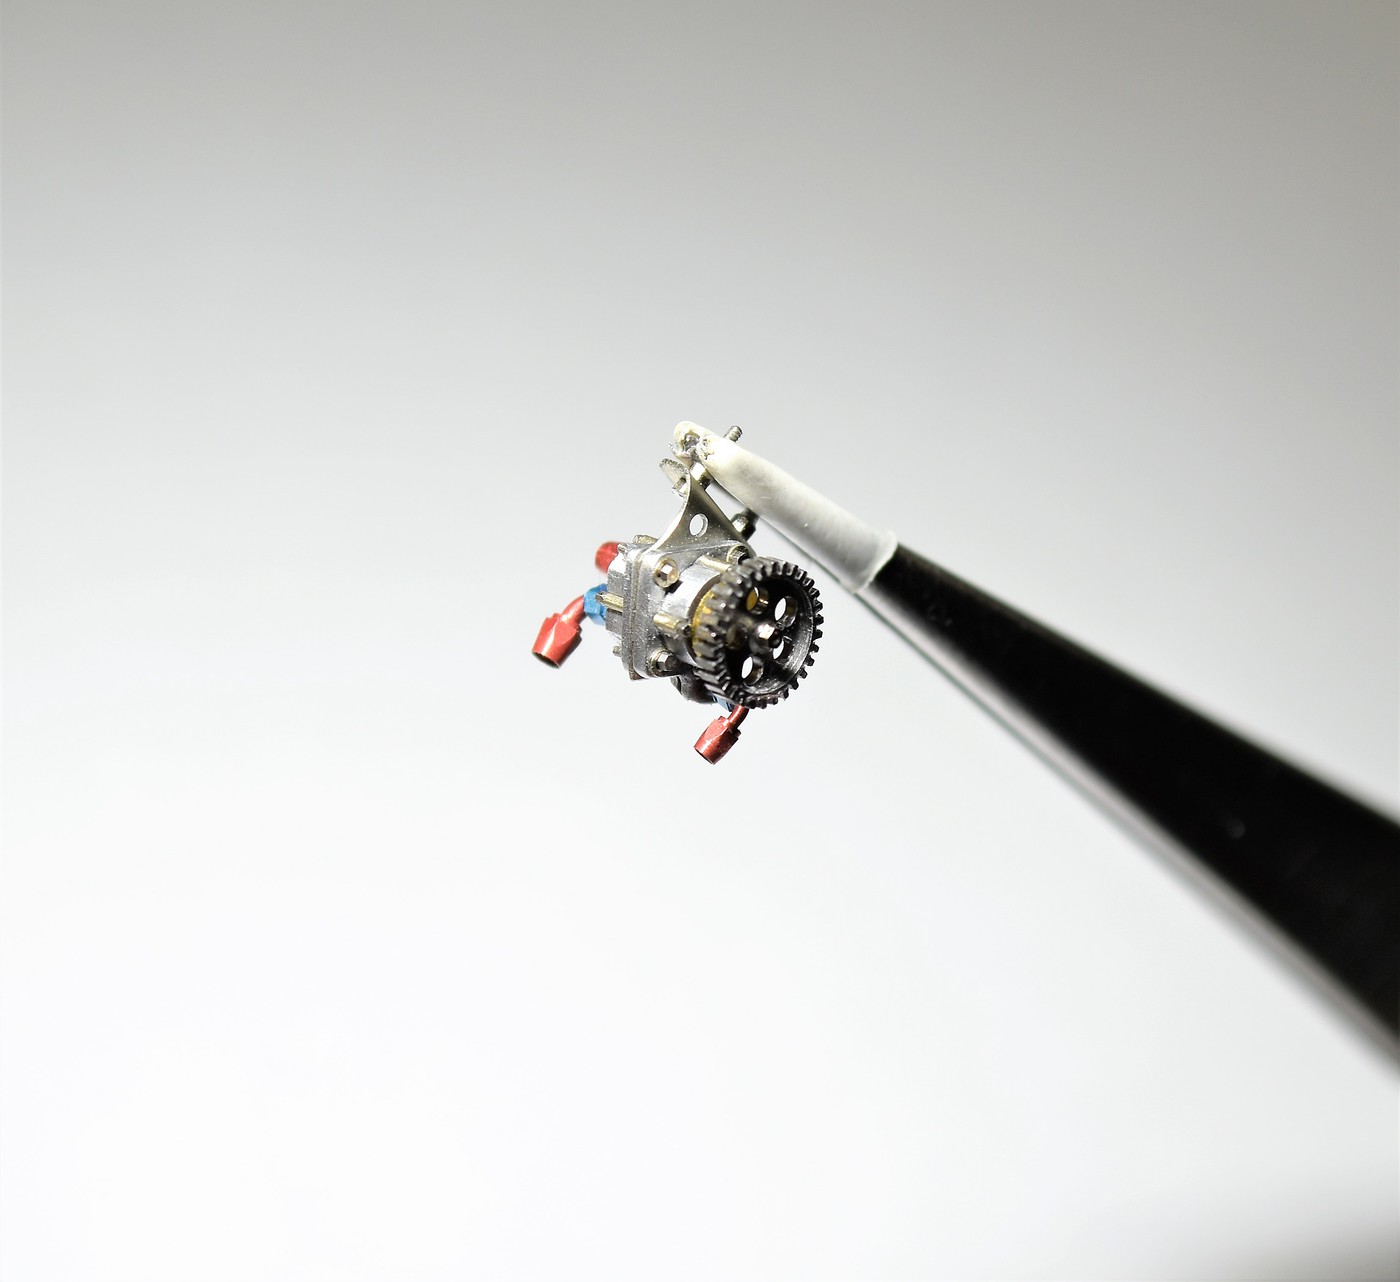
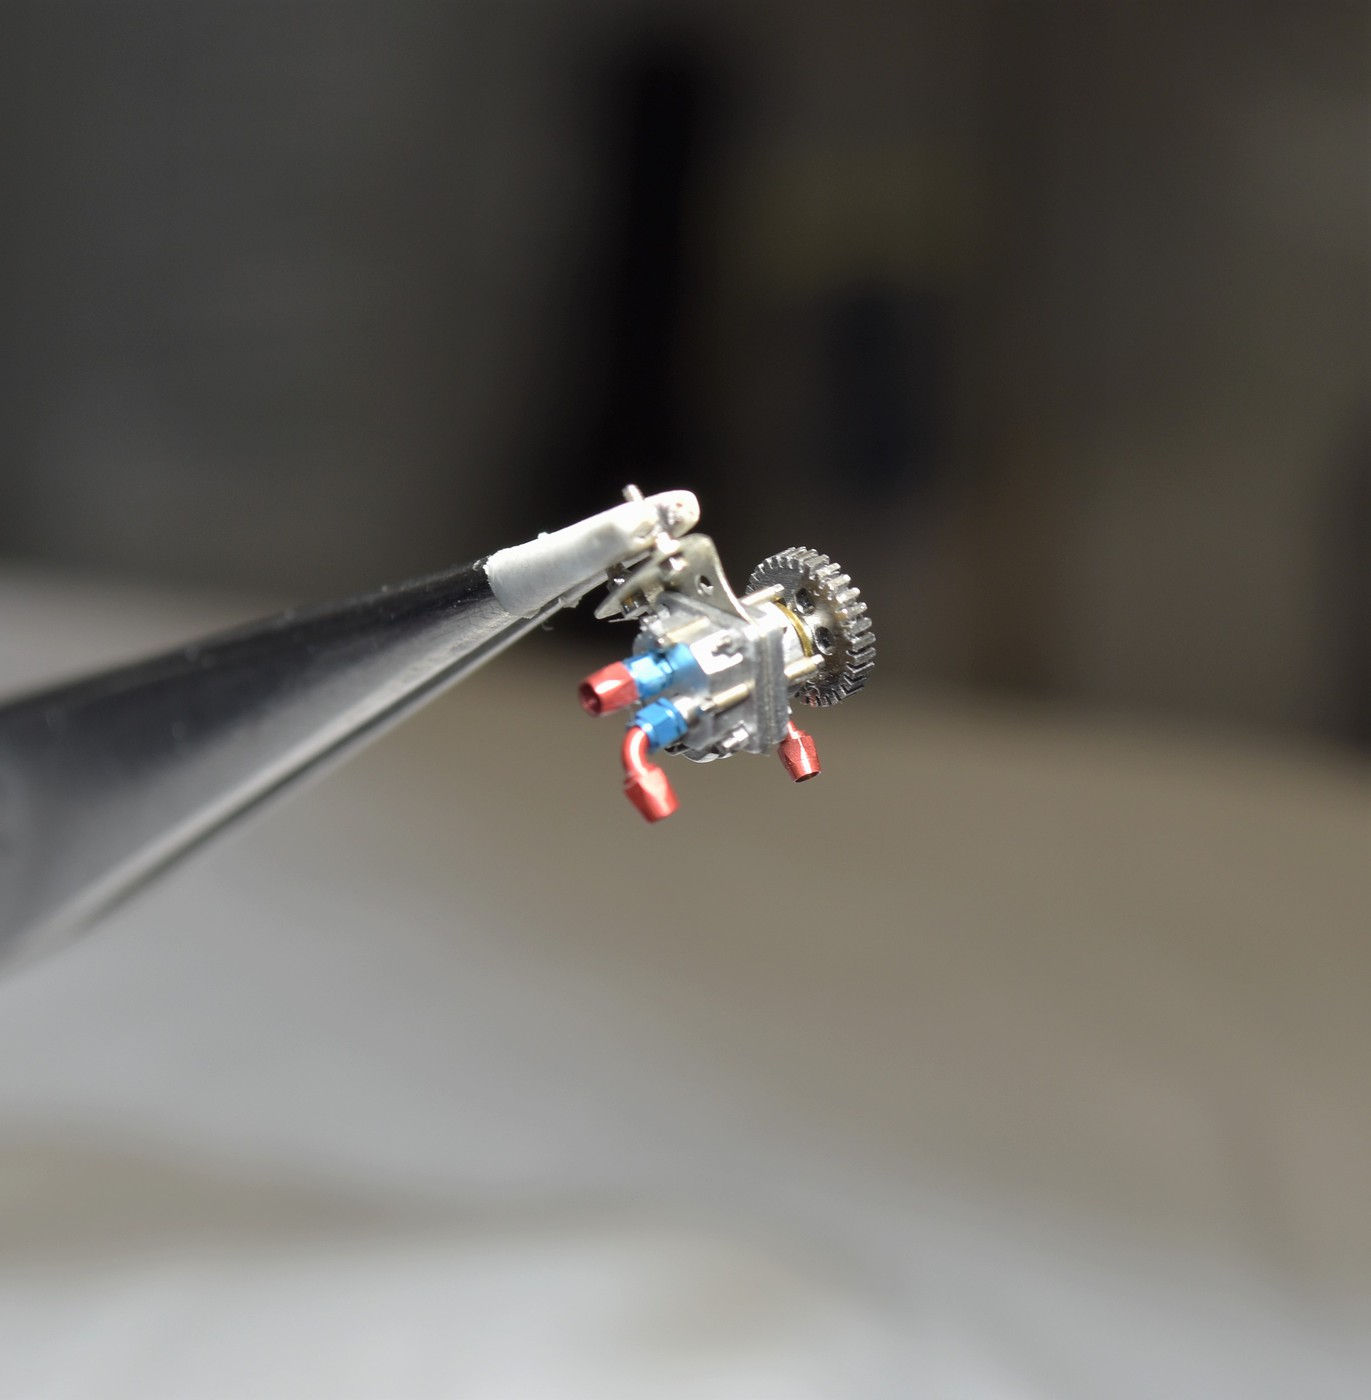
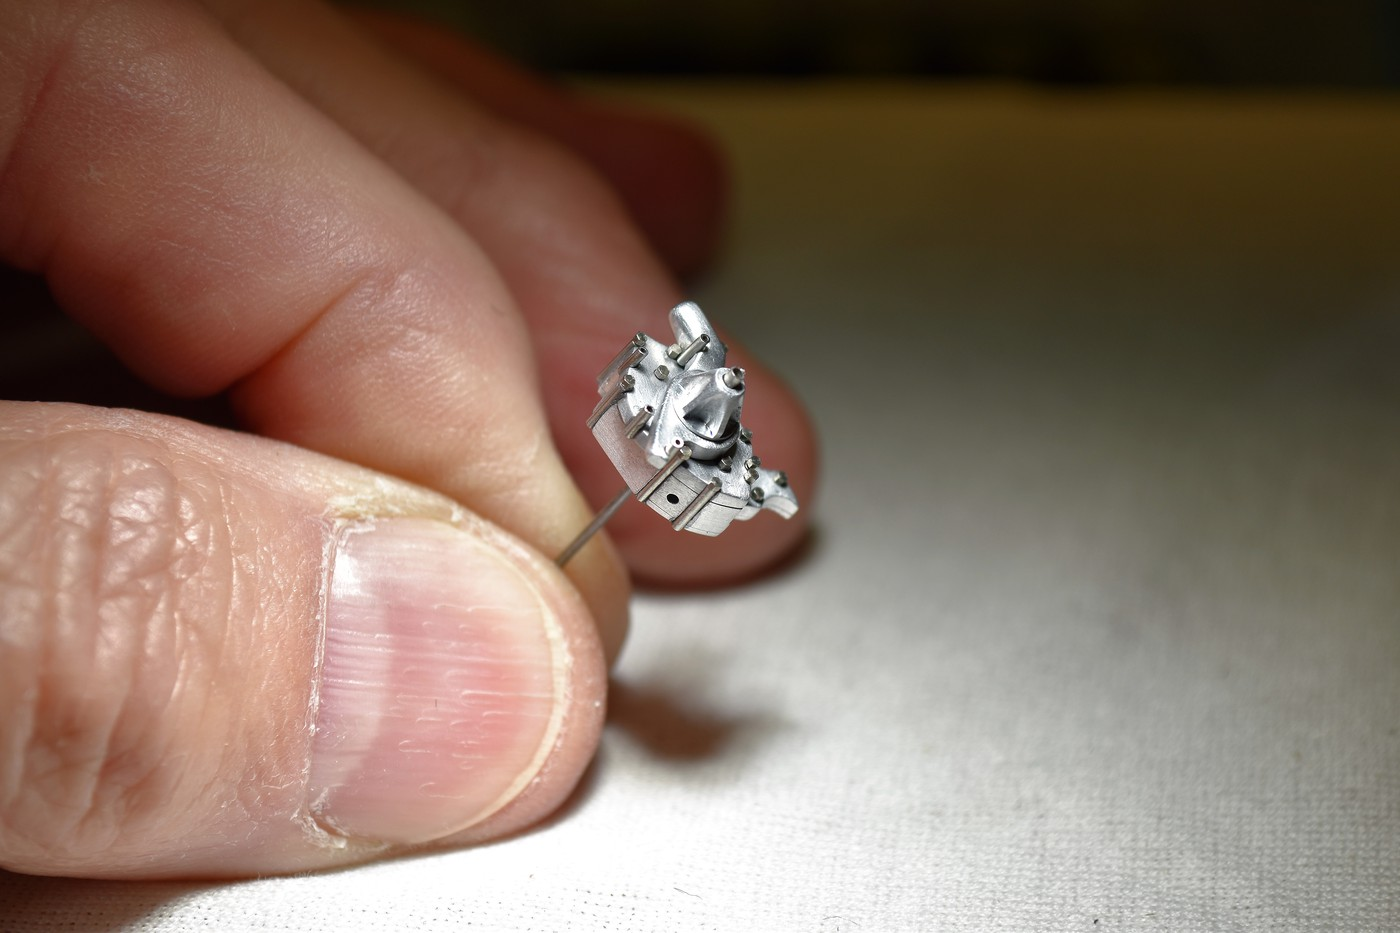
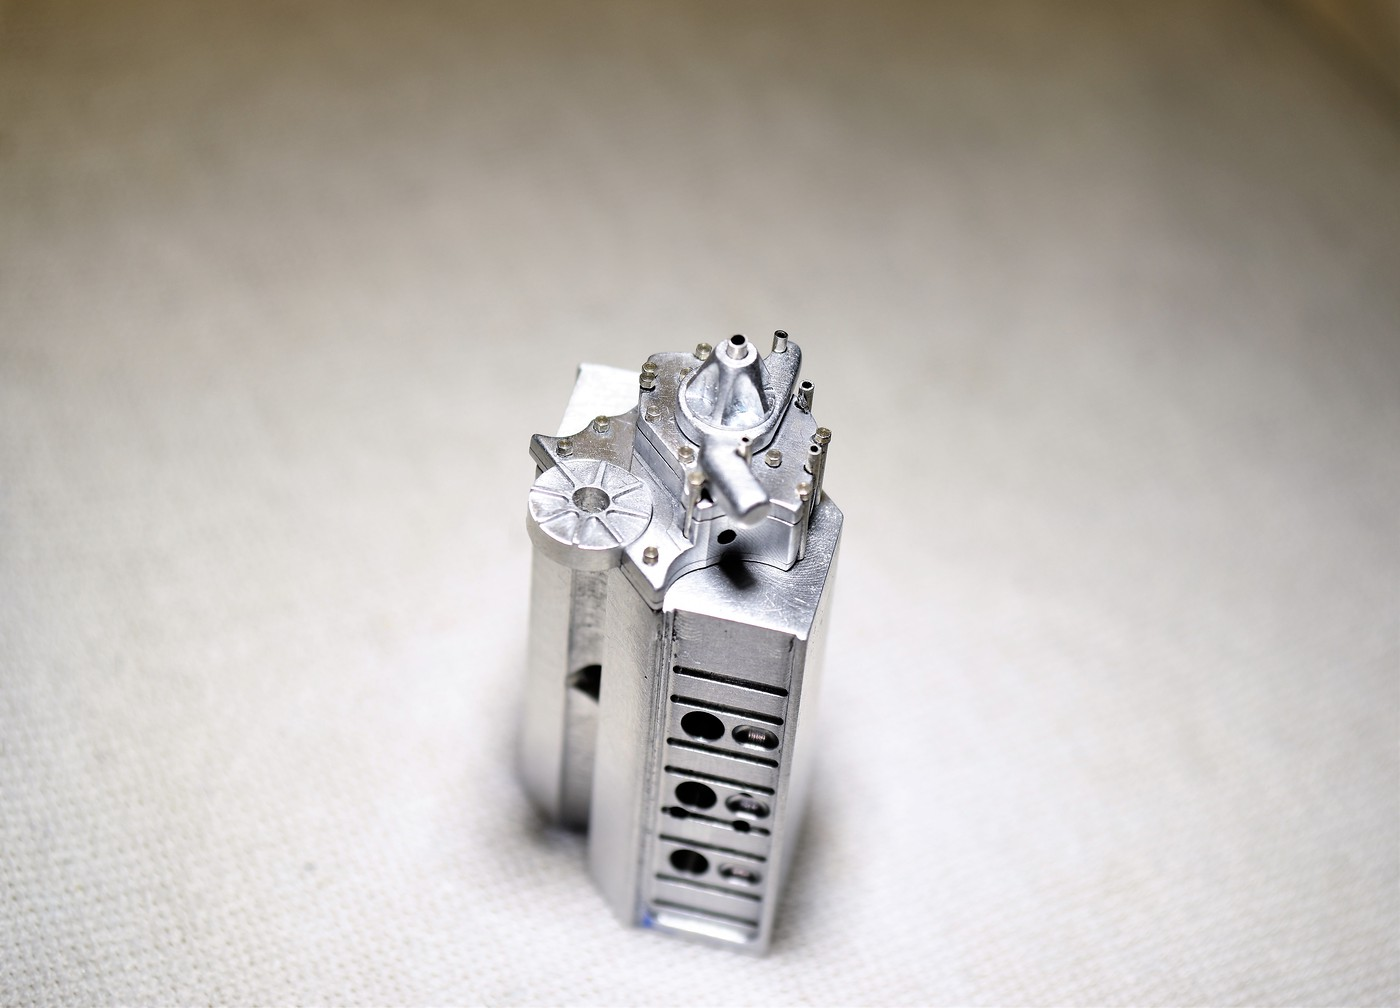
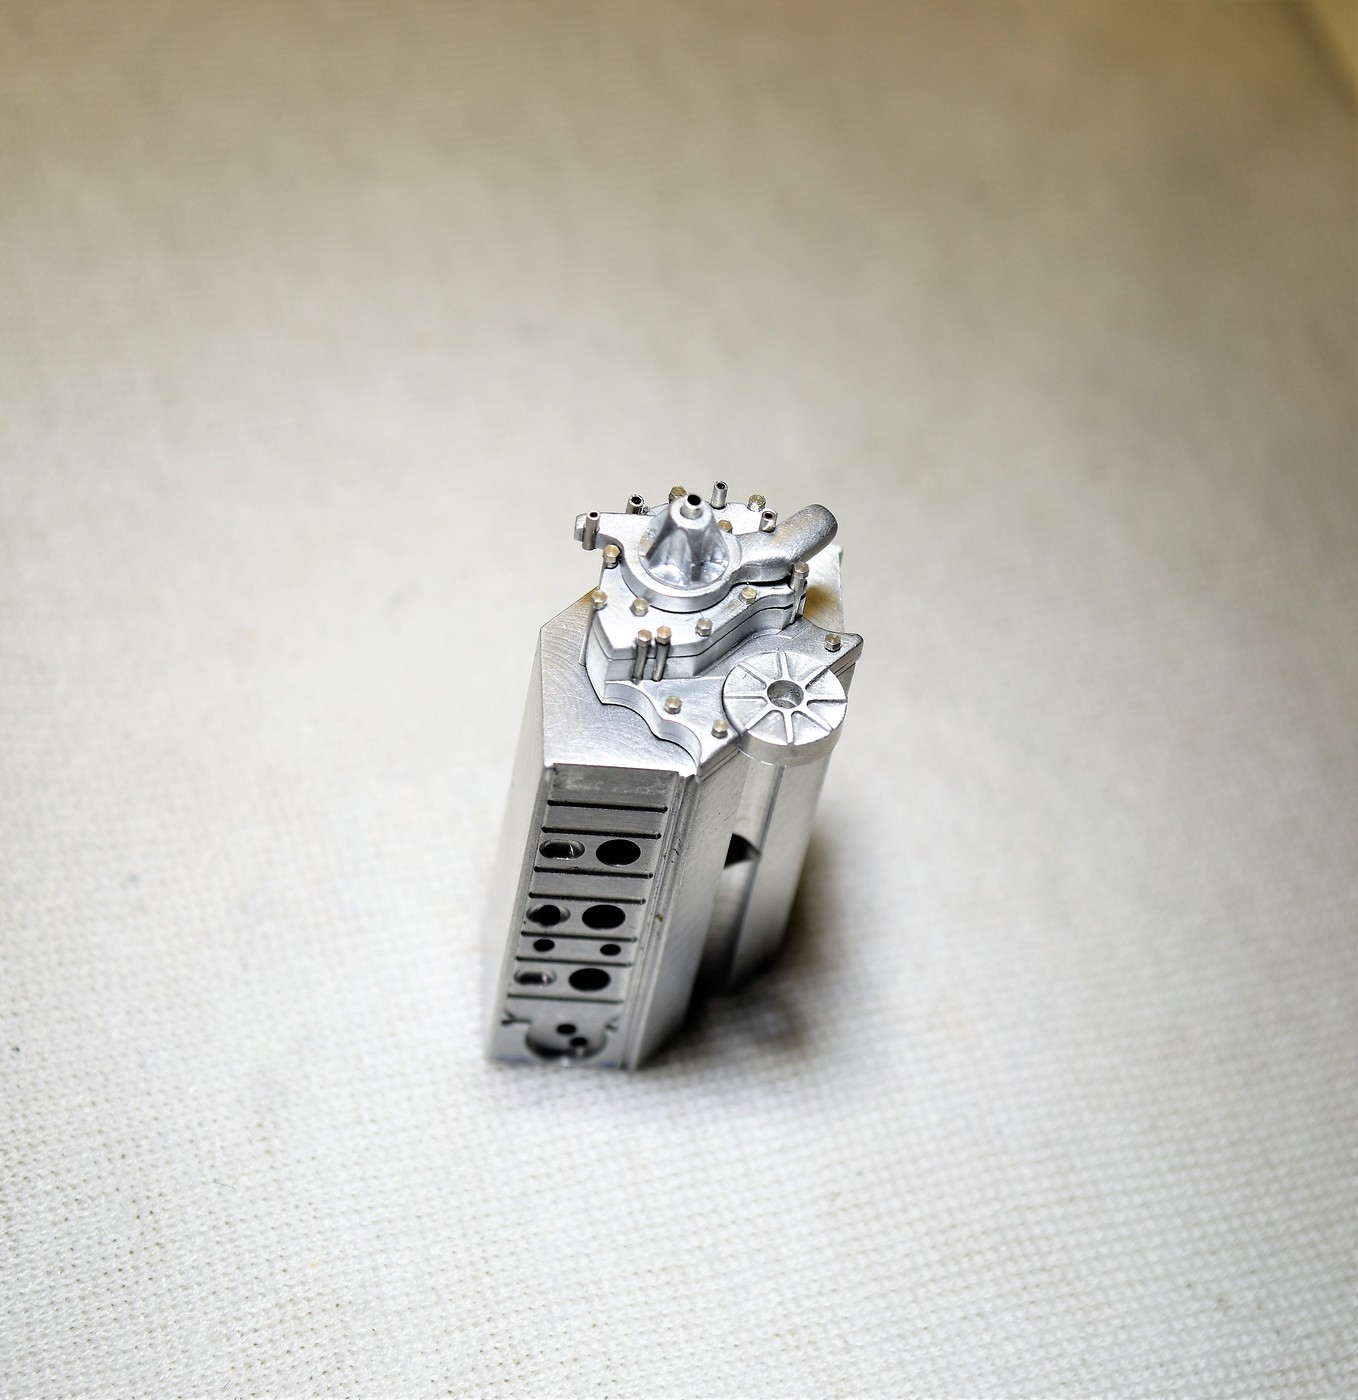
Chris, come on man, hope you get back to posting something soon. If Randy D. can do it, so can you. ? And thanks too for the compliment. Dave, I think you'll like these....... Pump is done other than making the extension for the fuel pump. You'll see a hole drilled on the bottom side of the piece where that will be attached. The round portion with the 8 ribs is only temporarily attached as an fyi. The bottom half will butt up against the oil pan. The last 2 pics I have it laying on the block as a reference........after taking the pics I realized I have the block upside down......duh!! In the next pic you can clearly see the hold for the fuel pump extension I have to make yet.
-
64 Dodge D100 Pickup Pro Street
Codi replied to AmericanMuscleFan's topic in WIP: Drag Racing Models
Well it would appear that Francis is a big ol' fibber..........he said earlier that he is SLOW when it comes to building. That is simply NOT true. For the level of detail work and the perfect results, I can only say I would take me a whole lot longer. Amazing work that reminds me of John Teresi (come on back soon John if you read this) in that not only is your work outstanding but you do it so quickly as well. Cheers, tim -
Mark, I'm surprised you have to ask me. I was one of the people to have answered your questions from 3 days ago about what recommendations there are as to what mill to buy. Others responded as well. Why are you still asking the question? Please don't answer me as it was rhetorical. Let alone the fact my pic's show SHERLINE stamped all over the equipment. Sherlock you're not. Tim
-
You've posted this query for the 3rd time in 3 days. Anyone else responding to this thread is simply wasting their time in my estimation even though you had multiple replies and suggestions (including my own) before. You should go do your own homework and stop wasting peoples time here. Tim
-
Darn it......Bill beat me to it. I won't take a year to reply to YOUR post Randy so here goes..............as President of the Randy D. fan club, I can only say that this is some of the absolute, finest scratch-building, if not THE finest in the country. What I love about your work is not just the attention to detail and your ability to transfer it to the part IN scale, but you capture the "delicacy" of it all. Which describes the Birdcage Maserati itself. You've captured it like no one else Randy. Can't wait for more and so glad to see you back posting again. Cheers my friend, Tim
-
Mark, I'll echo what advice you've been given by others. Sherline for the hobbiest and what you're interested in making are a great choice. The DRO is the "Digital Read-Out". I don't know how or why you'd bother buying any mill or lathe without one if you're hoping to be accurate. Best advice is that you should spend a few dollars and go to the Sherline site and buy their comprehensive book on their equipment and machine tips / setup and other general advice before you buy anything. I'm assuming that you're also new to machining so if you can find a local machinist that might be willing to mentor you, that is worth any and all the money you'll put into your equipment. For the hobby machinist Sherline also offers a WIDE range of accessories so your imagination and ability are the only things limiting you in what you can make. Good luck. cheers, tim
-
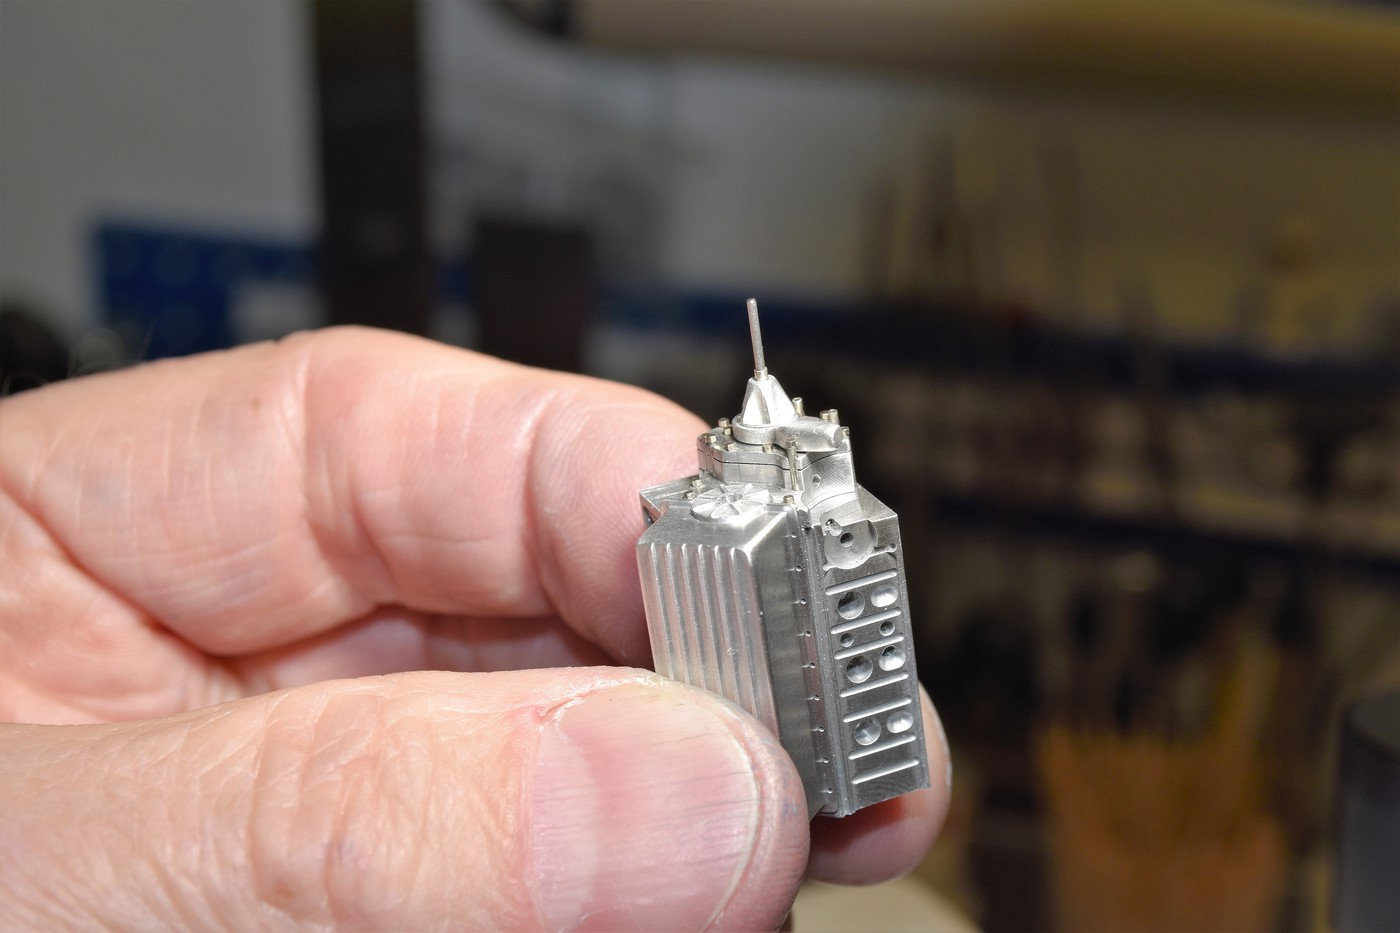
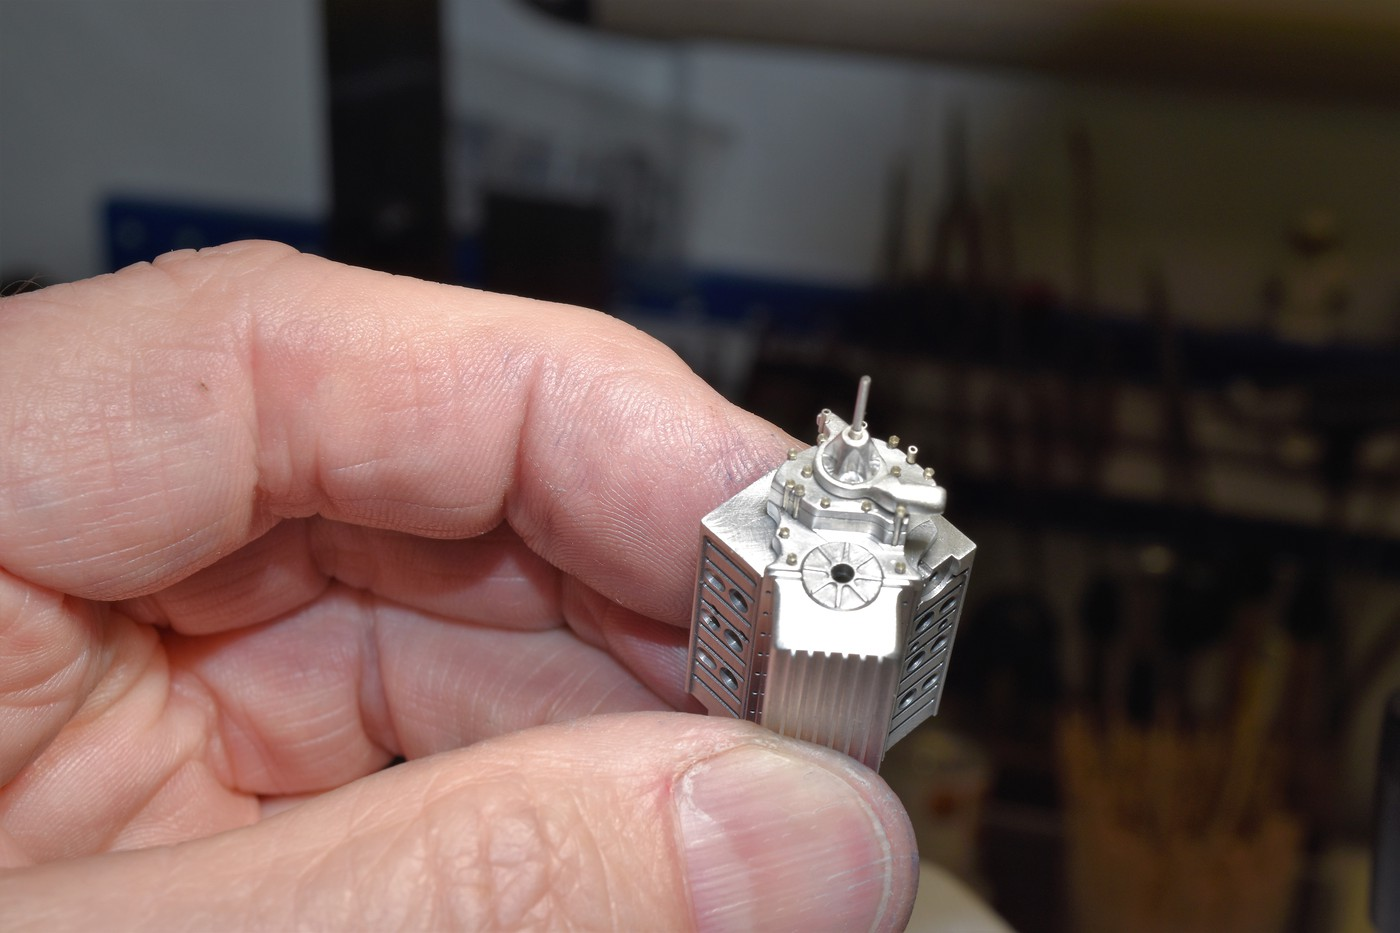
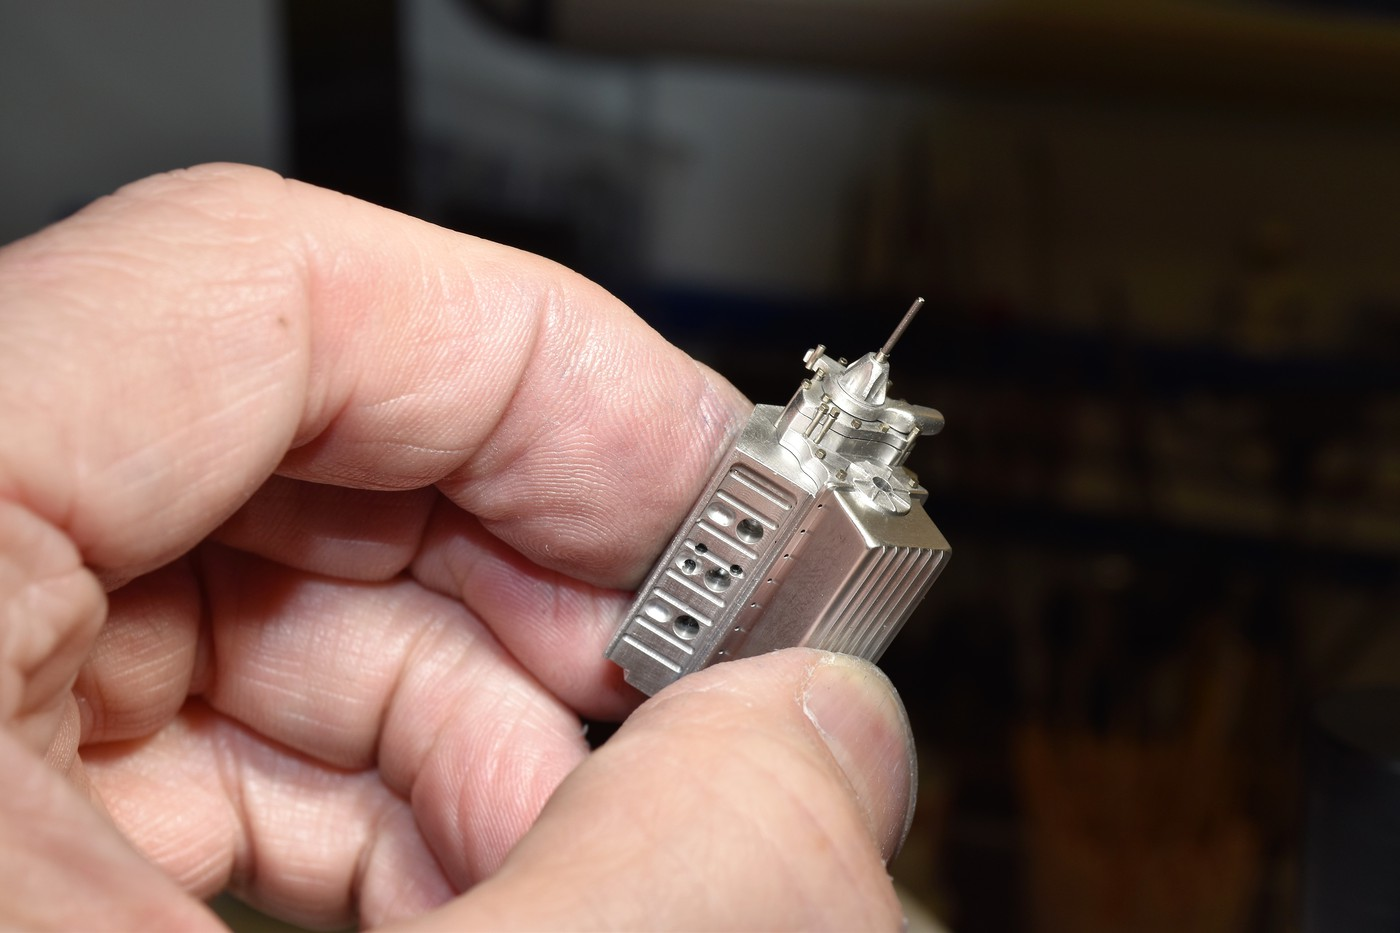
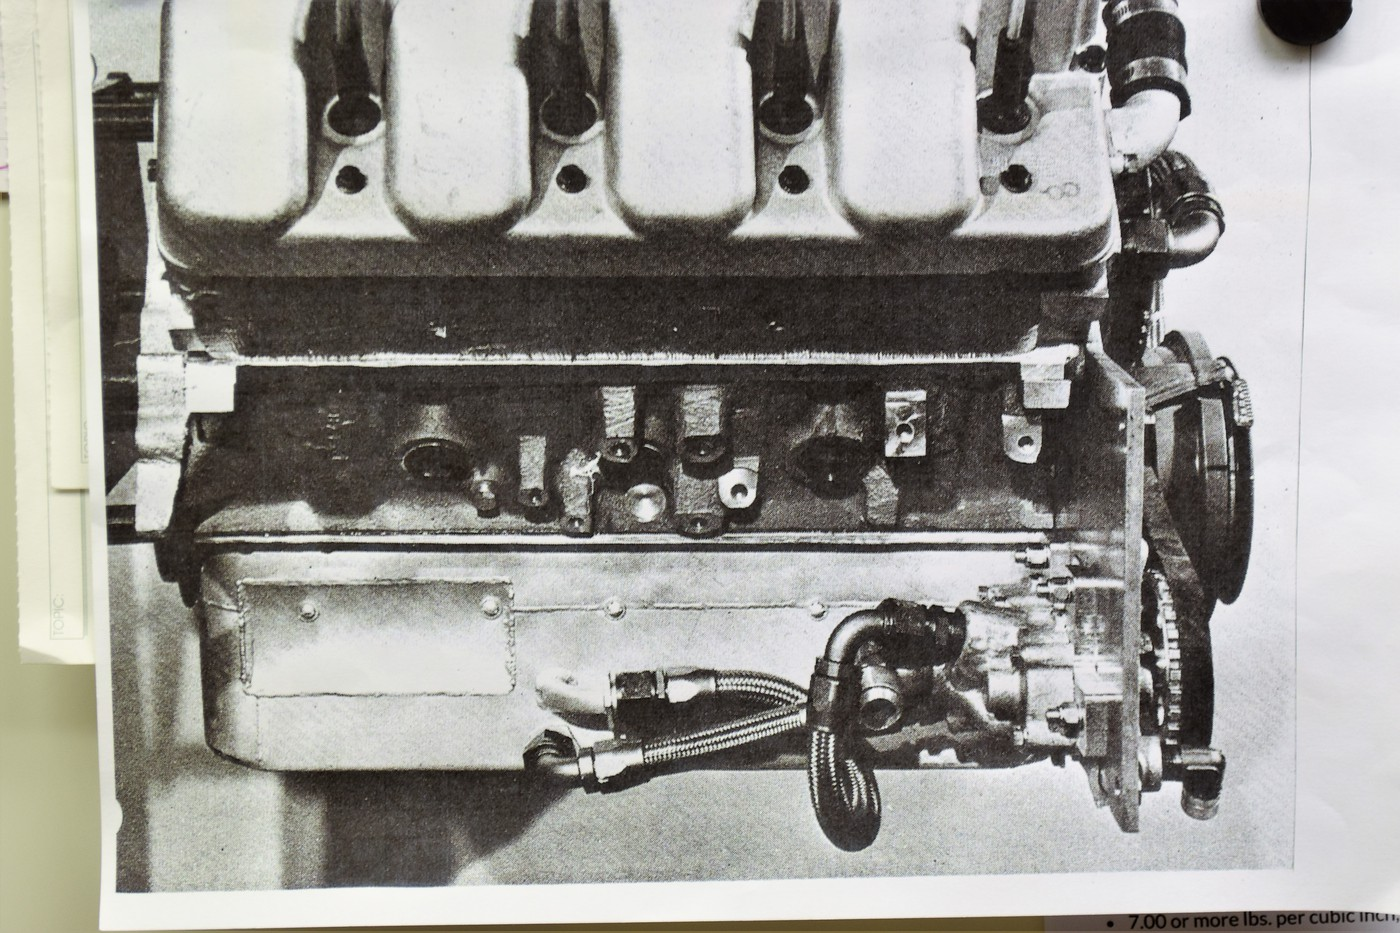
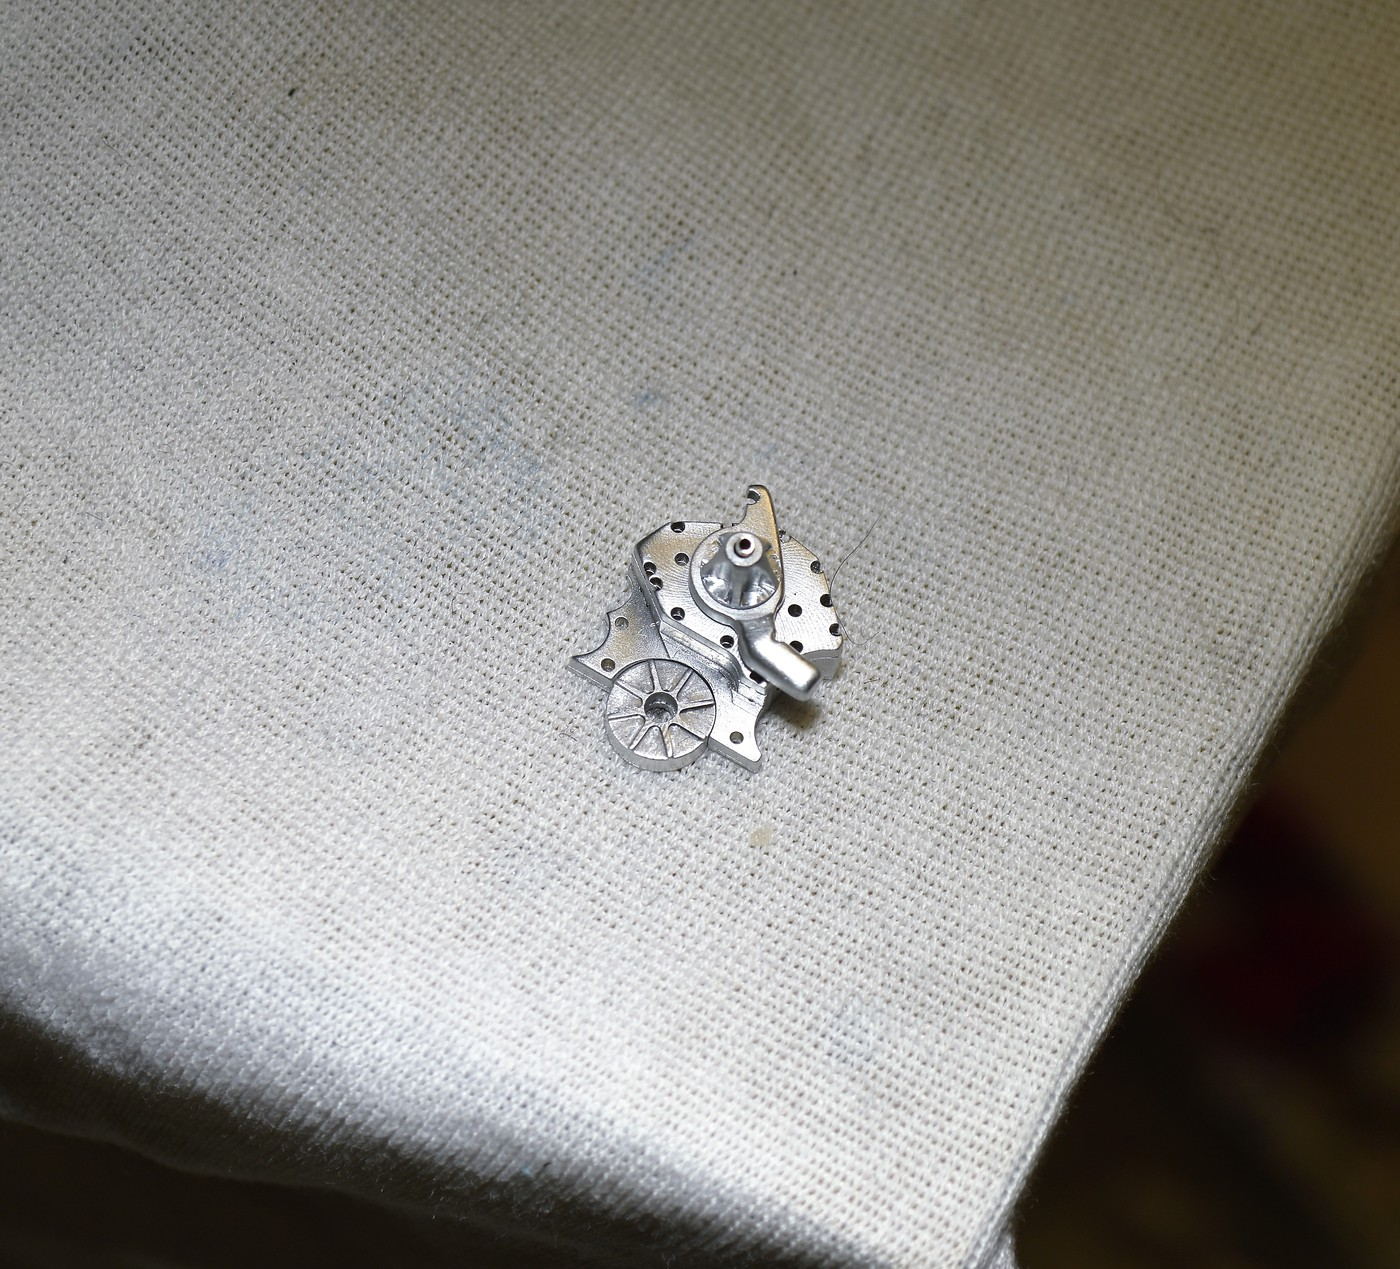
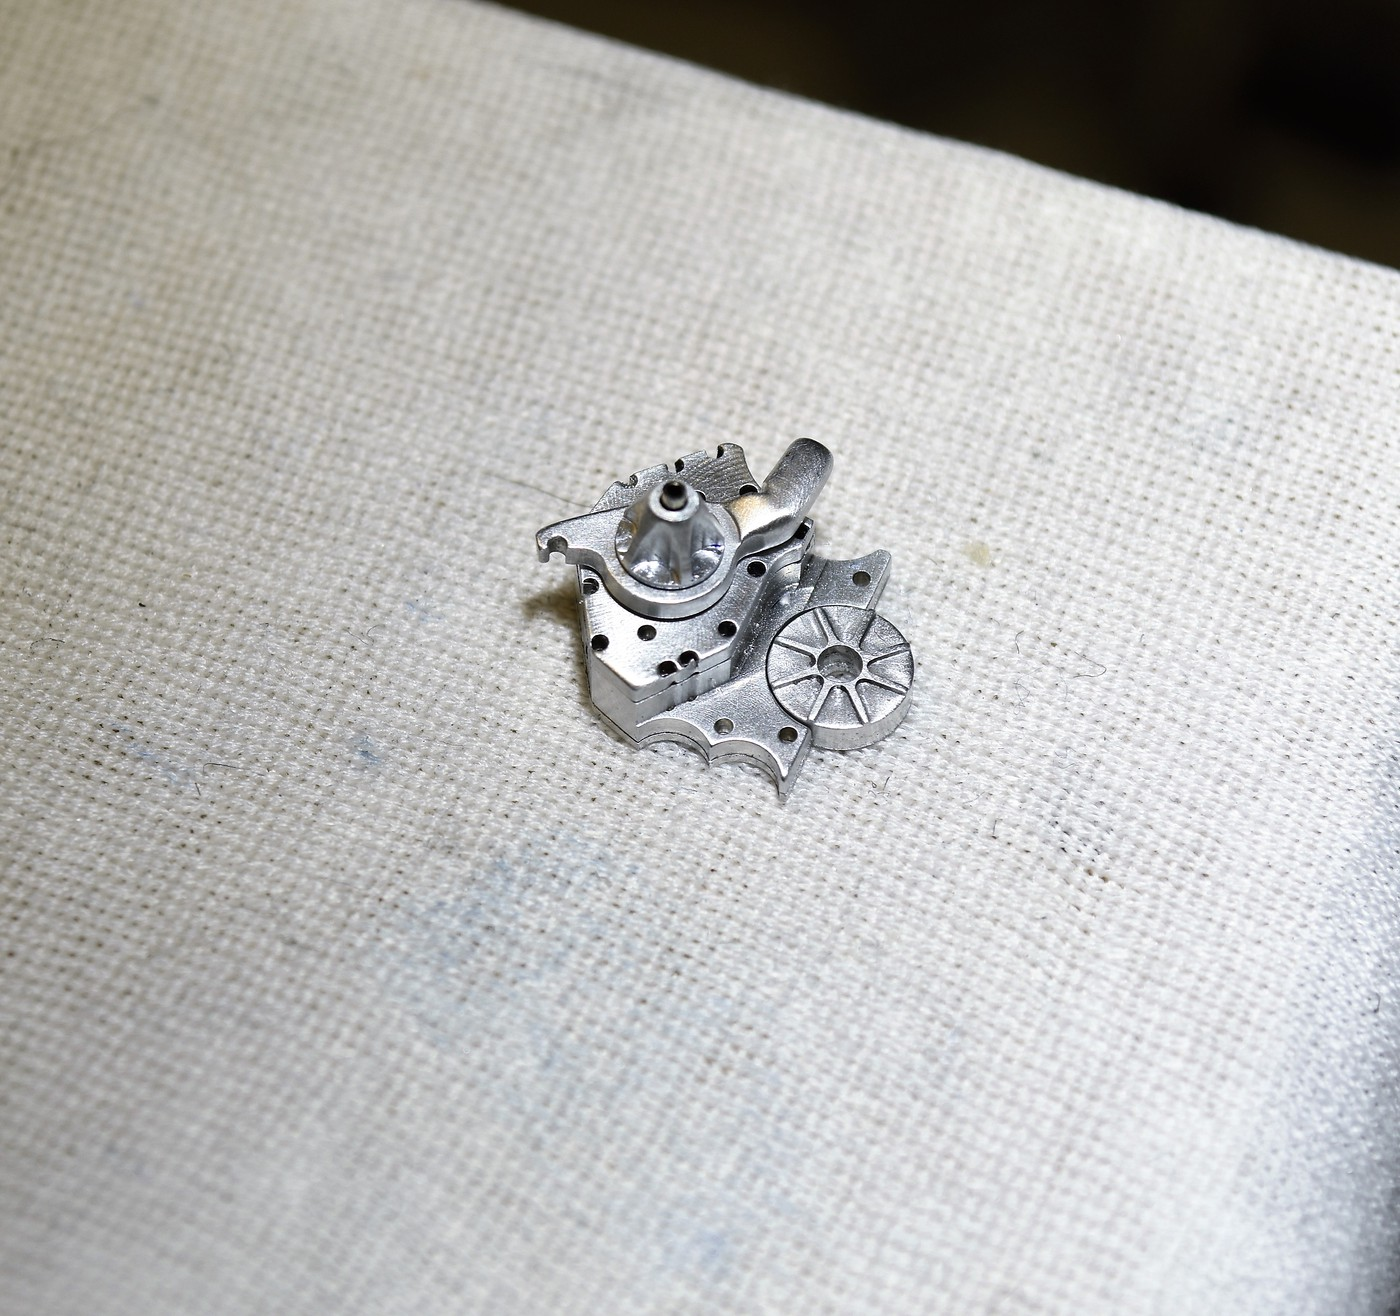
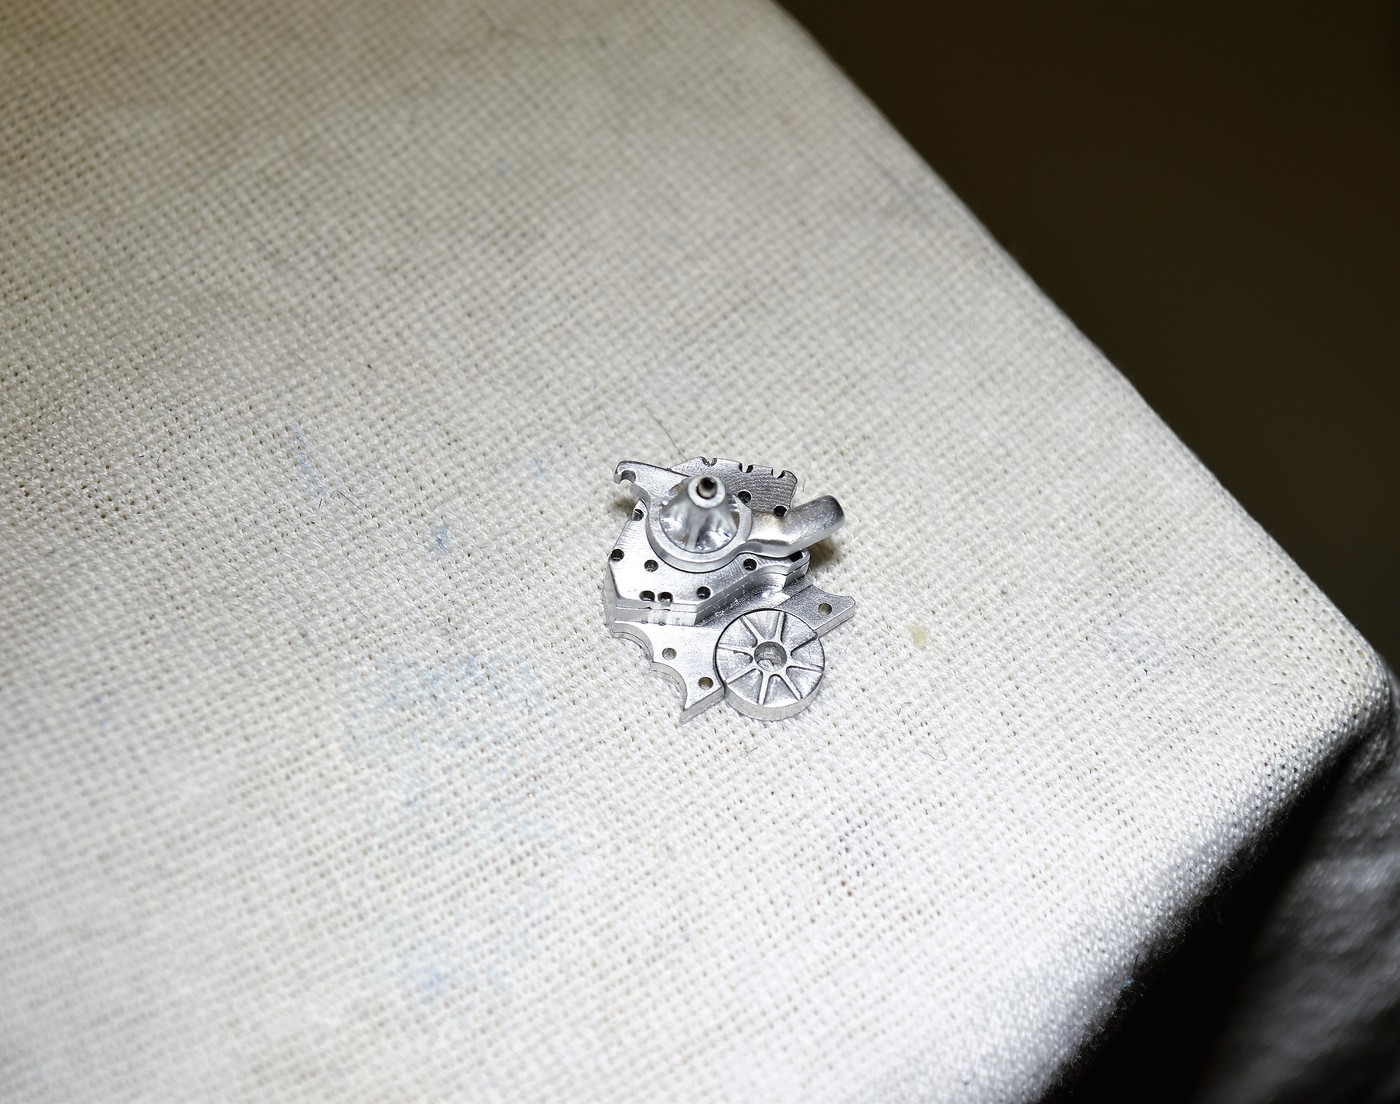
Thanks Bruce, I know you enjoyed the bantam......I'm doing my best to make this one unique in its own right. Also appreciated Francis, I'm certainly enjoying your new threads as well. Thanks Dave, I know they aren't pretty but they do work for me. I've included a pic of the Can-Am dry sump system. Got to figure out where some of the fittings/lines lead off to but I have some other pics that I think answer those questions. Cool looking though and I know you can appreciate the pic. Got the gear cover/ water pump done except for the final detailing. I'll do that next. There are 5 separate pieces that make it up. The pump "snout" is 2.8mm tall as an aside. The penny gives some comparison. I'm tickled with it and it should really add to the overall engine when it's complete. Cheers, Tim
-
Thank you fellas....... Dave, I'll post some pics the next time I post. I apologize for the big delay in replying to your question as I just saw your post. cheers Started finally machining the gear cover/ water pump. With no blueprints to work from I did a ton of research and got a little creative in getting some really good numbers on the piece so I could draw it up. DAVE, no laughing at my drawing, I know it's a mess and you must be shaking your head compared to yours.....I'm posting just 1 pic of the many drawings I had to do to get to this point. I will part off this piece with a slit saw into 3 different pieces. Next I have to make the water pump impeller housing and what I call the fan "snout". Overall length of the entire piece will be less than 8.0mm. It's a fraction of the size of a postage stamp. Not quite 11.0mm tall and 12.00 mm wide. 20 holes in total. The So far it matches the drawing fairly well so I'm hopeful that I can finish the entire unit sometime next week. cheers, tim I forgot to mention that all the holes will have Albion alum tube inserted & T2M bolts dropped inside each. Many/most of the holes on the perimeter are cut on the edge so the tube will stick up above the edge of the housing.........it will mimic the real unit by doing so. You can see in the drawing below for example holes 8 & 9 how they're past the edge of the cut line. It'll make more sense when it's parted off and assembled.
-
70 Plymouth HEMI GTX 1/25 Scale
Codi replied to AmericanMuscleFan's topic in WIP: Drag Racing Models
Thanks Francis for taking the time to post the pics of this build. I really enjoy seeing other machinists work and approach to doing things. Can always learn something new from others! The overall model is truly great and you're no doubt right to be proud of it. cheers, tim