Codi
-
Posts
2,675 -
Joined
-
Last visited
Content Type
Profiles
Forums
Events
Gallery
Everything posted by Codi
-

Twin Turbo Coyote Pro Mod - Turbo Impellers Updated Pics 7-23
Codi replied to Codi's topic in WIP: Drag Racing Models
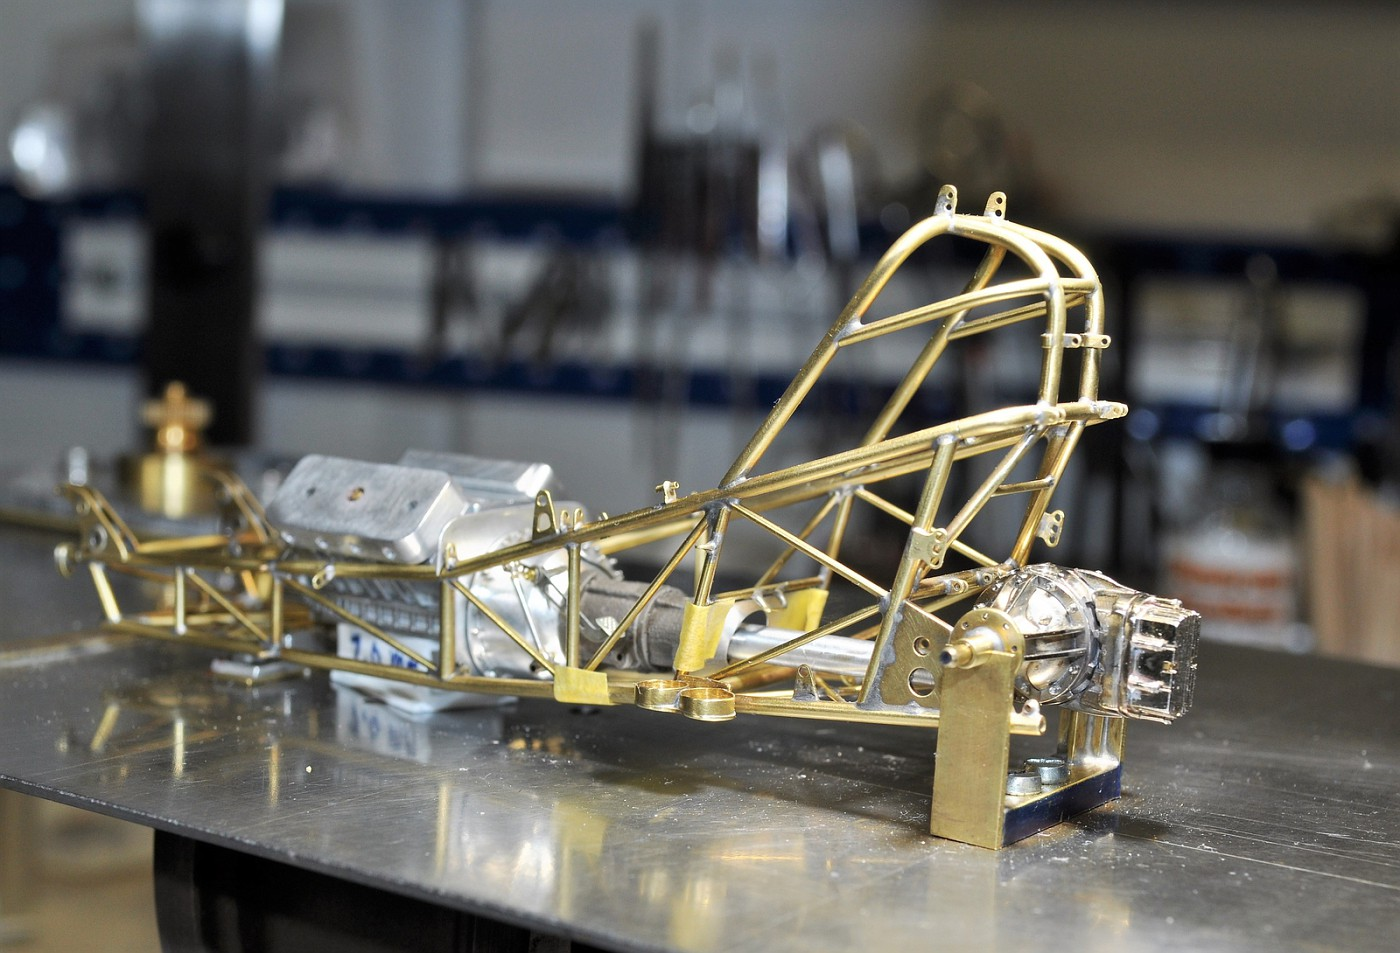
Thanks Dale for the offer.....I'll be in touch I'm sure as I get to the engine. Chris, I've seen your brass work skills already, make the leap and do it...........can't wait to see your next dragster update btw! Hey Jeremy, nice to hear from you and thanks for following............tell your father I said "hi" too! Couple quick teaser mock-up pics. Everything put away for the time being now and back to getting the bantam done.
-
Twin Turbo Coyote Pro Mod - Turbo Impellers Updated Pics 7-23
Codi replied to Codi's topic in WIP: Drag Racing Models
I just did a long post and got the 404 error messsage. A short reply in case it happens again. Thanks EVERYONE for the comments and interest in this one. Chris, yes, I'll do a lot of machined engine parts........some will be even more challenging than what I've attempted on the bantam. Thanks too! Dave, sent you a note about a visit. thanks for the invite! The body material is ULTRA FROSTED..........not the white flexible. I have both materials, my advice is skip the white flexible. Dr Cobra. Yup, chassis will be brass and I'm VERY jealous of your 1:1 car. Big fan of MMR as you can see. Any chance you'd be willing to share some engine dimensions or particular questions I might have before I begin machining the engine? I'm some time away from that but it's always good to have a resource to double check things............if it's not possible, I completely understand. Cheers everyone! Hope this one posts. -
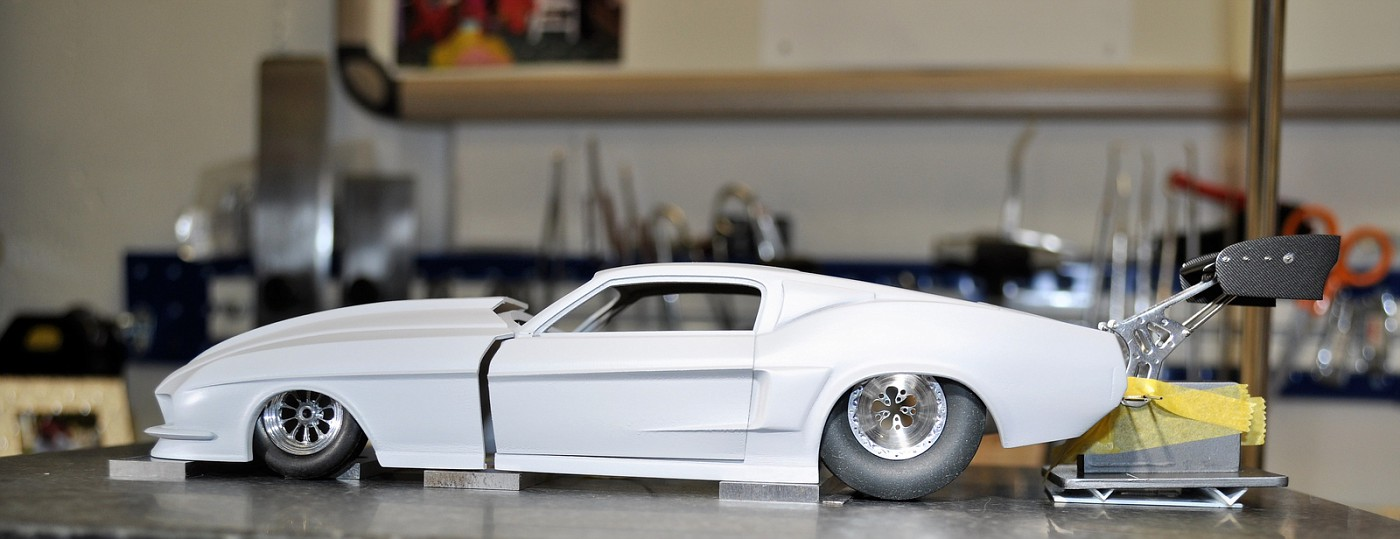
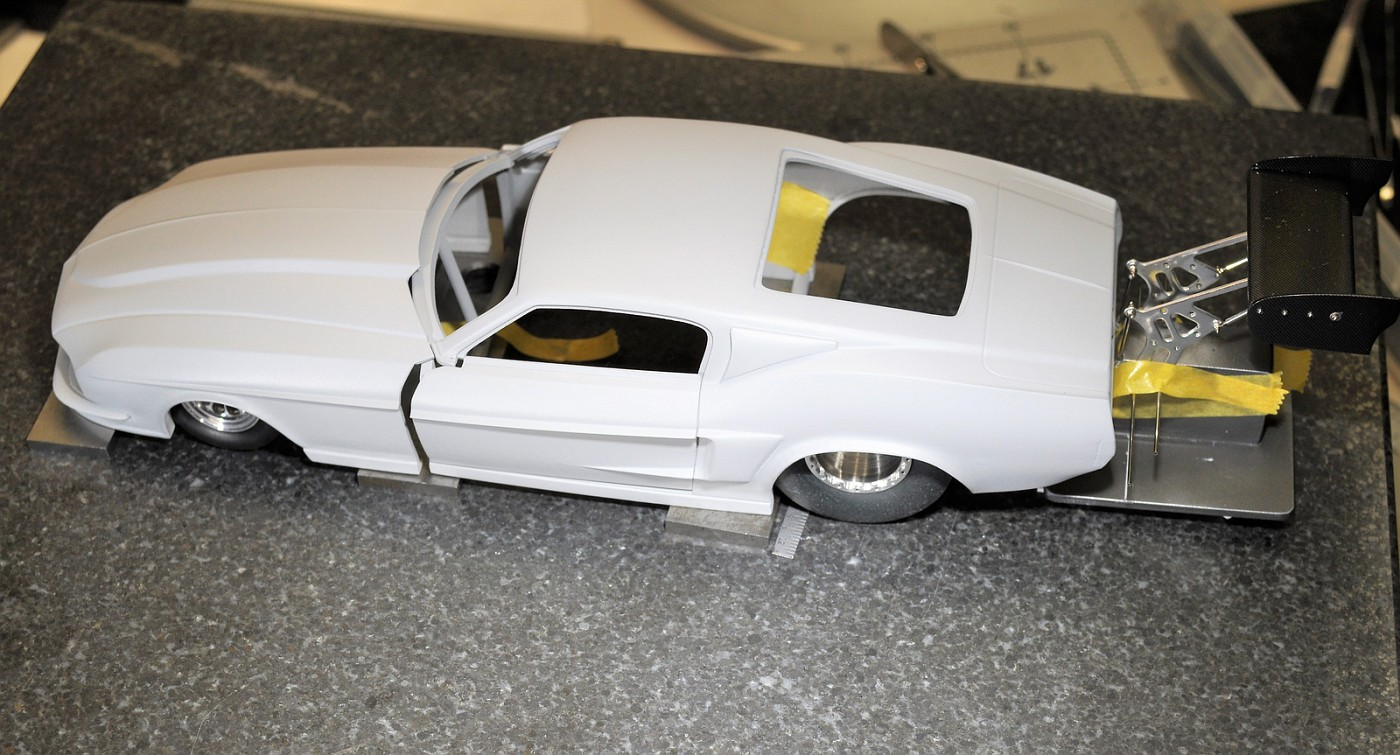
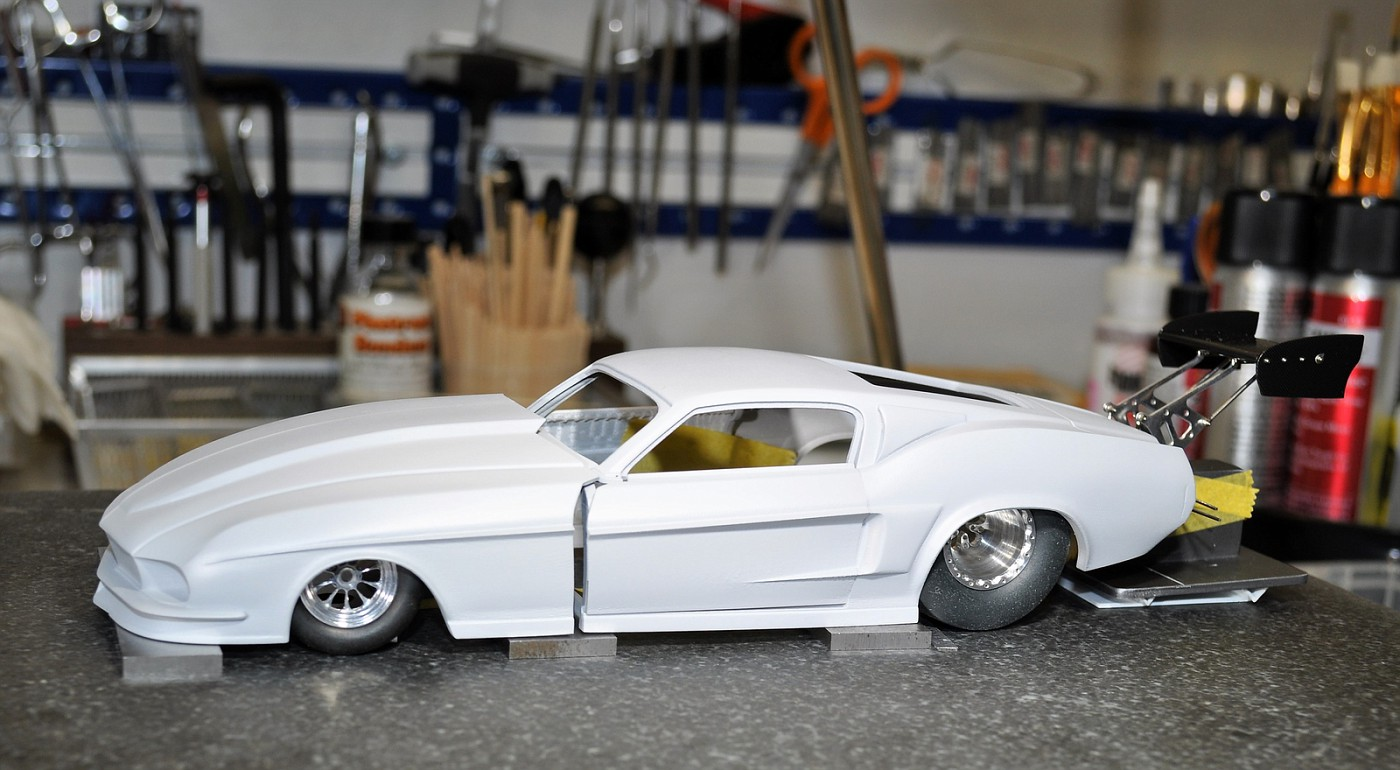
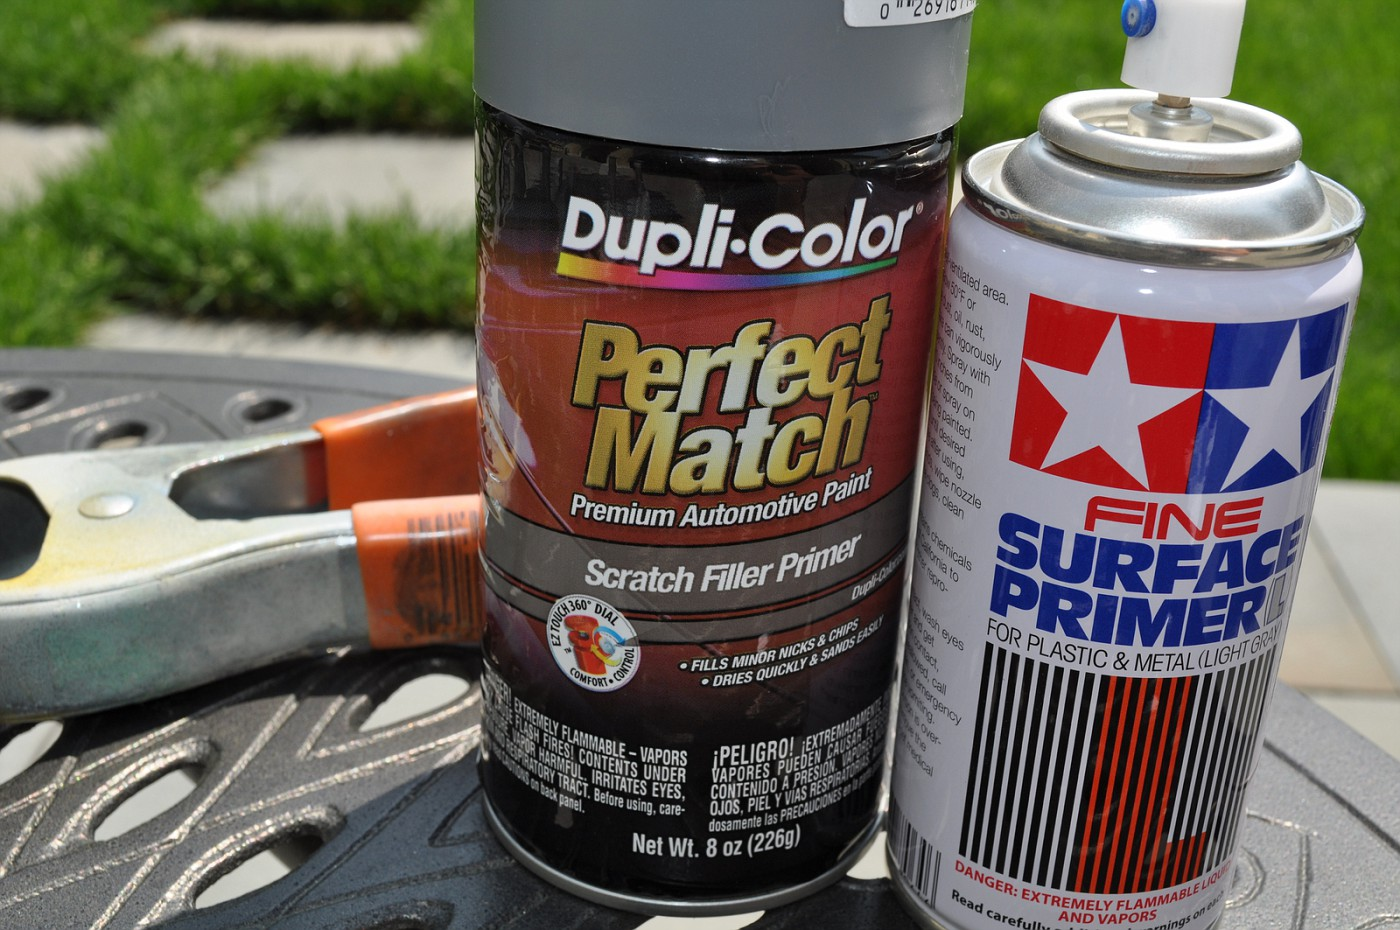
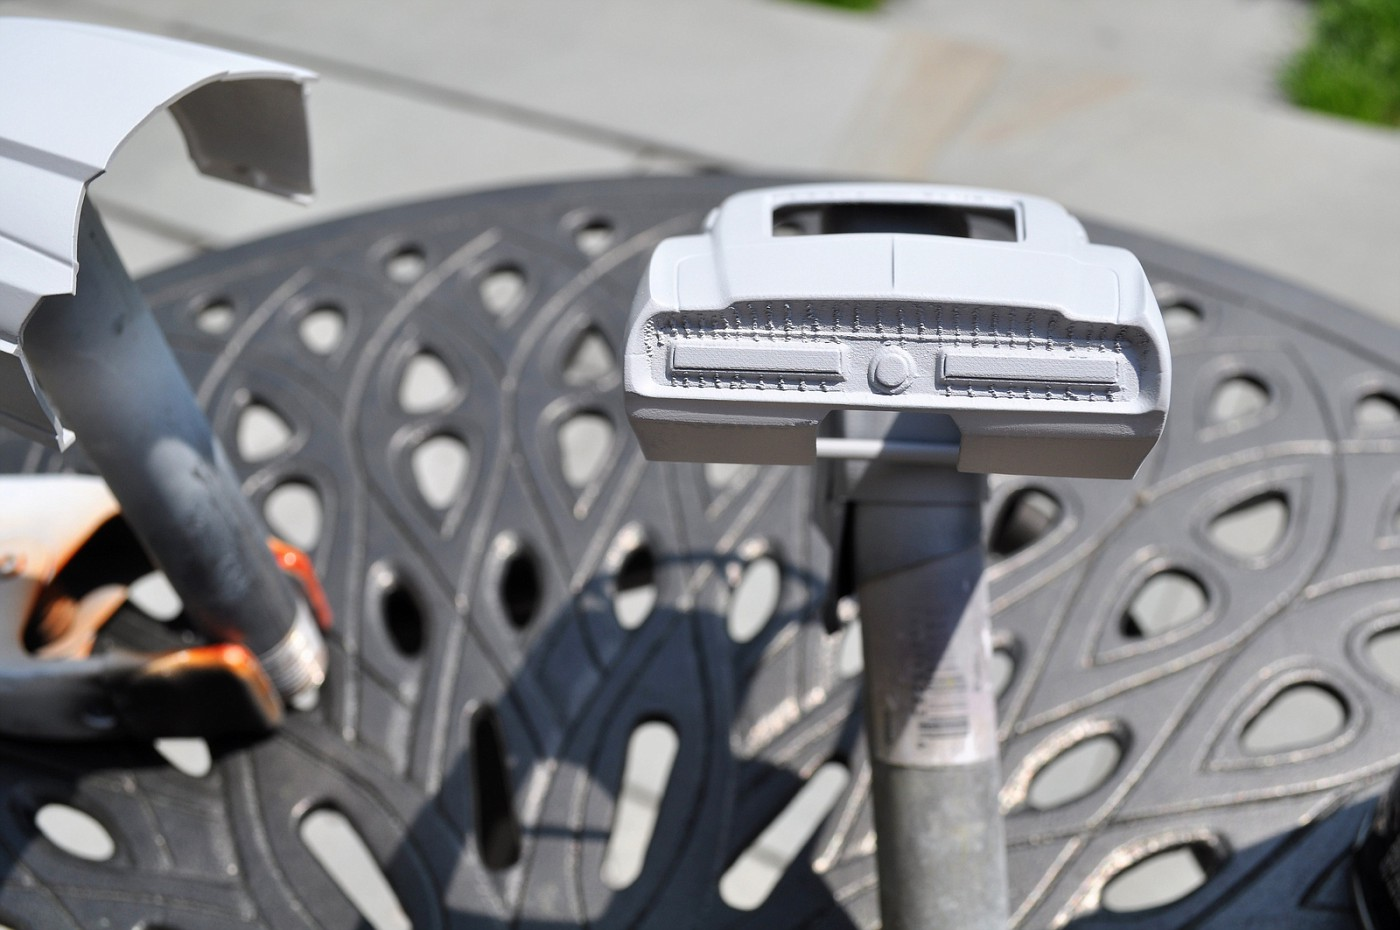
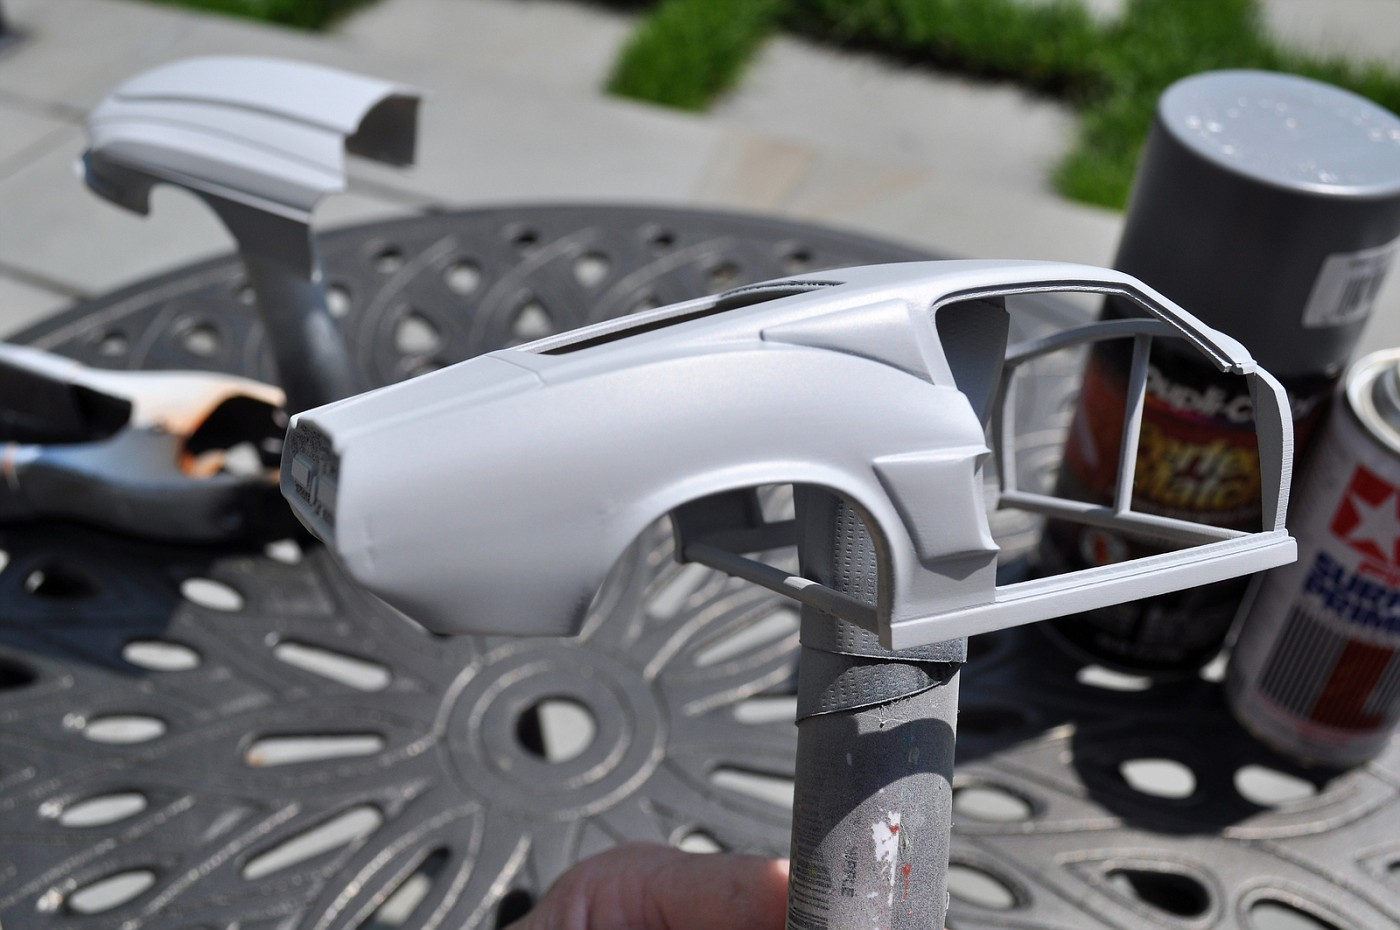
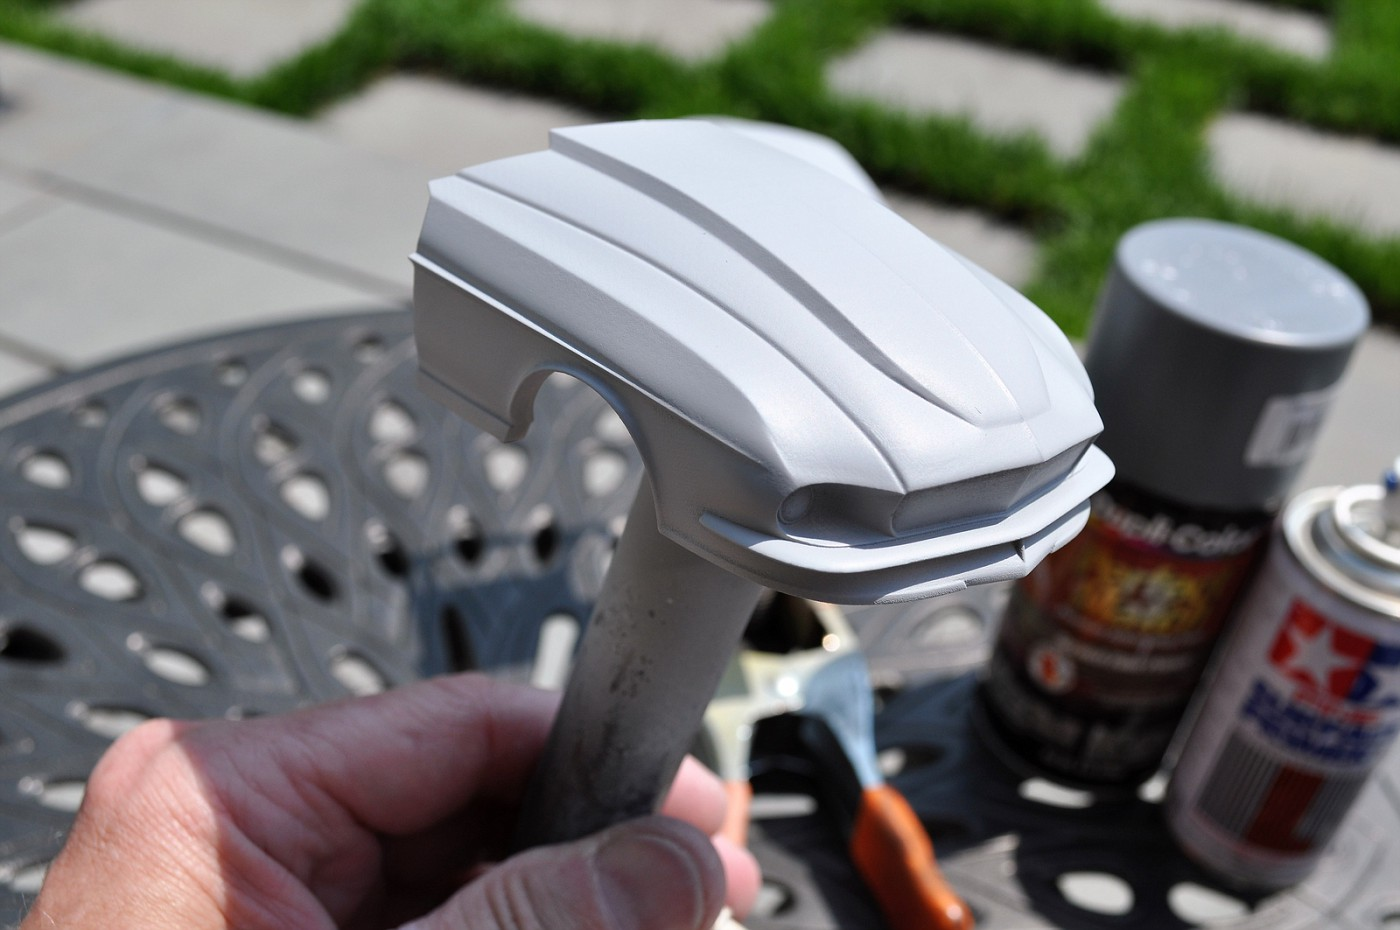
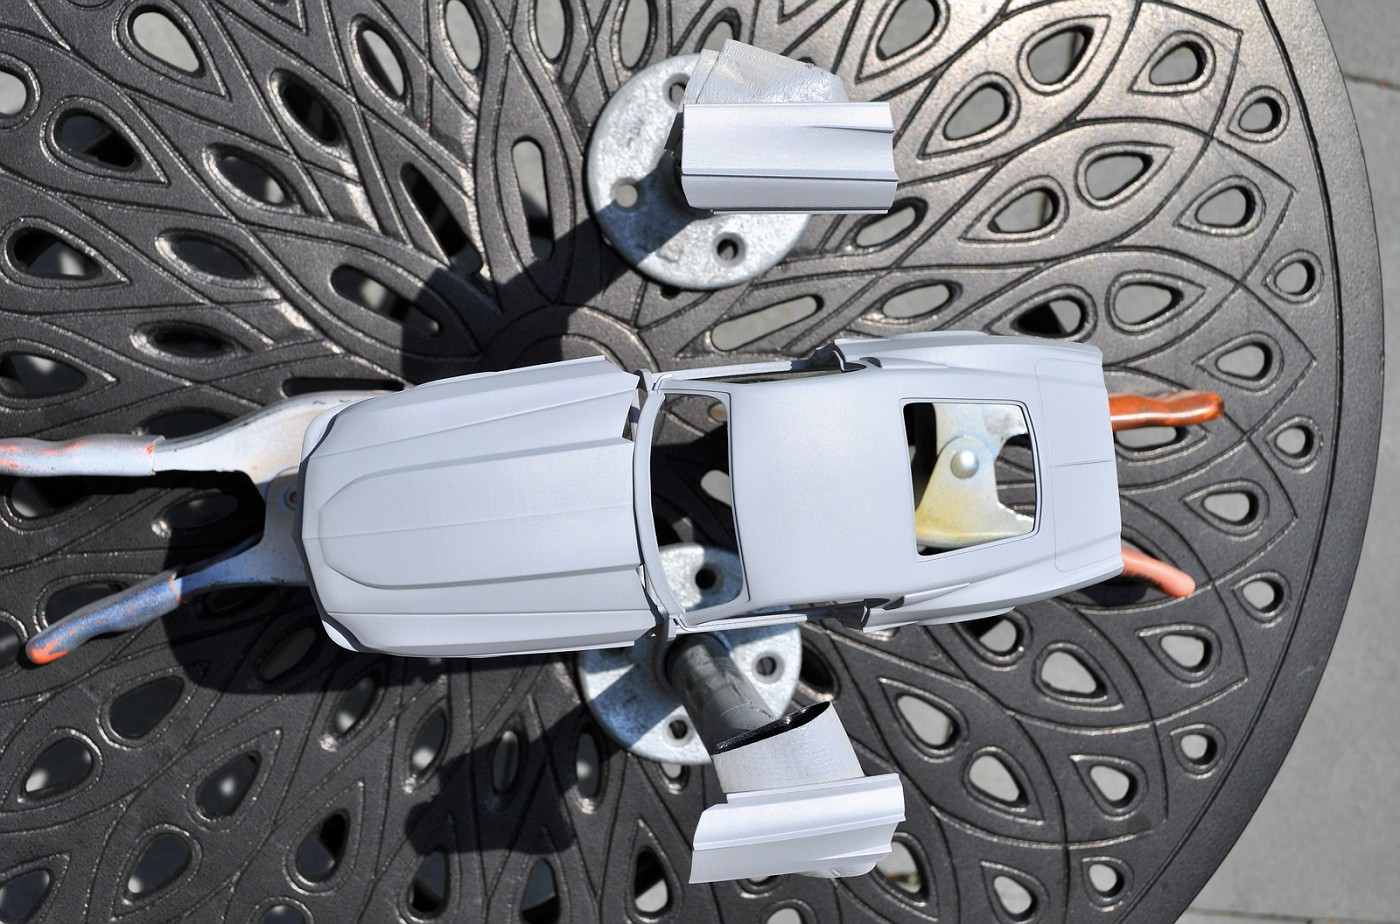
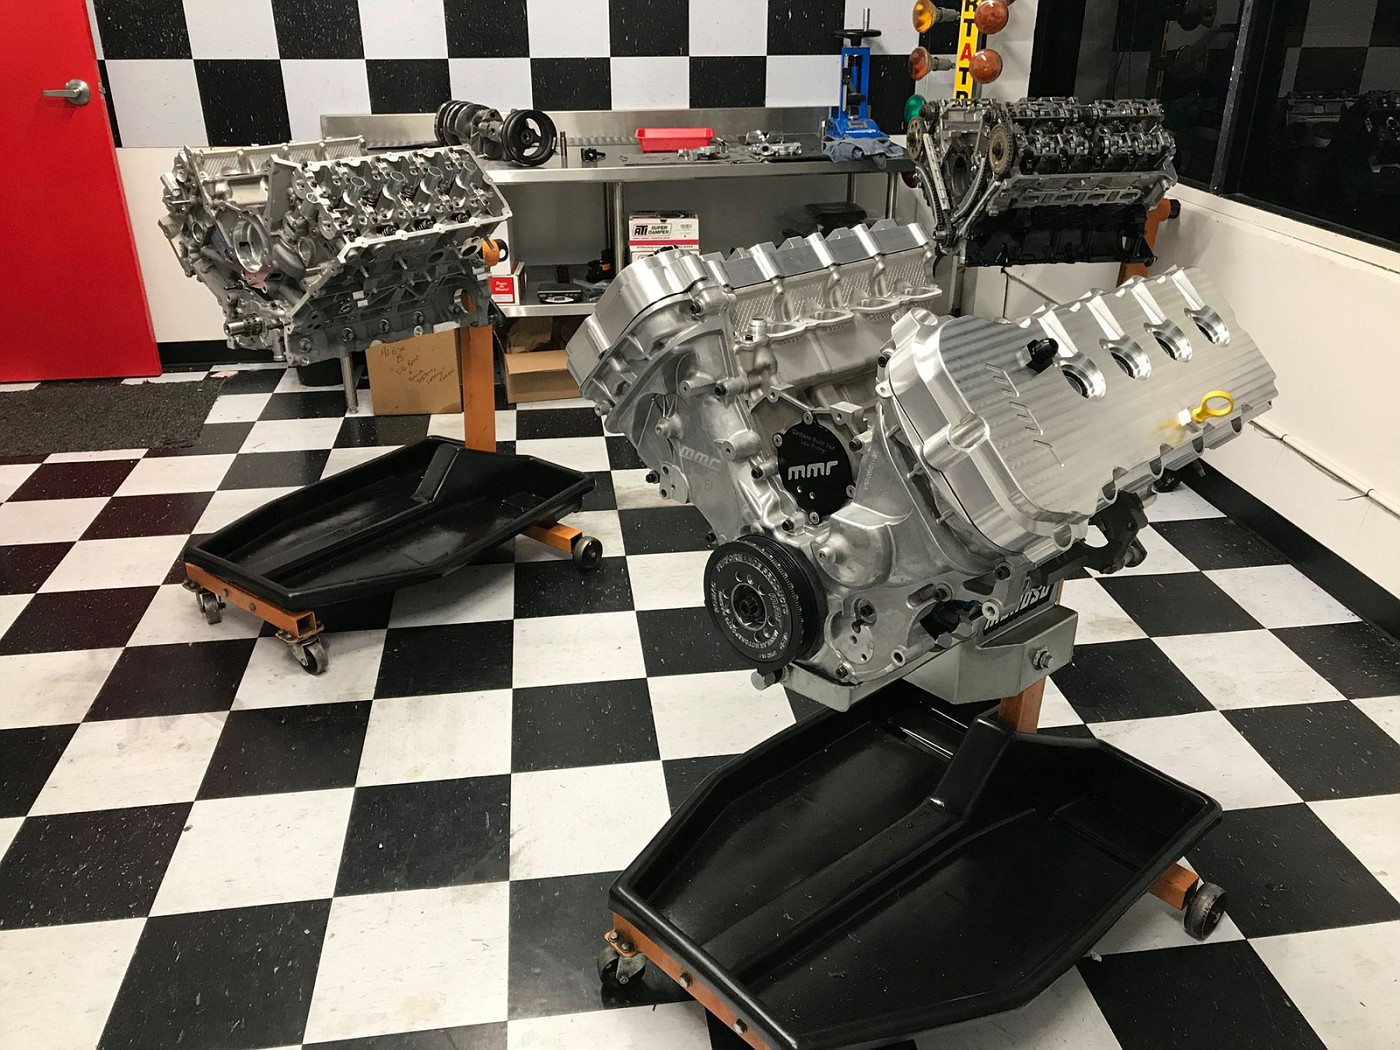
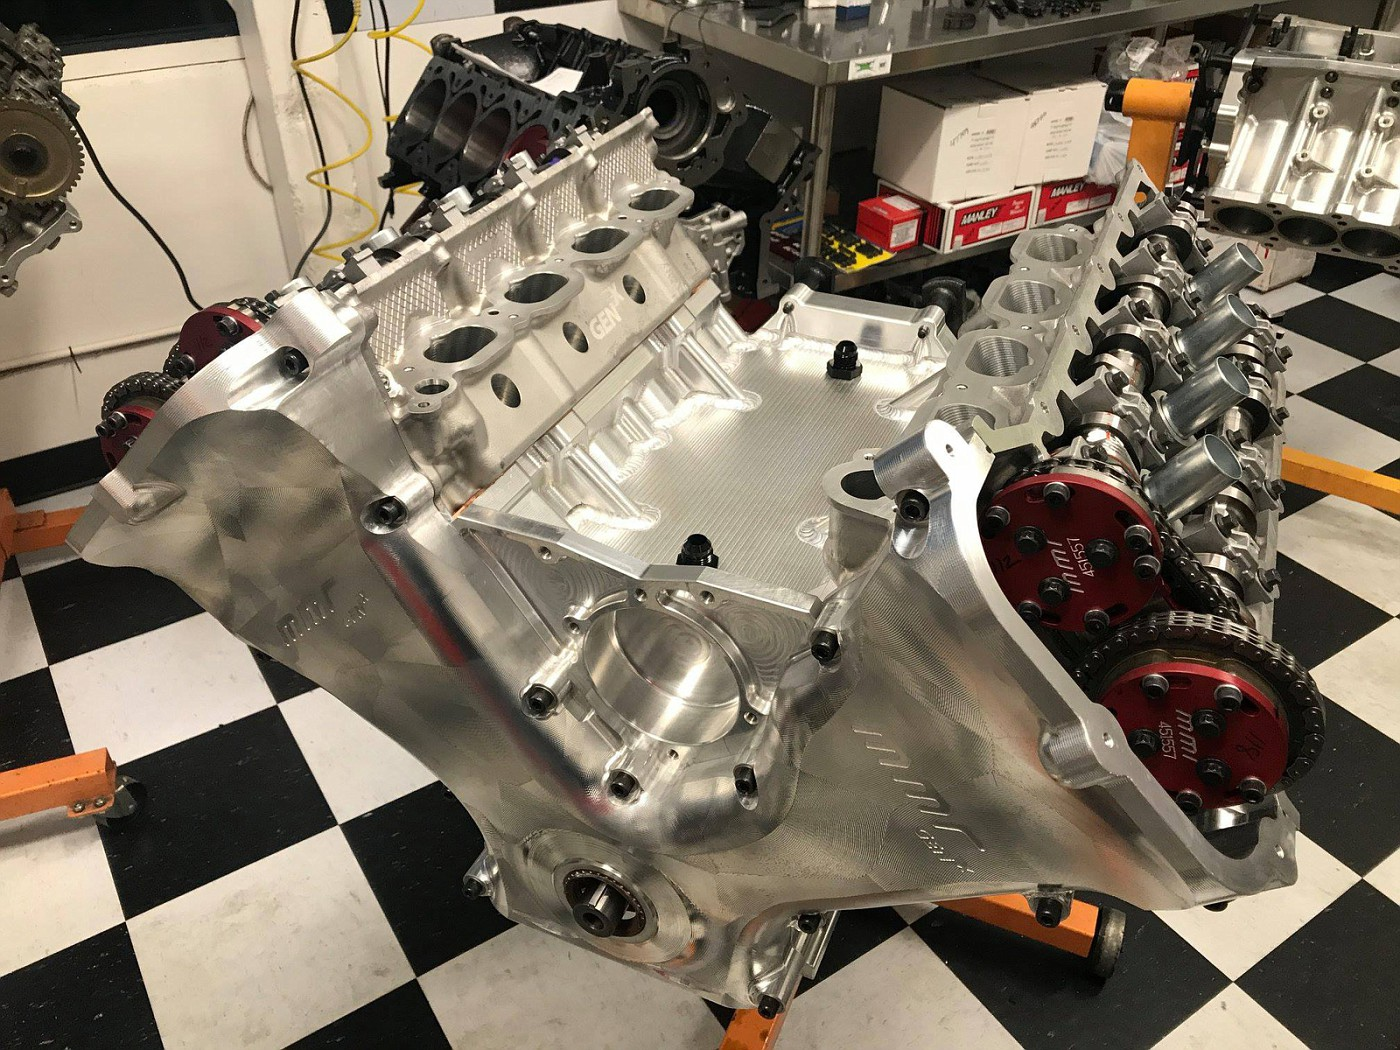
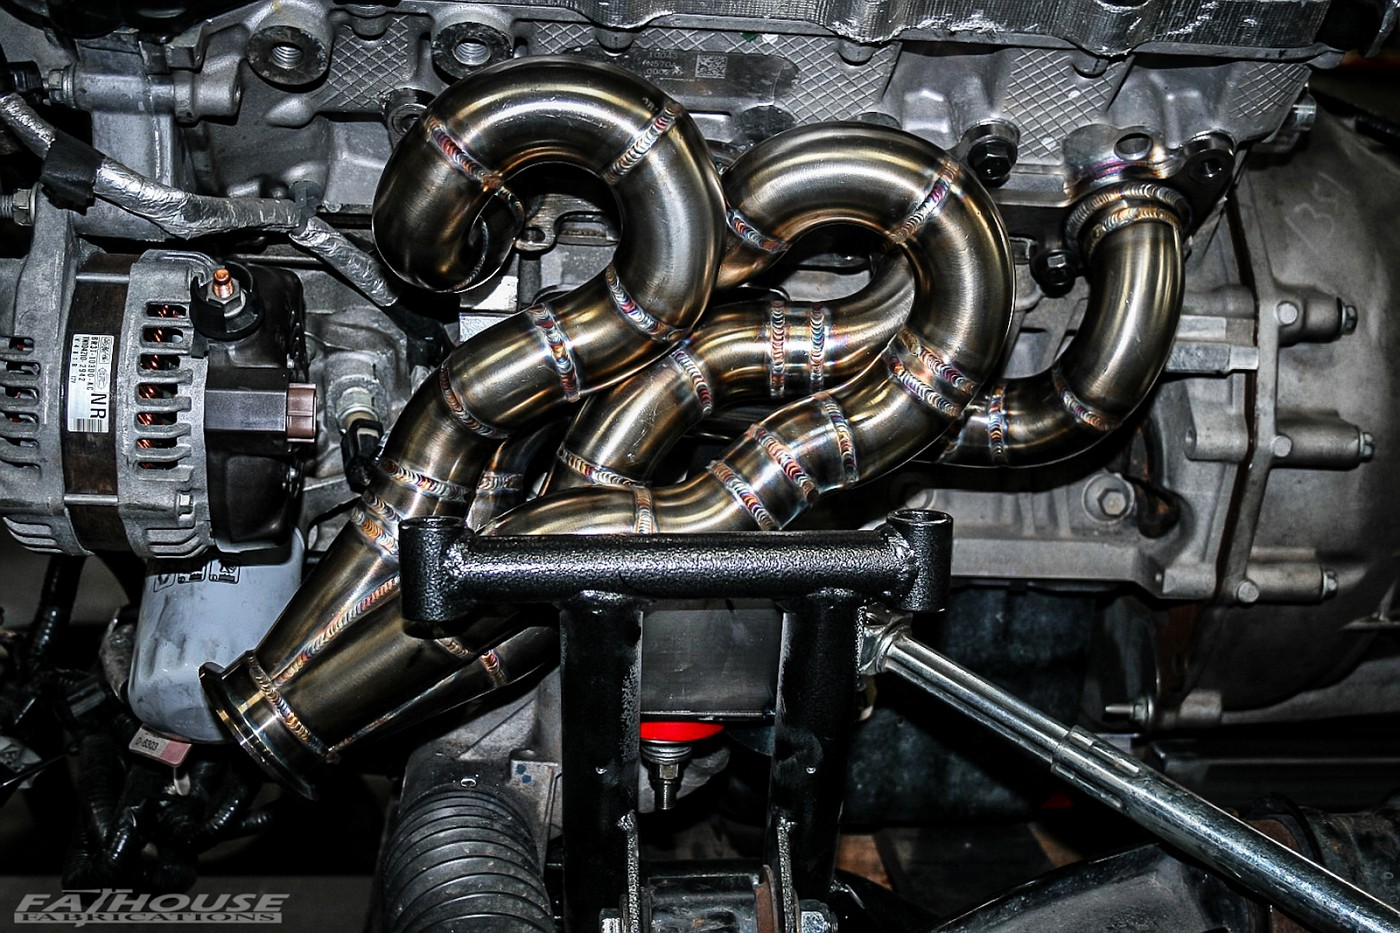
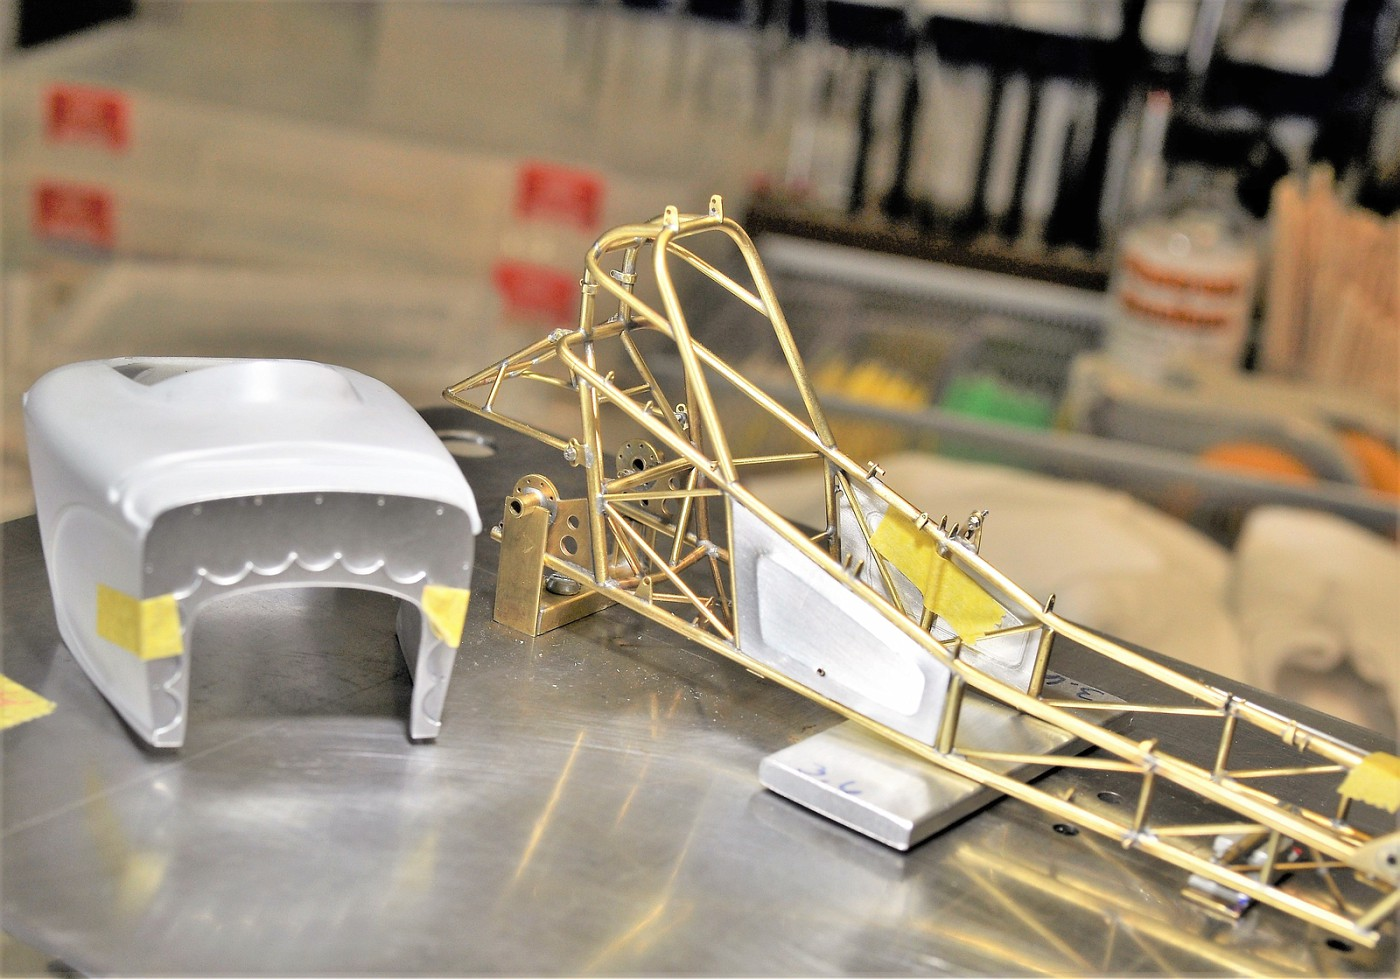
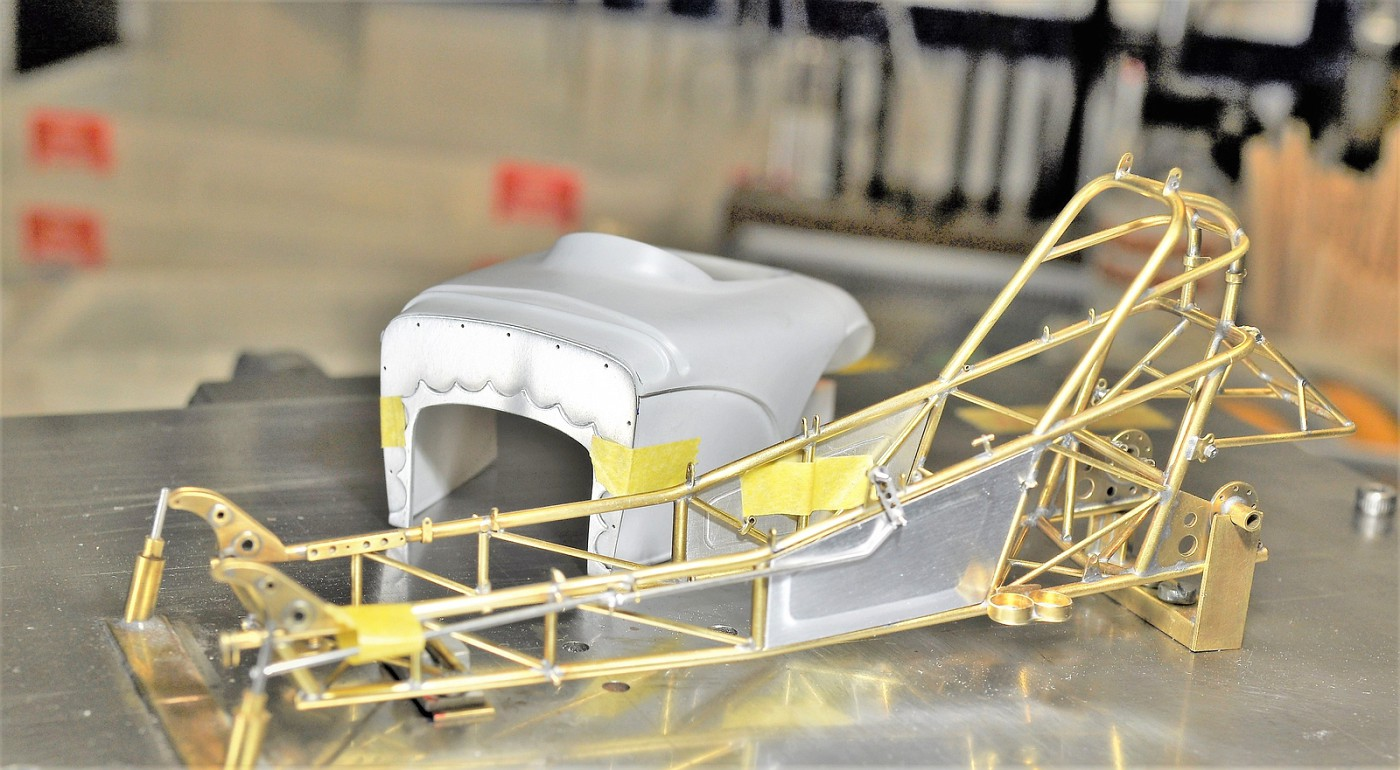
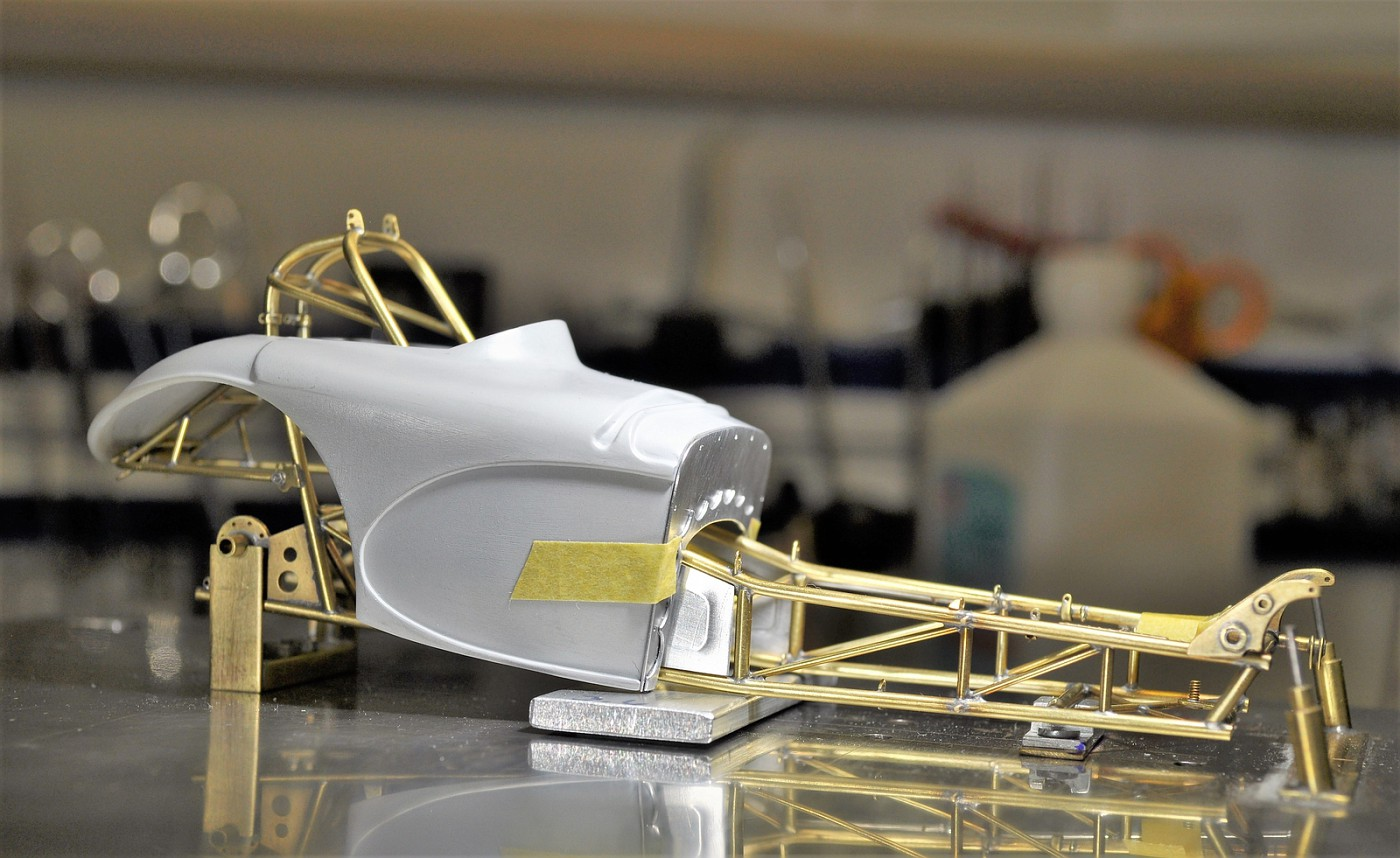
Hi, since I'm nearing completion of the Bantam I thought I'd start a new thread on what I'm going to start next. It's a 67 pro mod' Mustang body that I bought from TDR and will have a twin turbo Ford coyote engine. The engine is one that a company by the name of MMR races and has many of their own proprietary components including a billet block. Today was a sunny hot day in Pa. so I wanted to see what 3D printed bodies were all about. I sprayed the Duplicolor primer first and carefully wet sanded it with 400 grit. 3 hours later and I was really happy (and surprised) how it turned out for the first pass. I sprayed tamiya primer and next I'll sand it with 600 & 800 to clean it up. I think with 5 or 6 total hours of body prep it should be good to go. I honestly thought it would be a lot more work than what I experienced but I can't emphasis enough how carefully you must sand it. I used a variety of sanding "tadpoles" that I've used for years that I've cut up in a variety of shapes. It would be tough to get it uniform without those I believe. Some pics to give an idea of the basis for the build. Many of the components that I made for the defunct "Henry" build will be used on this build. Cheers, Tim These were the worst "print lines" on the body and will be challenging to remove, I might just cut it out and replace it from another kit. The trunk will be cut out as well and I'll likely replace the lid with one that I'll fabricate in brass. Couple of pics of MMR engines.
-
Thank you everybody..........a few comments - Clay is kidding btw, we've all seen his soldering capabilities and he's second to none. Dave, appreciated, fairly accurate but stupidly time consuming. How's the hot rod coming along btw? Pete, you're correct about the soldering tool I'm using. Between my mini torch for flame soldering and the experience I've gotten using my resistance unit I am getting much better results compared to my Henry build. I can set the correct amount of current where I need it and even down to tiny parts like this. Took me quite a while to learn how to use it properly but I wouldn't go back at this point. cheers, tim
-
Side by side by side Dragster builds...Kemp-Teresi-Sobak
Codi replied to ClayK's topic in WIP: Drag Racing Models
Beautiful start too Clay. I see what John has done here, he's giving you and Chris a head start as we all know how freaky fast he is when it comes to building. Just when you have it painted and ready to assemble I would suspect John will start his. Like others, I'm jealous I couldn't have been part of this effort but you'd have to give me a years head start. teehee. cheers, tim -
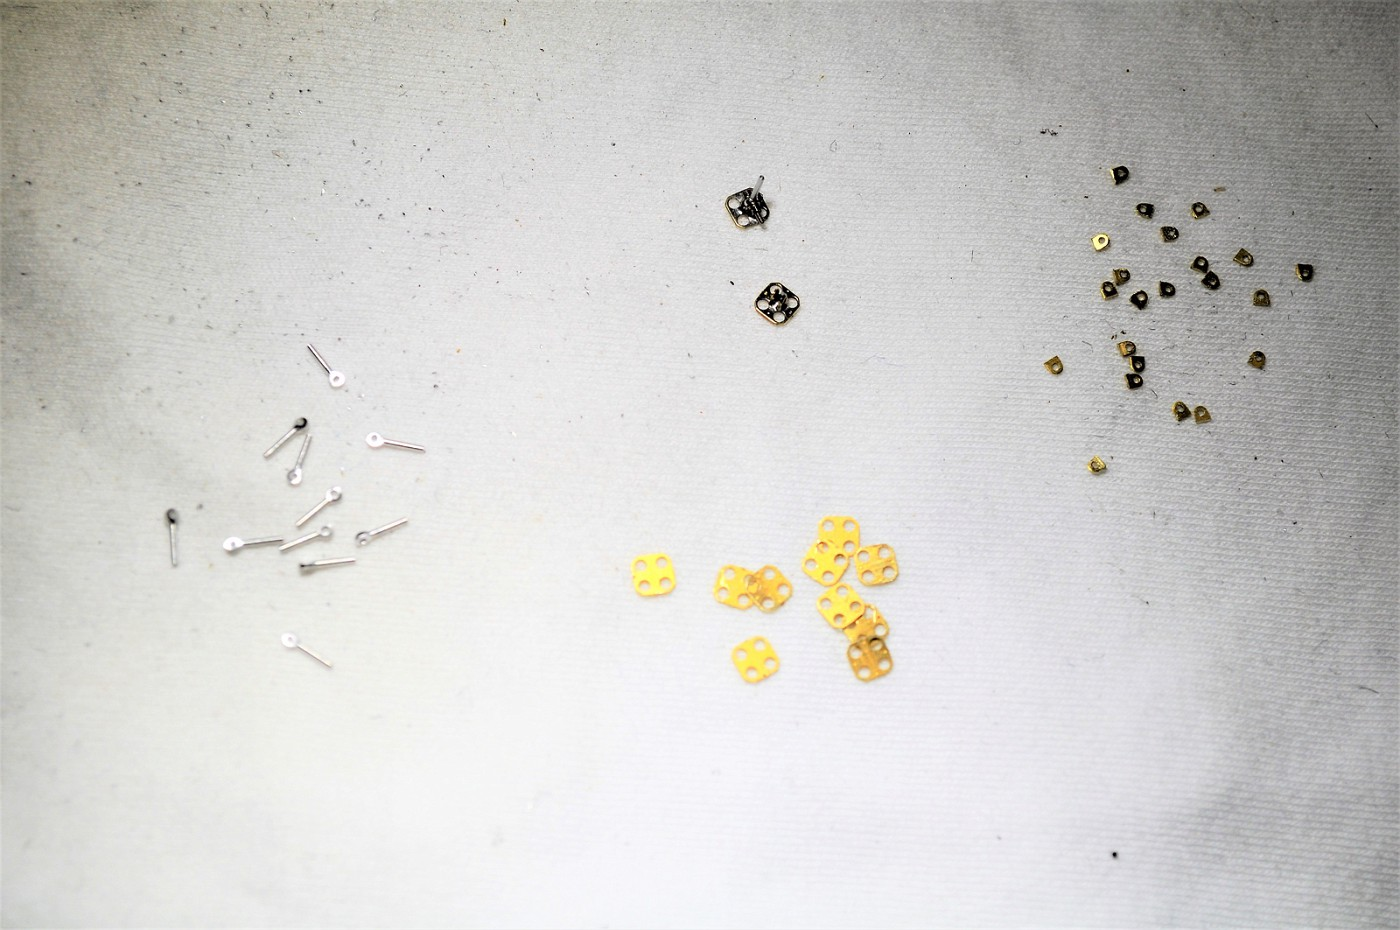
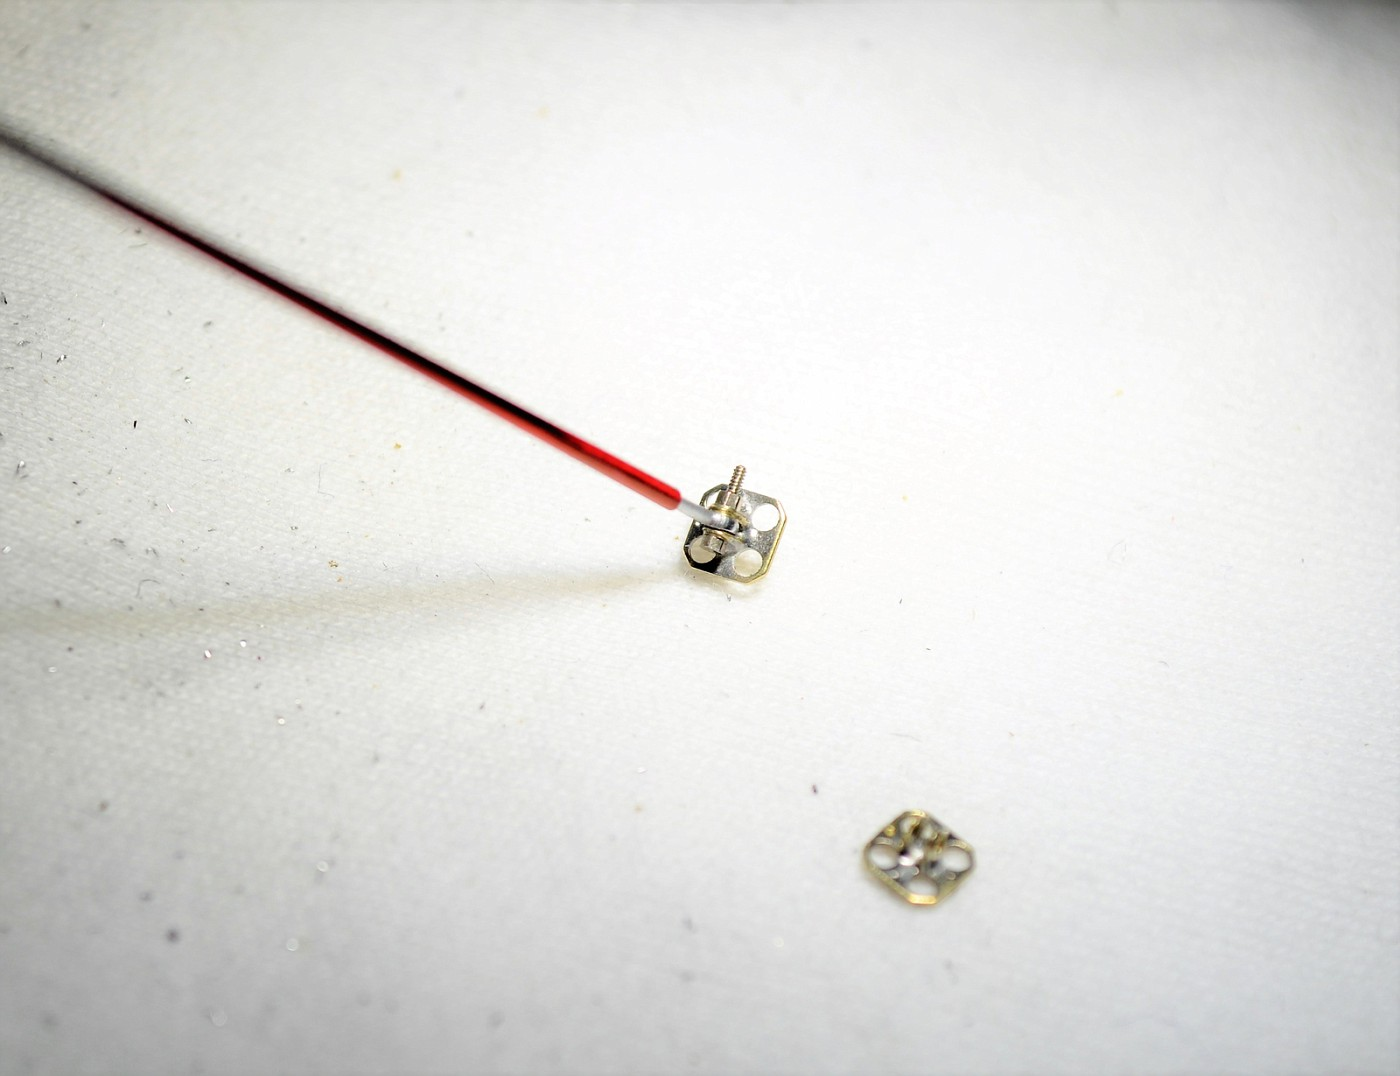
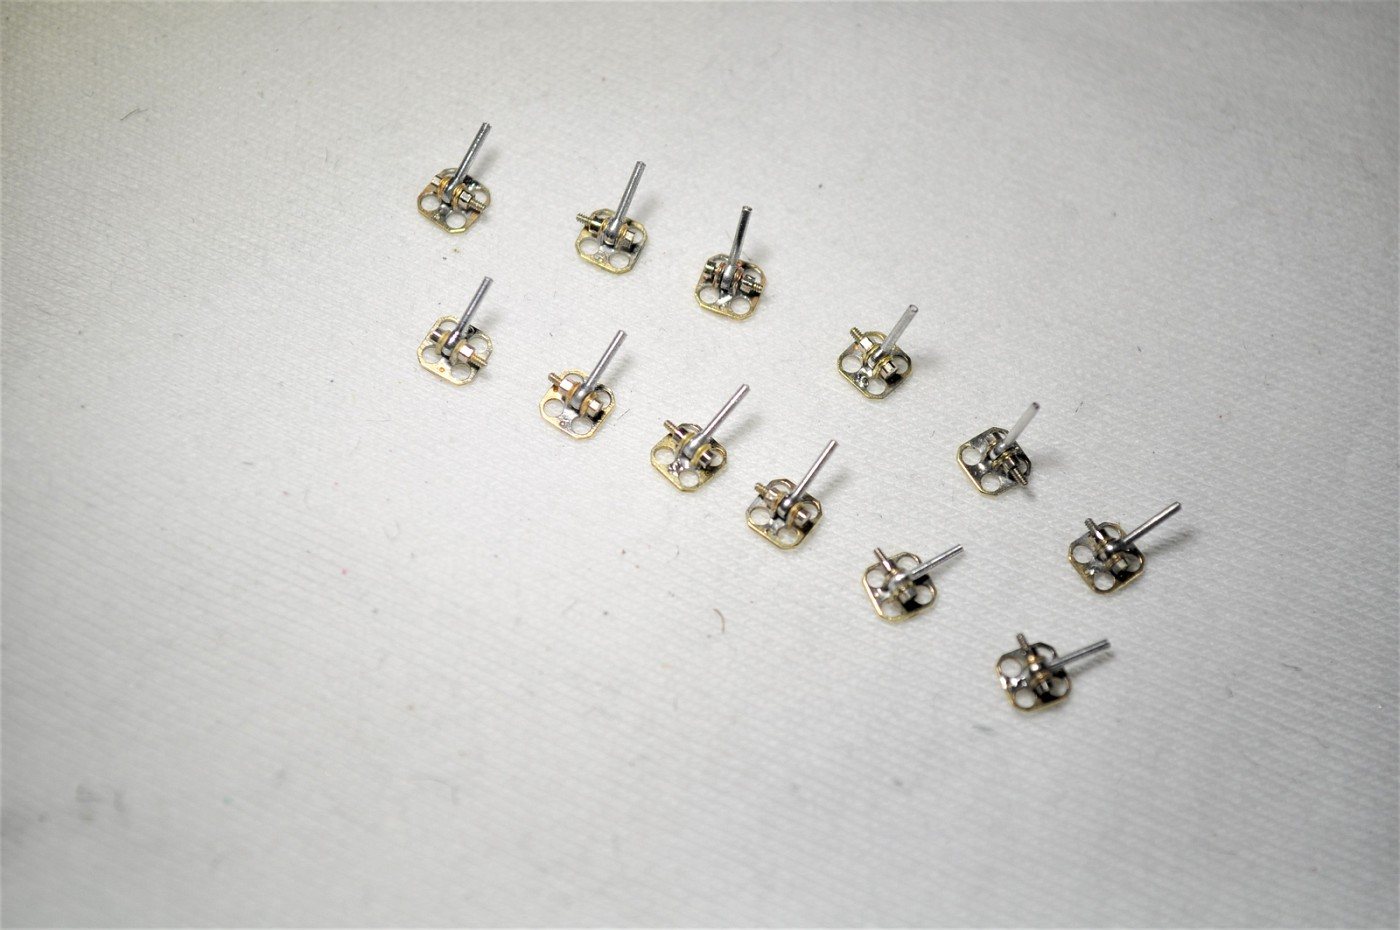
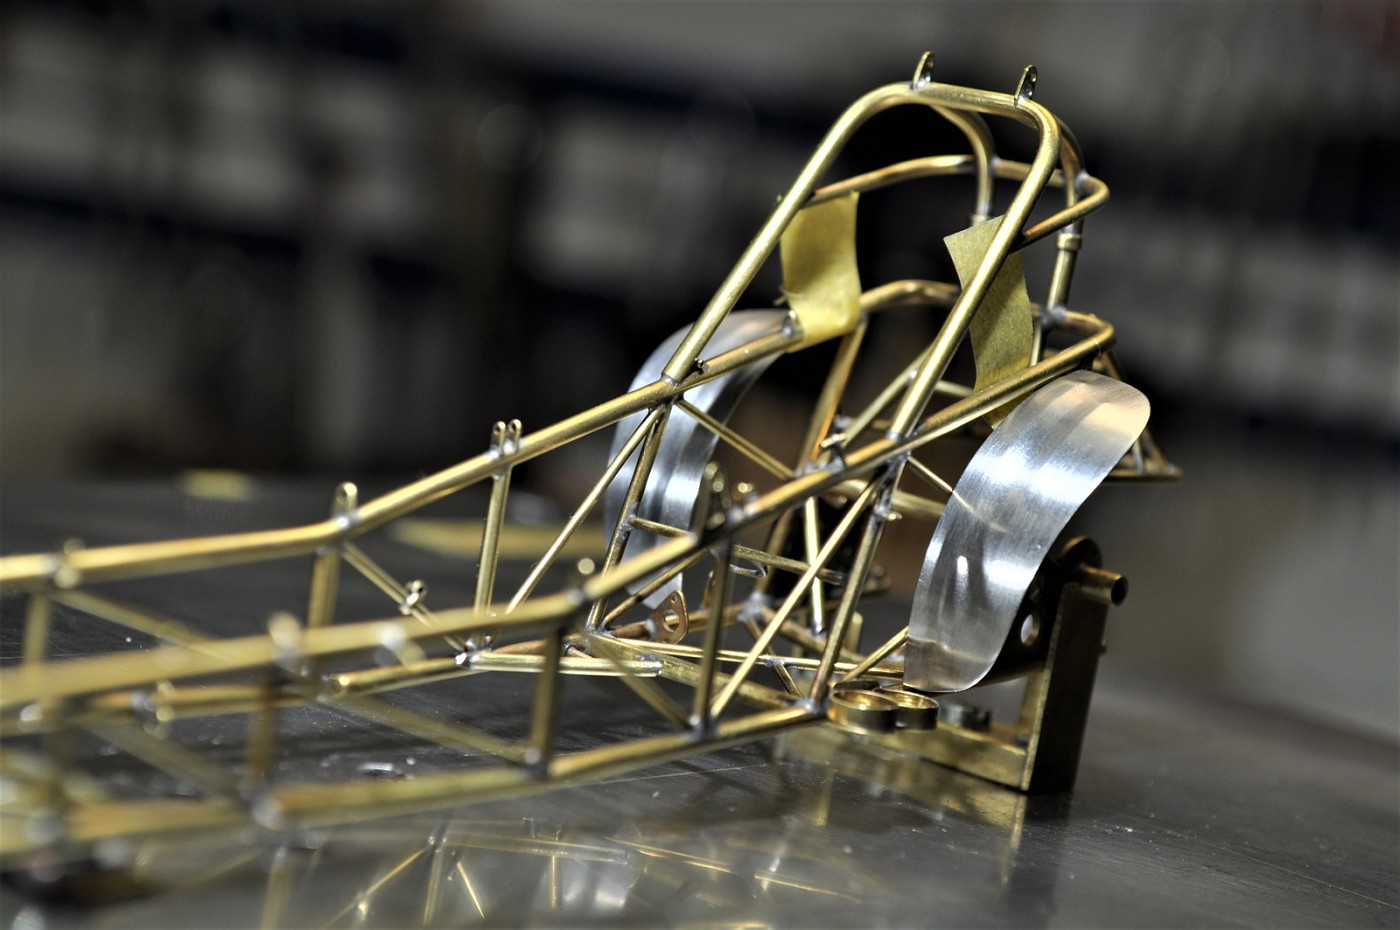
Thank you Brad........as you know I have tons of pics and there will be a build-book when I get it done. Spent far too much time trying to figure out how to make the brackets that tie in the interior support tubes. The brackets and tabs are brass ones from dirtmodeler and the rod ends are RB Motion. HOW to solder them together was the time consuming part. 3rd solution worked and made 12 of them. Few more support panels to make for the inside and this step will finally be done. The plan is to take complete photos of all the bits and pieces I've been making the last 2 years and then compile the final assembly order. Paint the chassis, plate parts and begin. I have some new paint on the way from a new resource that I'm anxious to try out for the body. More on that in the coming weeks. cheers, tim Lots of bits and pieces to make the dozen brackets needed. Kind of an assembly line to "tin" the tabs with tix silver solder.......which I did with a torch I assembled the tabs to the rod end with a .5mm bolt/nut. Then I held it with a piece of s/steel tube as you can see here......held it in place on the tab and applied heat with my resistance soldering wand. Each bracket is about 4mm square as a reference.
-
You're just getting better if that's even possible John. The colors are stunning in addition to the detail you're throwing at it. cheers, tim
-
Just getting caught up on your build Dann, that issue you had on the rear panel fitment was truly bizarre. Like you I wouldn't question it and just smile at the fact I wouldn't have to fix it. Oh but for small victories right? Looks great and the pics you're posting are fantastic. cheers, tim
-
'36 Ford Stock Roof 3-window - Back to Basics - Final Update 05-27
Codi replied to Bernard Kron's topic in WIP: Model Cars
That looks really nice. Love the interior tweaks too. cheers, tim -
Side by side by side Dragster builds...Kemp-Teresi-Sobak
Codi replied to ClayK's topic in WIP: Drag Racing Models
I can't imagine anyone that won't be following this thread. 3 of the best builders in the hobby doing something fun like this. WOW! Love the wheels Chris and the clean-up on the car looks great already. Cheers to you guys for thinking it up and collaborating. Tim -
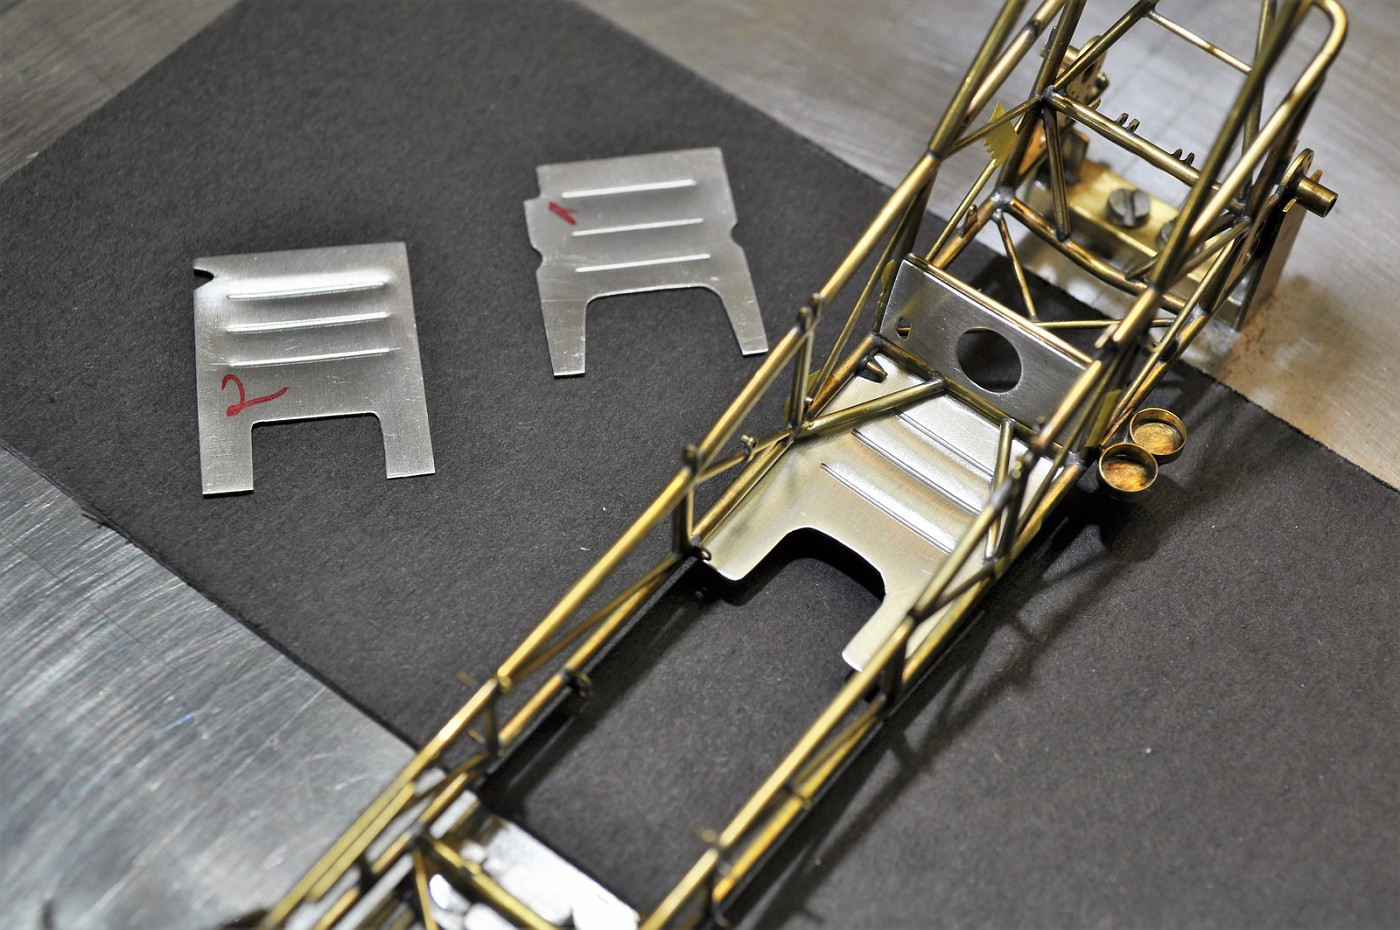
Chris, whatever you're doing next, I'll be sure to follow no matter what. Dave, thanks too.............I don't know about inspiring at this point but its getting near completion which I'm looking forward to. Thanks too for checking it out. Today I wanted to try my hand at making some bead rolled inner fender tins. The pics are lousy but sometimes when shooting alum. I get flash/exposure issues. 1/2 day to get a reasonable pair completed and now I have to figure out how I want to mount them. They should complement the chassis when its finally done as my plan is to mount them to the chassis. cheers, tim
-
Clay, I think Ford's copyright / marketing department will be in touch for your unauthorized use of their car images and for photo shopping their actual car all the while claiming it as your "model" of it. I am shocked, shocked I tell ya' that you would even contemplate such an obvious deceit................. Cheers, Tim
-
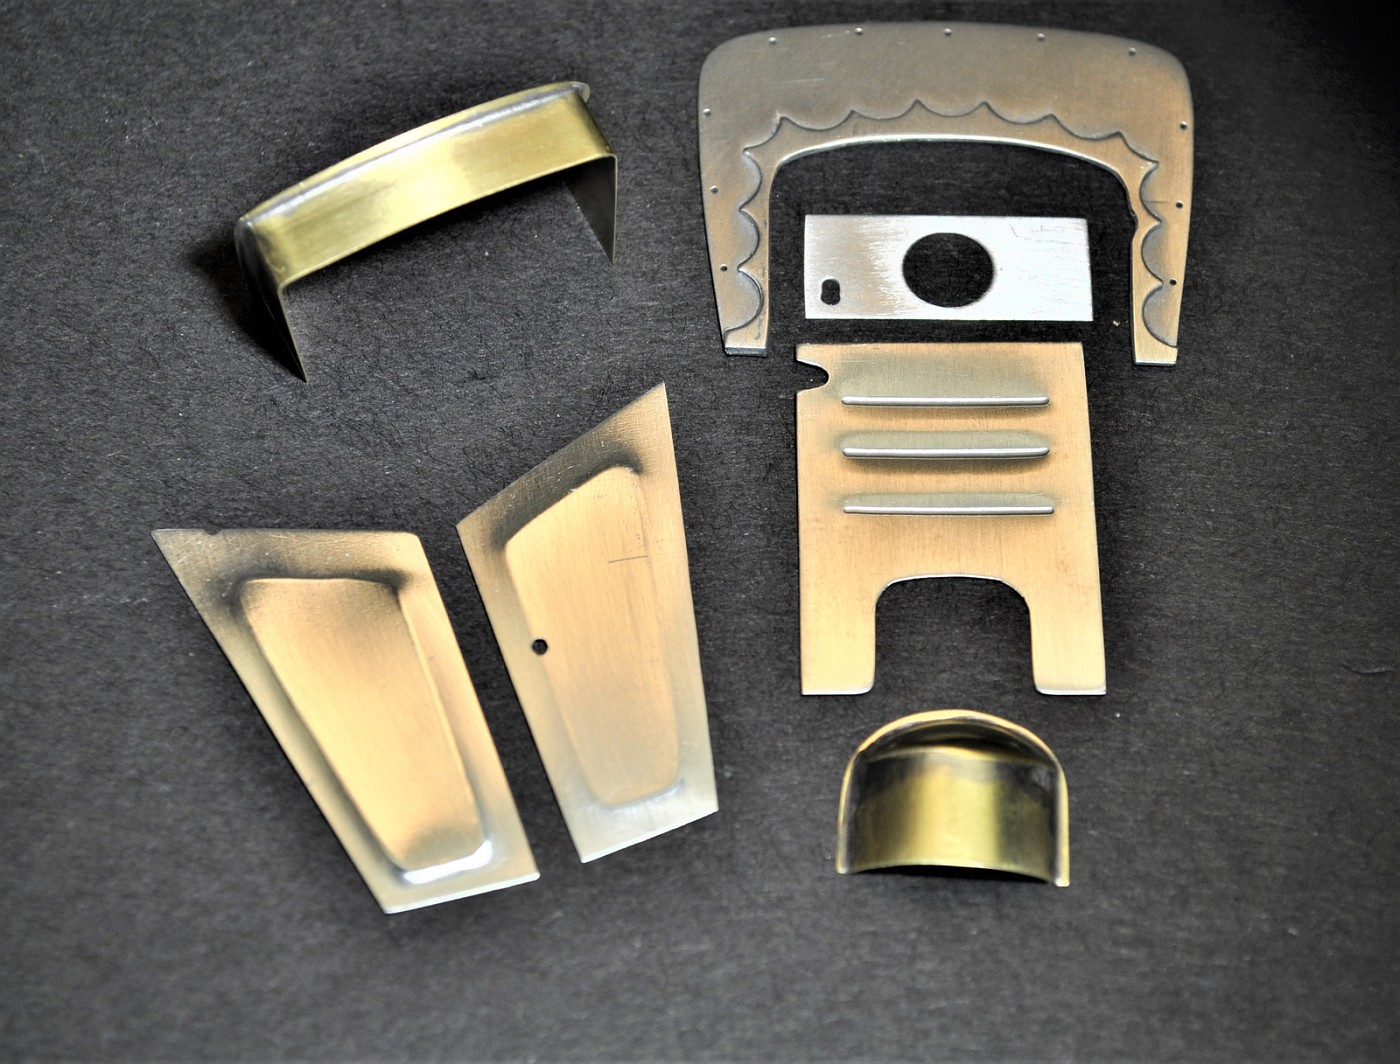
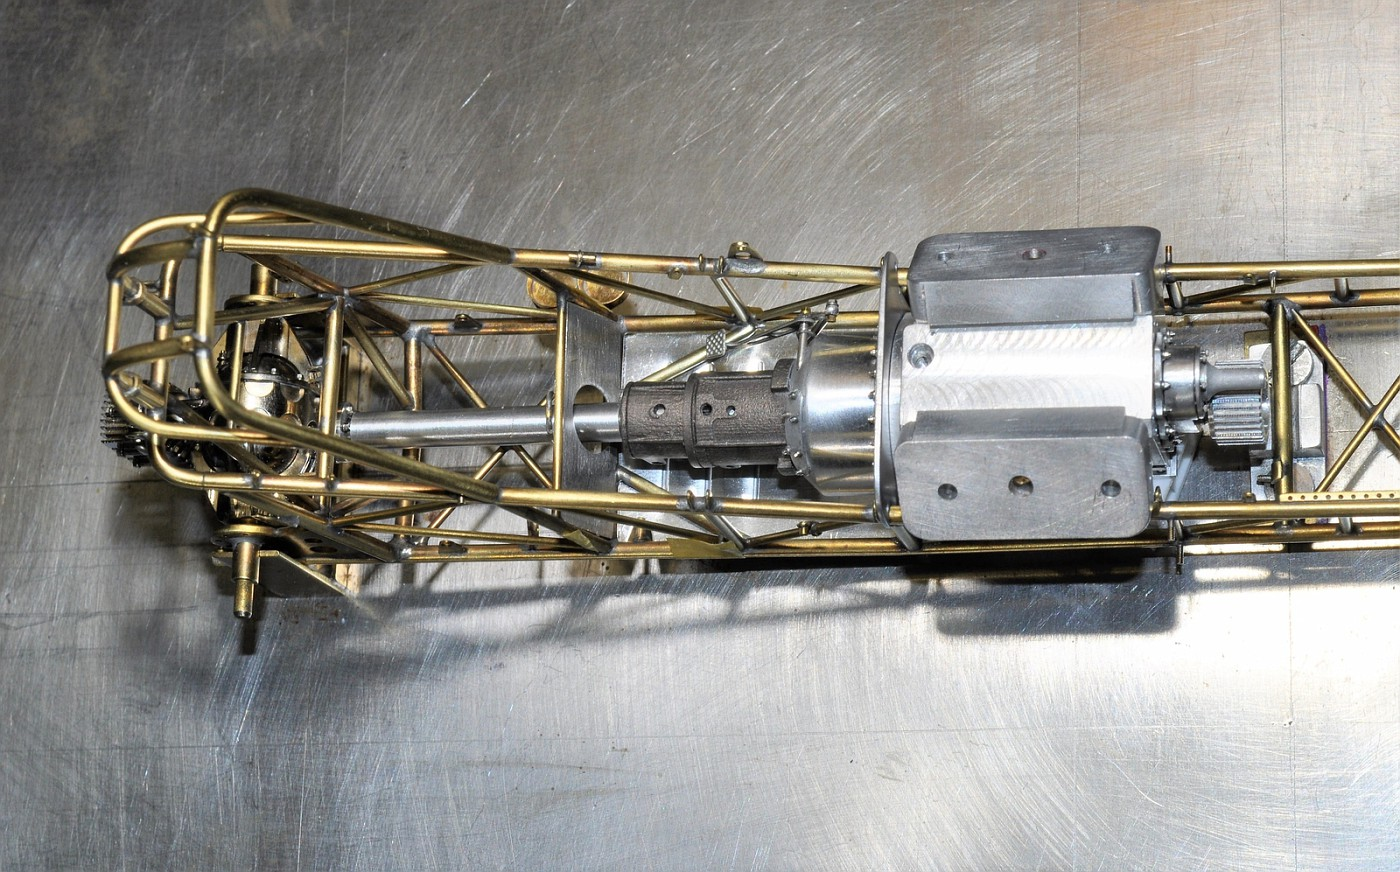
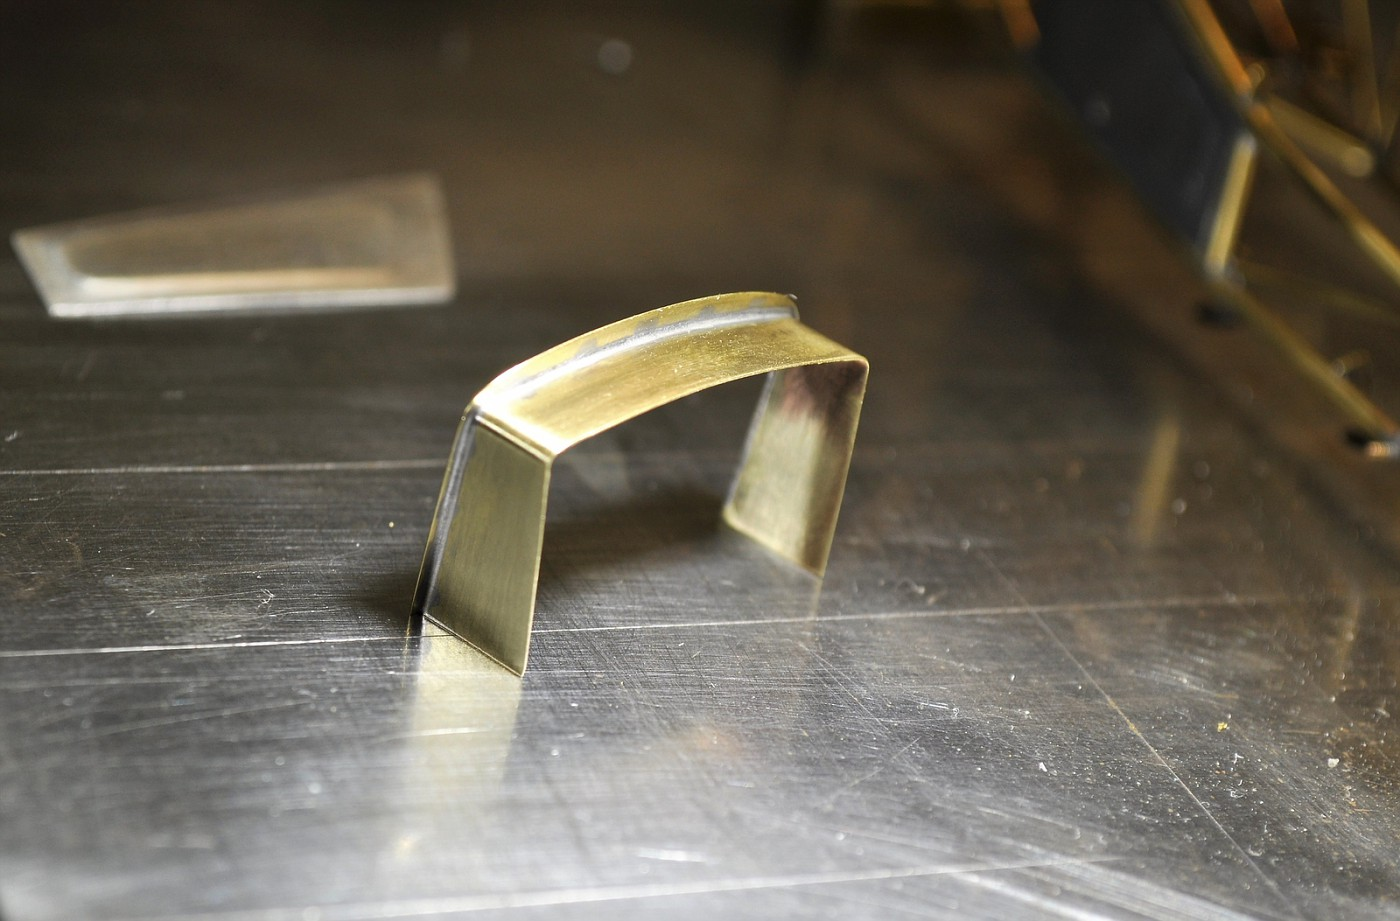
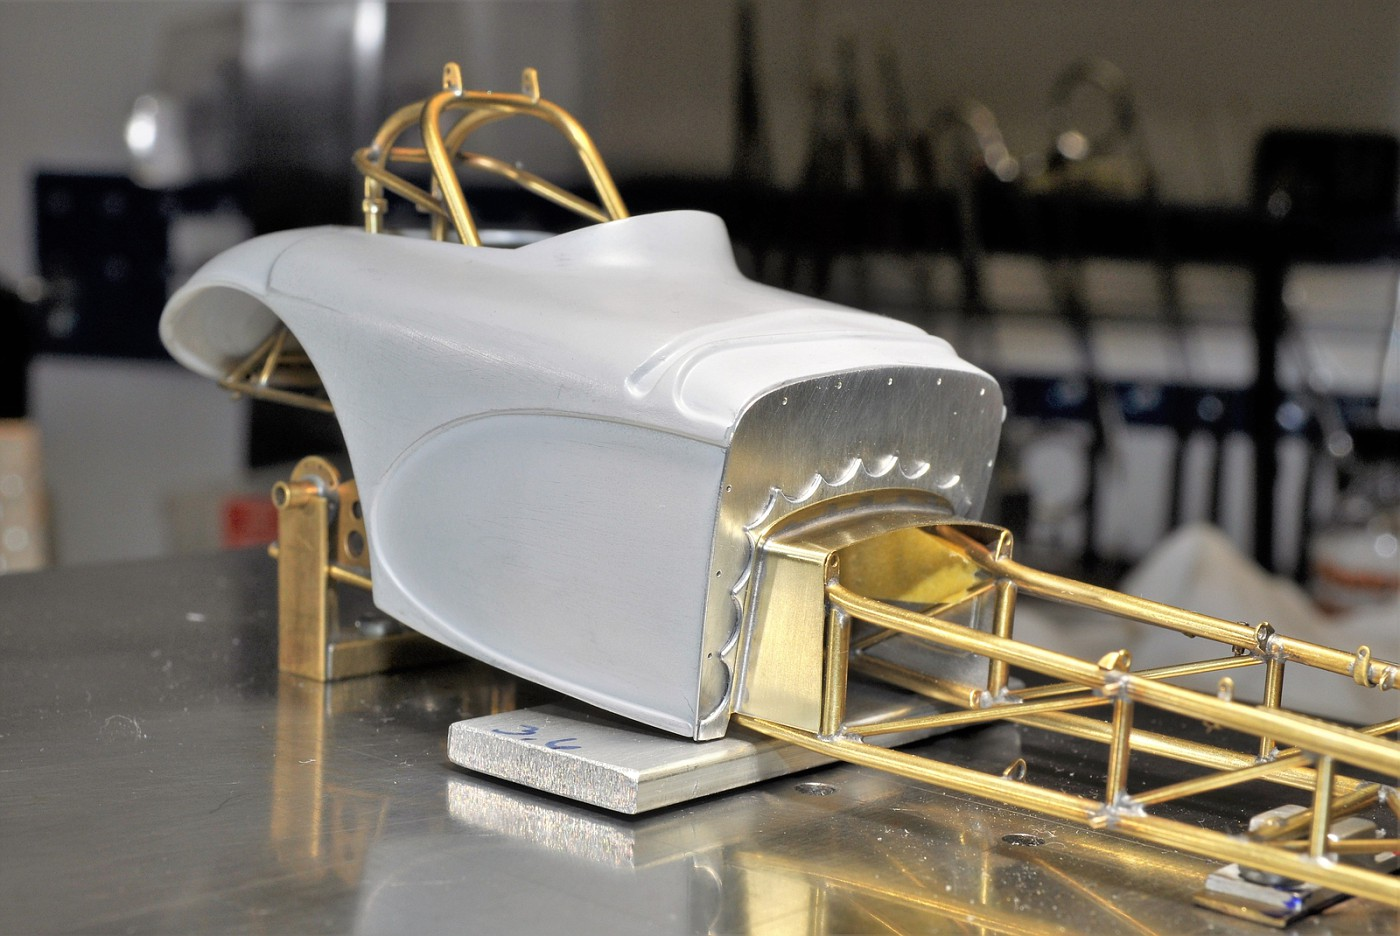
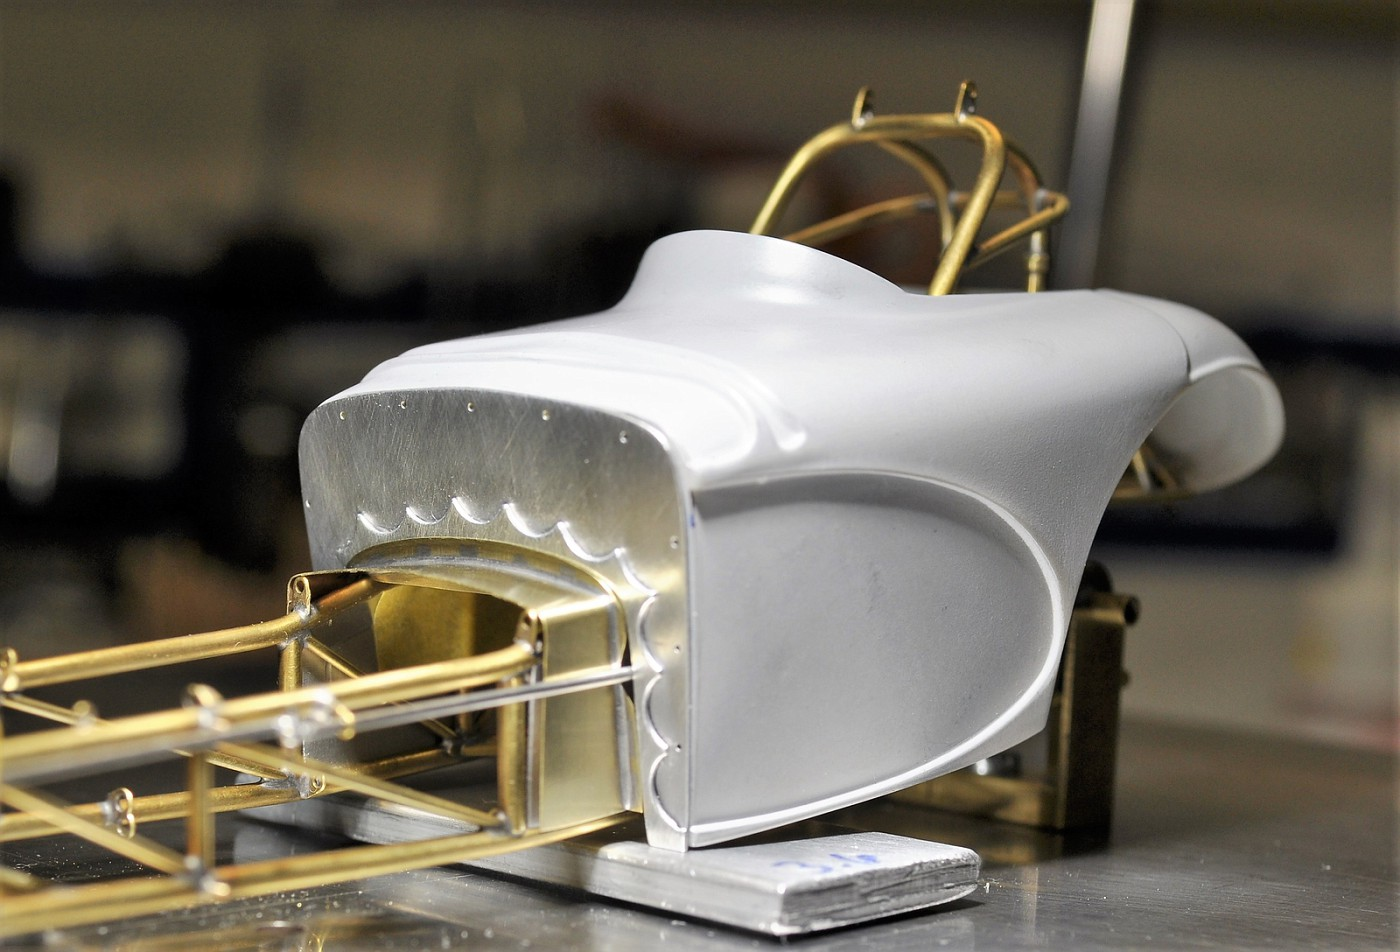
Hi Brad & Chris, the tins are completed now and I'm satisfied with them. Still have to drill them and locate & secure the dzus tabs to the chassis (they'll be devcon super glued on btw). Some odds and ends to clean up on the under body supports but it was a productive week all in all. As for what's next Chris, I'm hoping to get back and finish the replacement Pro Mod for the Henry J. I have too many parts (reminders) around the room to ignore it.........would rather do a "quick / fun" build but that will never happen as we both know. John, thanks man............really looking forward to your next update on that Caddy btw. Hurry please cause I wanna see your paint on that one. Dave, I'm just about out of cards........but everyone has always accused me of playing with half a deck anyhow. Couple weeks let's get together hopefully. Car's up and running again right? I want that ride you promised and it's always great to get caught up with what's been going on. Last but not least, thank you Pete. It was a struggle on this one for a couple of months but the build seems to be back on track for me. I've got to hurry a bit now to get back to a reasonable schedule as our "paint season" is almost upon us. I had to make a brass cover for the cut out in the floor tin that was made to clear the bellhousing. 3 different parts soldered together to make it and 2+ hours of time. ugh. The group photos of the various body tins & firewall are to help me during final assembly. Cheers everyone.
-
3 attempts to get the floor tin correct & onto the next step. cheers,tim
-
Bruce, thanks for the chuckle......I worked on concrete as a young kid and knew the diff between a trowel and float. Too funny that I got that one wrong but I had a lot of positive memories from your post. Chris, appreciated sir. Not sure I had any idea how long all of this would take me. I just spent the better part of yesterday working just on the floor tin........it was a beautiful piece of epic failure. I know what to do now to get it right but gee whiz, I thought I knew better.......I'll get it right eventually and move closer to wrapping her up. What's up next for you??? Miss your builds and insights! Thanks Dave.........like I mentioned above, I"m ever so slowly getting there to completion. Kind of motivating to see the end in sight though. Eric, always nice to see you pop in and check it out. Glad you're still following along and like what you see. I told Clay K. that I WILL have it at next years NNL East for exhibit finally. Hope you can make it therre as I admire your work too. Clay K. - Thanks man. Congratulations on your NNL East awards btw. Heckuva an accomplishment but truly deserved. For those that haven't seen or followed the build, you should drop by Clay's fotki page and look at the detail of his Nascar build that rocked NNL. I studied the pics and came across so many different details I've never considered before that are truly inspiring. Always admired the mans work and this particular build was no exception. Cheers, fellas!
-
Clutch can shroud is now done. Made from .005" brass sheet but I'm not sure whether I'll plate or paint it. The floor pan is next, some tabs to the chassis, seat belts and then ready to paint/assemble it. cheers, tim
-
Enjoying the way you're documenting your build Dann. The pieces you're fabricating next to the real deal pics are stunning. I don't know where you got your reference pics, but they're incomparable. cheers
-
1/16 Scale Army Vega Funny Car - Finished 10/14/2018
Codi replied to Mooneyzs's topic in WIP: Drag Racing Models
A hearty congratulations Chris. I can only imagine the pride you're feeling in completing the car. She's a beauty. I book marked your thread a long time ago and it has been an insightful source for me too. Cheers, Tim -
Fun build and you'll have a blast doing this one. I have to agree with what Bill said, that guys shop has quite the impressive collection of cars in his shop. Great photos too. cheers, tim
-
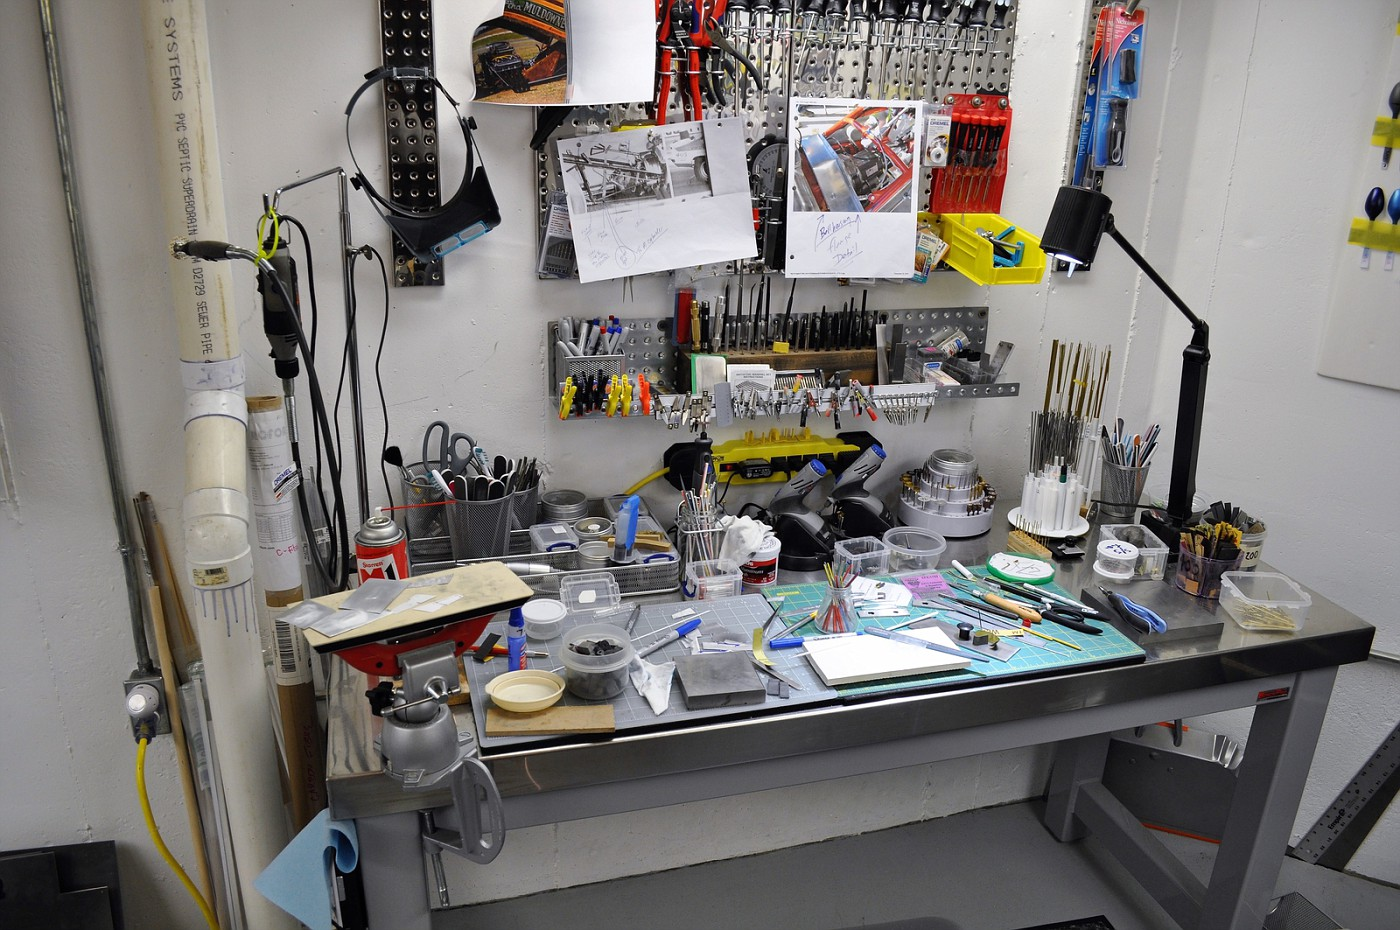
John, thanks buddy. Congrats too on your the awards won at the recent Desert Scale Classic........most deserving. Chris, thanks sir. You were the inspiration and the tips you shared were most helpful. btw, you ought to see the other 2 benches.........they're as bad as the one I shared. Time for some "spring cleaning". Jim, I don't know the answer but "Force" I believe has answered your question. Mine was given to me by GoatGuy and Brad. Good luck too! cheers everyone, Tim
-
Loving the creativity you're exhibiting here. cheers, tim
-
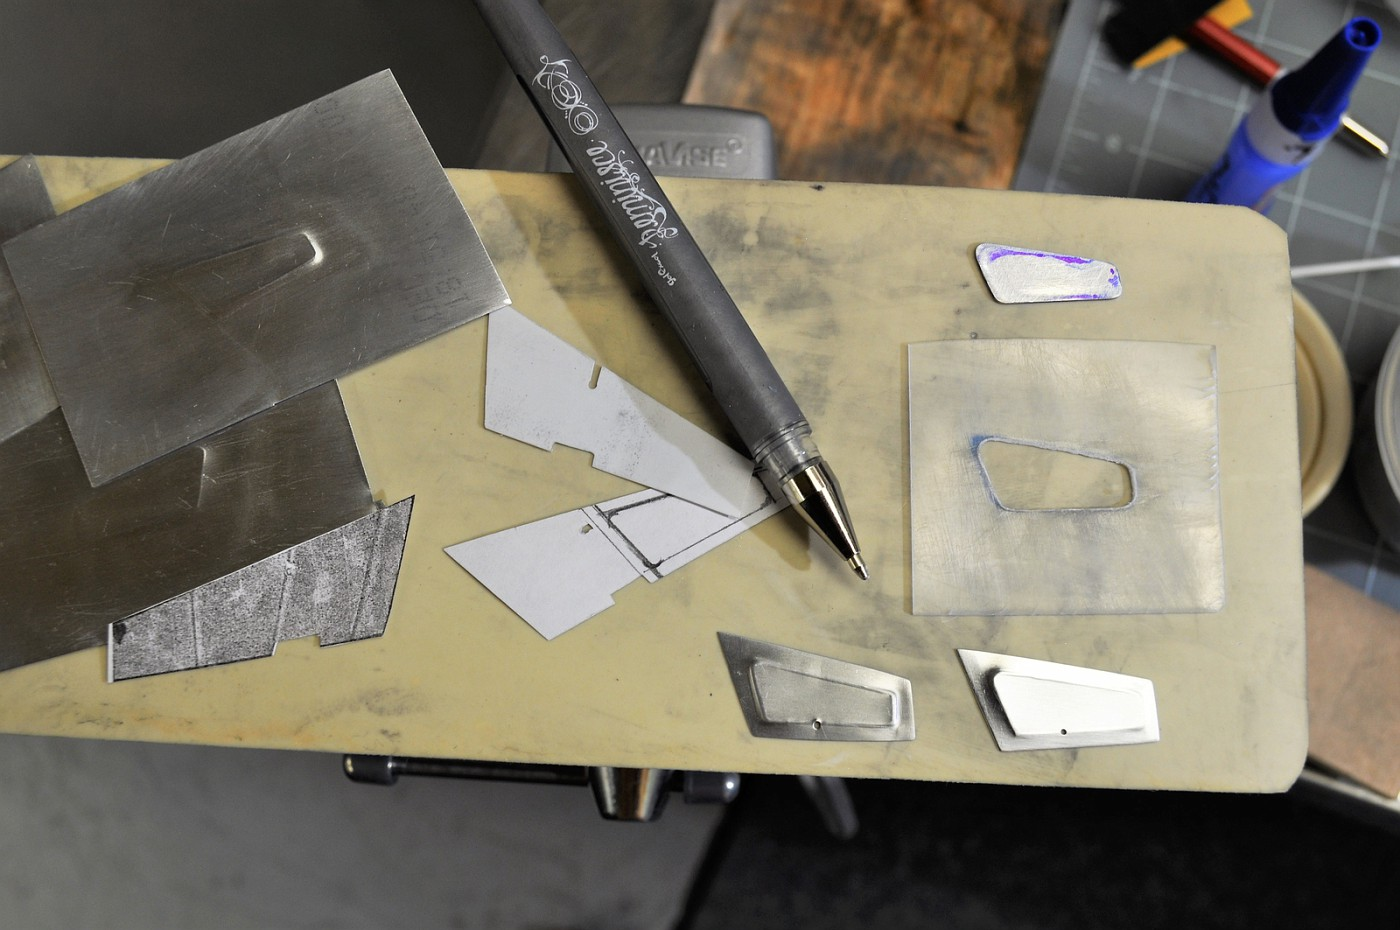
Thanks Chris, Brad & Eric...............yoiu can't believe how much of the printer plate I went through to get to this point. Long story to make something seemingly straightforward. Many variables to consider when making these. I was so impressed with how Chris' tins turned out on his Vega that I thought I'd try. After finally getting the write combo of material to press onto, the correct pen size and how to make the template properly, I realized that the way I was trying to make them wasn't feasible. The material would bend to some degree and whenever I tried to straighten them out I'd get minor crimp marks in the plate that couldn't be removed since the plate is so thin. (.26mm btw) Finally figured out that I had to emboss a larger size piece (2" x 2") then shape and size the panel around that. Keeping the edges straight was easier when using a wood block v. metal too. Enough of that. I'll make the floor tin and then a bell housing shroud and this part of the build up. Cheers, Tim The upside down drywall trough is what I used to emboss upon in this pic. This is just part of the mess I created this past week during my experimentation. The aluminum shaped template was a failure. Tracing around was hit or miss. I found that even the right depth of material to trace around helped. I used the aluminum piece to make the clear plastic template that you see. Much easier to trace around it. You can see some of my early failures in the bottom of the pic. I've got to drill the panels and put the PE dzus fasteners on them and the chassis................KUDOS to Chris for the detail he put into his. That was crazy............I won't be doing that. Sorry for the quality of some of the pics as they're washed out a bit and you can't really see the detail of the panels for the most part. They do look good and I'm glad I took the time to do them after all. I'll include them with the car when displayed but they'll be off the car as I want to expose the car and it's detail as much as possible.
-
Nice job on one of the finest cars ever made. Looking forward to your next update. cheers, tim
-
Oh for cryin' out loud. How DO you do this? John, you must build 12 (possibly more?) HIGH quality & diverse builds a year and they're each stunning in their imagination and execution. Nobody could/can or will match you for such productivity. What a treat man and just want to say that the "bones" on this car are wonderful. Cheers, tim
-
Made some progress on the body tins. I went to Chris Sobaks funny car thread and pages 19 thru 21 are very helpful to say the least. Brad Norgard & Dave Ryberg each provided me with printers plate to attempt these. Thank you in advance......I think.........I wanted to put a bead roll in them and had to experiment like the others. Having the right rubber density, pen diameter & stencil to follow are very important. This pic is my first attempt at one after a LOT of experimentation. I'm okay with it but the depth of the bead roll is too deep and wide. I'm going to re do it and hope to get a more refined / scale like effect. Once I get this right, I'll post a pick of the pieces I used & fabricated myself to do them. Just a bit more info to add to everything that Chris provided in his thread. Cheers, Tim