Codi
-
Posts
2,675 -
Joined
-
Last visited
Content Type
Profiles
Forums
Events
Gallery
Everything posted by Codi
-
 This looks like a fantastic subject and knowing the personal element, I know it will get the "Sobak" treatment. btw, what scale Chris? I know you said you're doing a brass chassis too this time......oh yeah! cheers
 -
1/16 Scale Army Vega Funny Car - Finished 10/14/2018
Codi replied to Mooneyzs's topic in WIP: Drag Racing Models
Congratulations Chris on the win at IPMS. Truly a worthy entry and very deserving. I can only imagine how satisfied you feel having the car completed. I'll be sure to check out your future builds of course as I always learn from your posts and marvel at the quality. Cheers Sir! -
Gold base is done. I'll get the chassis done this week, just a few more tabs to add, then finish body itself in Kandy Red. I want to take a second and thank John Teresi for his insights on how he lays down such beautiful paint jobs. His tips have proven helpful and I'm sure they'll help me to get a decent final product. cheers

-
1/16 Scale Army Vega Funny Car - Finished 10/14/2018
Codi replied to Mooneyzs's topic in WIP: Drag Racing Models
Be sure to take an extra suitcase to the show......you'll need it to haul home the hardware. Regarding your next build, just tell me it's NOT a bantam altered. -
Can't help you on that score Dave.......thanks too for the help way back when in showing me how to go about machining them in the first place and you're oh so right that that style wheel would just make your 37' Chevy just that wee bit better..............if that's possible. Chris, thanks man, I can't wait either........the whole summer has flown by and I'm so far off schedule. Back to school is coming though !! John, also appreciated.......I saw the weather in Cali is crazy hot right now........you must be on a painting binge unless it's too hot, which I know is possible. All else is well here, thanks for asking it's just the kids are keeping me busy and bench time is hard to come by it seems. Cheers guys!!
-
40 Ford 4x4 - update 7/23
Codi replied to Jantrix's topic in WIP: Model Trucks: Pickups, Vans, SUVs, Light Commercial
Very creative Rob and it looks like it was designed that way from the factory and they just forgot to bring to production. Nice job sir! -
You're certainly off to an excellent start Dann. Cheers, tim
-
Thank you Wayne....since I can't paint I thought I'd move onto the wheels. Was giving some thought to doing the rear wheels with a gold color inset but after polishing these up and putting the spare body on it, I've decided to go with this look. I was fortunate as I only had to chuck them up in the lathe and put some Maguiars mag polish on them. As soon as the weather breaks I'll finish up the wheels and tires too. The pics are kind of dark as the light was reflecting off the wheels so much I couldn't get a good pic otherwise. A good thing though. Cheers!
-
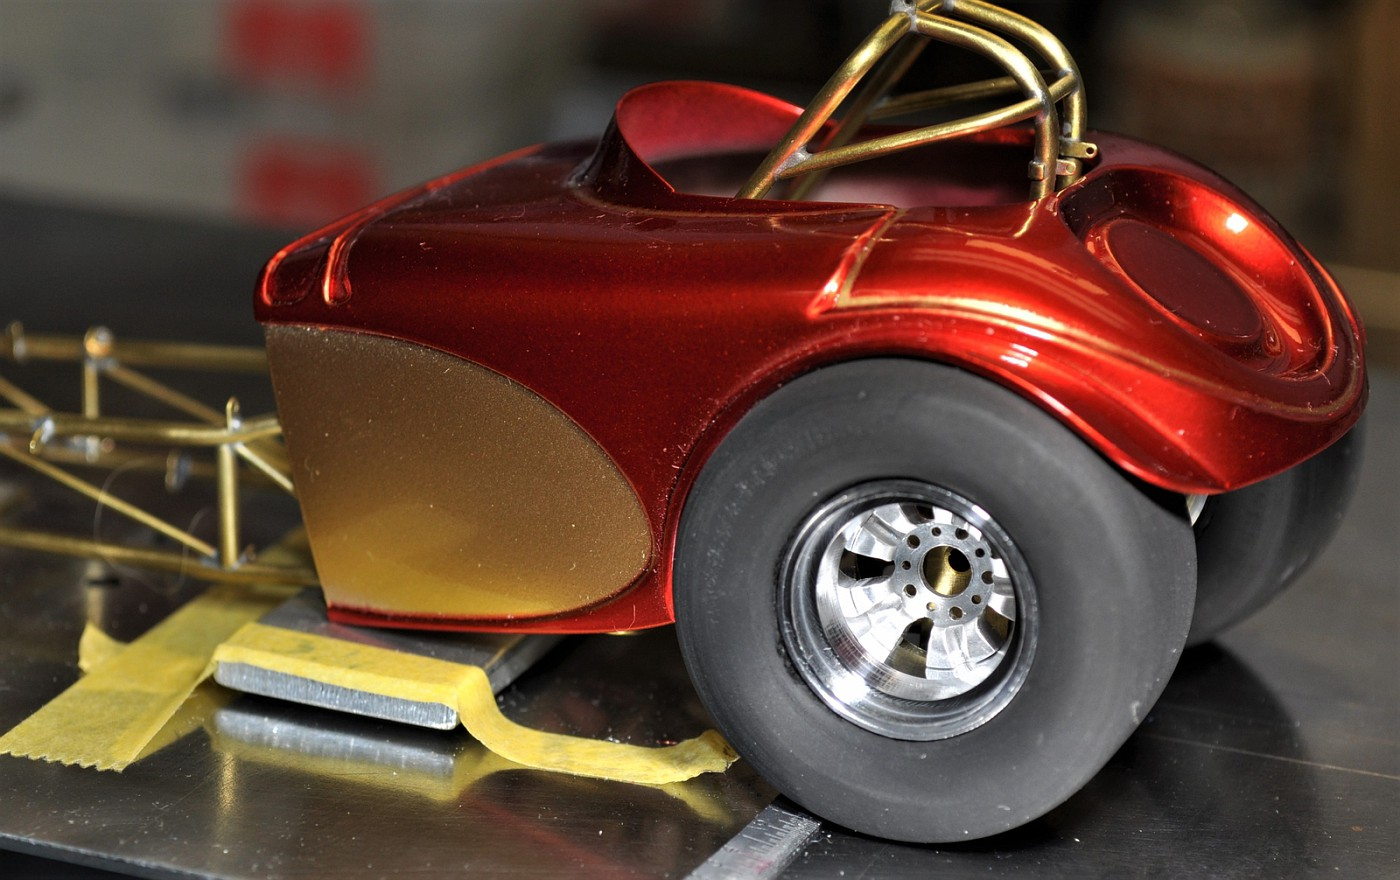
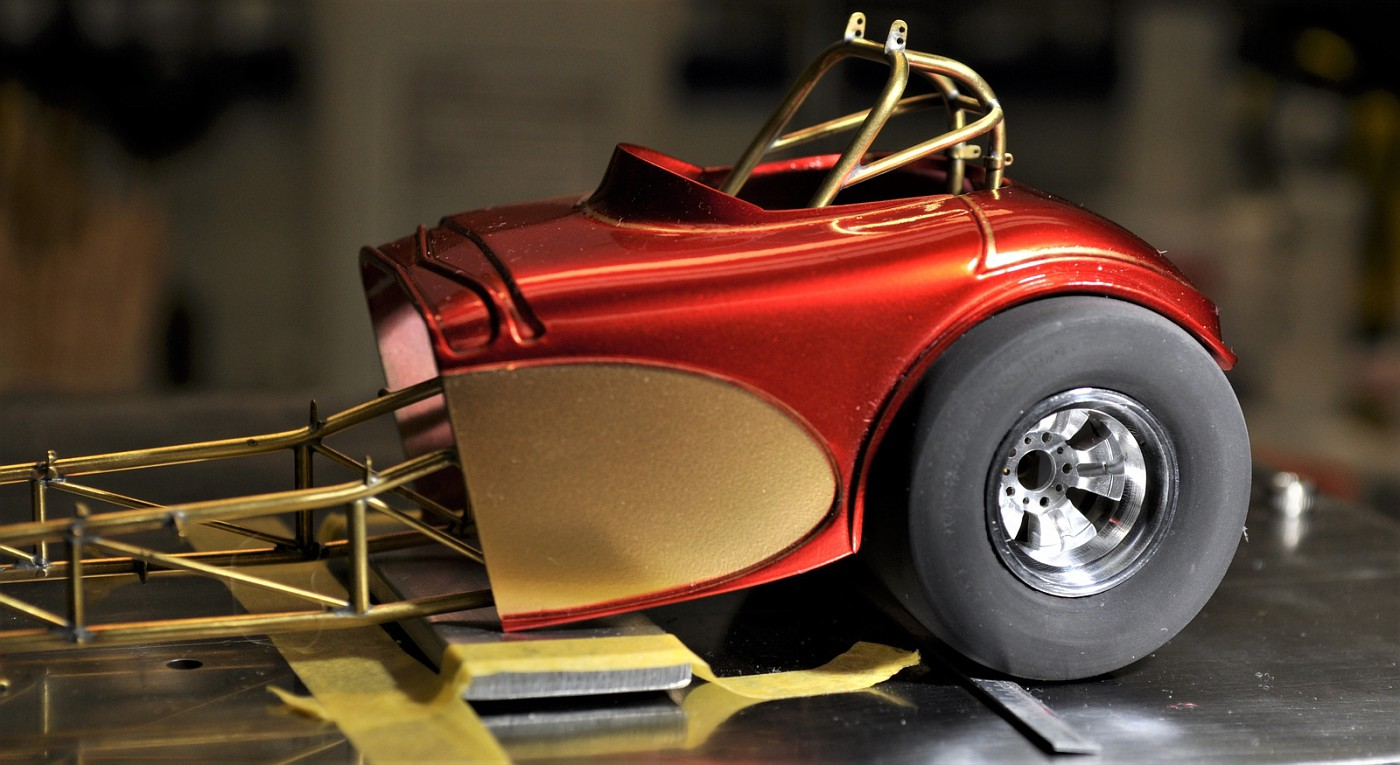
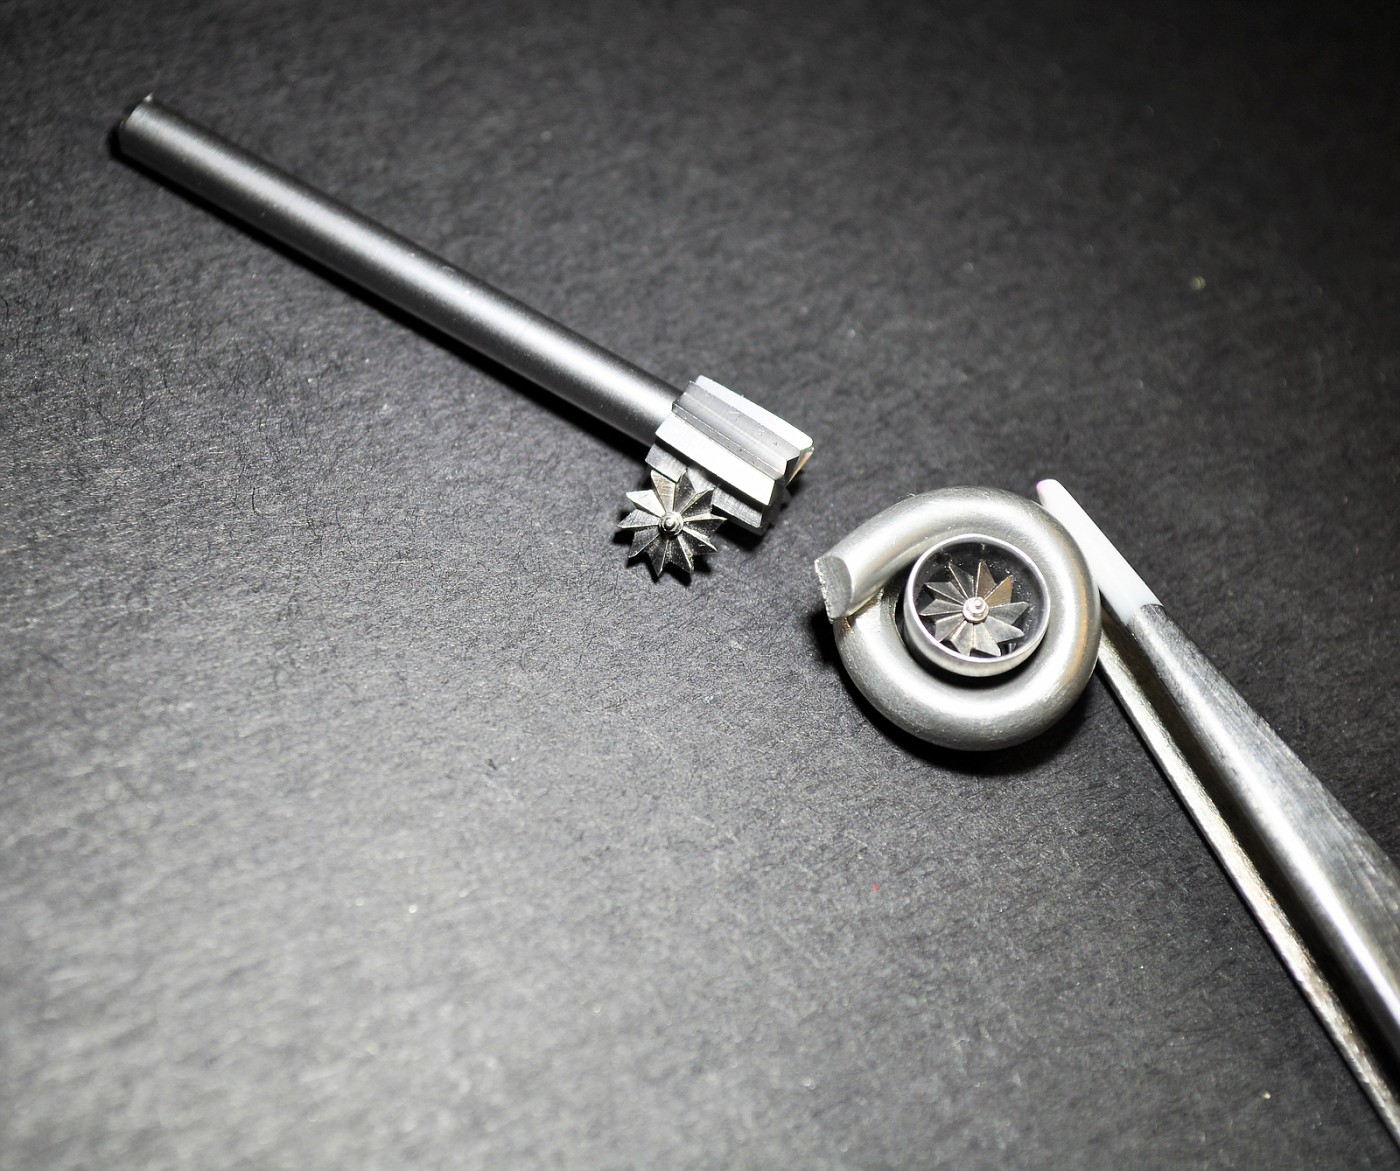
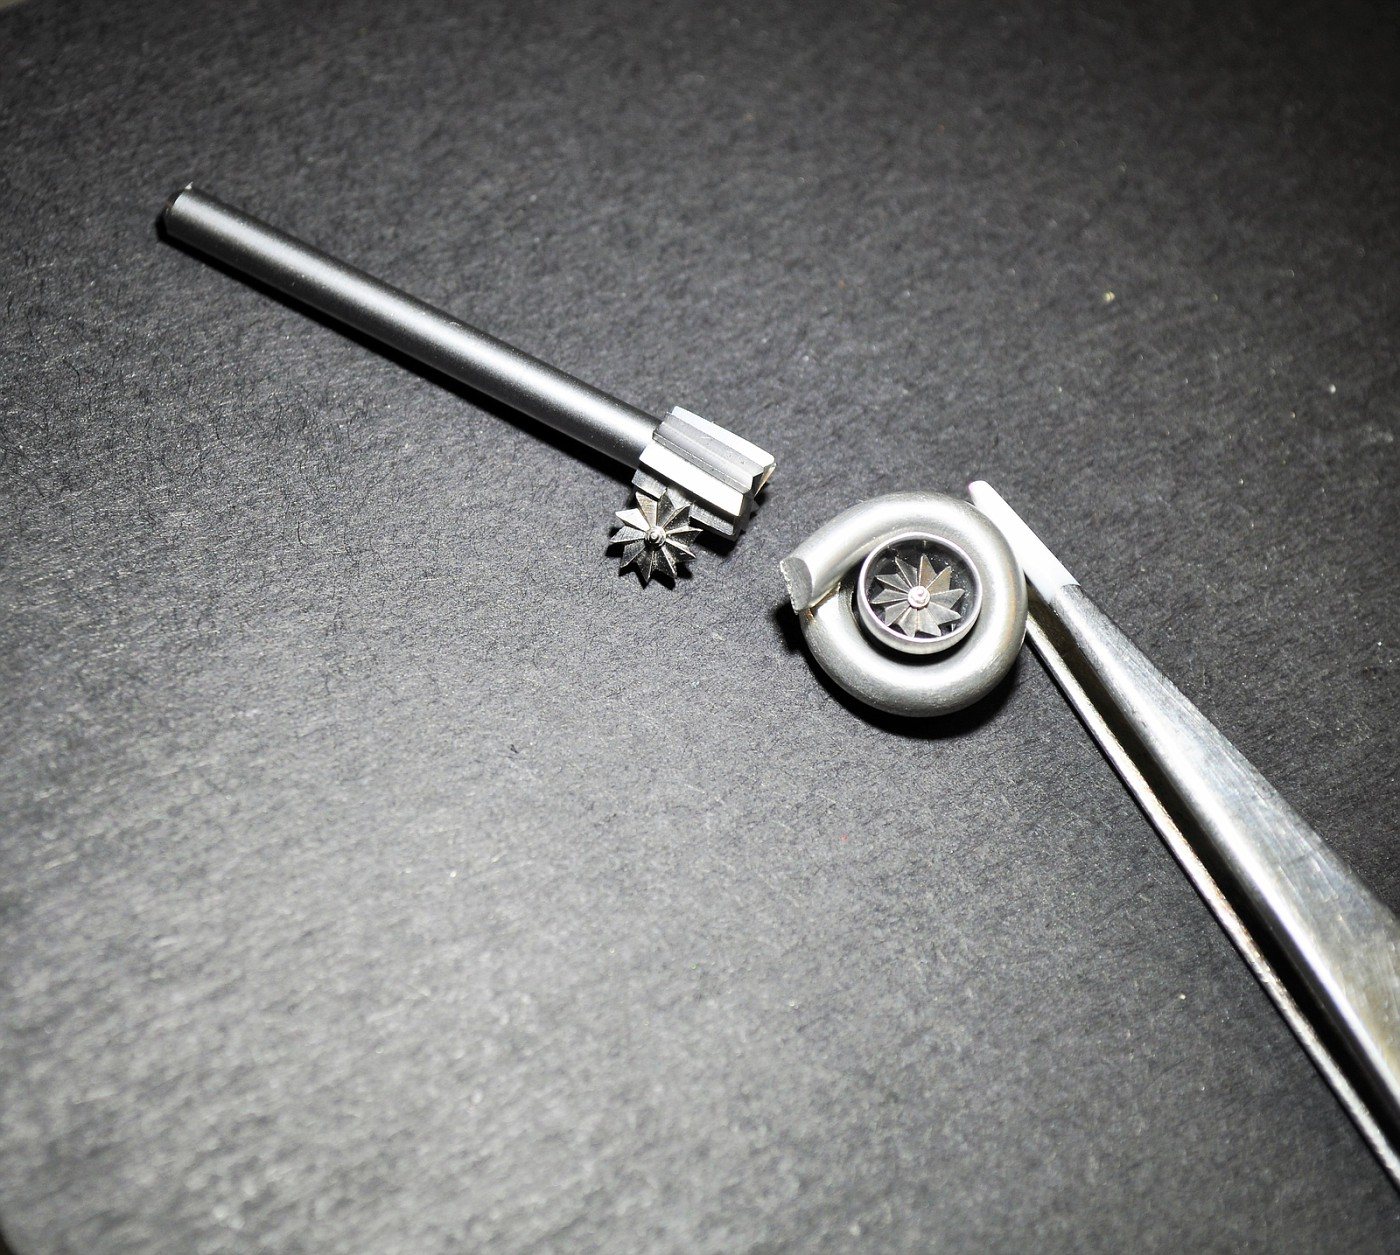
Twin Turbo Coyote Pro Mod - Turbo Impellers Updated Pics 7-23
Codi replied to Codi's topic in WIP: Drag Racing Models
Oh so right there Brad......drill bits were worthless and went thru 2 end mills & 4 jewelers cut-off blades (they're reasonably cheap thankfully) to do them. -
Wow, just wow! Gorgeous car sir.
-
Haven't poked my head in on this one for a while, my loss. Super Dann.....I like the details you're picking out and bringing them to our attention. Nailing it. cheers, tim
-
Nicely detailed Jason..........really nice. cheers, tim
-
Twin Turbo Coyote Pro Mod - Turbo Impellers Updated Pics 7-23
Codi replied to Codi's topic in WIP: Drag Racing Models
Thanks fellas, sorry bout' the very late reply to your comments. I got the bantam body painted matt black on the inside and primered the outside in white so I can finish the paint when the weather decided to take a turn for the worst. Even though I live in Pa. it's more like Louisiana right now. So much rain and humidity that I had to set the car aside. So I thought I'd try to come up with a suitable facsimile of a turbo impeller. I took a dremel high speed cutter, milled a hole out in the center and cut it off with a jewelers cut off wheel. Bit of cleaning up and I think they're good to go. The mock-up pics are just messing around as an fyi........the turbos themselves will be better I promise. cheers, tim
-
1/16 Scale Army Vega Funny Car - Finished 10/14/2018
Codi replied to Mooneyzs's topic in WIP: Drag Racing Models
Who doesn't look forward to your updates Chris? (rhetorical of course.........we ALL do) This car is just going to dominate at any show you enter it. Deservedly so. cheers, tim -
Side by side by side Dragster builds...Kemp-Teresi-Sobak
Codi replied to ClayK's topic in WIP: Drag Racing Models
Amazing detail no matter what scale you're building in John. Nicely done. Looking forward to any and all of the 3 musketeer posts on this thread. It's been fun to watch. Thanks guys. Tim -
You do such nice work Leonard. Car looks great and having seen your previous builds, this one will be no exception. cheers sir!
-
Appreciate the pics and link Steffen. Very nicely done sir and the attention to detail is fantastic. cheers
-
You haven't lost your touch Donn. Just stunning paint no matter what color, but flawless black no less. WOW! cheers, tim
-
Beautiful car/build there Dann. Nice pics too. cheers, tim
-
I do remember the car Dann. Most certainly follow along as I"m a sucker for scratch building. cheers, tim
-
1/16 Scale Army Vega Funny Car - Finished 10/14/2018
Codi replied to Mooneyzs's topic in WIP: Drag Racing Models
Exquisite -
Alfa Romeo 8C 2300 / Brass Build
Codi replied to Dougritt's topic in WIP: Other Racing: Road Racing, Land Speed Racers
This is fantastic to behold Douglas. Whether it stays here or gets moved to the Biz Boyz, I'll be sure to look for your future updates. Cheers, Tim -
Side by side by side Dragster builds...Kemp-Teresi-Sobak
Codi replied to ClayK's topic in WIP: Drag Racing Models
Nice one Clay........that paint looks like a lemon yellow lollipop.........perfect finish too. Cheers, tim -
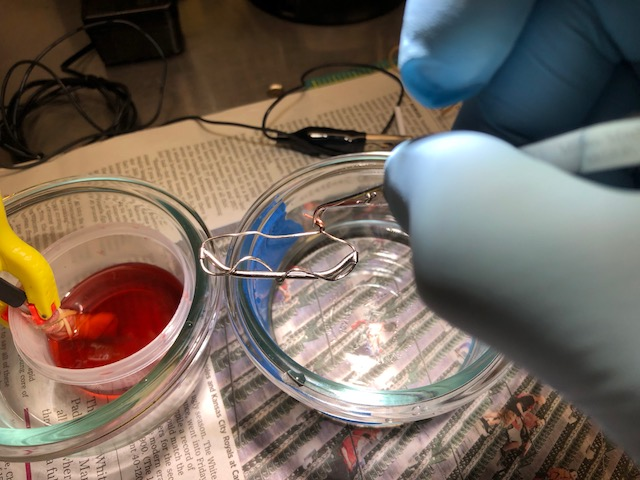
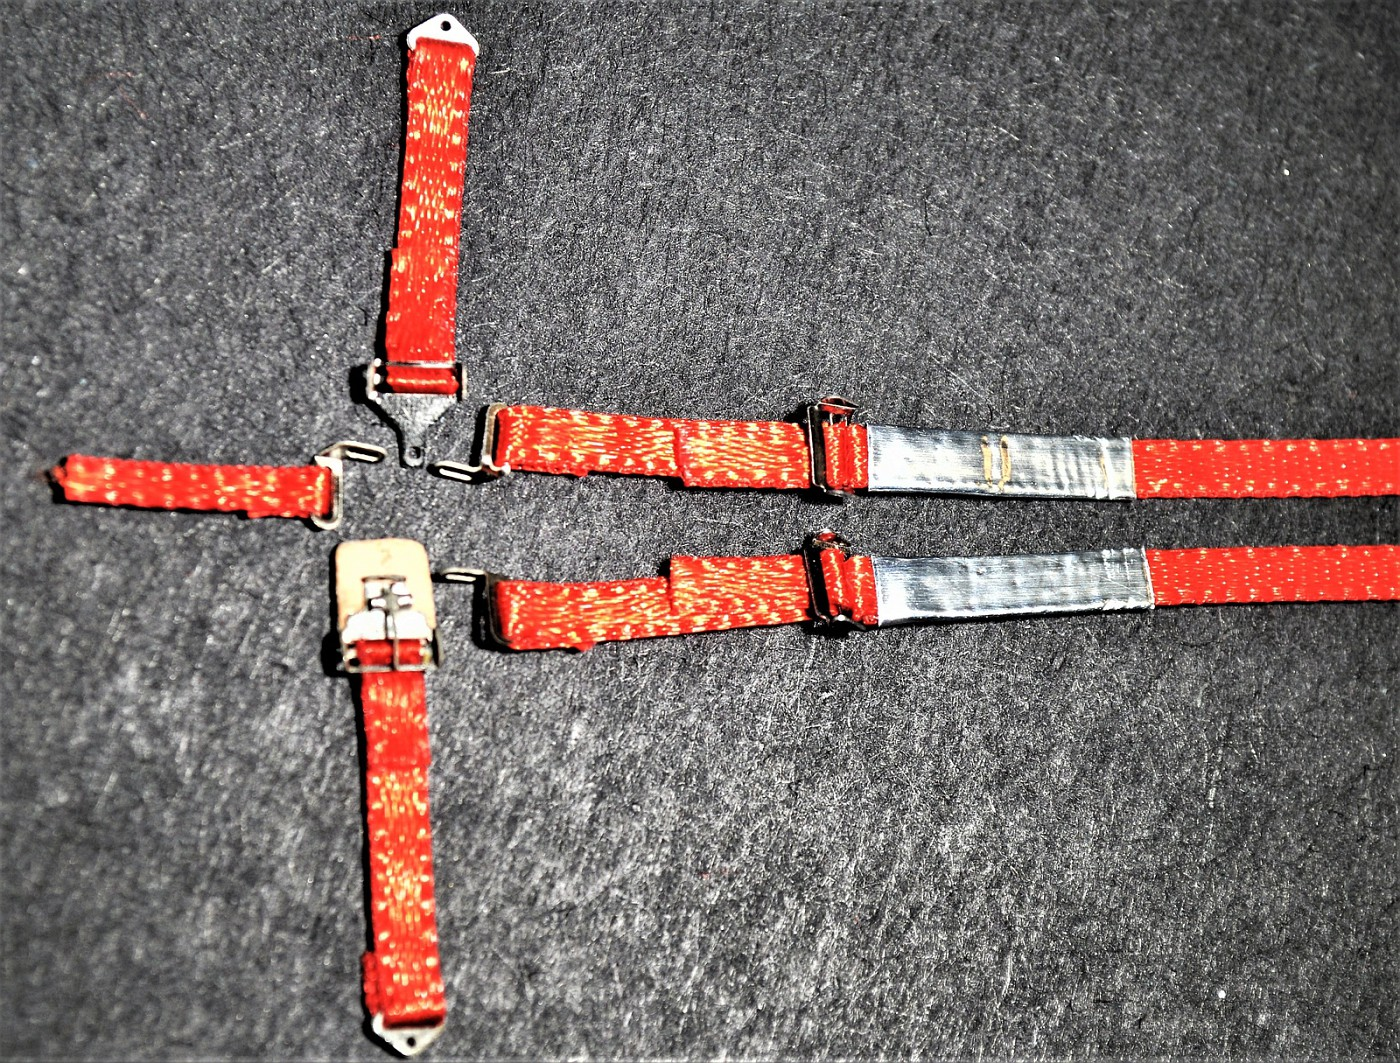
Thanks so much Dave & Chris............btw Chris, I pulled a bonehead on the belts and I'm re-doing them. I just didn't like how unrealistic they looked on the seat, they just wouldn't lay down properly because of the material I chose...............soooooo, I looked at YOUR belts on YOUR Vega funny and saw you used medical tape to get the right look and drape. I pulled out my medical tape and "colored" it with a red sharpie and presto-change-o, a properly looking belt. Yes, I'm re-doing them as we speak. Should have checked your thread in the first place or at least given ya' a call. Gotta go, those belts aren't going to re-do themselves. cheers
-
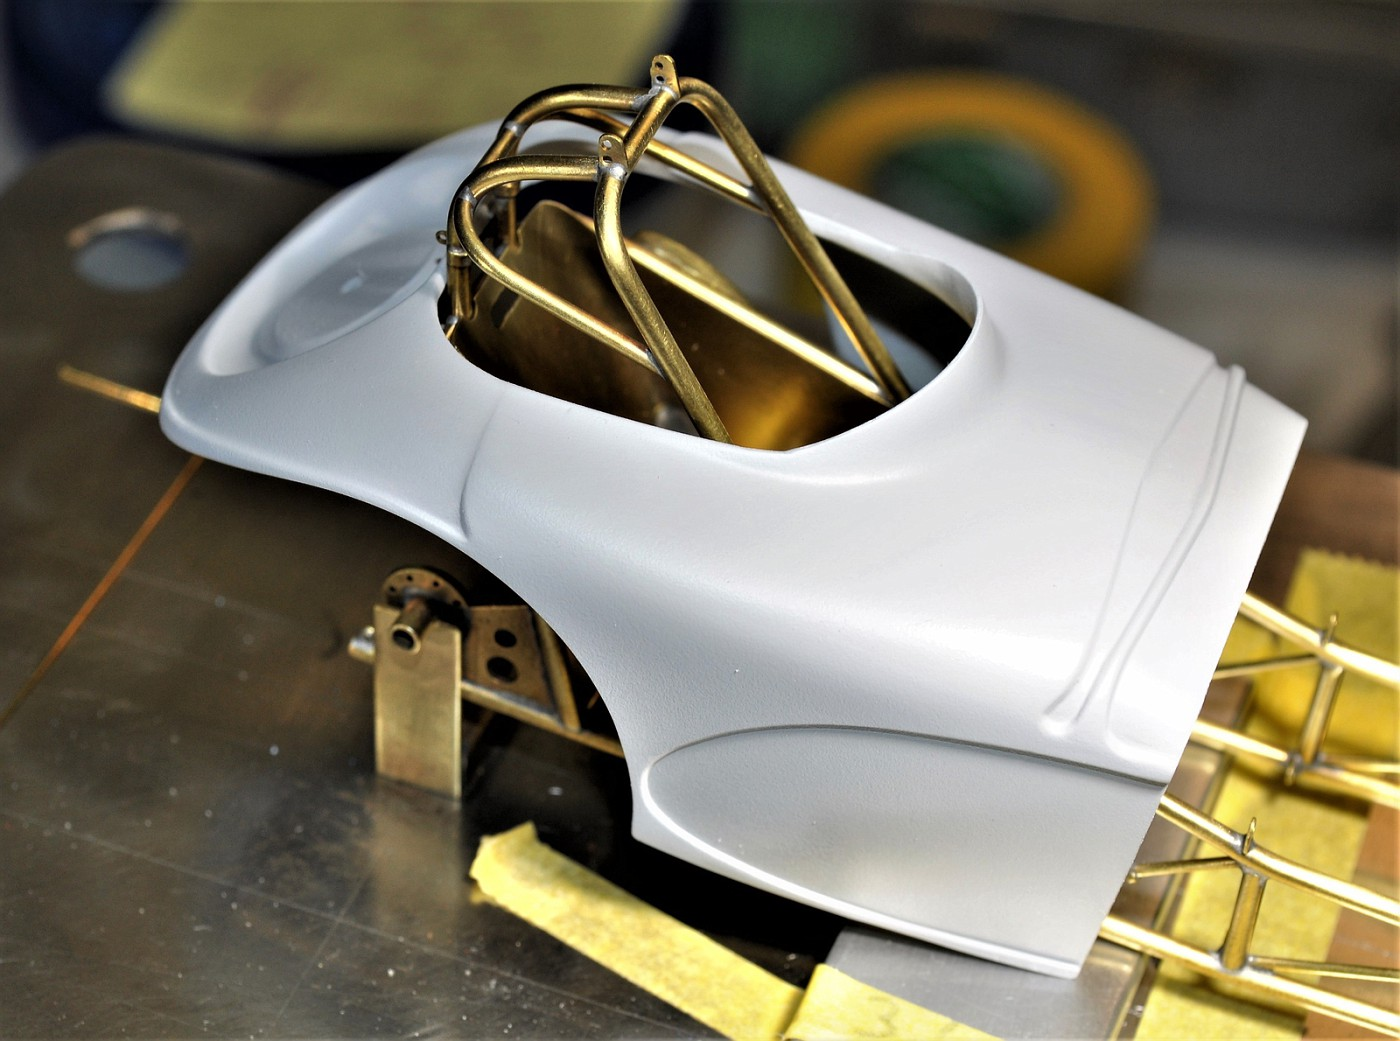
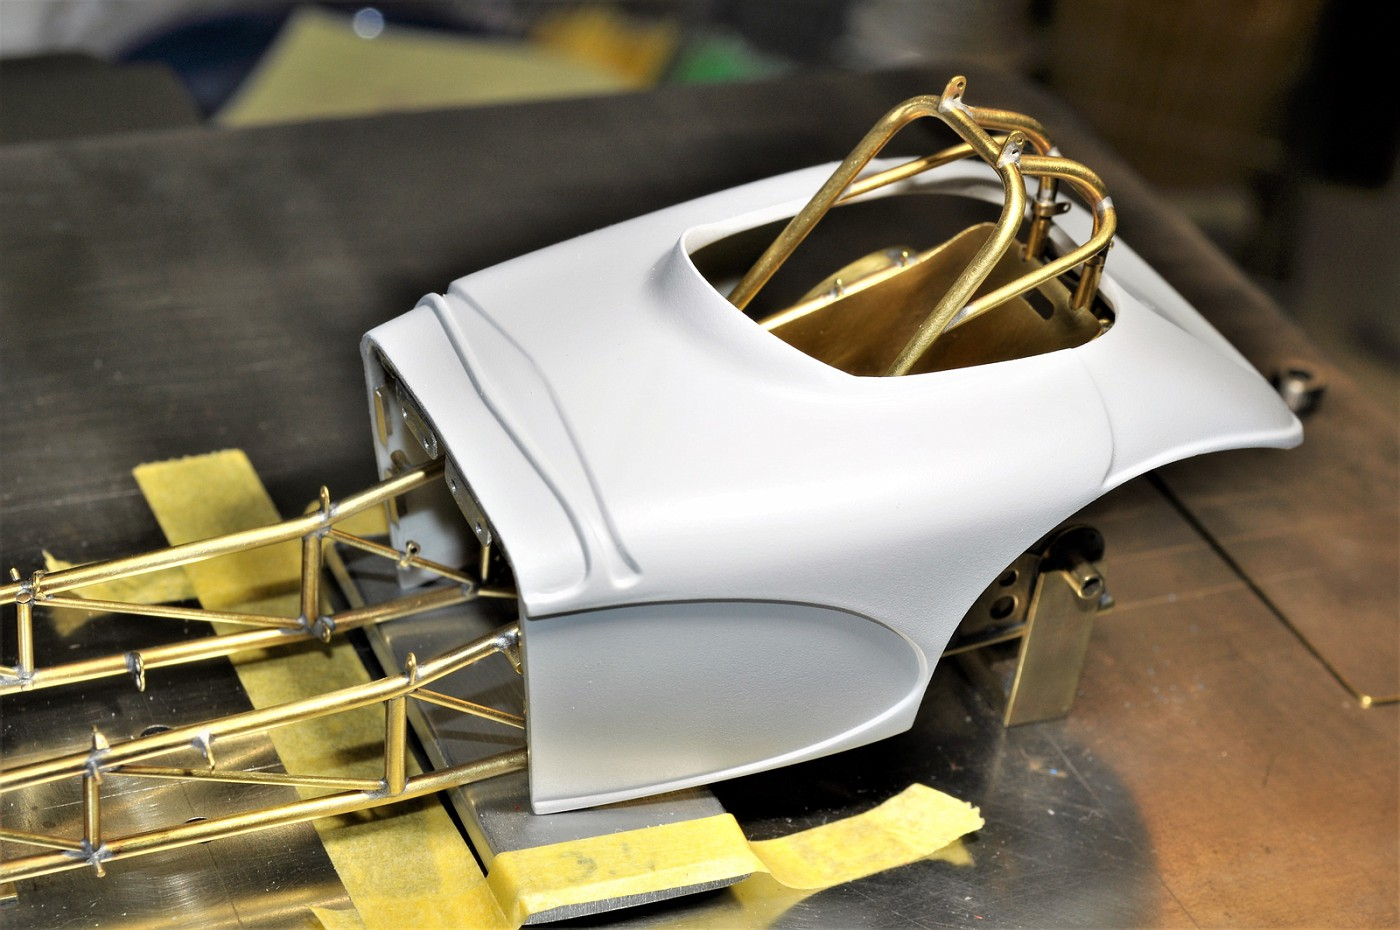
Thank you fellas...........and for all of you that celebrate the day........HAPPY FATHER'S DAY! I spent part of mine on the bench today finishing up the belts. Earlier last week I experimented some more with the Caswell copy chrome plating and found a way that will work for the axle and other teeny brass parts. I took an earlier spare axle and wrapped it with copper wire and dipped it. Few minutes later I called it done and was pleased with it. Should work out well on all the upcoming plating that I'll do for the car. Along the way I did decanted some Tamiya primer and shot it through my airbrush. Couldn't be happier in that there was ZERO bleed through of my earlier bondo/body work. this time. It's ready for final primer and paint top side. I'll primer the under body and paint it flat black before doing so. Lastly, as noted I wrapped up the 5 point belts. They're a bright red that didn't show too well in my photos. I'm going to try to nickel plate the seat and if it turns out then they should contrast really well. Next up is cleaning upu the chassis and then primer and paint. btw, the PE belt hardware was from Futurattraction. Cheers everyone! Tim My Caswell Chrome experiment Primered body Finally, the belts..........these took me an entire week to complete as an fyi.........Teresi would have started AND finished an entire car in that amount of time.... Just have to add the Simpson decals. I did find a piece of leather at Hobby Lobby that I skived to get it suitably thin for the waist belt also.