Codi
-
Posts
2,675 -
Joined
-
Last visited
Content Type
Profiles
Forums
Events
Gallery
Everything posted by Codi
-
Chris, like you I can't wait either to see it in the chassis. Still chipping away though. Thank you as always. John, and my best regards to you too this New Year. Oh, and I found your latest project on the forum. NICE! Rickard, wish I knew how to say "thanks & Happy New Year" in Swedish, but I don't unfortunately. Best regards to you too!! Hi Eric, nice to have you stop by and check it out.......now I have to explore the forum to find what YOU have been working on. They're always imaginative and well executed. Happy New Year! So, with a little advice from my friend Dave (comp1839) on how to machine mild steel, I re-did the brake rotors in steel. The alum. ones I have/had just weren't cutting it and I didn't want to paint them per se. The new ones are better. Spent the last 2 days detailing the calipers and here are a few pics of a quick mock-up of them. Just 1 or 2 days worth of "dumb" stuff to wrap up and then I'm starting the actual final assembly. Cheers everyone! The caliper support brackets aren't in these pics btw. The brake bleeders are from RB motion and the assorted bolts used are RB and T2M. The pics are just mock-ups and are not glued together yet.

-
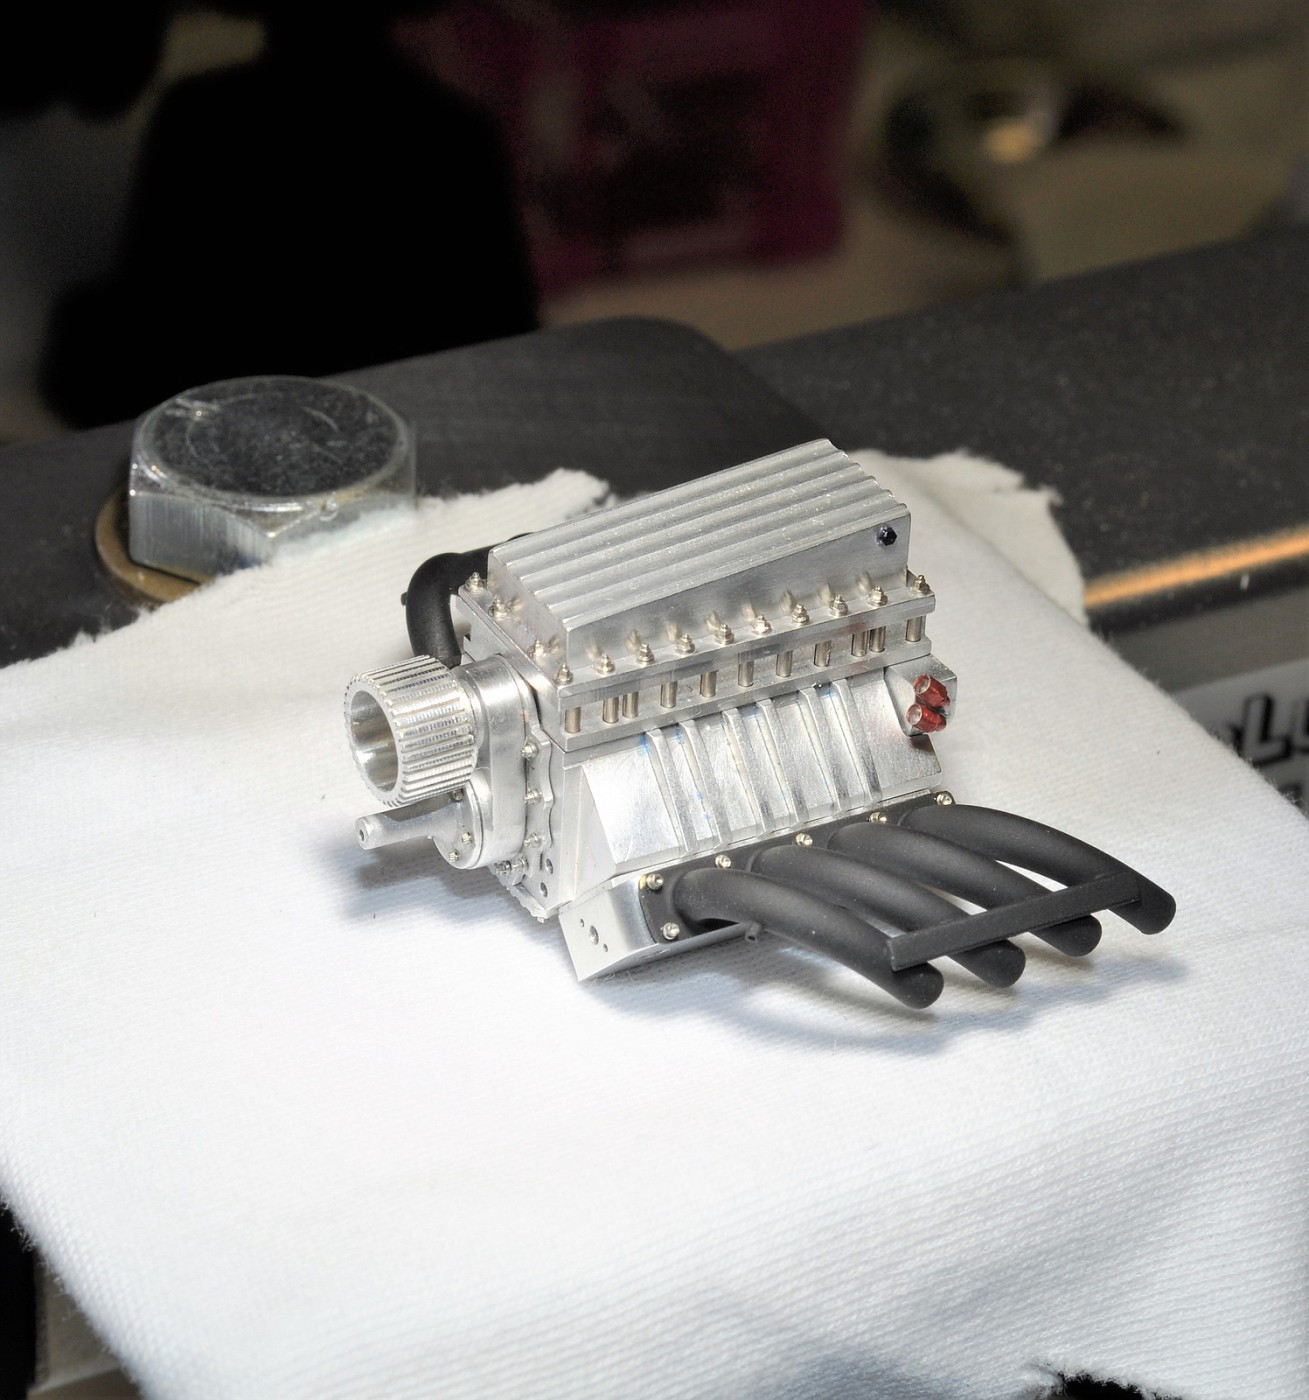
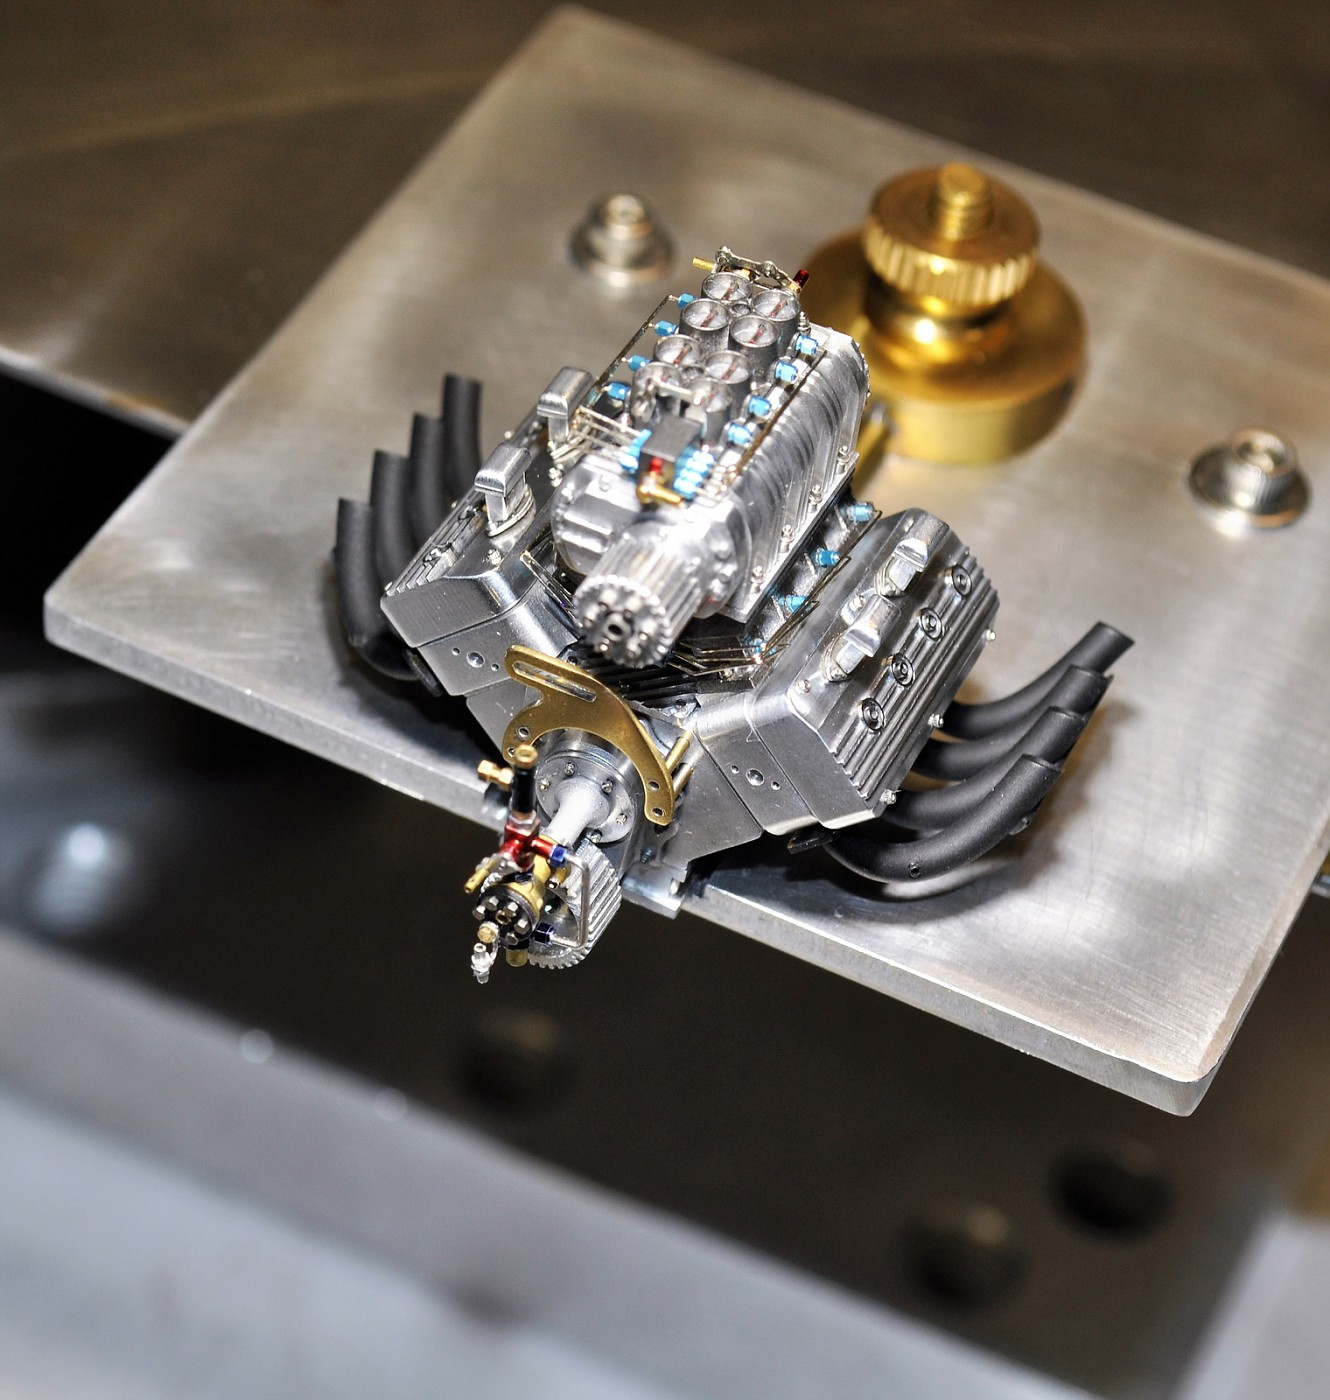
You guys have me really stoked to keep moving ahead on the car. Thank you for ALL of your kind comments. I completed detailing the headers (2 water neck lines to be affixed when I attach the headers near the end of assembly) and took some pics of the bottom end of the motor. You'll only be able to see some of the detail of course when it's completed so I wanted to snap a few pics now and share. To each and every member of the forum, may you and your family have a Happy & Prosperous New Year!!
-
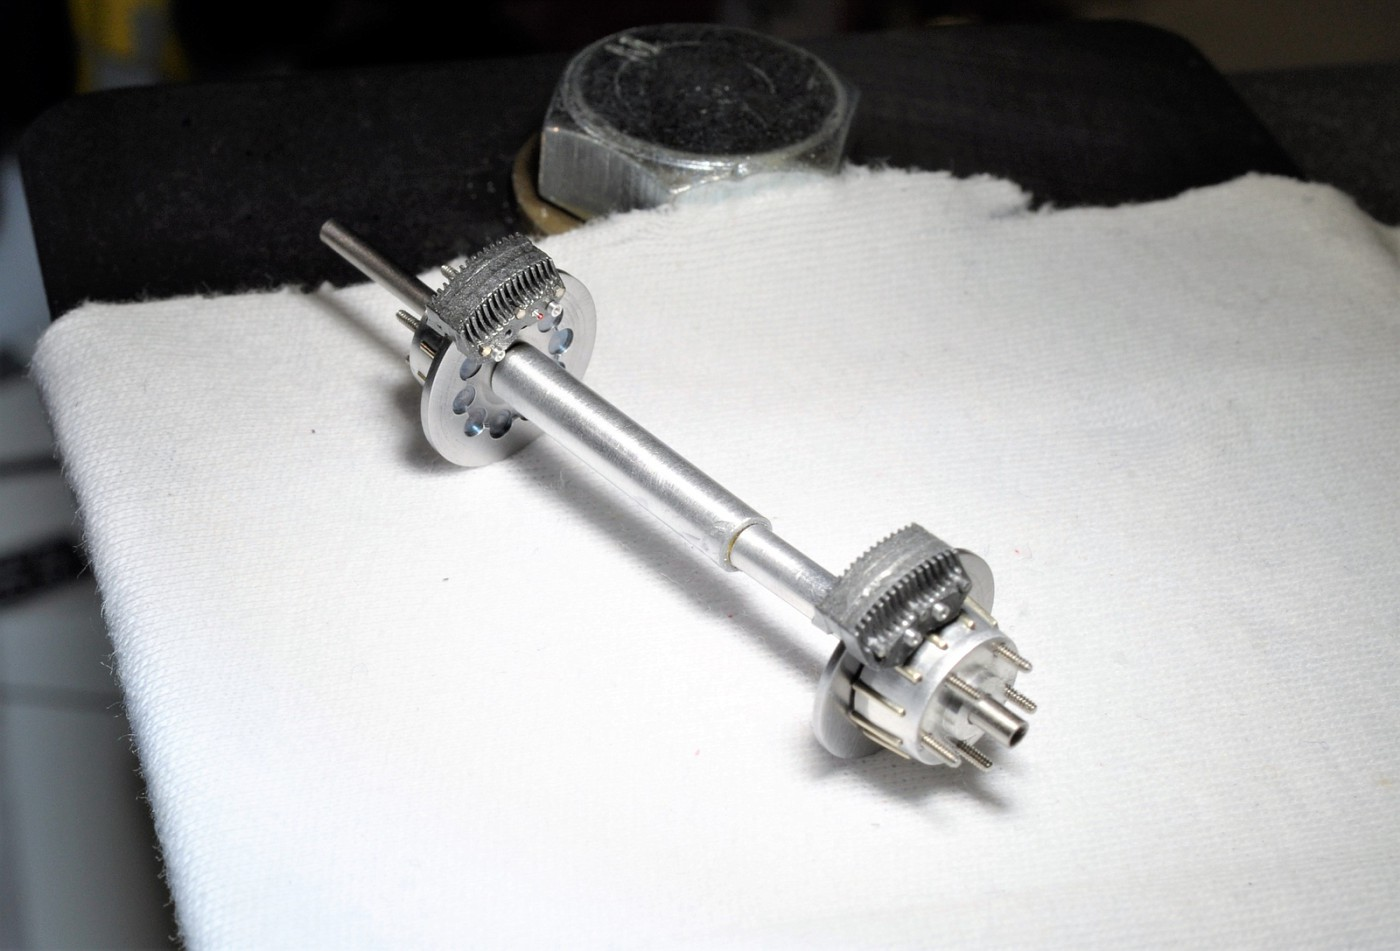
Got the trans detailing completed & a few mock-up pics and you'll note the bolt that fell out that secures the shifter.....I left it off for assembly purposes. To all that celebrate it..........MERRY CHRISTMAS.........and a Happy New Year! Cheers, Tim The entire trans is 1 1/8" long.
-
Dave is a stone cold master machinist. There, I said it. To see his work in person is something truly amazing and I consider myself lucky to have seen it AND to have learned from one of the best. Did I mention he's a great guy to boot? Cheers, Tim
-
You brought that one to life. Love it sir. cheers, tim
-
Exquisite Dann!
-
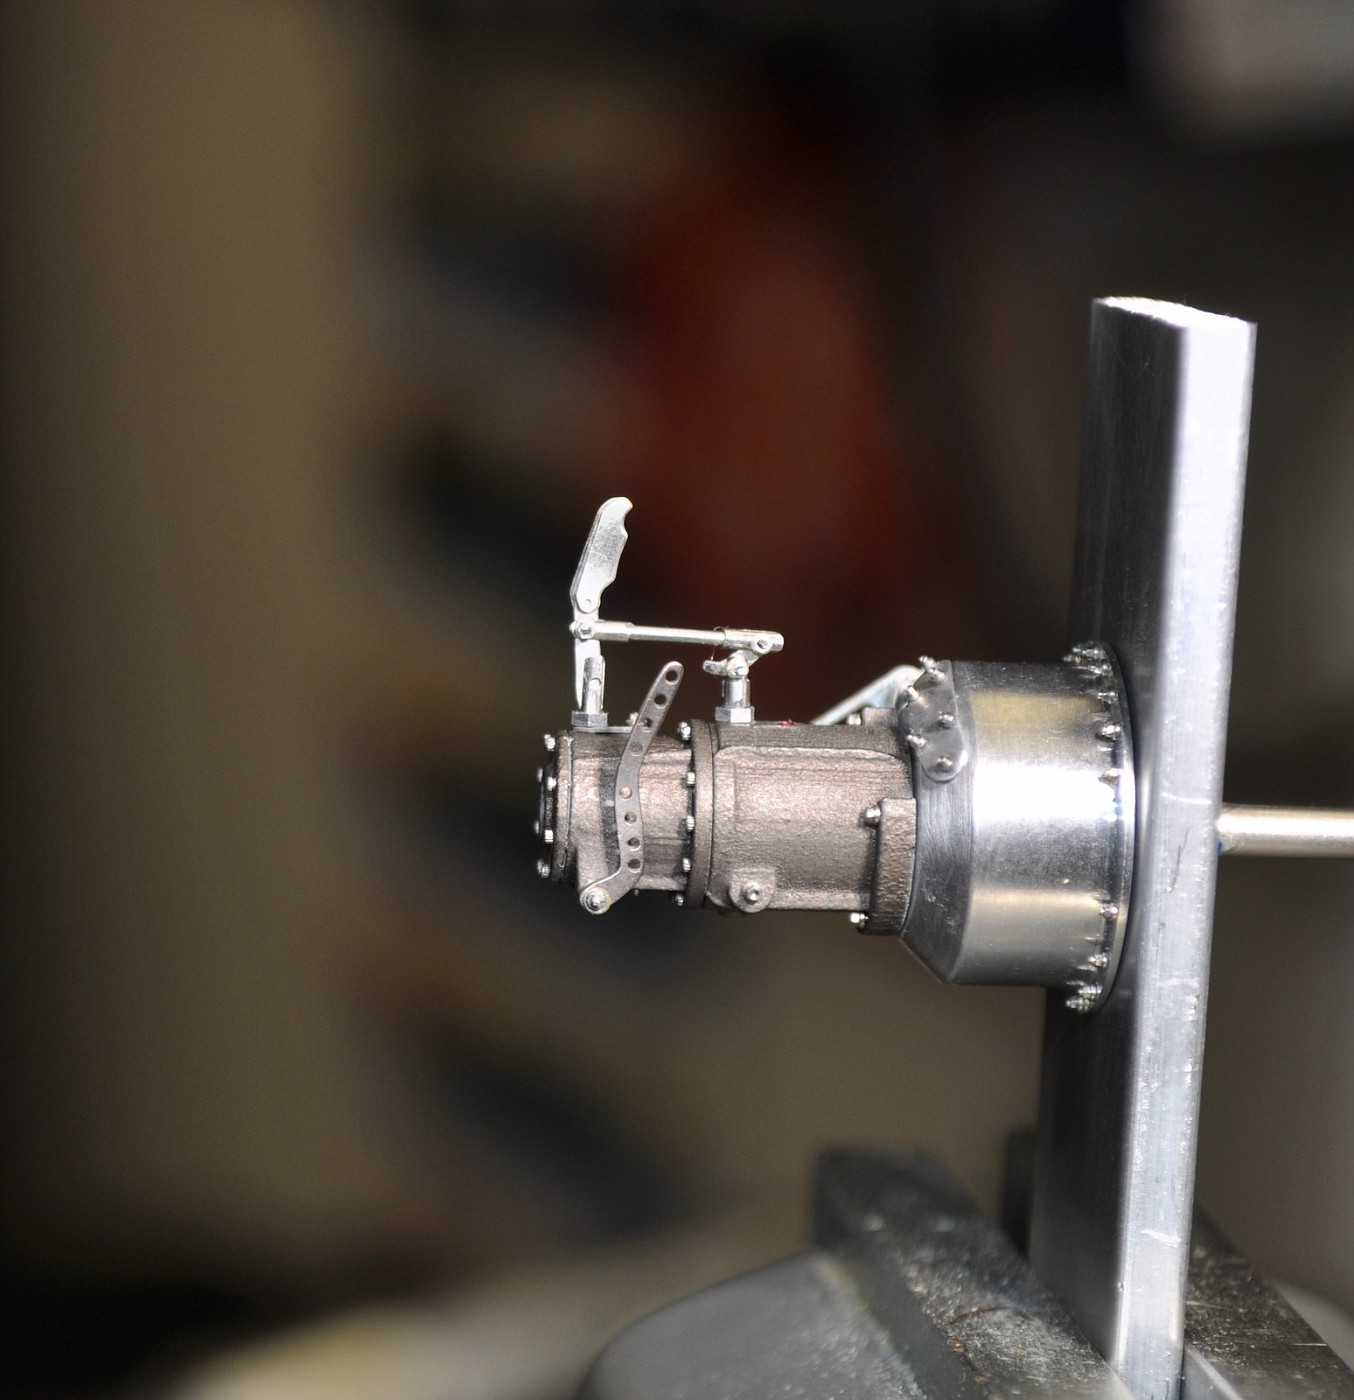
Hey Art, posted a note to your Foose truck. Really sharp my friend. What's that I hear, oh it's the brass chassis midget calling your name...... Chris, puppies ARE fun and a bit of work too as you well know. I'll send you a pic of her soon. Hopefully you'll get some time to work on your drawings for the next build. If I can be of any help when it comes to your mill, let me know.............if I can't help I know Dave sure can!!! Gotta mate the trans to the bell-housing next and confirm how I'm going install it in the car. The shift lever will interfere with the installation of the seat, so............these w pics are just for mock-up of the levers and linkage. I spent a couple days just detailing the pieces with the bolts. I used the method that Chris shared to get the proper length of the bolts (the bolt, not including the head is .5mm in length) by drilling holes in a .5mm thick piece of plastic, inserted the bolts, cut them off from below, super glued them and finally sanded them down. Chris documented it beautifully on his Vega Funny. The trickiest part was installing the tiny bolts after cutting them down. No tweezers will do, so I took a steel scribe that has a sharp point and was magnetized. I picked each up and positioned them into their respective holes and then super glued them from the back side. Hopefully it makes sense. Another day or so and this thing will be done. btw, the entire trans is 5/8" in length. Cheers, tim
-

Black Cherry Revell Foose FD-100
Codi replied to Art Laski's topic in Model Trucks: Pickups, Vans, SUVs, Light Commercial
I missed this one Art. Seems I always forget to check out the trucks on the forum. I like what you did on this one, very very NICE! cheers, tim -
Hey Dave, dropped you an email. Thanks for checking it out! cheers Chris, hope things are coming along for you on your next build(s). We're still anxious to see what's percolating. btw, we just got another G.Shepard pup. Stella, 8 weeks old. She's a keeper and puts a smile on my face every day even though I really didn't want another dog. Hope you find your next pup soon! Thanks too for the sentiment. As slow as this build has been, I get a bit fatigued from it. I know you know. RANDY! nice to hear from you, period. I've got to call you sometime to get caught up and I trust all is well. Your comments are a bit too much but I know they're sincere. Thank you. Barry, well, I've actually thought of just donating it to their museum if they'd want this one. As you've probably figured out already, I'm so slow at this point but it will get done. The trans is almost assembled/detailed. Like the rest of it, it's tedious in nature. I'll share some of the assembly tricks / challenges I used to assemble it when I post pics next week. Some of Mooneyez tips were helpful and I'll be sure to point those out too. Art, nice to hear from you too as always. I do miss what you've been working on as of late..........anything you'd share? Cheers fellas! Tim
-
1/16 th scale Micro Nitro Wire Lacing tool
Codi replied to Adhsdad's topic in WIP: Drag Racing Models
Now THAT'S precision. Great job on those Bob. I have a 1/25th lacing tool that I bought from micronitro several years ago. Never used it. Won't be of any help to Errol however. Sorry, tim -
I'm an acknowledged Ford guy but I'm sure glad I checked out this car of yours. It's just oh so right in every way. Nice nice car Bruce! cheers, tim
-
I'm a sucker for those kinds of details Andrew. That bezel is simply perfect. Always a treat to check your progress. cheers, tim
-
Thank YOU Dann for the time you took to document the build. It IS a great build and I learned a lot of neat tricks from the methods you shared. The car is so realistic looking but after going back and looking at all the close-ups a person has to be struck at how clean the build is. No mean feat with all that detail. Congratulations !! cheers, tim
-
Thank you Daniel & Ray. Before I put the engine aside again to move onto the trans, I shot it with the headers. 1 pic for ya'. cheers
-
I really really like the lines and rake you put on the body Wayne. The decals are awesome too..........did you do those yourself? cheers, tim
-
John, just checked out your radial engine truck thread again. You're embarrassing me.......... and thanks for the note too! Pete, nice to hear from you and completely concur with your thoughts on tools. One could have the best of the best but it truly comes down to the person using them. There are certainly many builders who don't have access to such tools but still turn out just stunning results. Just takes longer from my experience. Thanks too! Brad, Ray and Bruce, thanks so much too for the thoughts / comments on the build. Dave, hey man, been far too long since we last got together. Kids are outta school for Christmas break soon and maybe we can find some time to get caught up then. That'd been fun. btw, saw what you've been working on for your 37'............those struts are phenomenal. Chris, thank you sir and look forward to your future builds as well. Jason, appreciate your checking it out.........I've been looking for a scale fuel can but can't find any............gonna have to make one I guess. Cheers to all, tim
-
So much to soak in John. I just looked at your start date of this thread and just can NOT understand how you do this at such a high level and yet so quickly. Far too many details to compliment you on, but obviously another stunning Teresi build. cheers, tim
-
Duh.........Andrew, it's been a while since I checked in here and boy have I missed a bunch. Admire the creativeness throughout the thread and the scratch-building is just fantastic. I've learned some great tricks / methods already from you and hope you take your time on the car so I can learn even more. Cheers, tim
-
Sorry for the delay in replying to your comments. Hope everyone had a Happy Thanksgiving! Only the brakes/calipers and trans to detail before actual assembly now. The manifold hard lines are complete. These pics are just mock-ups. Cheers, Tim
-
John, I just had to do a bing search to see the pics of the real thing. You ARE killing the details of this. I want to buy stock in the faux rivet decal company (Archer I think? ) as you're going to need sheets and sheets of them. I never realized how much detail there is in the real one. This has to be one of the ambitious builds you've undertaken to date. I especially like your eye for design details, 1 example being the seat support and it's shape/curvature that you picked up beautifully. Such a build! cheers, tim
-
Hi Dann, just wanted to say like the others that this is just glorious in these most recent pics. All the little details you added add up to one tremendous car as one. Congrats! Tim
-
Hi John, the only thing I can add is this photo of the car that I have.........note it's a "short" car unlike Waynes. What's really odd, or interesting to note is that my pic and yours are similar in that they're the shorter car but the stars are different if you look closely. On my pic below you'll note the blue wraps around like Waynes but his stars are completely white like yours. In my pic it shows what looks like gold medallions commemorating specific polices departments or agencies inside them. My best guess and choice would be to wrap the blue around like Waynes pic and add white stars over the hood, trunk and down the sides as they show. Hope I didn't confuse the matter and it's of some help. I tried to pick out the class and number on the windshields to see if I could get a match but I can't make out the ones on the window on other than it looks like 440 (can't make out the class however) whereas your pic is 335 a/fx class & Waynes is number 2041. If I come across any others I'll be happy to share. Cheers, Tim
-
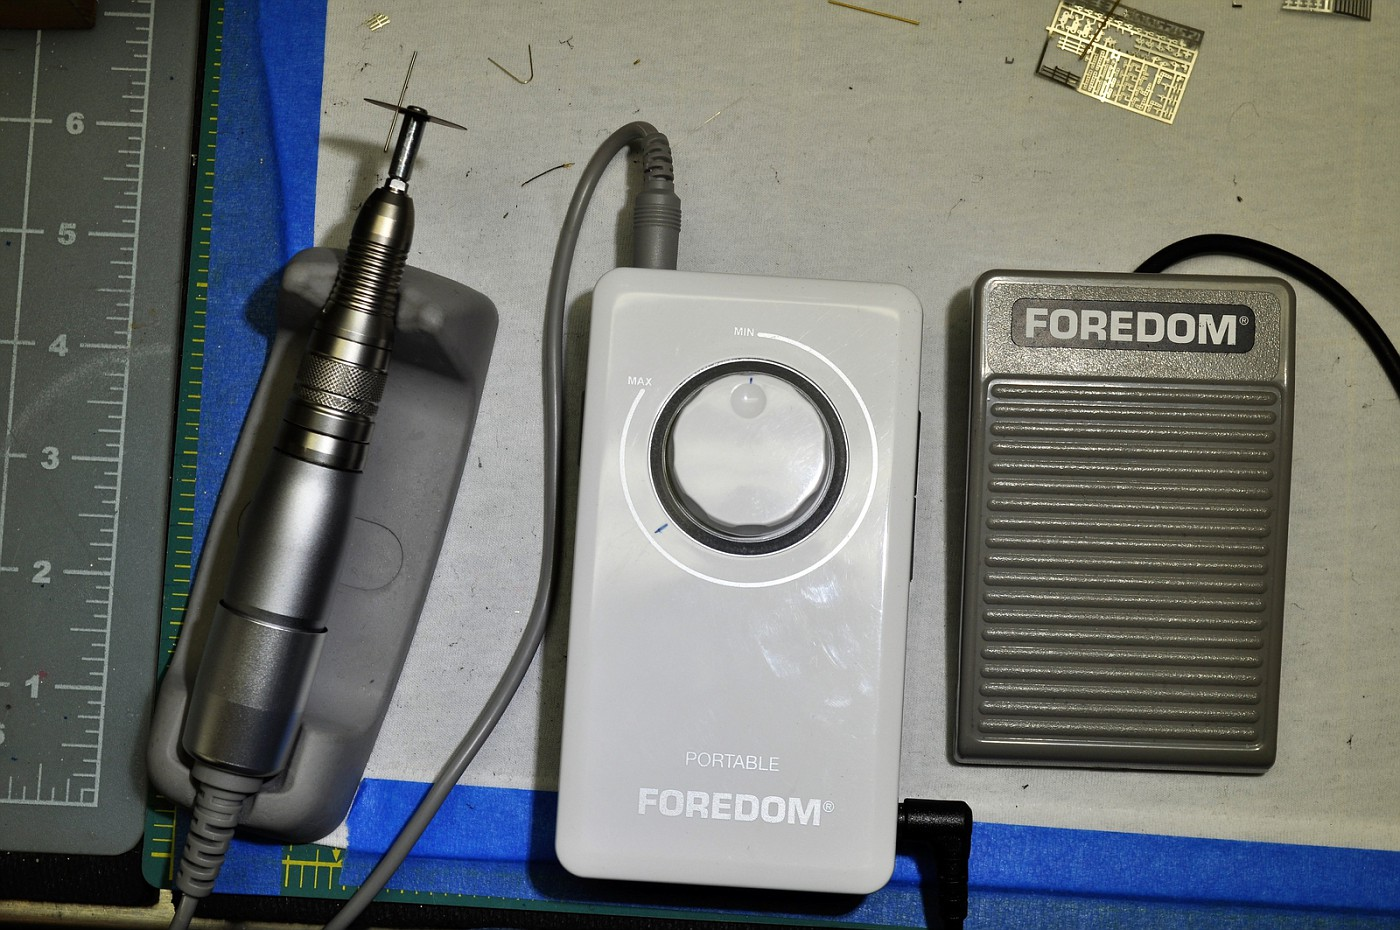
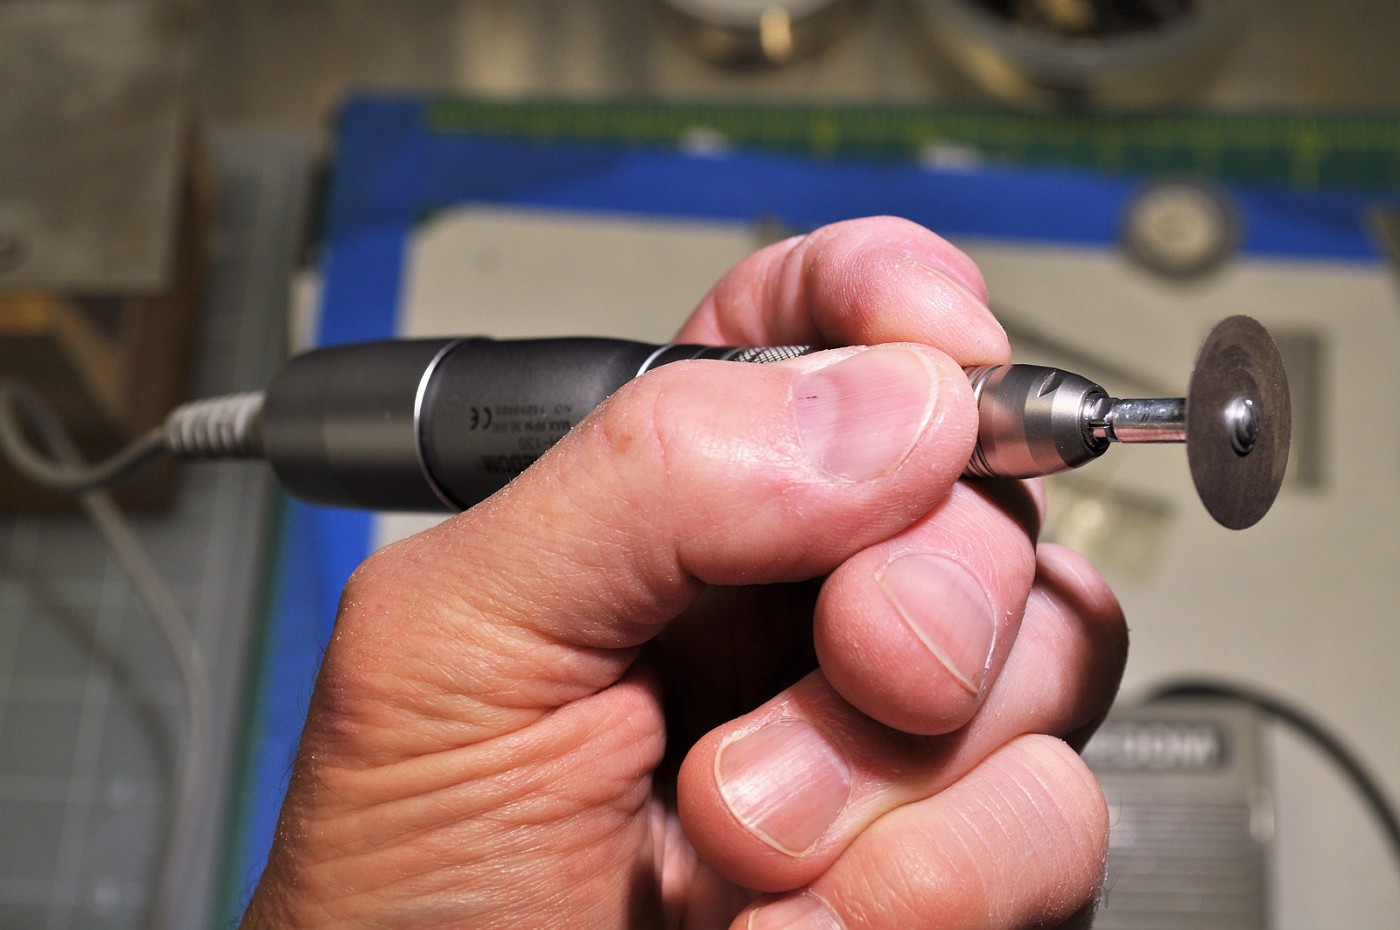
Thanks everyone, here's bit of info on what I used to make the cover btw. I did not machine the cover as an fyi. I found a piece of P-etch (it was a fire bottle tab of some sort) that I cut down by hand. The tool I used was one I bought when Dremel decided to drop the Stylus from their line-up. Rio-Grande sells quite a few hand tools geared towards the jewelry trade. Fordham is a company that makes a wide range of hand drills / tools. The one I bought (the MH-130) they describe as a "micro" hand piece. I bought it with the portable controller and a foot pedal to adjust the speed. A special adapter goes back and forth from 1/8" to 3/32" (think Dremel sizes) collets. It'll spin to at least 25k. rpm and the construction is of dentist quality. The ball bearing / motor design is such that it'll spin at it's highest level with NO vibration at all. The bad news, of course, is the cost. I think I spent for all the bits and pieces close to $600. In this instance though, you do get what you pay for. When switching back and forth with my dremel's, it's like comparing a stone age axe to a tomahawk cruise missle. I made the cover using the Fordham with the jewelers cut off disc that you see in the pic. Flattered that you guys thought I machined it but this was shaped by hand. Hope this helps in some way. Cheers, Tim The original P-etch piece before any shaping. The Fordham hand piece
-
Thanks for the reply Wayne. I had to chuckle because everything you described (and where you spray) in doing the painting is exactly what I've been doing the past few years including the "fan behind me" trick. So at least I know I'm doing something right. I'll chalk it up to just poor "luck" and try it again. When it goes down properly, it is truly an amazing product. Thanks again! Tim
-
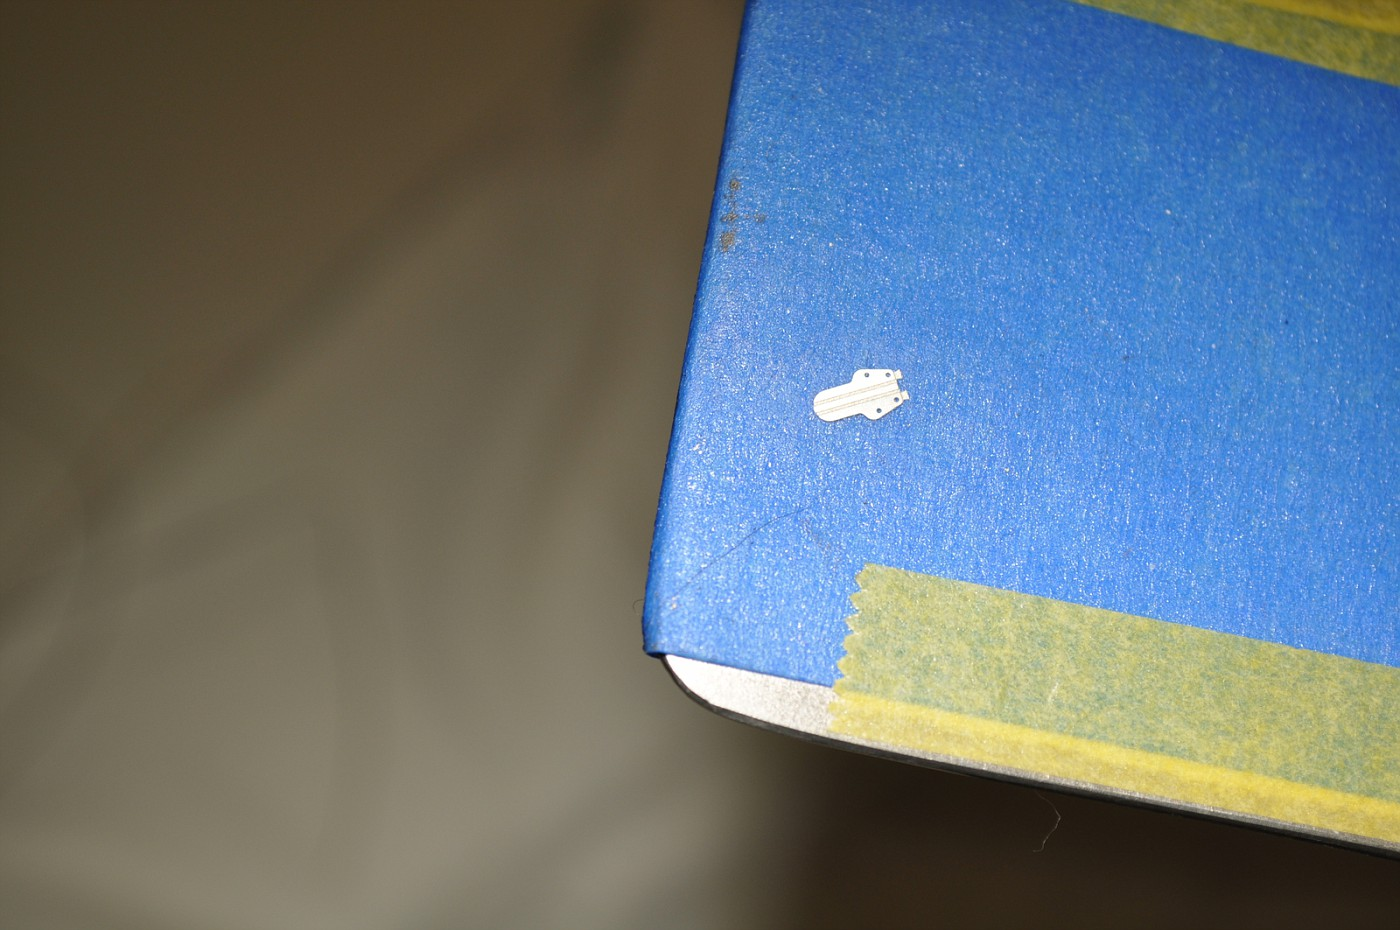
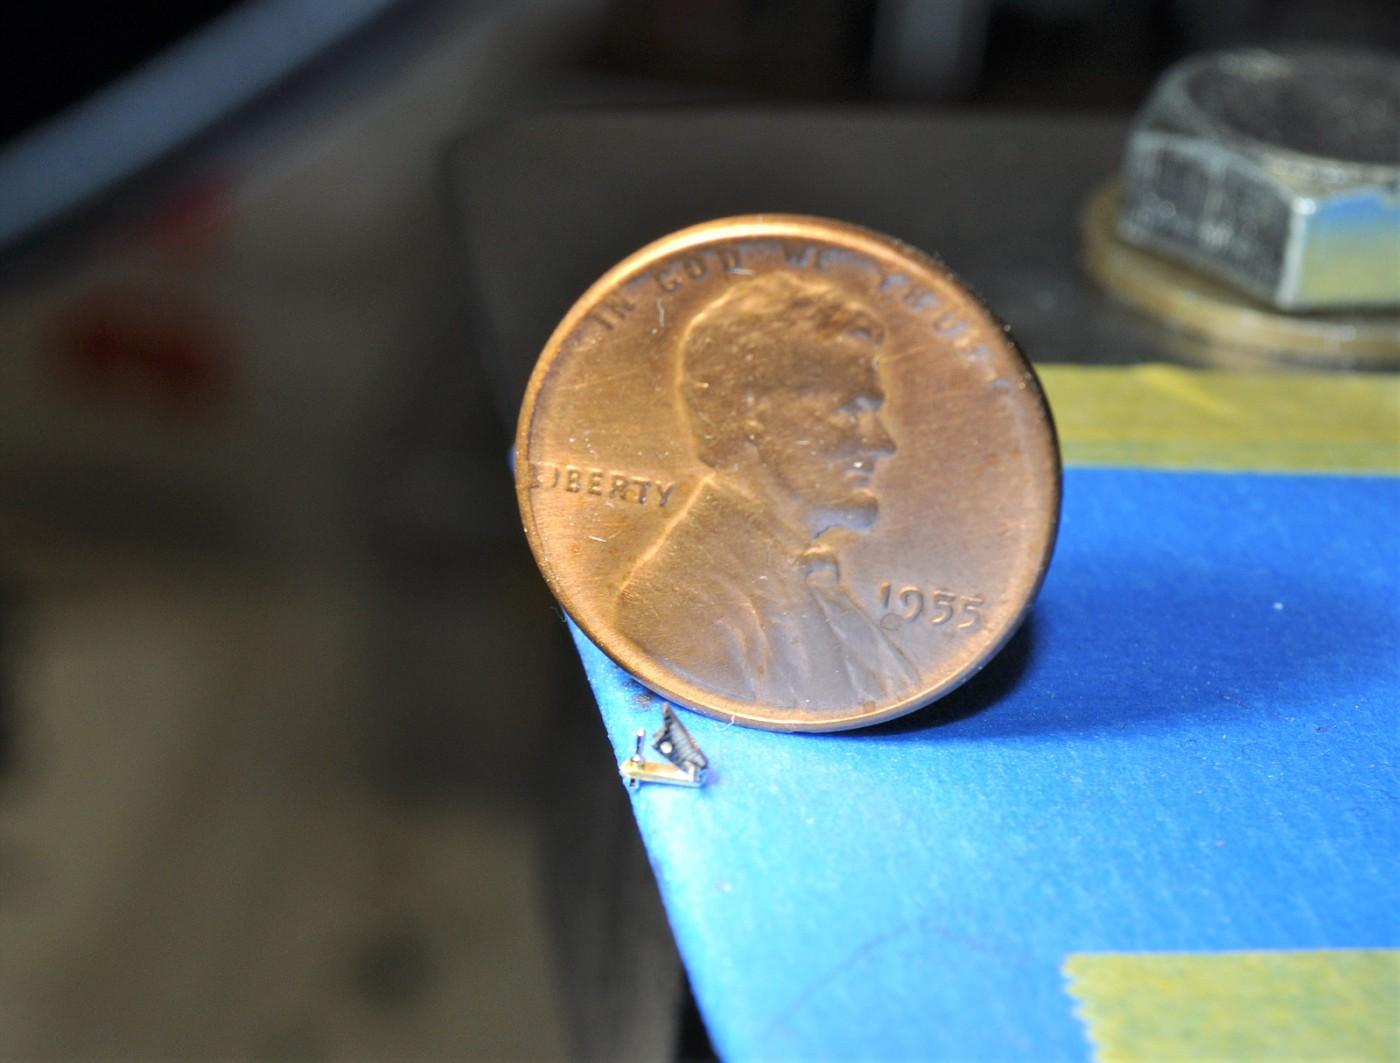
Thanks Chris for the compliment. The last few days I messed around with very tiny details. I added the wire to the mag which I wanted to replicate some pics I had as best I could which then led me back to the toggle switch on the small instrument panel. I came across some pics of Vietnam era fighter craft of toggle switch covers and wanted to have a functioning one. Don't ask me why.......there's no good reason. It's about 3mm in length. flips up as desired and I've got some detailing to do on it and then put it back onto the cluster. So, this post is for GoatGuy (Dave) who I ran into at the Larson Dragfest and we shared what we're working on. I told Dave if I could get it made, I'd post it just for him. Cheers from the loony bin. Tim Mag - the red wire will lead to the toggle switch. Cover Open & penny for scale Closed - really hard to get these pics clear as the camera just wouldn't focus on it.