Codi
-
Posts
2,675 -
Joined
-
Last visited
Content Type
Profiles
Forums
Events
Gallery
Everything posted by Codi
-
Sweet ride there Donn. I'll echo the others about the paint too...................a mile deep finish and oh so smooth. Beautiful sir. The grille that Bob made for the car really sets off the paint too. Cheers, Tim
-
Thanks for the "invite" Dave. I DO want a ride and will drop by this summer. Don't have any freckles but if you insist, I'll color some on before I stop by then we'll see what she can do. tee-hee Bill, "time or patience"...........it's a struggle on this build too for me at this point. That's why I'm determined to keep my head down and slog through it at times right now. This build will get done. Thanks !! Chris, thanks............as always for the support and sentiments. RandyD - always great to hear from you and your thoughts on the build. I'm STILL President of the RandyD. fan club and I've been telling all of your fans to just be patient a little while longer for updates on the Birdcage & GT-40............you sir have some truly unearthly skills. Cheers fellas!
-
Your builds are always so cleanly executed JC. This one is no exception........really nice sir. I almost dropped you a note to offer to machine that air cleaner you had on the car out of aluminum and I'm sorry I didn't. The scoop is perfect for the car but I'm wondering what the air cleaner would have looked like in metal subtly poking through the hood. I'm so far behind on the Bantam that it's probably better regardless. Congrats on a beautiful build. Now what you have sitting on deck is one of my favorite Fords of all time, will certainly follow along to see where you take it. Cheers, Tim
-

1/16 Scale Army Vega Funny Car - Finished 10/14/2018
Codi replied to Mooneyzs's topic in WIP: Drag Racing Models
Kudos to you Chris for moving forward with it. The updates look simply fantastic but I know full well where you are mentally at this point. Certain builds can be inspiring but maddening at the same time. They take on "epic" proportions. This build is one of them. The reward will be seeing it finished. Not winning awards (which it most assuredly will) but that you took the long journey to do the best you could do and executed it as well as you did. I've always admired others that take on such builds.....some that come to mind are Cato, RandyD, Dave(comp1839) and ClayK............no offense to anyone else that I didn't mention as there are many others that are on that list as well. Builds that stretch out continuously for several years (or longer) without interruption become a challenge to complete as you KNOW you can make or execute it and it takes on a life of it's own just to sit down and do it (you know you can, you just don't have the interest because there is no challenge..........a tedious task in other words).......the fun in scratch-building is the creativeness to conjure it up, figure out HOW to make it and then do it wherein it corresponds to your vision in the first palce. I guess what I'm saying is that I sympathize with you regarding where you are mentally with the car. However, you're now so close and when it's finished, you'll have something that no one will ever have and will serve as an epic "how to" for all of us modelers regardless of skill level. I've learned a lot myself from this thread and for that I thank you. Cheers my friend! Tim -
Force, glad you like the build. I admit the material takes longer to craft and the chassis will be painted but using the brass & stainless steel lets me get as close to scale in 1/25th that I can. Thanks again. GoatGuy, appreciate your thoughts too........nice to hear too how you're progressing with some of your new tools and look forward to seeing what you're making.........posting soon? Dave, well, you're just wrong. I saw what you've gotten done on the 37' and your new motor. Sheesh is all I got. I know the weather has been ugly here in Pa. but just think, you're only weeks away from getting that beast back out on the street. Oh yeah! cheers fellas!
-
Bob, thanks sir for the continued interest in the car...........I'm hoping everyone can be a bit patient yet as I entering the home stretch on it. ClayK, funny, I was just thinking about you and your Old Master build you had started. Hope you jump back on that at some point. Thanks as well for commenting and following along. Jesse(DaddyFink) that brief video made me lol. thanks for that one! A/FX(JC) thanks for commenting..........fan of your work as well, your builds are always super clean. Ace-Garageguy (Bill) Coming from an engineer, I truly appreciate your comments too. I think if given the chance I would have enjoyed a career in engineering myself. My daughter is going to pursue an engineering degree in college which put a smile on my face. Thanks again Bill. John (Mr. Teresi) "home stretch".............made me ponder that one and the only thing that comes to mind is my home stretch seems to be as long as the Bonneville Salt Flats....... I WILL get her done this year...........thanks too John. Scott, thanks for following and encouragement to finish this one. PeteJ. This one will see a few shows in her future....I'll let you know and it would be great to meet you too some day. Cheers to all, Tim
-
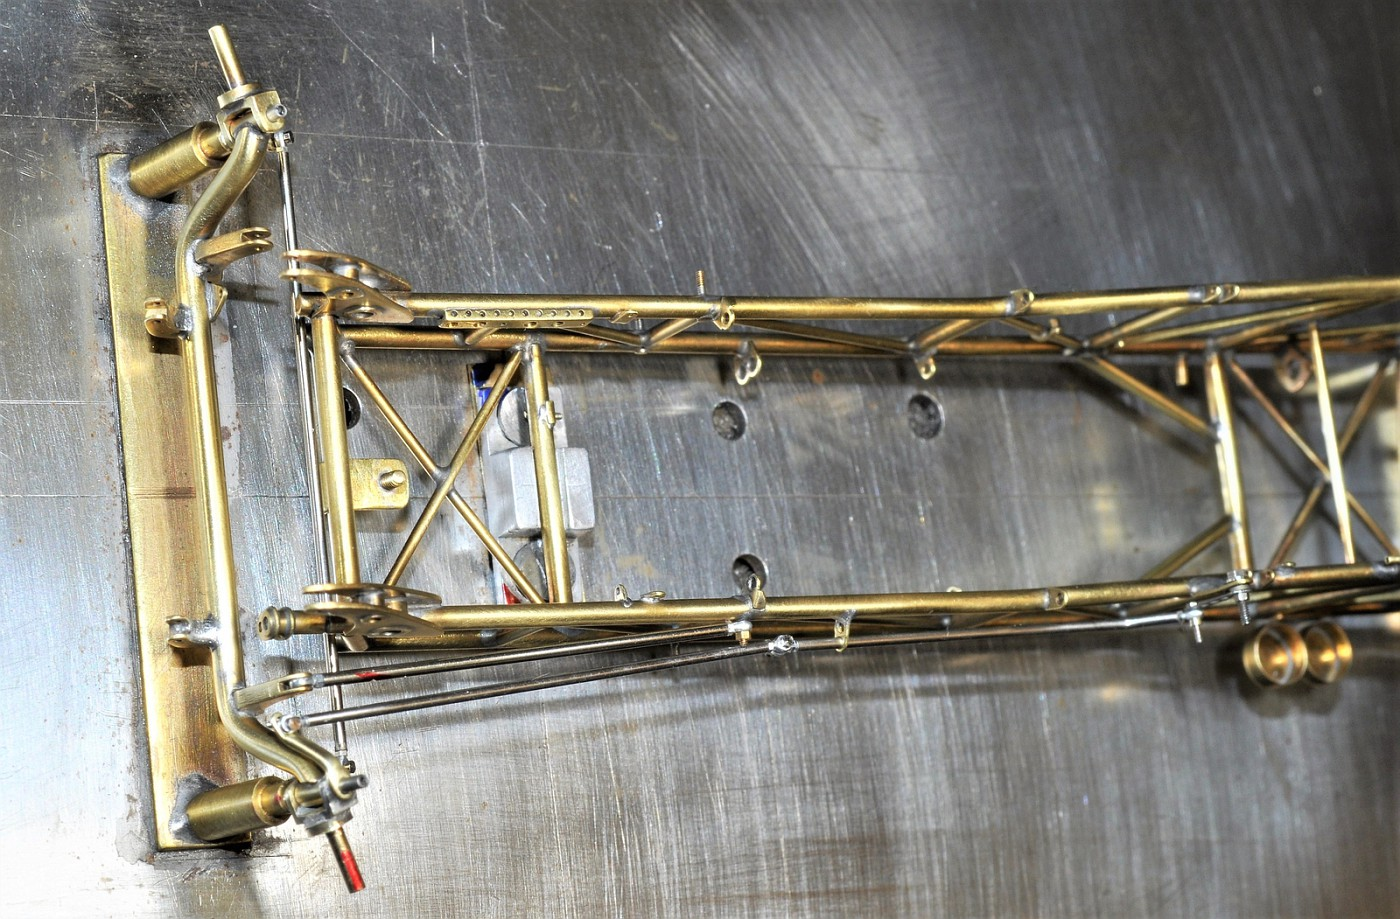
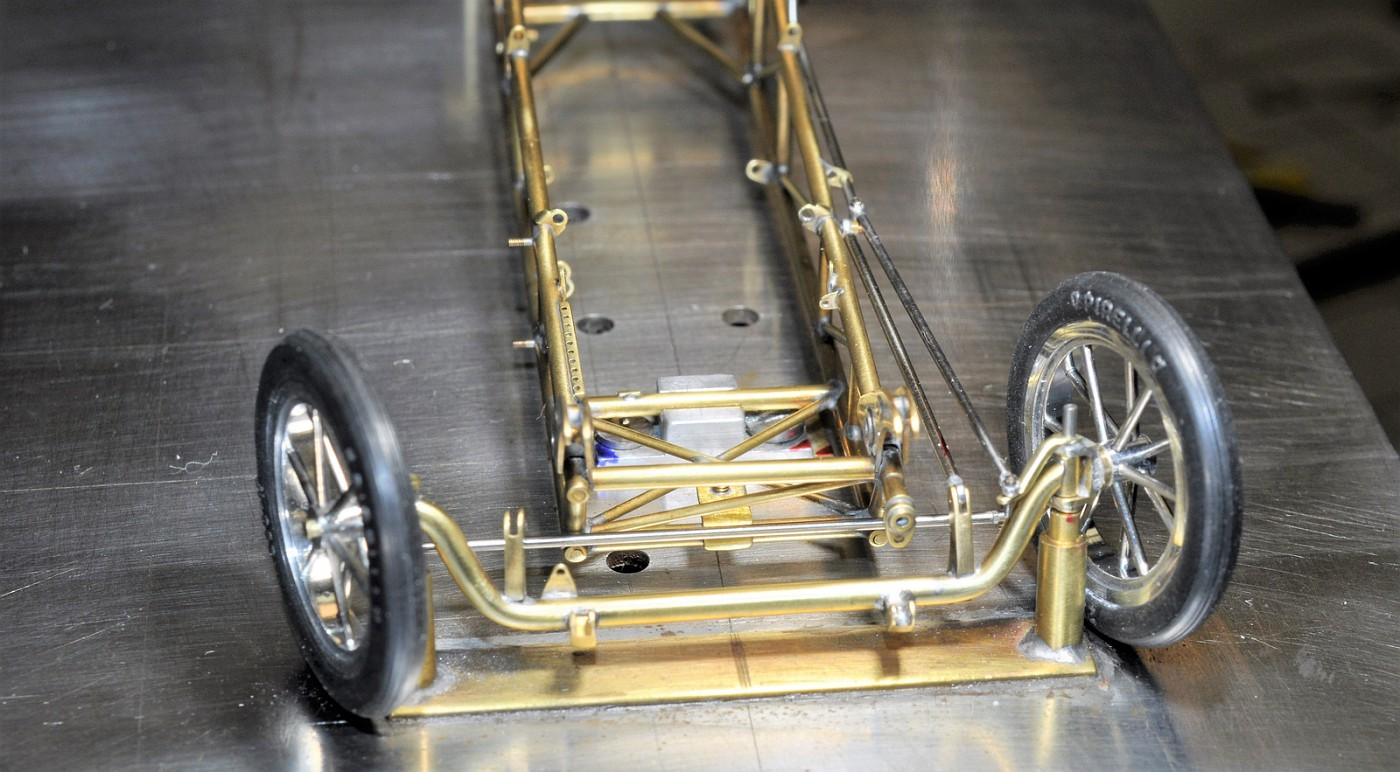
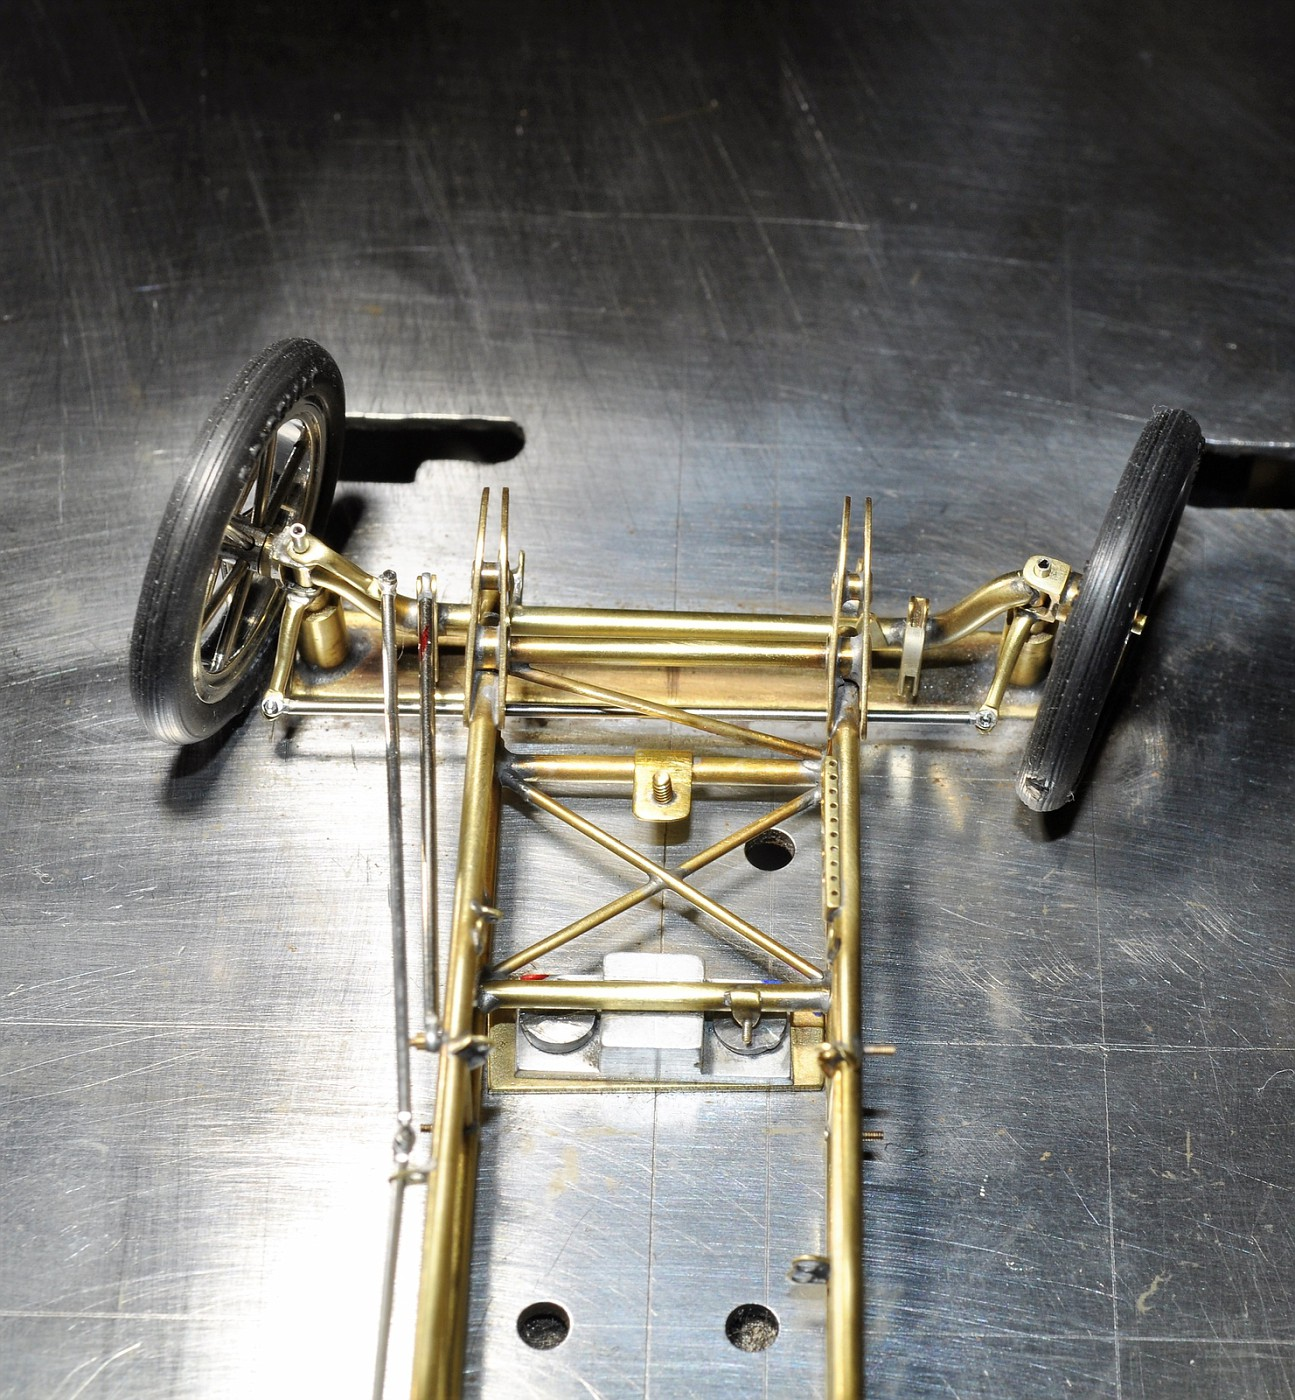
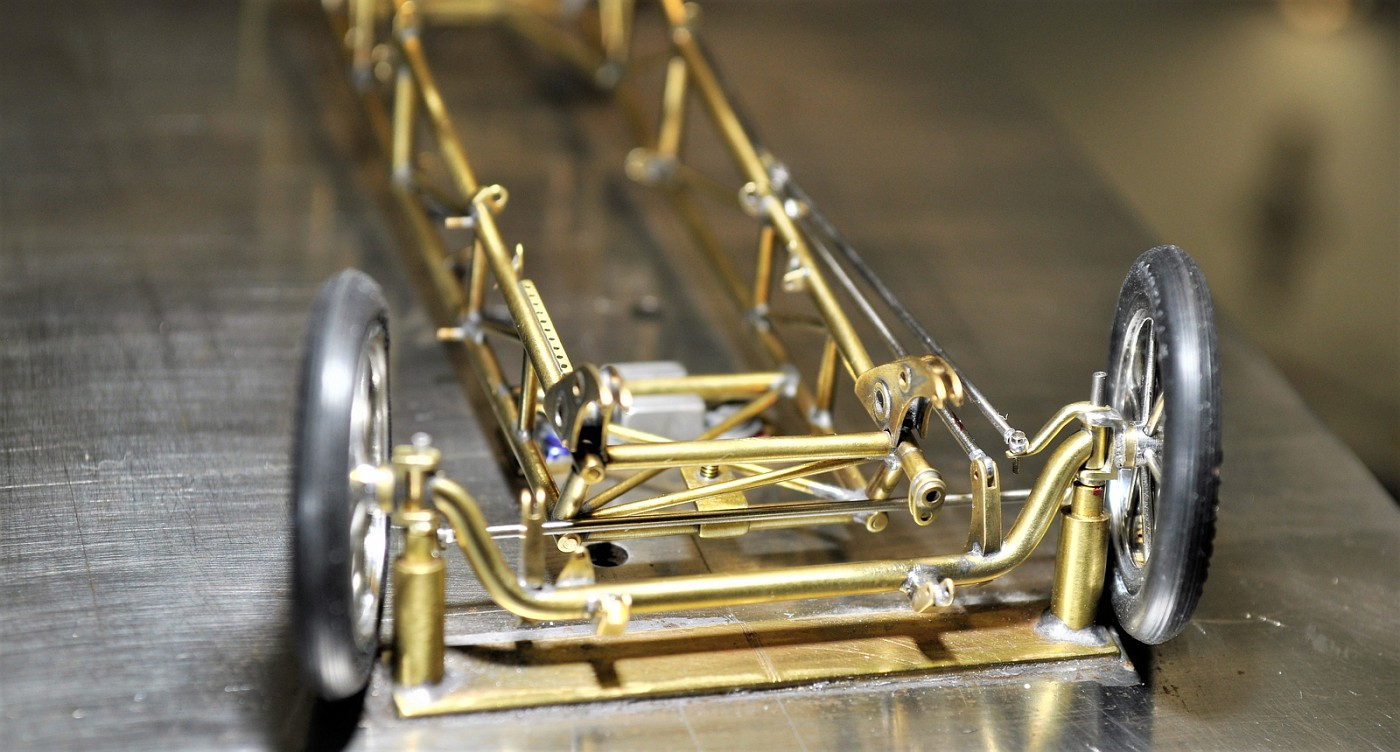
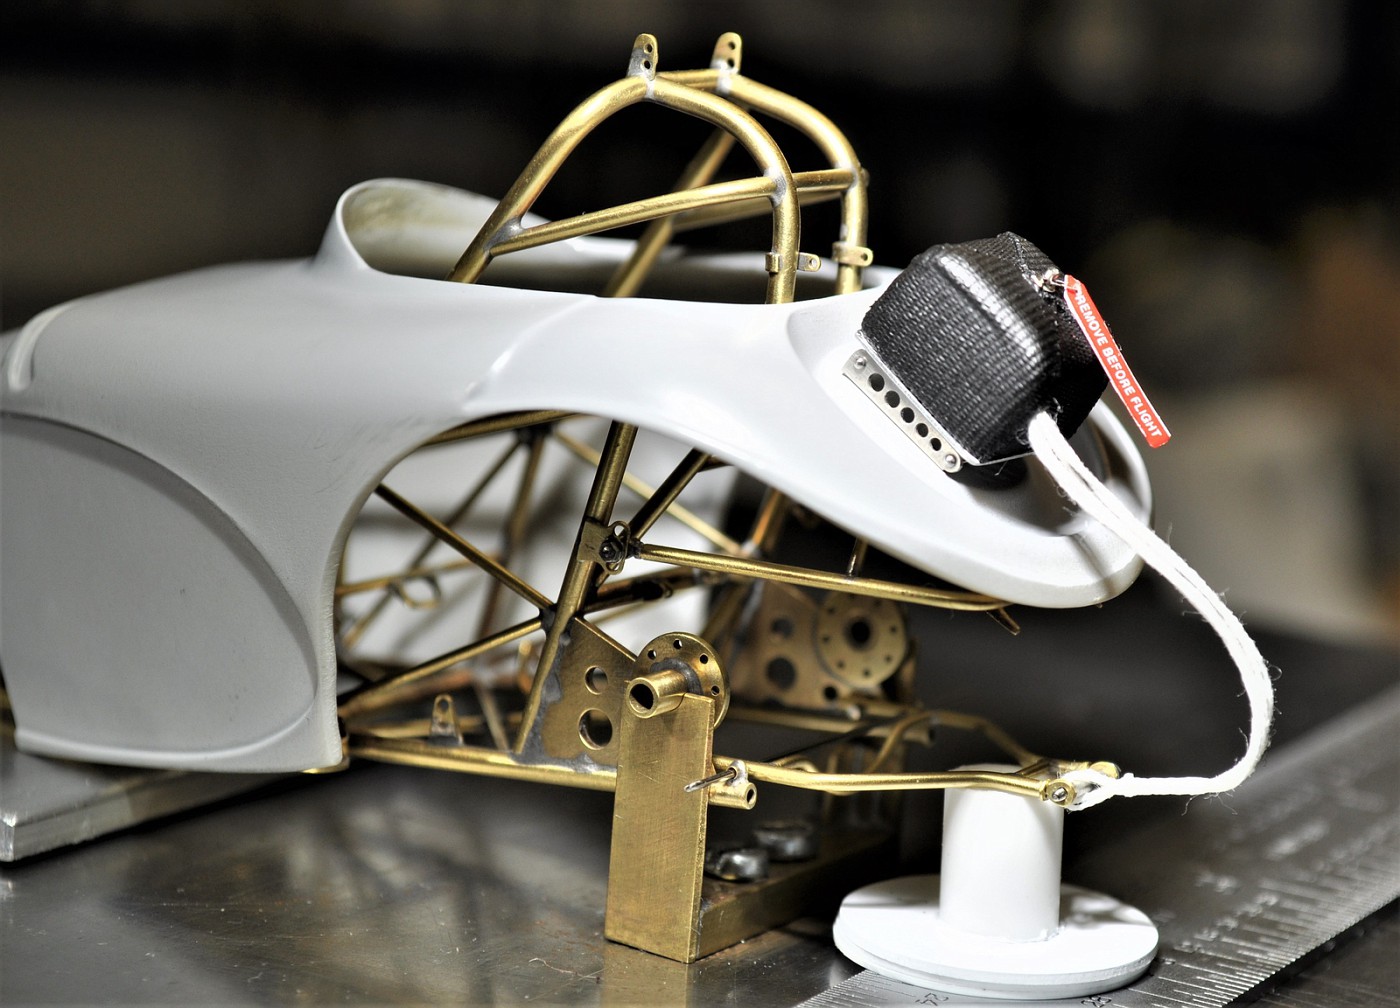
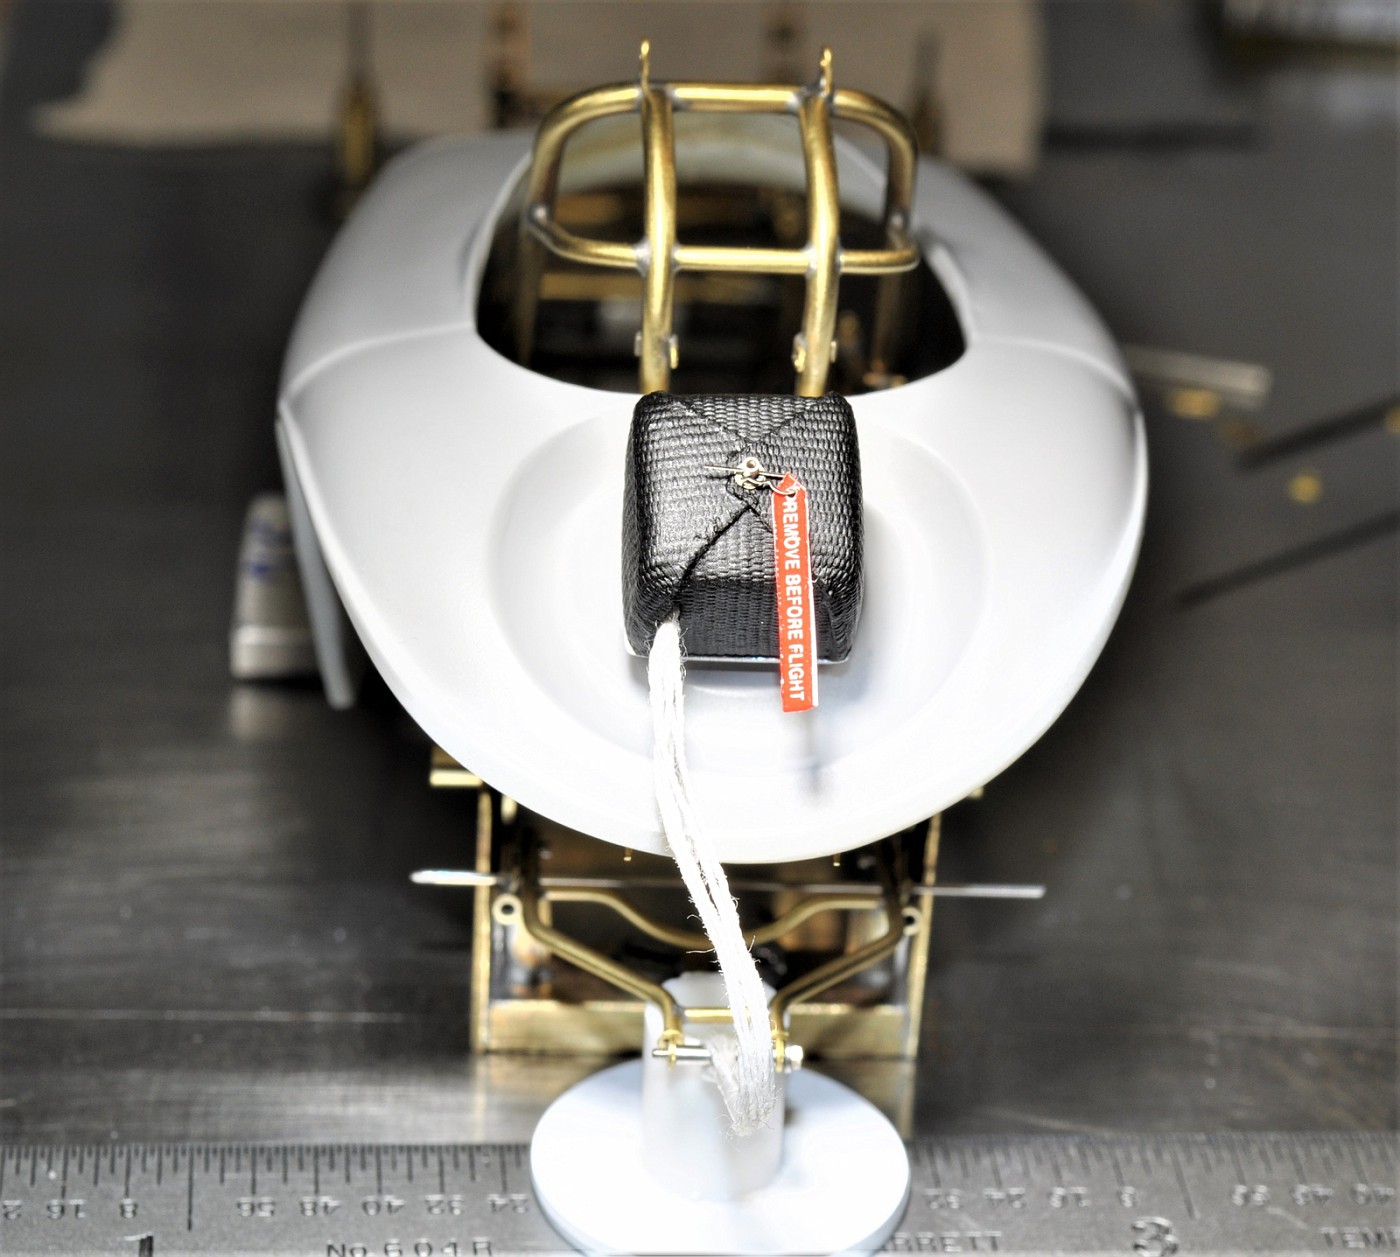
Hi fellas, sorry I haven't responded sooner to your comments. I'm glad you like the firewall, finally got the steering link and on the car. Good range of motion, no binding at all and it fits the bill. Wrapping up the body bracing etc. next and then time to paint, plate and detail for the final assembly now. yeah! cheers, tim

-
Sure do like your building style Bruce. The paint and graphics are stellar. cheers, tim
-
Cool and unusual build Bruce.........congrats. cheers, tim
-
Nicely executed Rickard. cheers, tim
-
That had and plumbing are stupendous Rickard. Great build and will certainly follow along like so many others. cheers, tim
-
Jet Powered Train / Dragster : On The Workbench 2/8/18
Codi replied to John Teresi's topic in WIP: Drag Racing Models
Just shaking my head here John. You are a machine when it comes to building. Cheers, Tim -
1/16 Scale Army Vega Funny Car - Finished 10/14/2018
Codi replied to Mooneyzs's topic in WIP: Drag Racing Models
Nice to have ya' back Chris and that's a great update. I still have that copy of the punch list for your build, it's not nearly as long as you think now. I don't know what happened to the engine when you dropped it earlier but I don't see any hints of damage anywhere. Nice save sir!!! cheers, tim -
Moebius Comet... Wild Bubbletop Show Rod- Done! 3-17
Codi replied to Impalow's topic in WIP: Model Cars
Been a bit since I've checked it out Eric but you didn't disappoint. Another cool build by you & especially like the diversity of the builds you select...........truly unique. cheers, tim -
Phenomenal car John, I'm waiting too like everyone else as you move along with it. Cheers, tim
-
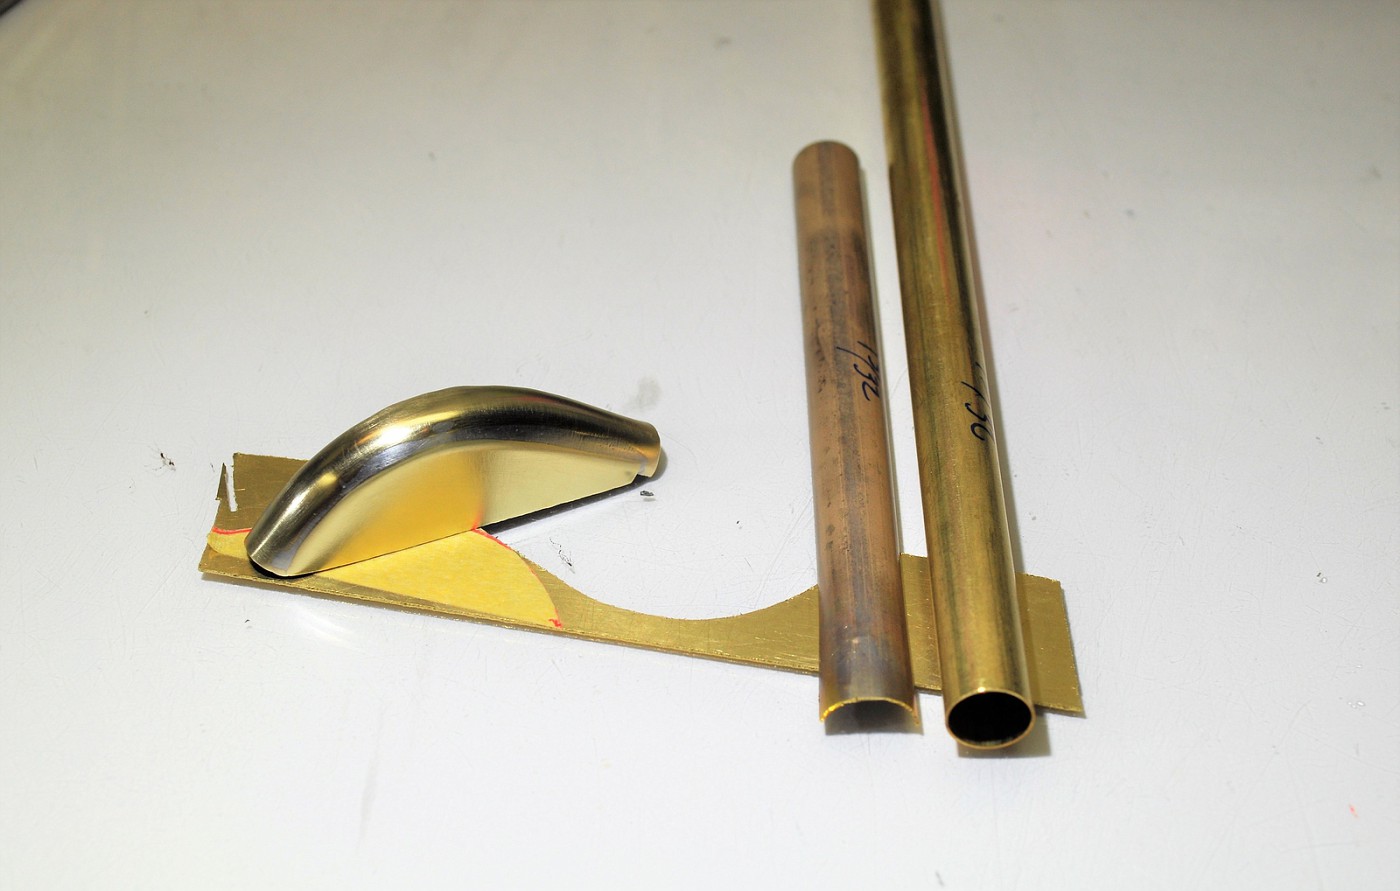
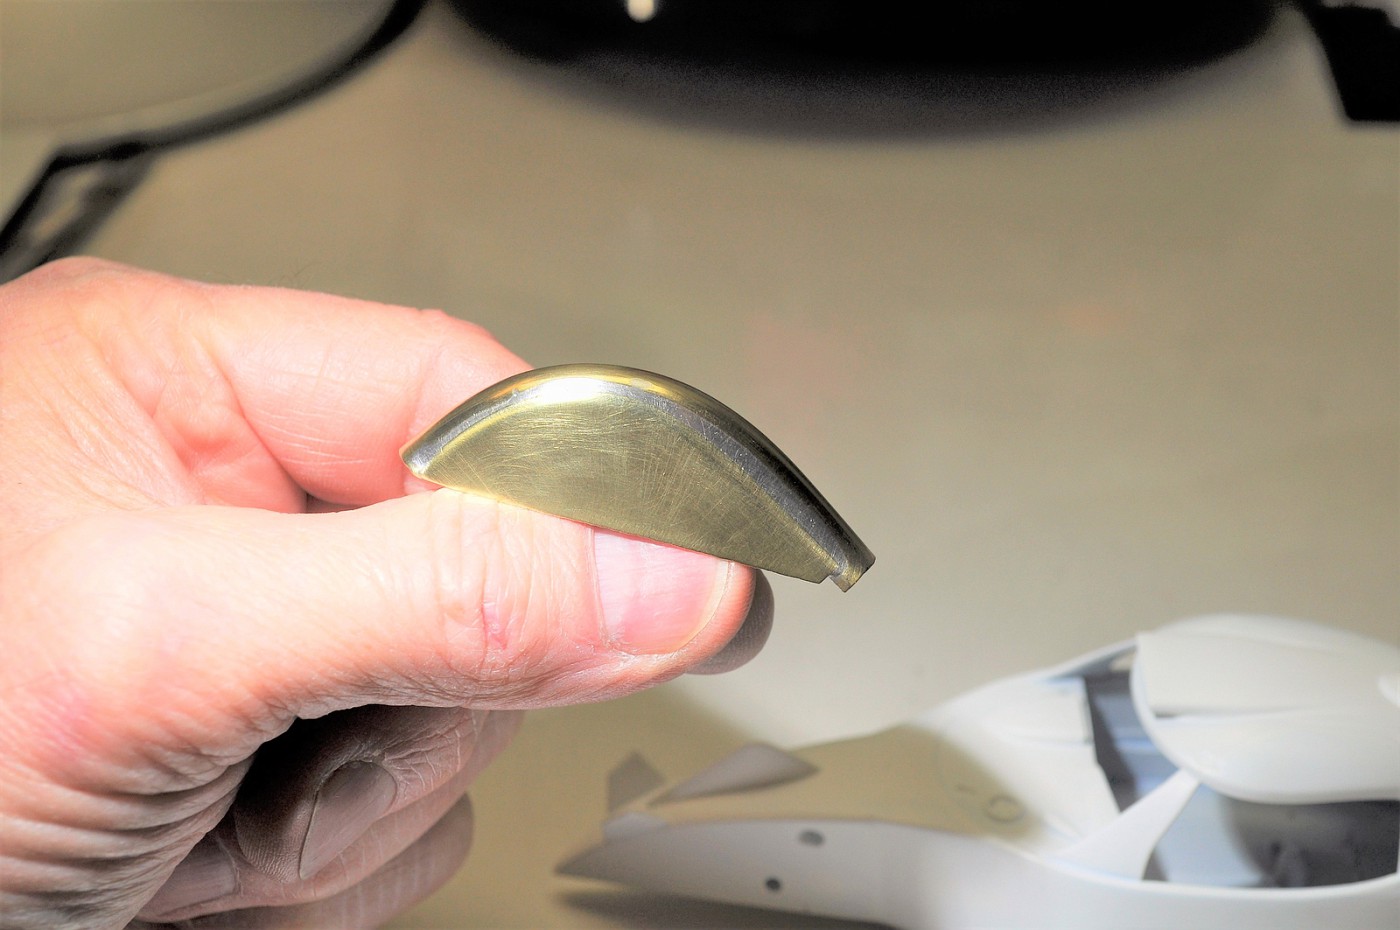
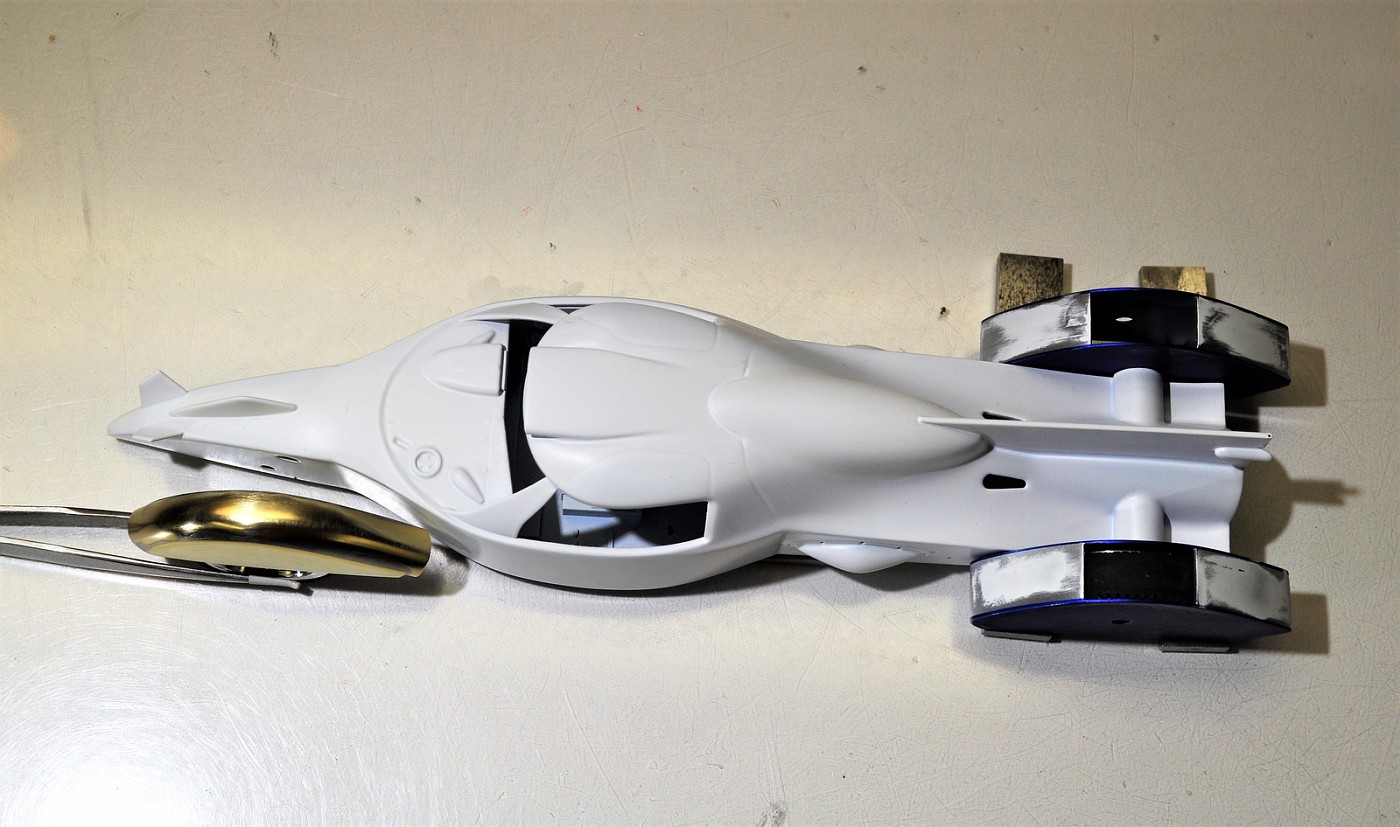
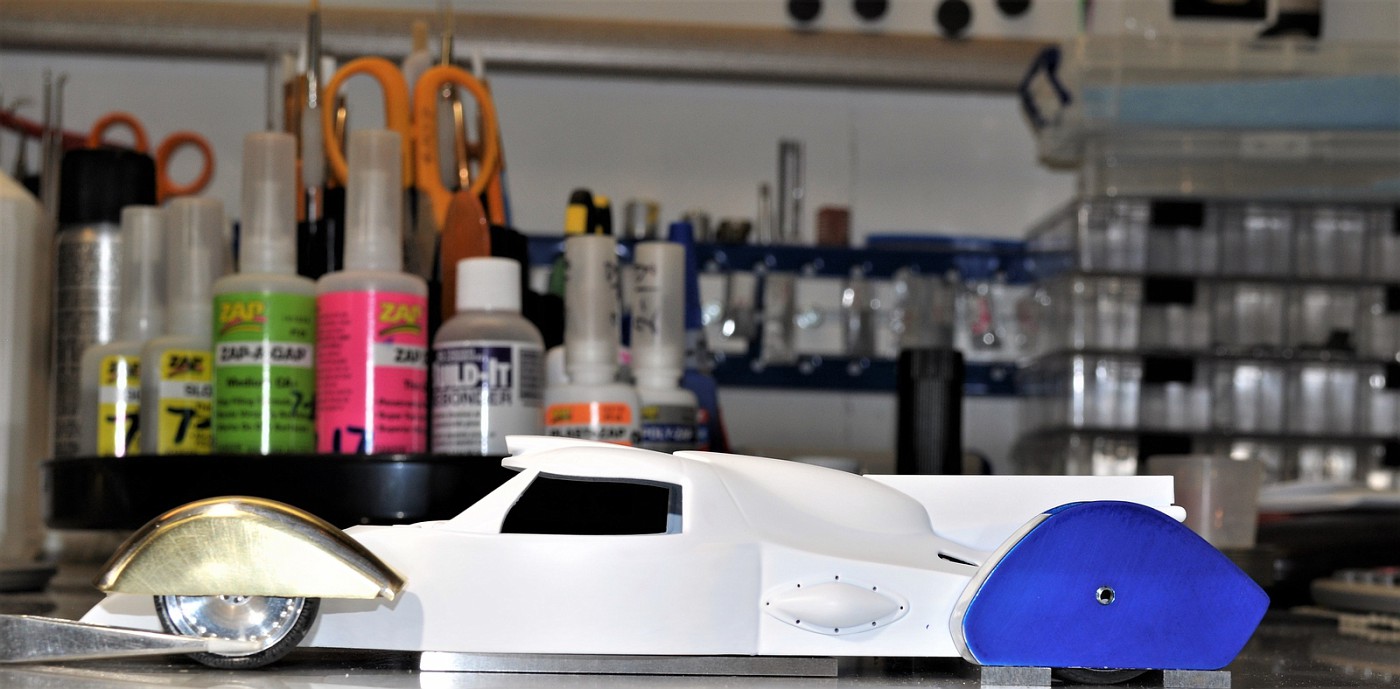
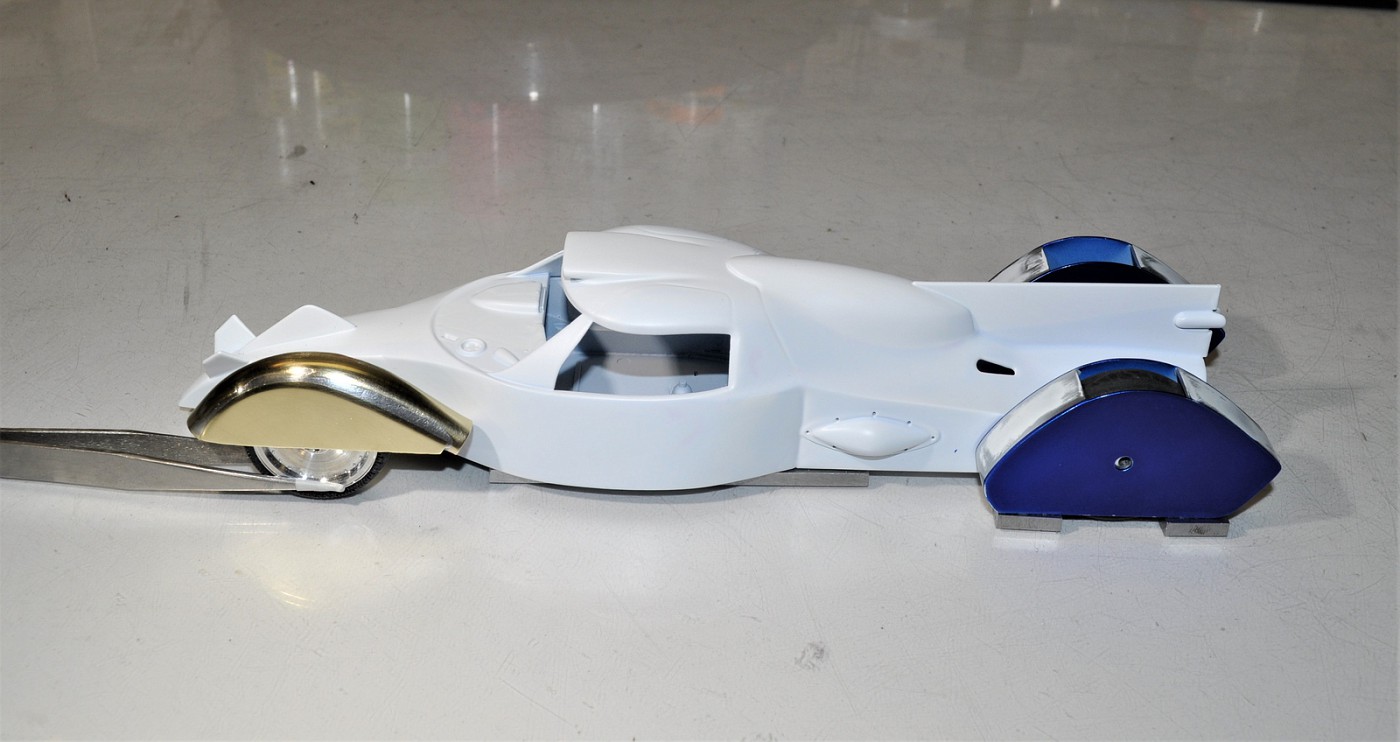
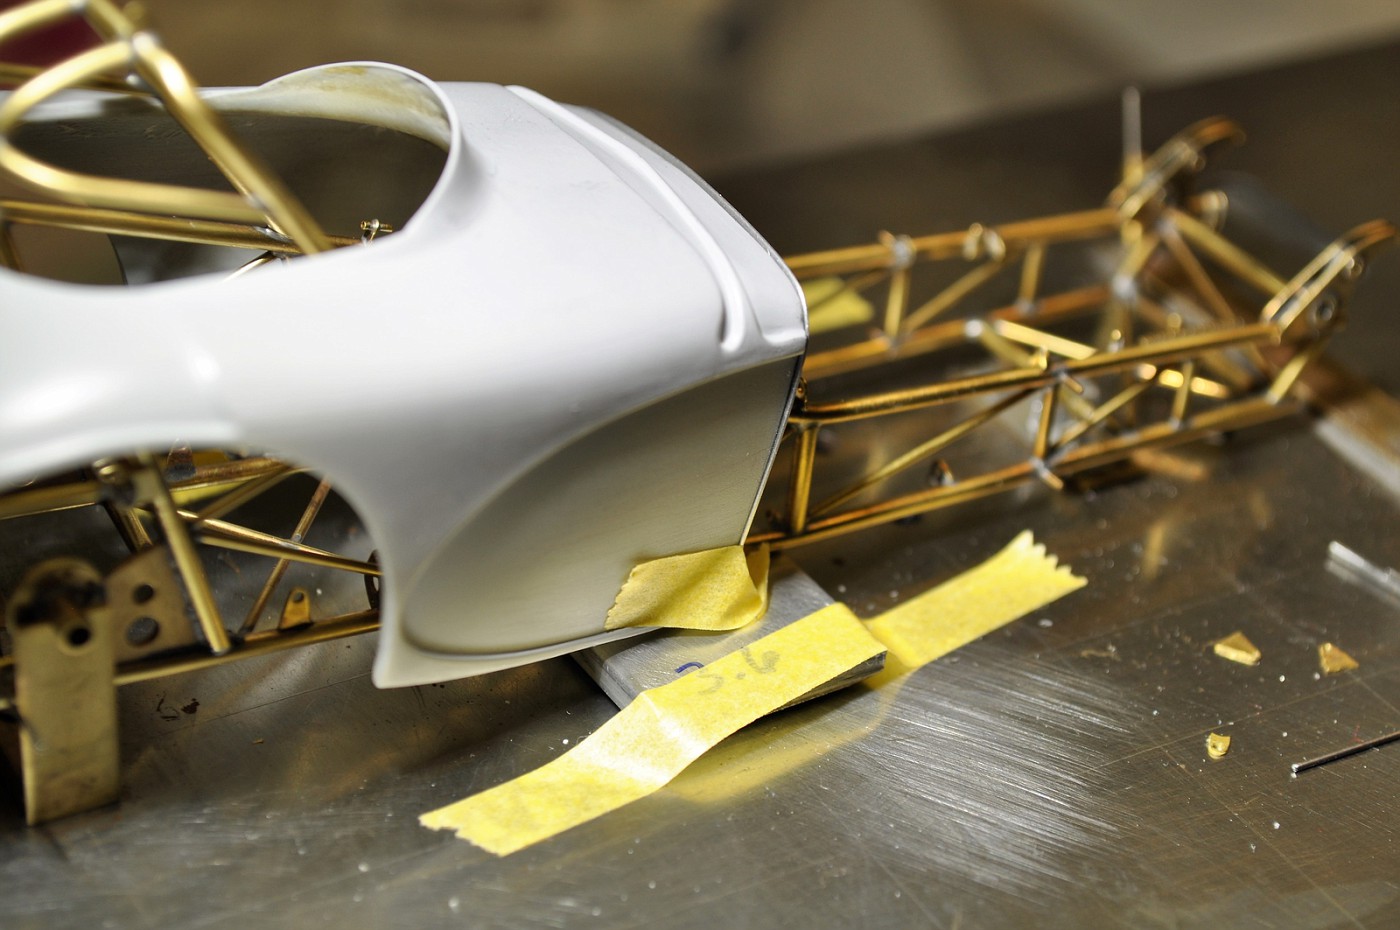
It's been several years since I originally posted this project. After the demise of Henry and the Bantam approaching the finish line (I'm doing the steering link currently) I wanted to get one done. The Bantam will take me 6 more months at the rate I'm going so it won't be done till Labor Day......HOPEFULLY. When I started this car there was one thing I wasn't wild about, that being the wheel fairings. As you can see by the pic on page one, they're flat on top because I couldn't figure out a way to make them properly curved/rounded. Spent about 10 or so hours this week trying a couple new techniques and stumbled across one that I think will work. I took brass tube, cut it down the middle and put small relief cuts (so it wouldn't crimp when formed) every 5mm. I came across a carabiner at the hardware store that had a shape similar to the original fairings. I annealed the brass and formed it over the carbiner while tapping the sides down with a forming hammer. After a bit of shaping with files I sweat soldered some brass sheet over the sides and cleaned it up. The sample brass fairing is not the correct size obviously but it gave me an idea of what it would look like on the car. This is what I wanted all along. So I'm figuring on a week of work to make all 4 fairings (the fronts are a bit smaller than the rears) and move ahead to finish it. Comments welcome, Cheers....tim Raw materials used to make the top portion Here you can really see the difference of the two designs
-
'32 Sedan Delivery Newstalgia Hot Rod: Updated 3/18/18
Codi replied to Dennis Lacy's topic in WIP: Model Cars
Cool look build Dennis. Your choices for the engine and wheels are perfect. I saw that Scale Motorsports is going to go out of business so I checked out their site yesterday. They have some really sweet billet wheels that are very similar to the ones you're showing here, big and littles, that might interest you. Good luck and I'll be sure to follow as well. Cheers, tim -
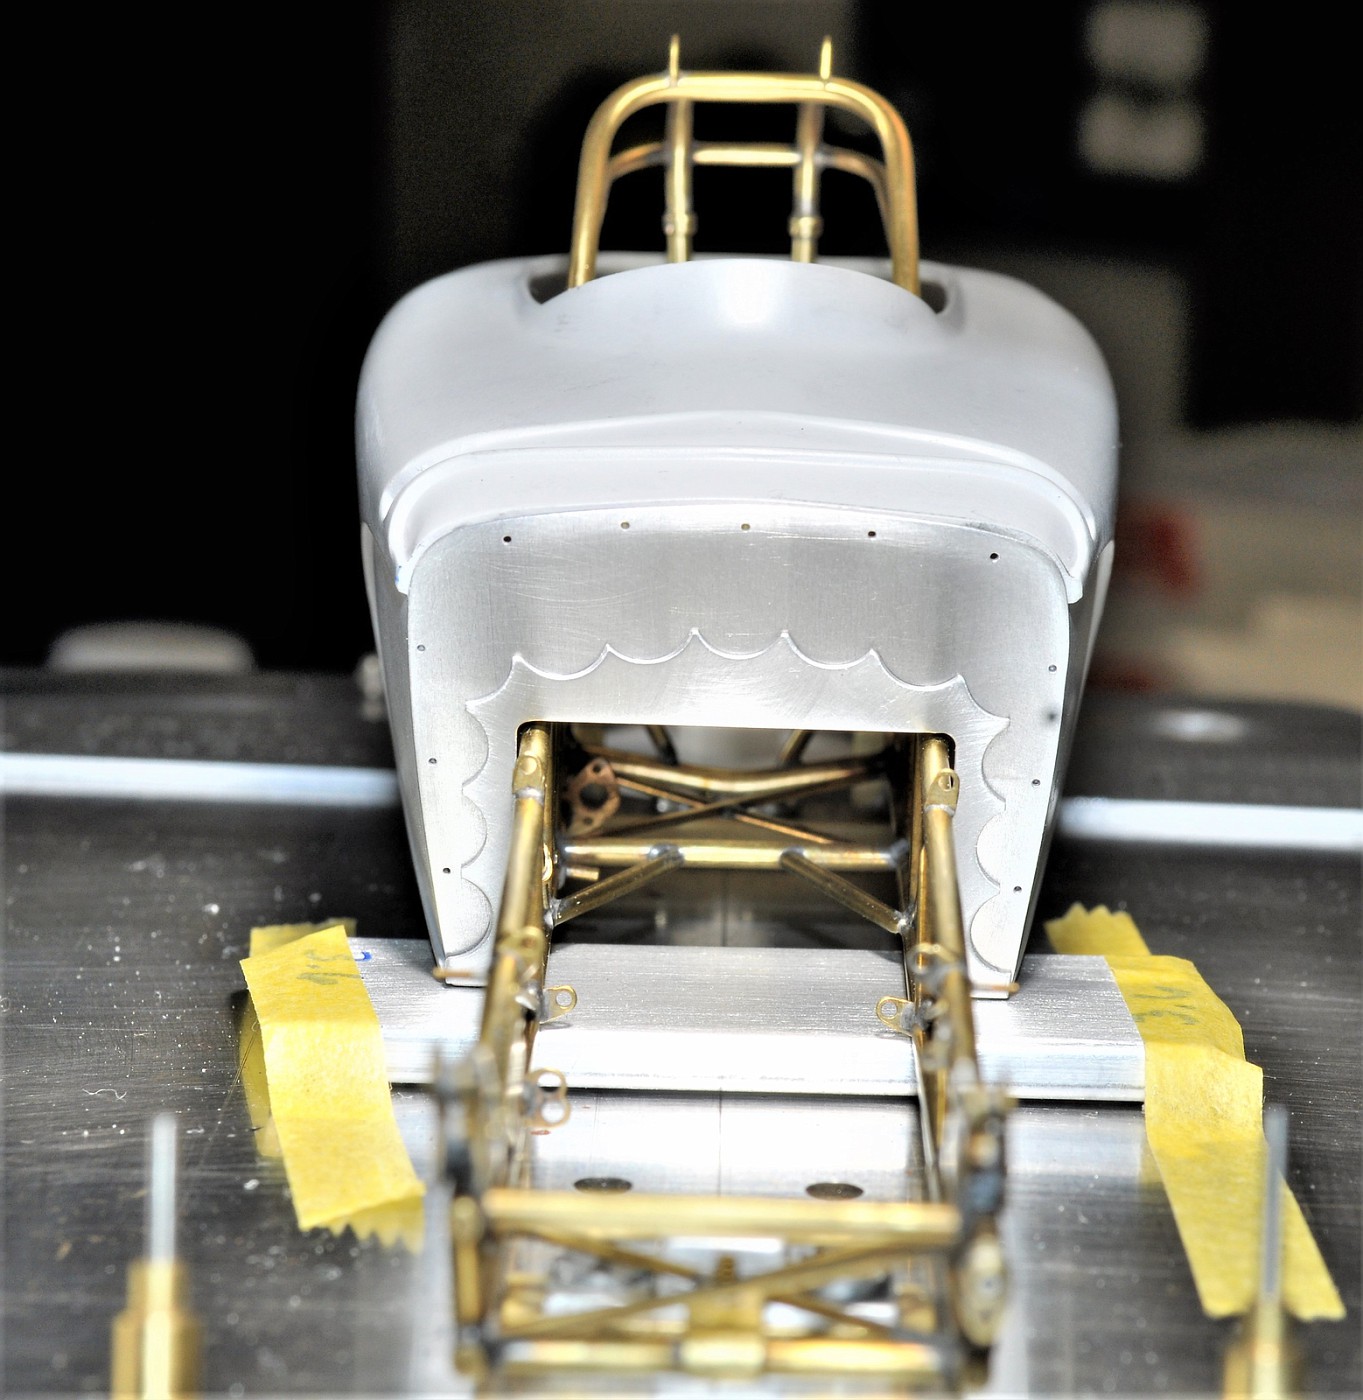
Finally some bench time after my entire family came down with all or some of the flu, pneumonia and bronchitis. I saw a pic of an altered that had a cool scalloped detail around the firewall opening, idea to strengthen the opening itself while doing so with a bit of cool factor. A little detailing and onto the next steps.............cheers
-
TOO FUNNY Gregory!!!!!!
-
Jet Powered Train / Dragster : On The Workbench 2/8/18
Codi replied to John Teresi's topic in WIP: Drag Racing Models
Hi John, 2 things come to mind, first one, I have no idea what a rocket anything should look like but whatever it is, I'm sure you're nailing it. Second, your use of the archer decals and the weathering skills you've applied to your tanks add such a wonderful level of detail / realism. Kudos sir. tim -
Drag Question about funny car tin work ?
Codi replied to Mr mopar's topic in WIP: Drag Racing Models
If you have the desire, there are some great insights on how to scratch your own...........both Chris on his mega Vega funny build and Brad (gasser59) have both built gassers/funnies with phenomenal tin work. I've not tried their methods but I'm going to at some juncture, they're VERY realistic. cheers, tim -
Wow, a lot of replies to JC's original comment & question. His observation of what constitutes real racing is spot on in my estimation. Rubbin' ain't racing. If you're behind, it's YOUR job to get around the driver ahead without hitting or causing an accident. I've been blessed to have road raced on some of the best tracks in the country and also on an oval, once.............the biggest difference being that if you make a mistake on an oval, well, typically that's all she wrote because you're more than likely heading up the track into the wall. Trying to save the car is darn near impossible. Purposely causing or putting yourself and others into a position where an accident might occur is irresponsible at best. Deadly at worst. So you can simply count me among the group that doesn't subscribe to rubbin' is racing. In closing, I'm sure this will stir the kettle quite a bit but you might ask yourself the next time you're watching Indy 500, do you see them purposely "rubbin" the other guy.........obviously not............and yet it's still great racing......on an oval. Something to ponder perhaps. Cheers, Tim
-
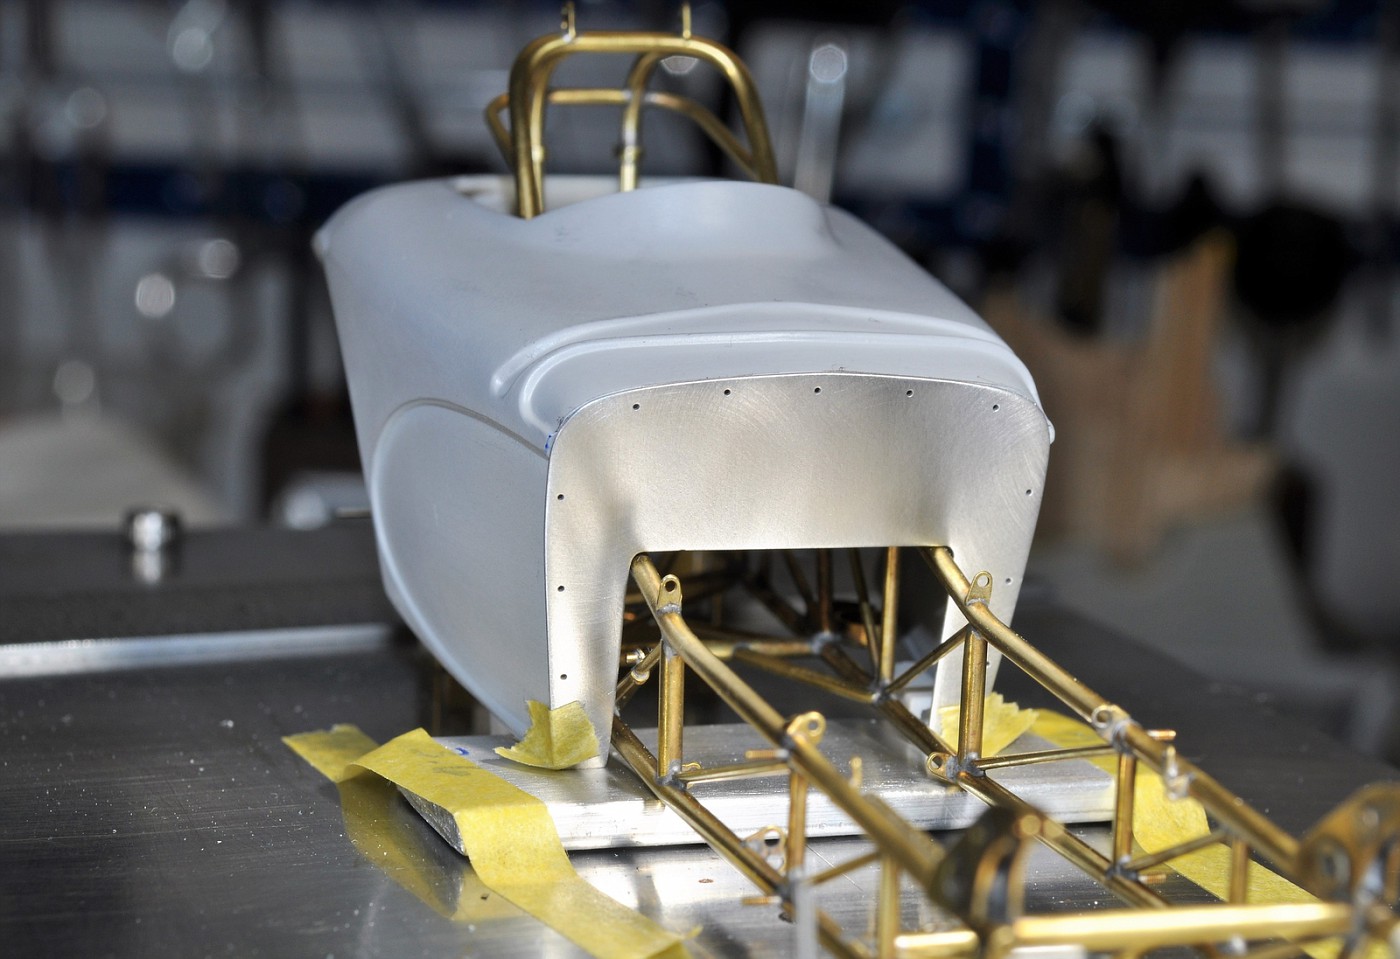
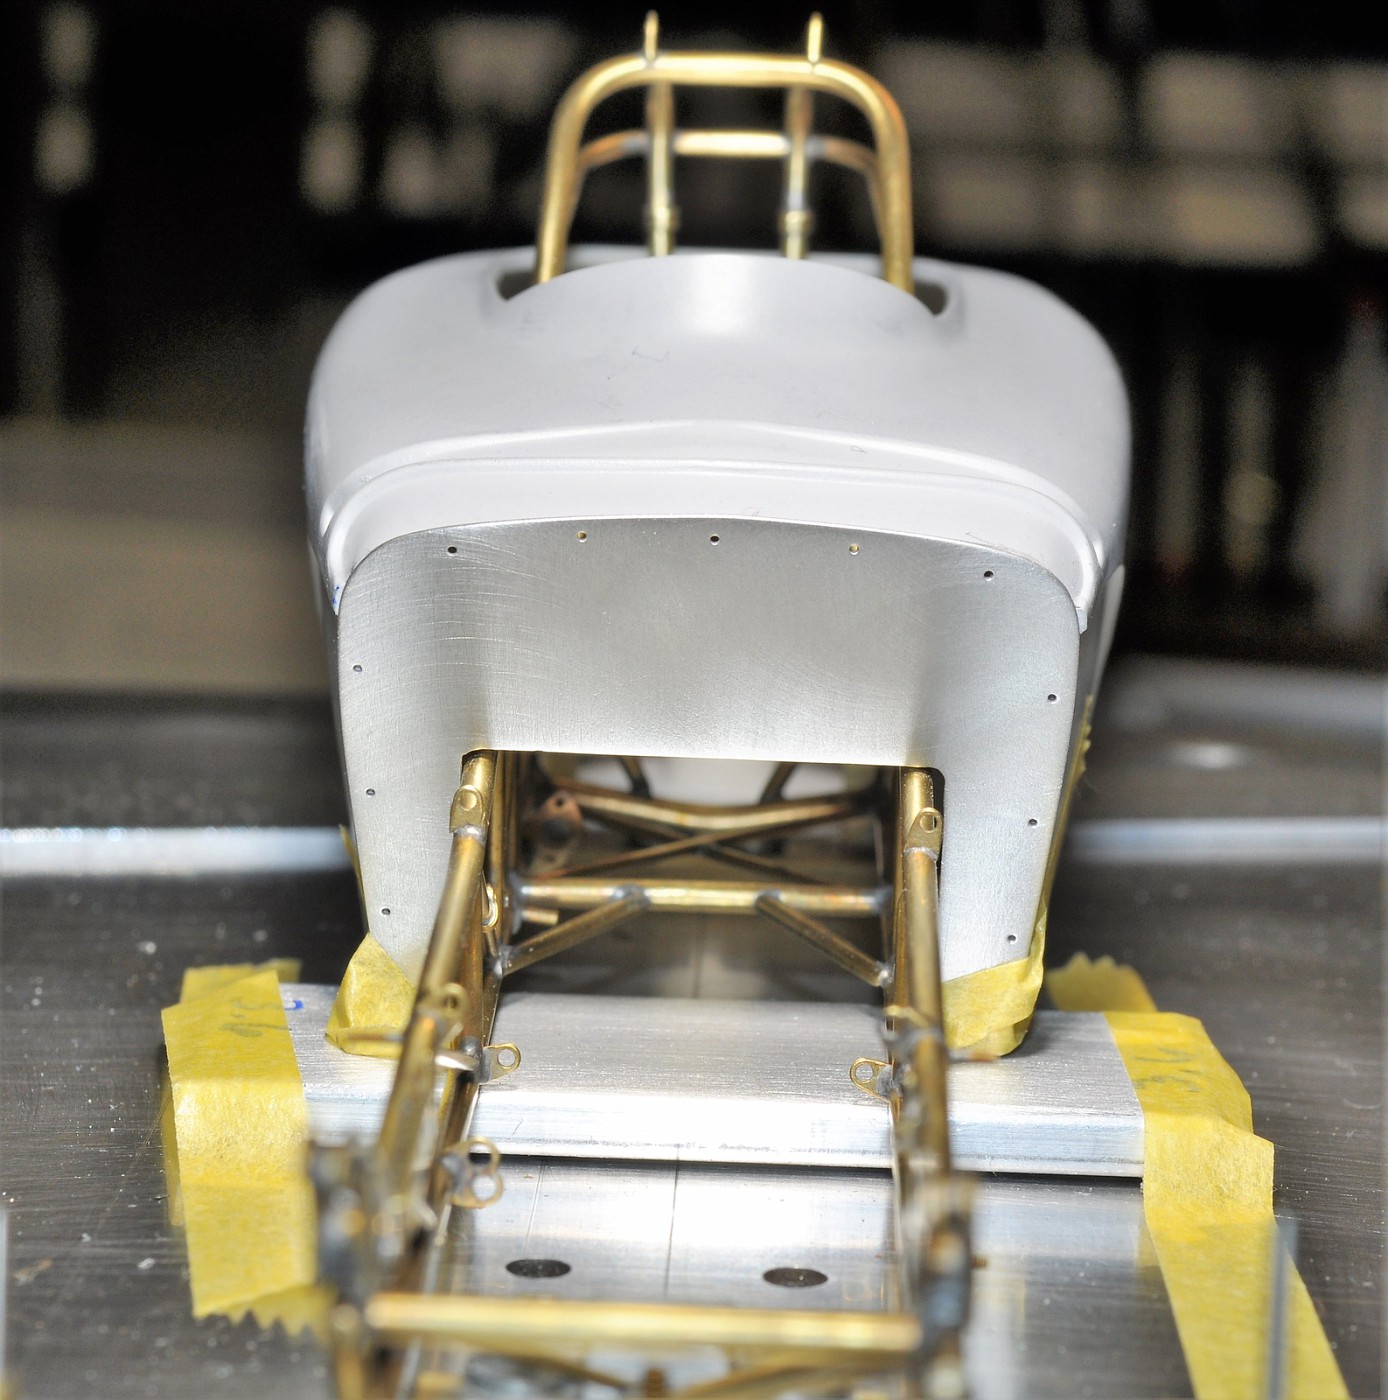
Thanks everyone and I'd like to acknowledge Lee's comments which are very flattering as that is some mighty fine company he's pointed out and I must agree with your comments about the forum in general. Great site here. Firewall is almost done and I'll be working on other tin work and supports now. . Still some fiddlin' to do to the edges to get them perfect but I'm sneaking up on it. Cheers, Tim this pic gives an idea of the tweekin' that I've got to finish on it.........
-
Saw that too JC and completely agree. The better car/driver did NOT win the race that day and we'll never truly know which driver & team it really was. I respect what those drivers do even though I'm not a big fan of Nascar..............more a drag and road racing fan personally. I think Nascar ultimately loses any hope of broadening their viewer base when potential fans witness that entire debacle and just turn it off and their less likely to turn it back on in the future. cheers, tim
-
On the body