Codi
-
Posts
2,675 -
Joined
-
Last visited
Content Type
Profiles
Forums
Events
Gallery
Everything posted by Codi
-
Ian I can only imagine the stories and fun you had wrenching on the real thing back in the day........great memory you've made come to life.........fantastic build. cheers, tim
-

T41 Bugatti sport coupe
Codi replied to charlie libby's topic in WIP: Other Racing: Road Racing, Land Speed Racers
It IS amazing what you've been able to do with the car Charlie after the accident you experienced. The black fender that you polished out looks fantastic......we all know what a bear black paint is to make it look perfect. You're a braver man than me. Cheers, tim -
Alfa Romeo 158/59
Codi replied to Chris Smith's topic in WIP: Other Racing: Road Racing, Land Speed Racers
So Chris........when the paint lays down that beautifully, describe for me the size of the smile on your face and how long it lasts. That's gorgeous. cheers, tim -
’72 Dodge Demon Drag Racer 1/25 scale
Codi replied to AmericanMuscleFan's topic in WIP: Drag Racing Models
Always fun to get caught up with your progress Francis. Saw some neat little tricks you fabricated on the body work and have certainly made note to explore them as well. Nice to see your progress too.....hopefully winter will be long this year so you'll have more bench time (hint-hint) .........cheers, tim -
Dennis, I admit today was the first day I checked out this thread and I'm glad I did. Fantastic scratch-building and thinking outside the box on this build. Will be sure to follow your future posts too. Cheers, tim
-
To Chris, Bruce & Robert......no pics just yet BUT it looks good what I got done this week....just the case ribs and then I'll take a pic or 2 of what all of the parts look like to date before media blasting and assembly. A month on this one piece....yikes! cheers, tim Andrew, I buy from Rio Grande a Jewelry Industry supplier.....here's the link of the cutting wheel used. Hope it helps. cheers, tim https://www.riogrande.com/product/sintered-diamond-cut-off-wheel4/346085GP/?code=346085
-
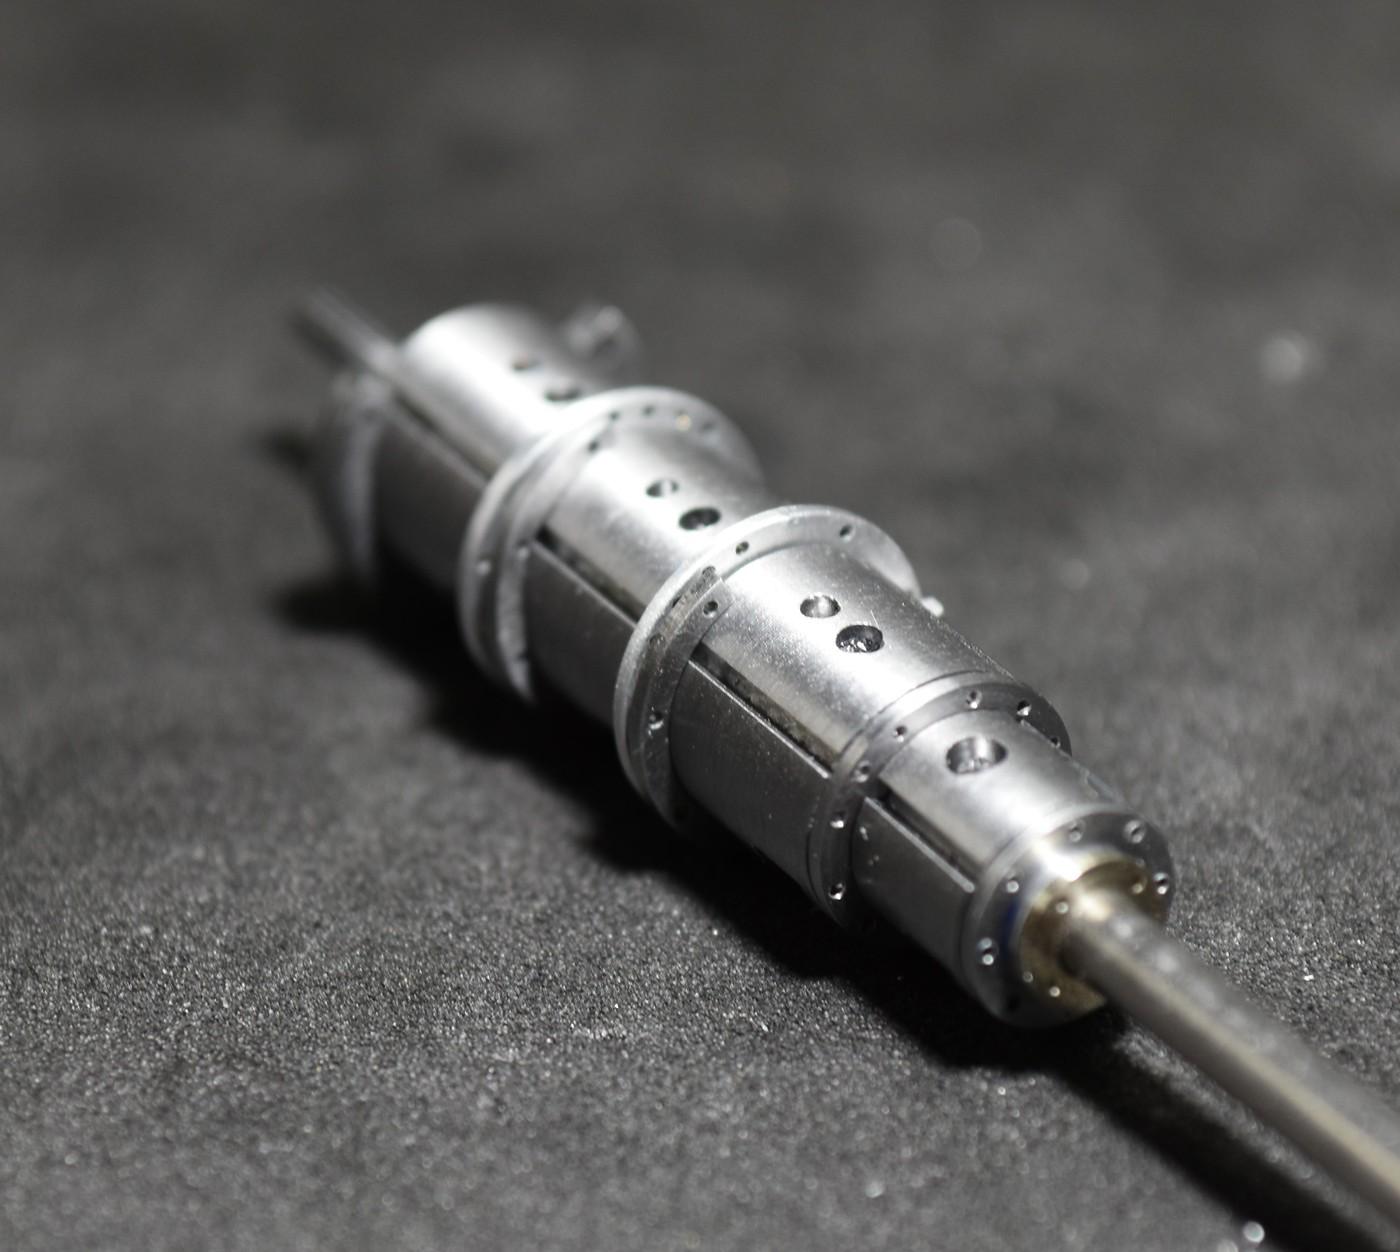
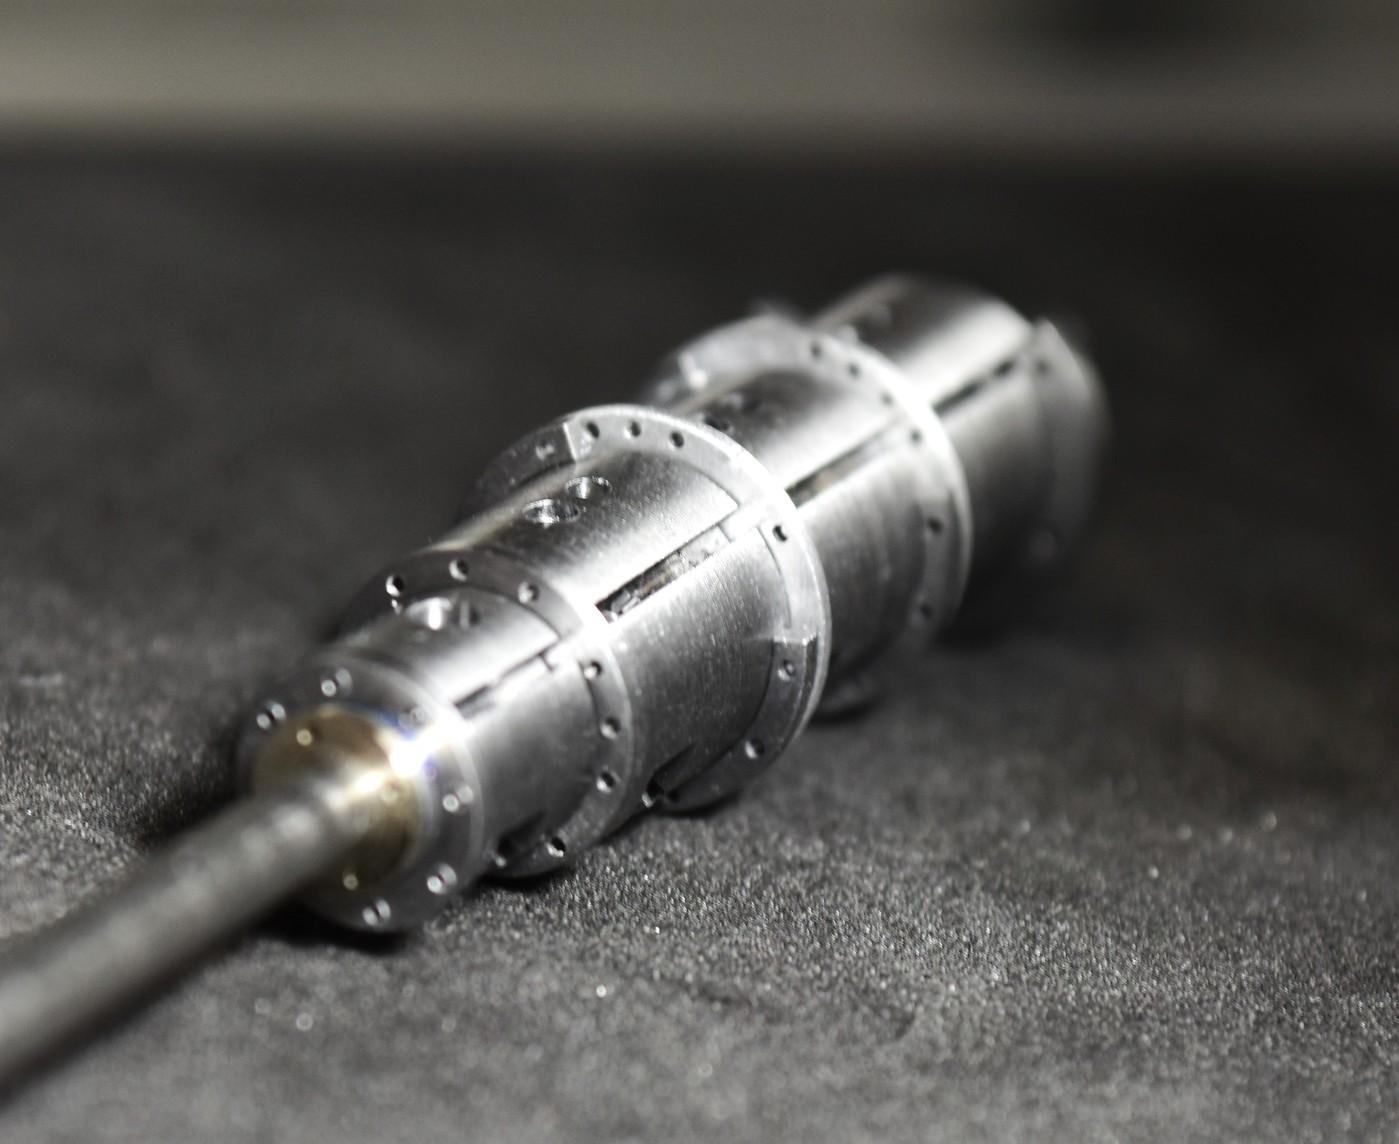
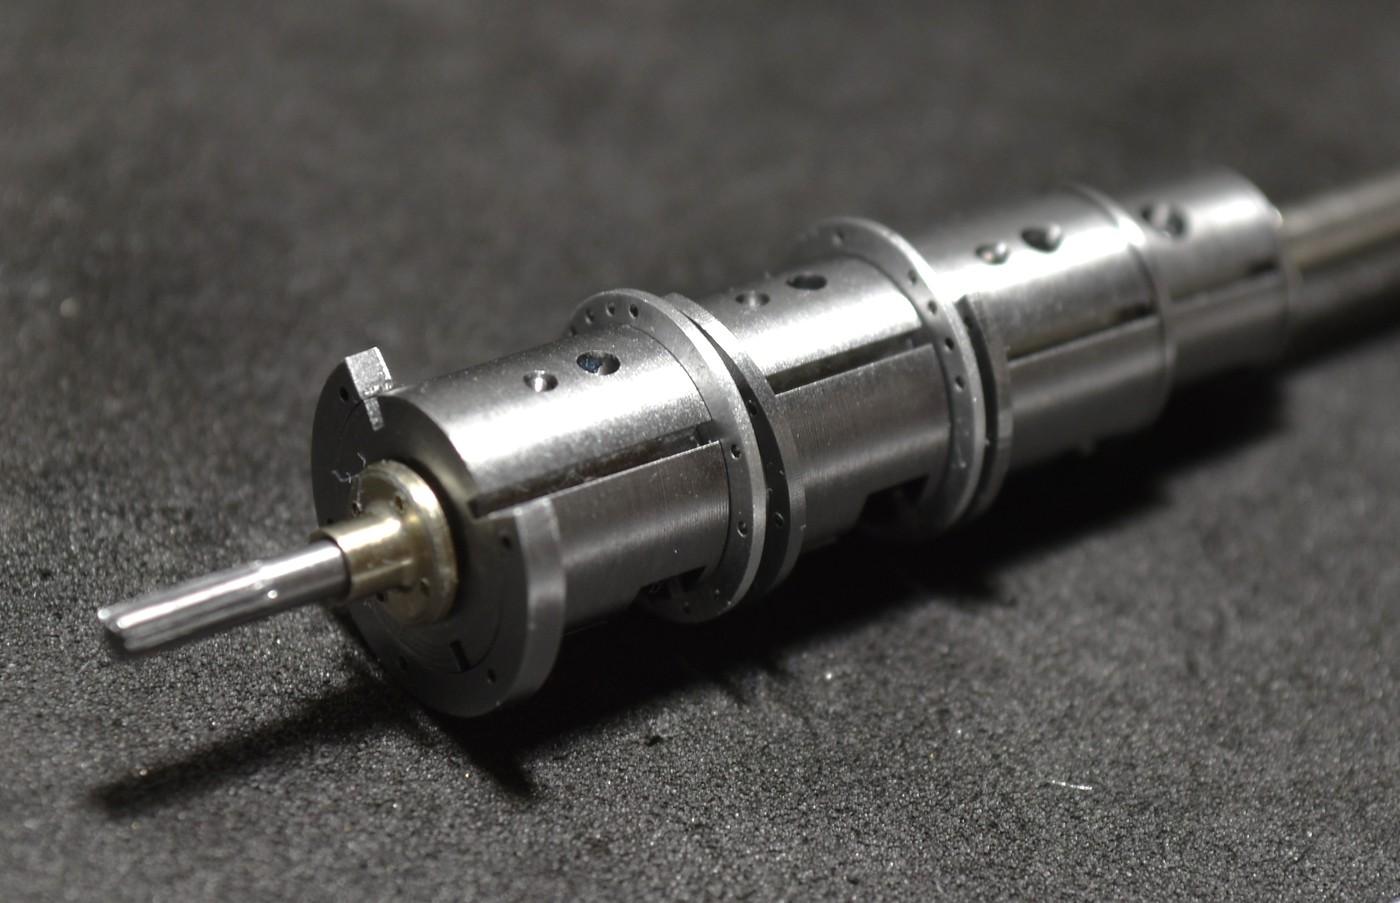
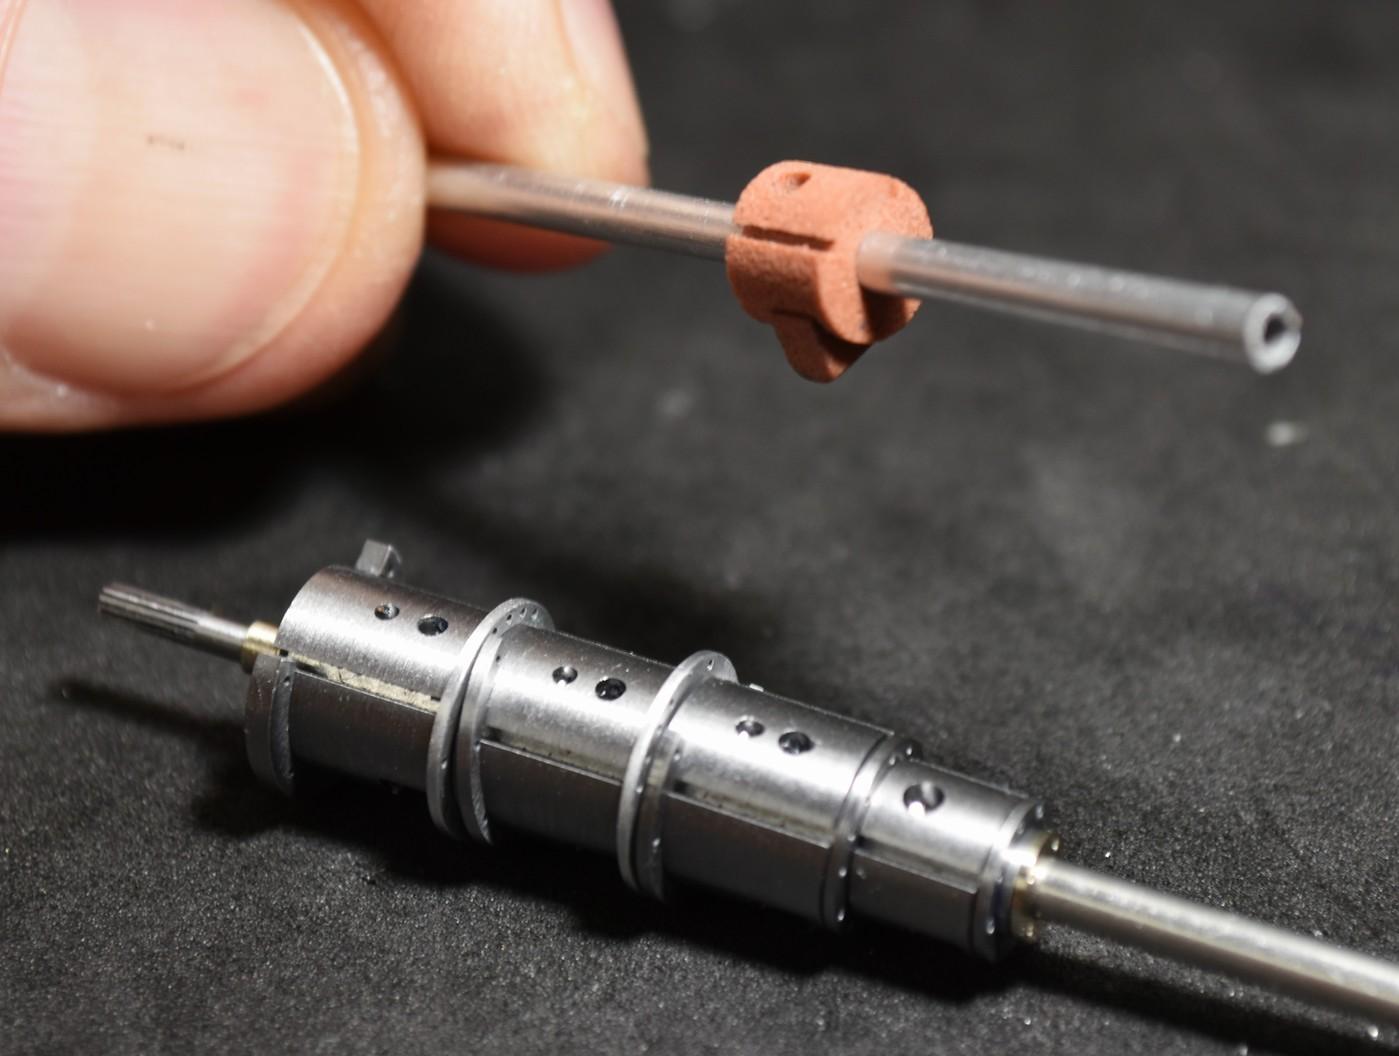
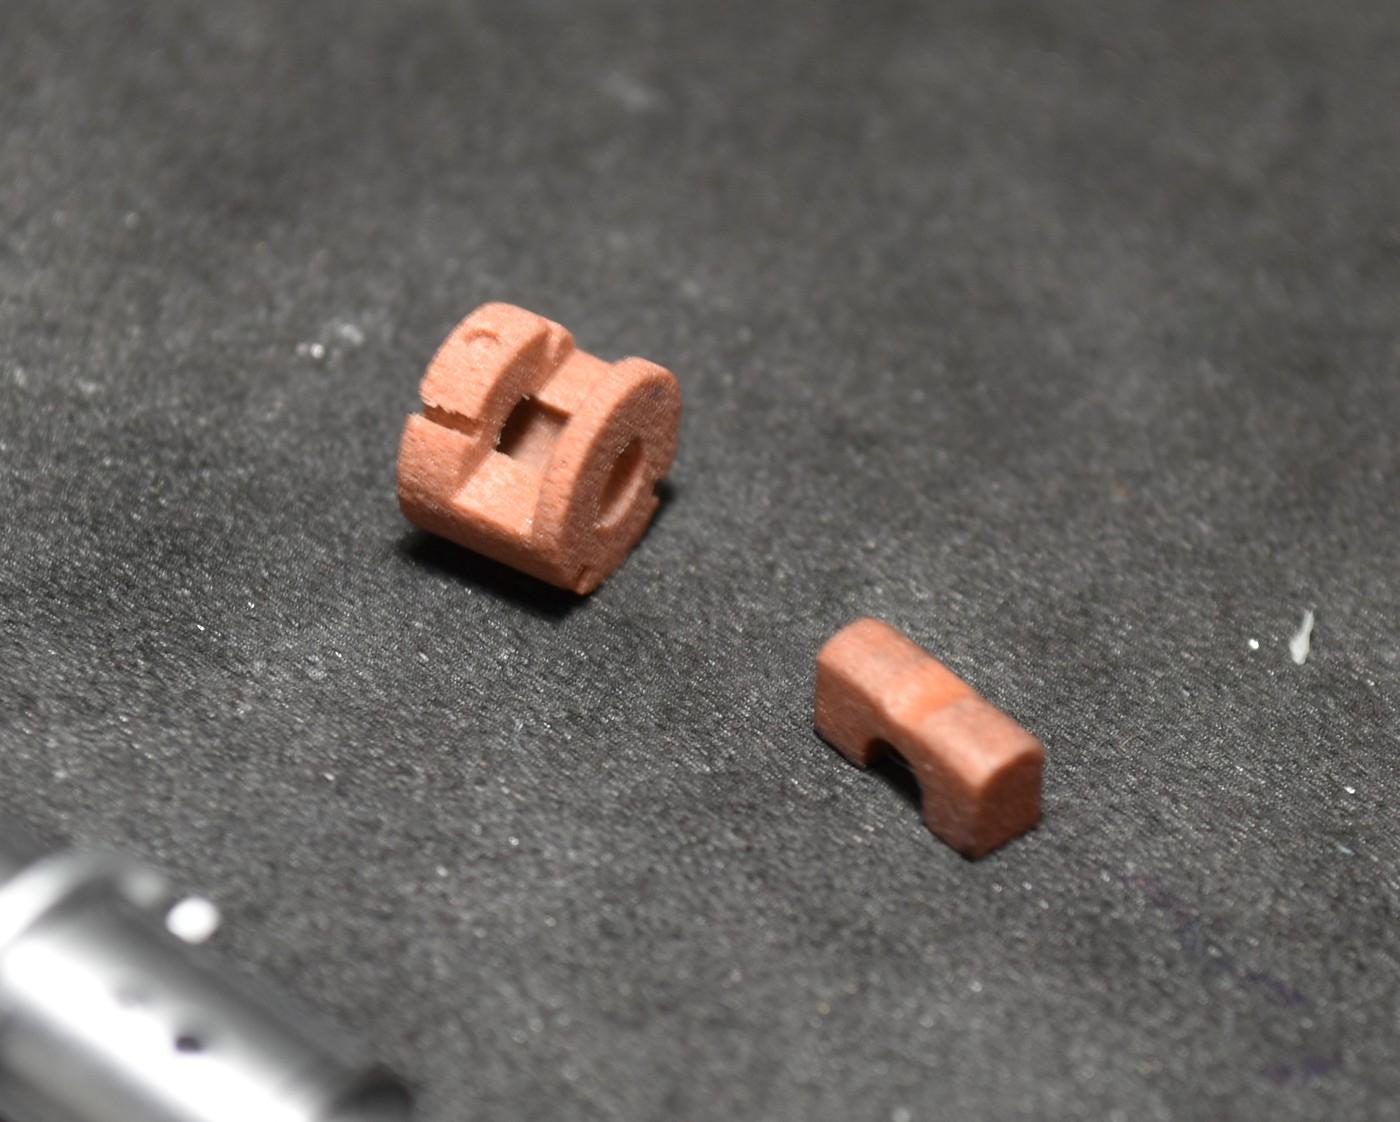
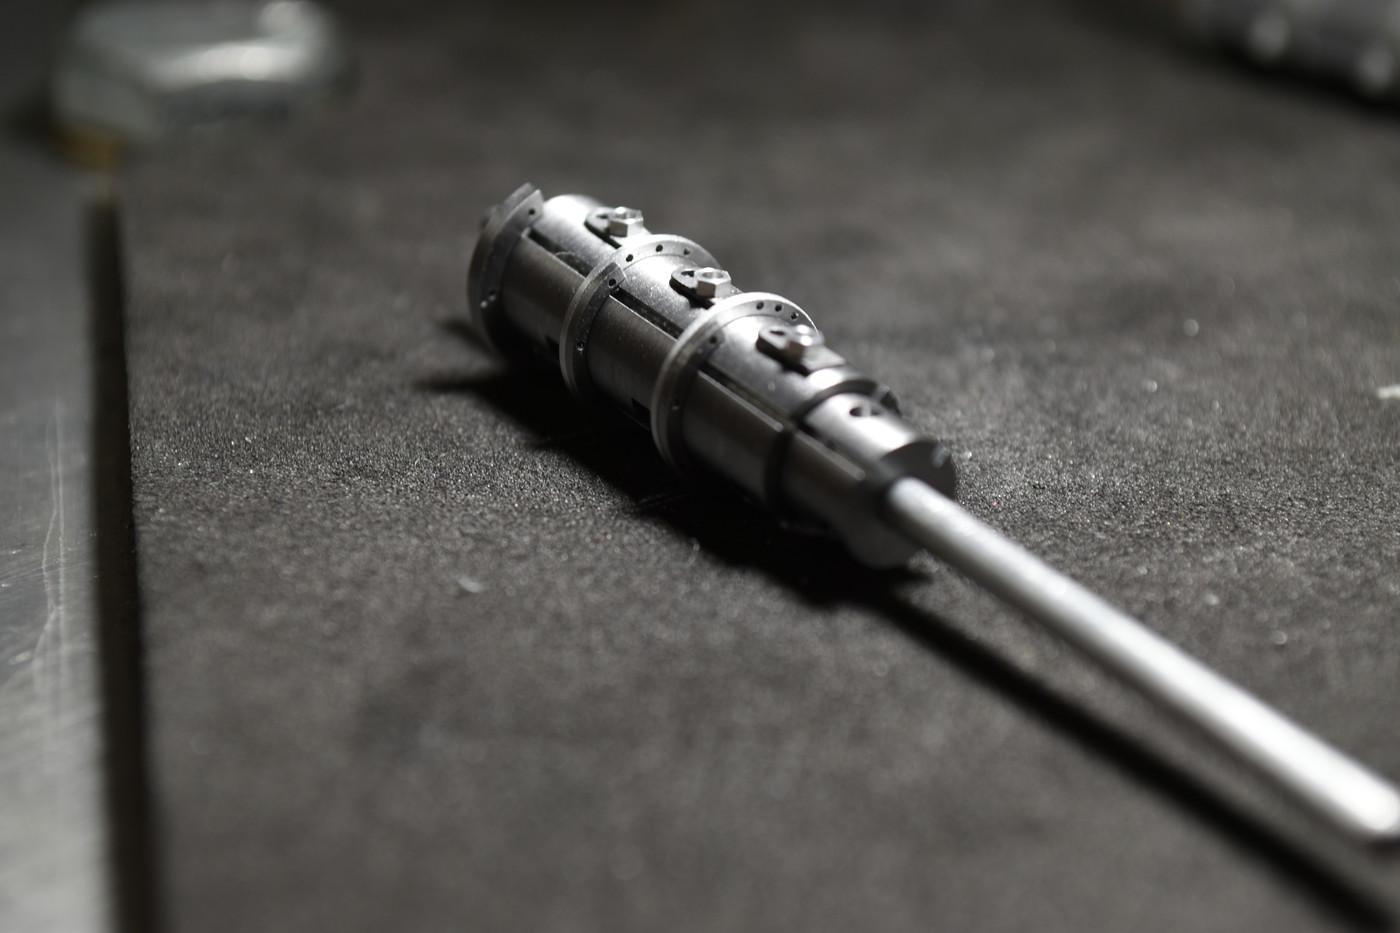
Brian - Thank you sir......I've not noticed the weight of it yet but once it's completely done, it should be noticeable. cheers Randy - okay......I'll keep going IF you post an update on the Maserati soon..deal? cheers, tim Art & Francis - Thank you gentlemen....I always look forward to your replies and continued interest. It's been a long slog but I'm getting there. cheers, tim John B. - Appreciate your compliment. I'm getting so close now to finishing this piece...guessing about 60% of the way done. Still have the ribs to cut and the "feet" to the bottom of the cases along with the shifter & it's bracket. I'm thinking I'll put it on it's own stand at this point and display it next to the engine.......even with the doors and front clip off the car I don't think you'll be able to see the lenco in great detail & I do think it'll be worth all of the effort when it's done......I sure hope so at this point. Pics today- tedious stuff mostly done now.....the flanges & rings are now drilled and completed. Next will be the fabrication of the "feet" for each case..you'll see the last 2 pics that I experimented with in Renshape to proof out my idea. I was convinced enough to go this direction. I'll use a corner rounder to shape the edges of the "foot" and then they'll slot into the notches cut into the bottom of each case. The somewhat blurry pics show the various flanges and all of the drilled holes....I can imagine it all now with ribs and bolts installed & I'm getting excited by what I see. Cheers to all, tim As an aside, the entire unit including the spline shaft is right around 40.0 mm in length....."about".......I'll put the penny next to the final pics for scale purposes.

-
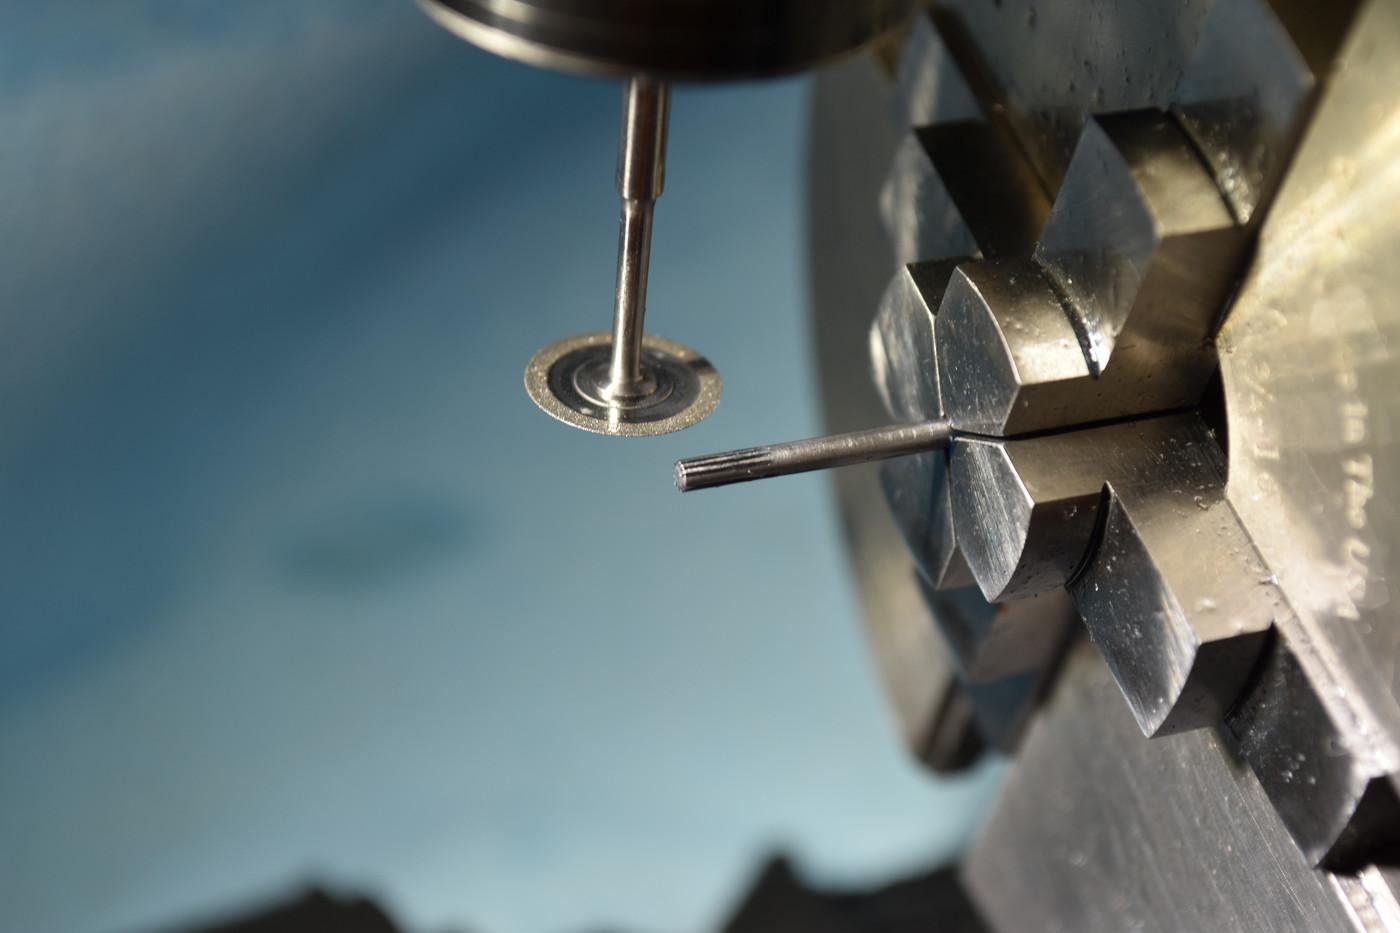
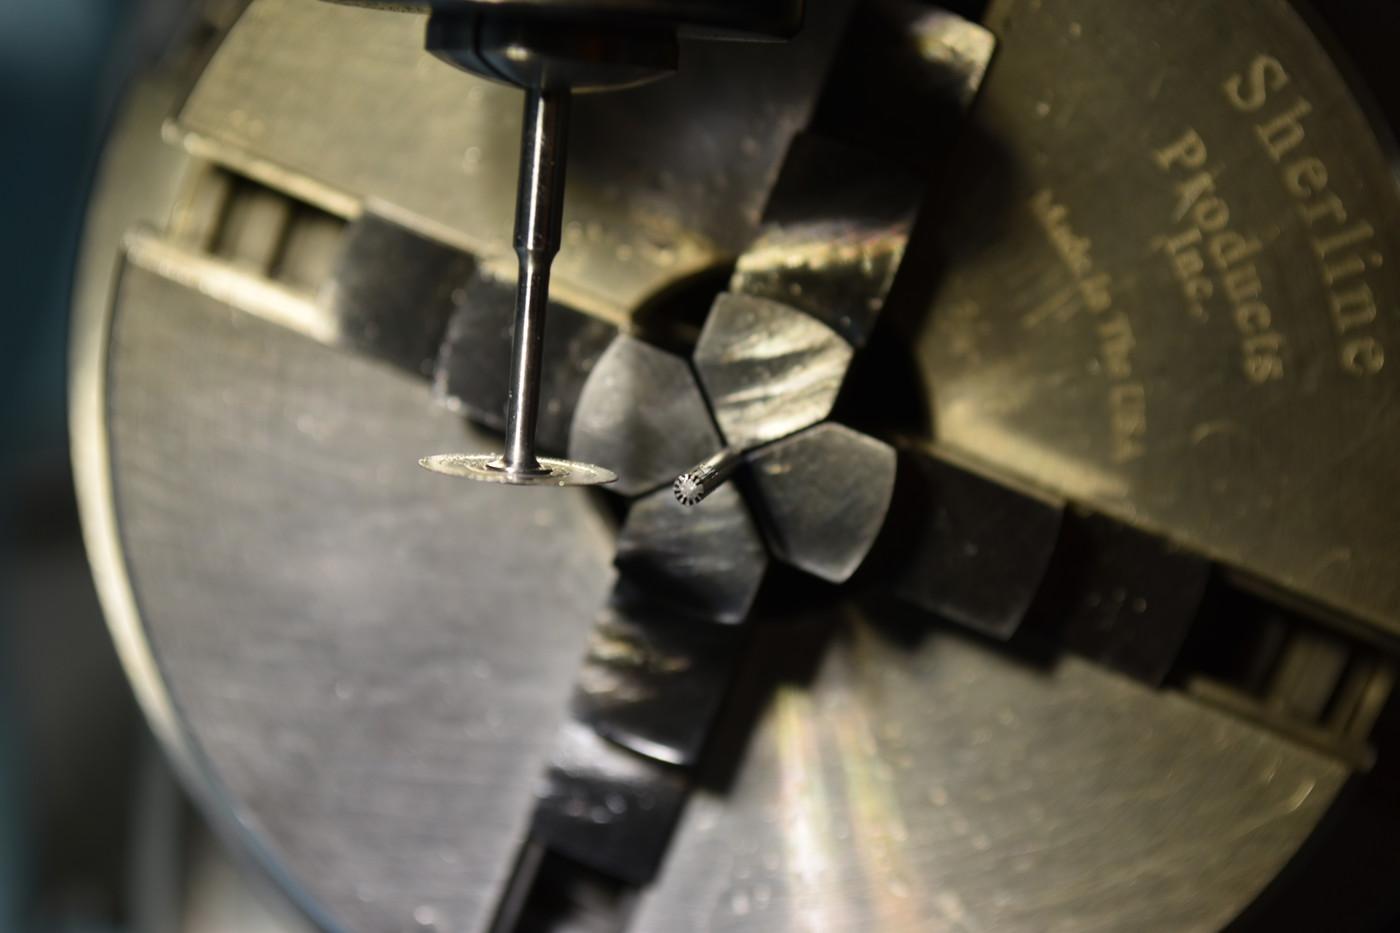
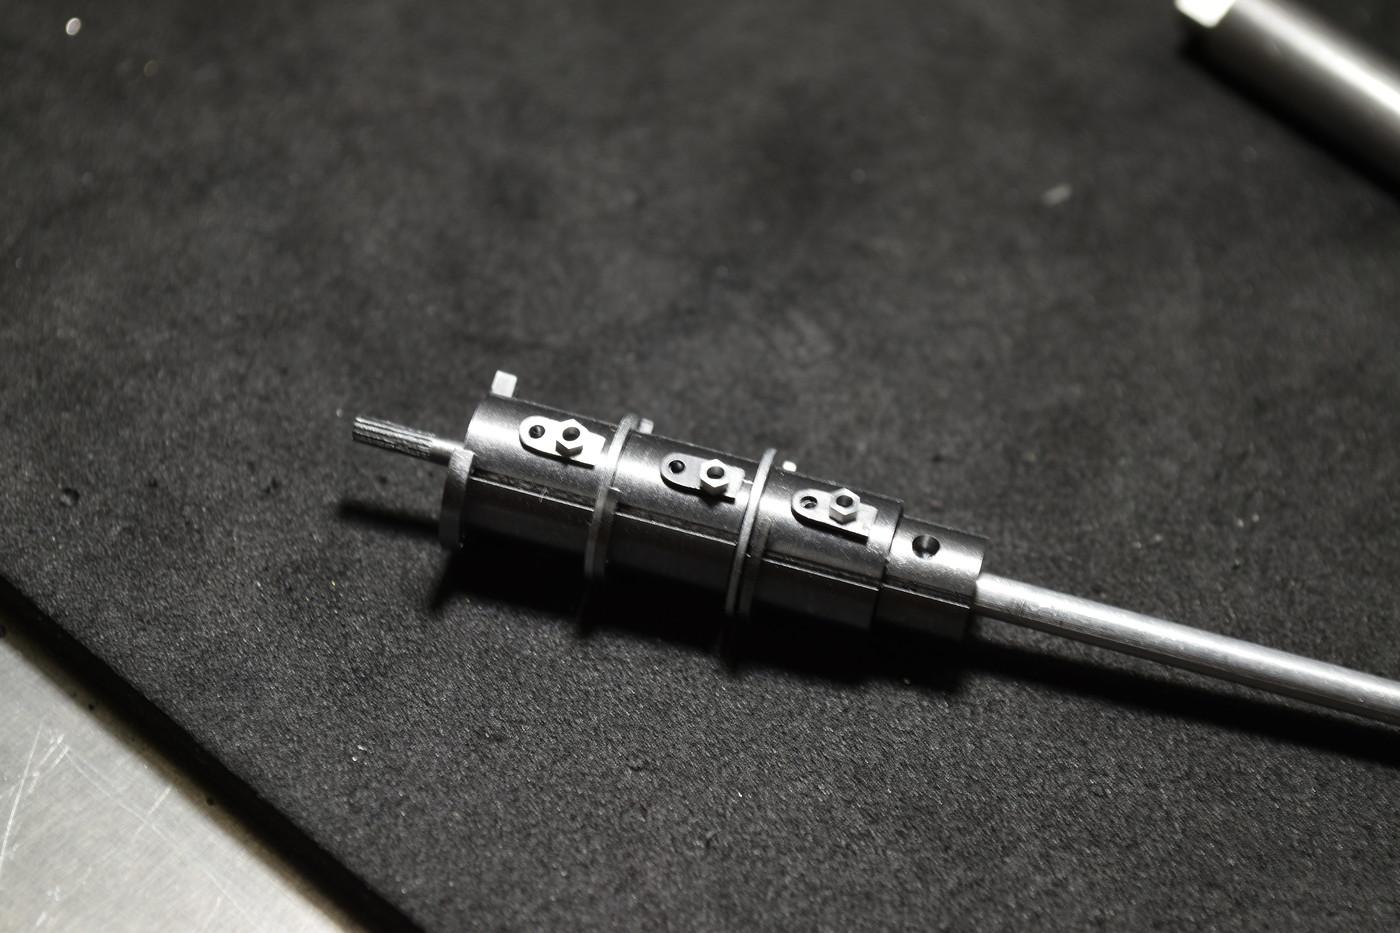
Thank you Bruce......it's always good to hear from you. This week was productive. Where I have left for the Lenco is to mill the ribs for install and to drill the 3 different flanges for the reverse case yet. The small nuts that will be the base of the lenco shift towers will be drilled out and shaved down to be more realistic. Then everything can be media blasted and assembled. There are many bolts to install & I've no doubt they'll add greatly to the overall look. At that point I'll install the shift levers & bracket to finalize it. The first pics show the spline shaft on the mill. Used a .17mm diamond cutting wheel to slice in 14 ribs.......the shaft is 1/16" steel piano wire. I was going to use a .27mm wheel but I didn't like it and the number of splines were too few......didn't look right. The 2nd group of pics is a very crude mock-up with nothing glued / assembled yet so please be kind. I'm hoping to wrap this up by next week & to post some pics then. Cheers, Tim
-
Alfa Romeo 158/59
Codi replied to Chris Smith's topic in WIP: Other Racing: Road Racing, Land Speed Racers
Chris, I have to agree (mostly) with Noel in that this was a truly handsome car. I didn't know much about it until I did a quick search on-line. You should post a pic or 2 of the real thing so everyone can appreciate what you're building here. It's a stunner. Cheers, tim -
Early '50s Bonneville Streamliner
Codi replied to W-409's topic in WIP: Other Racing: Road Racing, Land Speed Racers
Good morning Nico, I've always loved the salt cars of all era's and this one really catches the imagination. With your abilities, I can't wait to see where you take it. No doubt it will be well worth the effort. Good luck. cheers, tim -
’72 Dodge Demon Drag Racer 1/25 scale
Codi replied to AmericanMuscleFan's topic in WIP: Drag Racing Models
Nailed it Francis. VERY nice sir. cheers, tim -
Daniel.......thanks......I should have posted a quick pic of the media blasted sample for a better idea. Gives it the real matte metal finish I'm looking for with just the tiniest bit of etching for the cast look of the cases. I'm anxious to get it all machined so I can get to that point. Hopefully it's a sharp as I imagine it to be. Francis....I'll agree, a wee bit of a perfectionist. I'll settle for "high standards" though any day. Like I said to Daniel, it'll be worth the extra effort (or so I believe) once she's done. As you know, we don't know exactly what's in the jewelry box till we open it. cheers! Randy...thanks for stopping by and letting me harangue you about posting some more pics of YOUR builds......come on now, we're ready for more.....GT40 OR the Maserati. Seriously though, thanks for checking it out and your comments. cheers, tim Robert & Tony.....thank YOU both for the comments and stopping by to see where it's been. Hopefully in the next week or so this piece will be done and I can move on. Outside of the chassis itself, all of the major mechanical bits for the car will be done then. Minor things like brakes, foot pedals, fuel tank and stuff like that to wrap up. Chassis is the big one and I'm stilling waiting to visit the shop to get pics.......
-
Your last pic Tom brings back a lotta memories. My big brother had a new SS 396 Chevelle when I was just 16.......he was a typical kid and just beat the heck out of that car. Scared the BLAH_BLAH_BLAH_BLAH out of me a few times......Your color and stance are really sharp and your choice of wheels for her. cheers, tim
-
Nice touch Daniel. Like you I've found sources from time to time of model railroad parts that can be useful........cheers,tim
-
Alfa Romeo 158/59
Codi replied to Chris Smith's topic in WIP: Other Racing: Road Racing, Land Speed Racers
Hey there Chris......like the others, count me a fan of your techniques AND results. You should share more of your "how to" or in process tricks along the way. I, like others would like to know more how you go about getting certain results. The one you shared about the rivets today was insightful.....certainly yields a convincing result. I'm most impressed with your technique for leather seats. You shared it before and it's nice to see that the results are consistent AND spectacular. The most realistic finish using paint that I've seen yet. cheers, tim -
Tamiya Sauber Mercedes C9
Codi replied to galaxyg's topic in Other Racing: Road Racing, Salt Flat Racers
I remember the C9's and how dominant they were back in the day. Congrats to you on a handsome build. cheers, tim -
Alfa-Romeo winning car LeMans 1933. 1/12 Scale
Codi replied to maysula's topic in Other Racing: Road Racing, Salt Flat Racers
What a great build Thomas. Truly outstanding and I'm VERY impressed with your weathering skills as well. cheers, tim -
Well presented Roger. cheers, tim
-
What a fun build that must have been Steve. Certainly the result was more than satisfying. Well done sir. cheers, tim
-
1/12 Italeri Lancia Stratos!
Codi replied to jaymcminn's topic in WIP: Other Racing: Road Racing, Land Speed Racers
You're off to a great start Jason......will certainly follow along and I really do like the French Blue of the car pic you shared. cheers, tim -
T41 Bugatti sport coupe
Codi replied to charlie libby's topic in WIP: Other Racing: Road Racing, Land Speed Racers
OW Charlie....I felt that pain just reading your post and what happened. I can stand blood and pain but I'm still quite squeamish and can only hope that you heal quickly from that. Best regards to you! tim -
’72 Dodge Demon Drag Racer 1/25 scale
Codi replied to AmericanMuscleFan's topic in WIP: Drag Racing Models
Nice rack Francis..........😁.................cheers, tim -
MM, nicely executed so far. The body work you've done is spot on and with the mock-up you've shared it's sure to be a great build. Good luck, tim
-
Chris.....that was FAST......I posted it and 3 minutes later, there's your note. Appreciated sir! cheers
-
Slow DOWN Ian..........you're flying this one too fast. Great progress most certainly and yes, the wheels, engine, chassis all look spot on. There's so much to consider when doing such a build from scratch and I applaud how you just get after it! cheers, tim