dragcarz
-
Posts
2,134 -
Joined
-
Last visited
Content Type
Profiles
Forums
Events
Gallery
Everything posted by dragcarz
-
Very cool!
-
I like it!
-
Looks great
-
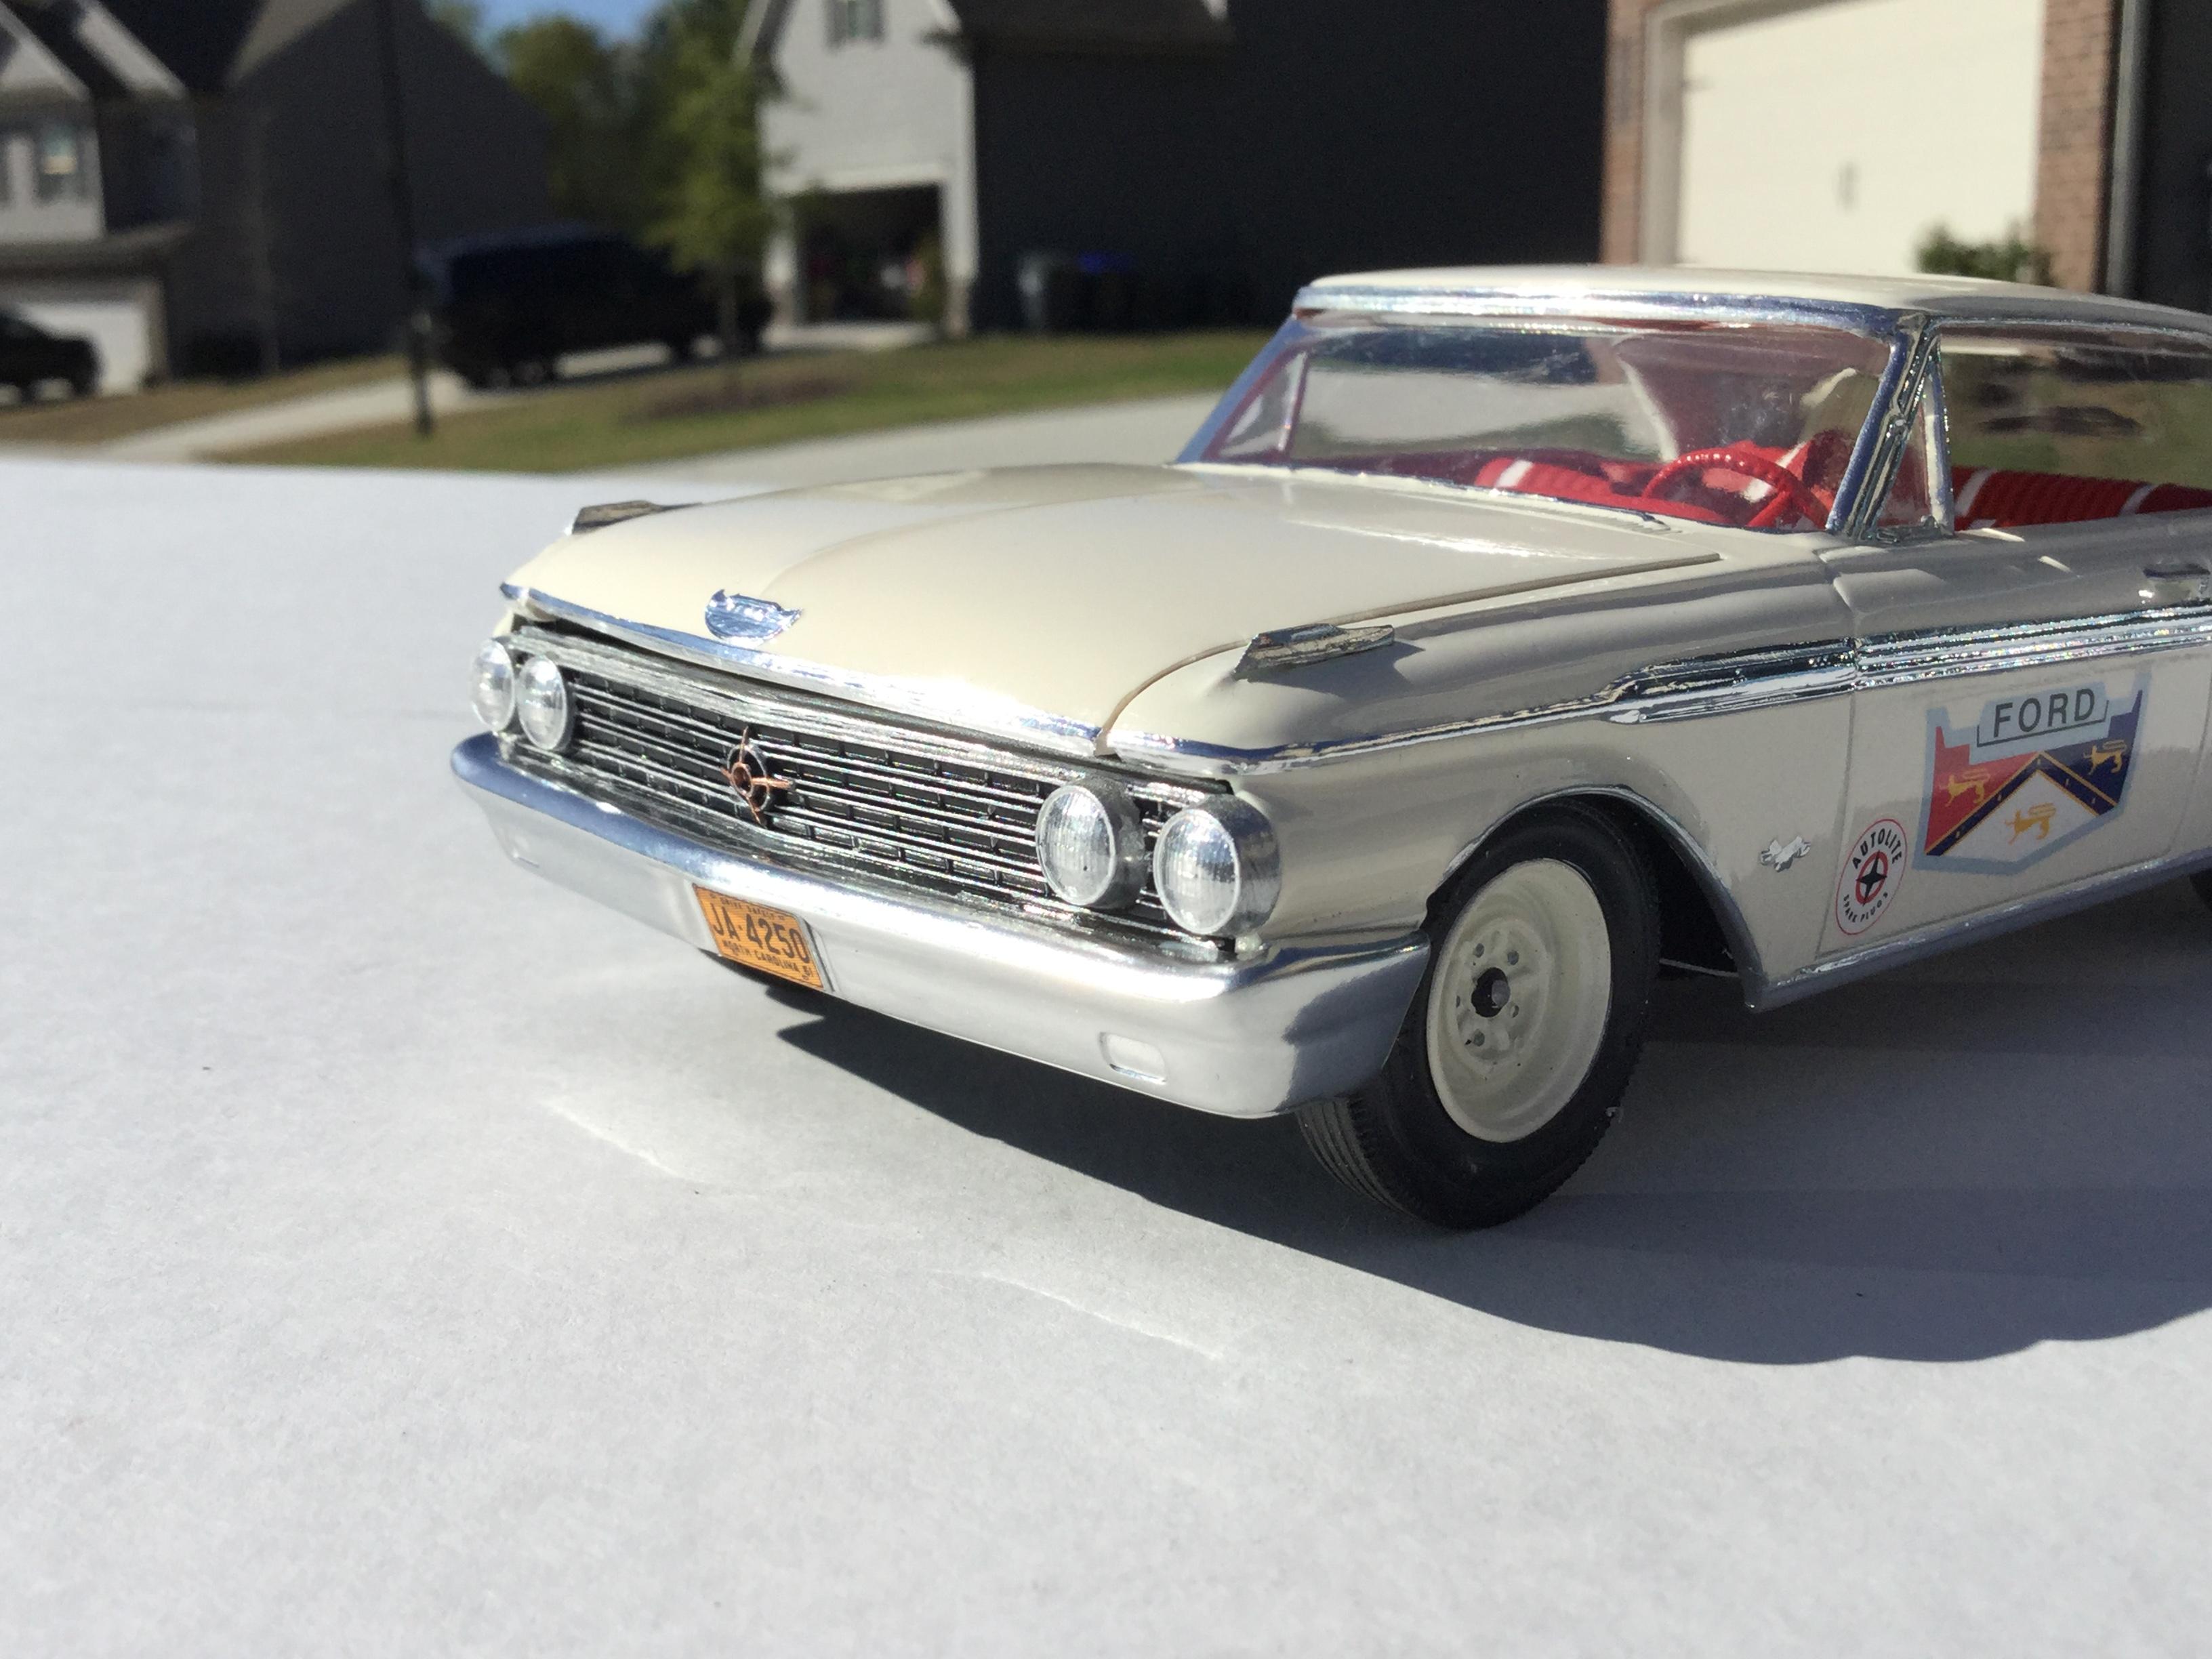
With the body painted, I then added the decals, the car does not represent a real car, I just wanted to capture the feel and look of an early Super Stock Ford. I used parts box open wheels, and front tires. The white wall slicks are from the AMT parts pack, I foiled the chrome trim screwed the chassis to the body. Ive lost some of my skills, with my bad finger, but I’m pleased with the results it’s still better than when I was 8 years old. Another build complete in 2020, I’m on a roll!

-
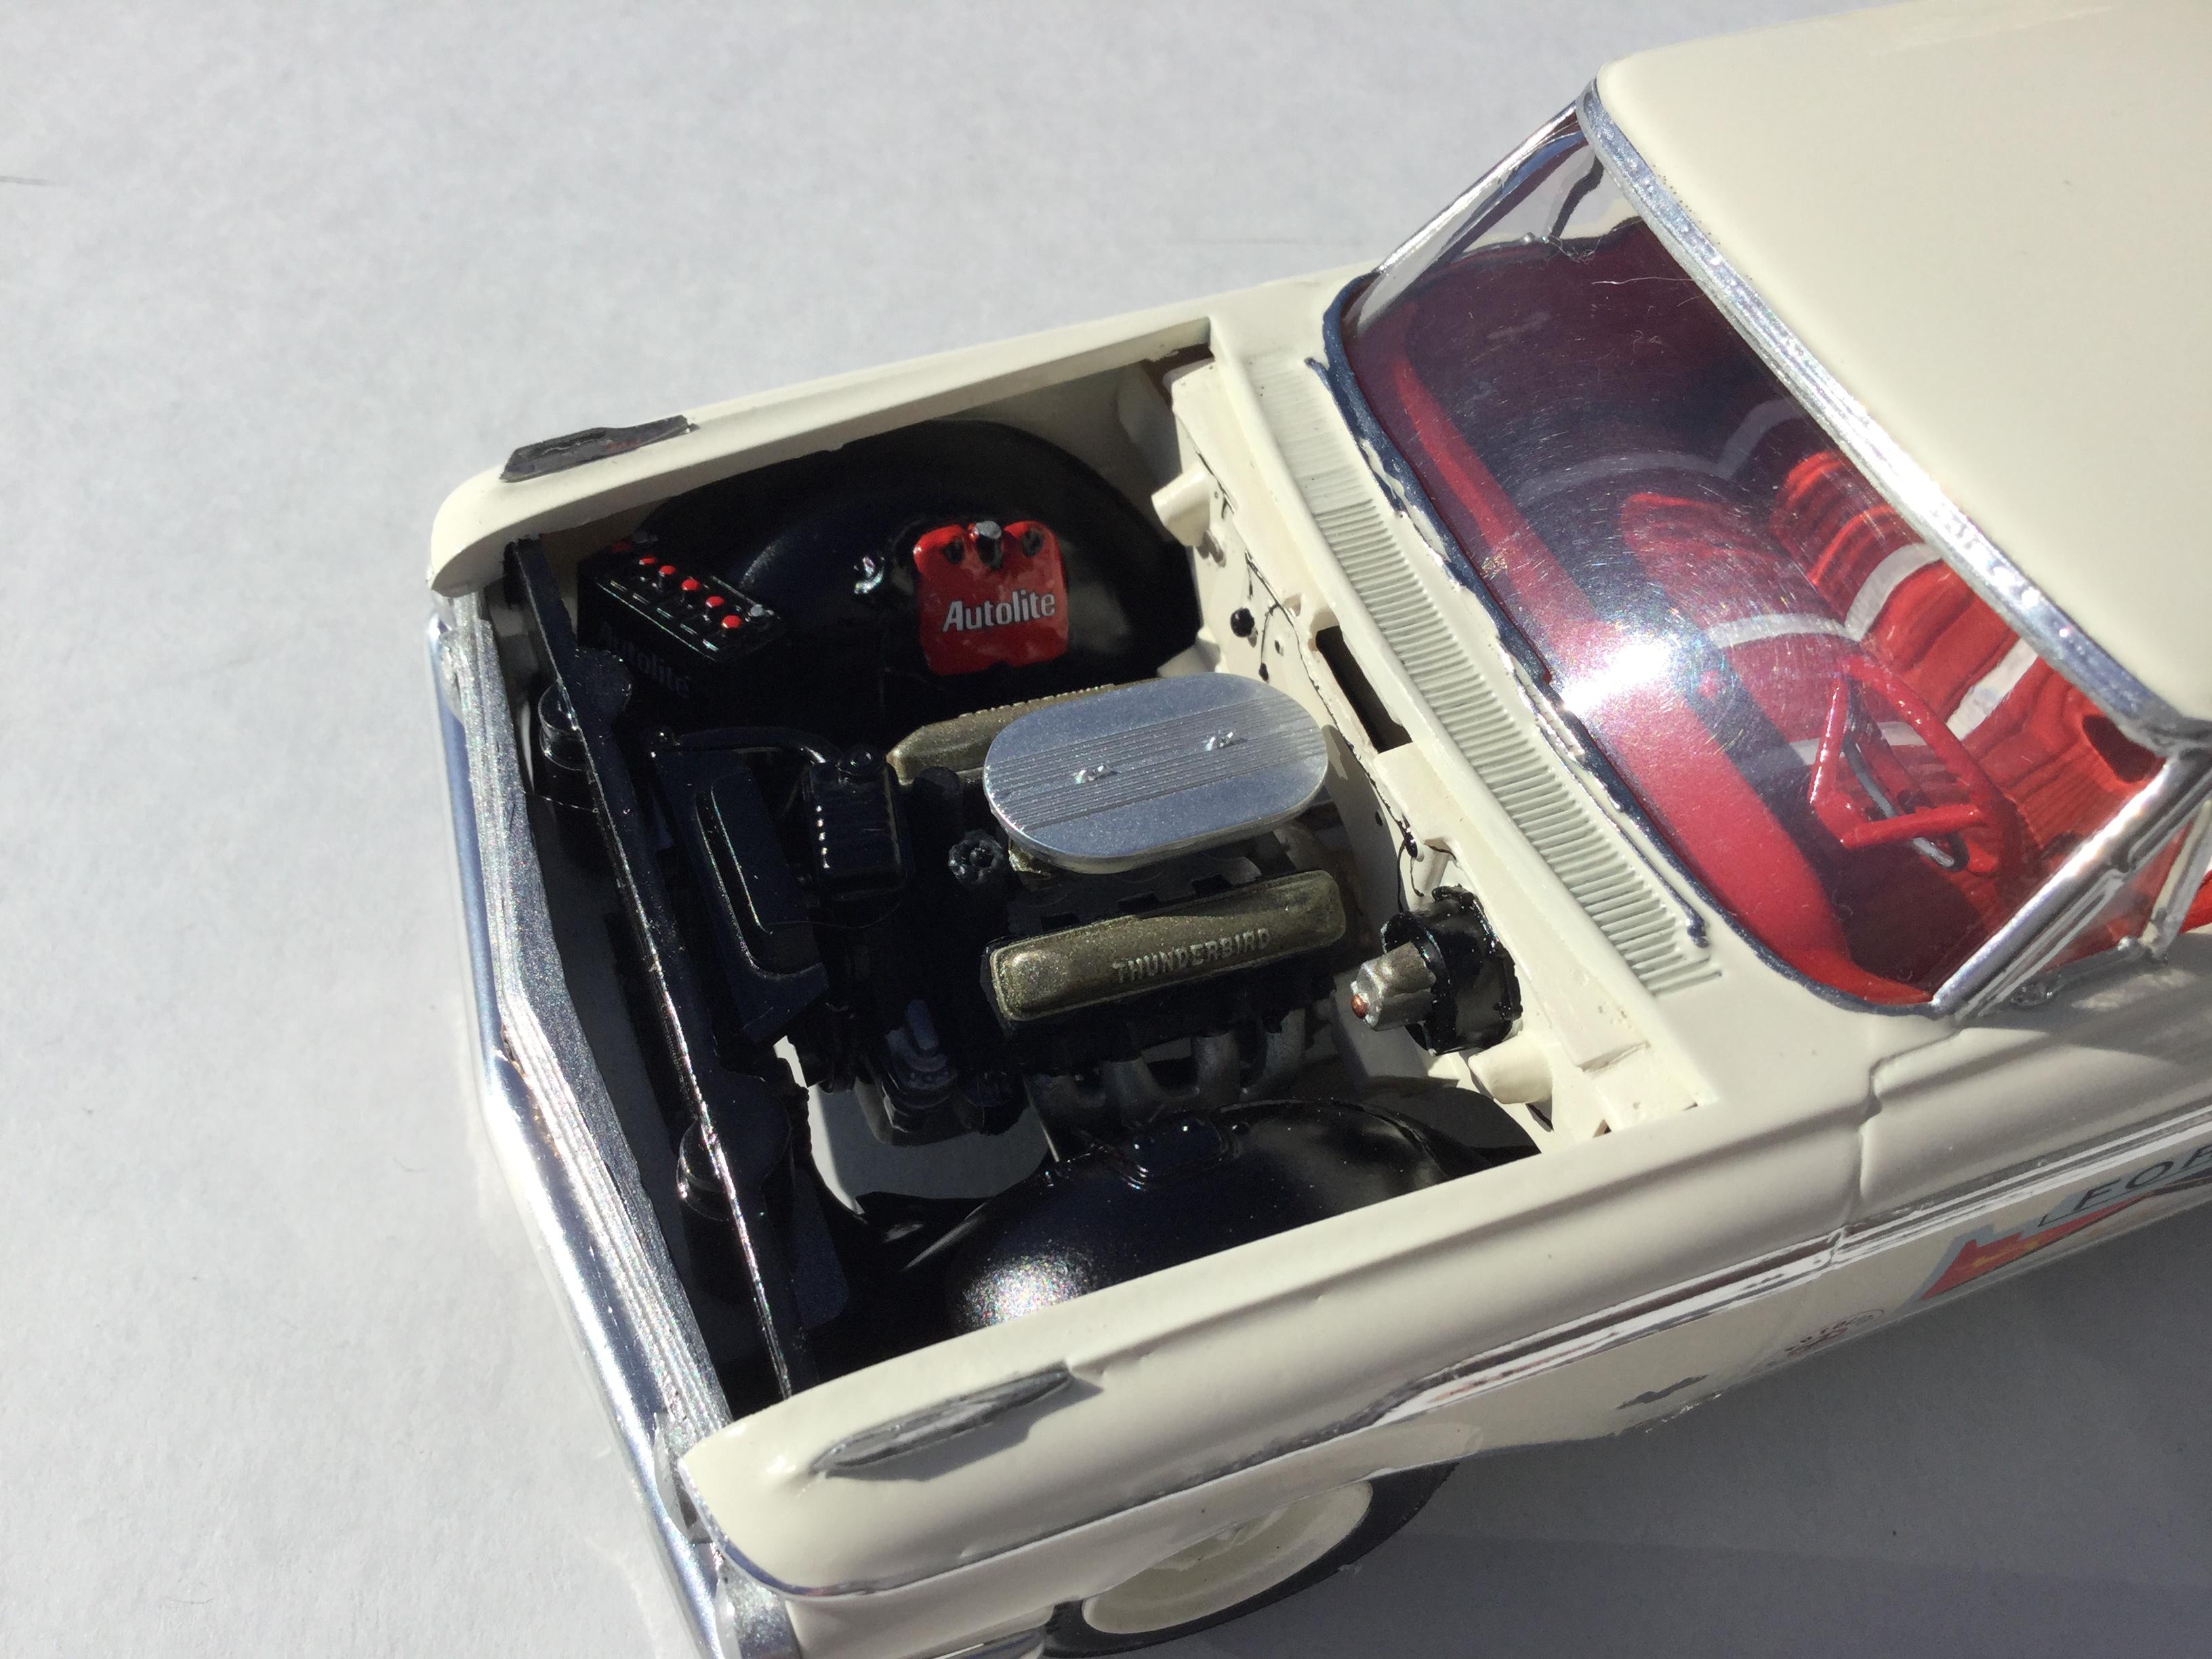
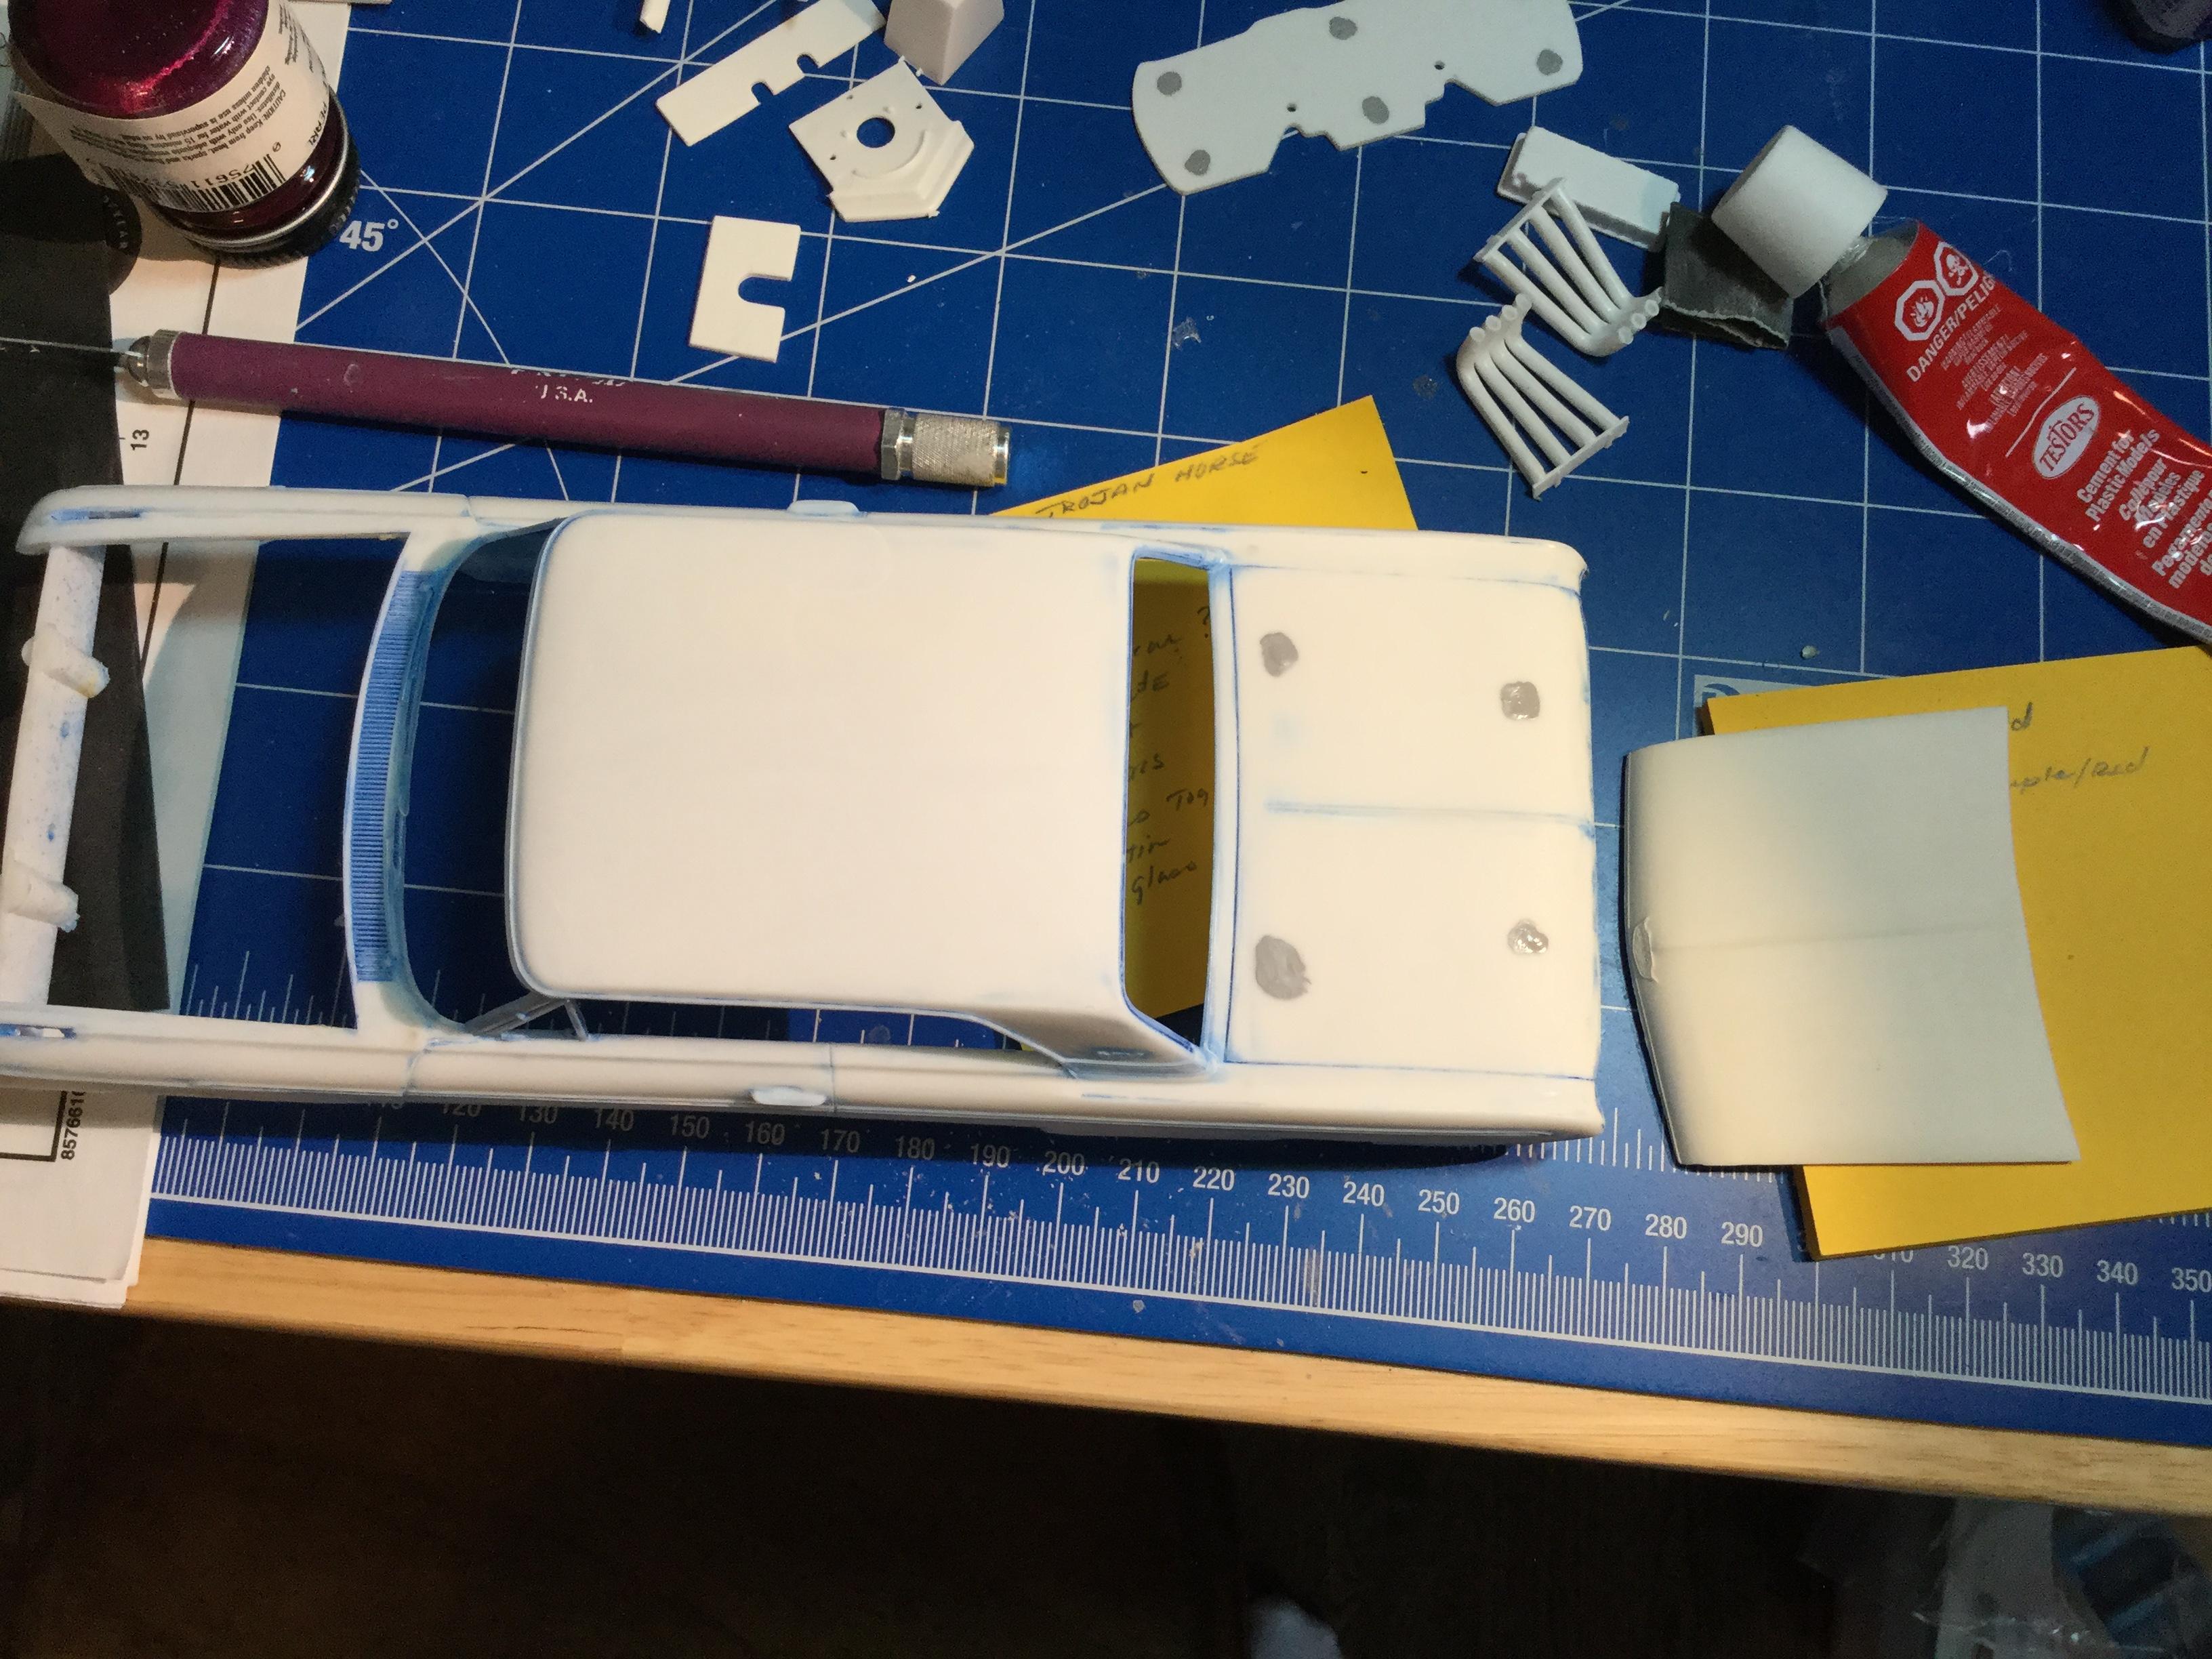
I had some Wimbledon White Spray paint that was common on early Fords, so that was my choice for the exterior. I sanded and polished the kits glass. Then during another internet search I found an interior that matched the kits seat and trim patterns, I located this pattern in two tone and blue and a red and white, I went with the Red with white trim. Detailed the dash and thinned the steering wheel which was very fat looking.
-
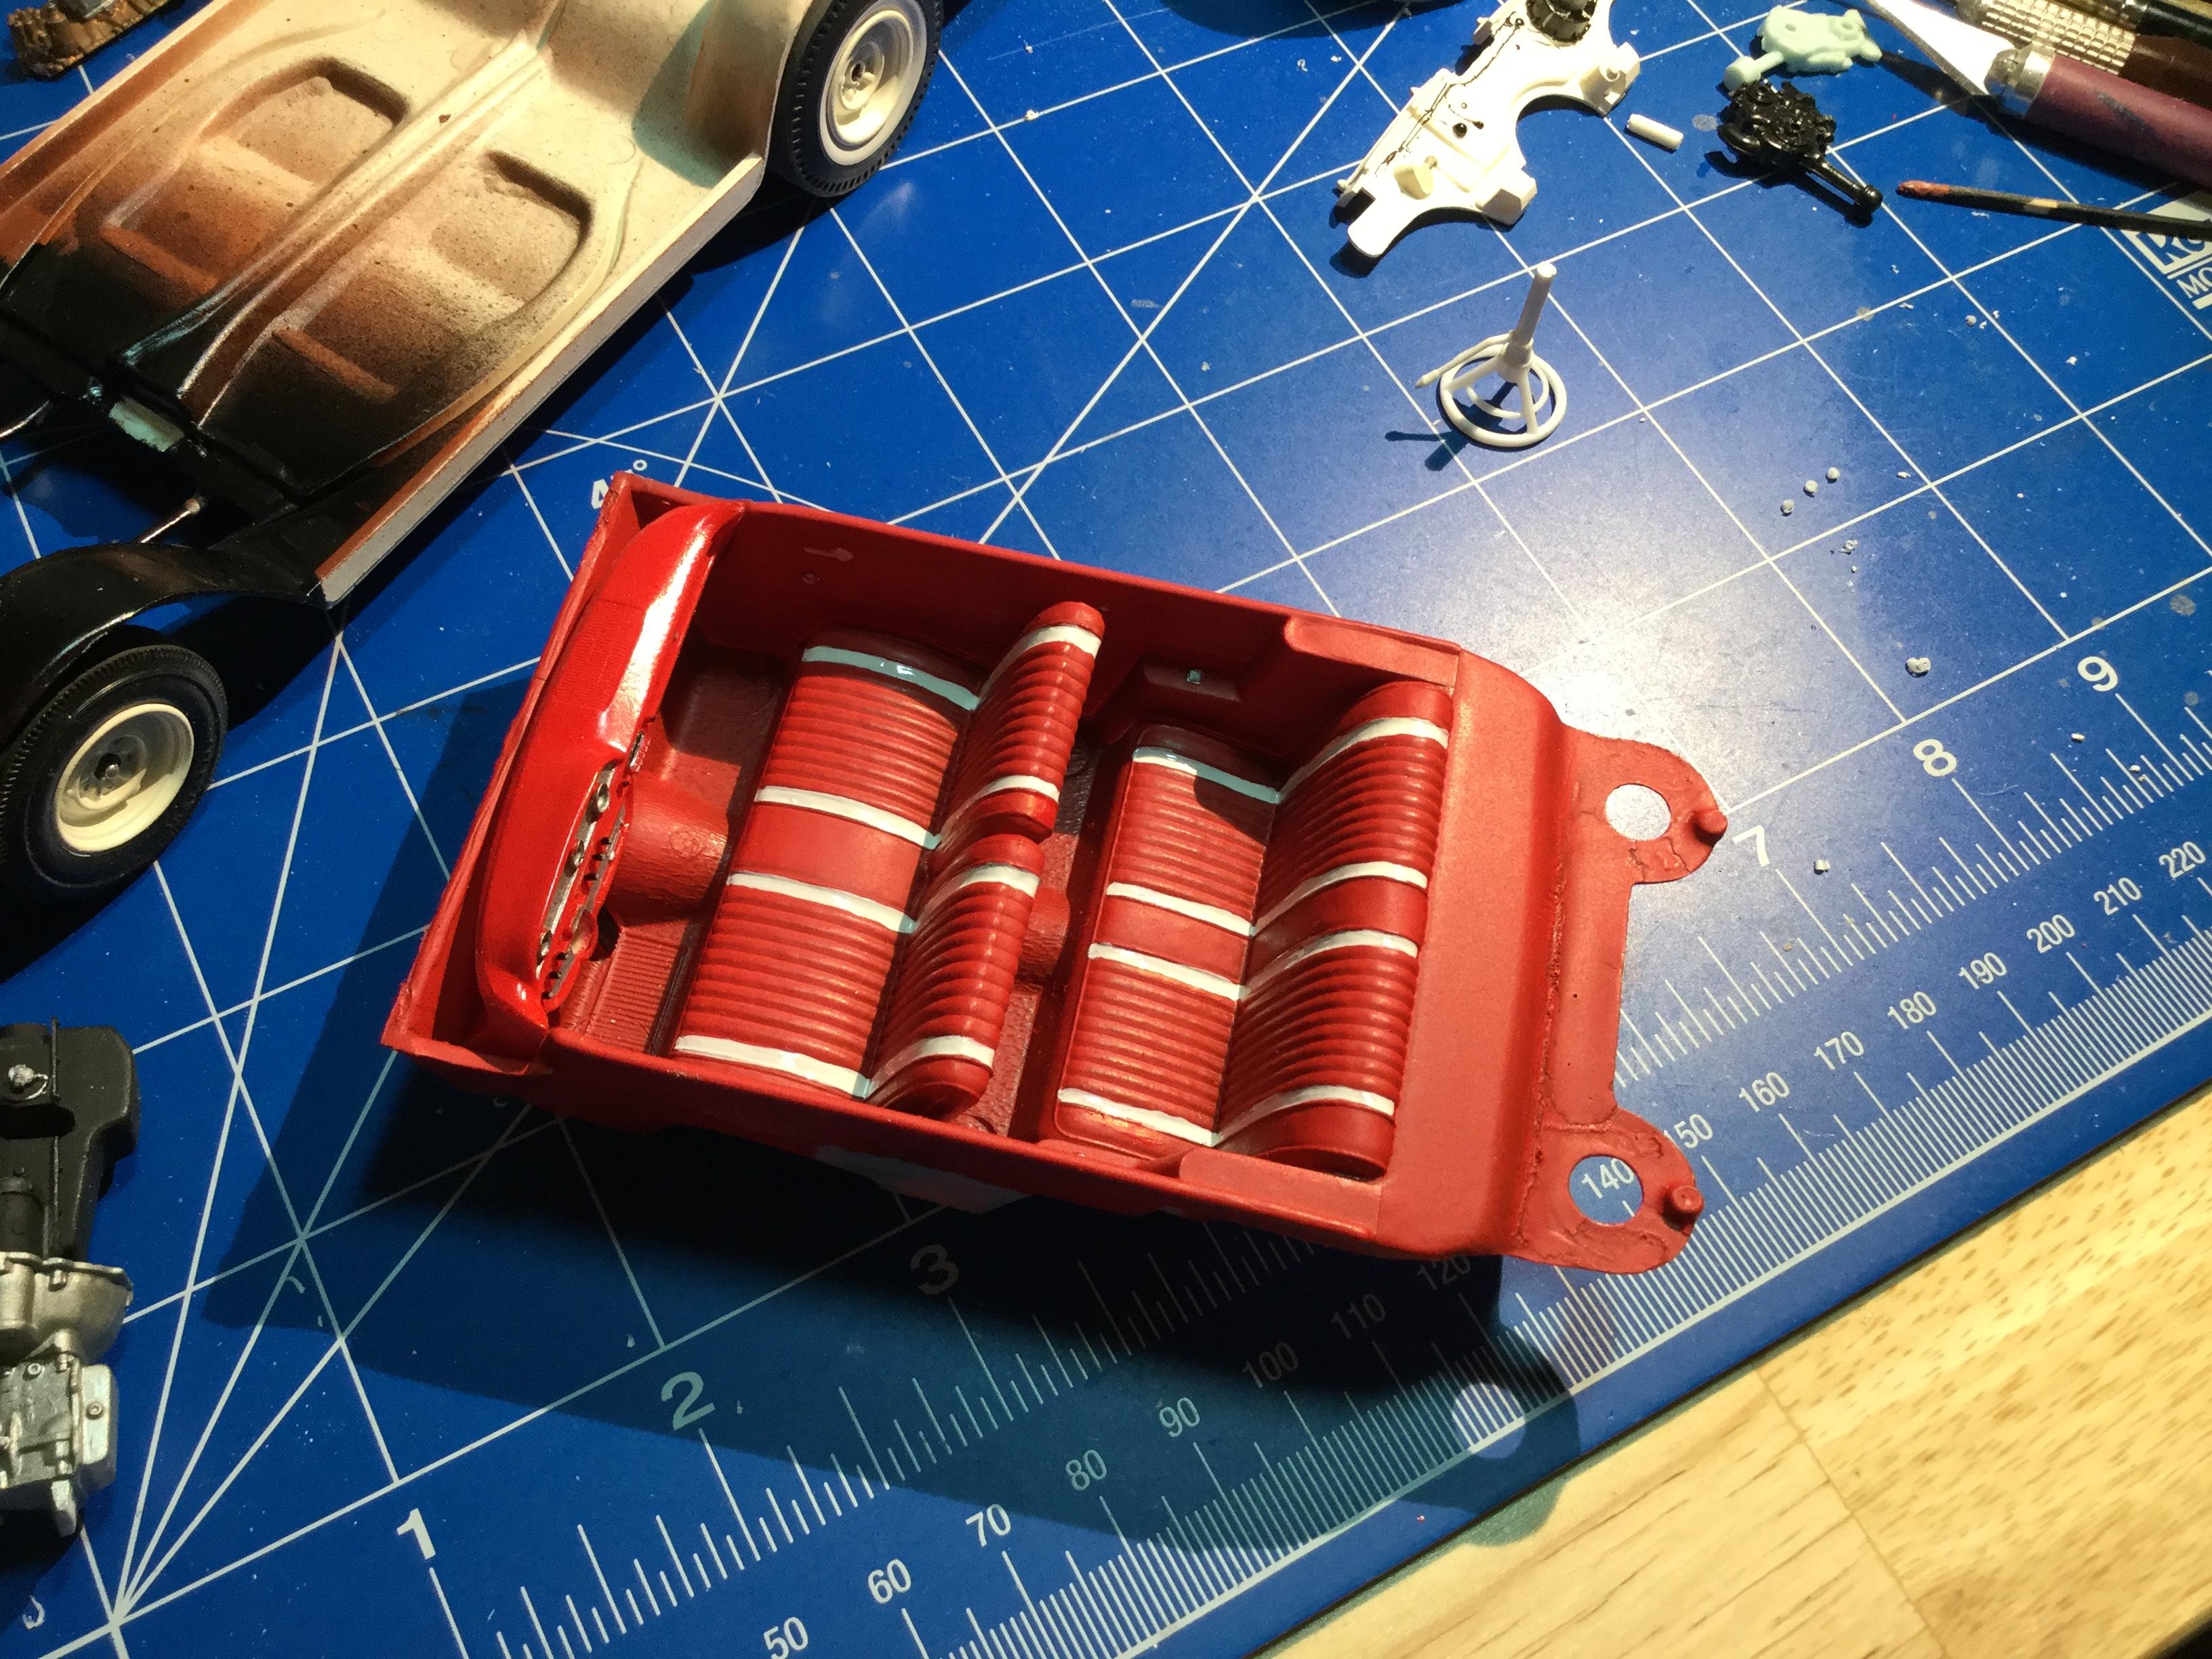
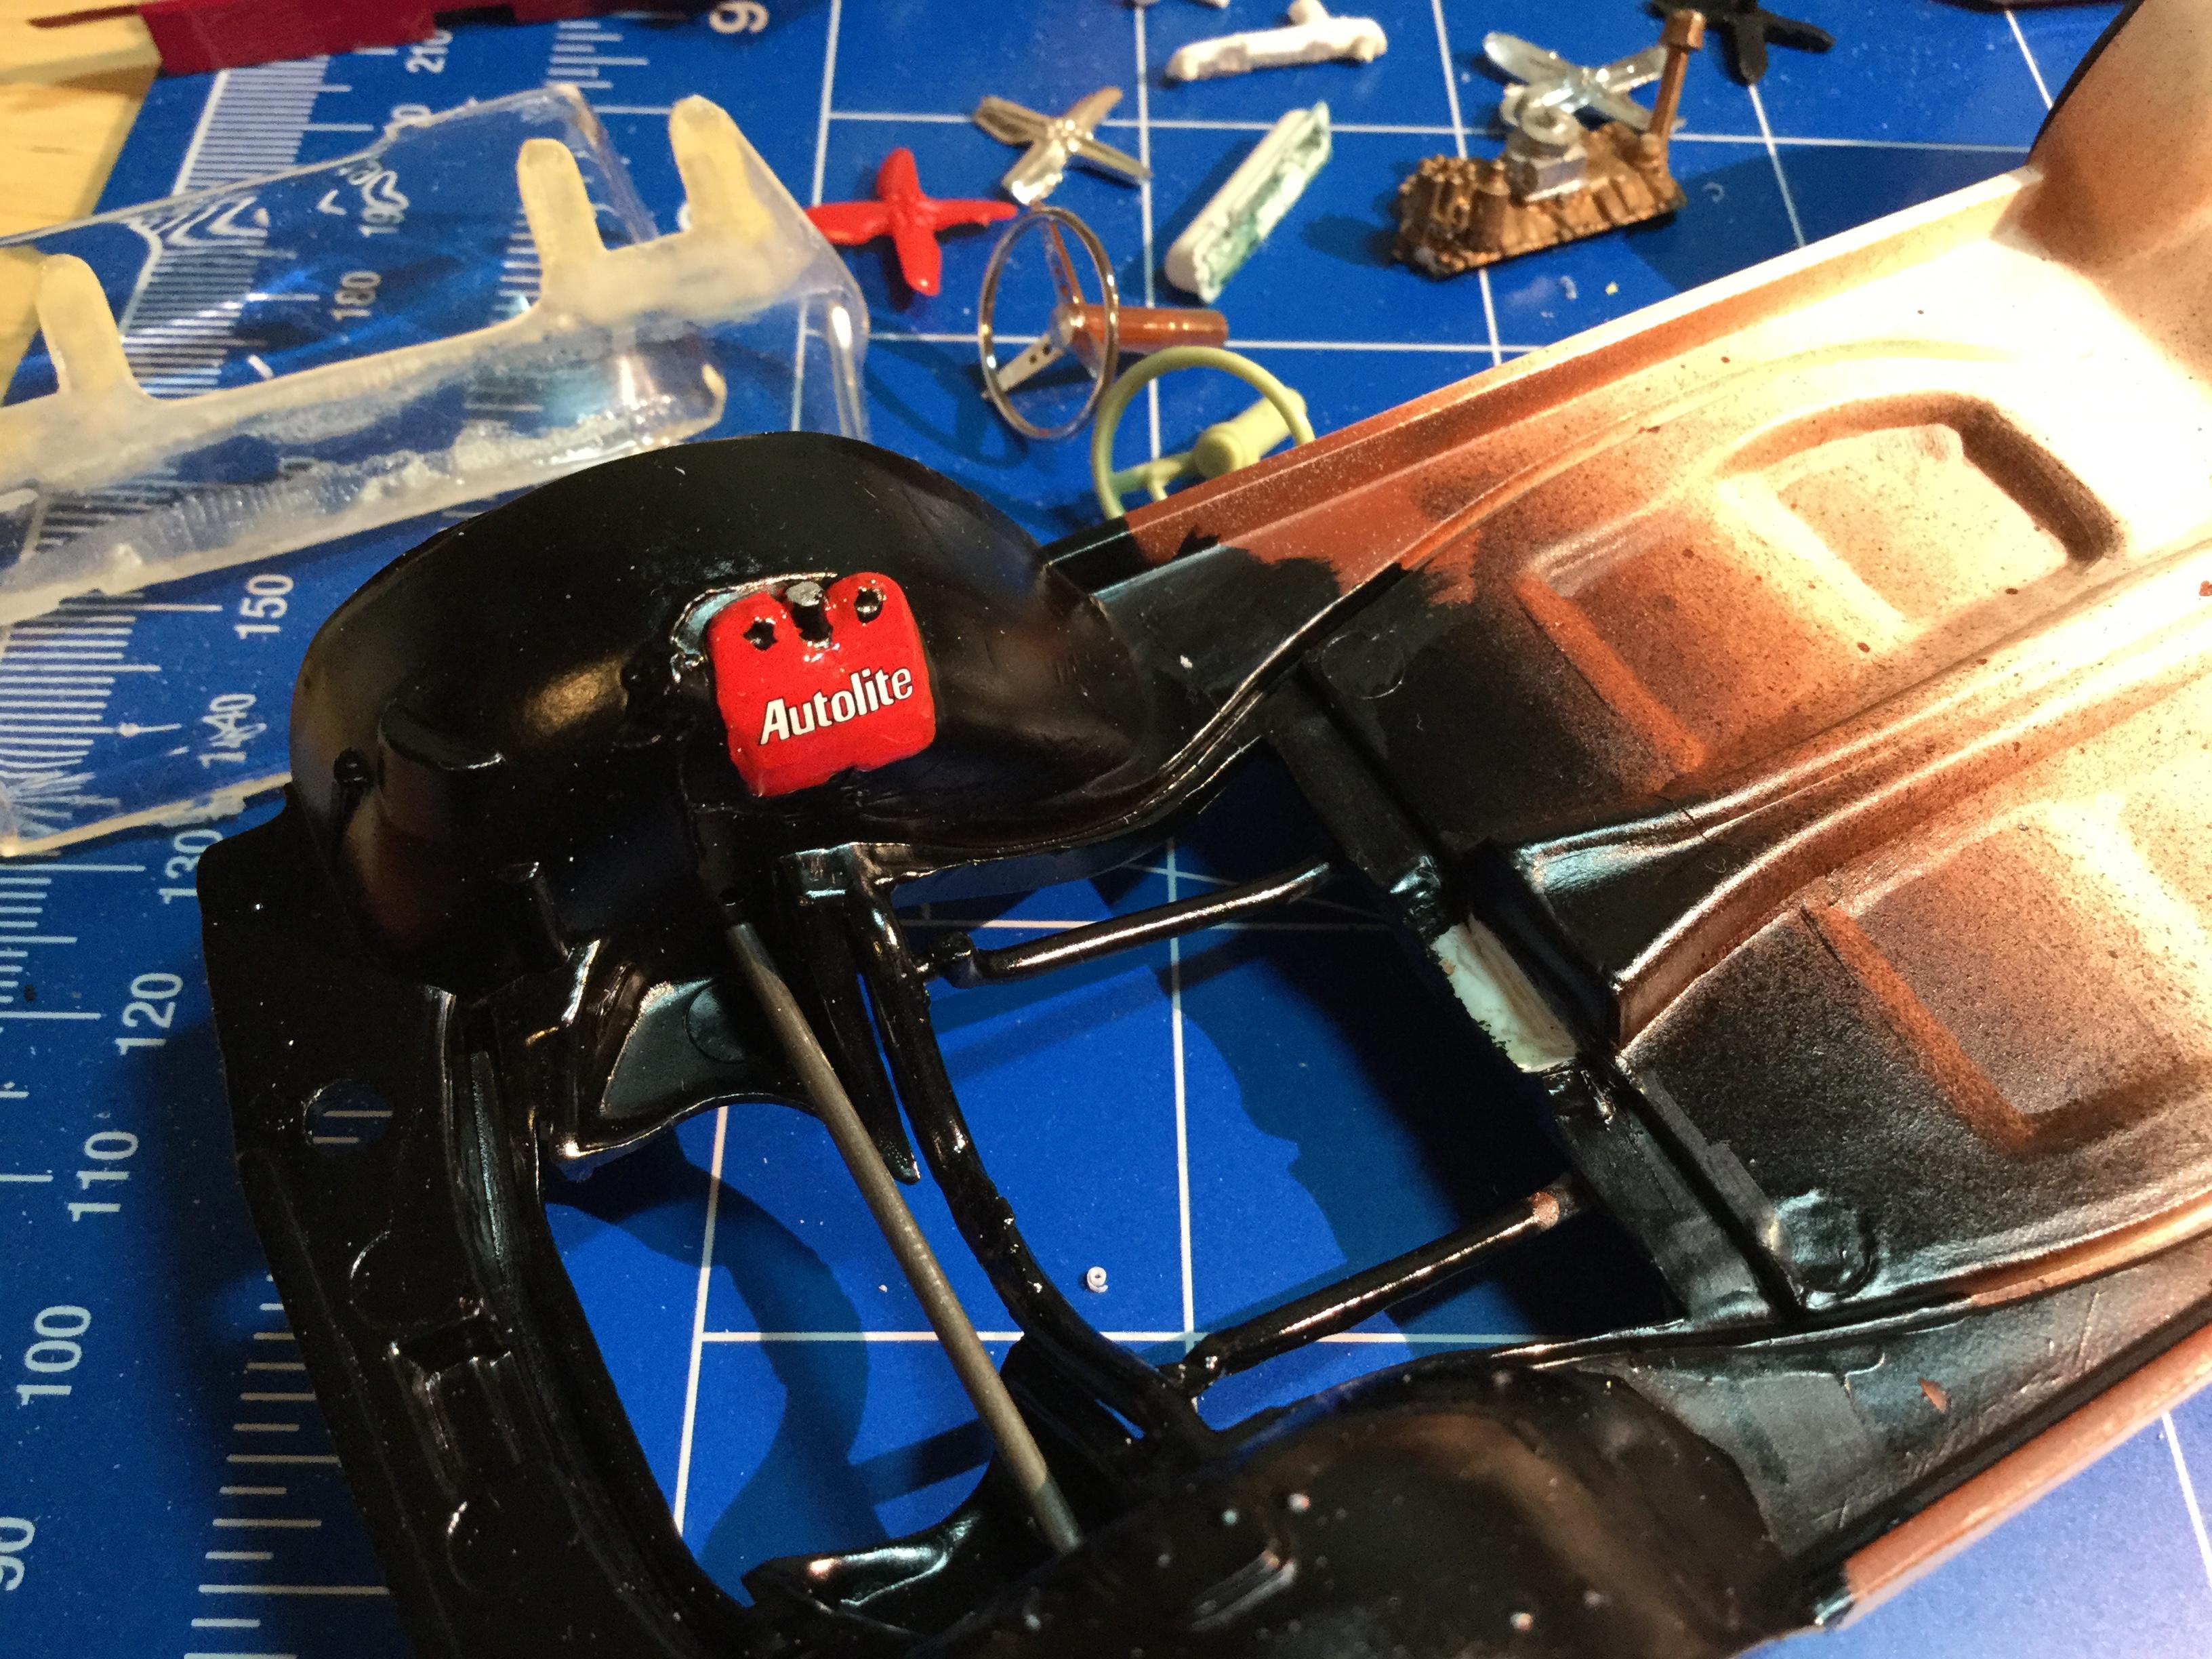
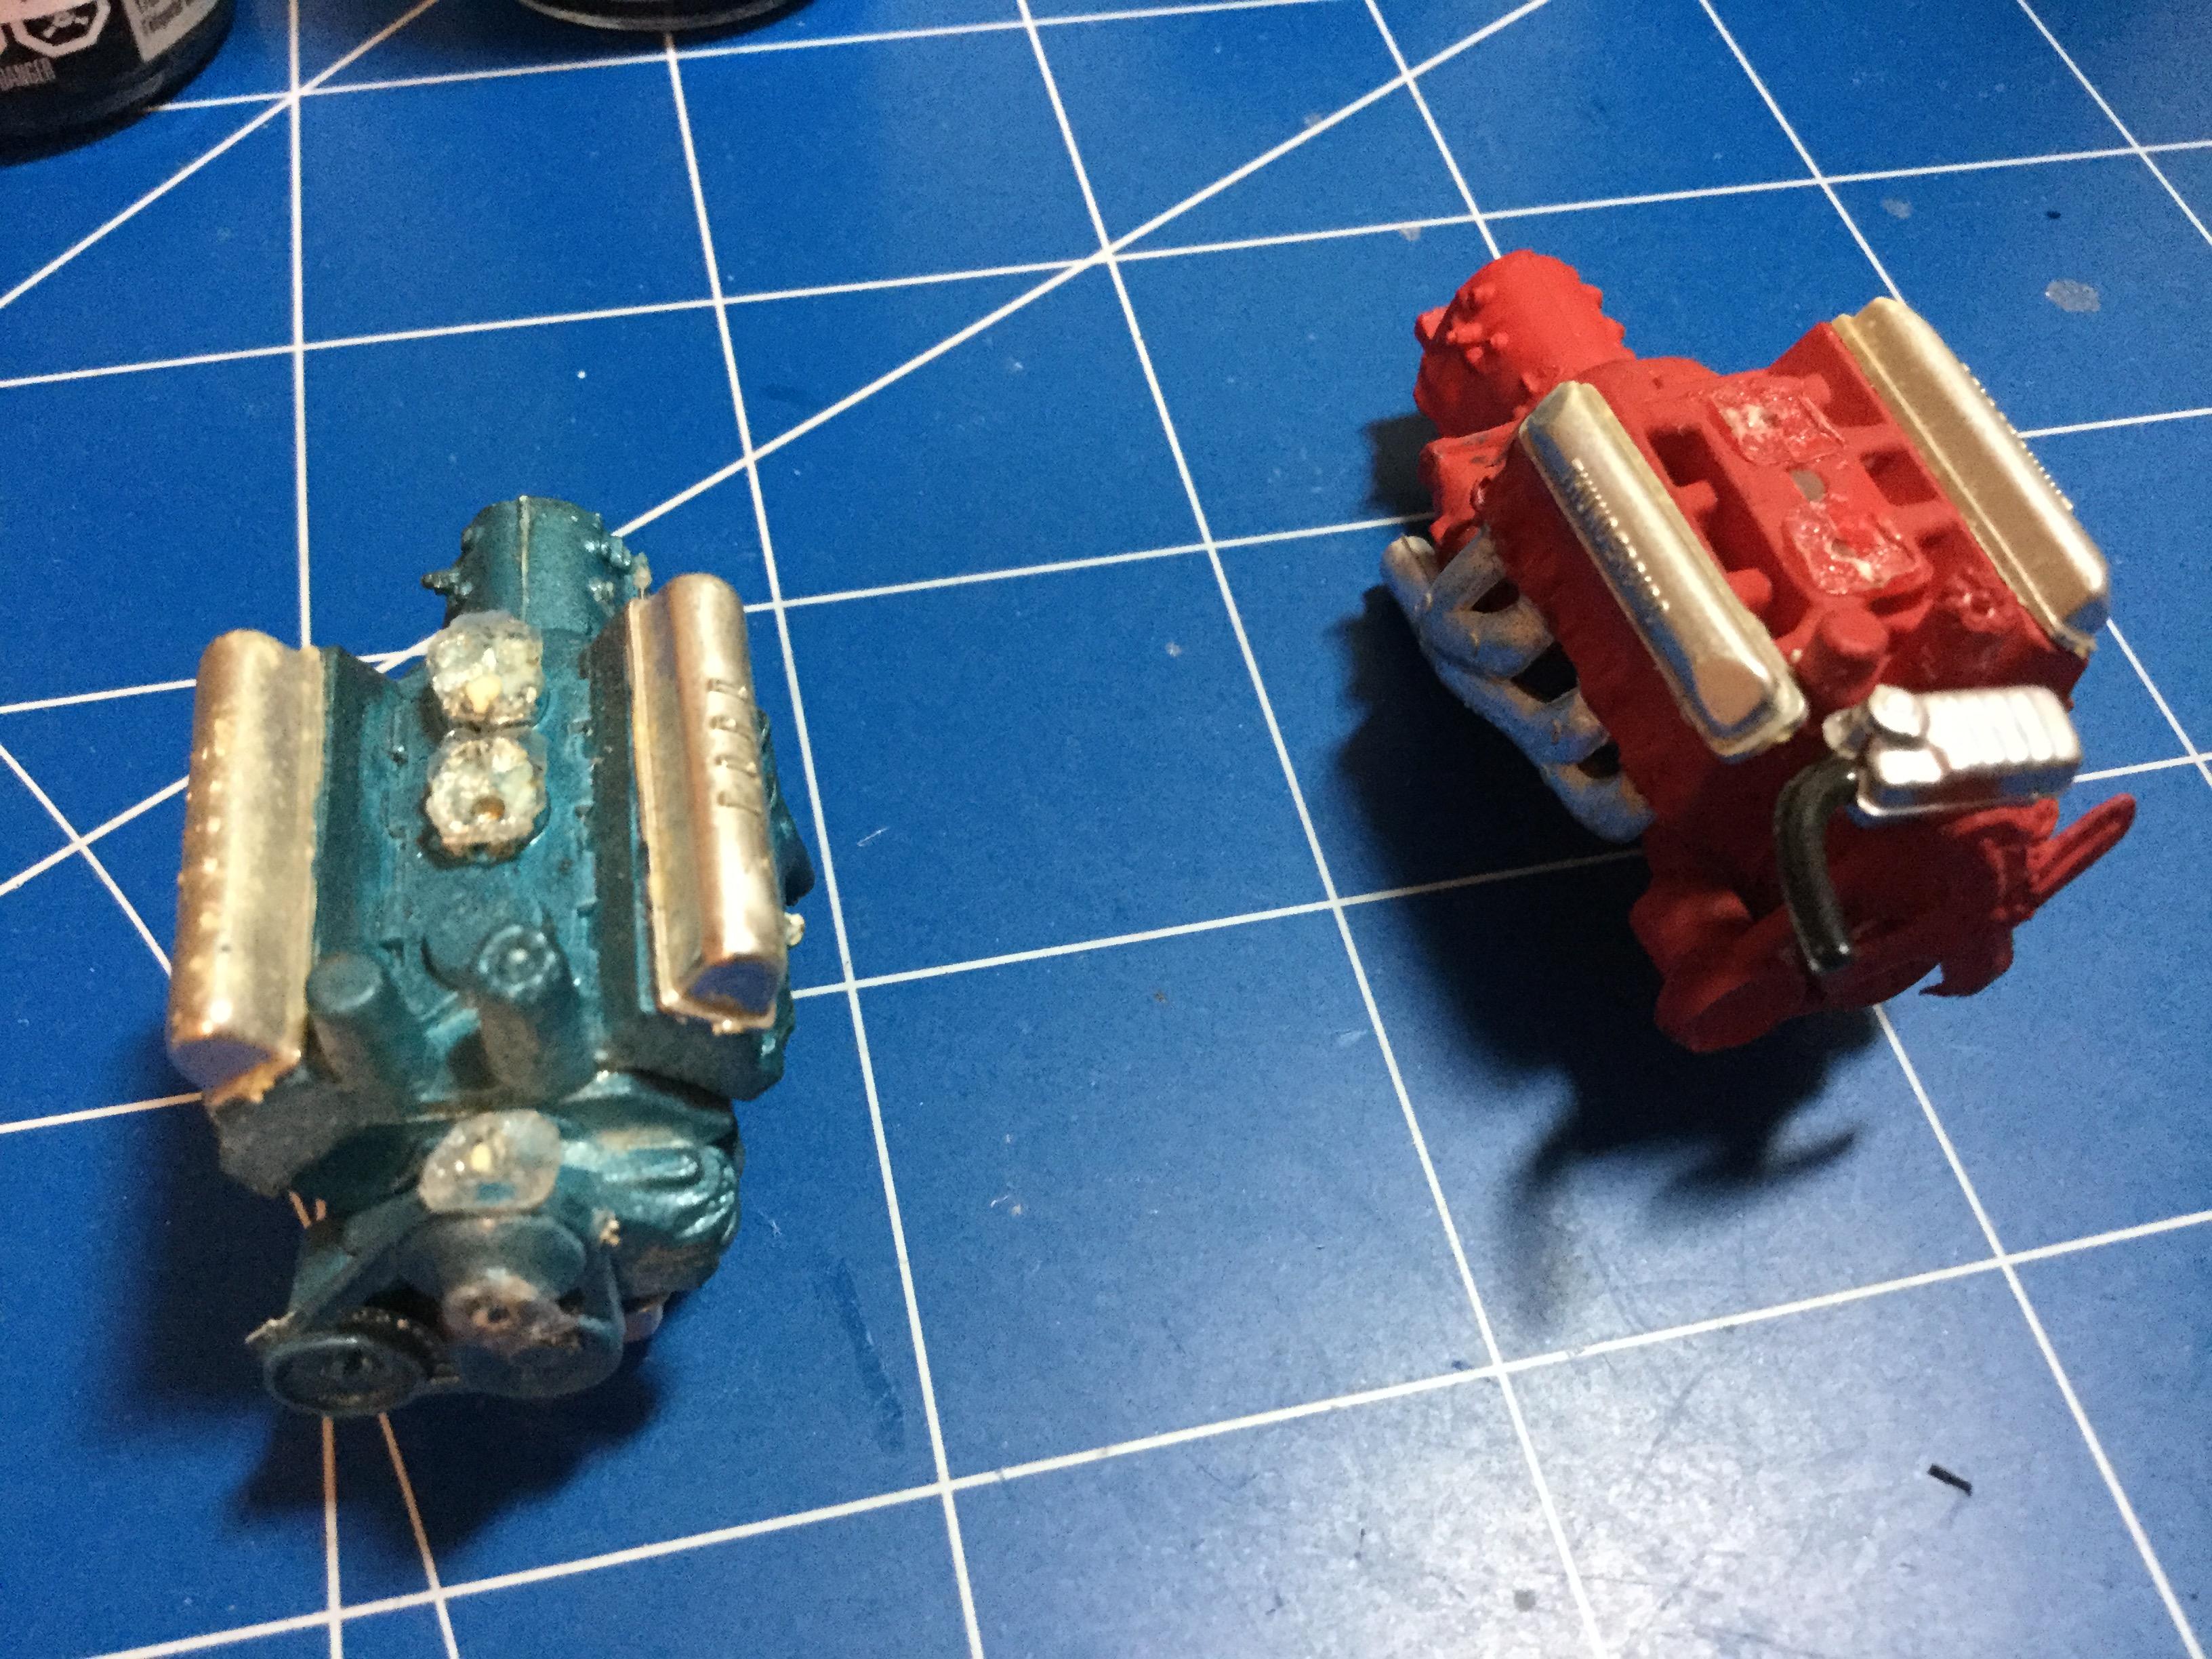
The parts box yielded up the 3 two barrel carbs and oval air cleaner. The reference material I had indicated the motor to be a 406 Thunderbird motor, so I used the T- bird valve covers. I used Testors Flat rust to simulate the primer on the chassis, over sprayed edges, and detail painted the frame, exhaust and fuel tank.
-
I repairs the sink marks in the trunk, and stripped the chrome from the bumpers. The chassis has the Ford features imprinted on the bottom and kinda liked it for the nostalgia of it. It was cracked and I repaired it. I downloaded instructions from the internet to determine what came in the original kit and I happened to have two motors in my parts stash. I stripped and cleaned up the motor.
-
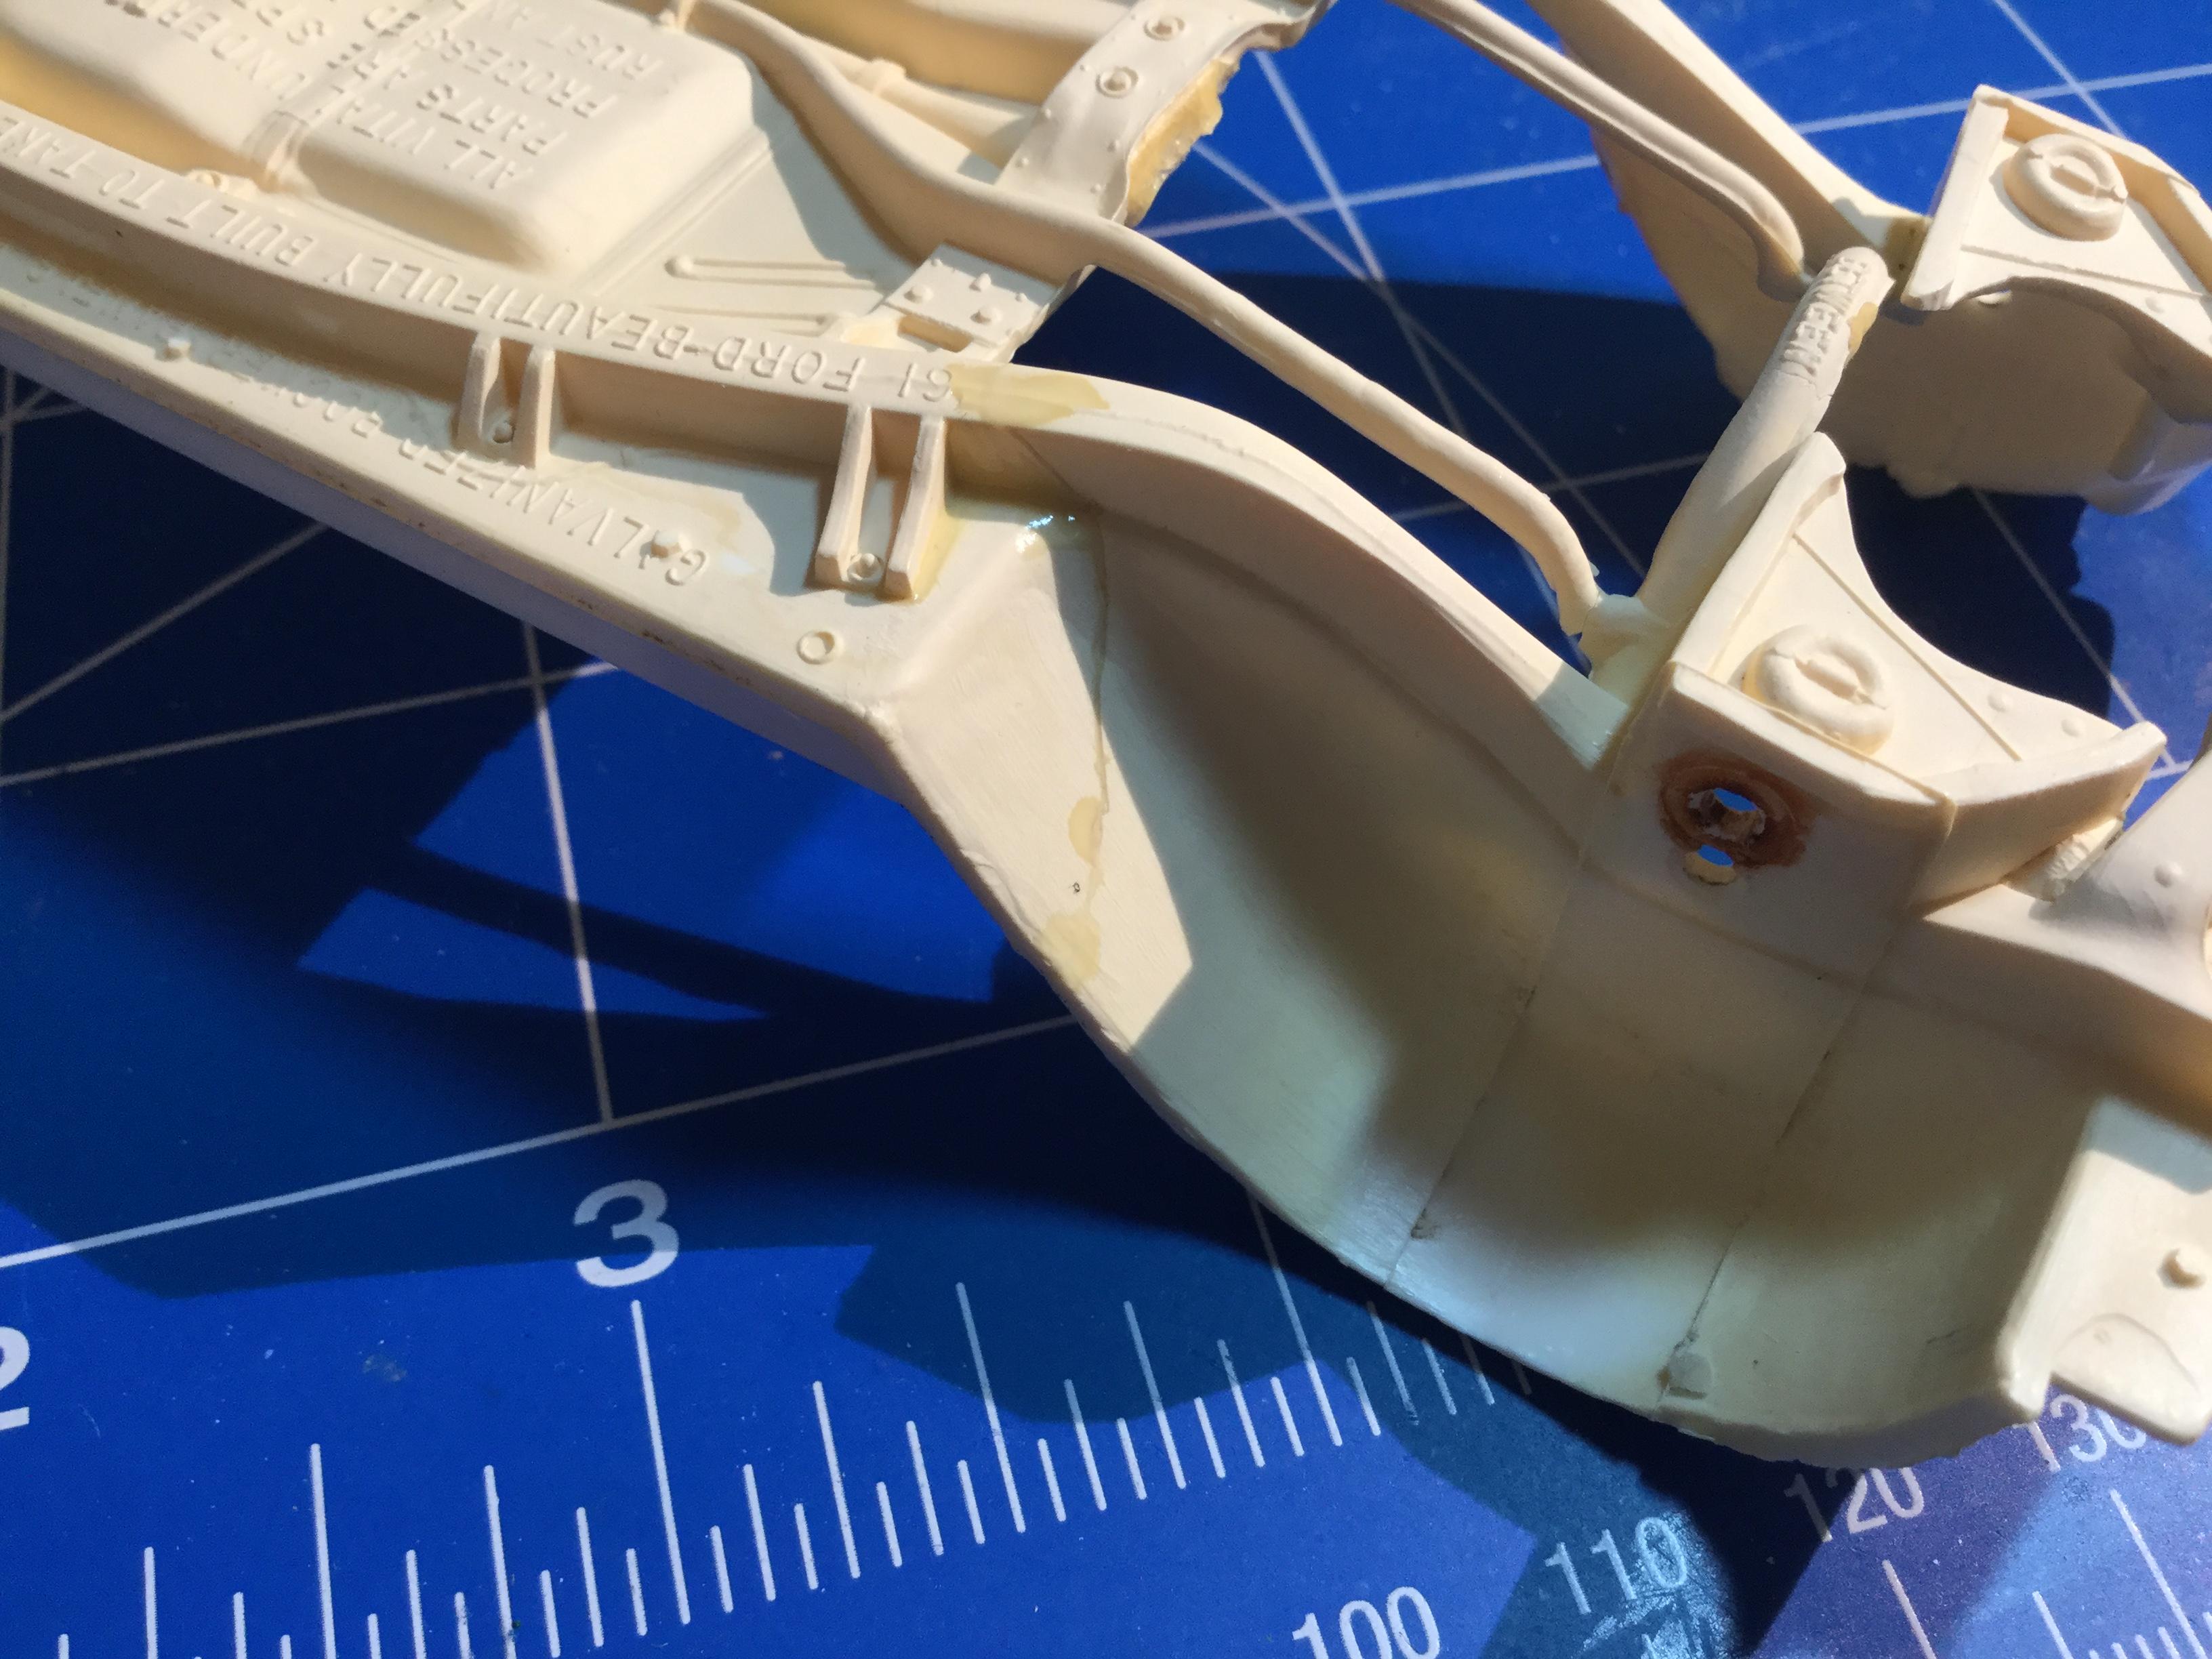
Back in October, I hurt my right index finger at work, of course I’m right handed. I no longer have full use of that finger, and as any model builder knows, you need good fingers. At 63 years old my building time is probably limited and it got me thinking. I came to the realization that all these kits I’ve been wanting to build all these years needed to get done. So I’m on a mission, we’ll see how long it lasts. This is rebuilder I purchased some years back and over the last few years I’ve been collecting the parts needed to complete it. The hood, chassis, tail light panel and tail lights are all from EBay. I stripped the paint and the body was in great shape.
-
First post Eddy Hill Top Fuel Car
dragcarz replied to Ian McLaren's topic in WIP: Drag Racing Models
Very cool, may I ask the color of yellow you used. -
Very cool
-
1964 MOPAR Cars
dragcarz replied to gks1964's topic in WIP: Stock Cars (NASCAR, Super Stock, Late Model, etc.)
The Johan body is a hard top like you need. -
Looking great!
-
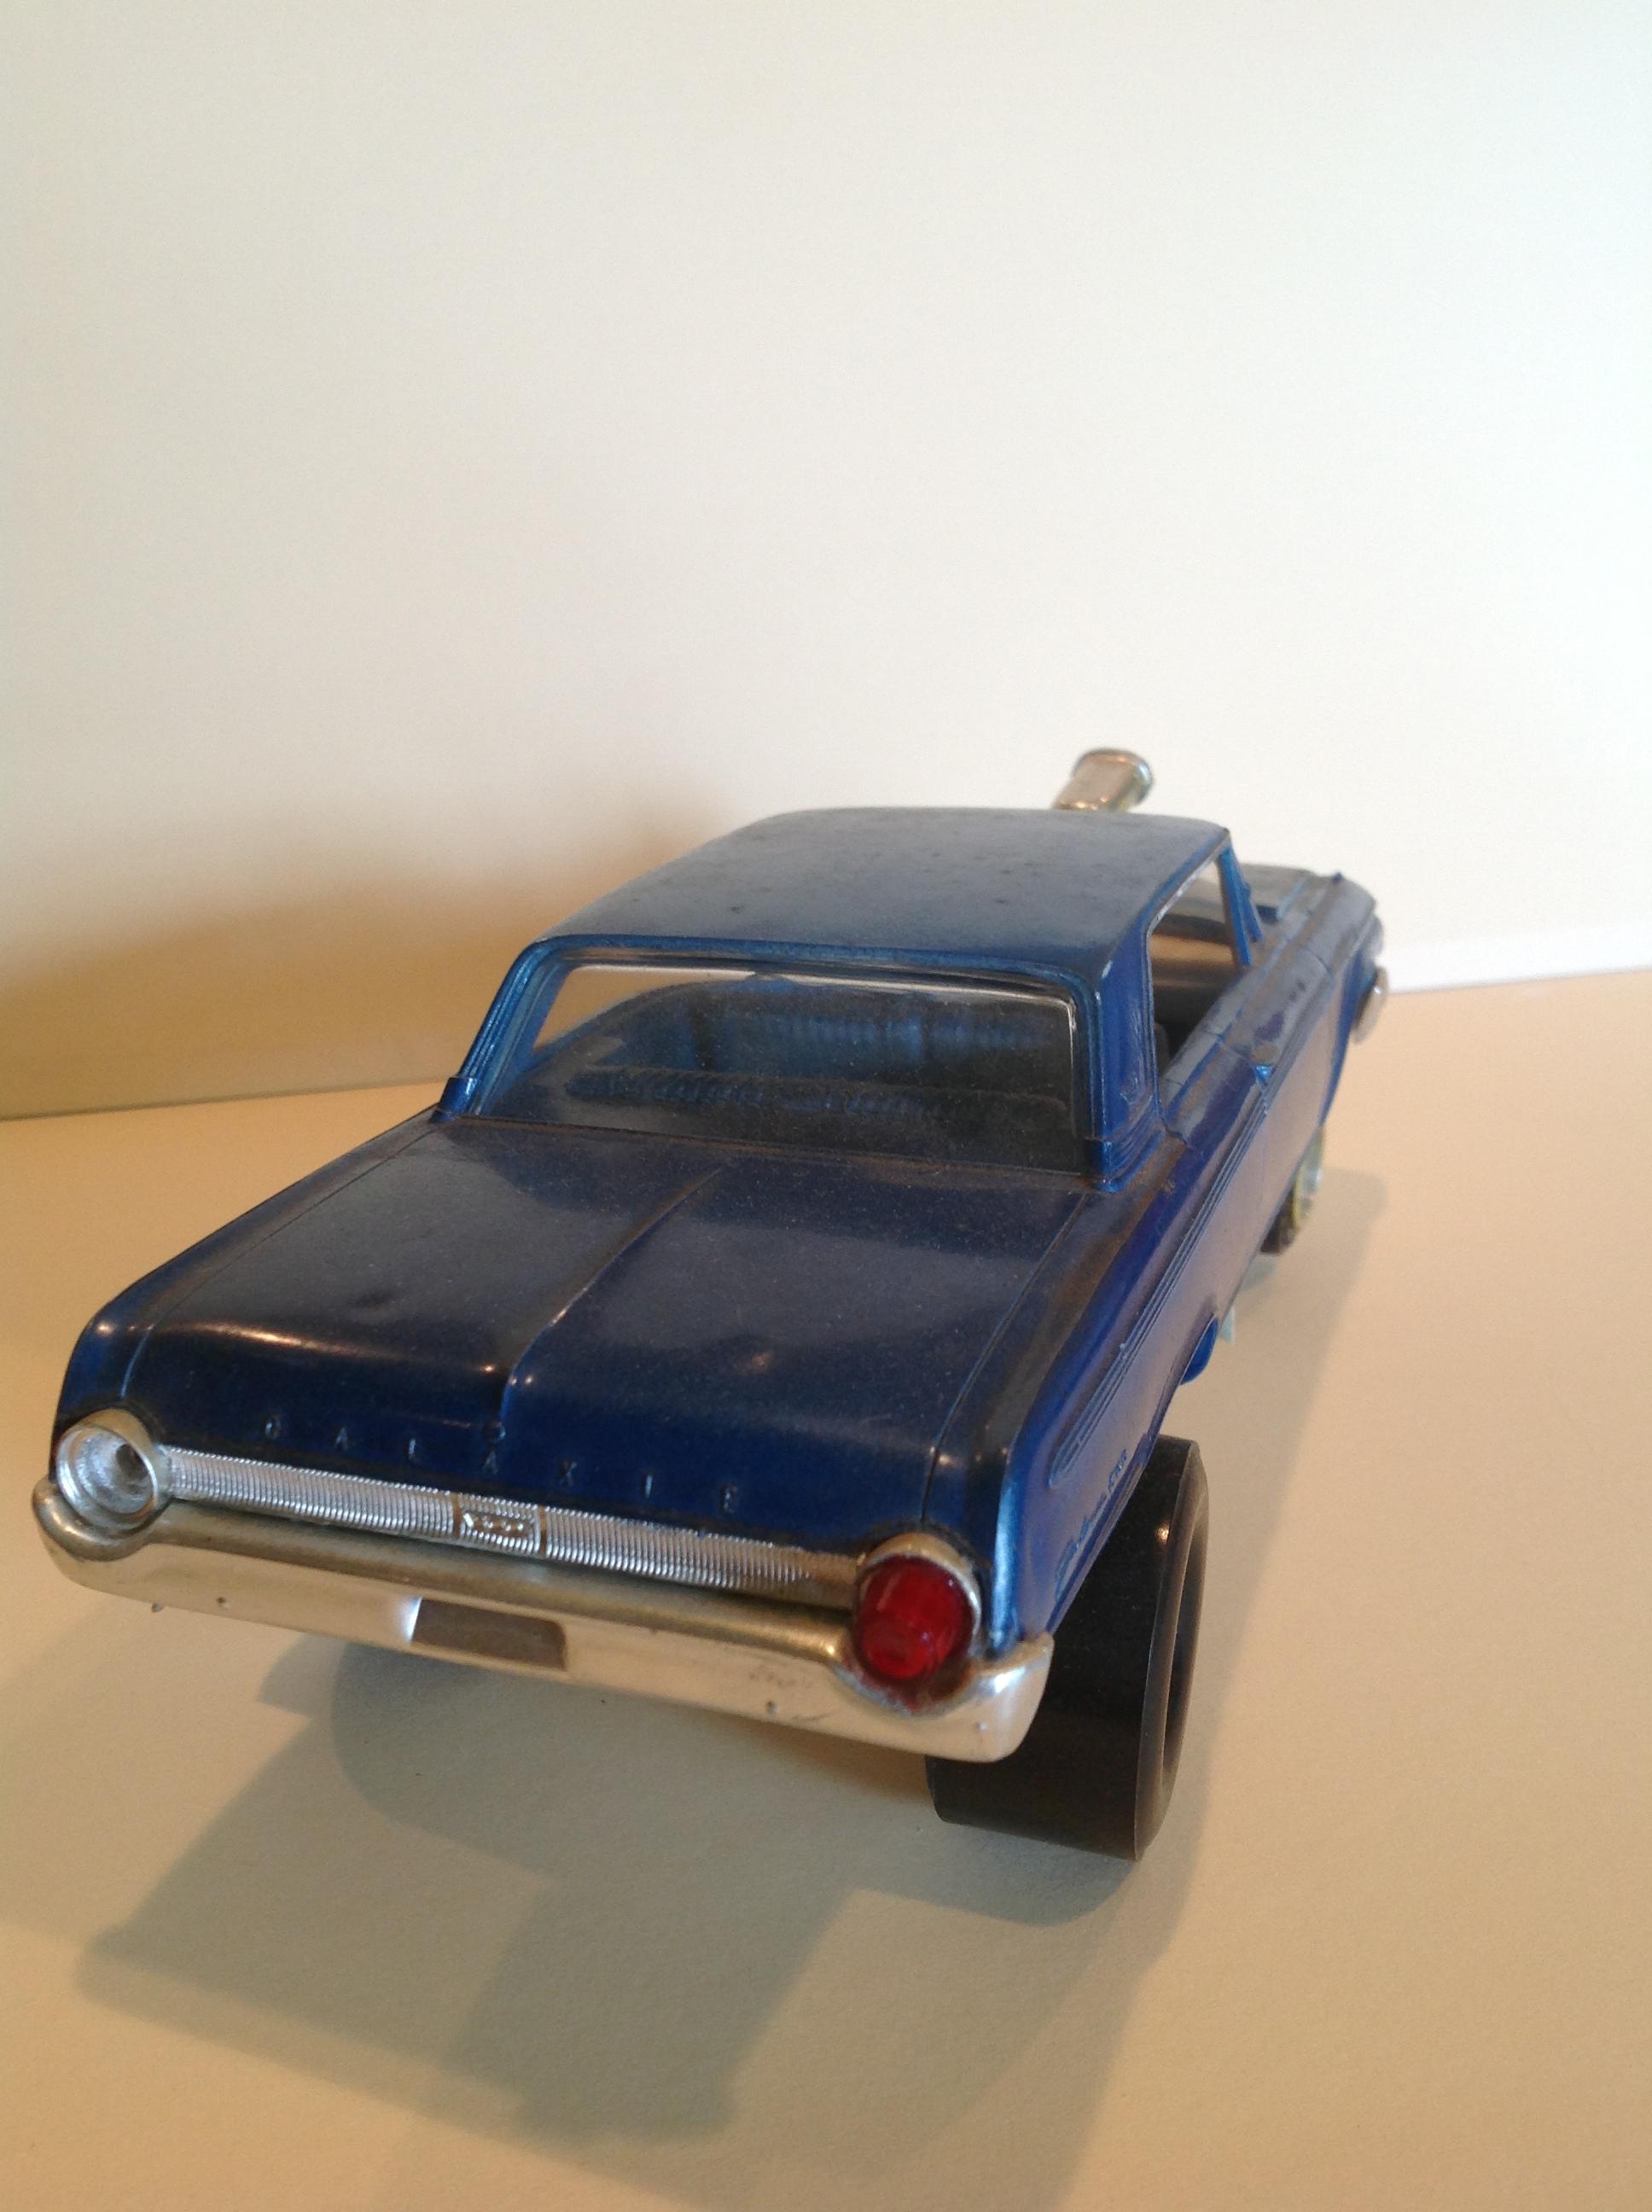
Thank you everyone, I really appreciate the kind words. I’m now working on a 62 Ford Galaxie, built in the same manner.
-
I used the engine and chassis from the AMT 65 Chevelle Wagon kit, drilling out the holes in the chassis for the screw bottom, and detail painting them both. After painting the body, I Bare Metal foiled the trim, added the sponsors decals, added the battery, washer bottle and upper radiator hose, and screwed it all together. I still need to clean up a couple things and try lettering the Chevrolet letters on the hood and gate.
-
After searching color combinations, I finally decided to go with White for the exterior and Blue for the interior, I wanted something other than the black, white and red that are so popular. The Gage decals are from EBay, and the seat belts are from the parts box.
-
I really enjoy the simplicity of the old screw bottom kits, and wanted a simple fast build so detail is limited to paint and decals. I filled the back up lights on the 65 rear bumper, as the 64 has them combined in the tail lights. I stripped the chrome off the front bumper and grille. I painted the front grill flat black, masked the grill and then air brushed Molotow on the bumpers. I then used their pen to detail the grille, Tamiya clear orange to the turn signals. I sanded and polished the original kit glass, it came out very nice to my surprise.
-
First finished build of 2020. I love the variety of cars you find in the Stock and Super Stock classes. I came across this EBay purchase back in 2011. It was missing chassis, tail lights, rear bumper, motor and trans, and hood. I kept watching EBay and eventually located tail lights and a resin hood. The interior tub, dash and seats were unpainted. I had a 65 Chevelle wagon parts kit, which I sourced a lot of parts from. The body was in pretty good shape.There was a small crack at the wind shield, and a glue spot from a bubble gum flashing light that I repaired.
-
My favorite so far, very nice build
-
Very nice, you don’t see many of these built
-
Very cool
-
I agree with Snake !
-
So Tim, I have to ask, did you become an architect, and do you still collect stereo equipment...? Great post, by the way, I always enjoy you contributions, a beautiful build!
-
Love your work
-
Very nice!
-
Very nice work