av405
-
Posts
1,206 -
Joined
-
Last visited
Content Type
Profiles
Forums
Events
Gallery
Everything posted by av405
-
Exactly. Looking at various facebook groups, people are constantly posting about building the Revell Blazer. Not that this is absolute proof that the kit has been a success, but I see the Blazer being built more than many other recently released/re-issued kits.
-
I keep reading that the Blazer has been a sales flop so far. Is there any concrete evidence of this? Or that at the very least its underperforming?
-

Ford Louisville
av405 replied to Jürgen M.'s topic in WIP: Model Trucks: Big Rigs and Heavy Equipment
You're making quick work of this one! I like the green. -
Agreed. I'm certainly no insider, but I wonder how hard it would be for, say, Revell to tool up a Suburban out of the Blazer or AMT to tool up a 1992 Bronco out of their 1992 F-150 kit. I know significant investment would be required, but some of the parts already exist and would be interchangeable. As for a 1992 Bronco kit, can you imagine the box art possibilities? Just draw a white Bronco cruising down a generic Los Angeles-area freeway 😄
-
New pickups would probably do well given all of the different variations available (single cab, crew cab, dually, different trims, etc.). Very similar to the range of 1990's AMT Chevy trucks that were released (single cab, extended cab, dually, stepside, 454SS, etc.). A lot of people have voiced interest in having a Dodge Durango kit. This would cover at least 3 major interests: performance, daily driver, and law enforcement. A lot of modern SUVs are boring, but I believe there would be interest in some of the domestic brands. In answering this question, I'm thinking back on the wide variety of then-contemporary "everyday" vehicles that AMT and Lindberg tooled up and released back in the 1990s. Trucks, cars, minivans, SUVs. Maybe they seemed boring to some then but it was probably relatable to a lot of consumers. I would even take modern examples as curbside/snap kits to reduce costs. I think there would also be a market for new tool "retro" subjects like a 1980's Suburban or a 1990's Bronco. The apparent success of the Revell 1985 Blazer is a good indicator.
-
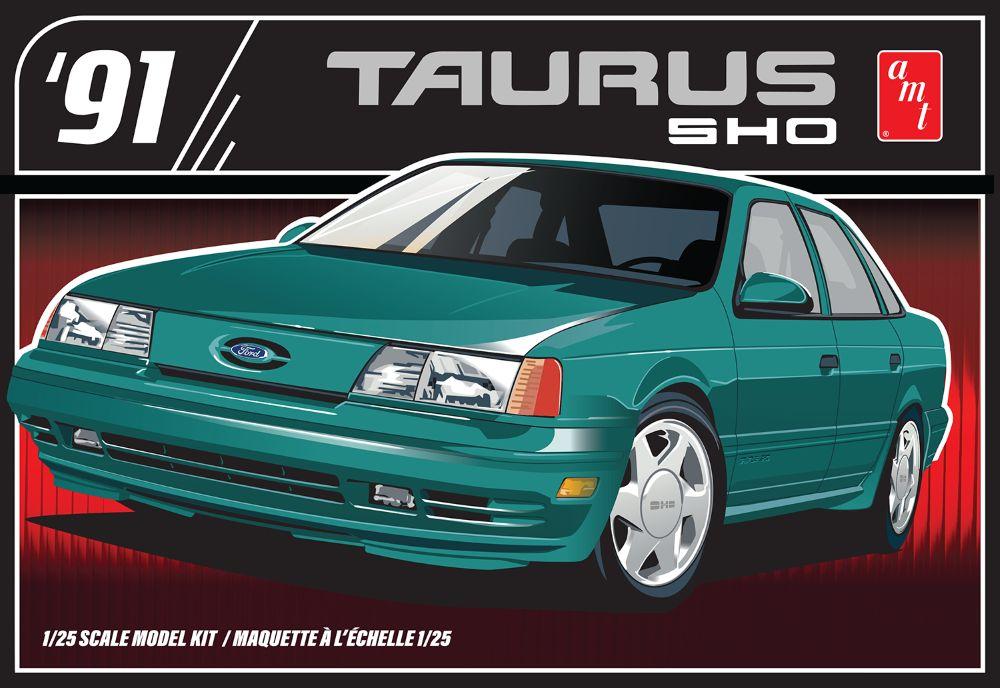
It's going to be a re-release SHO. I'm curious about this kit. I have a bunch of the Rescue 911 version that I plan to do as police cars. I commissioned canuck3D to make stock bumpers and police wheels for the kit, and I would say my Arizona Highway Patrol version came out looking okay after "de-SHOing": I may pick up a re-release if the decal sheet looks good and it has some interesting new parts. Maybe I'll actually build it stock as a SHO version.

-
My exact thoughts as well.
-
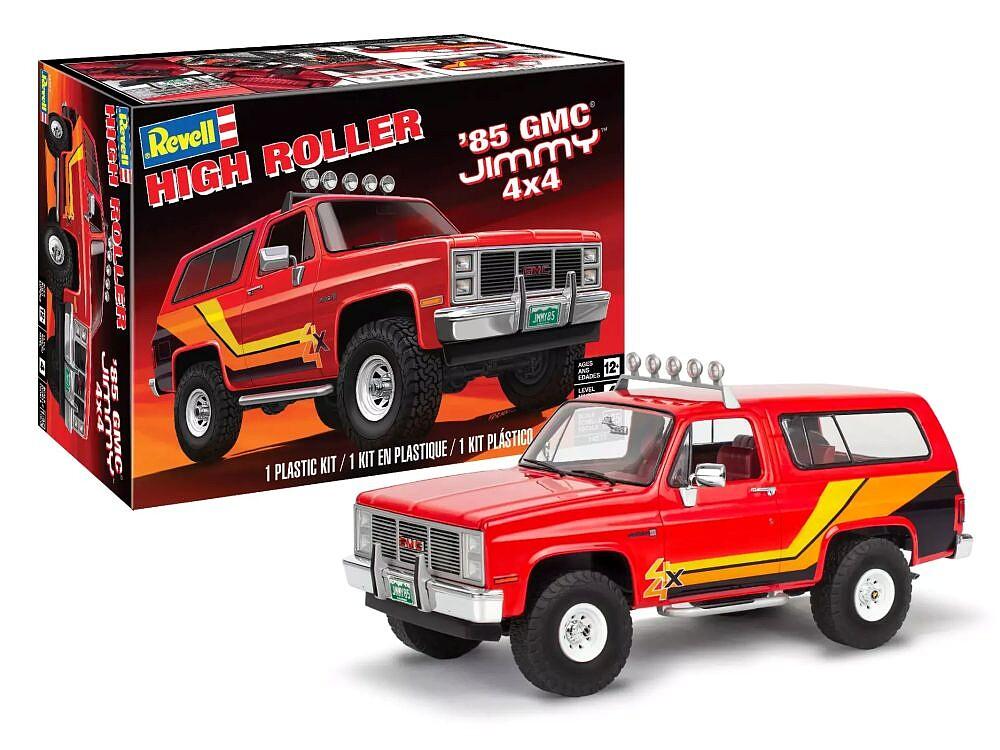
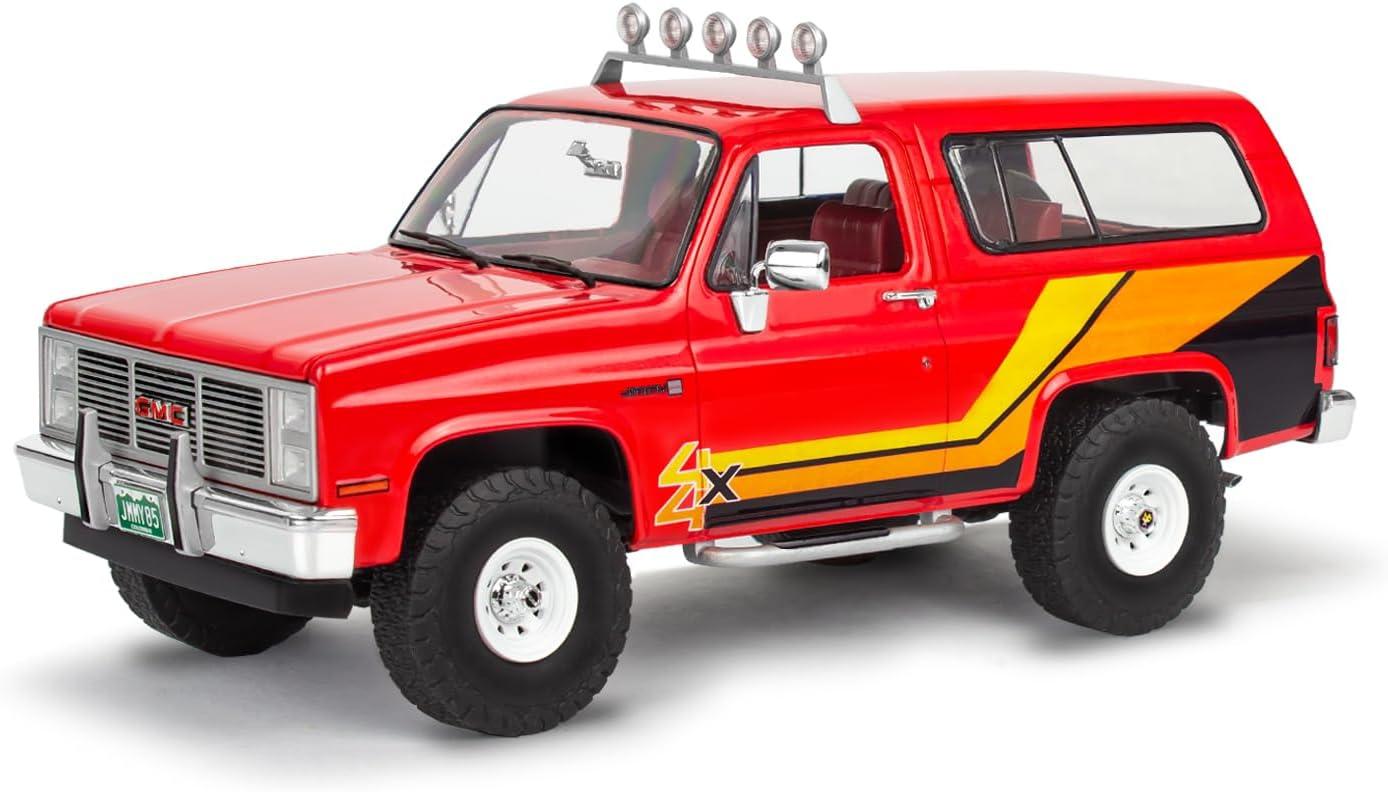
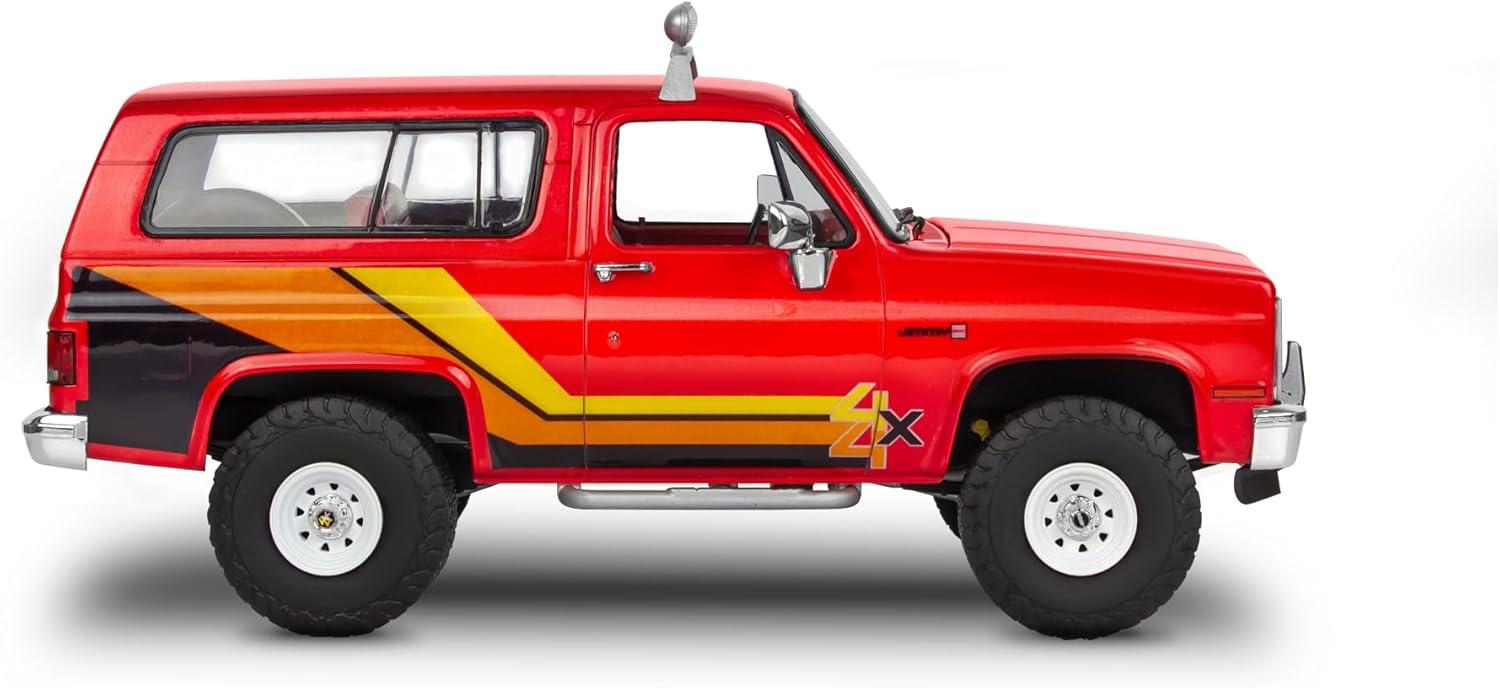
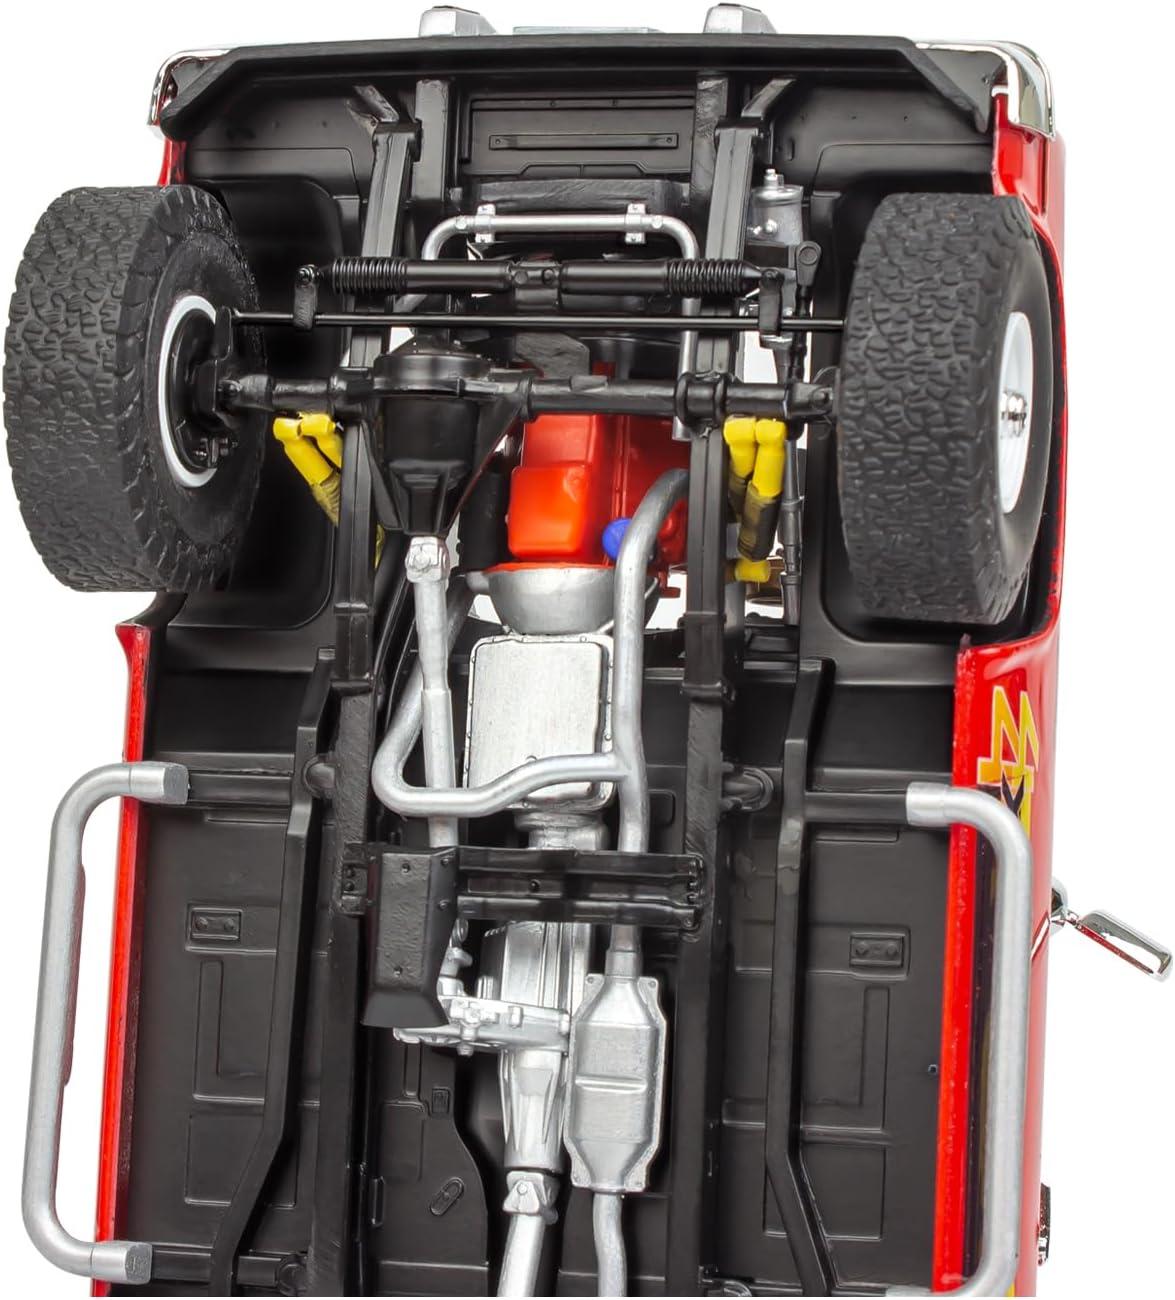
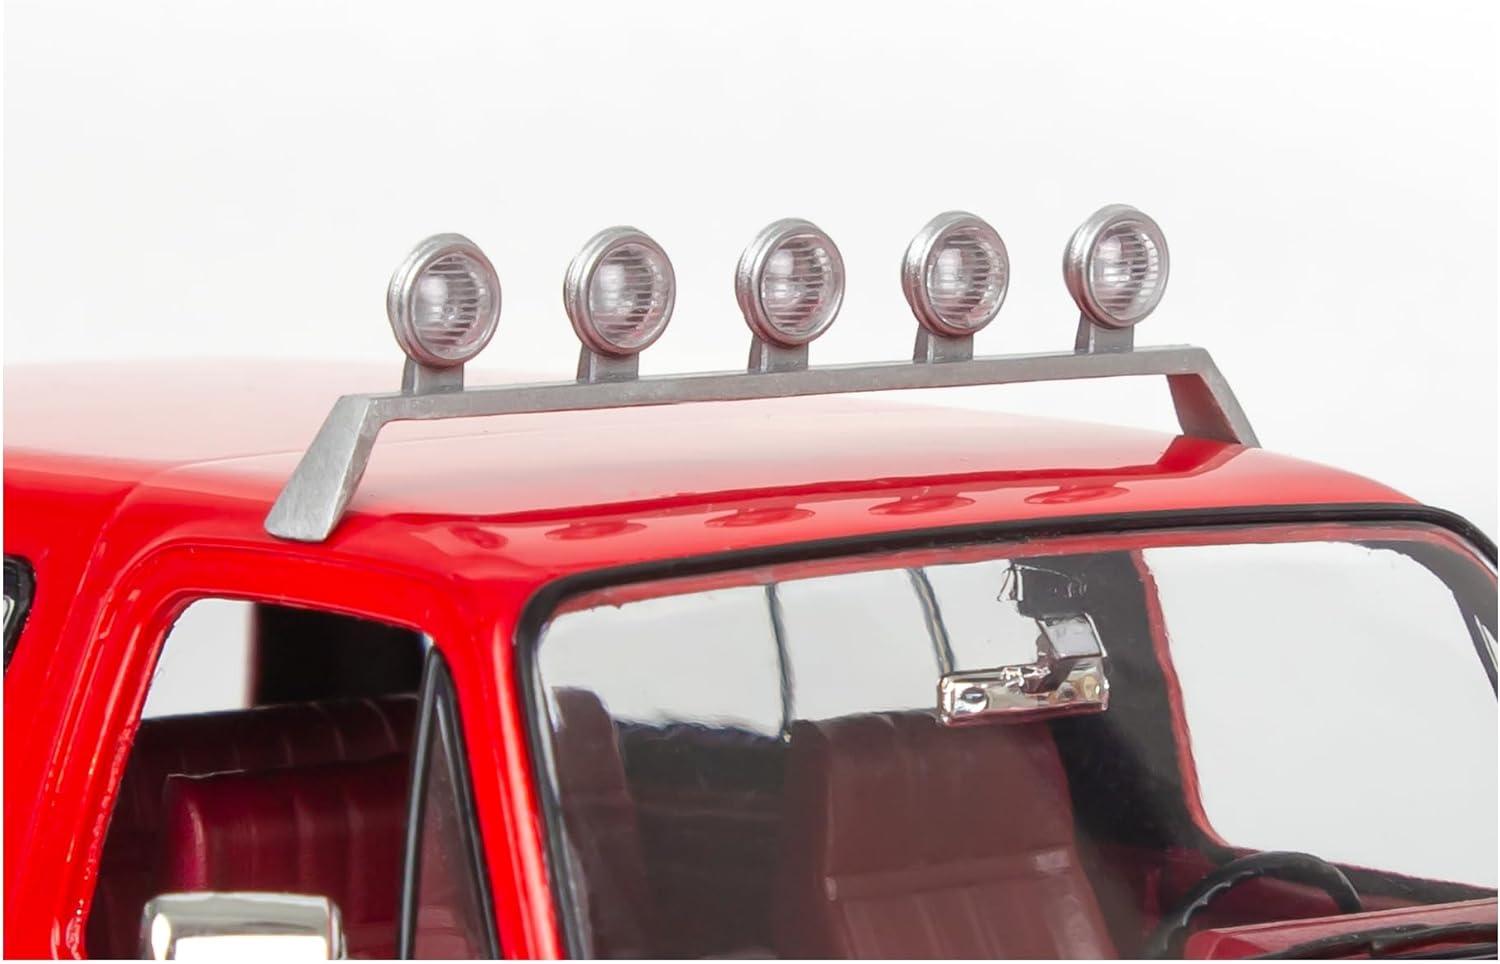
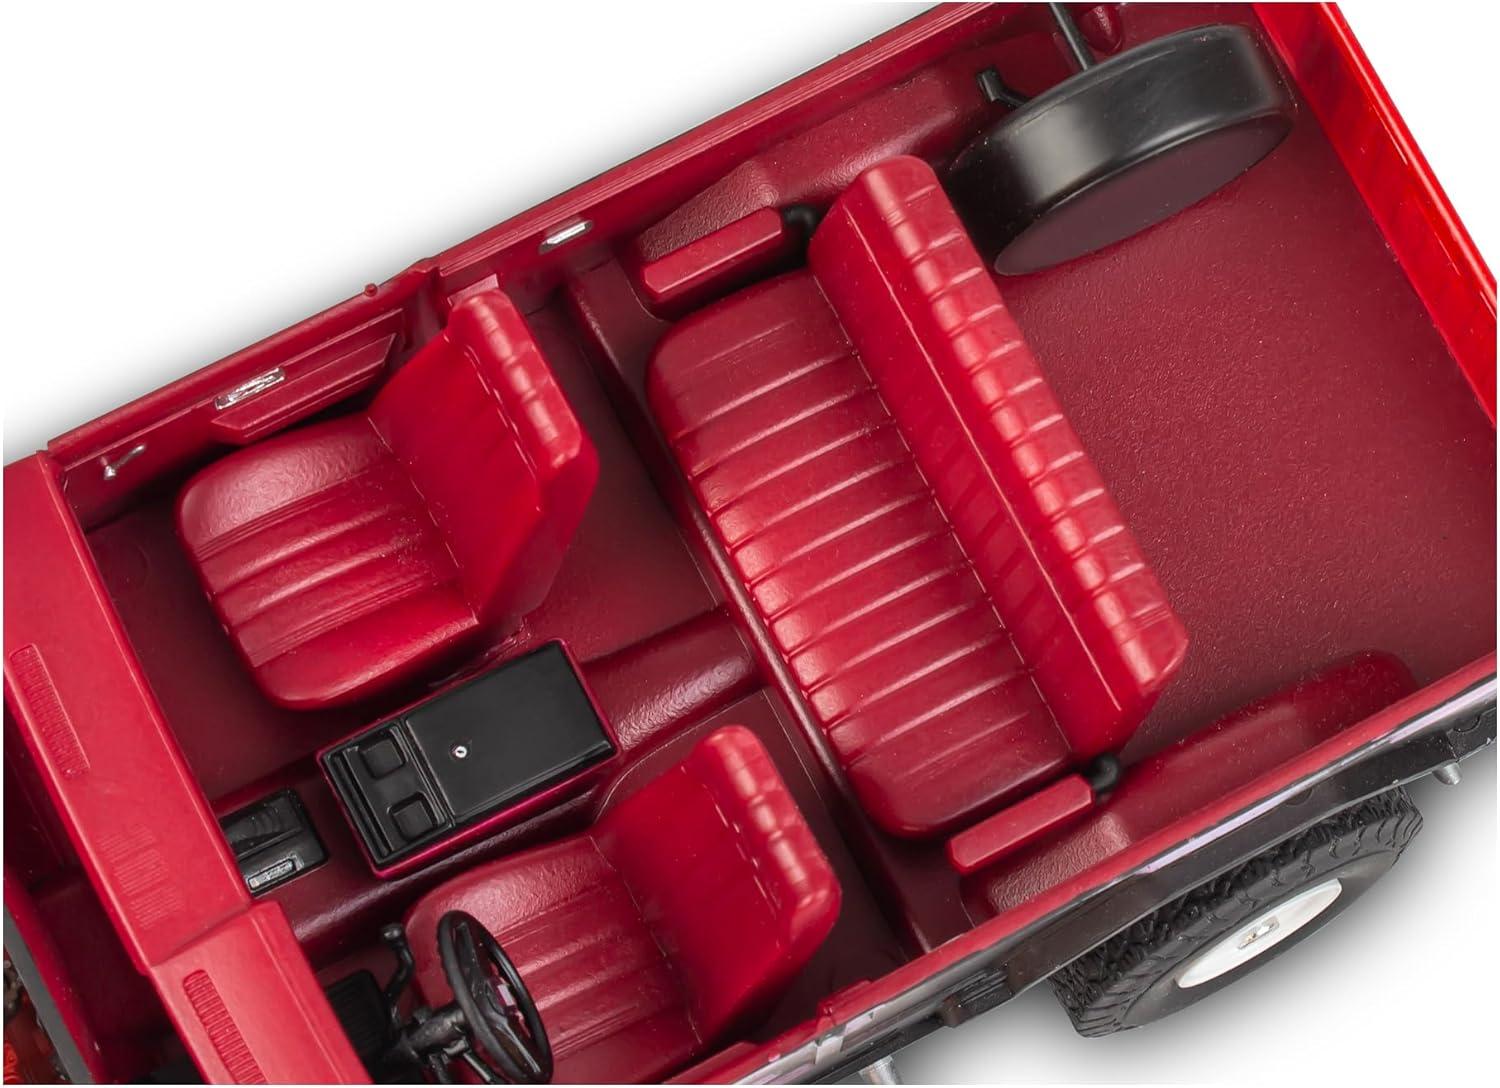
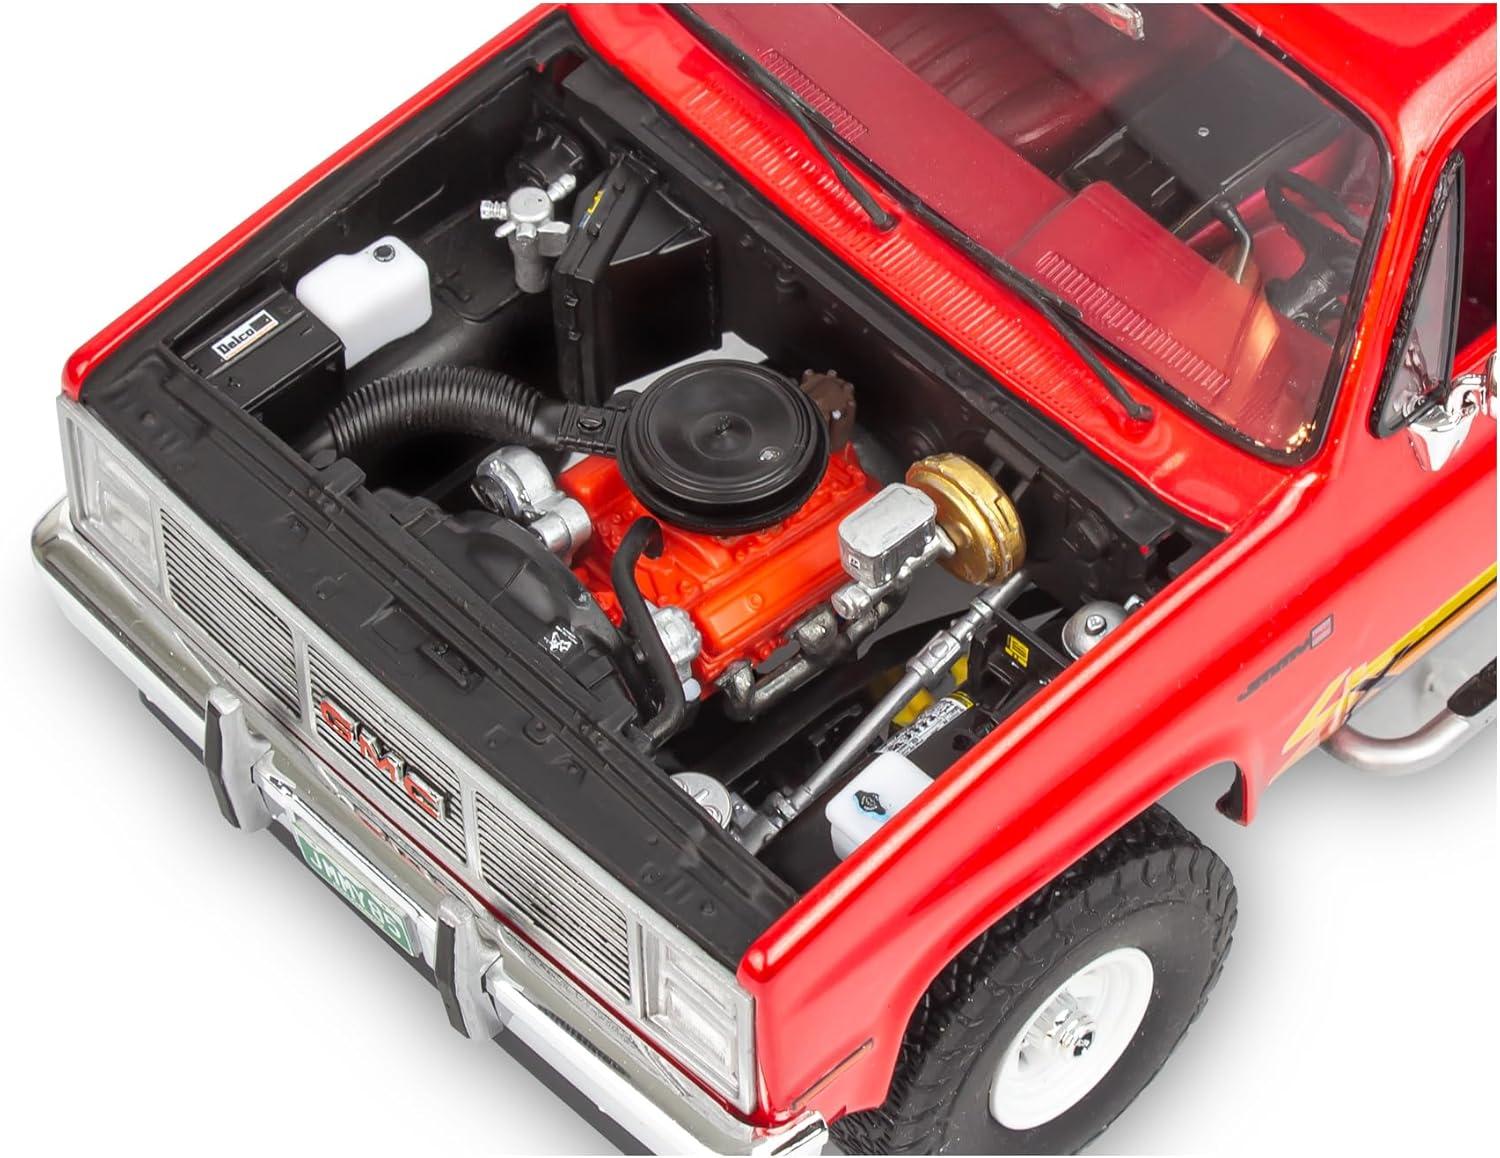
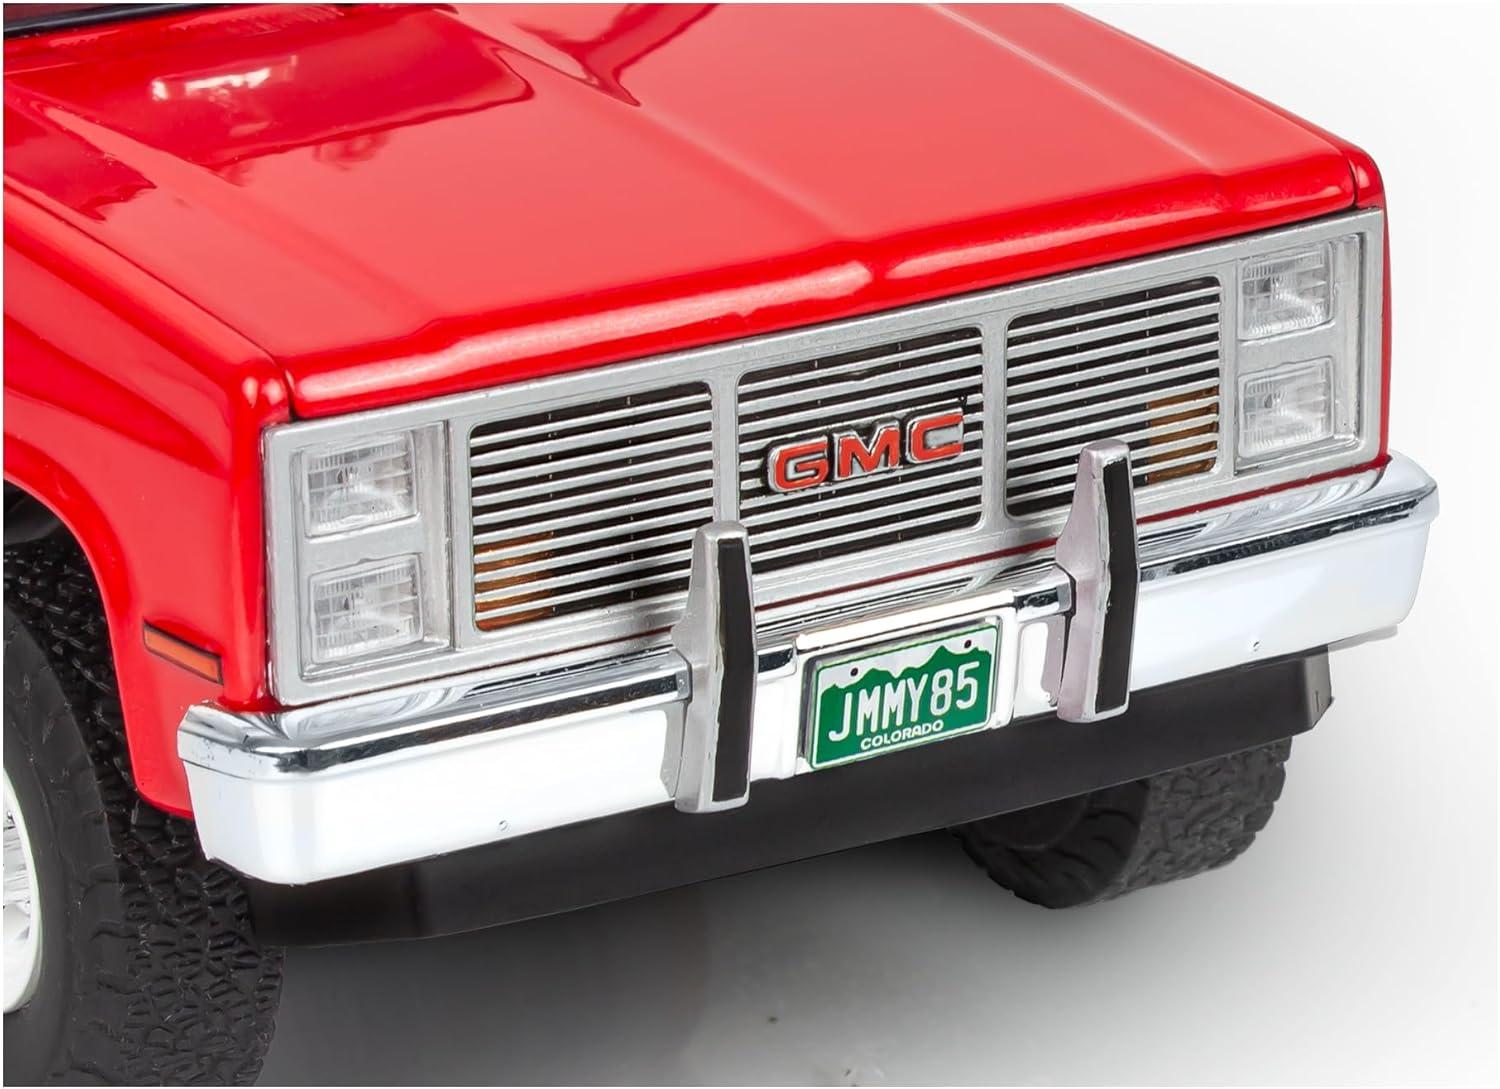
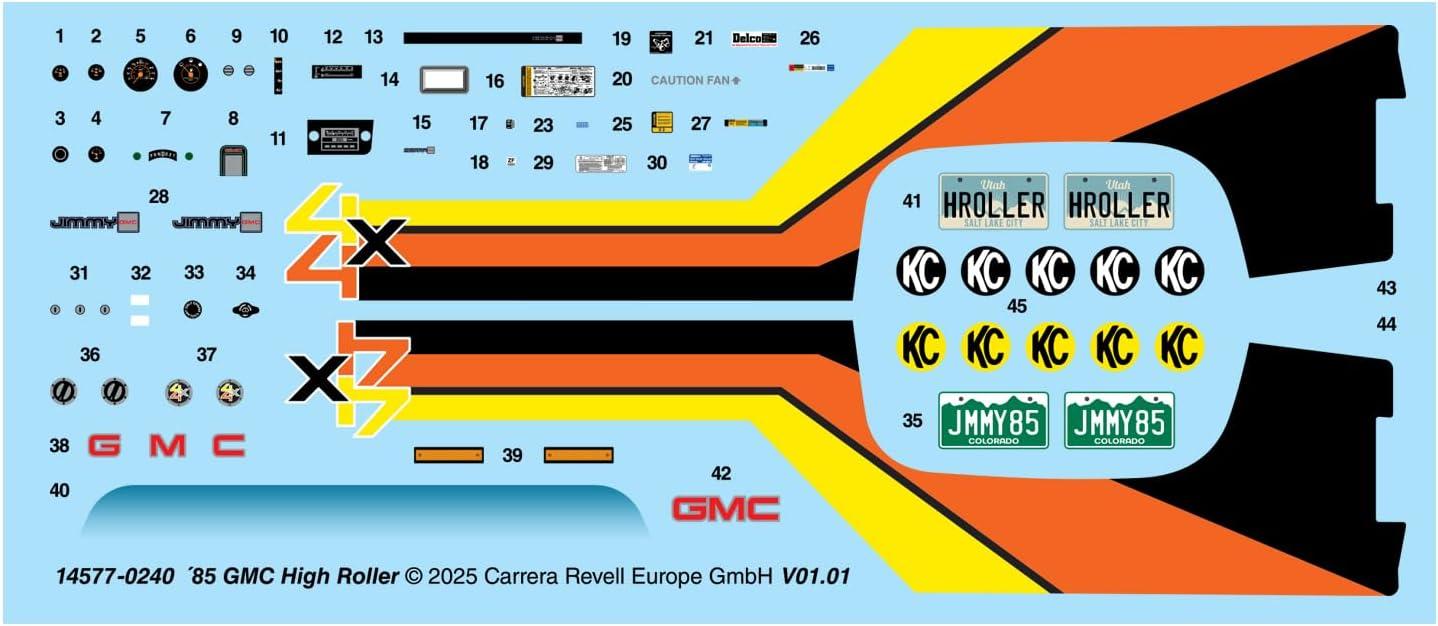
This kit is a variant/continuation of the Stranger Things 1985 Blazer kit and is out now. Here are Revell's official photos for reference.
-
Curious to see photos as I don't live far away from this. I've never attended but would consider doing so in the future.
-
BMF Glue Residue Removal
av405 replied to Horrorshow's topic in Model Building Questions and Answers
I 100% agree with Steve on his recommendation. I bought the smallest size can of WD-40 and keep it on my bench. I use the nozzle straw and spray some into a small cup. Then I dip a Q-tip into it and use it to scrub the adhesive off. I then wipe the area off with a slightly wet micro fiber towel. I admit to not mixing it with Dawn, but I probably should. I've been doing this for about 4 years and haven't had a problem yet. -
CA Smudge on Paint 😒
av405 replied to Perspect Scale Modelworks's topic in Model Building Questions and Answers
It seems to look a bit better. If you're satisfied with your fix and you think there's some improvement, that's all that matters. -
Absolutely amazing work with the black trim paint!
-
Revell & Atlantis at the IPMS National Convention 2025
av405 replied to niteowl7710's topic in Car Kit News & Reviews
Thanks for the photos. Do you think there will be any news on what the next Stranger Things kit will be? -
Thinkful Wishing about Round2 Models, future Kits.
av405 replied to stavanzer's topic in Car Kit News & Reviews
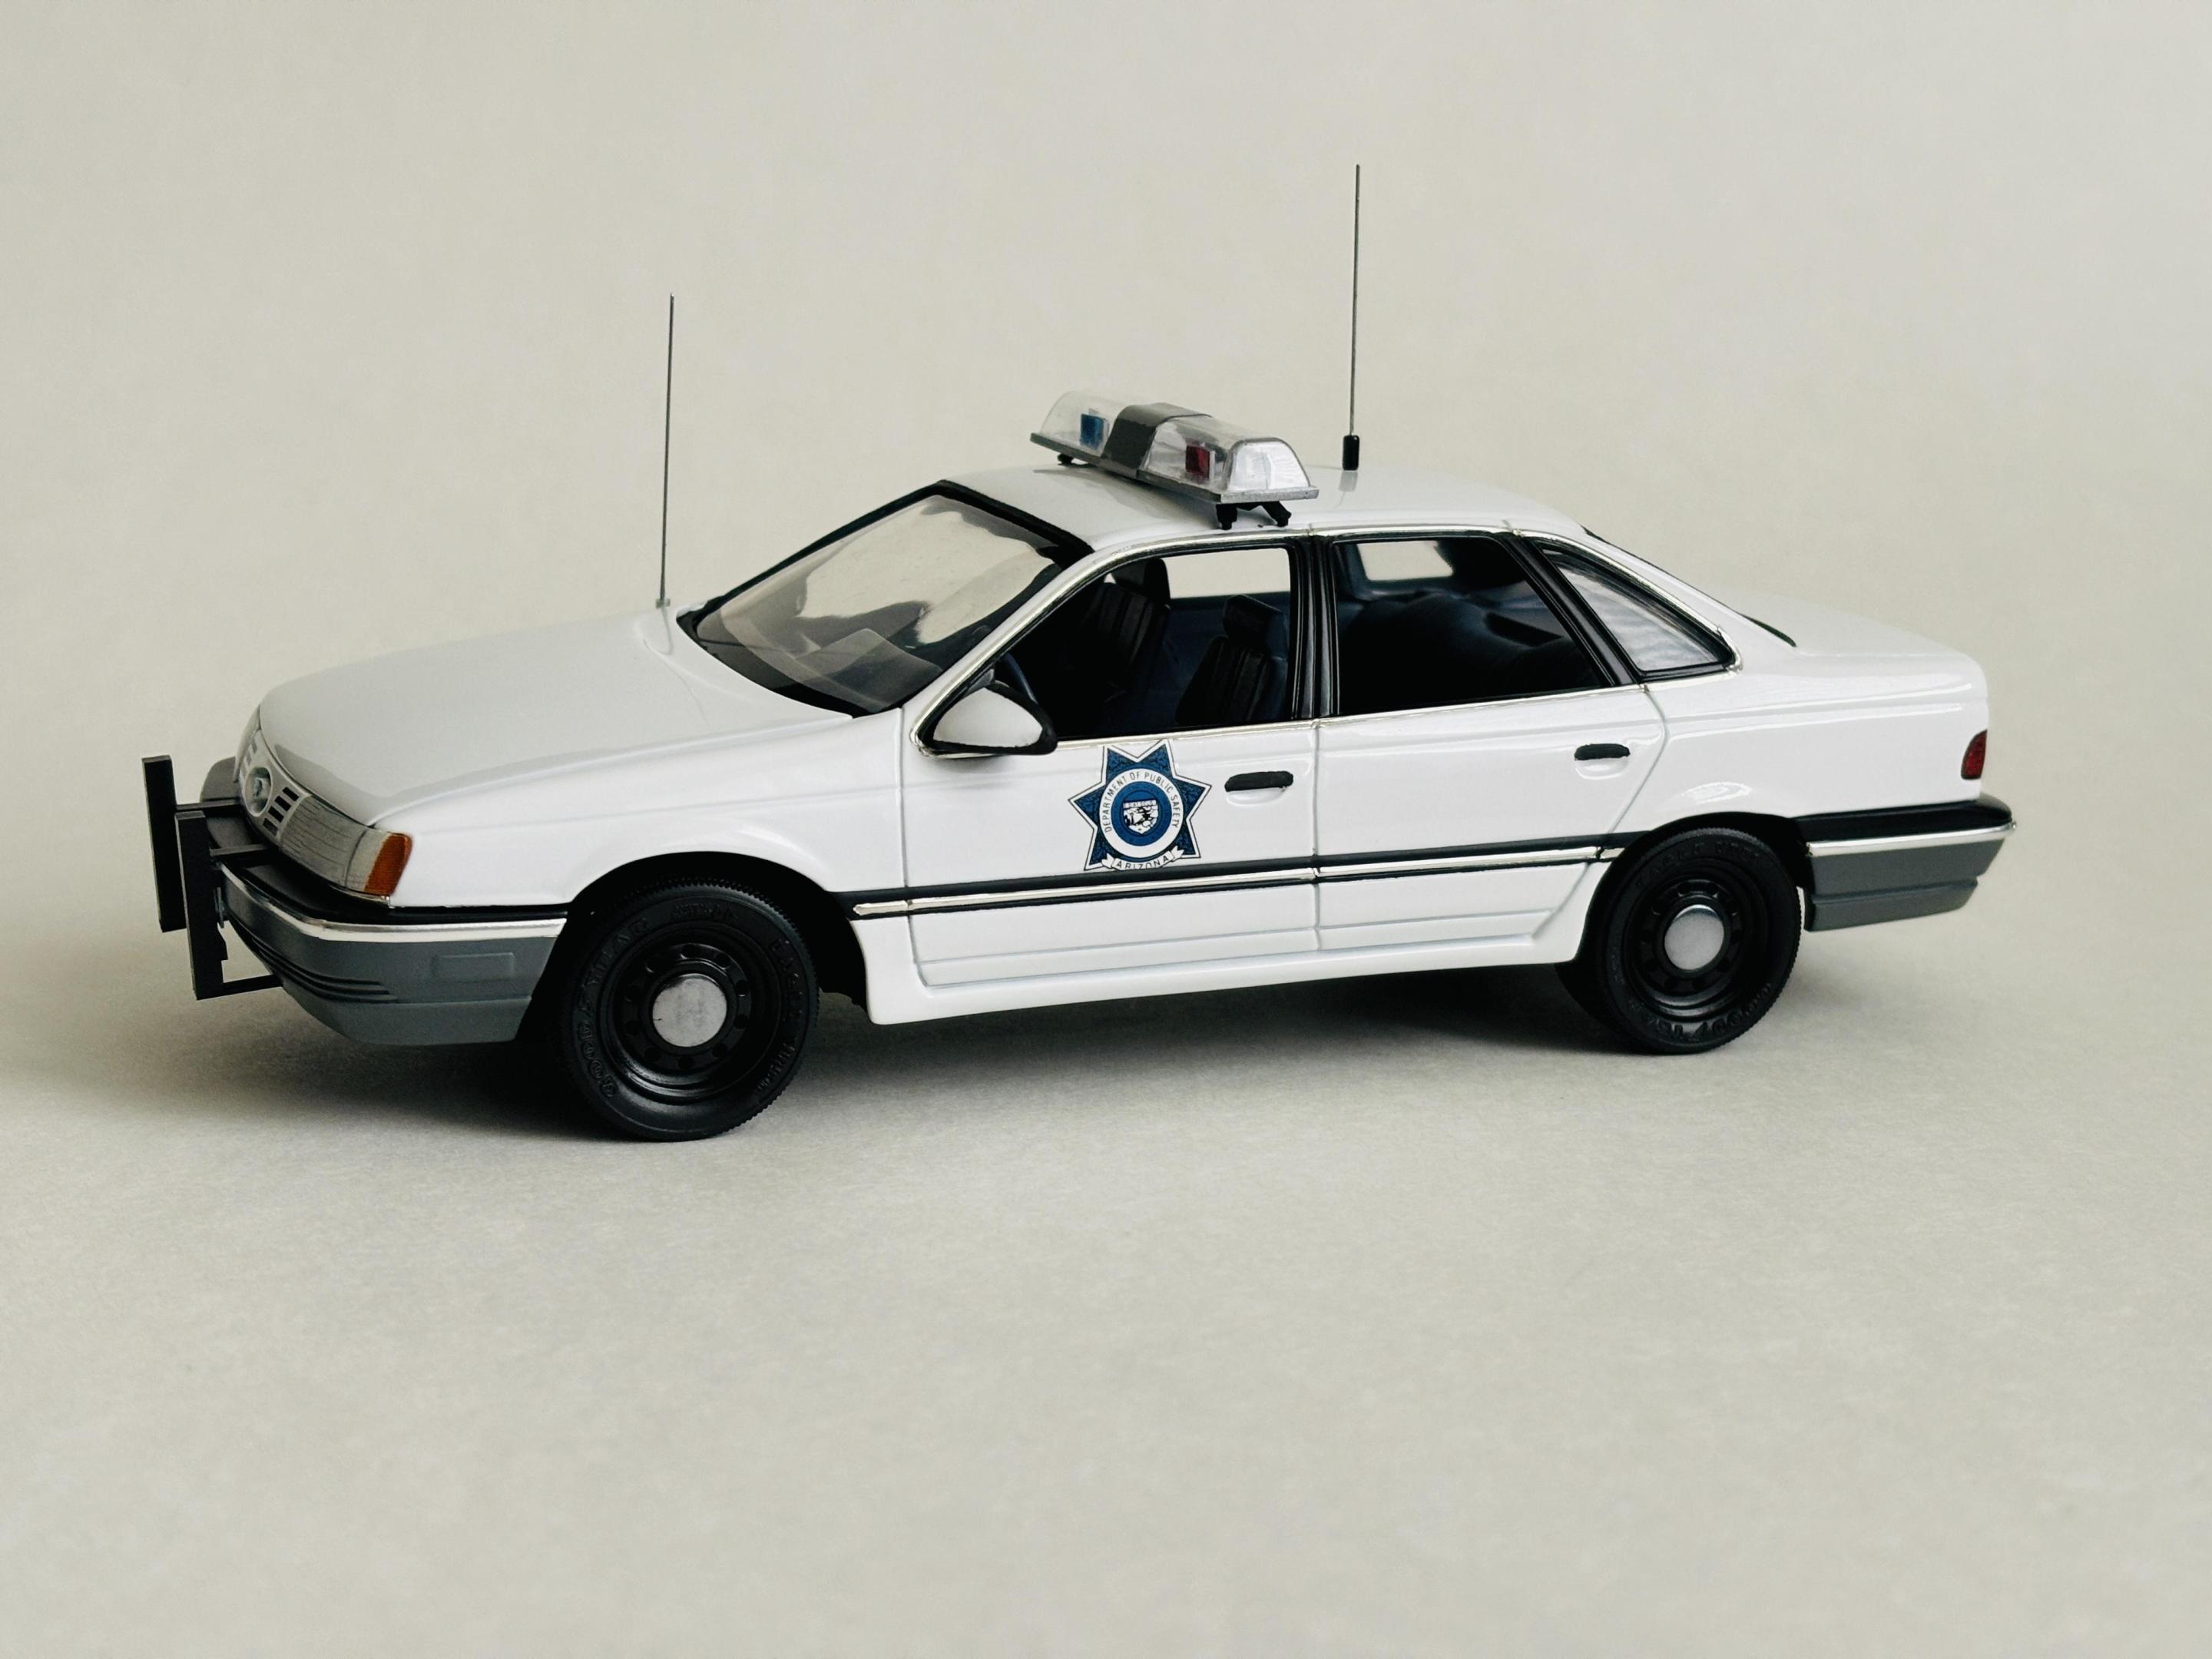
I recently built a curbside conversion of the AMT Taurus into a police-package version of the Arizona Highway Patrol. For that, I had Wylde from canuck3D design some police wheels and L base model front and rear bumpers. For this conversion, it is important to use the 1990-1991 AMT Taurus kits (in my case, the Rescue 911 version) as they contain the accurate 1990-1991 only dash and steering wheel that coincided with the 1990-1991 police-package Taurus. Some other body work was also done to "de-SHO" the kit and I used the police vent decals only found on the CHP version to round out the look. As I mentioned before, this was strictly a curbside build and the engine bay and underside aren't meant to be seen as they are not accurate. It's not perfect, but it's close enough.
-
1992 Chevy Silverado Sport
av405 replied to av405's topic in WIP: Model Trucks: Pickups, Vans, SUVs, Light Commercial
Thanks, Carl. Ha! Good point. Thank you. -
Looking For This Chevy Van Grill
av405 replied to oldcarfan's topic in Truck Aftermarket / Resin / 3D Printed
PM sent. -
1992 Chevy Silverado Sport
av405 replied to av405's topic in WIP: Model Trucks: Pickups, Vans, SUVs, Light Commercial
Thank you, Sean. -
Do you make notes/memory aids as you build?
av405 replied to Mattblack's topic in Model Building Questions and Answers
Unfortunately I have not done that as it just adds another layer of work. Yes, I'm lazy in that regard... -
Do you make notes/memory aids as you build?
av405 replied to Mattblack's topic in Model Building Questions and Answers
As someone else mentioned before, I use WIP threads to "keep notes." For me, WIP threads are as much about sharing information as they are for storing information for myself. I do realize that there is always a danger that the forum may crash or some/all of my threads may be lost. But I enjoy WIP threads and I know I would not enjoy keeping more traditional notes. -
Thank you, Gary! I too am a Ford guy, but I've grown to appreciate these Chevy trucks more and more.
-
Kermit My AMT Chevy Truck
av405 replied to oldcarfan's topic in Model Trucks: Pickups, Vans, SUVs, Light Commercial
Gary, check out my recent Tahoe build as I did the exact same thing: -
1992 Chevy Silverado Sport
av405 replied to av405's topic in WIP: Model Trucks: Pickups, Vans, SUVs, Light Commercial
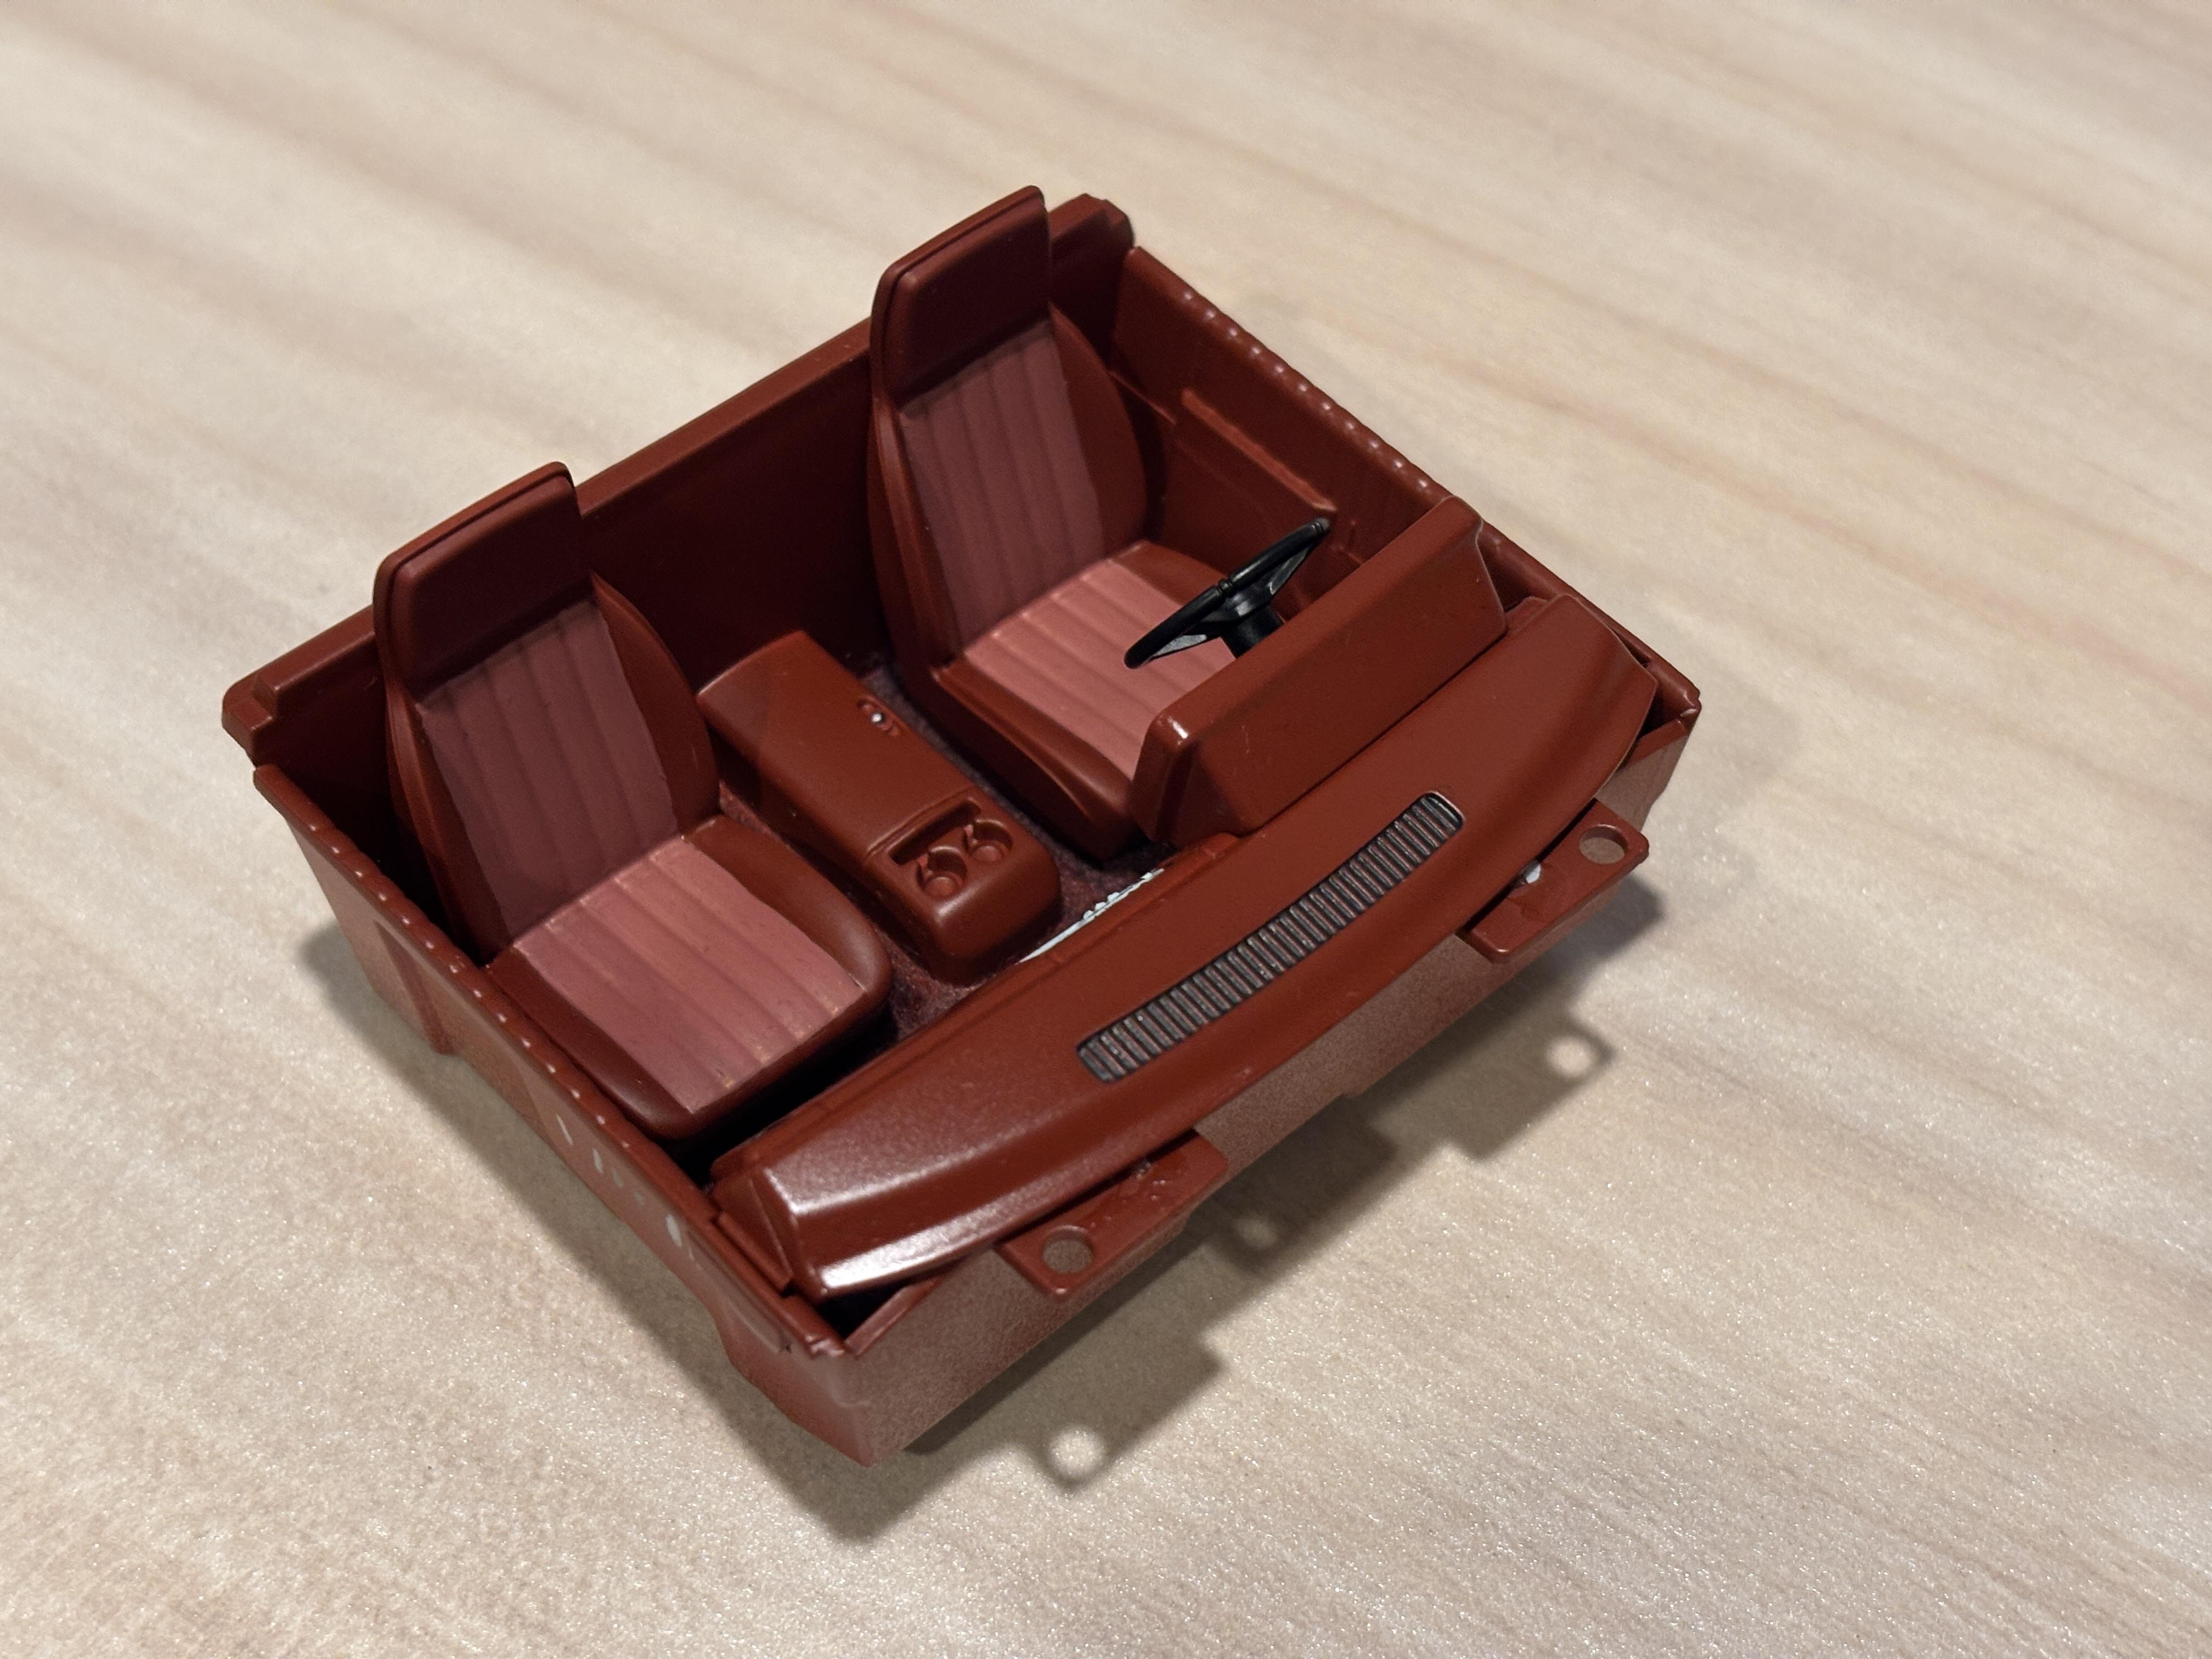
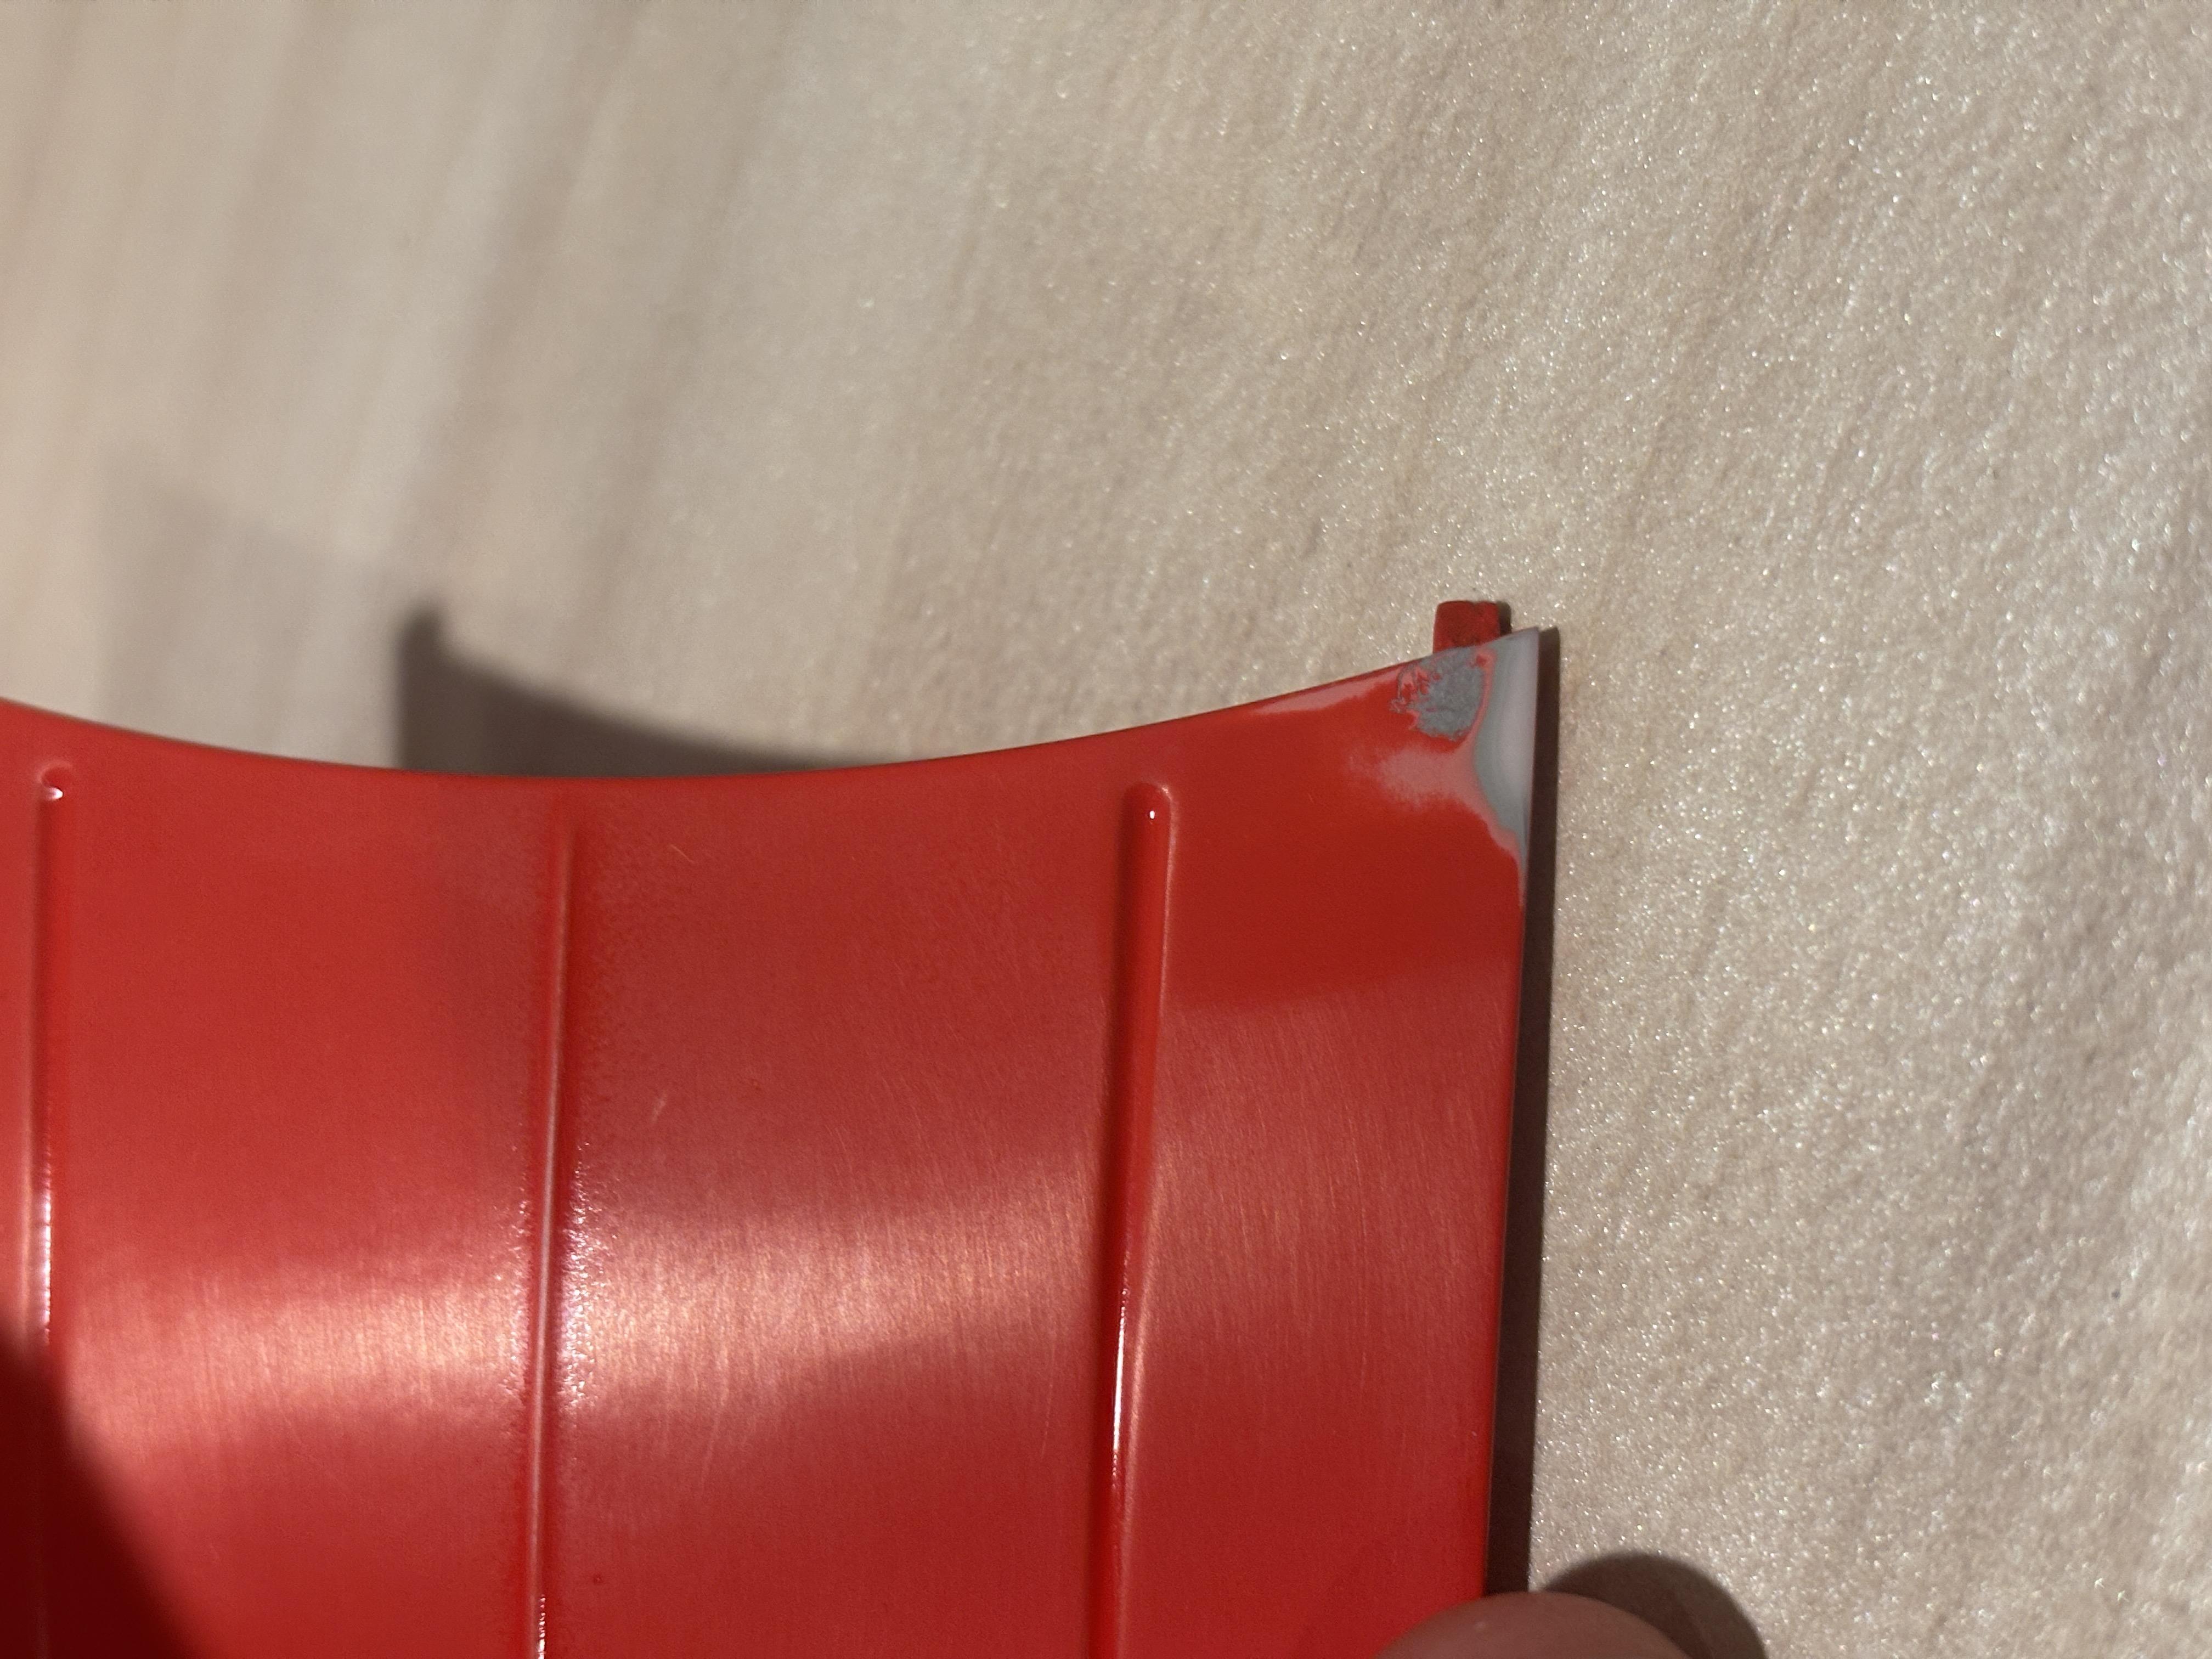
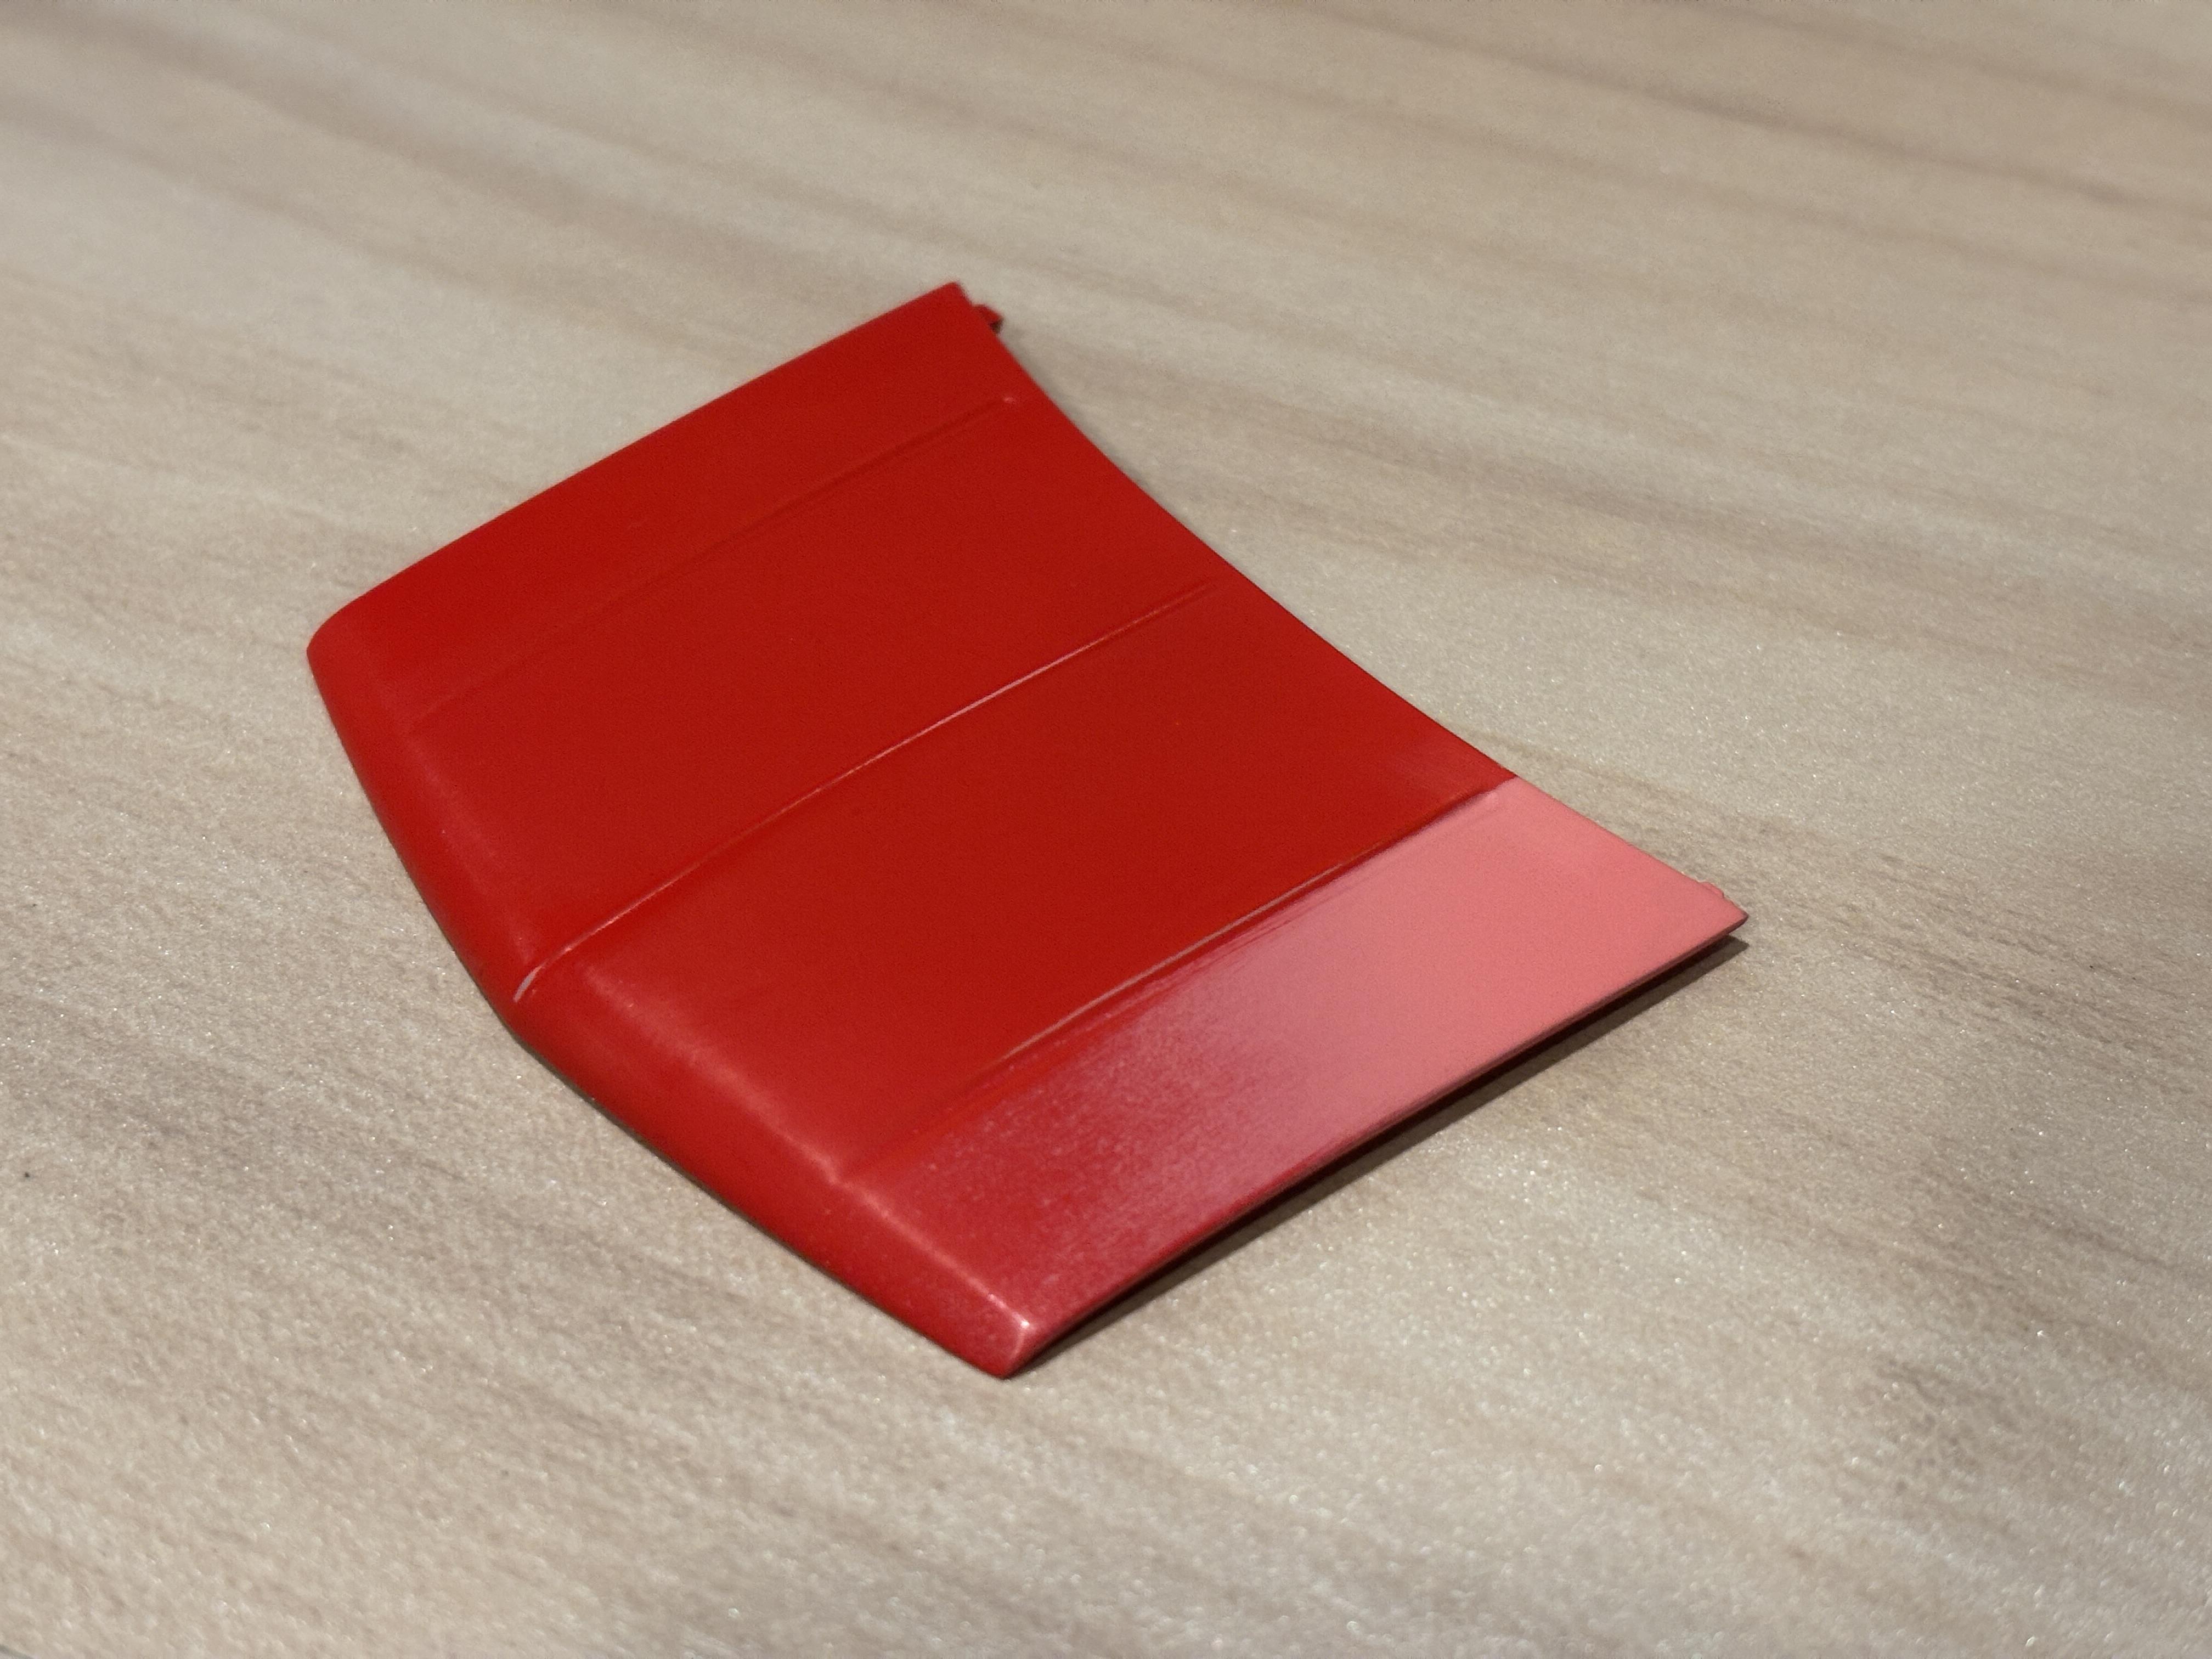
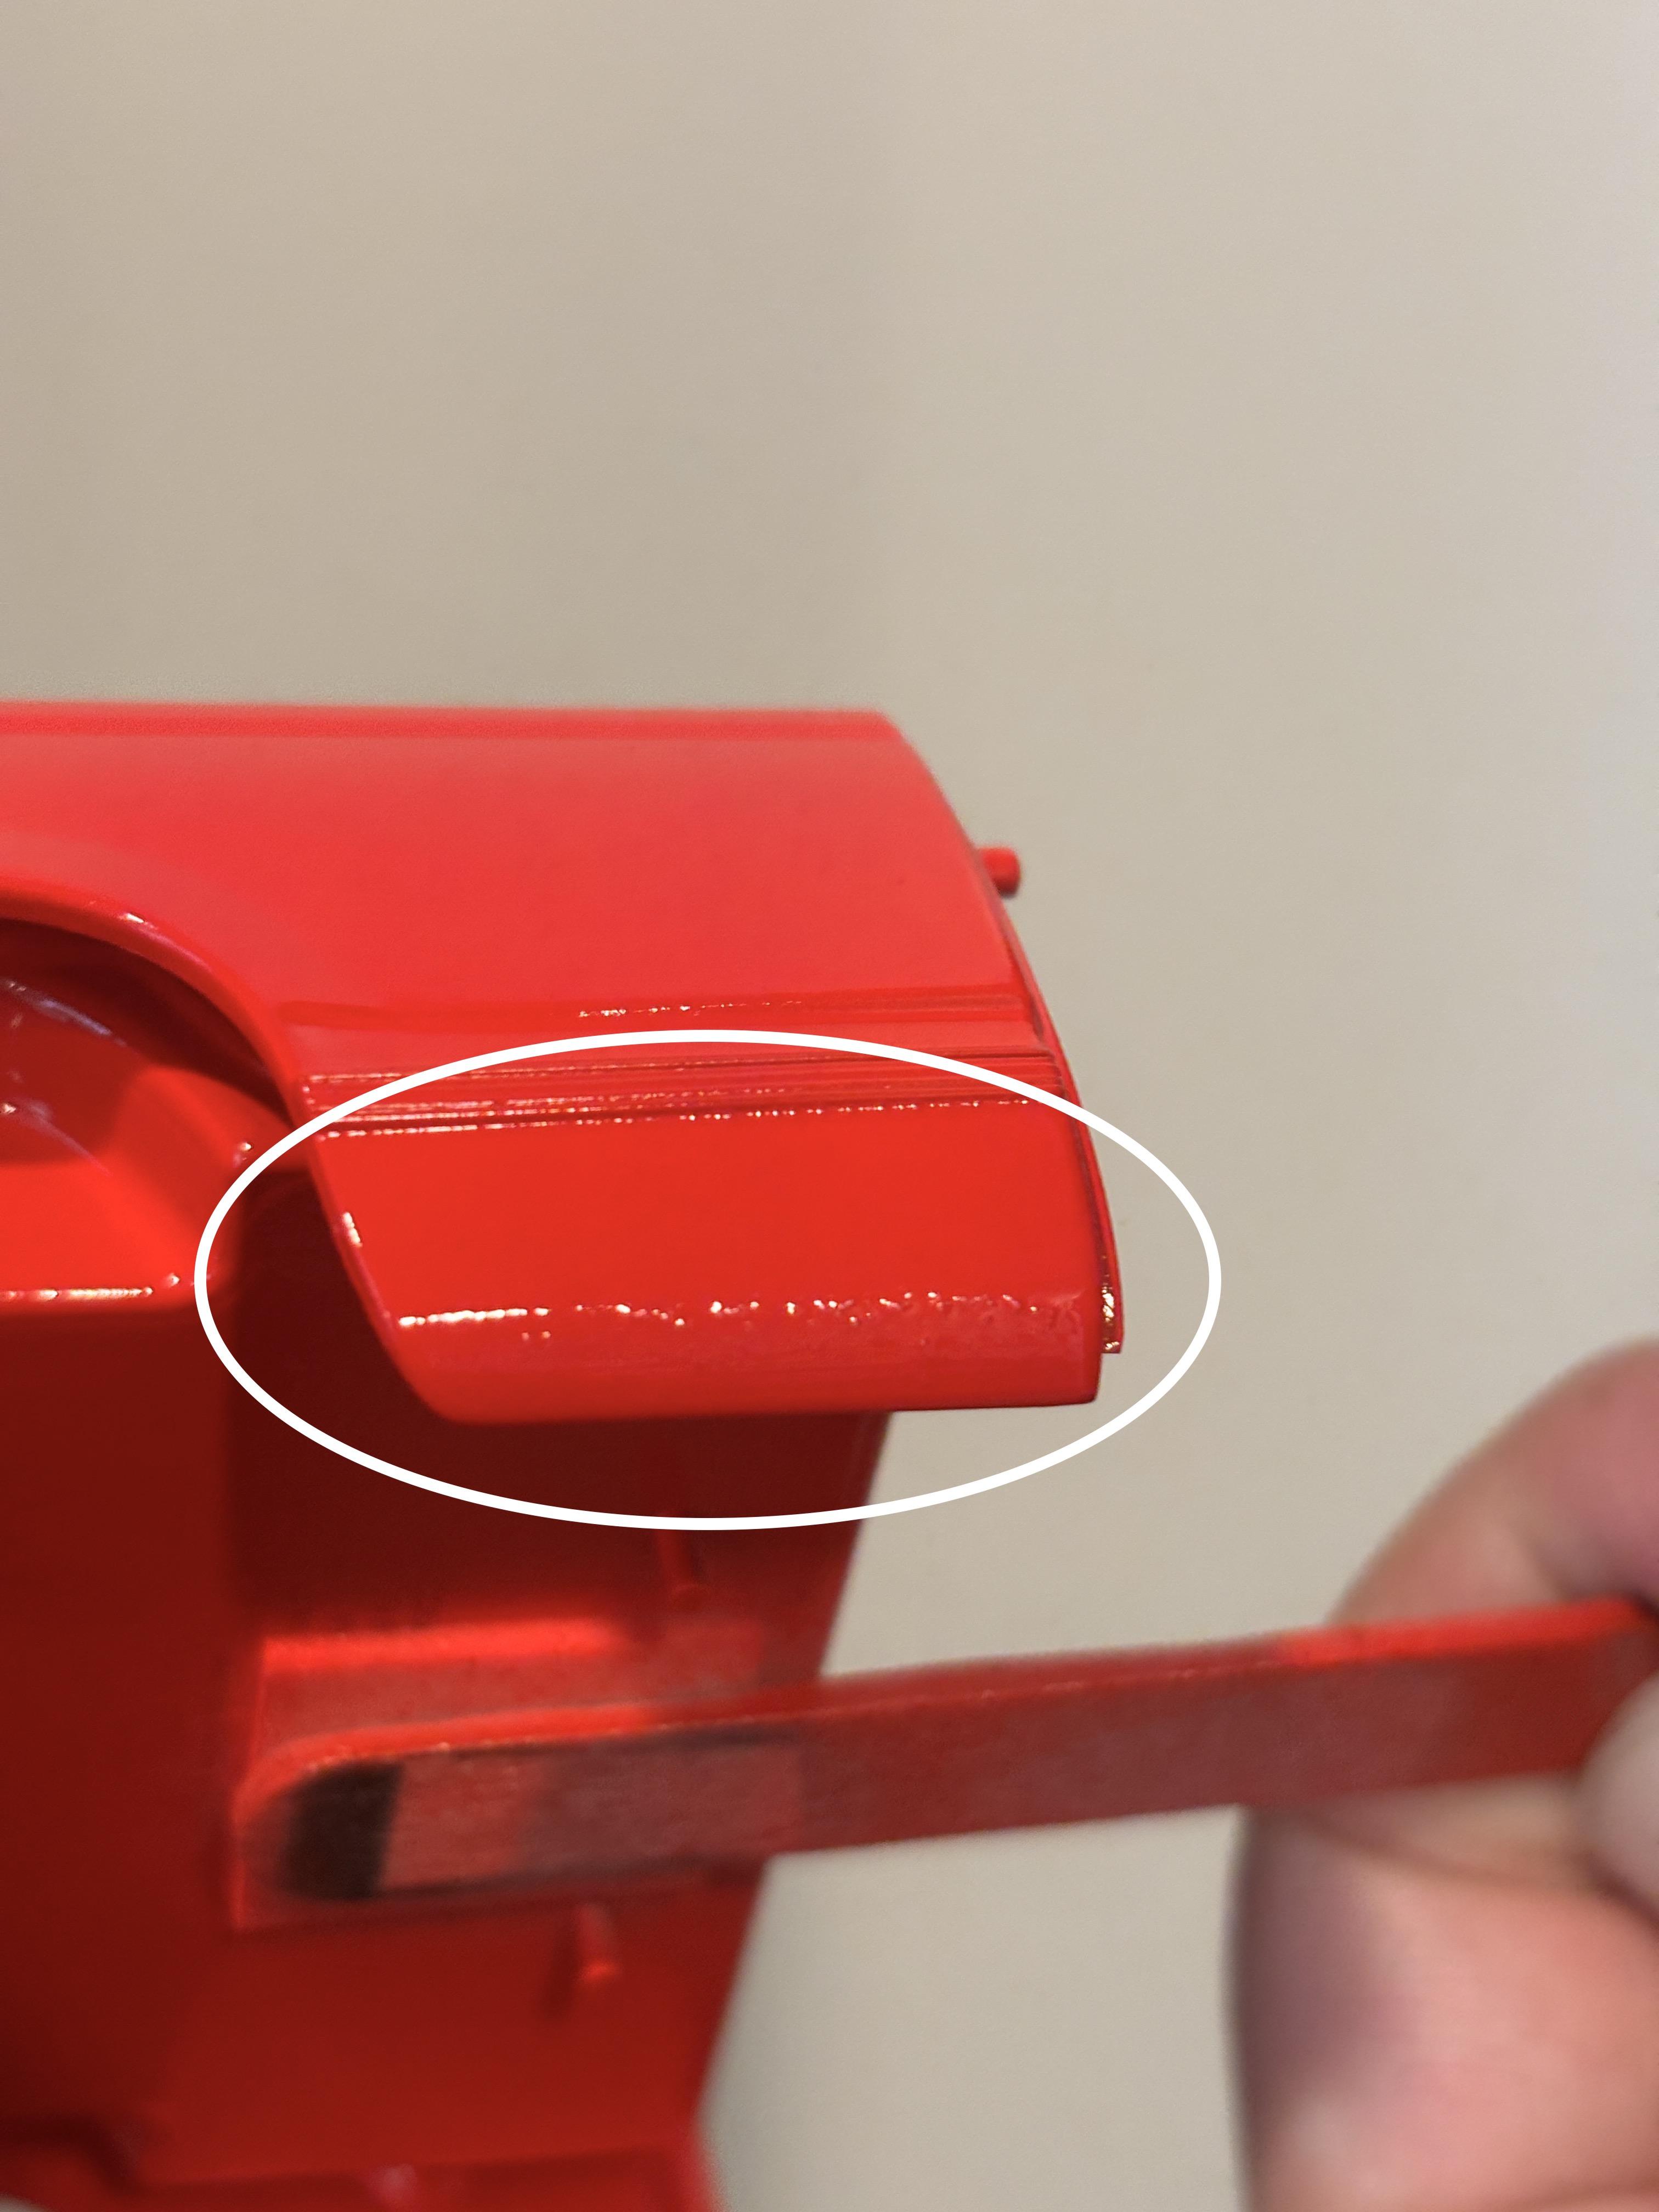
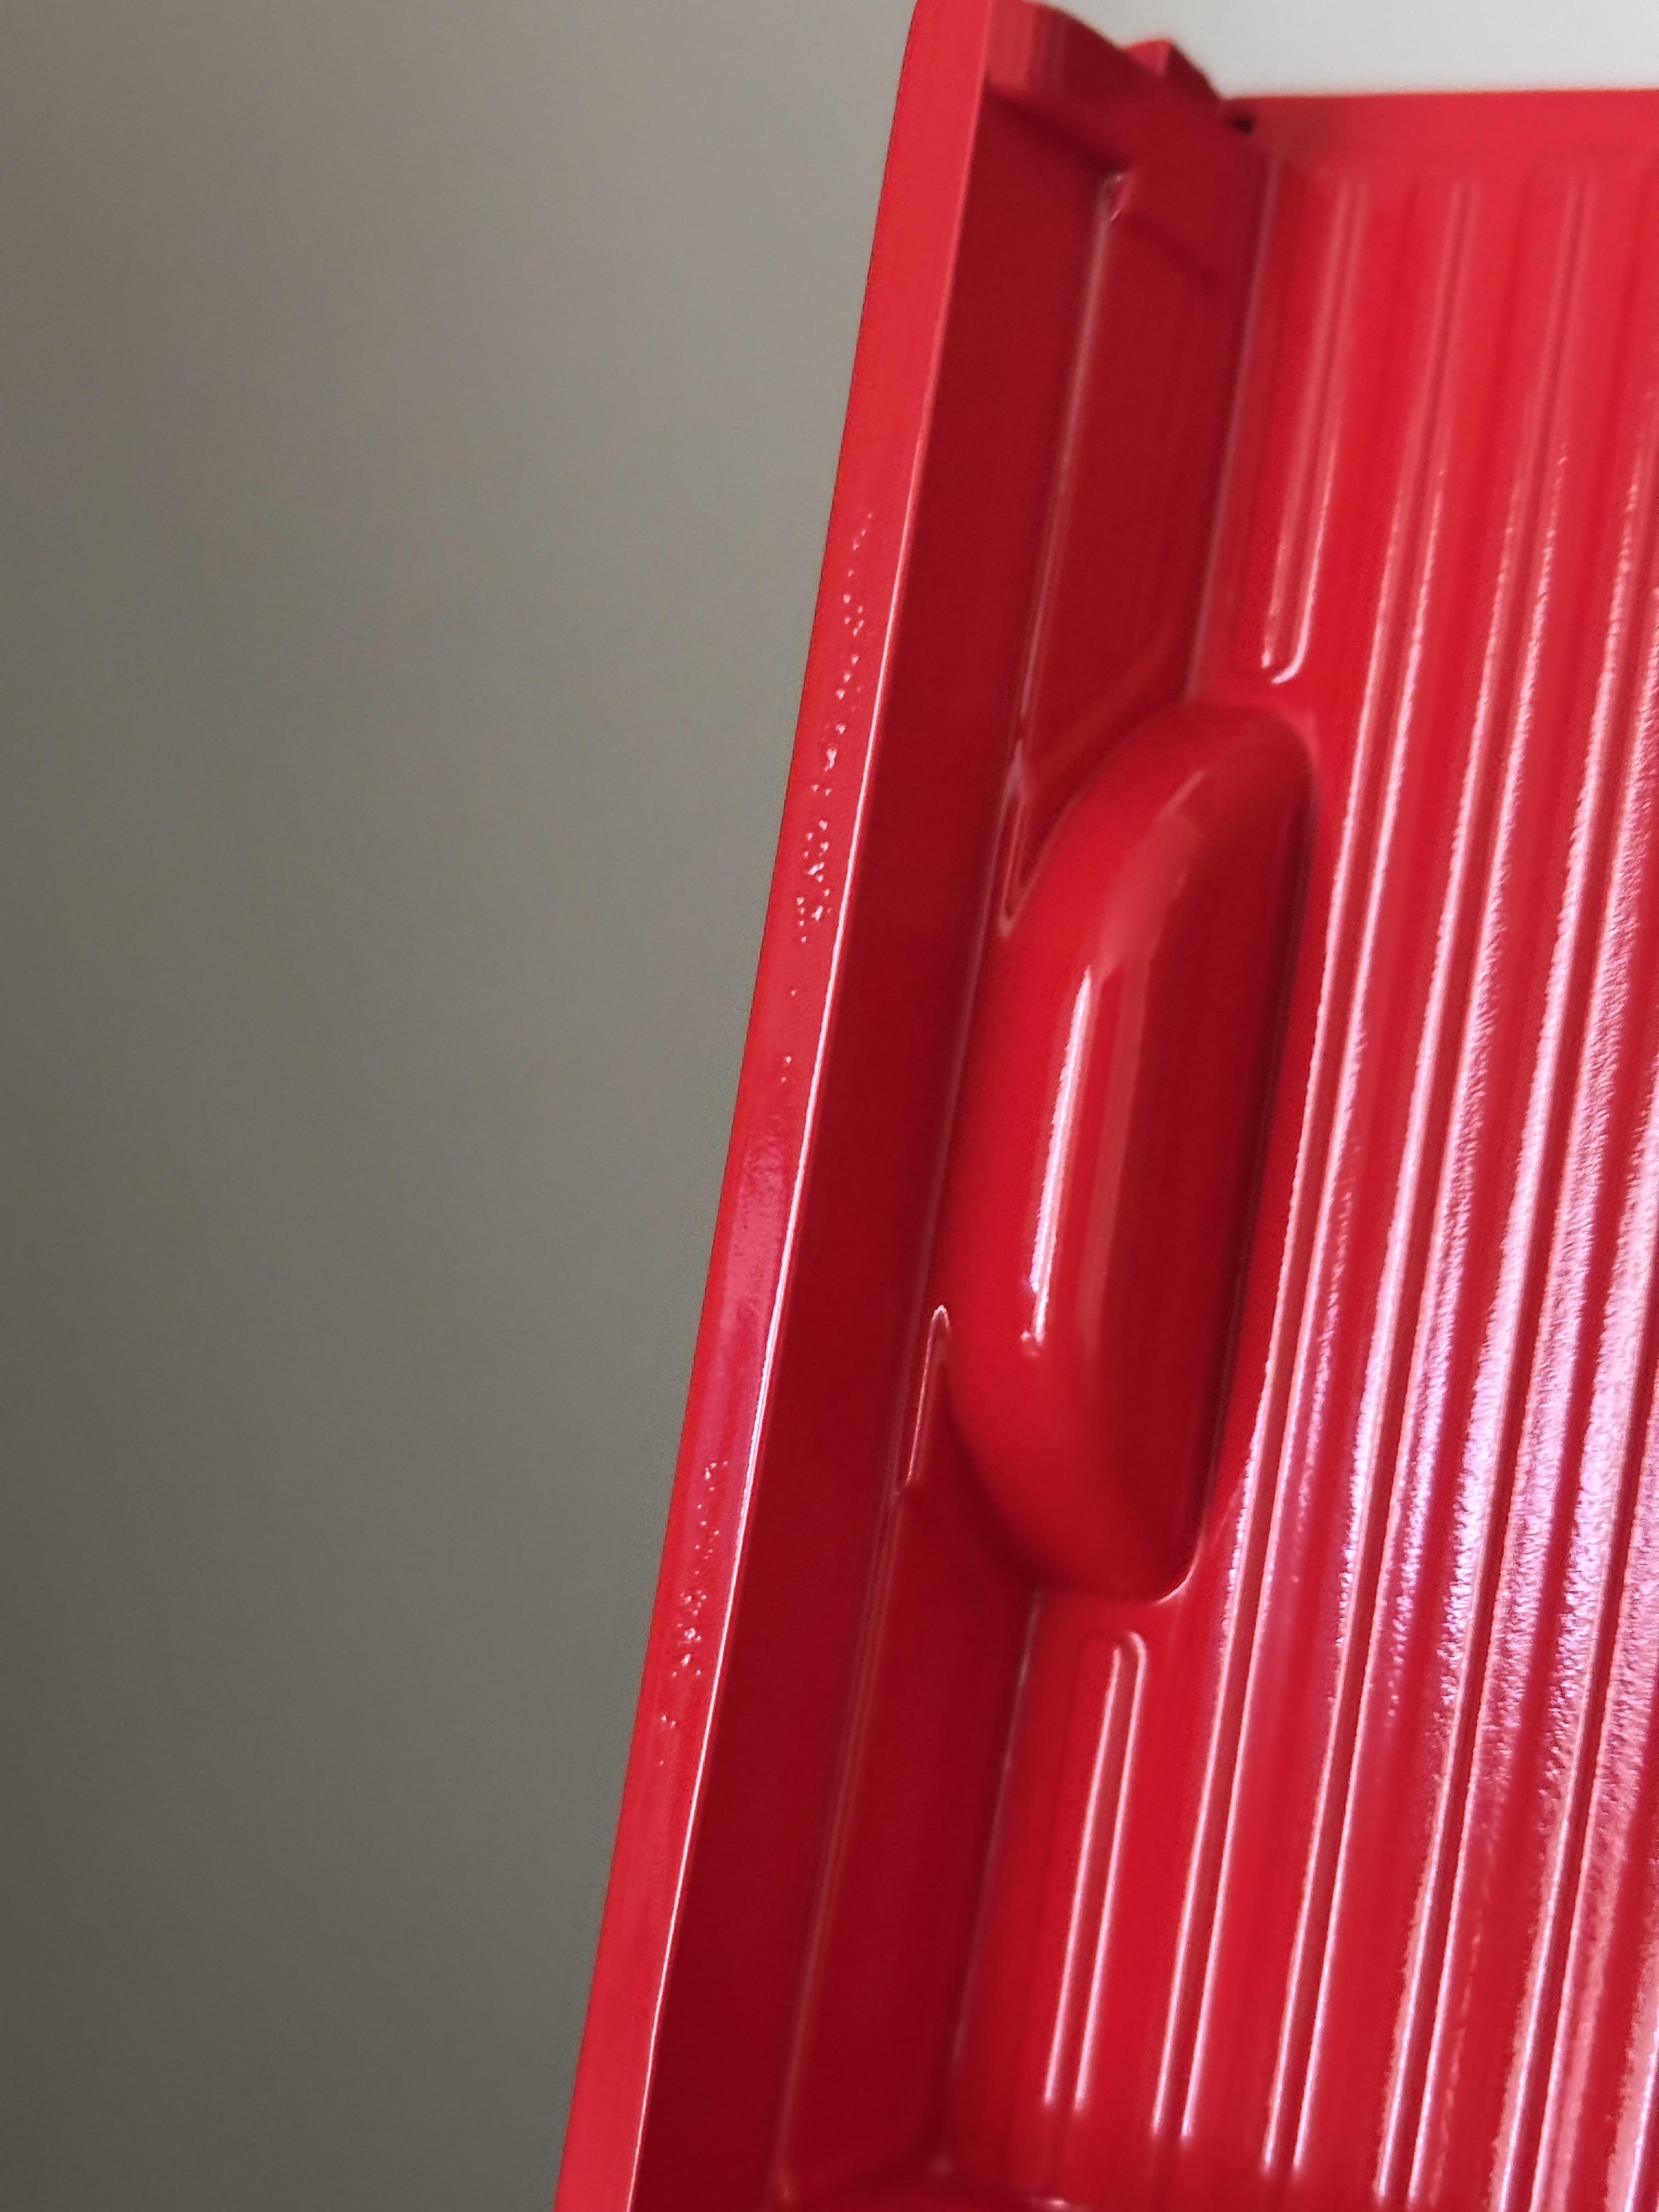
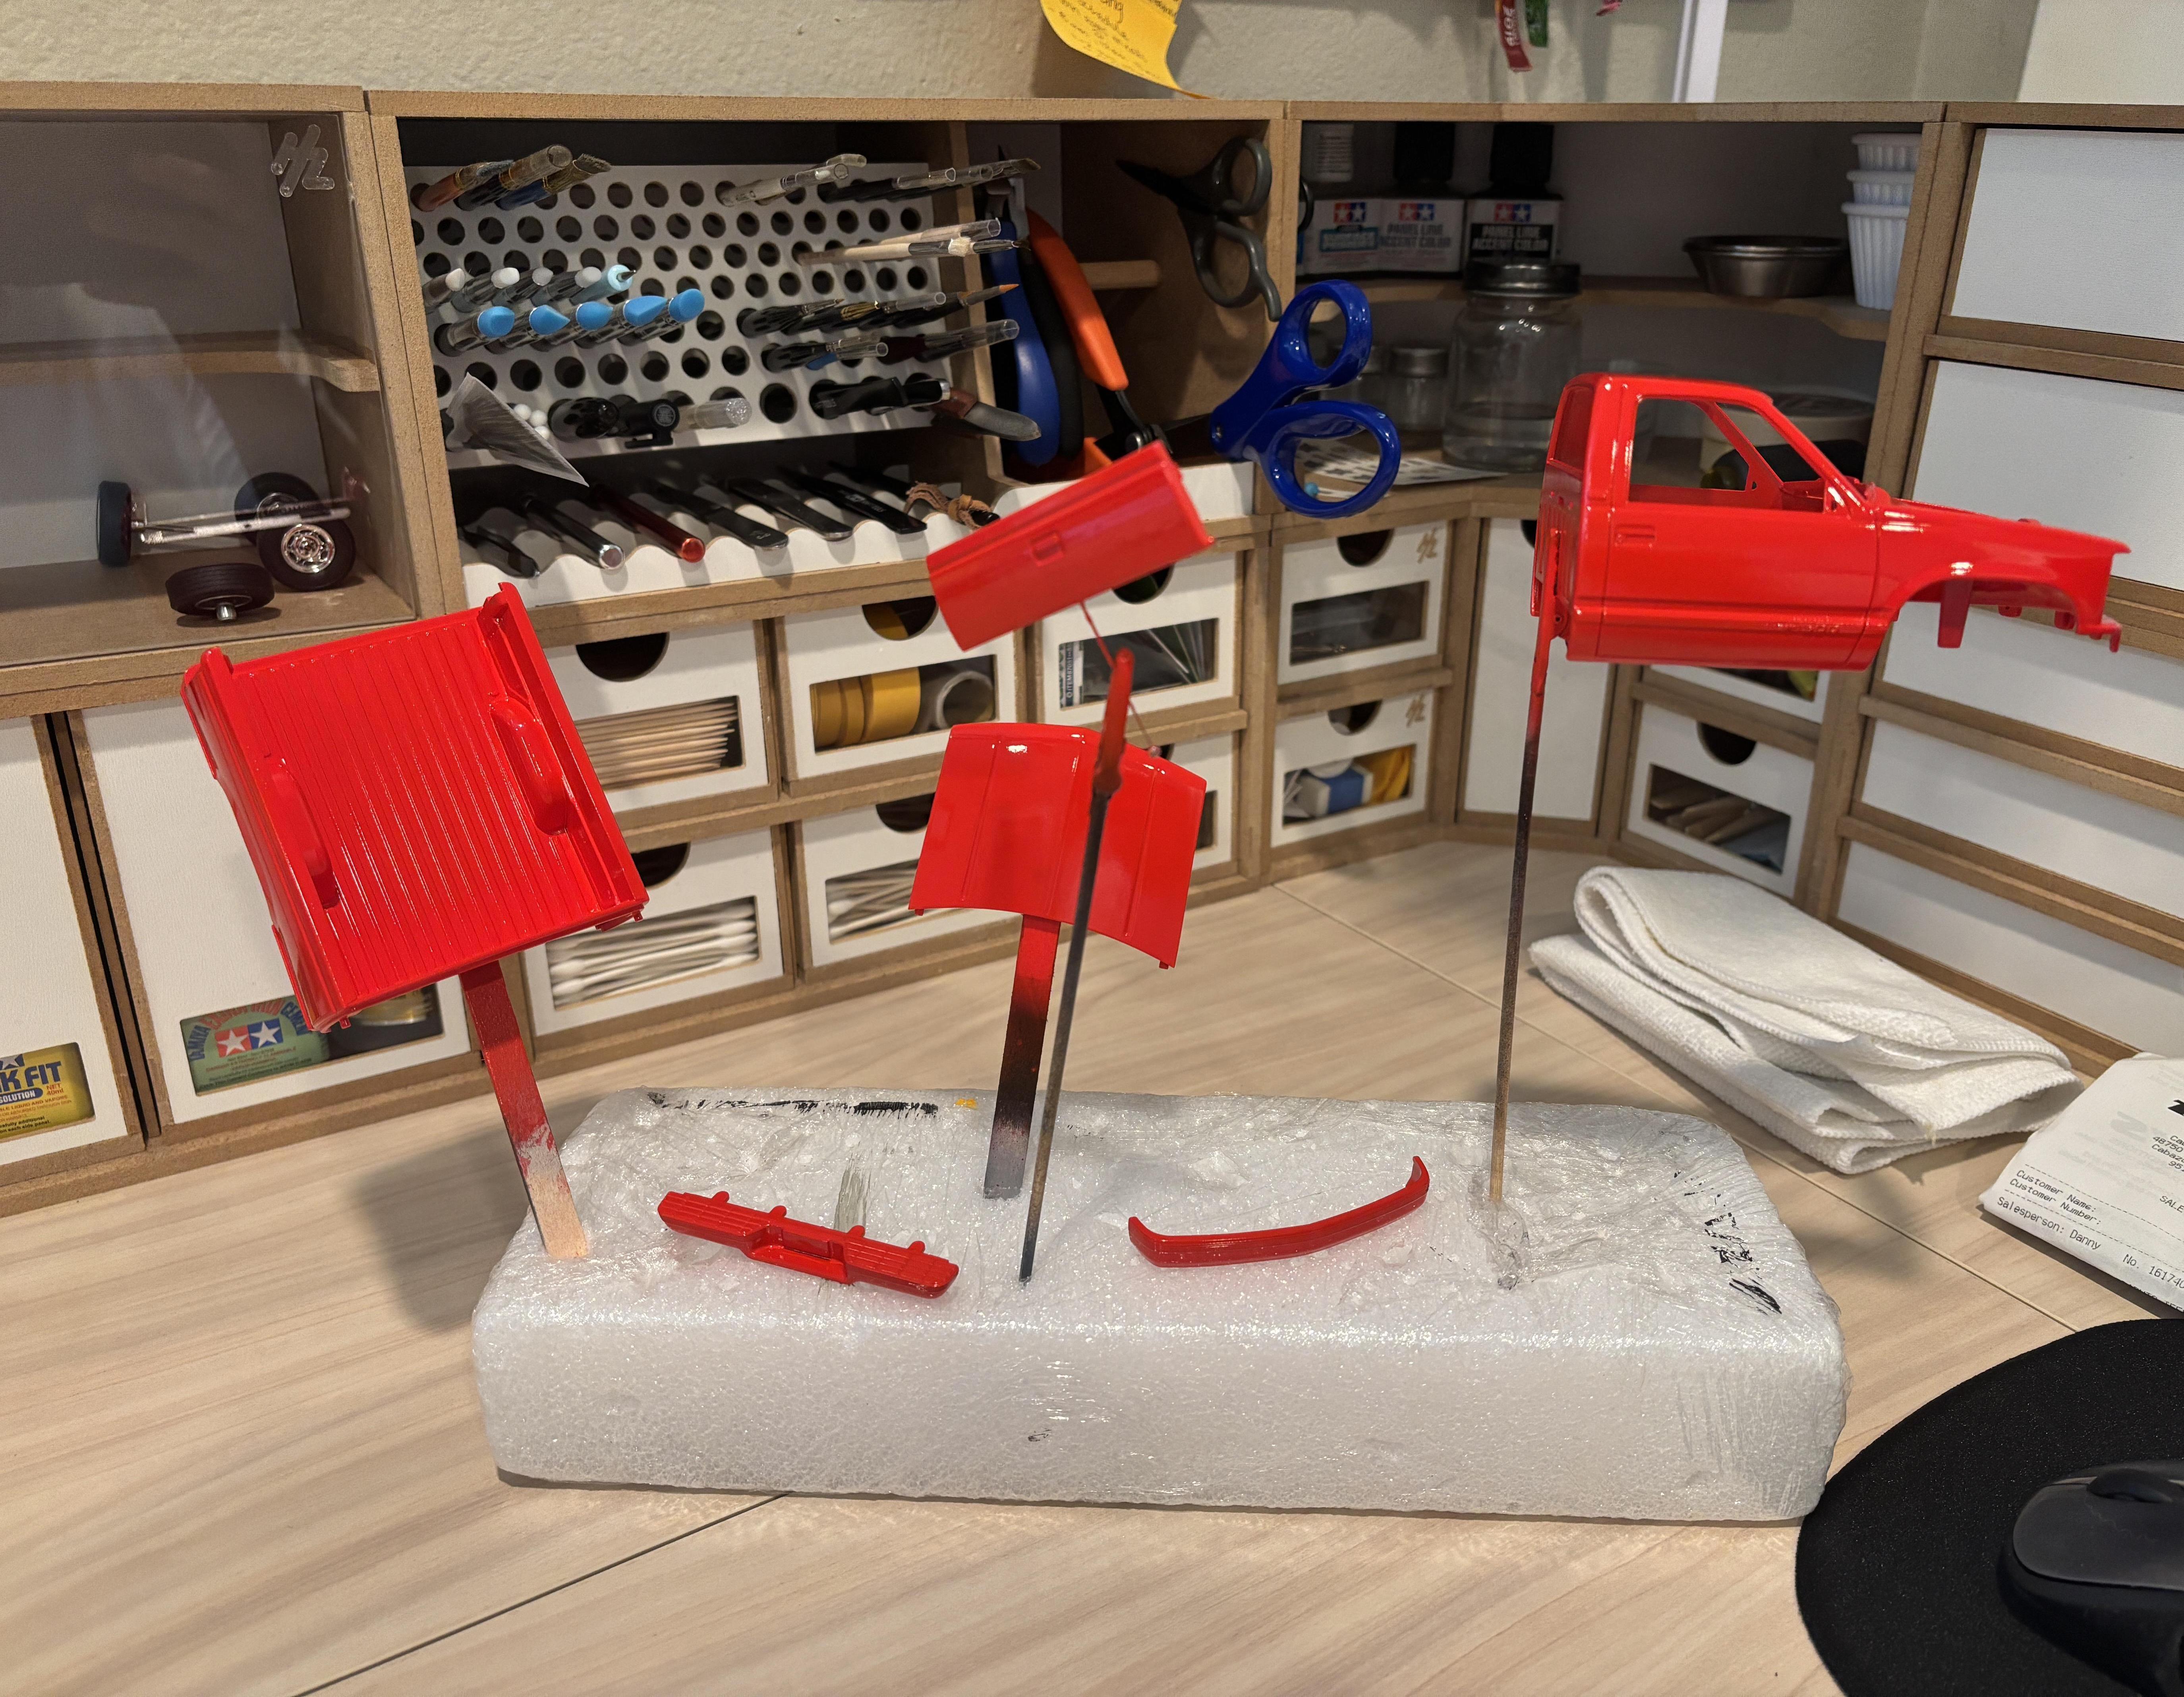
A couple of different updates for this month: I recently bought the full box of AK Interactive Real Paint Acrylic Paint Markers. This was after I bought a single pen from that line to test out and absolutely loving it. I used RAL-8012 Rotbraun-Red Brown to give the seats some additional detail. I had to give the seats two passes for even coverage. Even though the center fabric looks lighter than it would in real life, I do like that the seats now have some contrast. As you may remember from a few posts ago, I painted the hood with Tamiya Bright Red first as a proof of concept. When I painted the hood, I left a dimple in the plastic on the top driver's side corner. I was lazy at the time, but I regretted not dealing with it. I filled the dimple with Tamiya putty and then sanded the whole hood down for an even surface: I then blended the area in with Tamiya pink primer and re-sanded the hood with 1000 grit: Yesterday, I finally got a chance to paint the body and bumpers. I followed my usual routine of 3 increasingly heavier passes of Tamiya paint at 10 minute intervals followed up by Mr. Super Clear UV Cut. Again, all 6 passes of paint and clear were done concurrently at 10 minute intervals. Unfortunately I had some bubbles on the bed, so I will sand those down in a week and repaint them.
-
I agree. You put into words what I couldn't the first time I opened up my kit. I like it, but the "squareness" is what threw me off from the get-go.
-
Thinkful Wishing about Round2 Models, future Kits.
av405 replied to stavanzer's topic in Car Kit News & Reviews
Same here. Especially with the recent re-issues of the GM counterpart (the GMC Sonoma a few years ago and the upcoming Xtreme kit). -
AMT 1:25 Twisted Metal “Sweet Tooth” Ice cream van
av405 replied to gasman's topic in Truck Kit News & Reviews
Is this a new tool?