
freakshow12
-
Posts
2,247 -
Joined
-
Last visited
Content Type
Profiles
Forums
Events
Gallery
Everything posted by freakshow12
-
It's no big deal. I'm sure once everything else is on the chassis it wil be fine. I only noticed because I'm a Ford guy. Lol
-
Looks good but the small block chevy valve covers look out of place...
-
I like covering that line of paint with testors wet look clear. Works great
-
How about this Harry?
-
Nice! I used that paint on a nova. I love orange
-
I would like to buy it. Donate money to a charity or a kids thing. Or see if the model museum wants it? We could all sign the instructions or box top or something. Gotta be one of the few builds that has travelled as far as this has and made it alive
-
1971 duster on steroids nov 6 decalled and nearly done
freakshow12 replied to freakshow12's topic in WIP: Model Cars
Not much to report but all the sub assemblies that go on the chassis are painted and detailed. Just finishing up my cage and a couple more test fits then I can paint it and start putting the good stuff on it -
68 Mustang Twin Turbo Outlaw.... (updates 06/03/15)
freakshow12 replied to tyrone's topic in WIP: Drag Racing Models
Best one yet. I want it!! -
Not to start a great debate but... If building a factory stock muscle car I never clear over the decals! The 1:1s were never done that way and to me it ruins the look of the finished car.
-
These elkys build up nice. I have done a couple myself. The frame is seperate and can be done as a model by itself if you wanted. It's nice!
-
Yup! I have lots of his stuff. Beautiful
-
The GodFather 68 Firebird
freakshow12 replied to Outlaw_Pitbull_0411's topic in WIP: Drag Racing Models
I like the stock hood better -
Box stock challenge: 78 Dodge Monaco
freakshow12 replied to Las Vegas Derpy's topic in WIP: Model Cars
I like this. I was messing around with mine and found it fit an amt nascar chassis really nice. I'm thinking a sleeper is in order... -
A pair of 66 Novas- small update for now on the wagon
freakshow12 replied to microwheel's topic in WIP: Model Cars
Wow! Where do you get your guage faces and do they make them for most cars? -
I adore the yellow to red on the blue paint. Gives it attitude. I can whip up the covers to match now that I'm at the bench every day. The way I wired the engine it would be an easy change to make
-
1971 duster on steroids nov 6 decalled and nearly done
freakshow12 replied to freakshow12's topic in WIP: Model Cars
Thanks so much guys. I have no issues with anyone using this idea or any of mine. Lol. Solves a ton of issues on mopar front ends. I used the rack from the 5.0 LX kit. Cut off tie rods, drilled holes on the boots where I cut the rods off and it allowed me to set the width. I forget where I got the coil overs for the front. Amt kit for sure though as its that tan plastic. Wagon rod maybe? Then I flipped the spindles to drop it down. I had to carefully drill new holes on the upper a arms further out to square it up again or it will have lots of camber. On the rack I still have to add the part the steering shaft connects to. -
A pair of 66 Novas- small update for now on the wagon
freakshow12 replied to microwheel's topic in WIP: Model Cars
Looks great jim. Can't wait to see more. -
1971 duster on steroids nov 6 decalled and nearly done
freakshow12 replied to freakshow12's topic in WIP: Model Cars
Just a small update. Starting to work on front end and brakes. On the rear I tried something new, I wanted pe disks but put the rear together using solid wheel backs. I solved this by putting half the disk on the outside and half on the inside. I still have to add the calipers but you get the idea. Once it's all put together and in its final spot I think it will look ok. What do you guys think? -
I need the vectors and the other ones!!
-
Cannonball Run 2015 " The Sleeperball"
freakshow12 replied to wagonmaster's topic in Community Builds
Here is a pic I took years ago of a focus with an 03/04 cobra engine slammed in it -
There are a few guys on here. Pm chief Joseph. He would be able to help you. They won't be super cheap but they will make the difference in the model.
-
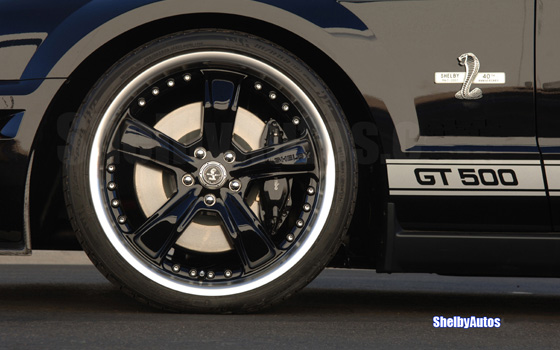
Just have the wheels printed. I have all the pieces to build my 07 40th anniversary convertible but the razor wheels. And I'm playing with parts to build my 14 500 as well. I will be following this
-
What do you mean about the bumper? Put up a pic. Maybe we can help
-
1971 duster on steroids nov 6 decalled and nearly done
freakshow12 replied to freakshow12's topic in WIP: Model Cars
Thanks guys. I'm hanging out in North dakota the last few days at a hockey tournament so I'm about 12 hrs away from the bench! Yes the bench is an epic mess right now lol. It gets that way during mockup and I have to stop and clean it once I get to doing paint and assembly. The nuts and bolts were just stuff I cut off a 1/12 Camaro chassis and reused. -
I swear by dupli color filler primer. I even spray it into the lid and brush trouble spots to avoid getting it on the whole body.