gtx6970
-
Posts
7,940 -
Joined
-
Last visited
Content Type
Profiles
Forums
Events
Gallery
Everything posted by gtx6970
-
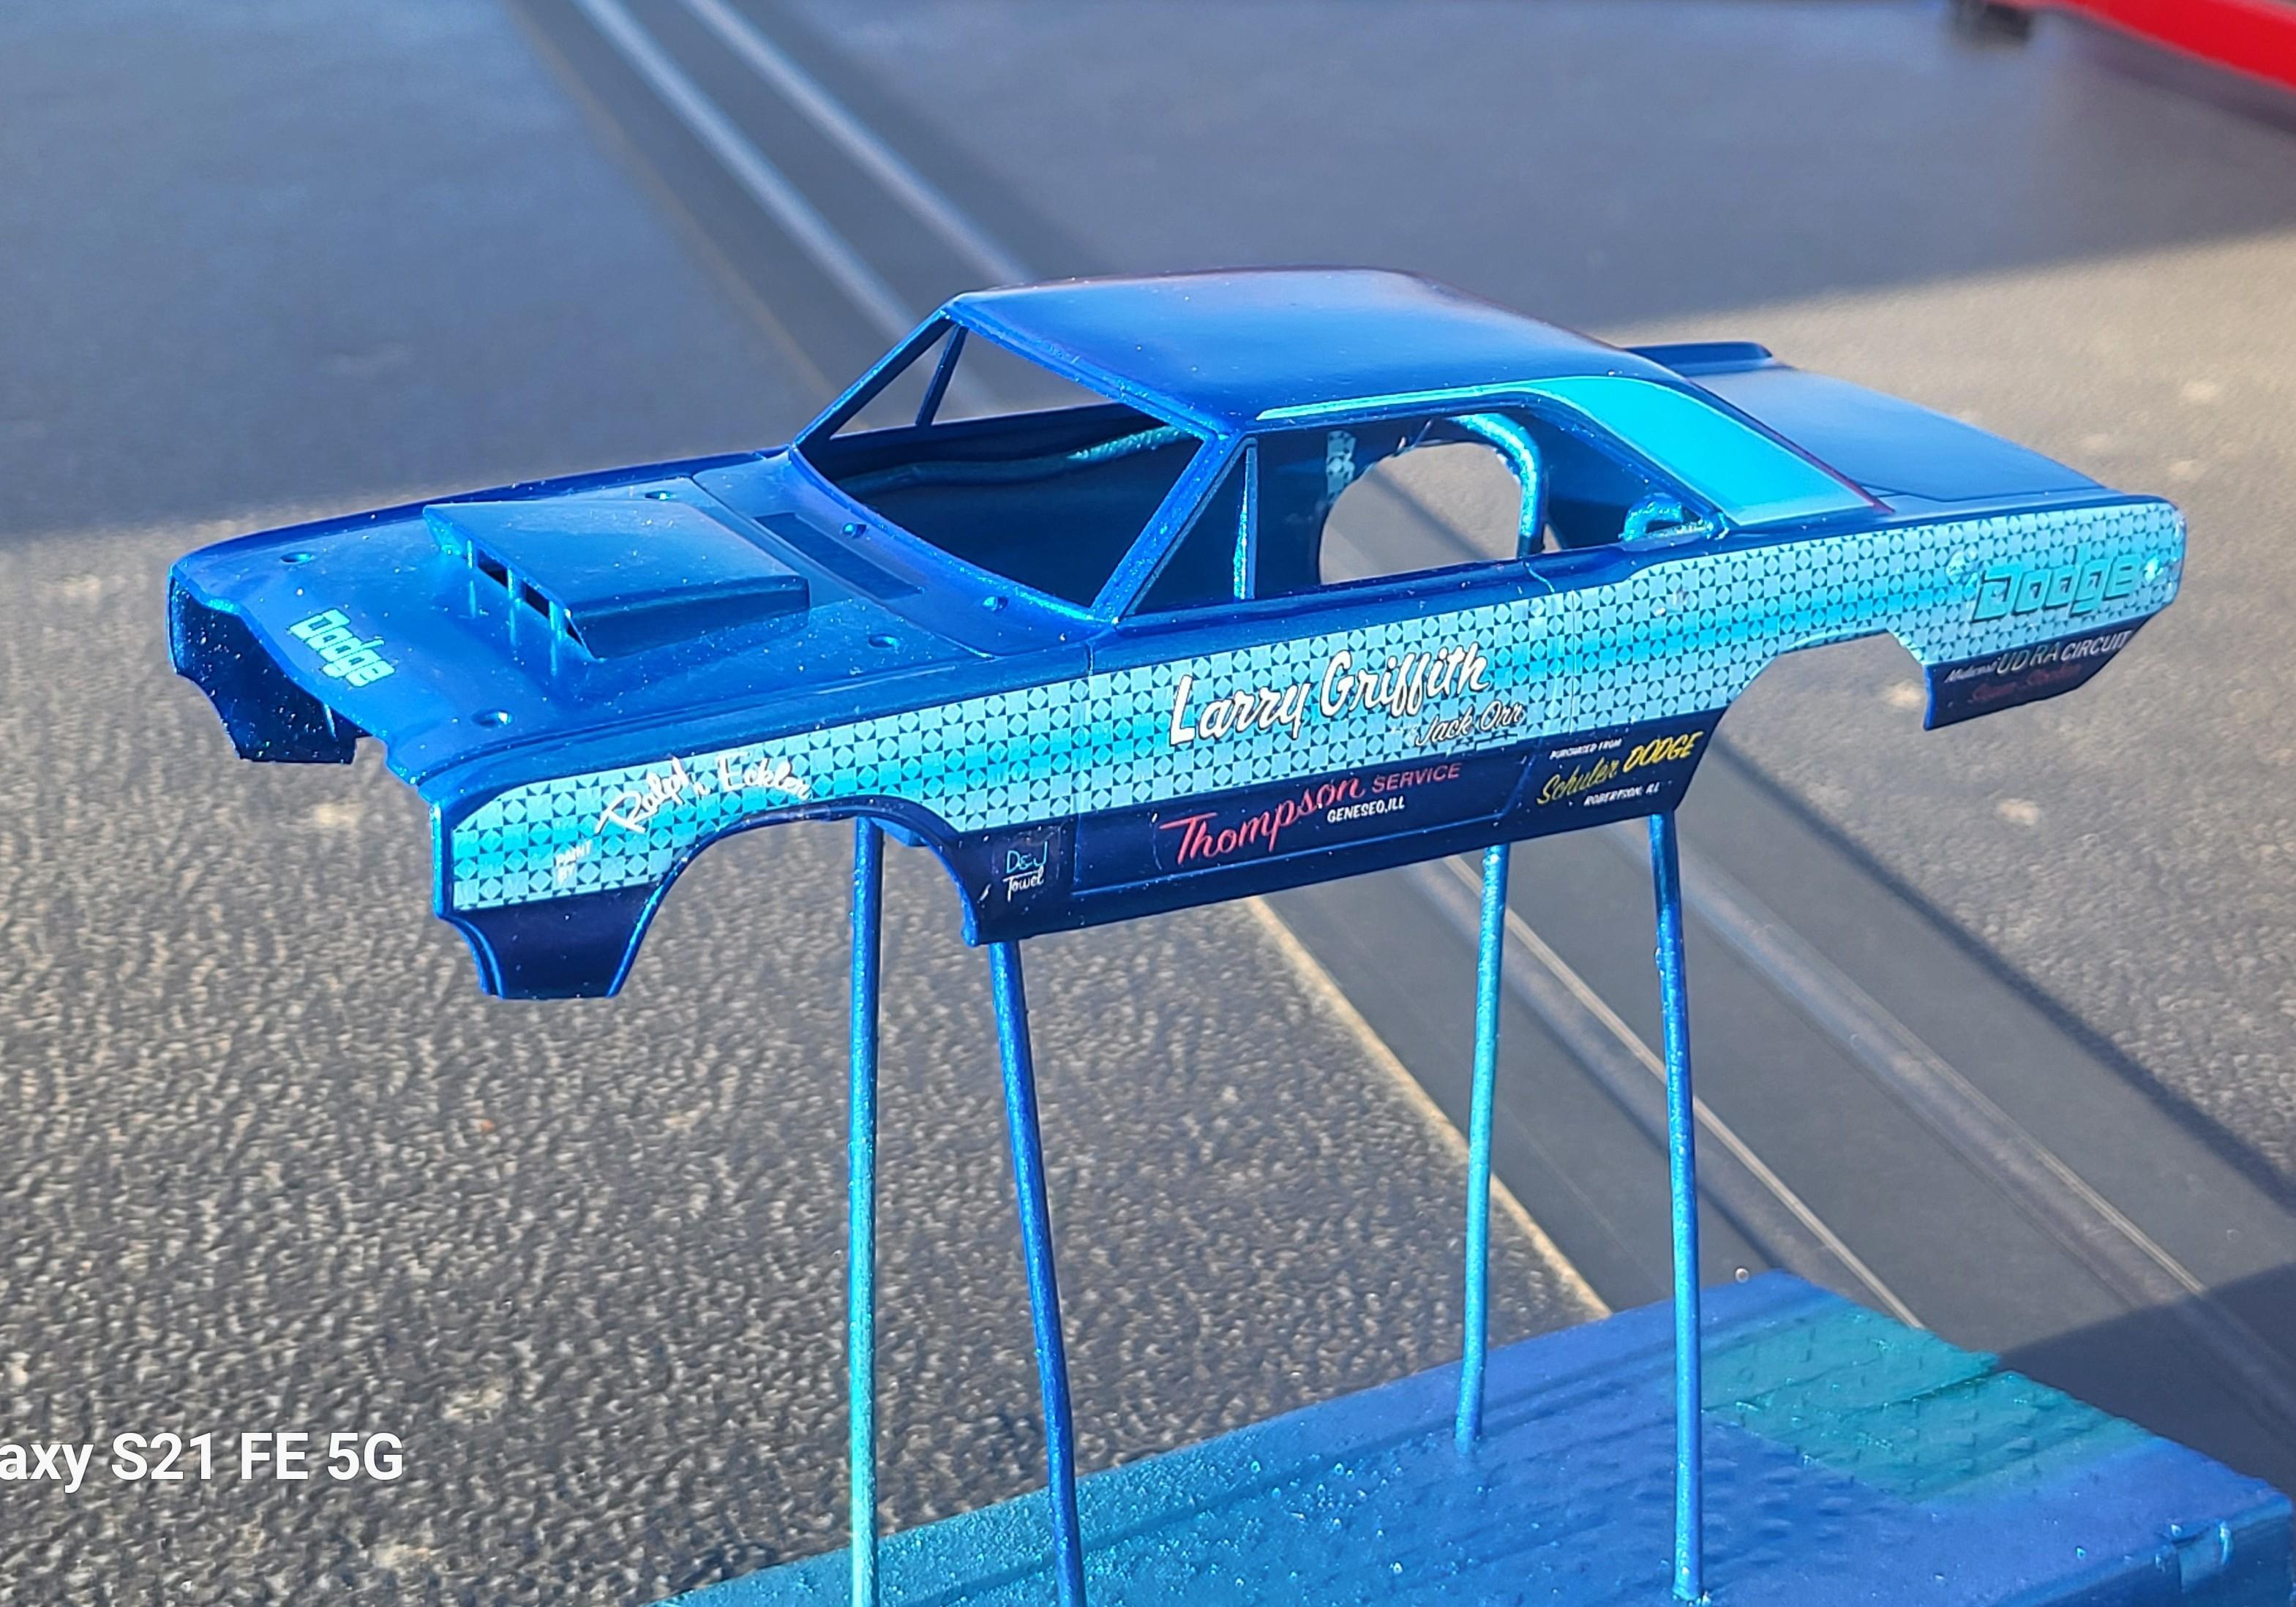
Well, I gues sthe cat is out of the bag , so to speak. Its The Larry Griffith 1968 SS / A Hemi dart Got the body painted yesterday . Decals today ( THAT was fun . ) My Slixx decals are starting to get old, And Even though I put a clear topcoat of these before working with them . I still had cracking issues I had a MAD pre wired dist, so decided to use it . Might still add fuel lines . Maybe

-
Where is Chad with R2 February news?
gtx6970 replied to Chris in Berwyn's topic in Car Kit News & Reviews
Although quite true. Most non mopar people wouldnt know the differences outside of maybe the grill itself -
This year's AMBR winner...
gtx6970 replied to Ace-Garageguy's topic in General Automotive Talk (Trucks and Cars)
Agreed, I was told the owner had well into 6 figures in the Woody when it was done -
This year's AMBR winner...
gtx6970 replied to Ace-Garageguy's topic in General Automotive Talk (Trucks and Cars)
Im not a street rod guy by any means, BUT, Having used to work in a shop that built high end cars. I can fully appreciate the effort, time and money that goes into these kinds of builds. It takes a team from start to finish and an owner that's committed to bring it to fruition . I used to work for Clay Cook whom built this one https://www.hotrod.com/features/award-winning-1937-ford-woodie-long-way-beach/ In person these cars are phenomenal and like any cars done at this level it would take days to understand and take in all the little details it takes to compete at that level -
Close, Larry Griffiths Provided the slixx decals still work ( fingers crossed )
-
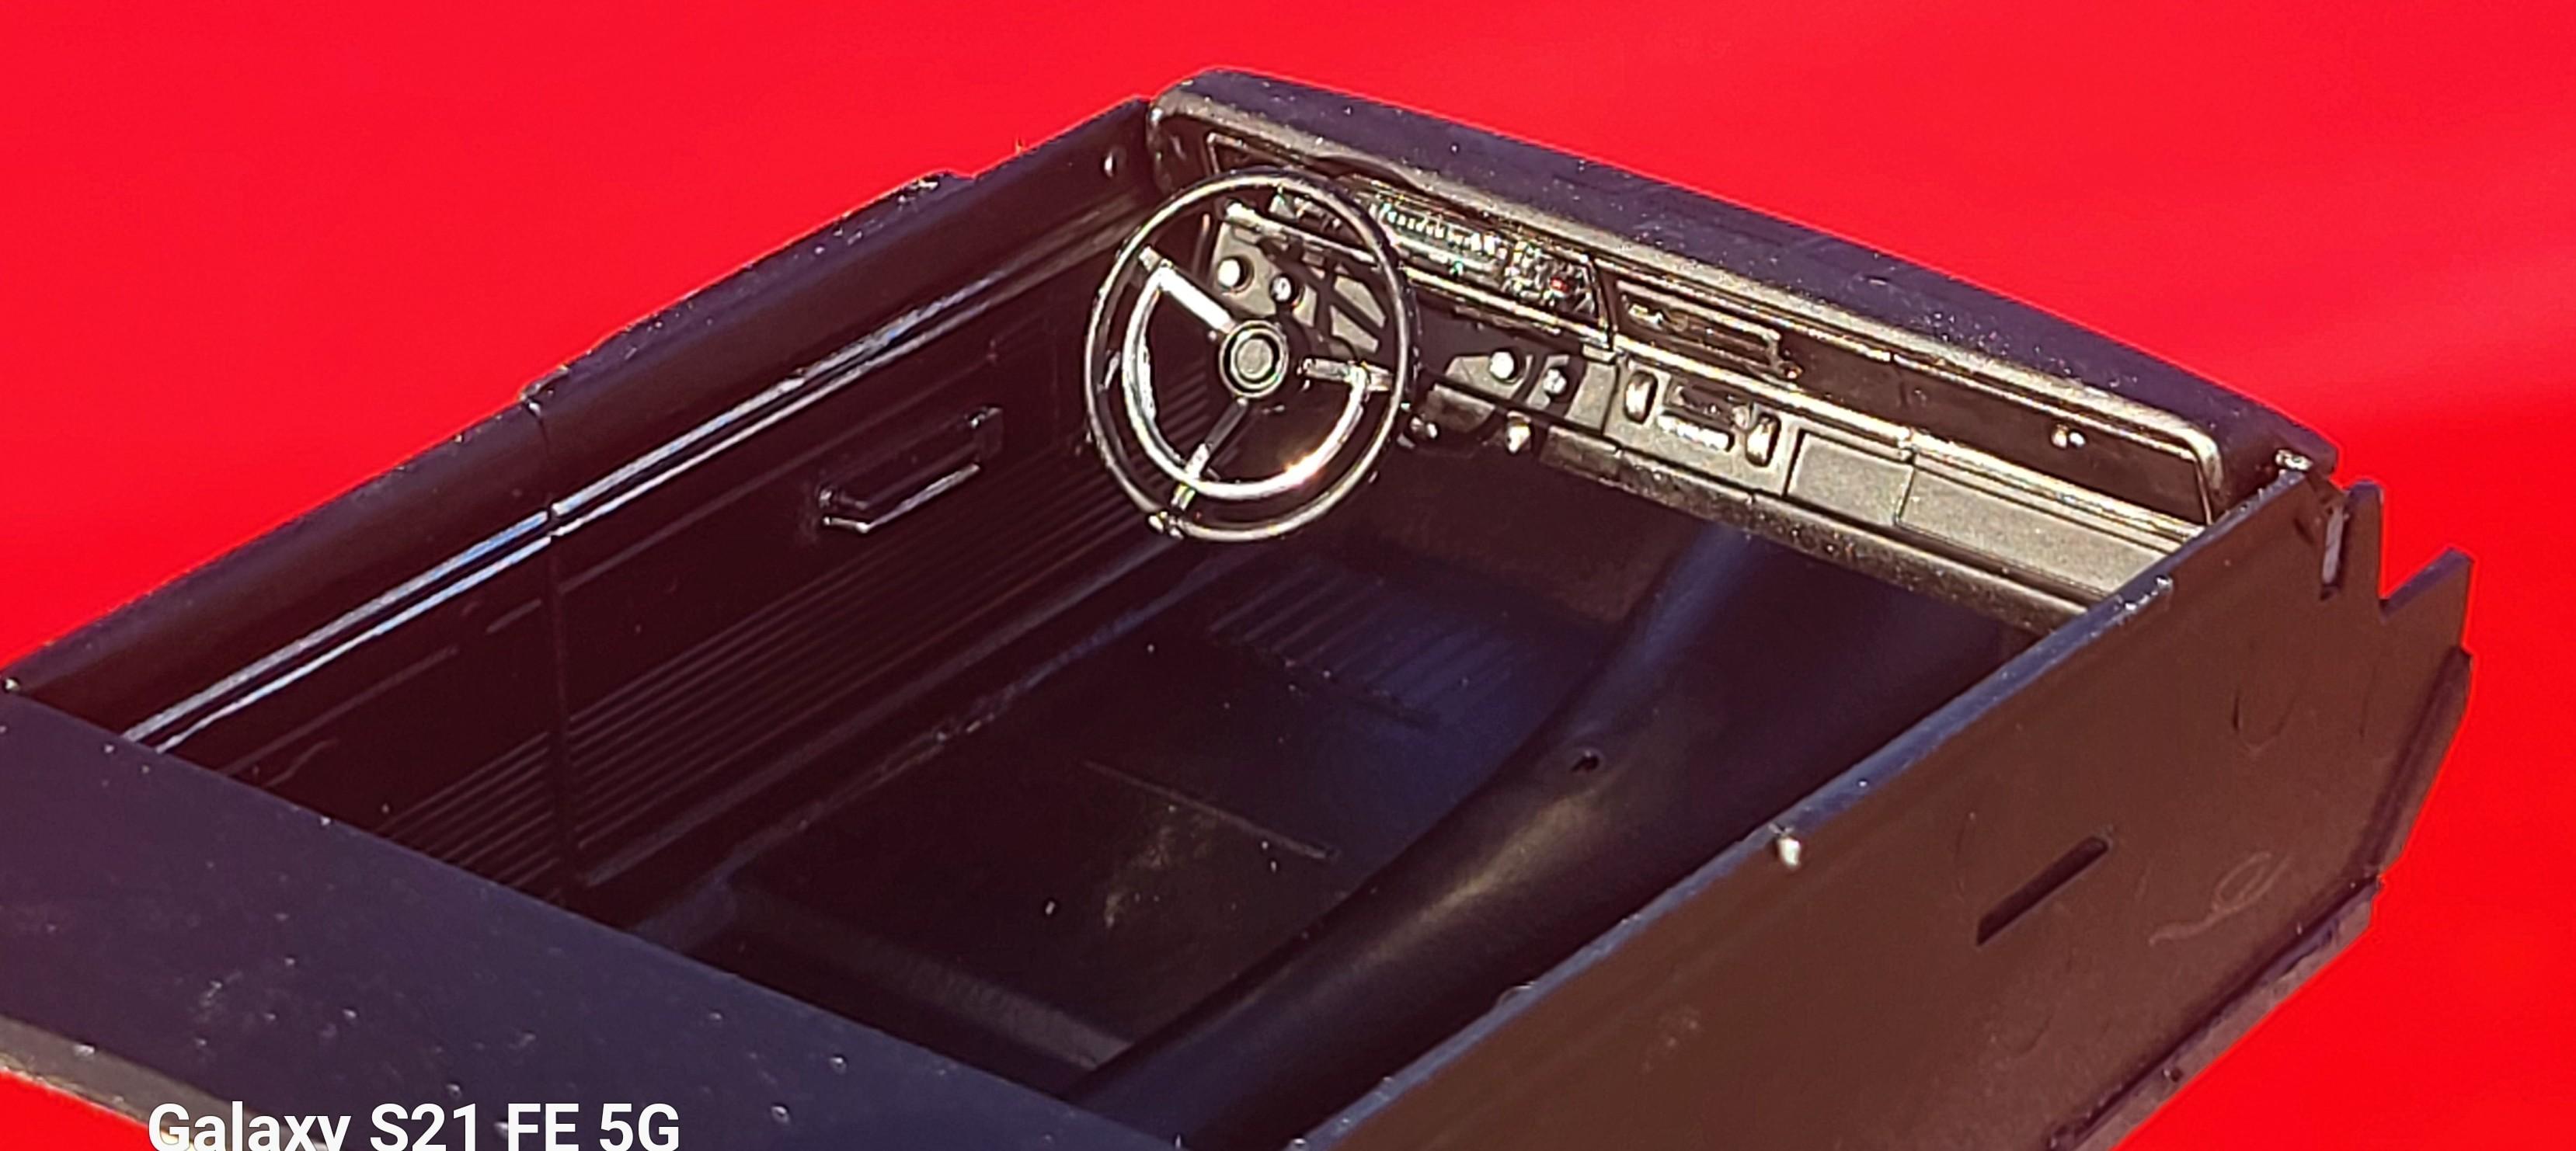
Wow. They look good. I'm afraid I'm not getting that detail involved I'm thinking at the most plug wires and fuel lines. Or just keep it box stock????
-
Yes....actually already gone since these pics were taken
-
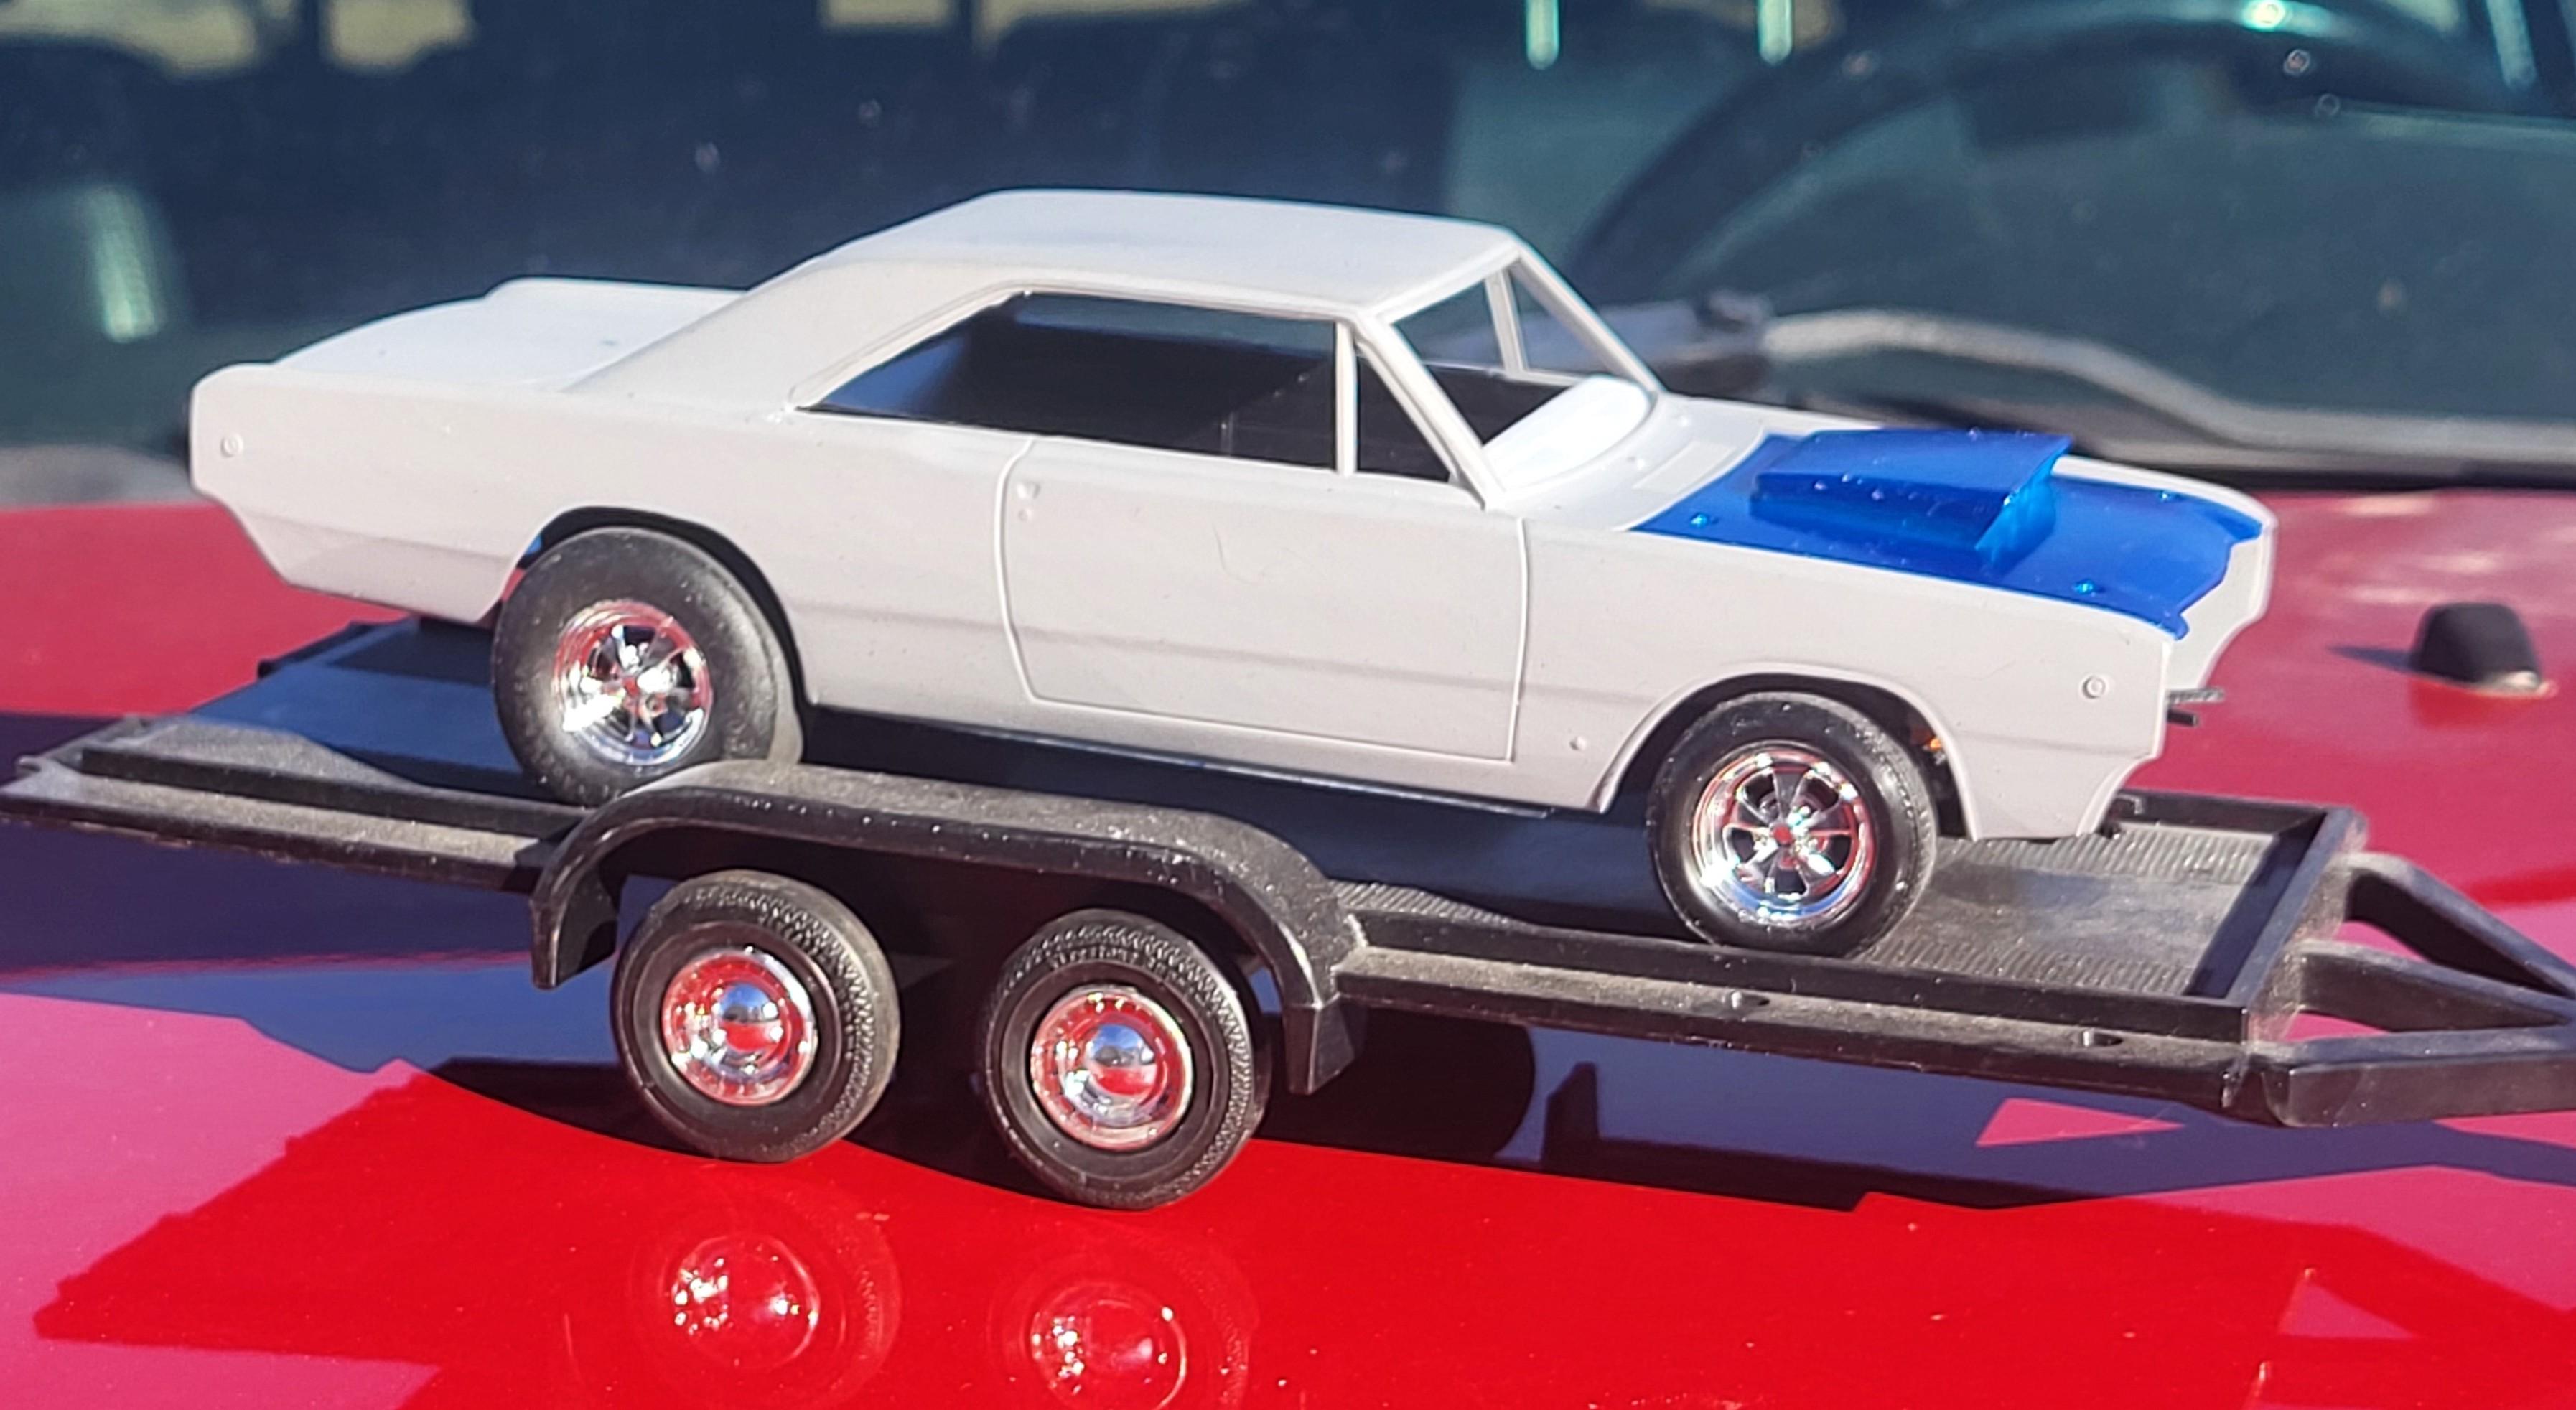
I was after ( since found ) a Landy SS/EA Dart kit . This is not Shirley Shahan's car, Good guess. Though, Ive never even considered that one. Might have to look for decals now that you mention it . I have several of these kits on the shelf
-
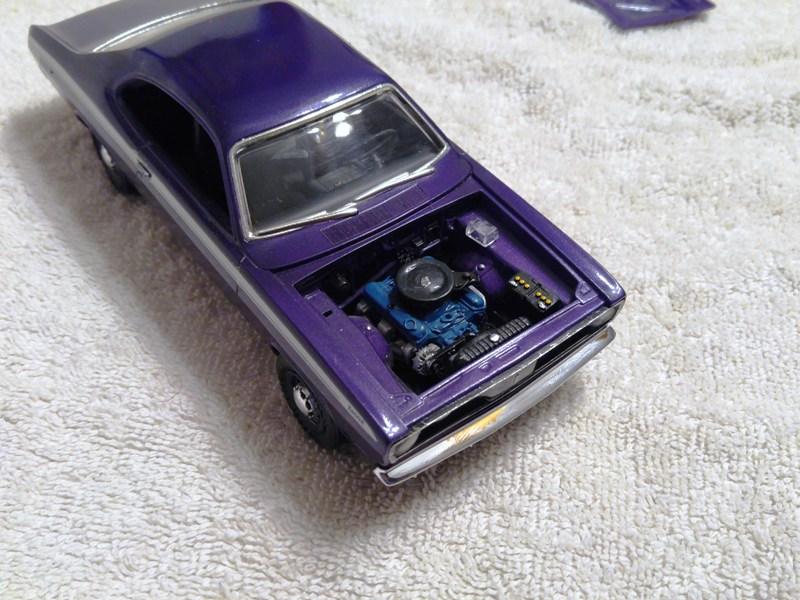
Nice, I have the decals to do this car. And its on my short list . Probably this summer Chris is the 1st one to finally do this sheet with the correct colors https://www.ebay.com/str/gloryyearsdecalsandgraphics
-
Hemi was a light pumpkin orange up to 1968. ( aka race hemi orange ) And maybe even some Very early 69 street hemi
-
1/16th scale California Charger Dragster
gtx6970 replied to Mr.1/16th's topic in WIP: Drag Racing Models
Very nice Ive always thought The Keeling - Clayton cars were one of the best looking FED of the era , bar none -
Nothing fancy Probably gonna be a stock box build with exception to aftermkt decals. Been a while since I've done one of these. So felt better ck it closely as I go along. I was actually a little worried I had opened the rear wheel wells to much. But.....I think I have it about right. ( fingers crossed ) Anyone dare a guess which car it's going to be ?
-
Where is Chad with R2 February news?
gtx6970 replied to Chris in Berwyn's topic in Car Kit News & Reviews
THIS ^^^^ I buy based on subject matter and that alone. Accuracy is secondary If I don't like the subject ( not matter who makes it ) Its simple. I don't buy the kit.
-
Where is Chad with R2 February news?
gtx6970 replied to Chris in Berwyn's topic in Car Kit News & Reviews
I built a base line Duster to replicate my brothers 1/1 car. Bought the grille off Ebay 7-8 years ago
-
Where is Chad with R2 February news?
gtx6970 replied to Chris in Berwyn's topic in Car Kit News & Reviews
Round 2 was basically created to create and cater to that niche. And I for one, Am ok with it just they way it is. Keep in coming In regards to the other manufacturers in the world today. I have zero interest in 90 % of the kits being produced . Outside of Round 2 and Revell, There is basically no kit that catches my attention But Im not the only one buying model kits either -
Where is Chad with R2 February news?
gtx6970 replied to Chris in Berwyn's topic in Car Kit News & Reviews
agreed, Biggest difference be it the grill and the interior Exhaust is different if you want to get picky -
I'm sure the reasons it's made offshore has far more to do with costs than anything else. I seriously doubt " Can't or Don't Want To " have anything to do with it.
-
Where is Chad with R2 February news?
gtx6970 replied to Chris in Berwyn's topic in Car Kit News & Reviews
Same here . But...then again. I have an MPC 1972 Duster builder kit So that one is not tops on my list. But a friend of mine owns a 1972 Duster. So,,, I will be getting one to build his car -
Where is Chad with R2 February news?
gtx6970 replied to Chris in Berwyn's topic in Car Kit News & Reviews
1960 chevy wagon. 1965 Barracuda 1972 Duster. Finally. Something I will open the wallet for. All 3 -
MPC Coronet with Revell Charger chassis ??
gtx6970 replied to gtx6970's topic in Model Building Questions and Answers
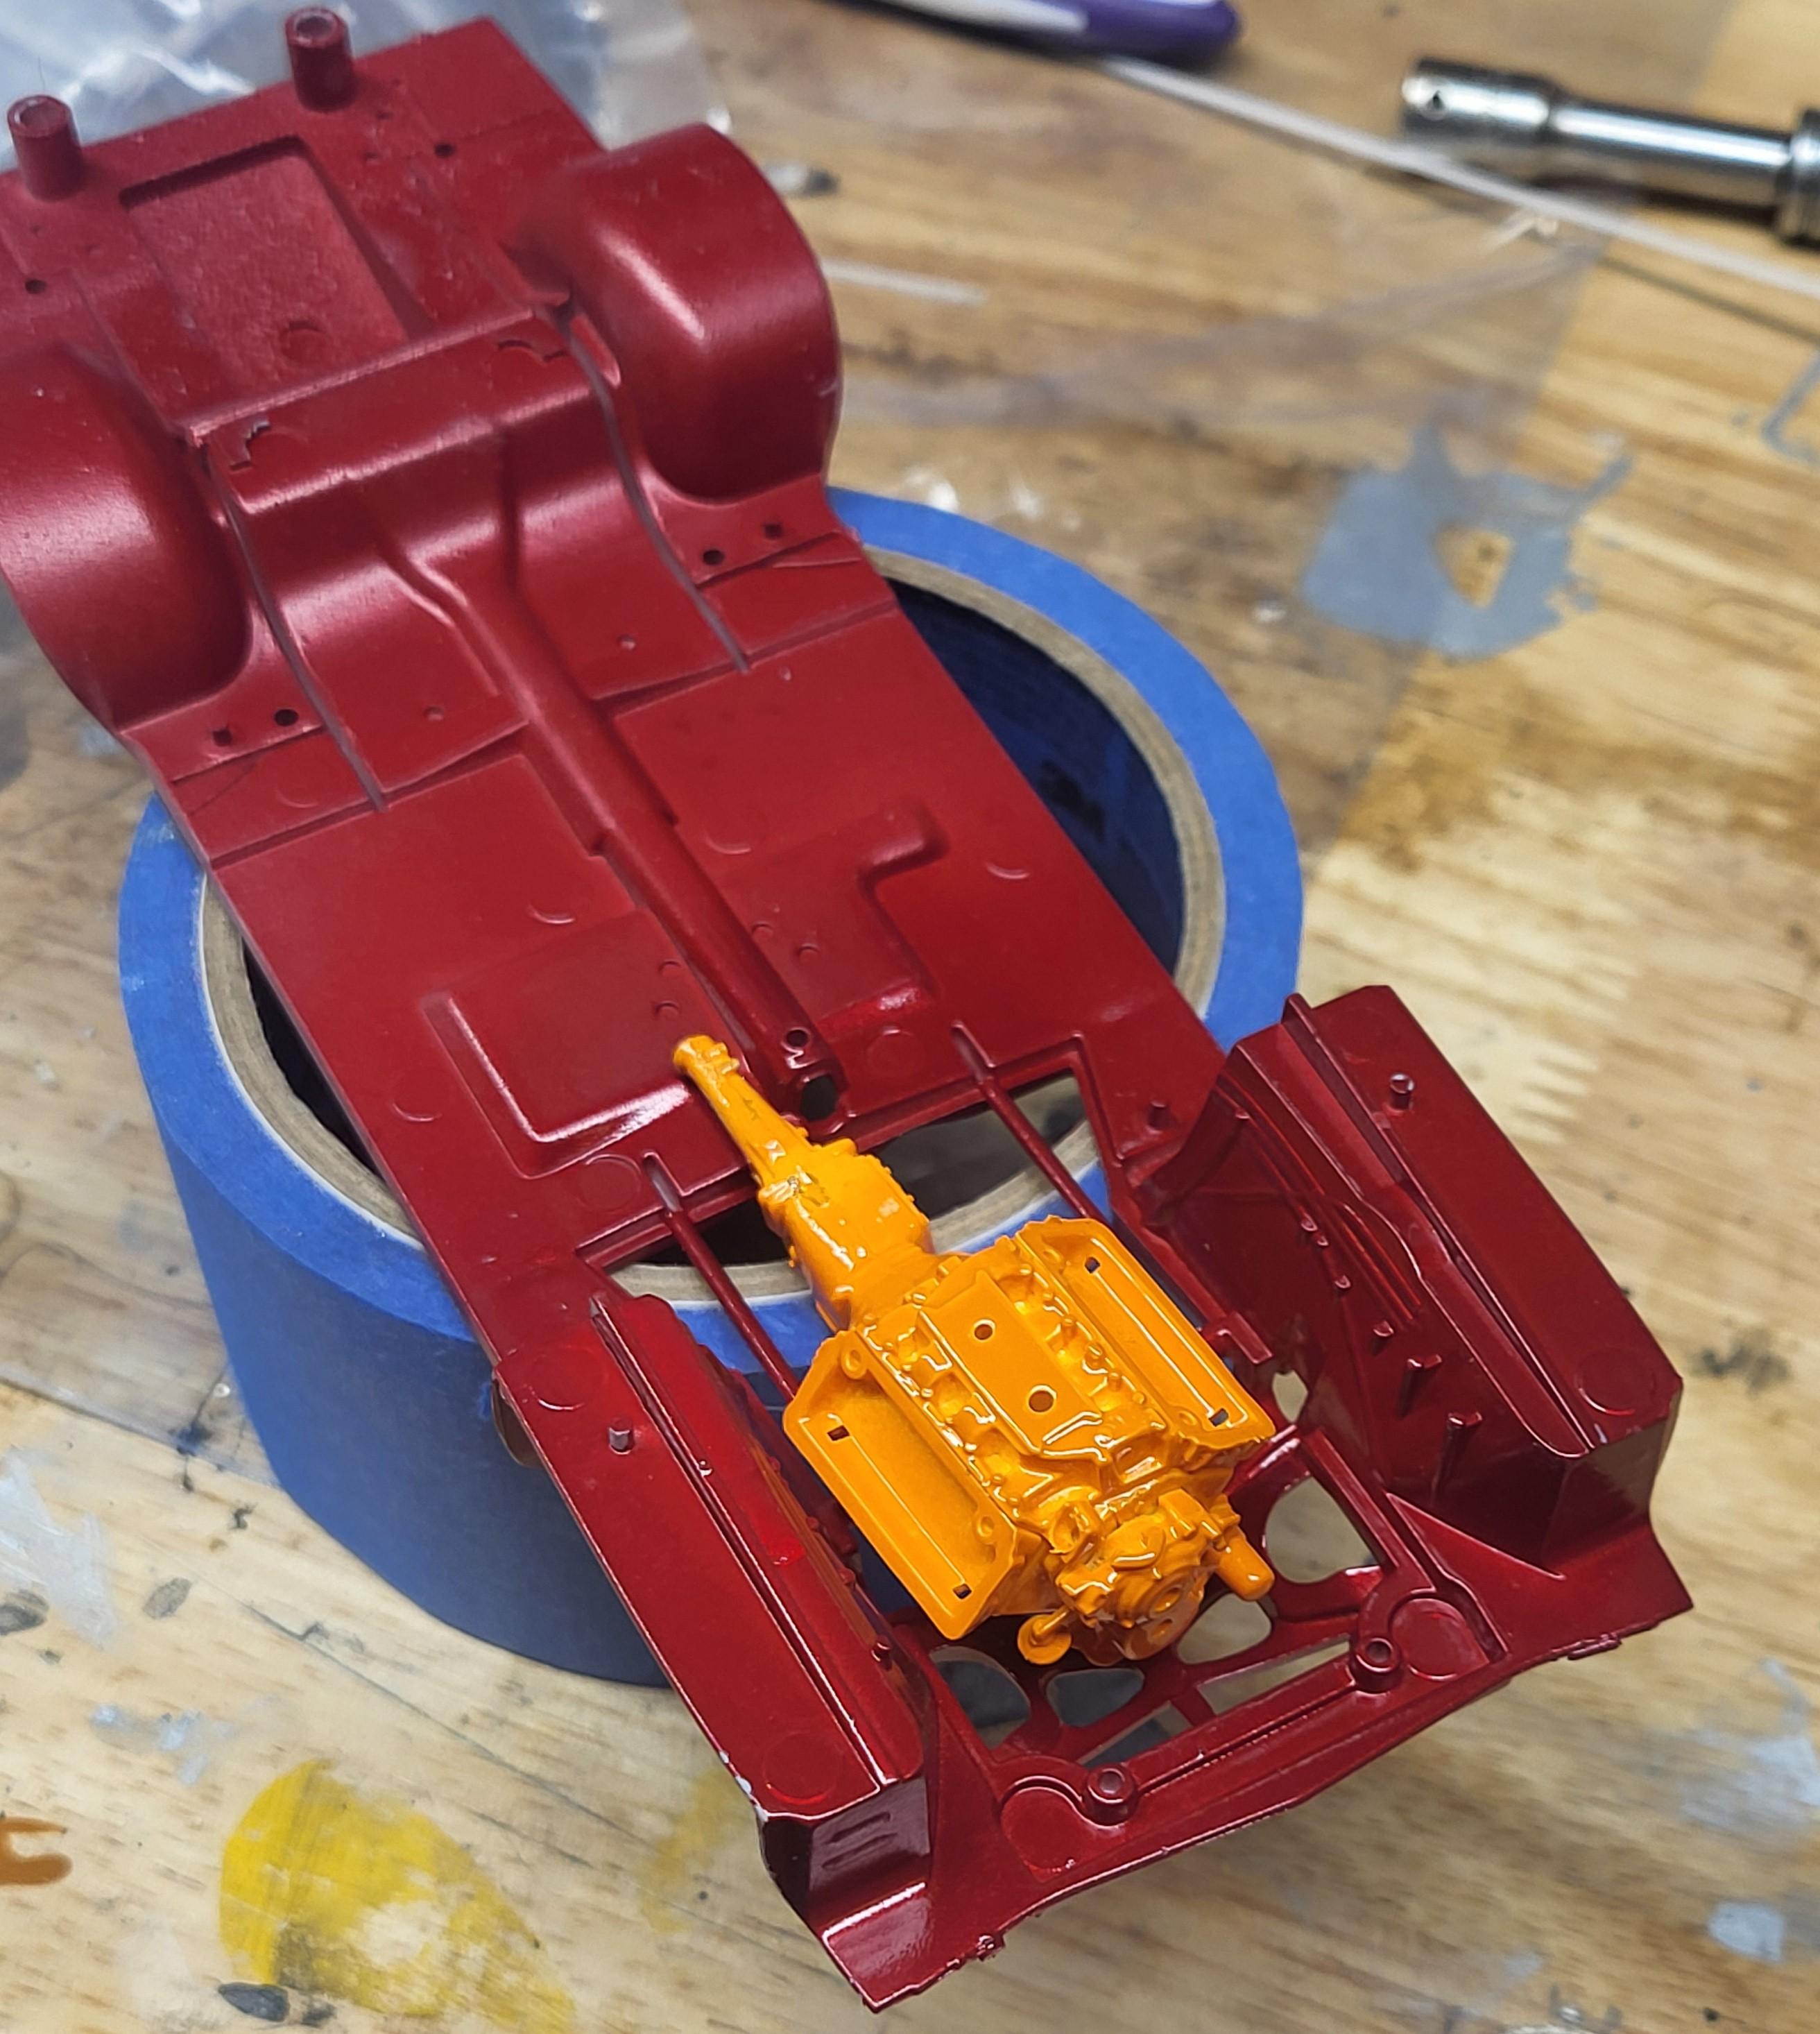
Steve, I have not completely ruled out modifying the Revell dash just yet The upper dash differences are the 68 V shaped - thinner versus 69 straight across and thicker Im waiting on some aftermkt pieces for the car,,,, so its off the bench for now, While I finish up some other long ago started projects One being my Petty Blue Superbird thats been on again and off again more times than I care to admit I did pick up some paint for the engine . so I can get the correct shade of orange for the early cars . Gonna be an interesting clash of colors for sure
-
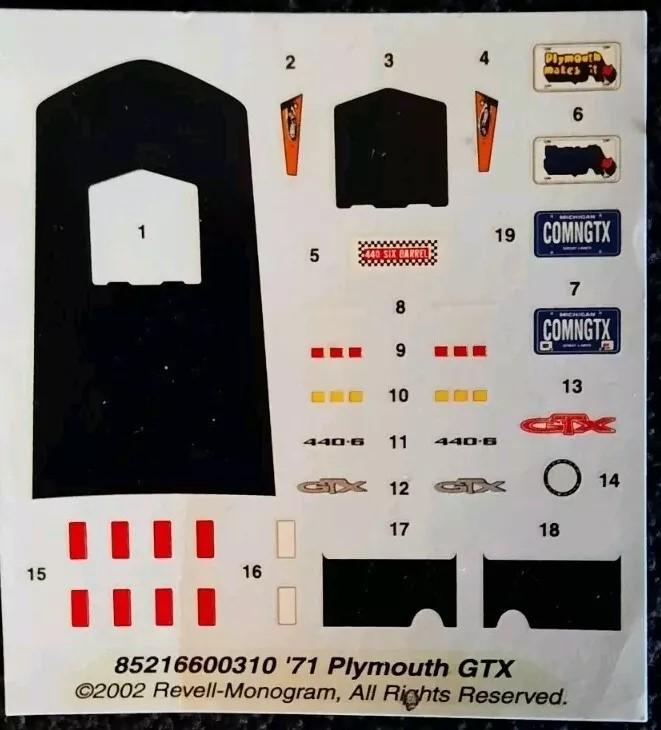
This decal is the one I think would be my best option
-
I dont need the hood blackout or license plate decals Mainly just the 3 GTX and hood engine size callout decals I want to do a build of a very good friends car
-
Found. Thanks
-
blue streak tires
gtx6970 replied to earlleecliffton1's topic in Model Building Questions and Answers
Edit I now have 6 of them my desires list is above.
-
MPC Coronet with Revell Charger chassis ??
gtx6970 replied to gtx6970's topic in Model Building Questions and Answers
I havent completely ruled out using the dash from the Revell charger yet. But so far I think its going to be more work than its worth I have the ac vents in the MPC dash filled already , Plus ground the not so accurate console from the MPC floor and will be using the console from the I think is Revell kit Mine will basically be this car, Only black interior , top boot and rump stripe . Beenie hubcaps with redline tires