gtx6970
-
Posts
7,940 -
Joined
-
Last visited
Content Type
Profiles
Forums
Events
Gallery
Everything posted by gtx6970
-
What do you use for flat and satin black?
gtx6970 replied to LennyB's topic in Model Building Questions and Answers
Cheap rattle can flat black. Usually Dupli color, Rust oleum or similar in the big cans Same source for a semi gloss if thats what I need Its $8 -$9 for model size cans of paint. I can get big cans for same money and get twice the amount exibit A is Rustoleum grey primer, Duplicolor semi gloss black. Tamiya gloss clear
-
All primer coats were wet sanded with either 600 or 800 grit Exact same process I used on other bodies Like mentioned Im beginning to wonder if I have a mis labeled can of glossy white / flat white
-
Yet. Mine is quite glossy when first sprayed It's 15 . 30.minutes Or maybe an hour later it's anything from blushed to downright flat
-
Ps. I'm starting to wonder if the can of gloss white is mislabeled and anything I put on top of it goes flat as well
-
I'll shake any rattle can pretty good. To be honest I think 2 of the 3 were with warmed paint 3rd was not. All 3 same result. I got one of the afx cars ( strickler 65 Dodge ) shined decent..but it took almost a full can of clear 2nd one is sox martin afx hardtop. The white came out dead flat. The blue roof is so so . Slightly above pure flat...more a semi gloss at best I'll paint the red on it and see how it looks. But picked up some testors wet look clear today I've always had good luck with it. Worst case they all go in the strip tank and I'll start over with all Duplicolor
-
My 64 plymouth is all tamiya base and clear. It looks killer ( imo )
-
That's the weird part. I painted 3 others in past couple months. 2 were duplicolor rattle can touchup paint for base and tamiya clear topcoat ( black chrysler 300 and red challenger ) 2nd was Testors extreme lacquer color base with tamiya clear( green vega) All three of them turned out fine While I'm out today. I'll pick up some testors extreme and try again . As I have 2 more bodies I want to paint.
-
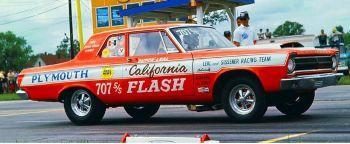
Vintage drag cars and muscle cars Modern stuff is neat to look at in person....but zero interest to build a model of them
-
TS series straight from the rattle cans. No airbrush Same method I've used for years About 10-12 inches away. Paint lays down nice and has a killer shine....until it dries. It's almost like it's crazing appearance to it. One I painted yesterday with gloss white dried to a flat white primer look to it in minutes. I've painted primered bodies sanded with 600-800 grit. To untouched bodies right out of the box. No sanding. No cleaning....pulled it out of the box and painted it Same result The only one I've had with no issues was Tamiya gloss black. It went on real nice. Only reason I had to clear it was to seal over decals That was on a lindberg / AMT 1964 Plymouth Kit I've never had these issues with Testors paints. Including a couple painted in past few weeks. Issue for me is Testors is not readily / easily avail. Hobby Lobby has it....but it's across town. But i will be near there this weekend so plan is pick up some paint and try again. Especially wet look clear. Ive used in the past with excellant results. And I can get Tamiya at my local Ace hardwares hobby section 10 minutes away. I've also used Upohl urethane spray can clears as well. With excellent results over both testors and duplicolors paints. But that stuff ain't cheap. And is online orders only
-
Waht the hell am I doing wrong. Ive painted a half dozen cars using Tamiya paints in the padt 2 weeks...and with exception to one...all have shine issues. ALL seem to dry out with virtually no shine what so ever. It's like the plastic or primer absorb the paint. Ive painted over Duplicolor grey primer, Tamiya white primer/surfacer And today over bare white plastic And all same exact result Ive cleaned some , Ive not cleaned some and same result. Im in southern Az and humidity is in the 5% range the past week or so Painted 3 different bodies today and same exact problem on all 3...an AMT 1971 Duster over duplicolor grey primer basecoat. 1 Mobieus 65 AFX body with tamiya white primer base and gloss white topcoat. .3rd was tamiya gloss white over bare white plastic .And it dried like it was flat white paint. Cleared one of them ( 2 coats clear ) and it barely made a difference I painted a MPC 71 Demon 6 months ago and took almost a full can of Tamiya clear . And even then I had to polish the heck out of it to get any kind of shine The only constant here is Paint brand I'll pick up some testors clear this weekend. Hope that helps... If not I think Im going back to Duplicolor spray cans full time
-
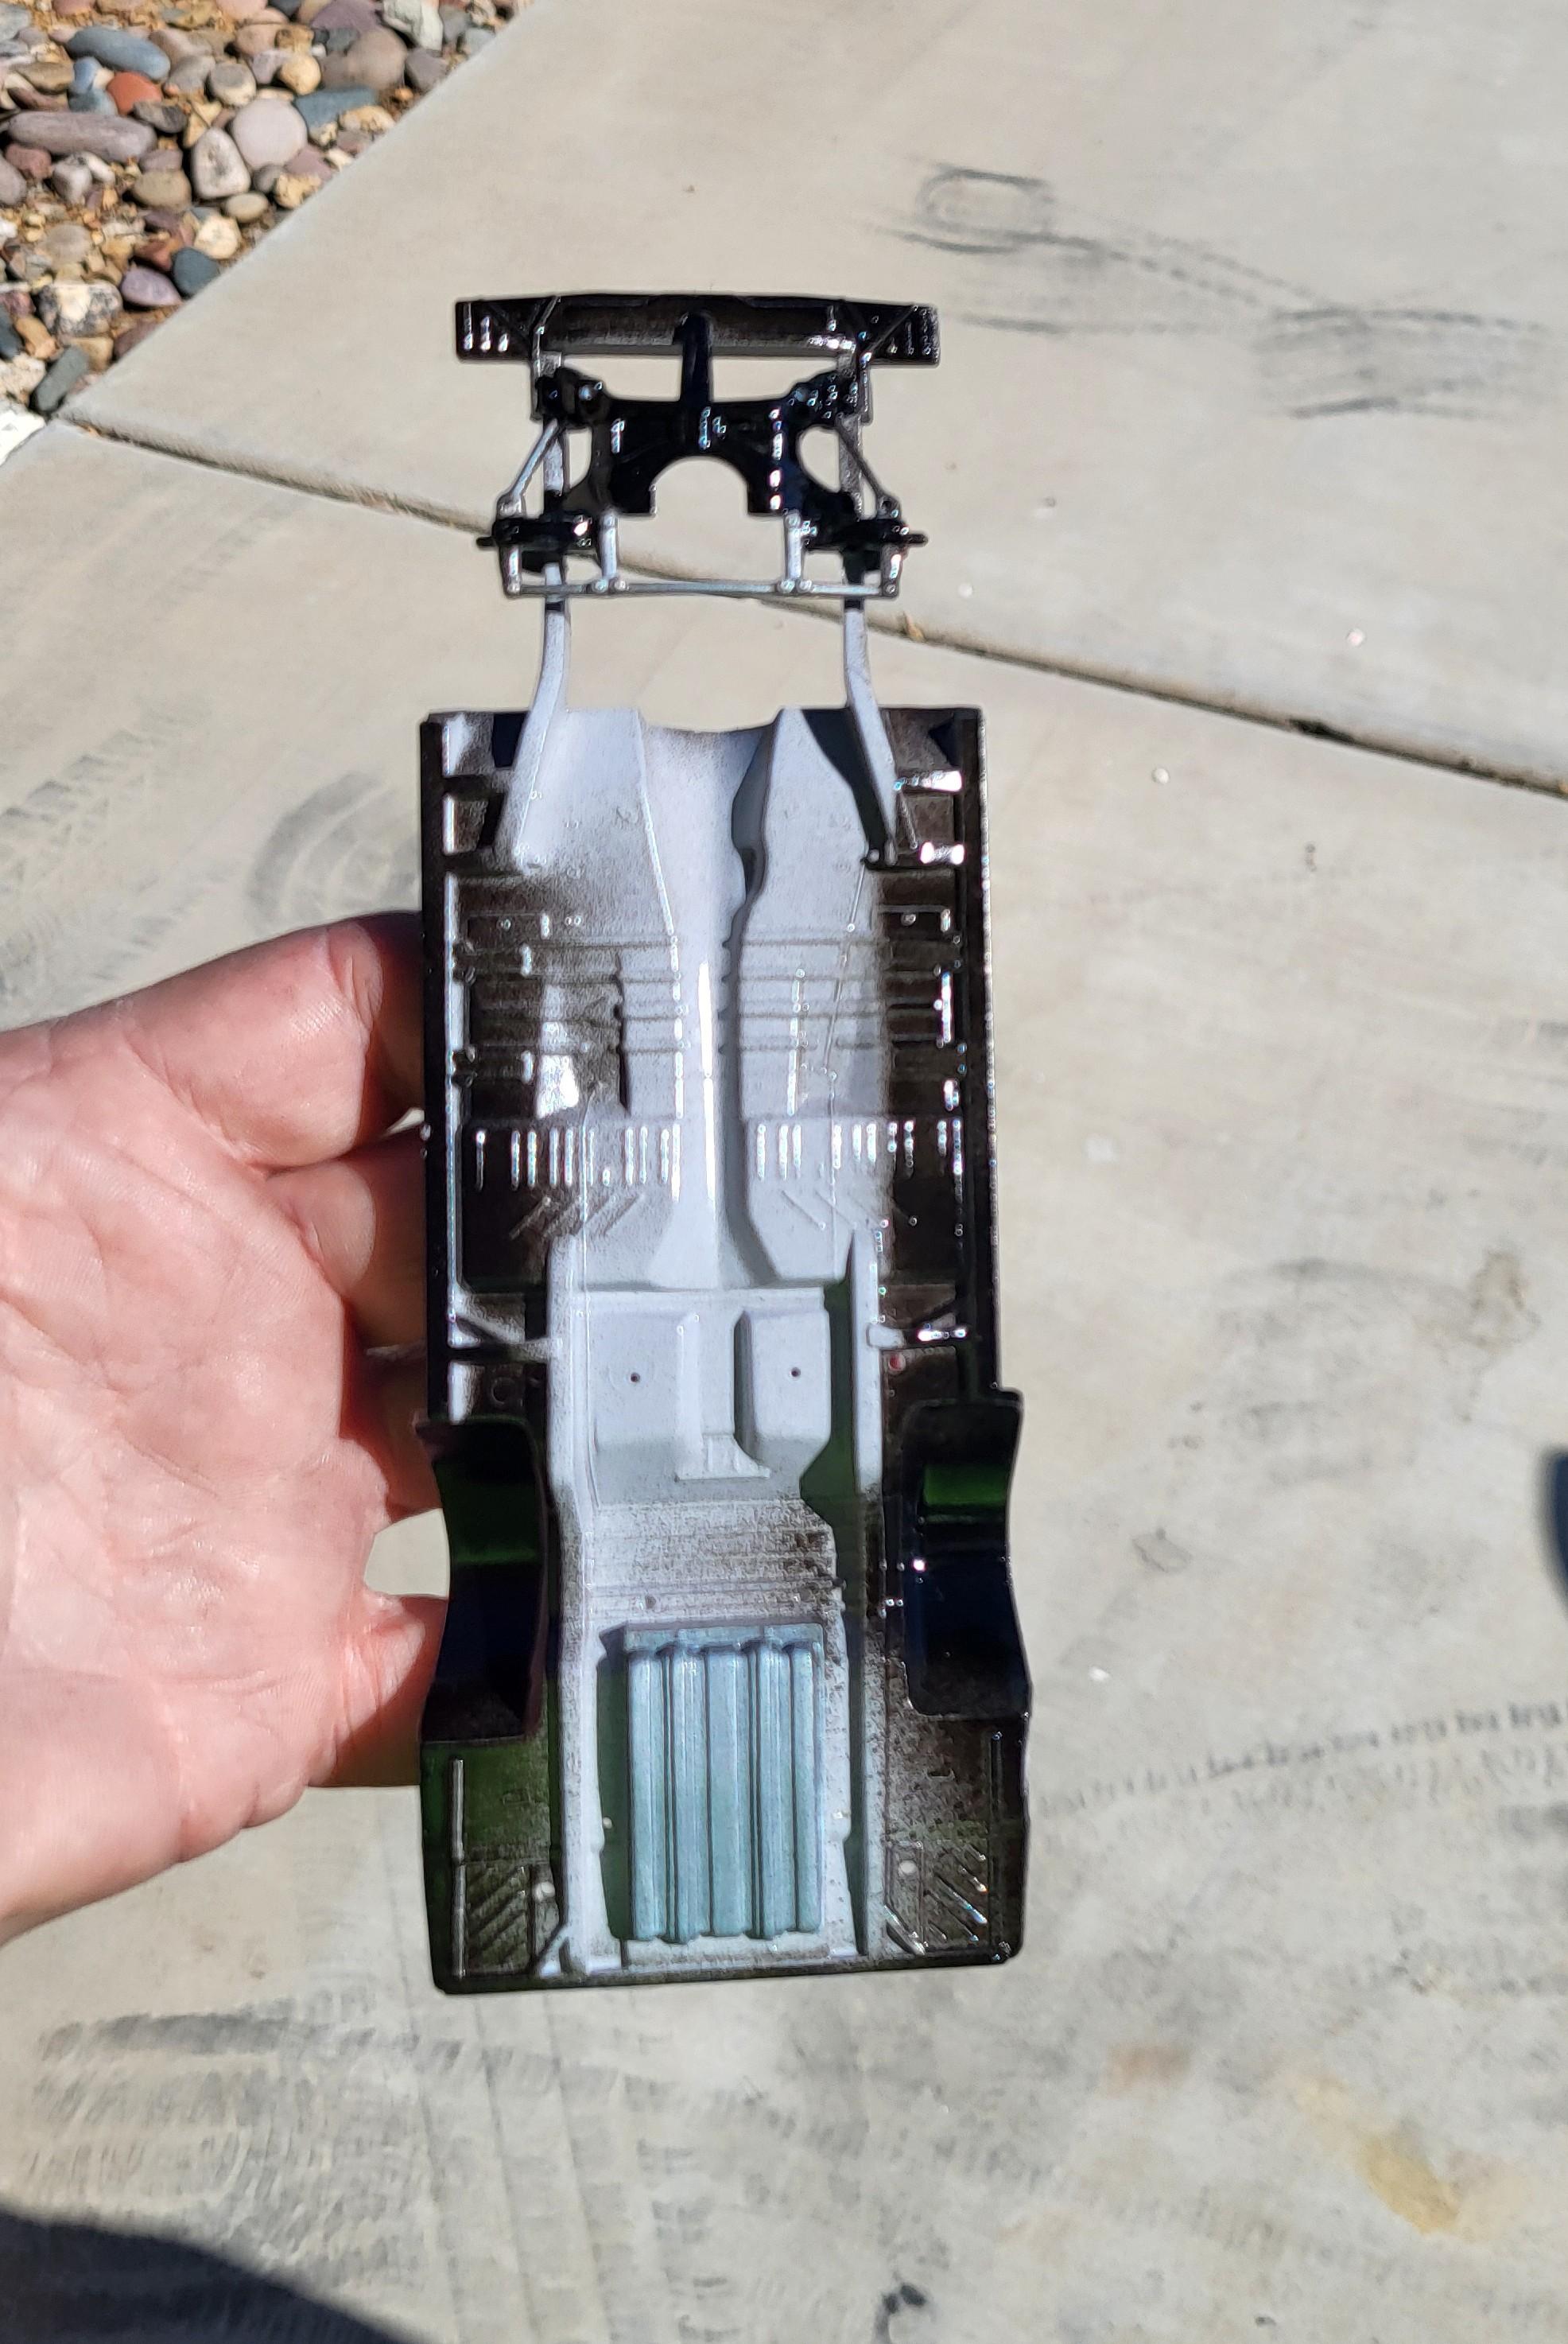
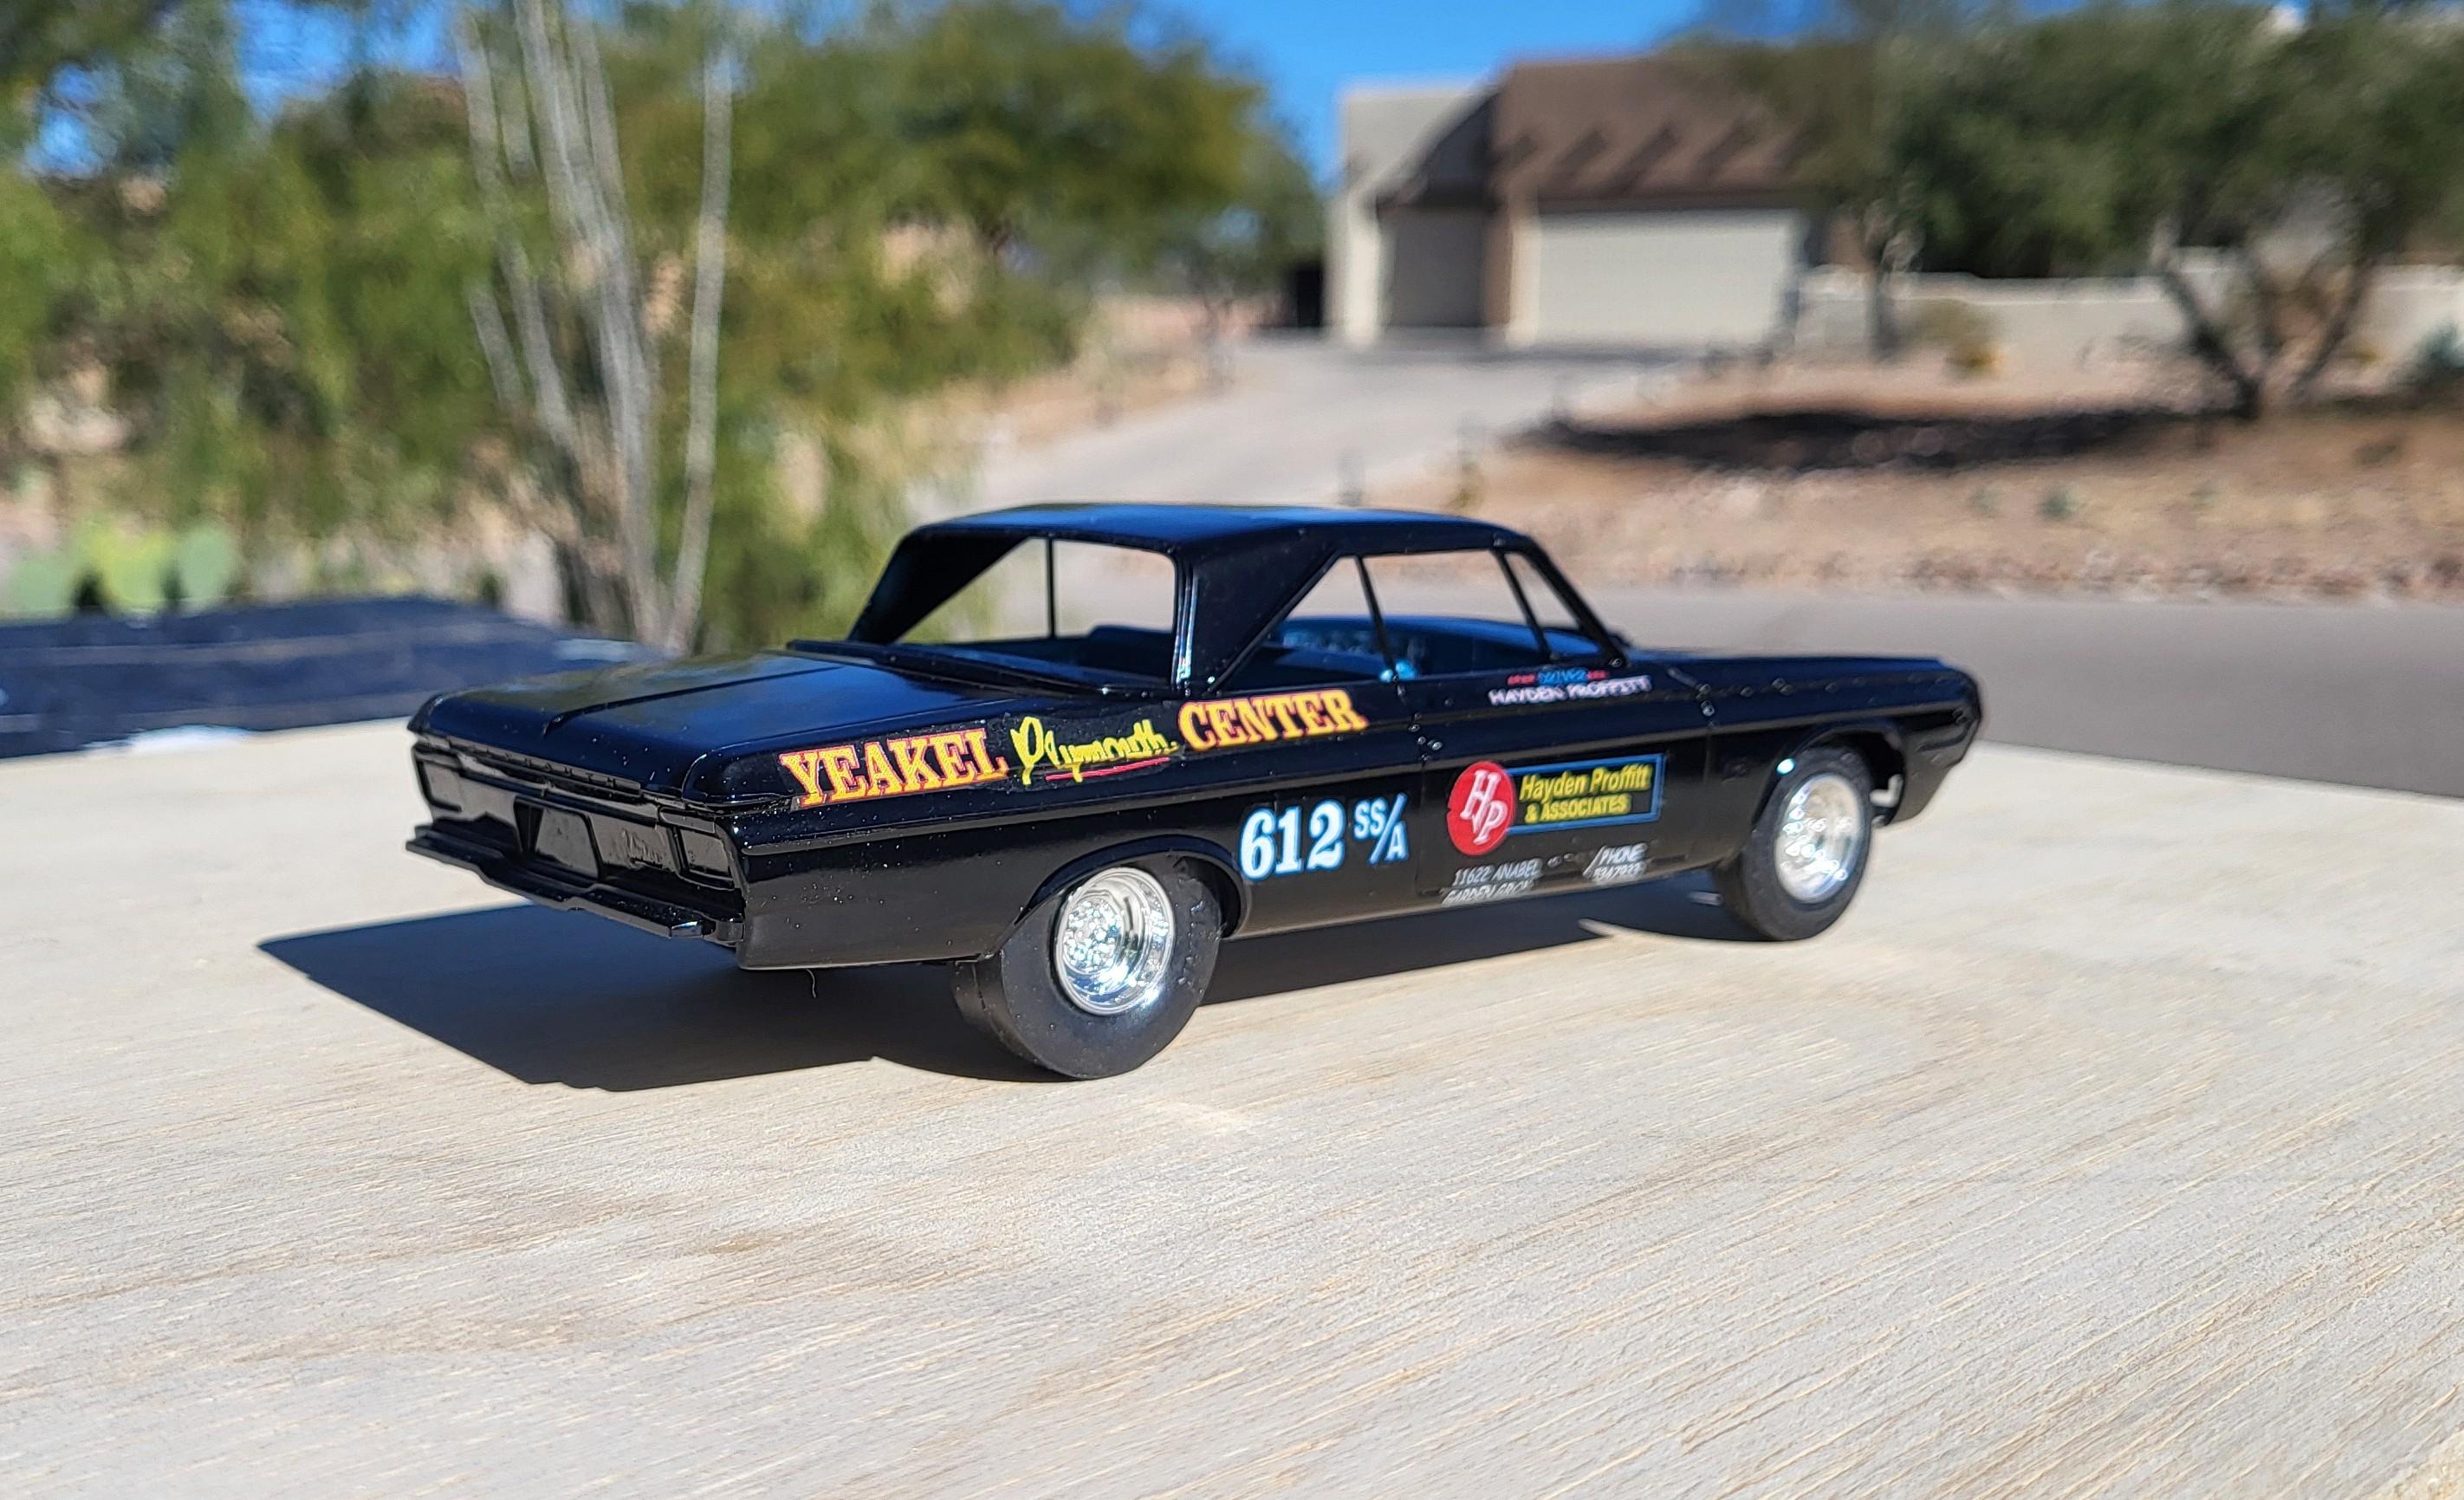
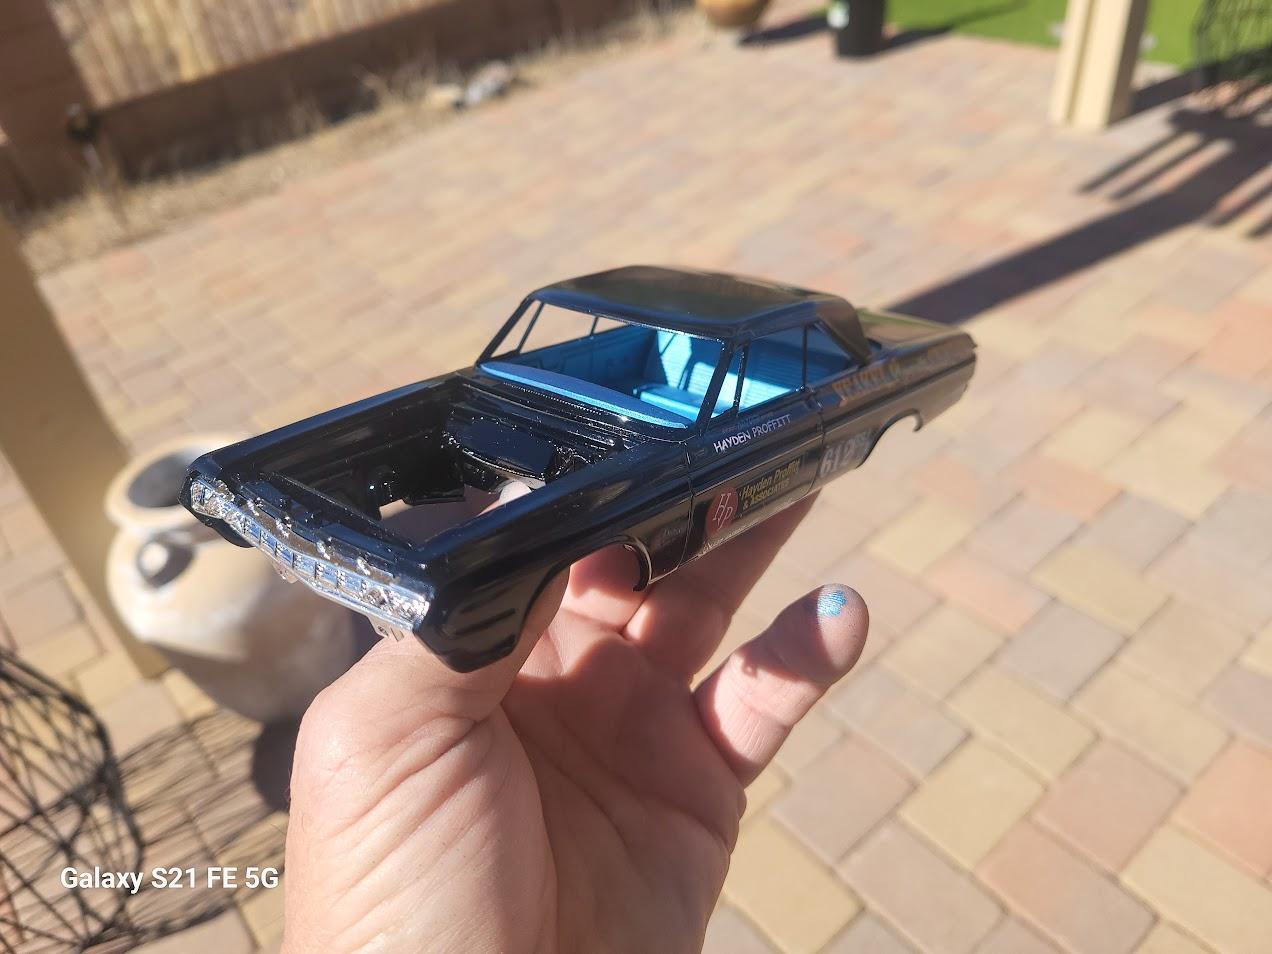
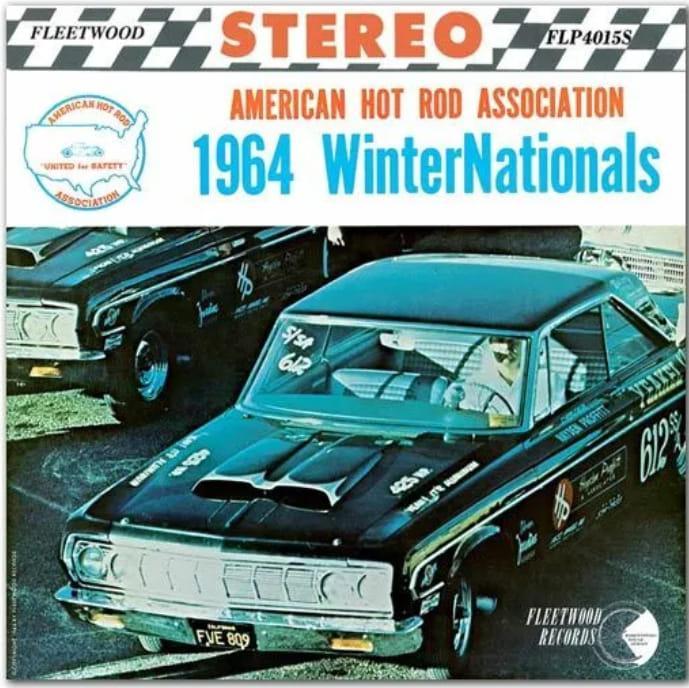
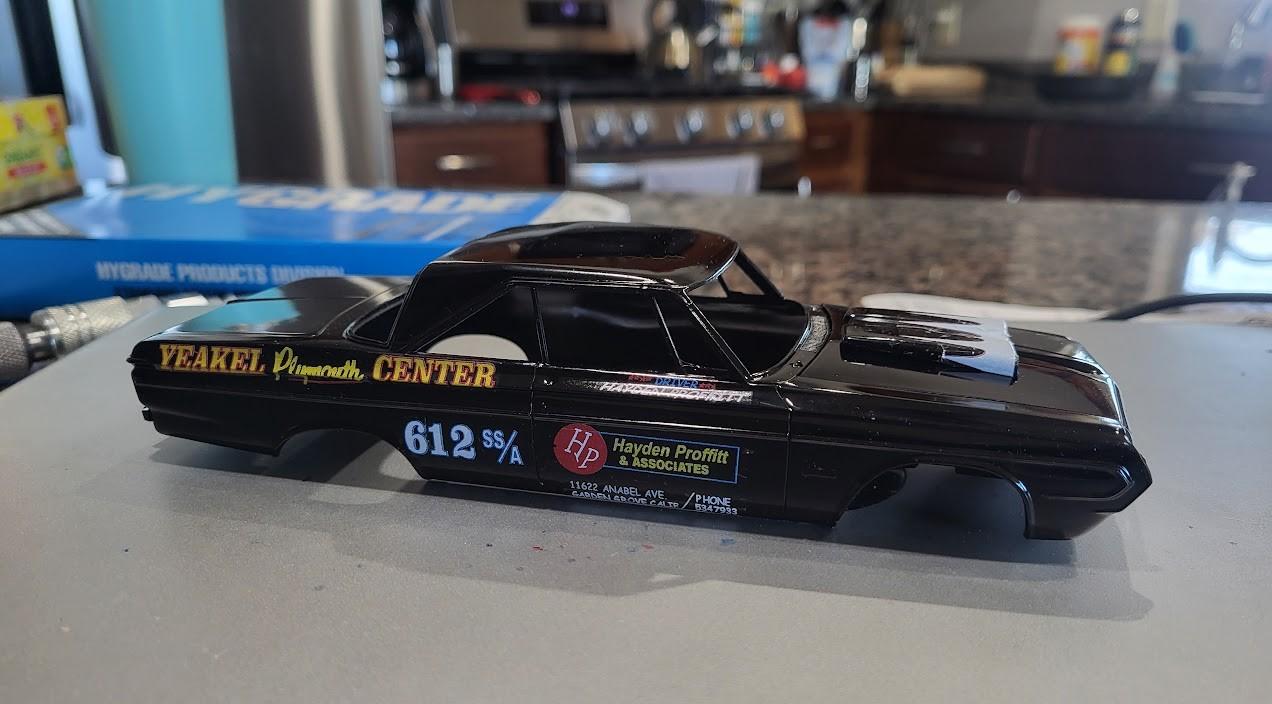
Hayden Proffitt 1964 Plymouth Max wedge car
gtx6970 replied to gtx6970's topic in WIP: Drag Racing Models
Got the chassis done this morning. Kit Dana rear axle ( yes I know it's wrong for the year) Kit rear tires. Parts box fronts. Johan chome reverse rims round out the rolling stock So decided to do a stance ck. So far. So good. Ps....the chassis for the lindberg 64 dodge is different from the 64 plymouth.....just sayin. LoL
-
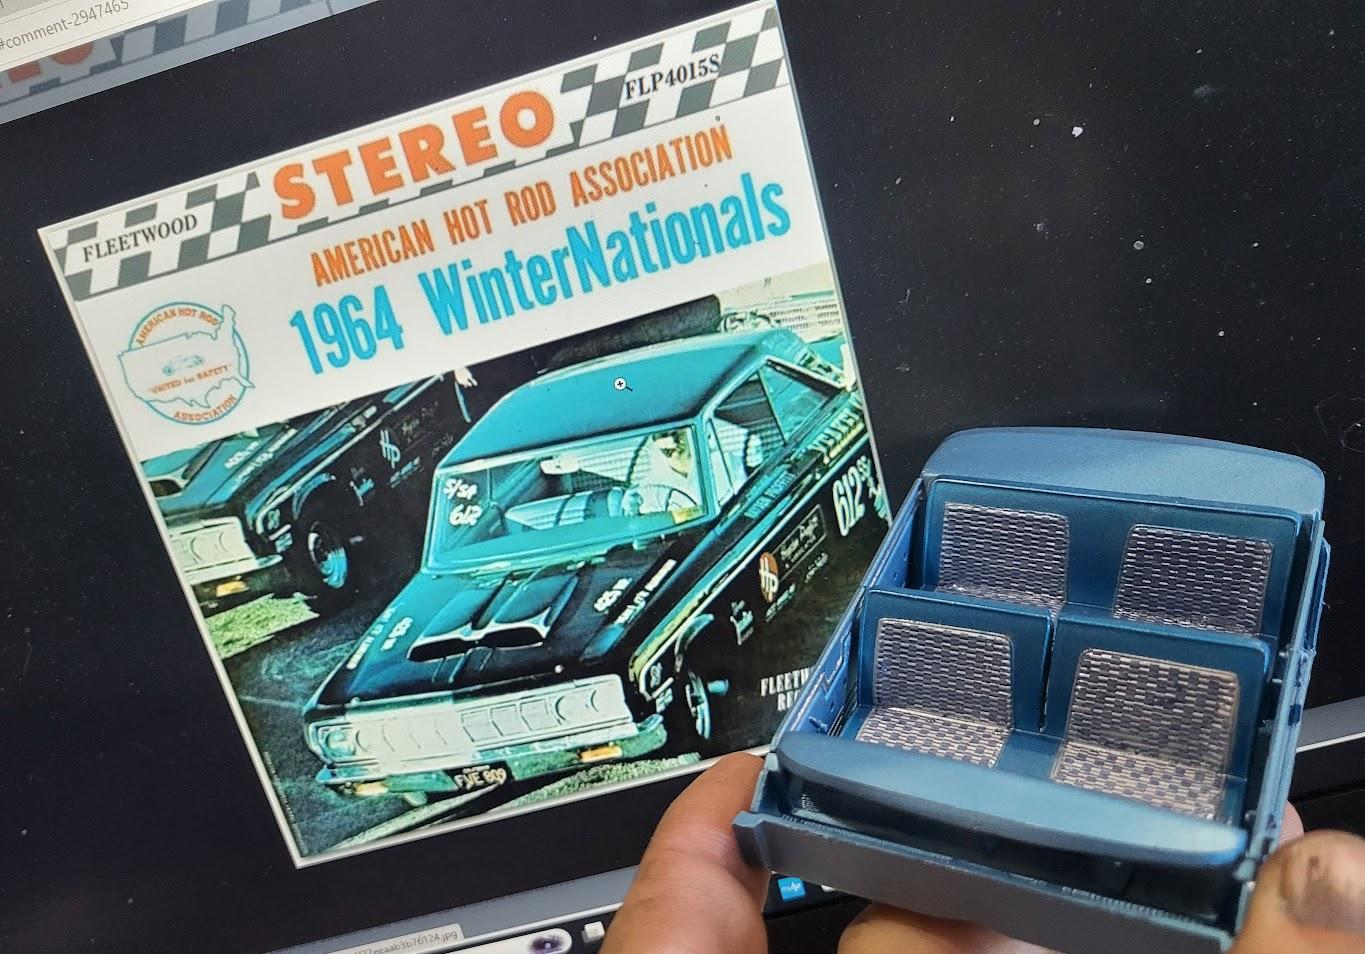
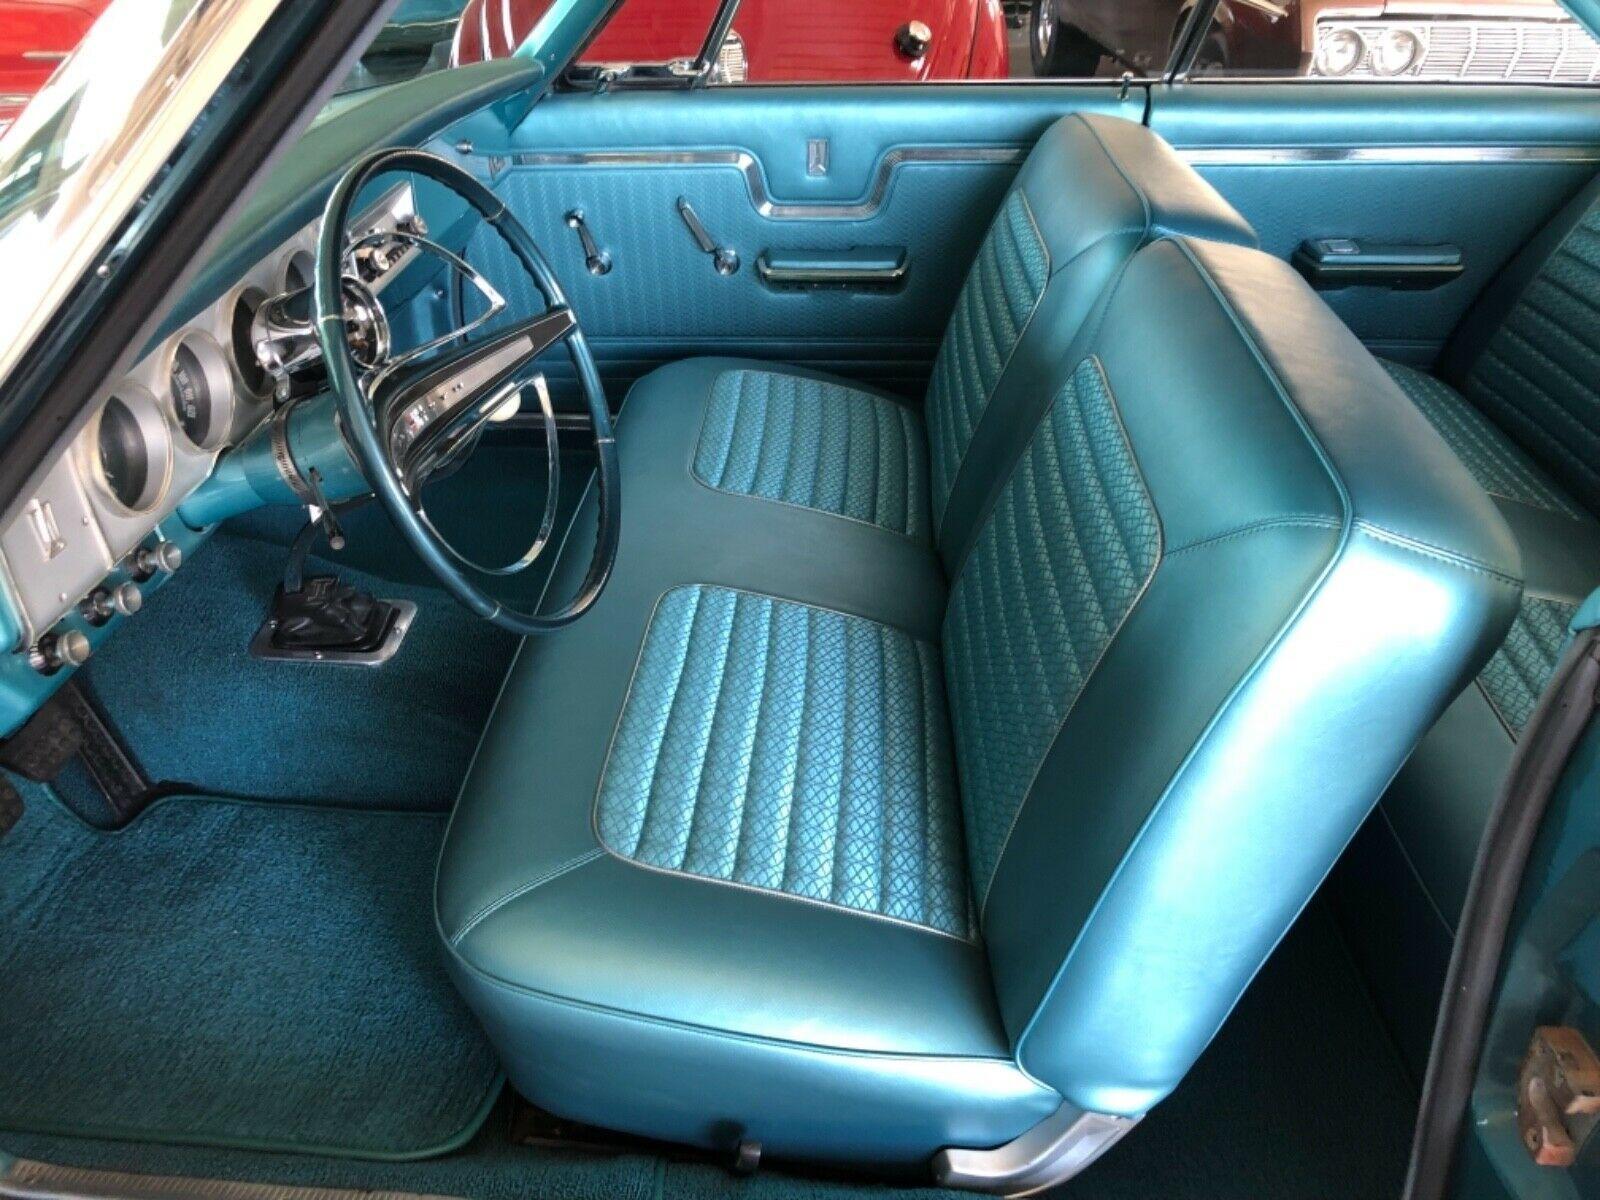
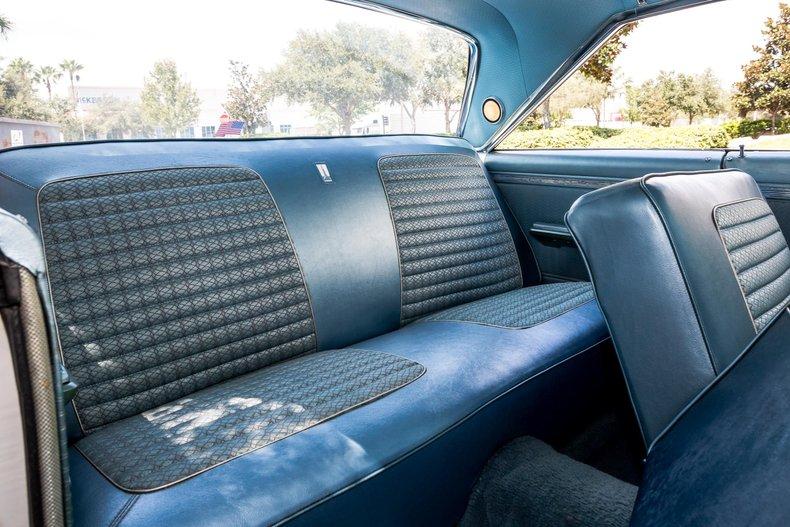
Ok ,Had me worried as I can only find one or two photos of this cars interior color. And both have been blue , bench seat. BUT, I see he had more than one car / Plus later in the season he switched to a Hemi powered sedan . But I dont know interior color of that car. Regardless, Mucho thanks for the reply
-
Revell 67 GTX to Belvedere conversion
gtx6970 replied to Brutalform's topic in Model Building Questions and Answers
Upper body line moulding on belvedere -
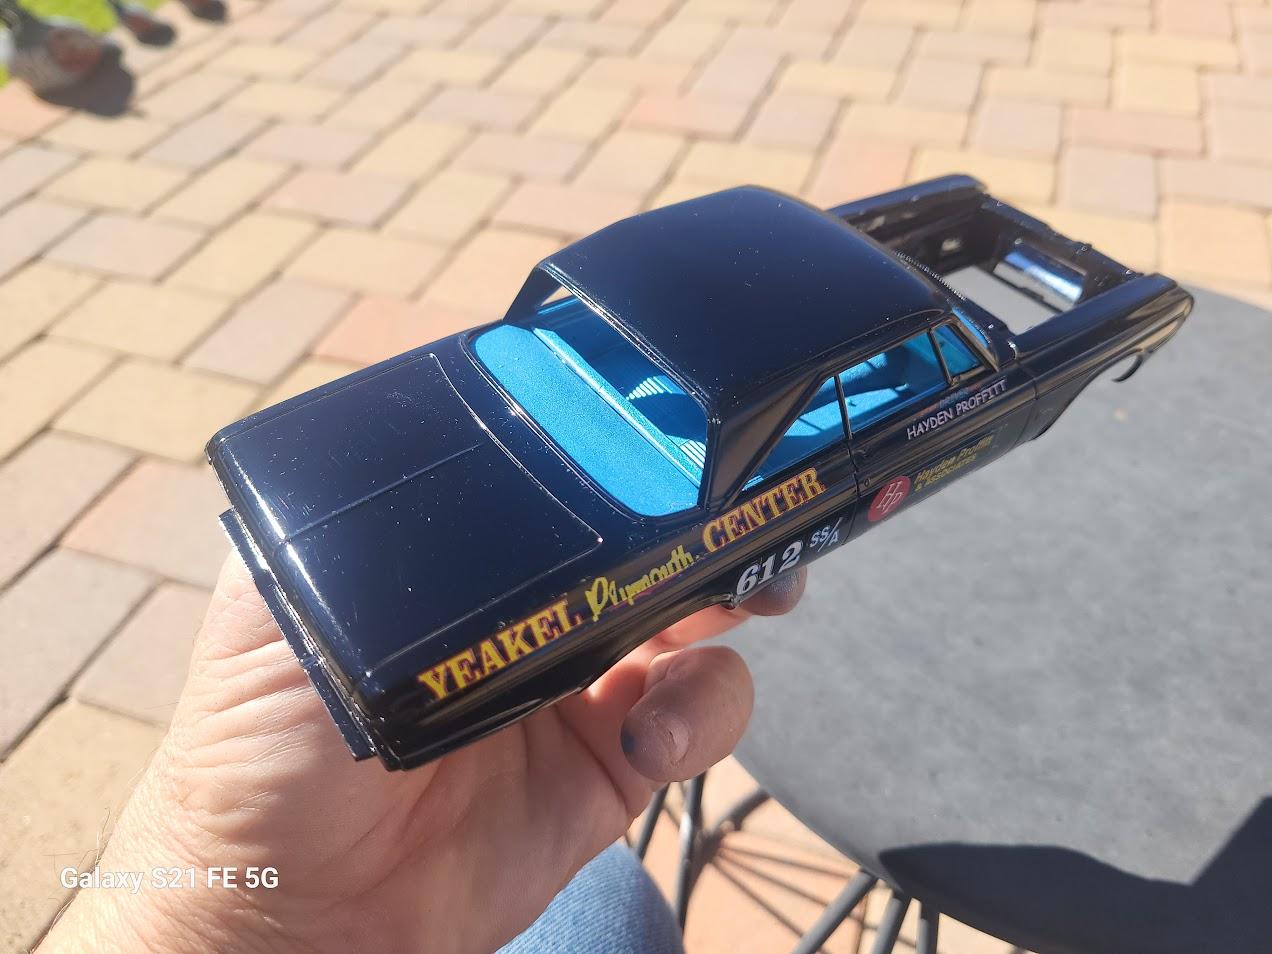
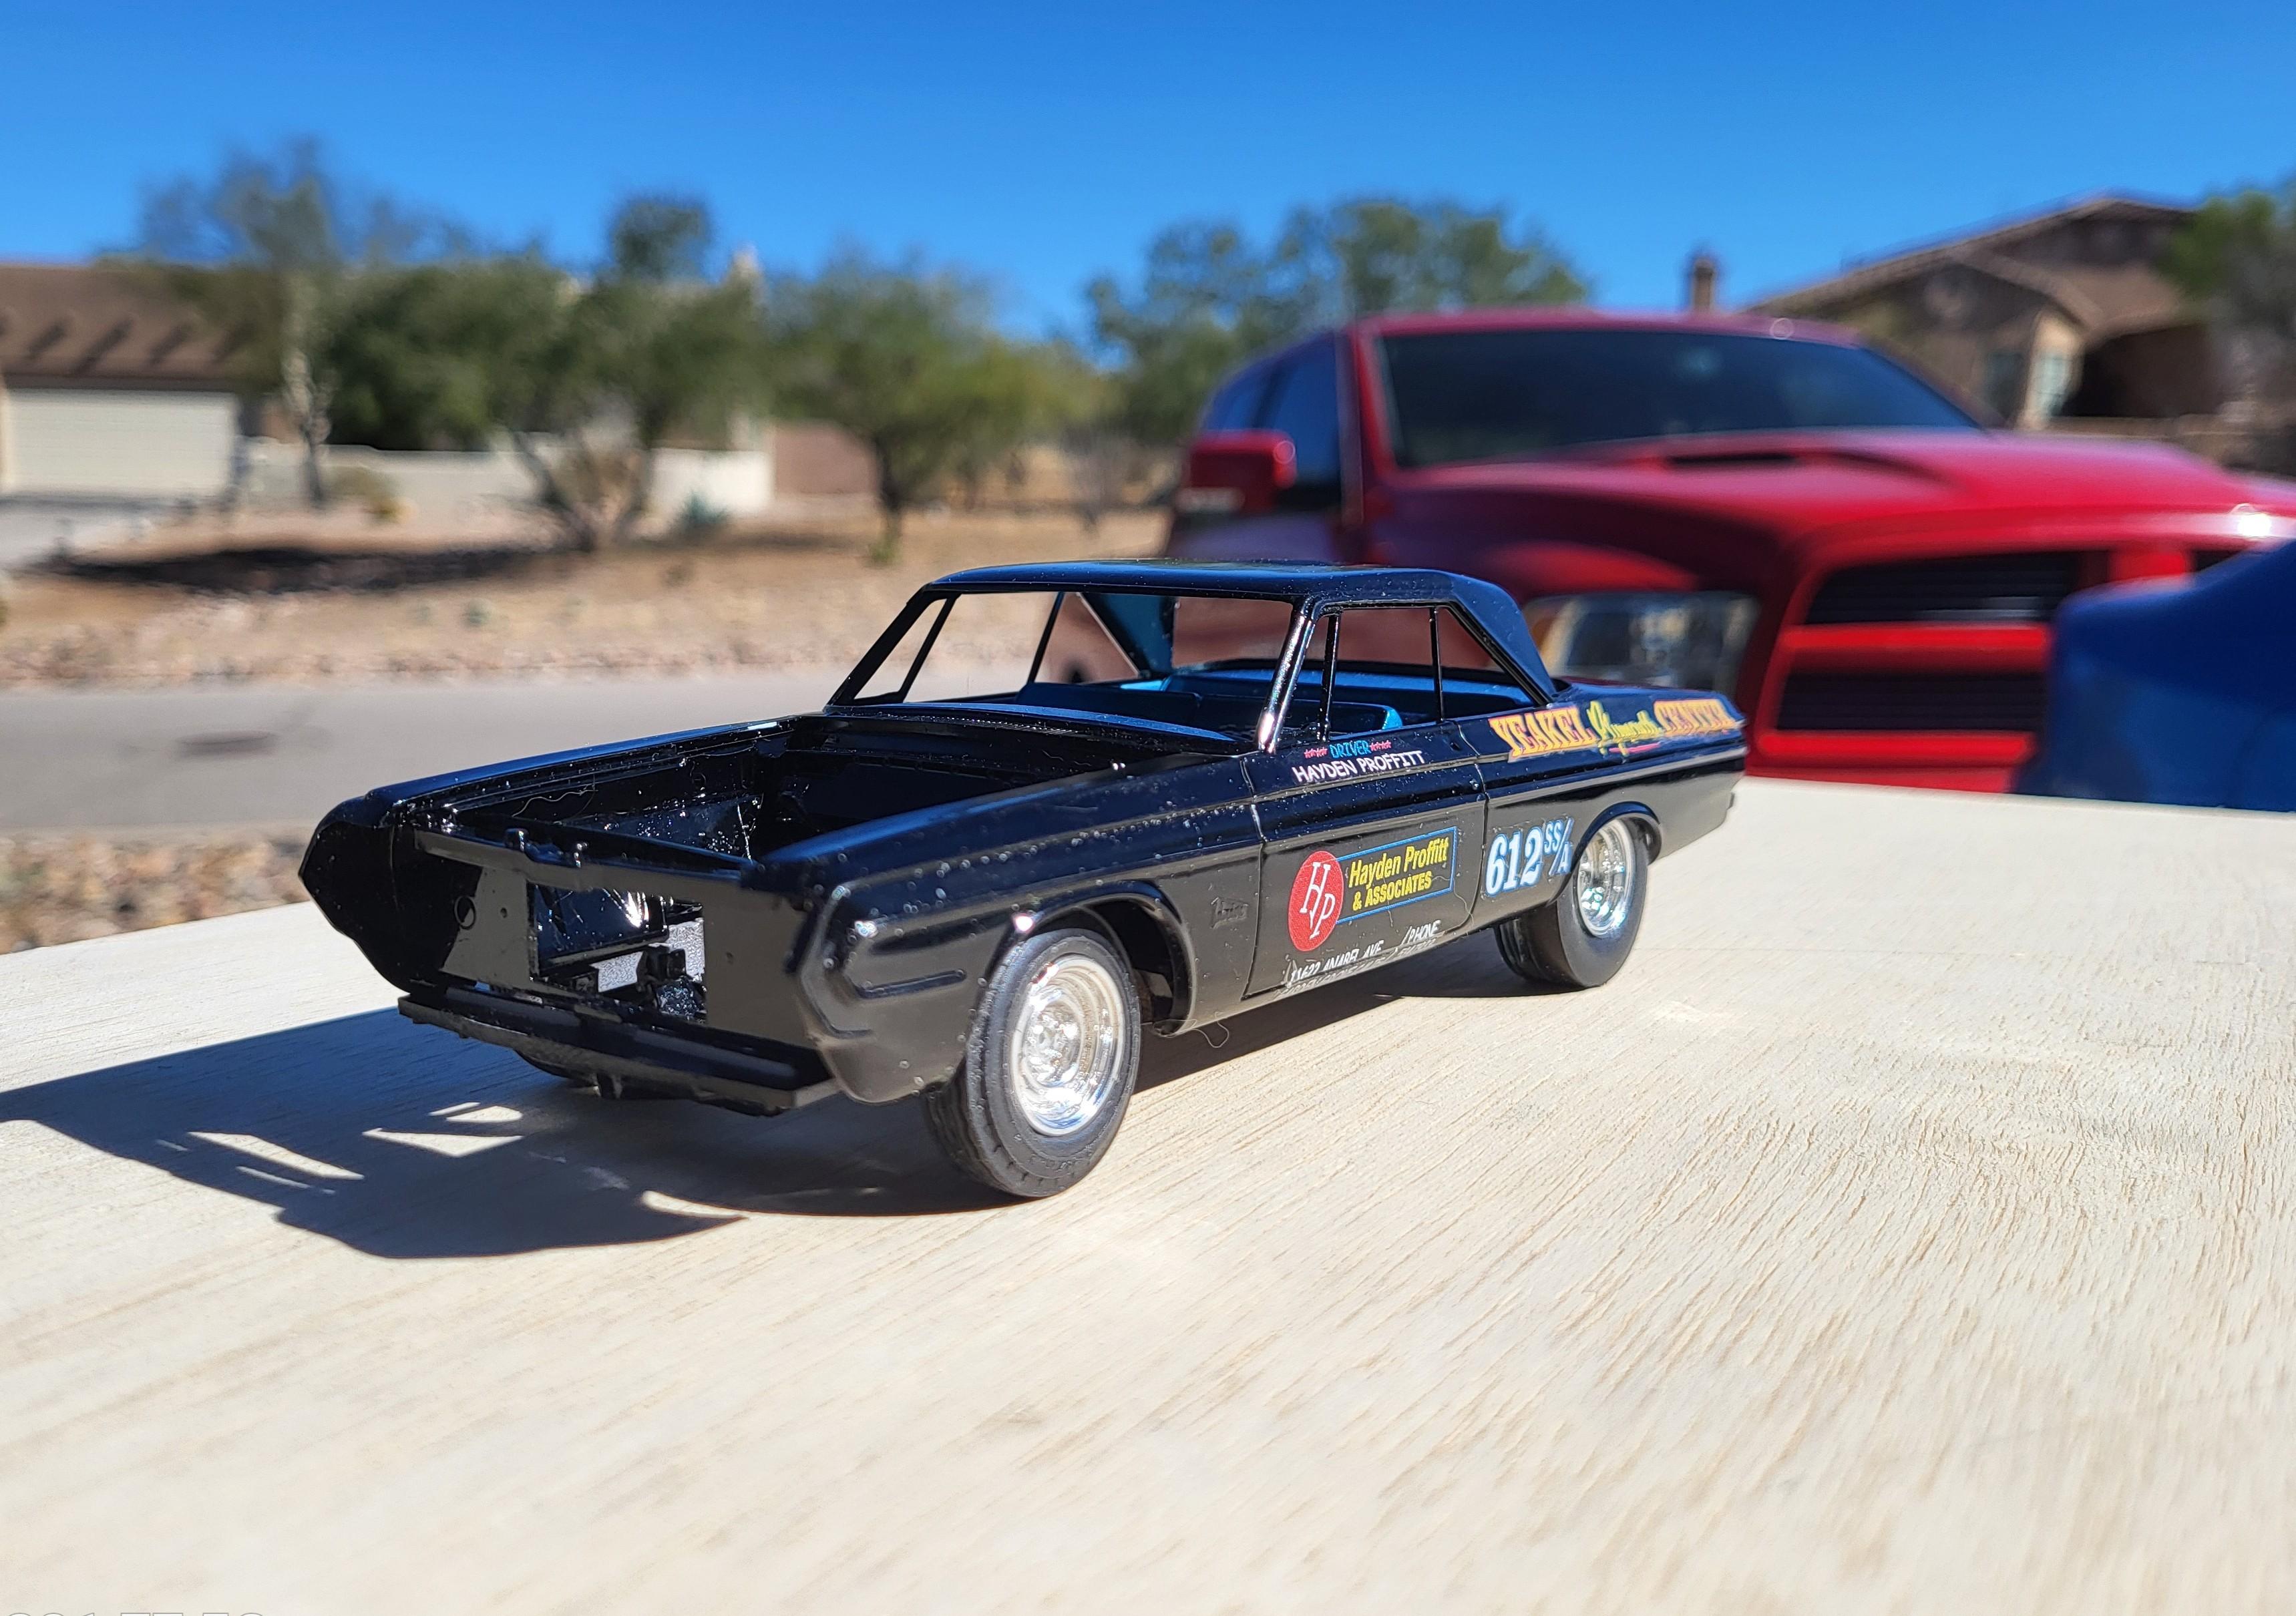
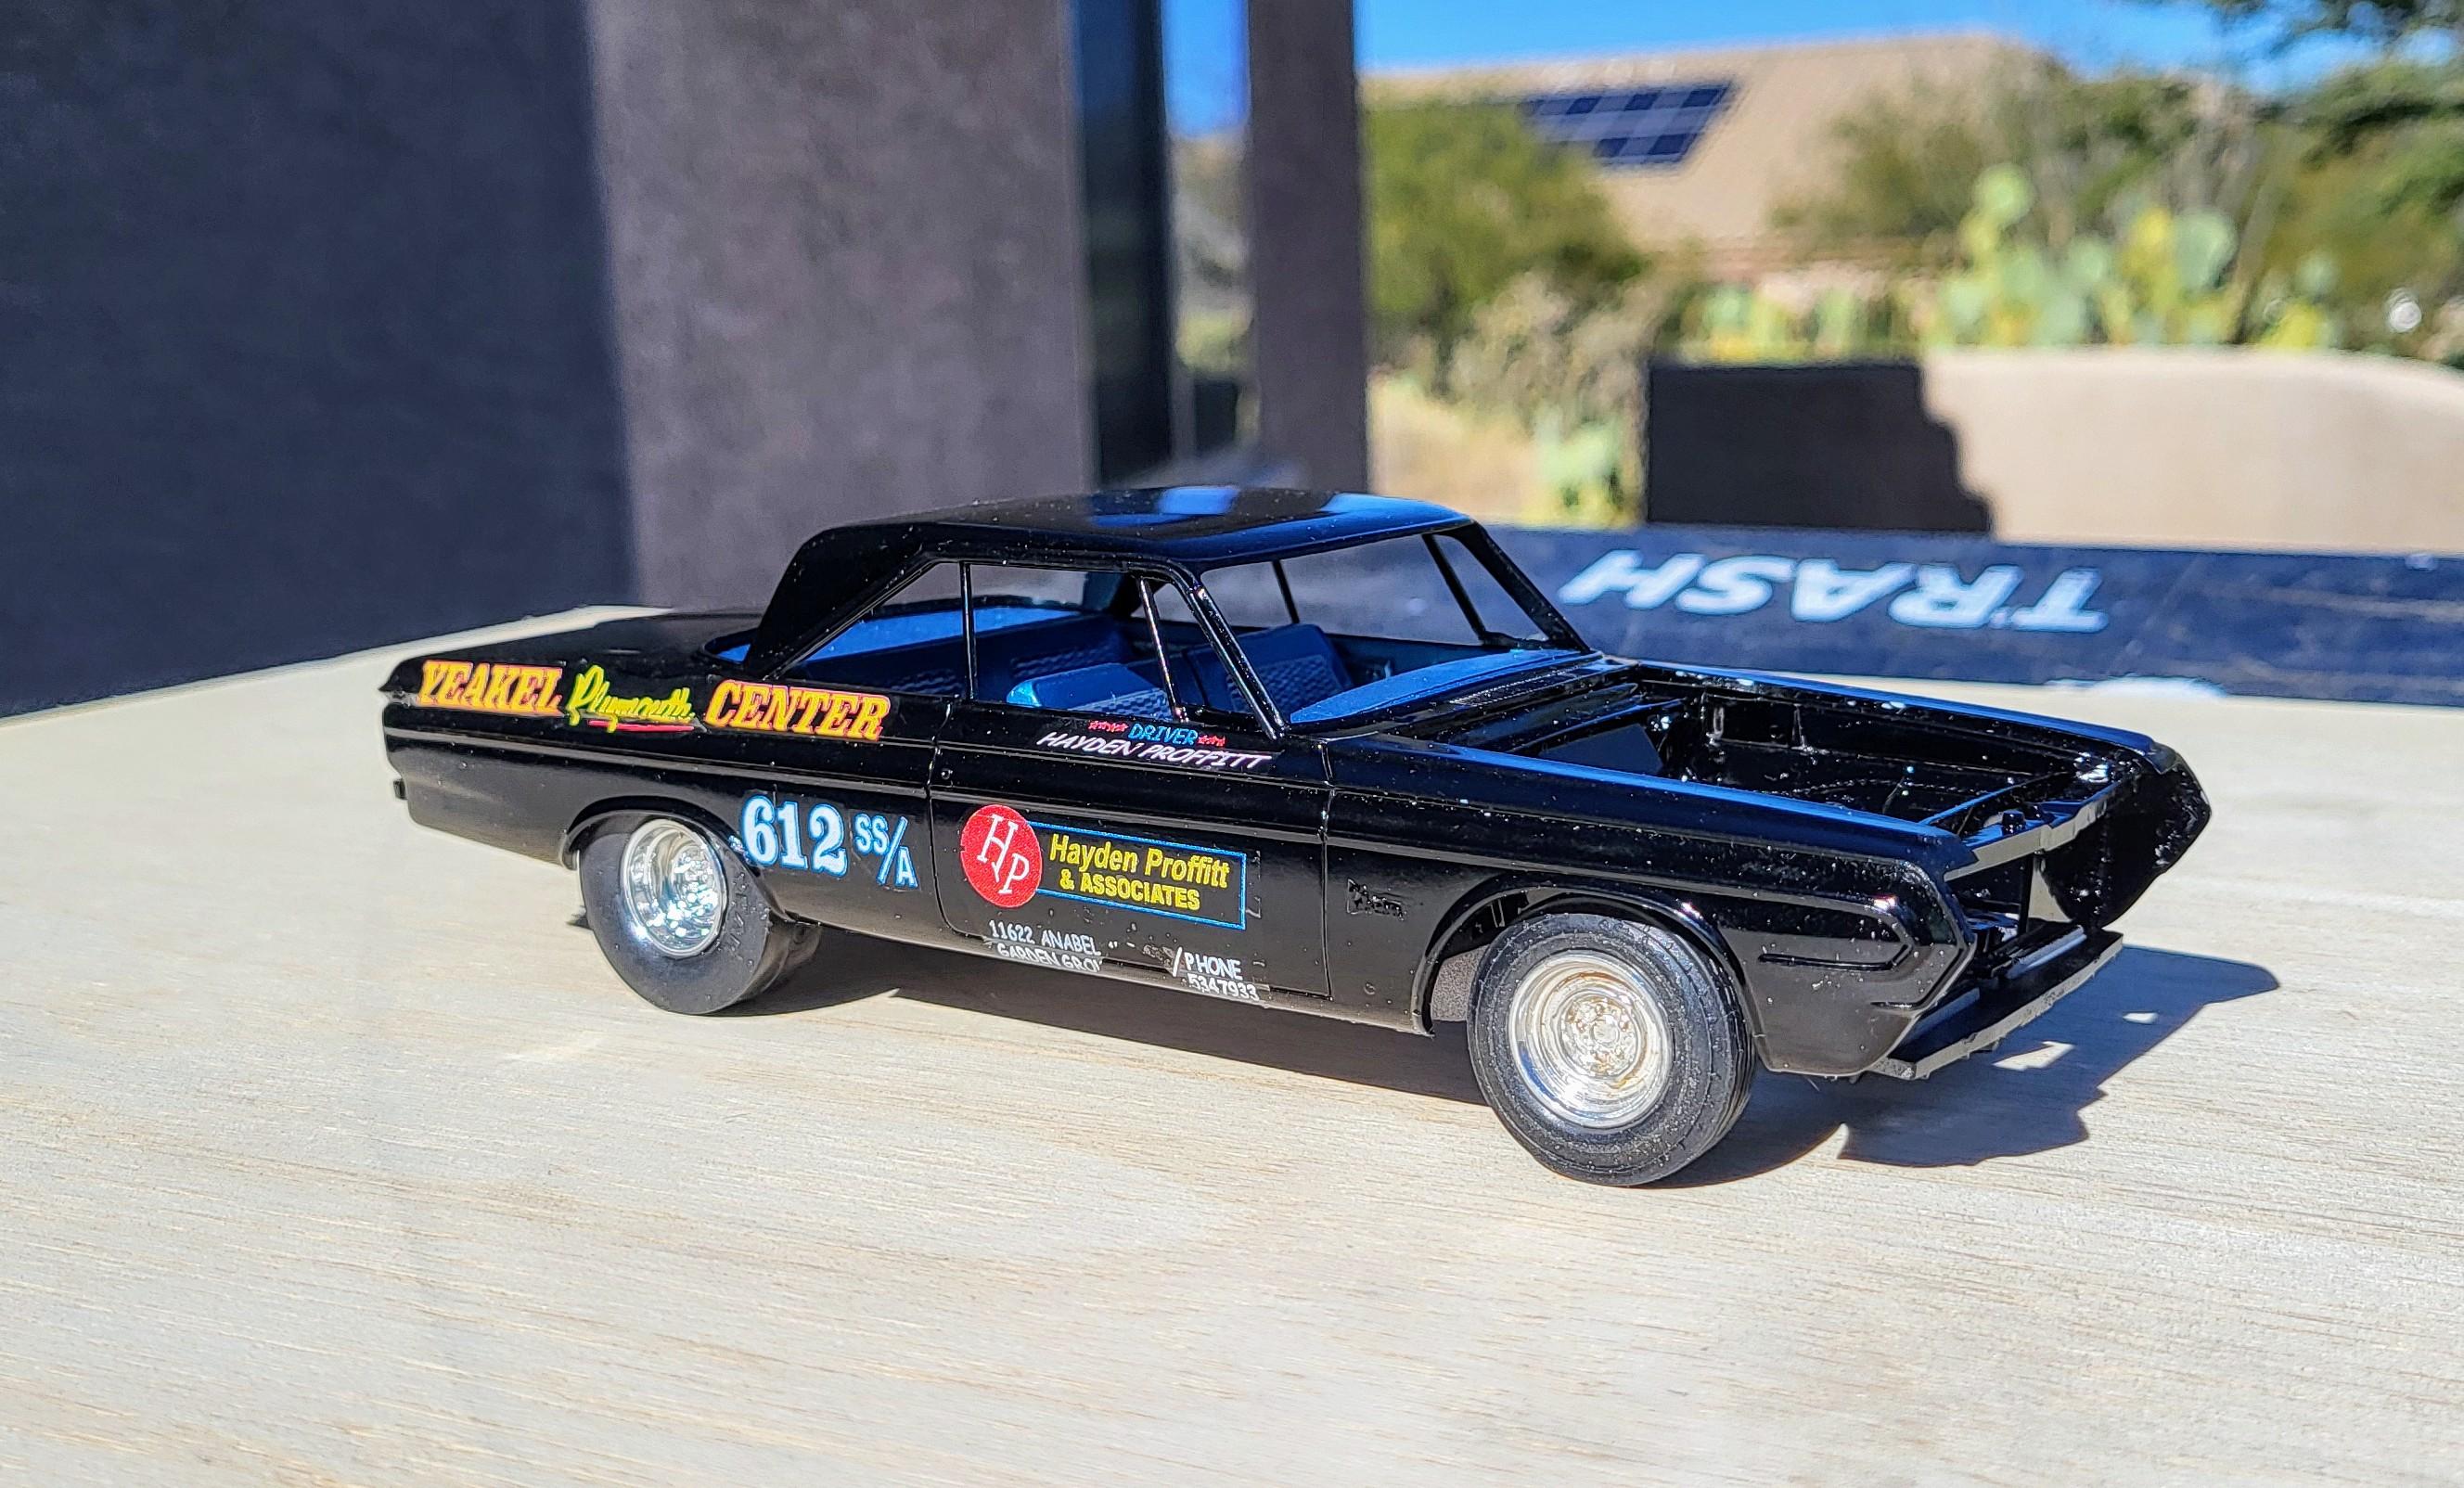
Hayden Proffitt 1964 Plymouth Max wedge car
gtx6970 replied to gtx6970's topic in WIP: Drag Racing Models
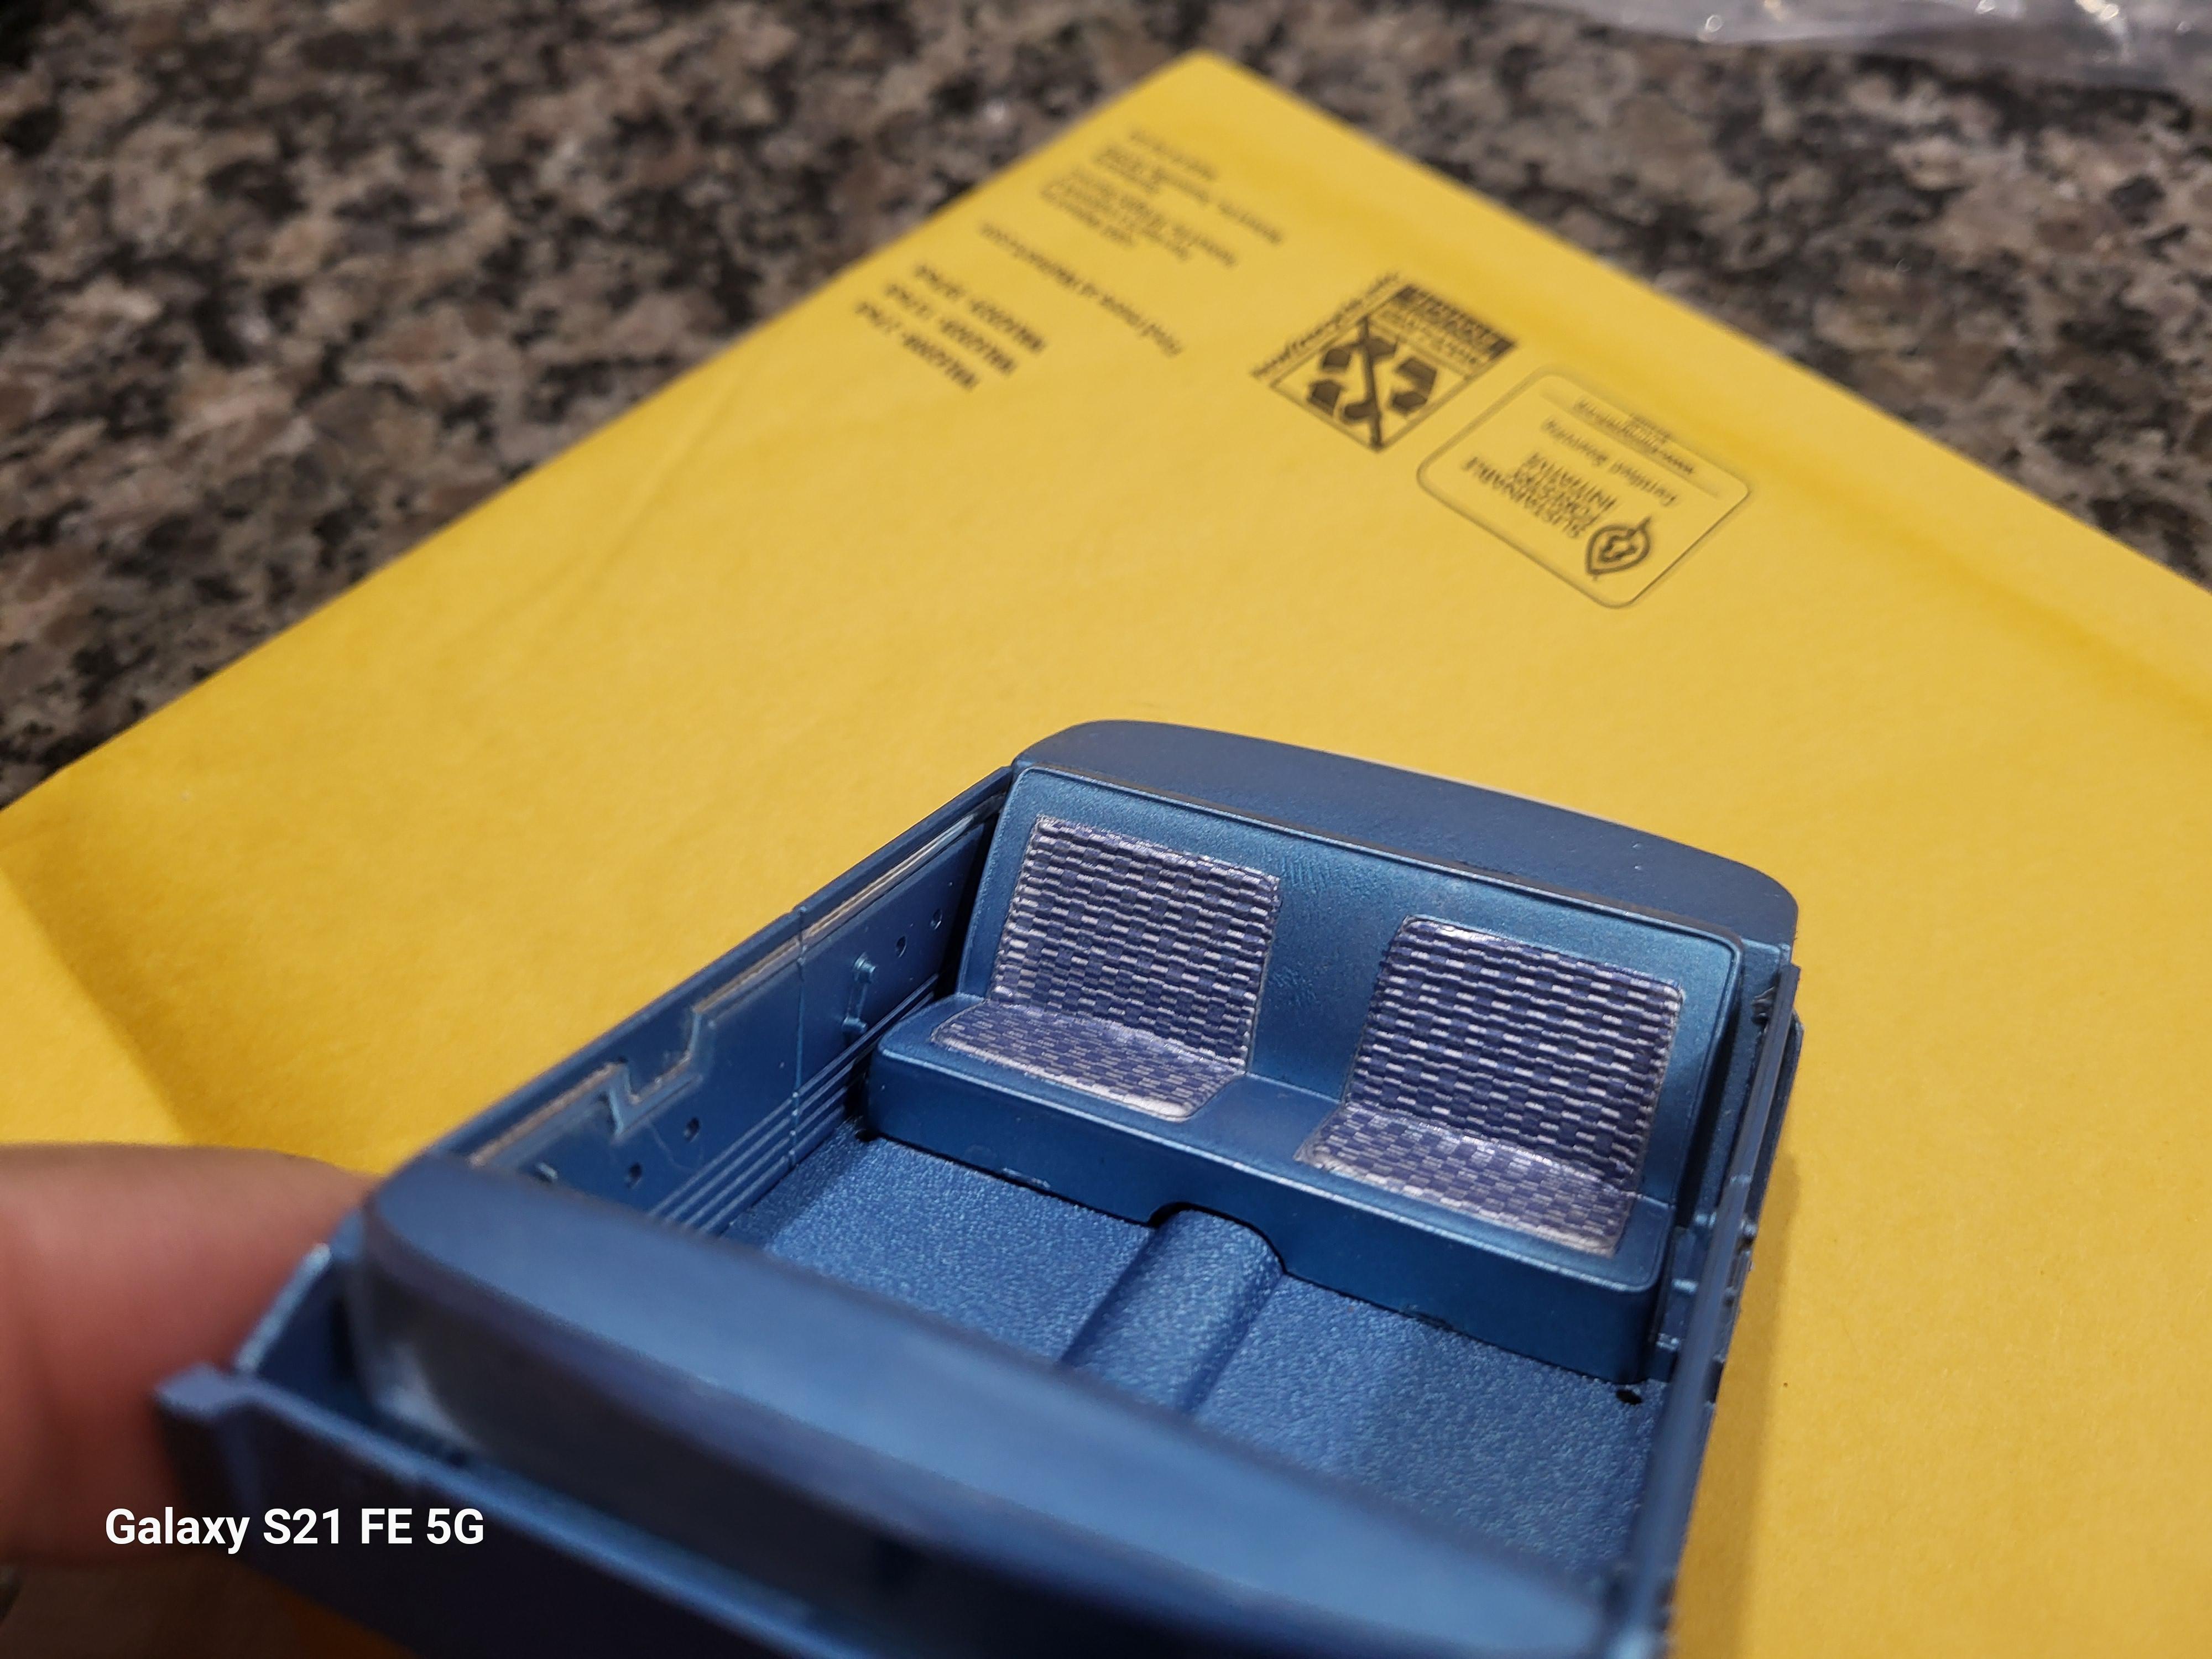
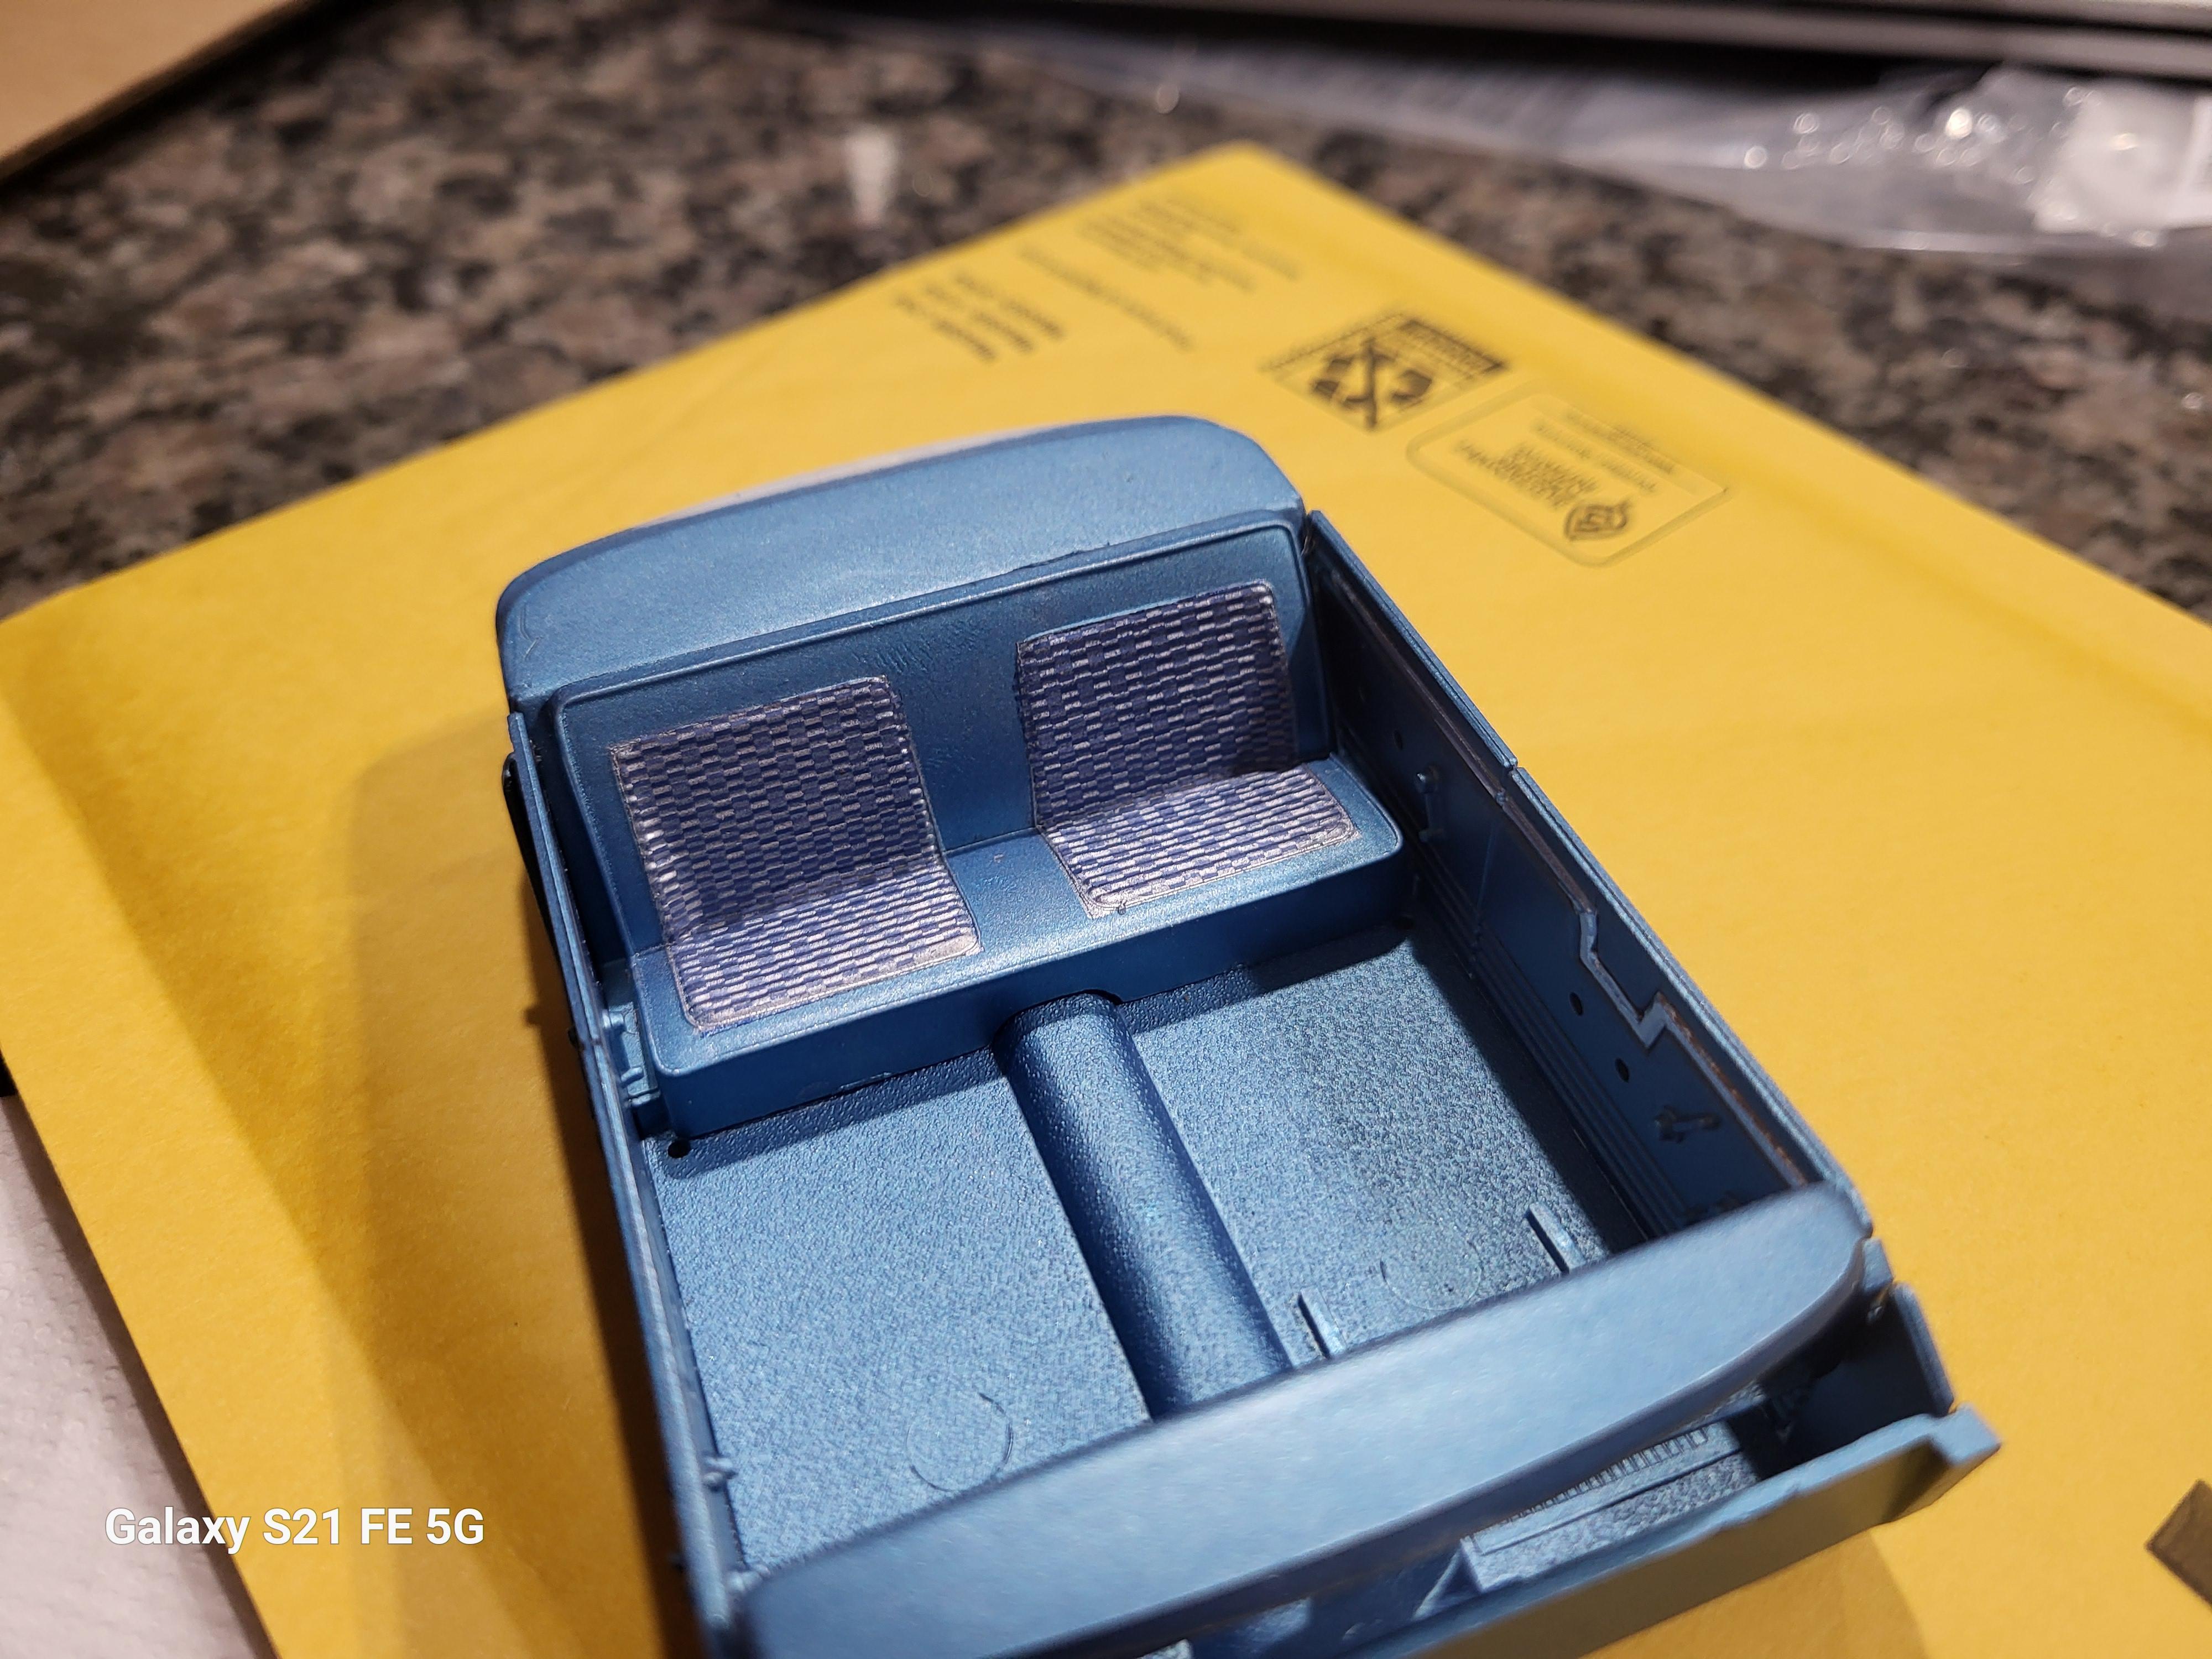
My first attempt at using scale motorsports Painted the seat inserts silver Then decal over that. I like it
-
Hayden Proffitt 1964 Plymouth Max wedge car
gtx6970 replied to gtx6970's topic in WIP: Drag Racing Models
many many thanks I'm really feeling this one . And having built a few of these kits before I feel comfortable should be no issues along the trip( fingers crossed ) So am trying to stay focused on this one to the finish line Couldnt find a bench seat. So, making my own . Plus I have some Scale MotorSports decals to replicate the seat pattern pretty close I think Interior color is Testors Nassau Blue and I think is dead on the original ( or at least close for my shelf )
-
Bumping this one up. Reason so, IS mind if I ask the source to do the HP car with red interior.???? The few pictures I can find it looks like a blue bench seat interior
-
Hayden Proffitt 1964 Plymouth Max wedge car
gtx6970 replied to gtx6970's topic in WIP: Drag Racing Models
Thanks, I have the Shahan sheet. Planning to to her 68 Dart down the road a bit But not the Dyno Don Maverick I may have to do without that one Im gathering parts mode to do the Proffitt car . Im building the blue interior bench seat max wedge car -
I have this one on the bench and would like to take this one all the way to the finish line BUT, I need the Bite By Casler decal on the rear quarter panels and I think is Jardene Headers on the front fender dogleg Anyone have a source ? . I've gone thru every decal sheet I have and came up empty The decal sheet I am using is 'technically' for the 64 Hemi car, and the graphics are different
-
I have a grille thats painted with revell chrome paint. And dulling it down via handling it hasnt been an issue so far. It seems to be holding up A LOT better than anything Ive "chromed " with Alclad or the Pens by a long shot
-
‘21 Dodge Charger chassis color?
gtx6970 replied to shoopdog's topic in Model Building Questions and Answers
In person. It's much more a Grey than it is green -
Here as close as I can get without it not getting all weird for a closeup between the 2 grills https://photos.app.goo.gl/o4hDrb2UejfeGHq4A
-
I dont have a lot of experience in buying 3d printed stuff. But I would say overall print quality between the 2 is the same. Both have some very fine texture to them But cant say if that texture would get better with primer on them or not. I will say the 3d Scale parts supplied grill is very nice in my hands and looks better in regards to in hand finish . But it has been sprayed with Revell Chrome spray , so maybe thats the difference I personally would be very happy with either one given no other choice Im MY build I will probably use the 3D scale supplied grille and the Few Sprues Loose back end
-
On a side note. I also worked with Bedlam Creations and he made me a decal to do the trunk finish panel Bedlam Creations - Creators of custom waterslide decals for guitars, miniatures, models, and more! I may , Or may not use these , time will tell as I progress forward on this build So there is that option if you prefer
-
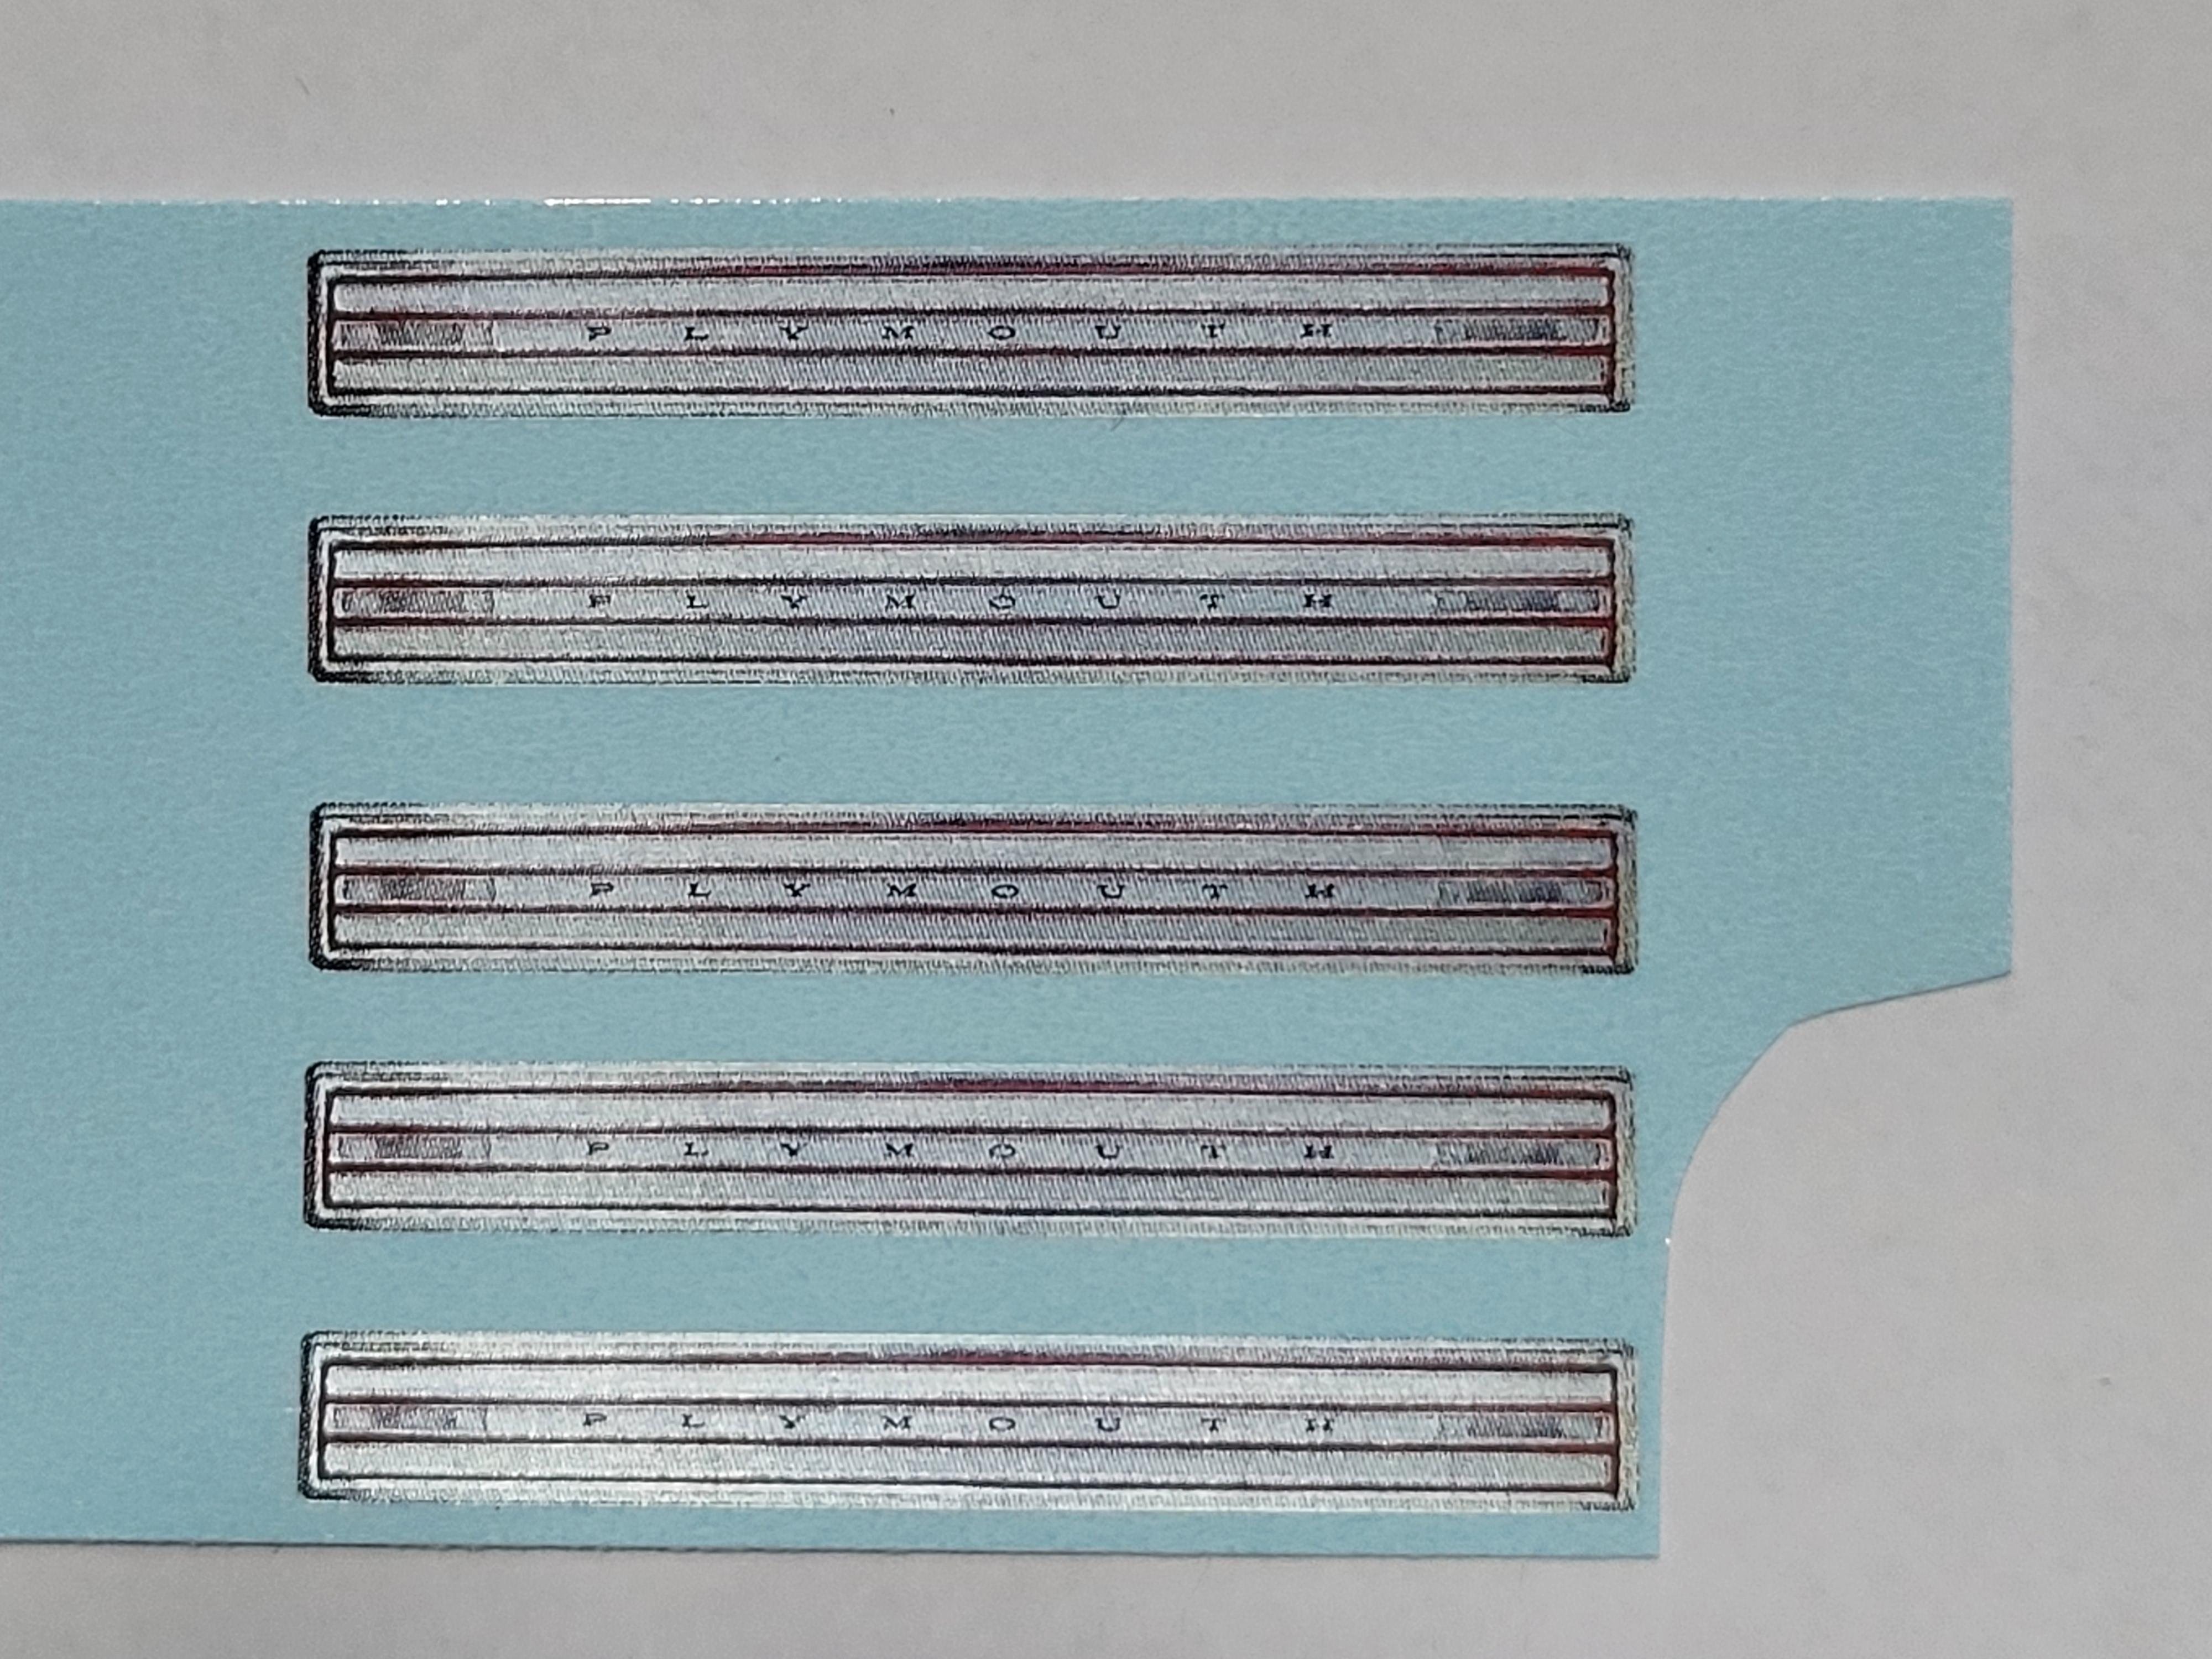
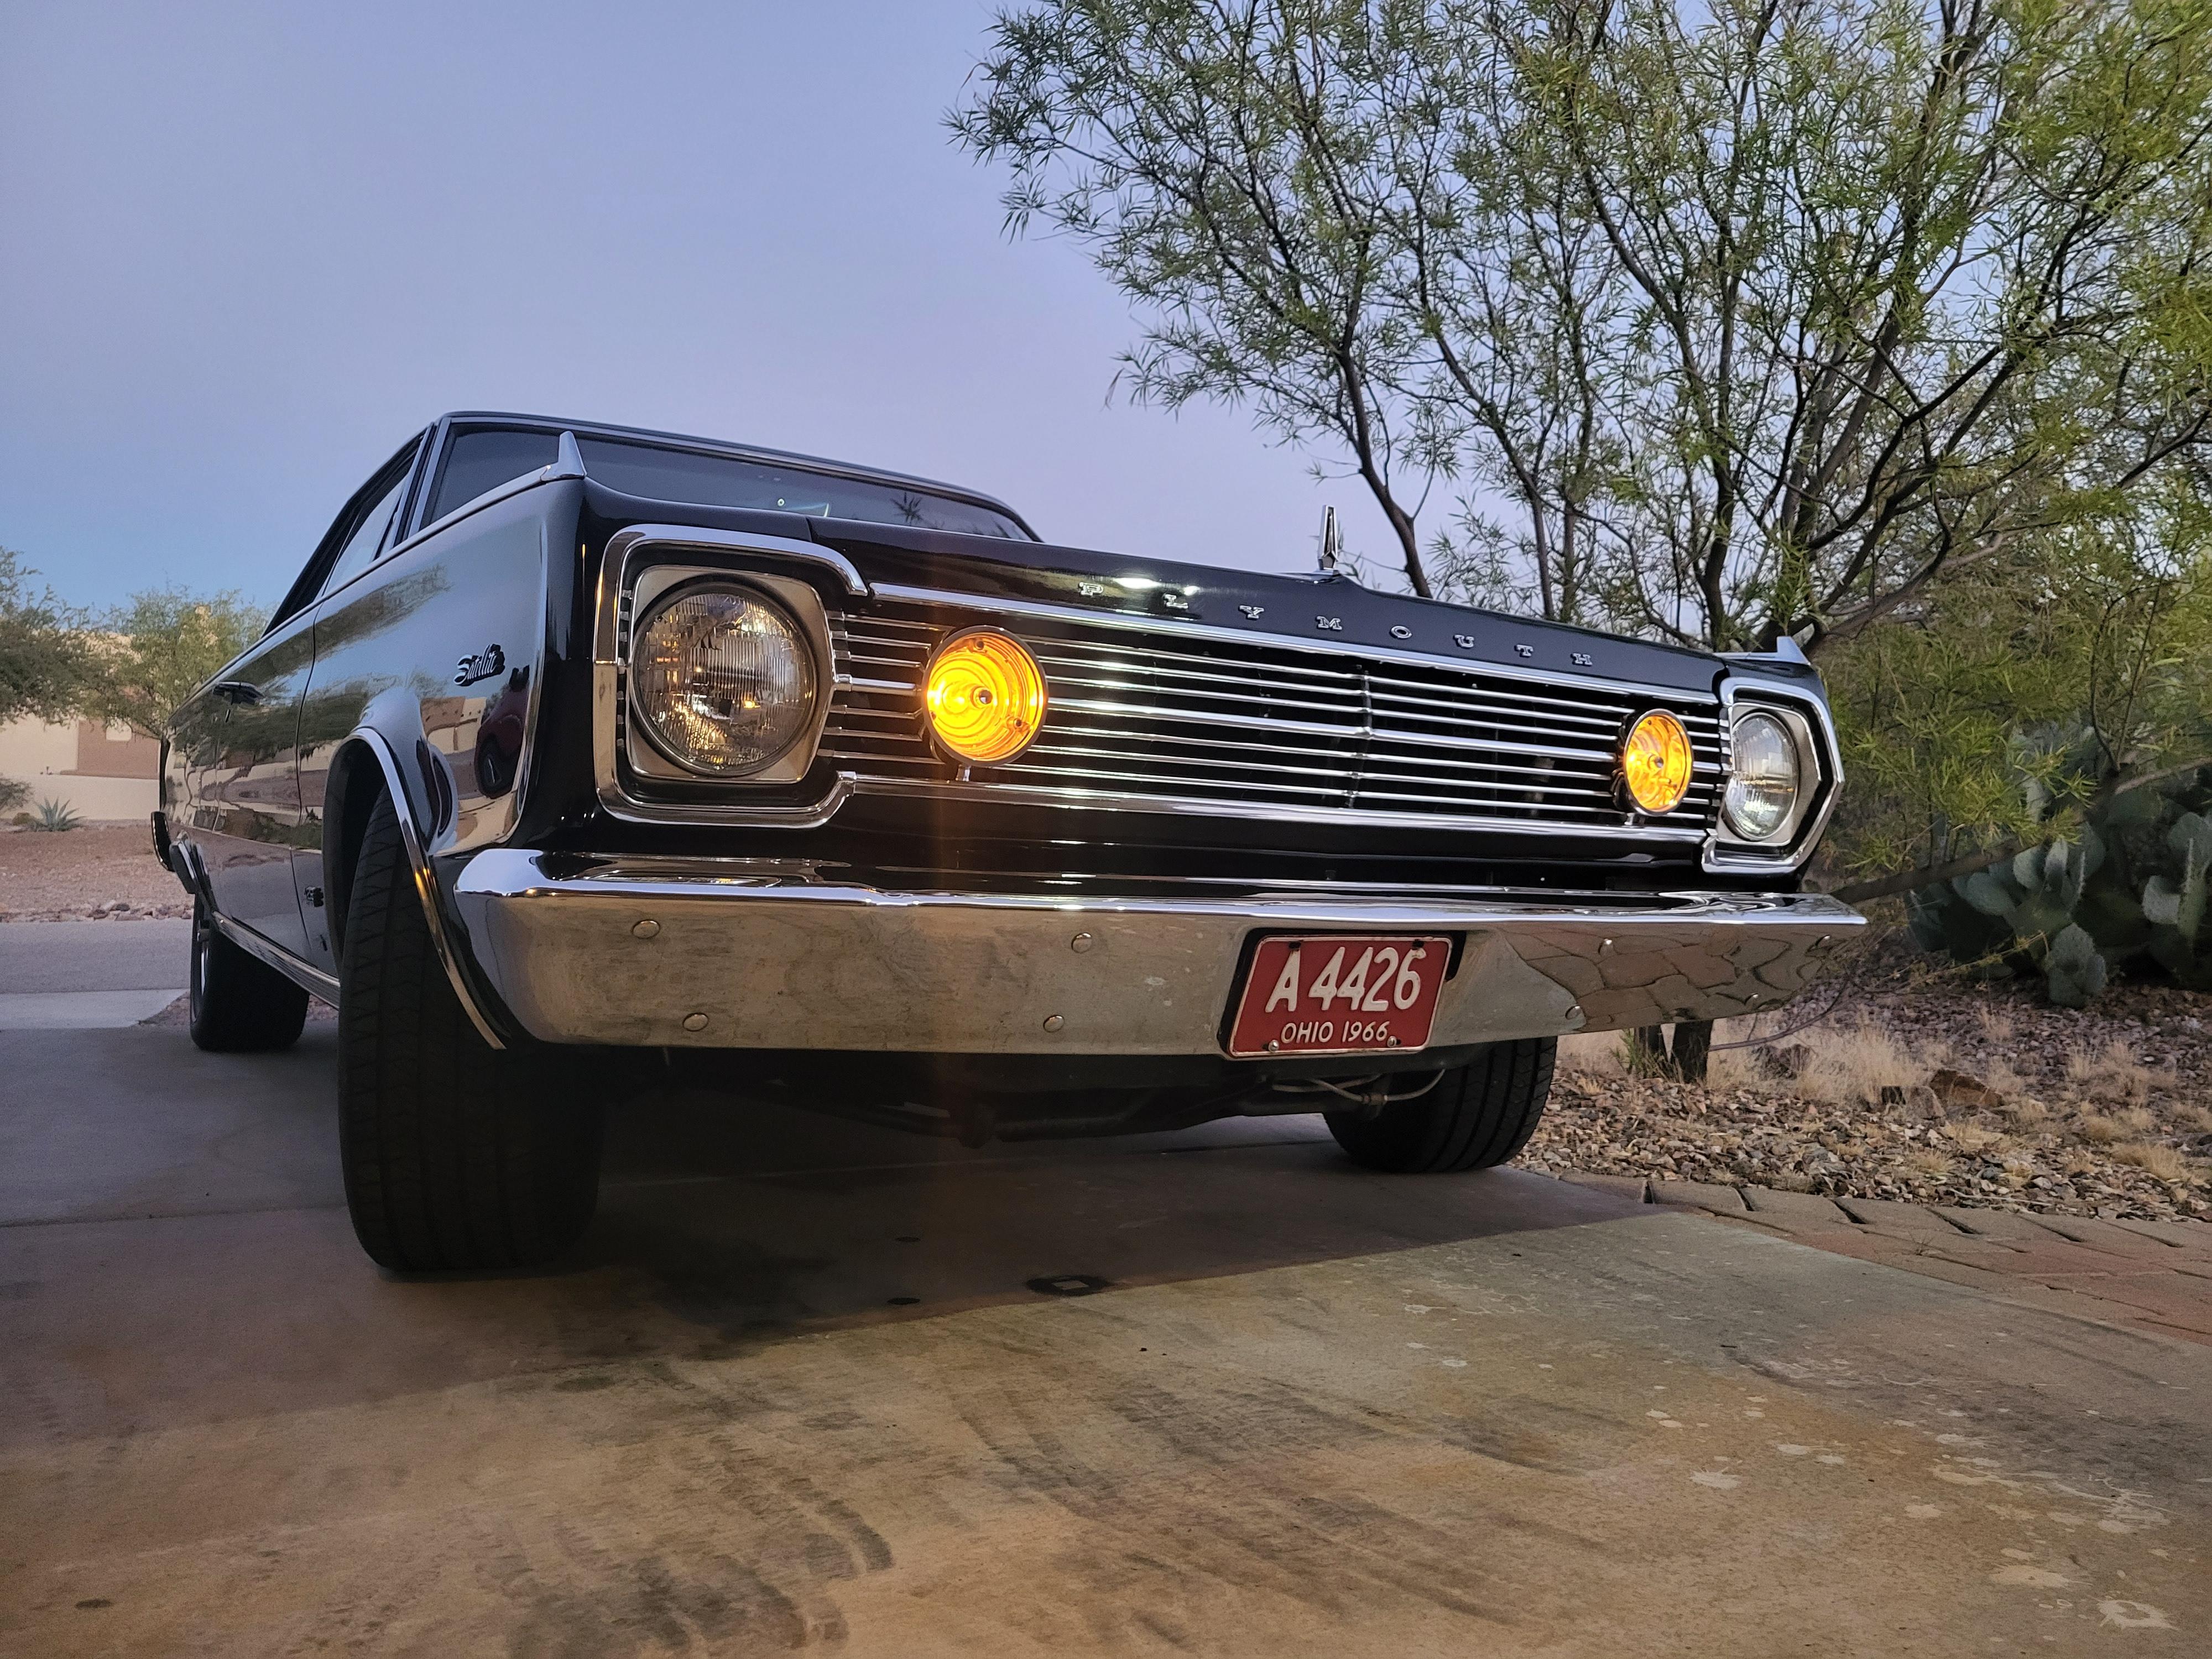
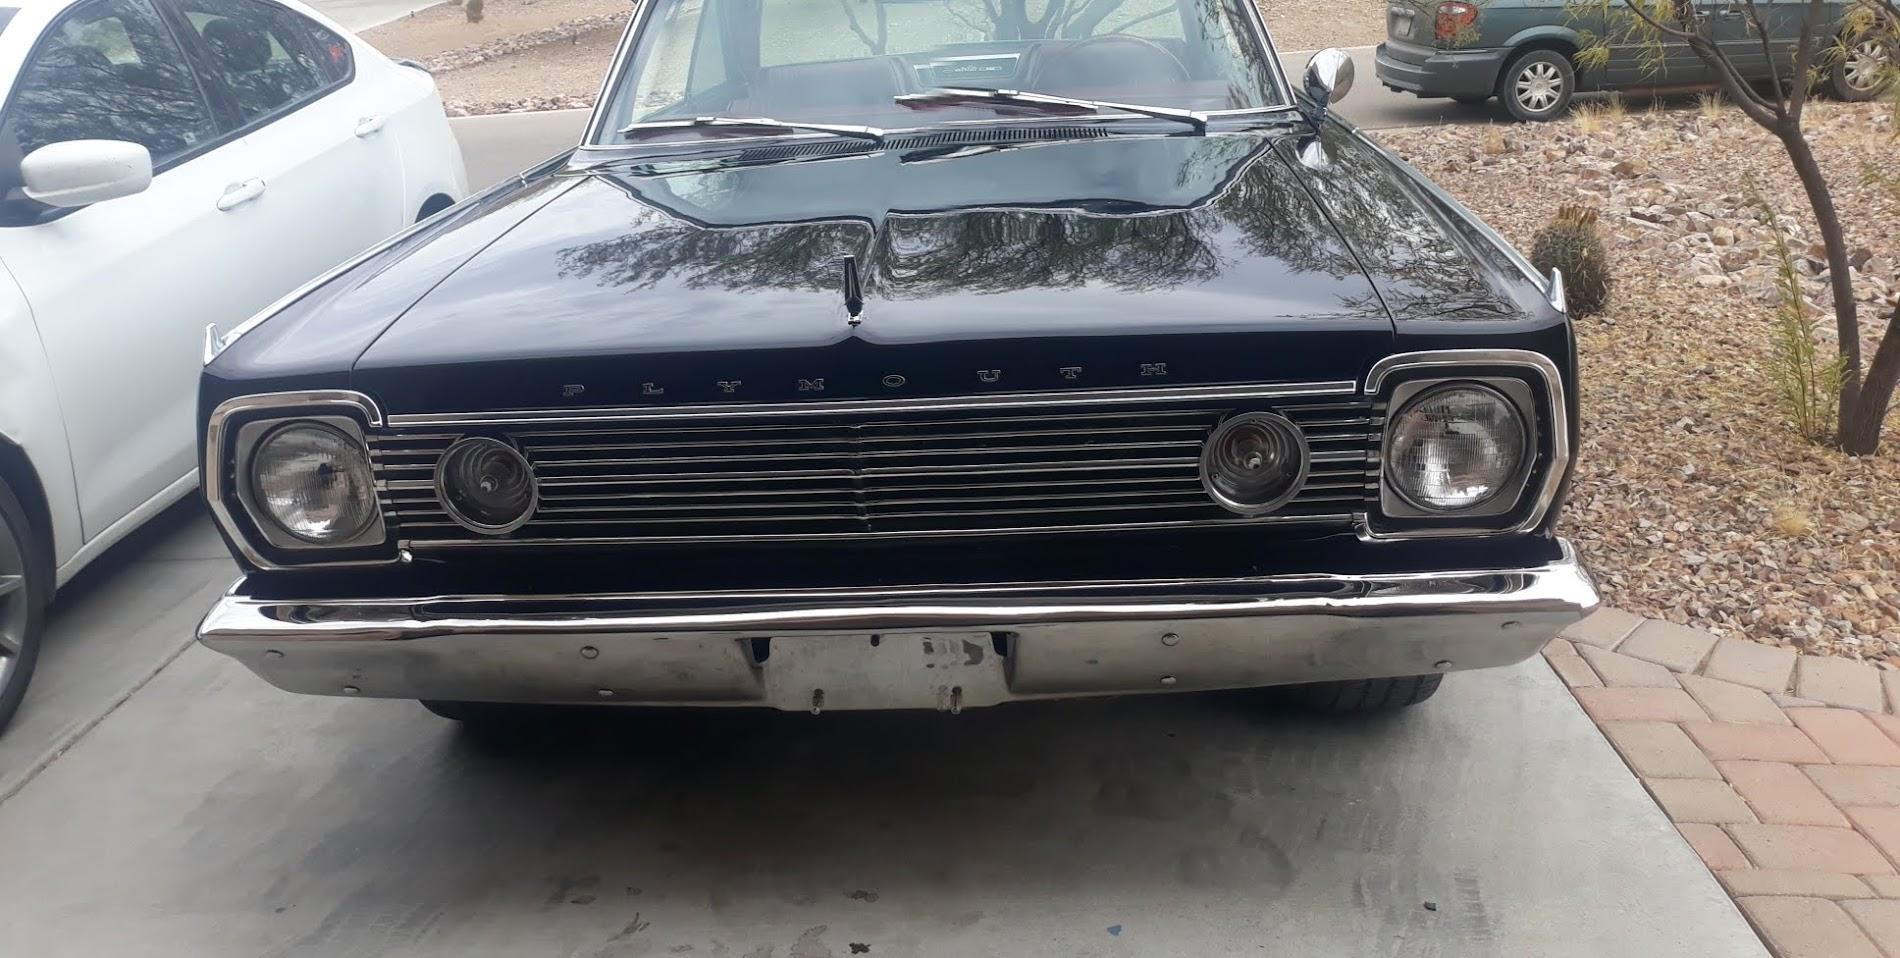
As many may know here I own a 1966 Satellite and have long desired a conversion to backdate the 67 GTX kit to replicate my car, Well, we now have 2 companies doing them ( Yippee ) 1st one I worked with 3d Scale Specialties, poking and prodding to have him do them , even sent him pictures and a spare body and part to scale to I received the parts back a month or so ago. Looks killer except IMO only the gap / area between the tail lights and trunk panel could be a little wider by just a few thousands of an inch. But overall very very nice. Tail lights are molded in as one piece. Grille come pre painted with Revell chrome and seems to be holding up to my handling very well Biggest downfall for this one is the rear bumper and finish panel/tail lights is printed as one unit. Not an issue except the rear bumper on the 1/1 has a depression in it but the 3d printed part this area is a raised lip. Wrong for my car, BUT perfect for a car that happens to have the optional rear bumper guards , SO IMO its a win , just not for my own car IMO I think the details on the finish panel are a bit too bold and the letters are raised, should be depressed Overall Very nice I give it a B https://www.ebay.com/itm/135163477887 2nd is Few Sprues Loose on Ebay Gille is just as nice with a bonus the upper mildg is part of the hood and is printed separately . Rear finish panel is a little better / seems to be more correct to the 1/1 , with separate lenses for both tail lights, back up lights , front head lights and turn signal lenses I can get it off the sprues easily and if the lenses fit nice I may upgrade that grading. On this one the builder is required to re-use the Kit rear bumper Great in my case for the above mentioned issue. But getting it attached may or may not be an issue ( we will see on that later this year when I get back to this build ) I would like to mention neither kit supplies the 66 only front bumper, so the builder is required to fill the turn signal lights in the 1967 bumper and ' rechrome ' it . I've mentioned to BOTH suppliers to produce the 1966 Only wheel covers. SO, whether or not that happens????? we will see if they materialize (fingers crossed on those) https://www.ebay.com/itm/375723598761 Also, If the builder intends to build a Petty 1966 Belvedere the finish panel detail is moot point ( it doesnt have one ) IMO the price difference between the 2 is how its received, Cheaper version is still on the print board or what ever its called requiring more work from the builder, pieces are off this carrier , chrome sprayed grill , etc etc 99% of the builders receiving either one will be ecstatic with their choice Im sure of it.
-
I'll have a similar picture in coming years. But will be all convertibles I have my 58 On the bench now trying to decide on color combinmation . So maybe later this year