Search the Community
Showing results for tags 'CHEVY'.
-
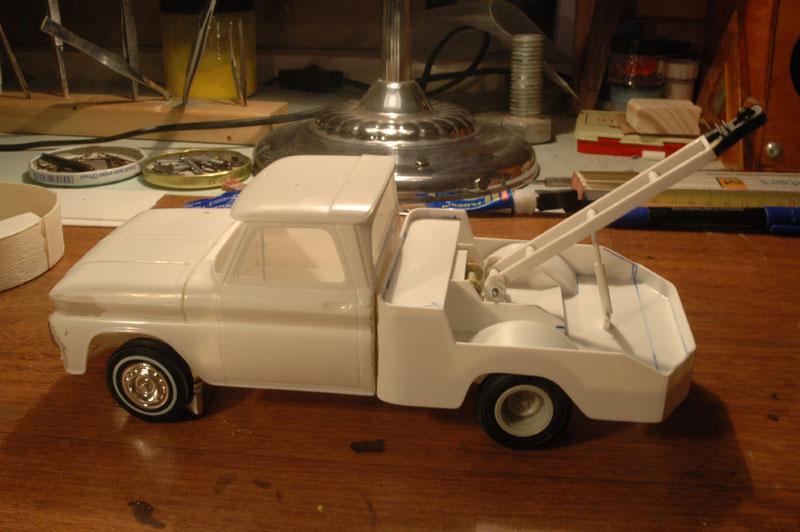
hello here is my 64 chevy tow truck the cab is from the revell 64 chevy fleetside the wrecker unit is scratch made... best regards maik

-
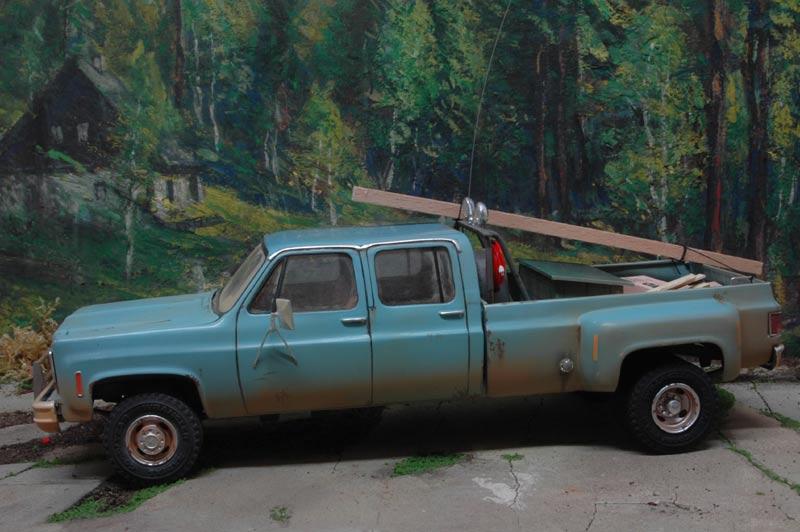
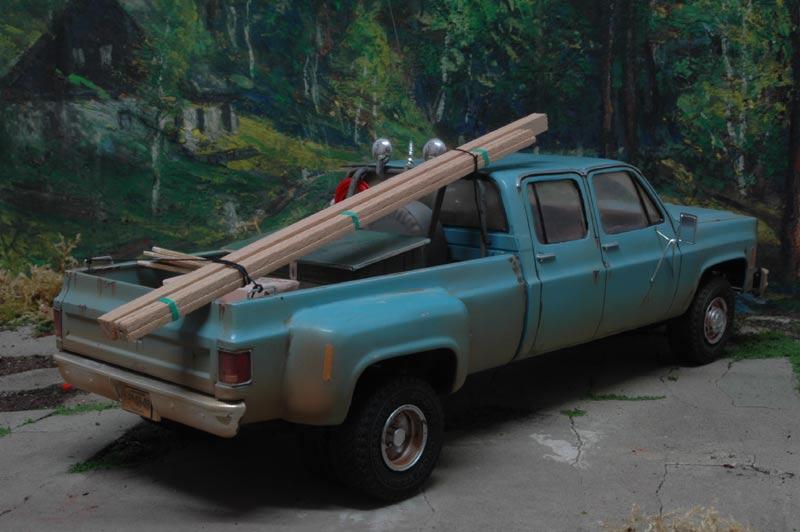
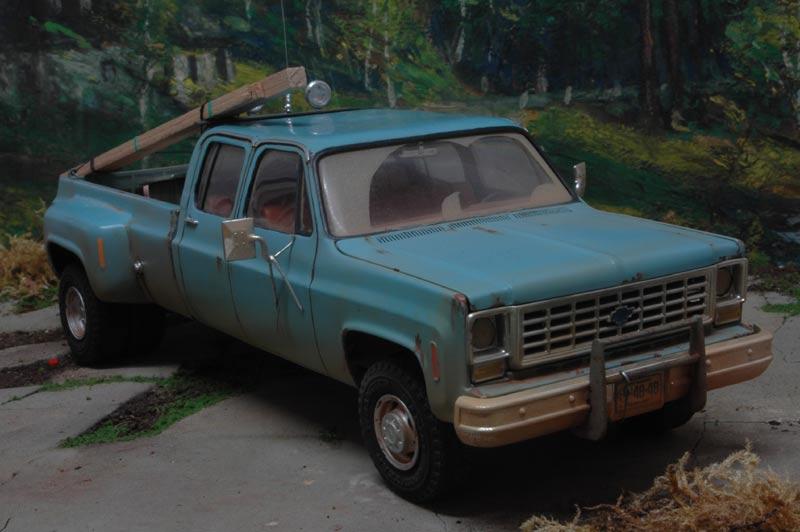
hello guys i will show you my c30 crew cab... i have build this model out of the revell 77 gmc snow plow and the 76 sport pick up and of course some scratch build i hope you like it best regards maik
-
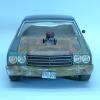
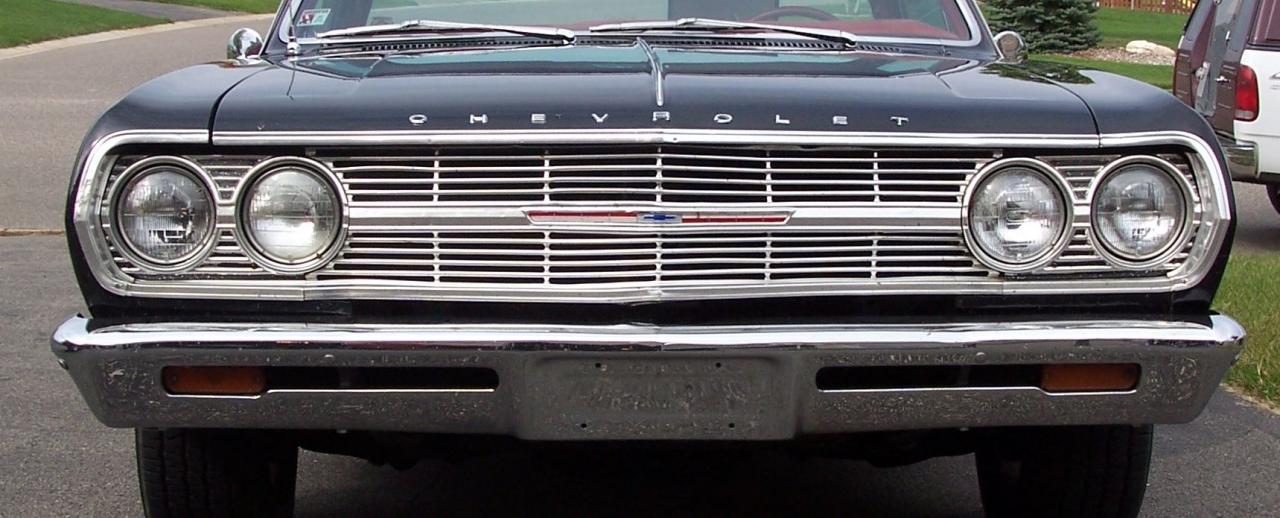
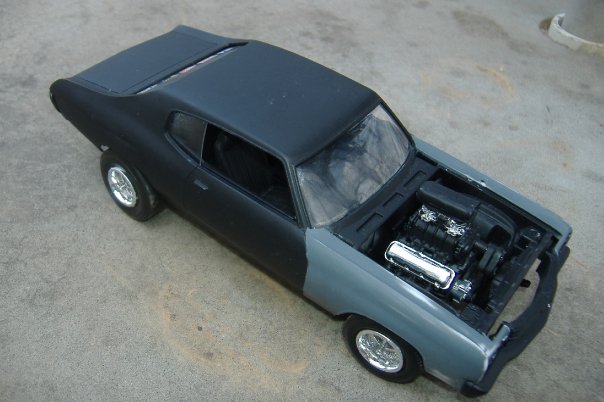
Well here I have a all factory looking 72 chevelle.
-
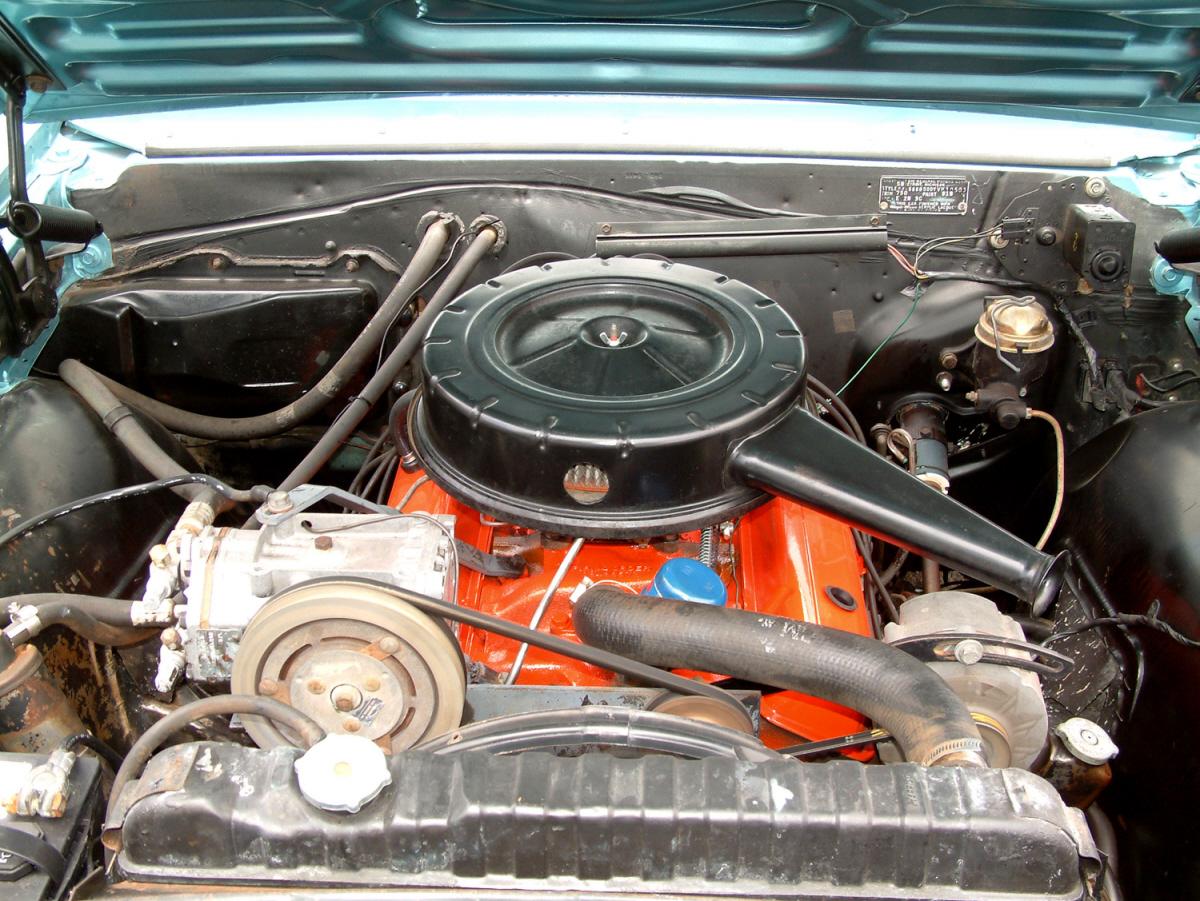
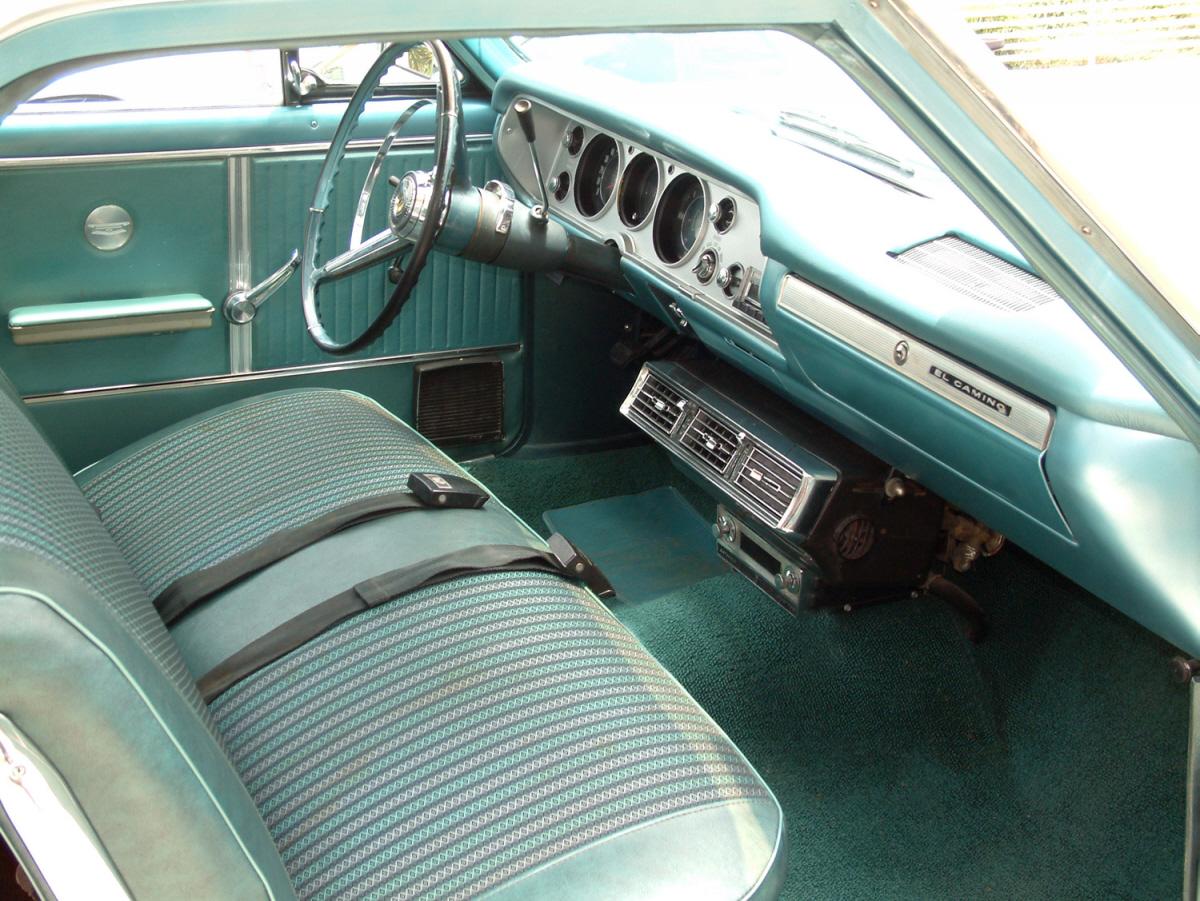
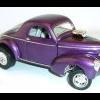
 Since I am stuck until I can get to the hobby shop this weekend, I decided to mock up my next build. I hope it goes here under pickups Anyway, I am going to do a 66 El Camino topless cruiser. Here is what I am starting off with: Here is the mock up. I am going to try to keep it close to that low. Not sure yet what that will entail but I want it LOW. Top will get cut off leaving the windshield and vent windows and a little of the top right behind the windshield. I want to cut out the detail of this hood and use it. If I can find a cowl somewhere I might use that. I could buy a resin cowl if I could find one. If not though, I like this hood detail anyway and think it would look good. And here is the color I'm going with. Probably white as an accent color but still debating. Need to find a good color to offset the purple. I'll probably work on this a little until I get the parts I need this weekend for my 41 chevy pickup.
 -
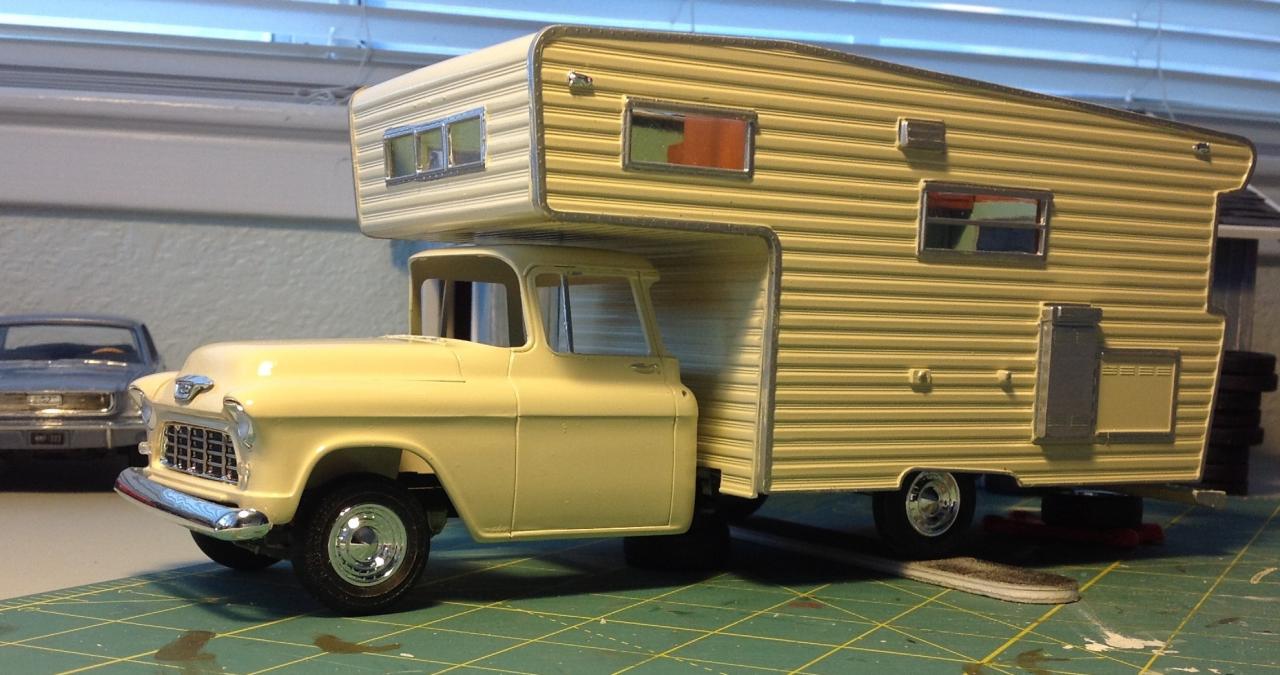
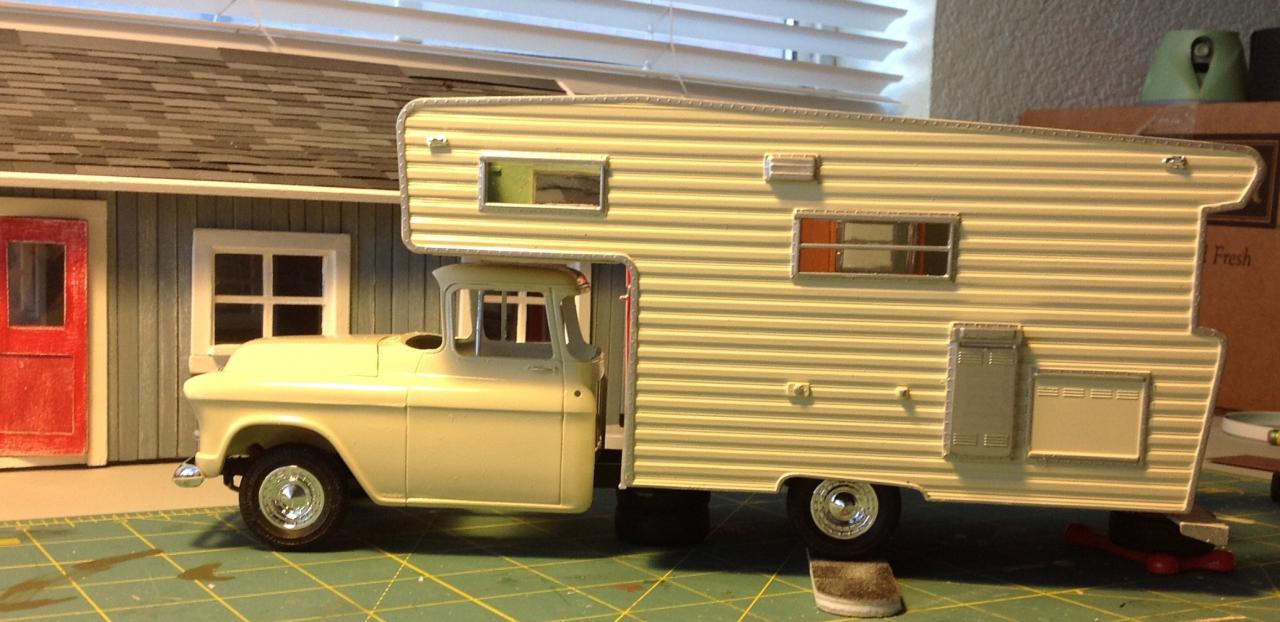
 This is a mock-up of my Open Road Camper, with a 1955 Chevy Cameo in front of it. The original release of the camper kit came with a truck. I believe it was a 1967 Chevy. But the AMT re-release did not come with a truck. It was a 'stand alone' camper. I wanted to connect it to a truck, but found it hard to find a match. As you can see here on the photo, the suspension of the camper is too low. I placed the camper on a sanding stick to verify the difference in hight. I think I need to take the wheels off under the camper and elevate the suspension a bit.
-
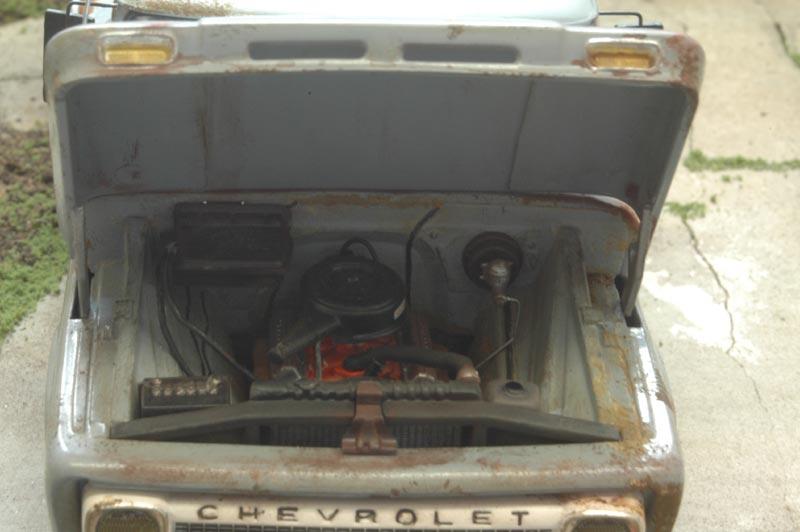
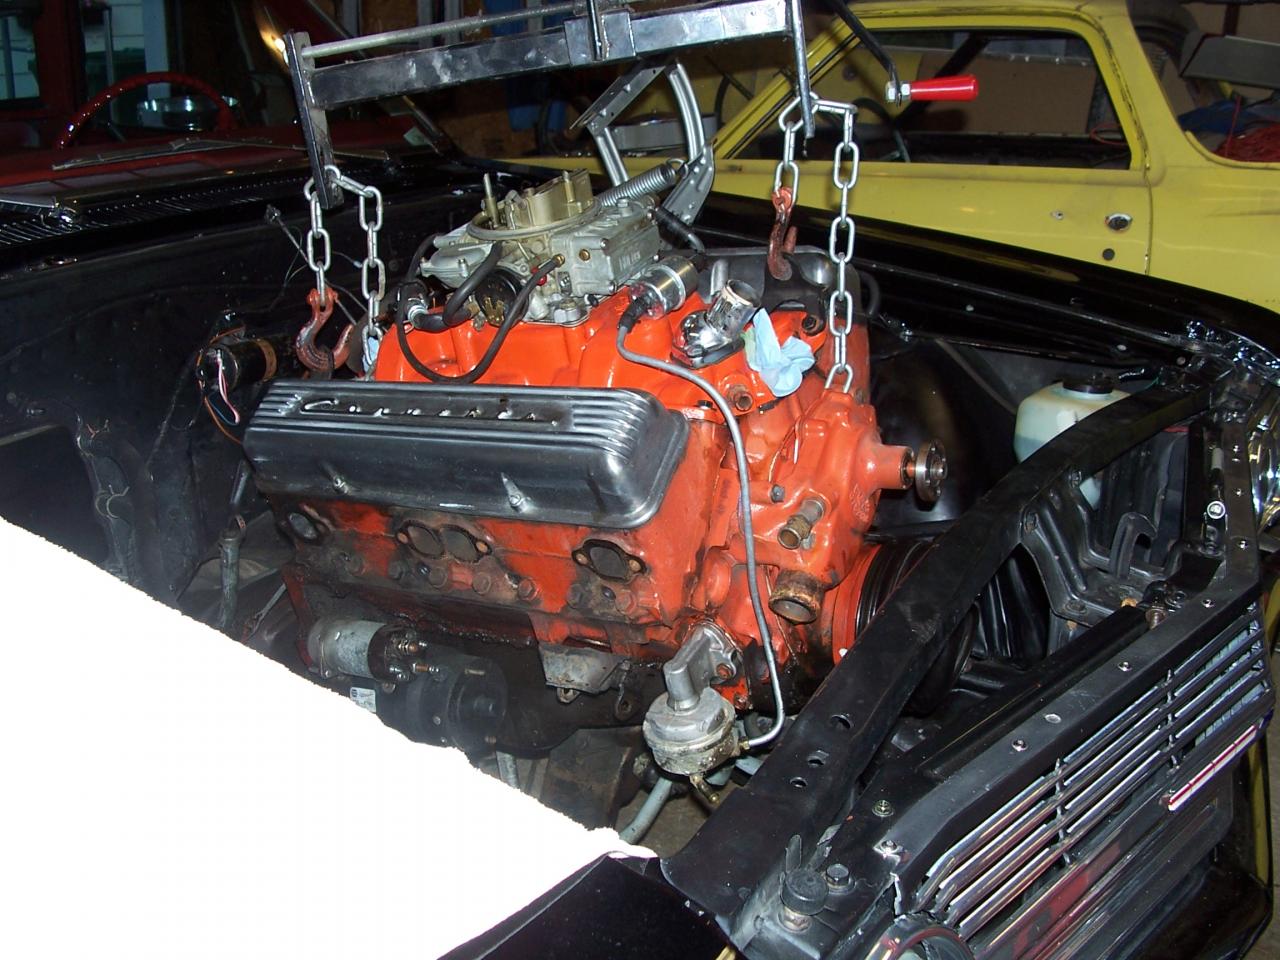
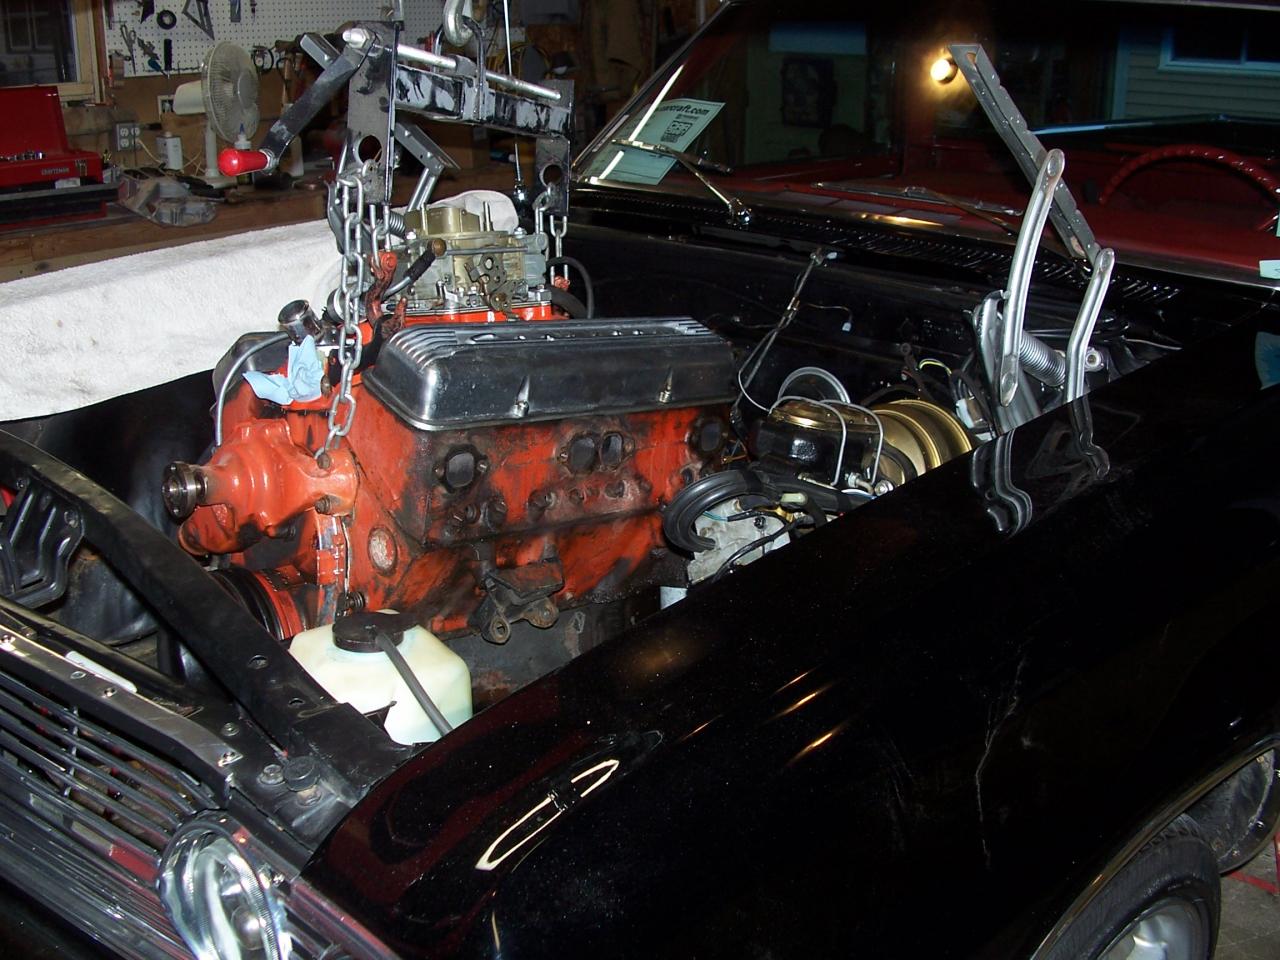
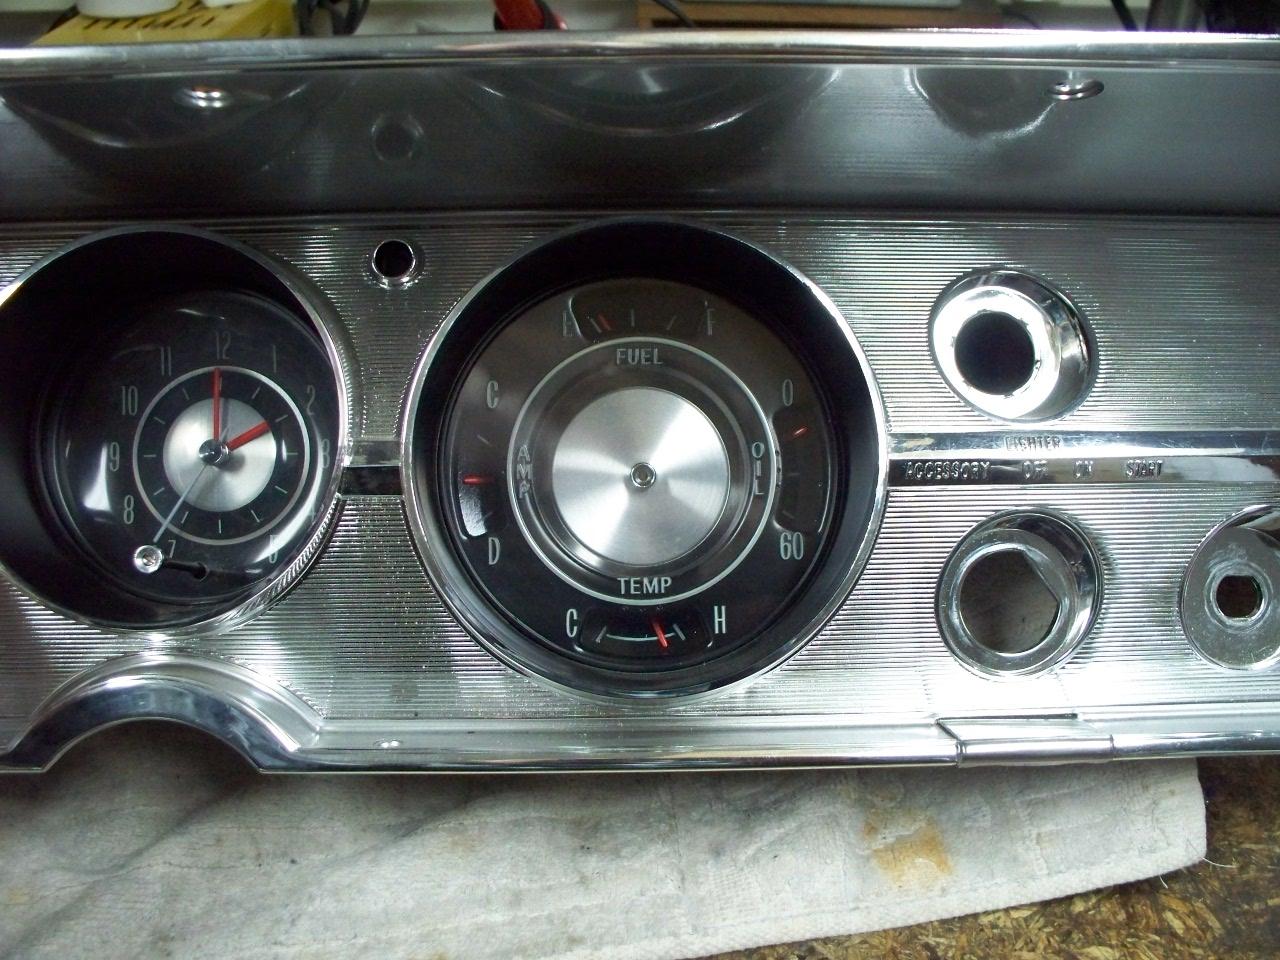
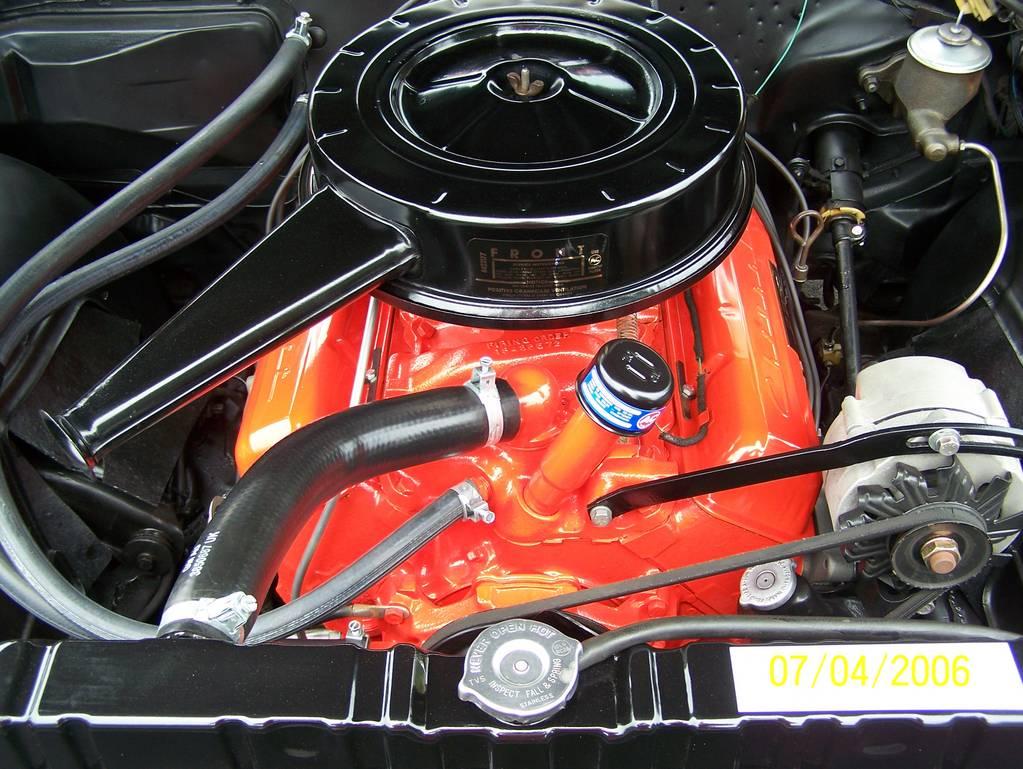
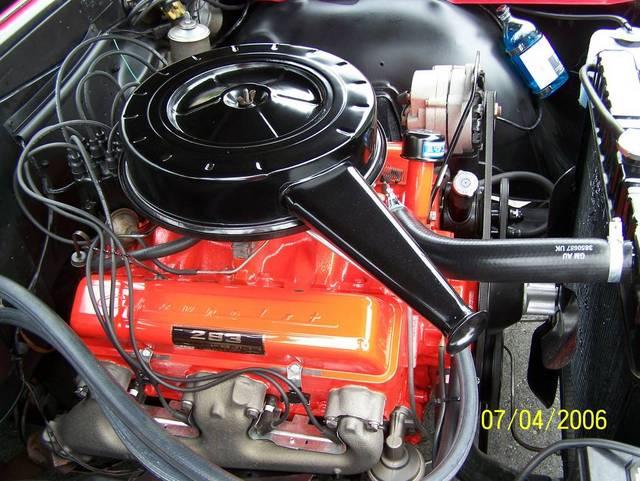
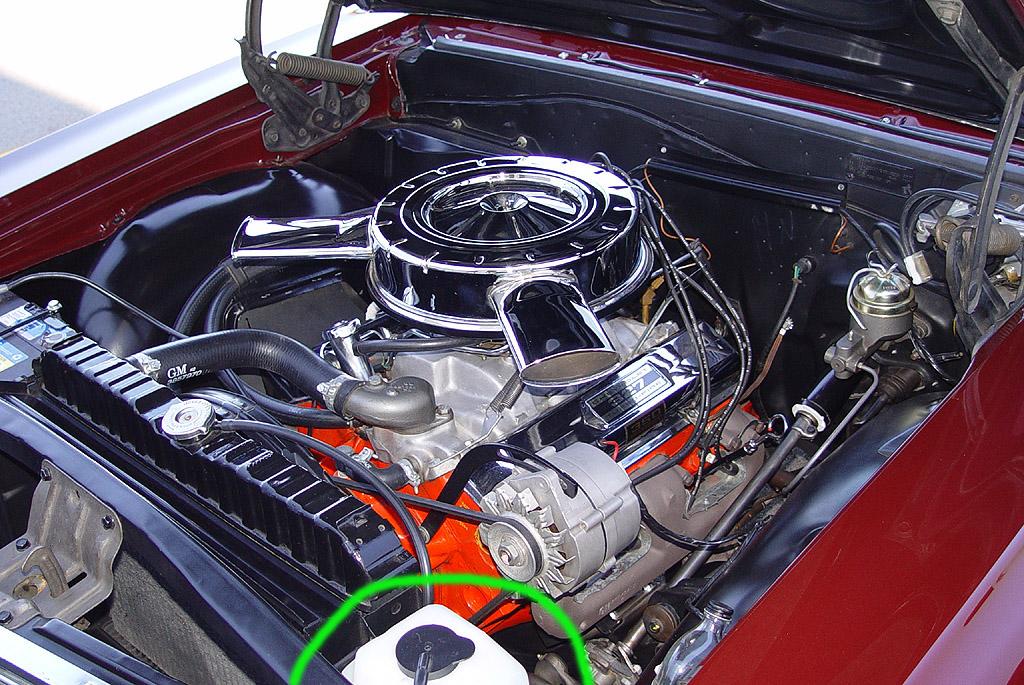
 An original 327 sb (45K miles) on it's way out. A '65 dash/interior with RARE factory air conditioning. Detail of clock and gauges for '65 SS cars. Grille emblem insert for '65 A (correctly) restored engine compartment ('65 w/ SB) A (correctly) restored "L-79" high-performance 327 An unrestored (clean) '64 or '65 with dealer A/C engine bay The "dealer A/C" unit in the cab ('64)
-
Since its Christmas I mite as well share my new pro mod project a 2009 zr1
-
 SUP GUYS,I AM WORKING ON MY FIRST BUILD!A 65` CHEVY STEPSIDE FROM REVELL.I WANT TO "BAG" IT AND DROP IT.IF U HAVE ANY TIPS JUST LET ME KNOW.IT WOULD BE GLADLY APPRECIATED.IT WILL BE TESTORS METTALIC BLUE FLAKE WITH SHAVED BUMPERS,TAILIGHTS,GAS CAP,ETC..YOU GET THE PICTURE.BUT YEAH THINK THIS WILL BE A FUN BUILD.I WILL MAKE A CUSTOM FRAME AND MUCH MORE.STAY TUNED!I HAVE FINISHED THE MOTOR AND SANDED SOME STUFF.IT`S ABOUT 8% DONE.ANYWAYS,HERE ARE SOME PICTURES OF WHAT I AM WORKING WITH!!!THANKS FOR VIEWING.
-
I have been packing for a few months now, hoping to move in November. The good part is my new model shop will be in full time air conditioned space. So .. I'm going to post a model from the past. This is a 1/18 Johnny Lightning diecast done by Ertl several years ago. It has opening hood and rear gate but not the doors. Door handles are molded on but does have some nice detail over-all. If you're going to get serious about cutting up diecast, you need this RotoZip. Stay tuned! AzTom
-
Here is one of my builds. its a 1967 caprice demo car. hope you guys enjoy!
-
 Hello Every one! My name is Luis, but lots of people know me by pancake. Its been my forum nick name for years and I have been in the automotive scene for quite some while, imports to be exact and had a civic featured in a magazine last year. Anyways this is my first time building a model car. In this case a truck. SO sorry if its terrible! ha. I dont know where you guys get aftermarket wheels, or how to lower my model a bit, but im going to try it. Anyways on to some pictures and my progress. 1) Well took a photo of the cameo before I painted the cab. Decided to go with Blazing Metallic black from testors. 2) Here's a pic of the cab painted. I did 3 coats of testors Lacquer Blazing black. Im pretty happy with the results. Zero drips or runs, this is my first time spray painting a plastic model truck. I also painted the frame flat black. dash board, steering wheel are match painted to the exterior of the truck. But I decided to go with red seats. The seats only have one coat of paint and I havent taken a picture yet. Would love to get to meet more fellow model car builders. So please comment on my thread. I will keep you updated. Plans: Bigger motor. Dont know what yet. But the small 265 v8 wont cut it. LOL Id like to lower it. But would like for it to roll.. i dont know if thats possible .... sugguestions?
 -
Mods please delete. Posted on the wrong section.
-
I recently started building a Revell '69 Chevy Nova and can't really decide how to build it. I'd like to see some of your Novas. Different wheel and color combinations are welcome.
-
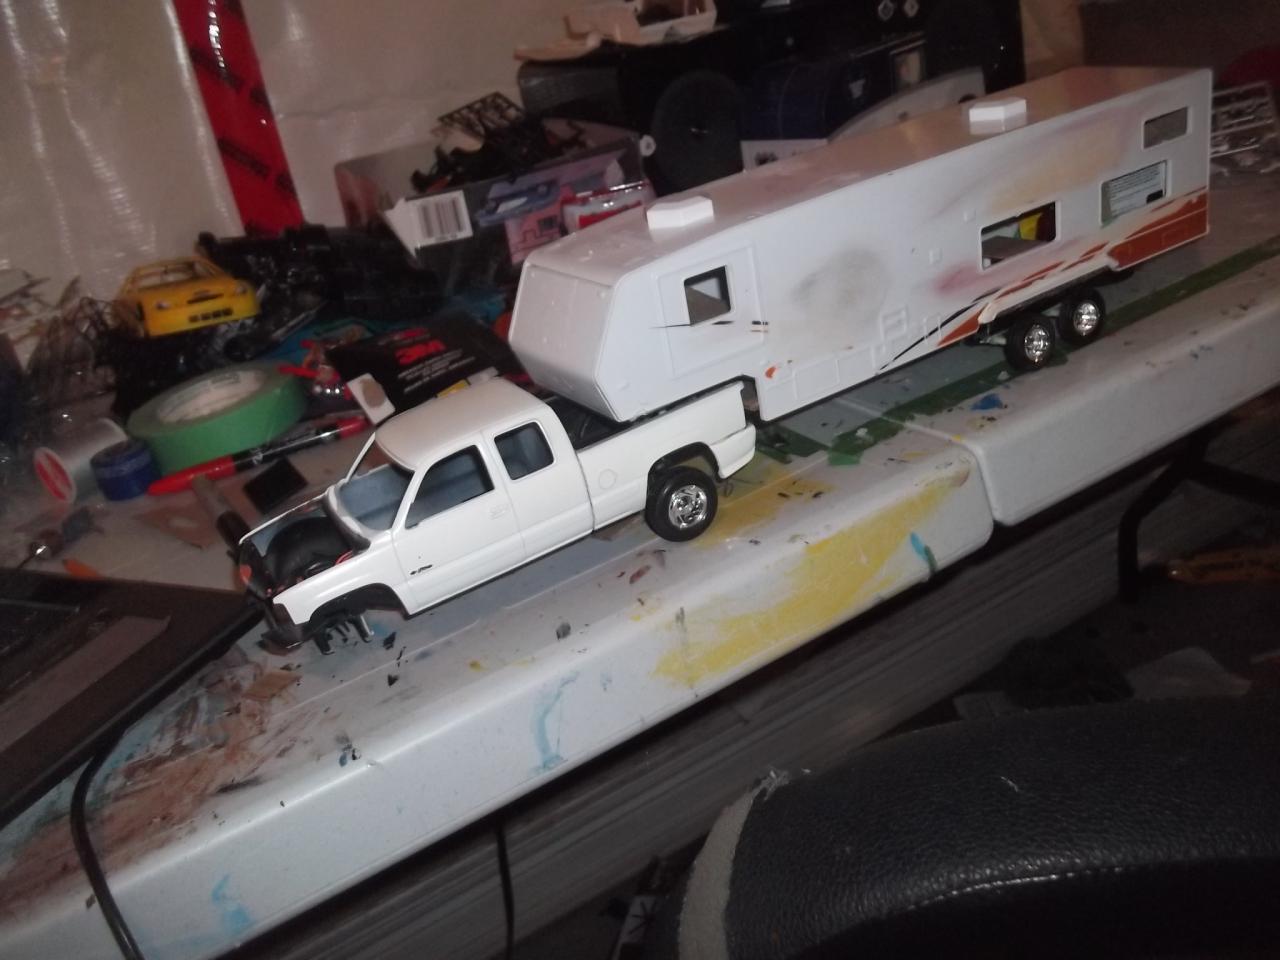
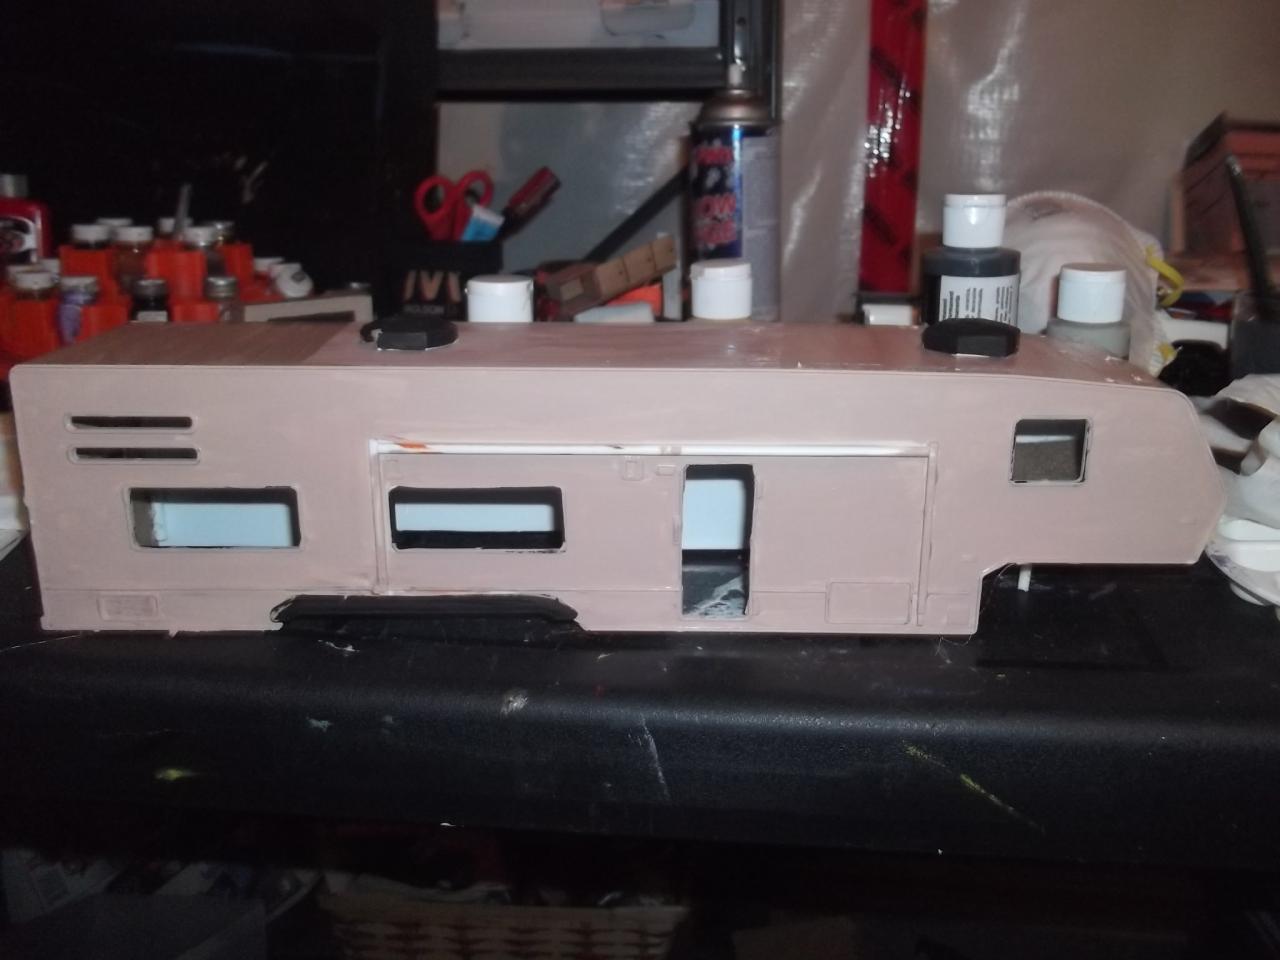
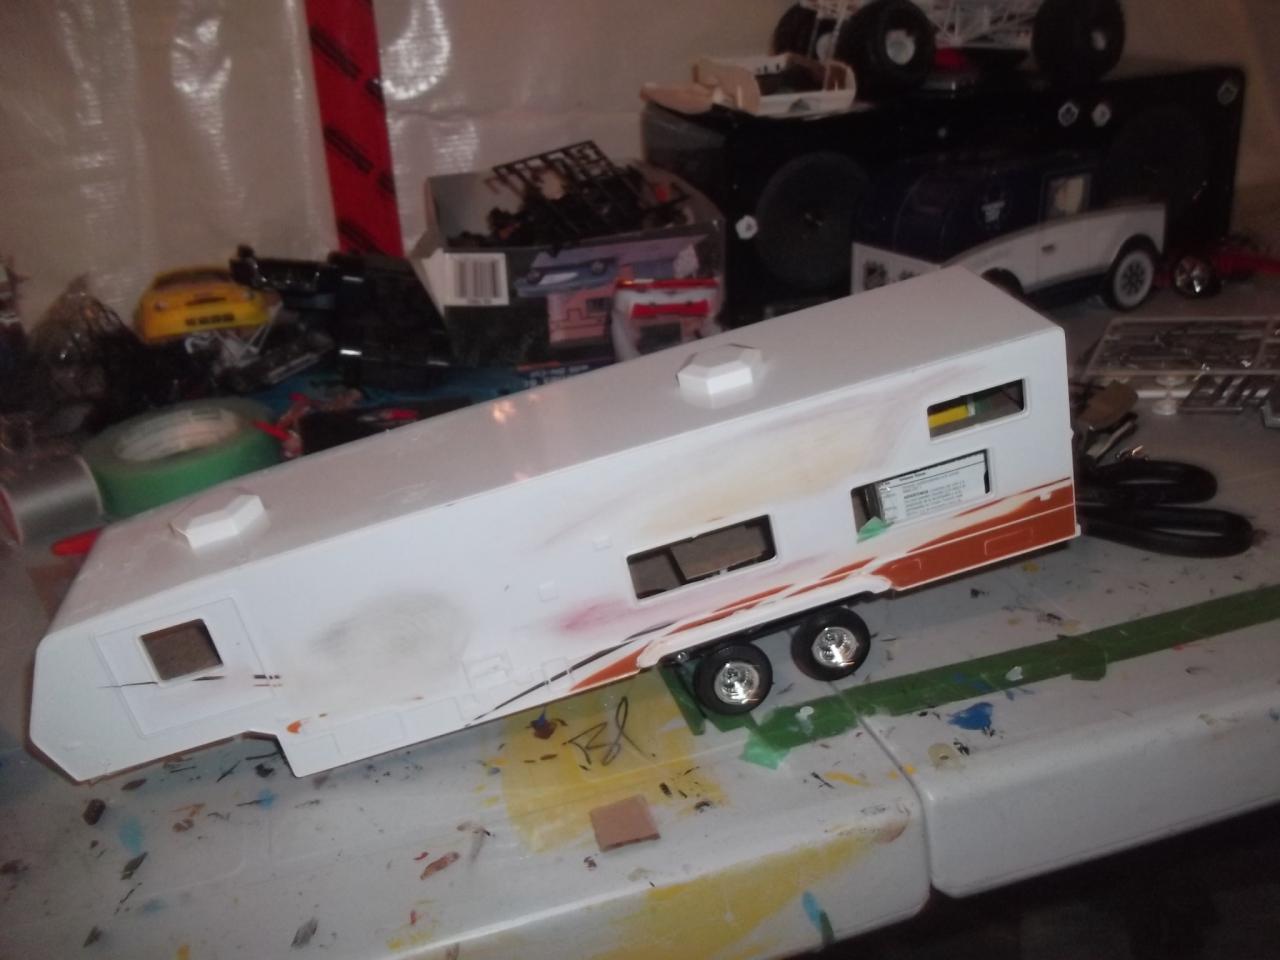
 Hey my wip nothing special just my 99 silverado with my plastic die cast camper i dtiripped it made a interiopr painted it and am still working on the let me know how it looks thanks
-
All black vehicles. Black tint, trim, windows, lights and paint. Anyone ever do it? Let's see 'em!!
-
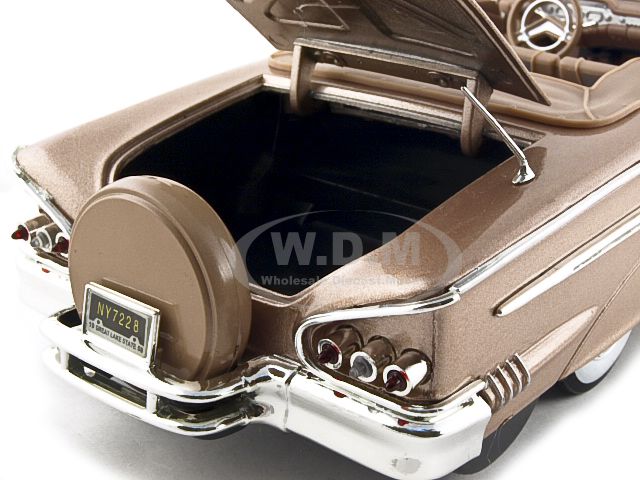
I have a 1/18 scale Die cast Motormax 58 Impala convertible. I have turned this car in to a fully shaved kustom A$$ dragger. It looks awesome as it site but there's a huge problem. The ugly 5th wheel or continental kit is on the back and the bumper sticks out in the middle and looks rediculous. I really want to cut it off but I am not sure how to go about putting the bumper back together once I have cut it. This is the one I have.
-
A lot of you probably use or have used them hair brushes with the plastic bristles. Next time you do, take a look at them. They are basically a bunch of shifter handles with ball knobs on 'em. I've used them once or twice in die cast. Let's see how it works for plastic.
-
First build. No skill, no detail or nothin. what do y'all think?
-
I'm lookin for some simple and dirt cheap wasy to build engine mounts for a Revell parts pack 354 cadillac to mount into a 72 chevt c10.,
-
I gotta 72 c10 gluebomb from a buddy of mine a while back. The windshield is scratched to death and is cracked in he middle a ways ans stuck back togeher with super glue. I was wondering if there is a cheap and relatively easy way to save it.
-
 I'm lost any help would be much appreciaed. Wanna build this engine for a 72 chevy s10.
 -
Hi everybody, today i want to show you my 57 BelAir. On this kit i made some more technics to weather all parts of it. Like interieur, exterieur and Decals. I built it in June this year, based on the first issue of the Revellkit. The History of Belair: The Chevy has come on in years and has a wild youth behind. The current owner has taken care of him. He is currently at the stage when he left the front damage repaired with used parts front and rear wheel arch on the left has been de-rusted and primed. The trapper damage, the rust on the rear and right are still so when he bought it in pitiful condition - for which he cares little by little. Inside, he has had more luck. The inventory lists a broken window on the right, worn seat cover, headliner loose and dirty panels / rear seat, the rear parcel shelf has been cracked by the sun - everything is possible. Well, the side windows are renewed. The owner can not waive his or her means. So he must always carry out the work so that he comes to the job every day. What happens to the engine? Additionally, he is still at odds ... Therefore: "Rolling Restoration": And now? Photos (a little more than usual) around the outside at irregular times. Have fun;) ...
-
 Hey guys heres another build and just finished it a few minutes ago.The project started out as a 55 chevy pickup and then I custom made the rest of the build.Its not perfect but what rat rod is right.I was trying to figure out how to lower this panel on the front so decided to put the solid front axle over the leaf springs and not like original it would of been on the under side of the spring.I built up a big block chevy for this build to added some big wheels and disc brakes.I donèt know about you guys but I rarely ever use them big wheels on any build but this 55 was a great project for them.So here are the pics. First stage Body done and in primer Almost done in this pic Now done