exesivefire Posted December 22, 2016 Author Share Posted December 22, 2016 (edited) Somewhere in my rebuilding the bed 100 times it was off a bit front to back. In hindsight I probably could have started over but I just fixed this one again. In fact most of the stuff I did over the past few days was just redoing stuff. If it's worth doing it's worth doing over till I think it's right? In addition to the bed I also cut down another grille shell, and robbed the wheels from a 30 kit (thanks to Tim Boyd for pointing me in the right direction) i did however fill the stock rear door line and door handle hole Mocked back up with what should be the final wheel and tire combo. The spinners should really set them off. Also note I'm going to do something with that windshield frame. It's too tall as is In addition to squaring up the bed, I also raised it a tad. Edited December 22, 2016 by exesivefire Quote Link to comment Share on other sites More sharing options...
James2 Posted December 22, 2016 Share Posted December 22, 2016 Funny how the smallest things can throw you off. Fixing things that are not right or even starting over is a great way to discover how not to do something. I'm sure you'll get it right Andy. Quote Link to comment Share on other sites More sharing options...
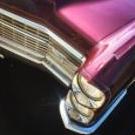
Codi Posted December 22, 2016 Share Posted December 22, 2016 You're making it look easy even if it's not. You have a very keen eye for perfection. I love the stance along with many other aspects of the car. cheers, tim Quote Link to comment Share on other sites More sharing options...
Psychographic Posted December 22, 2016 Share Posted December 22, 2016 I think this is the first version of this kit that I like, I don't find the stock kit attractive at all. Quote Link to comment Share on other sites More sharing options...
exesivefire Posted December 22, 2016 Author Share Posted December 22, 2016 (edited) Funny how the smallest things can throw you off. Fixing things that are not right or even starting over is a great way to discover how not to do something. I'm sure you'll get it right Andy. yeah.. I've also discovered taking a lot of pictures helps. You would be amazed at what the camera captures that I completely miss with my own two eyes.You're making it look easy even if it's not. You have a very keen eye for perfection. I love the stance along with many other aspects of the car. cheers, timI really appreciate that!I think this is the first version of this kit that I like, I don't find the stock kit attractive at all.funny, I don't like the look of the stock kit either, but I own 3 of them anyway. There are some great parts in there! Edited December 22, 2016 by exesivefire Quote Link to comment Share on other sites More sharing options...
exesivefire Posted December 28, 2016 Author Share Posted December 28, 2016 Started replacing that upper body line, I used a piece of .060 half round and wrapped it around the upper edge of the body. Then I sanded the face down to square it off a bit, and brought the back of the cab down to meet with the body line I created. Need to score that rear door line, fill some obvious imperfections and I can probably move onto primer. I hope.. Quote Link to comment Share on other sites More sharing options...
James2 Posted December 30, 2016 Share Posted December 30, 2016 So nice, and cleanly done. Quote Link to comment Share on other sites More sharing options...
wayne swayze Posted December 30, 2016 Share Posted December 30, 2016 You're doing a fabulous job on this! Love everything you have goin' on there! Quote Link to comment Share on other sites More sharing options...
crazyrichard Posted December 31, 2016 Share Posted December 31, 2016 very nice ...!! Quote Link to comment Share on other sites More sharing options...
Modelbuilder Mark Posted December 31, 2016 Share Posted December 31, 2016 cool, a lot of work already under way. Quote Link to comment Share on other sites More sharing options...
exesivefire Posted January 3, 2017 Author Share Posted January 3, 2017 Well I'm glad that's over, trimmed the top of the cowl, chopped the windshield frame, then leaned it back and narrowed it a tad. Also pinned it so I can assemble it easier after paint. Quote Link to comment Share on other sites More sharing options...
James2 Posted January 4, 2017 Share Posted January 4, 2017 Sweet! Quote Link to comment Share on other sites More sharing options...
misterNNL Posted January 4, 2017 Share Posted January 4, 2017 Great proportions and stance. Quote Link to comment Share on other sites More sharing options...
exesivefire Posted January 7, 2017 Author Share Posted January 7, 2017 What a community this is.. James2 found out I was on the hunt for a Revell 409. Not only did he have one he said I could have, he goes out of his way and hand delivers it to my work! I had to rush home and mock it up and make sure it will fit. Good thing I didn't plan on a hood or sides huh? Quote Link to comment Share on other sites More sharing options...
James2 Posted January 7, 2017 Share Posted January 7, 2017 (edited) Well that's what life is all about, helping one another no matter how big or small the matter. I'd much rather do that then count rivets any time! Edited January 7, 2017 by James2 Quote Link to comment Share on other sites More sharing options...
exesivefire Posted January 7, 2017 Author Share Posted January 7, 2017 Well that's what life is all about, helping one another no matter how big or small the matter. I'd much rather do that then count rivets any time!that's why I haven't finished the uhaul.. too many rivets to count... Quote Link to comment Share on other sites More sharing options...
exesivefire Posted January 7, 2017 Author Share Posted January 7, 2017 Now that it's in there.. too much engine? Or just enough? Quote Link to comment Share on other sites More sharing options...
58 Impala Posted January 7, 2017 Share Posted January 7, 2017 Just enough, no engine is too much. The 409 is perfect. Nice work so far, will be following your build. Quote Link to comment Share on other sites More sharing options...
bobthehobbyguy Posted January 7, 2017 Share Posted January 7, 2017 That is the perfect engine choice. Fits the cars character. Looking forward to seeing more. Quote Link to comment Share on other sites More sharing options...
exesivefire Posted January 12, 2017 Author Share Posted January 12, 2017 So the 409 is too big.. just not enough room. Since I decided I can't use that I went a completely different direction and started on the interior, specifically the dash. I had an idea in my head centered around a large gauge that was well.. centered. That's where I had to start. Whittled a piece of aluminum and carefully cut the lense off one of those googly eyes from the craft store. Then I drew up a face in illustrator and printed it on photo paper. Looks good to me! Starting the dash.. I'm happy with that. Quote Link to comment Share on other sites More sharing options...
geewhiz Posted January 12, 2017 Share Posted January 12, 2017 Up to this point everything's looking very good. It's too bad the 409 won't work out for you...any thoughts on which direction you'll go from this point??? The dash and your single gauge in the center is awesome!!! ???????? Quote Link to comment Share on other sites More sharing options...
1930fordpickup Posted January 12, 2017 Share Posted January 12, 2017 Andy what about the 4 banger you had mocked up in the other model A you had going a few years ago. I think it was a pinto 4 If my memory is correct. Quote Link to comment Share on other sites More sharing options...
afx Posted January 12, 2017 Share Posted January 12, 2017 Your gauge is excellent. Quote Link to comment Share on other sites More sharing options...
Davewilly Posted January 12, 2017 Share Posted January 12, 2017 looks very cool...The gauge is really nice! Quote Link to comment Share on other sites More sharing options...
Intmd8r Posted January 12, 2017 Share Posted January 12, 2017 That guage looks great! Quote Link to comment Share on other sites More sharing options...
Recommended Posts
Join the conversation
You can post now and register later. If you have an account, sign in now to post with your account.
Note: Your post will require moderator approval before it will be visible.