exesivefire Posted February 9, 2017 Author Share Posted February 9, 2017 It was fighting me last night but hopefully I'll have better luck tonight Quote Link to comment Share on other sites More sharing options...
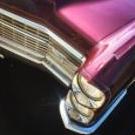
exesivefire Posted February 10, 2017 Author Share Posted February 10, 2017 I didn't get a lot done last night, but I did manage to save the rear axle and add a taper to the tubes while I was at it (still needs some cleanup) and got some primer on my grille to see how that was doing after the splice. 1 Quote Link to comment Share on other sites More sharing options...
bobthehobbyguy Posted February 11, 2017 Share Posted February 11, 2017 Definitely keep this going. Great project. You've got some really nice work in this. Looking forward to seeing it finished. Quote Link to comment Share on other sites More sharing options...
Randy D Posted February 11, 2017 Share Posted February 11, 2017 Looking good Andy ! Randy Quote Link to comment Share on other sites More sharing options...
exesivefire Posted February 12, 2017 Author Share Posted February 12, 2017 thanks again for the kind words. I almost don't want to admit the amount of time I have spent on this rear end. I have had this center section in the parts box for a while now and decided it was time to use it. It was rough to start so that didn't help things but I can say I am happy with it now. There is a 1/8th inch aluminum tube in there, some styrene tube tapered and blended to that and some link mounts cut and layered from .015 sheet. I'll have to decide what to do about the rear cover, part of me wishes I knew where this came from so I could source it. It was all chrome to start so I kind of think its from one of those parts packs maybe? Either way I am moving forward.. A little over a month left! Quote Link to comment Share on other sites More sharing options...
exesivefire Posted February 13, 2017 Author Share Posted February 13, 2017 links made and mounted. Now I have to figure out coil overs... Quote Link to comment Share on other sites More sharing options...
Impalow Posted February 13, 2017 Share Posted February 13, 2017 That looks great! Those RB motion rods ends are amazing... thanks for showing me them, and spending more of my money.. haha Seriously tho... they make all of this look so much more realistic. Quote Link to comment Share on other sites More sharing options...
Spex84 Posted February 13, 2017 Share Posted February 13, 2017 Love those 3-link hangars! Layering is definitely a better strategy than filing notches into solid blocks like I've attempted in the past.The quick-change rearend center section could have come from any number of kits, but a few that come to mind are:-Double Dragster-Double T-Orange Crate-Paddy Wagon (but that one would probably be gold-plated and black plastic underneath)These kits all have differing lengths of torque tube attached to the rearend, so knowing the length could help determine what kit it came from. Quote Link to comment Share on other sites More sharing options...
exesivefire Posted February 16, 2017 Author Share Posted February 16, 2017 well the paint showed up.. now I have to finish! GM Verdoro green from Gravity Colors. Quote Link to comment Share on other sites More sharing options...
bobthehobbyguy Posted February 16, 2017 Share Posted February 16, 2017 That is a great color choice. Quote Link to comment Share on other sites More sharing options...
exesivefire Posted March 1, 2017 Author Share Posted March 1, 2017 Hey progress was made! Which is good since I have something like 17 days to get this done... assembled the 29 front and whipped up a leaf spring Then got to work on the interior.. lotta time in that silly floor there.. Quote Link to comment Share on other sites More sharing options...
microwheel Posted March 1, 2017 Share Posted March 1, 2017 Howdy Andy, I finally got around to ready through your entire thread on this build and all I can say is "WOW" outstanding work. Look forward to following along and seeing more progress. Quote Link to comment Share on other sites More sharing options...
bobthehobbyguy Posted March 7, 2017 Share Posted March 7, 2017 Any more progress? Quote Link to comment Share on other sites More sharing options...
exesivefire Posted March 7, 2017 Author Share Posted March 7, 2017 Started making progress on the interior. Have had this idea to make diamond pleating, I think it works.. Quote Link to comment Share on other sites More sharing options...
exesivefire Posted March 7, 2017 Author Share Posted March 7, 2017 Not too bad I don't think.. Quote Link to comment Share on other sites More sharing options...
bobthehobbyguy Posted March 8, 2017 Share Posted March 8, 2017 The diamond pattern looks good. Quote Link to comment Share on other sites More sharing options...
bobthehobbyguy Posted April 3, 2017 Share Posted April 3, 2017 Another cool project. Looking forward to seeing this painted. Quote Link to comment Share on other sites More sharing options...
DrKerry Posted April 3, 2017 Share Posted April 3, 2017 Looking awesome!!!!!!! Quote Link to comment Share on other sites More sharing options...
James2 Posted April 3, 2017 Share Posted April 3, 2017 Please finish! Quote Link to comment Share on other sites More sharing options...
Kit Karson Posted April 12, 2017 Share Posted April 12, 2017 Andy, you have a keen eye for detail and execution... -KK Quote Link to comment Share on other sites More sharing options...
Codi Posted April 12, 2017 Share Posted April 12, 2017 That pleated effect you achieved turned out really really nice. cheers Quote Link to comment Share on other sites More sharing options...
Randy D Posted April 13, 2017 Share Posted April 13, 2017 Hi Andy, That paint going to look great !!!! Randy Quote Link to comment Share on other sites More sharing options...
bobthehobbyguy Posted June 4, 2017 Share Posted June 4, 2017 Any more updates. Really want to see this painted. Very cool project. Quote Link to comment Share on other sites More sharing options...
horsepower Posted June 5, 2017 Share Posted June 5, 2017 Great looking build. I'm a fan of the roadster pickup, and this phantom is really looking good. On another note, I believe your quick change center is from the AMT/Round2 dirt modified kits, like the '40 Ford, '37 Plymouth, Gremlin, etc. They're based on a '70s Tobias modified. That center section was chrome with plain unplated axle housings, the axle housings were Frankland/Winters style. Quote Link to comment Share on other sites More sharing options...
Kit Karson Posted June 24, 2017 Share Posted June 24, 2017 Impressive! Great attention to detail, Bro! -KK Quote Link to comment Share on other sites More sharing options...
Recommended Posts
Join the conversation
You can post now and register later. If you have an account, sign in now to post with your account.
Note: Your post will require moderator approval before it will be visible.