ShakyCraftsman
-
Posts
797 -
Joined
-
Last visited
Content Type
Profiles
Forums
Events
Gallery
Everything posted by ShakyCraftsman
-
 Yeah I know, but it's the only way I could get them to fit with the way the steering on this Revell kit works. Ron G
 -
Farm Floater Truck 1/24th scale
ShakyCraftsman replied to Randy D's topic in WIP: Model Trucks: Big Rigs and Heavy Equipment
Okay Randy, I have you figured out. You have invented a shrink ray machine and these are actually real parts shrunk down to look like model parts. So, how much for this technology. Come on talk!!!! Really, HOLLY you know what! This is freakin amazing. Super quality work. I'm still recovering from the shock.😱 Ron G -
AMT monster truck tires?
ShakyCraftsman replied to ShakyCraftsman's topic in Model Building Questions and Answers
Thanks Russell -
Hey all Anyone know what the diameter for the AMT 1/25 scale monster truck tires is? Also how wide are they? Ron G
-
FDNY Wrecker
ShakyCraftsman replied to Scott Eriksen's topic in WIP: Model Trucks: Big Rigs and Heavy Equipment
WOW! Scott this is really looking righteous! Great job. Ron G -
Service Truck Kitbash
ShakyCraftsman replied to PHPaul's topic in WIP: Model Trucks: Big Rigs and Heavy Equipment
This is a cool build. I need to make one of these for my construction company fleet. It is looking amazing and keep up the good work. Ron G -
FDNY Wrecker
ShakyCraftsman replied to Scott Eriksen's topic in WIP: Model Trucks: Big Rigs and Heavy Equipment
Looking good Scott Ron G -
FDNY Wrecker
ShakyCraftsman replied to Scott Eriksen's topic in WIP: Model Trucks: Big Rigs and Heavy Equipment
She's looking real good Scott. Ron G -
It all depends on what the part is printed in. Filament is strong, but has a rough surface that is difficult to sand, but doable. Resin has very fine detail, usually, but is very delicate, easy to break. Just my two cents. Ron G
-
Wow! Looking great Lee. Ron G
-
FDNY Wrecker
ShakyCraftsman replied to Scott Eriksen's topic in WIP: Model Trucks: Big Rigs and Heavy Equipment
HOLY C☆♤P! That's what I call detailing!!!! 😱 Ron G -
She's starting to look like a great little Mack! Ron G
-
Keep.up the great work Lee. This is going to be a show stopper. Ron G
-
It's really coming together Lee. The grey look great, now you just need to add some oil spills...lol 😁 Ron G
-
Looking good Lee Ron G
-
Hello Everybody Okay, before everyone starts yelling and complaining that I have several builds going right now. And that I should stick to one or the other. I'm not actually starting on this build yet. It's more of a whats coming down the line kinda thing. Just to let you guys all know what goes on in the depths of my mind (and that can be dangerous 😁) Okay, this will be another construction equipment build. It will go along with my Payhauler 350, XL SPECIALIZED XL120 RGN Lowboy trailer, jeep & stinger, the "BS" Peterbilt 359 HH, my 1/25 (diecast) first gear 560 Payloader, AMT Cat D8H dozer, plus a few other rigs that will fall into that category. Well what is it you say? A 1/24 AMT Ford LTL 9000 tractor kit turned into a Dumptruck with a Ertl IH 5000 Paystar dump box, resin Cat 3406, 18spd Eaton Fuller transmission, front Bridgestone M844 425 floats, roadX DD990 24.5 drive tires, 5- hole Budds with lots of detail work. A 1/25 Revell heavy duty trailer that I'm going to convert into a pintle hitch deckover equipment trailer. I will be converting into a dual axle instead of a tri-axle so I'm getting a different suspension system for it. And last but not least a AMT John Deere 310 Backhoe. I am going to make all the cylinders work on it plus detail and weather it up. Here are some pictures for yous all to look at. This is the kit I'm using. This is the dump box I'm going to use. It's temperaly sitting on a Italeri Peterbilt 378. Either this rear suspension. Or this one, I haven't made up my mind yet. Hopefully it will look something like this, but with out the lift axle. This is the AMT John Deere Backhoe kit I'll be using. This is the Revell trailer kit. This is what I'm shooting for. It won't be exactly like it, but I'll get as close as I can. These are the two sides of the trailer. Top one I modified into a dual axle set-up. Bottom one is the kit part before modifications. This view shows the rear drop portion, deck and neck of the trailer. This is the scratch built neck that I made. This view shows the neck tool box lid and the piano hinge at the rear of it. This view shows that the lid actually opens up via a hidden masking tape hinge. This is the under side of the trailer deck. This shows how the neck will attach to the deck. There is a absolute TON of work to be done on these builds, but I hVe to finish the Payhauler and the "BS" Peterbilt first. Well thanks for looking in and I hope you liked it. I hope this is something everyone here wants to see. It is what I love to do. Bye for now Ron G

- 6 replies
-
- 2
-

-
- 1/24 truck
- trailer
- (and 1 more)
-
Boy oh boy can I relate to it. I have an eye condition that makes everything blurry and a severe back issue. I can only do about 4 - 5 hours at the bench before the pain is to much. It really sucks getting old.😒😏😉 Ron G
-
It's going to look sweet when you get done. 😁 Ron G
-
She's looking good.😁 Ron G
-
Not to get off topic. But I sure wish someone would make a accurate 1/24 Mack Superliner complete frame. If not a complete one how about just the frame rails. Then you could build a nice truck from the Italeri/AMT kits. Okay, back to your post. Ron G
-
Okay, you hooked another fish. I like Mack's ( my favourite is the Superliner E9). Great start, I'll be following.🍿🥤🍫 Ron G
-
Western Star Classic heavy haul
ShakyCraftsman replied to Biggu's topic in WIP: Model Trucks: Big Rigs and Heavy Equipment
Hey Jeff Look into Tamiya mica red metallic (in there lacquer line). I know they have it in there lacquer spray cans and I think you can get it in a bottle. Ron G -
Western Star Classic heavy haul
ShakyCraftsman replied to Biggu's topic in WIP: Model Trucks: Big Rigs and Heavy Equipment
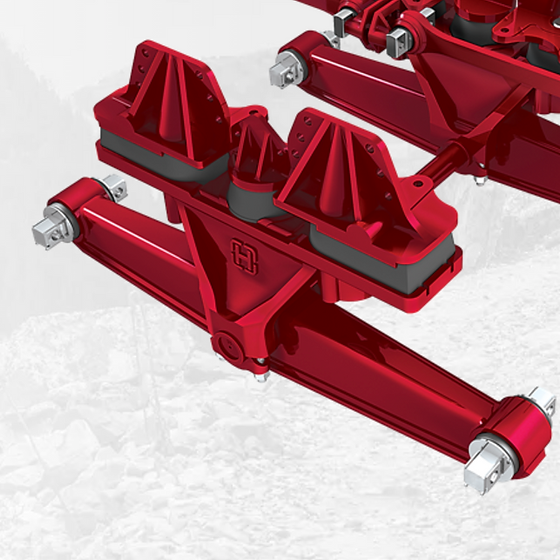
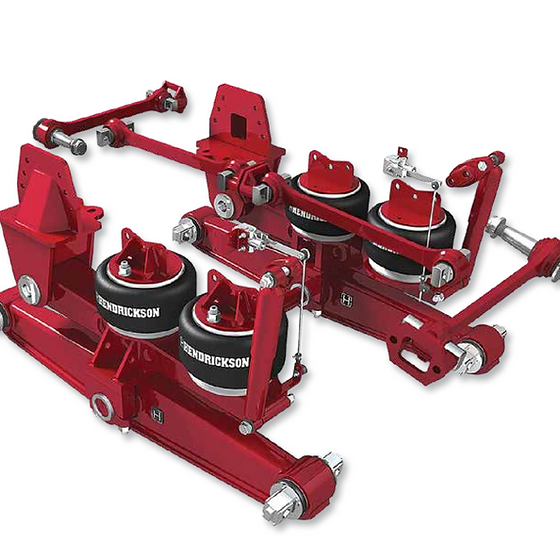
Hey Jeff Do you mean this one Hendrickson R/RS (1 Pair) Ron G
-
Great nut and bolt detail. Ron G
-
Western Star Classic heavy haul
ShakyCraftsman replied to Biggu's topic in WIP: Model Trucks: Big Rigs and Heavy Equipment
WOW! Nice job buddy. Engine looks great. I told you it would fit.😁 Ron G

.webp.dad4e096412de0f44c0de872fdc08aa5.webp)


(3).jpg.872bb368418ce17ae8c0c86be487e719.jpg)
.jpg.c44503da29f8fb3afc752bb4a5037b42.jpg)