Search the Community
Showing results for tags 'Revell'.
-
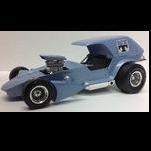
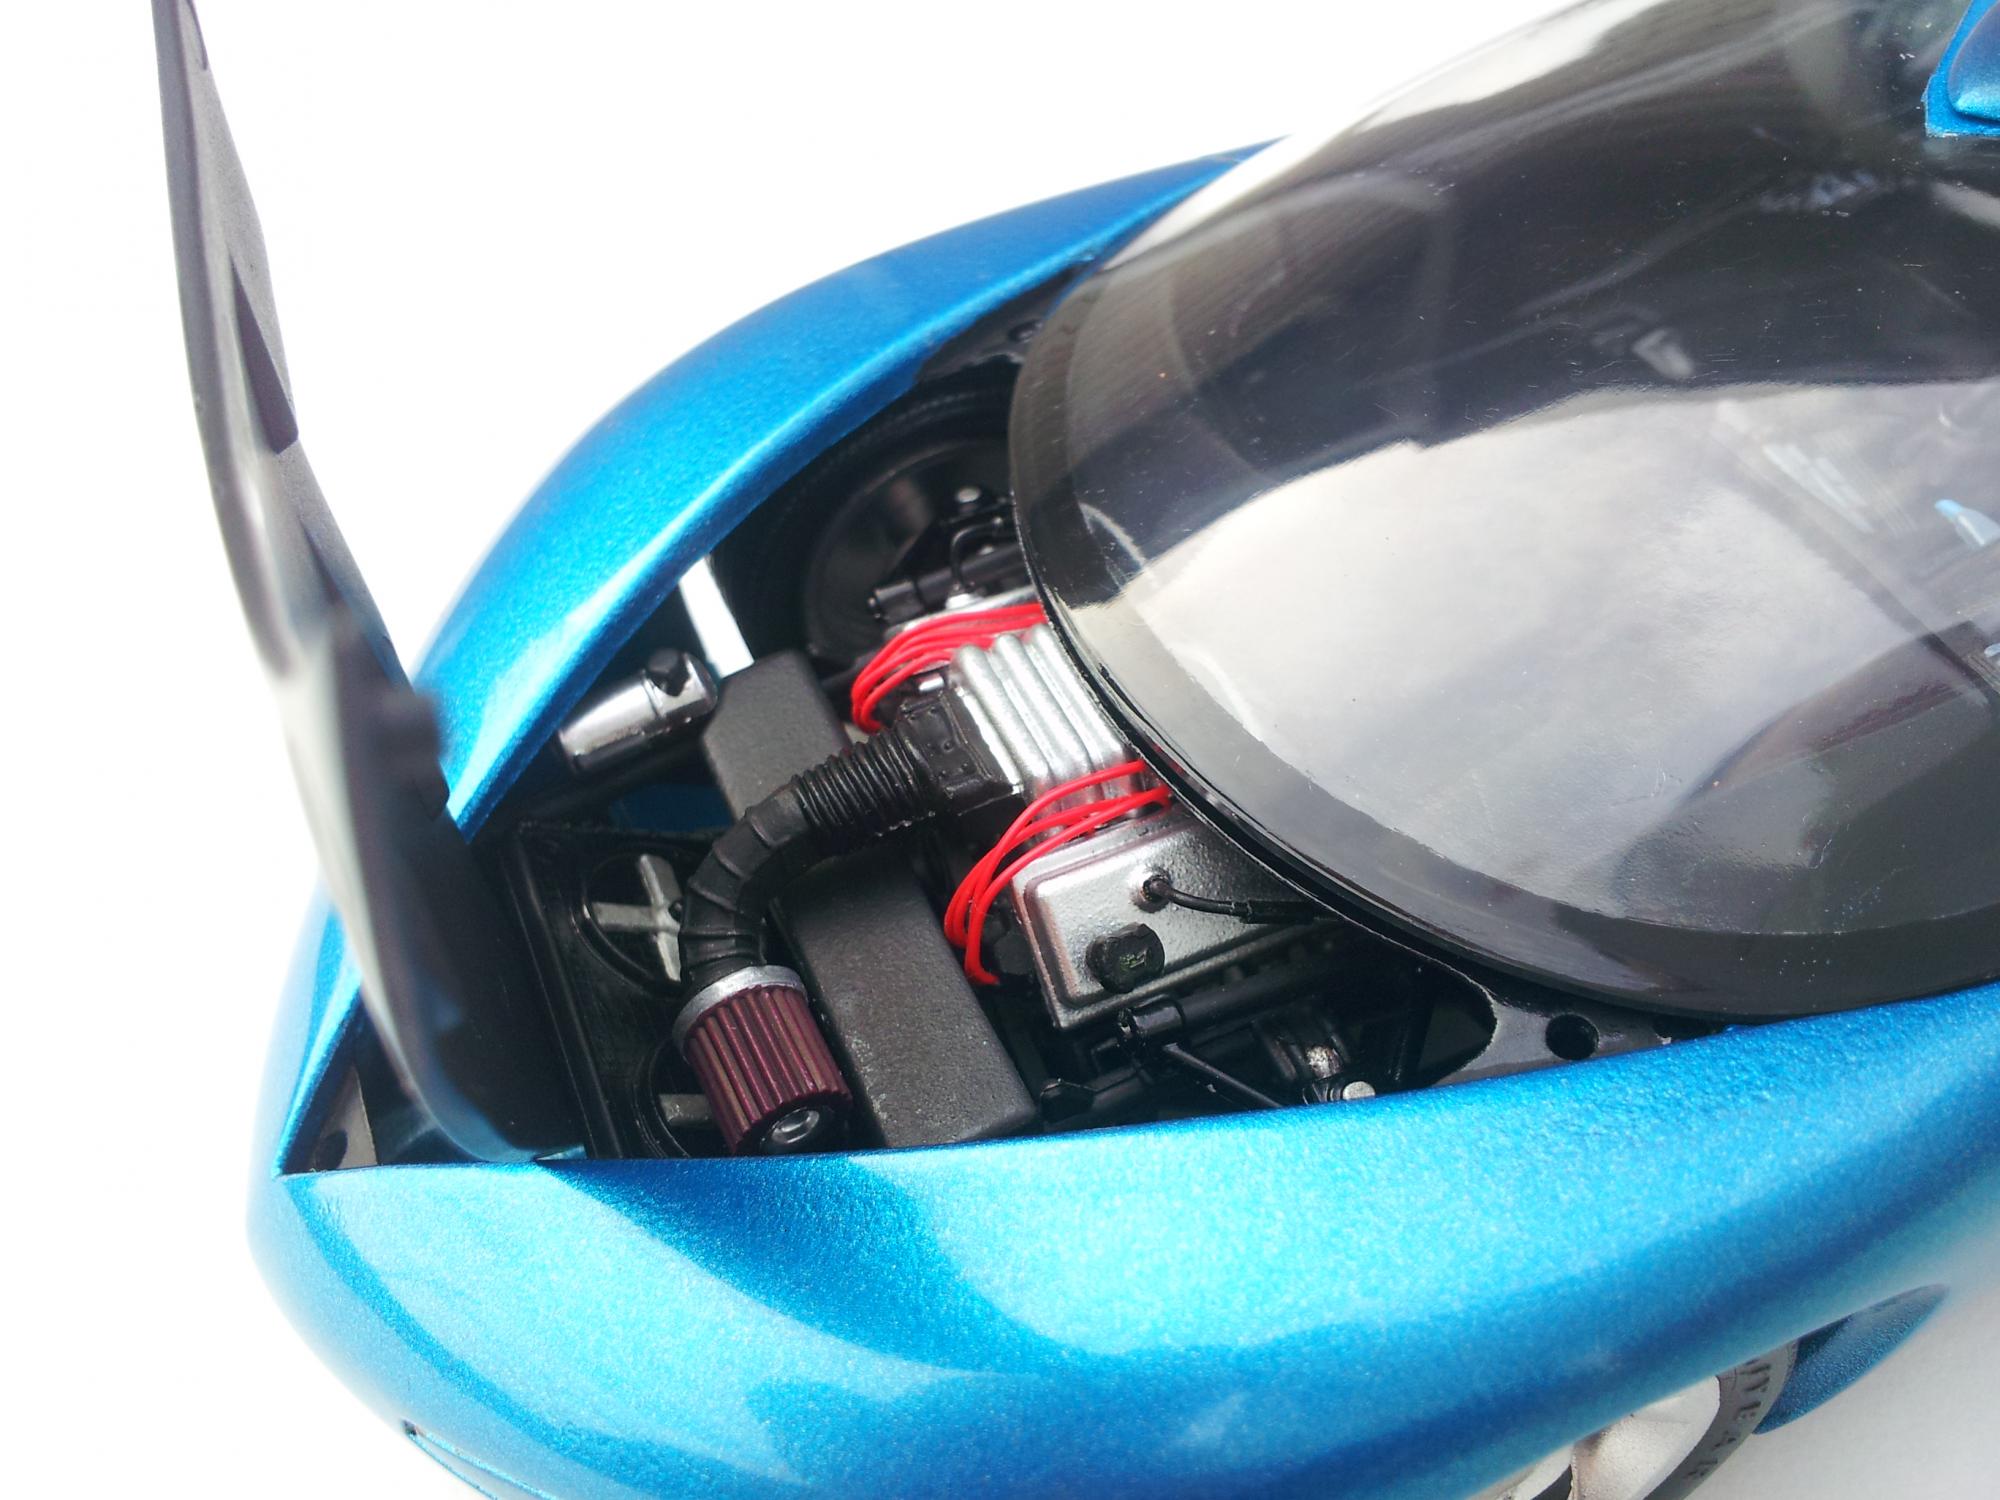
It may be a simplified kit, but a little bit of work yields a nice result... A grand total of five parts in that interior! Colour is Zero Paints. I started out with "Protonic Blue", (a BMW i8 colour), but decided it was too pale, so I overcoated it lightly with Blu Dino. It looks nicely zingy to me now. There's a reasonable amount of detail to paint, even through construction is very simplified. I put carved a centreline channel in the engine covers, and striped the chrome from the headlights before repainting with the complexity of the real thing. And I had to add a bottom to the steering wheel -- I don't know where mine went, short shot, broken or just not there...? The 2005 GT (actually a 720 Mirage...) is a Polar Lights snap kit, titivated, and the 'vette is the recent Revell Germany release of another snap kit. Just goes to show that there's nothing inherently wrong with them, and that a bit of detailing work with pain can really lift them. bestest, M.
-
Here's an old unfinished built that is finally nearing completion. In 2009, I started a Revell '32 Tudor by chopping the top (my 2nd chop ever, and first sedan chop) and dropping it on a scratchbuilt frame with a Revell '41 Chevy PU stovebolt 6 engine. It was only my second build after re-entering the model car hobby in '09. The initial plan was to run straight pipes and have rear airbags and a very low stance, like the rat rods of the day but with nicer paint. I tossed around a number of ideas for paint color, from brown and black to metallic aqua and red. Eventually I settled on a Duplicolor metallic red. In 2009 I didn't know where to get tall rear bias-ply tires, so I spent ages looking for discount toys and was ecstatic to find the 1:24 diecast T-bird tires for the rear. 6 years later, I know how many options are available online, and also which kits have the best traditional-style tires. The build languished half-built for years, and last year I pulled it out to fix some problems with the paint, and chop the grille shell. Then it sat again. Finally this year I pulled it out and am assembling it. Because I didn't plan as well in 2009 as I do now, assembly has been frustrating and there were several minor disasters with glue and fitment. In the end, I've mounted the body higher than originally intended, and changed the exhaust to a set of sweeping dual pipes made from solder. The original setup: Building the frame: Modifying the interior, scratchbuilt windshield frame: How it sat for years: Getting another coat of paint: Updated exhaust made from solder: How it stands today, just needs some radiator hoses and other small details:
-
I have this kit now and have done a video review of the parts. Enjoy.
-
Hello Everyone, my first post... this is my last build of 2015 the Revell Ferrari Aperta S.A. in baby blue made with enamels and aqua colors of revell, hope you enjoy! thanks for watching!!
-
Just finished this new quick builder. I did spend some time doing a few extra detail items. First cutout all the grill areas and replaced with PE diamond mesh. Had to do some trimming of the clear headlight lenses to fit flush, if you don't, they will sit low and not flush. Also painted the headlight details to match close to the actual, however the molded detail is good, it's not exact. Pegasus wheels with knock-offs. I modified the rears for a slightly deeper off-set for the wider tires the kit comes with. The supplied painted rear taillights just didn't look real to me so I made my own from clear tubing and used a red sharpie. The paint is Duplicolor light blue with black base for the Testors blazing orange Gulf inspired stripes. 8 coats of polished Duplicolor clear.
-
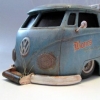
This is a mockup while I smooth out the seams on my 1/16 Karmann Ghia project. There were flat spots in the body casting in the nose, right above the point where the lower apron glues in place, so I'm taking extra time in an effort to build up the proper contour. If it doesn't start coming together soon, it's going to get primer, rust, peeling paint and I'll pass the front end off as old body damage. Engine will be finished off with scratch-built manifolds and linkage for 3D printed Weber IDA's I purchased from Shapeways. I'm also contemplating a more traditional hot rod/low rider wheel and tire combo for the planned super-low ride height. We'll see how it goes, eh?
-
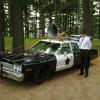
Started this project a few weeks ago. Plans are to do a series of three(3) builds all based off the same vehicle: 1st a (semi) factory original, 2nd a rundown/abused version, and 3rd a resurrection. I'm calling this an OOB build as there's no major changes being done. Any and all comments, pointers, suggestions, sarcasms, etc. are openly encouraged. Starting point from the box: Sanded down the body mold lines and flash and shot the body/grill/hood with primer. Scribed the panel lines: Very early in the build my visions started getting cloudy. I want to keep things original, yet present some "extra step" aspects to the finished piece. Saying this, I just had to open those gills up: Also the OCD in me couldn't stomach the front fender lines that are not supposed to be there. Laid out where the correct panels should be and started cutting (does this change the OOB status?):

-
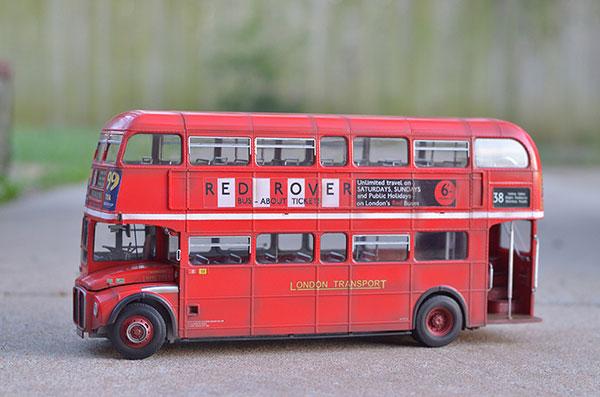
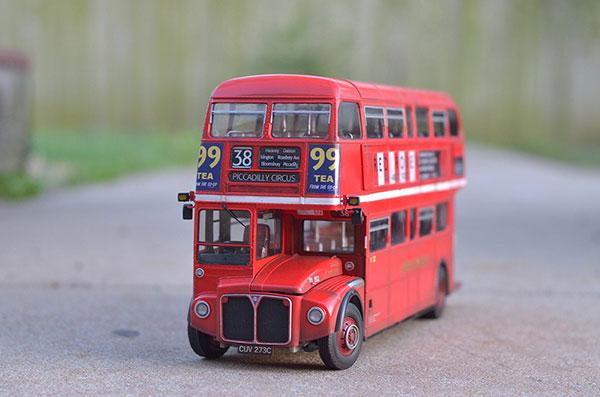
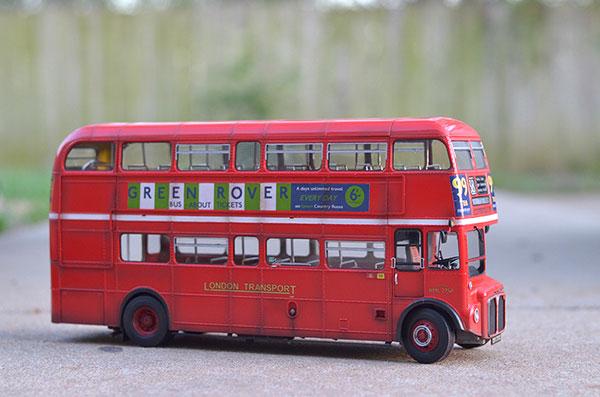
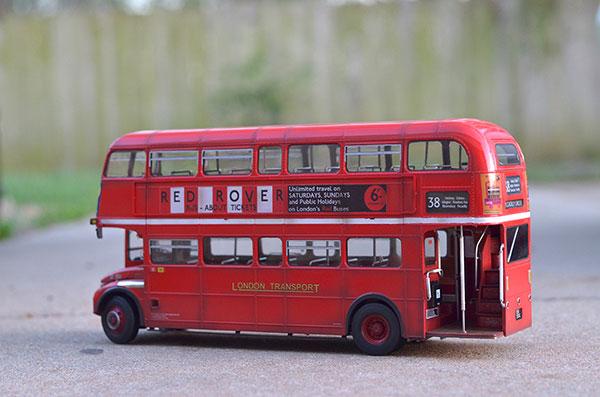
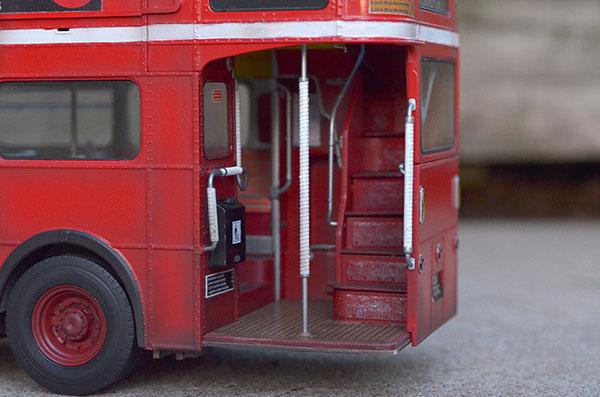
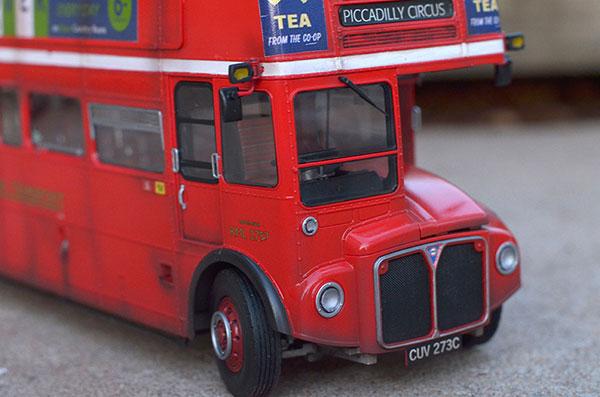
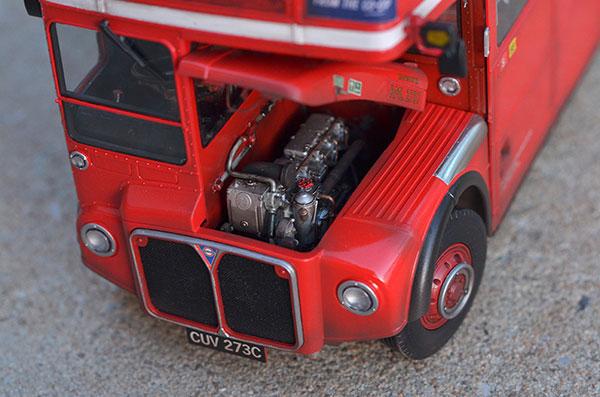
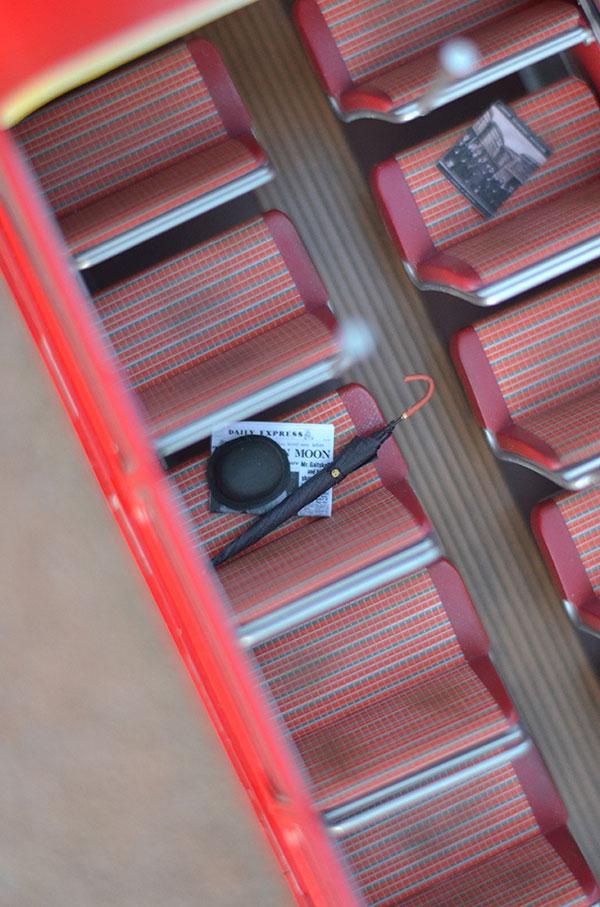
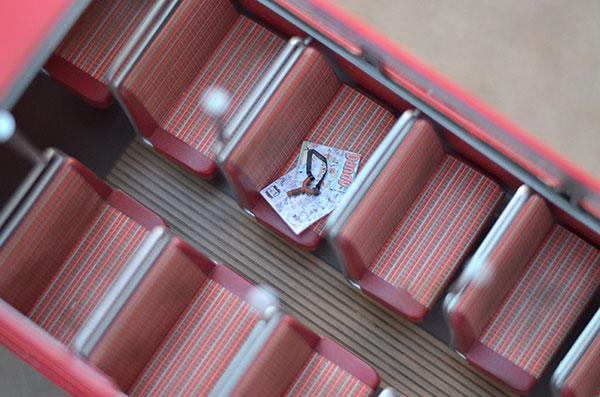
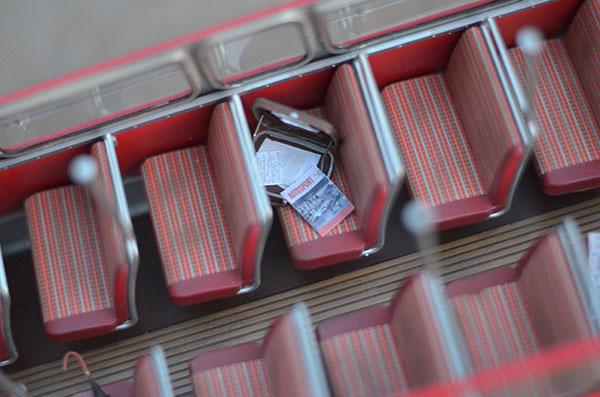
 Hello all, I have completed my build up of the Revell of Germany London Bus. This is definitely a time consuming kit and not for the faint of heart. All-in-all it was a fun build bit it took me 6 1/2 months to complete and I am glad it is over. The whole thing is painted with acrylic paint. The body is cleared with Krylon Gloss clear. I detailed the engine with some parts from Pro-tech. I also made my own umbrellas, breifcase, sling shot, and magazines for the interior. I hope you enjoy. Thanks, Paul
-
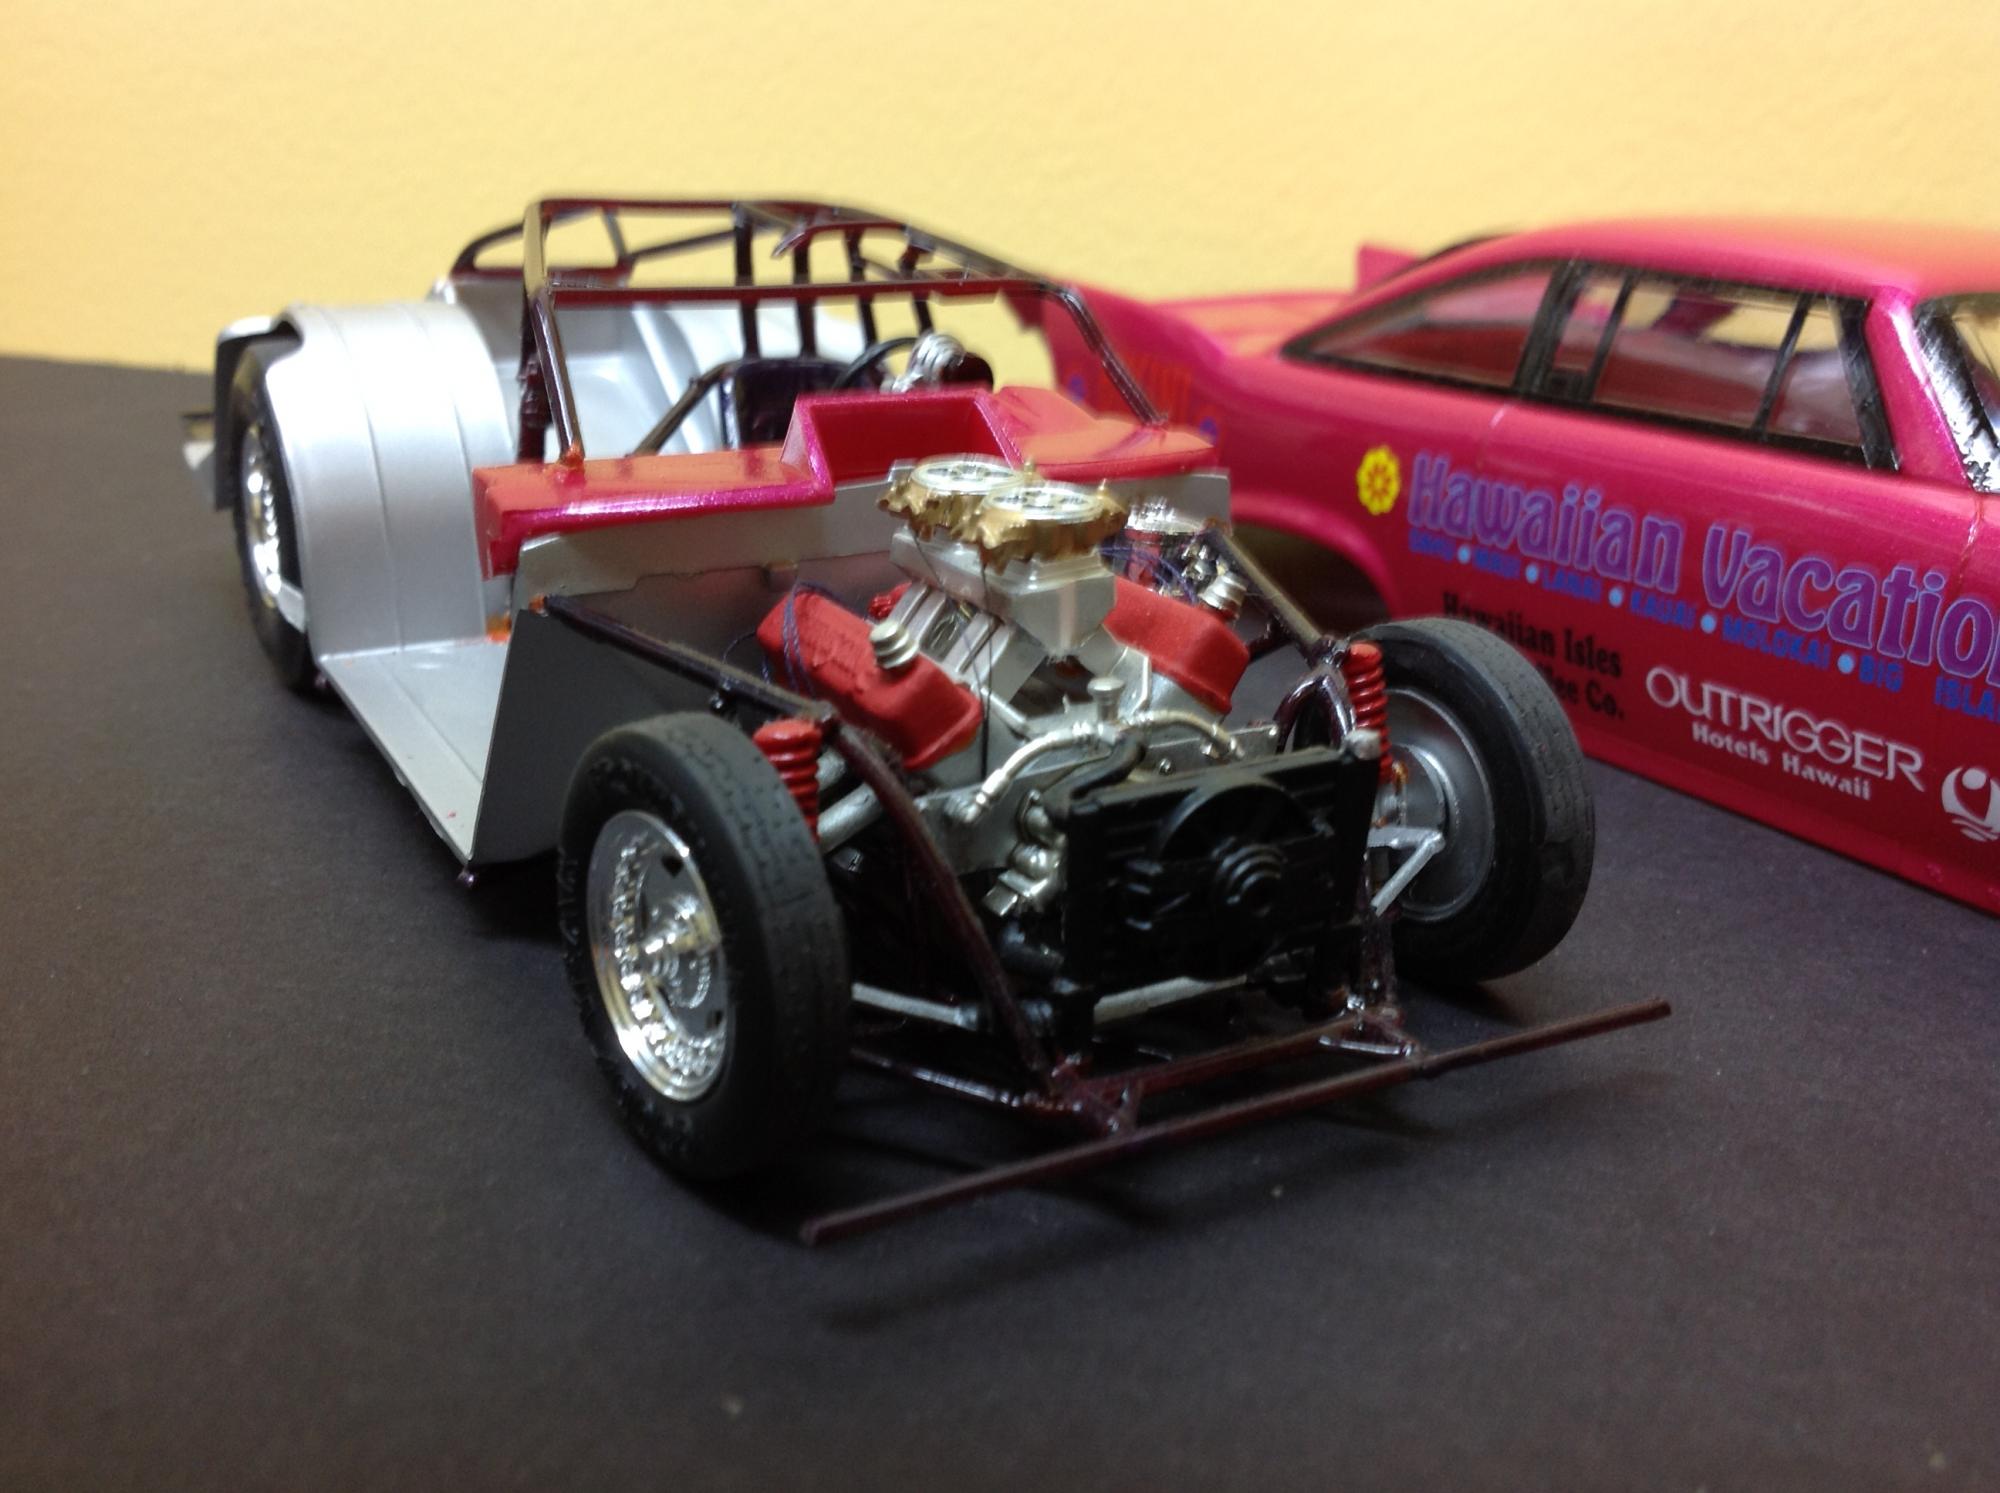
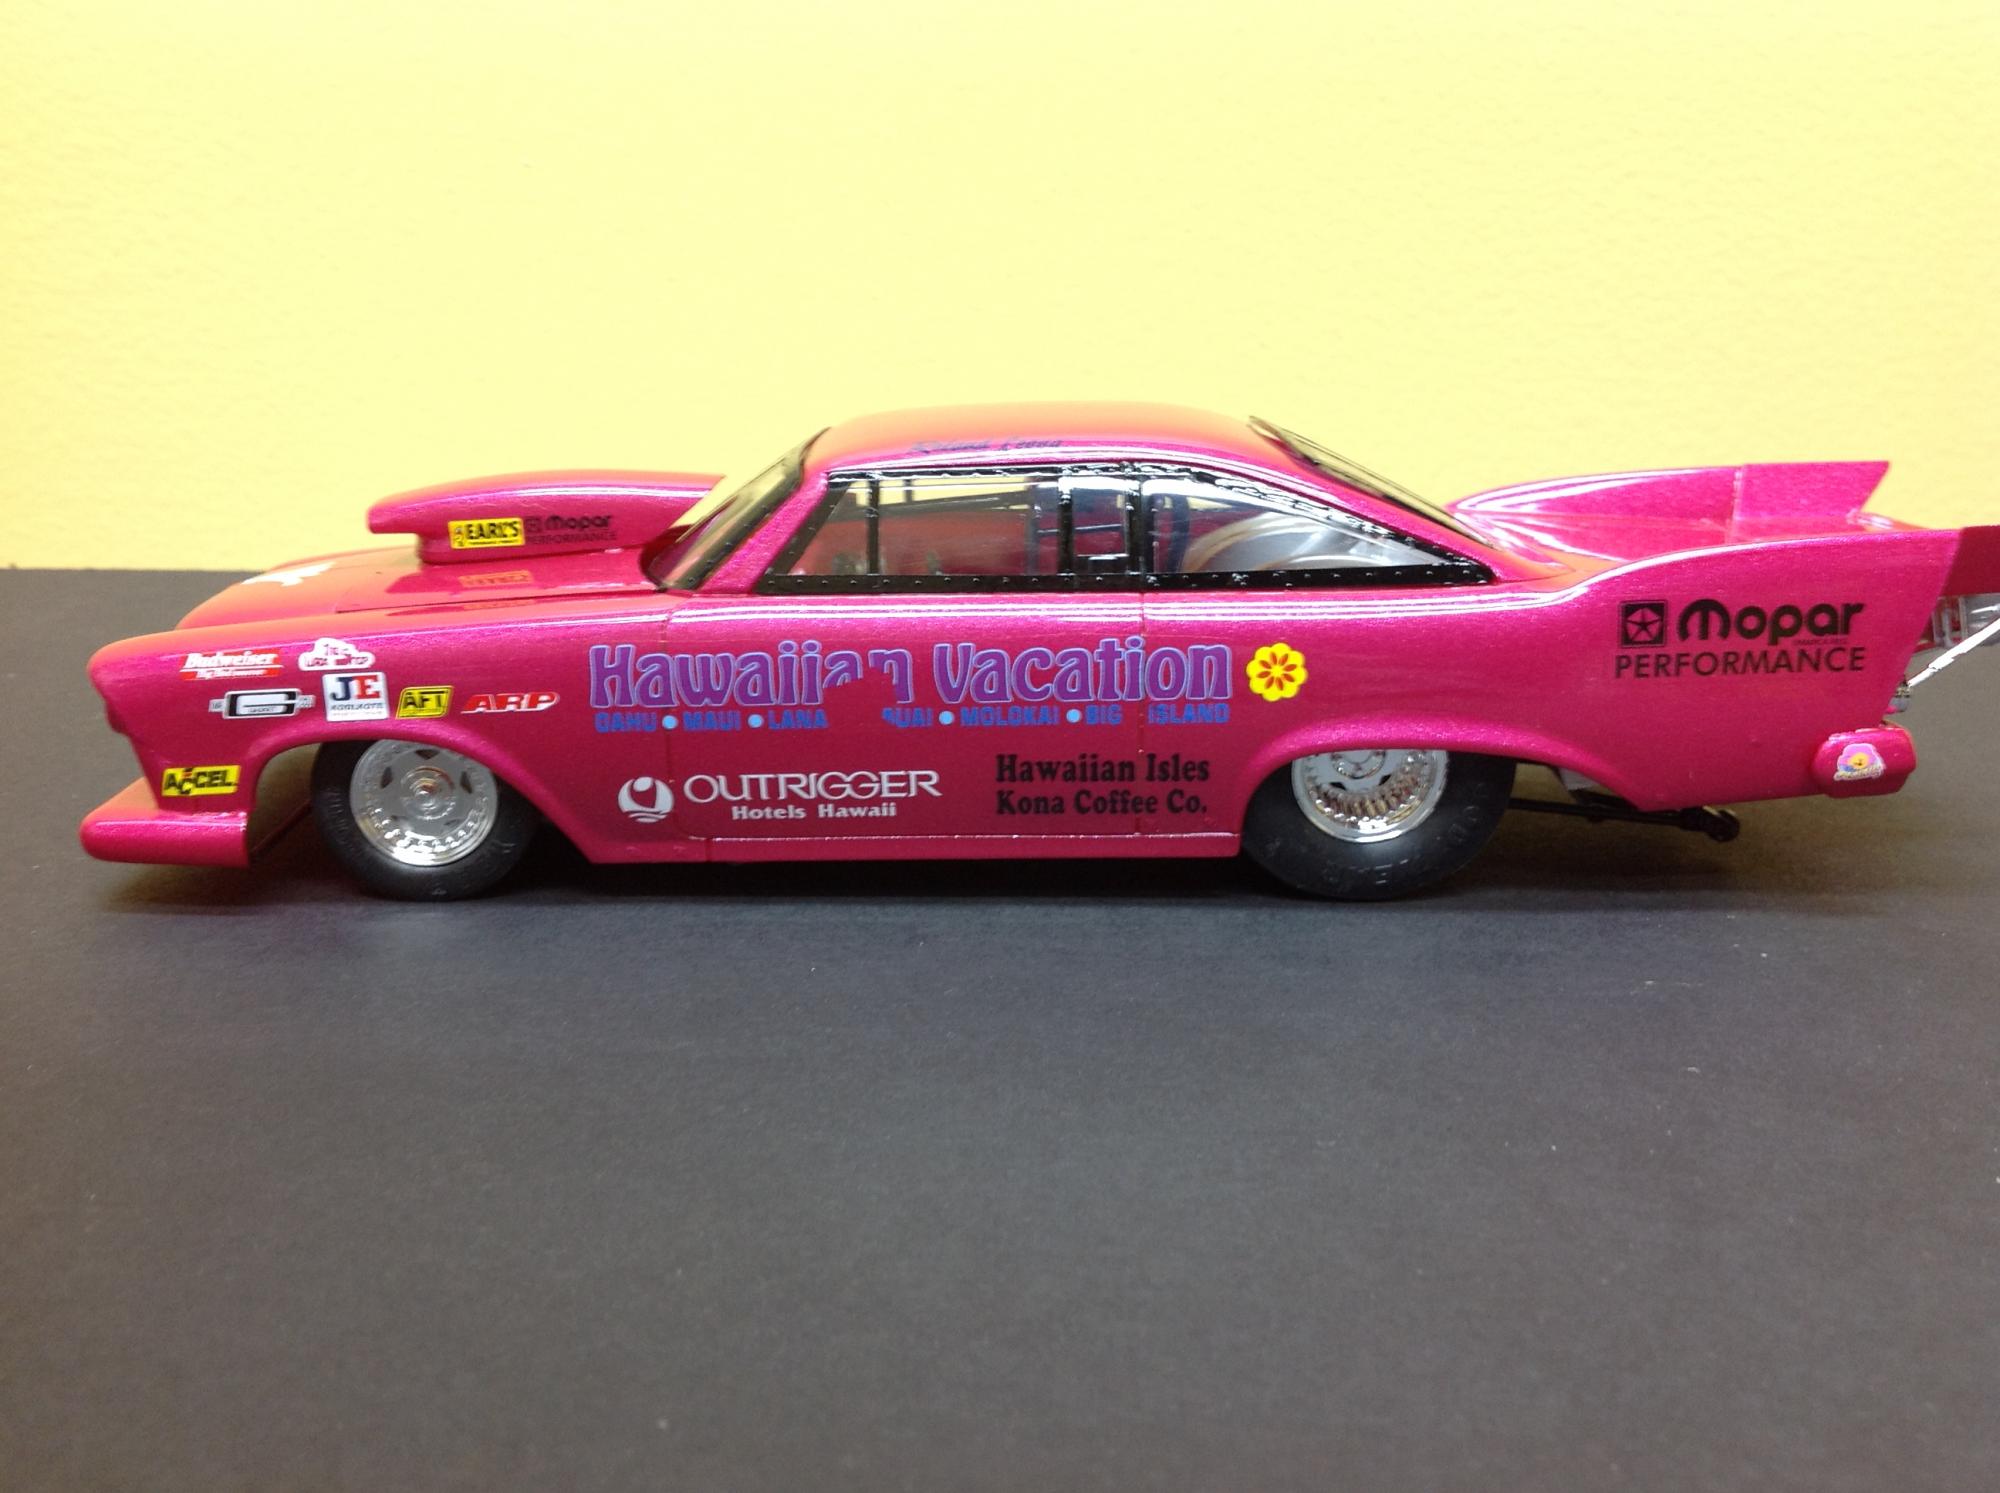
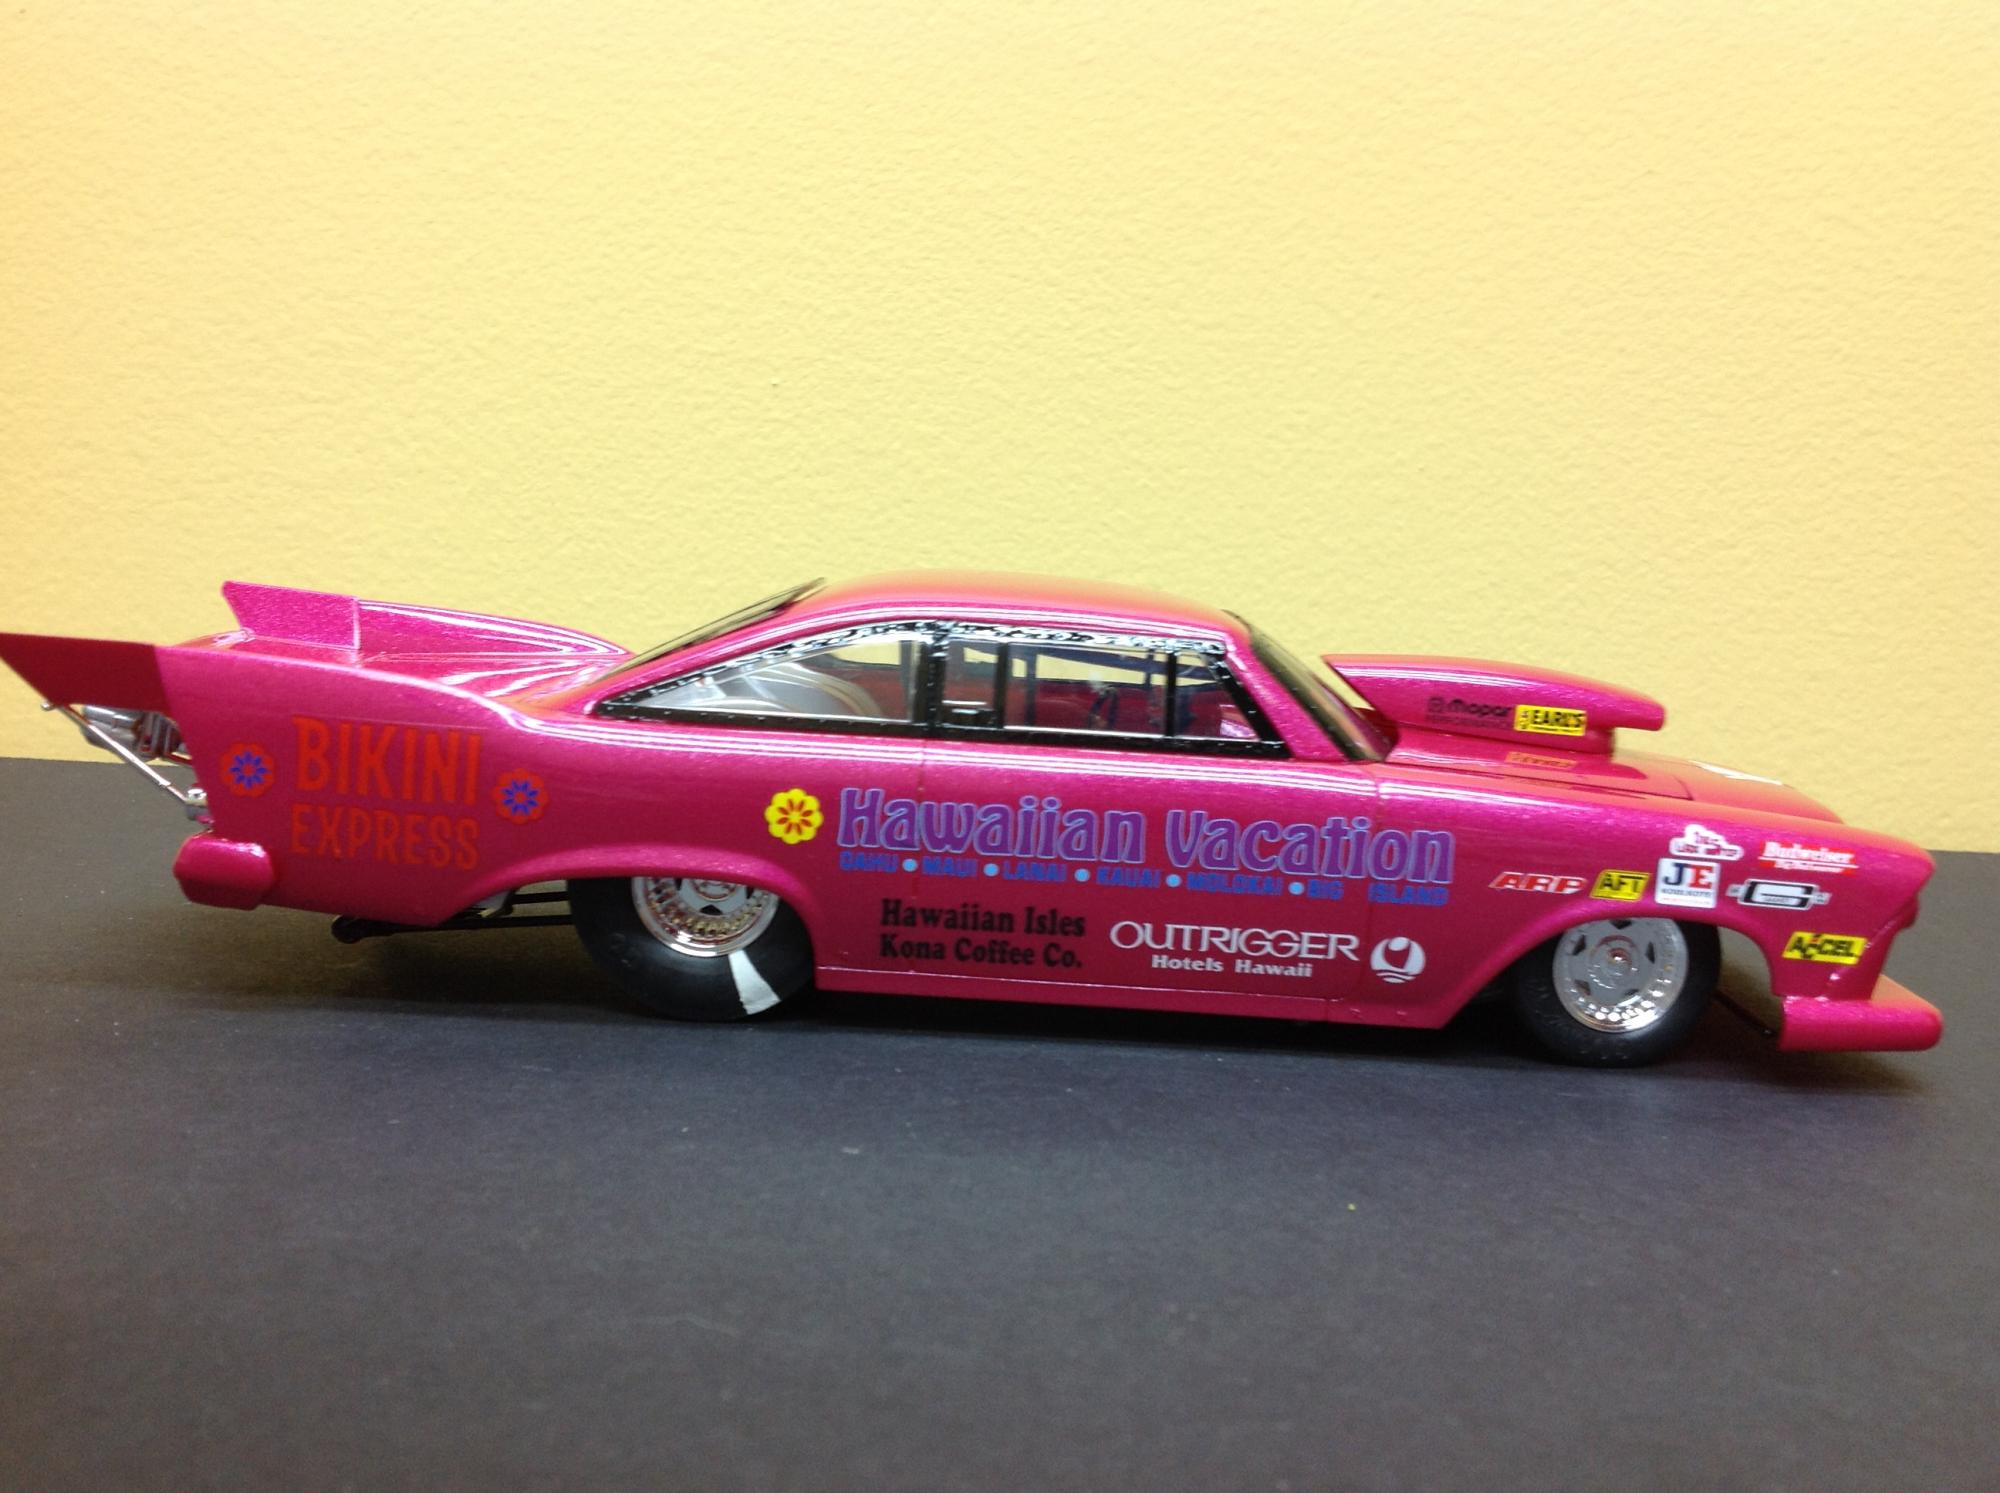
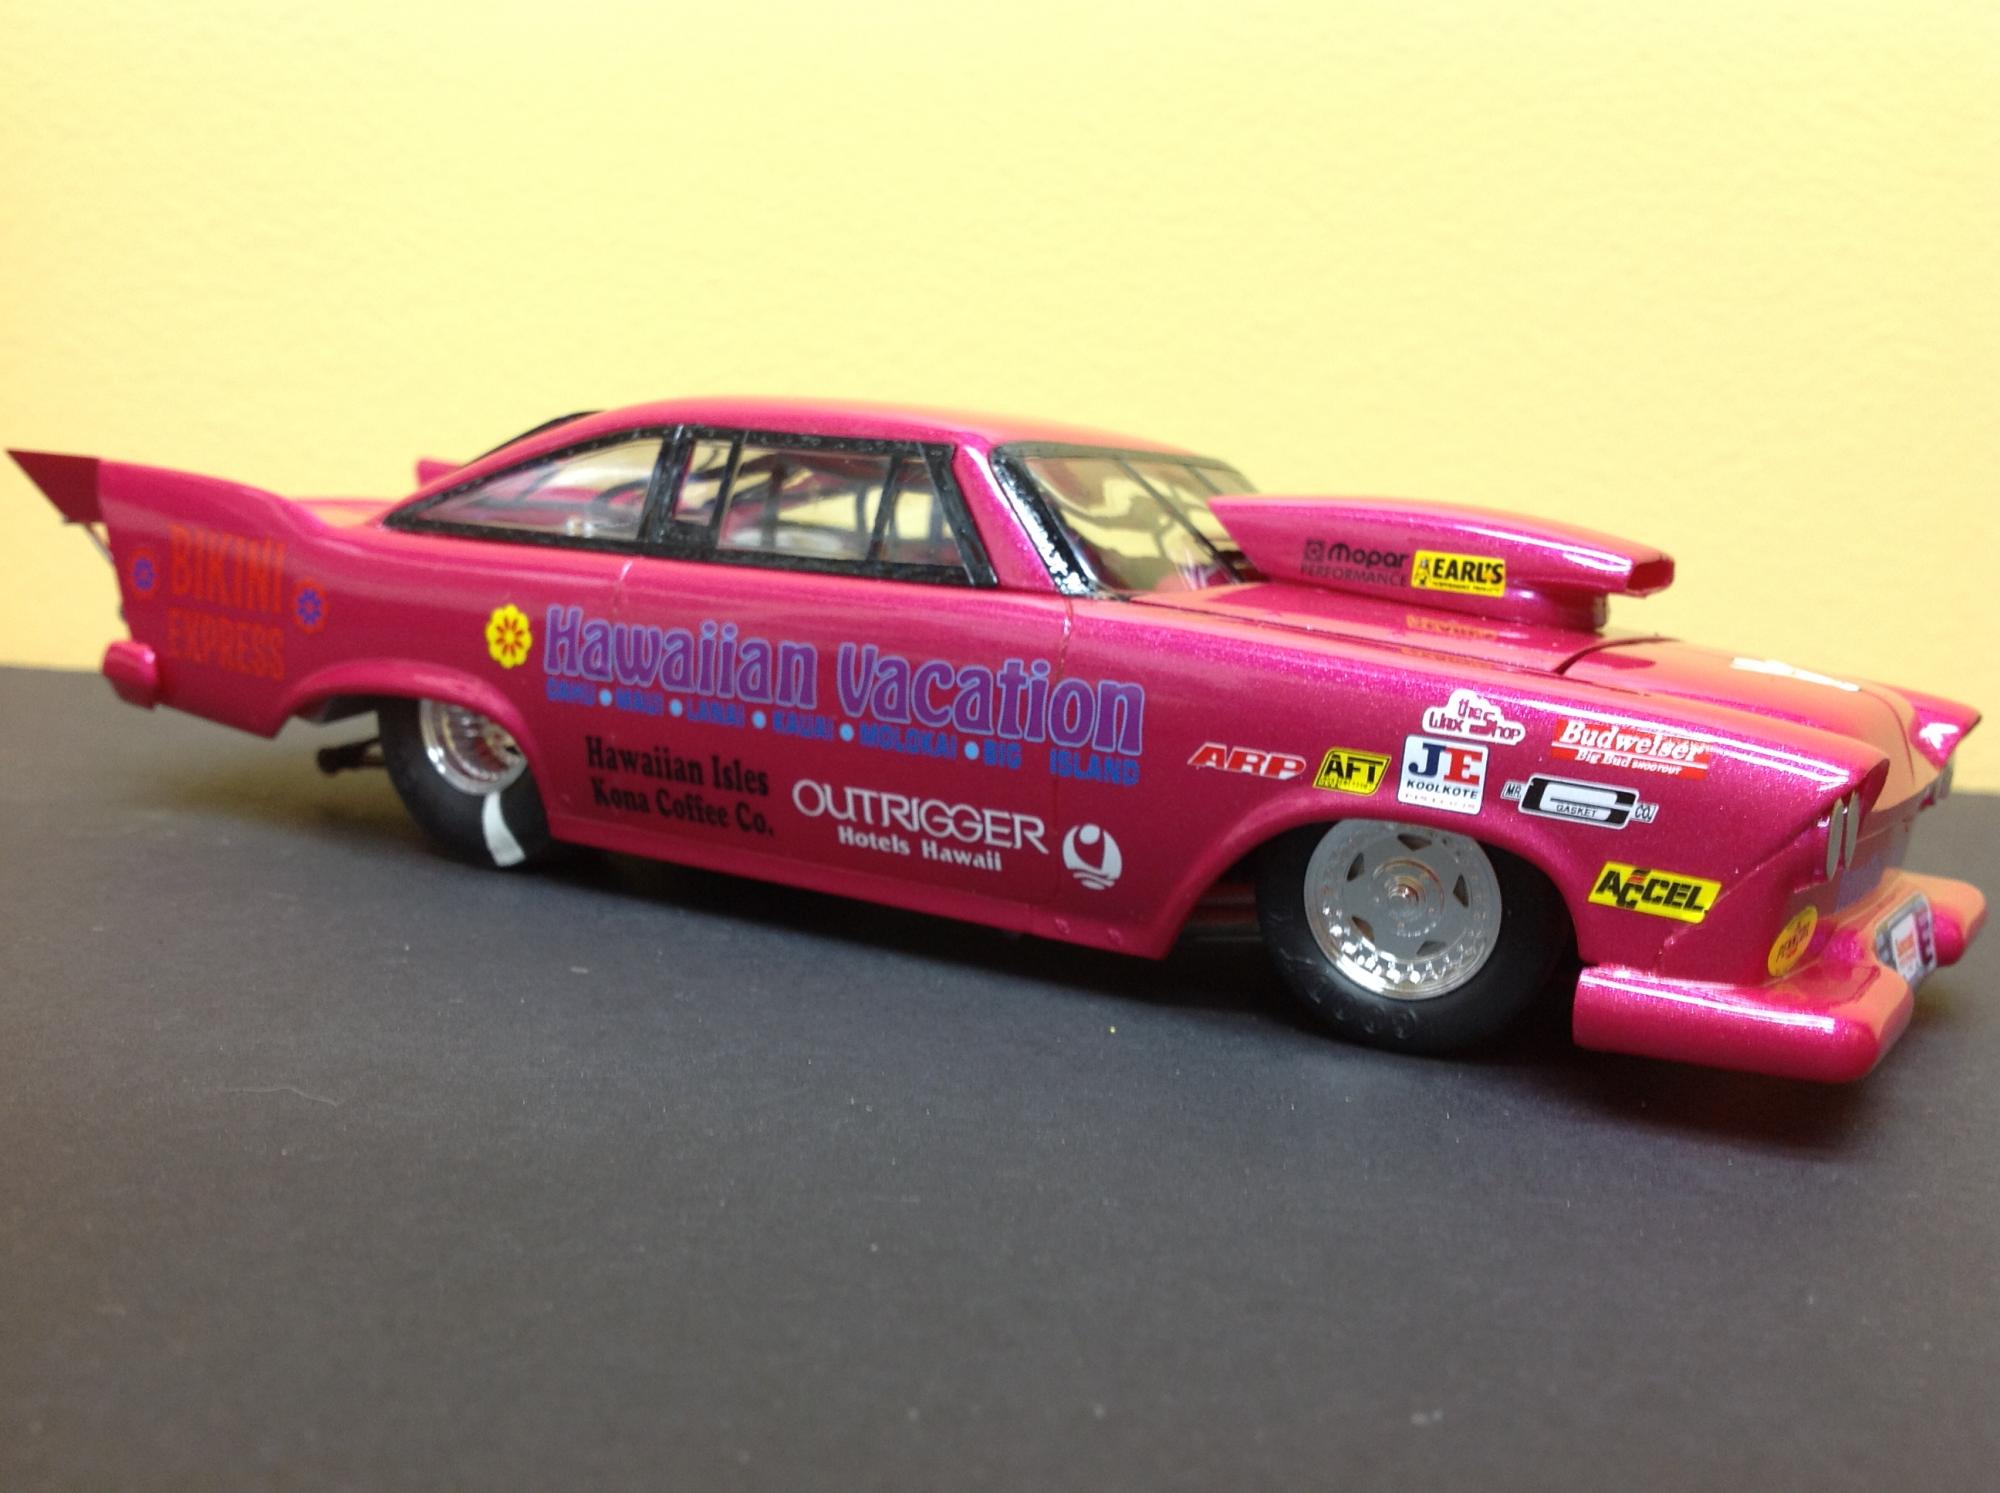
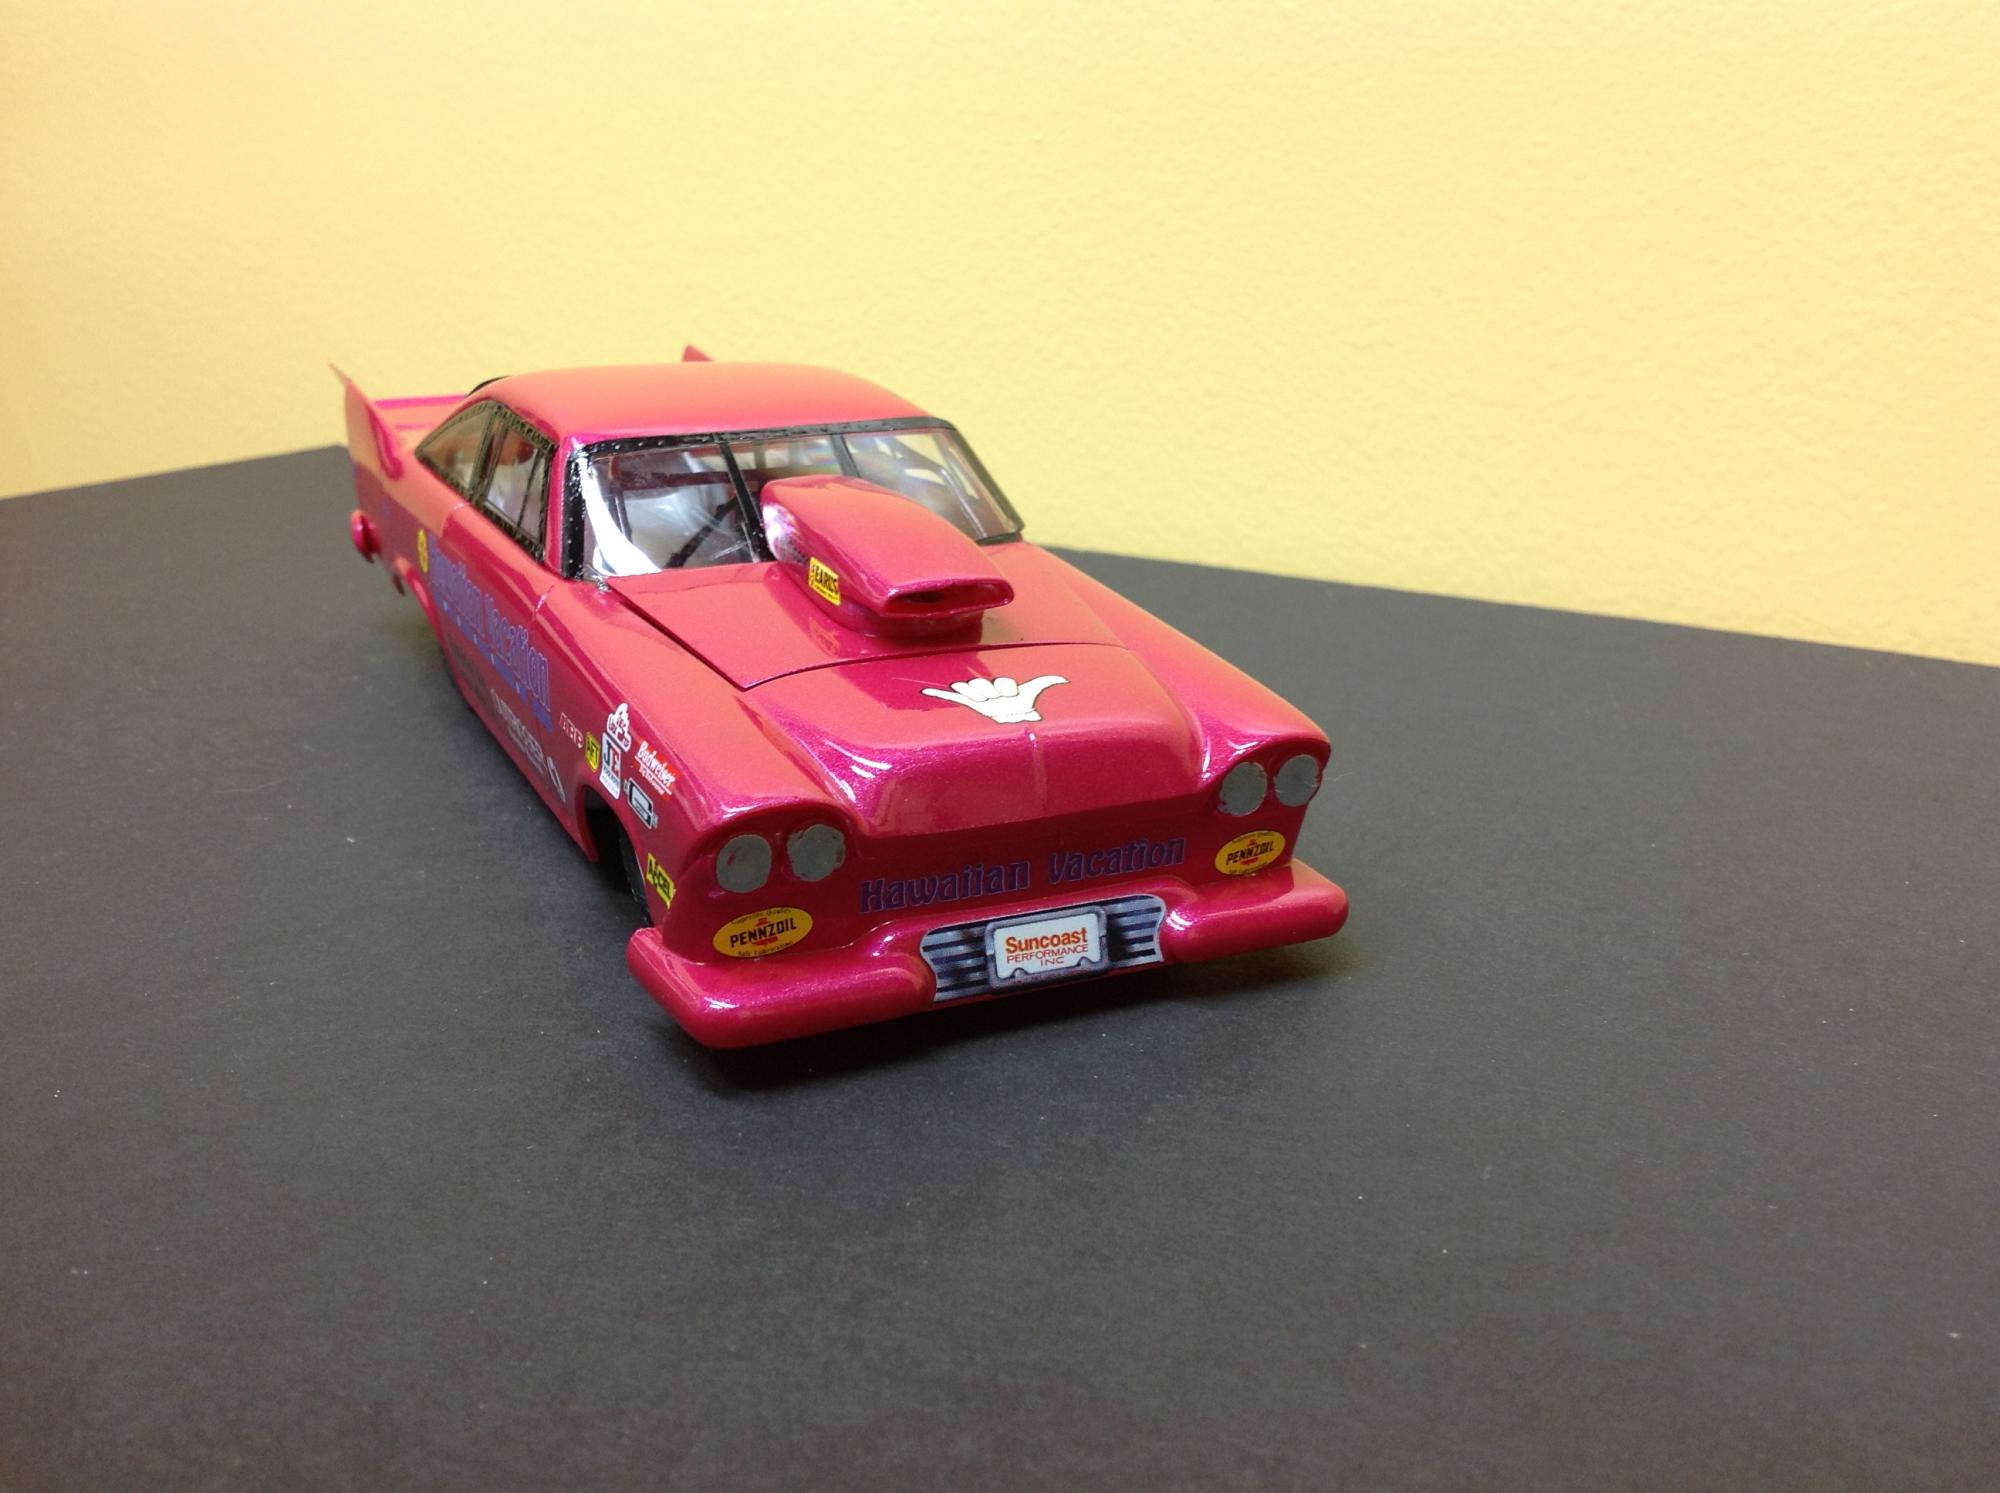
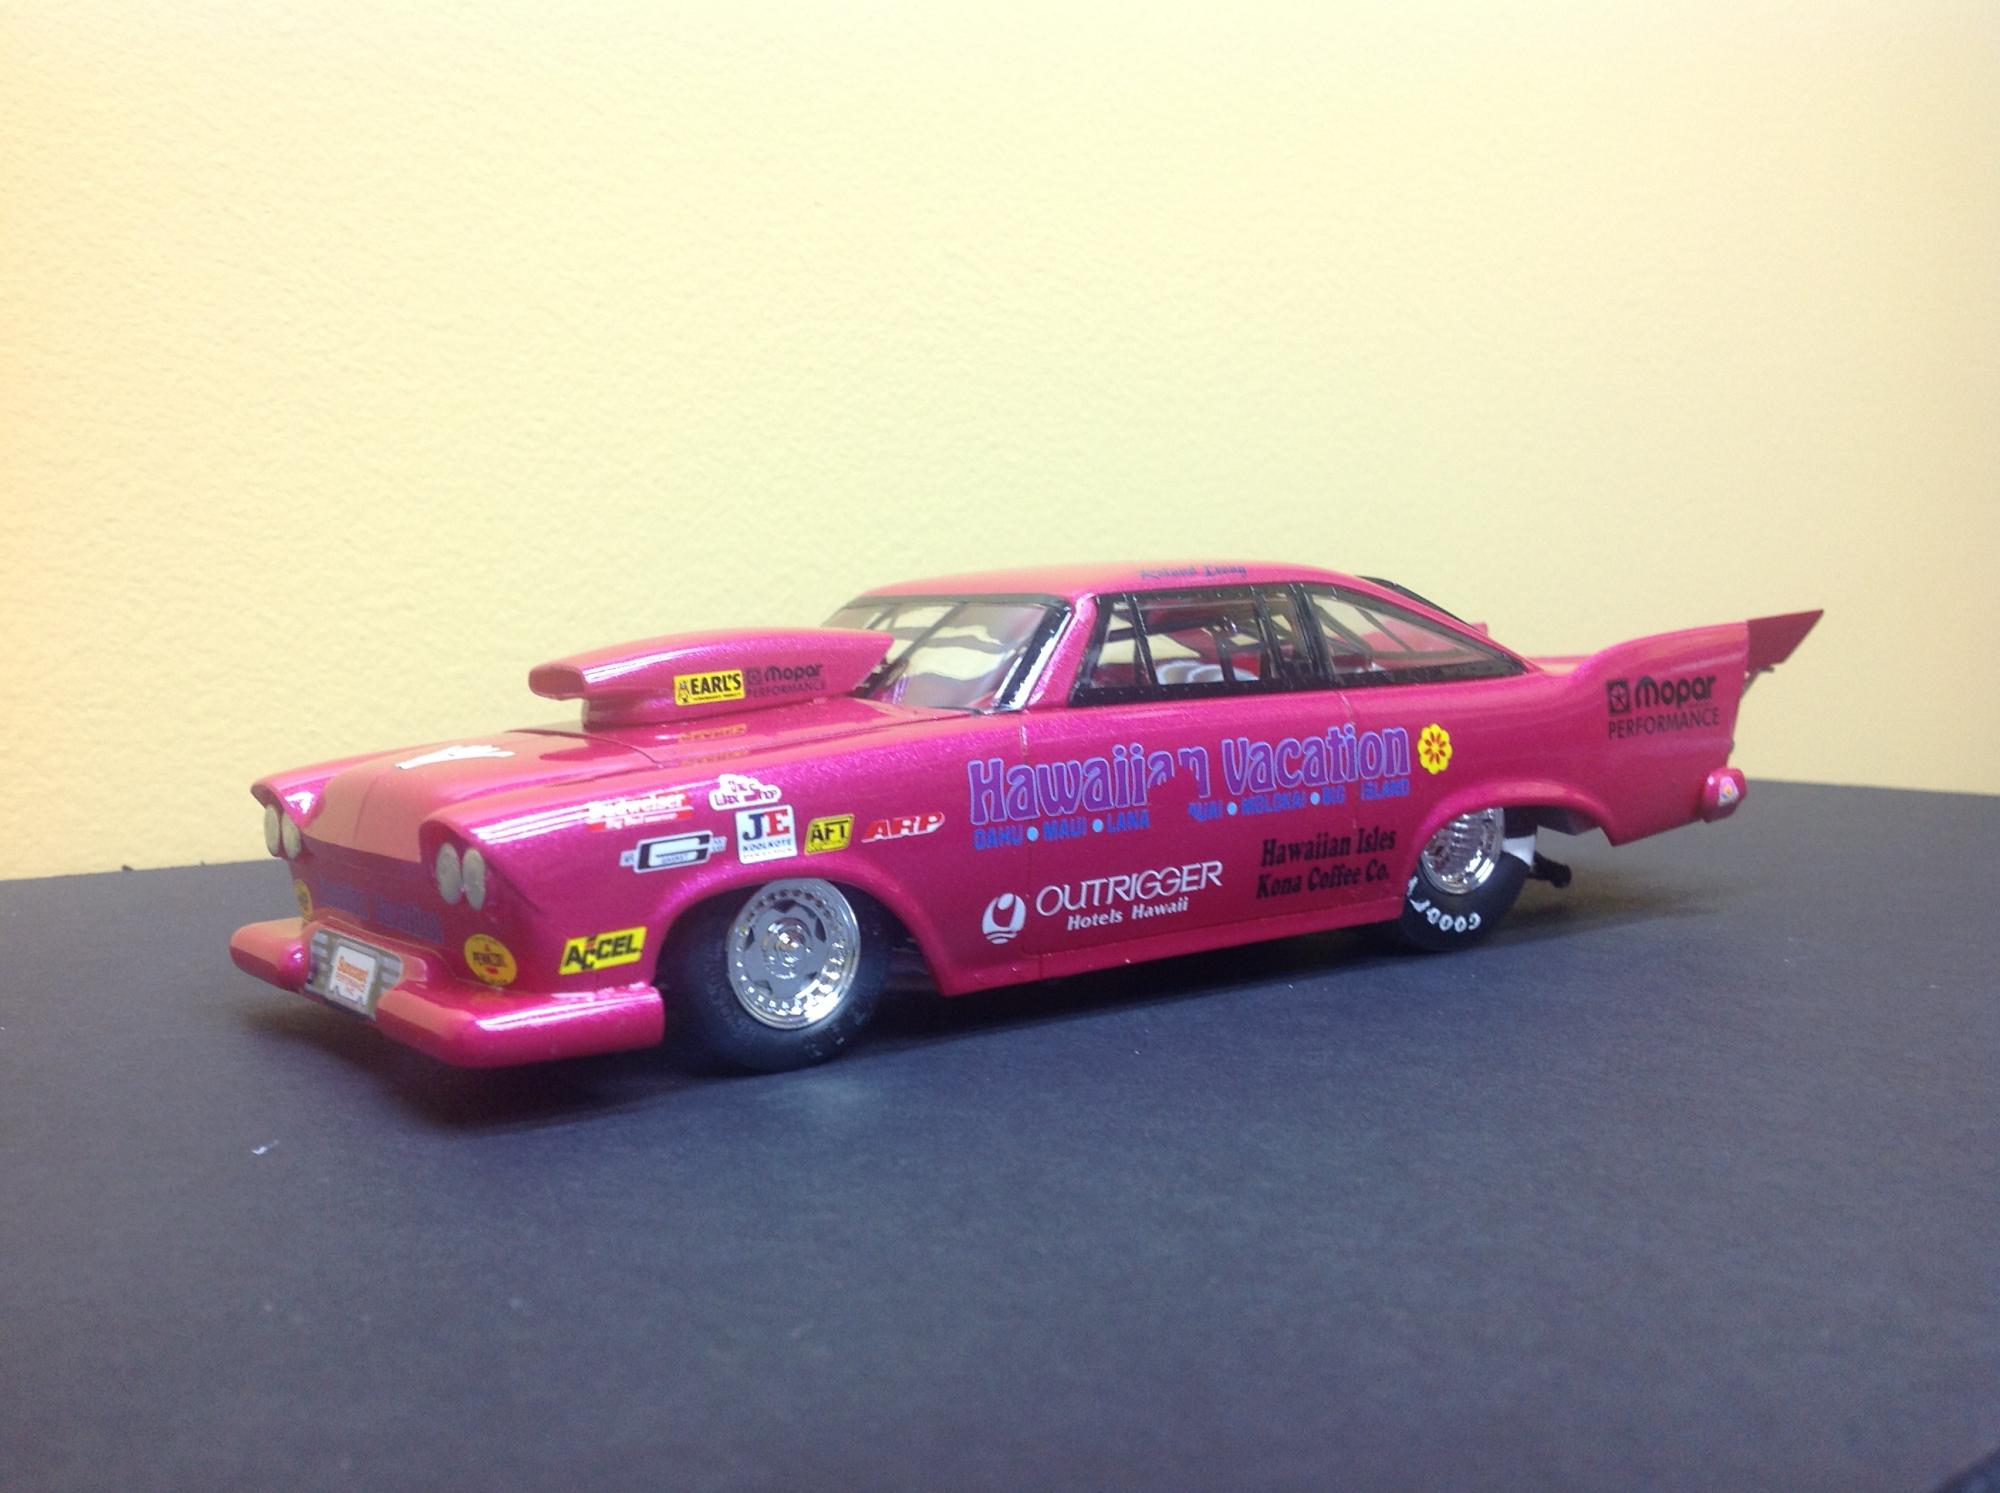
This Revell kit started out as a "Christine" Pro-Mod. Before losing all interest in building models my son finished the engine and chassis some 20 years ago. He allowed me to finish it so I got it done in late 2015. The kit decals were very yellowed and unusable so I decided to go with an Hawaiian theme from Slixx Decals. Painted with Testors electric pink. I learned on the drivers side not to use tape to hold windows in while the glue drys. Removed my Pledge Future and decal when tape removed, talk about a let down. So now it's only displayed from the right side. Also ruined the Mopar Performance decal so had to use the bikini express decal from my AMT Fruit Wagon kit on the right quarter panel.
-
 I bought this a while ago, but I've only just got around to building it. I liked the look of the lace decals, even though the lace is a tad out-of-scale. Gold and purple always go well together, so I used purple candy over a silver base. The horrible kit wheels were replaced with some from a Polar Lights funny car. Now, I've heard it said that this kit has one of the worst Ford SOHC engines in 1/25, so I decided to pep it up a bit. I added resin pulley wheels, intake, oil filter and gear linkage. I also added a Mallory ignition module and rear disc brakes. The engine had no magneto, so I made one that looks kinda like a Vertex. A Detail Master 5-point harness and a fire extinguisher were added to the interior. I had to lift the pickup bed a bit to stop the rear arches rubbing the tyres. A note to anyone who plans to build this kit...The front axle is set too far back. The rear edges of the tyres would foul on the bodywork. I know some guys re-position the leaf springs, but I'd already painted the chassis and installed the axle before I realized my error. Luckily, I'd only fixed the front axle on with CA glue, so it came apart easily and I was able to fit it in a better position with epoxy. The kit decals were dead tricky. They seemed to stick fast, on contact with the paint. I managed to get them all on, but it was a sweaty hour. 'nuff blurb.. Here are the pics: Comments appreciated Hope you like it Thanks for looking
 -
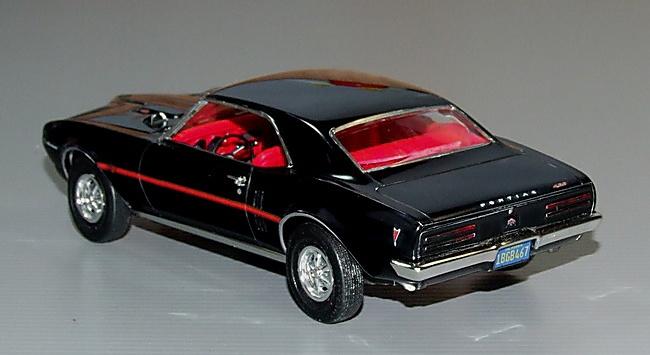
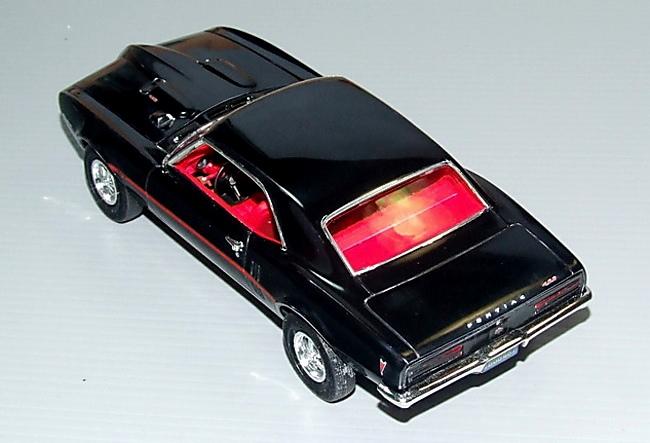
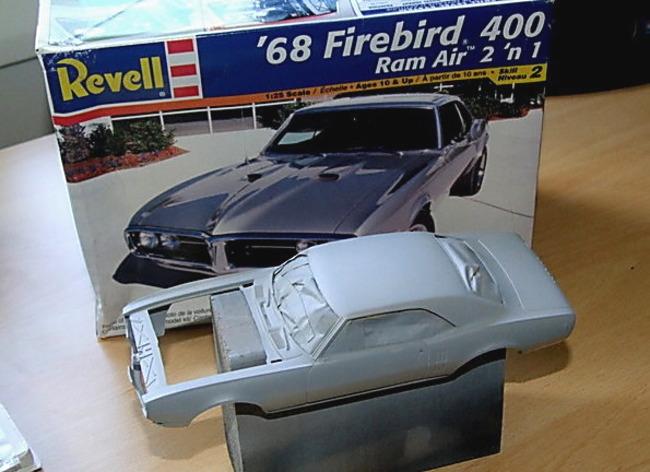
Started just three weeks ago, and here it is 'Under Glass' - Not bragging at all, in the 'workbench' section I did call this a "Clear the bench" build. Part of the reason for the speed of this project is my enthusiasm for the project - I really like Firebirds, the other reason is the quality of the kit, in my opinion Revell produced such a superb quality product it's actually quite difficult for an average modeller like me to scr*w-it-up. Learning points, well I asked here and on another couple of sites about varnishing over an already very smooth & glossy finish, I took the advice from most folks and applied those extra clear coats and it worked-out... so learning point #1, be brave and with the correct tools and a little luck the finish you want, you can achieve !! Learning point #2, I need to re-learn my BMF 'skills' next time around . Thanks for taking the time to look and/or comment, and as ever all comments, criticism and questions welcome. Ian.
-
This was a fun build that took a little over a week to complete.
-
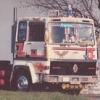 Here a progress started for at least 3 years (yes I'm taking my time ) It was interrupted because of a painting problem : the spray paint did not stay on the white curved parts beneath the cab. Finally I used brushes, and, it worked !
 -
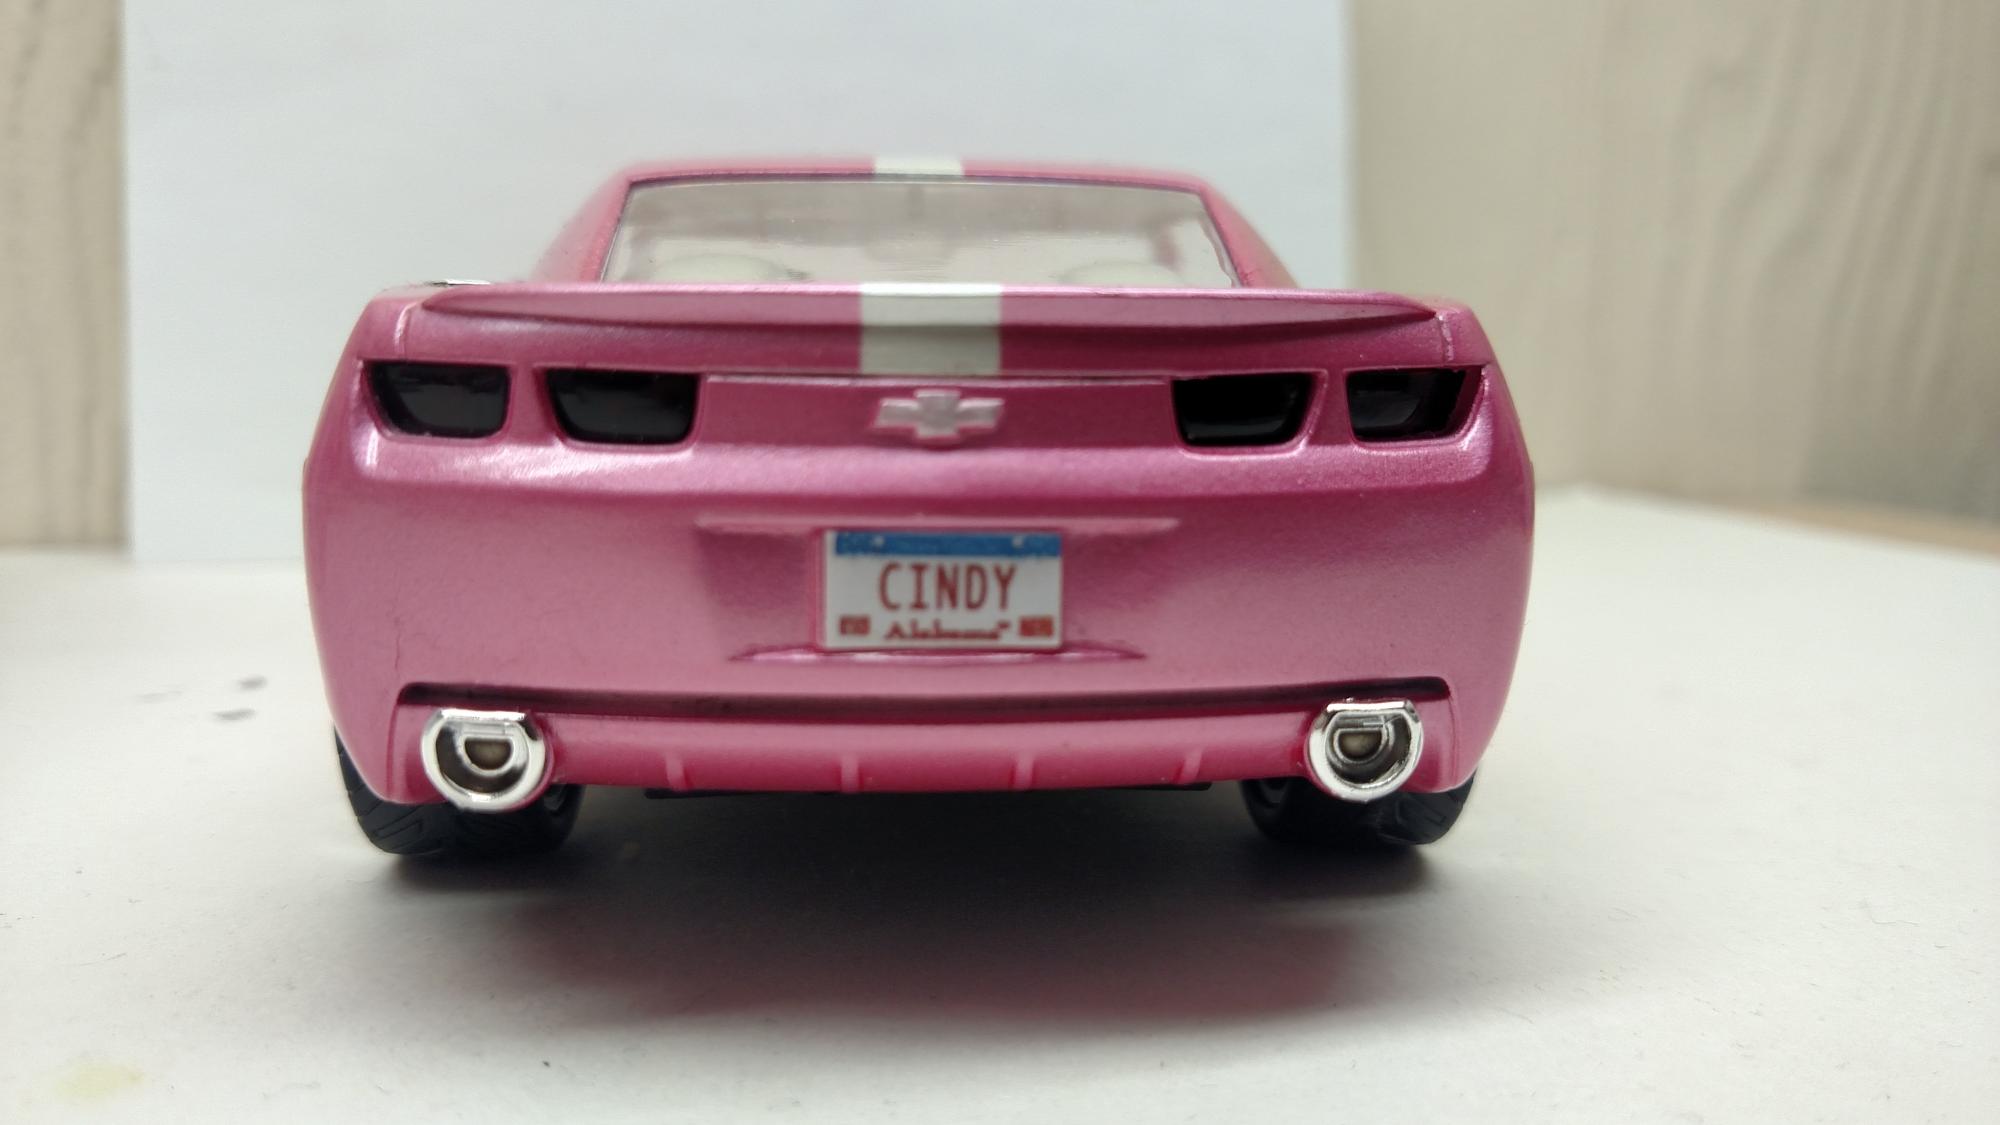
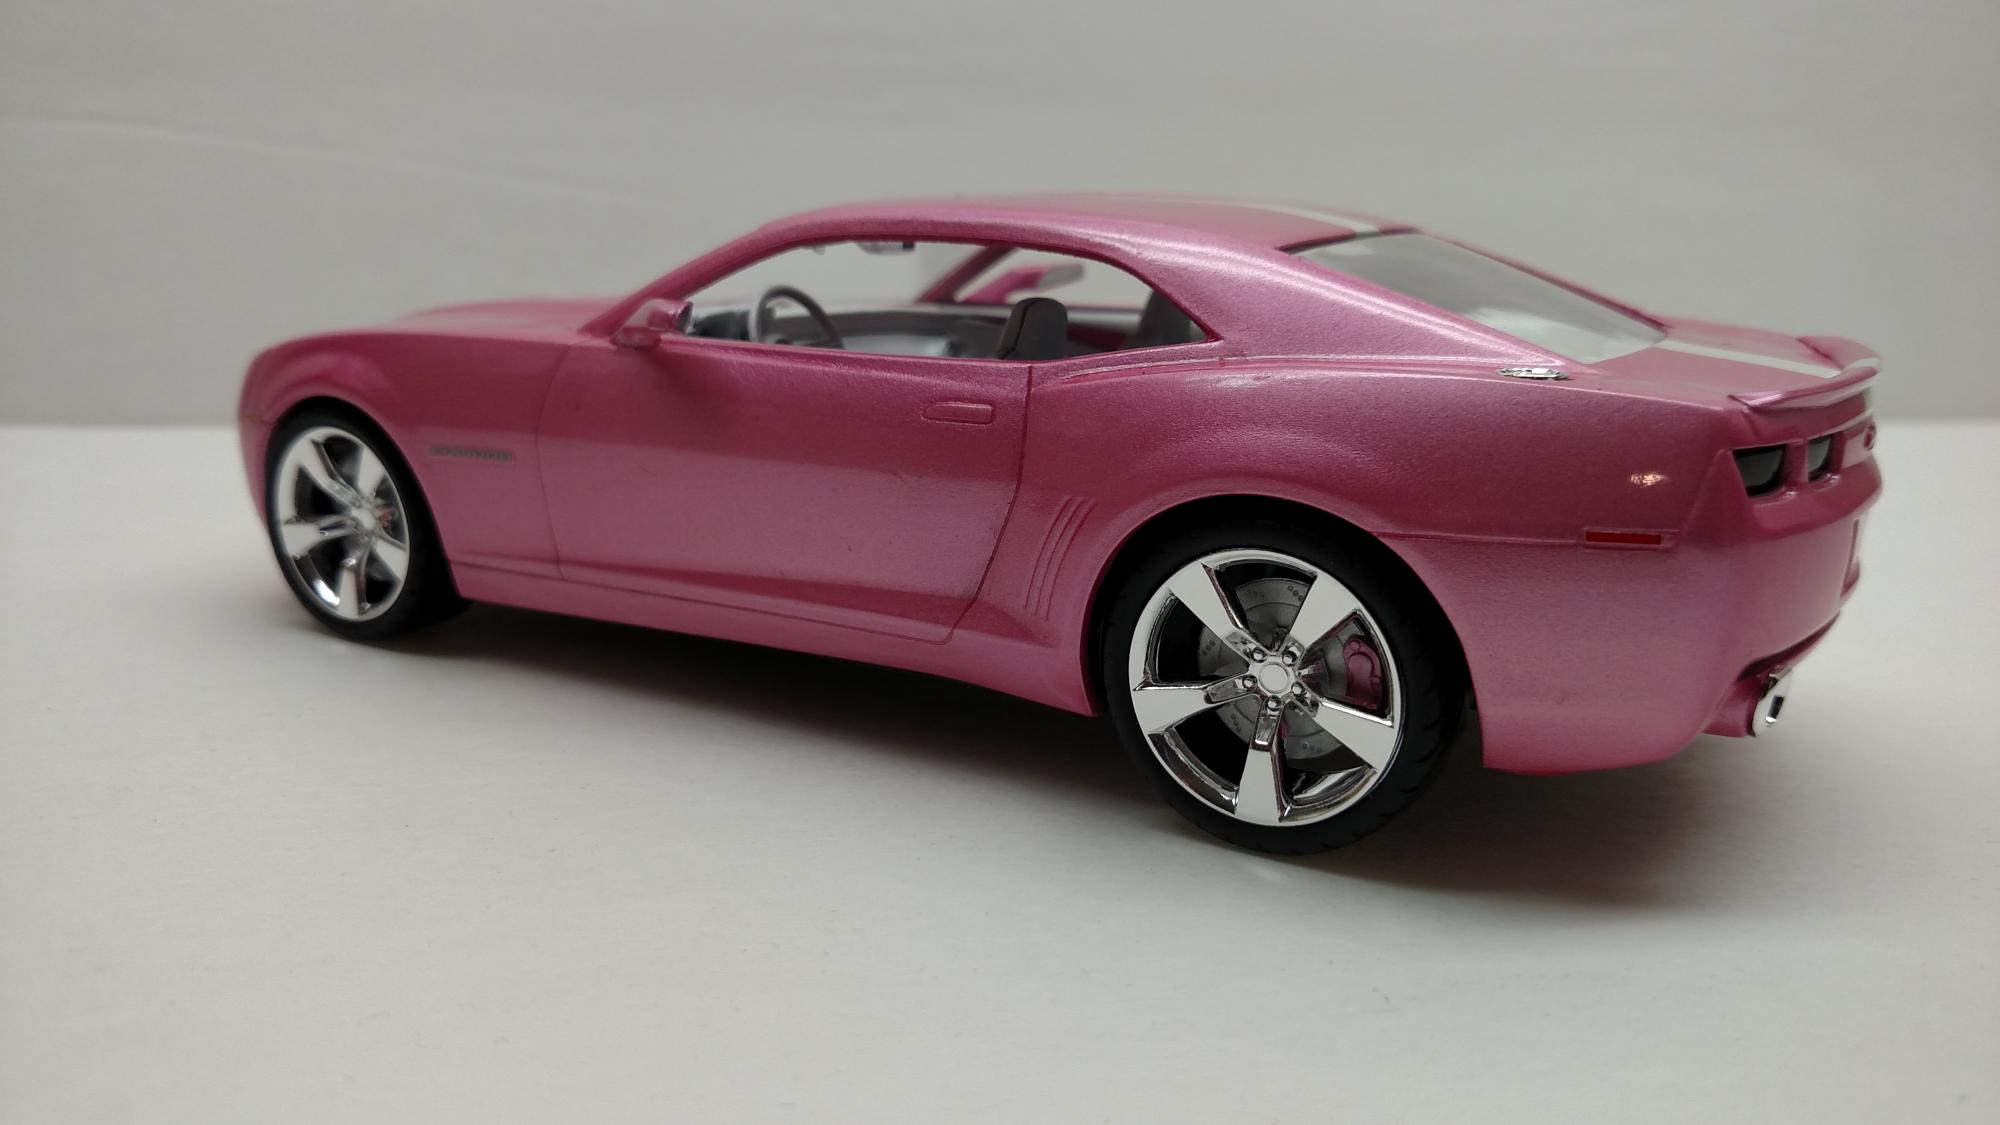
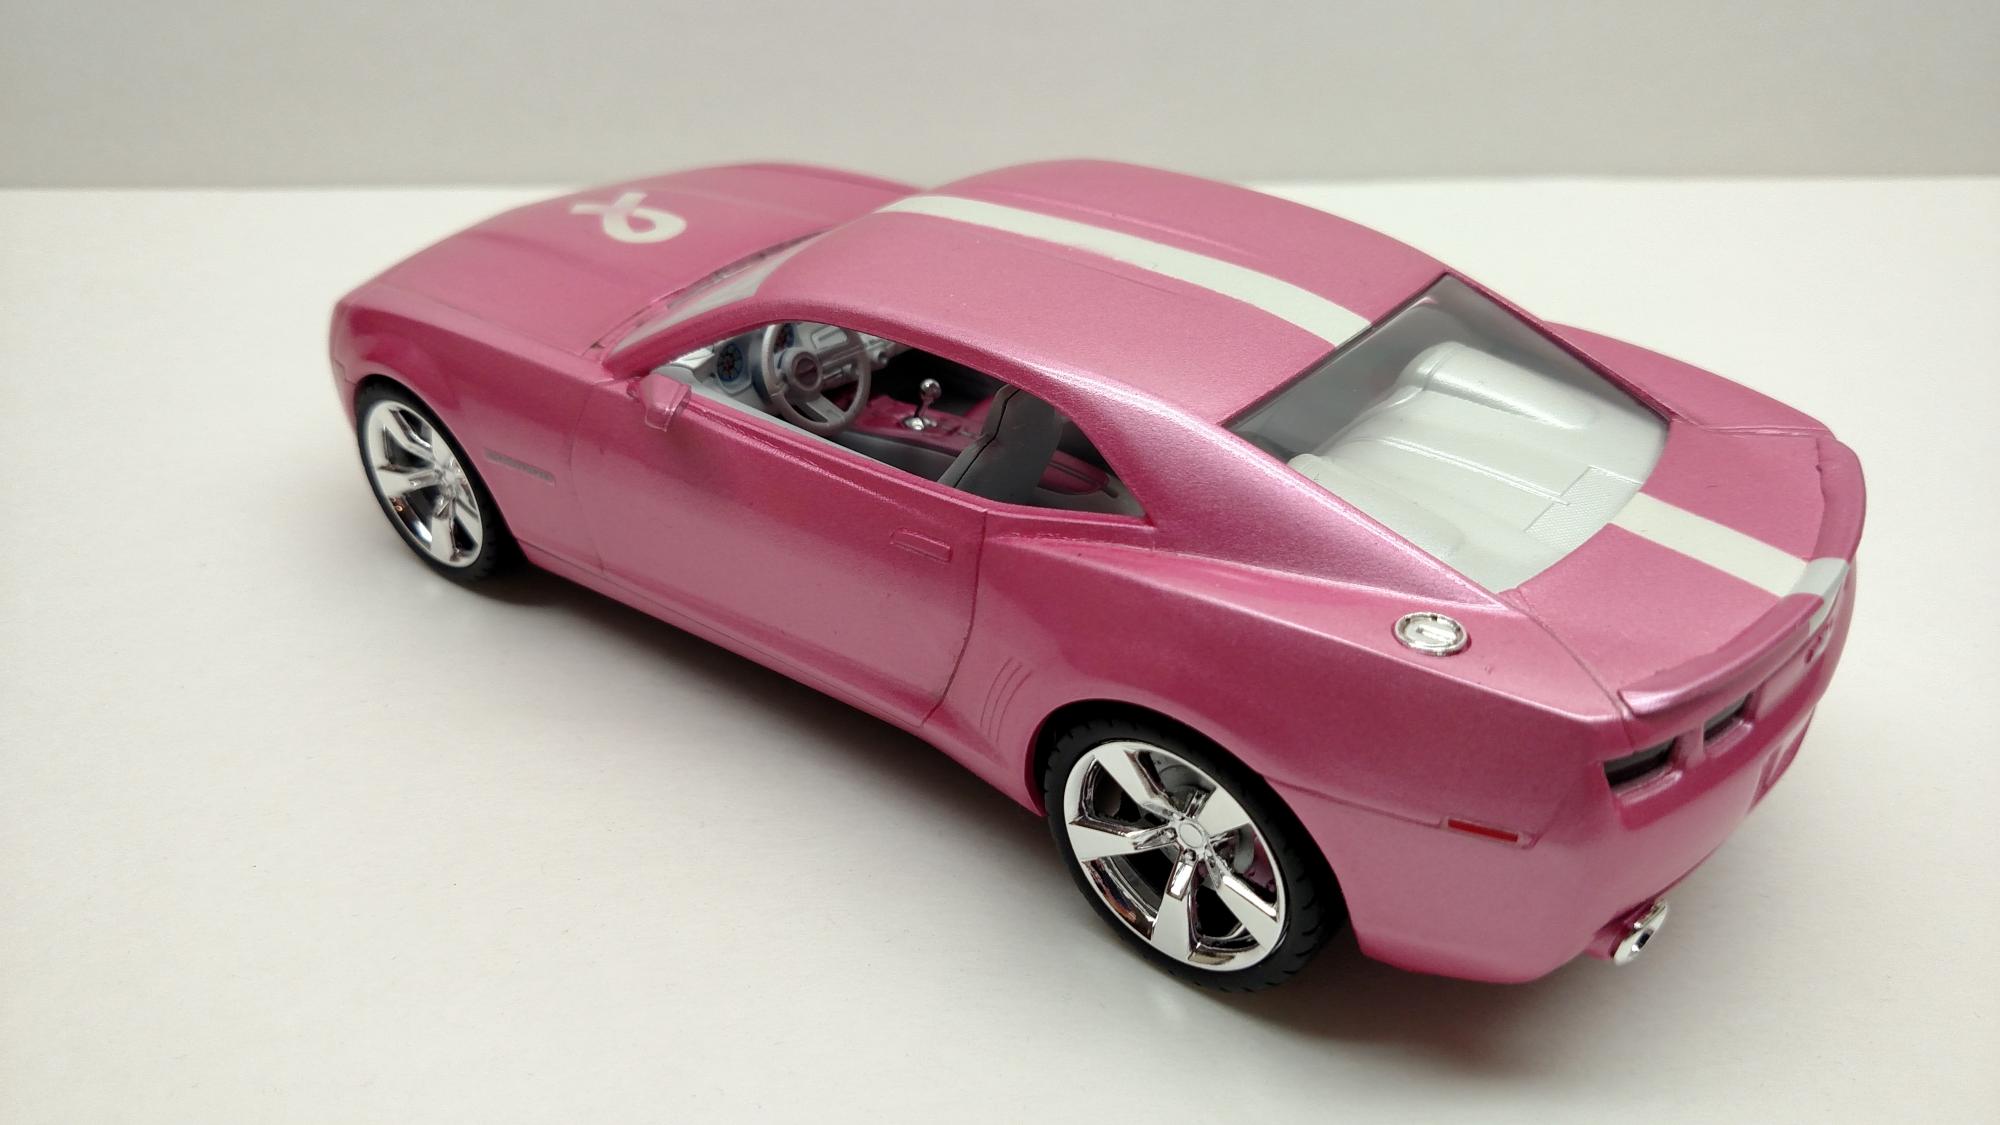
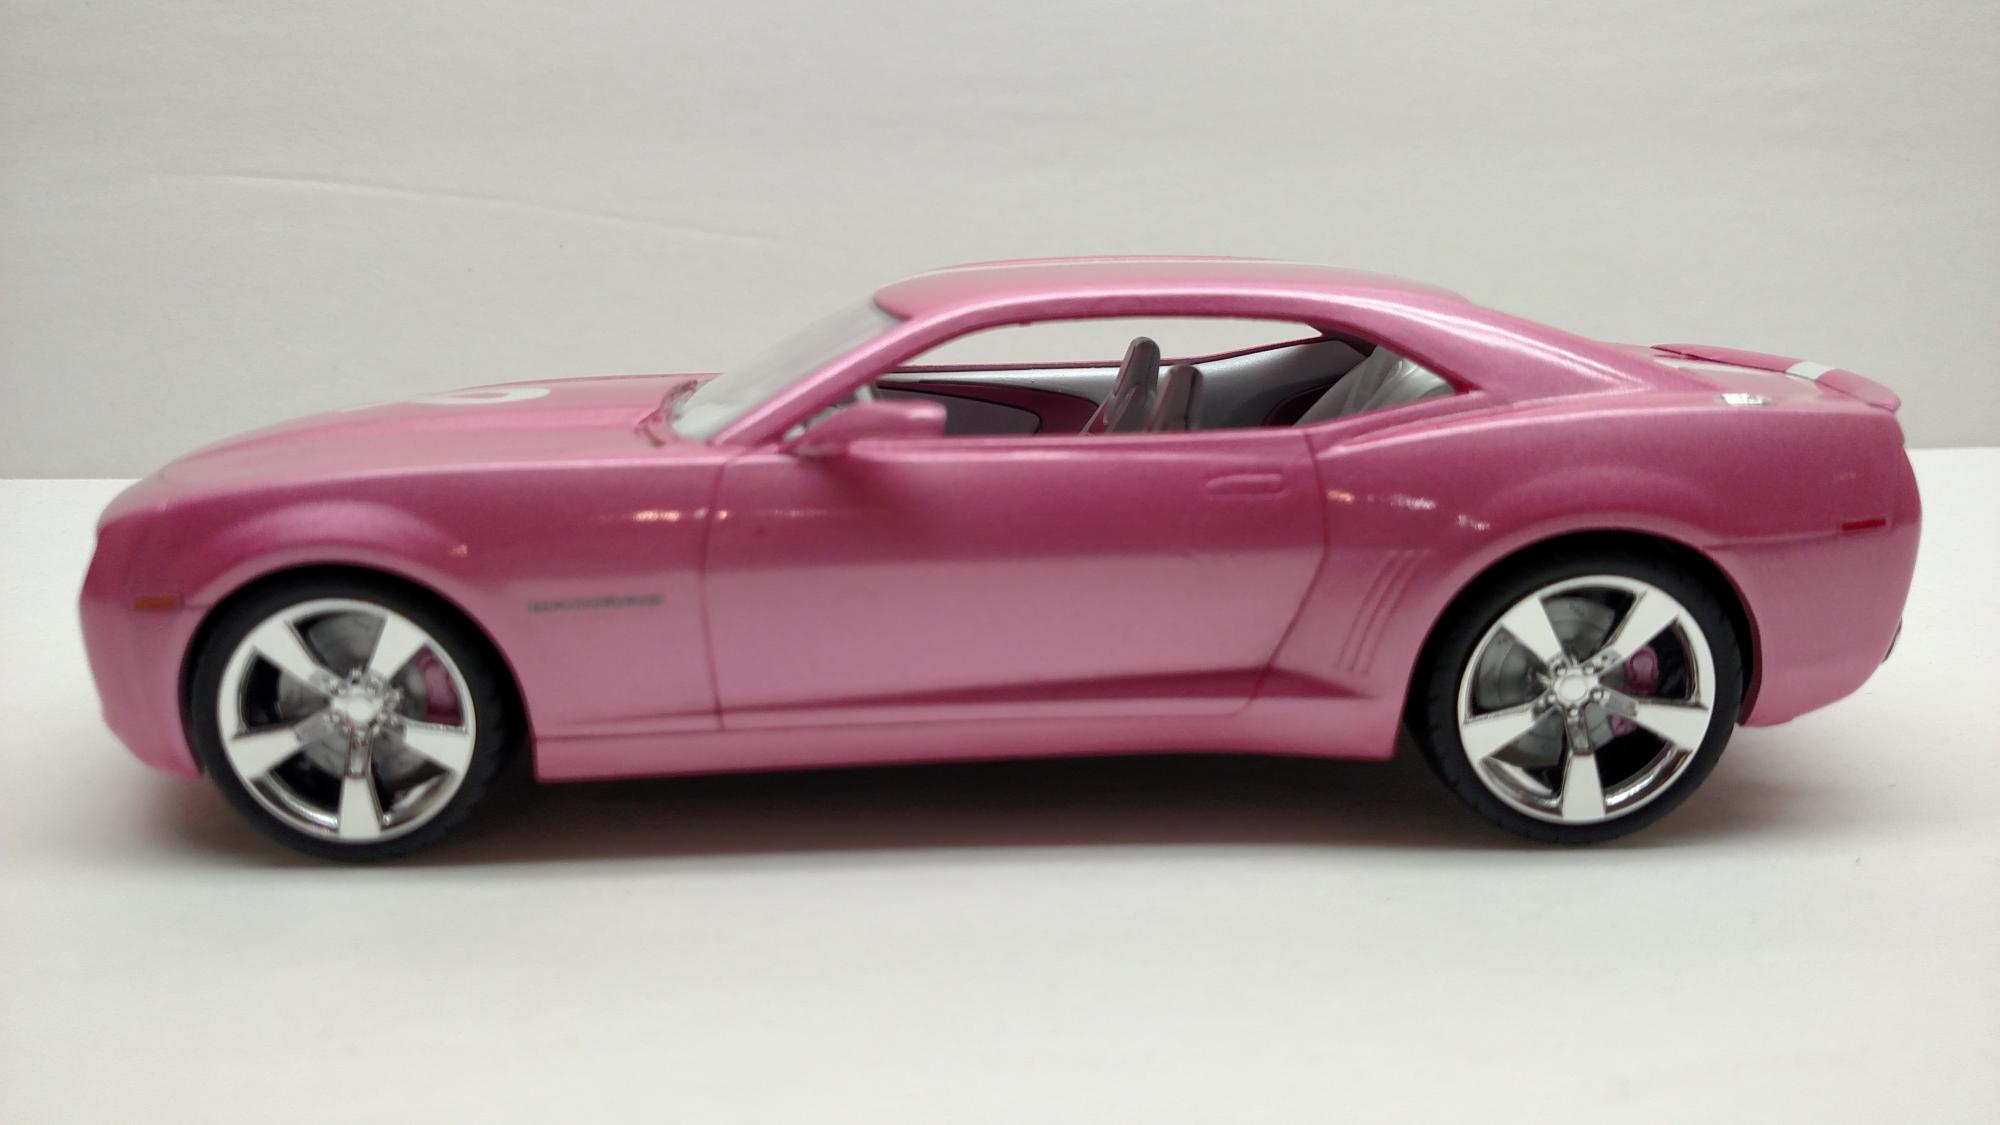
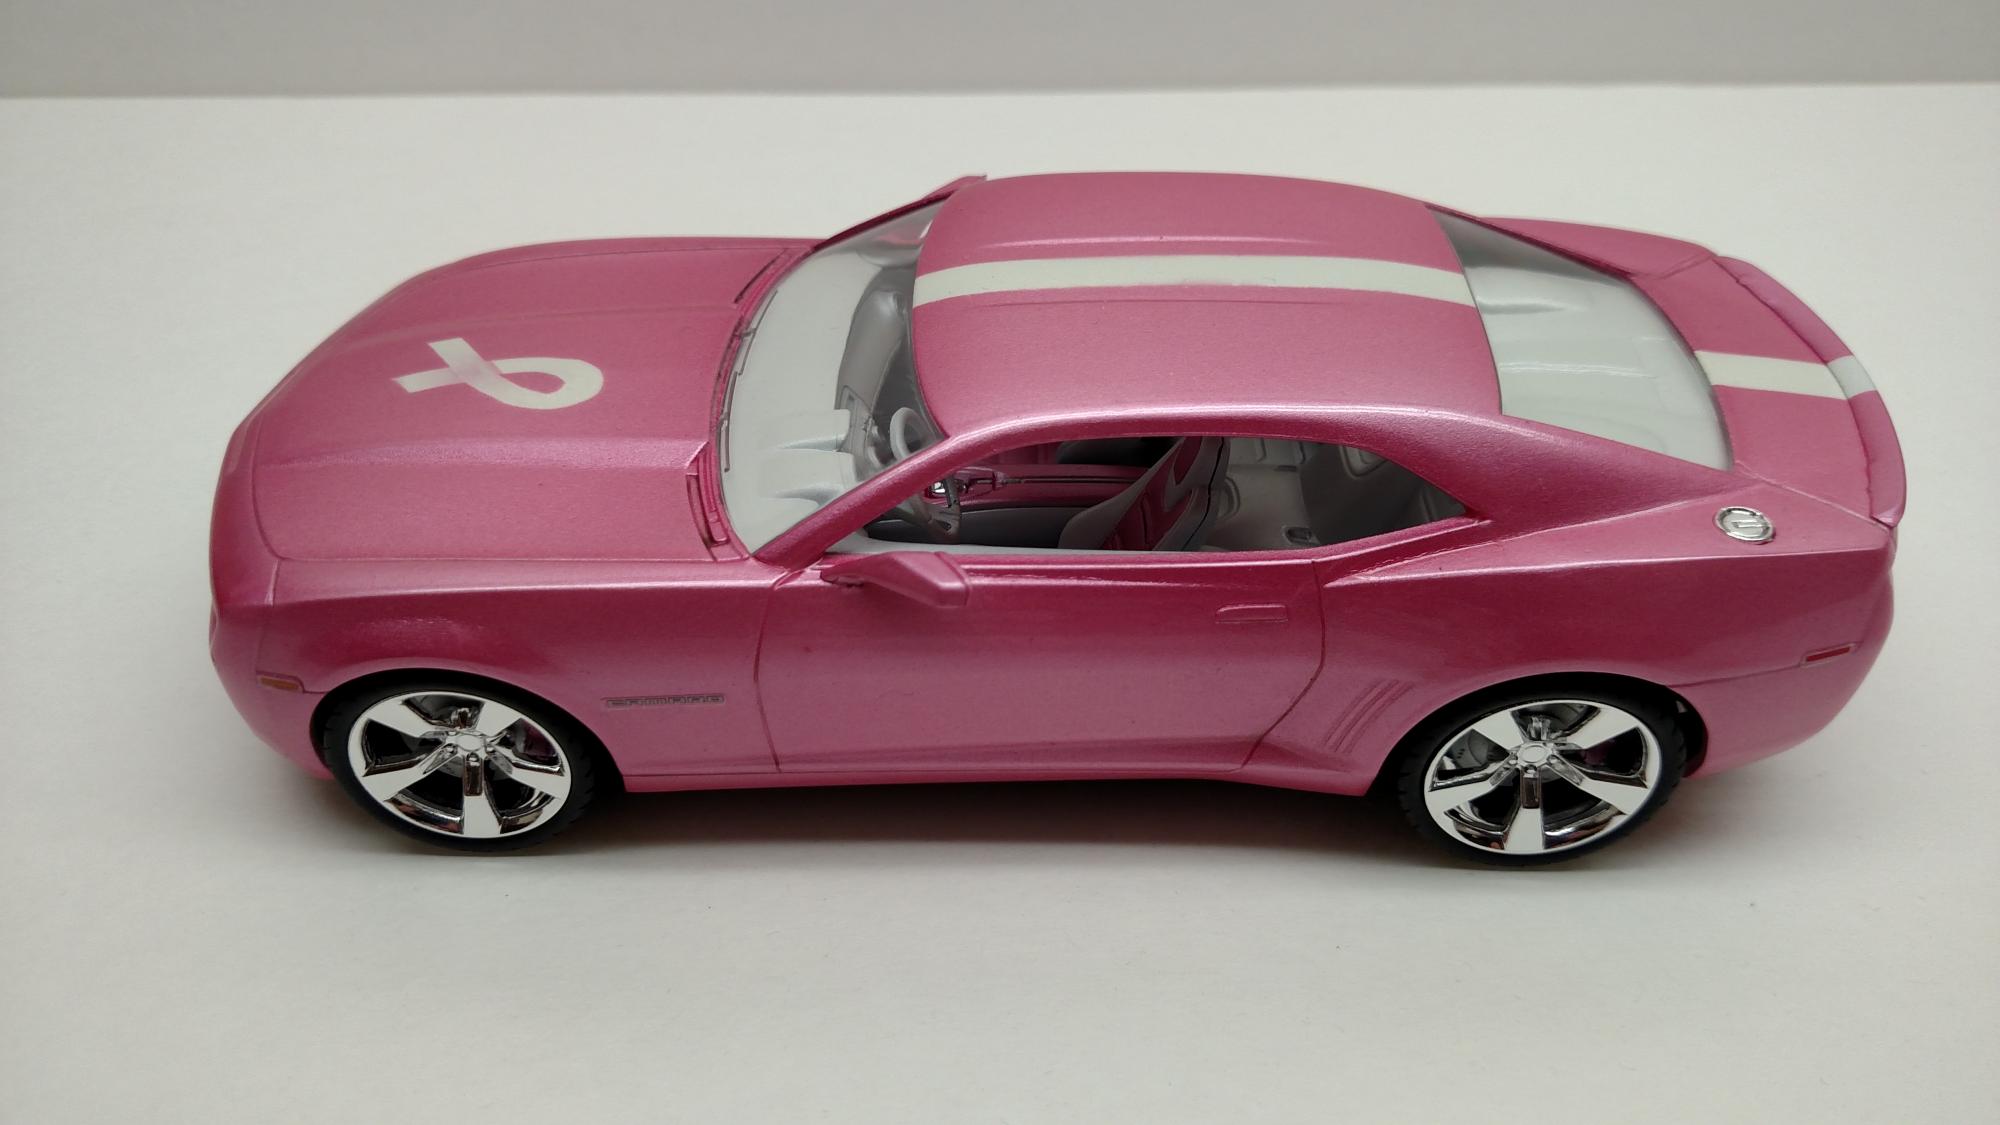
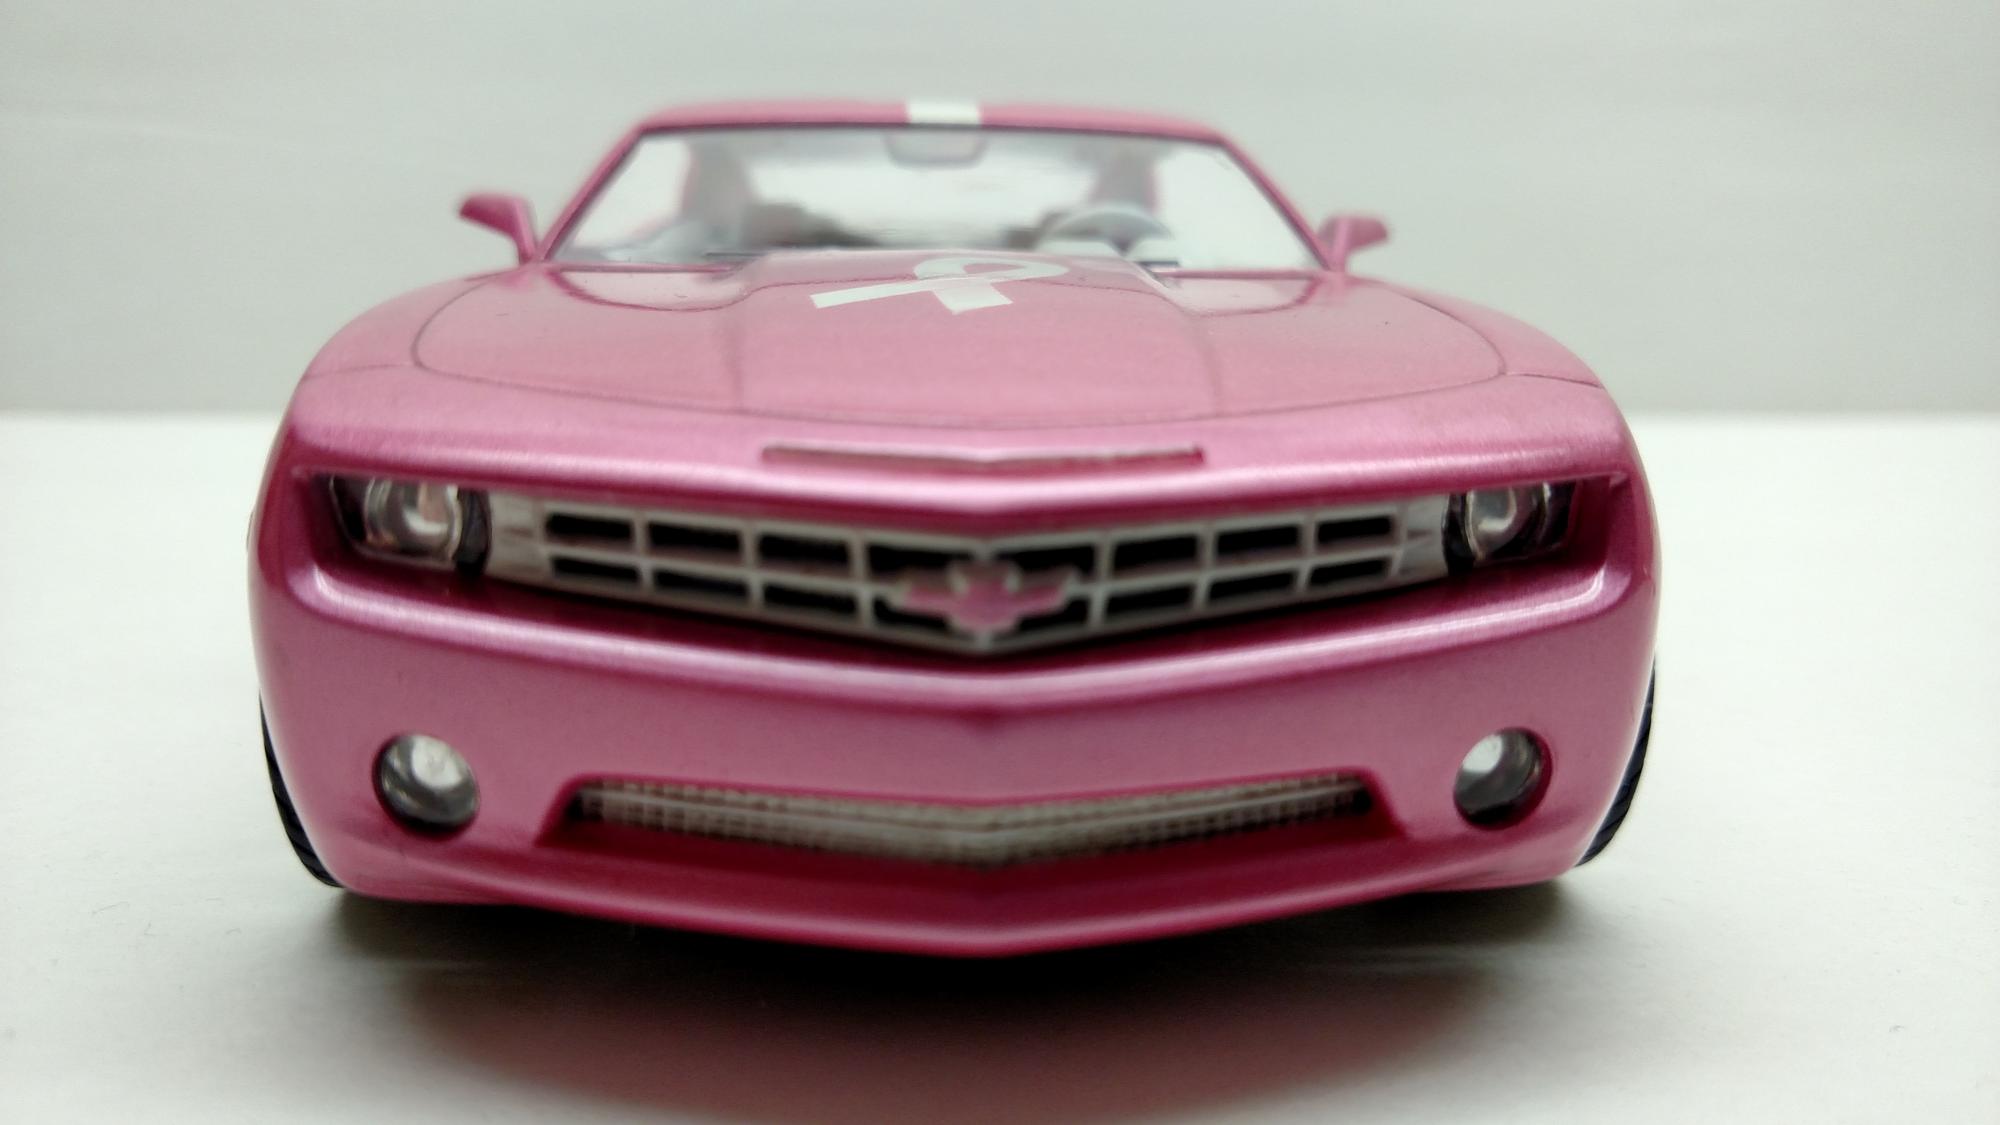
Here are some shots of a build I recently finish, along with a link to my YouTube video of it. I have posted this on about 3 or so pages on Facebook so you may have already seen it. I'm not bragging on it or anything, I just thought there may be some here who haven't seen it yet and would like to. Back story: A YouTuber hosted a group Cancer Awareness build back in October and I completed a Mustang that I took to the ACME show in ATL in Nov. When I returned from the show I took the car to work, as I normally do, because some co-workers like to see what I build after they are done. One of my coworkers told me the story about how her sister is a breast cancer survivor and she would like the car to give to her. She didn't come right out & say that, it came up in conversation. But, her sisters favorite car is a Camaro, so obviously, I couldn't just give her the Mustang (I could, but you know how Ford/Chevy people are). I told her that I would be her a replica, but a Camaro. The kit is the Revell Snap-Tite Camaro Concept car. The primer is a $0.99 can of flat white from Wal-Mart, the white is Folk Art Metallic Pearl White, and the Pink is a mixture of the Pearl White and Folk Art Metallic Rose Shimmer. The color turned out really good. The paint scheme is inverted from the normal Pink Breast Cancer bow. Another YouTuber (Dale Elliot - Pappaws Scale Dreams) donated the custom personalized Tag. Thanks for checking it out. Link to the YouTube video: I should have painted the rear rocker flat black. I hear that hind sight is 20/20.
-
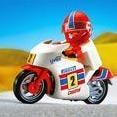
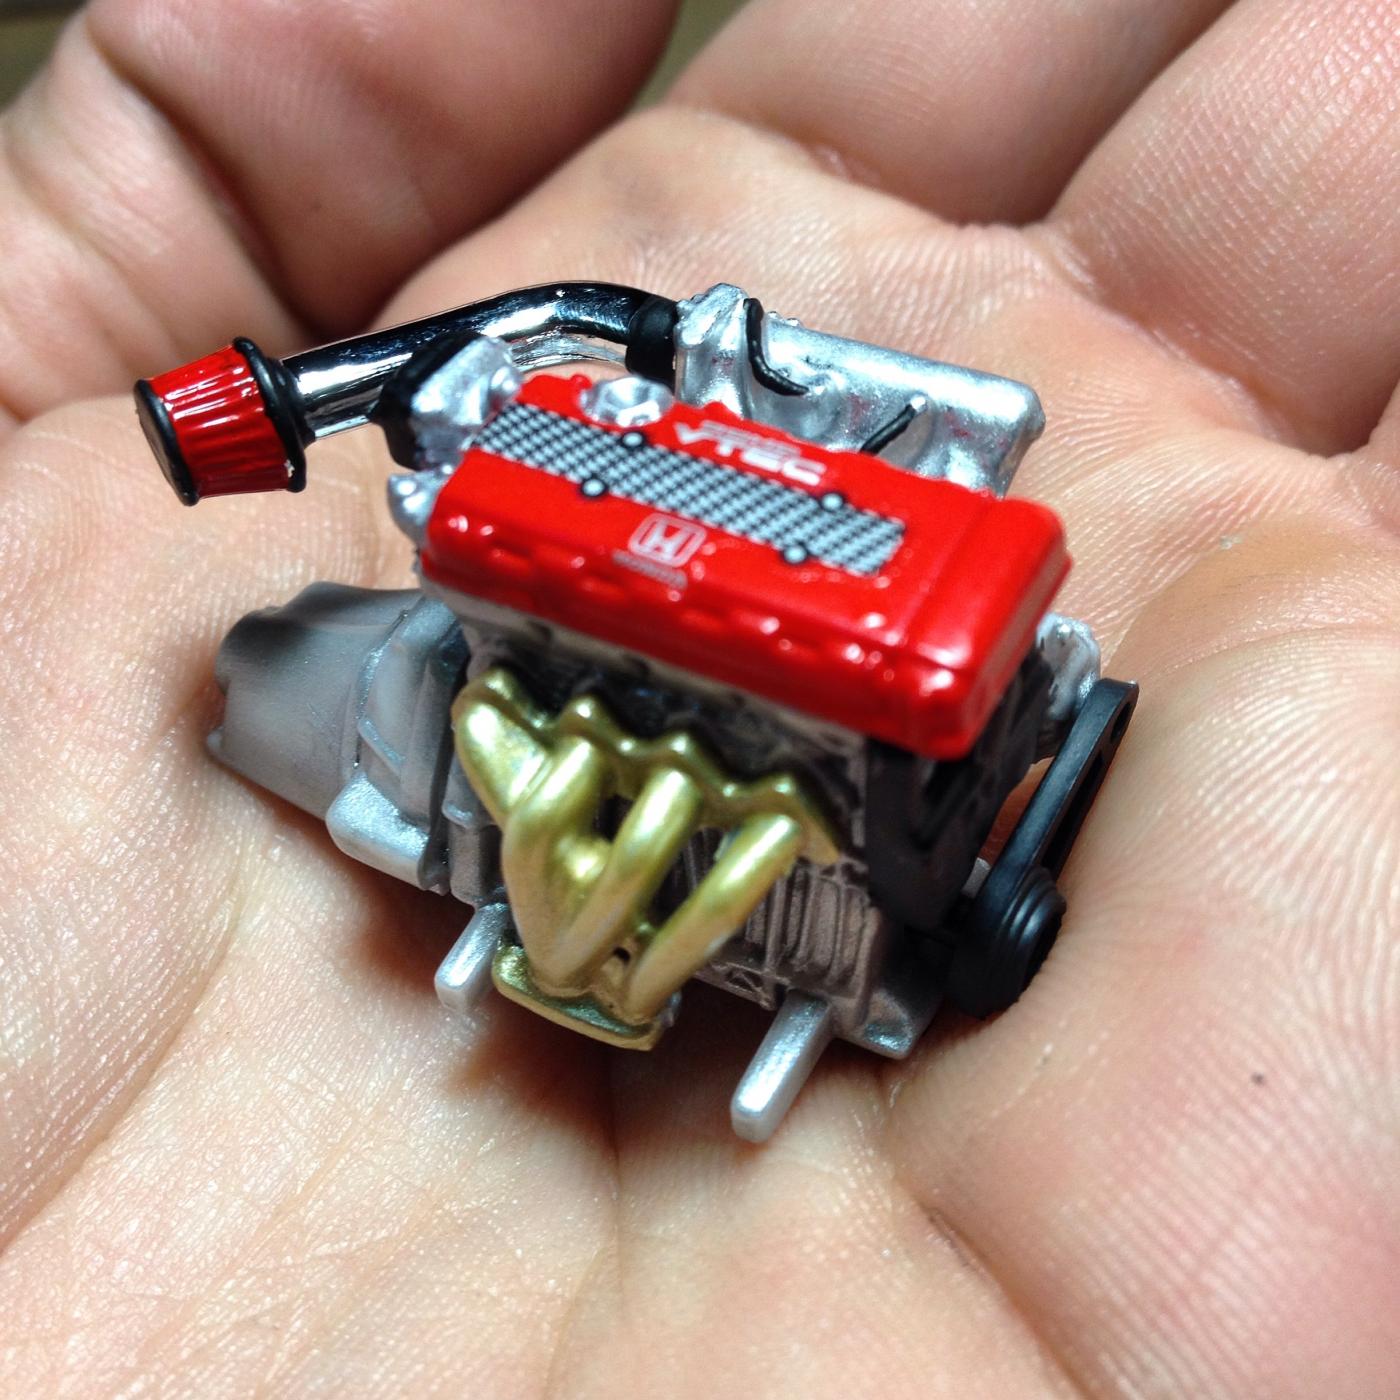
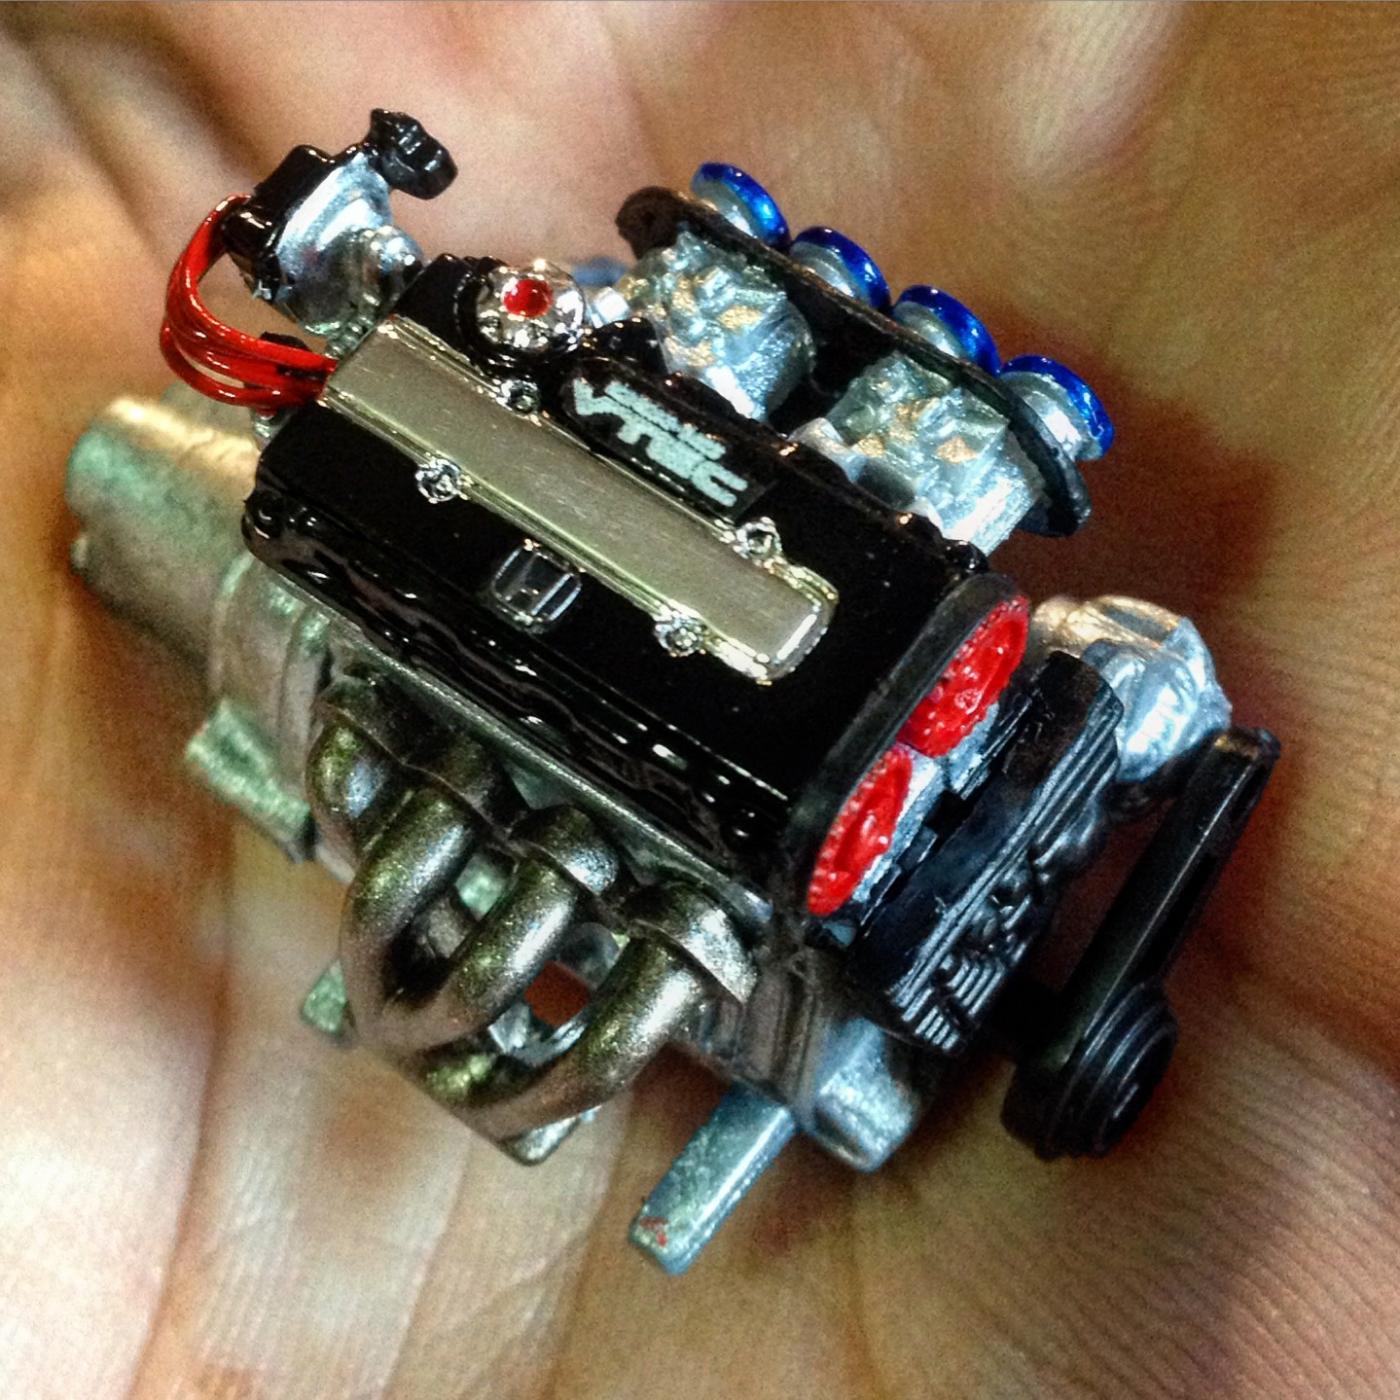
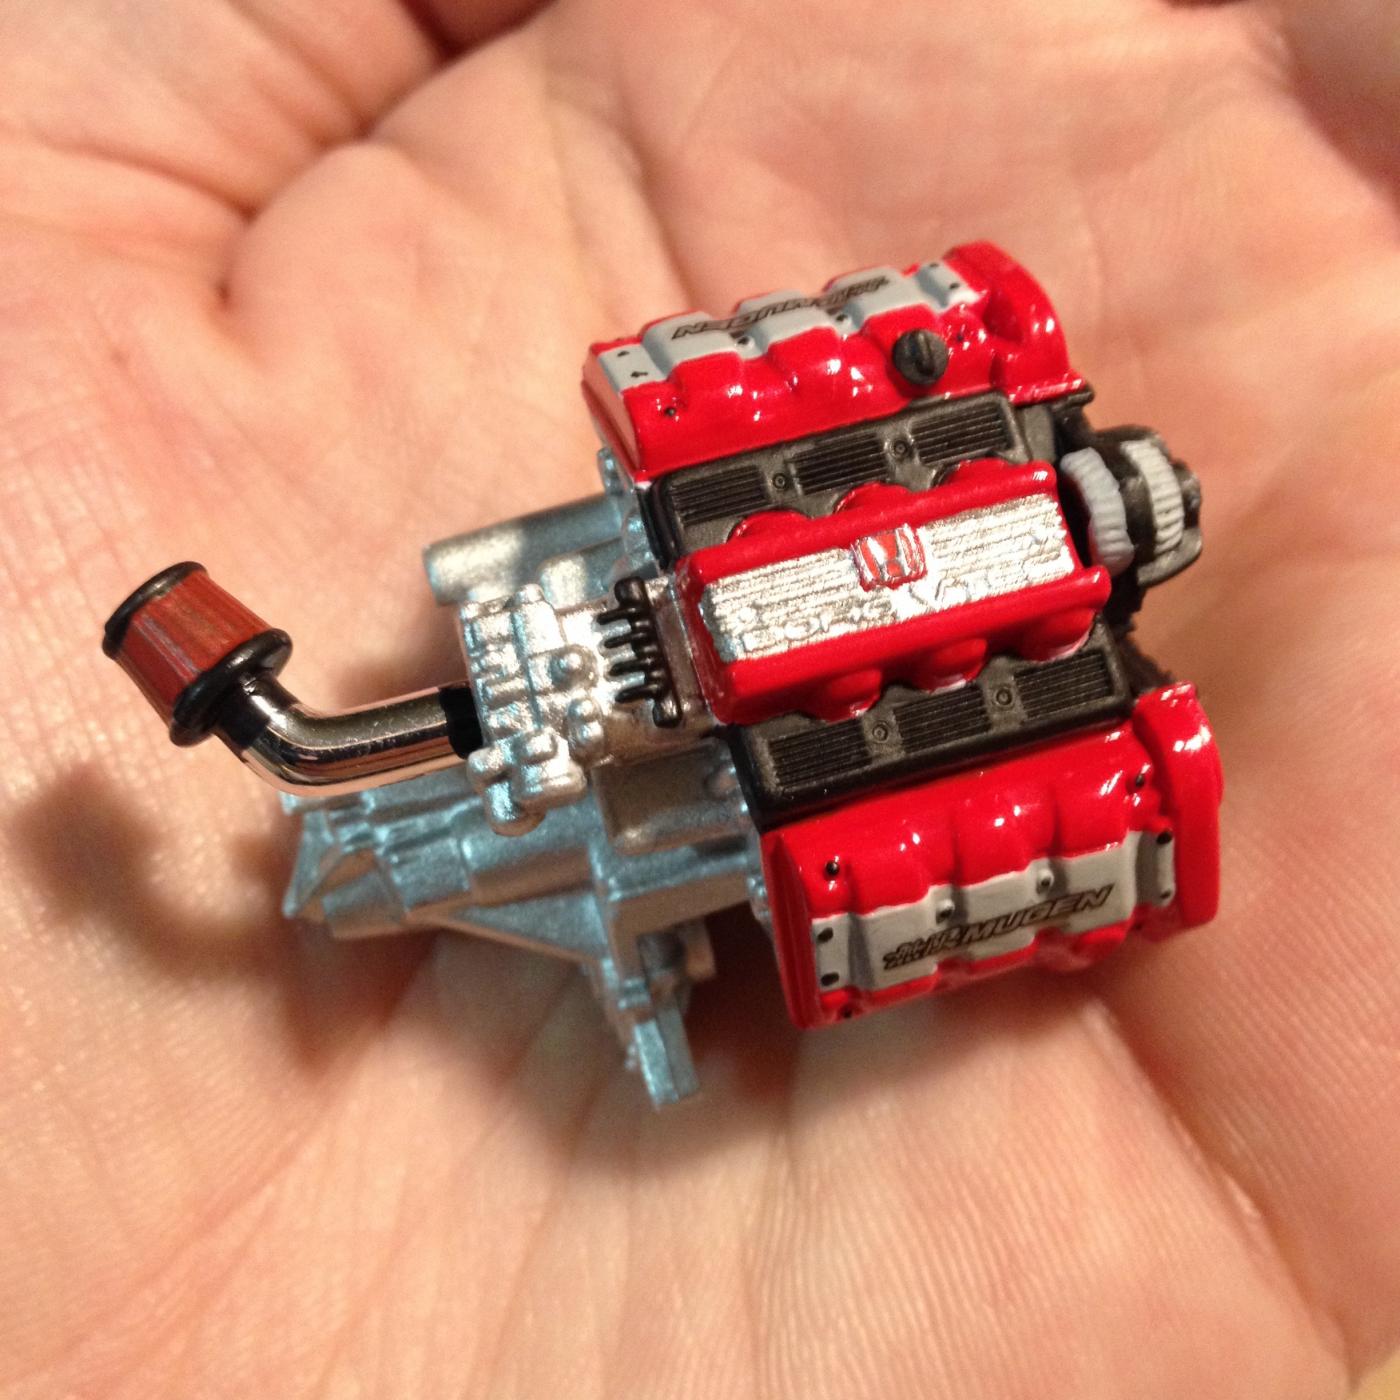
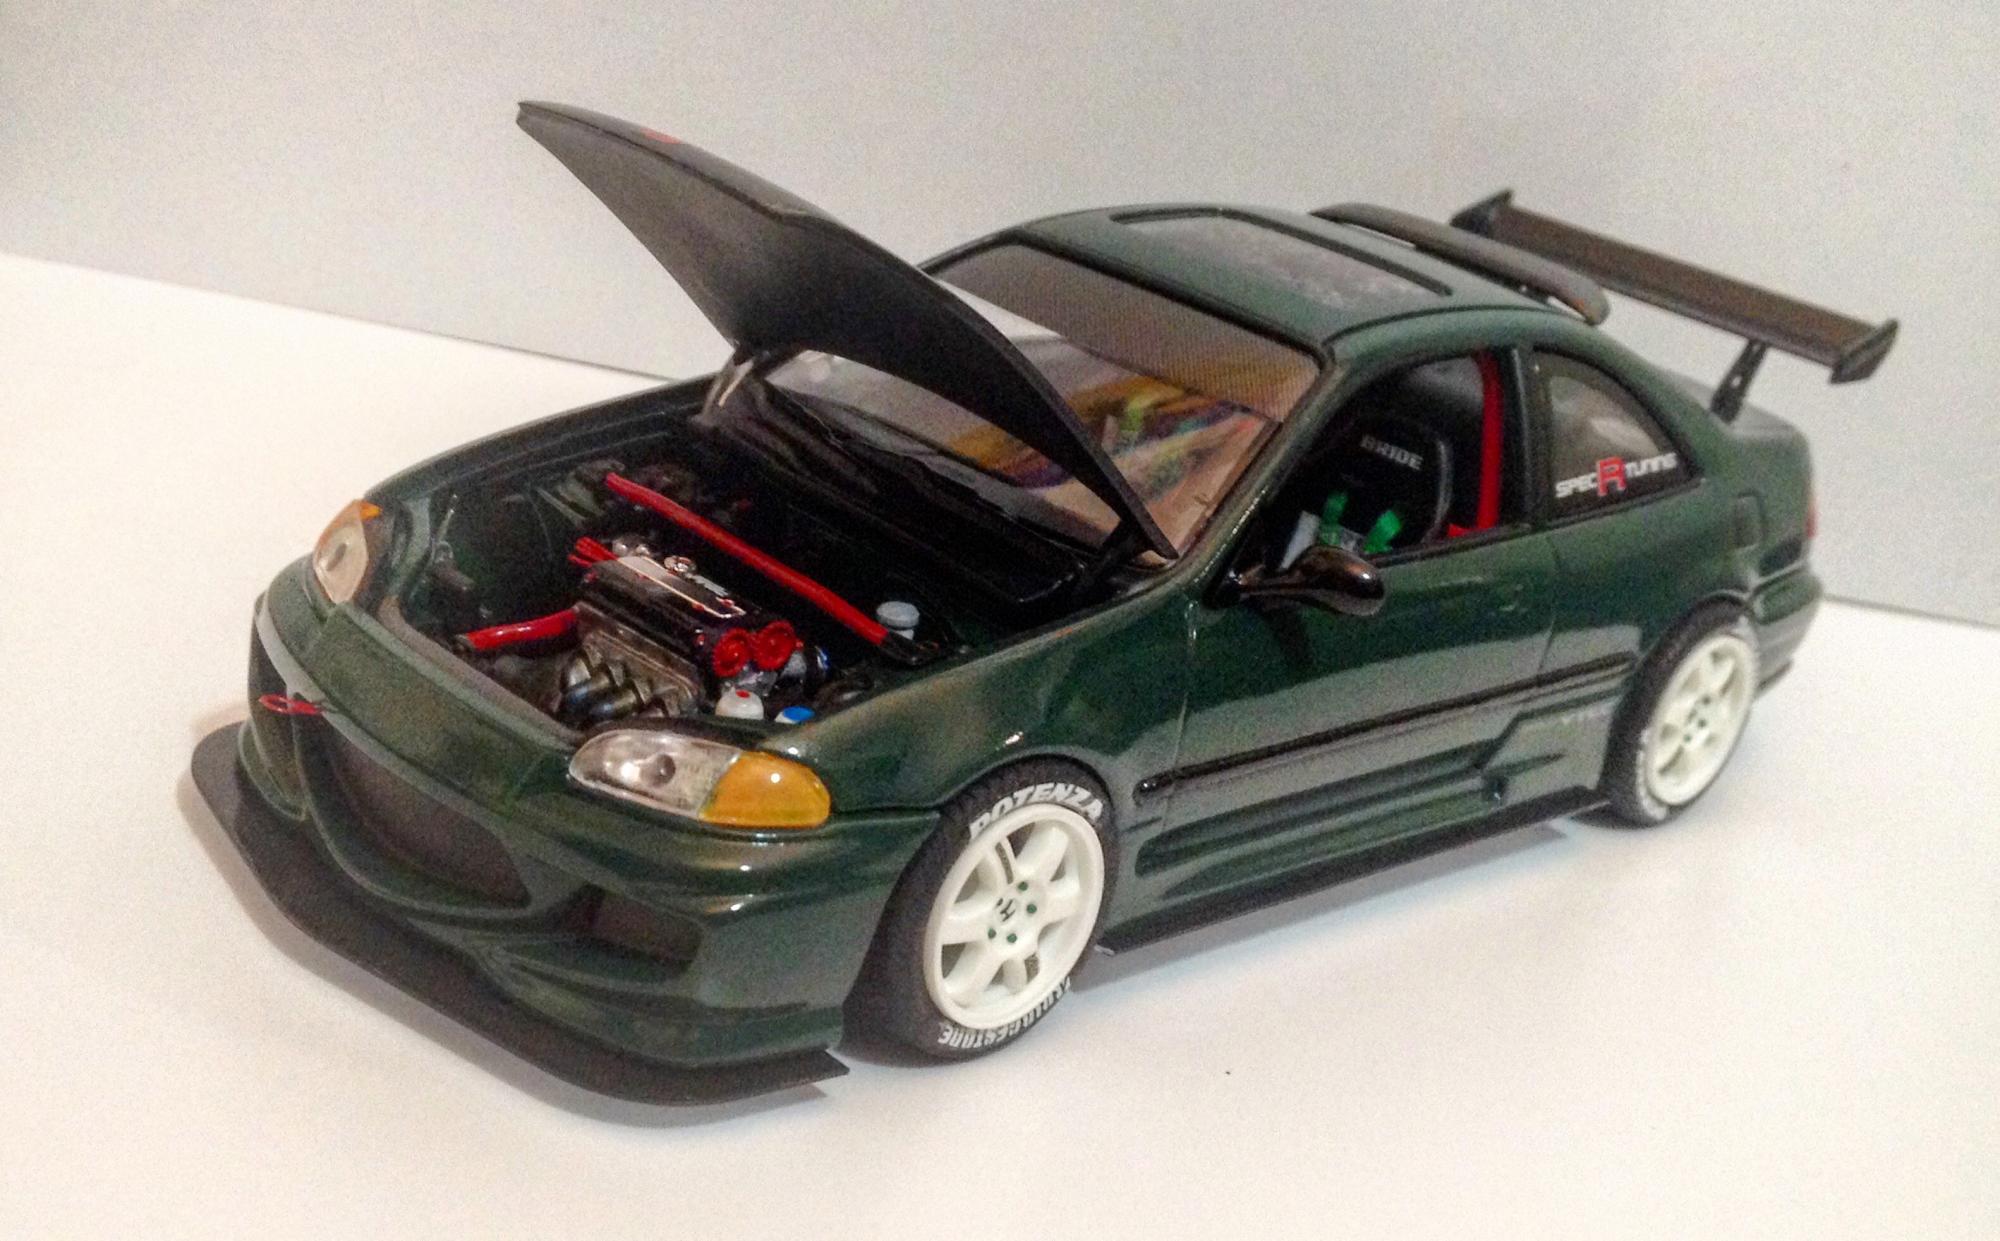
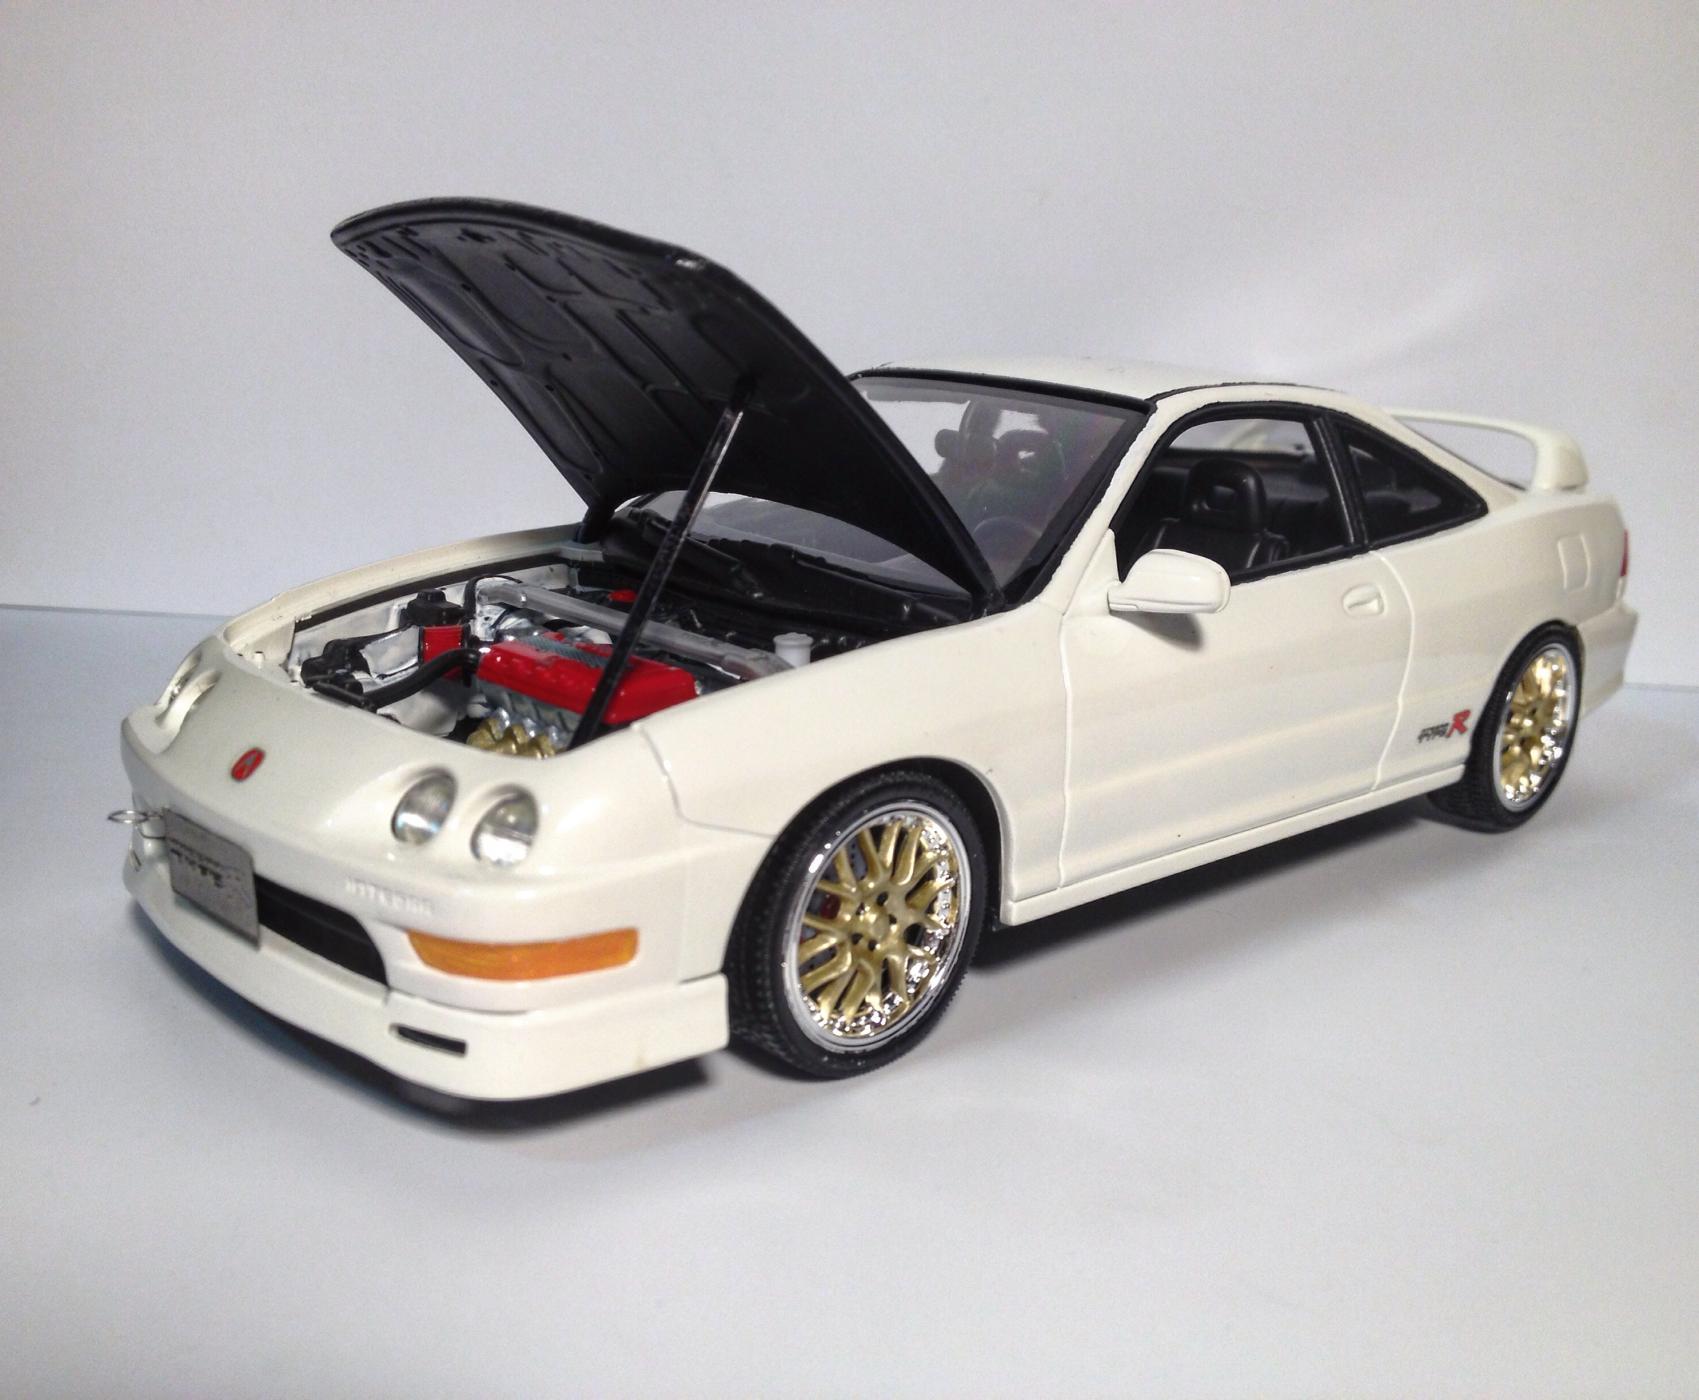
All the Honda Motors I've built so far!
-
Hey everyone, My name is Shawn & I'm a Honda enthusiast. I have built almost all of the Revell Honda or Acuras. Recently turned onto this page I figured I'd come share my work. Please Enjoy!
-
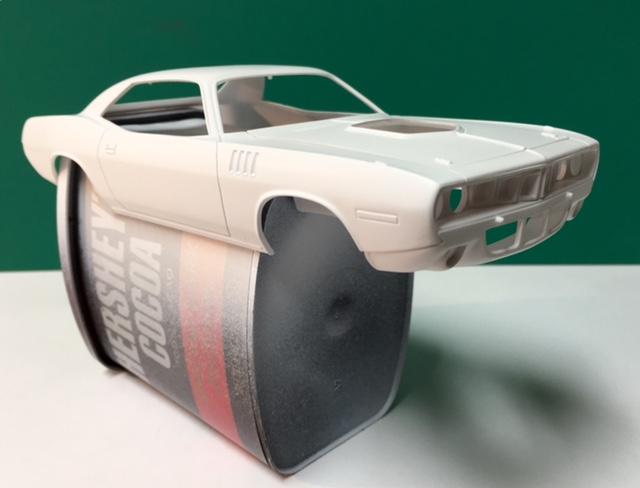
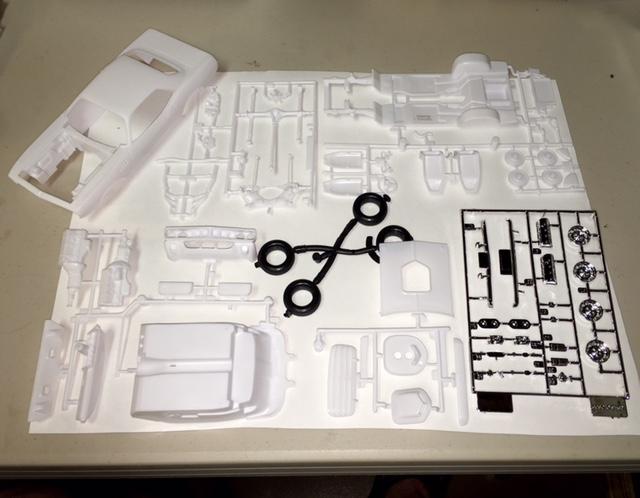
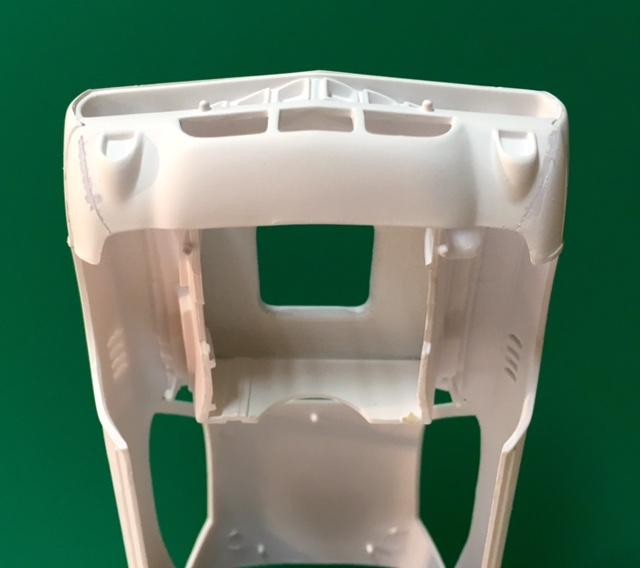
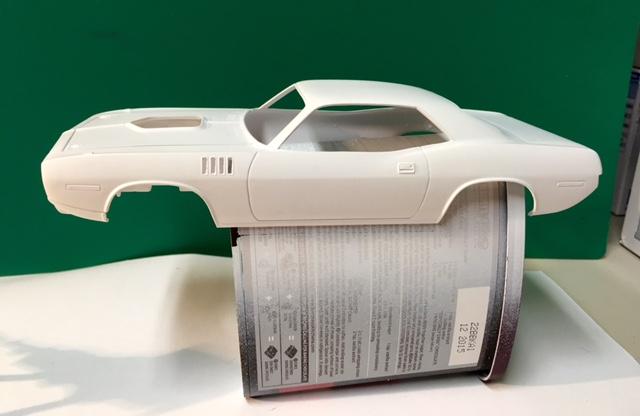
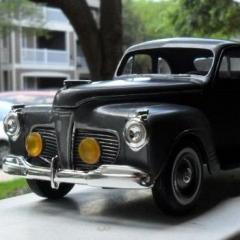
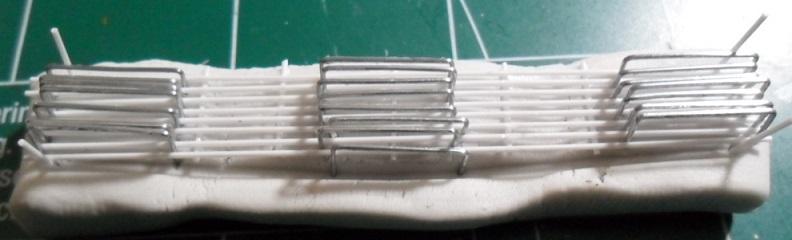
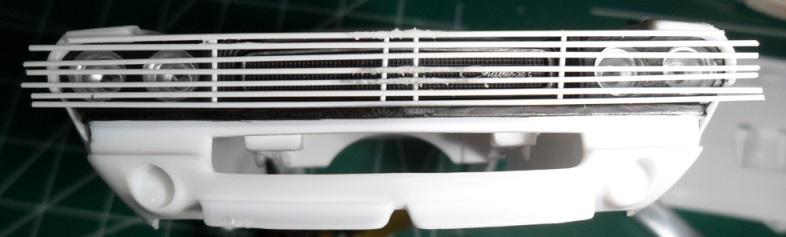
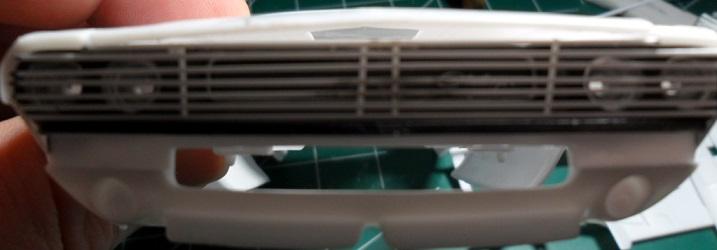
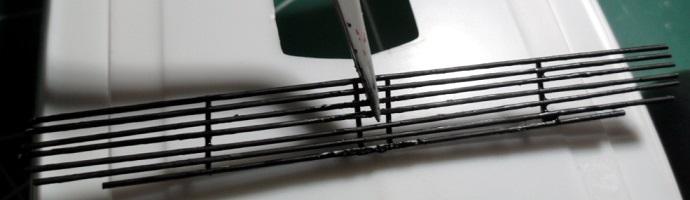
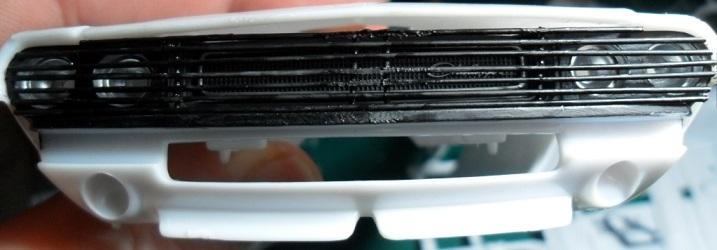
Before the end of 2015 I picked three of the Revell Streetburner 70 Challenger kits for less than 10 bucks each. The first was built to match the box art. This one I'm thinking of taking a bit farther, and the first part of that will be a grill cover. The grill work was done using .20 rod approximately 3" (75 mm) long, since I wanted light to pass through, and for the chrome and headlamps to still be visible behind it, the spacing is about .20 as well. Step 1. Building the jig. Starting with a base of tacky putty, I pressed the grill from the clip in far enough to provide the outline. Saved a lot of measuring, and gave me the points to set my corners. Placing each horizontal piece, I then alternated with standard size staples for uniform spacing. I then applied liquid glue to the verticals and placed them on. The mockup above does show the verticals under the horizontals. That was a first run through, and it made more sense to apply the verticals from the top rather than try and cement them underneath. 2. Placement Once the glue had set, I eased out of the jig with #10 blade, since I may want to use the jig again. Her's a shot of the grill laid over the front of the car. I used a marker to mark the ends of the horizontals for trimming to fit inside the setback over the headlamps and grill. That bit of rough texture visible in the picture is some of the tacky stuff that still needed to be removed. and here's a shot after trimming to fit. The top vertical was cut to fit the width of the hood opening. Cleaning and painting. I'm going black on this one. And here's another fitting after painting. Also thinking of carrying the same grill to the lower opening, but haven't decided on black or body color. Your comments are always welcome.
-
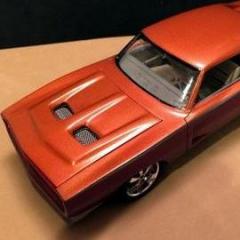
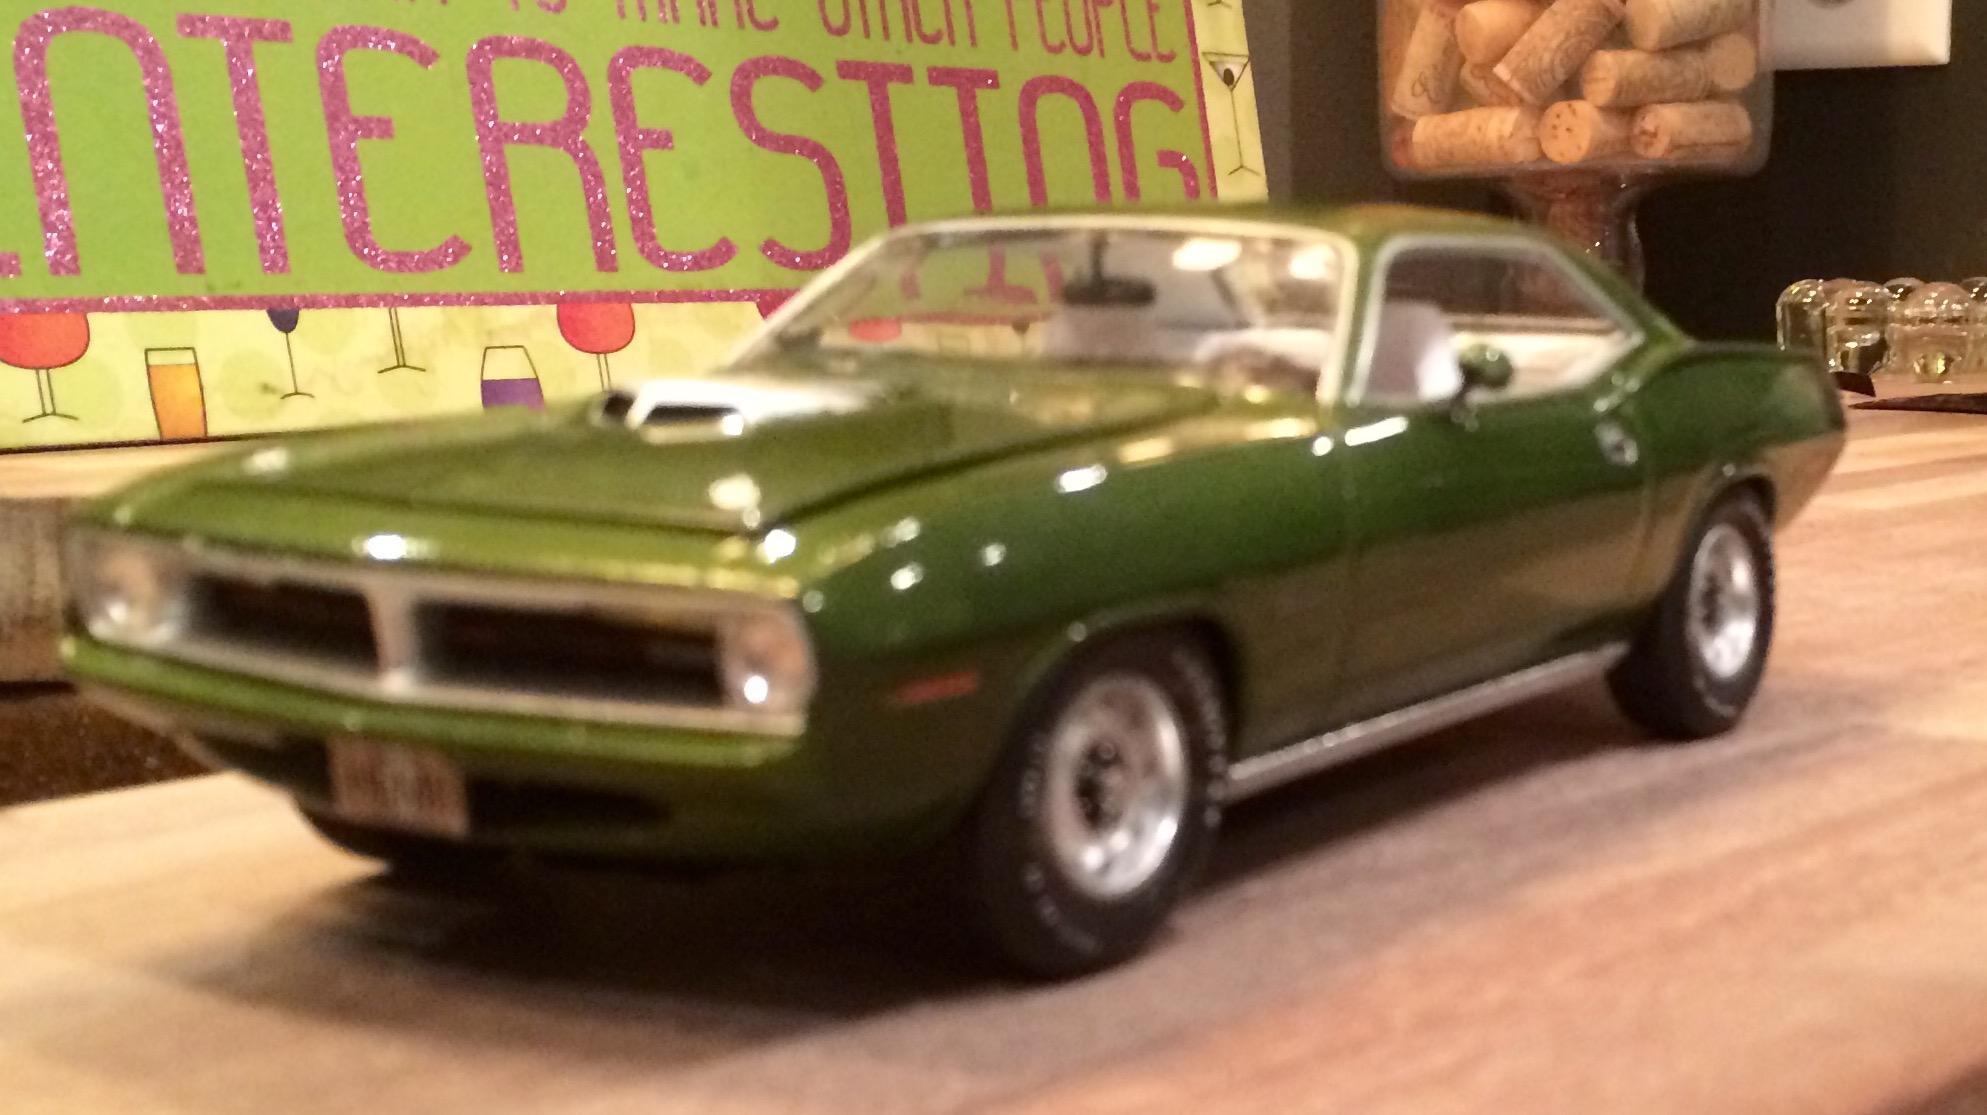
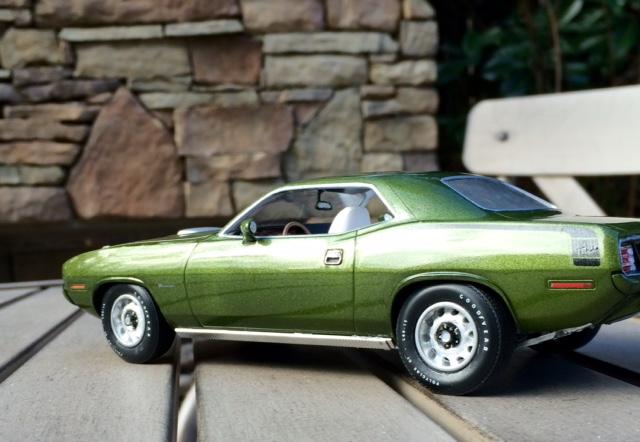
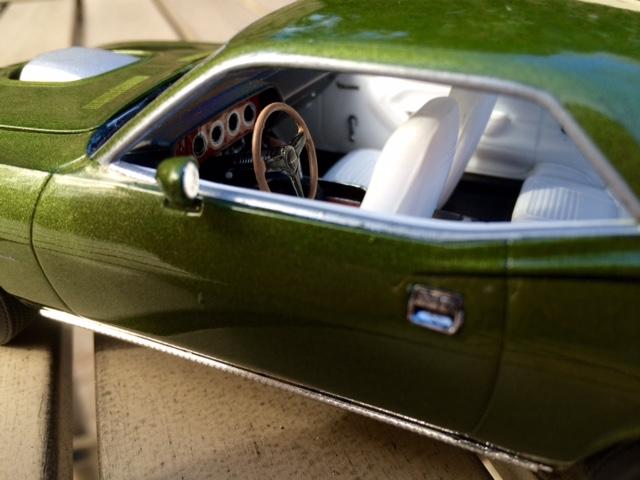
So, I researched this one for a couple months. I read all 29 pages of the discussion when this kit was released, checked out a ton of people's builds, then started figuring out what I wanted to do with it. In the end, I decided to: I looked at tons of pics of the real car as well, waiting for something to really stand out to me as the perfect combo. I knew the interior was going to be white, but couldn't decide on a body color. In the end, a few pics of a Lime Green Metallic Cuda stayed with me the most. Then I set out to find a suitable paint (I don't own an airbrush), and was terribly disappointed. How on earth is it that different shades of light metallic sage-olive green were offered by every manufacturer and was the most popular color of the 60s and early 70s, and NOBODY offers a decent rattle can of a suitable color???? Anyway, after researching for two weeks, I found Automotive Touchup, and purchased a can of Pontiac Verdoro Green and Clearcoat from them. Two coats of color and 4 coats of clear were applied, compounded and waxed. Tried several different tires to get something a little more beefy but not over the top, and settled on the AMT Goodyear Polyglas GTs. Wired the engine, added battery cables and a little wiring on the firewall for detail I heard all of the complaints about the fenders, and agreed. I'm not sure what the reason is that the fenders were molded with such ridiculously prominent lips. I saw several builds where once painted, they weren't terrible, but they stuck out like a sore thumb to me comparing to photos of the real thing. I also noticed several pics where the real car didn't have the chrome trim rings, which I preferred, so I actually used the hobby knife to trim most of the lip off, then sanded as best as I could. Anyway, I have read all of the complaints, but this was a JOY to build, and is an excellent kit. First, i'll give a few WIP shots as it came together, and then some finished pics. Finally, I had to take it outside in the morning sun. Hope you enjoy... I loved this model. Added a little wiring to the firewall: Was able to get the silver outline trim painted onto the steering wheel, and the black trim around the window cranks: One last pre-finished shot: I was in final assembly, and the sun hit just right: Done: Finally, a few outdoor shots, including under the hood with everything in place:
-
 Picked up a new model last week in Reno. Looking forward to learning from my mistakes on my previous kit 1970 Chevy Monte Carlo. This is the Revell 1965 Chip Foose edition Chevy Impala With Clear
 -
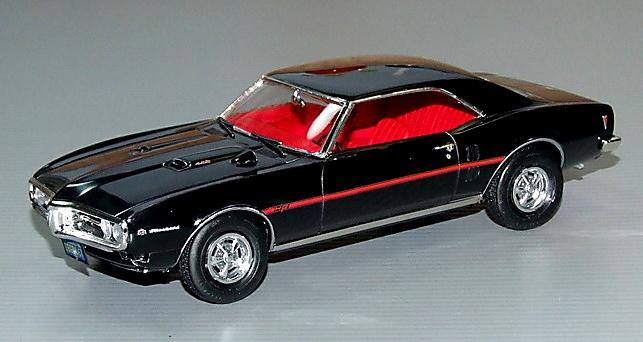
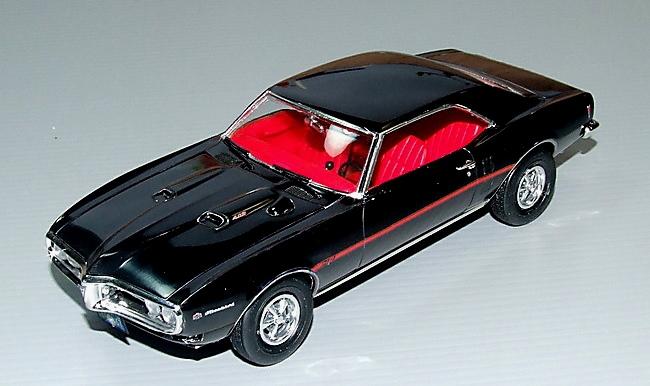
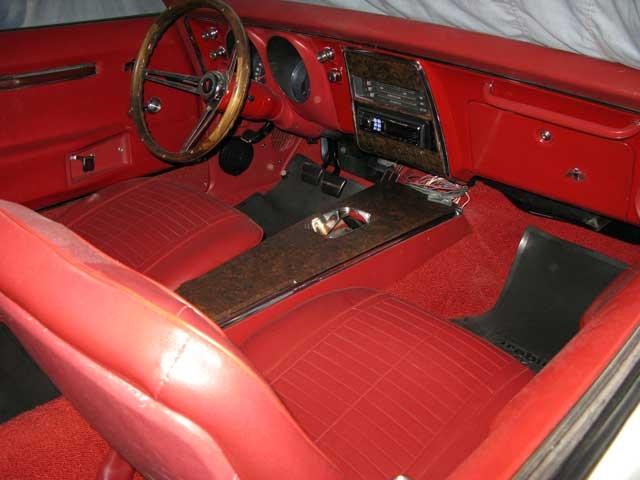
Following all the anticipation and 'prep' for the Cambridge Show which took place over Armistice weekend (same as the UK Nationals) and last week simultaneously 'instructing' & taking a SAR course, that part of my brain that deals with modelling is really working only at 'tick-over'. That in mind, I decided to clear the bench, drag-out a relatively straightforward kit and simply build it from start to finish. So here t'is. Revells 1968 Firebird 400 in it's original 2004 boxing. The roof lining has been sprayed Tamiya acrylic 'Buff' and the chassis & firewalls Tamiya 'Satin Black' enamel. The body has been primered with Tamiya grey just this morning and will be left alone for a day or so to fully cure before rubbing back and polishing ready for the first coat of glossy black. Not certain whether in 1968 the red interior was available as an option with the black body colour, but even if it wasn't for overall effect, black with a red interior is really hard to beat and in my opinion, so classy. The bonus is that the red graphic stripes are in the kit, so it's sort of a 'no brainer' for me. Hopefully at the end of the process it will look something like this: Stay tuned & let's see !! Ian.
-
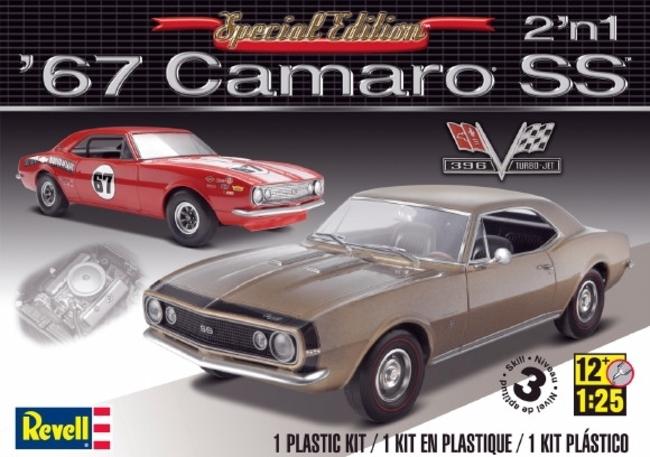
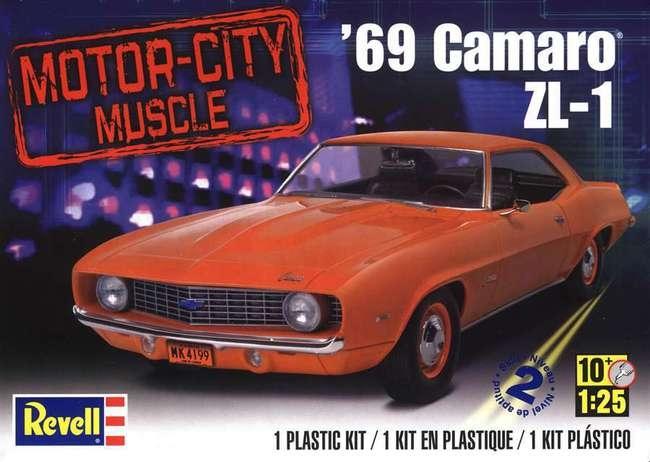
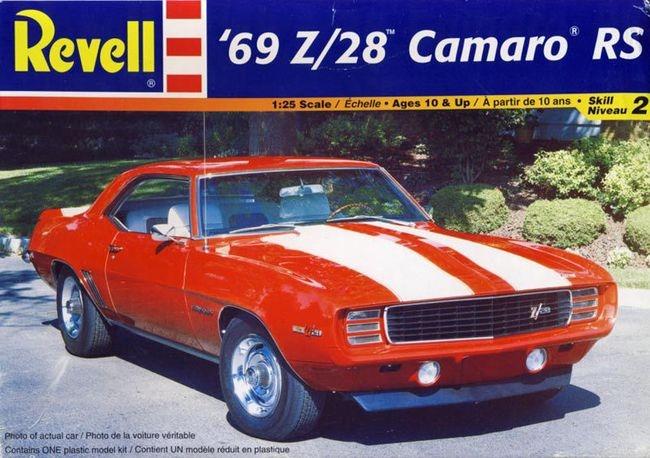
Hey folks Could do with a little guidance. I have the Revell Yenko Camaro which to my eye is a superb kit, so nice that I'd like to get at least one more, but I'm a wee bit unsure as to which of the currently available kits are (relatively) new releases and which are re-treads of the older Monogram kit. Over to you folks, any help is very welcome. Ian.
-
 I used my 40% off coupon at two locations in the north Phoenix area, got one at each location. I haven't seen them at Michaels yet or I would have gotten them for 50% off.
 -
Please include any links to copies of model car instructions whether on the Manufacturer's Website such as the ones on Revell's website. Suggest that if you have instructions laying around that you contact the Clubs who host them on their websites to see what kind of format they accept copies of instruction sheets. Helps us all out. Revell/monogram/Hobico - http://www.revell.com/support/instructions.html Drastic Plastic Model Car Club - http://public.fotki.com/drasticplasticsmcc/mkiba-build-under-c/
-
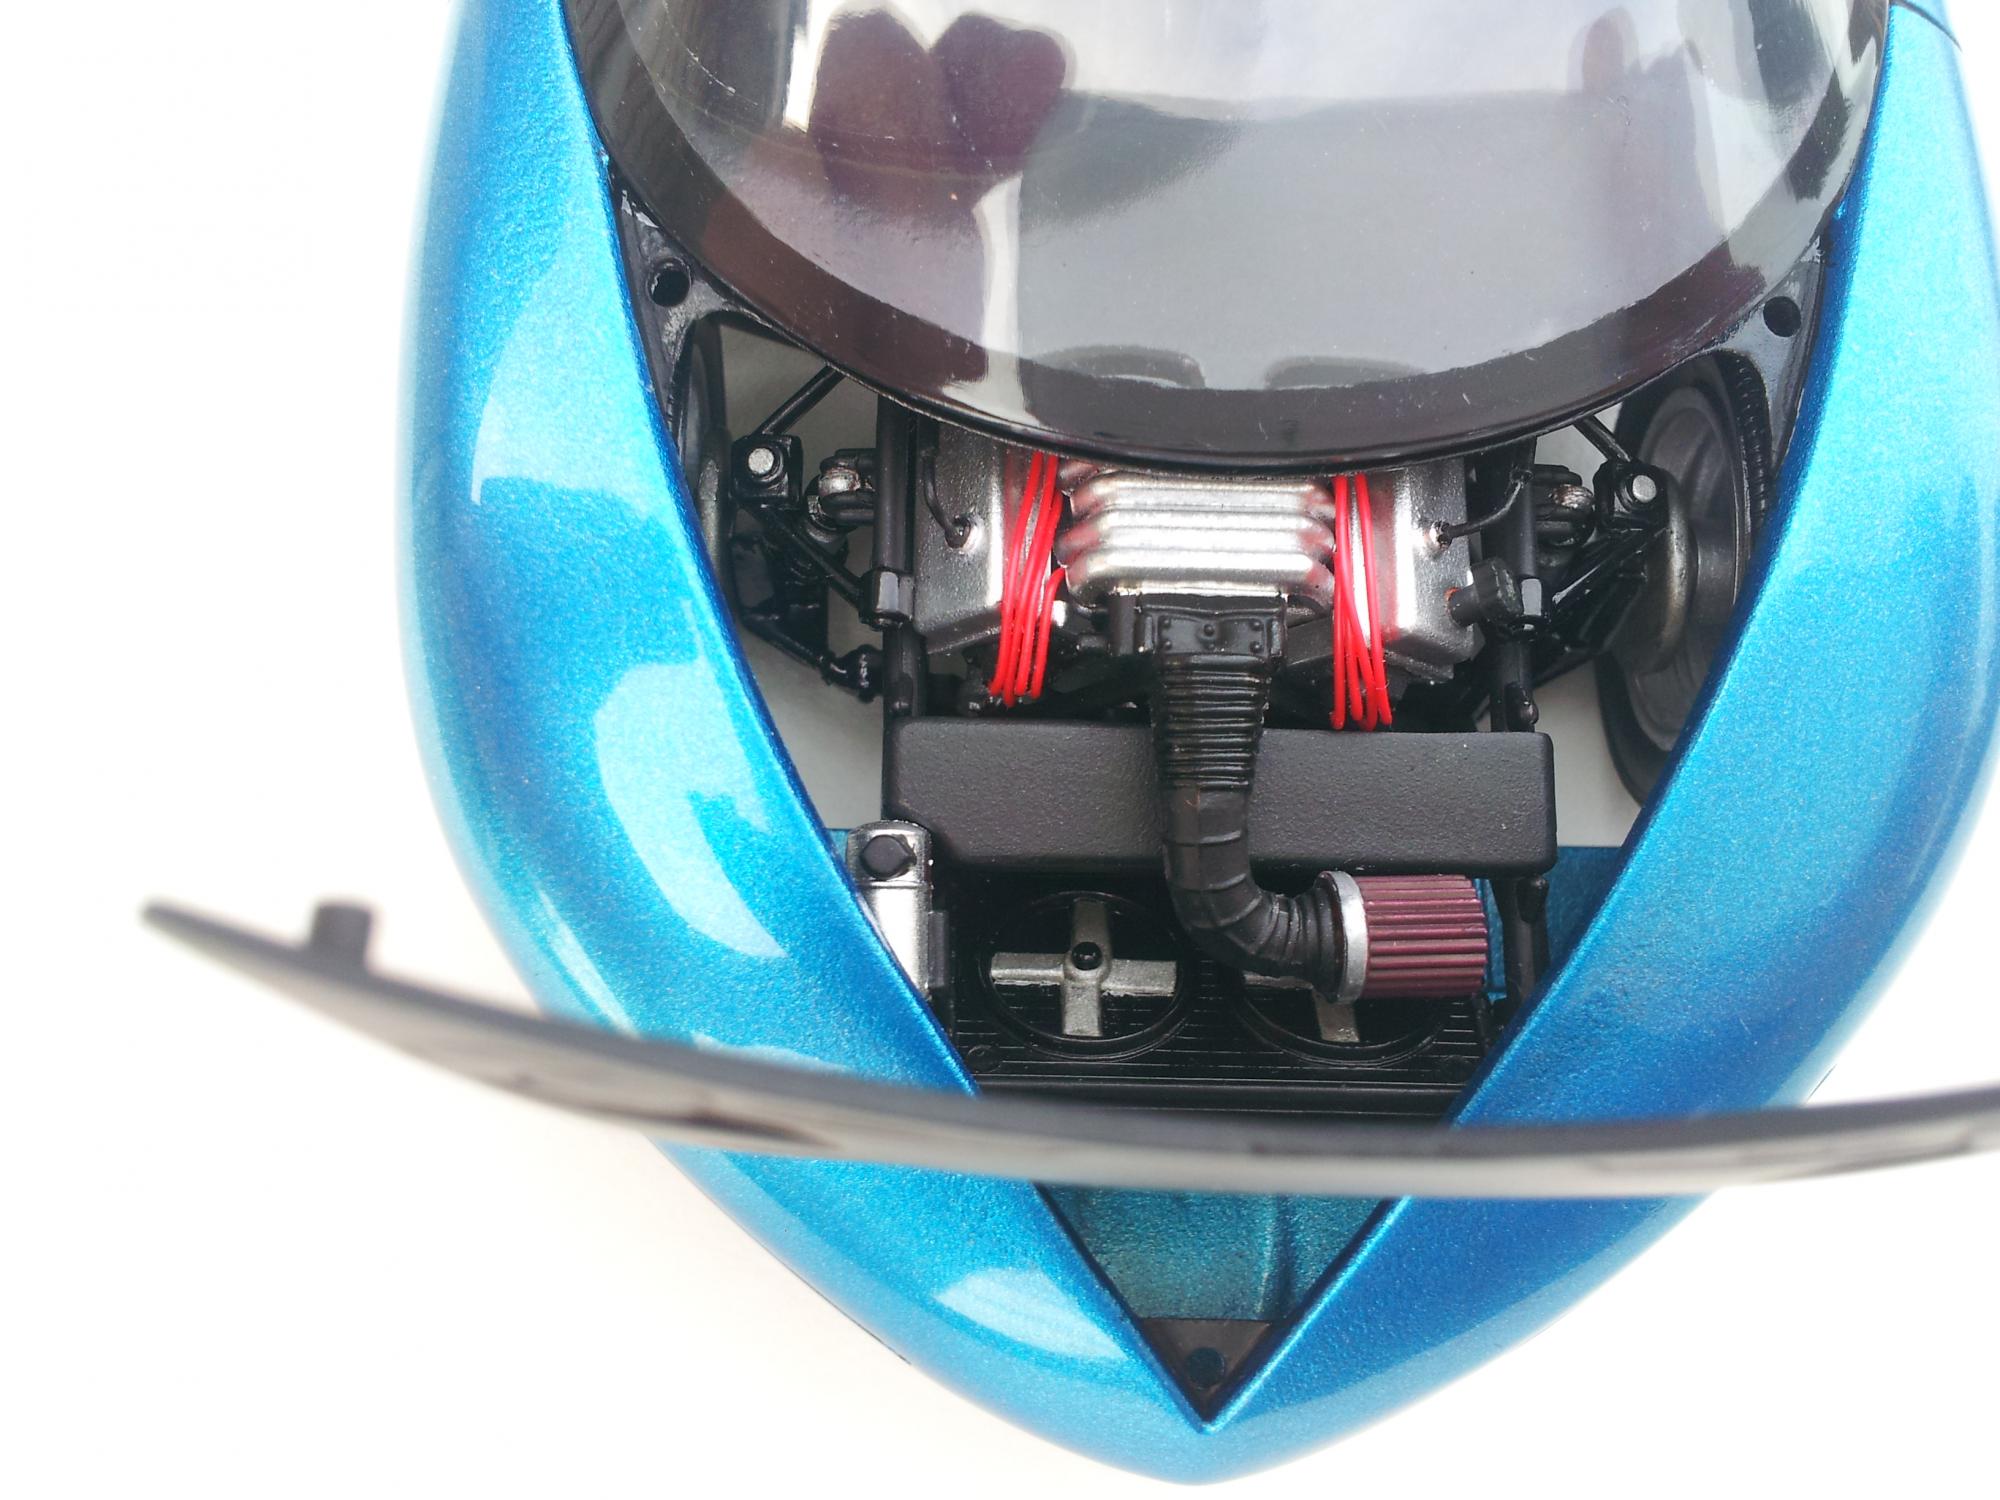
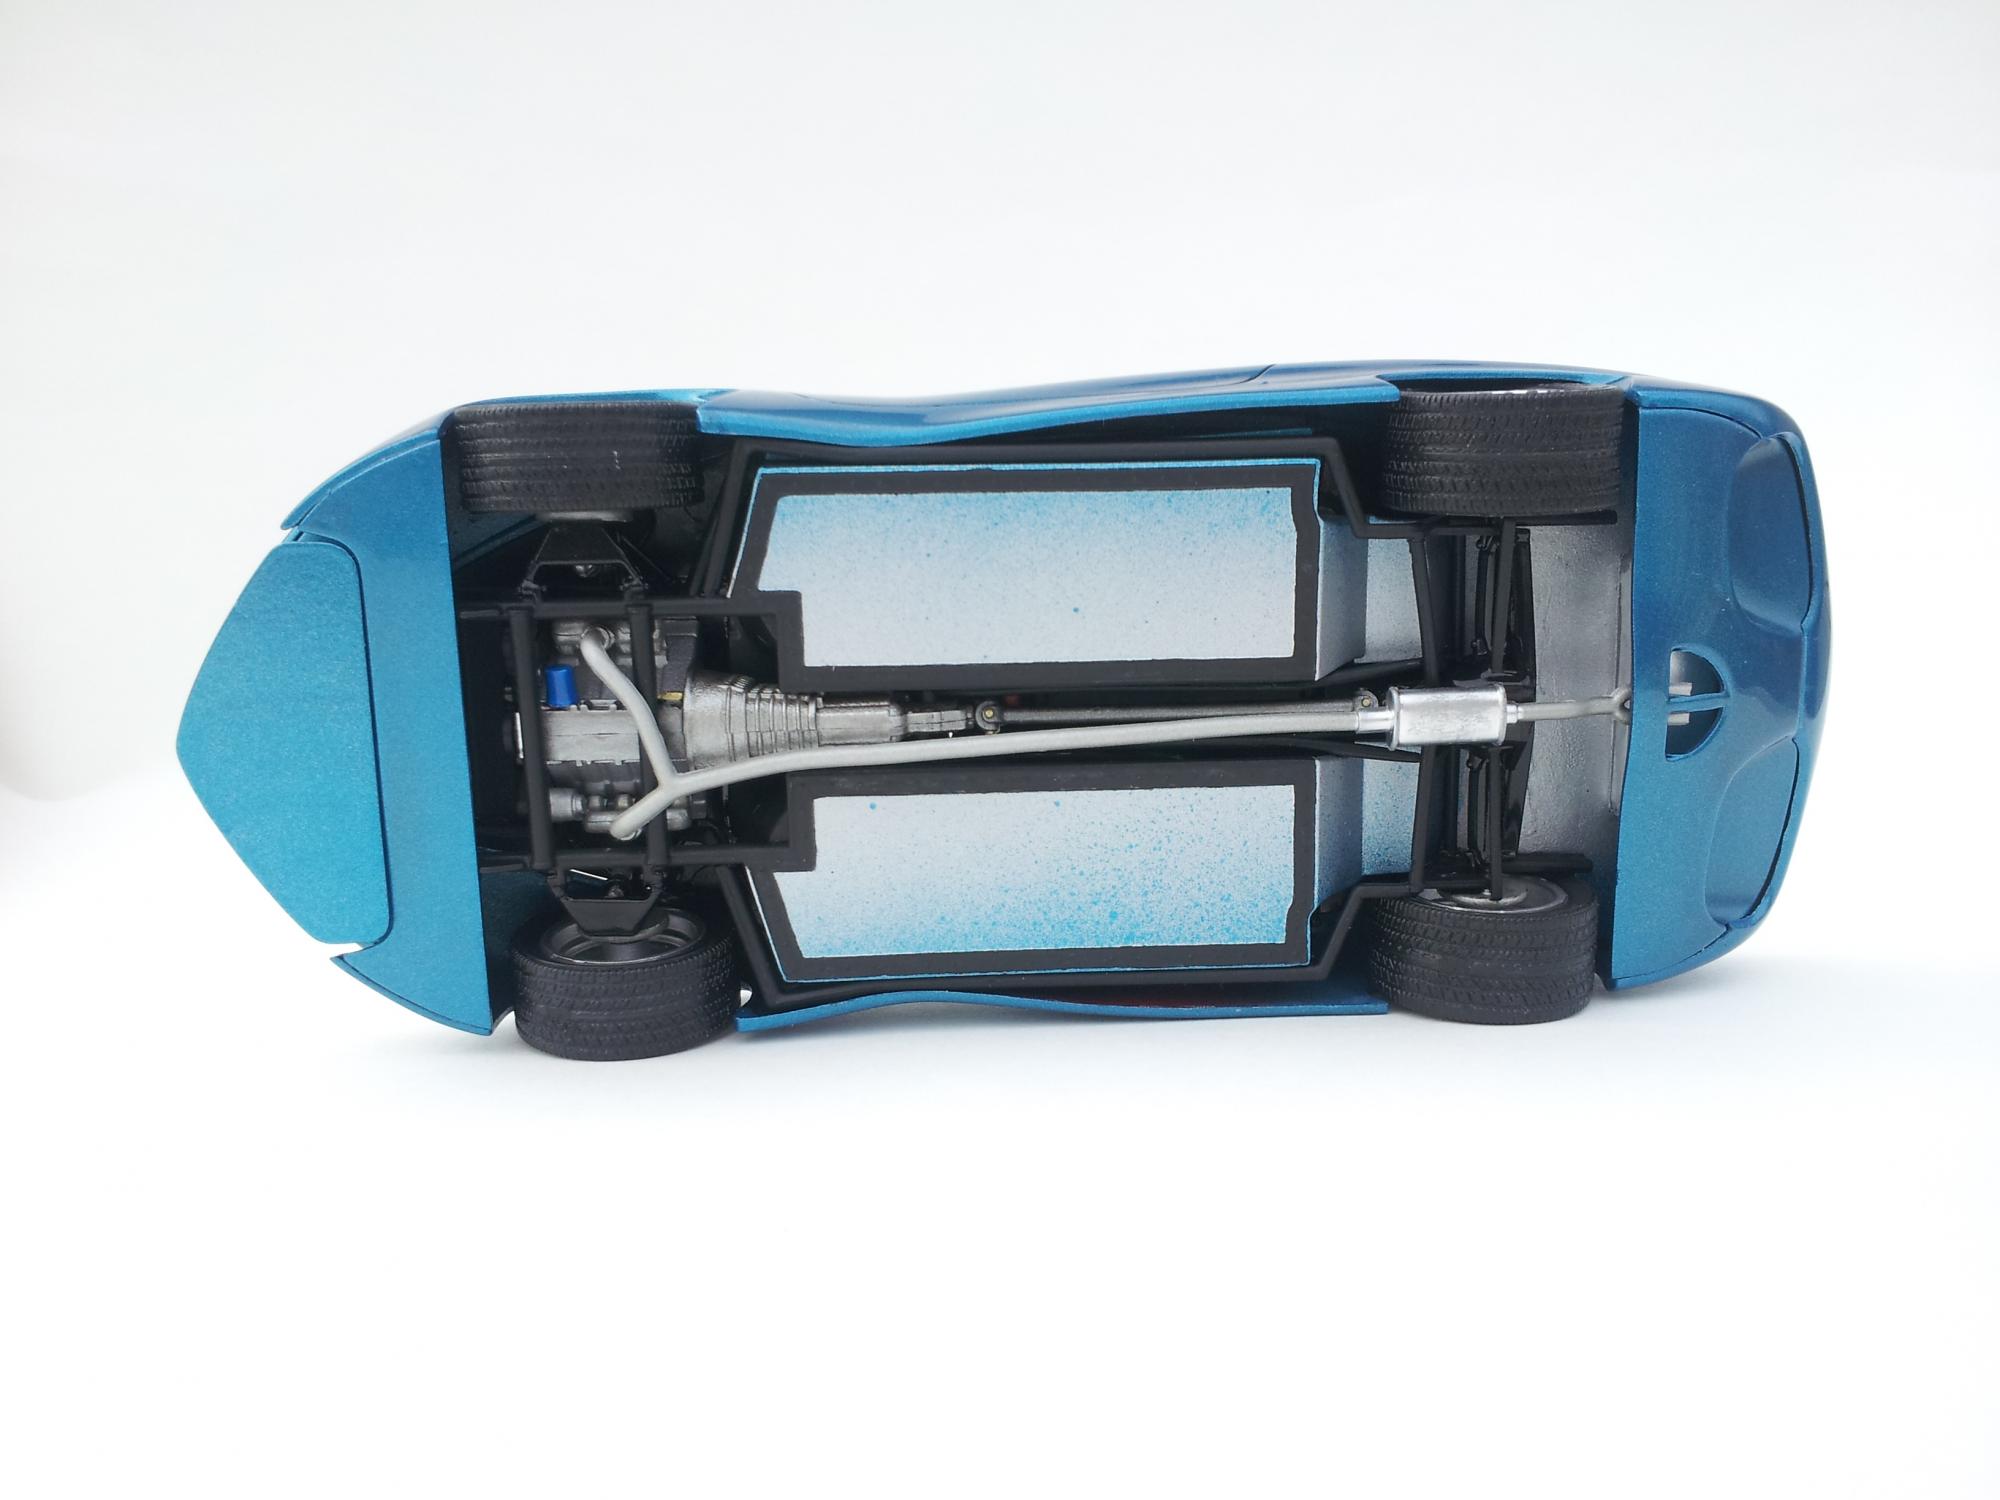
Since the snap-tite kit was delayed by about 2 months, I decided not to wait for the "in theory" Sept release of the full(er) detailed kit. I started to paint it yellow but had some problems so I sanded it down and prepped it with Tamiya Silver leaf. Then I shot Tamiya Mica Silver as a base coat for the Tamiya TS-50 blue final color. Model has a few coats of Tamiya TS-13 clear over it. I got some chipping around the headlight area when I put the covers on, I am hoping I can touch this up with some Tamiya clear blue brush paint. I am going to use the chrome wheels from the Revell 2006 ZO6 kit along with it's stock brakes since the 2014 kit basically has washers for the brake system. Tail lights have been detail painted and installed . All and all not a bad little kit for a snap together, but watch out for those headlight covers!
-
 Hi guys, i want to share with you my last finished model, an Unimog from Revell in 1/35 scale, i also made a little diorama trying to replicate some road in the afganistan desert.