rsxse240
-
Posts
633 -
Joined
-
Last visited
Content Type
Profiles
Forums
Events
Gallery
Everything posted by rsxse240
-
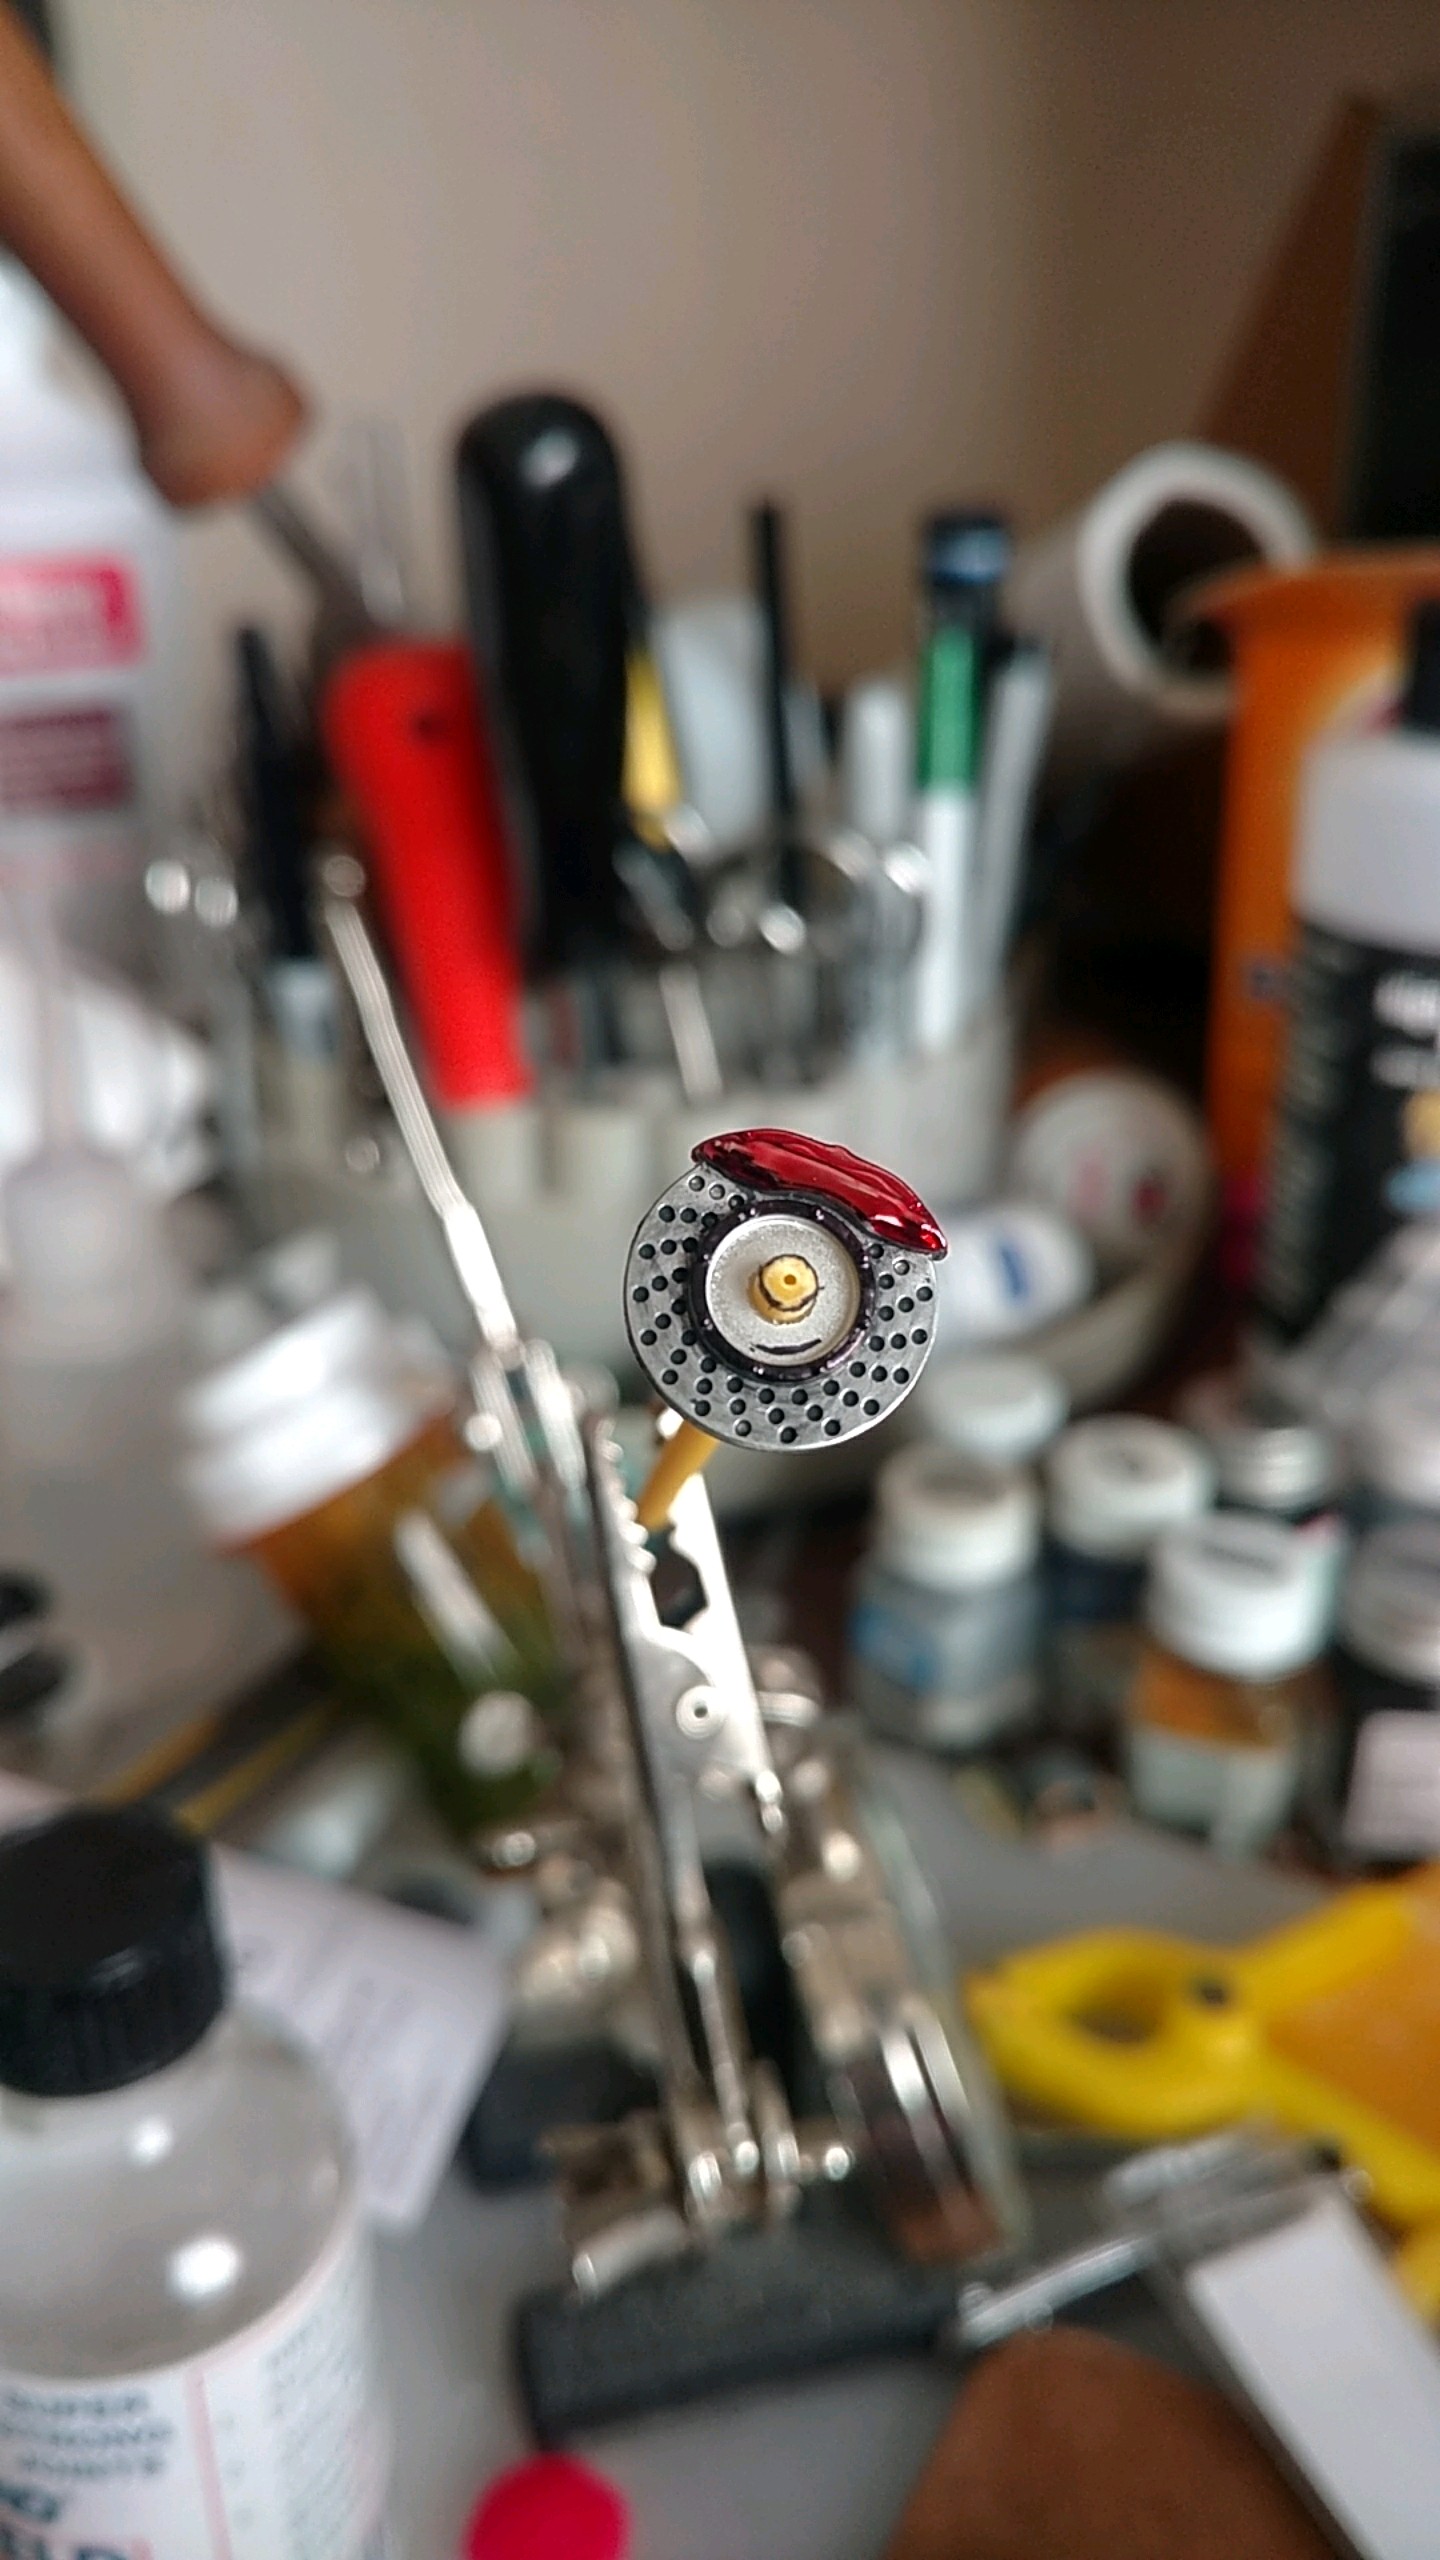
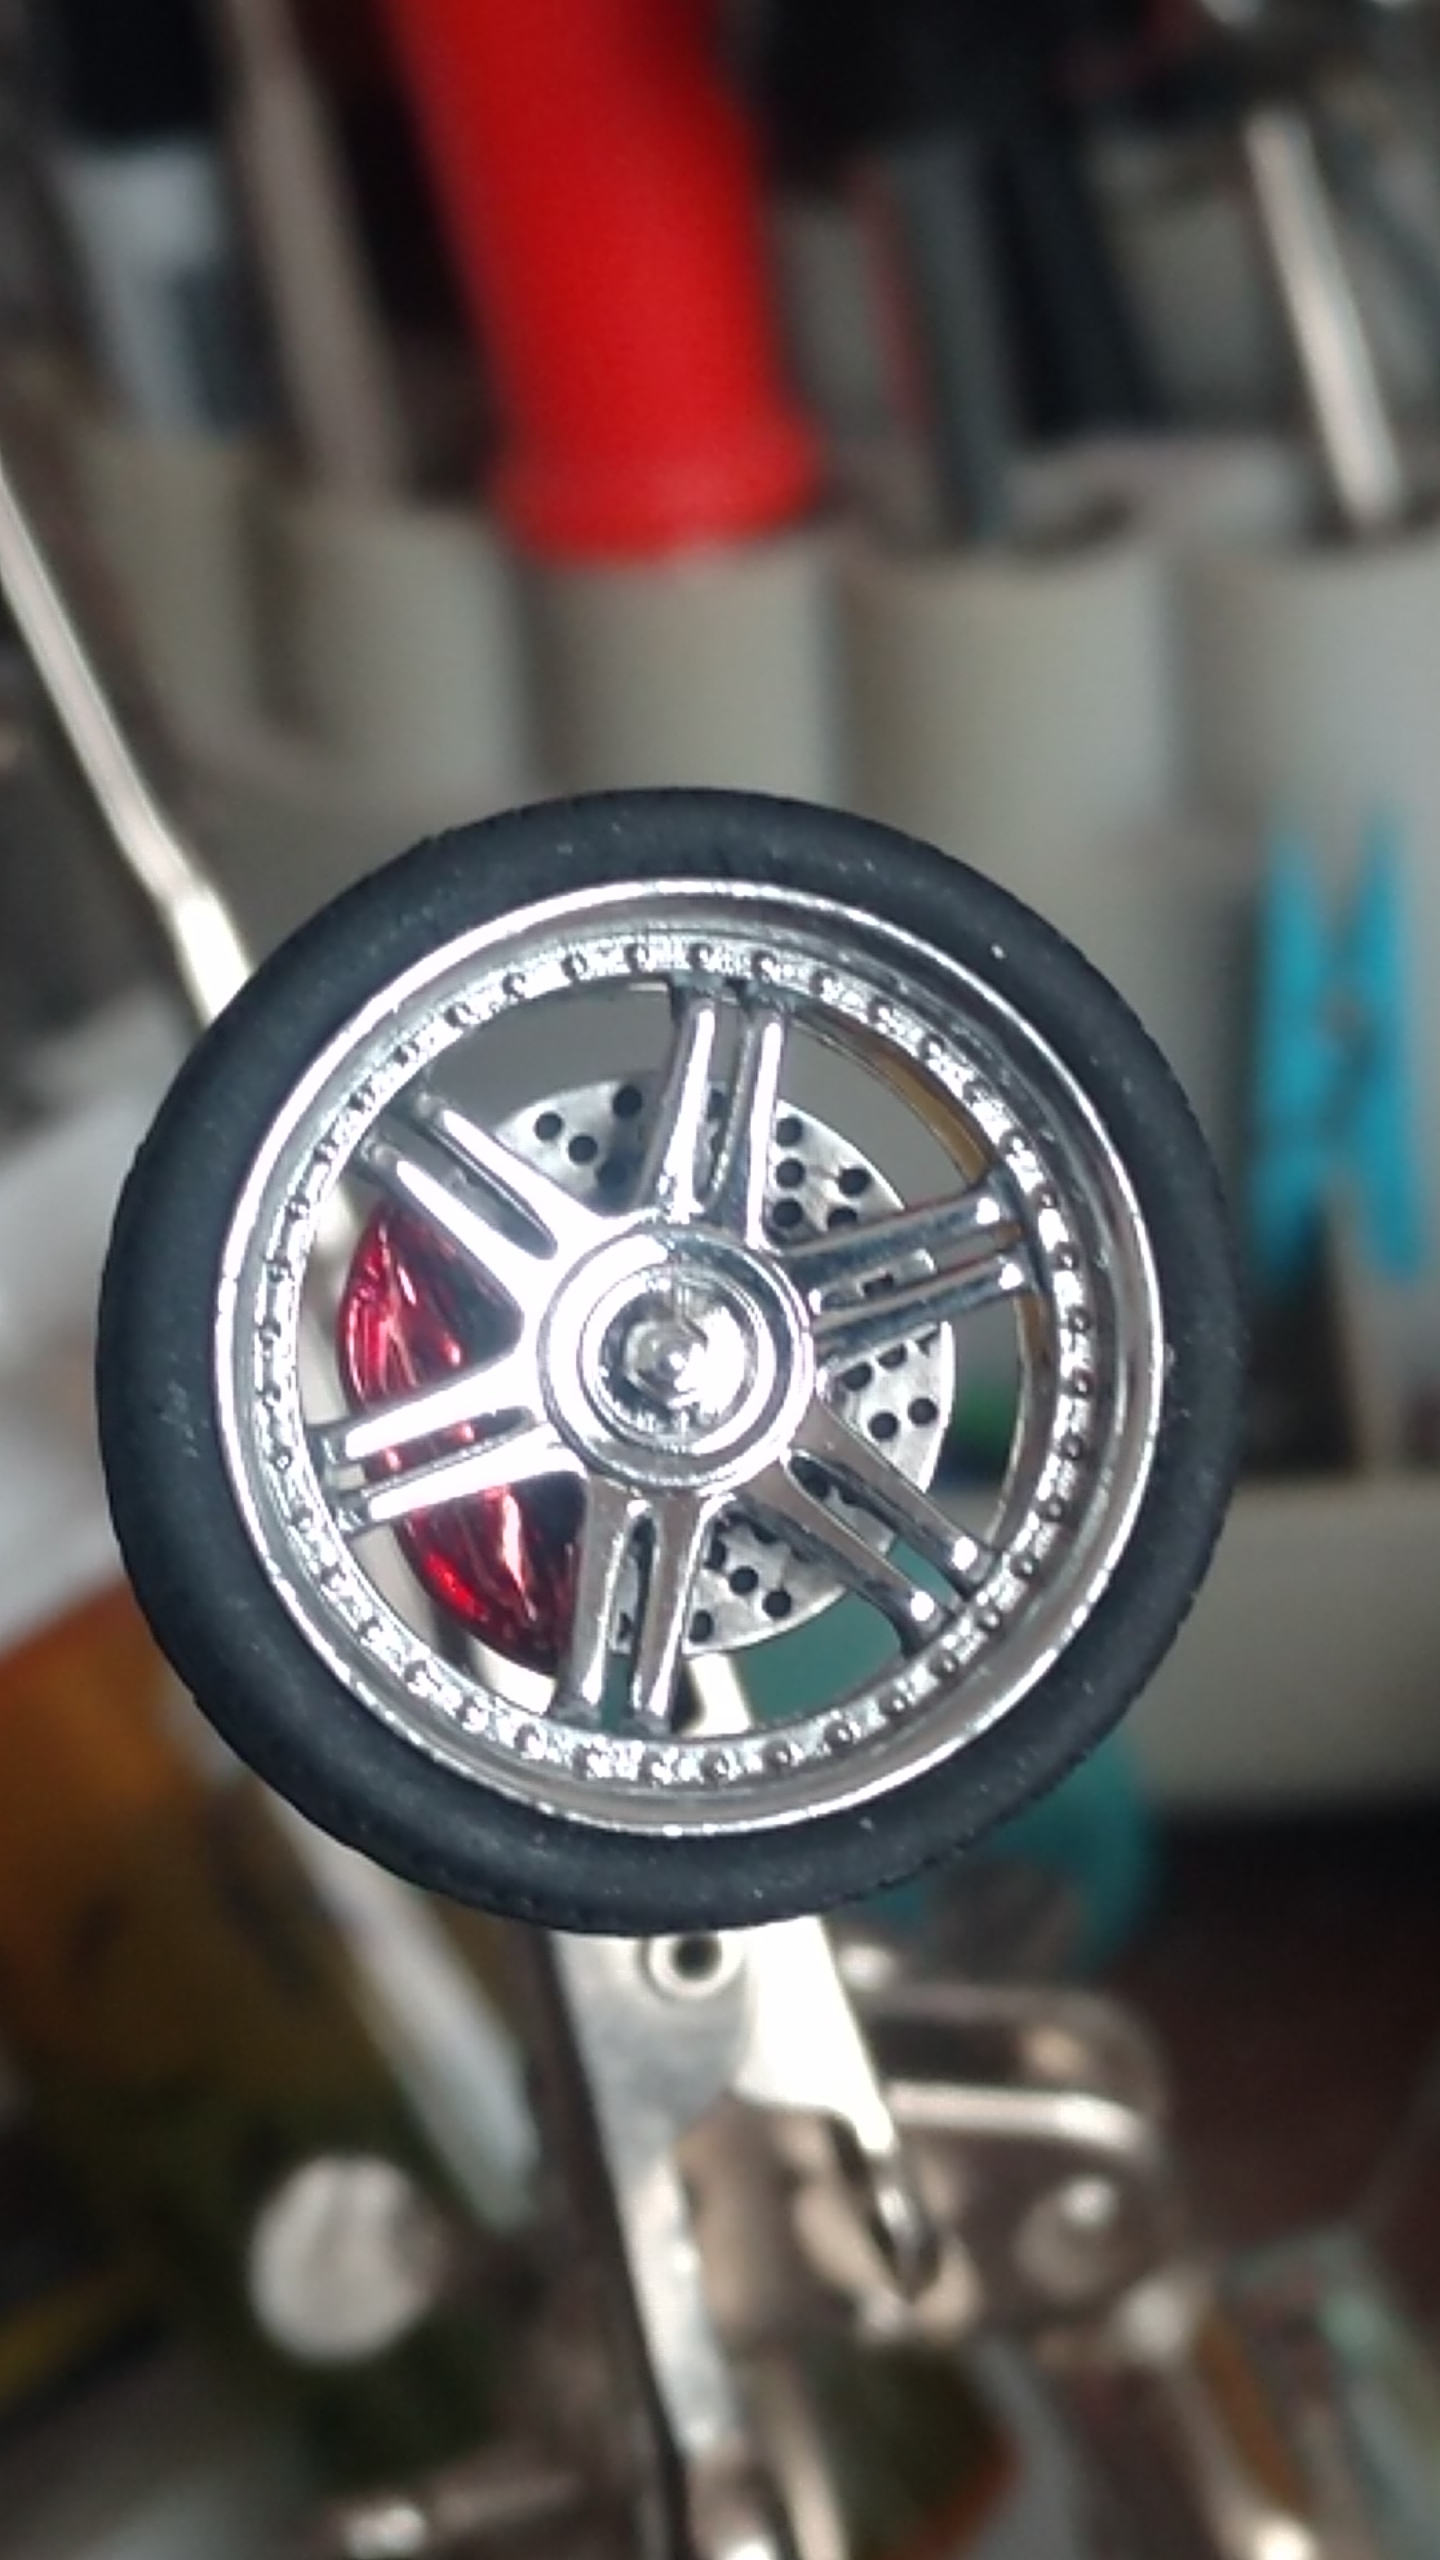
So I put this one back on the table. I found some brakes and finished the wheels. Here's the final dry fit before I make the final assembly.

-
Having delt with the exact issue with the exact kit, I can tell you that after several failed attempts, I finally decided to foil both pieces of trim with one piece of BMF, then paint over the foil and carefully clean the trim off with some paint thinner.
-
If you cover the area you want to modify with masking tape, the tape prevents the Bondo from adhering to the body. Once it is dry, you can carefully remove the Bondo from the body and the tape will also come clean from both the body and the Bondo.
-
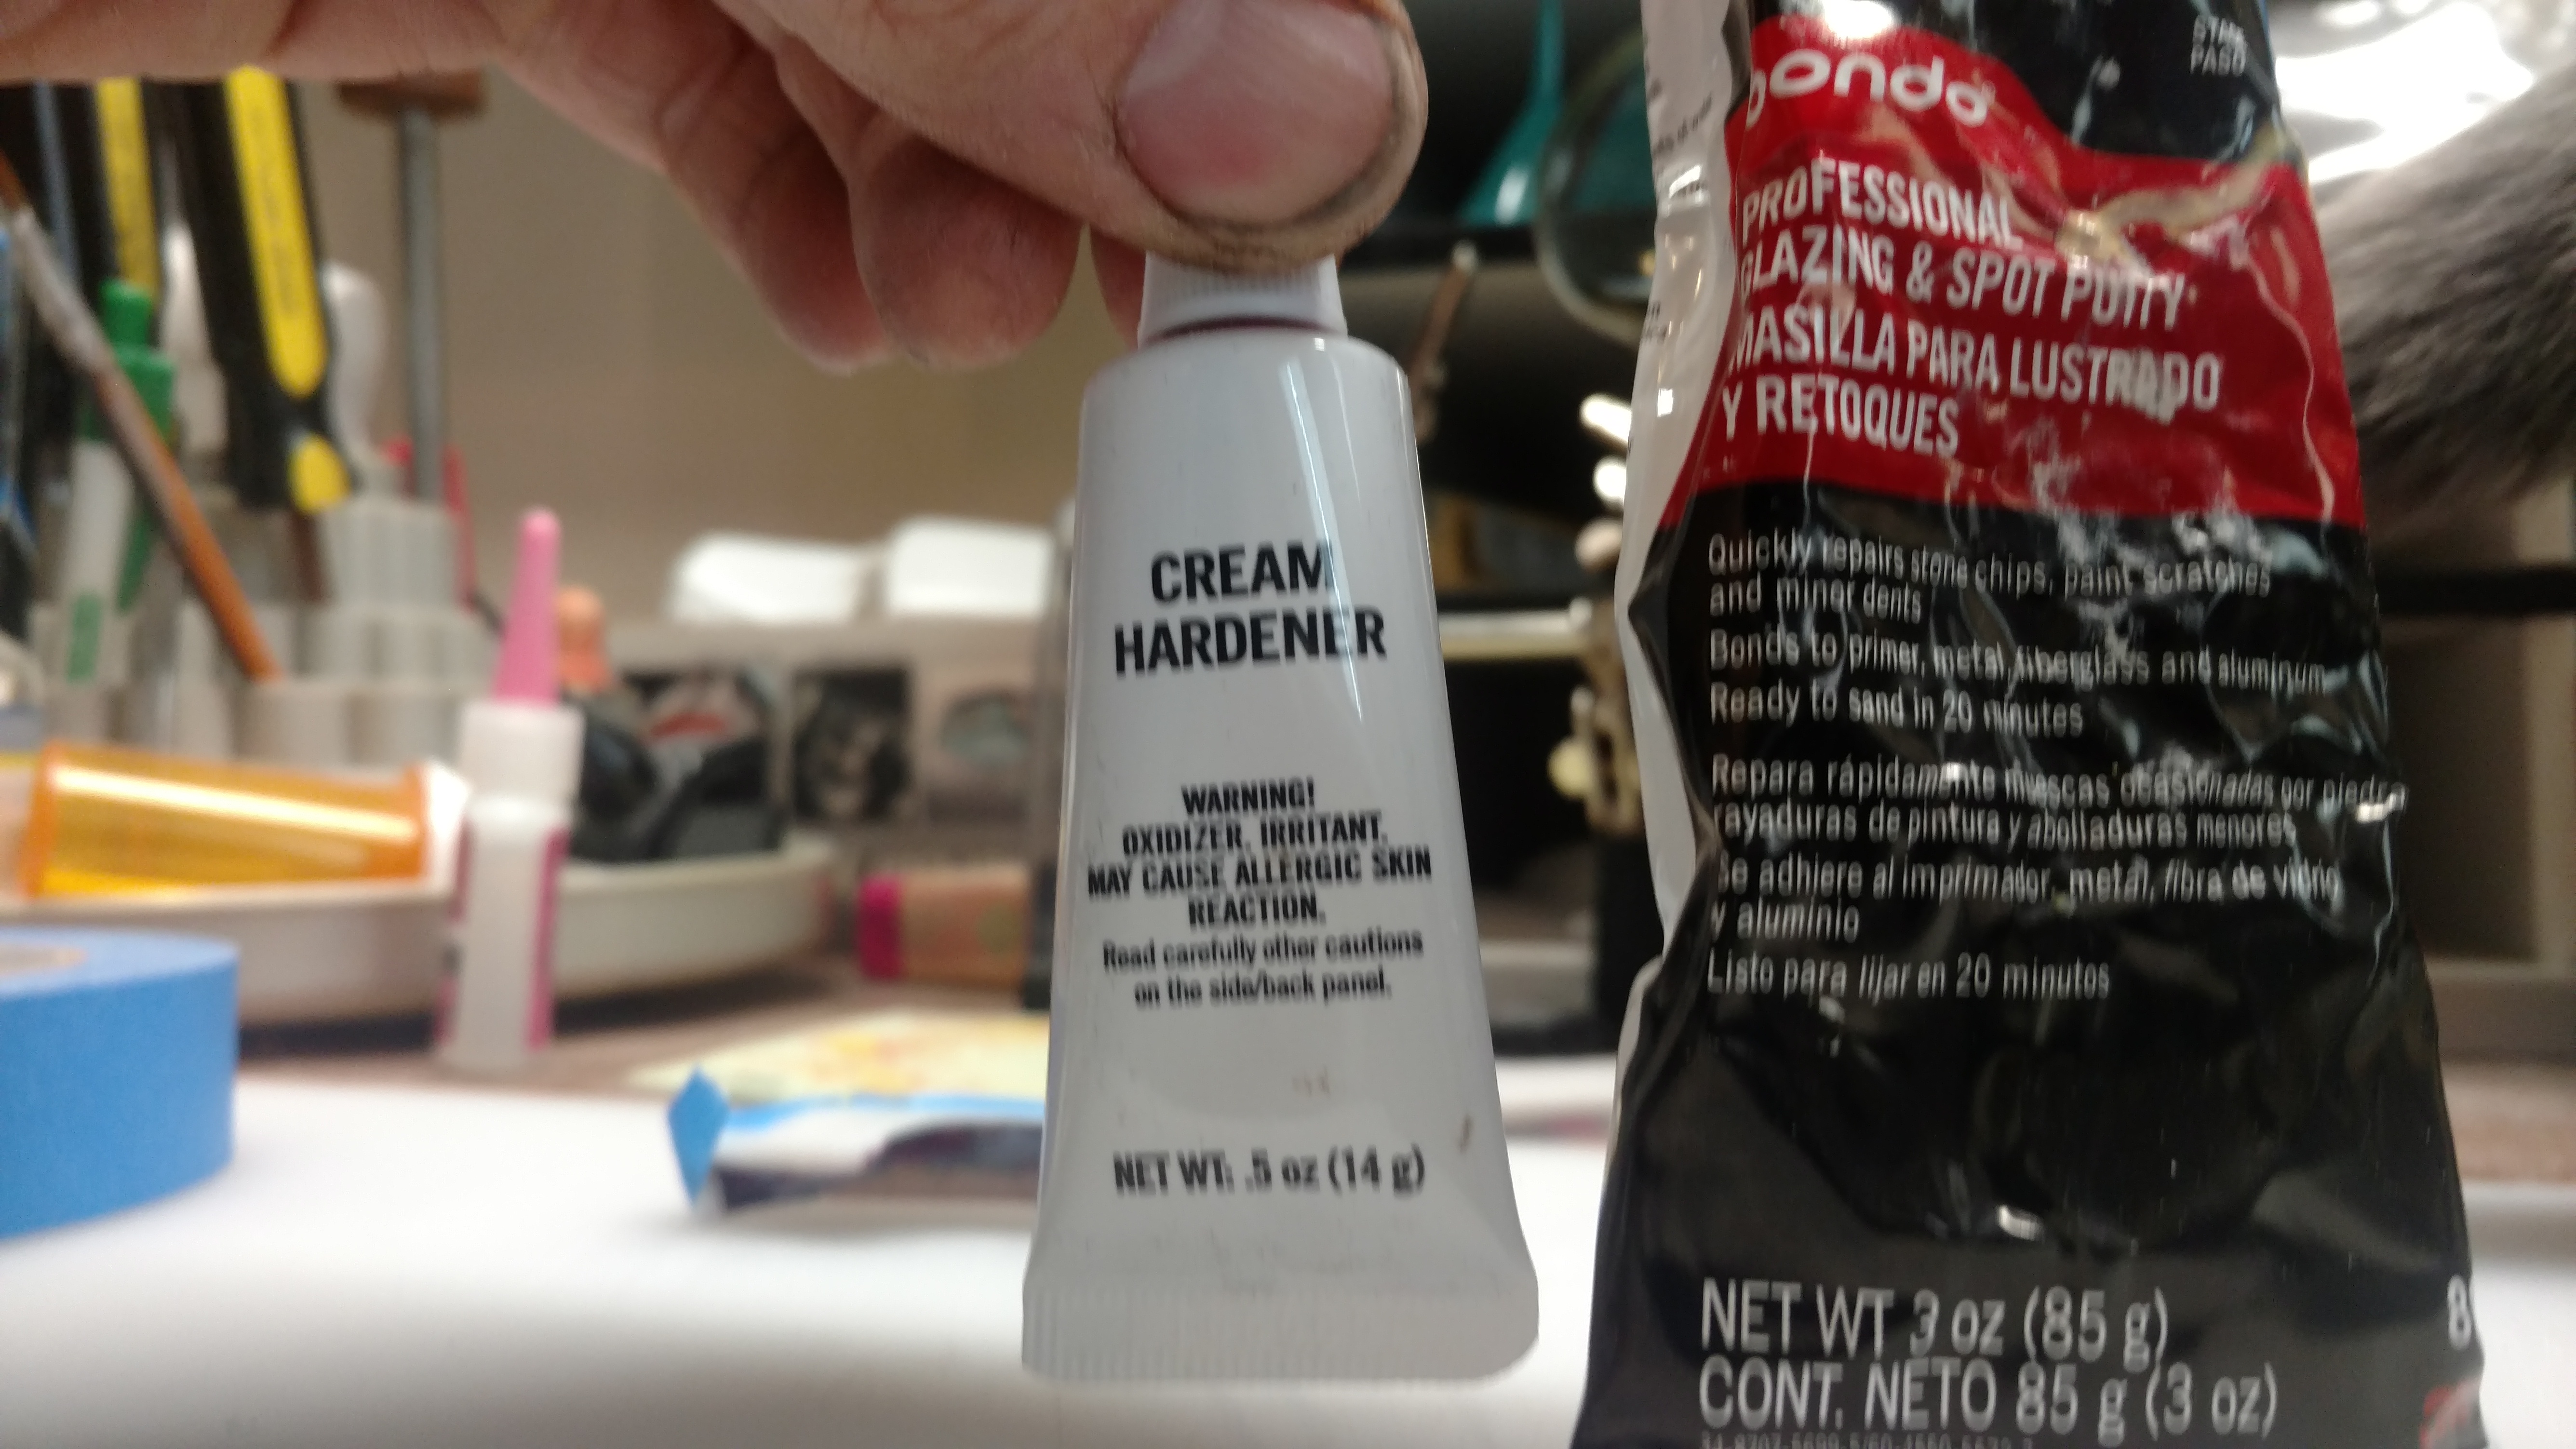
I encourage you to try to build that! Nobody builds Z32 kits and when they do, they're stock. I think I have suggested my method previously, but I'll try to explain it again. Cover the area you wish to modify (such as flares, skirts and bumpers) with masking tape and using Bondo PROFESSIONAL glazing putty, get a basic shape of what you're trying to accomplish while it's wet. Now let it cure thoroughly then CAREFULLY remove the part and rough in your shape adding more putty if needed. Then you can use some fine finishing putty to get it smooth and get your final shape. Now you have a part that is easy to work with, fits perfectly to the body and you don't have to do very much modifying to the body to have a really nice job.
-
I got to drive one, once. It makes me so incredibly sad that I didn't buy it. Black 2.3l Turbo Merkur Xr4ti. GAHHH! I kick myself in the pants for that. Dave Van has pictured a resin body on a Mustang GTP, isn't it? I recall seeing someone on here having one for sale not incredibly long ago.
-
I see your point and i will whole heartedly agree with your choice. I think this will be quitea stunner when it's done!
-
I've been thinking about doing this exact same thing! I am quite shocked to see the 67-68 cougar body being cut up, as I cannot find one to save my life! I am watching this one!
-
I couldn't agree more! This is one of my FAVORITE cars of all time! I also have one and I am trying to track down a Revellogram Thunderbird Turbo Coupe to swap the drivetrain so as to make the U.S. model XR4TI. Since we all know the lump of plastic in the kit is a fair REPRESENTATION of a Ford V6, plus it was slow in comparison to the 2.3 Turbo. I can't wait to see what you do with this!
-
^ I know the feeling. I've made some wheels, seats and other things for people then see the way they turned out and wish I would've kept the Masters. Lol As for the build at hand. I am in love with this truck. Always have been and always will be. You're doing a fantastic job and it looks great so far!
-
Very nice! It always feels good to complete a build, specially when it takes a long time. Hopefully, you are inspired to continue to build, I'd like to see more of your work.
-
The "glass" can easily be blacked with a good black Sharpie or a careful masking of the clear section and airbrushed the black. As for a body kit, if you message me with a picture of what you're looking for or something similar, I could possibly build one and resin cast a transkit. I've been looking for a good excuse to build mine. Here's a picture of the current project I am working on. A Tamiya 180SX with an Aoshima S15 body kit modified to fit.
-
Why not use a yellow highlighter? Tellow sharpies would work too.
-
custom '50 chevy pickup
rsxse240 replied to rsxse240's topic in WIP: Model Trucks: Pickups, Vans, SUVs, Light Commercial
Well, there goes all my progress photos on this one. Thanks photoF**Ket. I am not going to pay for photo hosting. I guess I will just start another progress thread...maybe, if I feel like doing all the down and up loading of images. Since they are all on Photobucket What a hassle. -
custom '50 chevy pickup
rsxse240 replied to rsxse240's topic in WIP: Model Trucks: Pickups, Vans, SUVs, Light Commercial
Thanks, Tom, for the kind words. I have since put this back on hold. I went M.A.D.D. (Modeller's Attention Deficit Disorder) and decided to change things up a bit and build some aircraft for a change of scenery. I had to do a bunch of repairs to the body and doors due to shrinks and cracks in the body work. It's back in primer and looking good, but really no notable progress on this one, unfortunately. -
I am going to use this idea of flipping the hood around to make a custom rear end
-
'56 Chevy Truck
rsxse240 replied to Slotto's topic in WIP: Model Trucks: Pickups, Vans, SUVs, Light Commercial
Those wheels look fantastic on that truck! -
custom '50 chevy pickup
rsxse240 replied to rsxse240's topic in WIP: Model Trucks: Pickups, Vans, SUVs, Light Commercial
Thank you all for the compliments and motivation. I am quite busy now that the grass is growing again. I'll post progress as it happens. -
custom '50 chevy pickup
rsxse240 replied to rsxse240's topic in WIP: Model Trucks: Pickups, Vans, SUVs, Light Commercial
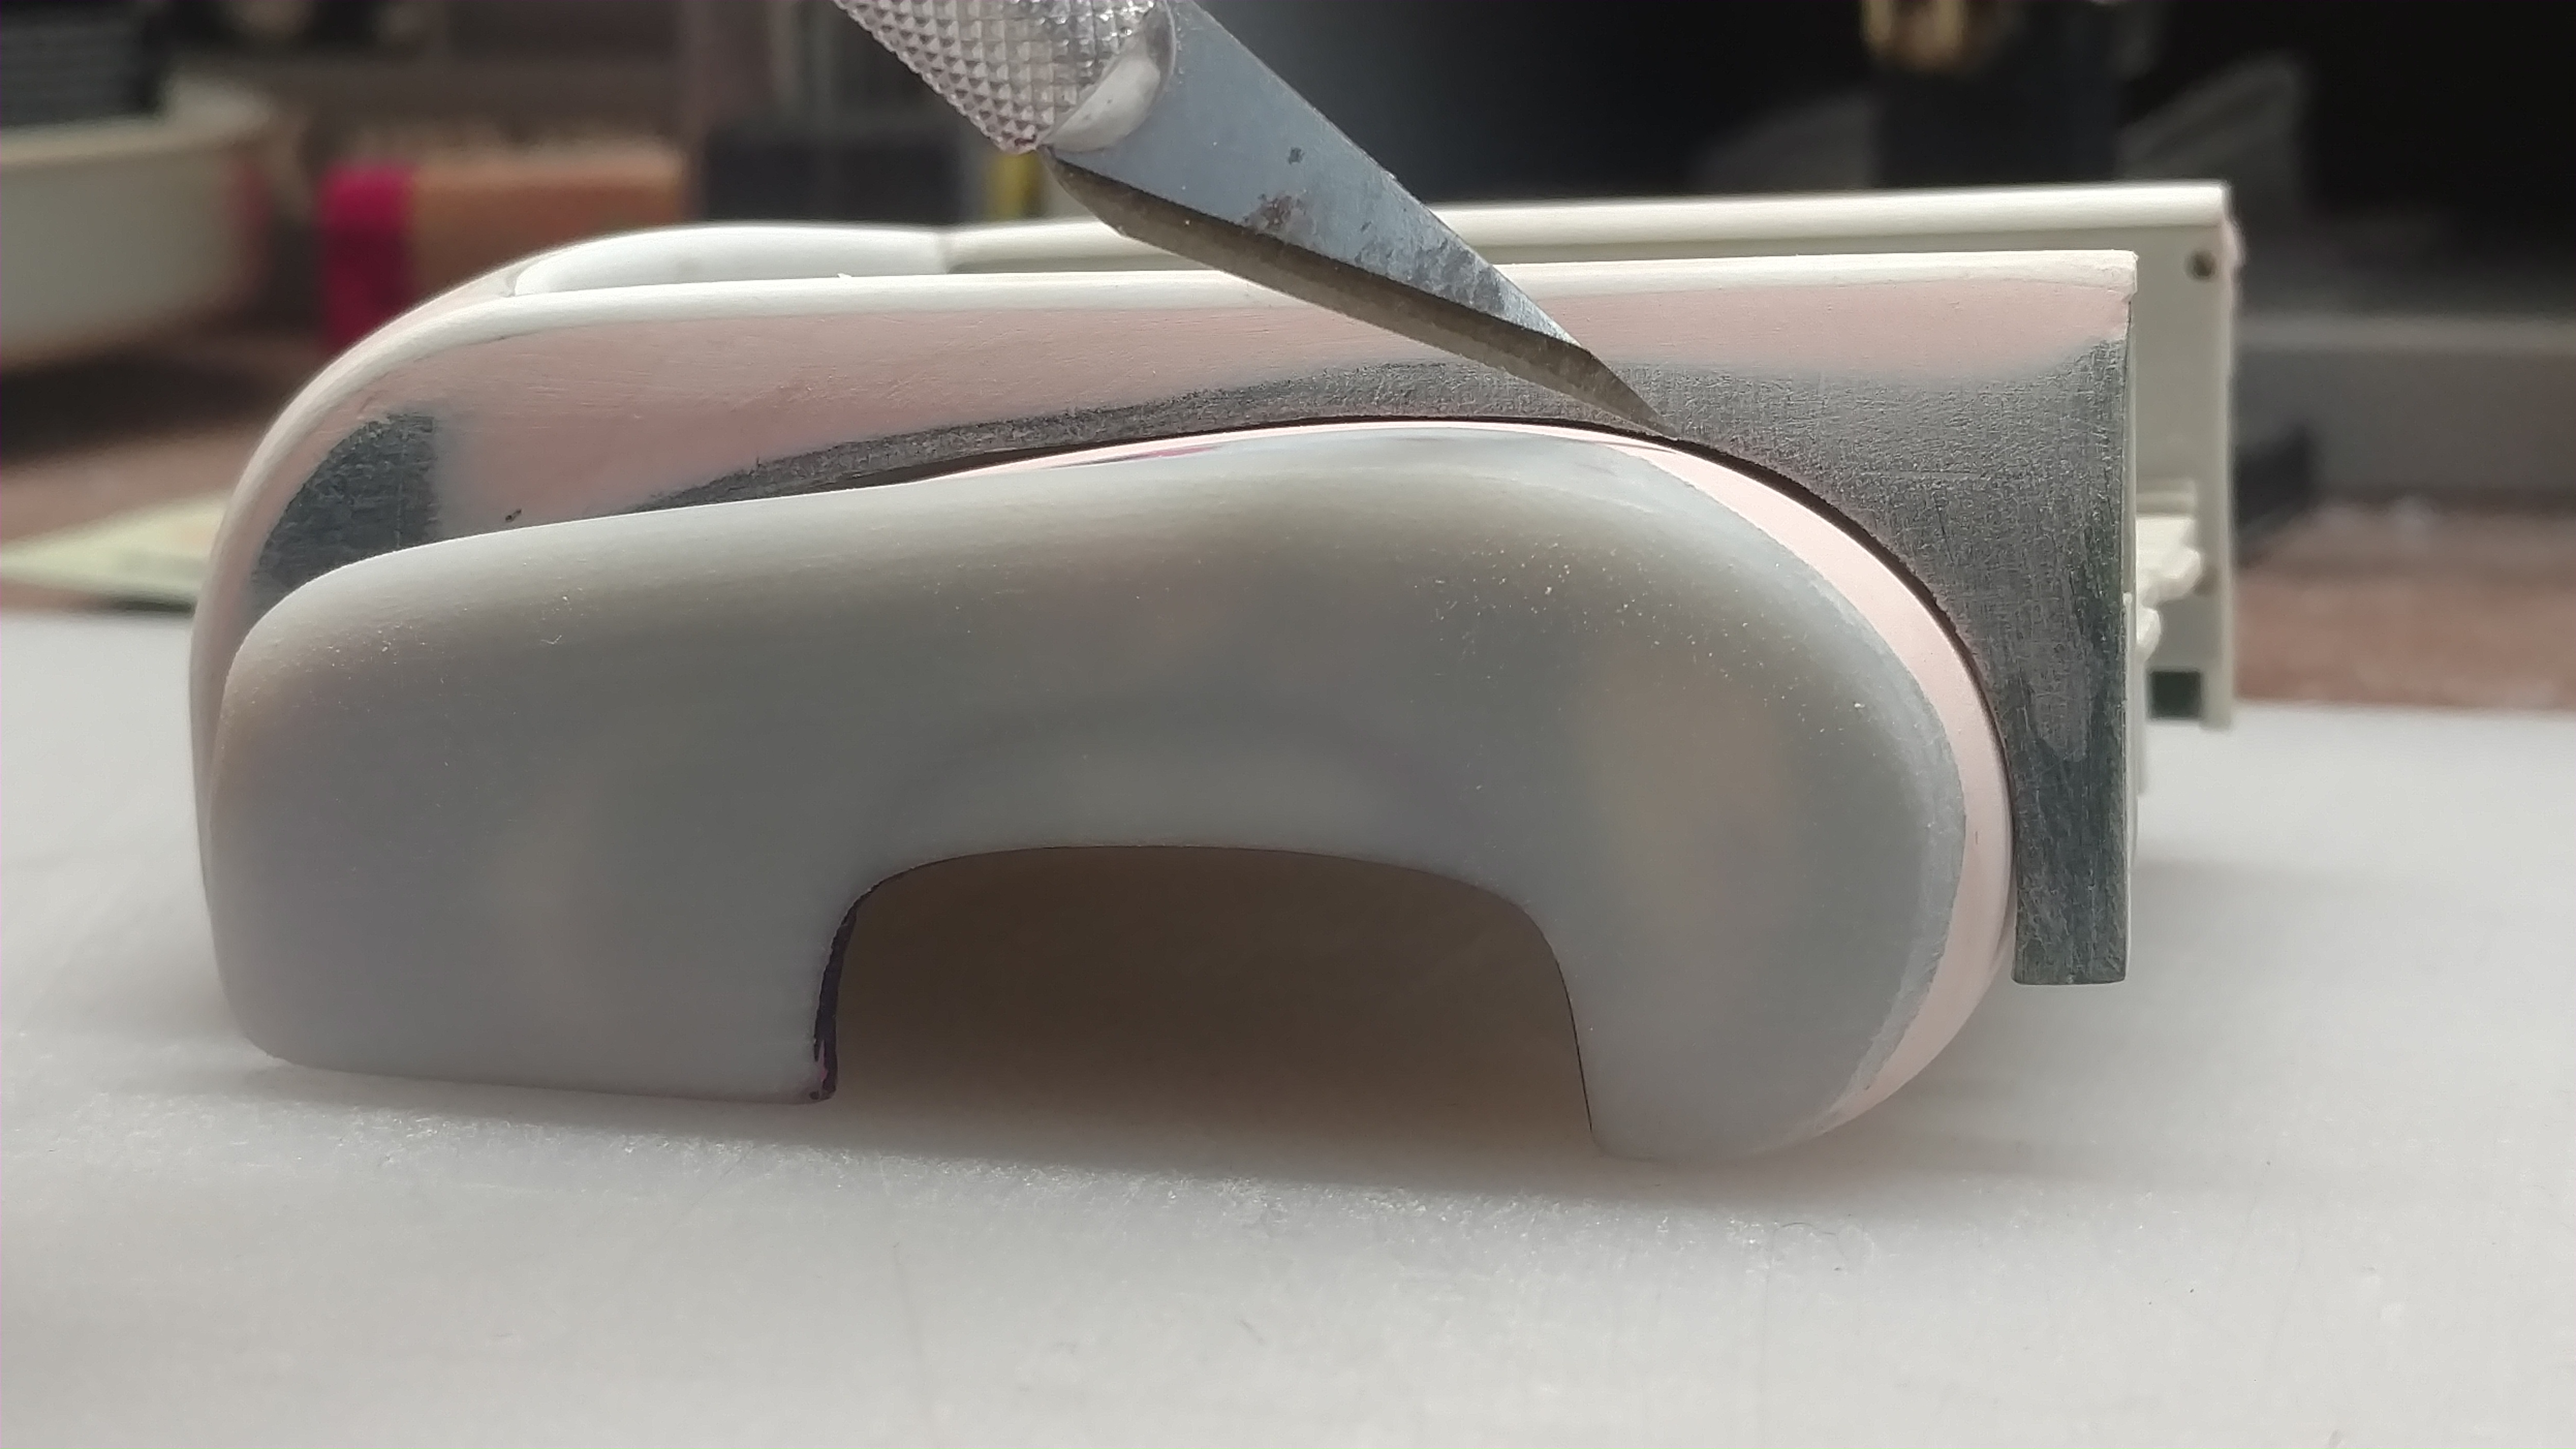
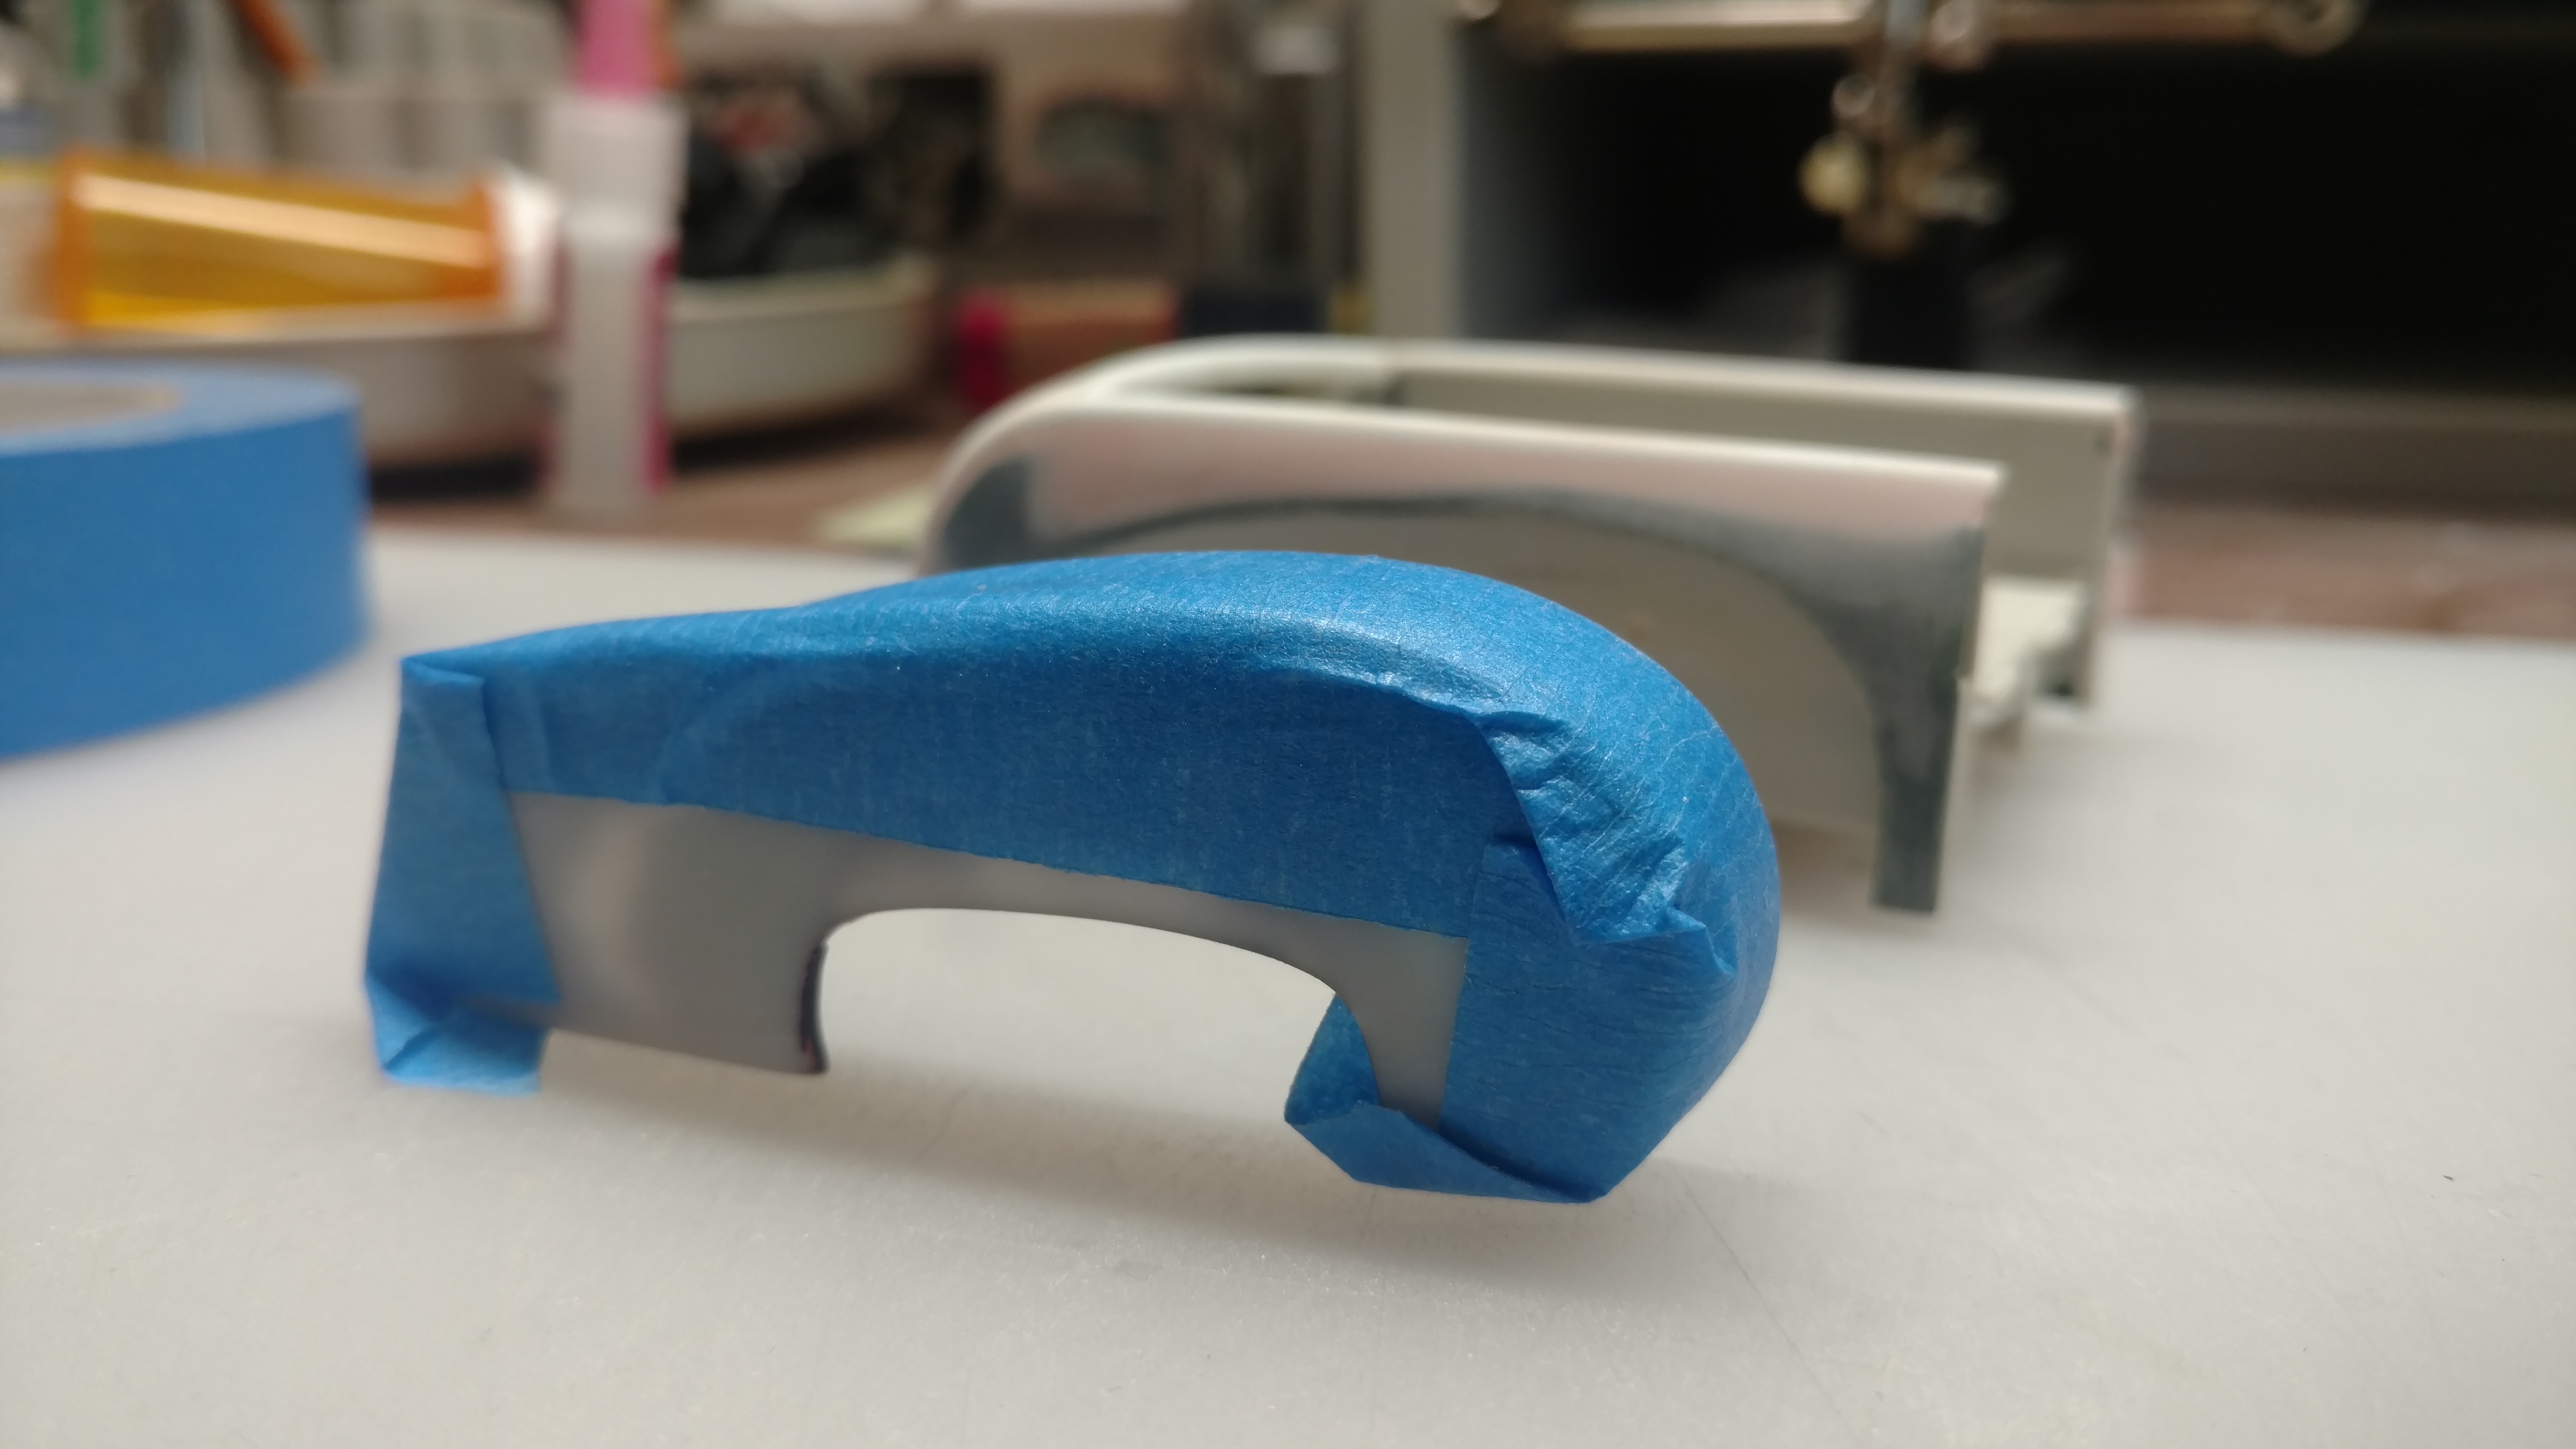
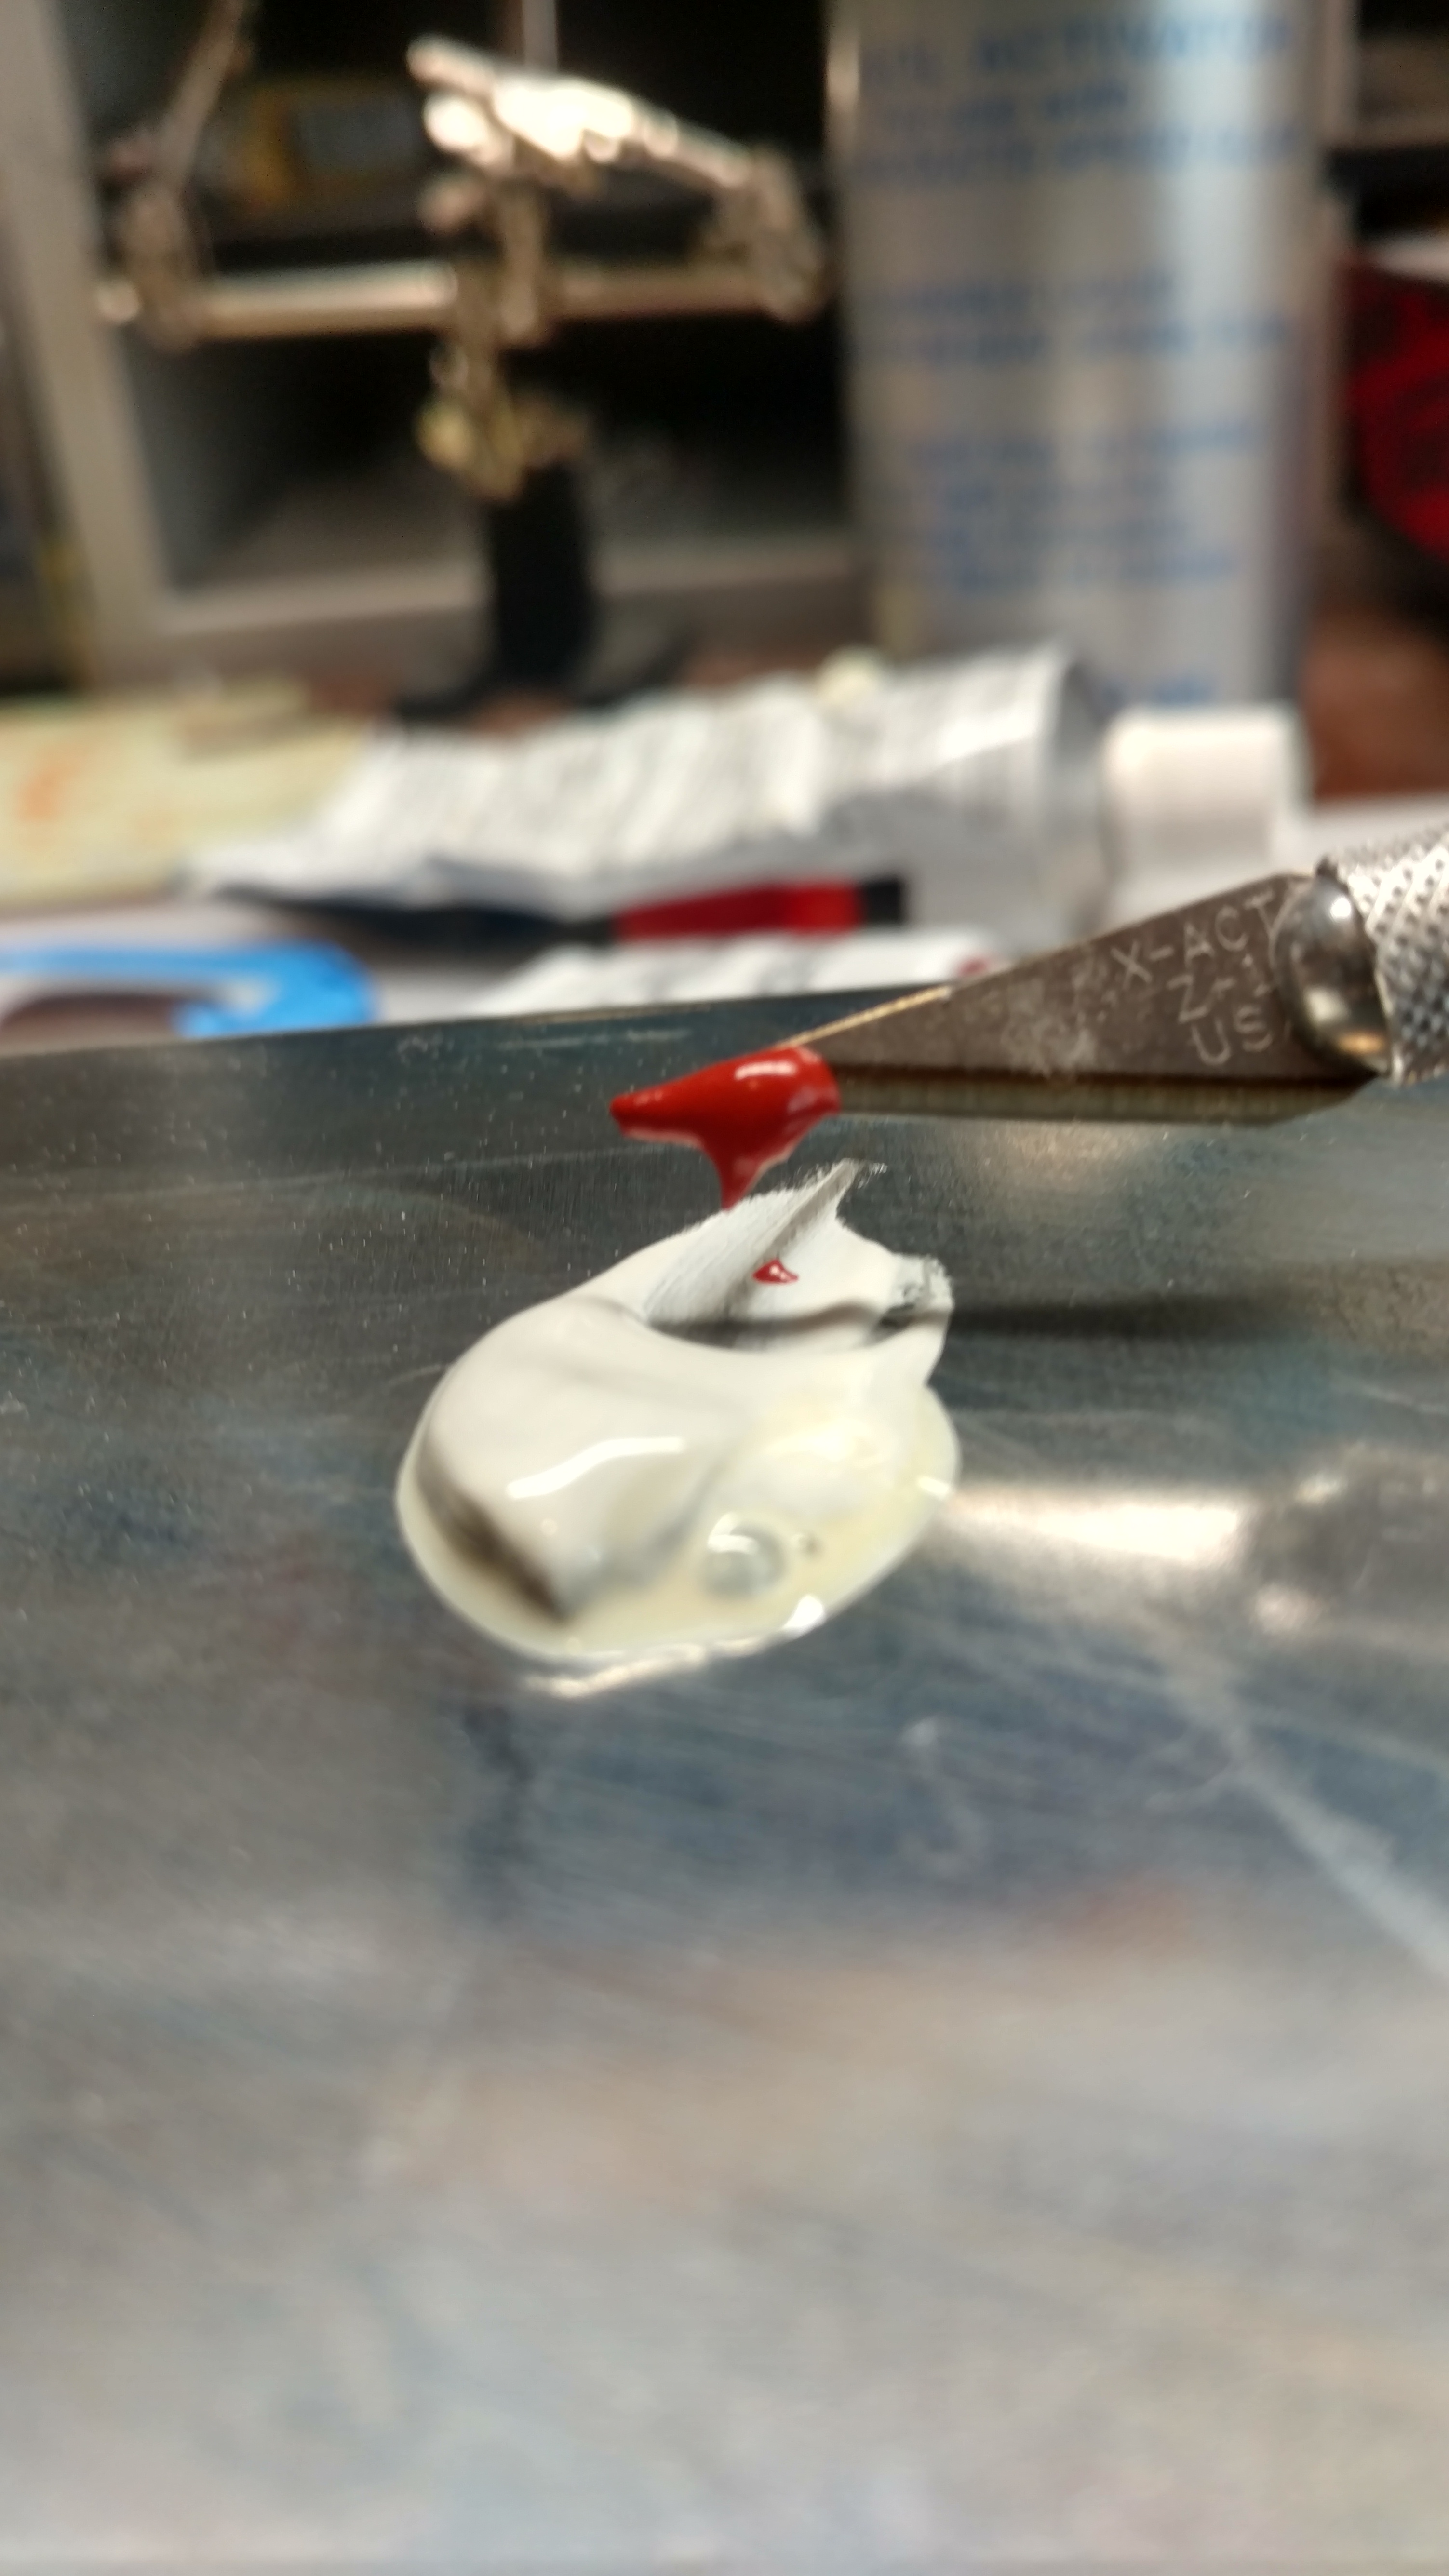
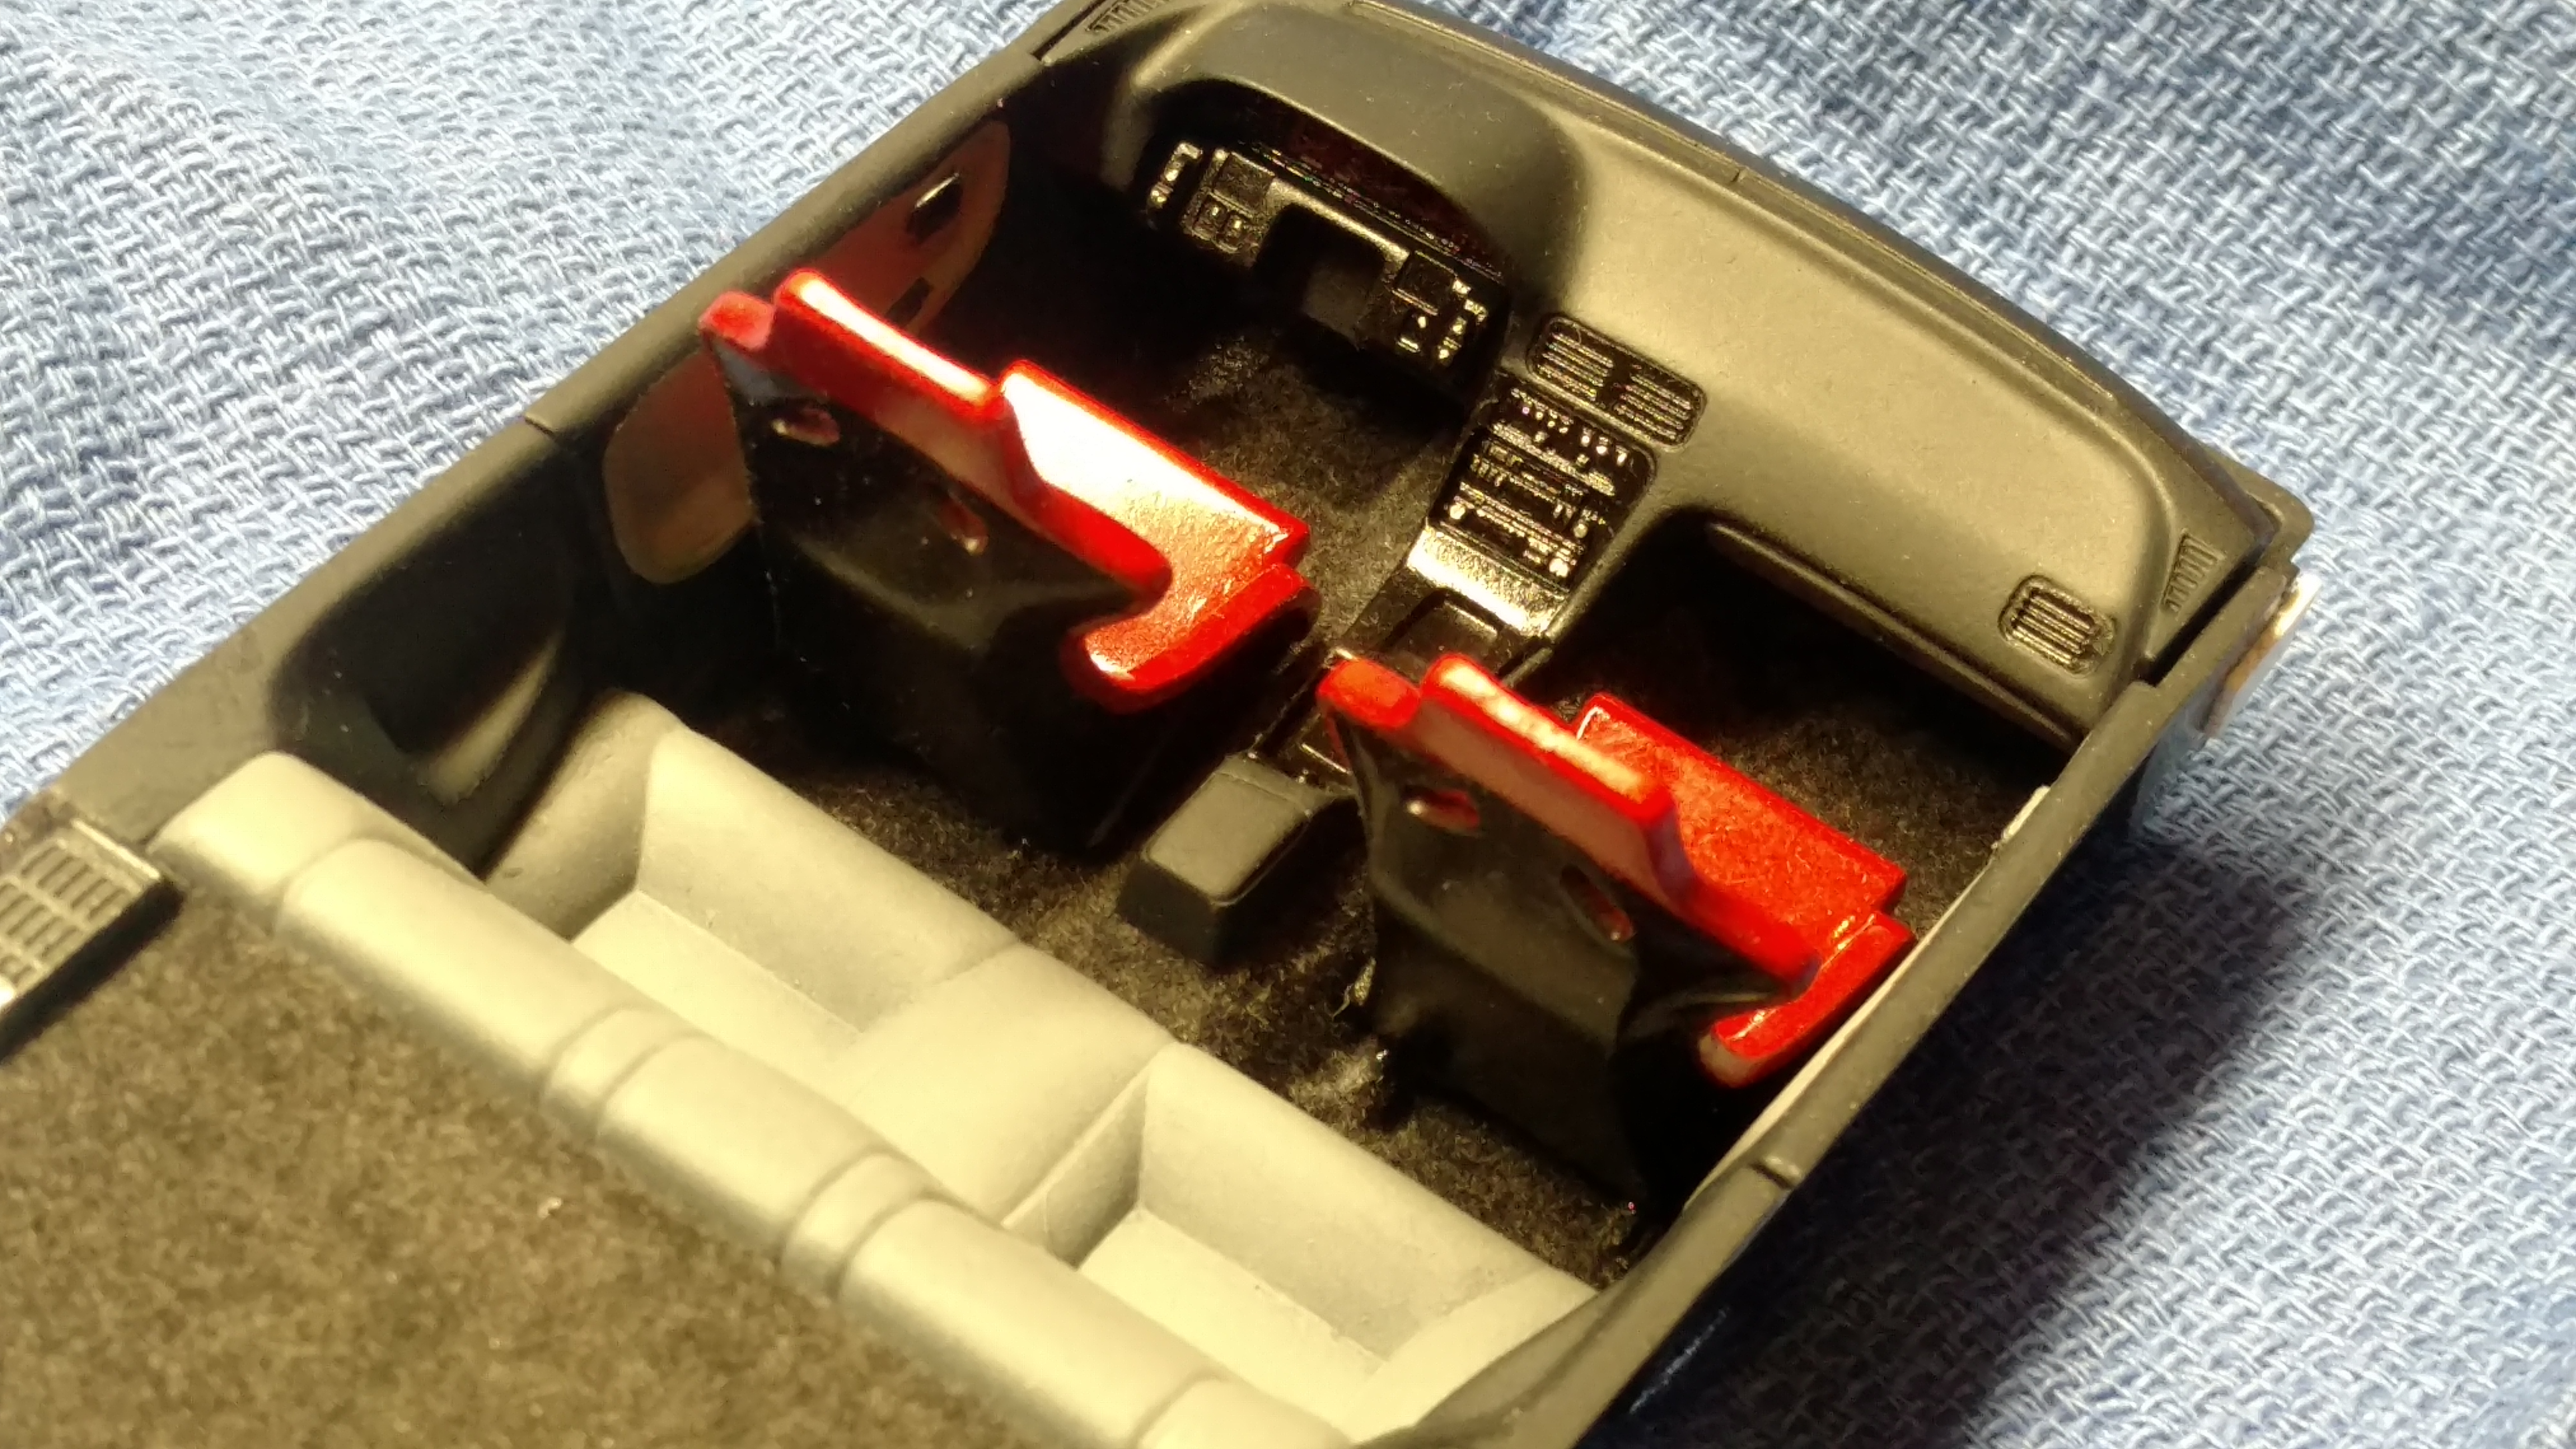
I pulled this back out to do a write-up on how to make a good clean fitment in tight quarters. You see the poor fitment and huge gaps between the fender and bedside that needs filled, but it's in a hard to reach area. I tape the fender to protect it from the filler. After cleaning the parts for good adhesion, I then mix my filler. For this application, I am using 3M/Bondo PROFESSIONAL glazing putty. Be certain to follow the directions at first as mixing ratio is very important. Too much hardener and it cures too quickly and shrinks and cracks. Too little hardener and it won't cure at all. Finding the right ratio for your own use is not difficult. I use about 10:1 ratio of filler to hardener. It gives a good 4 minutes of working time before it starts to kick. Mix it thoroughly but be quick about it, you don't have much time! Sling it on the area to be filled, in this case, along the edge of the bedside cut out for the fender. Soon as you can, press the masked up part into the wet putty and let cure until hard. I went and cut the exess off with my #11 blade while it was still quite soft in order to cut down the sanding time and mess. Once it is hardened, you can carefully remove the fender and sand the filler down quite easily, then simply place the fender back in the hole and check your fitment. This process can be used for grafting roofs onto bodies, tail/headlight housings, grills, bumpers, the list goes on. This can also be used to make custom body panels like skirts, flares, spoilers, etc. I hope someone finds this helpful!
-
I love it!!!! Makes me want to go finish mine! as for you doing something simple... I think I'd rather build an engine and detail the engine bay than to fab up an entire "stripped" interior. Keep it up, I can't wait to see this one done!
-
I was very sad this week to find that my bottle of Proweld is nearly empty only to find it is my last bottle and Ambroid is out of business! So what is a good alternative to Ambroid Proweld? I have used the Plastruct Plastiweld but I didn't like it as much for some reason. I've not used the Flexifile stuff yet. My question is what can I buy at Lowe's to make my own?
-
Which Karmann This kid is this? Hasegawa, I presume, with the engine replacement. (The Tamiya kit is amazing) I like the ox blood interior. Should go well with white, red or black paint. I can't wait to see more progress, the Ghia is one of my favorite cars!
-
Sorry I have not made any progress since March 4th. I've been catching up on the house work since I had neglected it for the last month building models and working on real cars. I did get my desk cleared away to make room for more progress. Stay tuned for more real soon.
-
'60s Style '56 VW Bug street rod - Updated 5-04
rsxse240 replied to Bernard Kron's topic in WIP: Model Cars
Only problem with the 29 Ford wheels is the offset is way wrong for a Bug. Not that it is a big deal. -
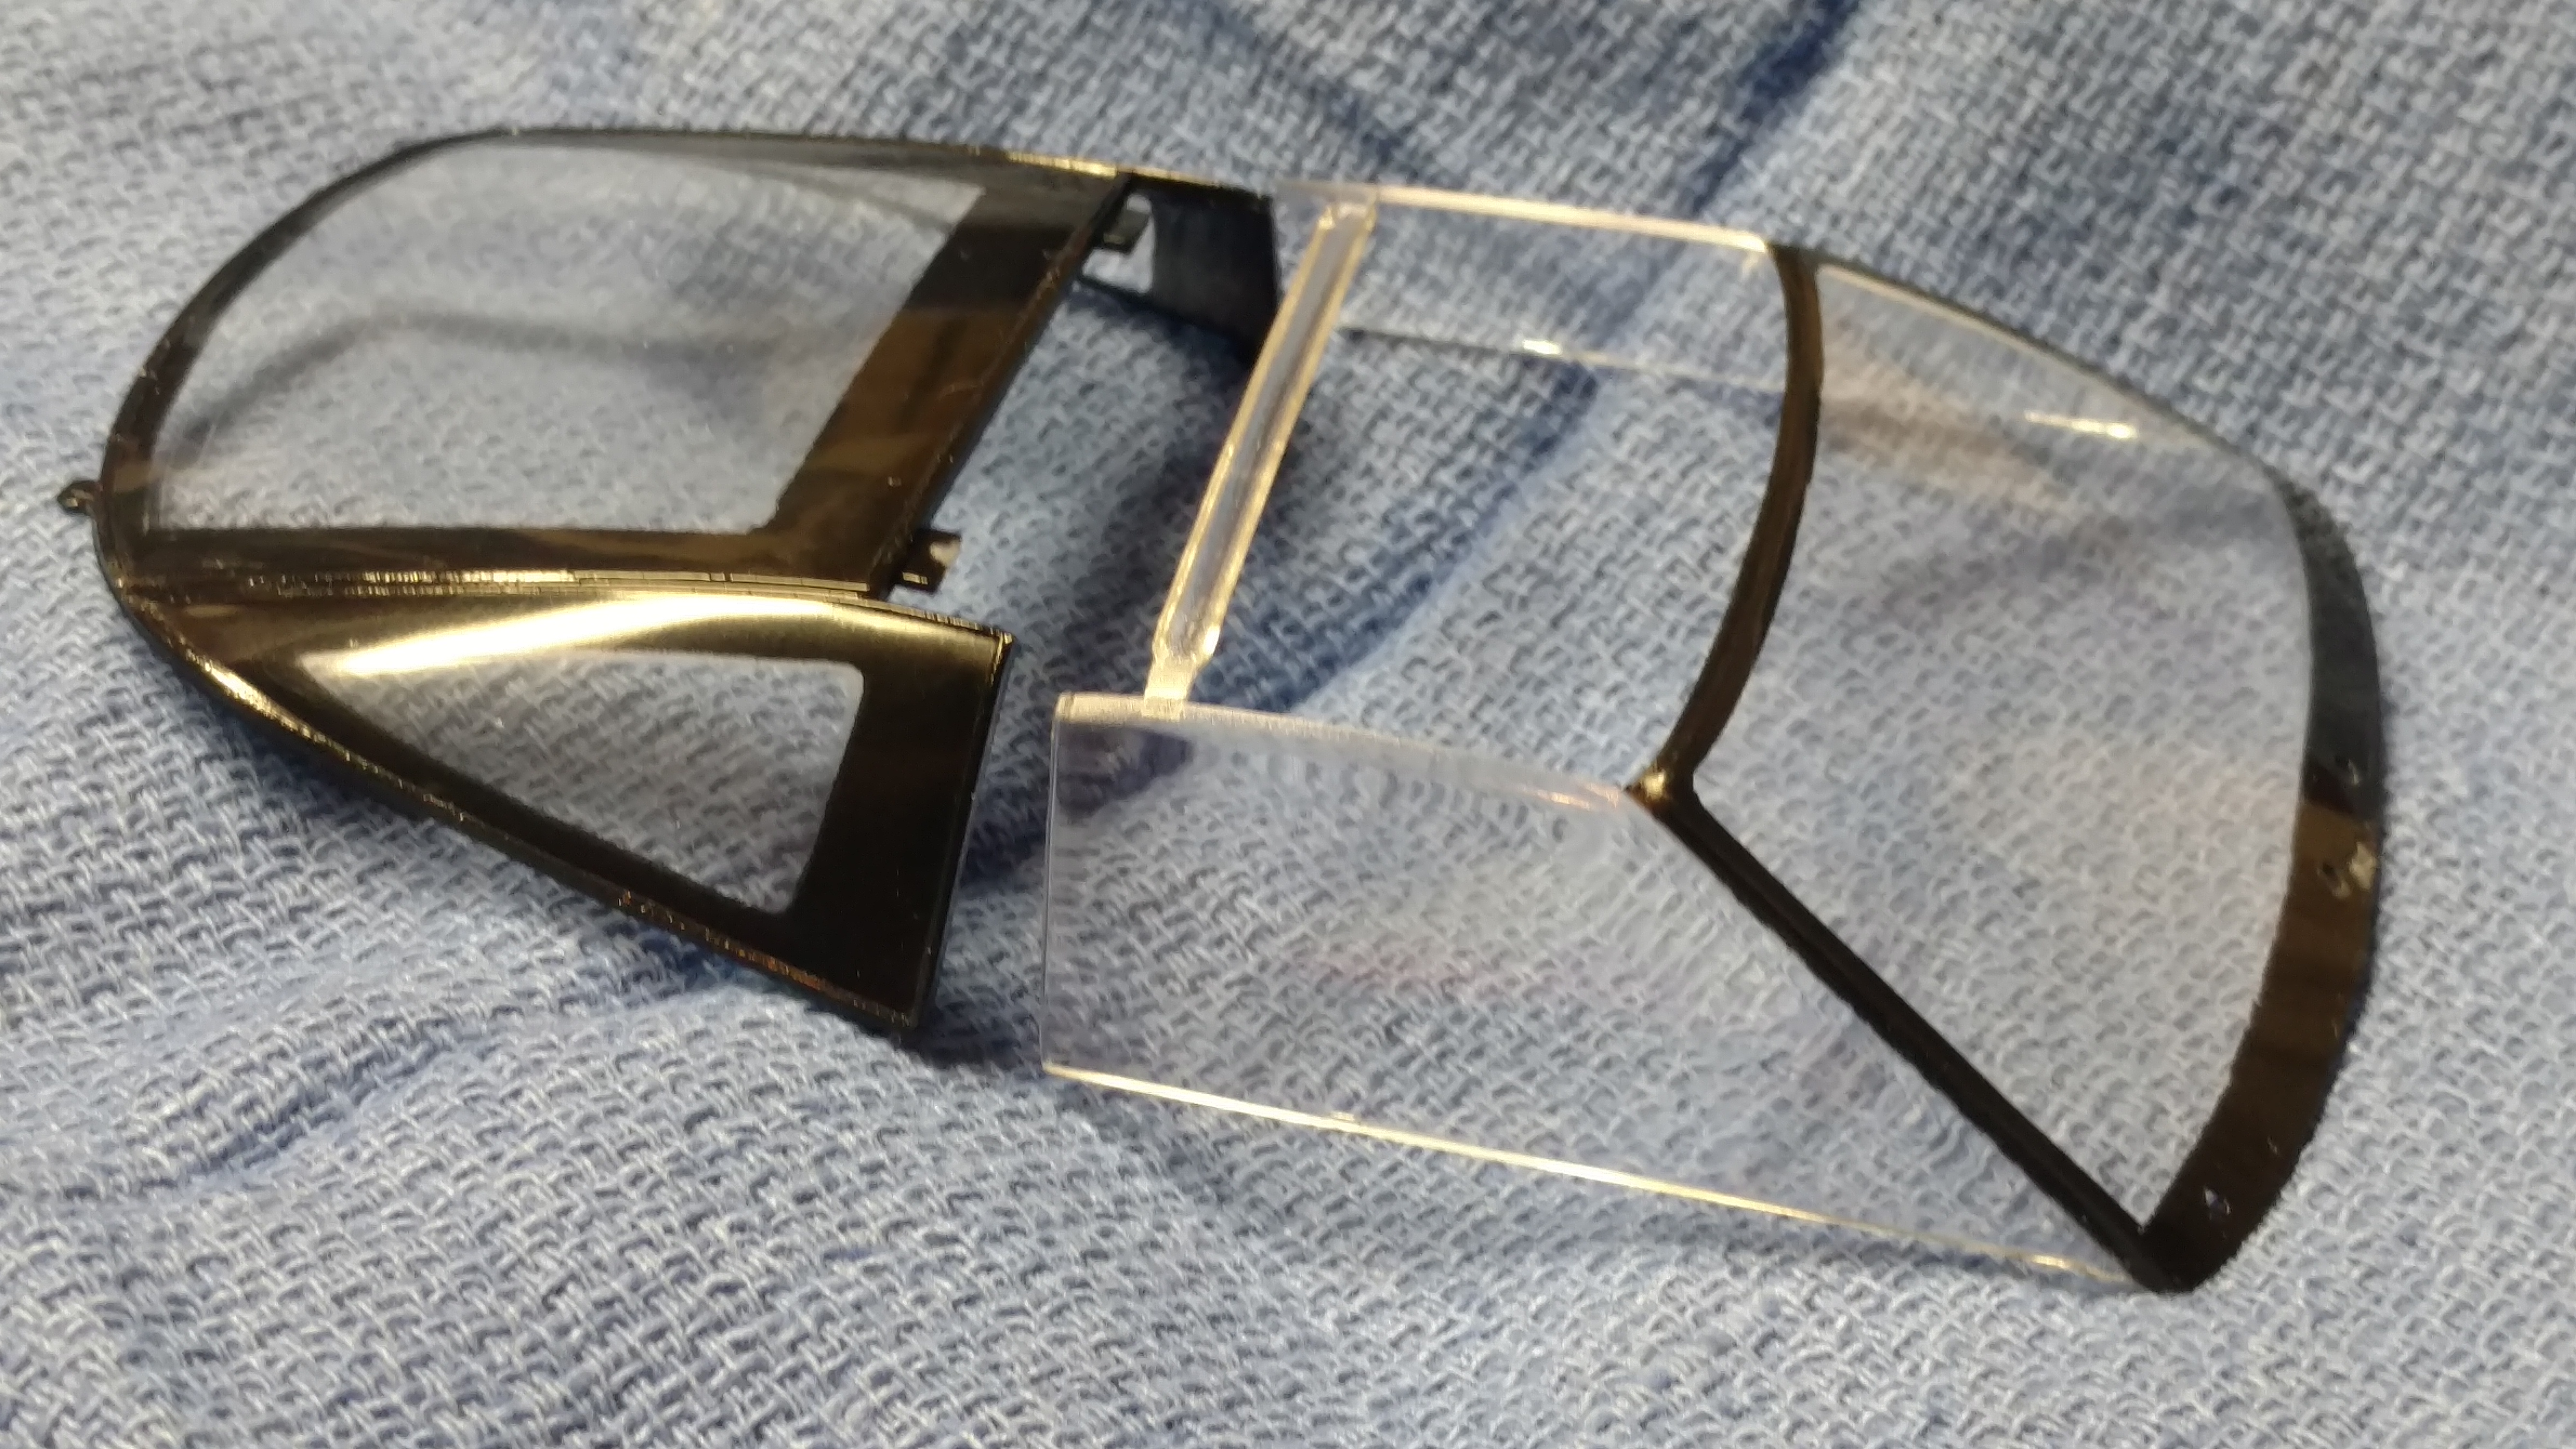
Almost done! I finally have a paint job that I am happy with...Or I'm just super high from the Testors #2017 Lacquer Clear Coat. Which, by the way, is AWESOME! It is the first clear coat I've used on the Sinful Color nail polish that didn't craze, haze, fisheye, orange peel or any other adverse reactions (aside from some dust specs). I, unfortunately won't be done for the 2017 Shoot Out in Farmers Branch, TX in the morning, but I'll bring it for the project class. Here's a low light midnight pic for you. Here's one of the interior bucket. Still needs some dull coat and some CF decals for the seats and some details here and there. I also have the glass trimmed in black. I guess I can stop stressing about finishing one kit and just enjoy building for a while since it won't meet the deadline. Stay tuned, I'll be finishing this one up soon!
-
I cut out the door panels to detail them a bit. Built up the "arm rest" and made the door pull cup (it's really difficult to see) and made the door handles from a piece of strip styrene carved into, what I think is, a convincing detail, if not absolutely correct. Now, I hope I can get some more work done so I can have it done for Saturday's show in Texas!