Nacho Z
-
Posts
2,924 -
Joined
-
Last visited
Content Type
Profiles
Forums
Events
Gallery
Everything posted by Nacho Z
-

Evil Iron Trike
Nacho Z replied to Nacho Z's topic in All The Rest: Motorcycles, Aviation, Military, Sci-Fi, Figures
Thank you, Noel! I purposefully photographed it that way to fit the Halloween theme that it was built for. Thanks! -
Evil Iron Trike
Nacho Z replied to Nacho Z's topic in All The Rest: Motorcycles, Aviation, Military, Sci-Fi, Figures
Thanks, guys! -
Evil Iron Trike
Nacho Z replied to Nacho Z's topic in All The Rest: Motorcycles, Aviation, Military, Sci-Fi, Figures
Thanks, guys! Thanks for checking her out. -
Evil Iron Trike
Nacho Z replied to Nacho Z's topic in All The Rest: Motorcycles, Aviation, Military, Sci-Fi, Figures
Thank you, Doyle, I appreciate it! -
April Wine founder and lead singer Myles Goodwyn passed away.
Nacho Z replied to Can-Con's topic in The Off-Topic Lounge
April Wine was the first concert that both my wife, (girlfriend at the time, high school sweethearts), and I ever attended. Bismarck, ND, 1981 or 1982 I’m guessing. -
I just went back and read your WIP. Doggone, I’m glad that you persevered with the build! You have turned out one great looking Nomad!
-
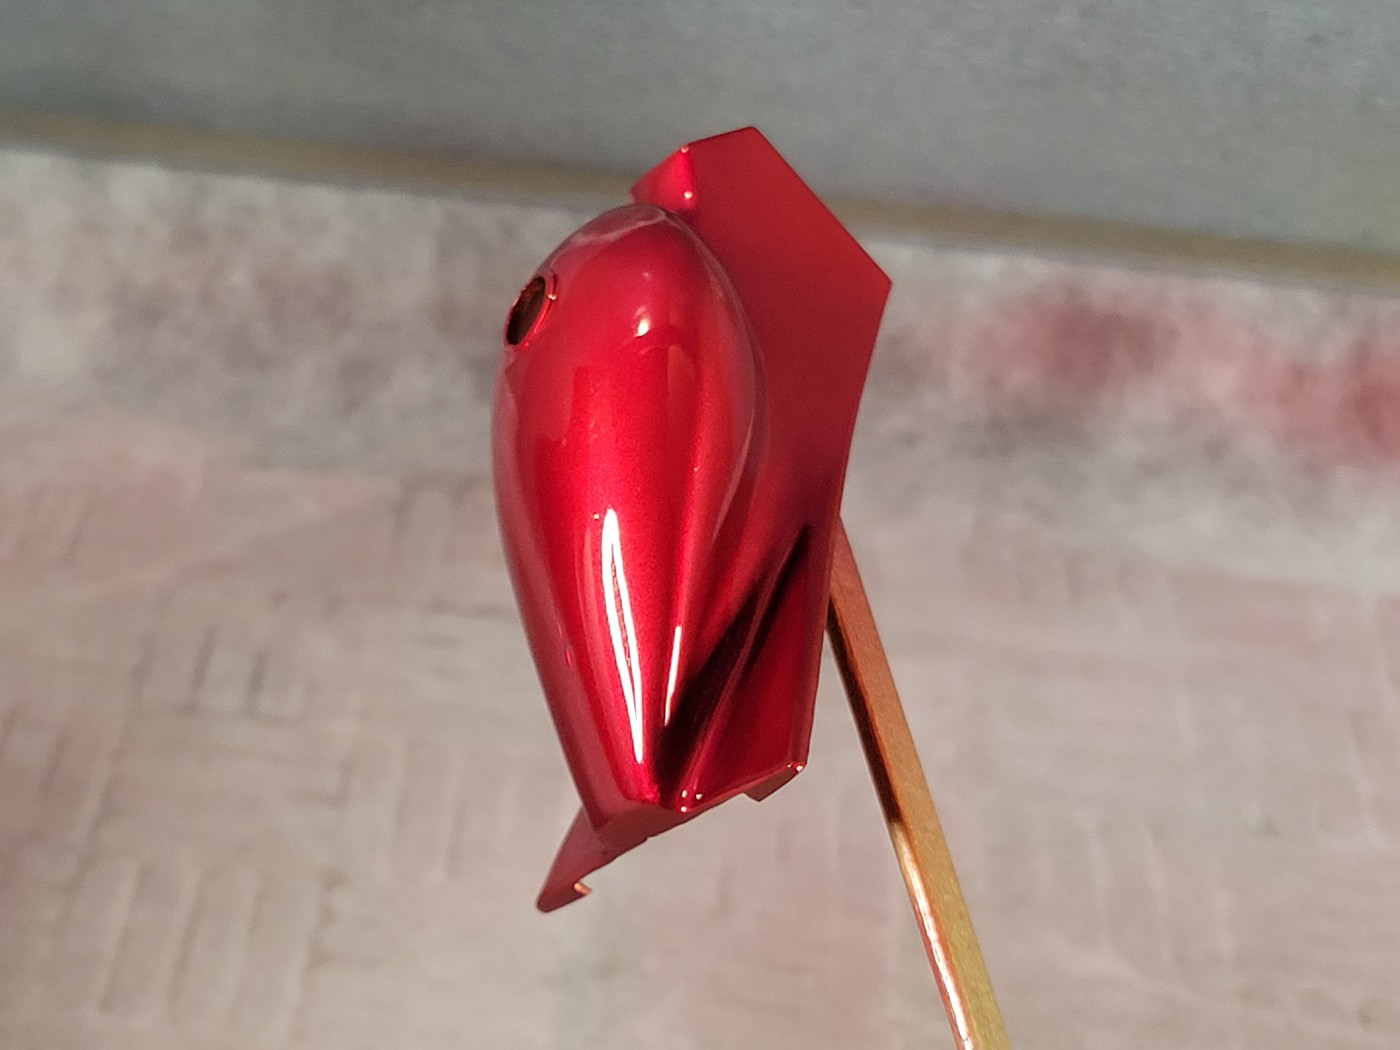
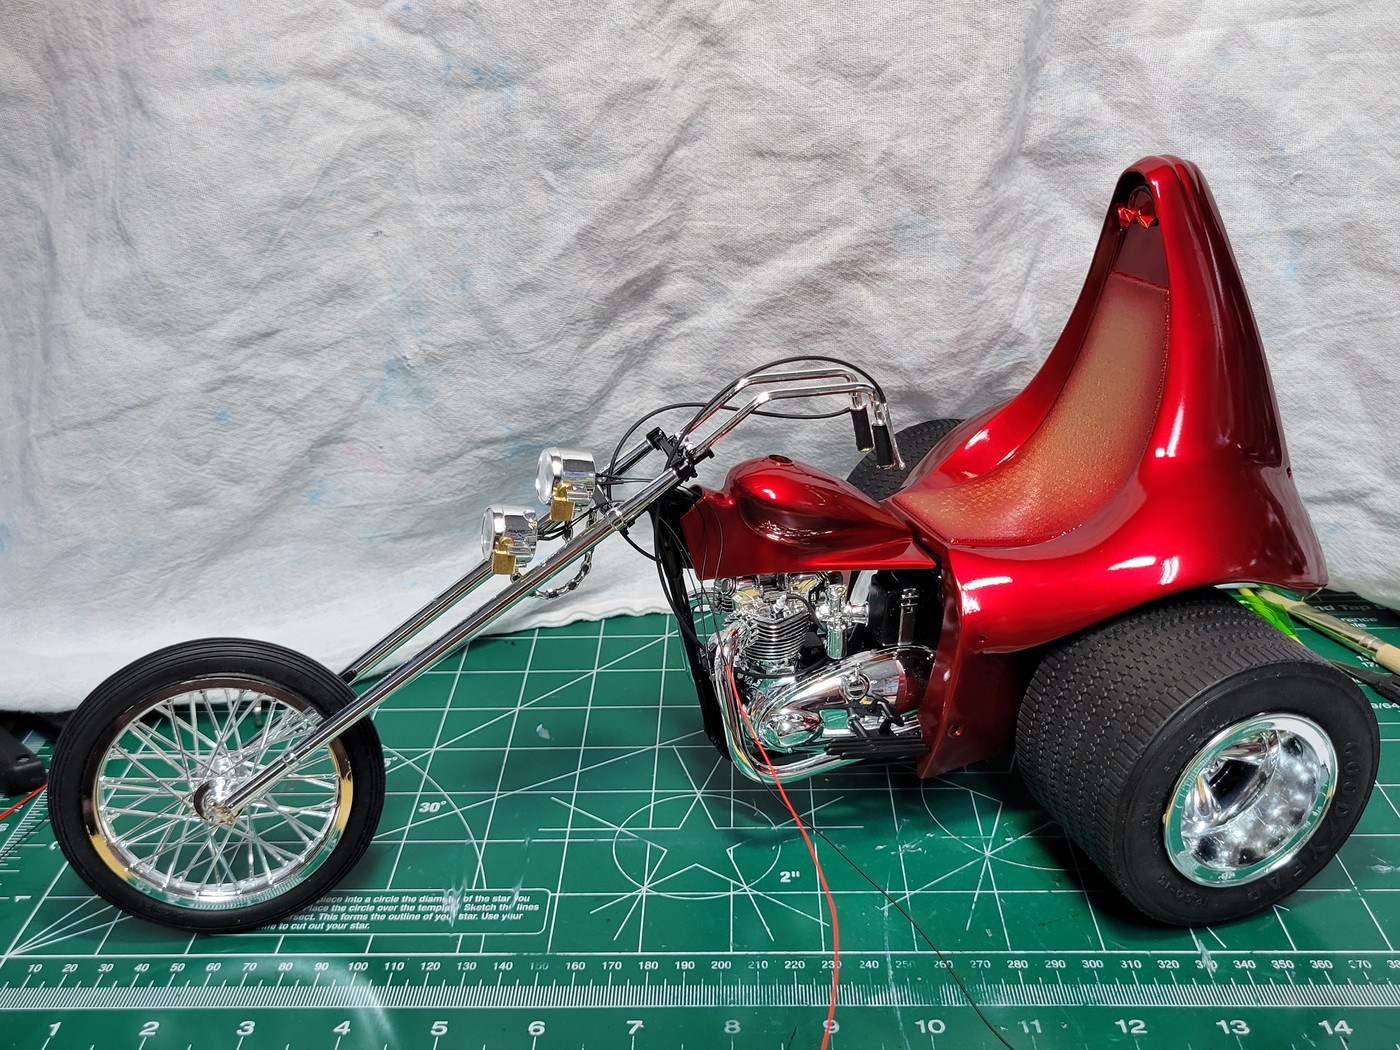
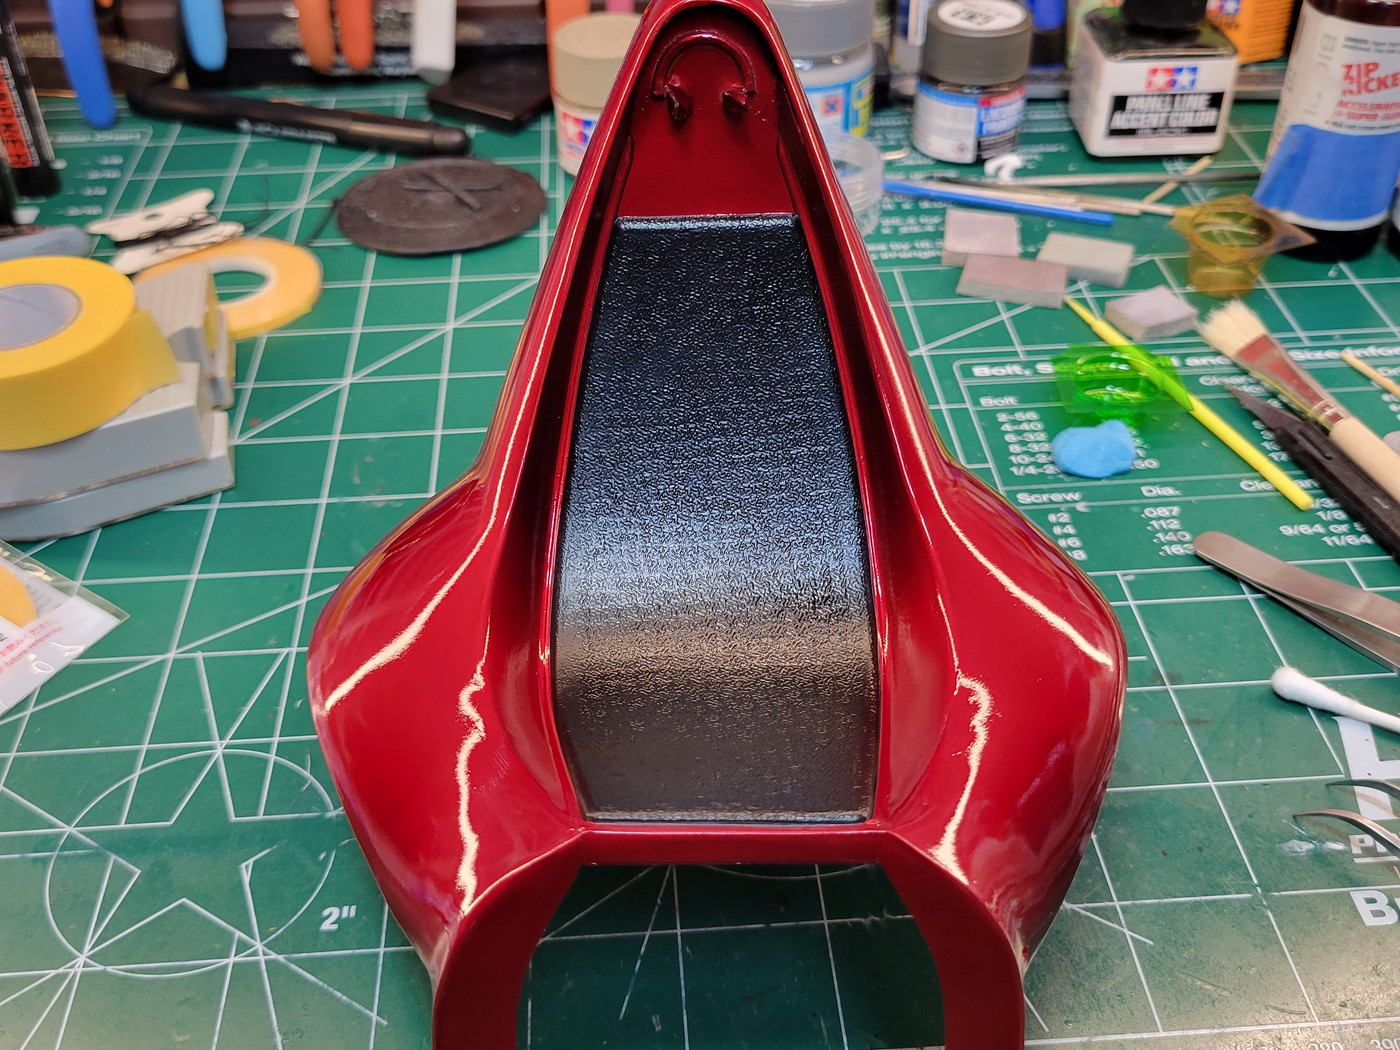
Here is my completed Evil Iron Trike. I have added a link to the WIP thread. Maybe it was just my kit but this thing was not an enjoyable model to build. It is, however, an impressive model when finished. To do a quick review, this was a Halloween themed Facebook group build. Most everyone missed the October 31st deadline so the deadline was extended until the end of November. I hit that deadline. I used Evan Designs LEDs for the skull eyes, the headlights and the taillights. Unfortunately, during final assembly, an LED for the taillights broke. I will fix it later. The color is House of Kolor Brandywine shot over a base of Tamiya Gold. Having no figure painting experience, I am fairly proud of how the skull came out. In keeping with the Halloween theme, I shot the pictures in a darker than normal setting. I've included Grandpa's DRAG-U-LA in one picture to give a sense of the size of the Evil Iron Trike. Let me know what you think!

-
An absolutely stunning model! Bravo!
-
Evil Iron Trike
Nacho Z replied to Nacho Z's topic in WIP: All The Rest: Motorcycles, Aviation, Military, Sci-Fi, Figures
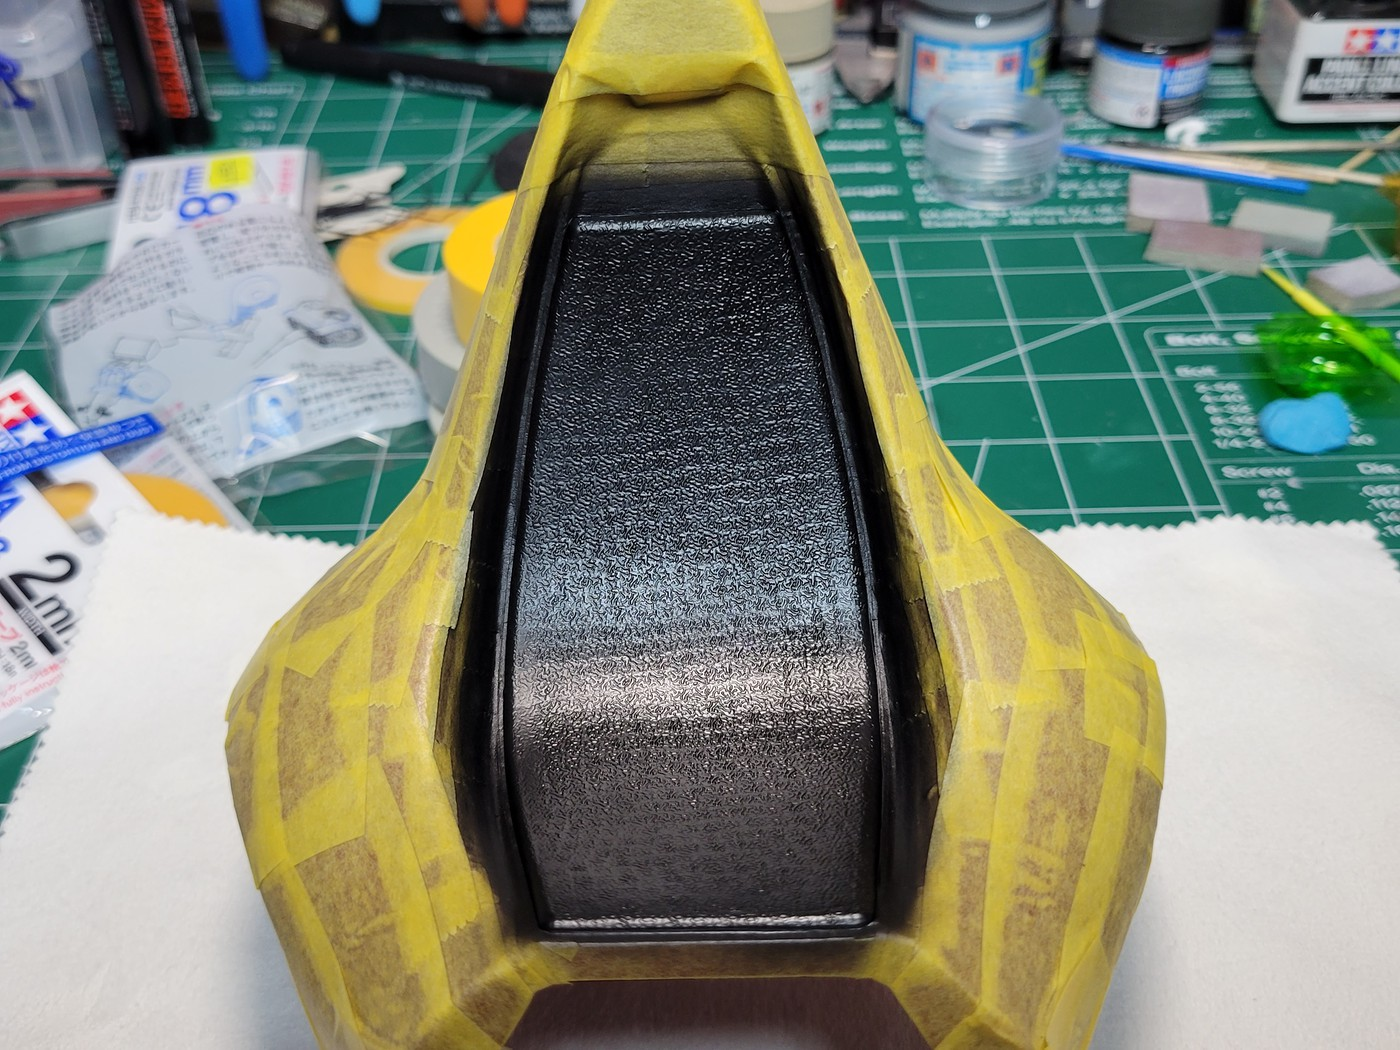
The second deadline for this FB group build is this week, the end of the month. This will probably be the last update. Because I have not been very faithful with my updates, the leap in progress is a bit large. I just haven't had my heart in this one. A quick mockup. At this point, the body work is complete, and she is under primer. The frame is built, the rubber is on, and the engine is nearly finished. I shot 4 coats of House of Kolor Brandywine over Tamiya TS-21 Gold. The pictures don't really capture the true color that you would see in person. It is a darker red than the pictures show. Three coats of Tamiya TS-13 Clear straight from the can. The tank and body have not been polished yet. And of course, another mockup. You may notice additional parts added since the last mockup a few pictures prior to this one. Last night I masked off the seat and painted it. The masking took way longer than I thought it would. The seat is a concave, compound curve. That's it. My next post on this one should be in the Under Glass section. Let me know if you have any questions about this build or this kit. I'd be happy to answer them. Thanks for checking in!
-
Fandamntastic!!
-
Tamiya Lexus Zent Cerumo SC 2006
Nacho Z replied to DON2000's topic in Other Racing: Road Racing, Salt Flat Racers
Outstanding model, Serg! Thank you for the great photos of it, too. -
Ryan Blaney
Nacho Z replied to Model Guy's topic in Stock Cars (NASCAR, Super Stock, Late Model, etc.)
Very nice! Did you have any issues with the build? -
Fantastic finish on this, Gustavo! I have always thought this was such a cool model. You did a great job on it.
-
Gotta love Grumpy’s cars. This is a good looking Camaro!
-
Very nice model, Donald! Your 1:1 is just beautiful.
-
Very nice! Definitely an award winner!
-
And now for a bit of a different compliment. We all know this will be stunning when finished, that is basically a given. What I really appreciate is this; I appreciate the amount of time and effort you put into the narrative, the explanation of what you did, why you did it and how you did it. Secondly, I appreciate the clear, in focus and uncluttered photos that accompany your narratives. I get that not everyone is a wordsmith, but everyone can take a second to take a decent photo. I appreciate you doing both, Steve.
-
Beautiful build! I love that top down shot!
-
Very, very nice!
-
I really can't add much more than what has already been said. Just an all around great looking Vette!
-
Very nice!
-
Outstanding! I would have never thought of that color combo but it looks so good together. Nice job, John!
-
Evil Iron Trike
Nacho Z replied to Nacho Z's topic in WIP: All The Rest: Motorcycles, Aviation, Military, Sci-Fi, Figures
Not Monday night, but I thought I would do a quick update on the trike. I masked the battery box (?) strap and shot some Alclad chrome just to add some visual interest. I also was able to add a little more to the frame. Here is another example of the quality control issue with this kit. I am assuming it was still a little warm when it was packaged. I know the mold is not misshapen like this. The "rubber" is nice and thick and seems to have a bit of a memory. I tried to straighten it out but was unsuccessful. I went ahead and glued the wheels in. -
Kits you can't seem to have enough of.
Nacho Z replied to Sledsel's topic in General Automotive Talk (Trucks and Cars)
I probably have a few that fall into this category. I'm going to stick with the Hasegawa 962C kit. It is the same model with different decals. The molding is nice and the model is fairly simple and goes together well. The 962Cs are on the left with other Hasegawa kits on the right. BTW, this is not all of the Hasegawa kits in the stash, just the ones on this shelf. -
Model kit scales: Fraction, ratio, proportion??
Nacho Z replied to Nacho Z's topic in Model Building Questions and Answers
I literally and honestly thought of you when I asked this question. I have seen it written both ways on model kit boxes, ( / versus : ). I would say, generally speaking, the Japanese kits have : instead of /. Thank you, Bill, for answering the question. I was hoping it was one or the other but I just couldn't figure out which way was the right way.