Belugawrx
-
Posts
6,165 -
Joined
-
Last visited
Content Type
Profiles
Forums
Events
Gallery
Everything posted by Belugawrx
-
Donnie Allison's '74 Monte
Belugawrx replied to Belugawrx's topic in WIP: Stock Cars (NASCAR, Super Stock, Late Model, etc.)
Added seat belts (masking tape slices black sharpied and dullcoated with Liquitex matte medium), 4mm tube distributor, ignition wires (too big,...all I had), fan shroud and intake metal bent up out of some .040 aluinium sheet..added a rad puke tank. ..After Futuring the front 'glass',..I ground off the lower edge of the front windshield, to be flat with bottom of the cowl .. and BMF'd (non sticky variety..yay) the surround after gluing. Black Sharpied the backs of the 2 (should be 3) windshield crash bars The windshield...didn't fit ..even after filing and sanding the lower edge off...Canopy glue and some weight got it in place...and a day later I drenched it in BSI Instaset kicker, and applied a generous amount of BSI gap filling medium C/A glue..yay no fogging. Brush painted the body interior with CraftSmart Acrylic black. Little disappointed in the BMF application,..brand new sheet and only the middle 2" will stick...GRRRrr... Almost there -
Nova Salt Flat Racer
Belugawrx replied to Pierre Rivard's topic in WIP: Other Racing: Road Racing, Land Speed Racers
See..I learn something new every day... Interior is looking great Pierre (2thumsup) -
That's about where I'm at...keeps ya coming back tho....lol
-
Nova Salt Flat Racer
Belugawrx replied to Pierre Rivard's topic in WIP: Other Racing: Road Racing, Land Speed Racers
Just spitballin' here, but wouldn't the bumpers be the first weight reduction on a land speed car...?...lol Maybe black to break up the rust effect... -
Favourite Rims
Belugawrx replied to Falcon Ranchero's topic in General Automotive Talk (Trucks and Cars)
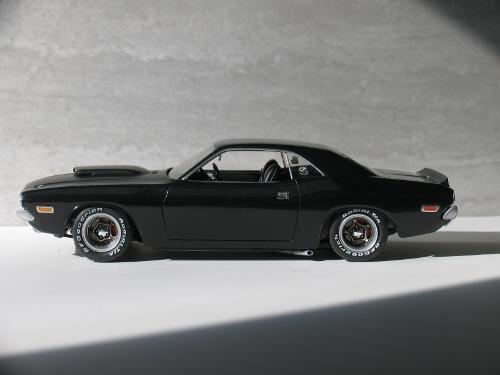
Found a set of those in the AMT Trans Am kit and was able to stuff 'em under the Revell '70 Challenger...Love those rims...
-
Donnie Allison's '74 Monte
Belugawrx replied to Belugawrx's topic in WIP: Stock Cars (NASCAR, Super Stock, Late Model, etc.)
Thanks Pierre.. disappointing to say the least ... Thanks Mark..me too So anyway, the idea of getting this into 'Under Glass' in a timely manner has gone by the wayside...still much to do These sink marks were unacceptable So made up some covers and continued it on up the rear sheet Cut down the oversized fire extinguisher and added some detail More to come as it happens...Q.C.+C.s welcome... -
Warren Tope 73 Mustang T/A and IMSA
Belugawrx replied to vamach1's topic in WIP: Other Racing: Road Racing, Land Speed Racers
Better late than never. It's looking good..always loved the trans am series. -
Alfa Romeo 158/59
Belugawrx replied to Chris Smith's topic in WIP: Other Racing: Road Racing, Land Speed Racers
Absolutely Beautiful workmanship Chris. Well done! -
Hard top roof for AMT Sunbeam Tiger....?
Belugawrx replied to Belugawrx's topic in Car Aftermarket / Resin / 3D Printed
https://www.acehobbies.com.au/home -
Hard top roof for AMT Sunbeam Tiger....?
Belugawrx replied to Belugawrx's topic in Car Aftermarket / Resin / 3D Printed
True, but again, only in 1:24th -
Hard top roof for AMT Sunbeam Tiger....?
Belugawrx replied to Belugawrx's topic in Car Aftermarket / Resin / 3D Printed
If anyone has one of these Aoshima kits, do me a favour and take a couple measurements for me please....? It's a 1:24th kit whereas the Sunbeam is 1:25th, but it would save me ordering one for $100 CDN to find out it's too big...lol Thanks for any help. Cheers -
Love the stance you got going Jay...got any ideas on colours.?
-
Nova Salt Flat Racer
Belugawrx replied to Pierre Rivard's topic in WIP: Other Racing: Road Racing, Land Speed Racers
Like what your coming up with Pierre....^man, now that is a crowded interior^^^ -
Show Us Your Work Bench
Belugawrx replied to Bruce Poage's topic in General Automotive Talk (Trucks and Cars)
My little hideout The recycle bin/paint booth has an extraction fan out the window -
@Goodwrench3 did a nice 1985 Tim Richmond car some time ago..I'll try and paste the link
-
Bobby Allison 1972 Monte Carlo photo info
Belugawrx replied to MarkJ's topic in Model Building Questions and Answers
https://www.mecum.com/lots/503116/1972-chevrolet-monte-carlo-nascar/ Found this while looking for info on Donnie Allison's car which I'm working on down in the NASCAR WIP section.
-
Very nice !
-
Nice work Joe..nice detail and paintwork
-
Donnie Allison's '74 Monte
Belugawrx replied to Belugawrx's topic in WIP: Stock Cars (NASCAR, Super Stock, Late Model, etc.)
Looks like thats a '73 bumper -
Donnie Allison's '74 Monte
Belugawrx replied to Belugawrx's topic in WIP: Stock Cars (NASCAR, Super Stock, Late Model, etc.)
This is the Canuck '73 bumper For the '74 bumper you would need to file/sand out the rub strip in the top protrusion And the lower vent holes would need to be shrunk...but otherwise...sure, give me dozen @$30 bucks each... -
Bunch of Beauties Ludwig...love me some Chevies
-
Tamiya Motul Pitwork Nissan Z
Belugawrx replied to galaxyg's topic in Other Racing: Road Racing, Salt Flat Racers
Very clean, beautiful build Michael ! Decal work and paint look fantastic!! Well done ..Cheers -
Yep ! I use contact cement..have a gallon for cabinet work..coat both the stick and the back side of the sandpaper..let it tack up and slam em together..also, all those poop bag roll inners get the same treatment..
-
Wow ! Another stunner from you Marcos.. beautiful paint and finish, as usual Cheers