Russell C
-
Posts
1,931 -
Joined
-
Last visited
Content Type
Profiles
Forums
Events
Gallery
Everything posted by Russell C
-
need help and info I am building the most famous model t of all
Russell C replied to dodge5522's topic in WIP: Model Cars
One other option, if you rather not do all that scratchbuilding & kit piece gathering, is to find one of the Memory Lane toy versions. Steeply priced on Amazon https://www.amazon.com/Santa-Claus-Comin-Town-Vehicle/dp/B0001WUZM0 , but I got mine several years ago via an ebay sale for around $30. If I was to guess, it looks like maybe 1:12 scale. It's now part of my Christmas decorations every year, I loved that show when I was a kid. -
Honored to be in the "Clone the past"
Russell C replied to Jack Herndon's topic in Welcome! Introduce Yourself
Well, got a quick response to my email from Mark Gustavson, which he asked me to repeat verbatim below while he is in the process of getting his old login info in order to respond directly: Hi Jack! Wow, I can't believe you're on the Forum. Please note that I did NOT receive your e-mail note about your great vintage model! Please e-mail me directly at the addy below. The Museum's Clone the Past program is alive and well -- we are cloning the most important models in the history of our hobby. Noted builder John Teresi did an incredible job replicating the "Herndon Special": it was presented at the Museum seminar at GSL-XXVI in 2015 (go here for details on GSL: http://www.gslchampionship.org/ ). Here's a link to the Clone the Past Museum program (a new website is pending so forgive the dated one still online): http://themodelcarmuseum.org/Programs/Clone/clone.html I'm presently writing the 2016 Museum newsletter (go here to see older issues: http://themodelcarmuseum.org/information/Publications/publications.html I would like to interview you and get photos of your models. Please e--mail at the addy below, and we'll talk. Sorry again that your earlier attempts to contact me/the Museum didn't work out for you. Welcome to the Forum! Wow -- it's great that you're still into building. Thanks for your enormous contributions to the model car hobby! Cheers, Mark S. Gustavson Founder, International Model Car Builders Museum msgsl@xmission.com -
Honored to be in the "Clone the past"
Russell C replied to Jack Herndon's topic in Welcome! Introduce Yourself
Been able to exchange a few emails with the main guy at the Museum, so I gave it a shot at alerting him to this thread. Might do the trick for getting some communication going. Welcome back to this part of the hobby. Hope you can find a way to attend the next GSL contest, which features visits for attendees to the Museum. Part of that attraction will be (if I have it right) the public re-introduction of one of the co-winning models from the '64 Revell-Pactra contest. The other co-winning model is already on display there. -
Need some design help. AMT '57 Chrysler
Russell C replied to Jantrix's topic in Model Building Questions and Answers
You could section it in a big way, fill out the back of the roof and flatten it a bit, and then call it a Chrysler Thunderbird.
-
Shipping a completed model?
Russell C replied to Vande's topic in Model Building Questions and Answers
I wire-peg mirrors and other small items when I attach 'em to my models. Much more resistant to falling off, then. I've not gone to this length yet, but a person could construct some kind of protective 'box-shape surrounding' thing out of corrugated cardboard that could have post-it note material glued to the underside perimeter of such structures, so that they could be safely temporarily stuck to the model. But what has worked for me is miles of toilet tissue wrapped around the model like what Wayne Swayze suggests, within a box surrounded by packing material that is inside of another box. One more thing, make sure the inner box at least is crush-resistant. One can do that even with a regular model kit box, just take a large corrugated cardboard sheet and cut two layers of rectangles matching the insides of the kit box -- the key is is that one layer has the corrugations going in one direction, and the second layer is going 90° to the first layer. Cut a cardboard paper towel dowel down to the inner height of the box, and you now have an additional piece preventing the top from caving in. You probably can't park a car on such a reinforced box, but it might stand a far better chance of surviving whatever football practice it gets used for at the delivery facility. -
'90s GMC TopKick C7500
Russell C replied to Sergey's topic in WIP: Model Trucks: Big Rigs and Heavy Equipment
Something "retro" as in these '70s GMC stripe designs out of the paint scheme thread? -
Now what do I do with it ?
Russell C replied to Jon Haigwood's topic in General Automotive Talk (Trucks and Cars)
Usually I can find photos of what I'm thinking in Google image searches, but it seems to let me down this time, so I just made my own - take Rob Shmit's mild custom seen in the Favorite Caddy thread and lose a good chunk of the middle. But in order to make it look right, instead of moving the rear wheels forward along with the body, they'd look more factory-ish if they ended up centered within the 'moved-forward' section.
-
What makes a model "show quality"?
Russell C replied to SamBred's topic in Model Building Questions and Answers
Achieving the allusive 'show quality model' level is basically building something that - if magically expanded to 1:1 size - could be mistaken for being a fully functional vehicle. So, imagine using so-so quality black thread for plug wires, and blowing those up to 1:1 size. An ordinary person might then say, "Man, the insulation on those wires sure is hairy." Or for an outside door lock, "Wow, this thing isn't even round, it doesn't look shiny like stainless steel, and there is no slot to put a key in." That's the level of detail a person can get carried away with. Btw, the door locks on my avatar's 911 woody wagon are bits of aluminum paper clip wire, chucked into my motor tool and polished flat and into perfect circles, with a vertical slot scribed into them with an xacto blade. Beats a dot of silver paint, and it wasn't especially hard to do. Plus, as a wire where you just see the ends, they also serve as pegs to hold the handles much better to the sides of the car. -
Top Trucker Movies
Russell C replied to AMT4EVR's topic in General Automotive Talk (Trucks and Cars)
One more, sorta, but for me it's just the first 1 minute 40 seconds of Sylvester Stallone's "Over the Top", since the road he's on (in the not super bright sunshine scenes) is from bits of my favorite Colorado summer vacation road north of Durango to Ouray. Entertaining Autocar he has. -
Small weakness for custom long roofs. Two really old builds from the late '80s piled on top of my current WIP, which I'm running behind on updating.
-
Step Side Cab Over ?
Russell C replied to Greg Myers's topic in General Automotive Talk (Trucks and Cars)
Current ebay listing of a fleetside model done gasser style: http://www.ebay.com/itm/172306139691
-
Alas, as underfunded as the IMCM is, which results in the website running behind on updates, don't let that appearance dissuade you from visiting. Speaking from my multiple visits during the GSL contests, and from news of major new recent model acquisitions, let me suggest that you make a particular effort to visit it. Tours will be happening during next year's GSL, with presentations of that new material happening at that time, and it is available for private tours, but through reasonable advance inquiry.
-
I had totally missed the news about Tim Pentecost. A tremendous loss, he was a fixture at the GSL contests, as well as a good friend to all of us.
-
My vote goes to the 2nd photo with the spinners. Glad to help with the visualization of the side window openings. One of my weaknesses is for customized Vettes, so I couldn't resist seeing how the suggestions would work on the window openings. I've photo alteration-visualized a few of my own Vette ideas, including this one within my 'artwork' thread of a custom I won't probably pursue. Handy to have my graphic arts training and my obsolete CorelDRAW 11 program to use for 'virtual model customizing'. By way of example, I thought I had a fun idea of combining a Daytona Superbird with a '72 Mustang a while back, but I absolutely could not get the illustration to look good. So, I saved myself the cash from buying a Dodge for a custom that would have looked just as bad in real life.
-
You mean like this collectively, with a re-scoring of the rear part of the door line?
-
Any idea how to "tint" windows
Russell C replied to JerseeJerry55's topic in Model Building Questions and Answers
Dang! Something new to learn every day! http://store.ritstudio.com/rit-dyemore/ -
No doubt that will be a fine addition to the Museum.
-
Truck Kits You've Scored Recently
Russell C replied to Superpeterbilt's topic in General Automotive Talk (Trucks and Cars)
Man! Didja also score a truck to haul back all those trucks? -
Yep, I hadn't noticed the rollbar location mostly due to how it blended into the color of the interior in the 1st, 4th & 5th photos, but once it got mentioned, it was hard not to notice. Didn't want to chime in at that time out of politeness, but glad that you were open to suggestion, and it does indeed look more natural now.
-
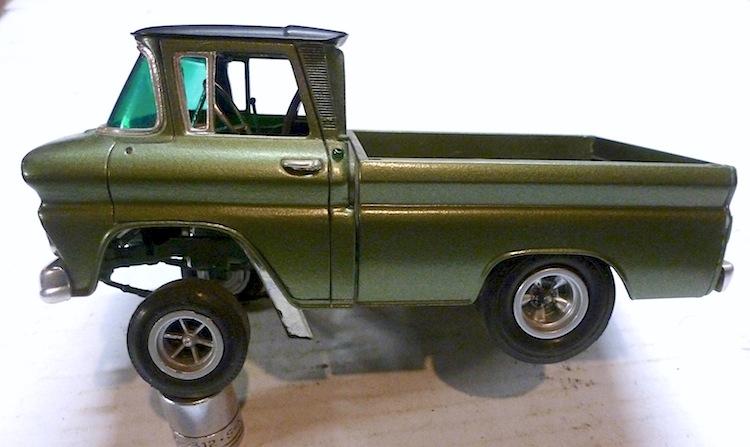
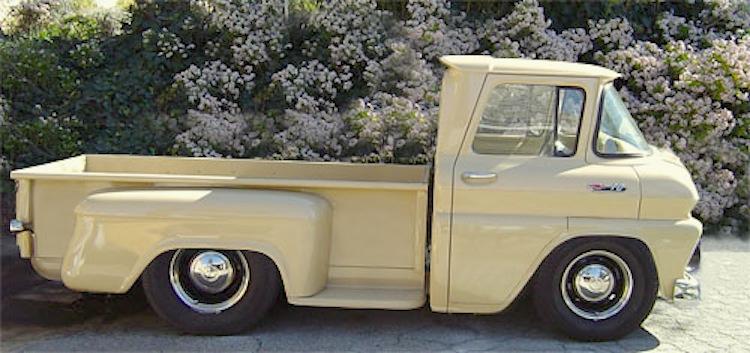
Step Side Cab Over ?
Russell C replied to Greg Myers's topic in General Automotive Talk (Trucks and Cars)
While doing an image search for something related, I ran across cab forward Chevy trucks, and one of the thumbnail image links led me straight to this thread, so I assume the missing photo above is the tan one I captured below. The other image link led to this guy's 25th scale blue cab forward Chevy.
-
"junk" collections on ebay, already built, 'key word'
Russell C replied to fiatboy's topic in The Off-Topic Lounge
I've had my best luck with the word "junkyard", a little less with "assembled", and in simply zipping through the newly listed stuff in the Vintage category within the Automotive section of Models & kits. Some otherwise clueless estate salers think of dusty old build-ups as 'vintage', I guess. -
Our man Joseph Osborn right here does custom Alps printing.
-
So if back in the day the guys at Palmer Plastics were to go off the reproduction here, does that mean the kit would have ended up proportioned correctly?
-
Let's See Some Glue Bombs!
Russell C replied to Snake45's topic in General Automotive Talk (Trucks and Cars)
In gathering what I need for a '34 Ford street rod project, I just got this off ebay for fairly cheap. It's only missing the rear bumper. It's an original maroon-molded 24th scale Monogram, where some long-ago builder only painted the body and nothing else…. but that also included the running boards in green, and the ragtop in three layers - silver, candy apple green and silver on top of that. No offense to the builder, I popped off the running boards and soaked them and the ragtop in Purple Power degreaser. The green peeled off in rubbery sheets, but the silver ended up being a tad more stubborn. Fun as the color is, it isn't salvageable. The builder didn't primer the body, so as seen on the forward surface of the left rear fender, the paint can be popped right off. I'm wondering if I can peel the whole body without using paint solvents. For my oncoming project, I need the running boards, taillights, bumper and grille. To achieve a particular effect for my project (which everyone will see later in a WIP thread), I have to have a 24th scale grille, which is noticeably larger than the AMT 25th scale one.
-
Tom Daniel's '60 Chevy Street Figher *8/10 almost done*
Russell C replied to JTalmage's topic in WIP: Model Cars
Greg Myers' post #1 in this thread shows three of the 4 kit versions, with the differences in headlights, roof openings, bumperettes, hoods, etc. The Street Fighter Two is the one other version, having radiused rear wheel openings.