gotnitro?
-
Posts
4,514 -
Joined
-
Last visited
Content Type
Profiles
Forums
Events
Gallery
Everything posted by gotnitro?
-

Cat D-7 is finished.
gotnitro? replied to Chariots of Fire's topic in Model Trucks: Big Rigs and Heavy Equipment
Fantastic work! The 3d printed parts are definitely improving our hobby w variety -
Looking forward to both of your builds! I see someone already called Shotgun!!! I'll lurk from my corner lol
-
Excellent video work Joe ! Hopefully we'll see your bottom dump trailer next yr
-
Western Star 4900 FA plow truck
gotnitro? replied to BK9300's topic in WIP: Model Trucks: Big Rigs and Heavy Equipment
This is such an epic build! Love how the 3d printing world is shaping our hobby -
International V190 Quarry Dump
gotnitro? replied to Warren D's topic in WIP: Model Trucks: Big Rigs and Heavy Equipment
Excellent work on a monster dump truck -
Resto Rod Autocar
gotnitro? replied to Gary Chastain's topic in WIP: Model Trucks: Big Rigs and Heavy Equipment
Excellent detailing -
The Same but “ a little “ Different
gotnitro? replied to Biggu's topic in WIP: Model Trucks: Big Rigs and Heavy Equipment
Cool build idea and history to boot ! -
Fulton Model Car and Truck Show?? When is it??
gotnitro? replied to mascari33's topic in Contests and Shows
The show is always held the Sunday before Thanksgiving, unless the weather forces them to change it.The 24 th is the confirmed date, hope you can attend -
Lonestar
gotnitro? replied to TopherMcGinnis's topic in WIP: Model Trucks: Big Rigs and Heavy Equipment
You could always change it up a little, more custom like this.. I have the bumper,, fenders and headlight conversion that was cast by the late Gary Wallace.
-
I needed another project....T800
gotnitro? replied to gotnitro?'s topic in WIP: Model Trucks: Big Rigs and Heavy Equipment
Thanks I really appreciate the feedback -
I tried to log in tonite and received a Banned message...switched over to work wifi and everything is working
-
Autocar DC75T (3D-Print)
gotnitro? replied to Jürgen M.'s topic in Model Trucks: Big Rigs and Heavy Equipment
Great job ? -
Michigan L190 Front End Loader
gotnitro? replied to Warren D's topic in Model Trucks: Big Rigs and Heavy Equipment
Outstanding work ! Looks ready for the job site, and the proper truck hauling it there -
A&N KW W990
gotnitro? replied to RoninUtah's topic in WIP: Model Trucks: Big Rigs and Heavy Equipment
Awesome details -
Western Star 4900 FA plow truck
gotnitro? replied to BK9300's topic in WIP: Model Trucks: Big Rigs and Heavy Equipment
Beautiful work -
A&N KW W990
gotnitro? replied to RoninUtah's topic in WIP: Model Trucks: Big Rigs and Heavy Equipment
Keep it going !! -
I needed another project....T800
gotnitro? replied to gotnitro?'s topic in WIP: Model Trucks: Big Rigs and Heavy Equipment
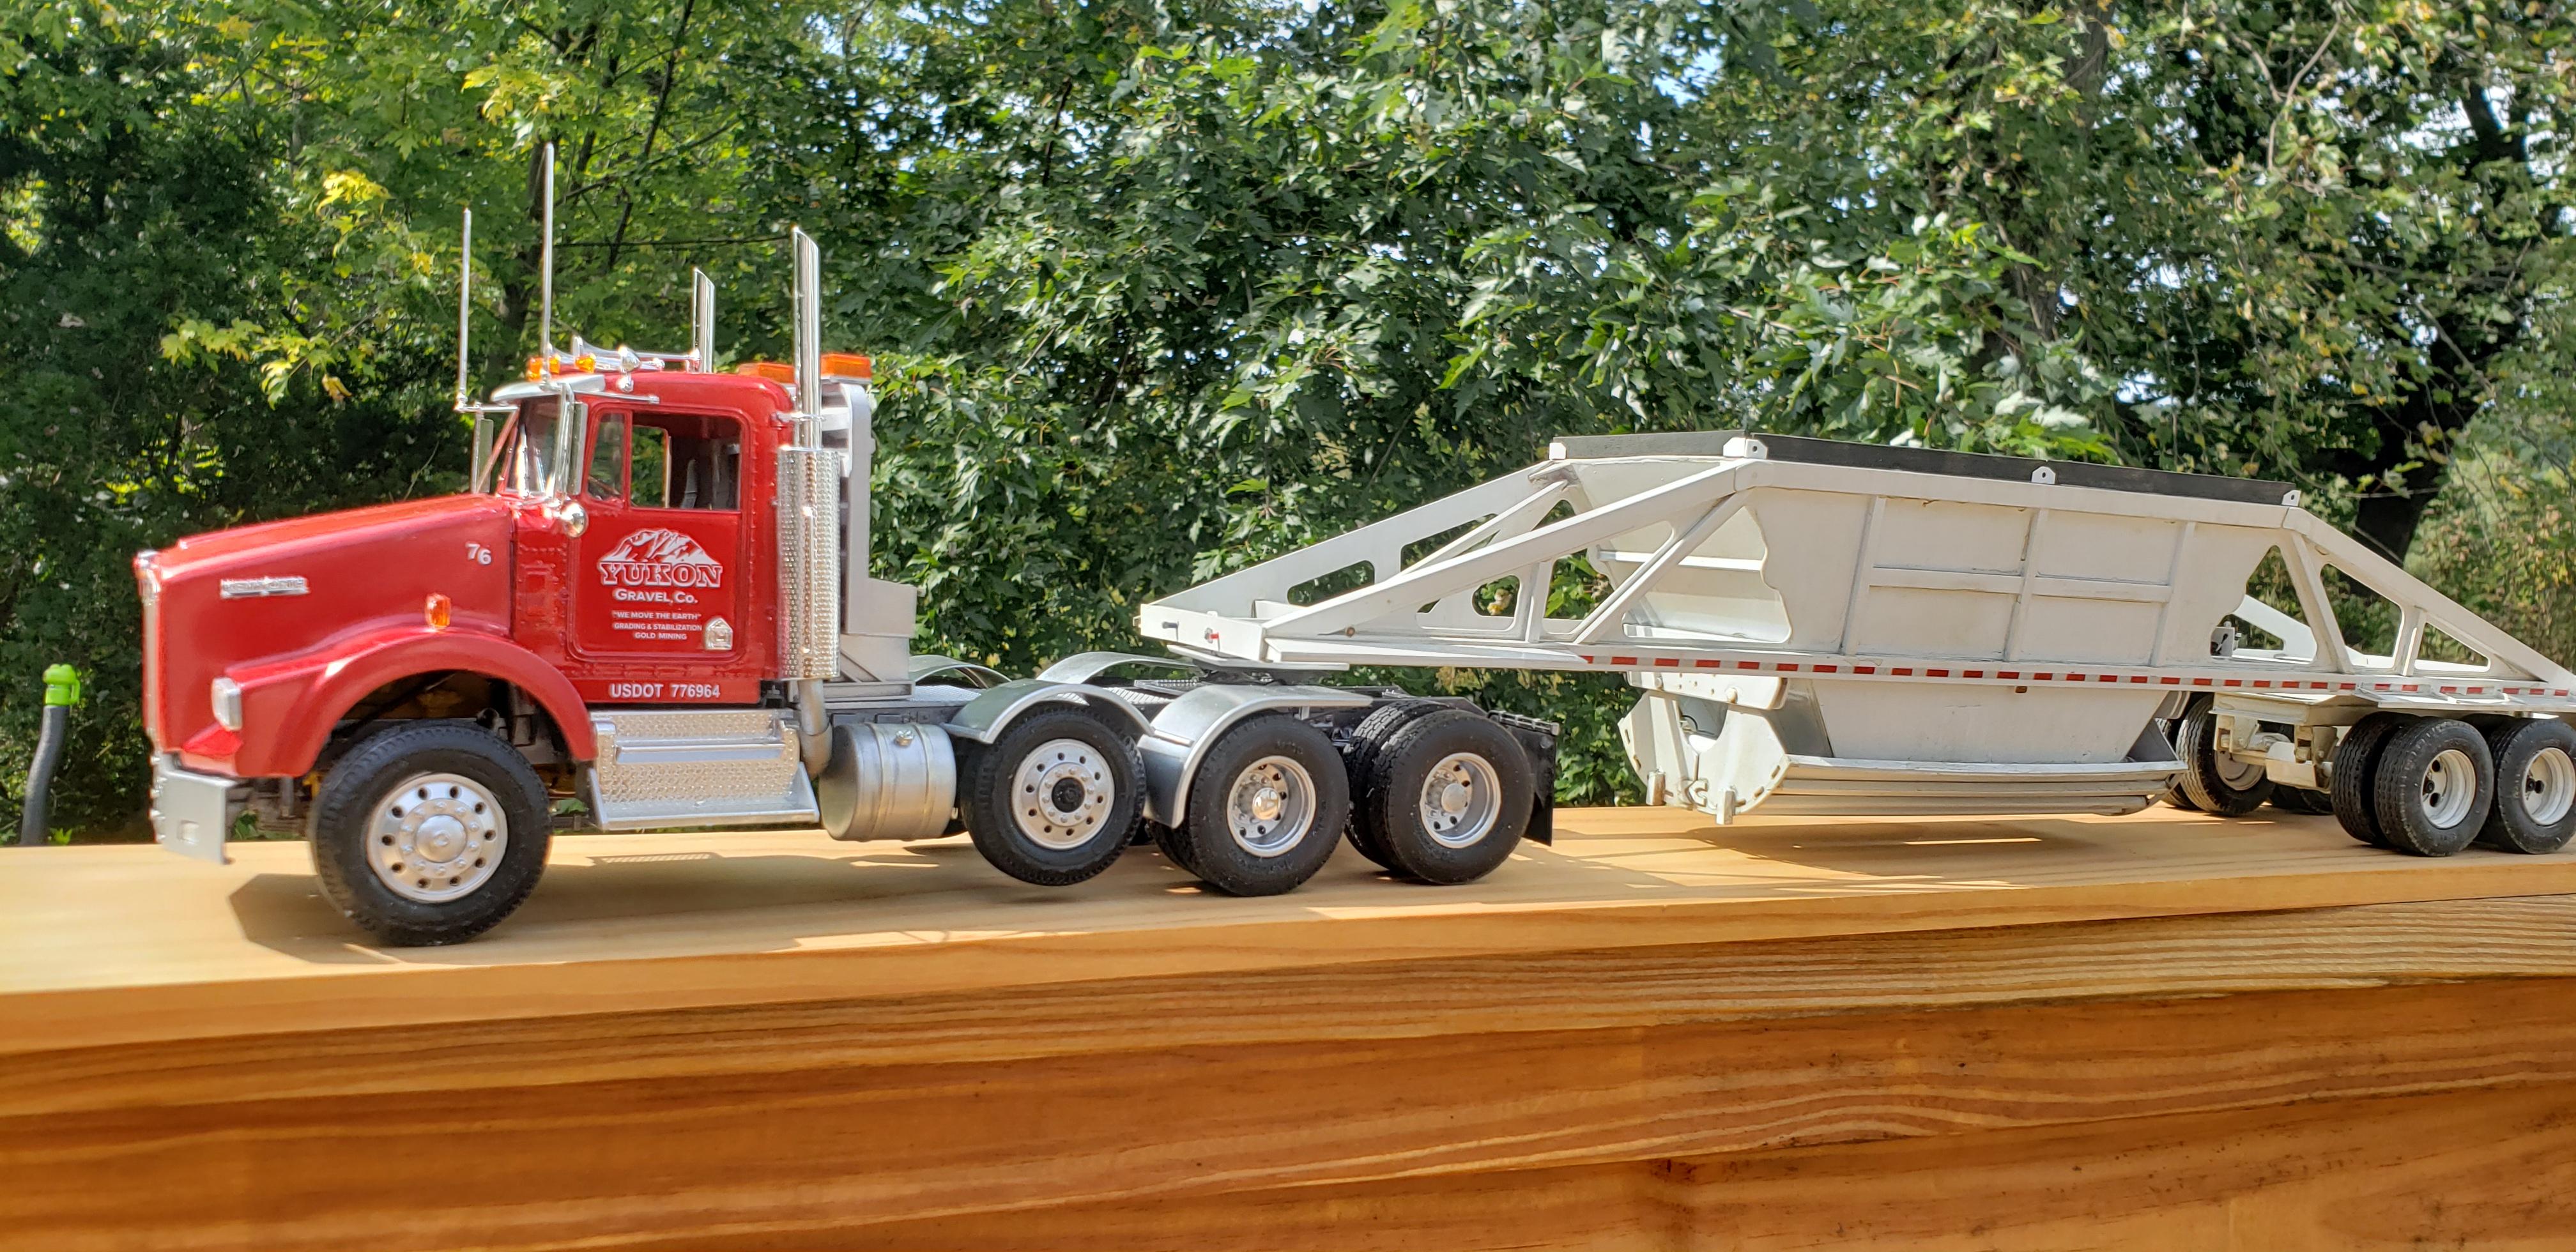
The combo together today, I used the kit decals ..thats a 1st for me ! Now their hooked together I'll add service lines. thanks for everyone following along and the comments. I really wish I'd figured out the air cleaners/ hood..but it worked out. The next build on the bench...let's just say I have a very large Hornet infestation lol..
-
AMT Ford LN 8000
gotnitro? replied to OldTrucker's topic in WIP: Model Trucks: Big Rigs and Heavy Equipment
Nice work so far Really like your weed burner exhaust arrangement -
I needed another project....T800
gotnitro? replied to gotnitro?'s topic in WIP: Model Trucks: Big Rigs and Heavy Equipment
Let me make some space on bench 1st lol its a long one ! Thanks Dan ! -
Watching for sure !!
-
I needed another project....T800
gotnitro? replied to gotnitro?'s topic in WIP: Model Trucks: Big Rigs and Heavy Equipment
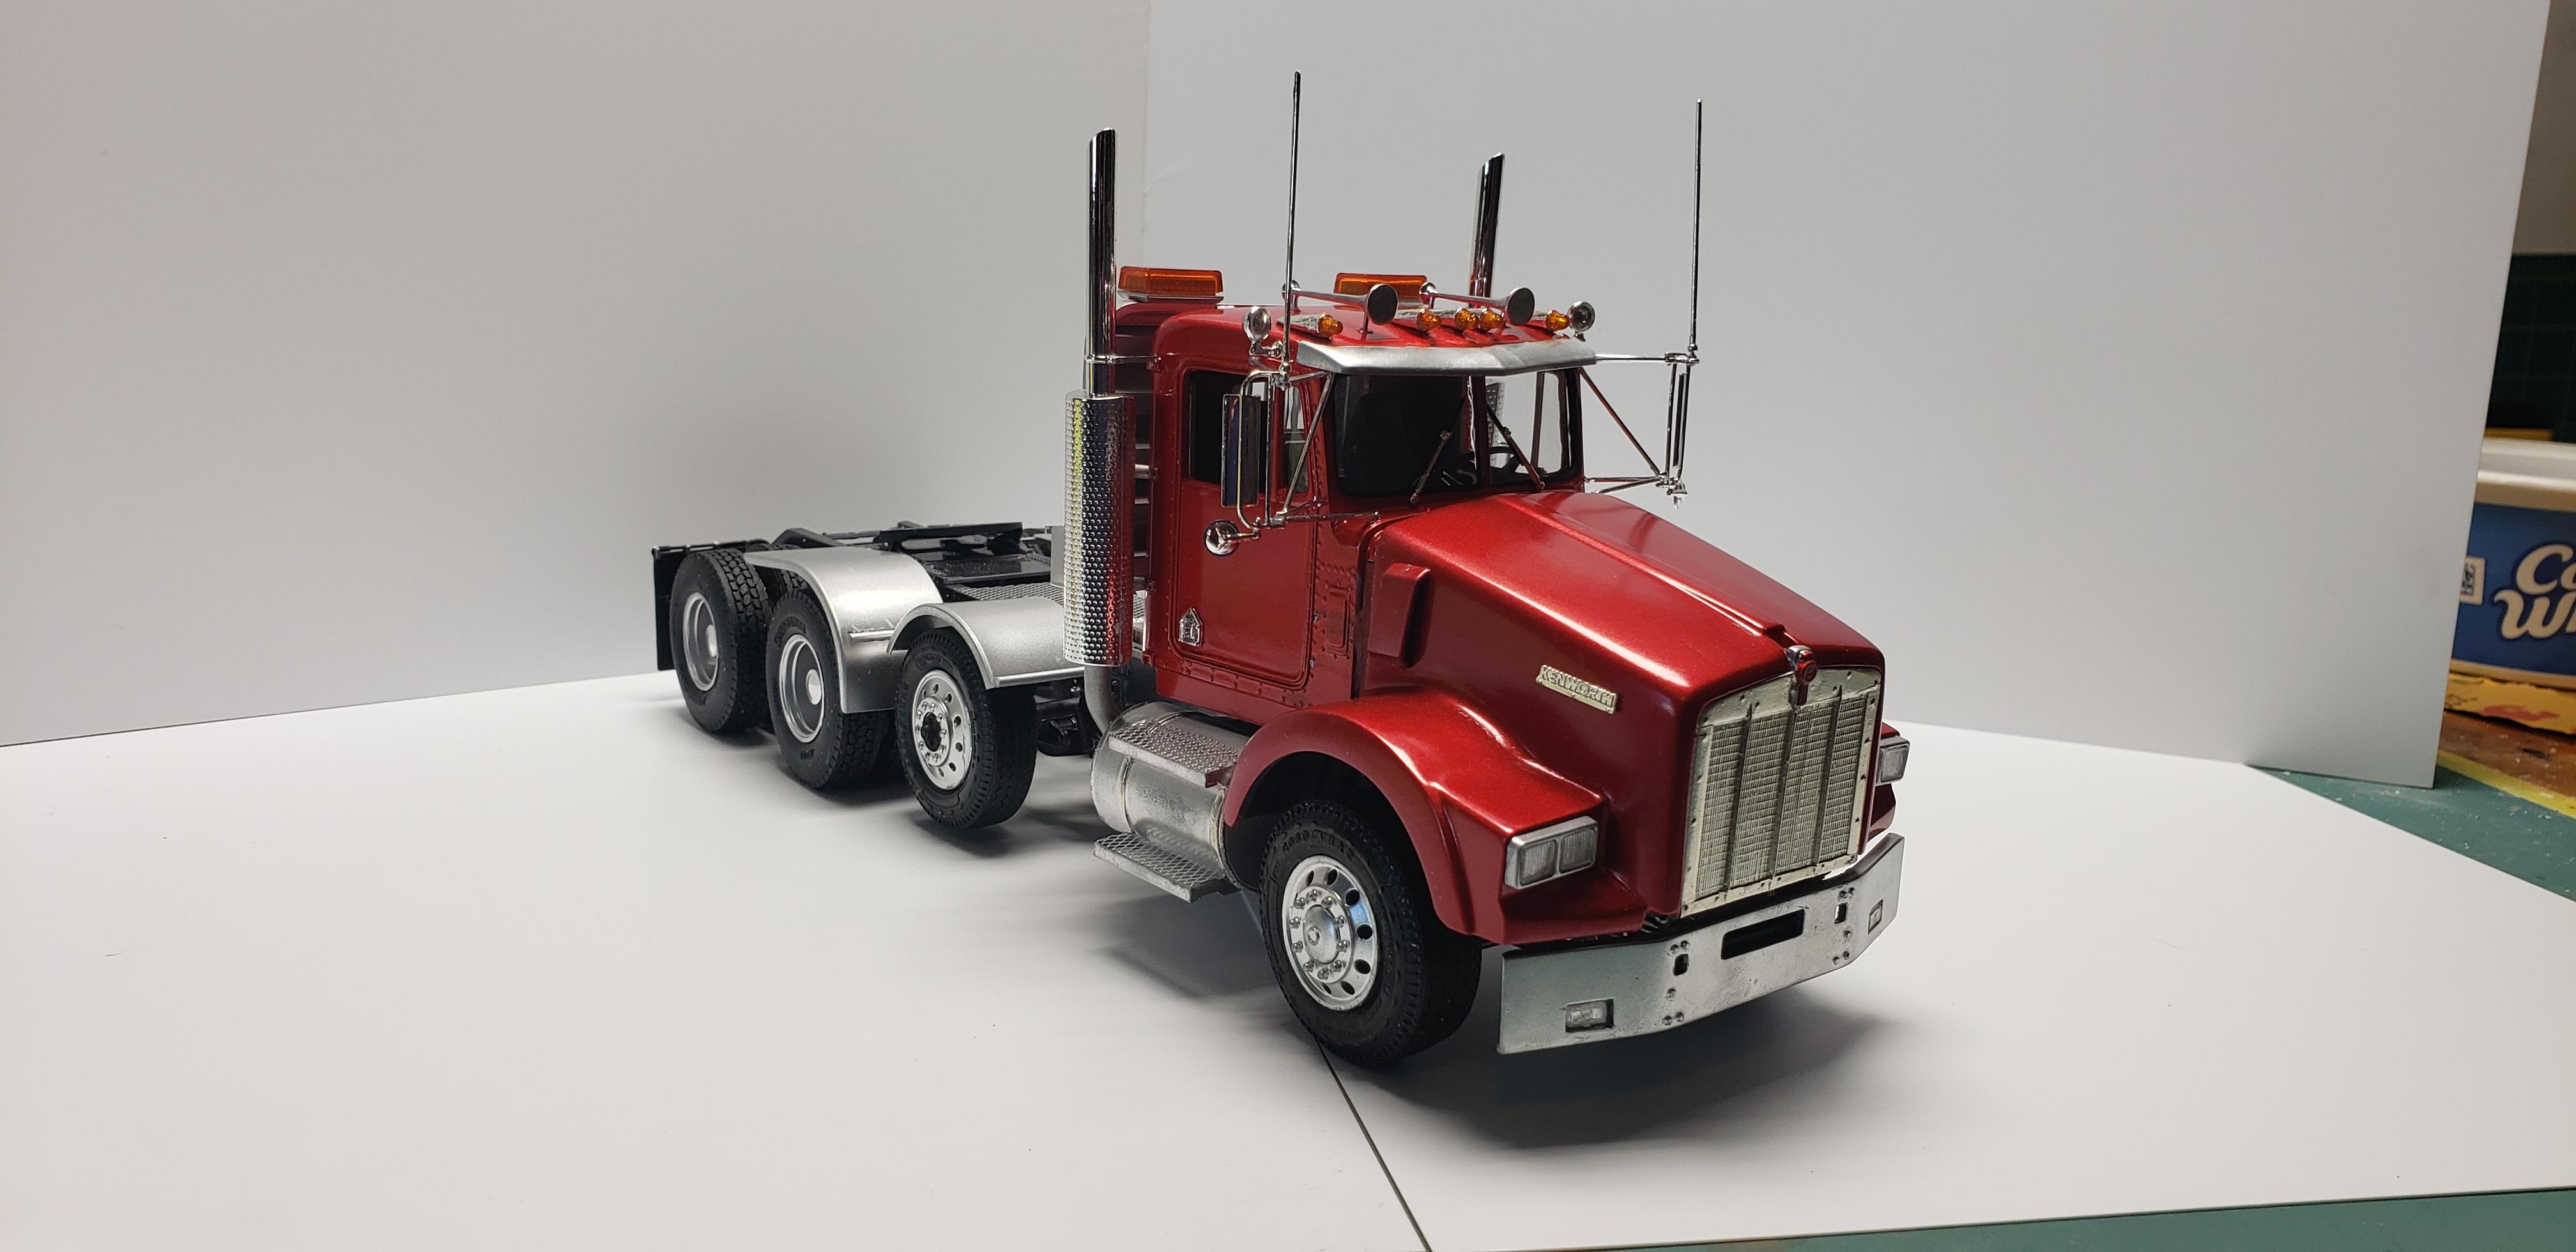
The T800 is done !!! Those flexi straws worked great for exhaust pipes, glad I grabbed a couple spares. The purrrrr- fect match for this build I'll add some minor dust around the chassis to sell the theme, but keeping the truck clean. Thanks for following along on this build...it took months longer than I planned.
-
Like the direction your going!
-
FDNY Wrecker
gotnitro? replied to Scott Eriksen's topic in WIP: Model Trucks: Big Rigs and Heavy Equipment
I'll be watching this ! -
I needed another project....T800
gotnitro? replied to gotnitro?'s topic in WIP: Model Trucks: Big Rigs and Heavy Equipment
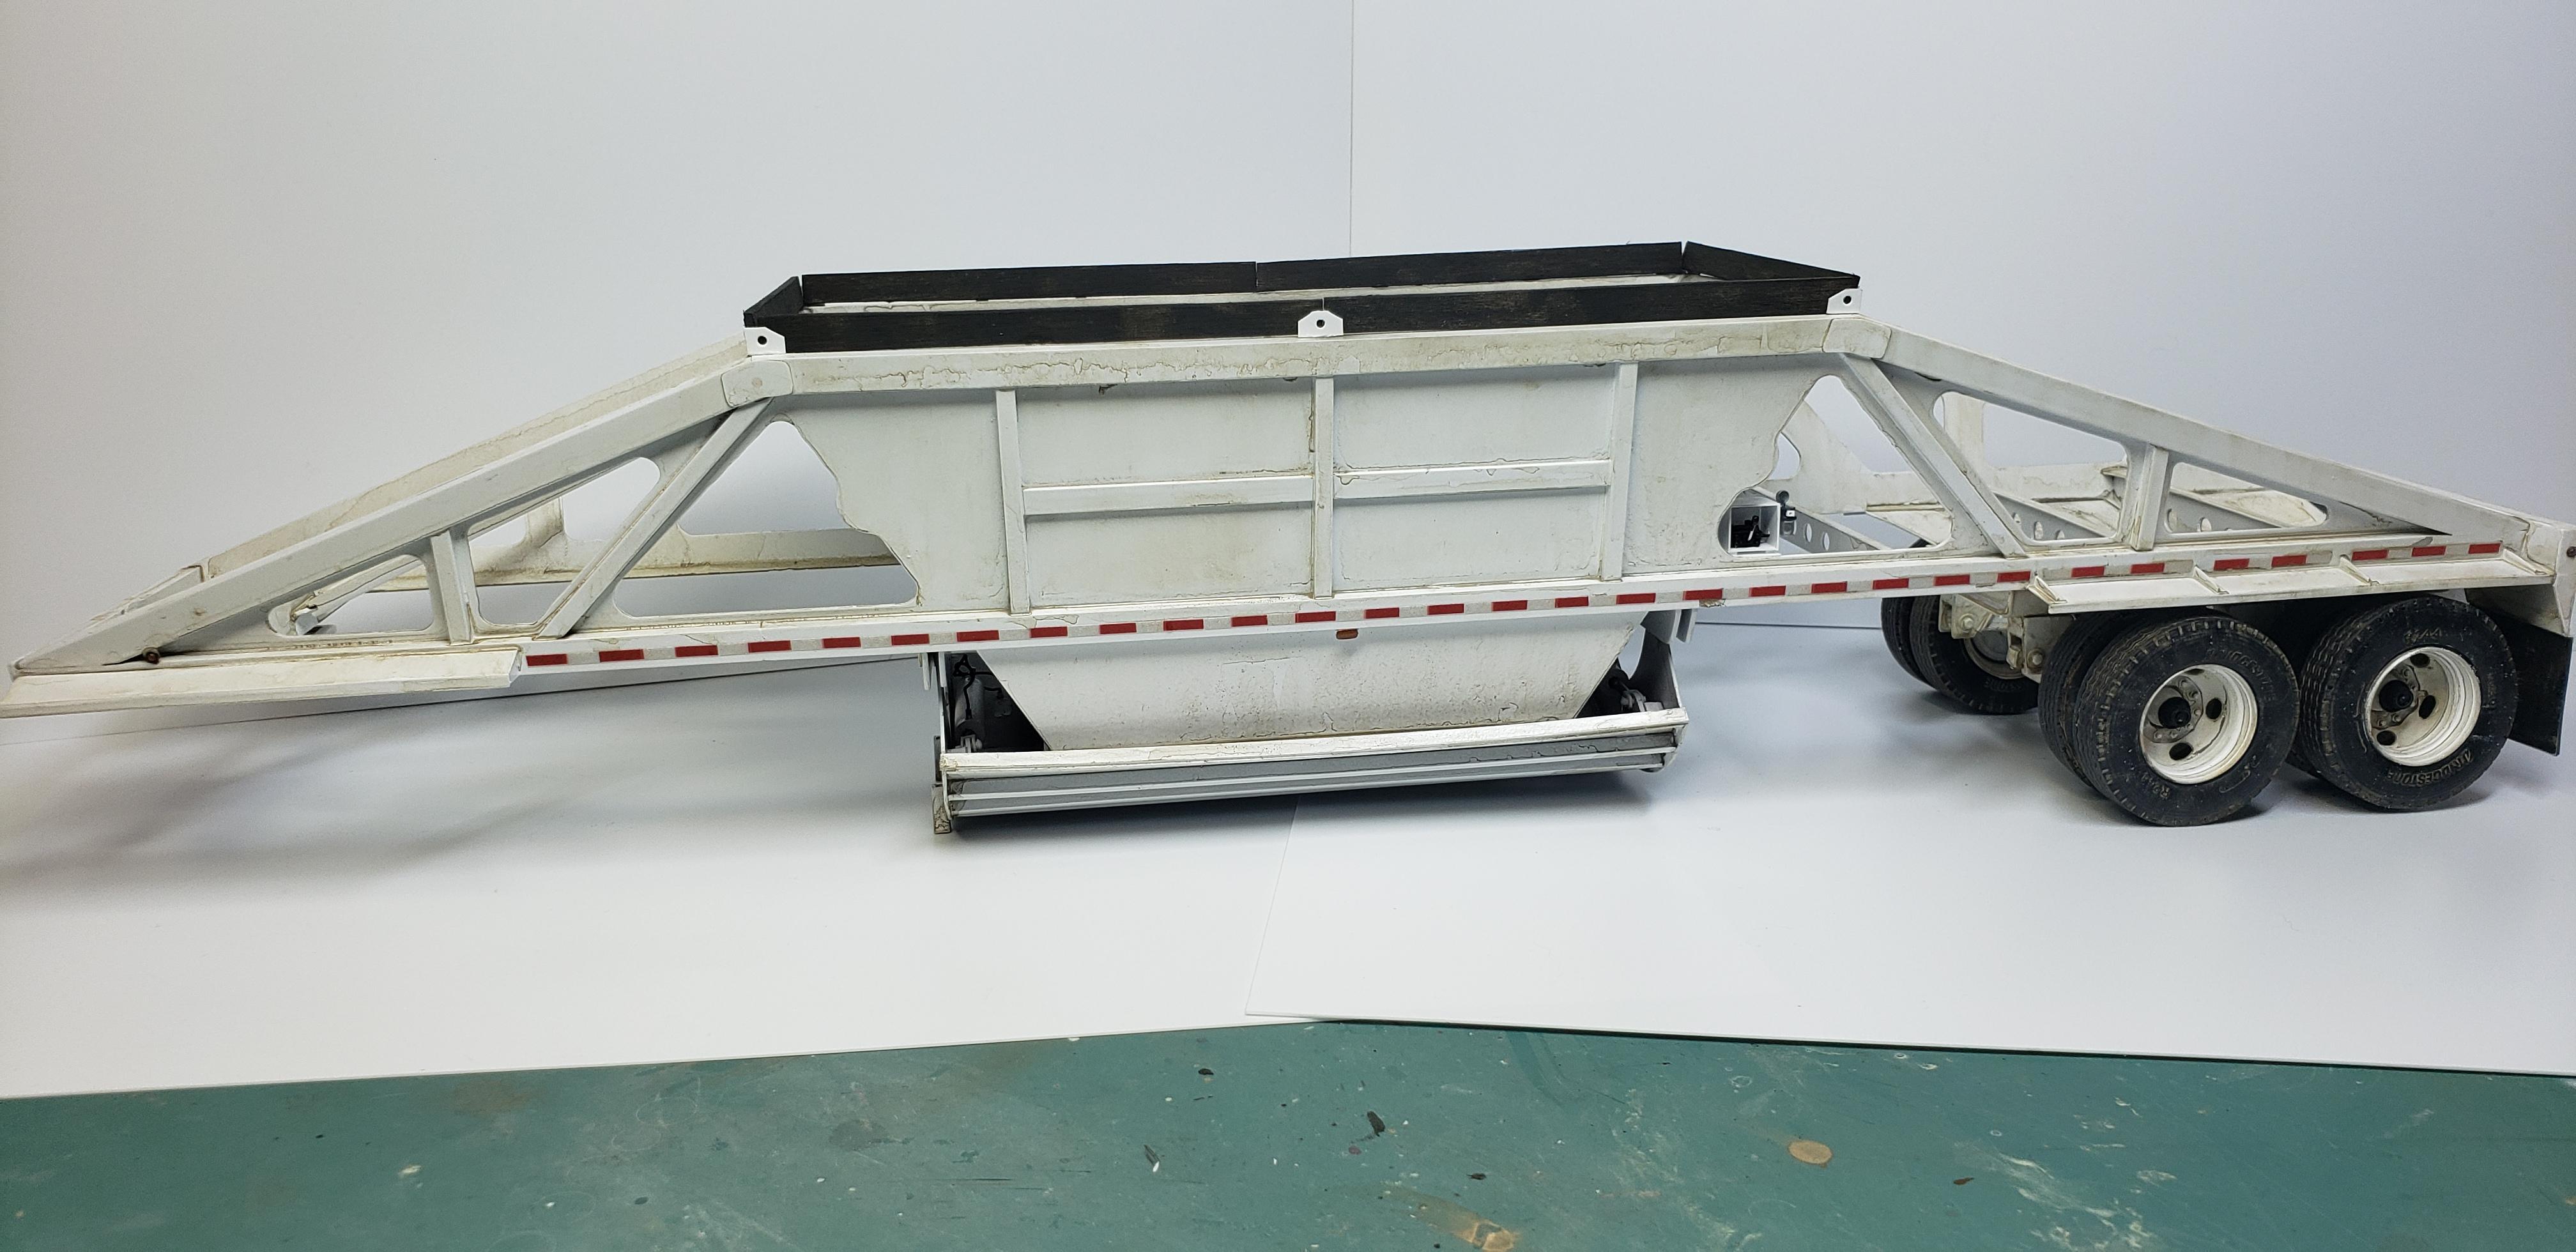
Thanks! I scored a pile of flexi straws yesterday while having lunch w my Dad, funny how modelers see supplies while drinking ice tea !! Thanks I wanted a daily used look after watching clips of these trailers in use. They get dragged thru worse conditions then NY pot holes -
I needed another project....T800
gotnitro? replied to gotnitro?'s topic in WIP: Model Trucks: Big Rigs and Heavy Equipment
Well, the trailer is almost finished! Just need to adjust some sloppy weathering, and make a couple decals. I don't care for the yellow appearance I noticed after the photos were taken..easy fix. The working portion of the trailer is my favorite. Its done w multiple layers of pigment powders, different shades of very thinned paint, and damp rags w thinner to remove base colors. Thanks for everyone following along! I promise I'll wrap up the KW soon