MeatMan
-
Posts
3,949 -
Joined
-
Last visited
Content Type
Profiles
Forums
Events
Gallery
Everything posted by MeatMan
-
Welcome aboard Frank!
-
No, you're absolutely correct. I wasn't thinking about a commercial setup. I have no wish personally to print for $$. I don't even do bodies.
-
Great idea! Well done!
-
Very nice work!!
-
Welcome to the fray Frank!
-
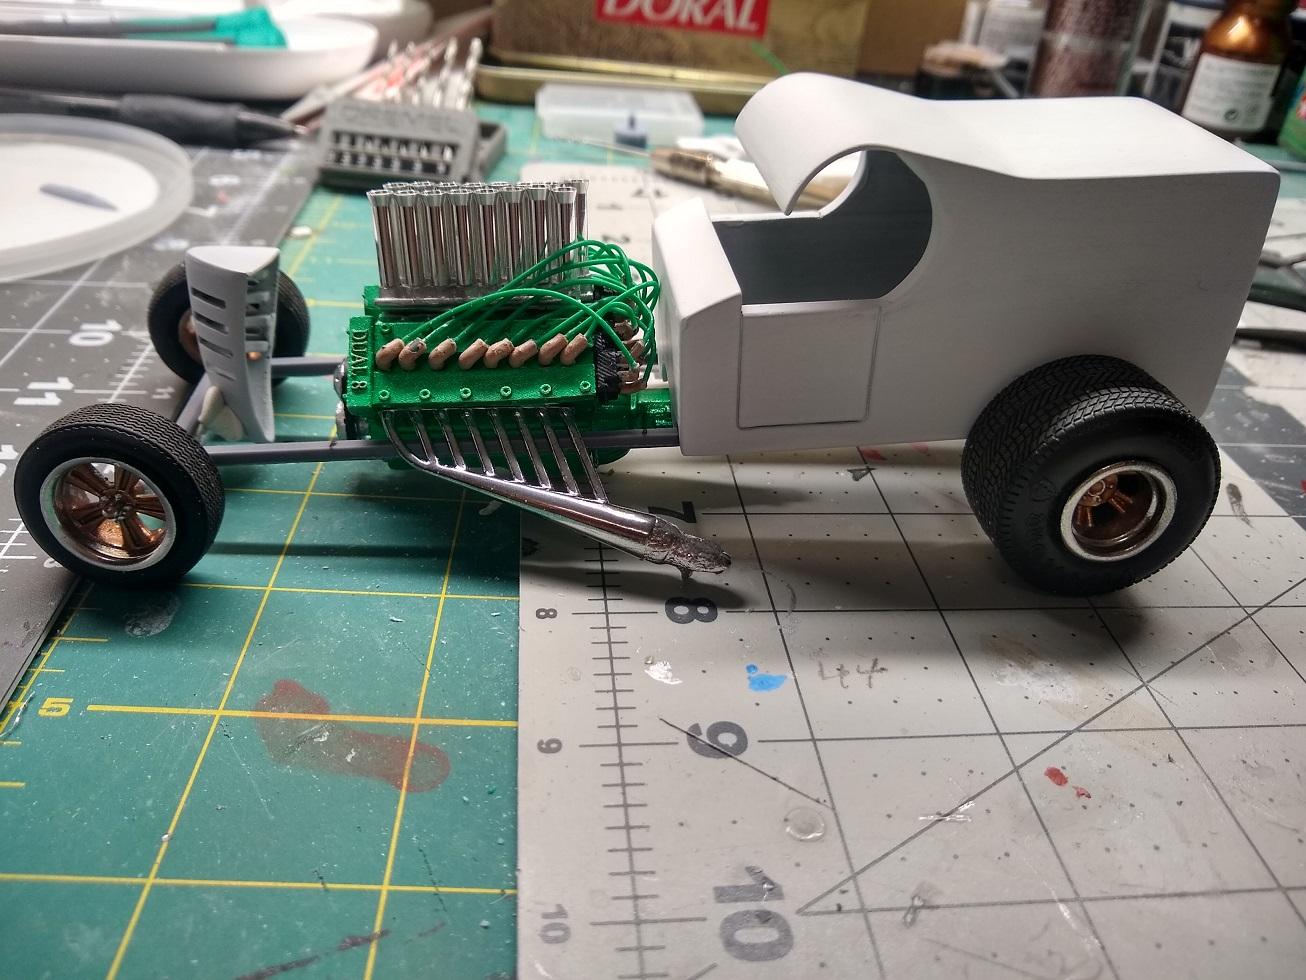
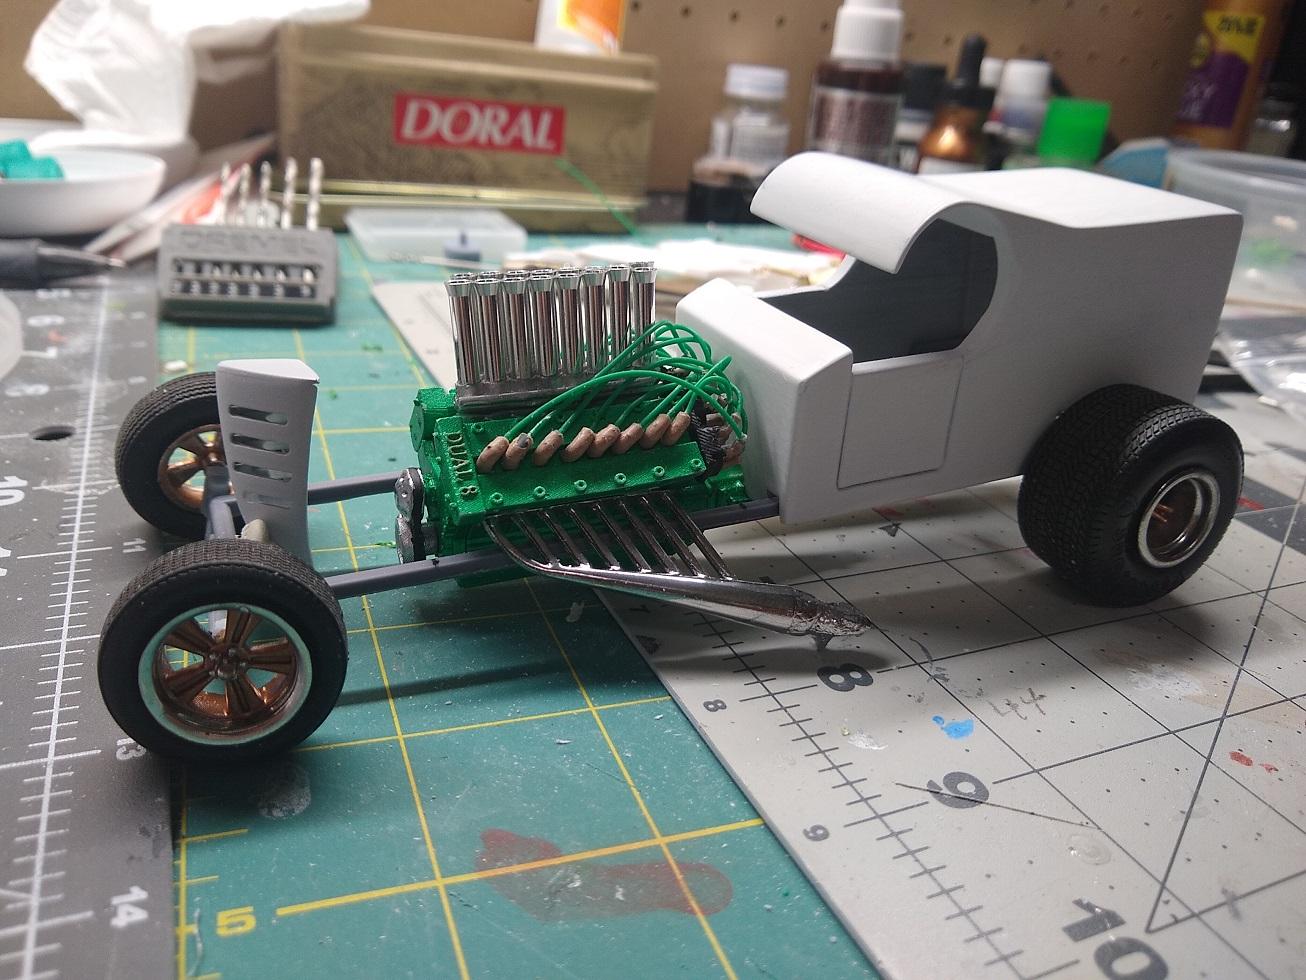
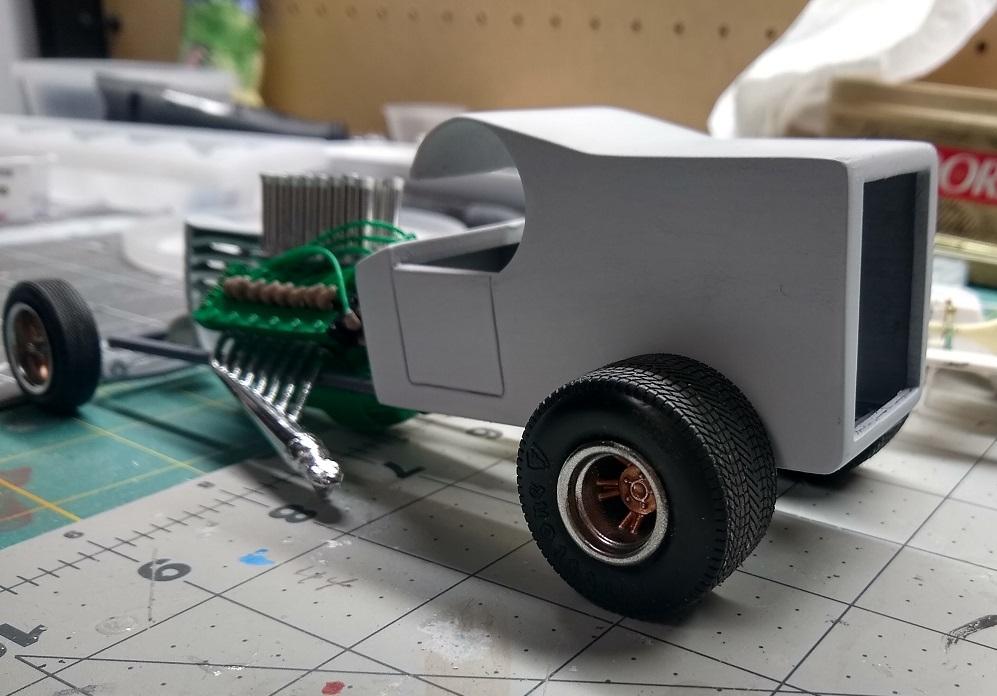
Well its been a slow go but I finally got some work done on the c-cab. The engine is mostly finished so I decided to mock it up with the chassis and I think I need to raise the engine a bit. I had a hard time with the wiring on this beast because the distributor I originally printed for it is huge, so I went with two coil packs with eight sockets each. Still looks quite busy tho. I printed the cowl which is a raven beak cut down with some slots added for cooling. The body will be the same green as the engine, with accents the color of the wheel centers.

-
I print in the same basement room I paint in. When I print I turn on the externally vented blower on my paint booth, which handles the ventilation with no complaints from the "boss".
-
37 Ford pick up
MeatMan replied to thatz4u's topic in Model Trucks: Pickups, Vans, SUVs, Light Commercial
Nicely done! -
2023 Cannonball Run-What-You-Brung Build Thread
MeatMan replied to White Rabbit's topic in Community Builds
A little chassis update on my Monza today too. I'm a bit giddy because I managed to design and print replacement front A-arms to give it about a 3mm drop. I wanted to keep it simple by using the dimensions from the kit A-arms, which lacked any realistic detail. Still have to add springs and shocks or coilovers. The last pic is from my CAD program for clarity .
-
2023 Cannonball Run-What-You-Brung Build Thread
MeatMan replied to White Rabbit's topic in Community Builds
Good start on the chassis. That rear axle looks like the same on I'm using. A 12 bolt from one of the AMT Camaros. -
Nicely done!
-
2023 Cannonball Run-What-You-Brung Build Thread
MeatMan replied to White Rabbit's topic in Community Builds
I got started on the body of my Monza by switching out the stock front fascia with the custom one, which I modified for a more streamlined look. I'm currently in the process of smoothing the hood and front fascia to eliminate the dip. It takes away some of the Monza identity but I want to add another feature that won't work with the dip in the hood. I removed the bottom of the stock rear fascia and added the bottom of the custom one because I didn't want the 5 MPH bumpers but did want to retain the stock taillights. I added a strip of styrene rod for the bumper. One reason for that is that the taillight housing overlapped the pan, which resulted in an unfinished look. My inspiration for this look is the Super Spyder concept car in the last pic.
-
Resin BBC Torker intake
MeatMan replied to Roadrunner1972's topic in Car Aftermarket / Resin / 3D Printed
I need that too for a replica of my 70 Chevelle I had back in the day that had a torker on it. -
Those are the same kinds of people that you see in road rage incidents. They take perceived slights quite personally.
-
Just finished my first diorama! Asbury, NJ streets!
MeatMan replied to GlueSniffer's topic in Dioramas
Truly awesome work! Thanks for the tutorial, too! -
Killer project!
-
Well done! I built that kit a couple of years ago and agree with your assessment.
-
That's the new world of filing. I read where youngies don't even know how to file anymore, they tag and search.
-
Very nice!
-
Awesome work!
-
Sweet build!
-
Beautiful work! Great attention to detail and light fabrication. Well done!
-
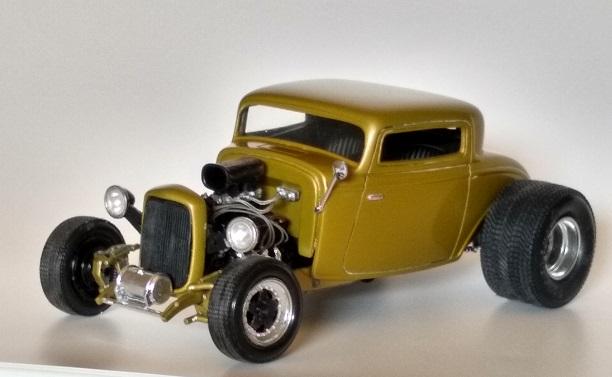
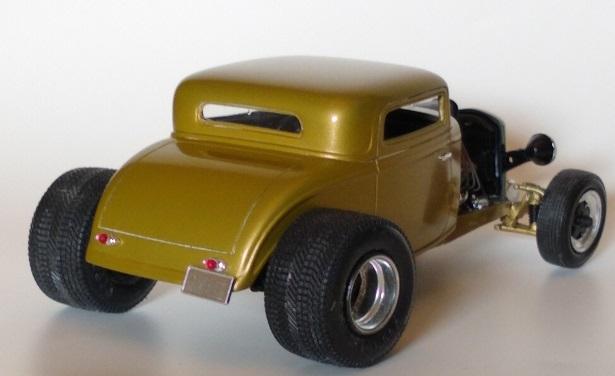
Well, here are pics of my first and only chop. It wasn't as hard as you might think, but was a nice test of my skills. Here is a link to my Fotki site with detail on how I did it. https://public.fotki.com/Urban-Poet/32-vic/ As for resin, I've done a few of them and they are no picnic either. You need to be very careful when sanding the stuff as it can cause respiratory issues and there may be work getting it to fit the chassis. I'm not against resin though by any stretch. Whichever you pick, enjoy!
-
Awesome build! Well done!
-
Very nice work! On the truck and photography.