Speedpro
-
Posts
854 -
Joined
-
Last visited
Content Type
Profiles
Forums
Events
Gallery
Everything posted by Speedpro
-
Hi steve, I was looking at your '83 olds (nice build by the way) and noticing it has a small seat in the back between the tubs. And you are incorporating a child seat into this build. I've seen them in pro street cars before, but far, few and in between. Definitely different. It's like it's your own little trade mark. I like your method of getting the car to sit low. Yea, it's a little more work, but well worth it. I like where this is headed.
-
Some really nice detail work going on here! The engine looks excellent. And the cal tracs are going to be real nice when finished.
-
Great looking willy's p/u project!
-
Nice 1:1 beaumont steve. Looking forward to your pro street build. Looks like you have some work to do getting those 3d parts to fit. If anyone can do it, it would be you. You said you have had your car since '96. Do you hang with the BC Chevelle club? Reason I'm asking is, I have a '66 chevelle super sport that I built/restored back in '99 and would drive it up from seattle to participate in their shows ( believe it was in langley). It was like a chevellebration. American and Canadian cars together. I remember talking with guy's about their beaumont's and them telling me how hard it was to find parts for those cars. They would have these beautiful paint jobs, but most of the trim stuff was far from perfect because they had to use all the original stuff that came on their car when they put it together, only hoping to some day find something better. Not new, just better. Parts for the beaumont's were like unobtainium is what they said. This is something I think about everytime I am looking at a beaumont. Some good memories from that show. I learned alot about the beaumont's. And I have an appreciation for them.
-
Great job finishing this Dennis! And it came out beautiful. Really like the color, very warm and clean looking. I think tim's comment is spot on about your build. And this is a first class example. Great pics by the way!
-
Great looking build!
-
Very nice! Good looking paint and assembly.
-
Way cool! One of the nicest '65 coronet's I'v seen. Very nice!
-
Very nice! Really clean build and the paint looks fantastic.
-
I think it was really worth narrowing the fenders like that. I like the picture that shows one side done and not the other side, really sums it up how big it changes things. One of the best mods you've done so far. Just wondering if you are double thinking the headlamp buckets yet? I think the ones you're using will work perfect, but I'm just curious. And I might be sorry for this, but just immagine a '32 ford grill cut down to fit. It just might work. Great work so far!
-
Great color choice, Dennis. I'd say ya got a handle on your paint. Looks awsome from here. Looking forward to seeing everything come together.
-
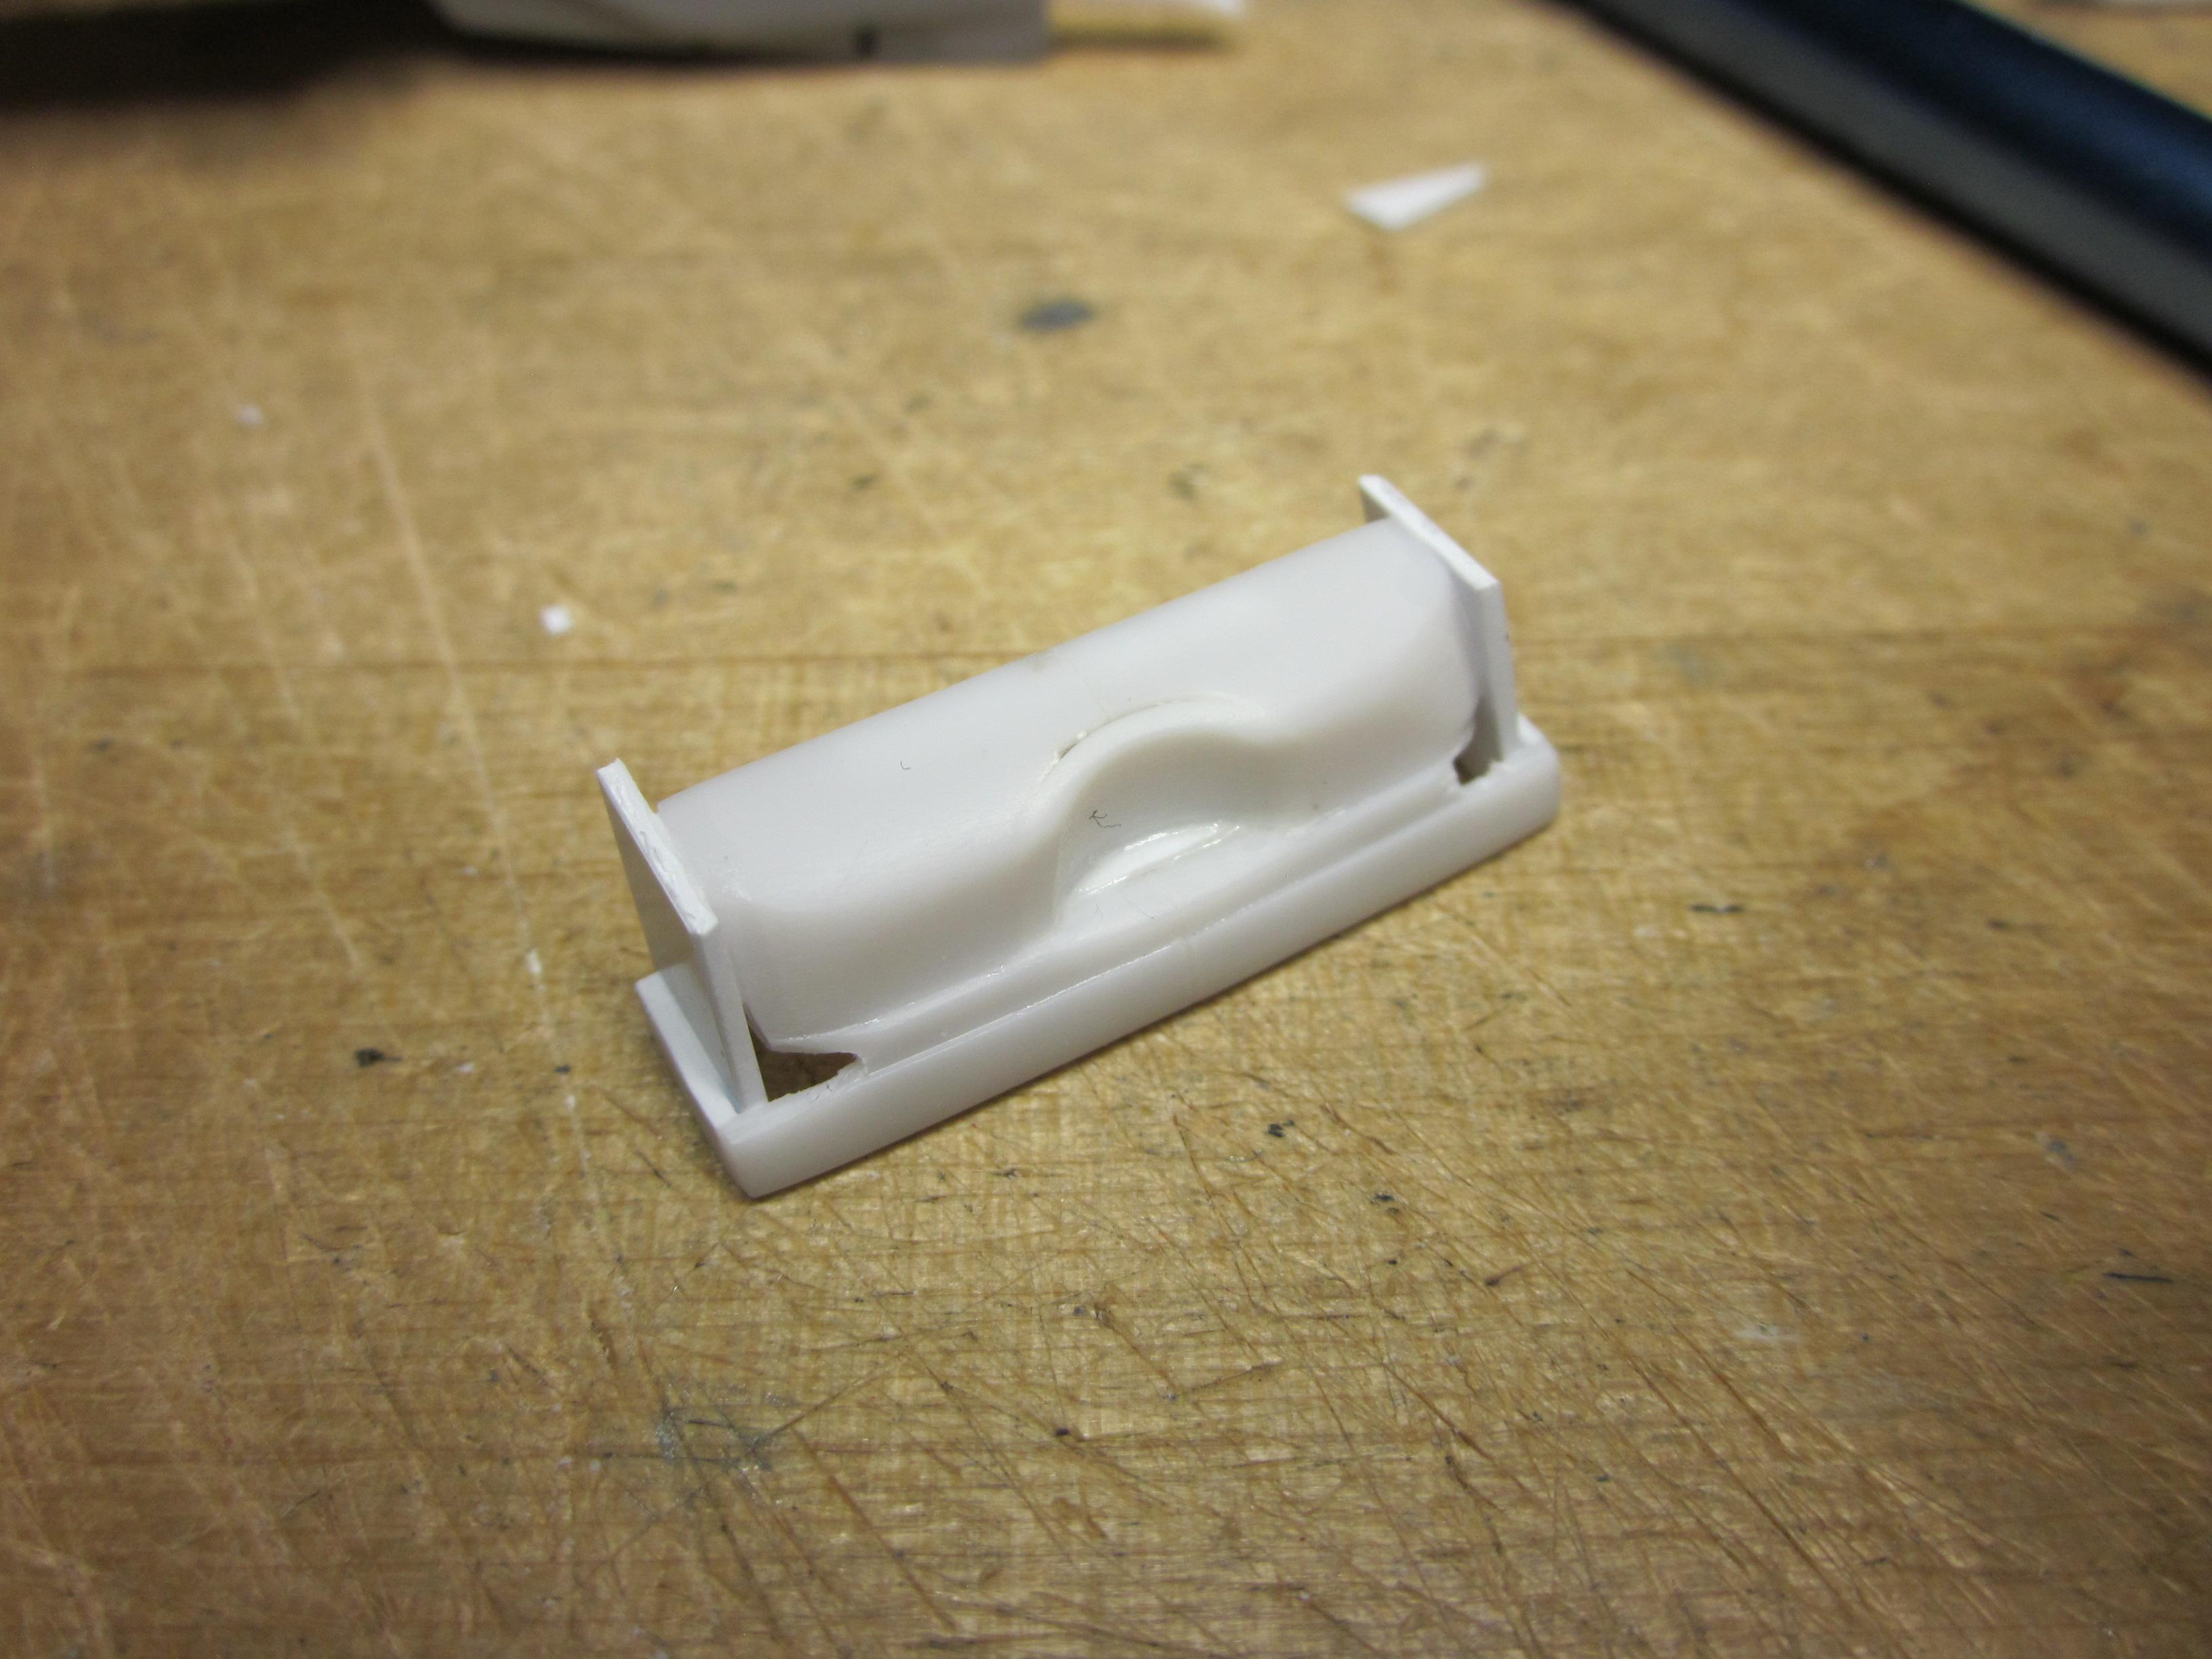
Some good ideas here. I use these foam blocks that are used in packaging. They last a long time and you can use any size diameter part holder. They measure 3 3/4 x 3 3/4. Sounds small, but they hold alot of parts

-
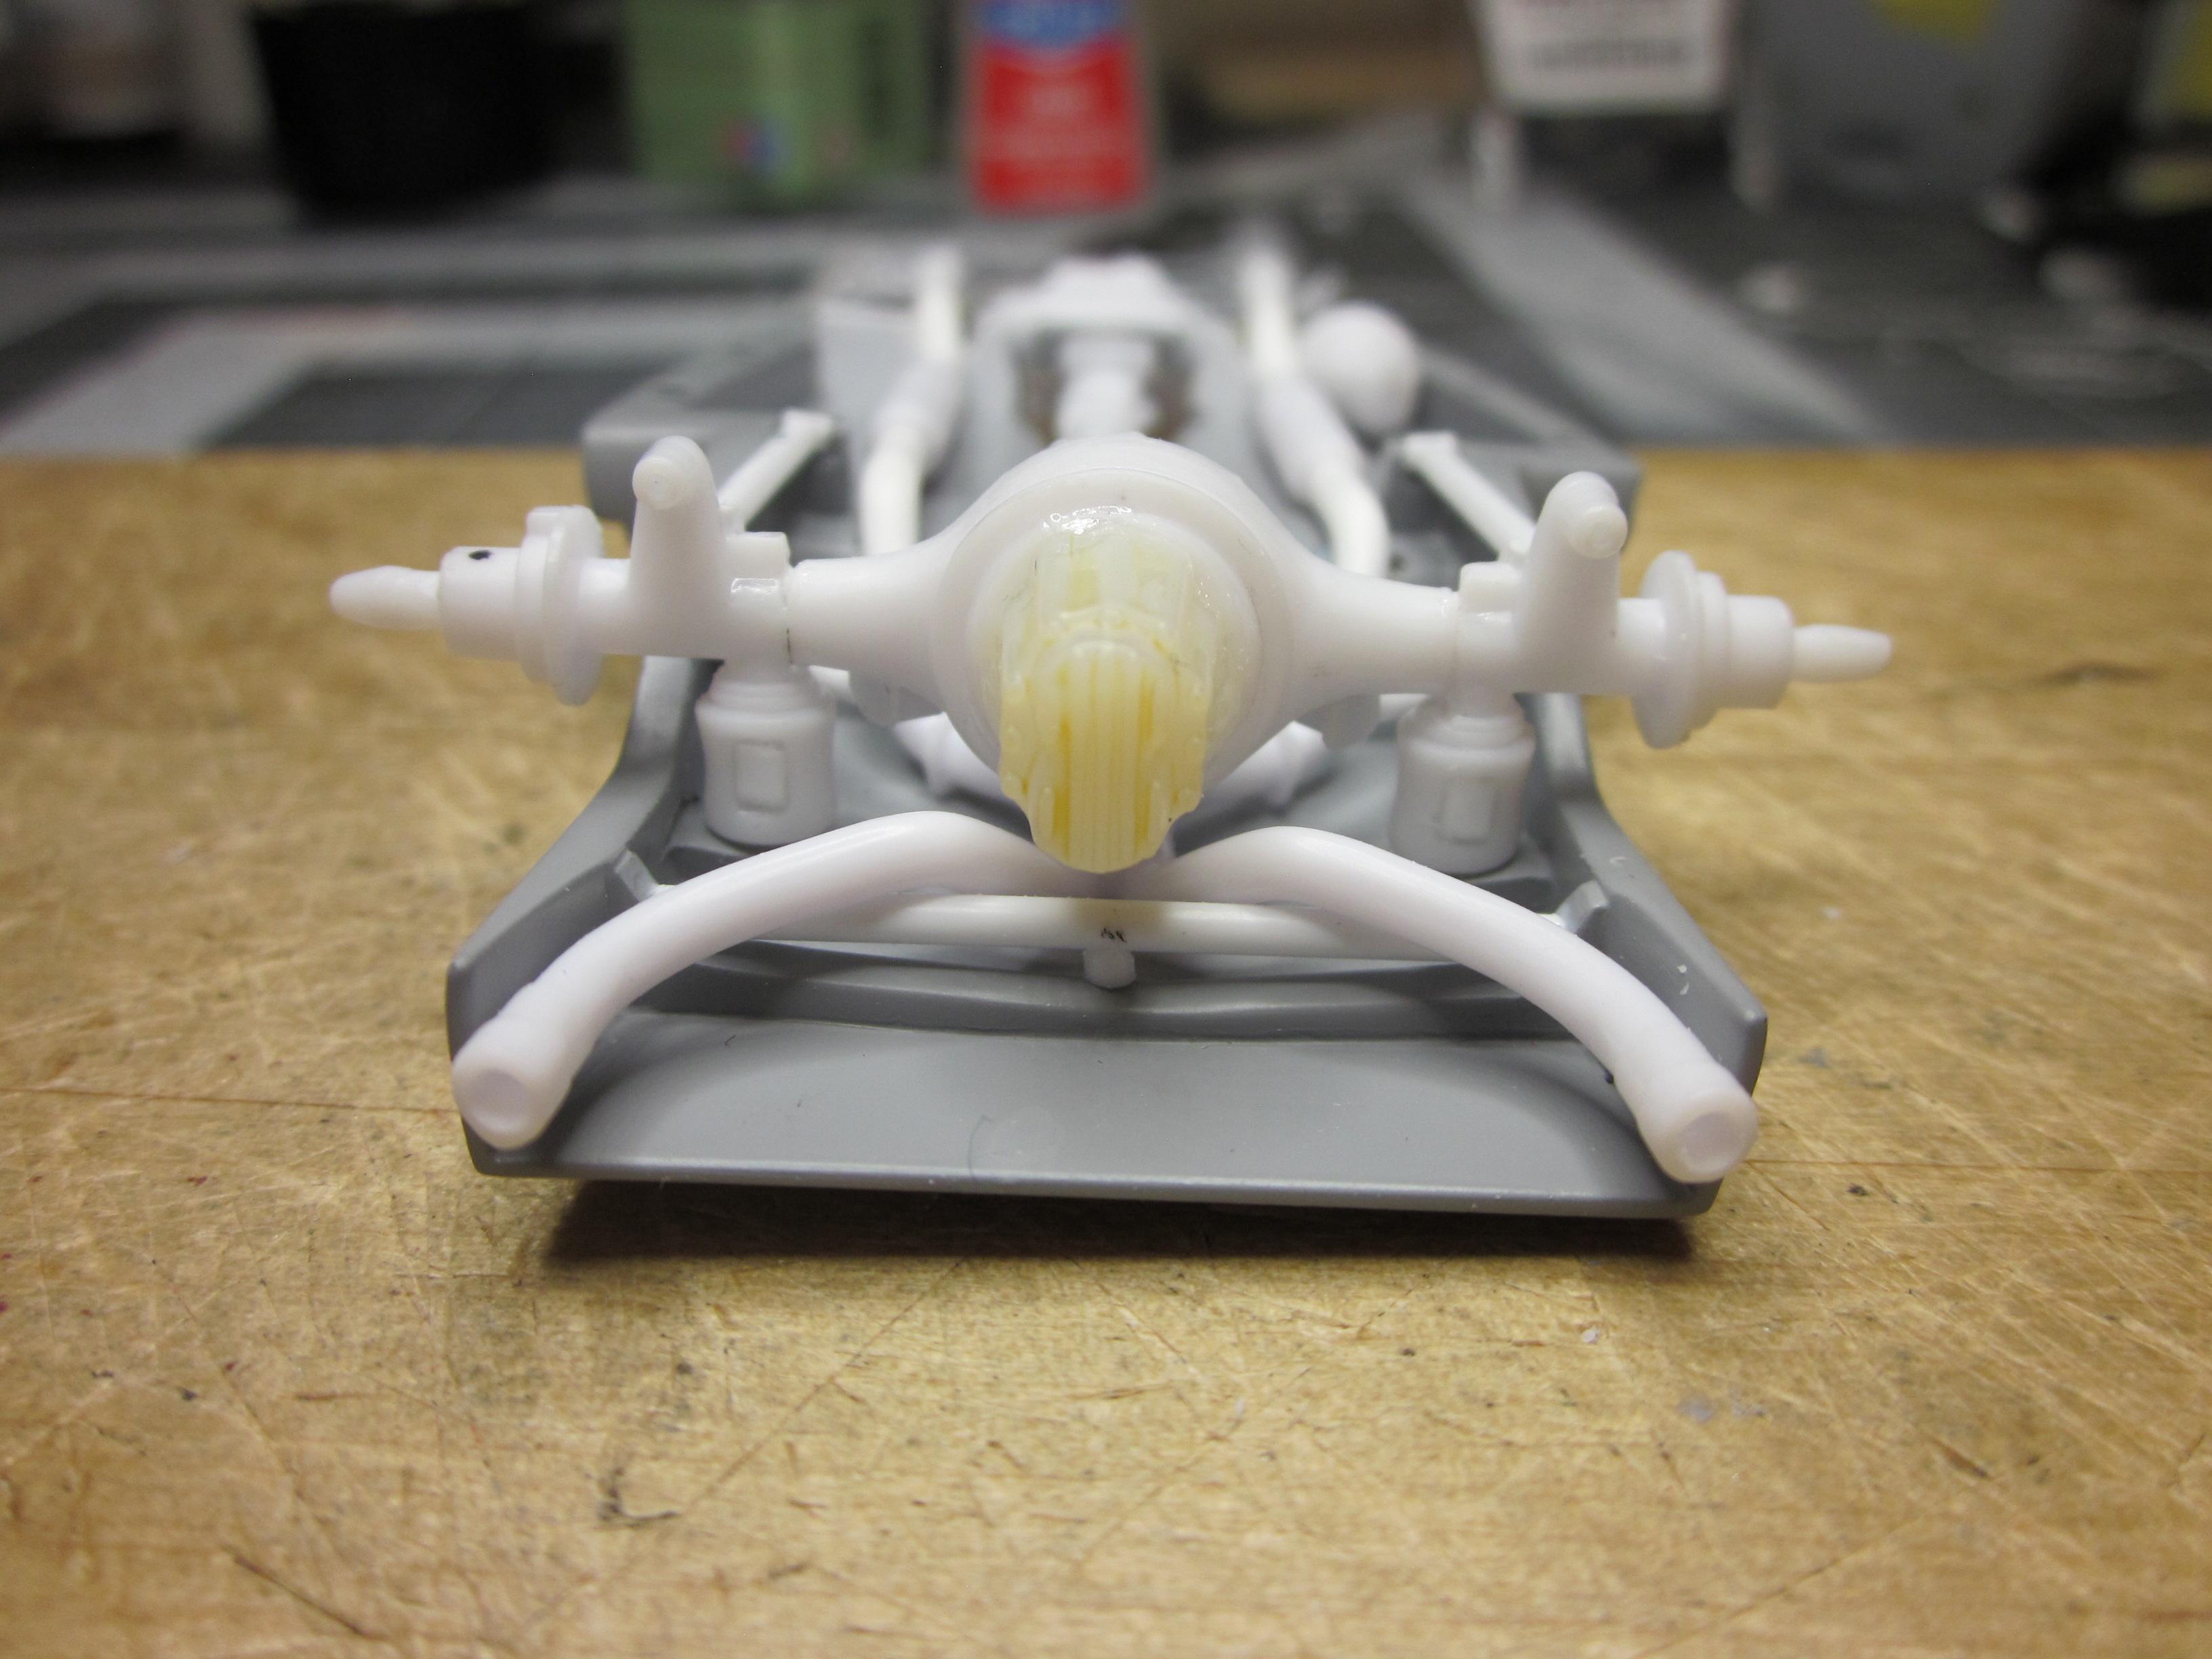
Yes it is. I think it's from a lil john buttera independent rear from my parts box. Made things a little interesting instead of just a ford 9".
-
@Kit Karson, I did it. I drilled the holes, but I can't show it yet.
-
John, It's been sitting on the shelf in the loop. I had this on the bench about 2 weeks ago reviewing where I was at on it as I want to get back to it. This is 1 of 3 projects I am currently working on. I've been spending alot of time a certain '32 sedan lately, but hope to be back on this soon. Looking forward to seeing you're '66 project.
-
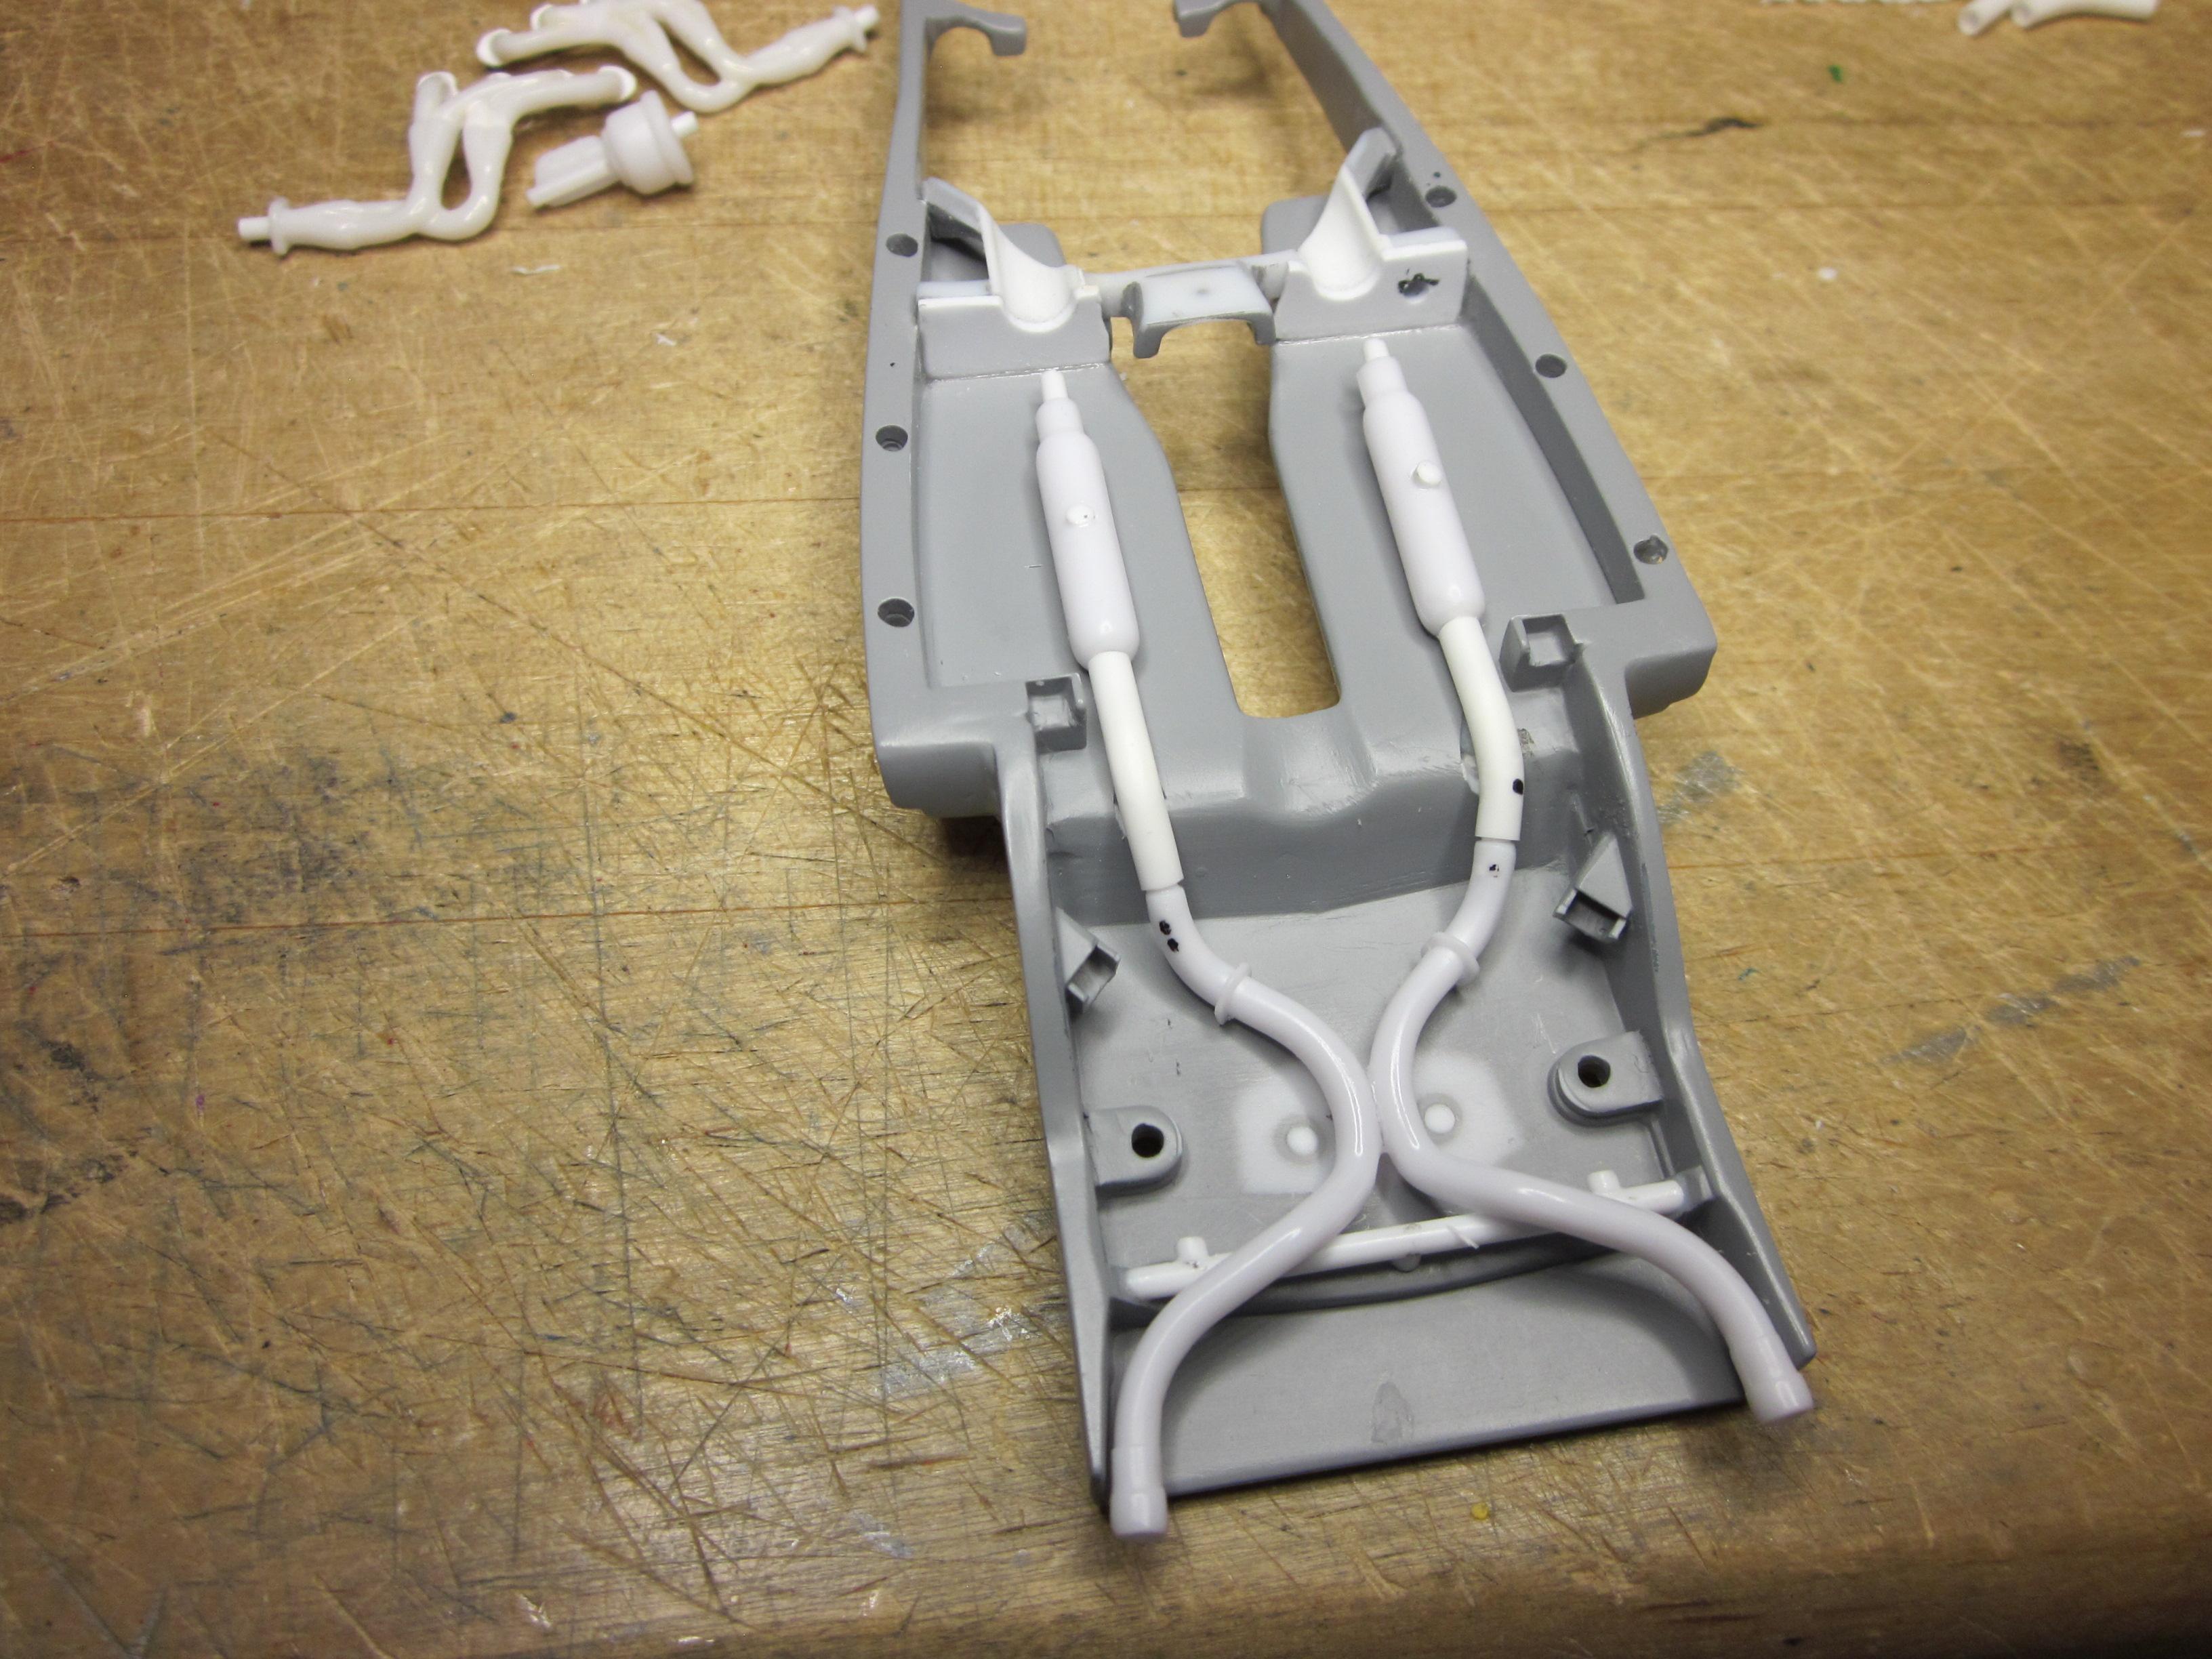
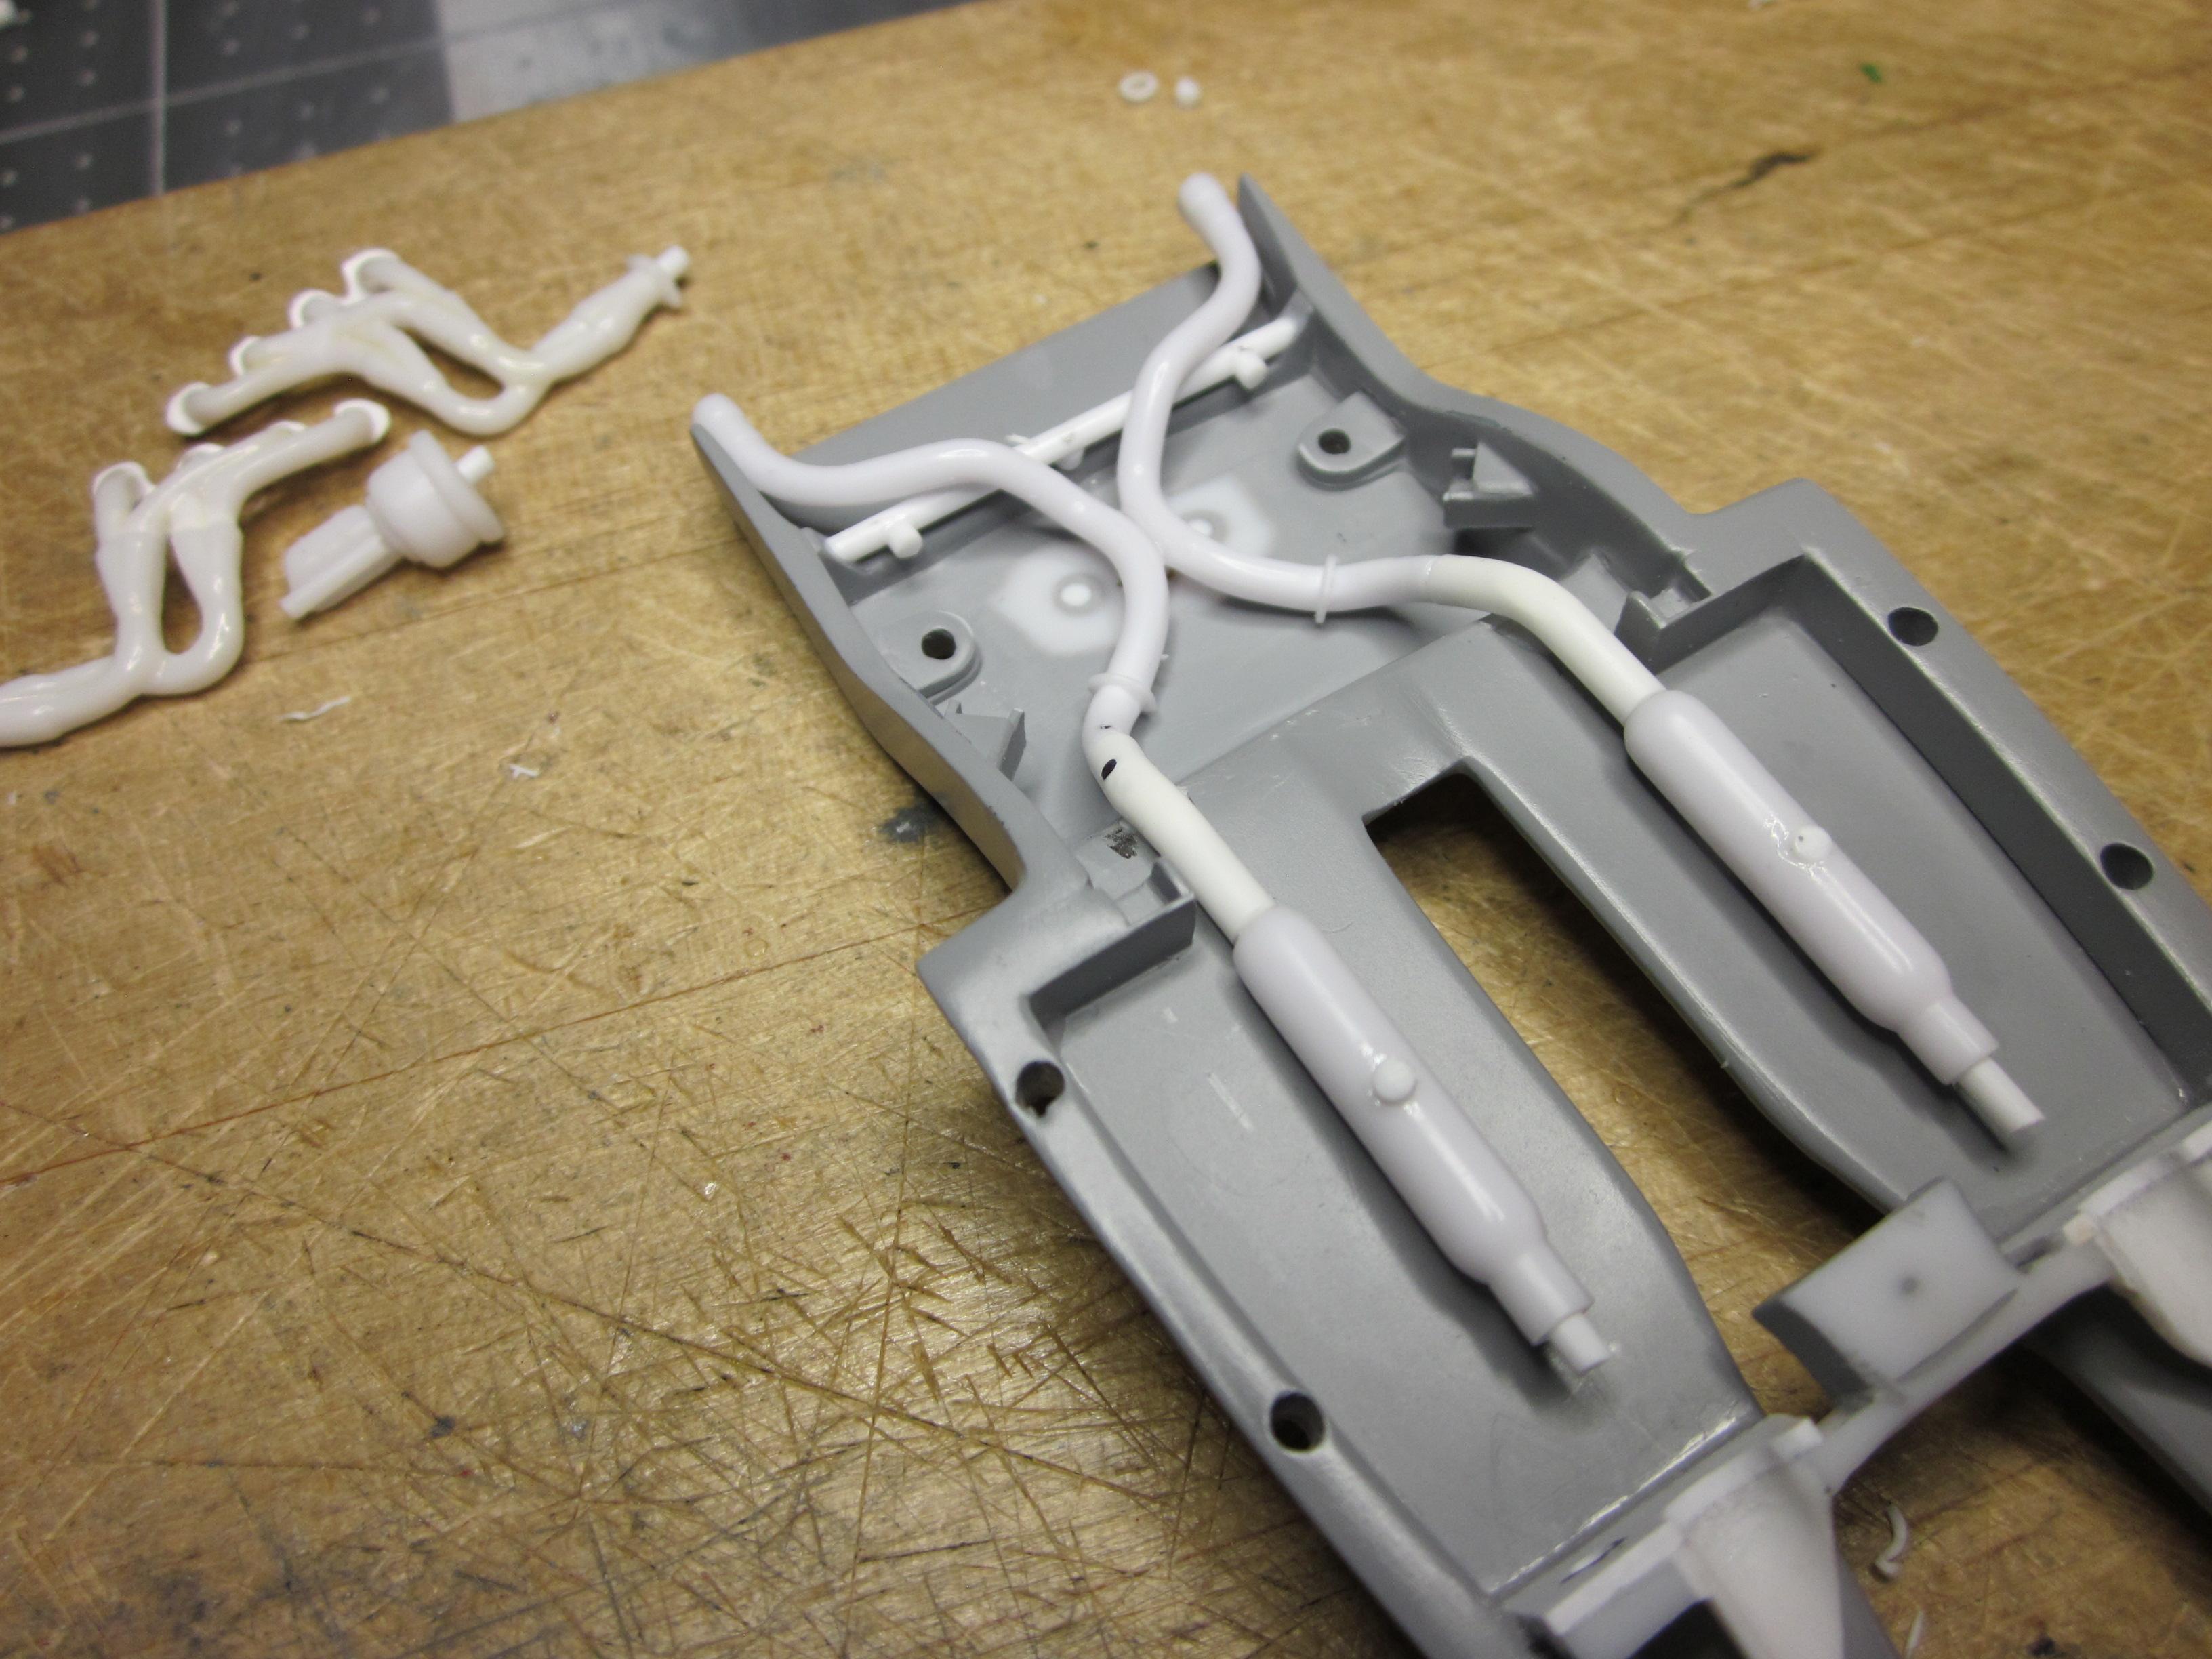
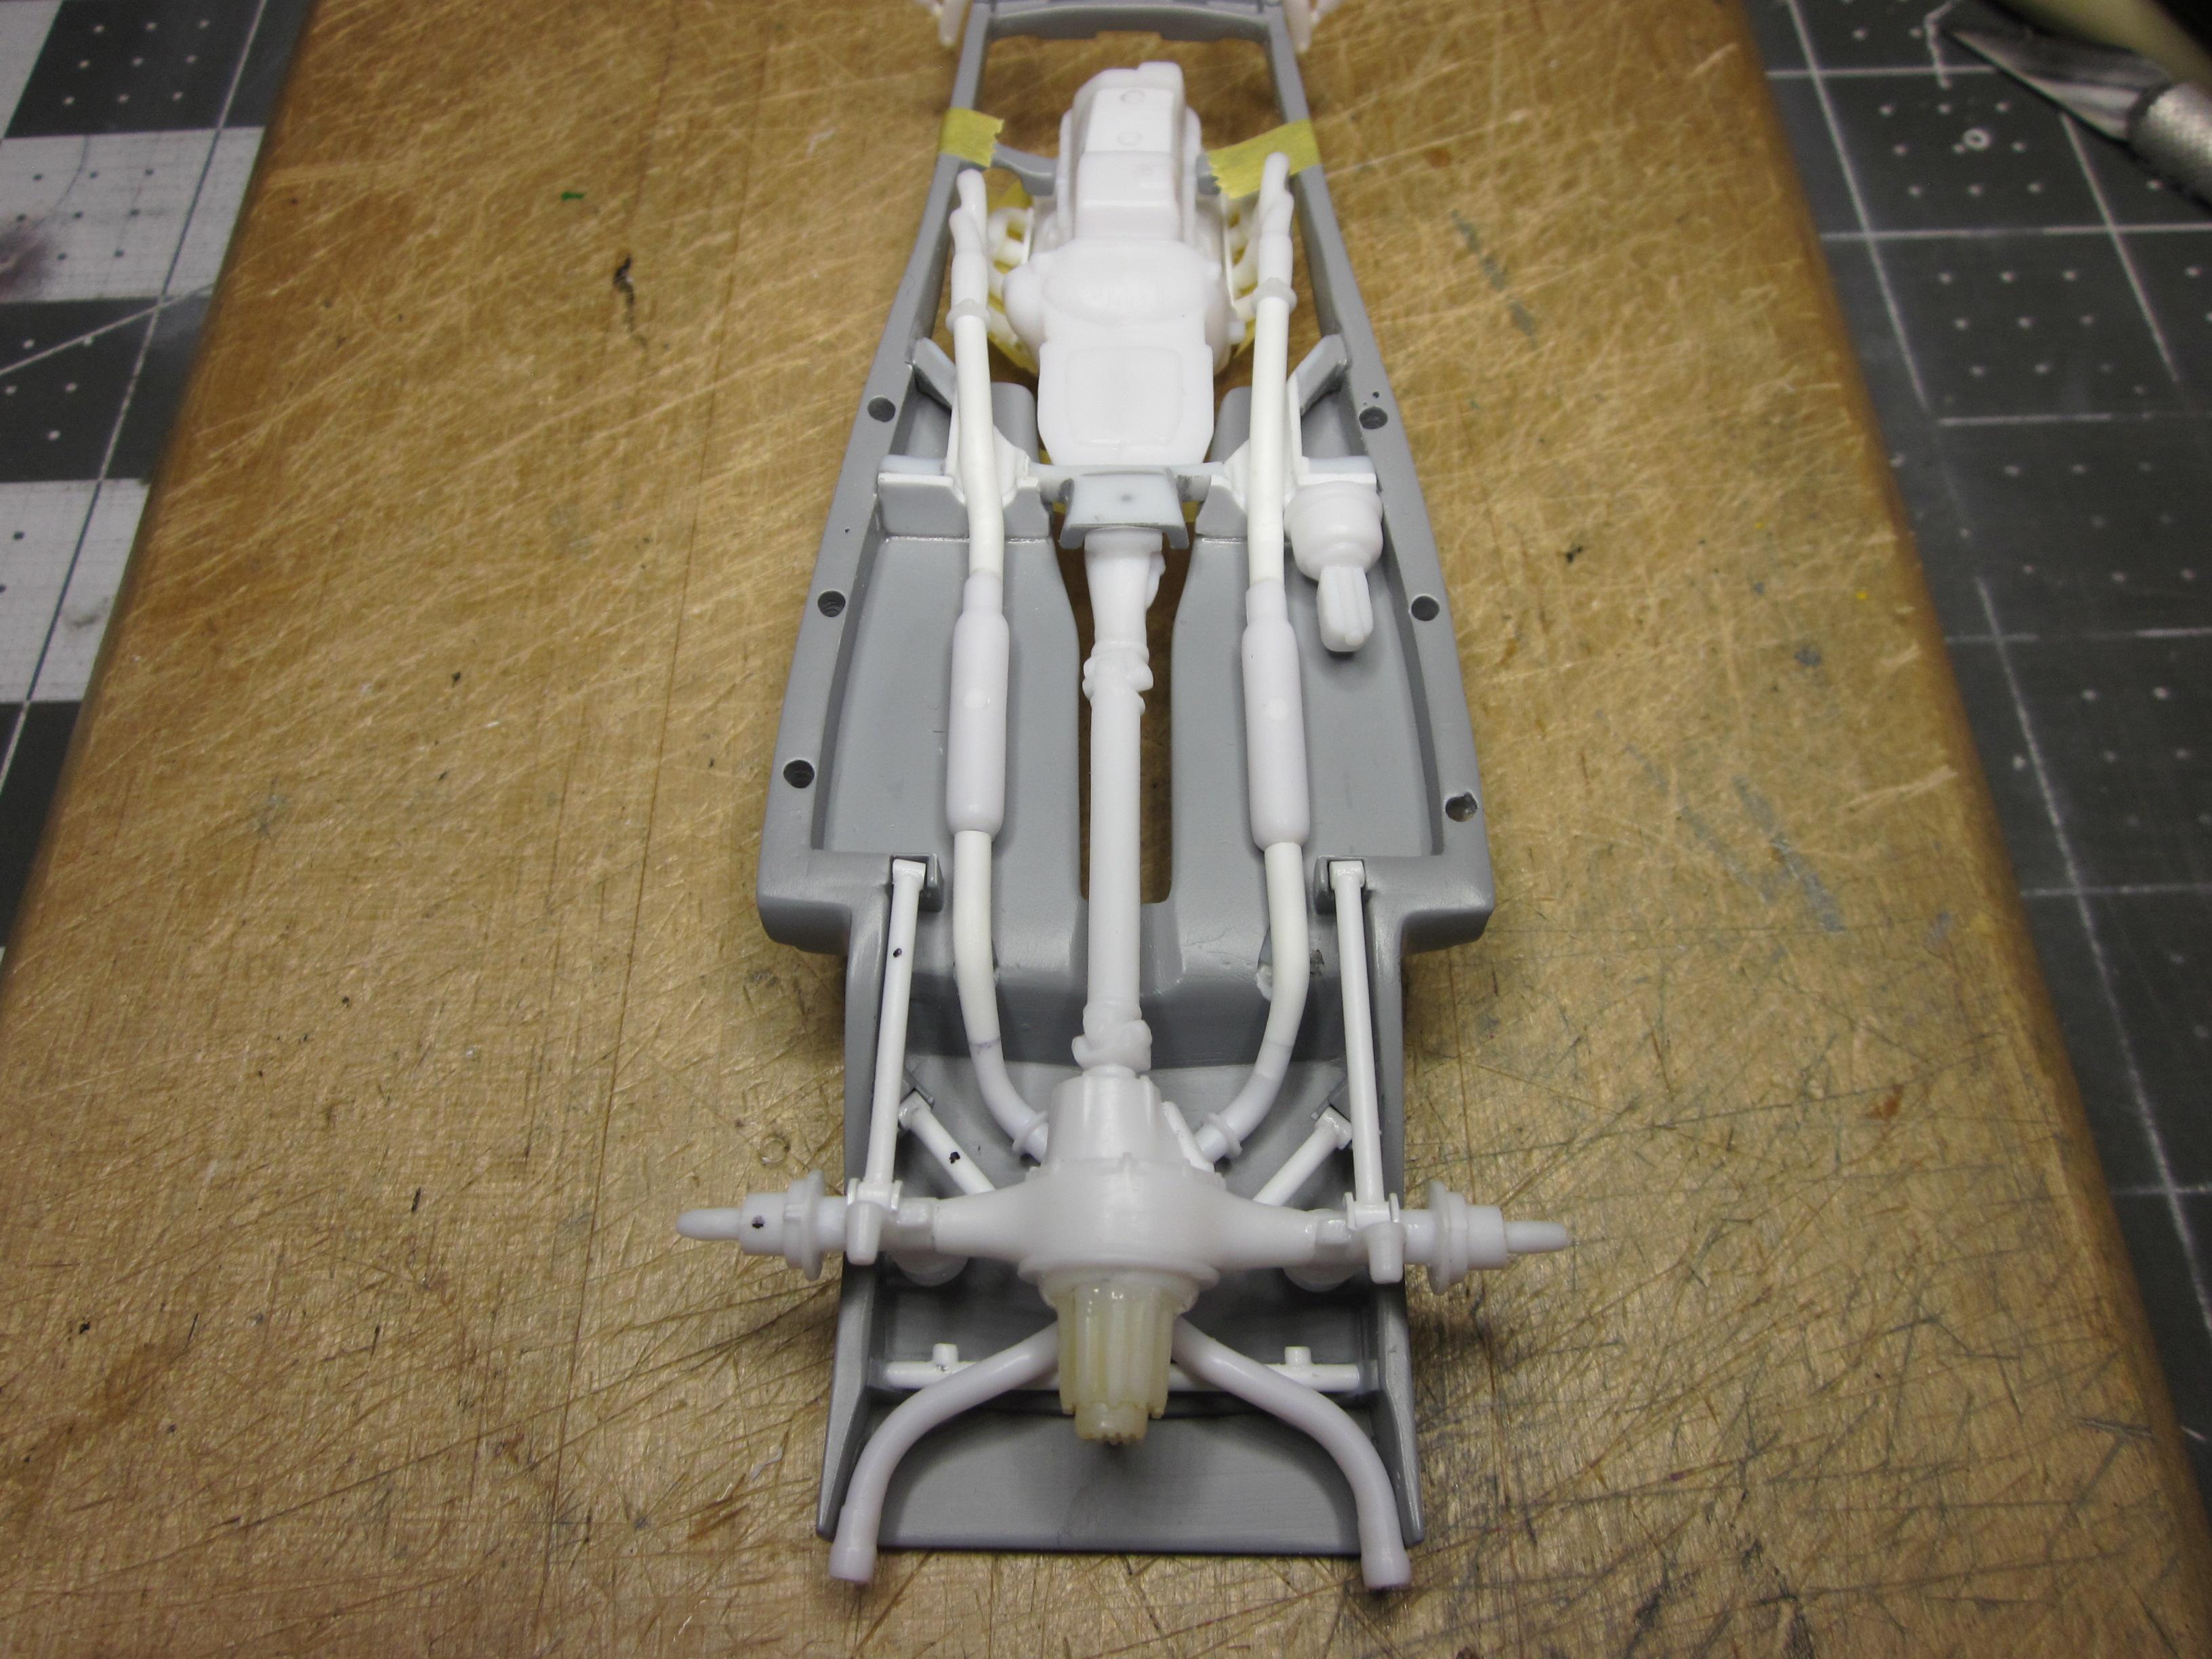
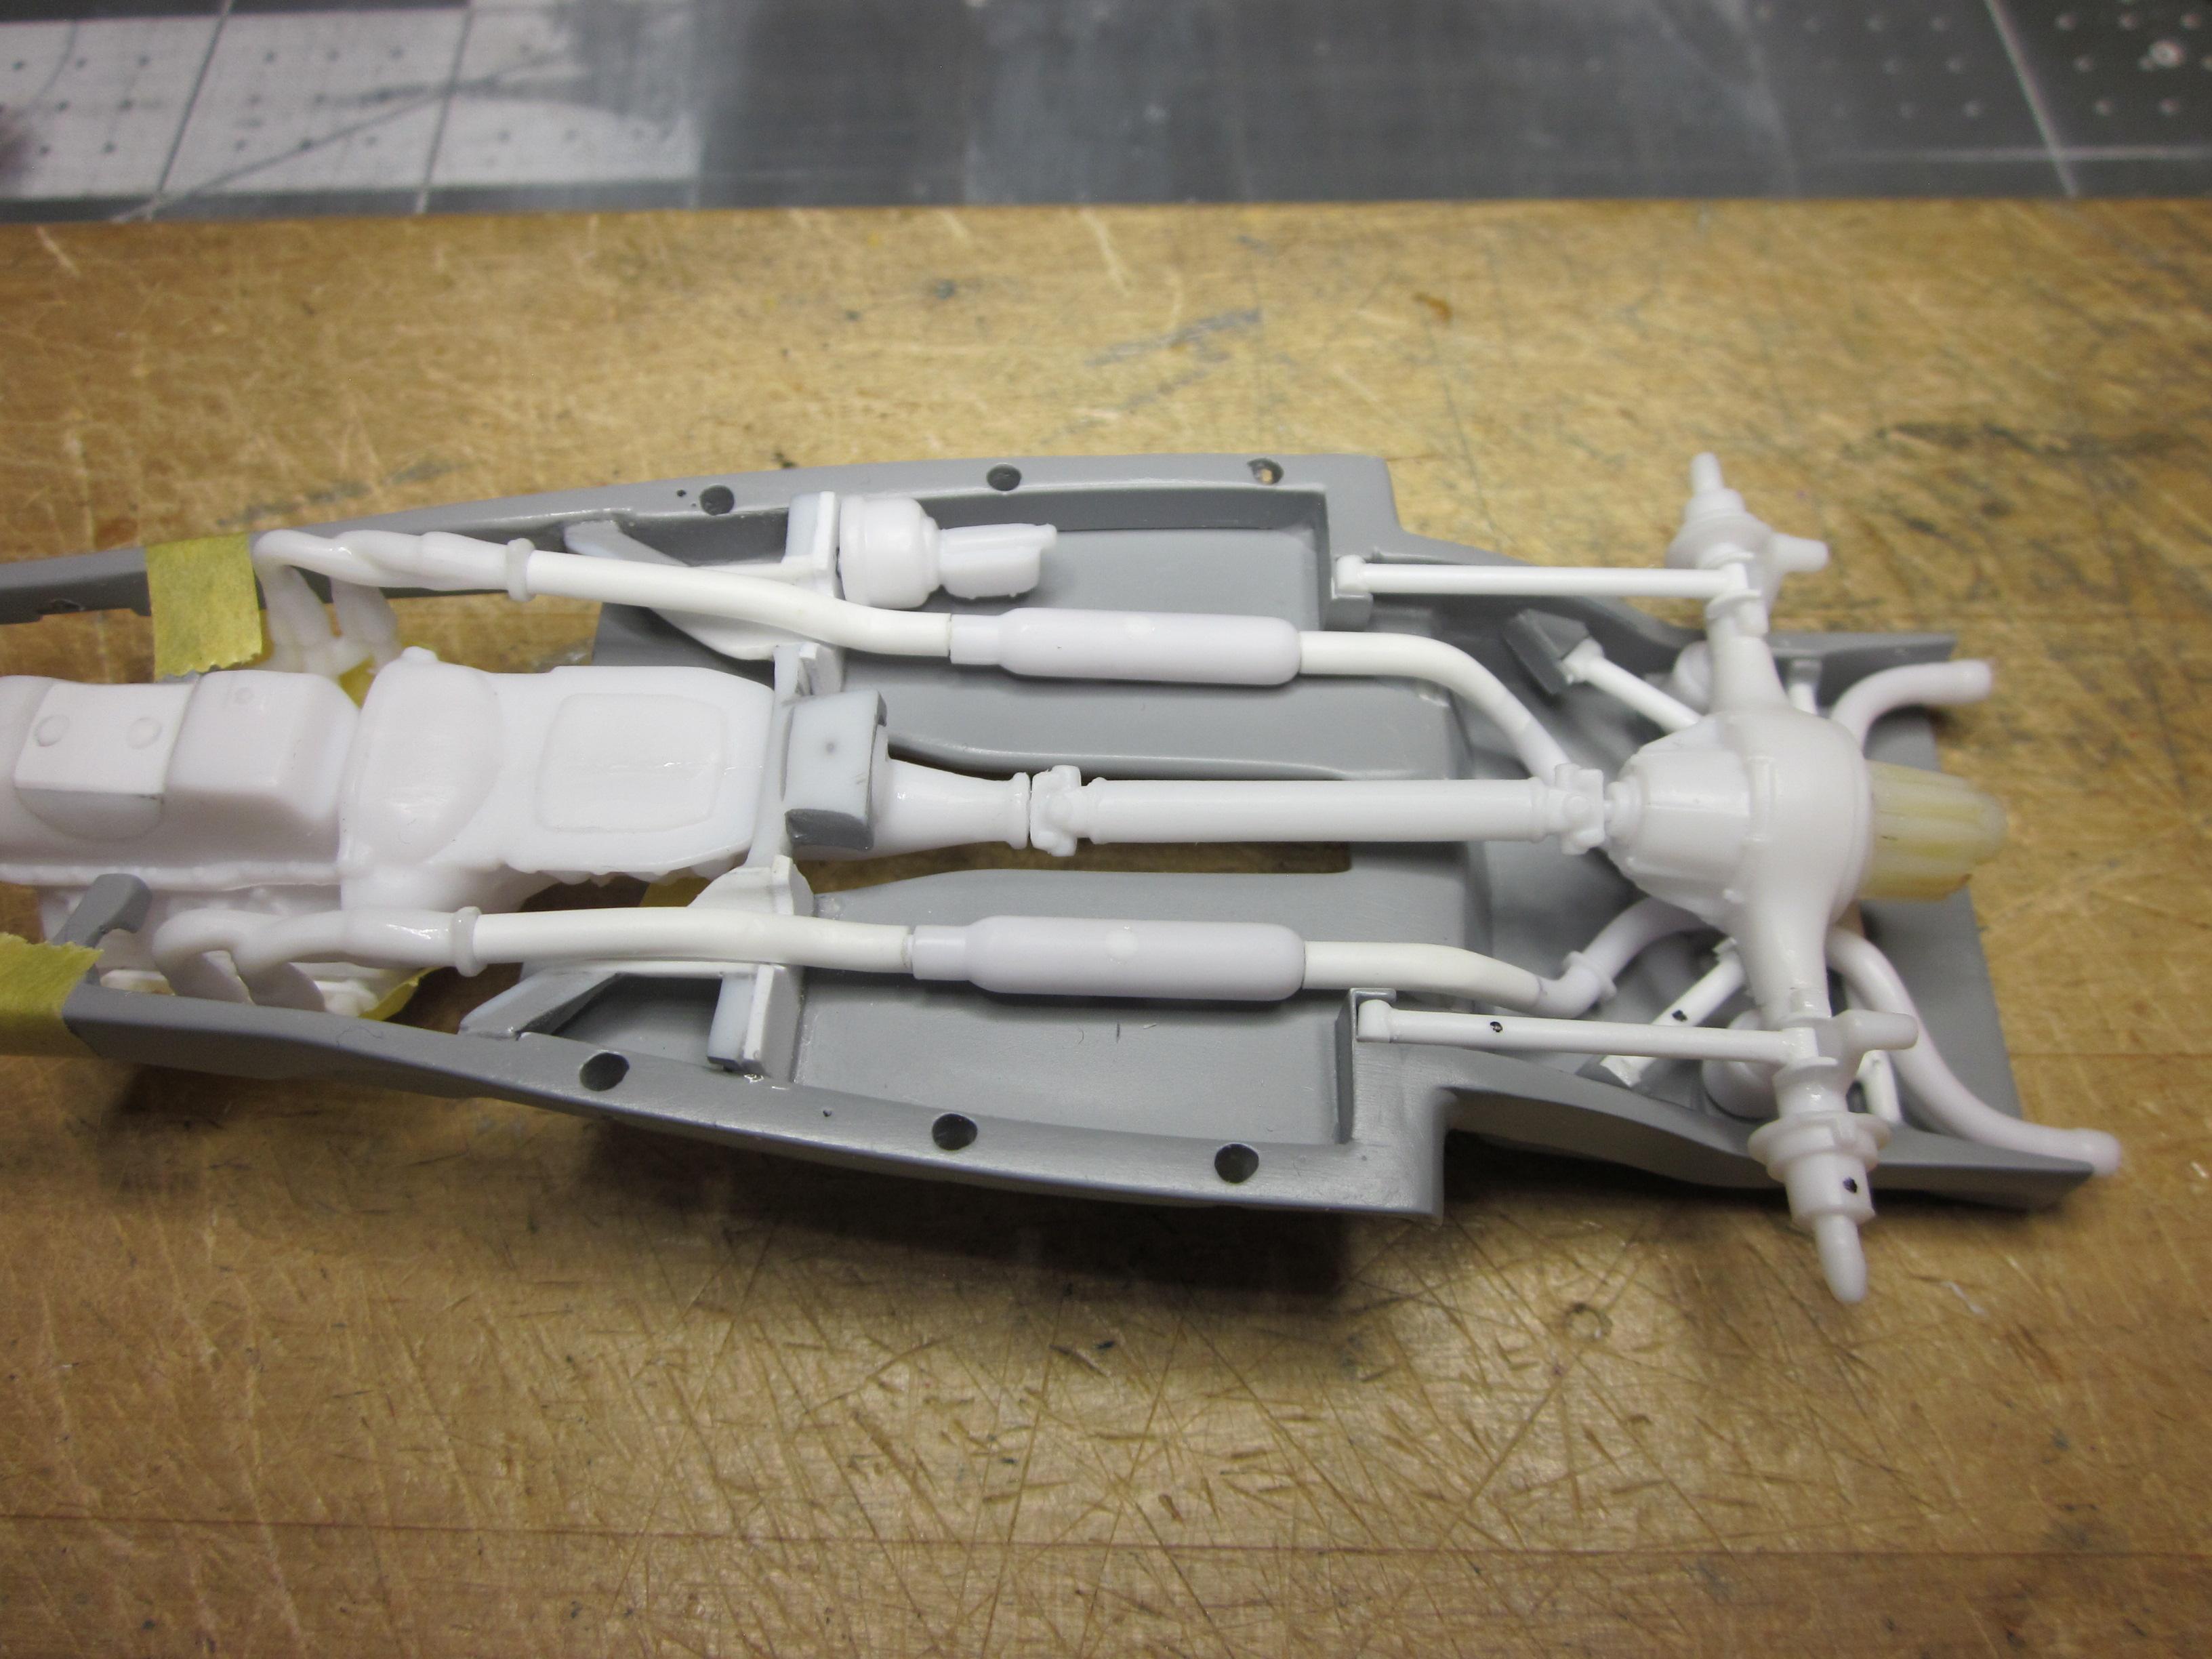
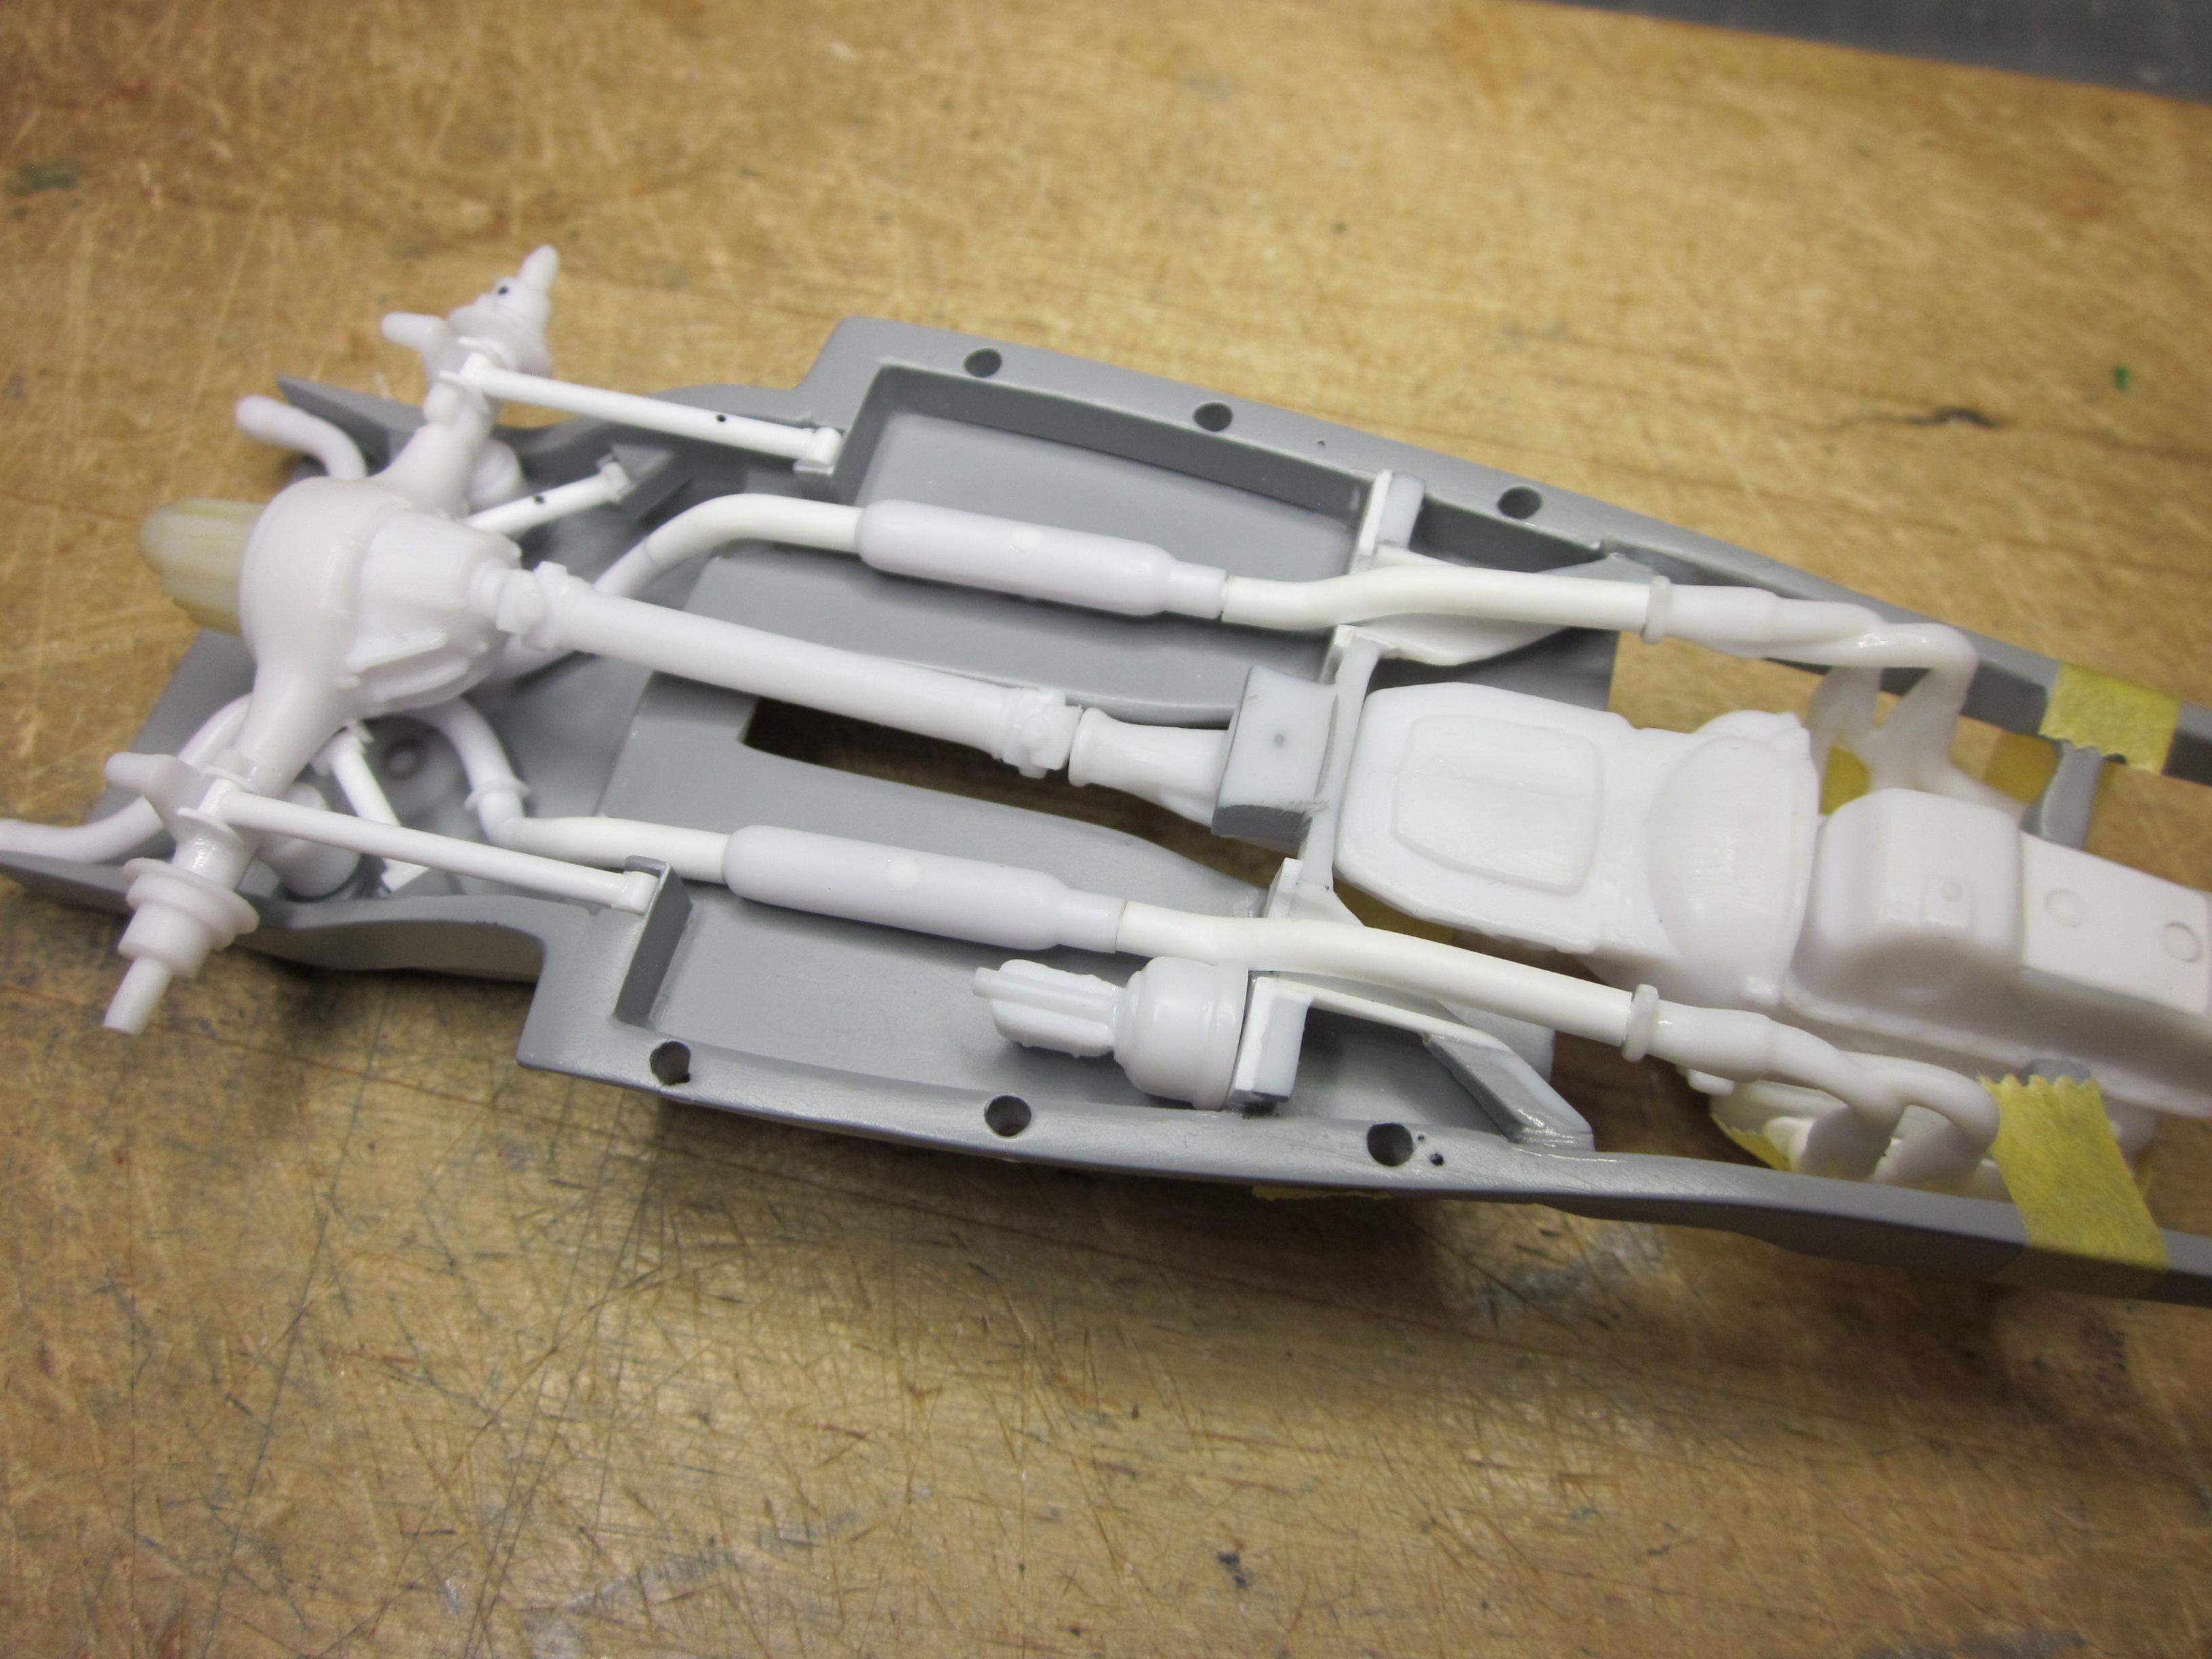
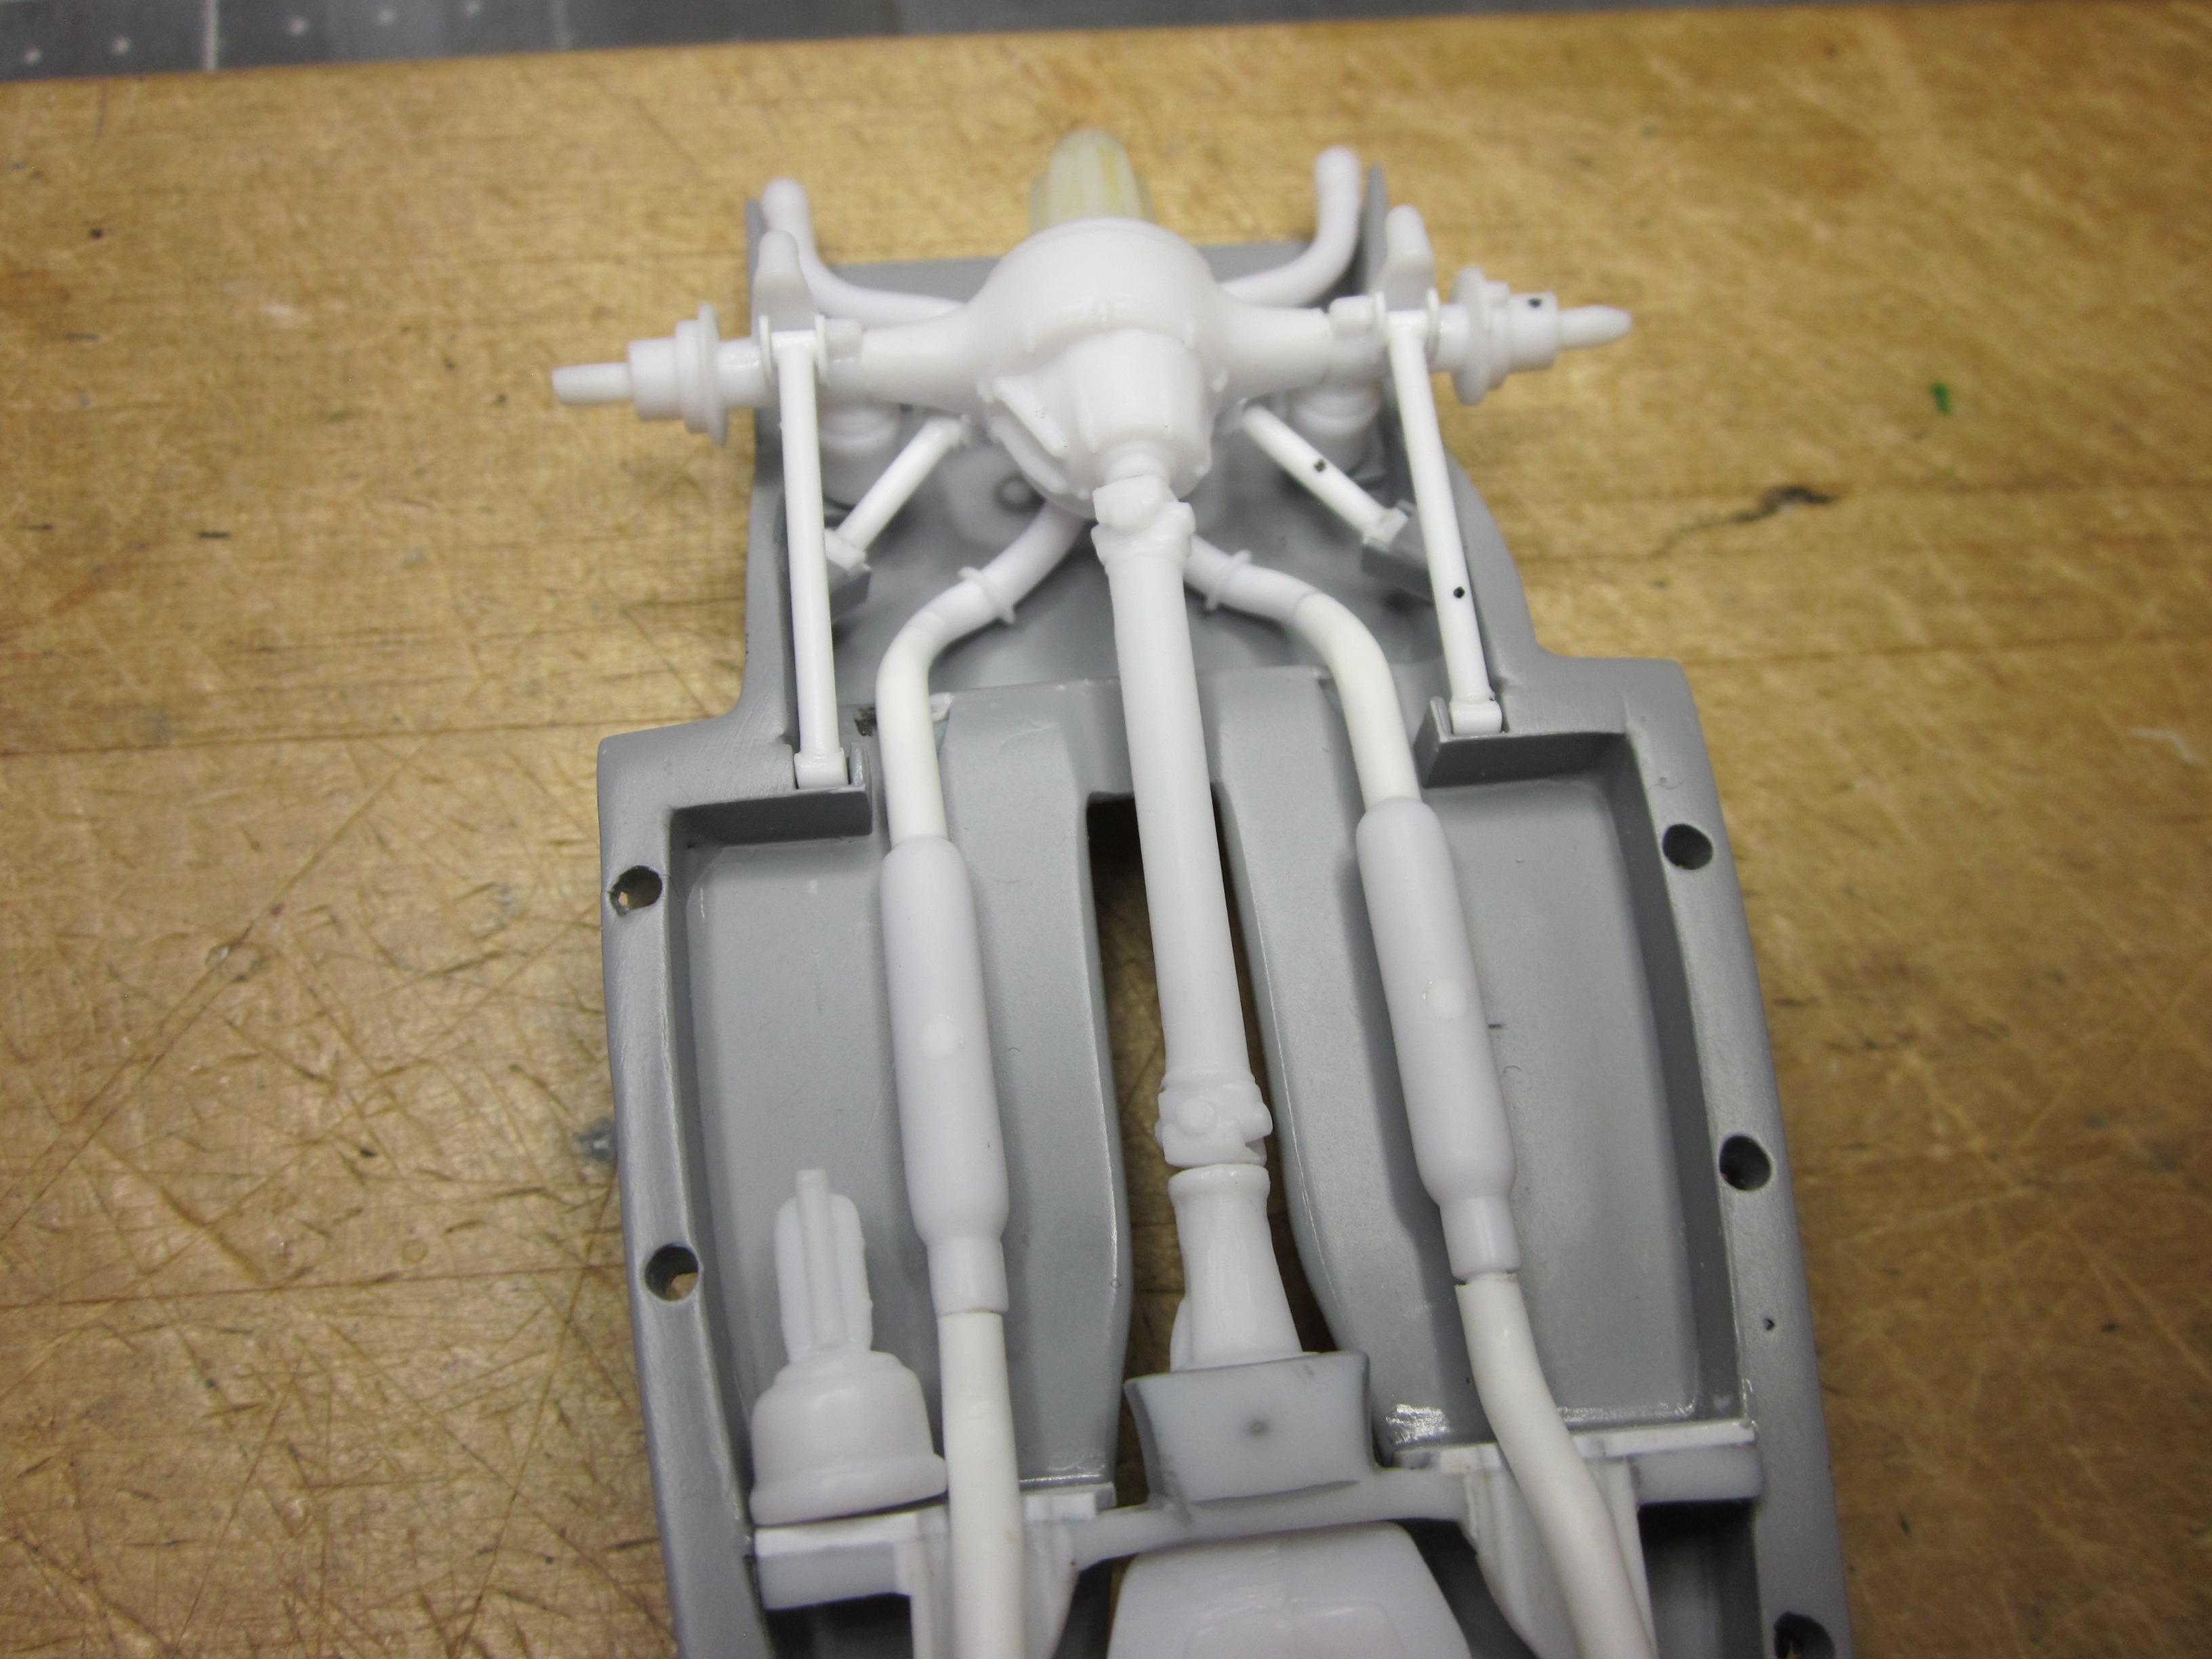
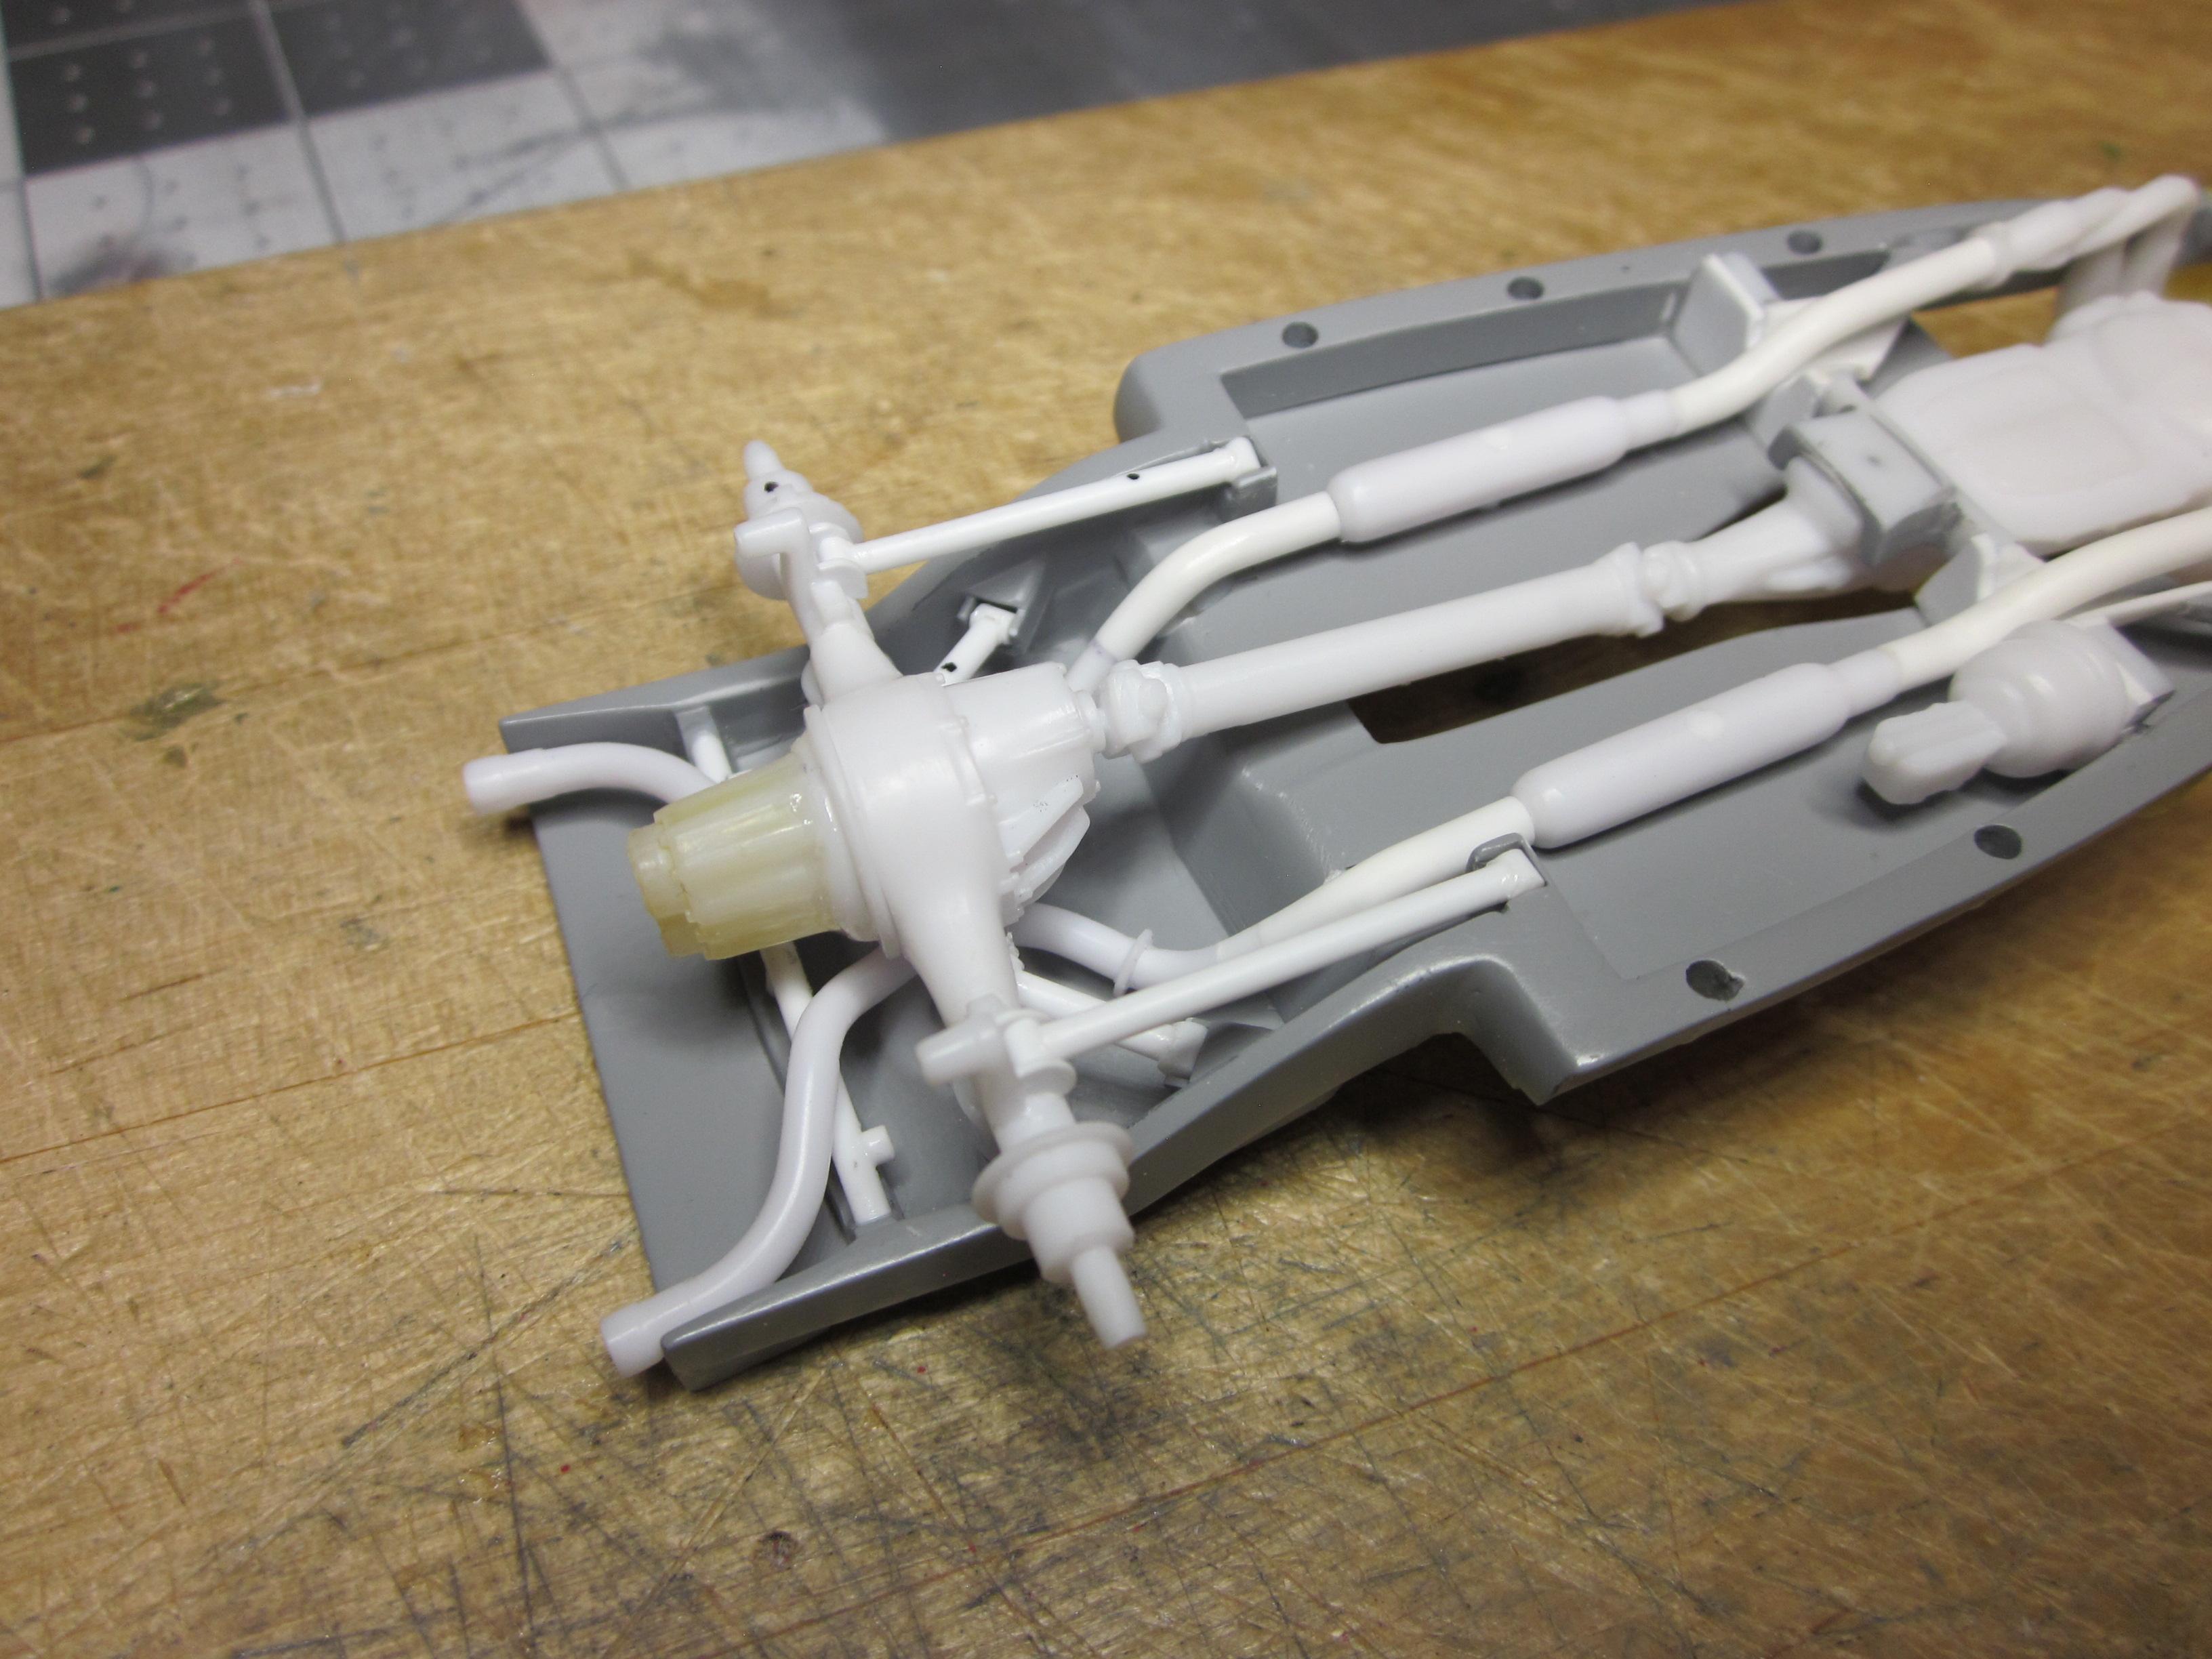
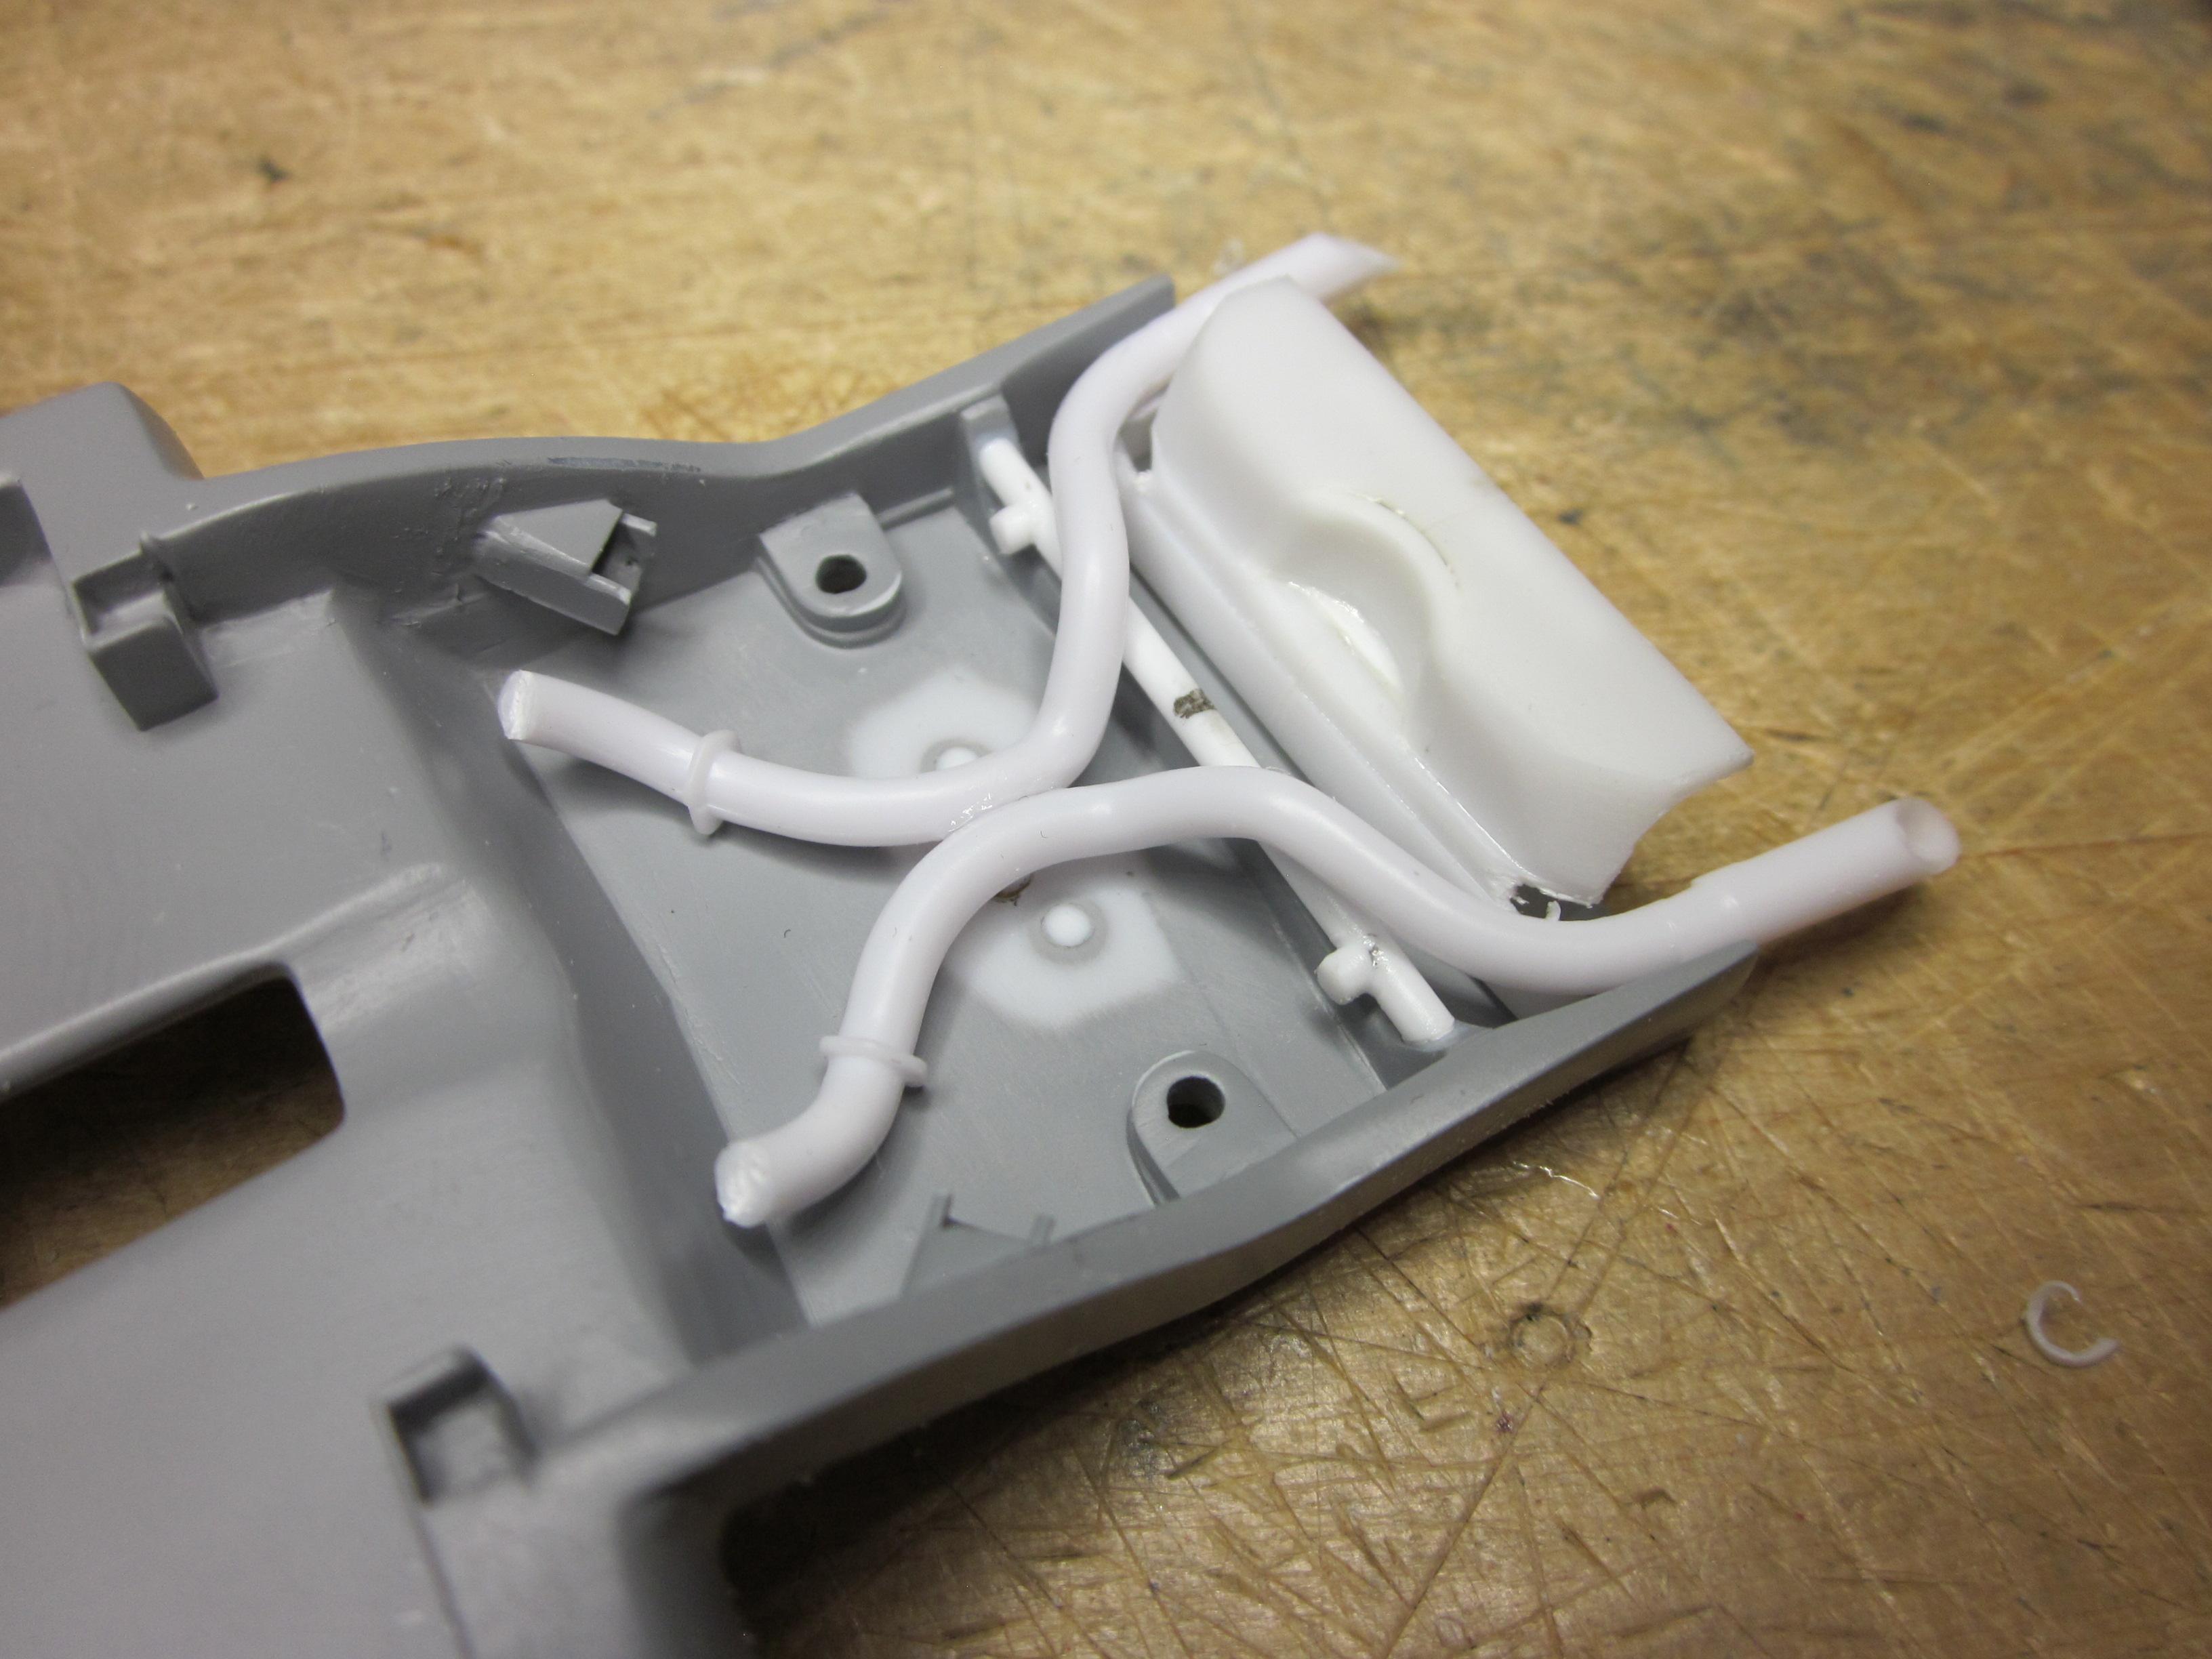
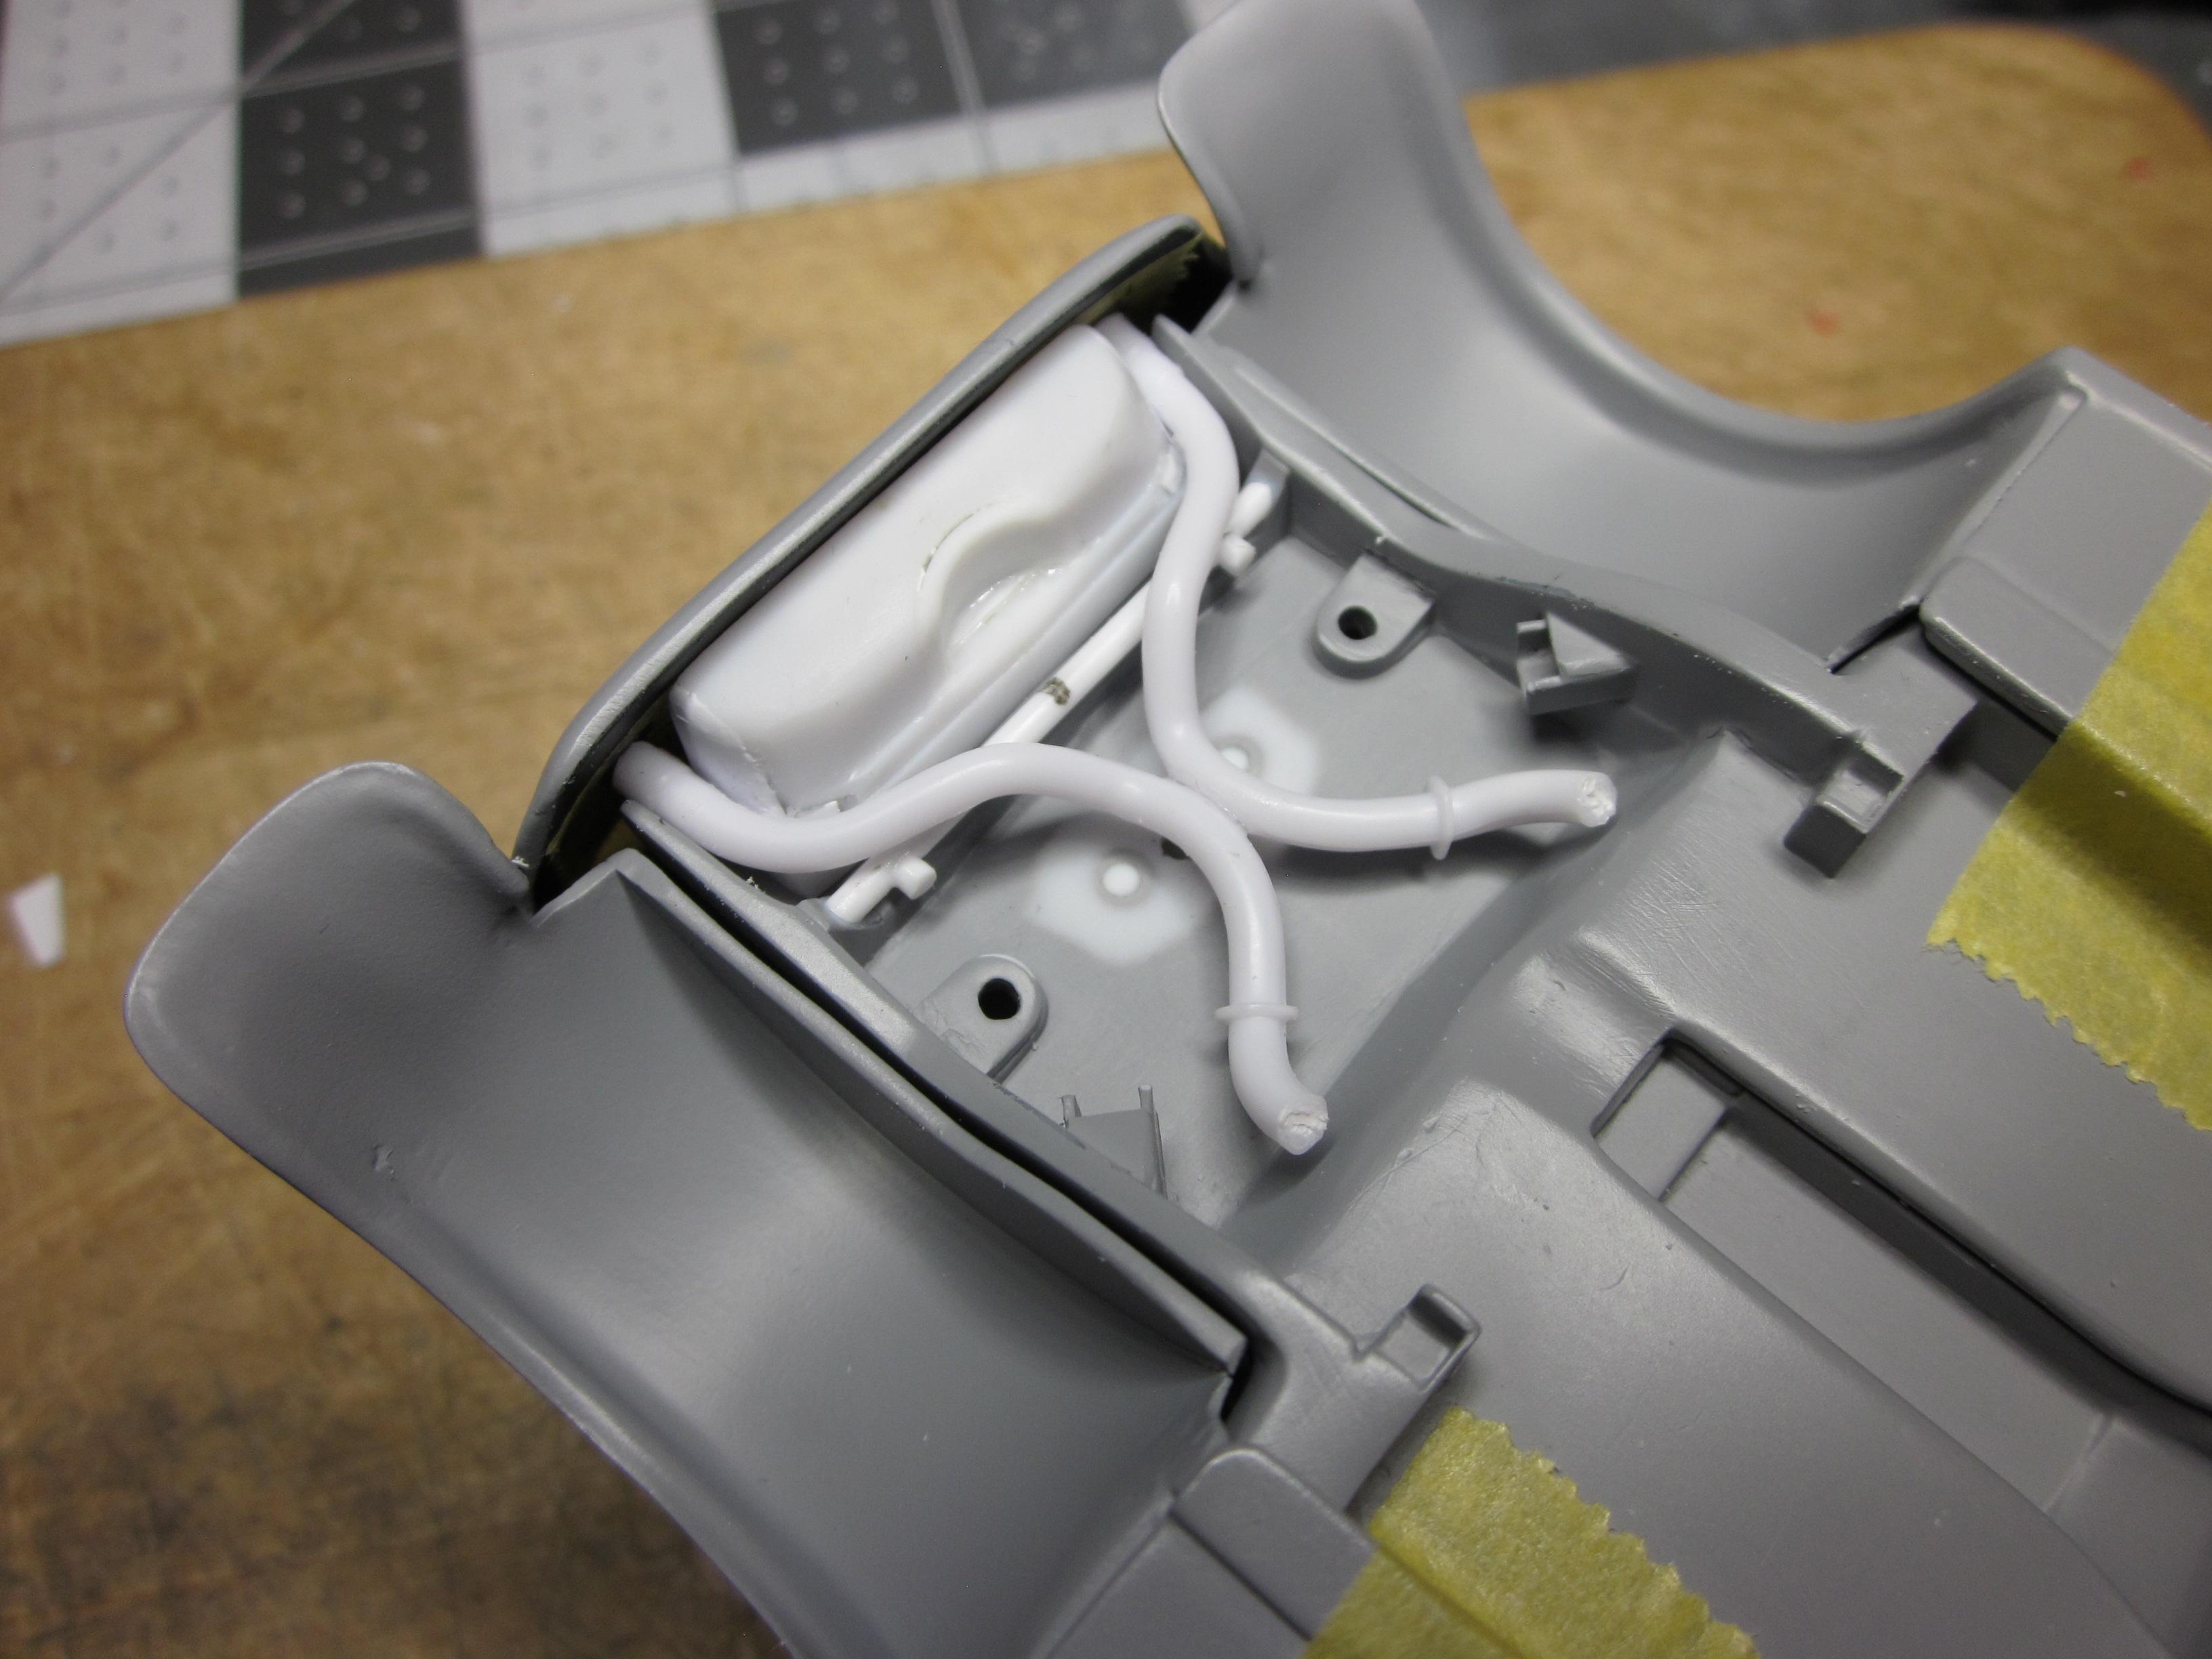
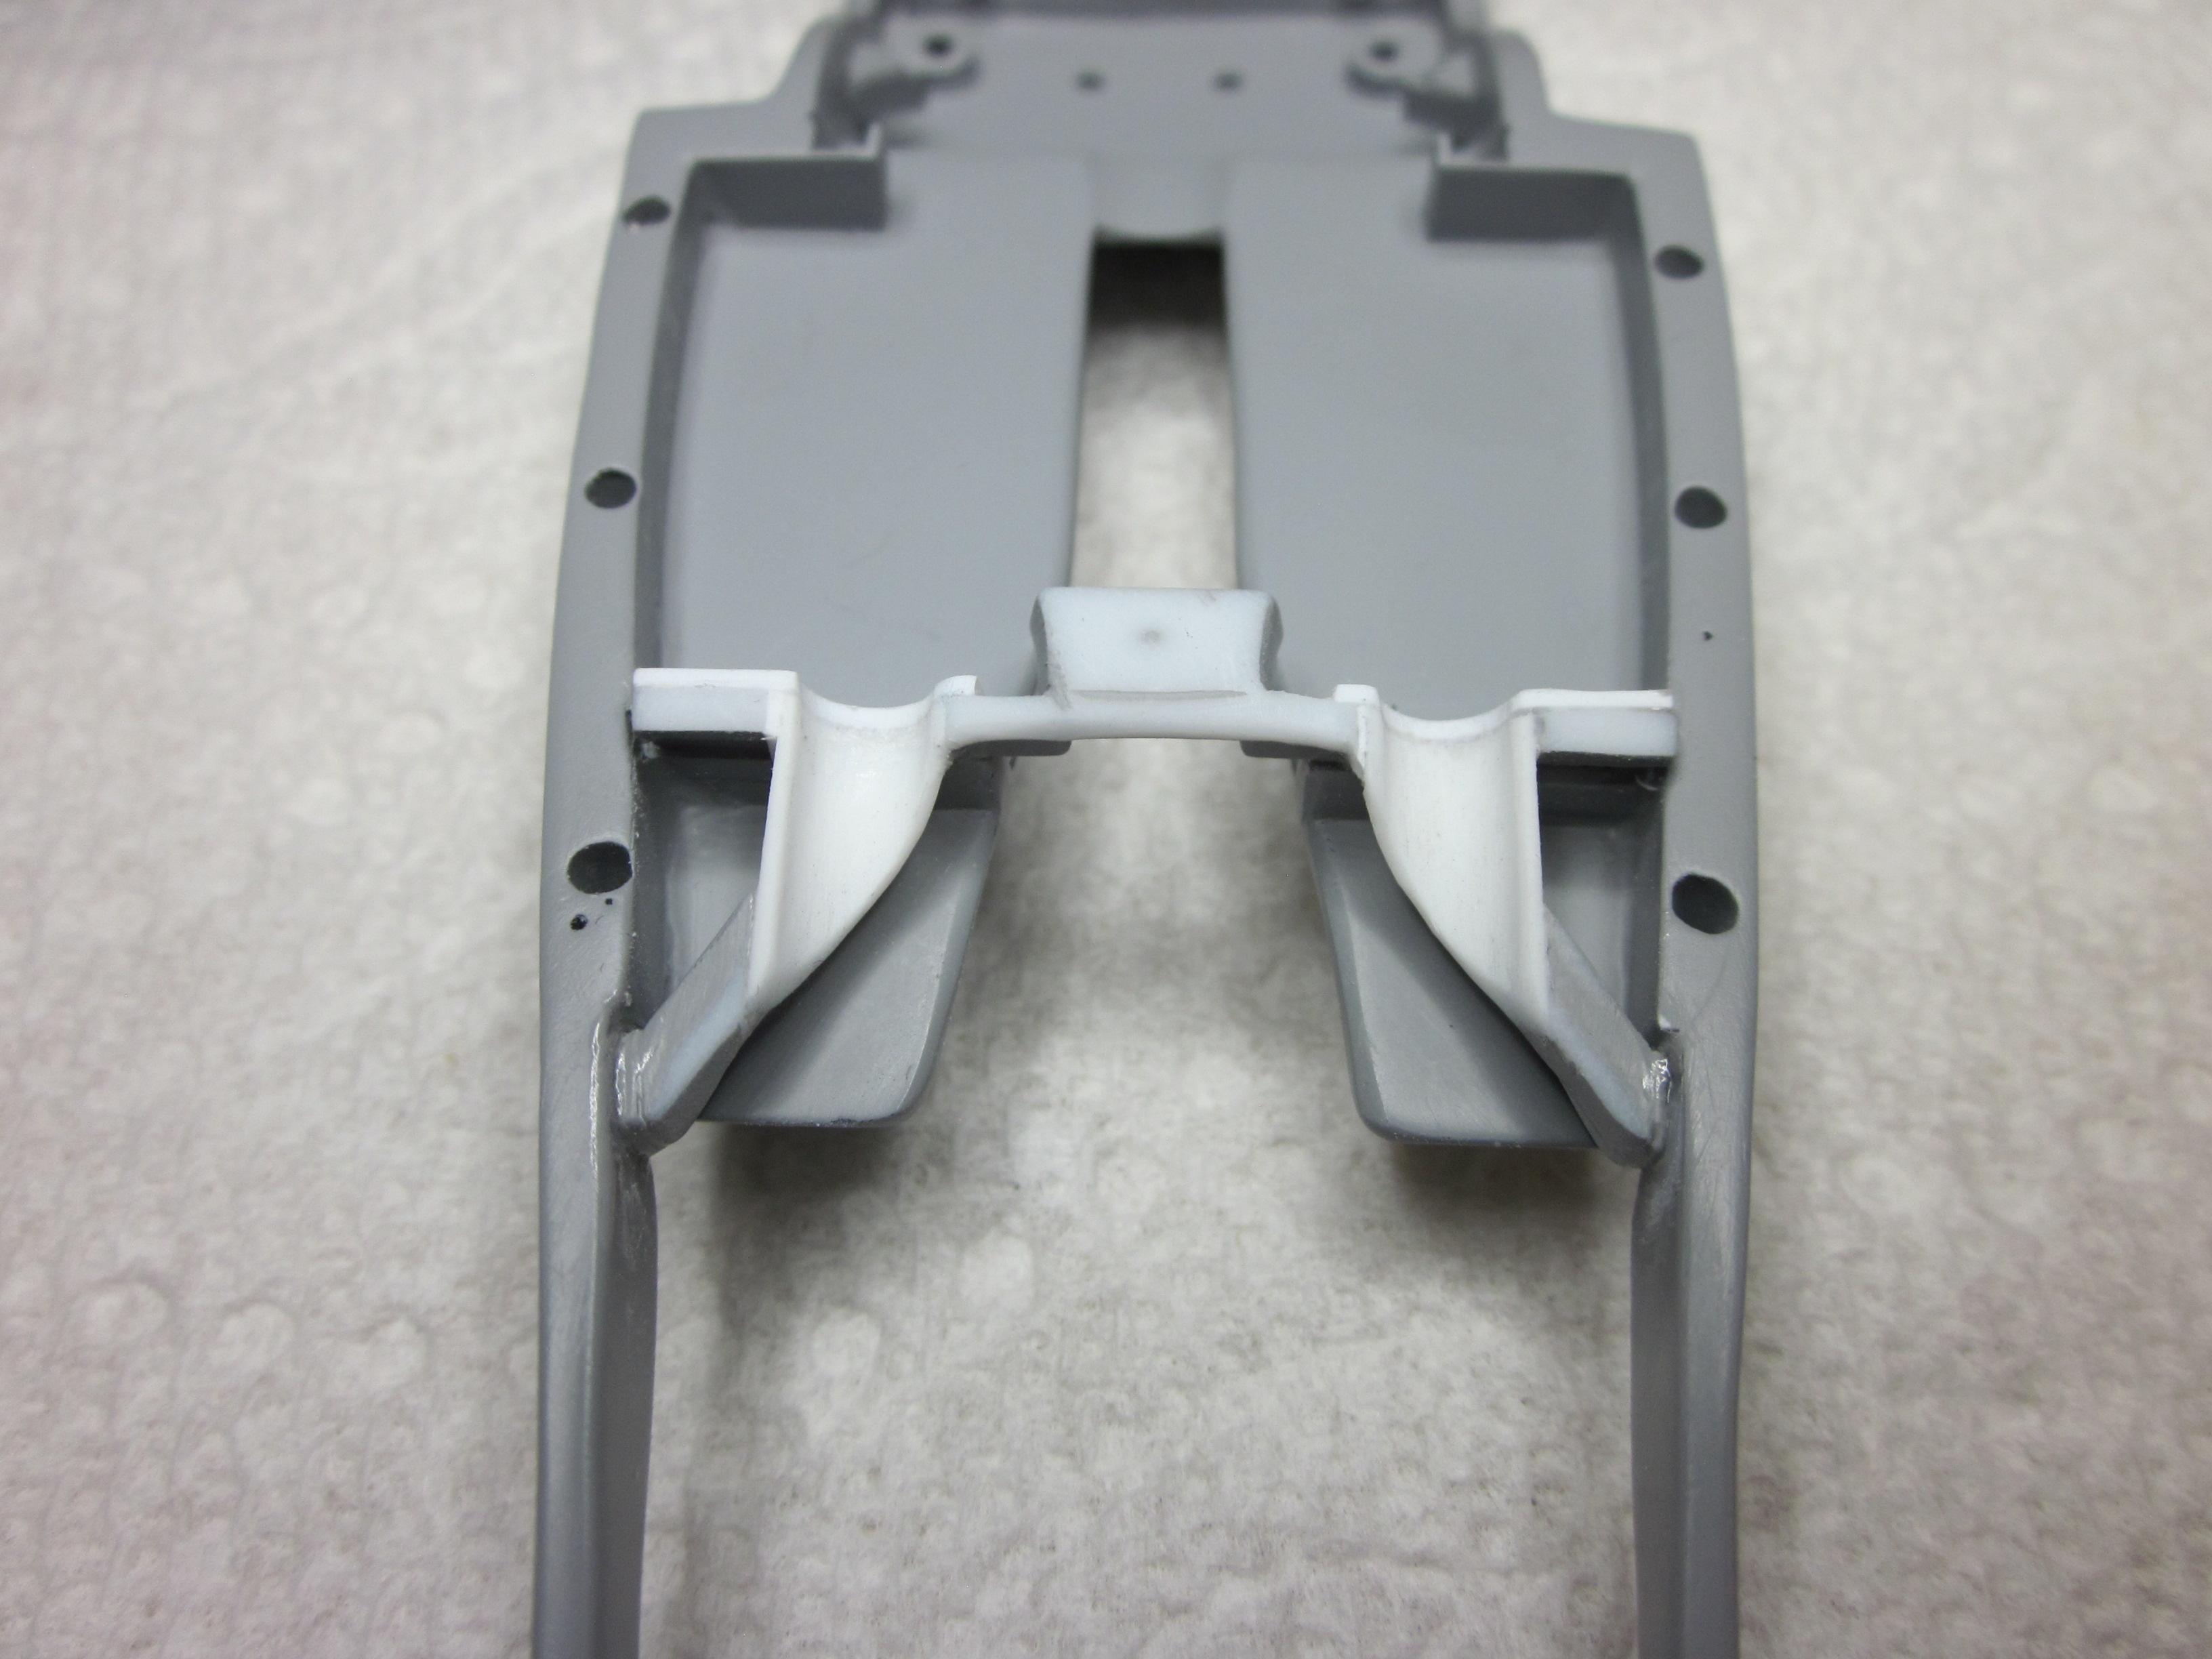
Got the exhaust done except for the exit out the rear. All the suspension parts are in place to check everything. The gas tank and shocks are not shown. Thats about it at this point. Maybe a this and that to finish things out. Looks like things can get some primer soon. Thats it for now. Thanks for looking.....................
-
 Great looking build, michael! Looks just like the picture.
 -
Great job on you're tribute build, Kevin. Looks just like the picture. You're cousin did a 1st rate job on that lettering.
-
My only plan is to build something different than the 500 way's every other builder already has. So I do alot of scratch building.
-
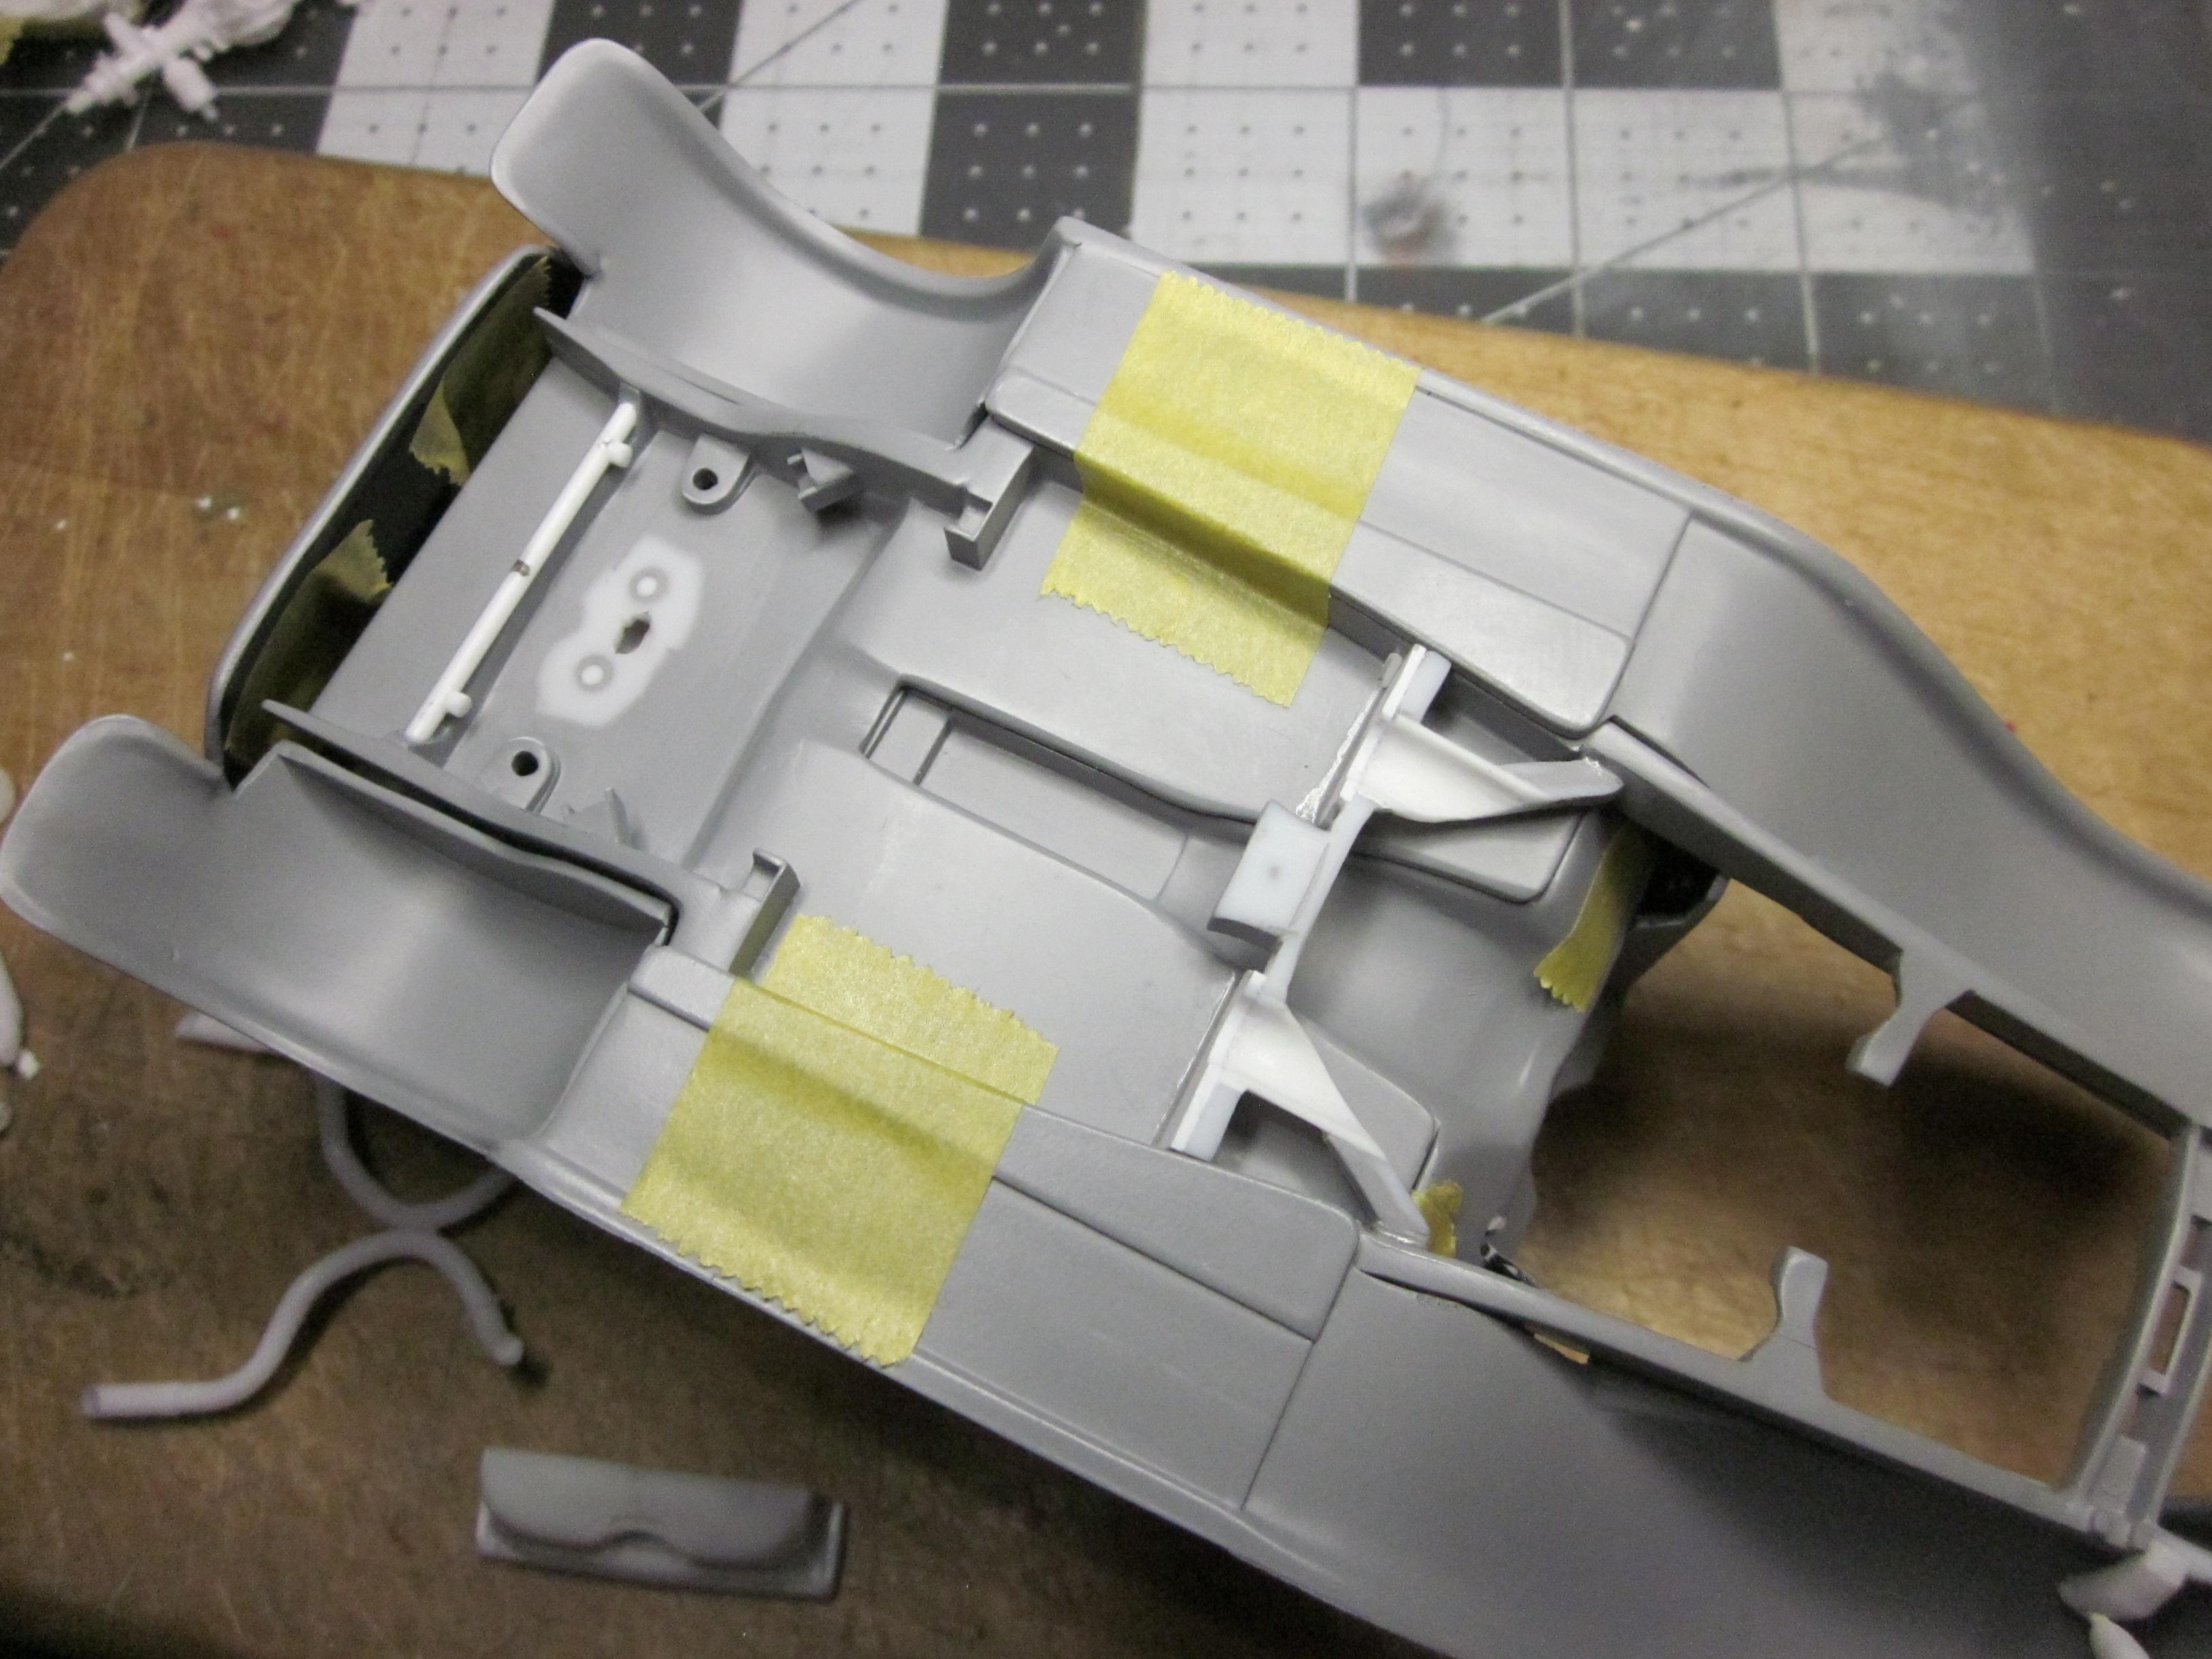
Really nice work on the engine compartment detailing. The seal on the cowl, to the correct colored electrical wiring, It don't look like ya missed anything. Looking forward to more.
-
You really got this custom stuff down. Great tutorial on building up materials.
-
Original AMT '64 GTO meets newer Revell '66 GTO and more!
Speedpro replied to dino246gt's topic in WIP: Model Cars
Great detail work on the engine bay! -
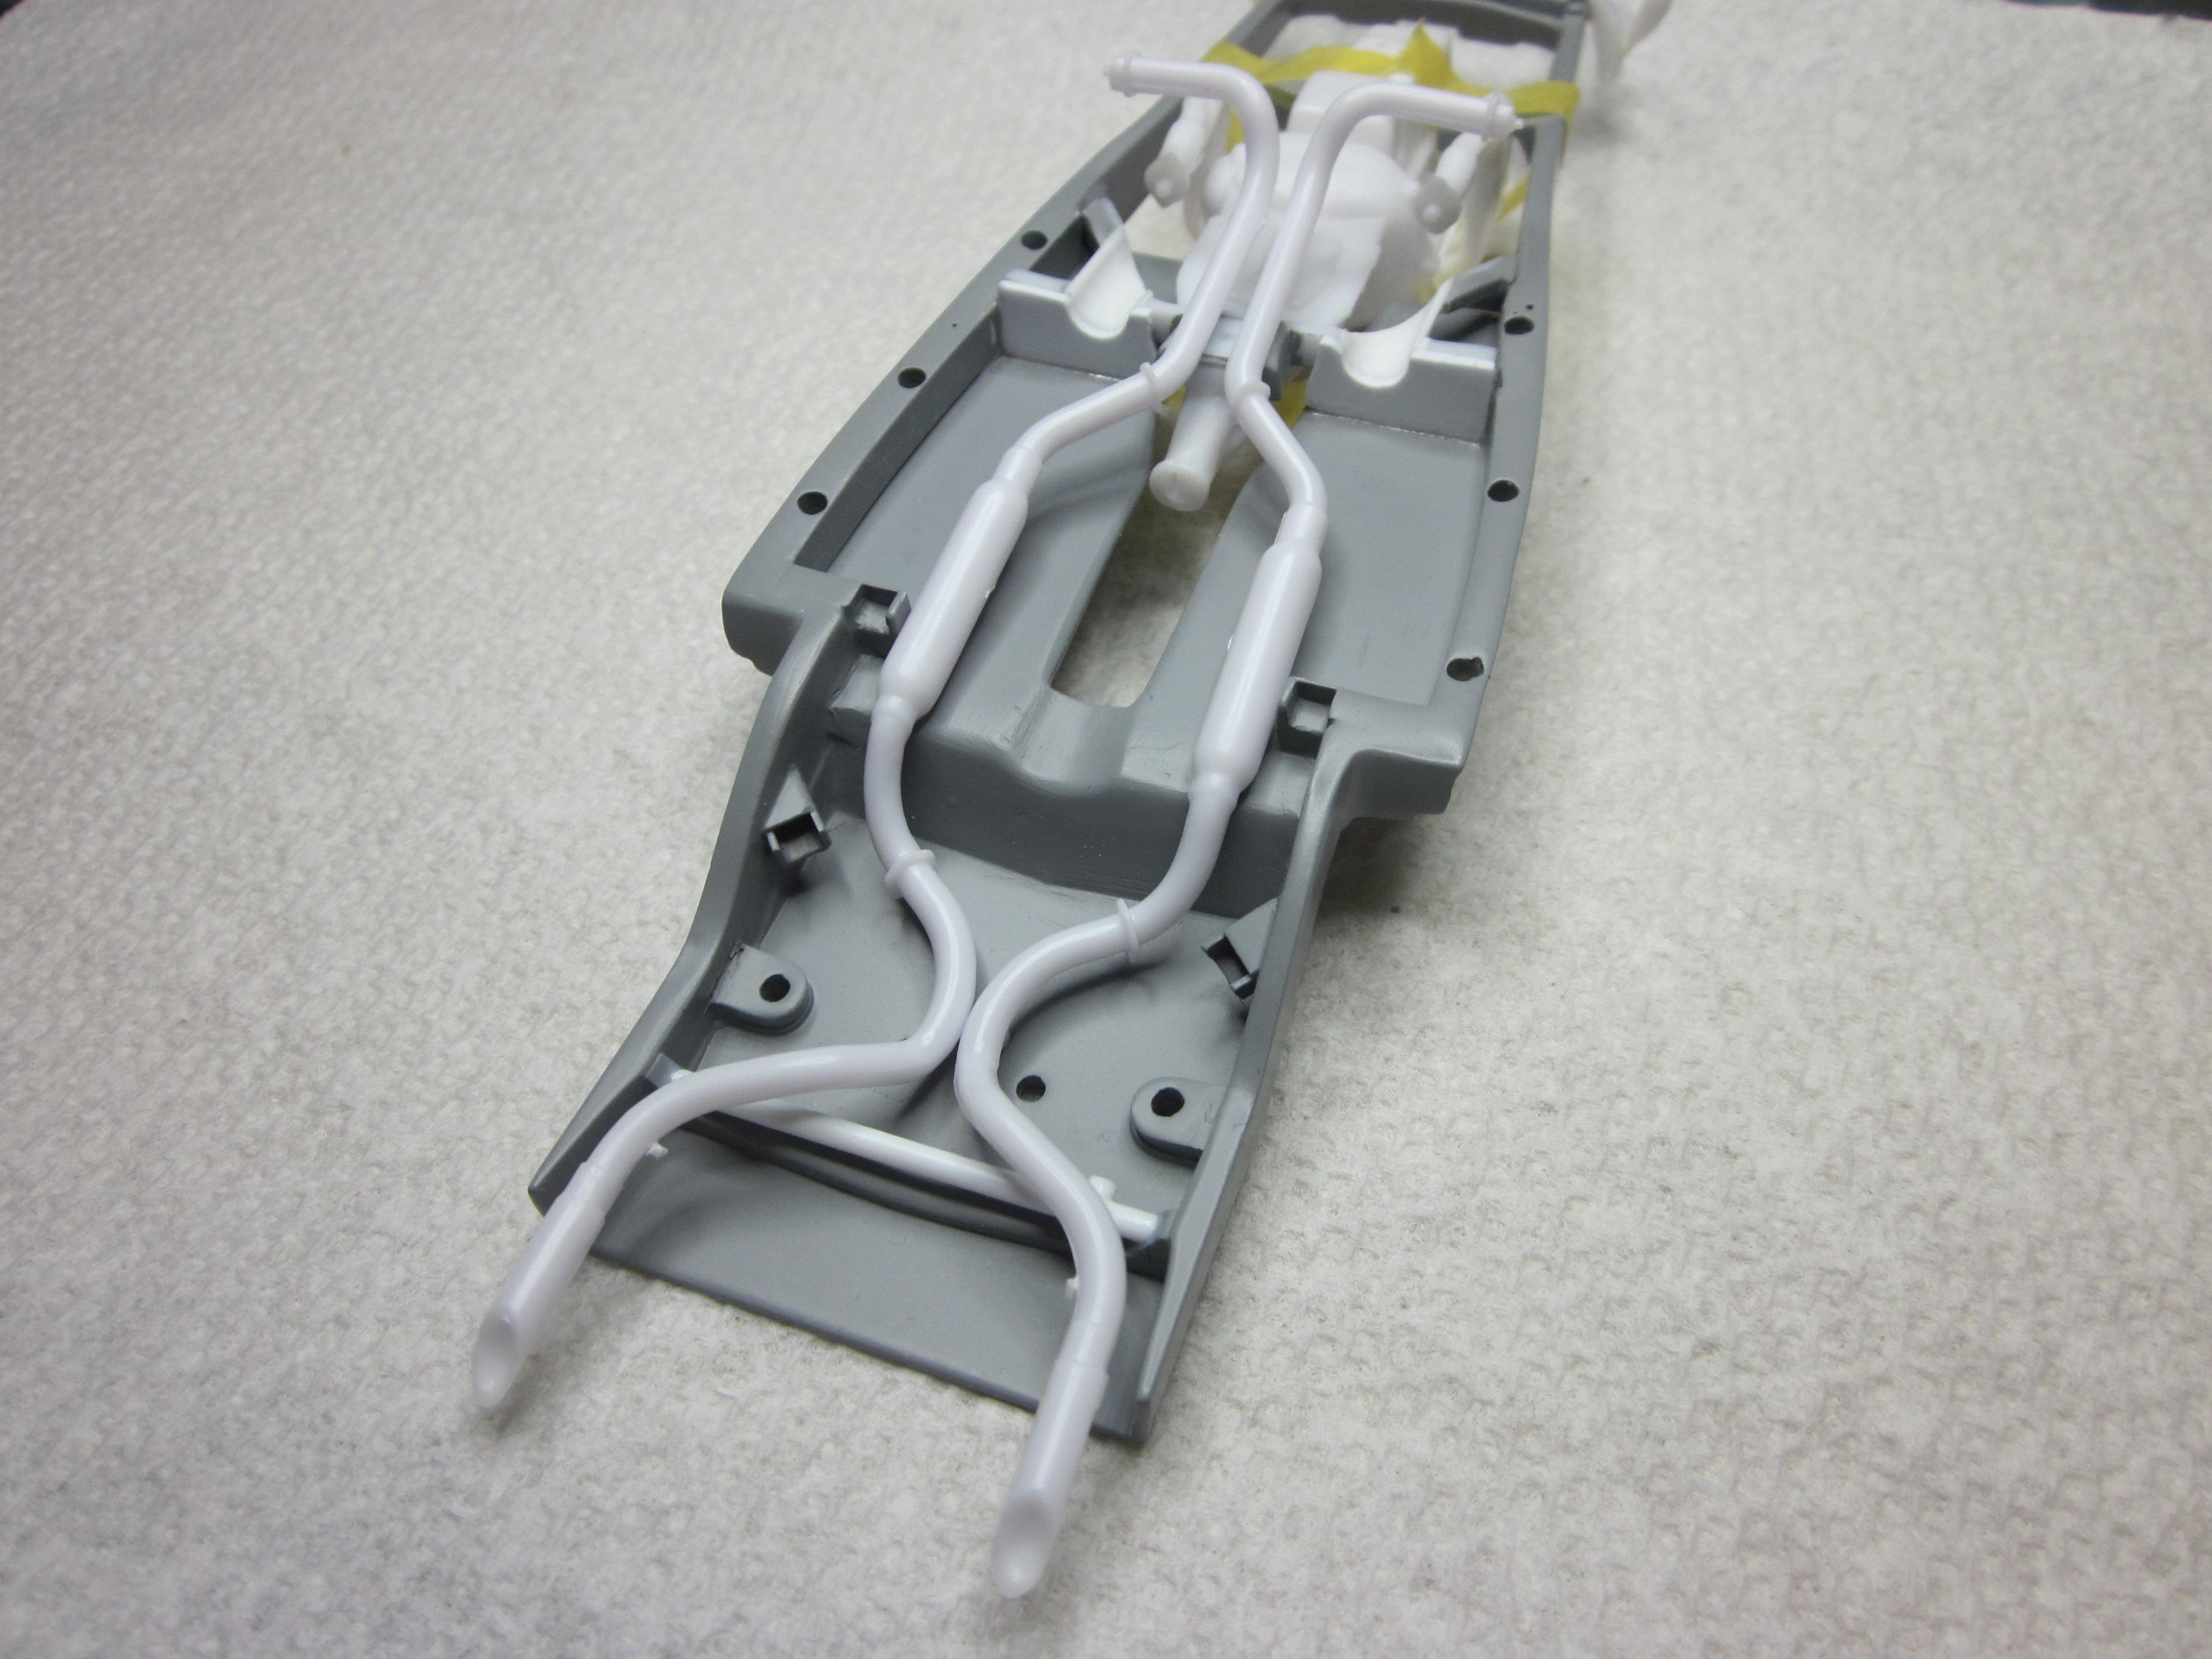
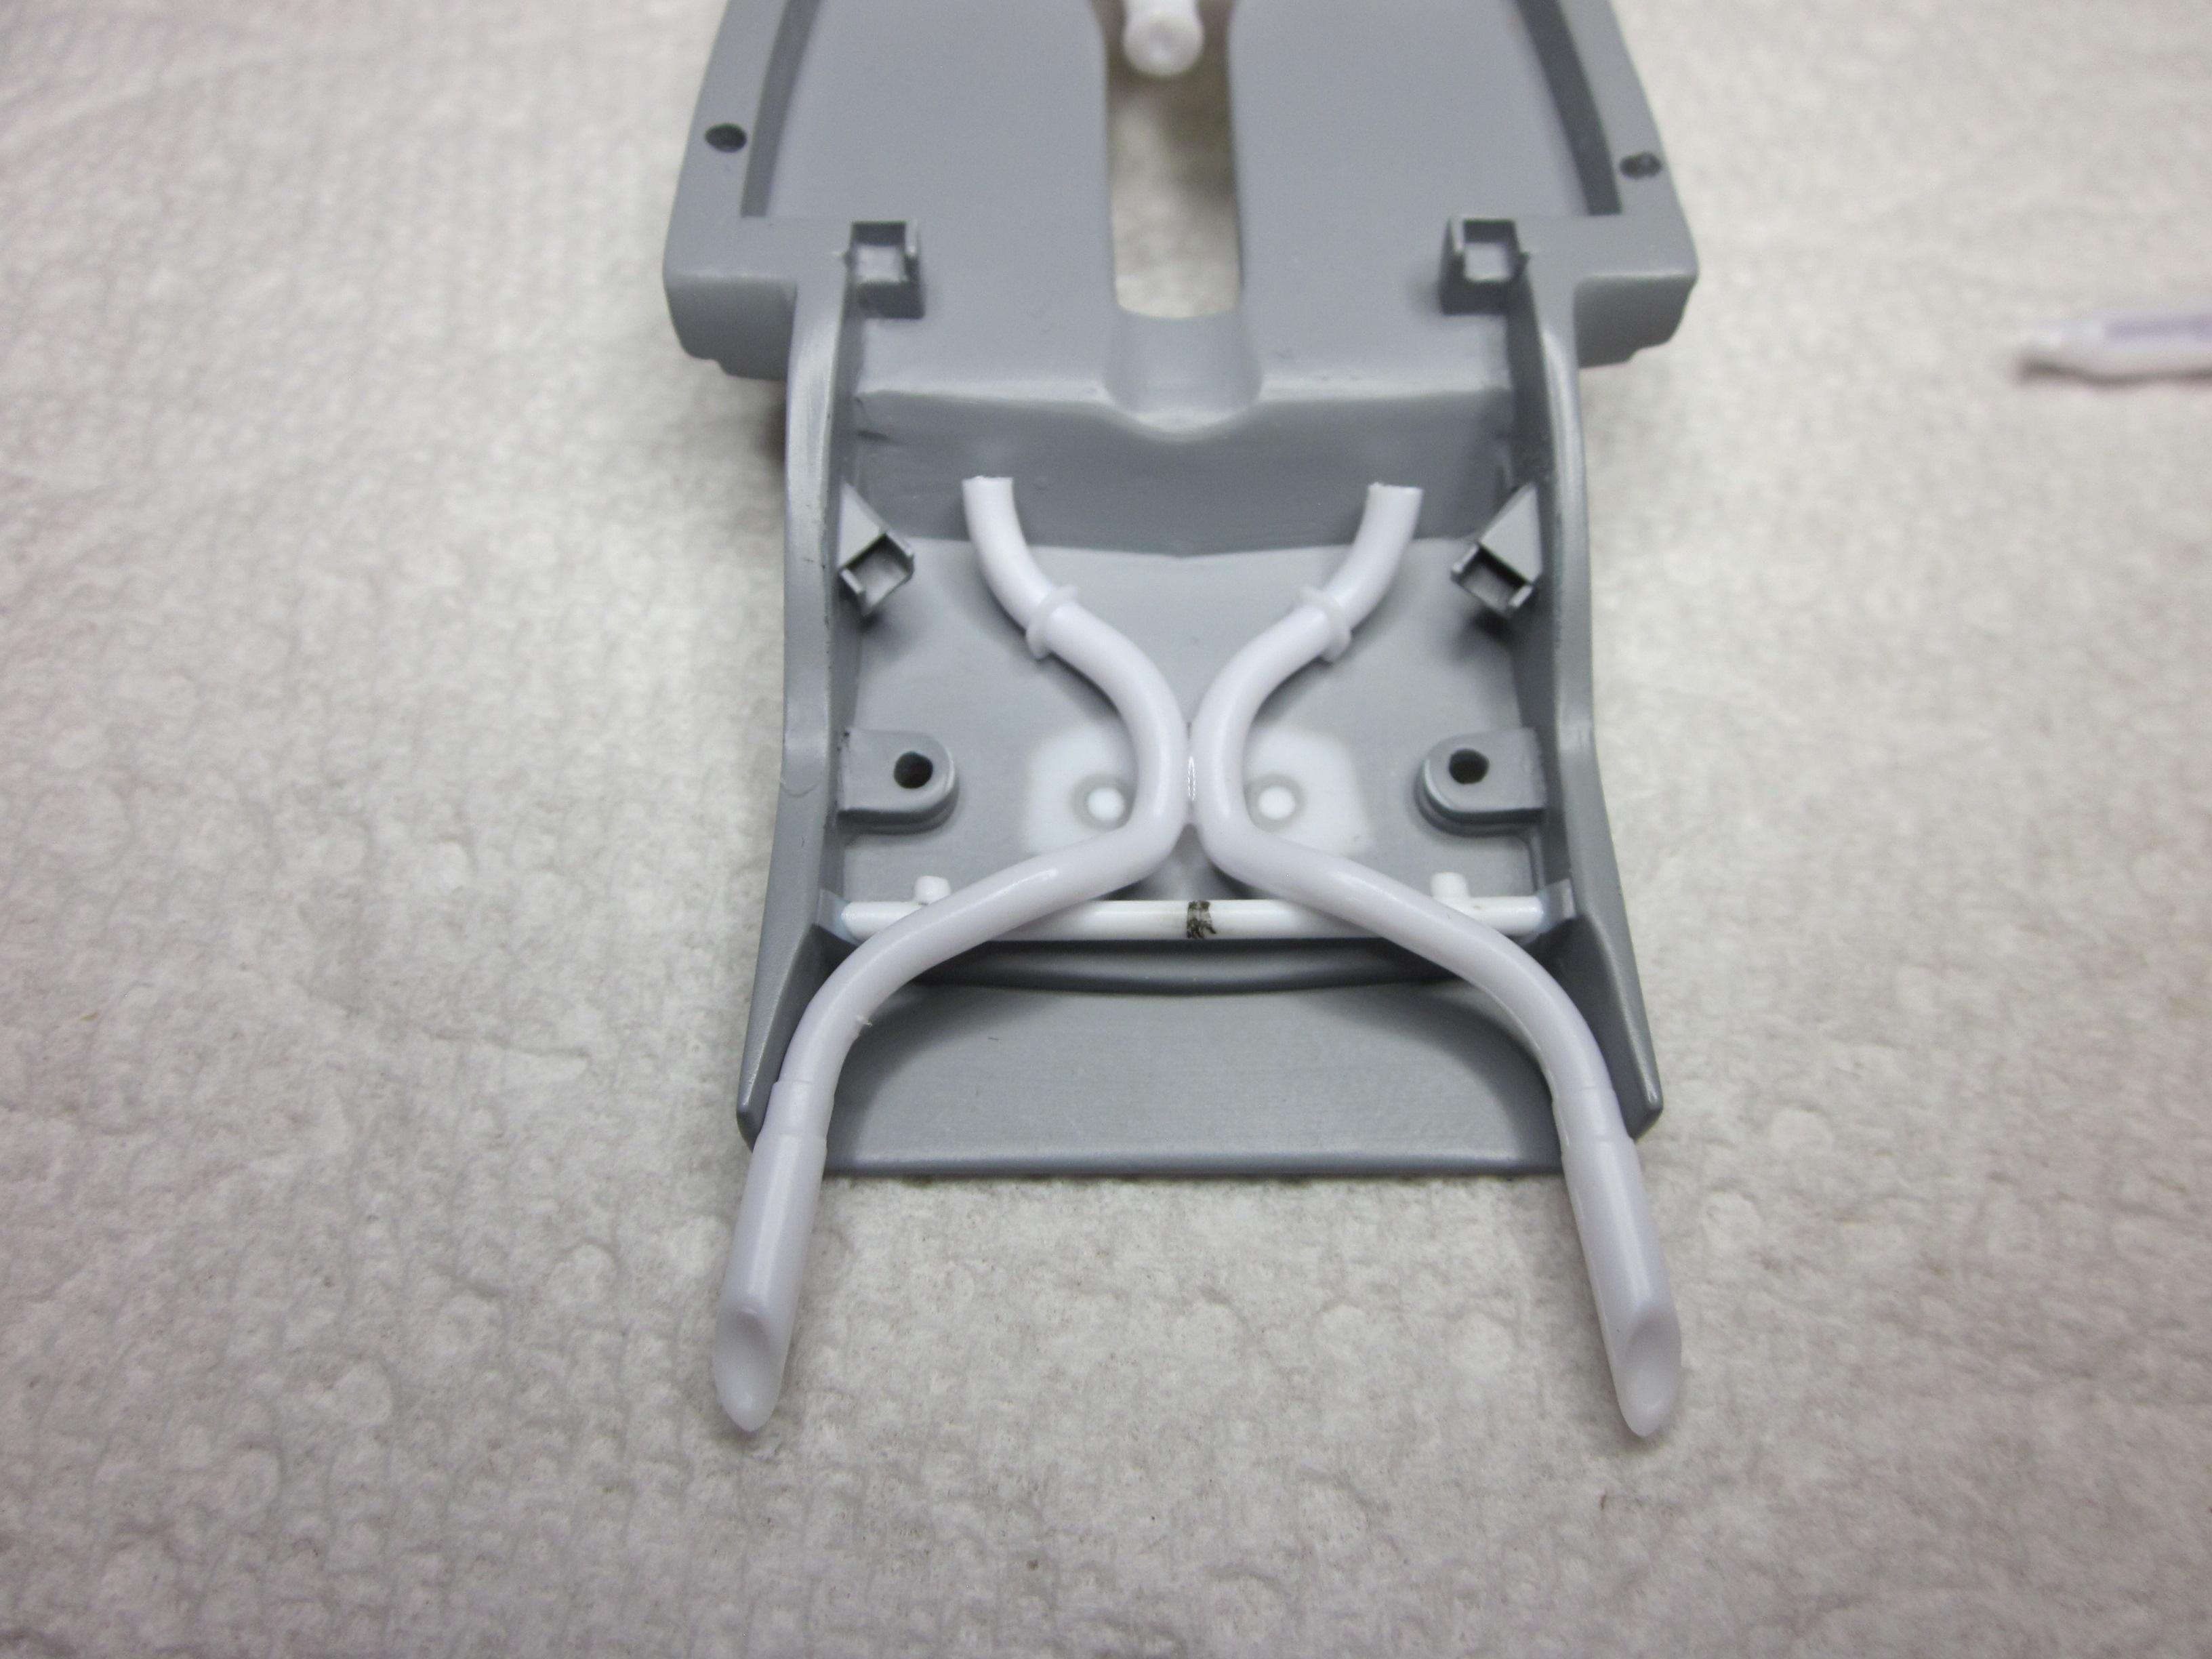
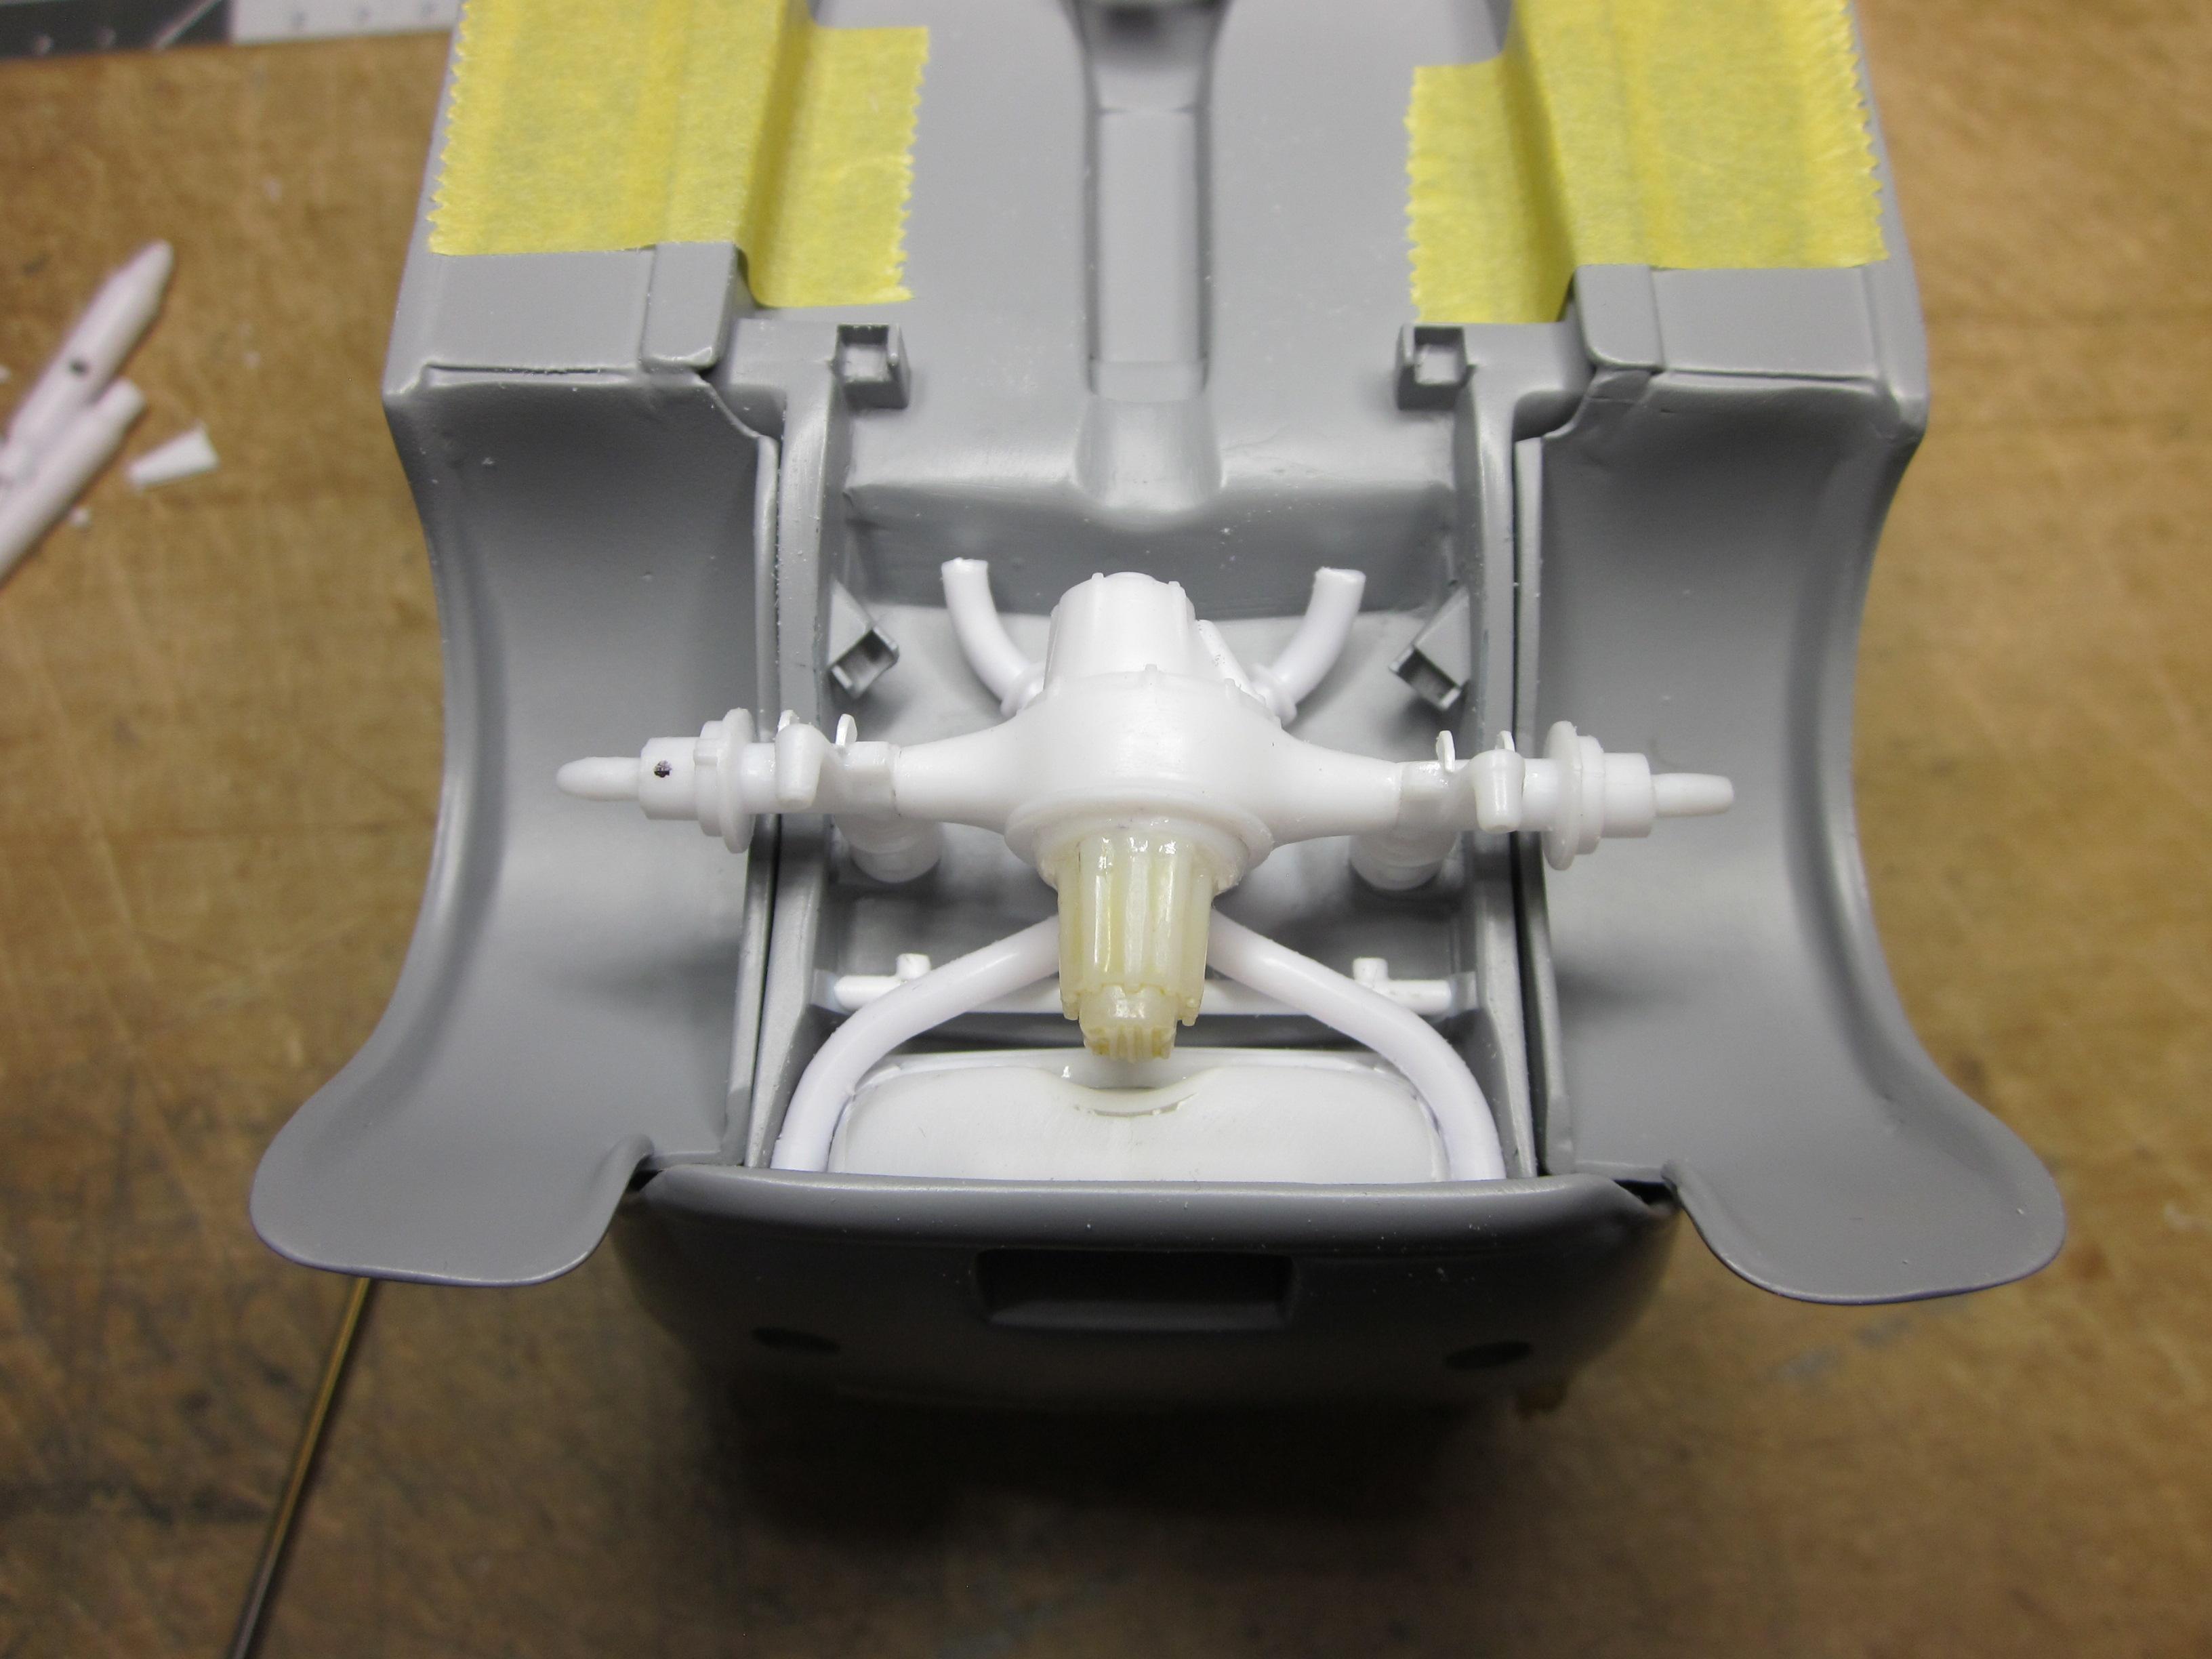
Got a start on the exhaust system. The pipes came from the '32 roadster kit (black w/flames). The pipes were glued together just under the rear end housing and a hole was drilled to locate the pipes during mockup. The gas tank required some work to clear the pipes as needed. After the tank mods, the rear end was mounted to make sure things were fitting. Some tape was put on the inside of the body and the pipes were trimmed to fit against the body to see were it needs to get holes for the tips too come through. Still thinking about the exit at the rear. In the meantime, there is work to be done on the rest of the system. Till next time.......................
-
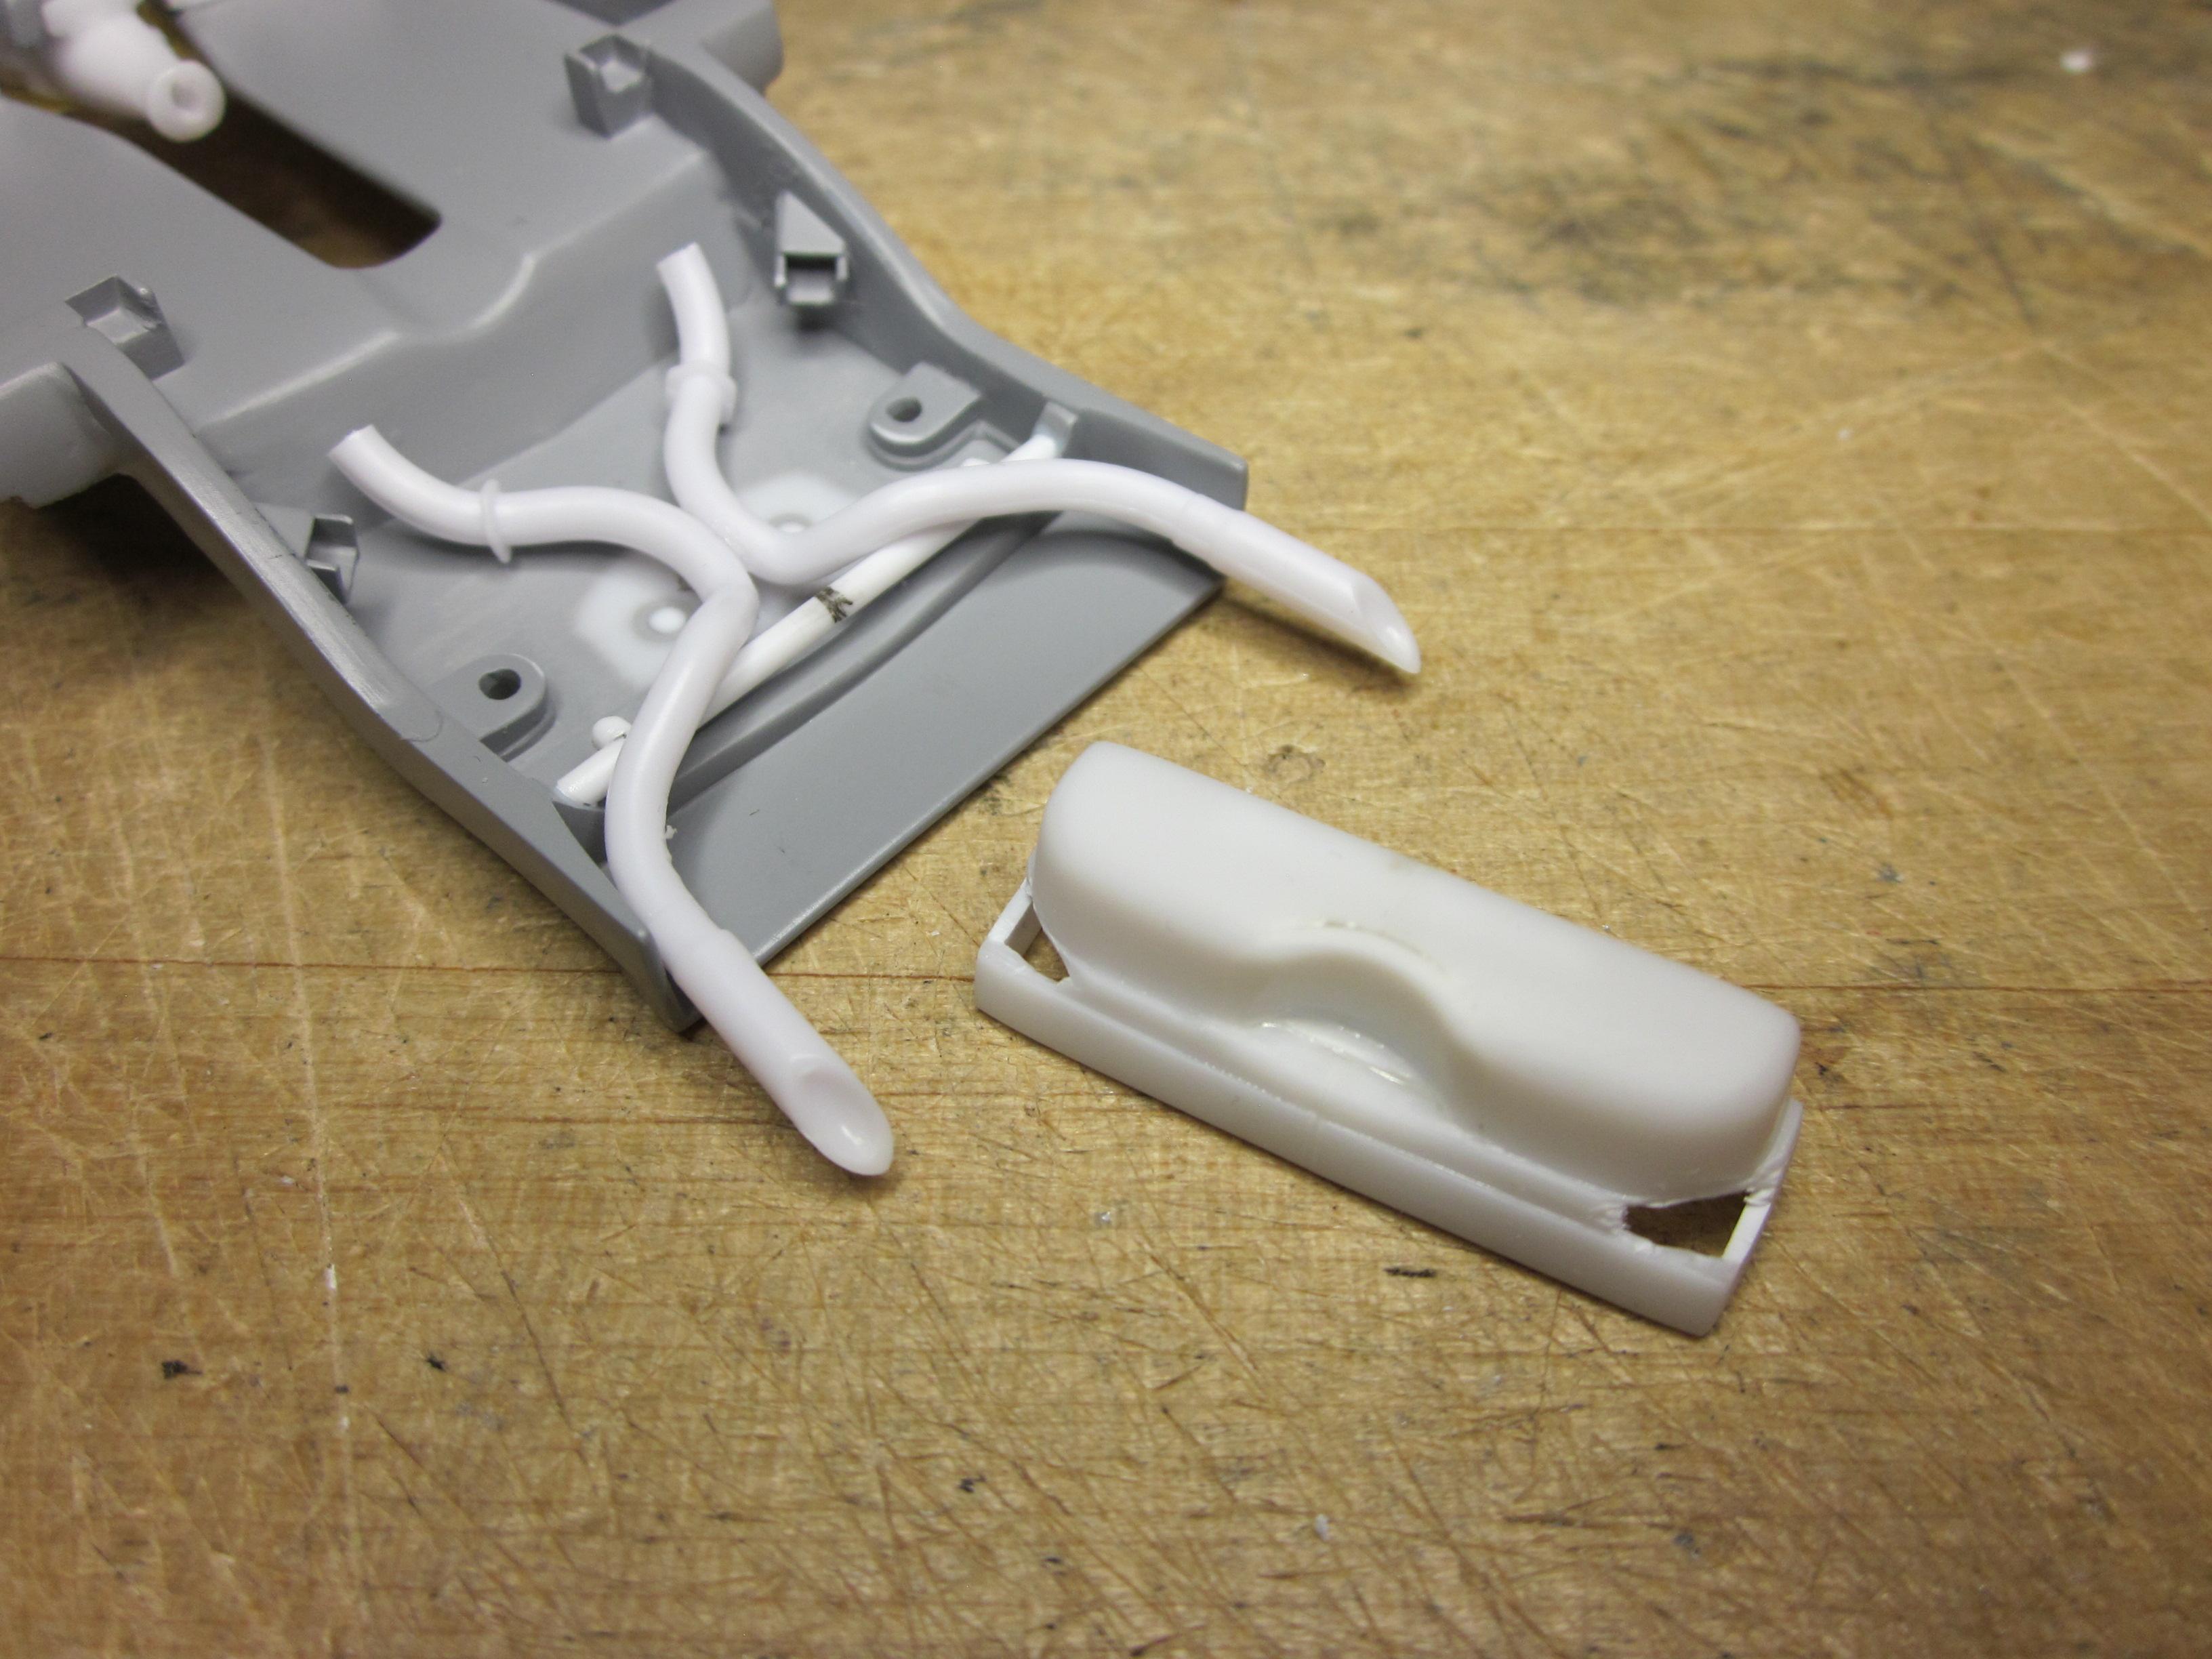
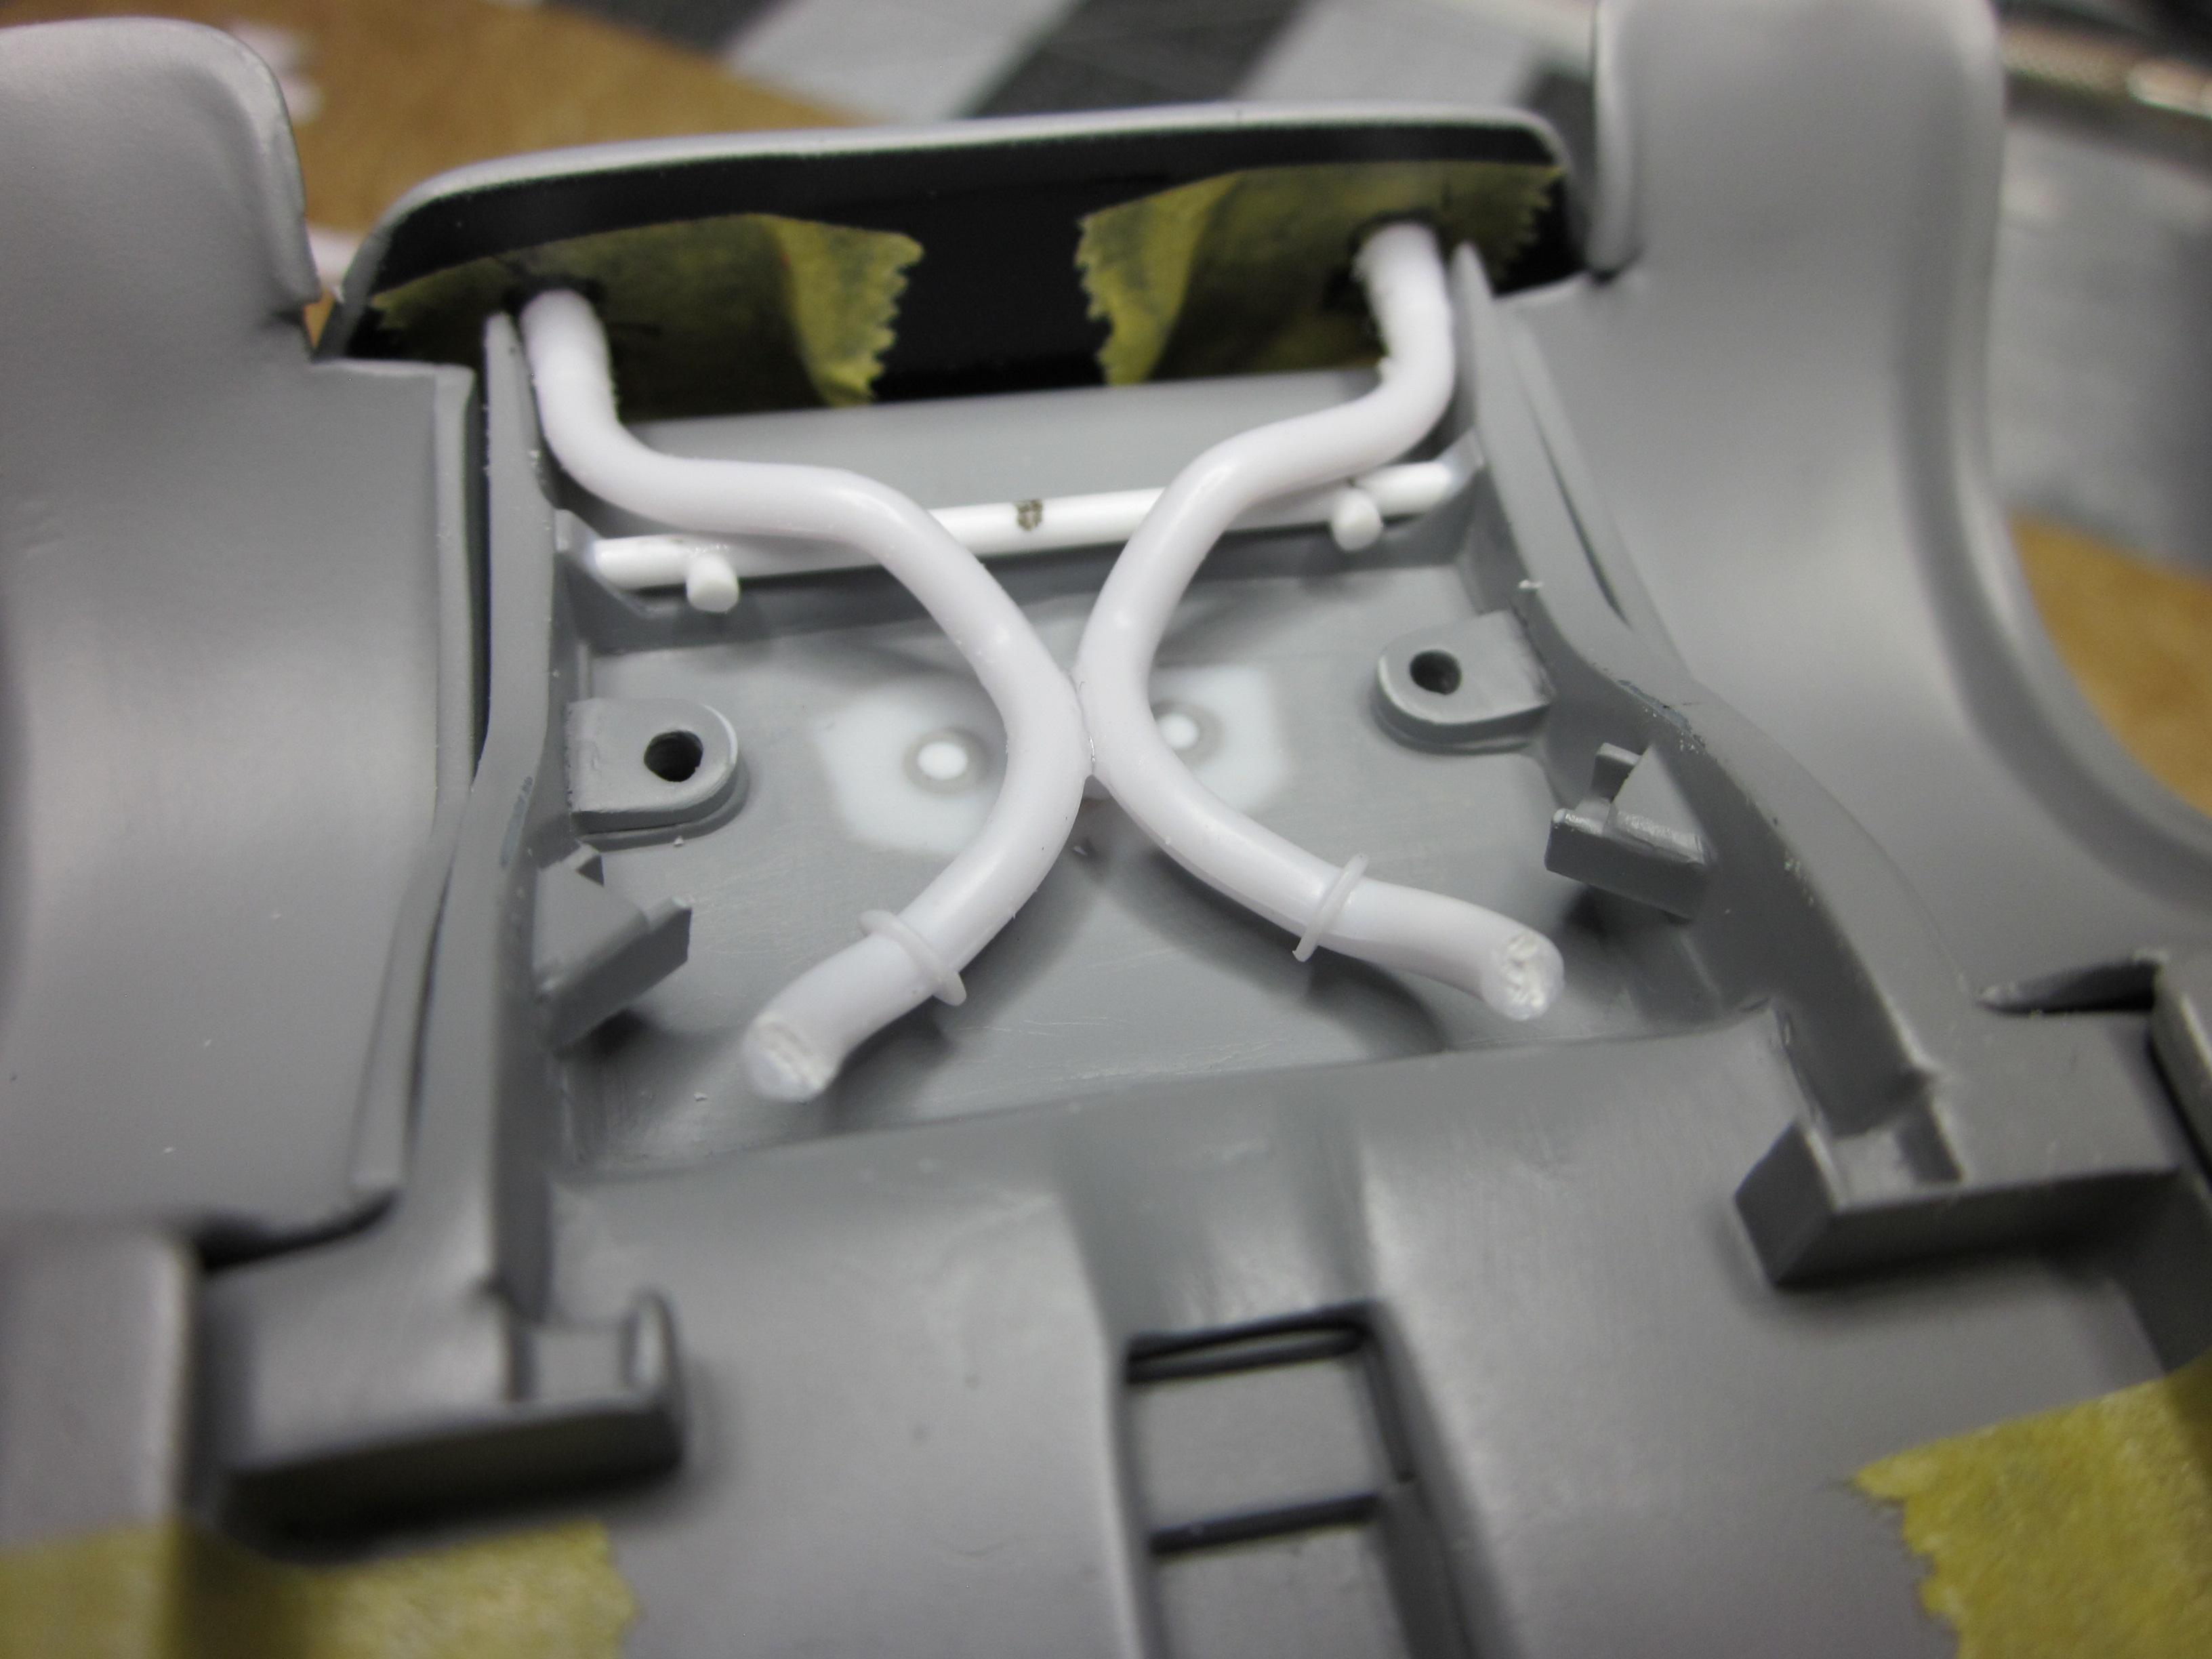
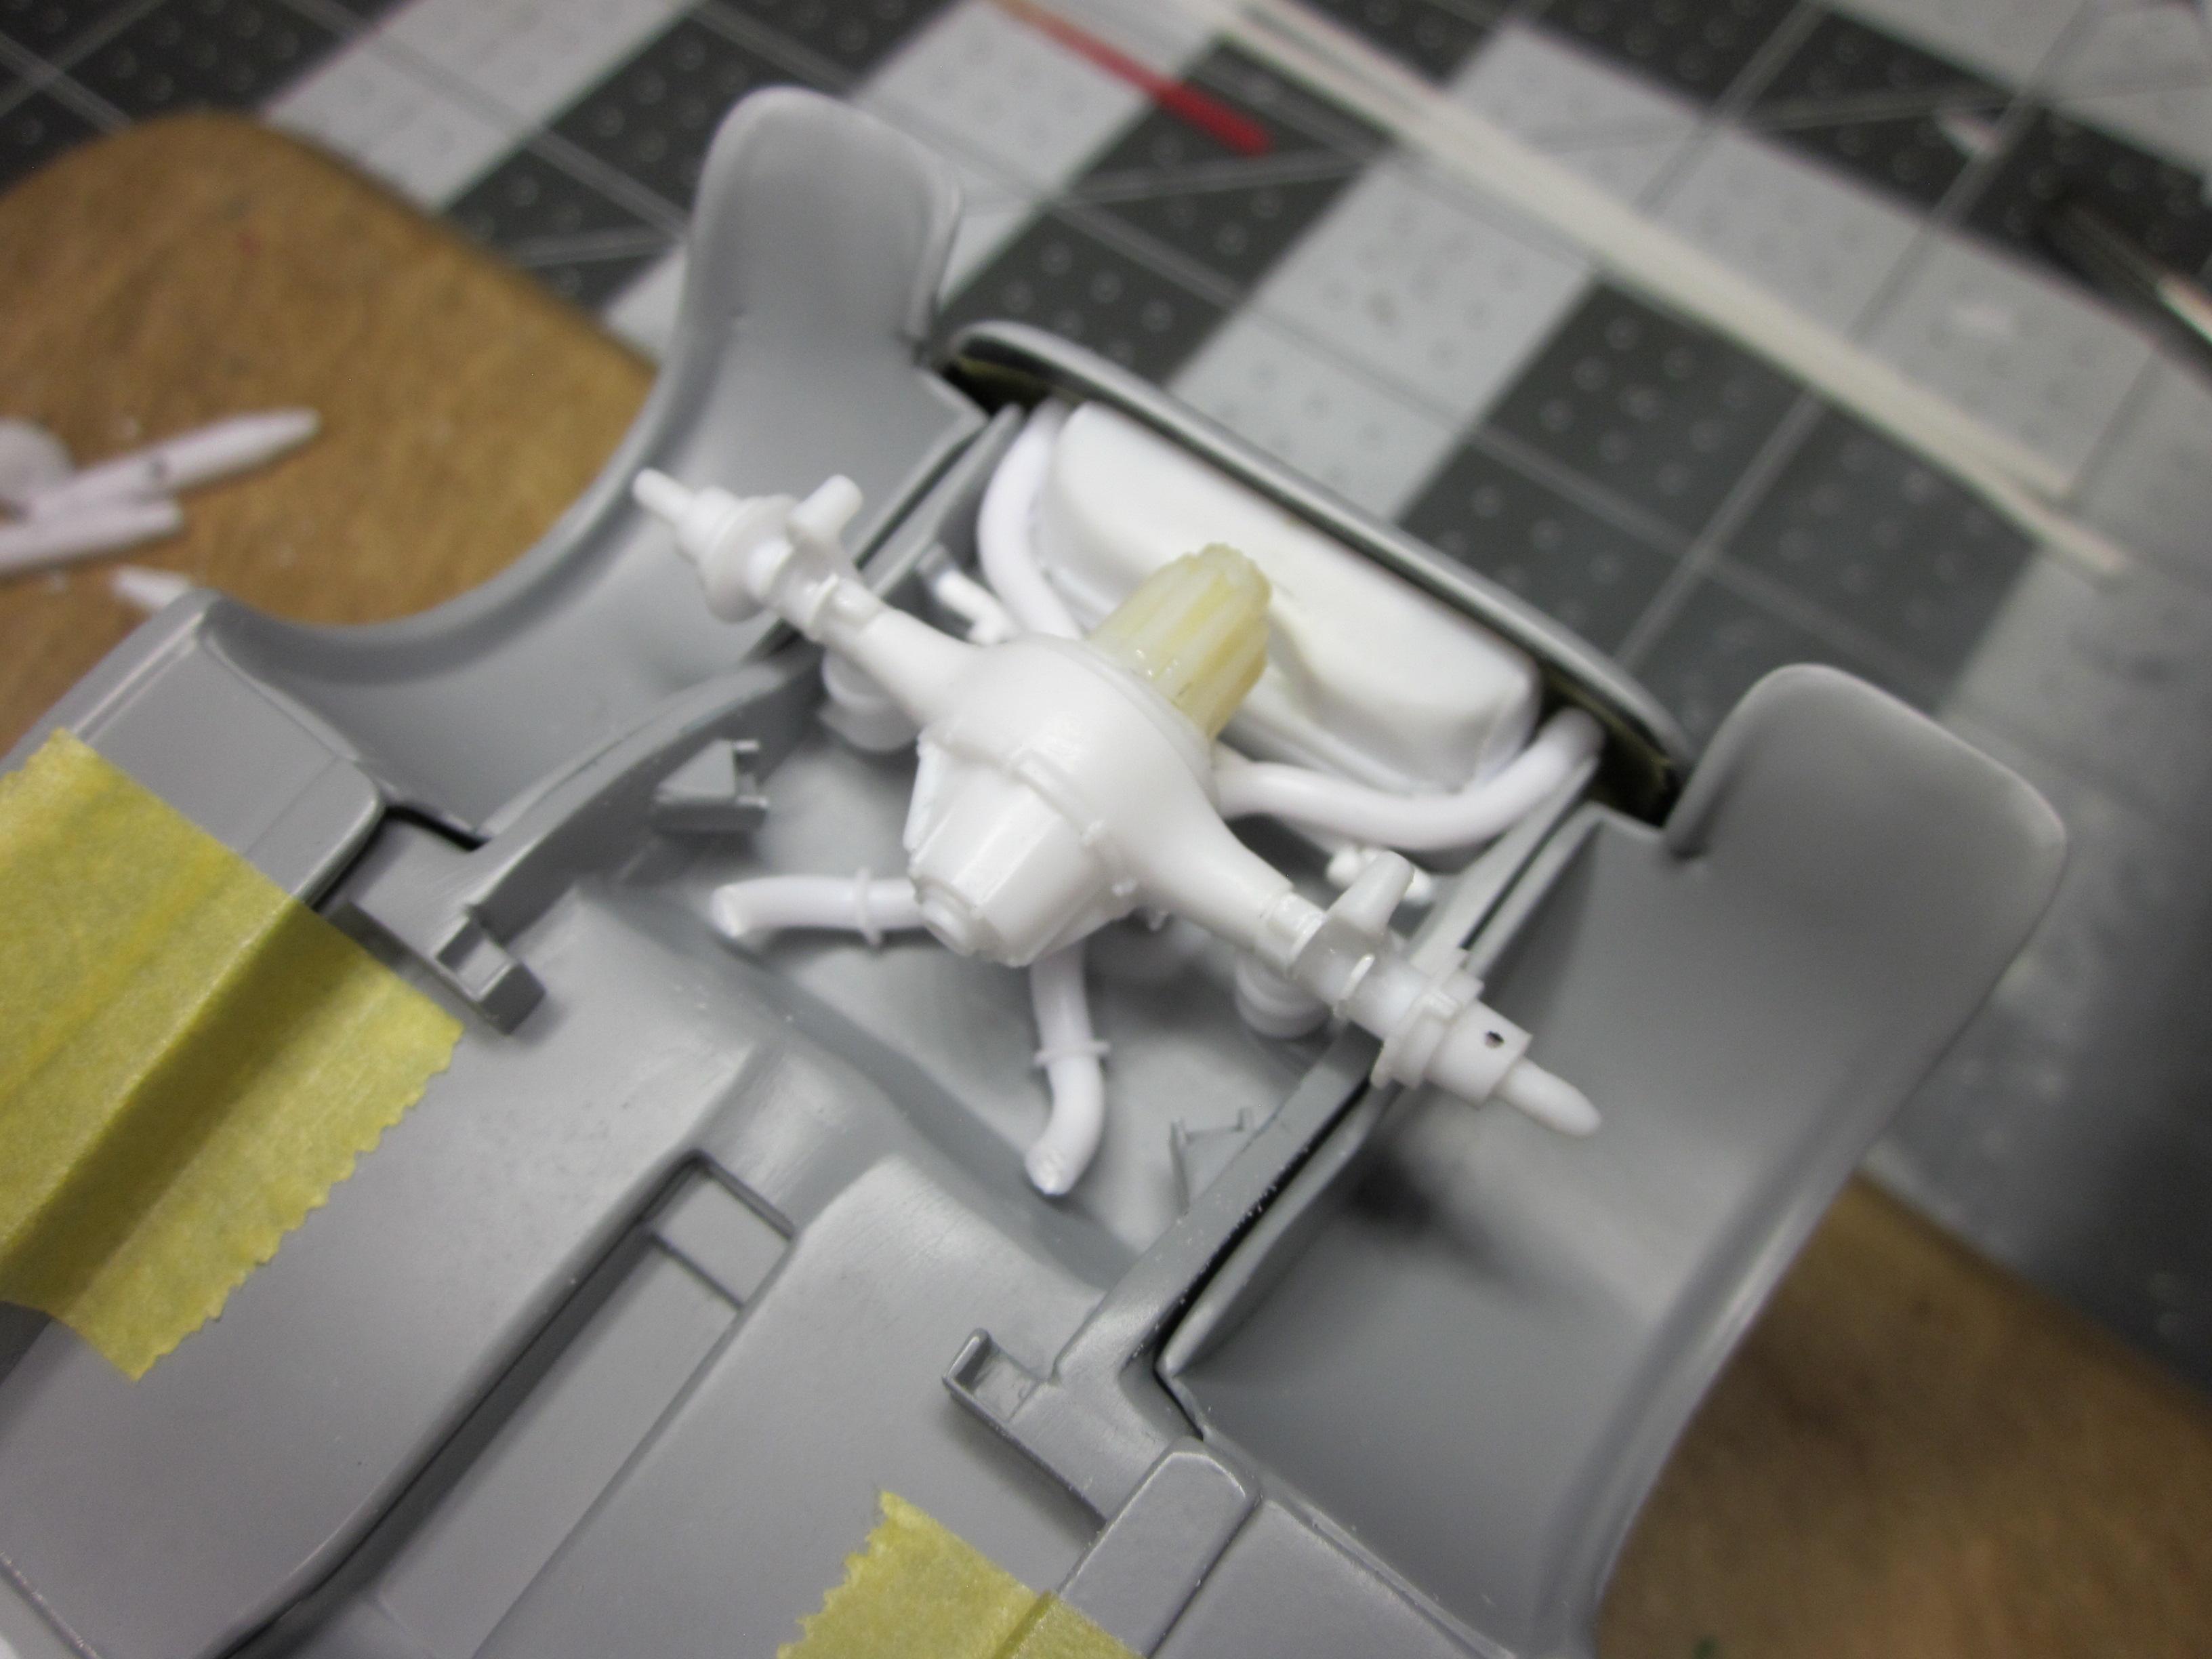
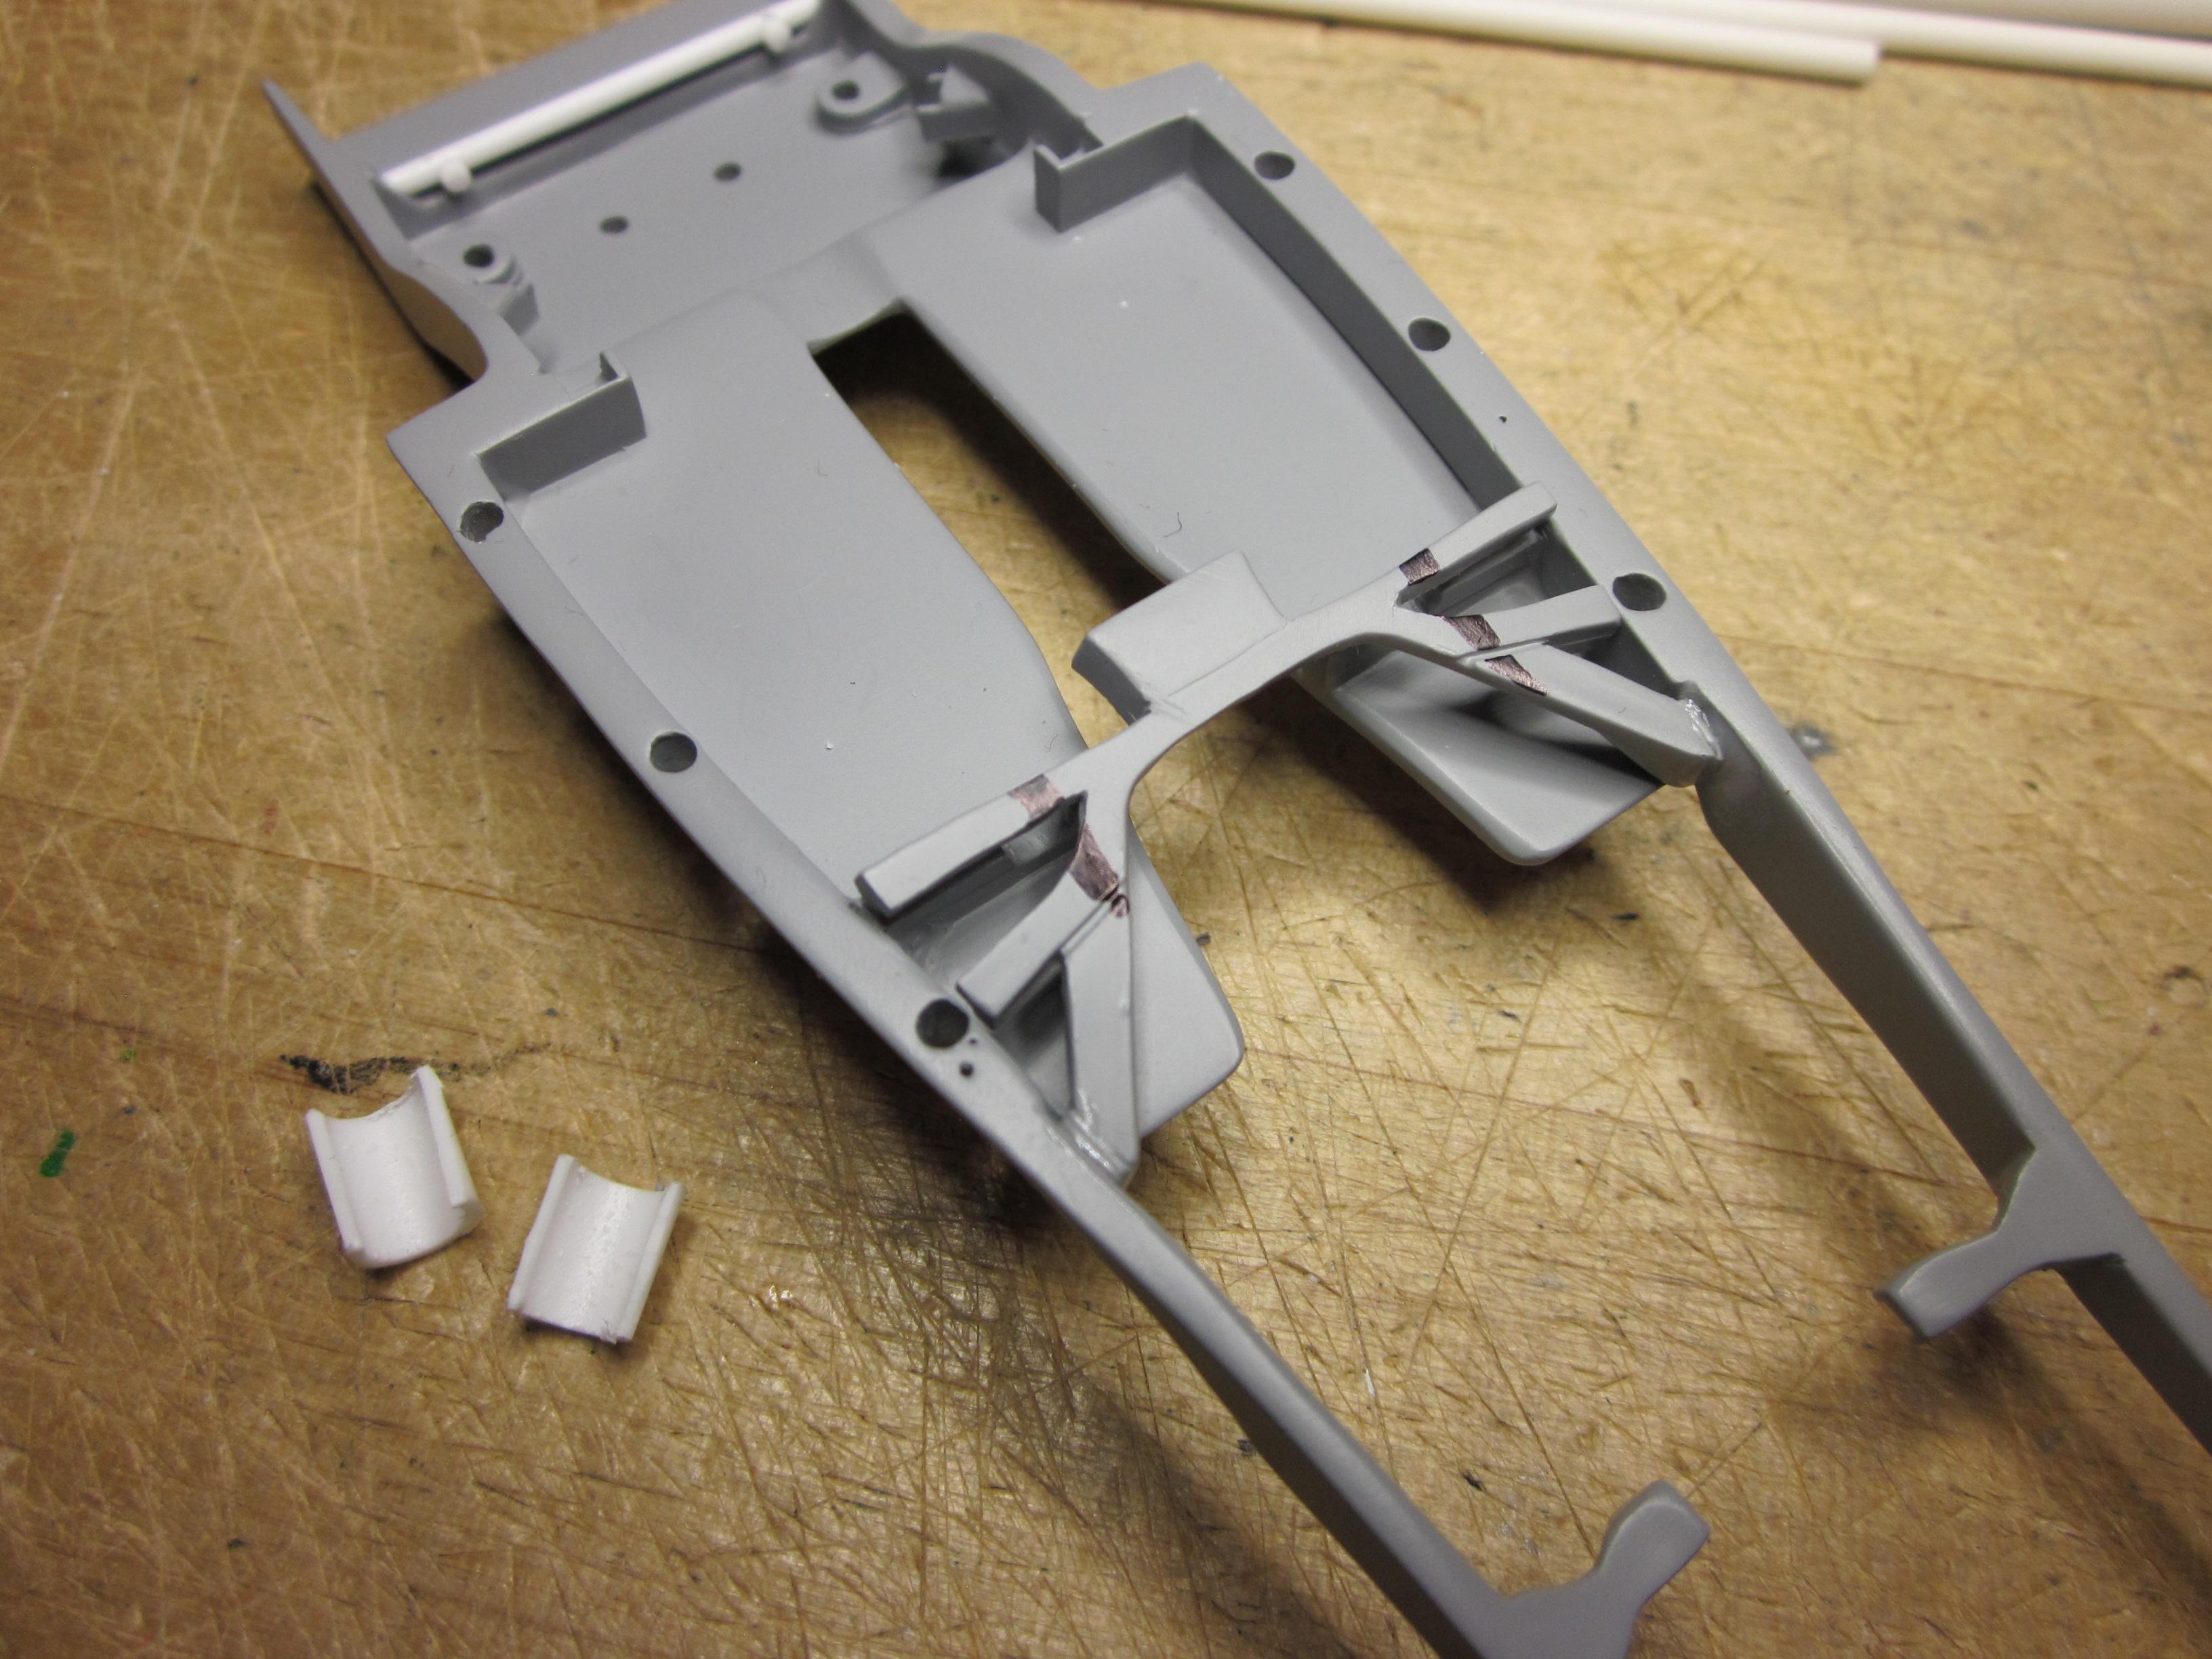
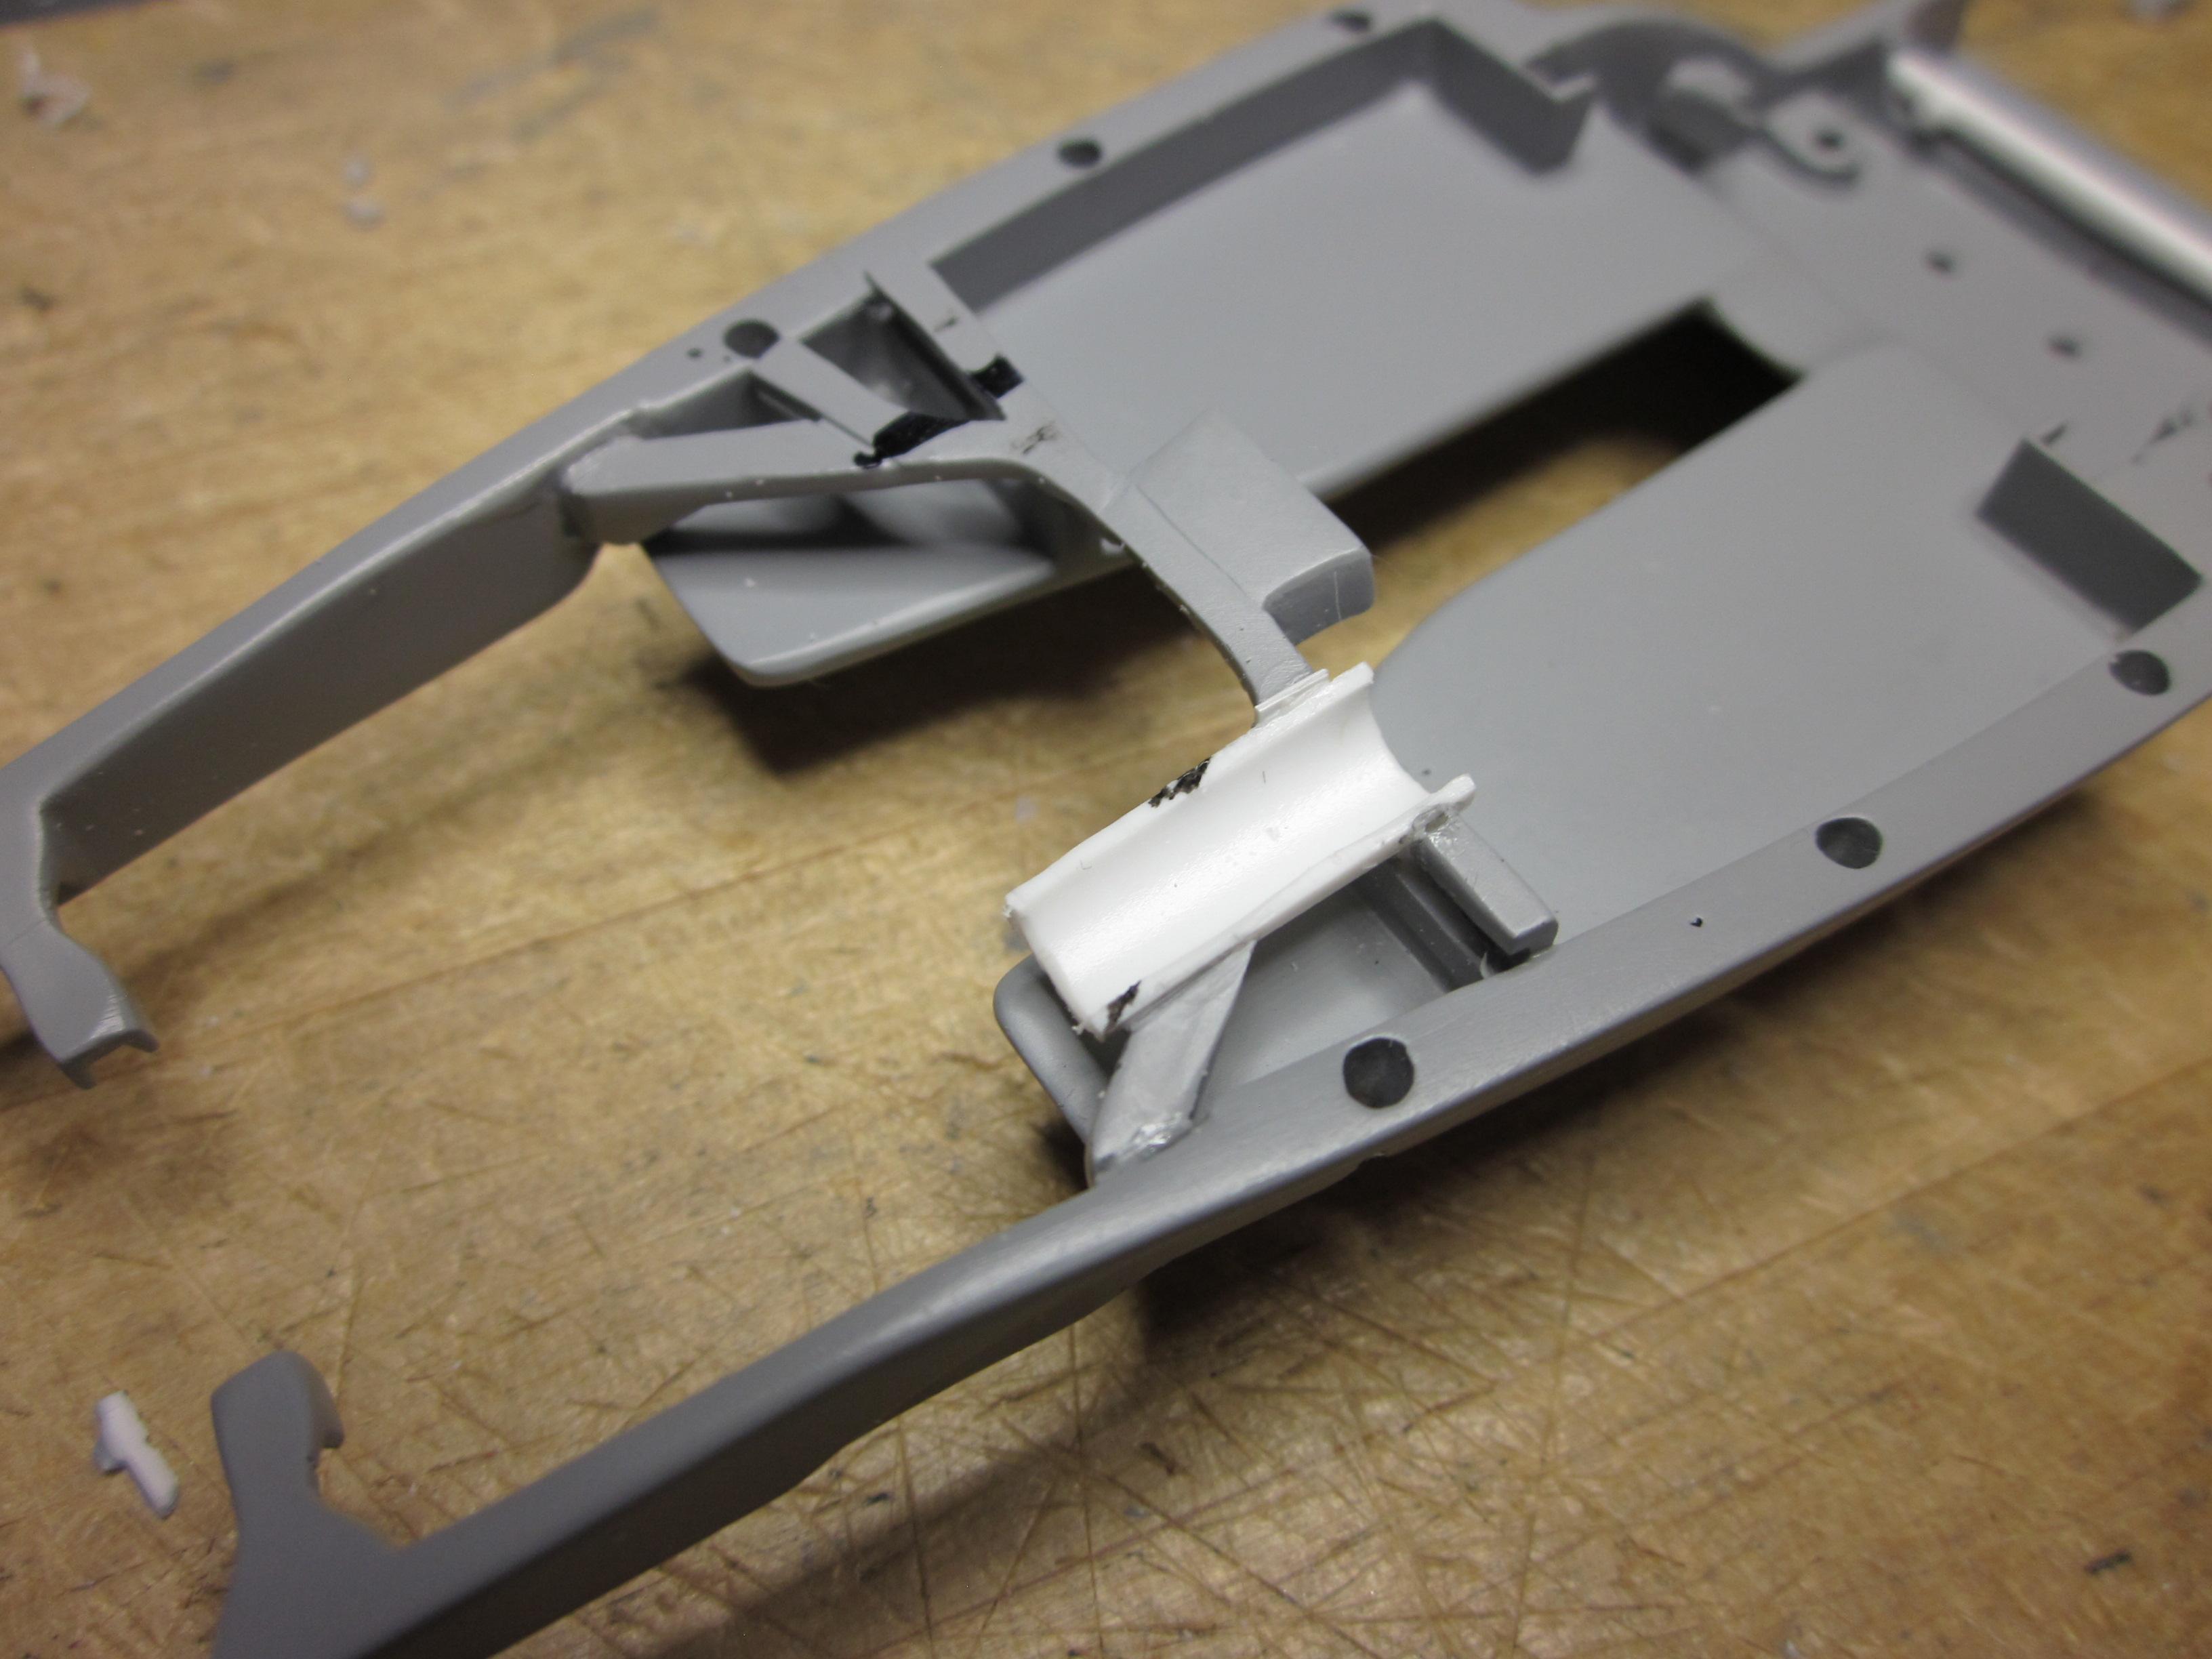
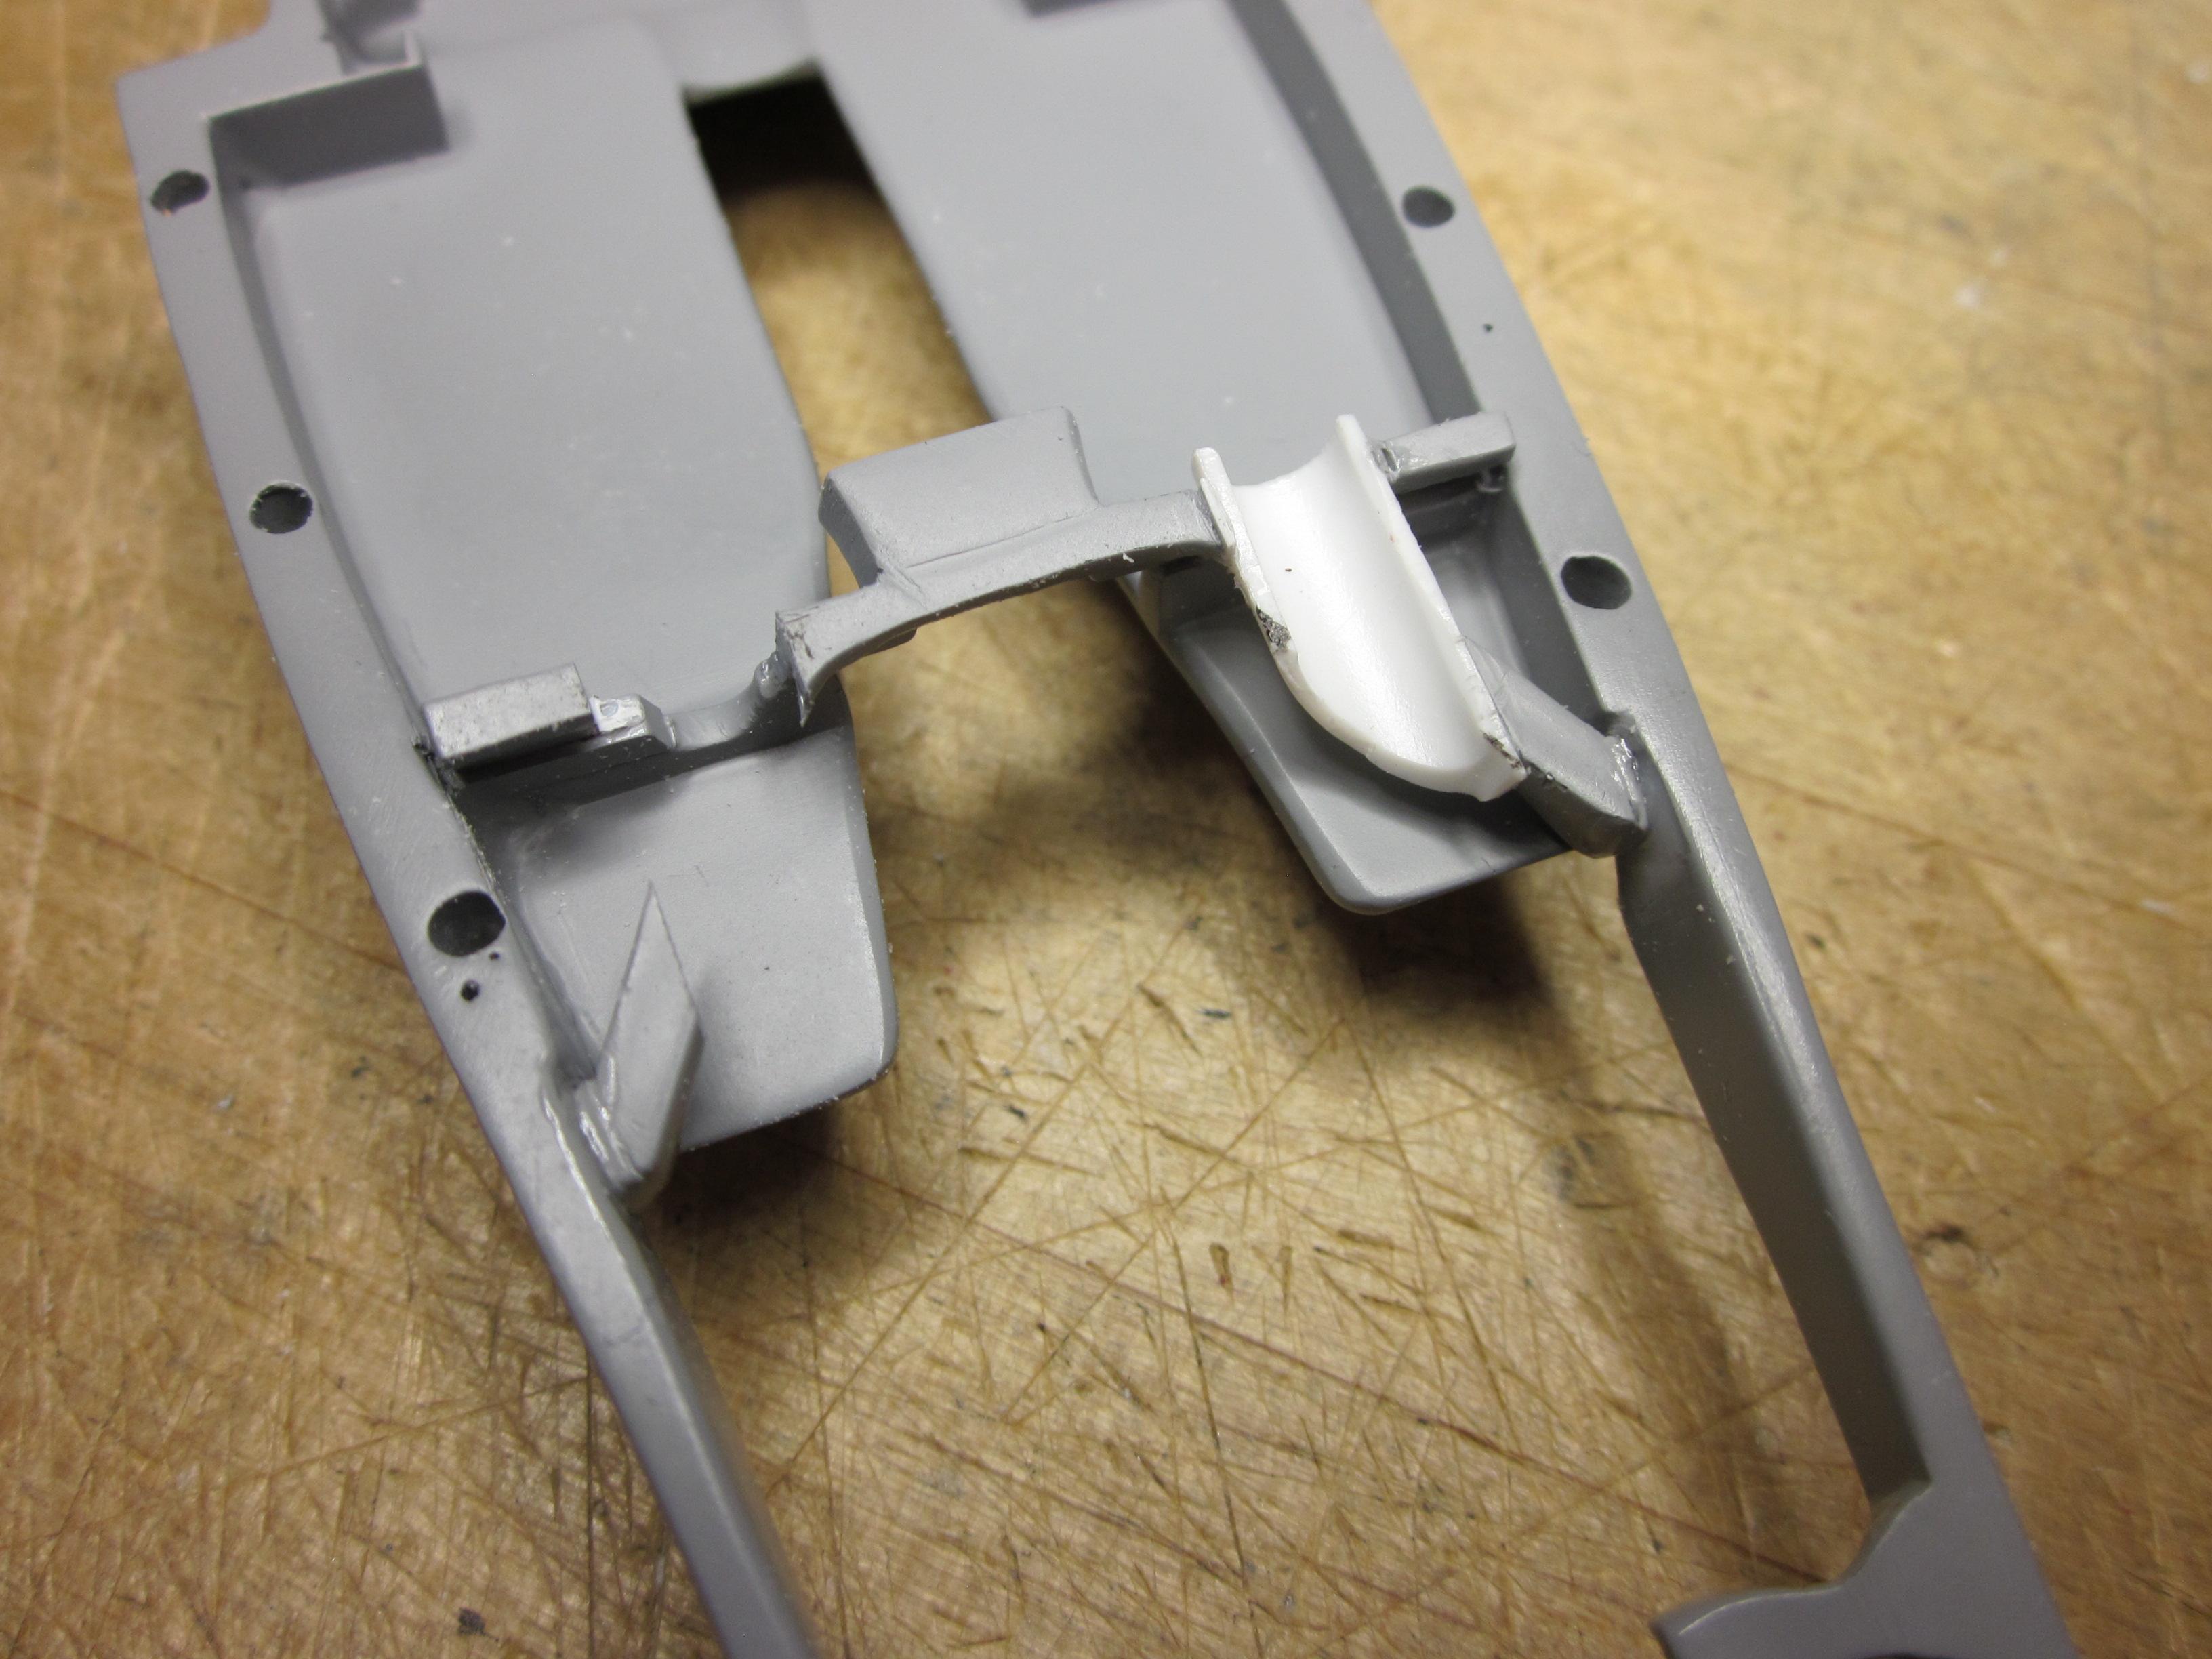
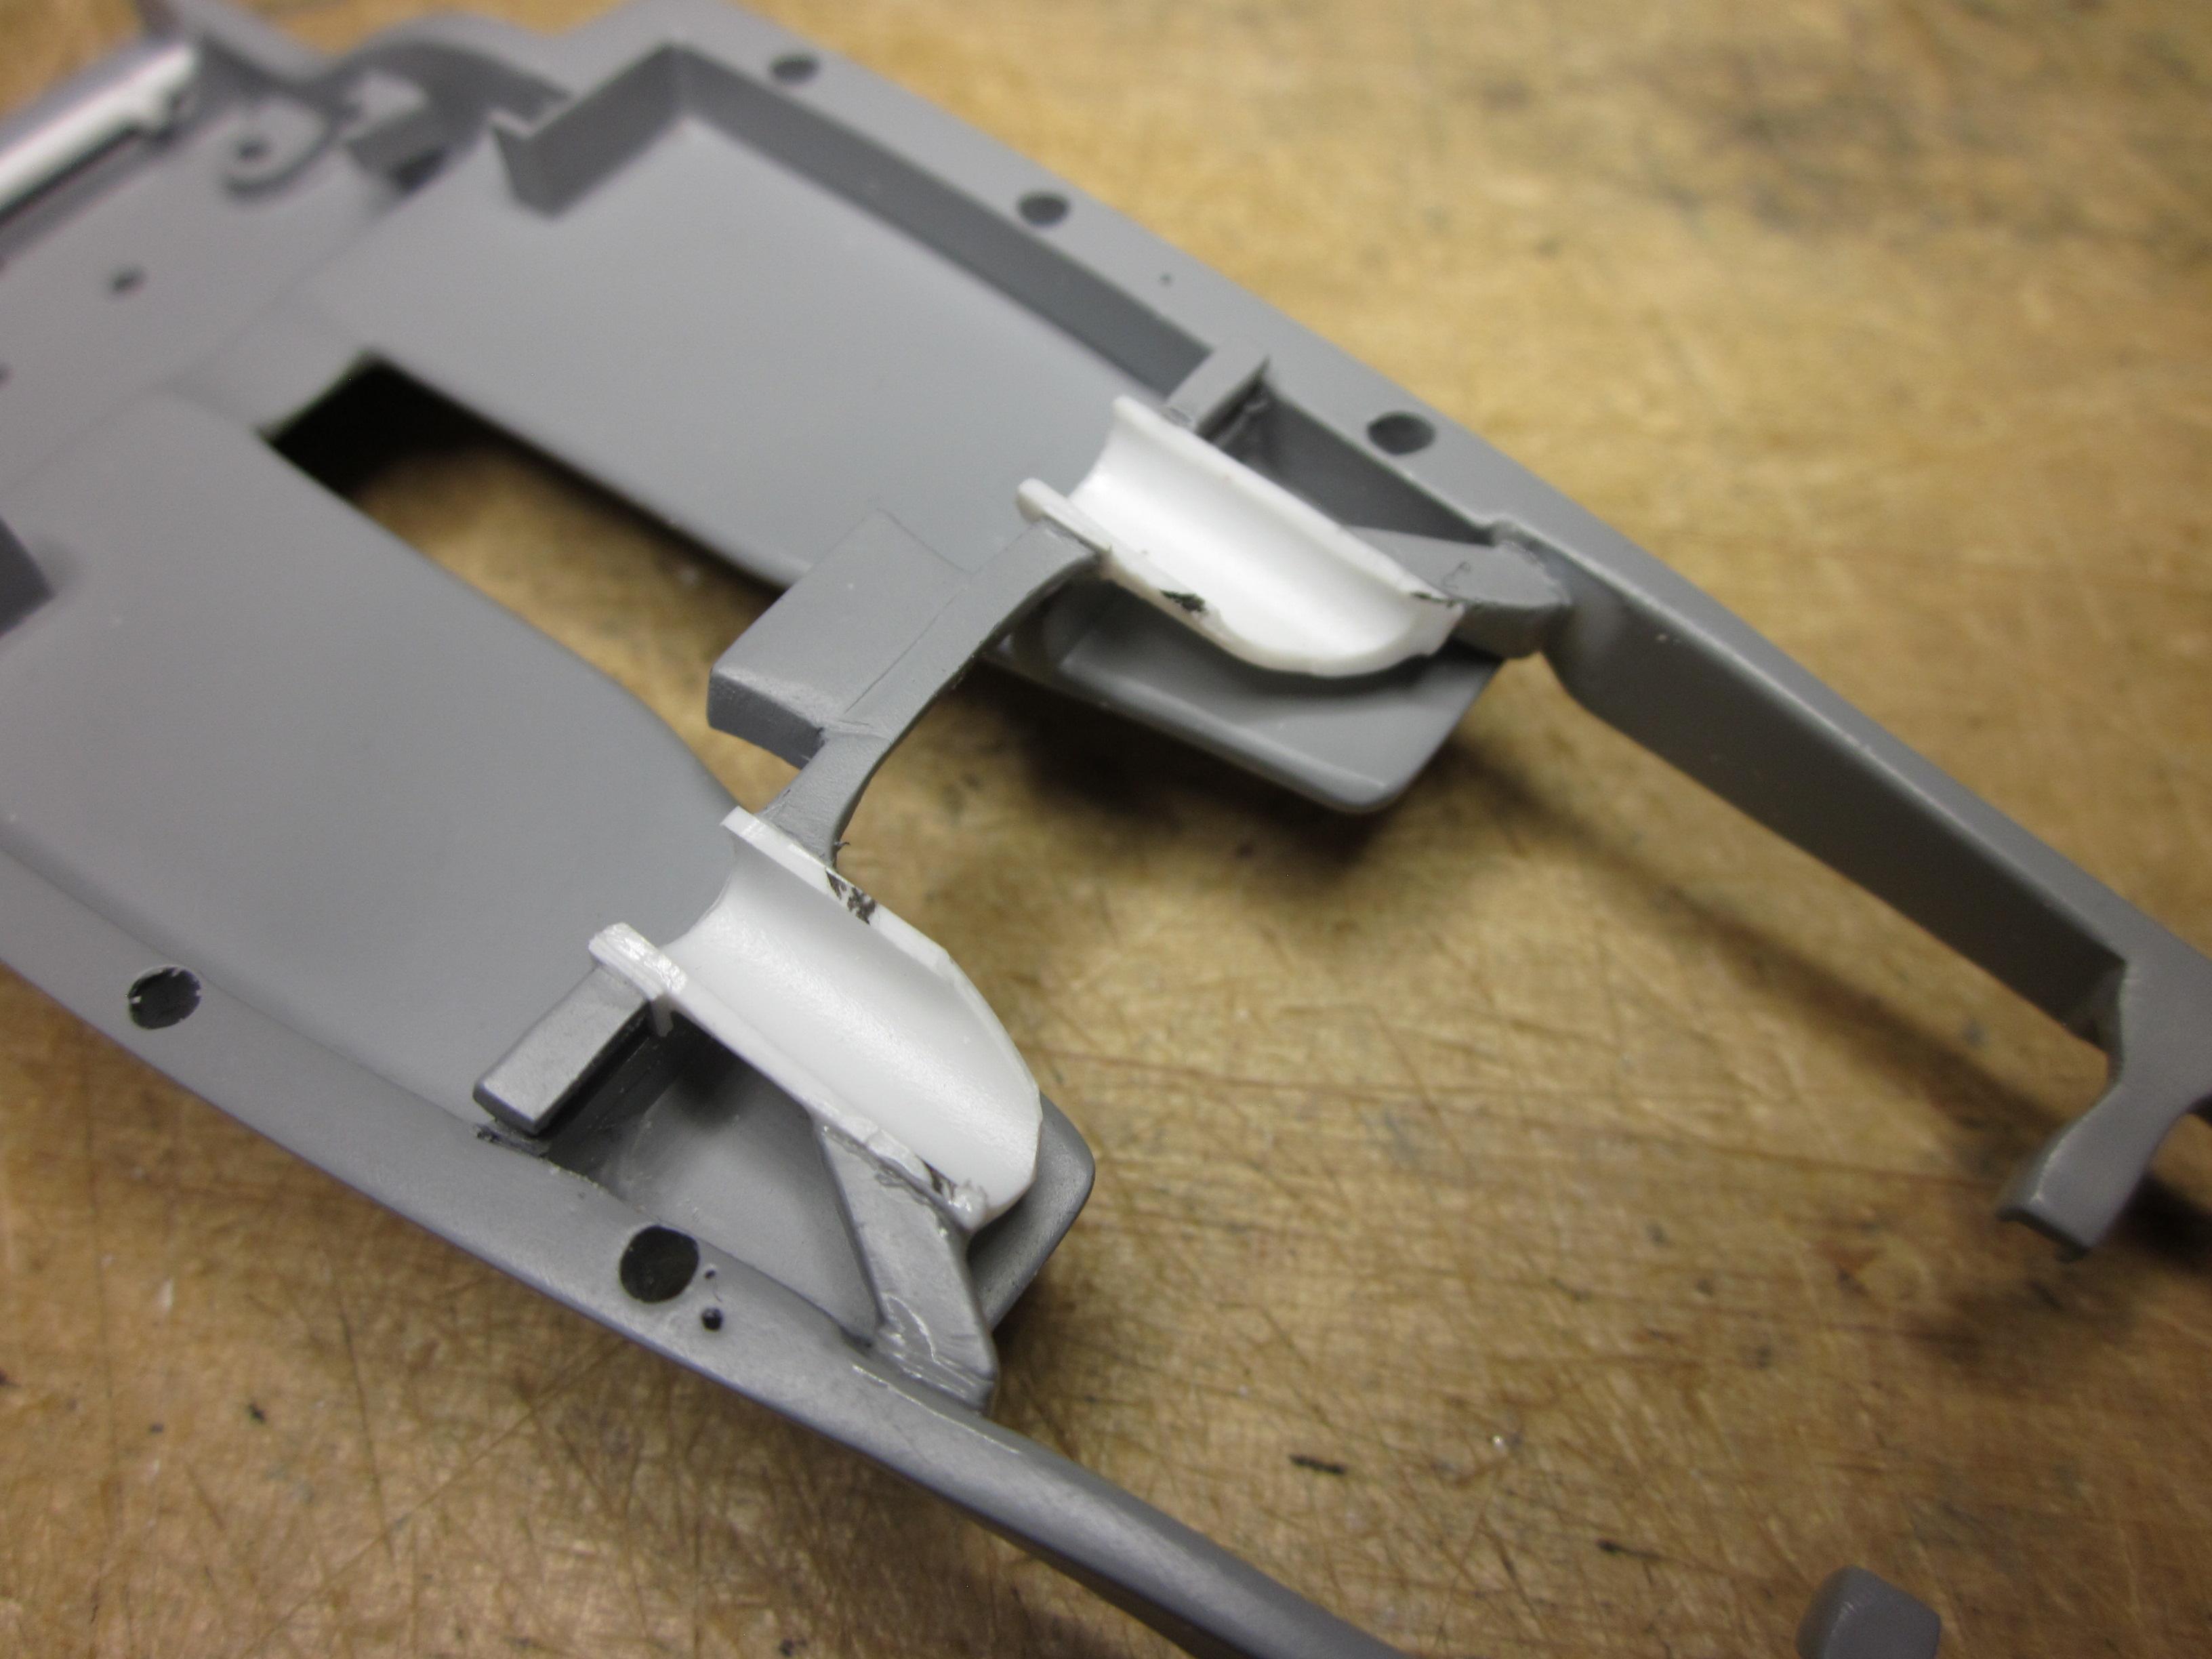
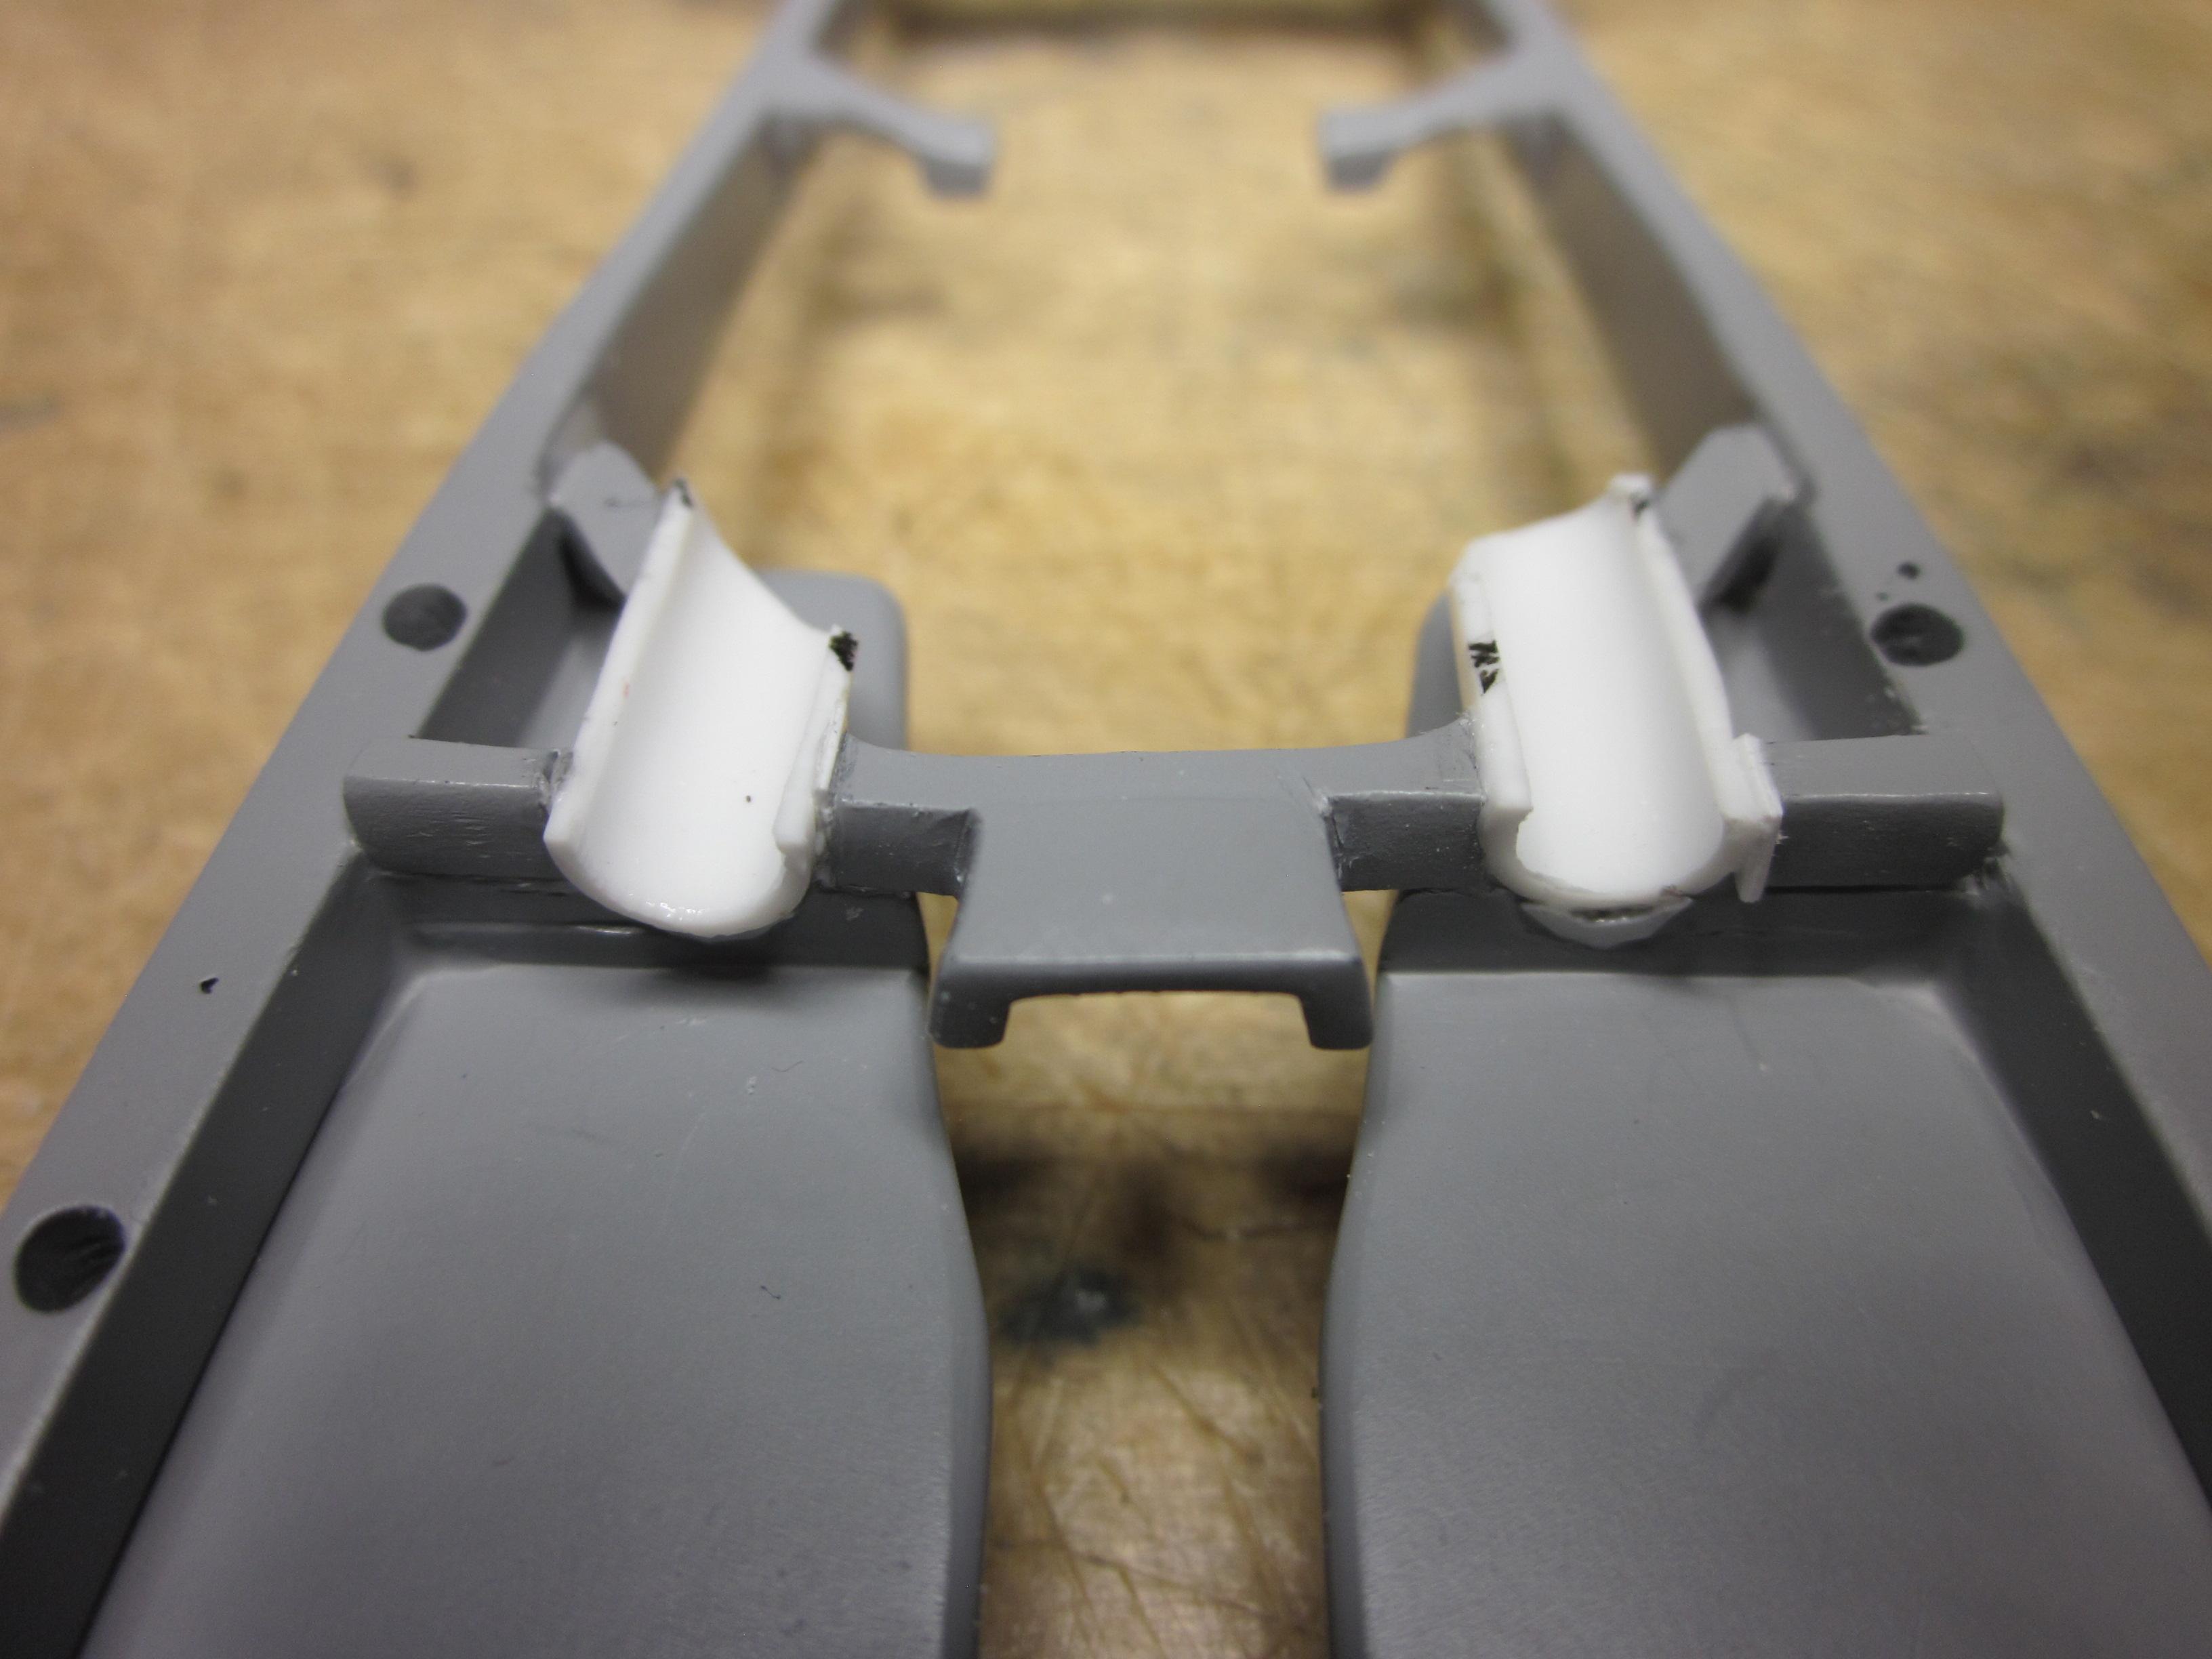
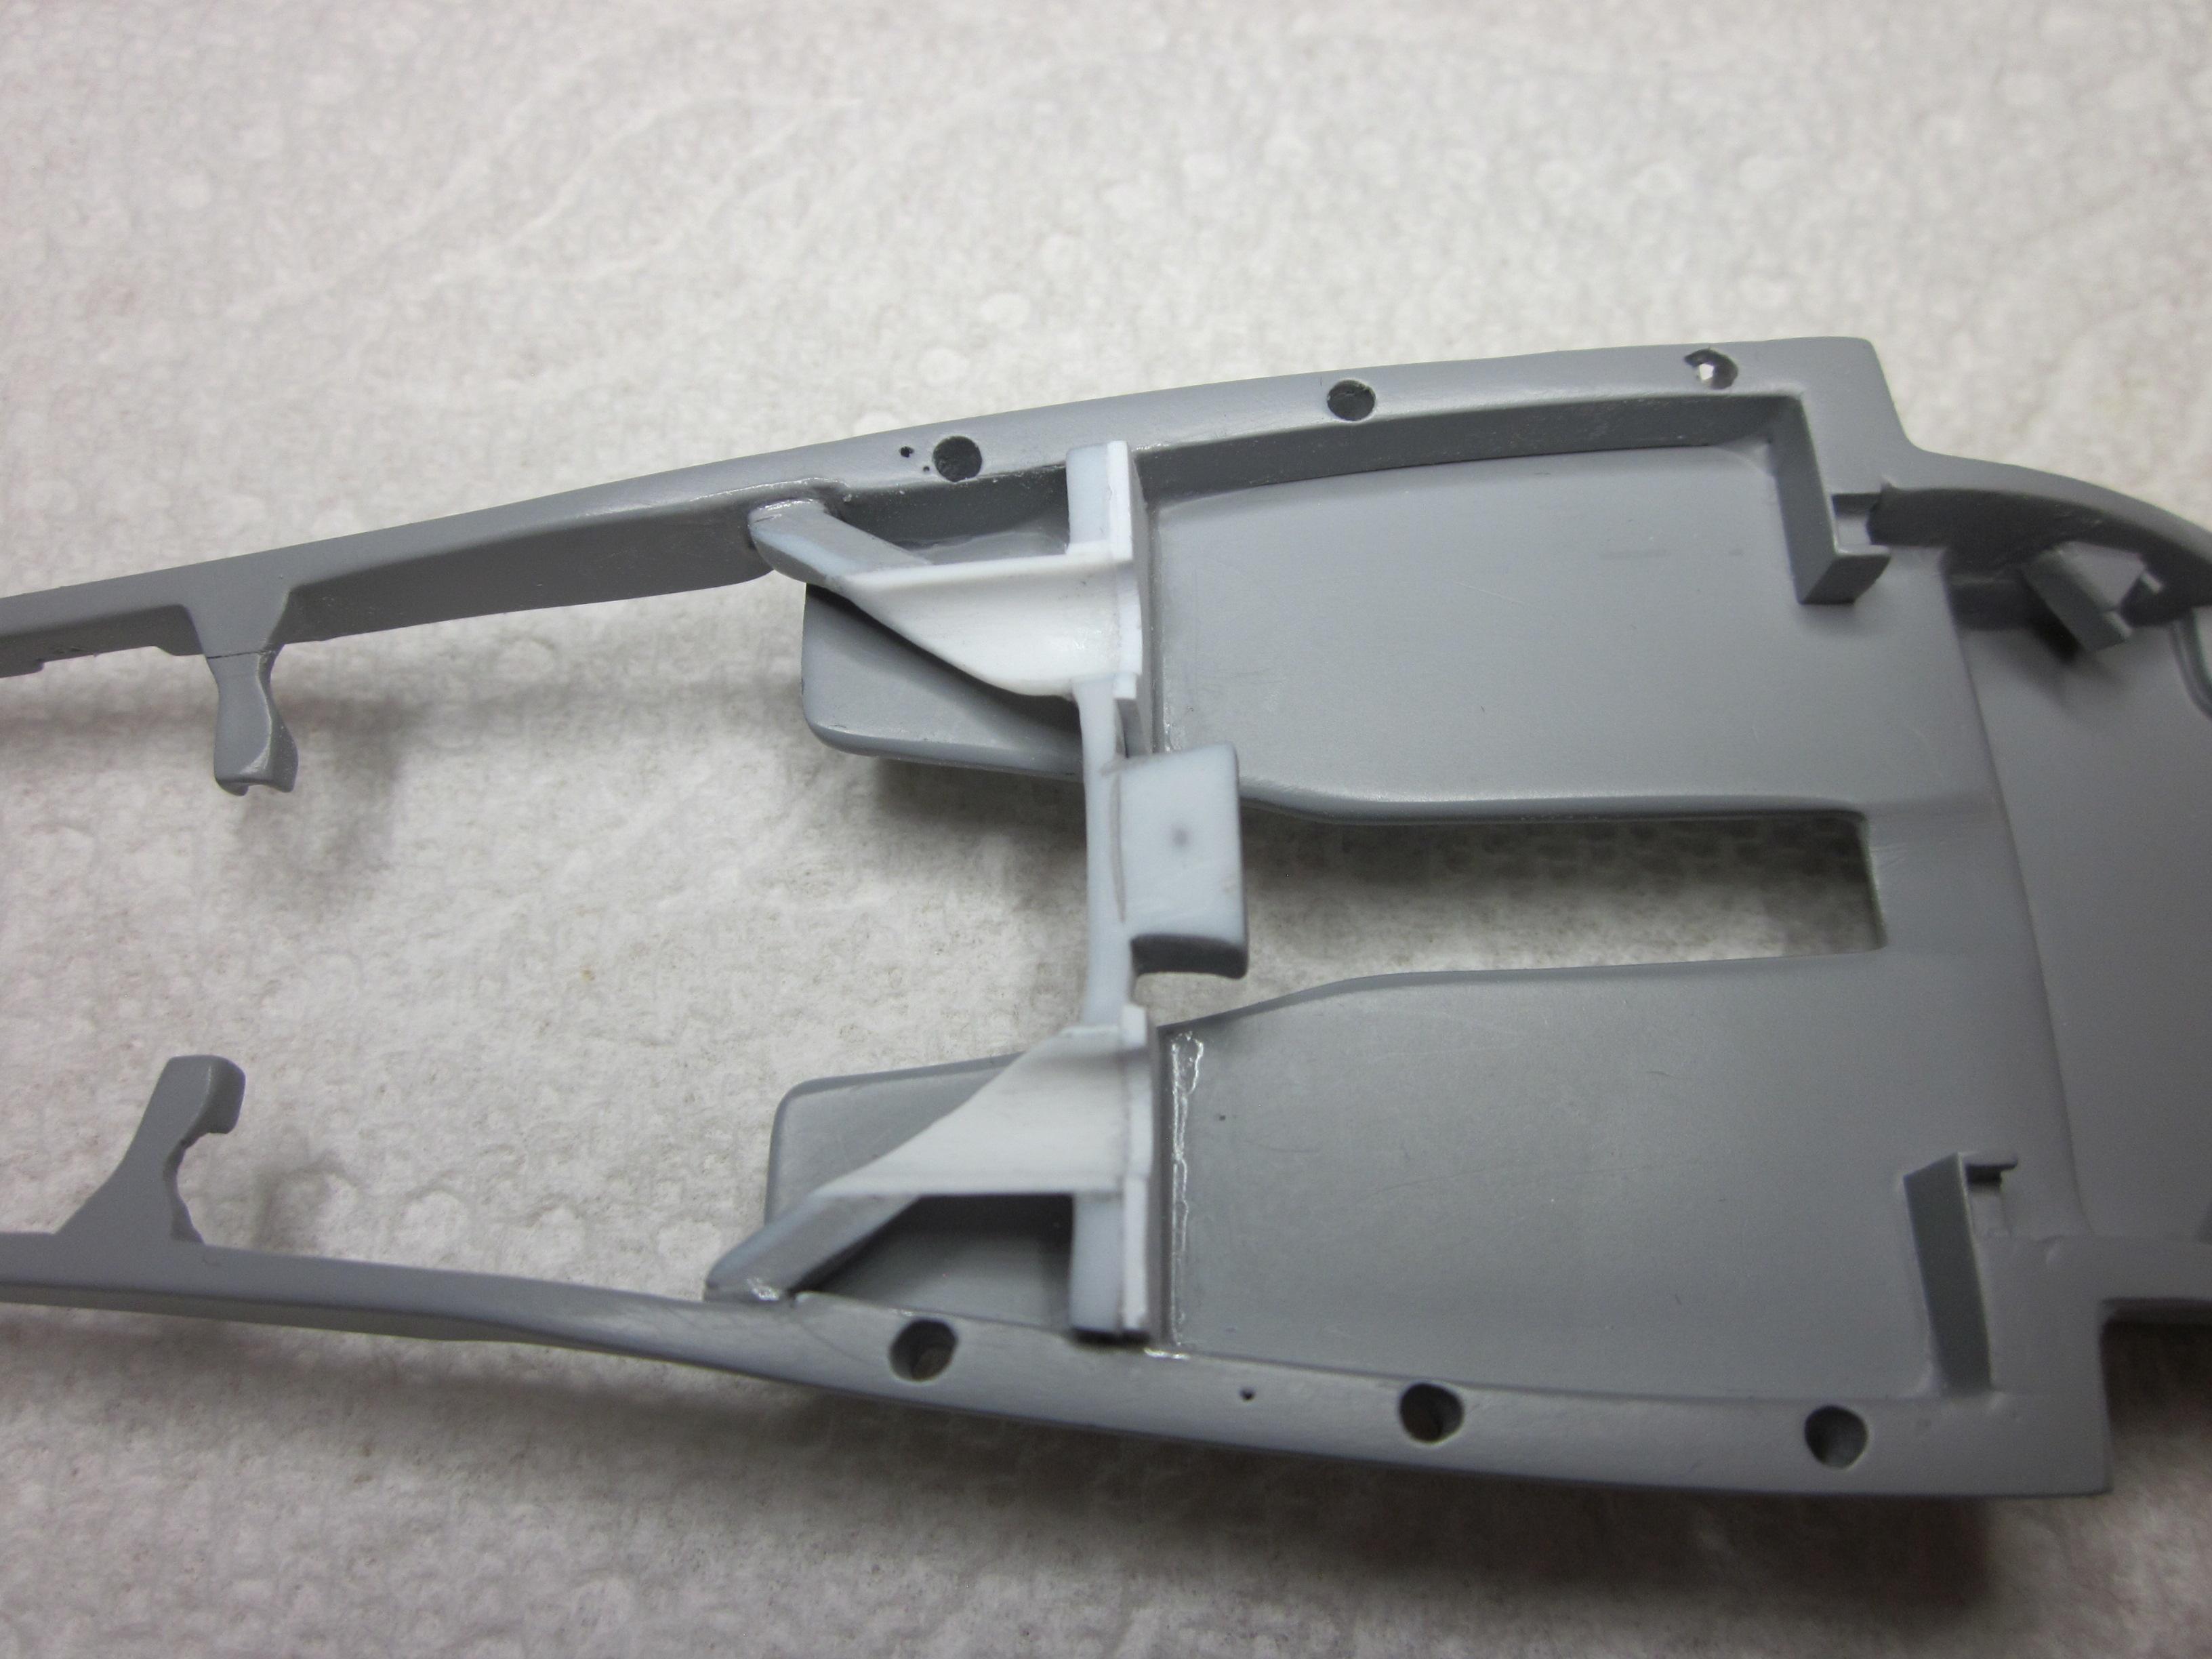
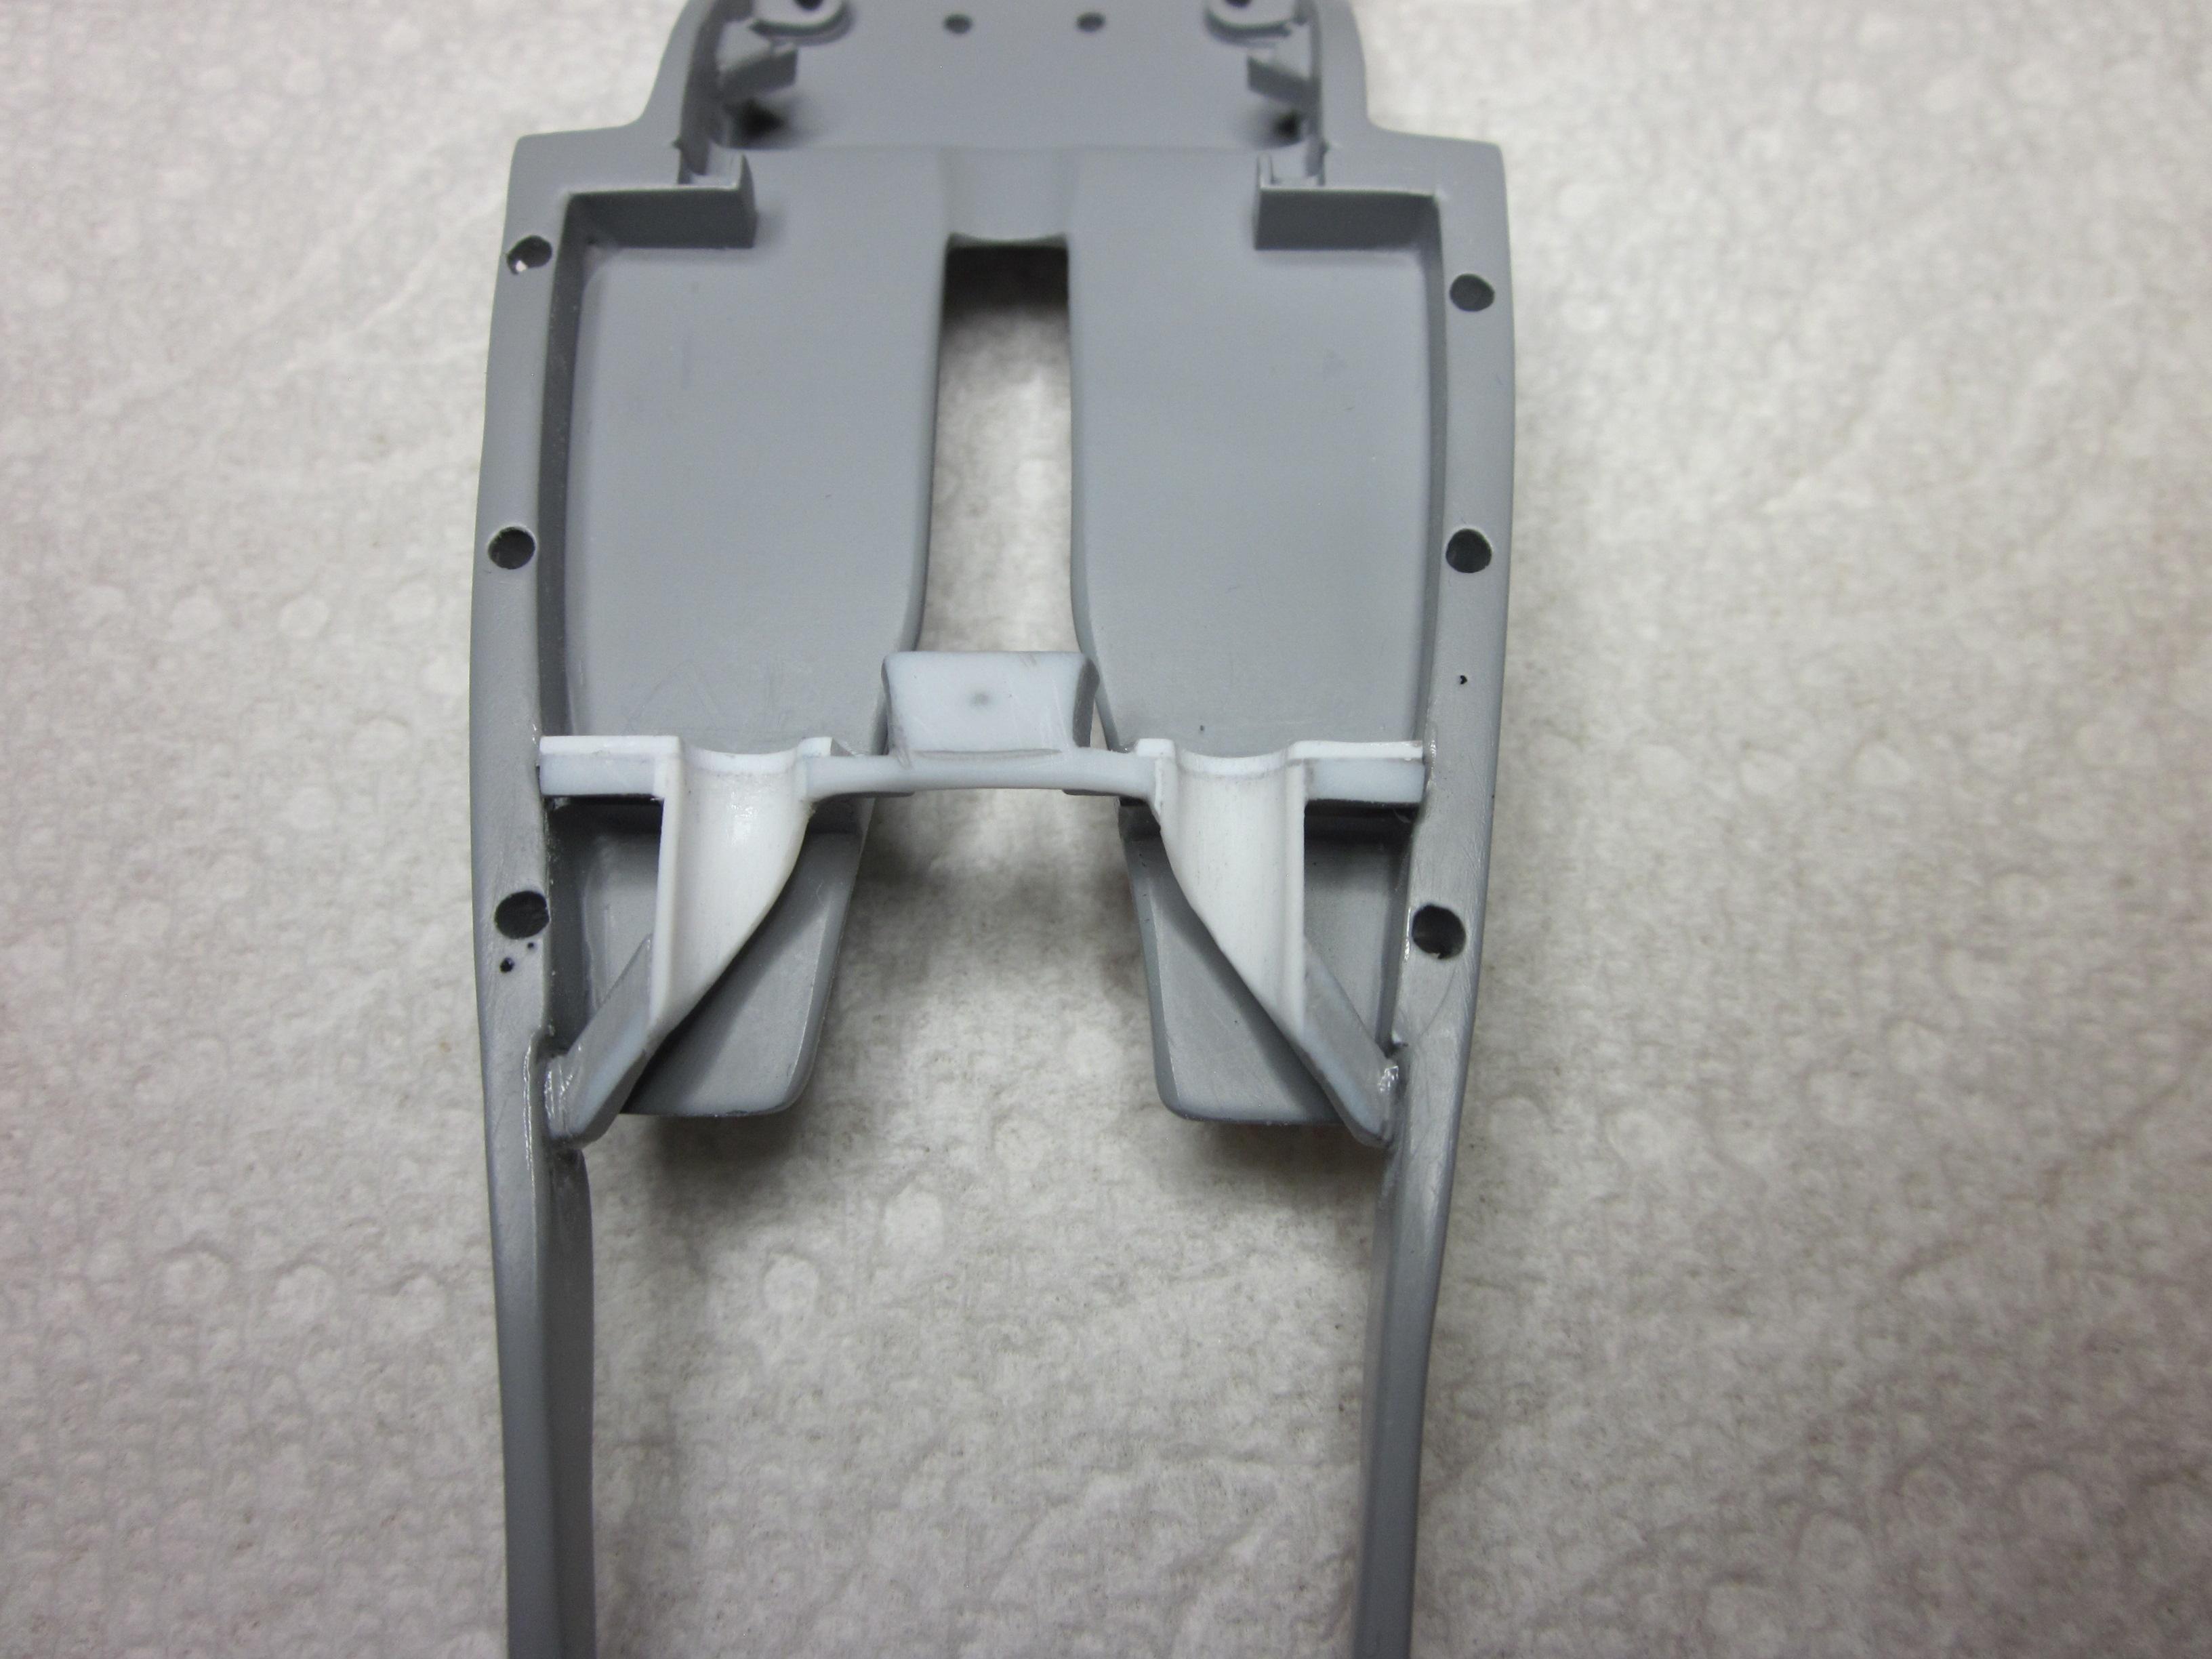
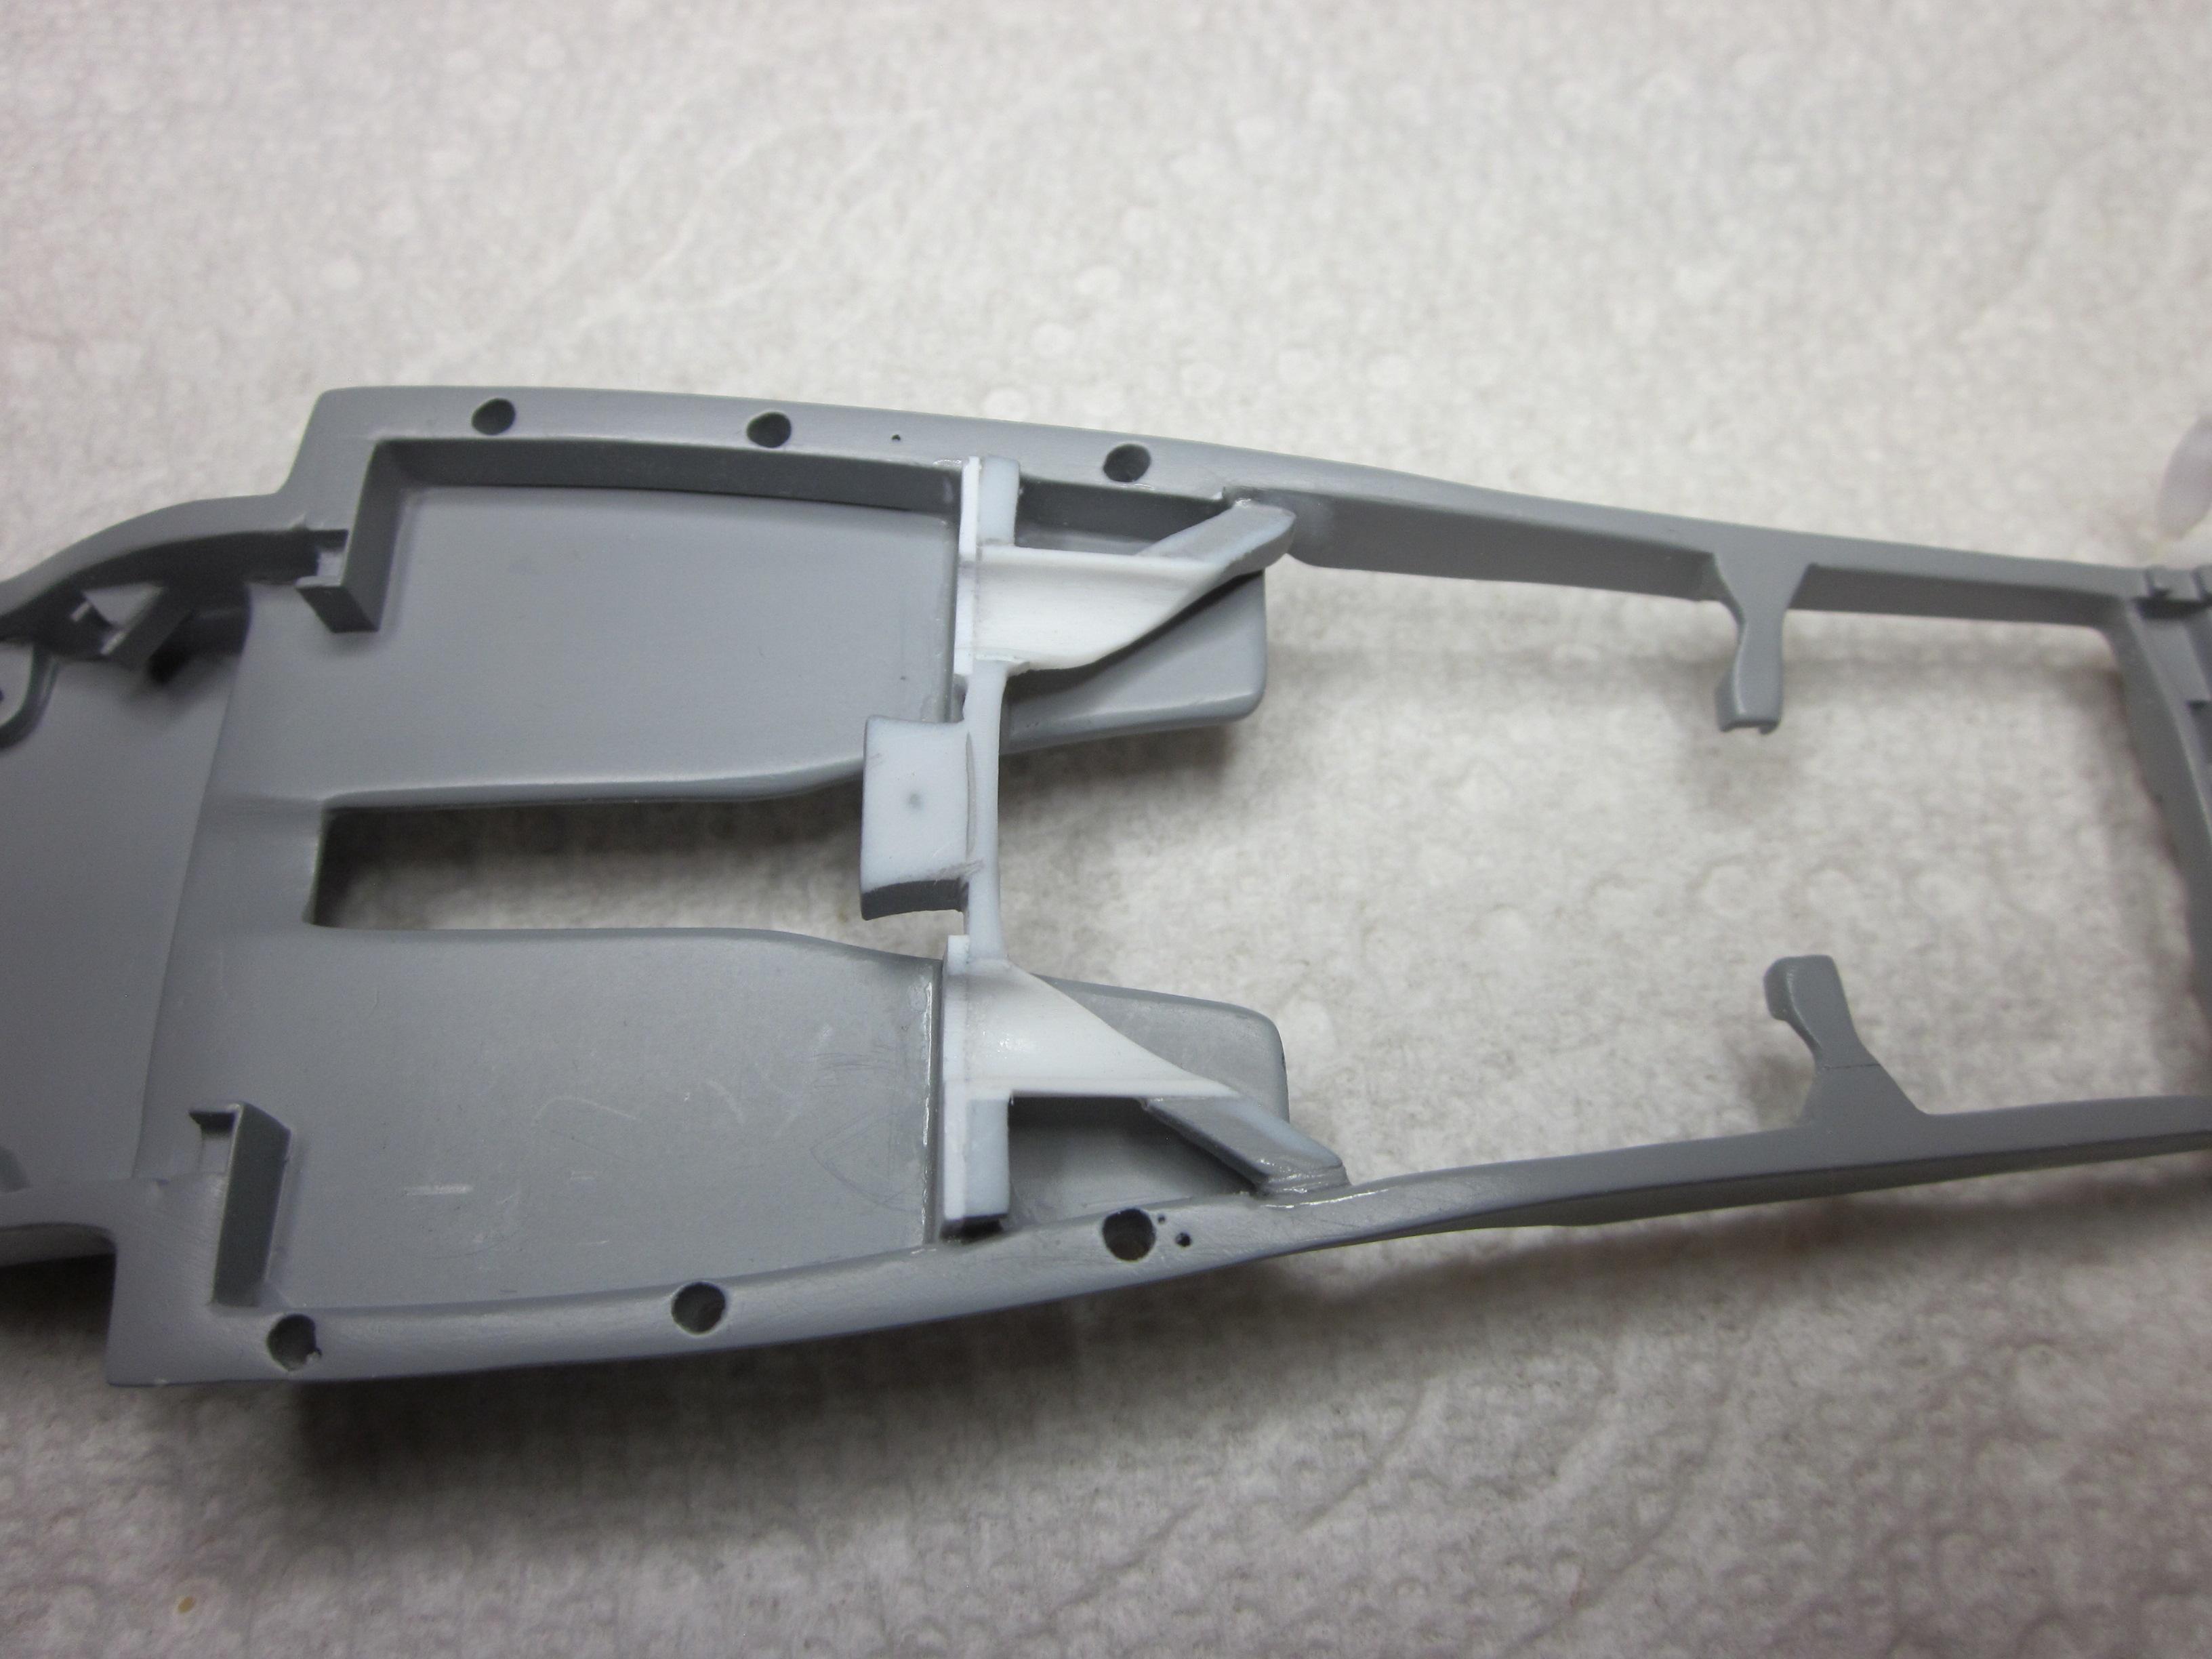
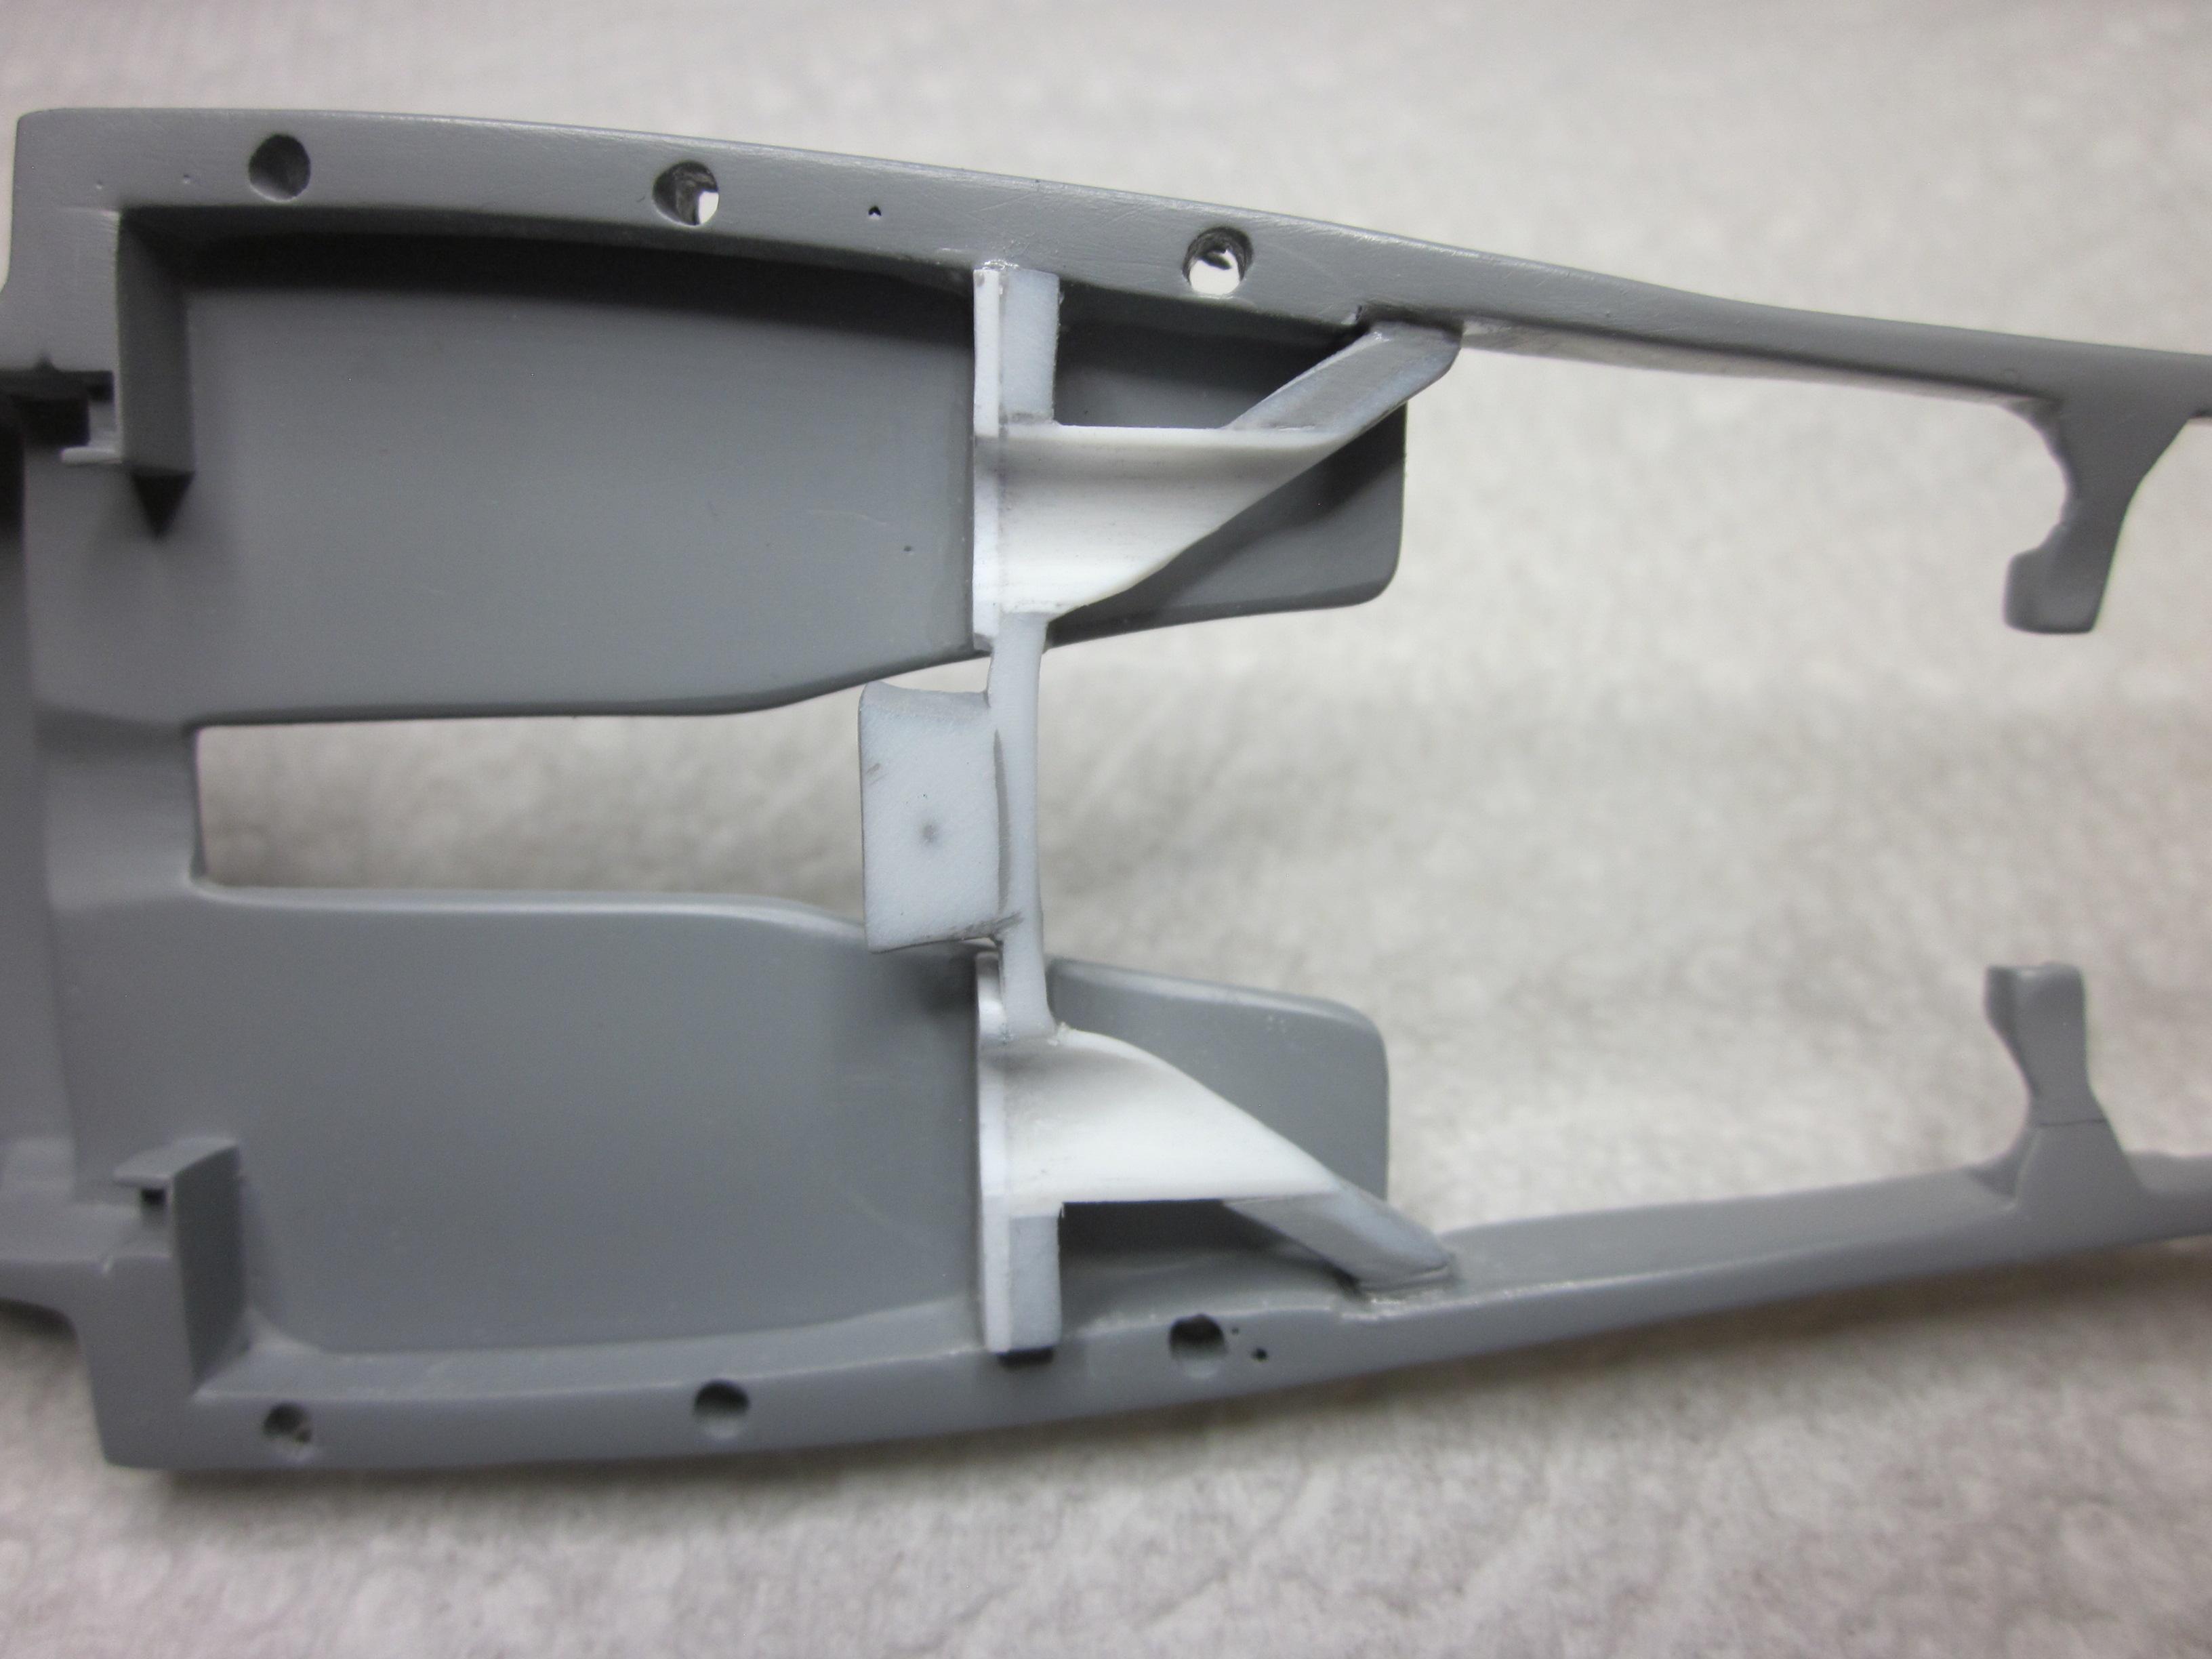
Started working on the exhaust system and found that there was no room for the exhaust to pass under the transmission crossmember. This is because I had taken some of the top of the frame off too lower the body over the frame. I first glued the already modifyed part in place and started cutting. This is what I ended up with. Not pretty, but it will work. More to come, till next time.........................
-
Bill, there are a couple areas that will test you. 1. The front suspension assembly is a little testy. Getting the steering gear in place was scary. Make sure the headers are glued in good before that step. 2. The steering column angle needs some help. 3. Make sure to pre fit the headers. They go in before the engine and there's not alot of room. Make sure there is no paint where glue goes. 4. The hardest area is the front grill, splash panel and front bumper. Lots of fitting here and it was still tough getting it together. Had to take off some material from the front edge of the hood latch to get the grill to go all the way in. Patients will be needed here. Everything else went together well. Every model needs a little love here and there.