10thumbs
-
Posts
2,983 -
Joined
-
Last visited
Content Type
Profiles
Forums
Events
Gallery
Everything posted by 10thumbs
-
What non-auto model did you get today?
10thumbs replied to chunkypeanutbutter's topic in The Off-Topic Lounge
Model trains....what a wonderful hobby. I'm in Germany, the guys here are freaks. Austria has excellent products, can we say world class? My favorite theme was the 1950's. Cool steam locos and interesting rolling stock. I did H0 and then later N scale....amazing the precision. -
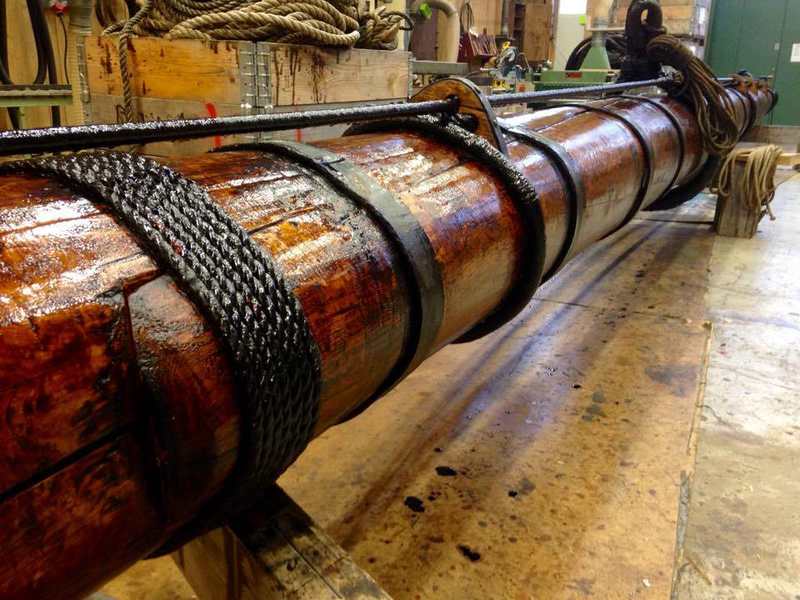
NEW. I found about the best pic of an old ship I've ever seen. Amazing. Here what appears to be the lower main yard arm of a large ship. This is a major piece: I estimate the yard style to be similar to ships of maybe the 1850's. It's from a big ship for sure. Notice the way the yard arms, and masts as well, were built. This piece has at least 8 different wooden lengths overall in it's cross section. The rough looking iron hoops were the major factor in keeping the sandwiched construction style held together. Probably later on, the rope loops were added as the outer rounded cap was starting to separate from the mass. The metal rod running along the top is the 'jackstay'. This was a major breakthrough for the working crew at sea, appearing around 1820 or so. The top edge of the sail was lashed directly to this iron bar, instead of being lashed around the whole wooden yard. The 'old style', when the sail was wrapped around the complete yard, hung directly underneath the yard. Very intense and dangerous work while at sea and wind and waves! Sails are heavy....one hand for the ship, one for your life. Hold fast. This newer method allowed a somewhat safer stand for the crew, and was quicker and easier dealt with. Plus, the sail was flush with the yard as it was now lashed on top of the yard, which also heightened wind efficiency. My guess, this is a yard arm from a clipper ship, early 'Cutty Sark' type. The chocks holding the newly introduced jackstay were in the early stages an iron eye bolt that was drilled into the yard arm. This piece here shows wooden chocks with a metal band, meaning my opinion, a somewhat later technique. I'm thrilled in finding this photo, it tells stories. I like the colors too! Just, I have a wooden ship with this color, and the current project is different. That is a heavy piece!

-
Clayton Scheiber
10thumbs replied to Modeltruckbuilder's topic in General Automotive Talk (Trucks and Cars)
Clayton was a wonderful asset to this forum, here on the trucks and cars as well. The man helped me out every time I asked him a question during my extensive 359 metal build, and I had a lot of questions! Humorous, witty, and just plain full of it. Had some problems at home too, and he talked openly about it, which I thought was touching. I appreciate that. Clayton built a lot of model trucks, I thought they were all flawless. I realized with too with his expertise, how I could plan upcoming build projects. I am not a trucker, just a fan. Respect. Whatever the circumstances, my opinion of him will not change. Always remember, there are at least 2 sides to every story. Let not a weak moment, and perhaps a slip of usual behavior, make a mark that lasts forever. Personally, I miss him. Sorry that this even came about. Michael -
REAR ENGINE DUSTER F/C - Beginnings - 8/27/17
10thumbs replied to Nytrozilla's topic in WIP: Drag Racing Models
Hello Joe, I guess your area will get electricity back fairly soon. Them hurricanes really knocked things out. We'll be waiting, I'm sure you'll give us an update as soon as you can get online again. Oh! Huh? They got hurricanes way out in Nevada? Anyways. Just checking in. Take care bud. -
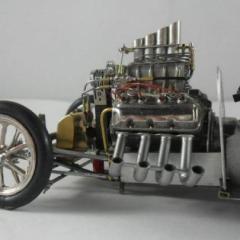
Wow! Dave, exceptional job and very well displayed too. Ultra clean, you do outstanding work. What scale is the model?
-
Building Les Ritchey's '63 Lightweight Galaxie
10thumbs replied to johnwitzke's topic in WIP: Drag Racing Models
John, looking like Holley carbs to me. Excellent! I like them old Fords. Very nice detailing. -
Looking good John. Nice body too. Are the headers scratch? Solder wire? I like.
-
83 Hurst Olds , put a fork in it , done
10thumbs replied to jeff f's topic in WIP: Drag Racing Models
Hi Jeff, looking very good. Question, if you don't mind. 'Machining slicks'....what do the beginning object look like? The tires look just great. Also, the metal rims. Can you give some insight to the origin? Greetings, Michael -
Bell OH-13H
10thumbs replied to Jim B's topic in WIP: All The Rest: Motorcycles, Aviation, Military, Sci-Fi, Figures
Hi James, I like it. Starting to really look like it'll fly. Nice and clean work! Good lighting on the pics too, I like bench pics during a build project. -
It's a video? Over on YouTube? I didn't know that. Motion picture show.
-
Hello Carlos, Again, I'm immensely interested in seeing your project. The other ones also. Still, I refuse to go to another site to view things of topics posted here. I find this irritating, personally speaking of course. Please, all photos can be compressed to fit any forum or website. I've done the same, why not give it a try? Greetings.
-
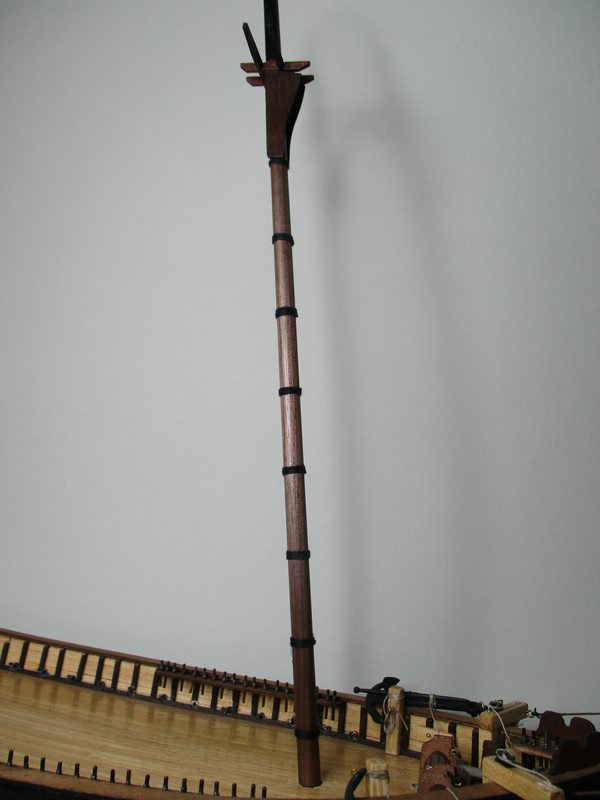
....and here with the 'bumper' mounted to the front of the mast; Moving on, a series of blocks will be mounted, then further up to the upper sections.
-
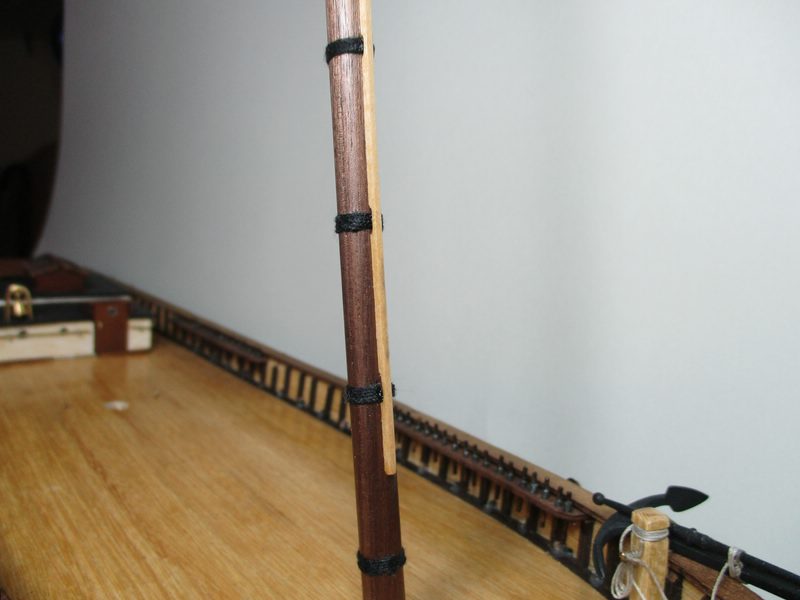
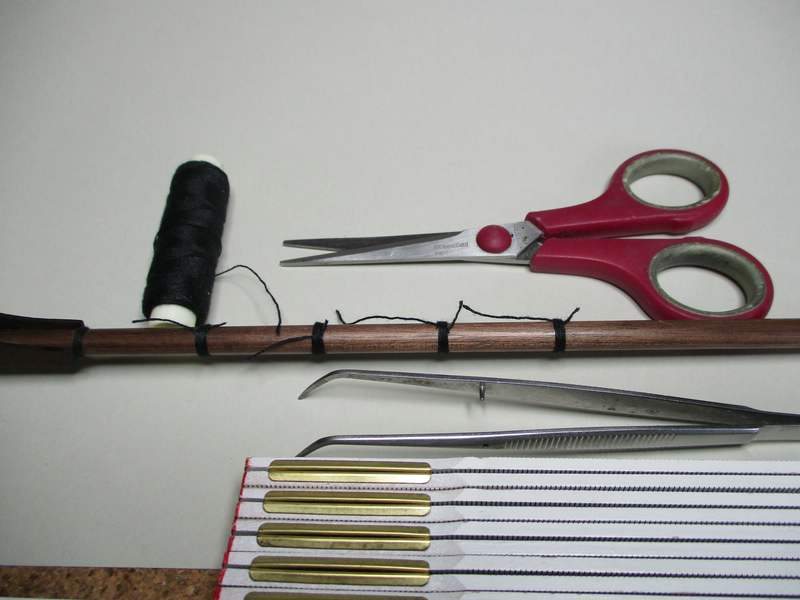
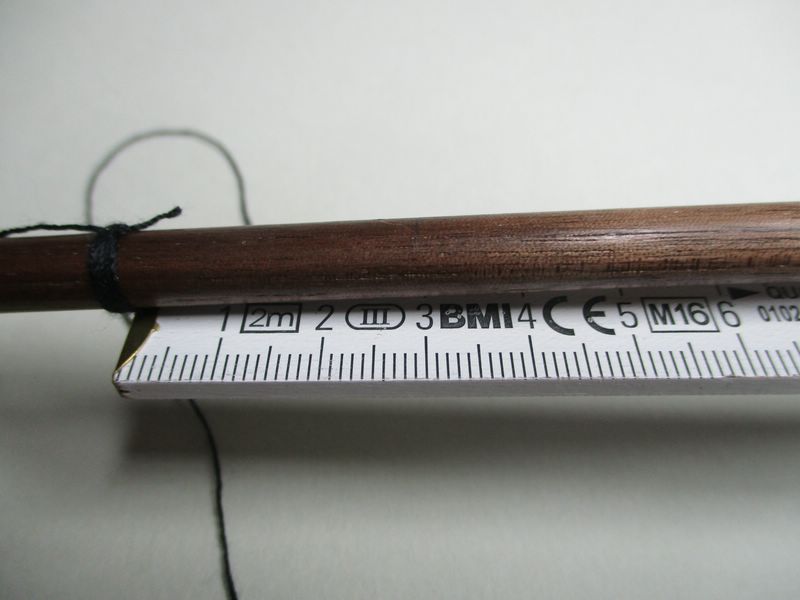
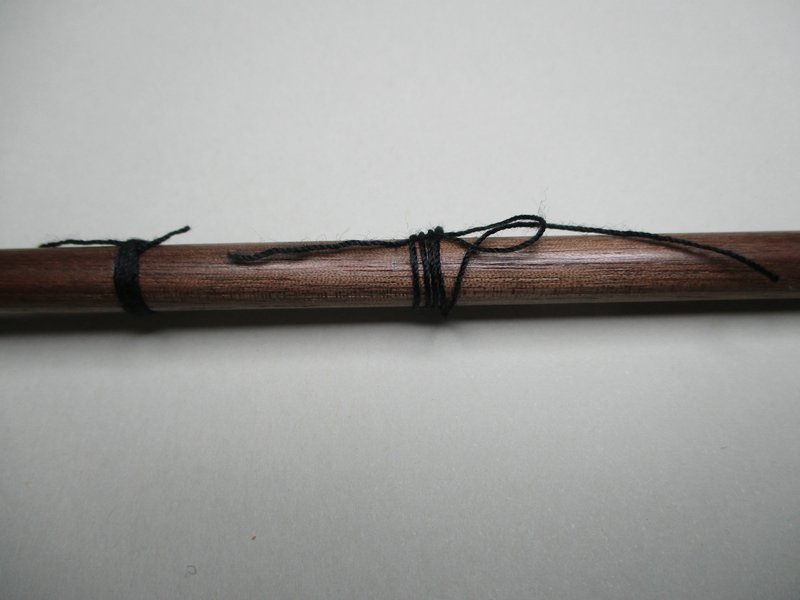
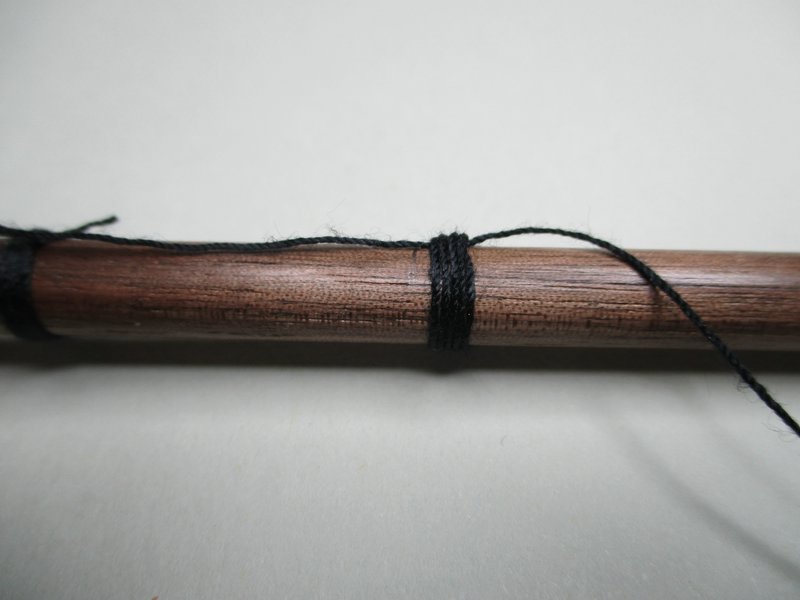
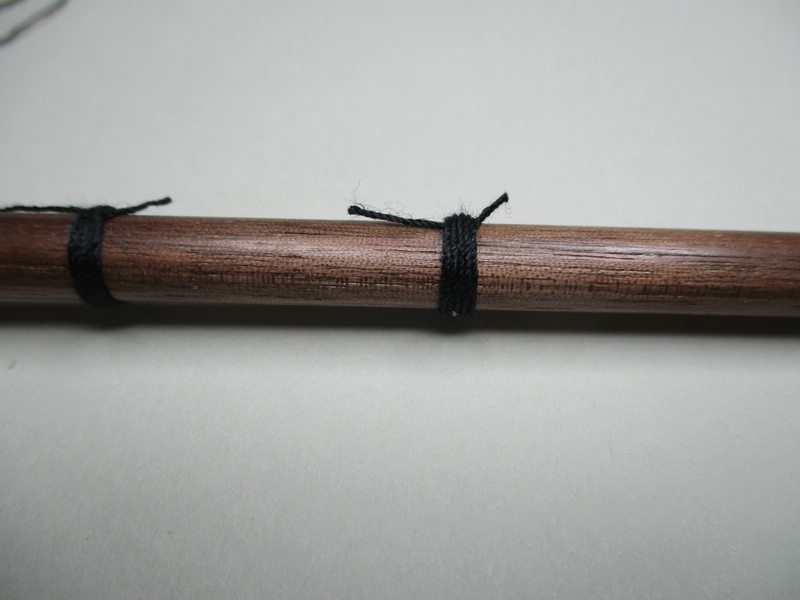
Update,new pics; The masts are cut and tapered, stained and sealed. Here a few pics of the front mast, lower section, preliminary rigging. The masts back in the day were built up using at least 4 lengths of sawed and formed wood for the core, they were not 'telephone poles' per se. Either the separate lengths were then held together with iron hoops, or tightly taught and sealed heavy lines. I've chosen the latter for this boat. Here a slick way to make a circular holder using thread, without tying the ends with a knot. Here the tools needed, tweezers, thread, measuring medium, scissors; Here the lower mast section, already with a few thread rings; I've chosen about an inch of space between the rings, more space than scale, but I think this is enough without letting it look cluttered up and busy; Here a thread cut to length, a decent amount to make working a comfortable experience; The thread is laid right along the 3cm line marked with a pencil; With a small piece of tape, one end of the thread is held in place at the marked line; Make a loop far enough away from the beginning point to allow for some working room; Right index finger (somewhat dirty from wood staining, sorry) placed directly on the loop, then the thread wrapped around 5 times with the left hand; 5 times, then the end is fed through the loop; Tape is off. Thread is loose, not for long....; Left index finger on the single, long thread to the right. Then with tweezers, pull the left single thread away. This tightens things up and makes for a nice loop; Trim up a bit to make room for the next loop. Then either with CA or diluted wood glue painted on, the ends can be snipped off; A skinny wood strip will be cut and then placed over these hoops, top to bottom, to allow the yard arm to be lowered and raised over the hoops, also protecting the mast from friction from the heavy yard arm.
-
Thanks Bob! Yep, the rigging is indeed intimidating. I've been out of this for a while so lots of research involved again. Question is, how much rigging to do? This can get insanely detailed, and I won't go this route, not necessary. The goal is to have sails that can be actually be raised, they can't be lowered as there is no weight to let gravity work. The sails will have to be pulled back down with tweezers. To have working sails though will entail lots of rigging. Plenty enough for a model, my opinion. Anyways, I won't be tugging around on the silly things at all. Just maybe nice to have them work as a special event. The masts are cut and tapered today, and the yards will be finished up tomorrow. More pics soon, thanks for looking.
-
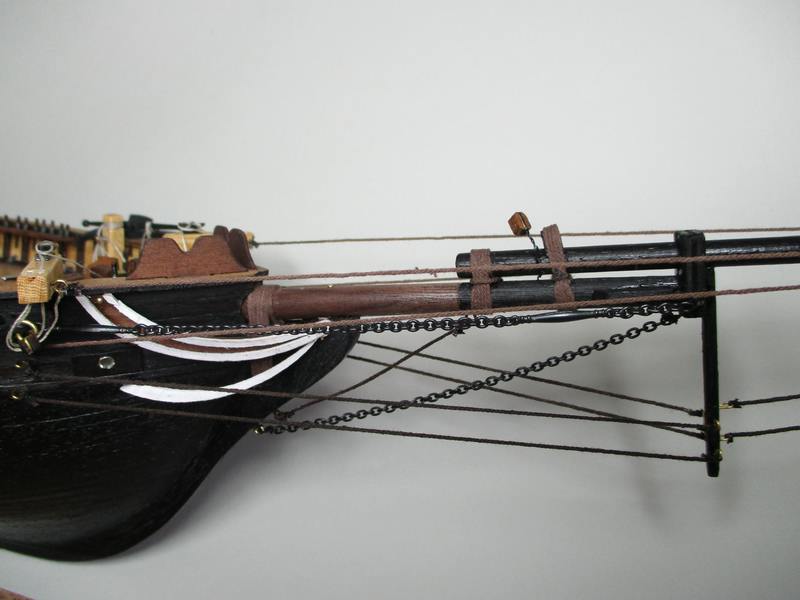
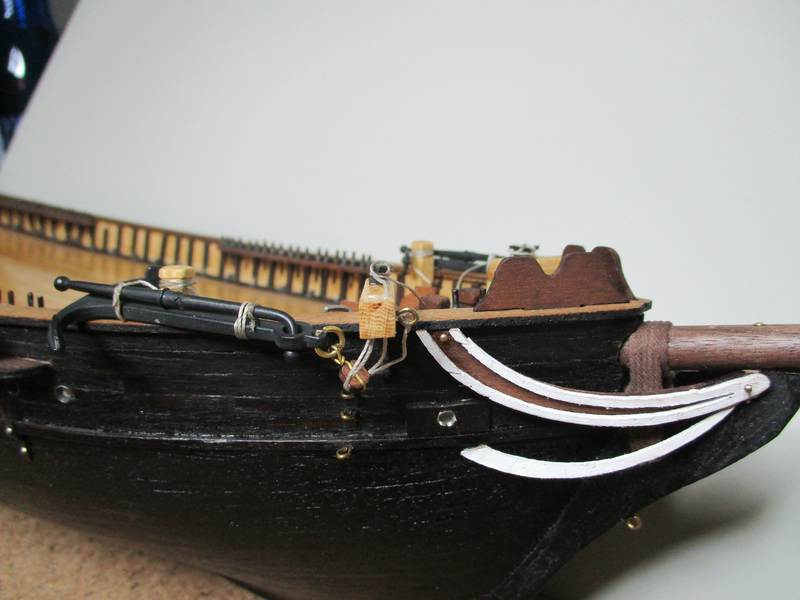
Bowsprit finished; The rigging up front is done for now. Later on there'll be more when the masts are mounted, then the sails. This is the standing rigging for the bowsprit; ....on to the masts now.
-
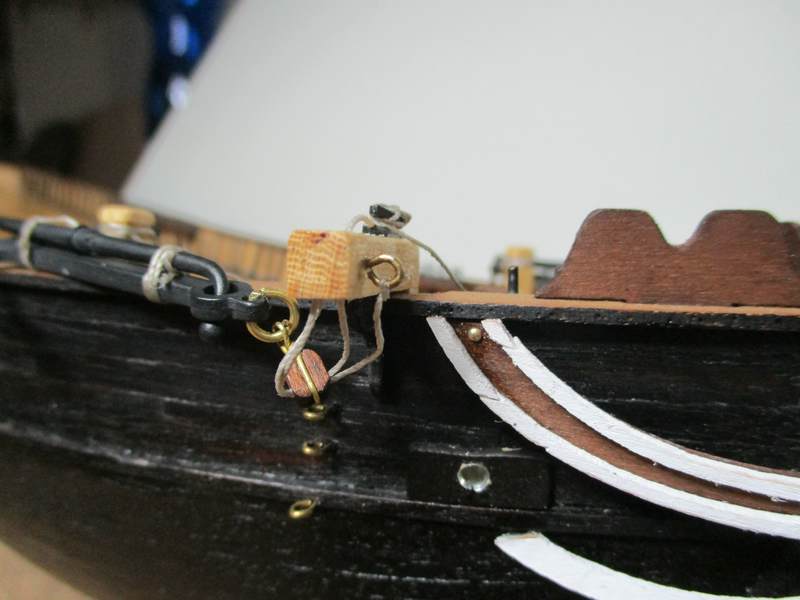
UPDATE, new pics: Today I started the rigging. There are lots of blocks to do, a hundred or more, here are just a few. I completely forgot how to do these silly things, it's been years. The 1st four, back at the rudder, took me hours. Not good. A way had to be found to do this on more of an 'assembly line' method. The few shown here are a little sloppy, up at the bow, at the anchors are a little better. These are weak, the lines going through the blocks are too rounded, they should show more tension, and the knots are shoddy looking. This procedure is called "stropping the blocks". The blocks are single wood pieces, but already have holes and the groove in/on them. Usually in a kit like this there'll be single and double blocks, and a couple of triples for the masts and the real heavy gear. Here a peek at some singles; Glad the beginning is over, it took hours and I had the shakes. A small jig to be used as a third hand was made, and things went smoother. Still room for improvement though. The bow is kind of a busy place, so the blocks for the anchors will not really stand out. Here the anchors lashed; The bowsprit is also done. The various brass round eyes are different than what the kit calls for, they suggest just drilling holes through the wood and run a heavy thread through there from one side to the other. That sucks, so I made brass eyes, no rigging lines running through the wood without any hardware support. A few pics; Here is where the kit says to just run the rigging lines through a hole. So I made a hole, but bent some brass wire to make two eyes for the heavy lines and chains later on; Same here for the "dolphin striker", As far as I can tell, next up are the masts and the further rigging. Still haven't decided 100% on the color scheme, probably just like the bowsprit. Some big steps coming up soon. Thanks for looking.
-
Carlos, why don't you post pics here? A shame, I'd like to have a peek.
-
Hi Jim, that's a nice clean model kit, Model Shipways is a good company, I have no personal experience though with their kits. Solid hulls will still need prep work, most kits want you to define the keel and on up to the stem, right up to just underneath the bowsprit. This would entail, generally speaking, just kind of either manually chiseling out a small wedge along the keel, or using a hand machine and a variety of rotating bits to work the wood to gain an outline of what the keel would be. This is probably the way these kits start off. I've seen pics of the finished model and they look great. Planking is involved on the deck, and rigging, everything is there. Just a word though about the copper plating for the hull. First off, to me it doesn't really coincide with the general outlay of this kit. Why a solid hull with no 2nd planking, then go to the ordeal of adding hundreds of small plates? That is, if this is the way the copper bottom is applied. I'd go with a not too shiny dark finish for the whole hull and it will be a nice looking wooden ship. My thoughts are that this would be a good one to see if you like wooden ships, and it will turn out nicely, not to worry. What do the directions say as to starting this project?
-
James....Hey, great a real trucker drops by, you guys do great models over on the Truck Forum, sad you don't get more recognition from other modelers here. Man I understand the intimidation. Wooden ships are a brand new ball game. "Get a level 1 kit for the 1st model"! Again, entry level wooden ships are a must for the 1st timers. Fantastic models, so called 'entry level' out there. The 'level' is basically the degree of instruction in the kit. A good beginner kit, from a good company, is completely do-able for styrene guys. No problem. Problems occur when the ship is intermediate, or even a beginner level kit that has weak construction plans. Talk with your dealer, do not be afraid to say 'I'm a beginner' with wooden ships. Big ships will kick your butt. Big time. Big old ships look great, but no one can do these as a beginner. No one should even try these, my opinion. Sure, a dude will come up and say this and that. I build 1:25 fuel altered cars all in metal, the motors have more than 200 parts. A 359 Peterbilt truck all in metal, scratch built, the cab in resin though. I refuse a 3 masted big wooden ship. These things are insane. Guys, these models will follow you through your entire life. My 1st was back in 1975, still there and looking fine. Wooden sailing ships, my opinion, are the greatest of models. Michael
-
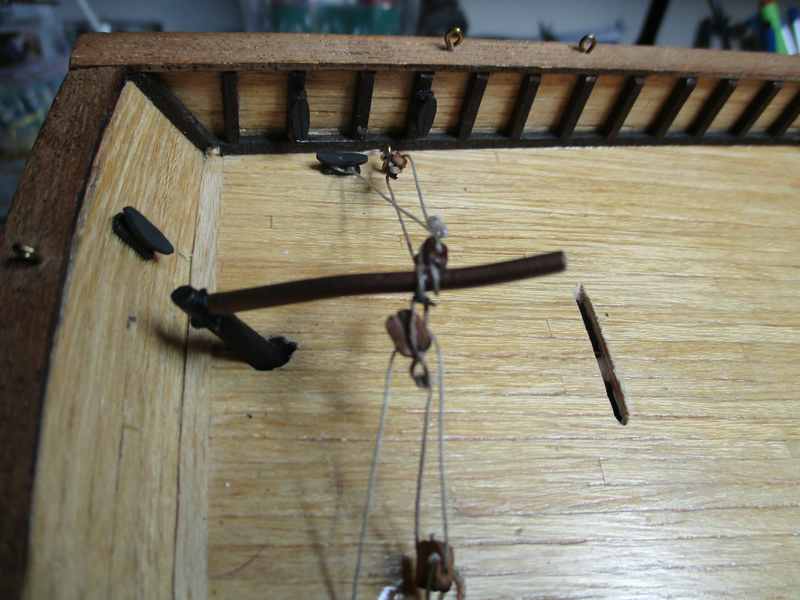
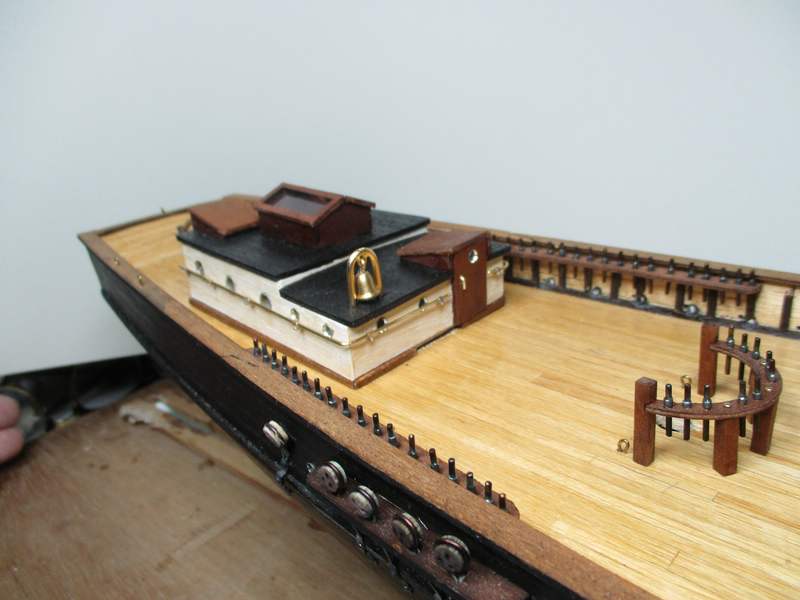
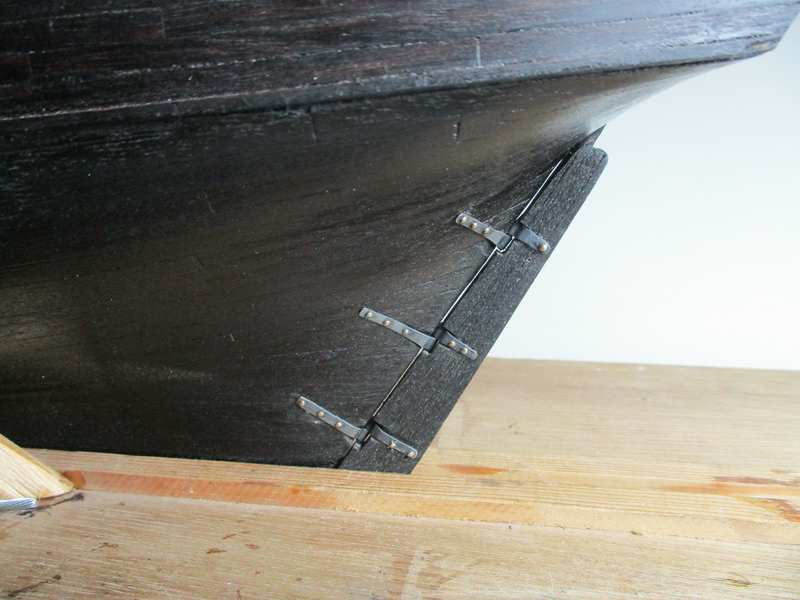
UPDATE: The deckhouse is finished, just different than the kit. Dimensions are the same, it's big, but there's nothing I wanted to add to the deck to use the extra space. Added some ports and a brass handrail and dirtied up the white stained walls; The ship has a rudder now, I prefer a wheel as they look nice on a model, but this type of ship used a rudder bar. The cleats and rings have been attached to the deck for the blocks and tackle to handle the steering; The rudder has been attached using the kit hardware, brass strips. These were thinned down to lessen the bulky look, and then chemically blackened. Not dark enough, so I added some Humbrol black/gray metalizer paint and buffed the parts out. I'll probably leave the brass brads as they make for a tiny bit of optical contrast. Not shiny or 'brassy' looking, just a slight break; Last up for now, the bow is done and ready for the bowsprit and rigging; I had some construction sheets blown up to 1:1 scale to the model ship, done by a printer shop. The paper sheets are 28" x 40", I'll attach them to a strong sheet of poster paper and hang them on the wall at the bench. This way I can hold the individual mast and yardarms directly to the paper to make sure the scale is right. The rigging starts getting fairly involved and actually, a complete mess of lines and blocks. This will be a major modeling situation as I'd really like to make this close to the real thing. Next up are covers for the deck entry to the holds, maybe a dingy mounted as well. Michael
-
Glad you guys made it through without great harm.
-
Hi John, great to see your further Ford updates, and new models. Question if you don't mind: Back in the late 60's there was a Ford Dealer in my area who sponsored race cars. A real nasty SBF Falcon and a T-Bolt too. Lynch-Davidson Ford in Florida. So, did Ford offer the performance parts for these cars over the counter? I was GM, later Mopar in this era. I remember them in the garages late at night working on these cool cars....probably also partially owned by employees there. Did Ford offer hi-po parts over the counter for anyone? Thanks, Michael
-
Yep, nice paintjob on a very interesting altered car, great model.
-
Yep, altereds are always welcome, great job. I suppose you saw a few of these in the pits, back then.
-
REAR ENGINE DUSTER F/C - Beginnings - 8/27/17
10thumbs replied to Nytrozilla's topic in WIP: Drag Racing Models
Good call on Jabba, doggie will have lots of folks around and other buddies too, he'll be a happier one for sure. Good stuff.