10thumbs
-
Posts
2,983 -
Joined
-
Last visited
Content Type
Profiles
Forums
Events
Gallery
Everything posted by 10thumbs
-
Hi folks, About a week now, I can't update my own topic or comment a member's build without having my Firefox freeze and block my whole PC. Anyone having similar issues? When I attend my topic with IE 11, no problems. Just, I don't want to use IE 11. Anyone?
-
 NEW, ratlines; Here a few pics of the beginning of the ratlines. No way around it, this is maybe the most tedious step in building a wooden ship kit. This is not an easy endeavor, and I'm having troubles getting back into this ordeal. My fingers are shaking on some days, and it drives me nuts. Something perhaps different for this forum now, but let's look at the problems. Here the beginning; 1. Added here a strip of paper as a background. This is the 'corrected' version, the previous attempts were worse! The horizontal spacing was a problem; The knots should be a lot tighter, no excuse for the sloppy tying; Here the spacing remedy. The 1:1 ratline had 16" spacing. That is the length from ankle to just below the knee. 16" is about 40cm. In scale 1:53 this makes to be about 8mm. An Excel map, adjusting the grid height to 8mm, then adding thick lines makes for a nice grid to follow the spacing problem; They are proper now. I added the jig paper later on just to take this pic, so it was not adjusted properly to position. The spacing is OK now, just the knots are not good. They have to be tighter. Here trimmed up a bit; This is the bottom half of the first shroud to be done, lots more to do. I'm leaving it as is, just the remainder should get better. No excuse for the loose knots. Later on, when the ship has full rigging and sails, I doubt this will be especially noticeable. On pics, yes. Just I'll move on now and hope the knots get better. Thanks for looking.
-
Hi Ron, I used to like those cars back in the day. Dyno Don and others. Good luck with your project.
-
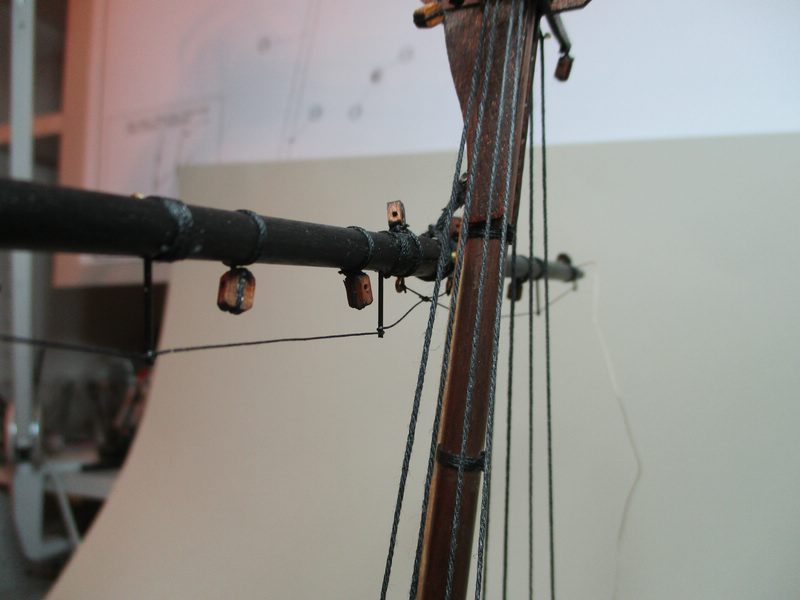
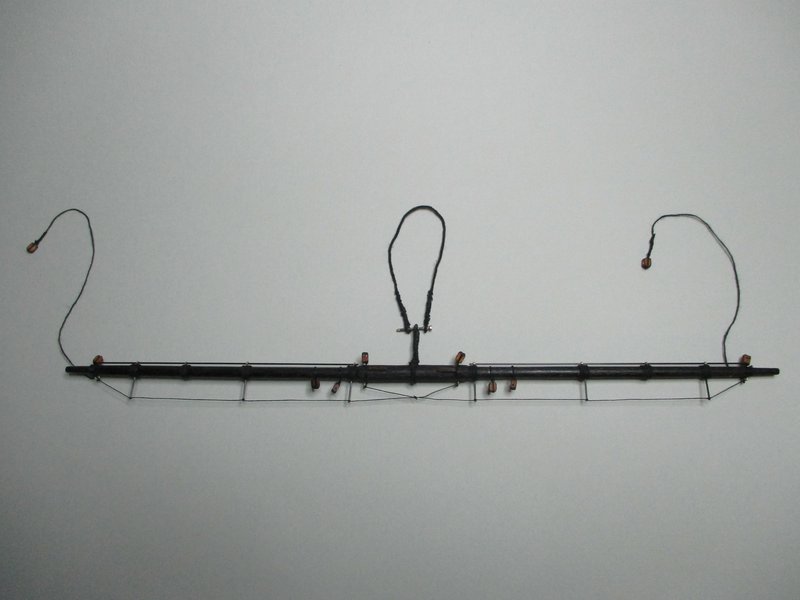
Lots of new pics today; Further on now with the central, standing rigging. Here a few pics of the mainstays. These are the heaviest lines on a ship, running from the top of the lower mast segment, down to the foot of the mast in front of it, or in the case of the foremast, the line (2 lines on a large vessel) tie off on the bowsprit. These lines are not adjusted as taught as the usual standing rigging, allowing for more movement of the masts. The mainstays keep the masts in relation to each other and their respective forwardness, also allowing the masts to not get set back too far in heavy storms or wind gusts. Plus, they are essential for hooking up other lines to be used with heavy blocks and tackle for lifting heavy objects, like yardarms and boats and heavy cargo. Here the point where the main mast stays are attached to the deck; Here a look at the already mess of heavy lines around the main mast foretop. Things will get really tight in this area, lots of hardware mounted here; Here a look at the foremast stay attached to the bowsprit; Just a little trivial note of interest, the chain shown just above is an interesting piece. Heavy iron content, magnetic too. My wifes' father was awarded his country's Iron Cross in WW1. This is the chain that was attached. It has perfect patina and the scale is great. No, the medal will not be placed on the ship....lol. Next up the beginning of the ratlines. Ugh.
-
Building Lindburgs Color Me Gone as the Hemi Honker done
10thumbs replied to Johnt671's topic in WIP: Drag Racing Models
Sorry, just one more thing. Take a flat file and sand the door posts down a bit. They look to be too wide otherwise. Michael -
Building Lindburgs Color Me Gone as the Hemi Honker done
10thumbs replied to Johnt671's topic in WIP: Drag Racing Models
The Lindgerg 64 Dodge kits have several issues. Ride height is way too low, motor is way too far forward and too far away from firewall, and the front tires are too small for the fenderwells. John, good you raised it up so the rear rims are completely visible. The hemi motor makes up for the space to the firewall, still though a tad too far away. I saw on a Sox and Martin S/S 'Cuda model from a member (I think his name here is Jesse, I'll look it up) and he solved the front tire problem with just adding a big front tire from a 1:24 model, if I remember correctly. Great tip! The tire looked absolutely correct on his model. My opinion, don't worry about the seats, good you chose a model that was not high backed, they came later. Those you show were from a 64 Plym Sport Fury, or the similar Dodge model from that period. The seats will be hardly visible when the car is finished. I'm nuts about this period of factory drag racing, all of them were just cool. Fords, Mercs, and Mopars were killers. Love them all. -
AMT boat kit
10thumbs replied to Mercuryman54's topic in WIP: All The Rest: Motorcycles, Aviation, Military, Sci-Fi, Figures
Excellent finish Dennis! -
Hi Christopher, so a cat decided to make for a new look on the shelf....man, I hear that! Over the decades, my wife....and a lot of cleaning ladies have done their share as well. The hull looks like a good candidate for an overhaul. I like the clippers.
-
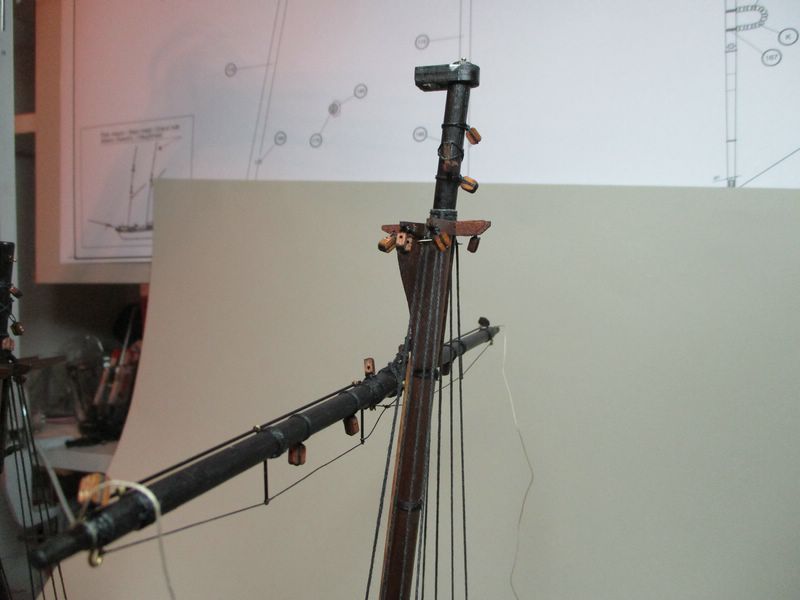
UPDATE: Main mast and shrouds mounted. Here a few pics of the progress, main mast; Here a couple of closeups; Main mast lower yard; Next up is making the actual 'ratlines'. This will be adding threads across the shrouds to make ladders so the crew could attend the sails. Thanks for looking.
-
Thanks JC for the input, appreciated.
-
83 Hurst Olds , put a fork in it , done
10thumbs replied to jeff f's topic in WIP: Drag Racing Models
Hi Jeff, looks very innovative and real, I like. Great detailing. -
Kerry, this would be an excellent opportunity to share, no? Maybe some pics?
-
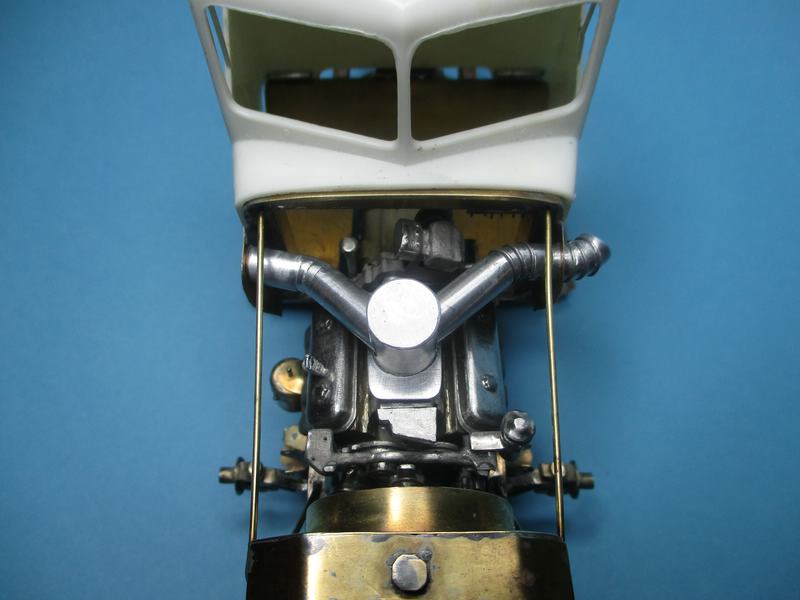
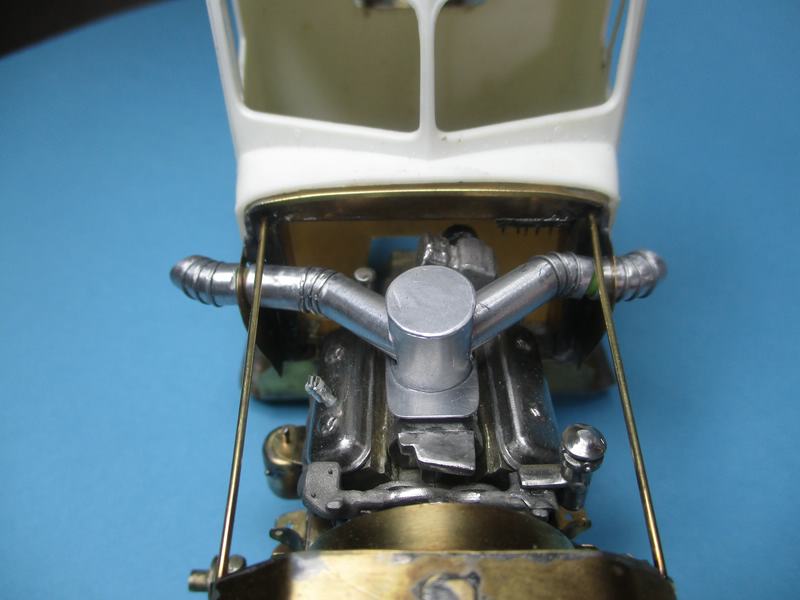
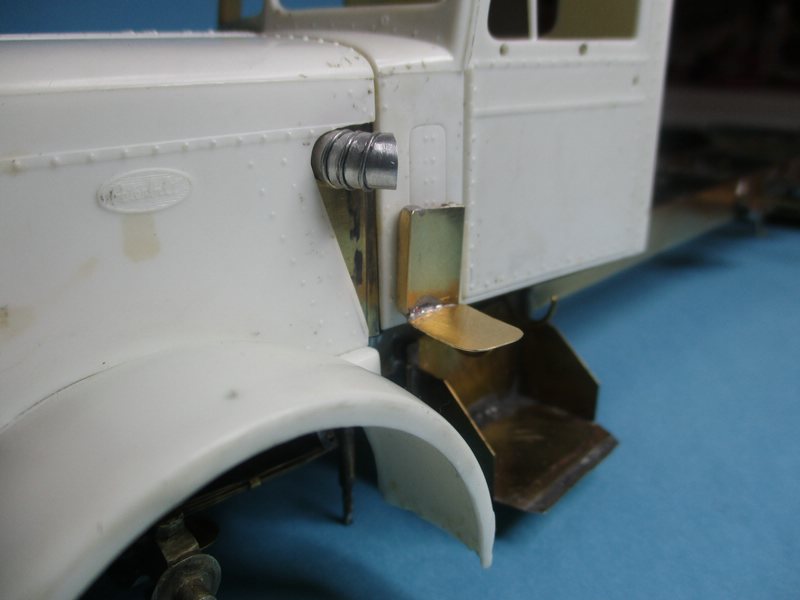
The straws look great, hopefully they last a while. Great looking ducts shown. Peter's look fantastic! A year or so ago I tried this method on a 1:25 truck: Since the whole truck (except body) was brass and nickel, I wanted metal ducts too. These are aluminum tubes, with an indentation around and a wire wrapped into the cut grooves. Looks fairly believable on a finished model.
-
Thanks you Andrea! I'm close the Italian people! My opinion, the best food in the world. I visit your country often, and visit one trattoria to the next one. Rome is wonderful, especially on a Vespa and off the 'touristi route'.
-
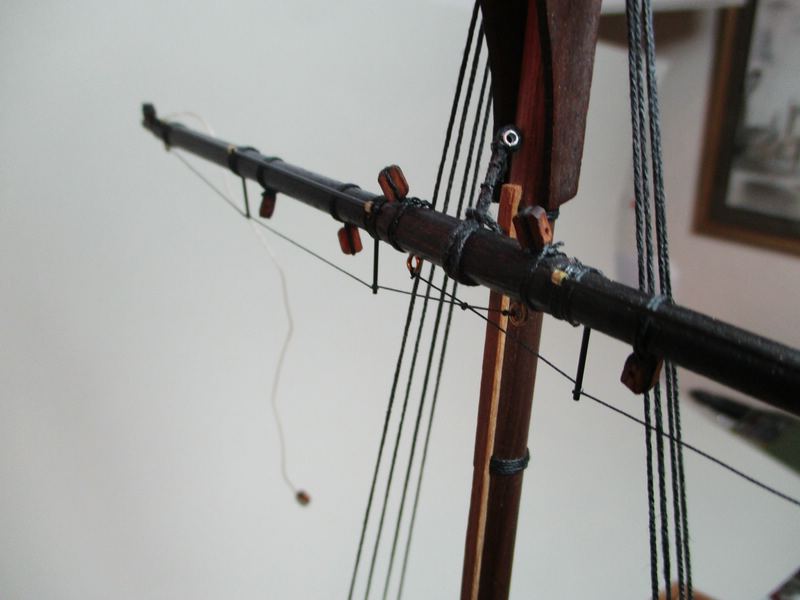
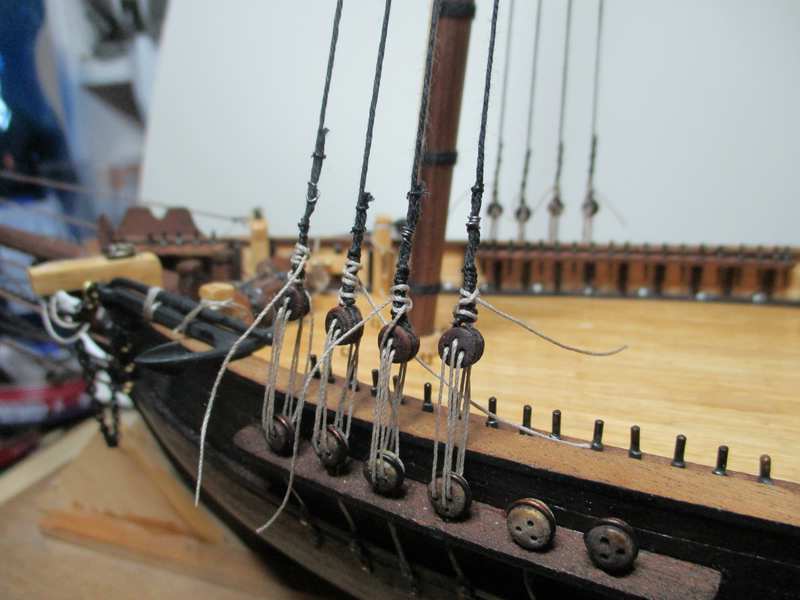
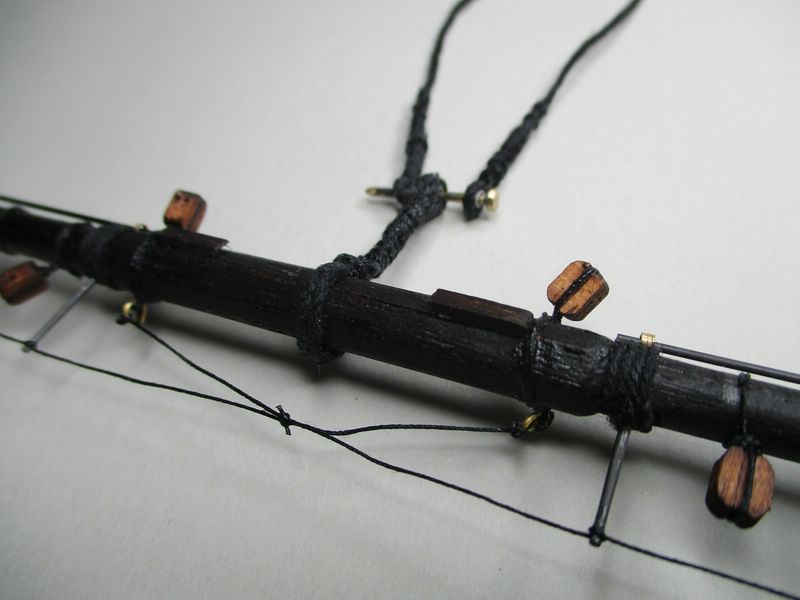
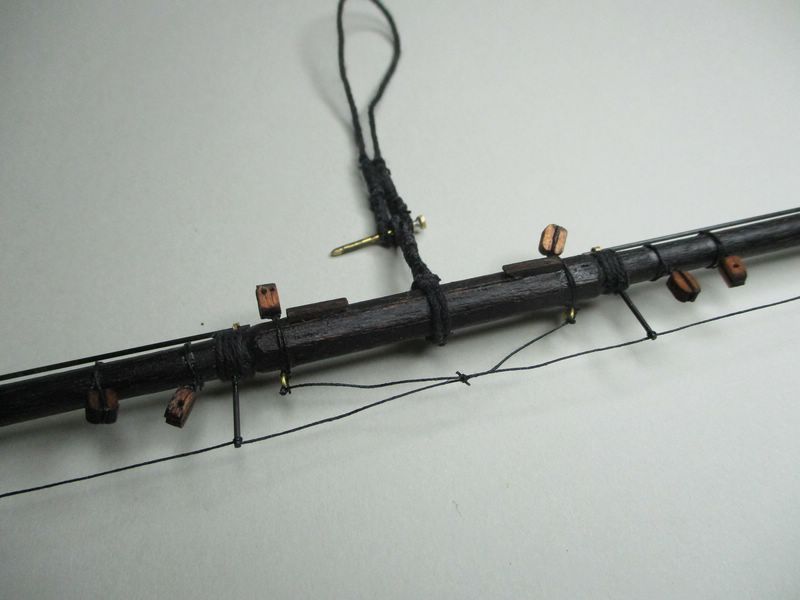
UPDATE: Feared ratlines have begun. I've been busy the last days practicing knots and lines. How detailed do I wanna go? Past experience tells me it's the overall view, and the overall model that pleases. Not necessarily getting ridiculous with details. This is not a museum model. Just more detailing than the OTB model would show, still in the comfort range, sometimes though, some stages go a little further. It's not a must do thing. These models are large, and no one goes up to study detailing. Me either once the ship is on the shelf. The infamous ratlines have been started. First off, the shrouds on the foremast, lower section. A little later on the horizontal 'steps' to make the ladders will be tied on, just not yet. Here a peek at the 'deadeyes'. These allowed for tightening the major lines that held the masts in position. Note, the deadeyes on top do not have to be level with each other as the tension was adjusted from time to time, allowing for an apparant misalignment. They're OK when not level; The tan lines are not glued, just tied off. Later on some adjustments may be necessary to keep the masts straight. These lines can be untied and pulled tighter or loosened. The finished line will be wound up nicely along the black, whipped heavier line to which it's now attached. They will not be glued, just tied. Here the shrouds as they wrap around the mast top. They're done pairwise, to each side. First one pair to one side of the ship, the next pair to the other, and so forth; Anchor chains attached, and running around the spill and below deck; Next up a clear ship modelers breach of procedure. But the yards are a real pita to mount the 'real way'; So, to make the initial mounting easier for me, a hole was drilled into the mast, then a brass tube inserted, the yard got the same treatment. Now the yard just slides in to the brass tube on the mast. This was, the yard is held in a position that can easily let the rigging do the rest. Position is basically secured with this 'cheat'. I like; The yards for the main mast have been cut and trimmed. Next up will be attaching blocks to all of the remaining yards. This will take a couple of days. Thanks for looking. Michael
-
Guess where I'll be next weekend...
10thumbs replied to Ace-Garageguy's topic in The Off-Topic Lounge
I once worked with a guy who was a tail gunner in a B-17 over Germany. A real quiet type, and reserved man. Upon being pressed, his stories were not so reserved. He watched the results during daytime bombing raids. Also stories of the many airmen who were shot down. Very ugly. Very high casualty rate. But don't those motors starting up sound radical? Love the sound! -
Oh gawd! Is this stuff really happening? Geez, I suppose in a year or two we'll have in Europe as well. Yuk. Maybe CNN too at the Oktoberfest? I doubt it.
-
Hi Joe, I like the work done. Take your time friend, and get used to the new environment. You'll get there. Looks good too, your prep work for the frame, and motor kicks butt. You're on your way now. Good stuff. Michael
-
83 Hurst Olds , put a fork in it , done
10thumbs replied to jeff f's topic in WIP: Drag Racing Models
Looking great Jeff! Guys, check out the background machines and environment in pics from the first page. Jeff knows his stuff. About the editing. Jeff, go to your first post on this topic, choose 'edit', and you can change/edit your title, better though, you can add in what a recent update might contain. In other words, you can add to the original title to show what you're offering on a particular new update. The valve covers look pretty sexy. Well done. Michael -
Thanks Rusty!
-
Looks fantastic Curt!
-
Thanks James, I hear that! Yesterday was not a good day for detailing attention, the small blocks whooped me good. Irritating too, better I'd used a smaller scale thread for the wrapping, see above pic. The junk really becomes visible with closeup pics. Still pressing on.
-
Bell OH-13H
10thumbs replied to Jim B's topic in WIP: All The Rest: Motorcycles, Aviation, Military, Sci-Fi, Figures
Looking good James! Nice and clean build. How did you keep the glass dome so clean? I'd have had glue everywhere and a zillion scratches. I always get glue where it's not supposed to be. Well done. -
An exquisite build Mike, looks to be flawless. I know nothing about motorcycle kits, this one surely has my attention! Thanks for opening up my eyes.
-
Here the lower yard of the fore mast, 13" long. Even though bare brass was not visible on real boats, I'll let it be, maybe later blackened if the brass parts stick out. No problem now though.