Straightliner59
-
Posts
5,817 -
Joined
-
Last visited
Content Type
Profiles
Forums
Events
Gallery
Everything posted by Straightliner59
-
Thanks, Christopher.
-

Super Gas '77 Vega--Completed! (11/12)
Straightliner59 replied to Straightliner59's topic in WIP: Drag Racing Models
Thank you, Ray! That's very kind of you, to say. -
Thanks, Bill. Now, that would be cool!
-
hanks, Bob! I appreciate that!
-
Super Gas '77 Vega--Completed! (11/12)
Straightliner59 replied to Straightliner59's topic in WIP: Drag Racing Models
No doubt! There have been plenty of them, though! Thank you, Mike. -
Super Gas '77 Vega--Completed! (11/12)
Straightliner59 replied to Straightliner59's topic in WIP: Drag Racing Models
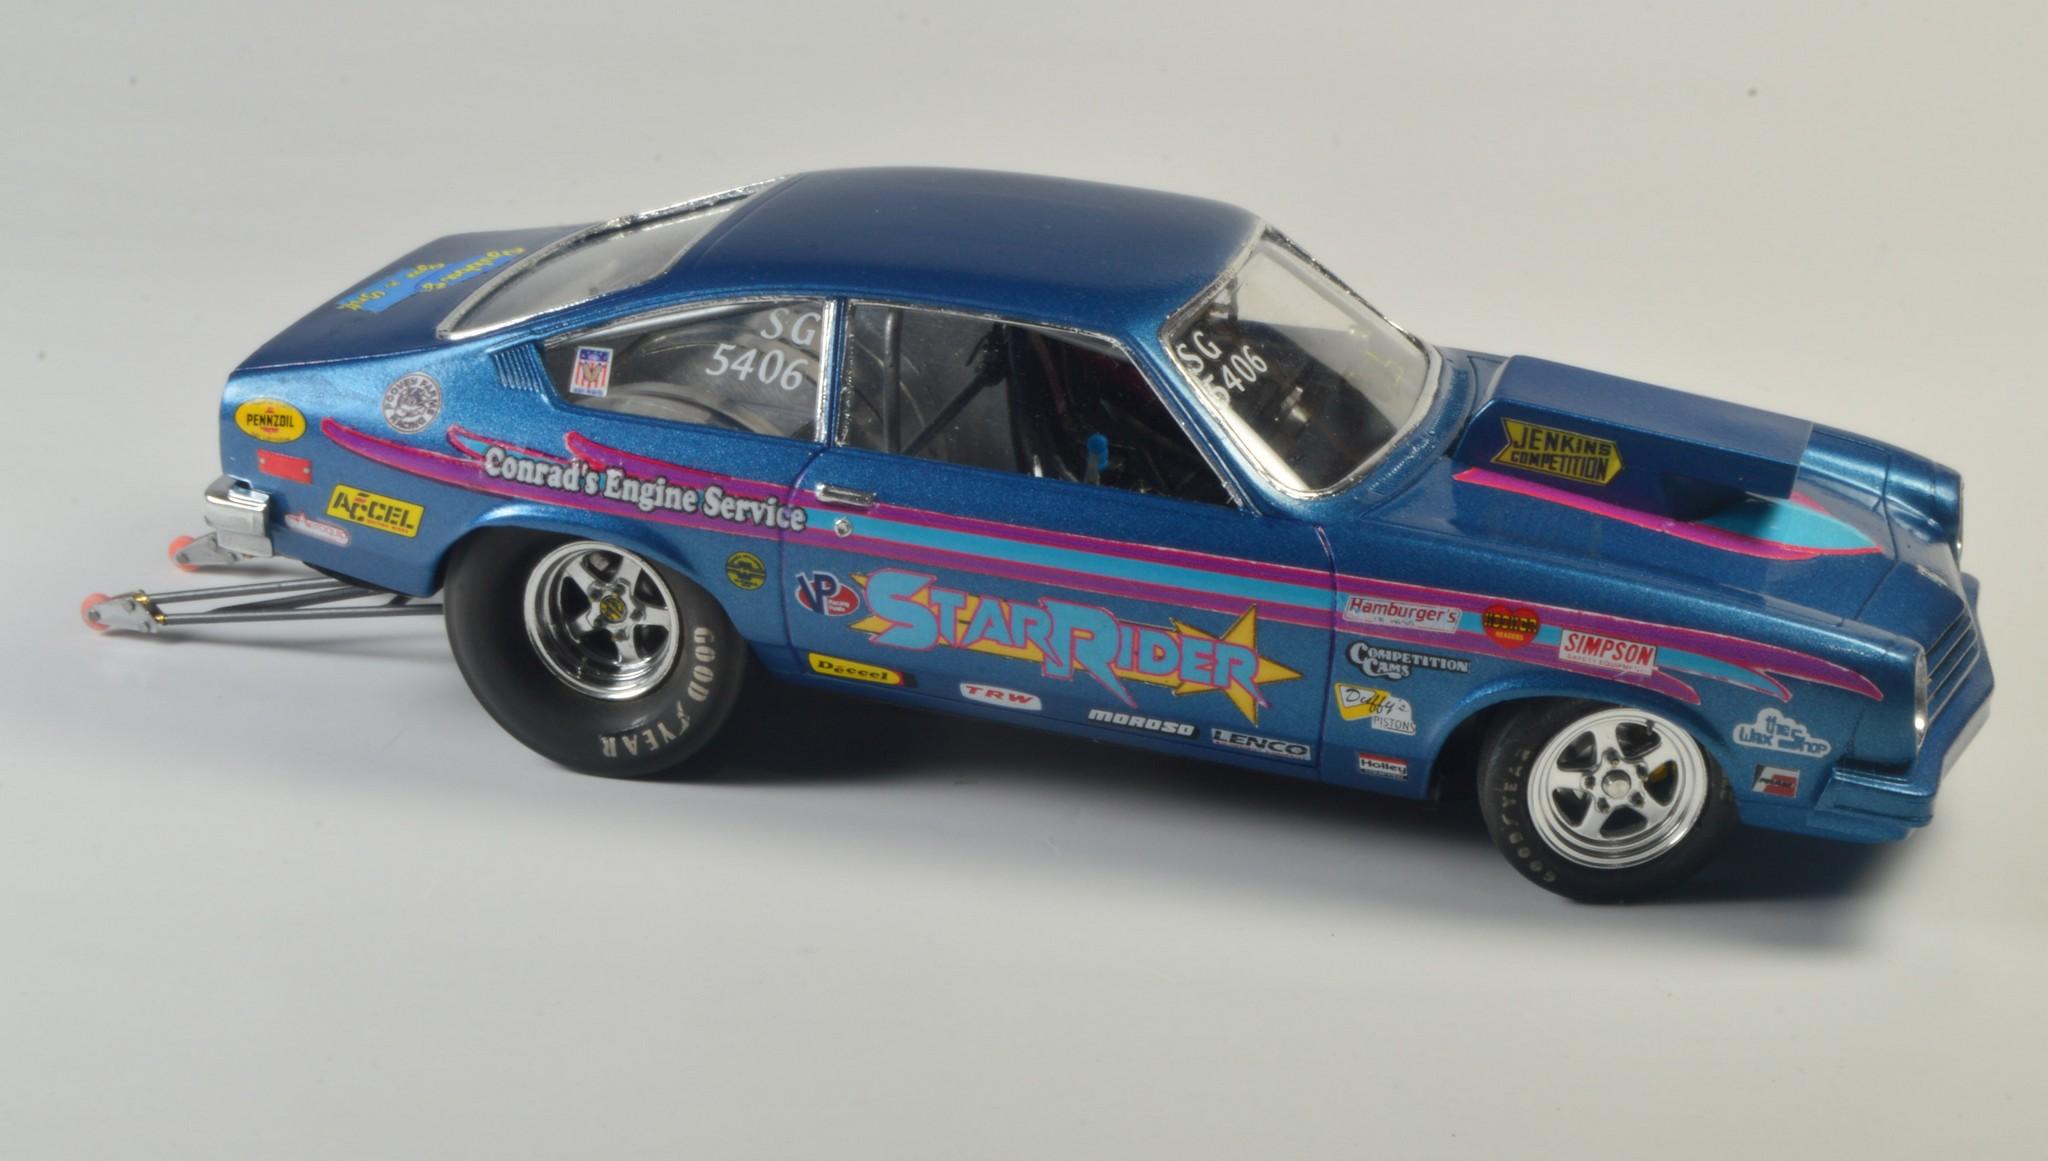
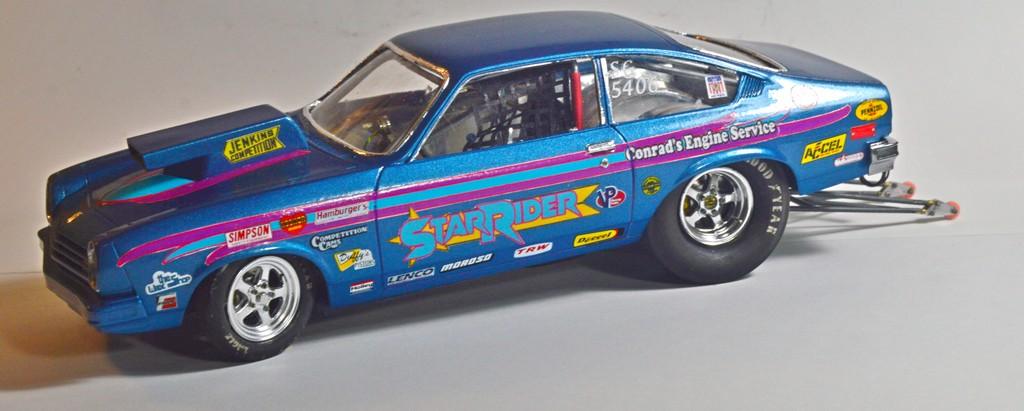
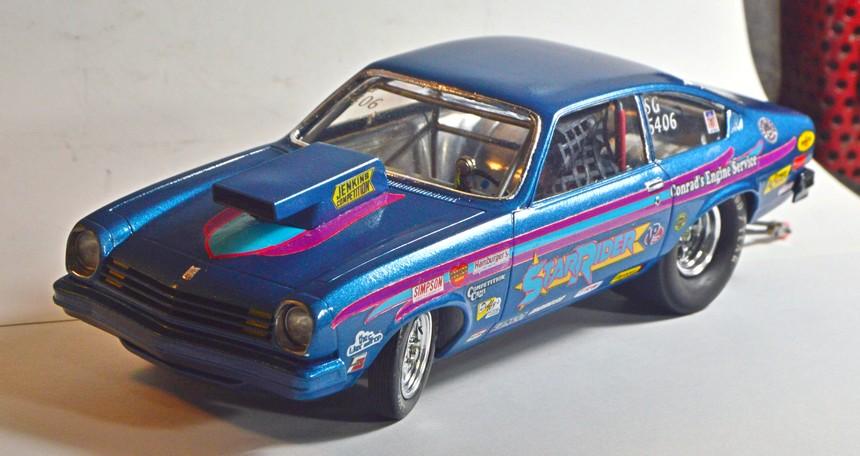
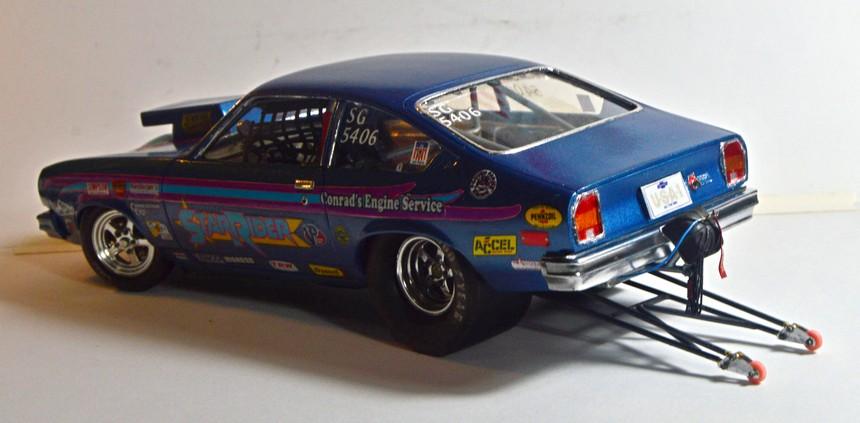
This one's done! Thanks to everyone who followed along and commented. It's always very much appreciated! Sexy pics here:
-
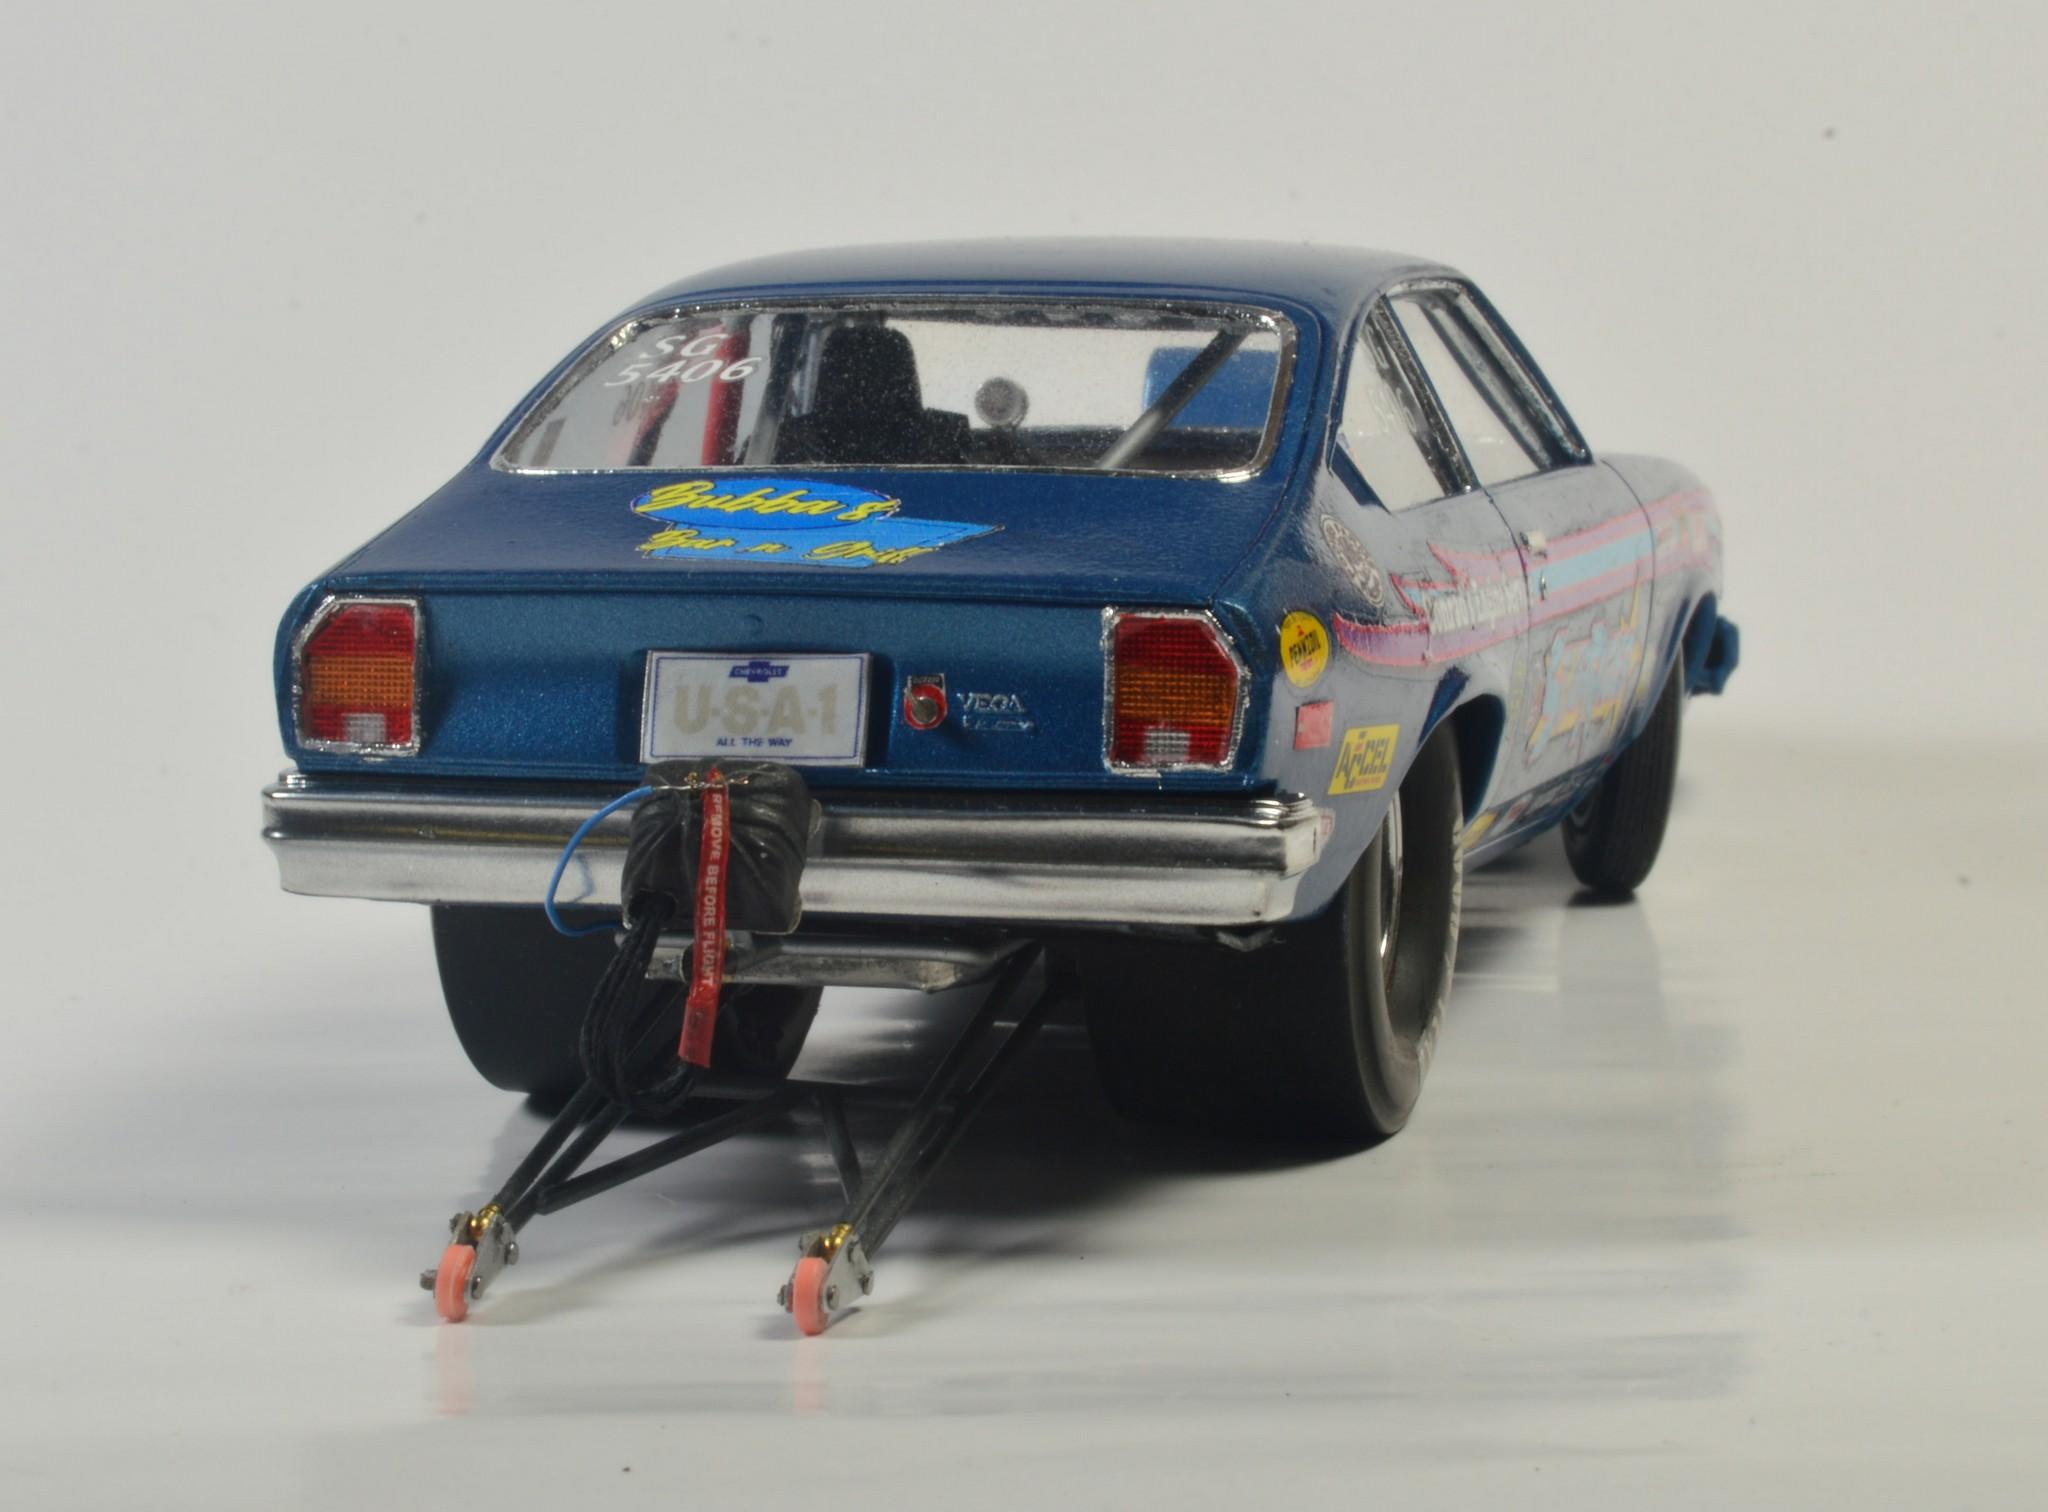
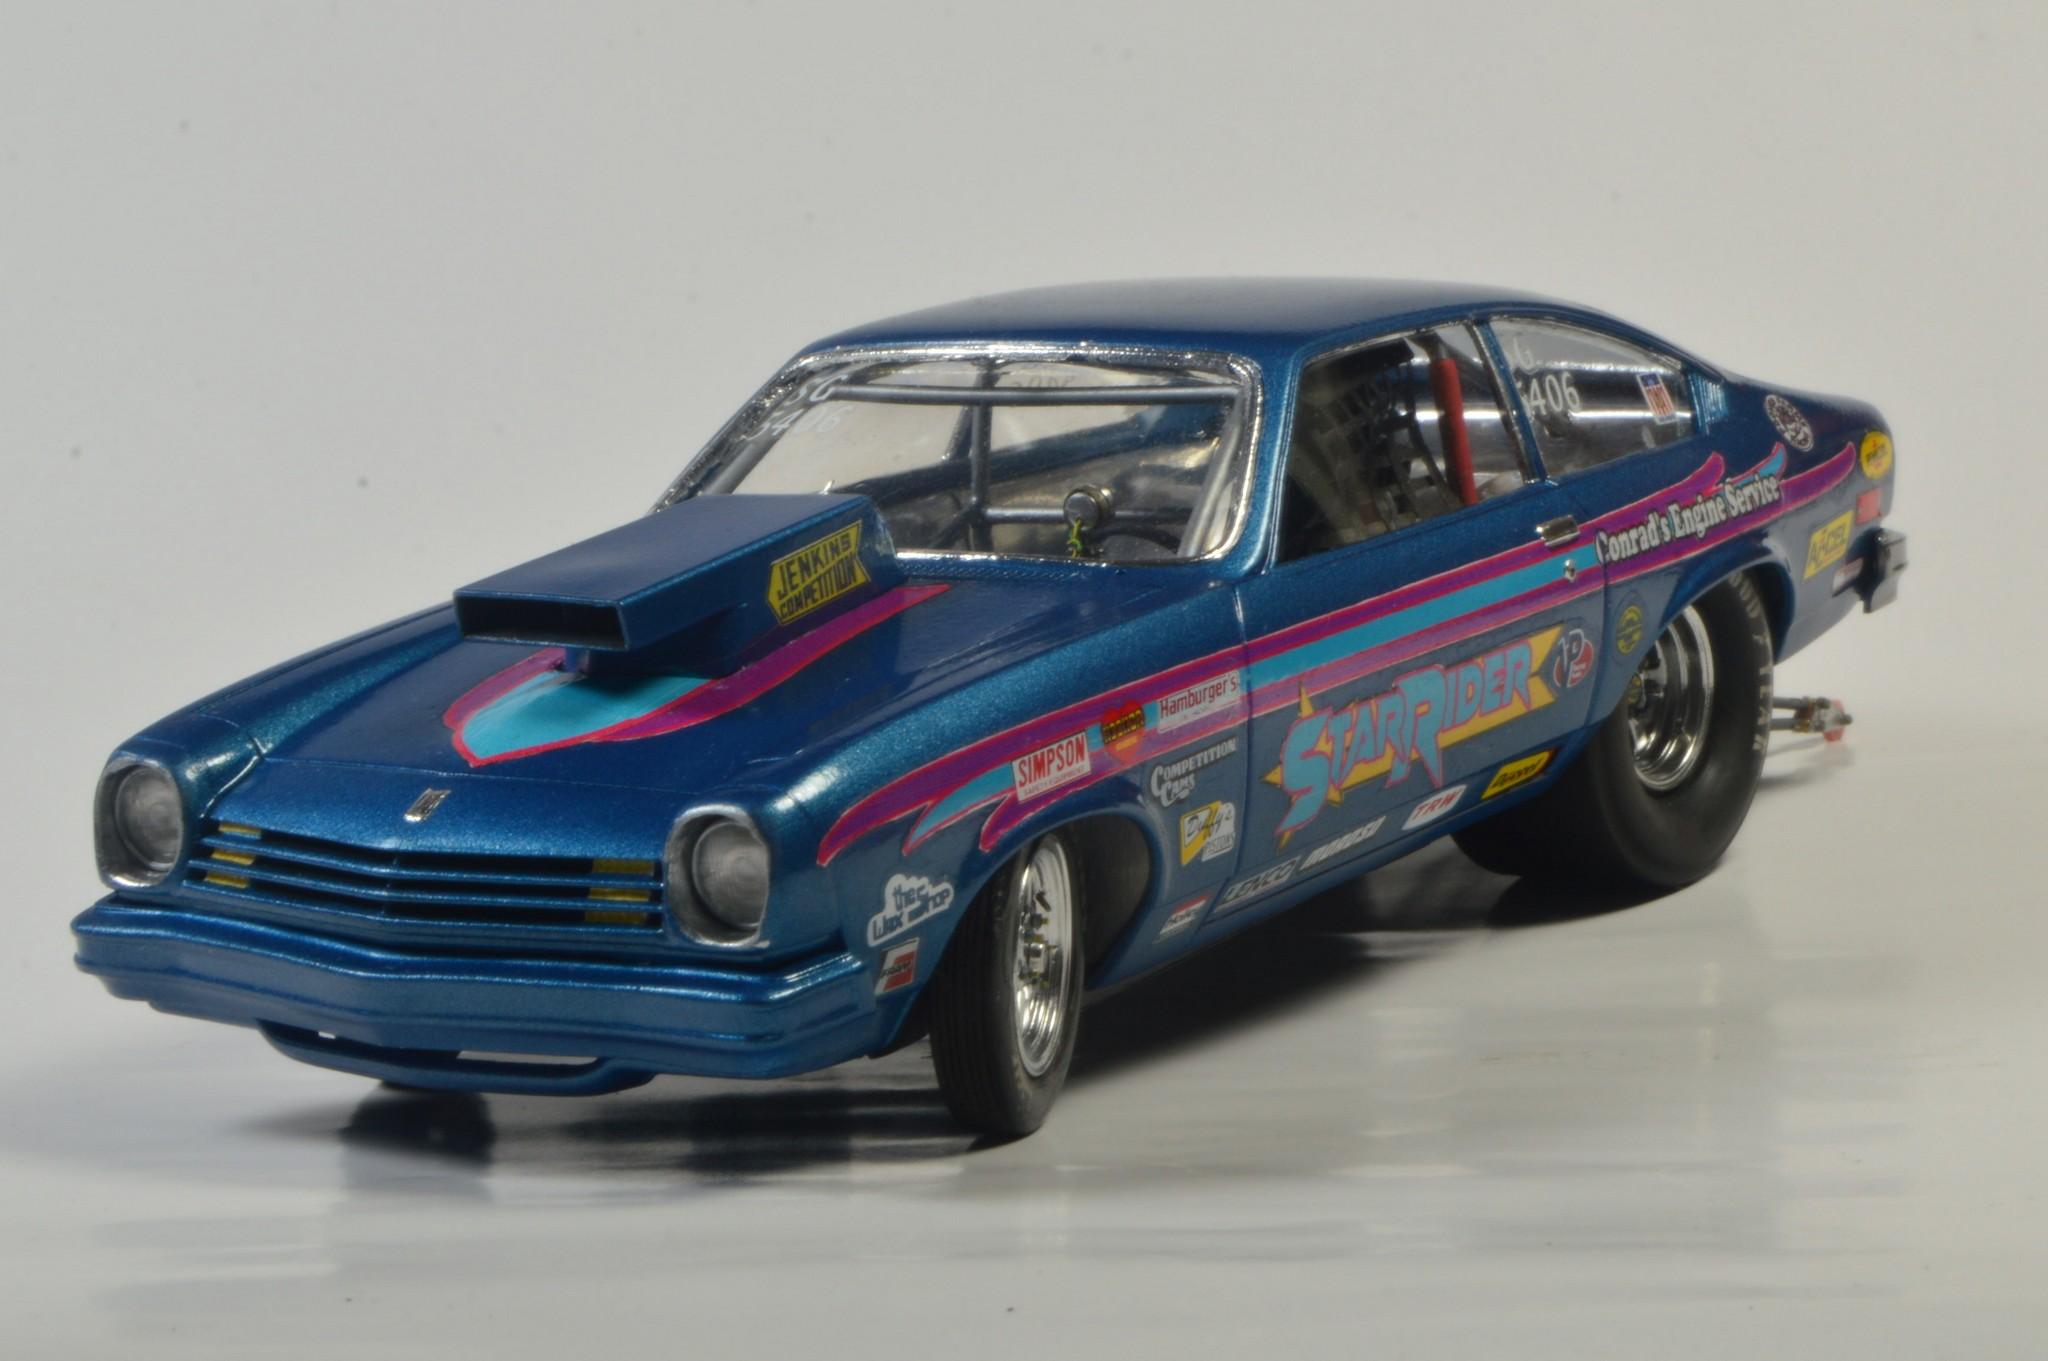
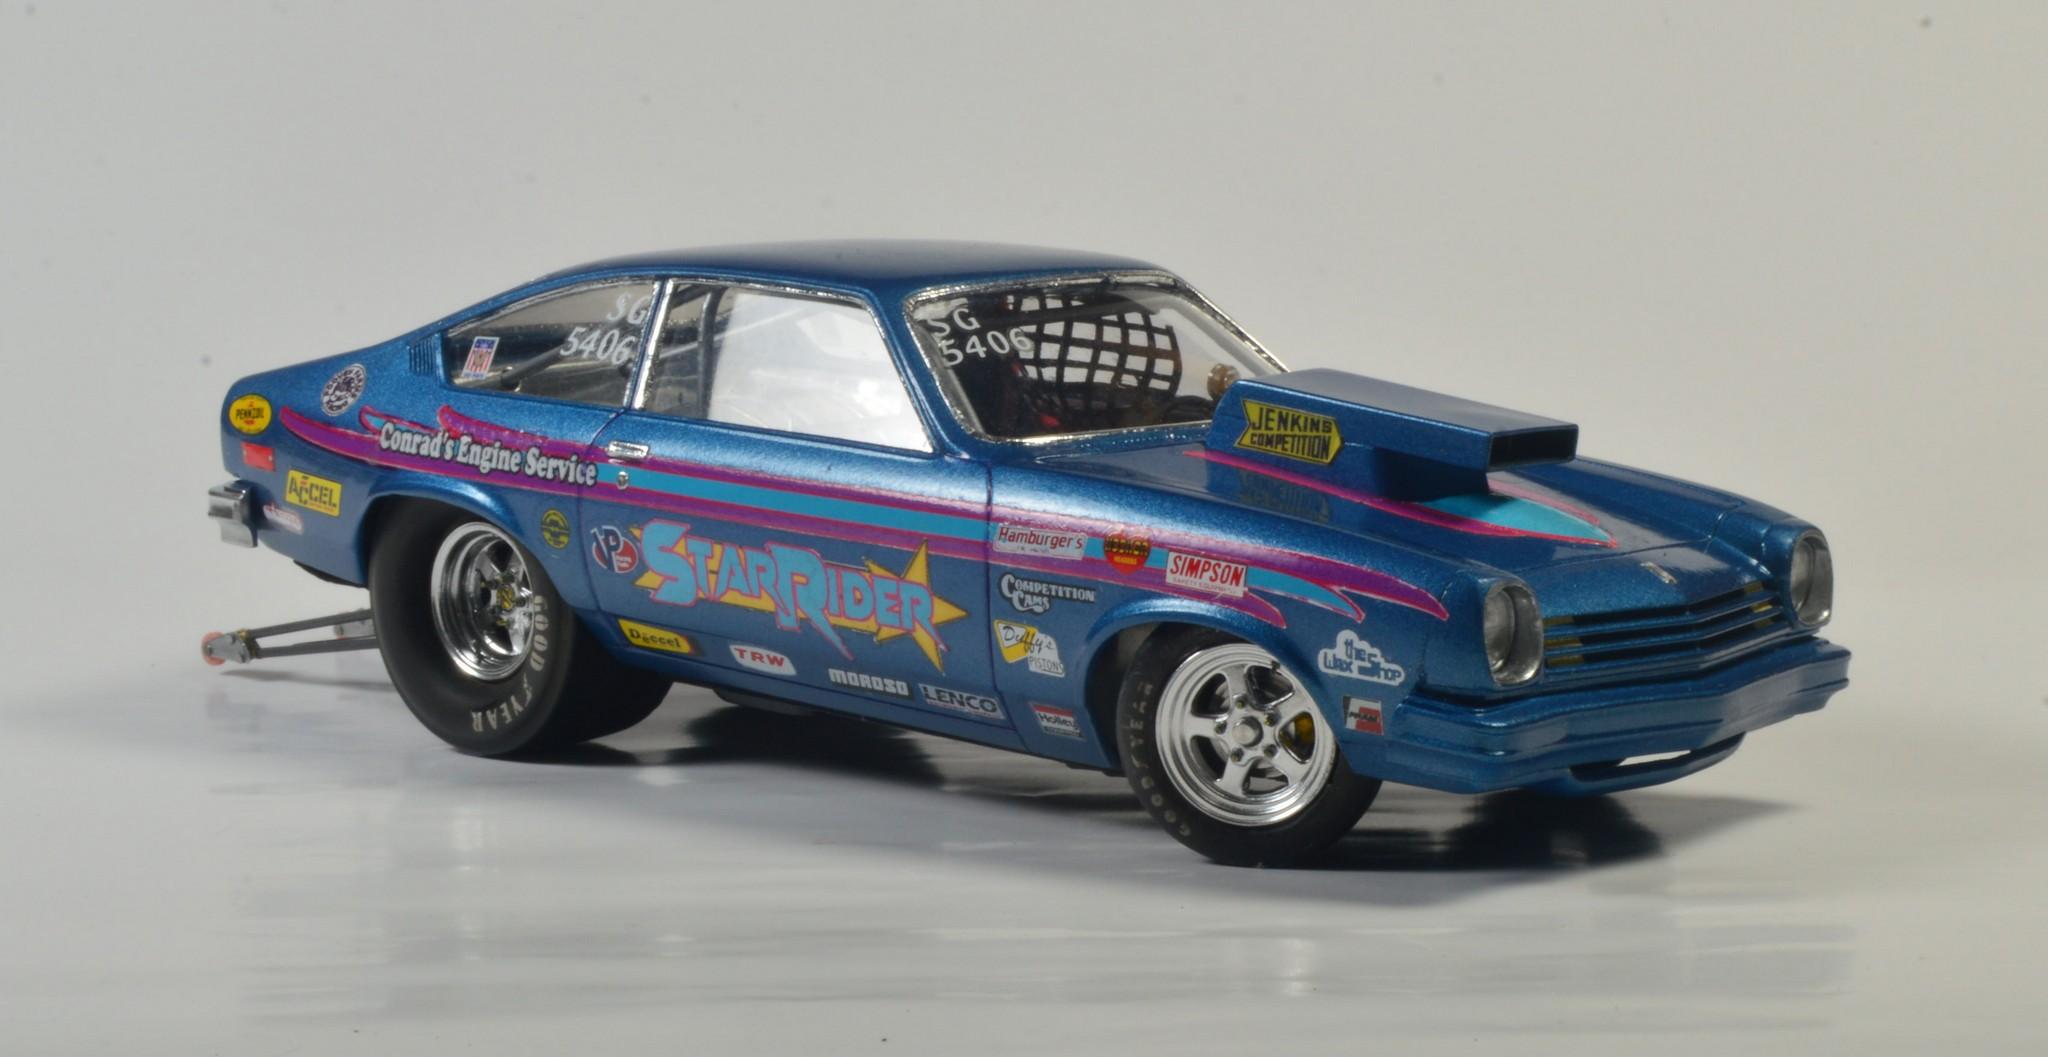
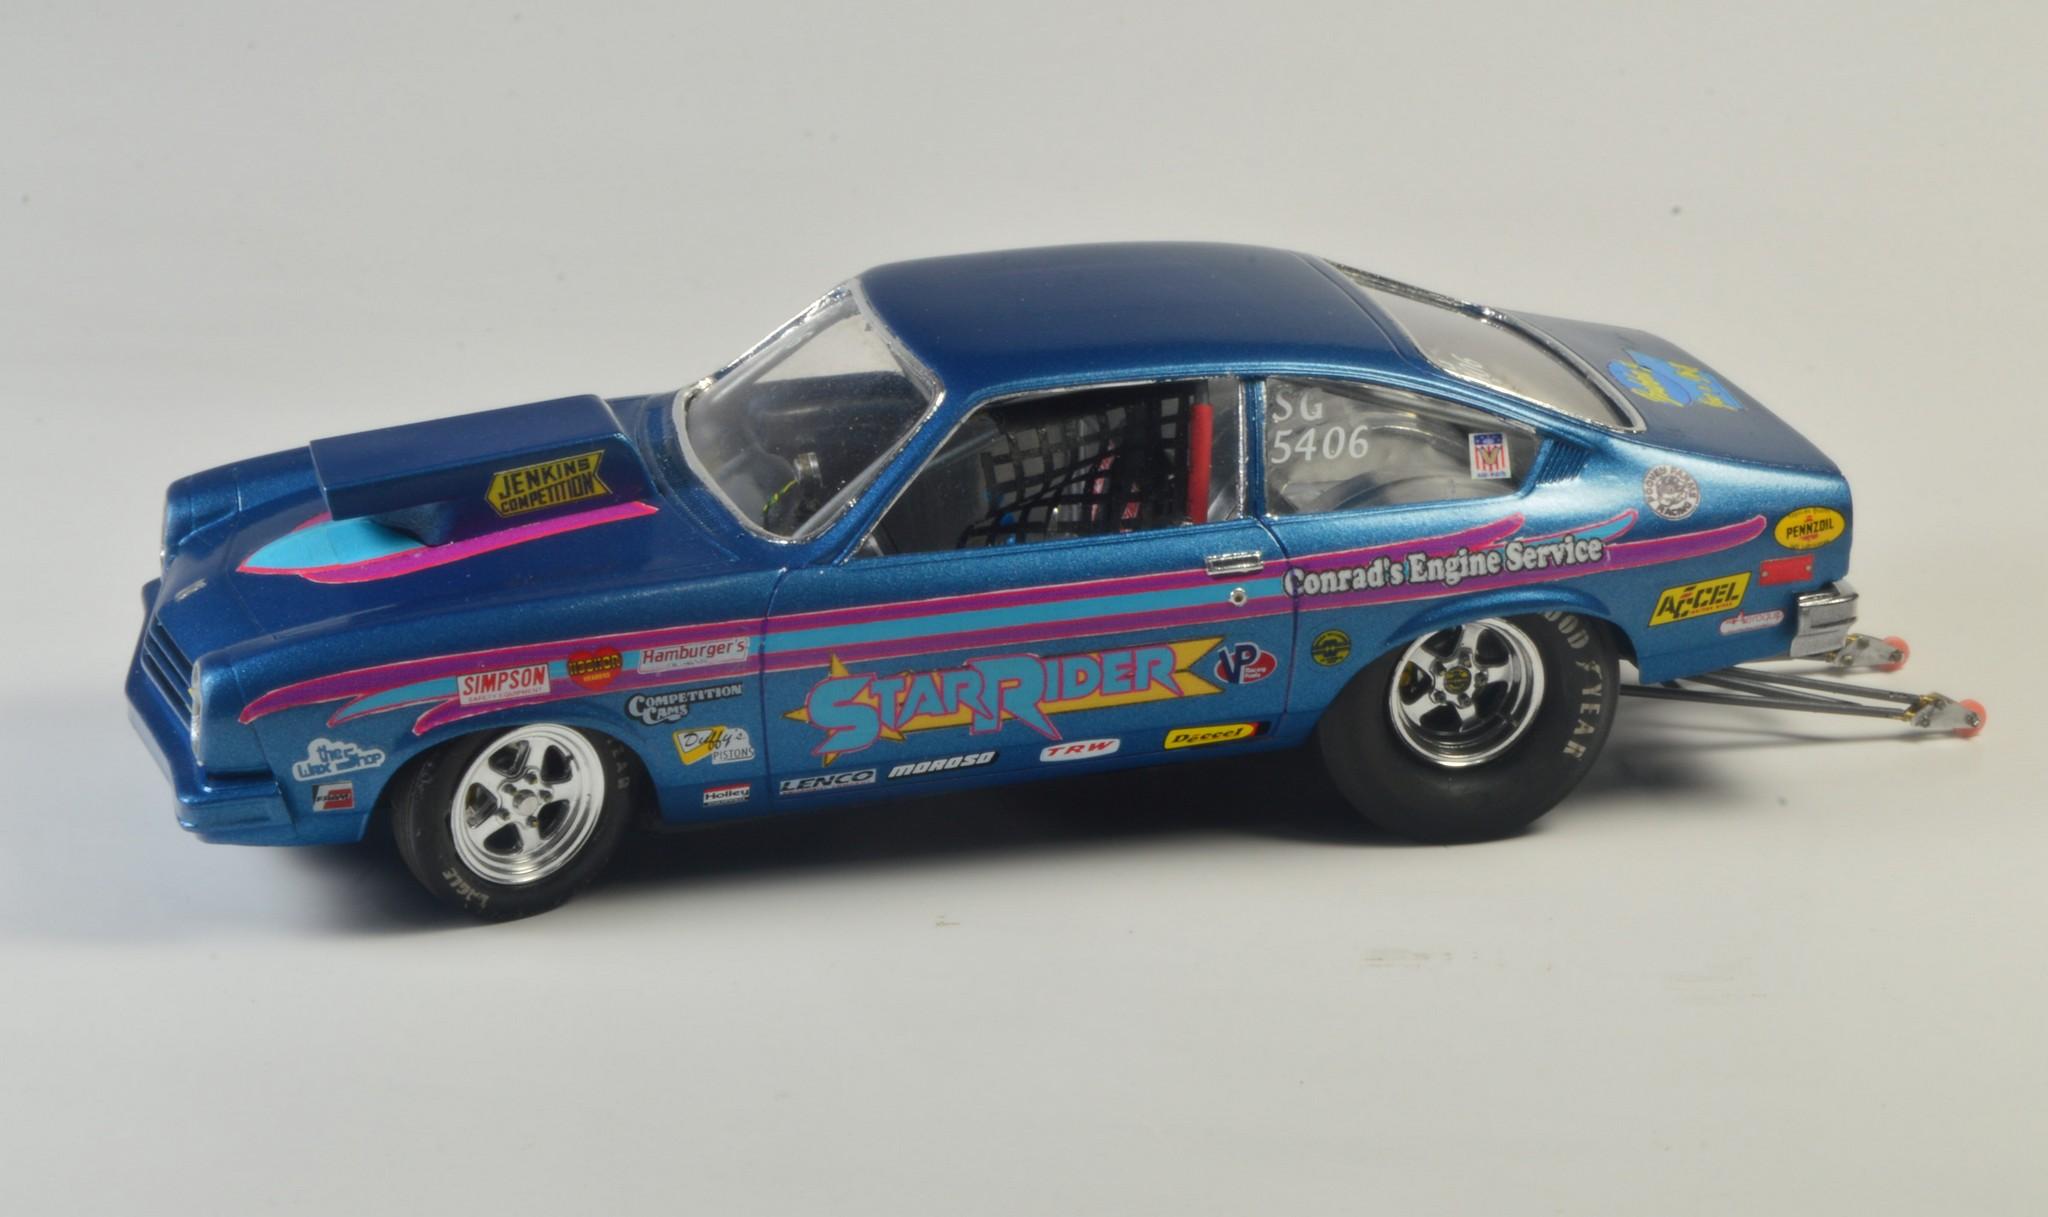
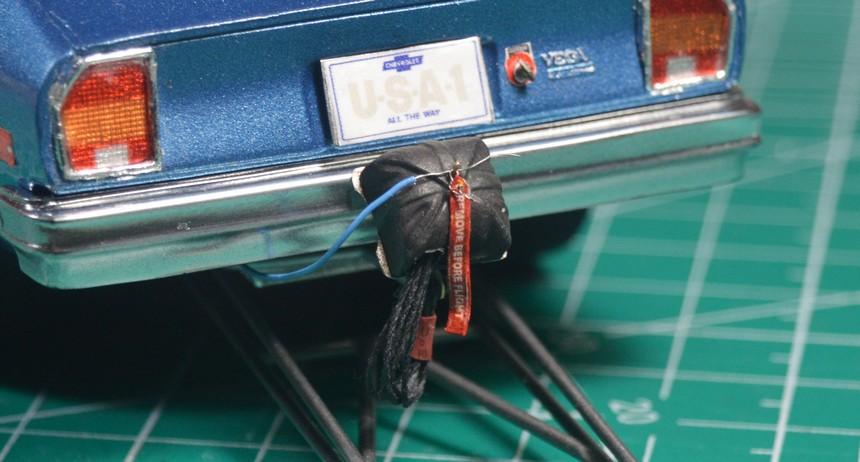
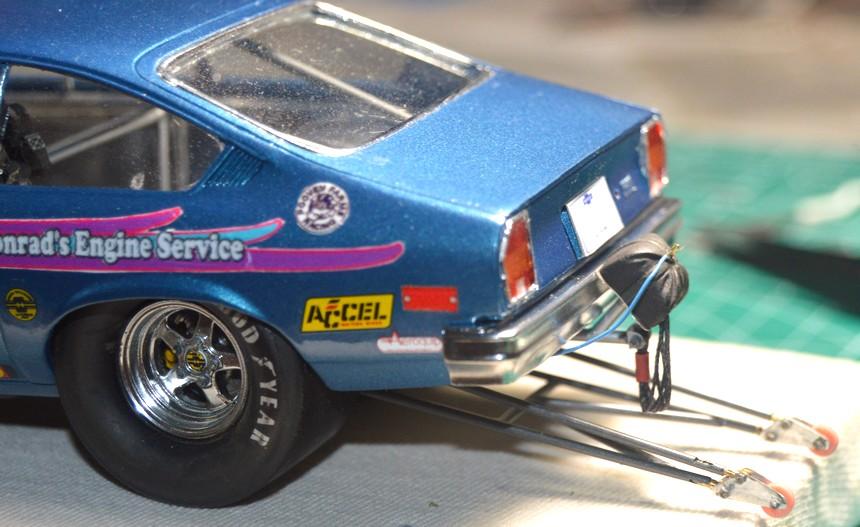
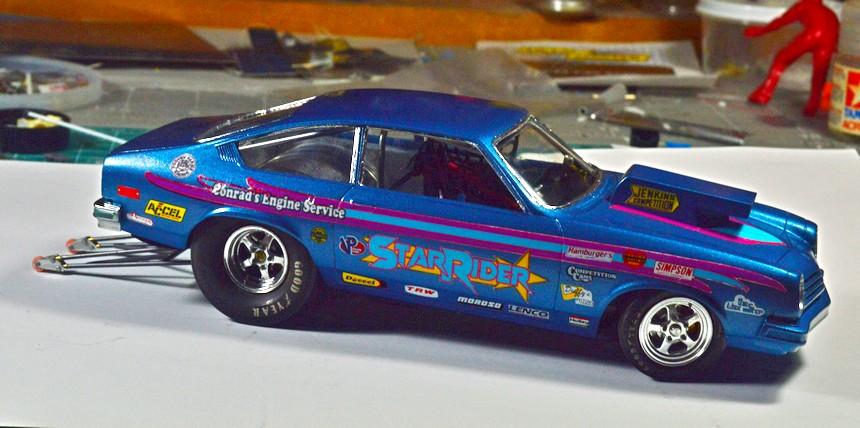
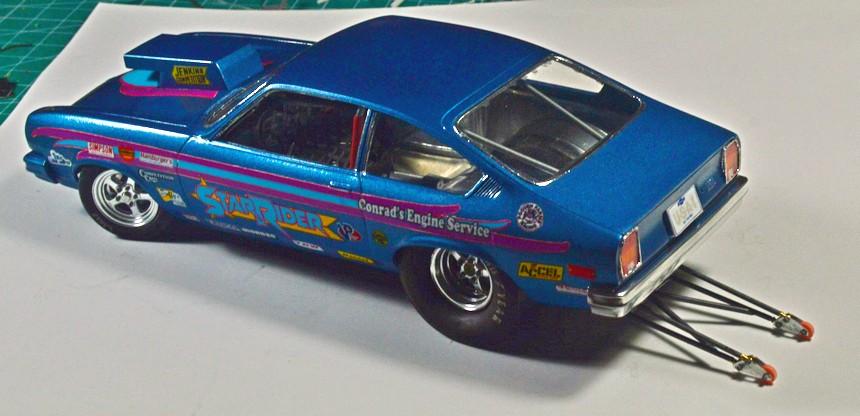
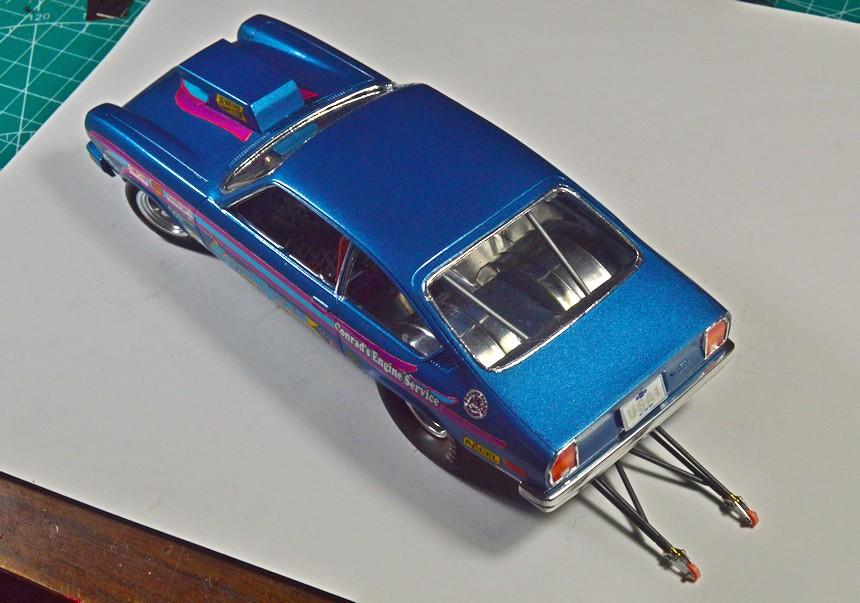
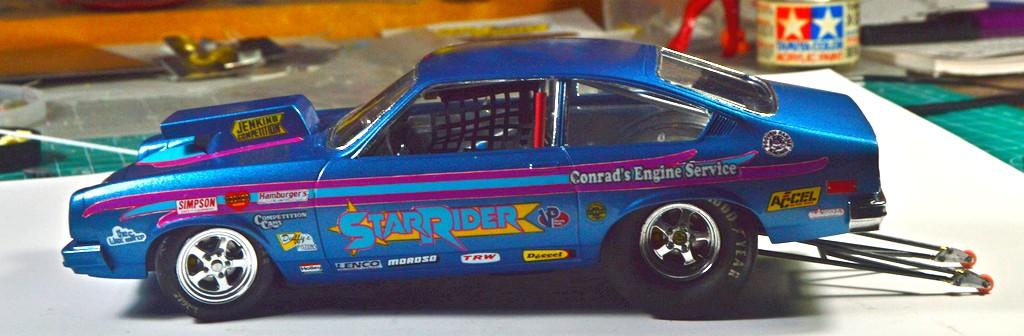
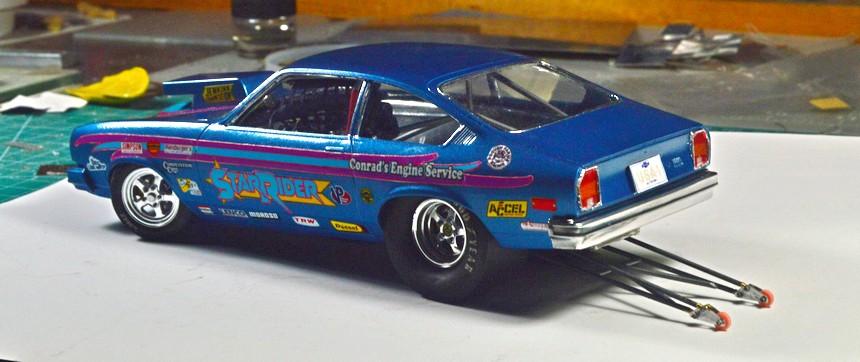
I've long needed a Vega in my display case. Now, I have one! This began as a red promo. In order to ensure that the red wouldn't cause my Mulsanne Blue paint to turn purple, I would need to block the red pigment. I remember Bill Geary mentioning that he uses Zinsser BIN primer. I didn't find that, at the store I went to, but I did find Zinsser Bullseye 1 2 3 primer in a spray can. It worked, beautifully! It covered the red plastic in pure white, and didn't attack the sometimes finicky and sensitive promo plastic. I recommend it, and will use it, going forward. The interior aluminum panels, wheel tubs and trans tunnel are fabricated from Maid-O-Metal 36 ga. tooling aluminum. It's nicely malleable, and easy to work, given a little practice. The main floorboard is aluminum flashing. The flashing is much more rigid than the tooling aluminum, and I prefer it, for structural members. The seat is from a Johan Sox and Martin 'Cuda--one of my favorite-ever parts kits. This project saw my first use of Eduard belts. They look really nice, but, they are stiffer to wok with than the wine bottle foil, I generally use. The Lenco shift levers, reverser, shift "towers" and actuator rods are scratch built from various materials. Window net is masking tape. The dash features an aluminum gauge panel, and photo-reduced gauge faces. Roll cage is .060" plastic rod. Chassis detail is minimal. Only the lower sections of the headers and the lower four-link bars are present. I also added the bottom of a fuel cell, and covered that with tooling aluminum. I bent a "loop" of brass rod, to mount the 'chute mount to. I also added shroud lines, release cable and "Remove Before Flight" tag. The tag was made from decals I printed, applied to wine bottle foil. Headlights were drilled out and replaced with reflectors made from tooling aluminum, using a doming block. Lenses are from the parts box. The hood scoop is mostly scratched. The graphics decals were designed and printed using PhotoImpact Pro 13 and an inkjet printer. Contingencies are from various decal sheets. Windows are clear styrene sheet (.005"), windshield is thermo-formed PET. I think that covers most everything. The WIP thread can be found here: Here are the glamour shots. Your comments are welcome. Thanks for looking!
-
Super Gas '77 Vega--Completed! (11/12)
Straightliner59 replied to Straightliner59's topic in WIP: Drag Racing Models
Thank you, Scott. Much appreciated! -
Super Gas '77 Vega--Completed! (11/12)
Straightliner59 replied to Straightliner59's topic in WIP: Drag Racing Models
Thank you, Marcos. It's pretty much done. I have to touch up some of the blue, and I want to add a decal for a "local" place, on the hatch, yet. Once those two items are attended to, I will take some "glamor" shots for "Under Glass". Comments, questions, and critiques are always welcomed. Thanks for looking, and thanks for coming along for the ride!
-
Joe, there is absolutely nothing wrong with what you're doing, here. It's very nice work! I think you're being too hard on yourself. I also think that's something we all deal with, or have dealt with. Don't get discouraged, judging your work, based on that of others. We all have different levels of experience, and, we all truly experience modeling differently. Just do your best work, and be satisfied that you did. Accept that there will be things you aren't quite happy with, but, move on. Soon, you'll see that your best work is even better! You've got a great start, here. It would be enjoyable to watch, as it comes together!
-
Project 1/16th AA/FA AND HERE IT IS!
Straightliner59 replied to Ian McLaren's topic in WIP: Drag Racing Models
Ian, my friend, you killed this one! Fantastic work, all-around. The paint is gorgeous--I definitely like the black! Glad you went with it. It was a joy to watch it come together. I'm looking forward to what comes to your bench, next. -
Super Gas '77 Vega--Completed! (11/12)
Straightliner59 replied to Straightliner59's topic in WIP: Drag Racing Models
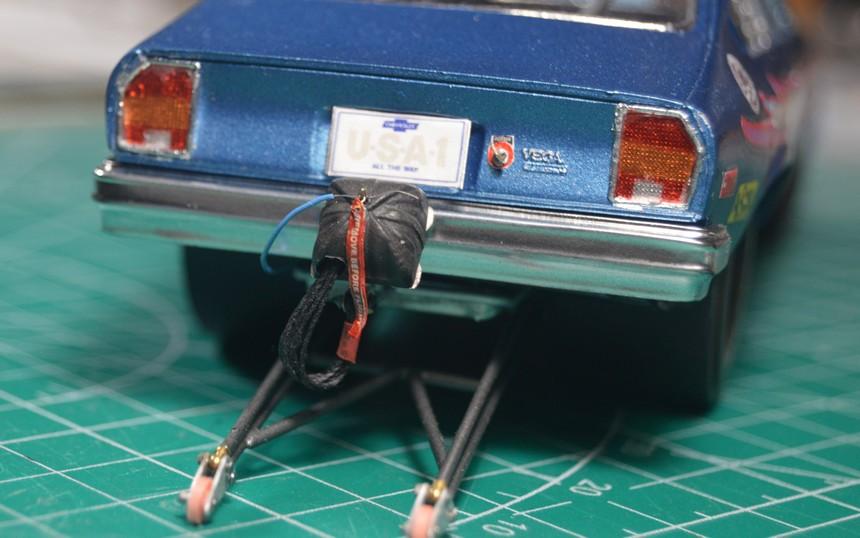
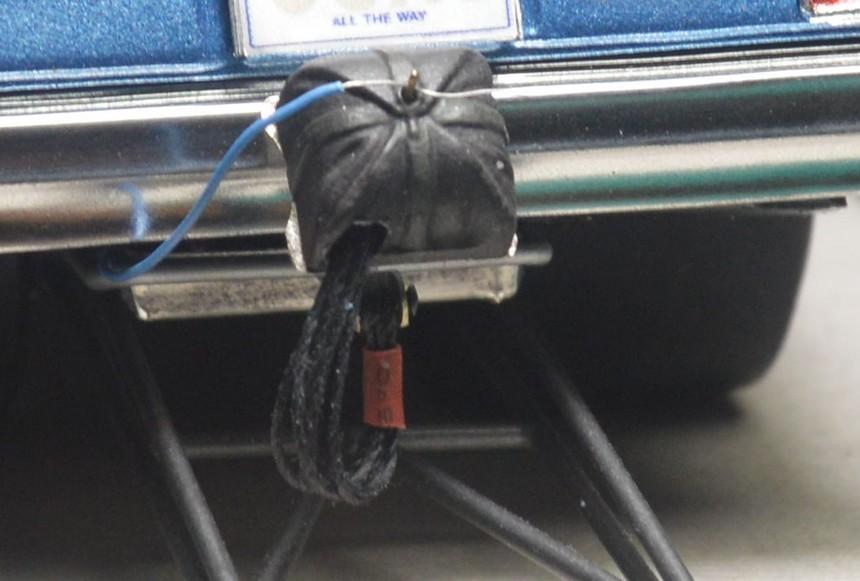
I got the main disconnect switch made and mounted. It's a Moroso item. I printed the "Remove before flight" tags as decals, and mounted one to each side of a bit of wine bottle foil. I think that wraps up the rear of the car. Mostly, it's down to touchup and small details. Shouldn't be too much longer, now...Thanks for looking!
-
Super Gas '77 Vega--Completed! (11/12)
Straightliner59 replied to Straightliner59's topic in WIP: Drag Racing Models
Thanks, so much, Ian! It's getting close. It's mostly details, at this point. Will be nice to have it finished! The altered looks fantastic! I saw it on FB. -
Super Gas '77 Vega--Completed! (11/12)
Straightliner59 replied to Straightliner59's topic in WIP: Drag Racing Models
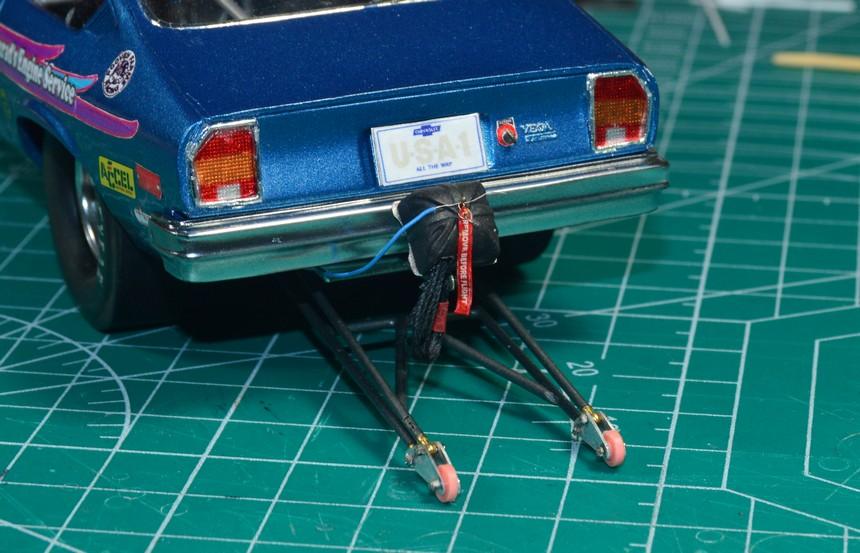
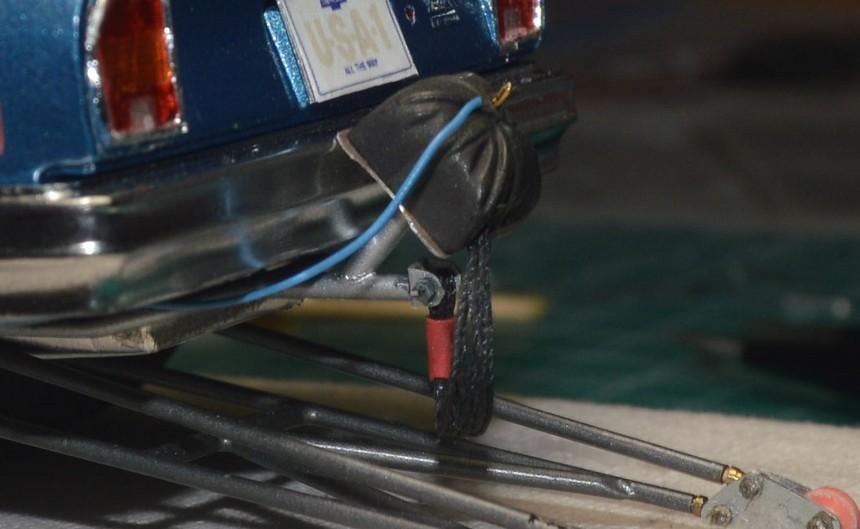
Thank you, so much, Marcos! I got the 'chute done. I made a little frame extension, to mount the parachute assembly to. That's all soldered brass. The 'chute, itself is from a Swamp Rat XXX kit. The shroud lines are the only thread I have on hand (I could swear I have more, but...). I think it worked out, pretty well. I am also working on a "Remove Before Flight" tag. This project's getting closer! Comments, critiques and questions are always welcome. Thanks for looking!
-
I've been wanting one of these for a long time, and never got around to picking up one. Got this one, shipped, for about 25% less than most are being listed for, and couldn't pass it up...
- 39,080 replies
-
- 3
-

-
- johan
- glue bombs
- (and 1 more)
-
Super Gas '77 Vega--Completed! (11/12)
Straightliner59 replied to Straightliner59's topic in WIP: Drag Racing Models
Thank you, sir! -
It's a pretty neat kit! You're off to a very nice start!
-
Super Gas '77 Vega--Completed! (11/12)
Straightliner59 replied to Straightliner59's topic in WIP: Drag Racing Models
Thanks, Joe! I've never owned one, but I've always had a thing for the H-bodies! Thanks for checking in! -
Here ya' go! https://www.tbucketplans.com/grasshopper-roadster/
-
Super Gas '77 Vega--Completed! (11/12)
Straightliner59 replied to Straightliner59's topic in WIP: Drag Racing Models
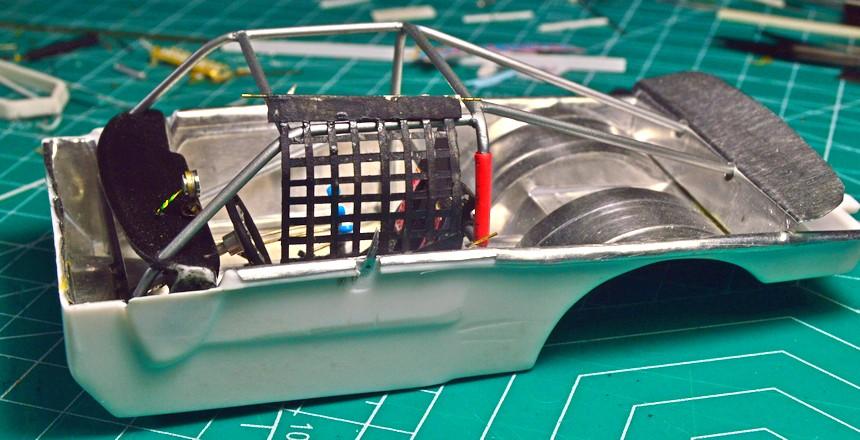
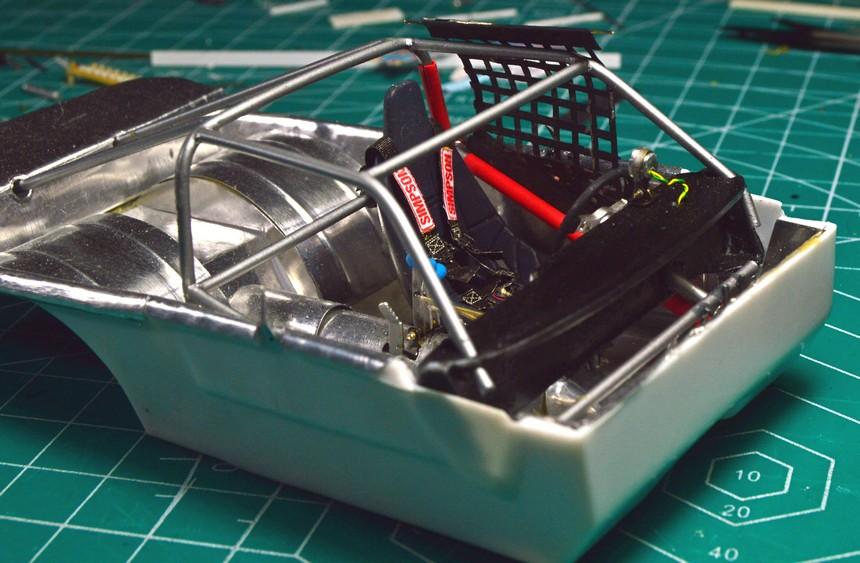
I got the interior in, without a problem. I wanted the net to be/look a little loose, like it was partially unattached. I got a little more than I wanted, but, I can live with it. It's all on the wheels. I'm working on the 'chute and mount. I have to get the class markings and comp numbers on it, and I want to make a decal for a "local" sponsor, for the hatch. There's a bit of foil work to do, and some touchup, but, it looks pretty much as it will, upon completion. Your comments, questions and critiques are welcome. Thanks for looking!
-
Gorgeous!
-
You can bet I'll be borrowing this idea!
-
AMT/MPC/Ertl Gravel Trailer
Straightliner59 replied to Jim B's topic in Model Building Questions and Answers
I believe that is correct. I think at one time, it may have actually said so (?). -
Issue 216
Straightliner59 replied to Dave Ambrose's topic in Model Cars Magazine News and Discussions
Mine showed up Thursday! Great stuff, guys! -
Super Gas '77 Vega--Completed! (11/12)
Straightliner59 replied to Straightliner59's topic in WIP: Drag Racing Models
Window netting, set in place. I need to add a little more paint, then make the mounting hardware. Once it's mounted, I can grit my teeth, and try getting the interior into the body. The Vega has some severe undercuts, which could make installing the interior tricky...