Straightliner59
-
Posts
5,804 -
Joined
-
Last visited
Content Type
Profiles
Forums
Events
Gallery
Everything posted by Straightliner59
-
 Thanks, JC! It was something I just had to try! :-)
 -
Custom Body Dart Sport FC WIP
Straightliner59 replied to Chris in Berwyn's topic in WIP: Drag Racing Models
I've seen Aileen's in the craft section at Walmart, as well. -
Ray, that's similar to what I'm doing, as far as controlling head size. I am limited by the size of the already cast heads, on one end. That's what led me to consider the sprue. However, now that you mention it, I do have some small diameter black nylon monofilament that I picked up in the train store. Railroad modelers use it to create power and phone lines. I've used it to make zip ties for models. The cauterizing pen sounds like an interesting idea worth looking into. I am interested in your thoughts regarding how you'd use the nylon to make ball joints. That sounds like an exciting possibility!
-
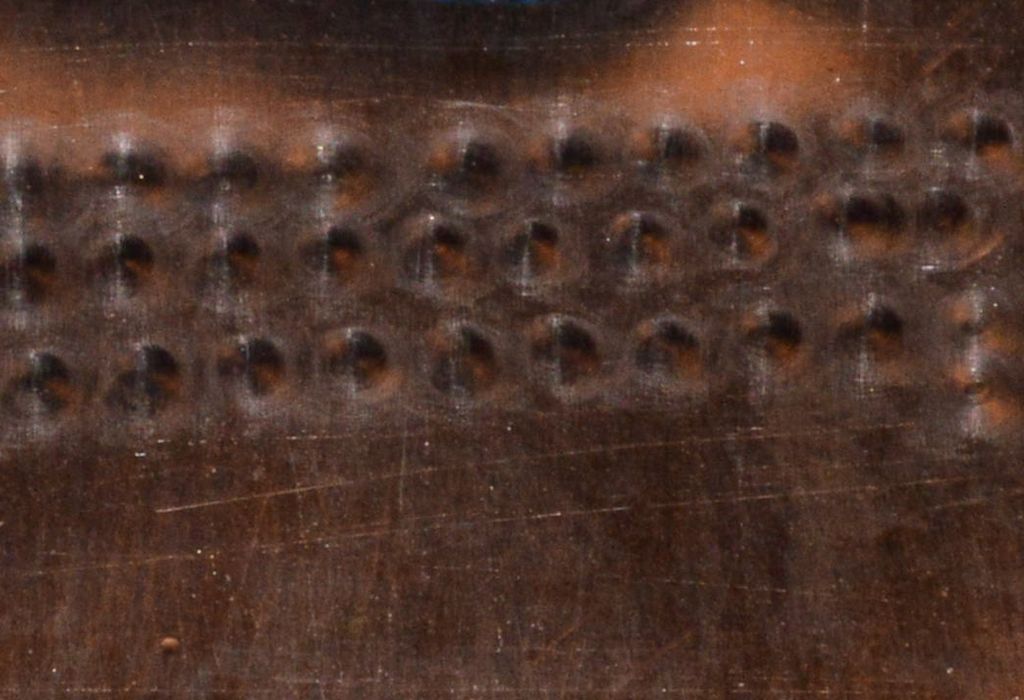
I made a windscreen from aluminum, but, I am still considering a plastic as well. Either way, I'll need some way to attach it to the cowl. Since they were generally riveted, I thought I'd see how I could do something passable, since I don't think making brass rivets of the size I need is a realistic expectation! In one of my drawers, I have some tiny Grandt Line plastic rivets. They are a bit out of scale, but I think they'll work. Here's what I did (experimentally--I haven't applied it to the model, yet). I laid two sheets together, and drilled a single hole through both layers (research said that it's best to drill and rivet one at a time to make life easier!). I then removed one the rivets from its sprue, leaving a long section of the rivet's shaft and inserted it through the hole. Then, it was merely a matter of swaging the end, to mushroom it against the sheet. I used a lighter, and just kind of waved it at the rivet. A soldering iron would work, as well. Rivets could very easily be made using stretched sprue. If the Grandt Line rivets look too large to me, I may switch to sprue rivets. I am interested in comments regarding whether you think plastic, or the aluminum windscreen would look better. Also, what you think of the rivet idea. There is also a photo I call "Frankenstein Vs. The Giant Arachnid." And, just for the fun of it, I'm going to throw in a pic from March 13, 2009. A decade of thrills! I was laying out the motor plate for the body you see here,as I was putting together an article on building dragster bodies from aluminum, for the old SLM website. I have since built another, the current cowl (the project's third). Lastly is a photo of an experiment using Wright's Silver Cream (Shout out to Snake for the heads-up) and a cut-off toothpick to create an engine-turned effect. I arbitrarily chose a number of turns on the cross slide knob (clearly, too many, once I washed it, and could see the result) and used the Dremel drill press. I'm looking for a reliable method of engine-turning, using the things I have at hand. I think this will work, as the silver cream (which, I assume, is some sort of jeweler's rouge) allows the toothpick to gently abraid the surface of the metal, without fraying the toothpick too severely, due to pressure.

-
Now, you just need this, to go with it! :-) https://www.ebay.com/itm/TOM-DANIEL-MONOGRAM-MATTEL-REVELL-SUPER-DIGGER-DRAGSTER-1970-MODEL-BOX-ART/223437479999?hash=item3405e9603f:g:sIcAAOSwFqJWpUVz
-
Love the vintage NASCAR stuff! Looks great! Very nice job with the Zolatone.
-
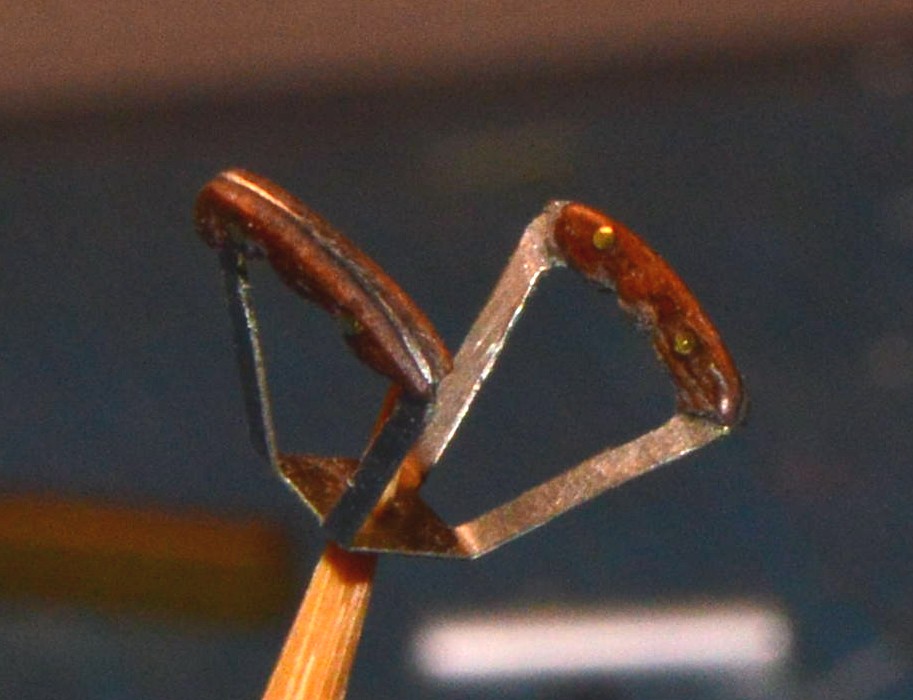
And, here it is, all done. I used super glue to bond everything together. There's no finish on the wood or brass, it's simply polished.
-
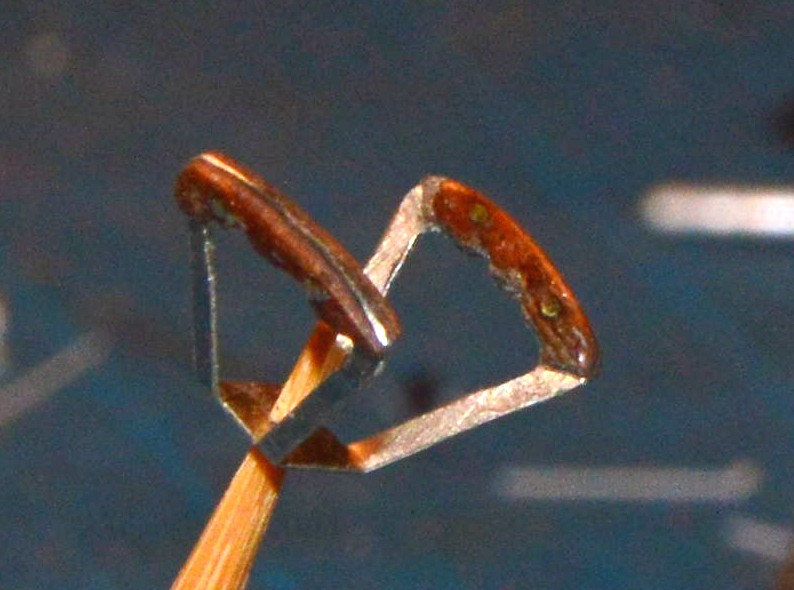
Working on the steering butterfly. The wood will be smoothed, and sanded to a hand grip shape. The brass pins will be cut down, sanded flush with the wood, and polished. The photoetch is an old Garage Scenes piece...
-
Thank you, Vince! Here are a few better photos. The pieced-together rectangular objects are going to be fuel tanks. I want this to be utilitarian, and I think those will look more that way than the round ones that come in the kit. I am also going with the spoked wheels, for the same reason. At some point, I will likely open a couple of the wheels up, and make a mold, since the steel wheels are harder to come by than their aluminum counterparts. I may also attempt to convert a couple of the Budd wheels to two-holers, and cast them. Qs and Cs always welcome! Thanks for lookin'!
-
Thank you, Jim. Much appreciated! I think these can still be found at a fairly reasonable price. I haven't looked, in a while. Since my day is just starting, maybe I can shoot some better pics, tonight.
-
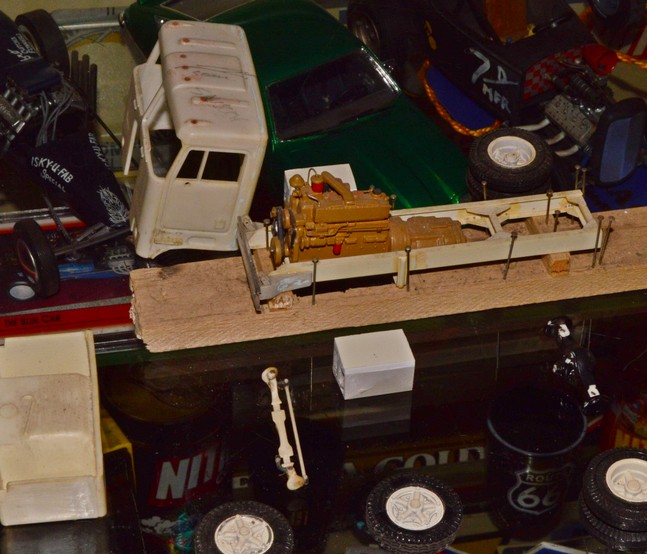
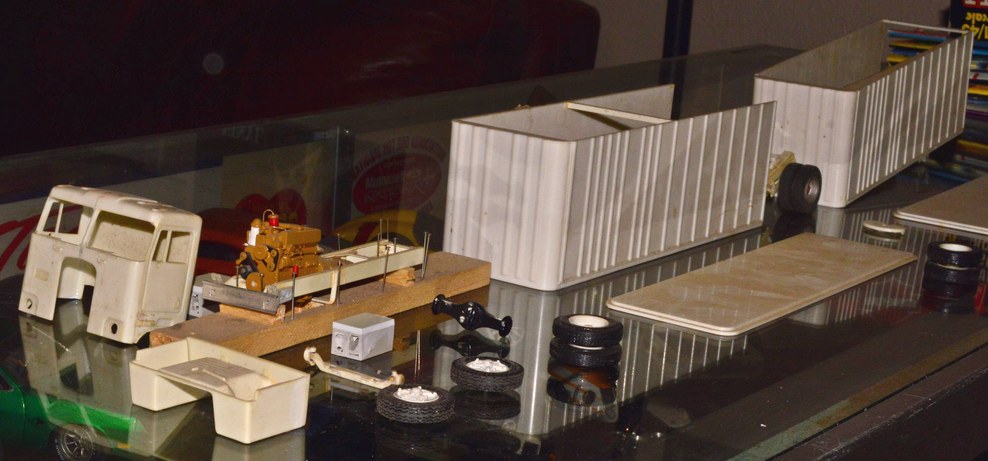
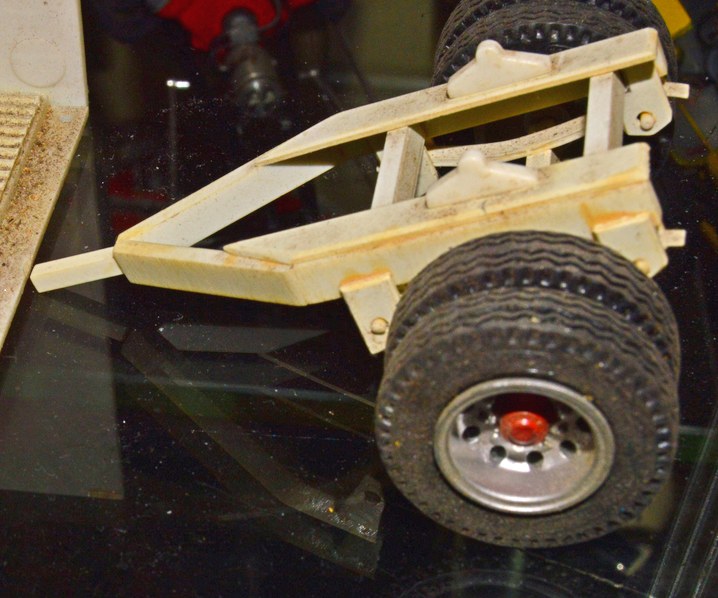
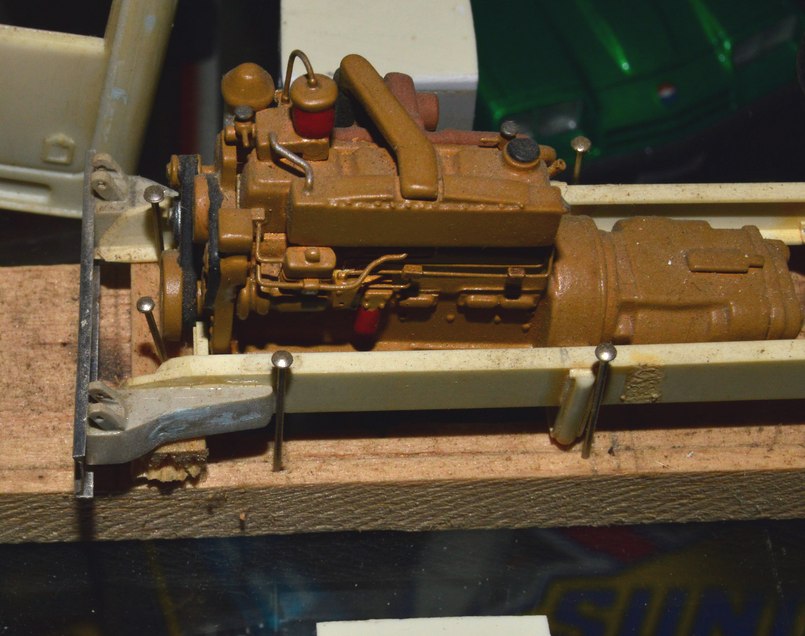
A project I started many years ago. It's an AMT 1/43 KW cabover that I began converting to a day cab. The chassis is scratchbuilt, as is the dolly for the wiggle wagons. Trailers are shortened AMT exterior post vans. I hope to make a chain "curtain" for one of the trailers, in place of doors, given that this is intended for shagging stuff around the city. The steering is poseable. I did some detailing to the Cummins, and made a shorty bumper from aluminum sheet. Obviously, it has a long way to go. I'll try to find some time to get it out and take some better photos, at some point. In the meantime, I apologize for the less than stellar pics! Questions and comments always welcome!
-
Thanks, Scott!
-
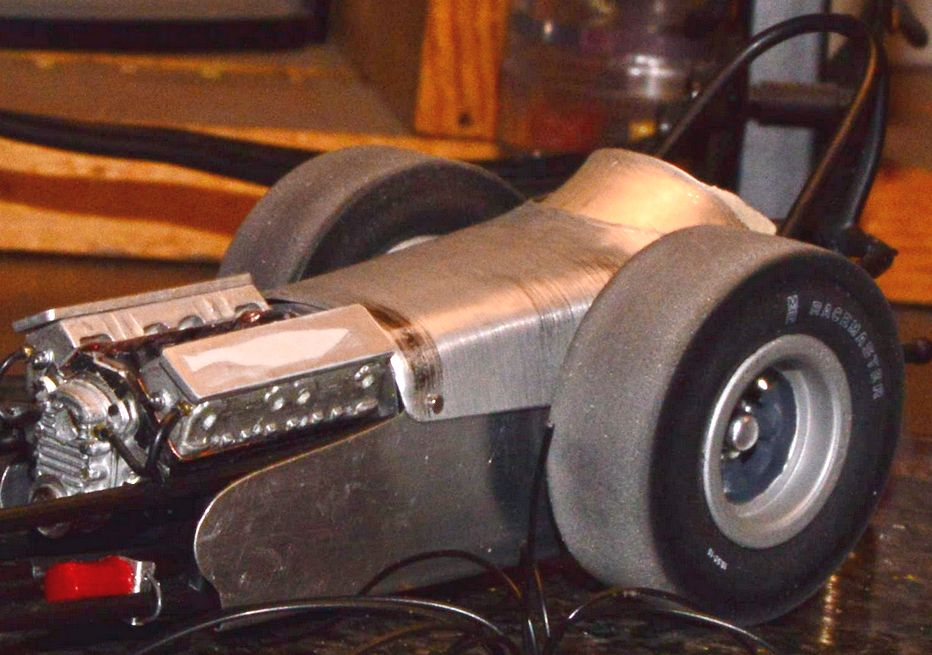
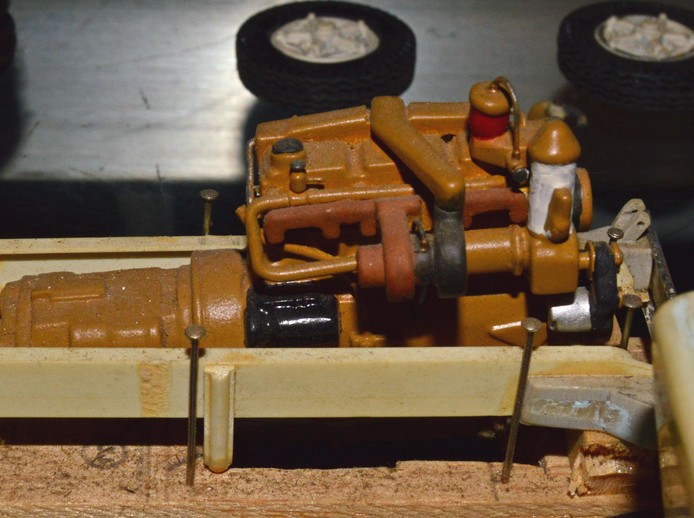
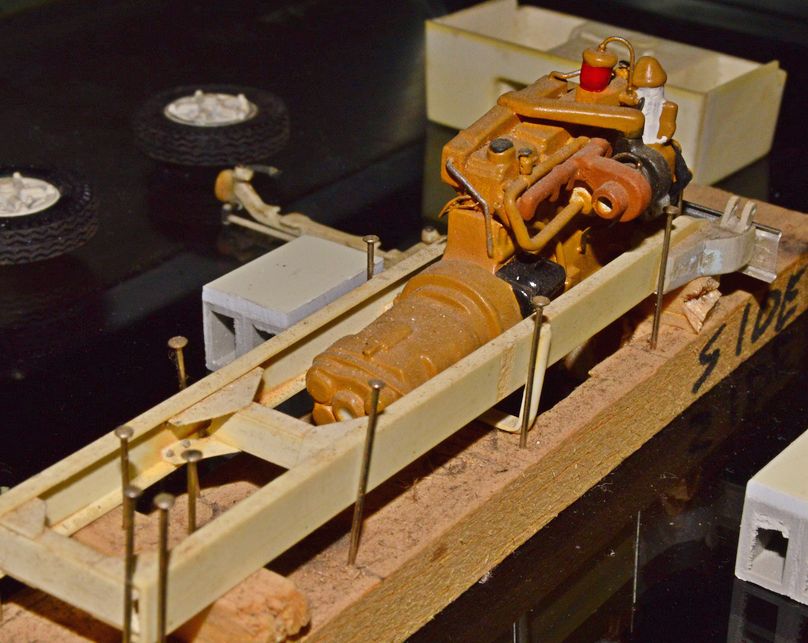
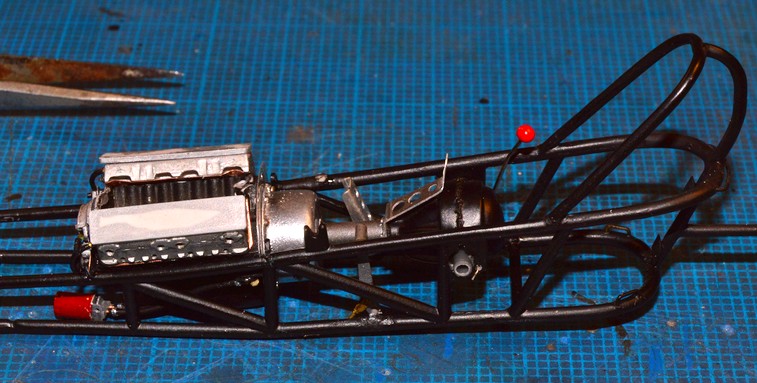
Feeling like I should take a day or two away from this, as each time I make progress, it seems that I have to fix something. Case in point: Although I'd installed the engine, motor plate, torque tube, bellhousing and differential many times, and they'd always fit, as soon as I was ready to install them permanently, suddenly, I was about 1/32" long. Don't know where it came from, as noting had changed. I broke the steering support off the chassis, so, it needs to be reattached, as soon as I am finished with the new steering box (when I found the old one, it looked great, but, somehow, back in the "sands of time", apparently, I'd cut or sanded something cattywompus, and I didn't like it). I can't say how many times I've reattached the oil filter and its assembly. Anyway, I am frustrated. At the same time, I still find myself drawn to the thing, so, perhaps my break won't happen. I am very happy with those Enderles! They really make this thing look the part of a junior fueler. Once the manifold's done, and plumbed, and the stacks are painted, and linkages installed, that assembly will be the crown jewel of this project. My friend, Guy asked if I was going to even up the stacks. Fret not! They're just sitting up there, not even tacked. I just wanted to see how it all looked, together. Just in case you missed the photos on the "Get 'er Done" thread, here's very much what the finished dragster will look like. Qs and Cs welcome, as always! Hope you guys like it!
-
"Bring Out Your Dead" Completion Build--ROUND 2 Is On!
Straightliner59 replied to Snake45's topic in WIP: Model Cars
This is pretty much how it will look, when it's finished. Well, add some wires and "hoses" and a bit of paint, here and there. I am going to do some basic markings, and leave the body bare aluminum. These injectors, on a small block just scream "junior fueler"!
-
Thanks, Snake! I'm on it!
-
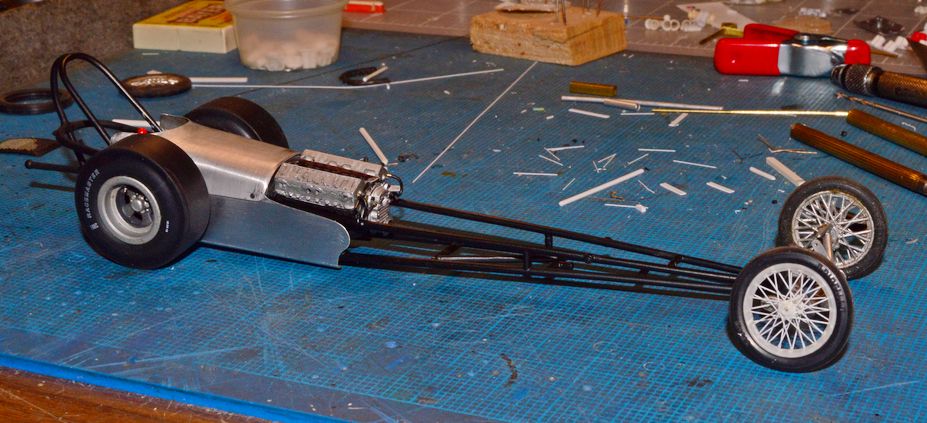
Drivetrain is installed! Also got the oil filter attached to the lines. When I get home from work, I'll attach the bracket to the frame. Redoing the steering box. Will have to reattach the support, since it's one of the many "casualties" this poor thing has suffered, in its resurrection. Next, I'll work on finishing the cockpit, so I can work on the body. Ideally, I will get this to a place where the last thing I will do is finish the manifold/injection, drop it on and hook it up. Sounds easy, huh? Here are two shots of the drivetrain installed, and a gratuitous "on the wheels" shot, just because I like it!
-
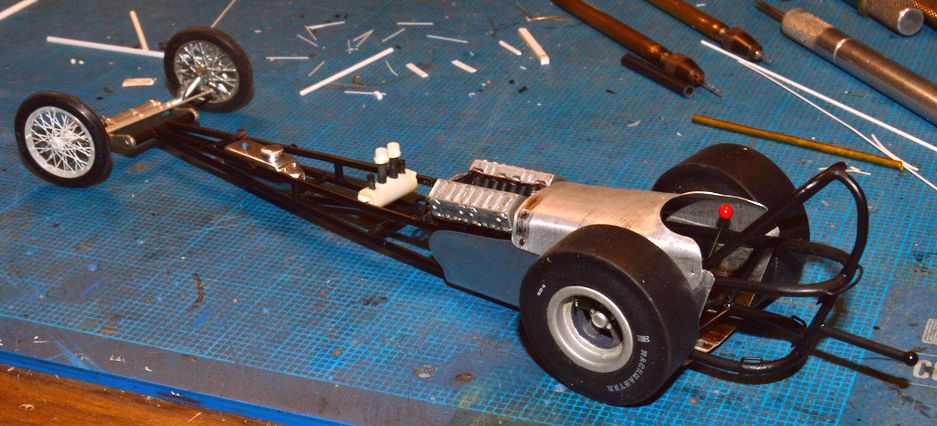
Since yesterday's update, I noticed that my front axle was crooked. Not sure how I did it (must have forgot to measure twice, somewhere!), but, it's fixed. I also broke off the clutch pedal/arm assembly. That's fixed! I drilled some holes in the motor plate/firewall for the throttle and fuel shutoff cables, and for the mag kill wiring. I also replaced the "power shaft" that aligns the engine, bellhousing, output shaft tube and differential, after the plastic one broke off. I'll know within the next couple of hours (I hope) if everything fits along that shaft, and ends up, longitudinally where it needs to be. If it does, I will install the power train, before I hit the hay, this morning. I got the wheels put back together, and the treads of the slicks sanded, as well as the brake rotors and calipers. I hope to post another update, pretty quickly (in modeling terms!) Last, but not least, I completed this little touch, here the body and the firewall meet. It still needs a bit of work...
-
Well, thank you, Jim. I appreciate that!
-
This feels like a breakthrough! I got a bunch of stuff touched up, and gave the heads and front cover a wash of thinned India ink. Both axles are now permanently (I hope!) installed. I drilled out the scratch built front wheel, so that it mounts to the spindle (one more to go!). I still have a few minor things to do, before I can install the engine, bellhousing and drive tube. I swapped out the Blue Streaks for a pair of M&Hs. I like the Goodyears better, but, research says the M&H owned the class, so...In a week or so, I should have everything done, but the injection setup and ignition. That is mostly down to some clean up and assembly. I'm likin' it, so far!
-
"Bring Out Your Dead" Completion Build--ROUND 2 Is On!
Straightliner59 replied to Snake45's topic in WIP: Model Cars
It's beginning to look a lot like a dragster! Front and rear axles are mounted. Brake handle re-installed. Goodyears replaced with M&Hs, even though I like the Blue Streaks, better. Steering shaft support is installed with the third member. I also drilled the scratched front wheel, so it can mount to the spindle. I think I just have a few things to mop up, before I can install the rest of the driveline (engine, bellhousing, torque tube). Oh! This is SO getting done!
-
Very cool! Excellent work, Dann!
-
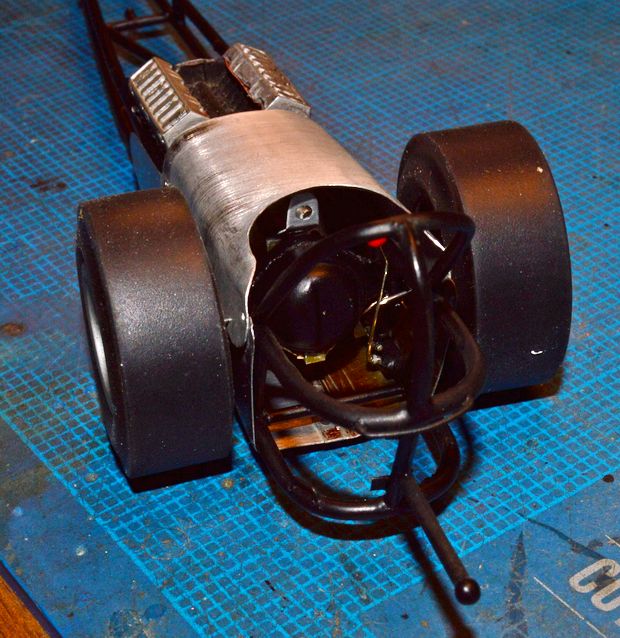
Just a quickie of an update. I made the front motor plate tabs (the white tabs, seen above the pan sump.), added oil pan bolts from Plastruct hex rod, and built the filter "manifold" and bracket. The filter assembly will mount to the lower frame tube using the "u-bolt". Often, this assembly is mounted to the engine, but, there wasn't enough room, so, I have to attach it slightly forward. Also padded the seat. I'm still deciding on what I want to cover the seat with. I have a couple of ideas, but, not sure which direction I will go, just yet. The oil lines are made of some black "bell wire" or phone wire with hose clamps made from aluminum duct tape. In researching remote filters, I discovered there are a couple of different ways to connect them (compression fittings, etc.), and I liked the hose clamps, best. I'm hoping to have the engine installed, after the weekend, so i can get on with finishing the cockpit, and get it on the wheels (once I've built the other front wire, of course!). I am apparently happy with the injector stacks, since I haven't messed with them, in almost two weeks!
-
"Bring Out Your Dead" Completion Build--ROUND 2 Is On!
Straightliner59 replied to Snake45's topic in WIP: Model Cars
Just a quick update on the junior fuel dragster. I got the oiling system done (except for mounting the filter/bracket to the chassis, via the pictured "u-bolt.). Above the oil pan sump, you can see the two small white tabs that are the front motor plate tabs. Added bolts to the pan rails from Plastruct .020" and .030" hex rod. I got the seat padded. I'm still deciding what to "upholster" it with. I'll use either craft tissue or kitchen parchment, unless i can find a textured scrapbooking paper that I like, to create a patterned seat. The harnesses are simply fed beneath the seat, and are only installed, to make sure I could get them through the slots, easily.
-
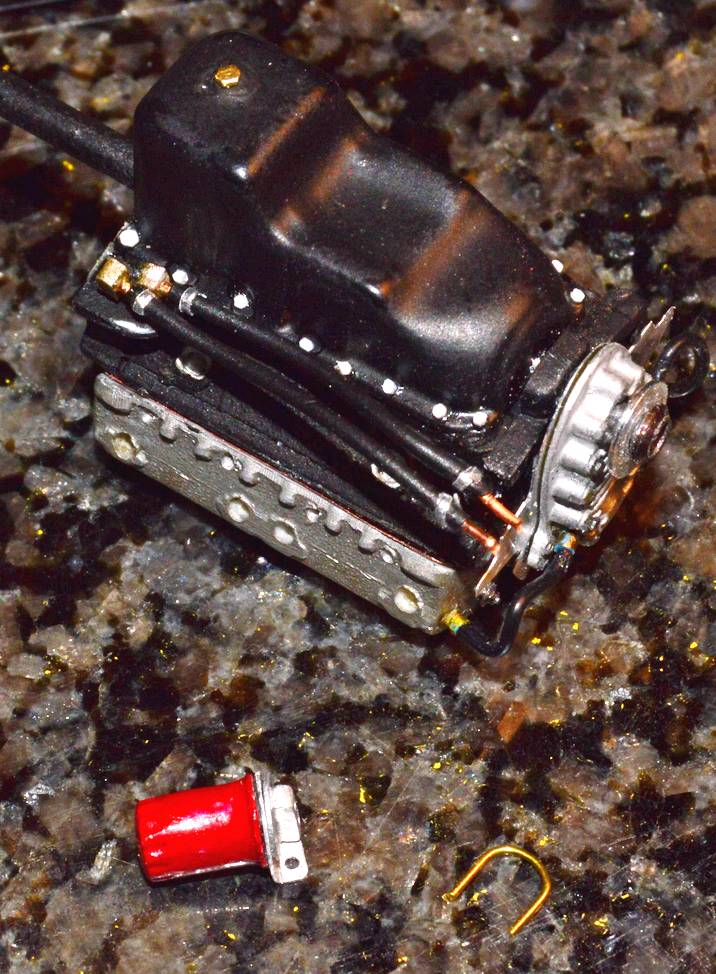
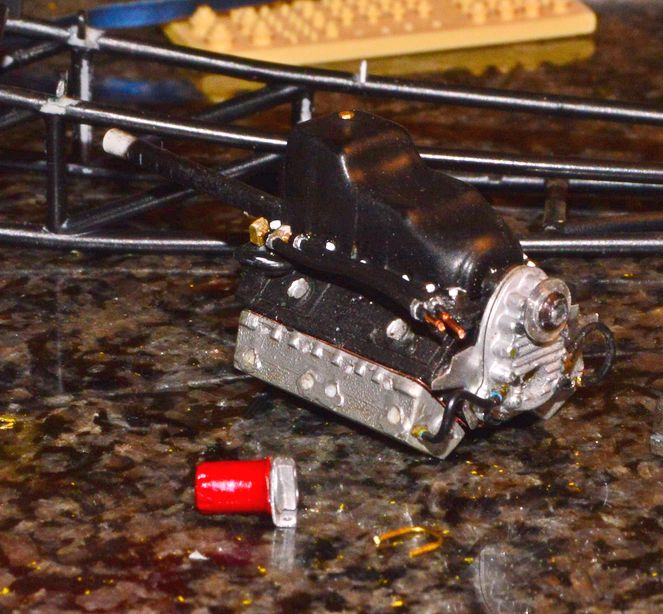
I've found some pretty small diameter wire at the train store. I still have LOTS of the old MSC plug wire lying around, as well, although it's a bit large for stock wires, it's decent sized for competition wiring. I just collect wire! On a related note, here's the link to a tutorial I did a while back on making your own "pre-drilled" distributors/magnetos from readily available materials:
-
Quick update. Unfortunately, no photos until tomorrow. I have installed the padding in the seat--covering to come. I got the components made for the oil filter/bypass assembly. I also traded out the Blue Streaks, for the M&H slicks. Tomorrow, I will pull all the loose stuff from the chassis and install the lower firewall tabs, the front motor plate tabs, and the one that mounts the filter. Once those are installed, I should be ready to begin installing some of the chassis attachments, permanently. I'm hoping for a warmer day, soon, so that I can shoot some paint on a few parts (I really need to get my spray booth ducted!). Then, it will be on to the other front wheel! I still think I can make it, by deadline...