Straightliner59
-
Posts
5,805 -
Joined
-
Last visited
Content Type
Profiles
Forums
Events
Gallery
Everything posted by Straightliner59
-

"Bring Out Your Dead" Completion Build--ROUND 2 Is On!
Straightliner59 replied to Snake45's topic in WIP: Model Cars
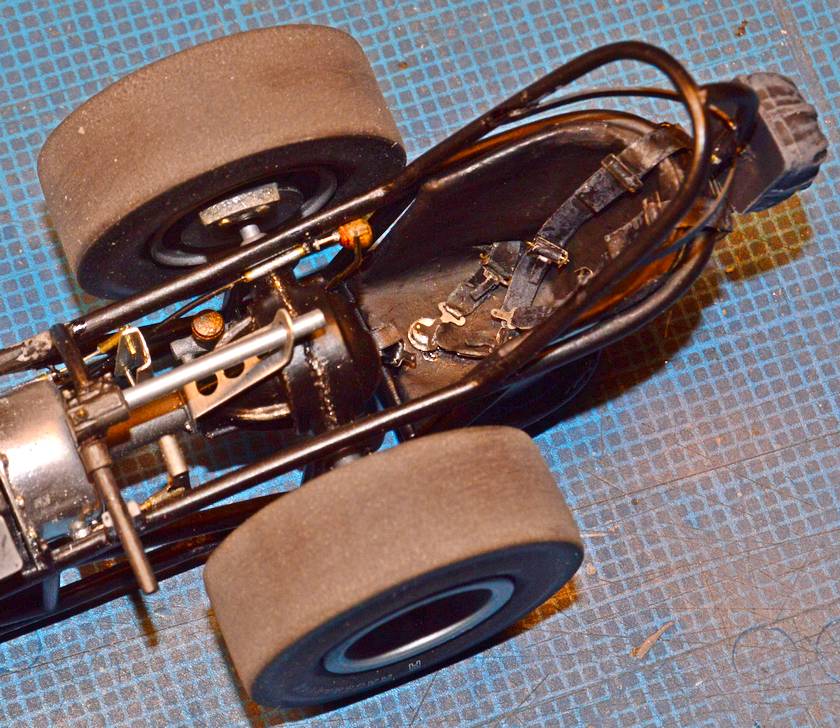
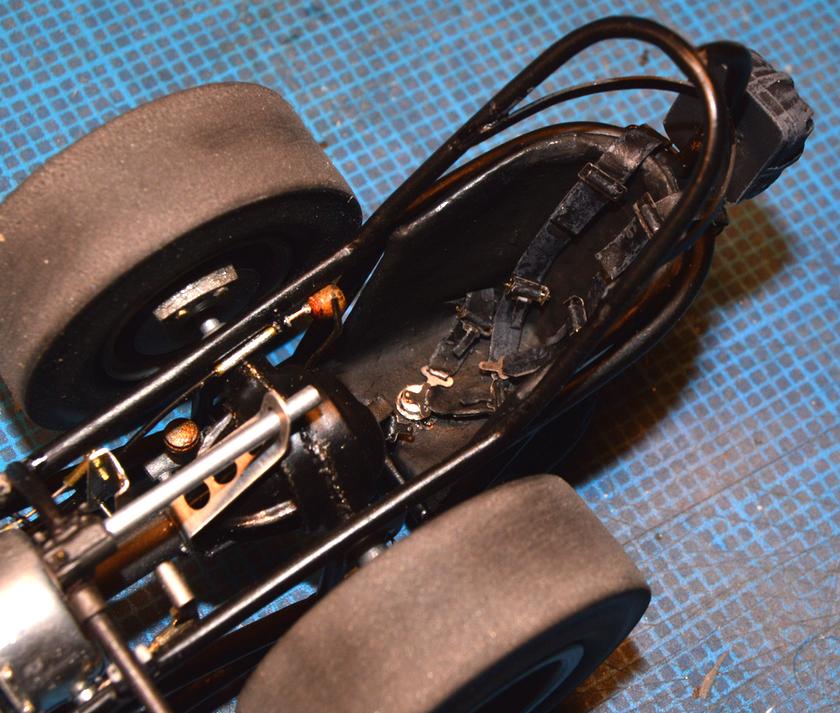
I've gotten a few things done. Will get the roll cage wrapped, next, with an eye toward mounting the body. 'Chute is just hnging out, in these pics. I will be building a new manifold, as well...
-
Okay, here's where I am, now. The harness is installed. 'Chute is mostly painted, and is hanging on its mount, in these photos. I got the puke tank painted, and its draincock installed. Next up, I'll be installing the eye for the 'chute release cable and 'd'-ring, and wrapping the roll cage with thin strips of electrical tape. I dry-brushed some steel on the diff, since the driver's legs will be riding over it. Getting closer to working on mounting the body...
-
"Bring Out Your Dead" Completion Build--ROUND 2 Is On!
Straightliner59 replied to Snake45's topic in WIP: Model Cars
Still flogging away, here. Hope to complete the cockpit over the weekend. I have the harness installed. I also got the "puke tank" painted. I have an old brass model railroad casting of a draincock that I will be installing in that. Once the cockpit is done, I can move on to installing the body. I have also begun work on another (third? fourth?) manifold. I've figured out a couple of things, regarding it, that made me realize just what an idiot I can be, sometimes! -
Bantam Fuel Altered - New pics 1-7
Straightliner59 replied to Codi's topic in WIP: Drag Racing Models
Tim, the fuel lines--oh, hell, everything looks great! The hard injection lines are perfect, man. Excellent work, sir! -
Interior painting
Straightliner59 replied to porschercr's topic in General Automotive Talk (Trucks and Cars)
I'm with you! If it's the color I want/need, I'm using it! -
Bantam Fuel Altered - New pics 1-7
Straightliner59 replied to Codi's topic in WIP: Drag Racing Models
Outstanding, sir! I am continually amazed and inspired by your work. Enjoying watching this come together. -
Scratchbuilding Slapper Bars
Straightliner59 replied to Straightliner59's topic in Tips, Tricks, and Tutorials
You're welcome, John! Good to see you, around! -
I learned that the hard way, too!
-
Austin!
-
Scratchbuilding Slapper Bars
Straightliner59 replied to Straightliner59's topic in Tips, Tricks, and Tutorials
Glad to help! -
Scratchbuilding Slapper Bars
Straightliner59 replied to Straightliner59's topic in Tips, Tricks, and Tutorials
Glad you guys like it, and may find it useful! Thanks, gentlemen! -
Back in "the day" , a lot of GM drag race cars used Lakewood slapper bars, as traction aids. Mopars used pinion snubbers, mainly. I put this piece together for the old SLM website. I've put it back together, and, since I don't think I have shared it, here, I thought I would, now. Some of MPC's old Monza kits had a set that wasn't too bad, but, these are better(!), and they can be built very quickly...
-
Car Model History in My Hands!
Straightliner59 replied to Snake45's topic in General Automotive Talk (Trucks and Cars)
I used to buy Auto World catalogs at the local newsstand, in my old home town. I still have the '74-1/2, and the '75 issues, I think. That may explain why there is no shipping label on your catalog? -
Detail Master Racing Harnesses
Straightliner59 replied to Straightliner59's topic in Model Building Questions and Answers
Thank you, Scott. Not too late, at all. Your caption is right on the money. It is a bear to figure them out. Those look great! -
I technically didn't get this, today, but I found this, and two others (one turquoise and one, "metallic bronze", which isn't bronze, at all, but a nice, almost pearl red), while digging through one of my paint drawers. Apparently, I bought them on closeout, as the orange sticker on top marks them at 5/$1.00. They are all, unbelievably...good!
-
Wire and Hose sizes
Straightliner59 replied to SCRWDRVR's topic in Model Building Questions and Answers
You are so right, Trevor. Since so much of the stock we use is manufactured in those sizes, I always use that method. Easy to remember, easy to calculate! -
"Bring Out Your Dead" Completion Build--ROUND 2 Is On!
Straightliner59 replied to Snake45's topic in WIP: Model Cars
I should finish this time, with time to bring out something else, to carry to round four! -
Alan, I reckon you've heard at least a thing, or two about Reliable Resin! Ahh! The good ol' days! :-)
-
Thanks, JC, but, that is the brake handle knob from the re-creation of Karamesines' Chizler. It is very cool! I was going to try to somewhat replicate it, for mine, I have a 1/72nd scale tank commander's head I was going to use, but it is just too big. That's why I started carving the skull. I should have this thing finished in about a month, give or take.
-
Dig the subject! Especially those Pennzoil cans. Nice work!
-
"Bring Out Your Dead" Completion Build--ROUND 2 Is On!
Straightliner59 replied to Snake45's topic in WIP: Model Cars
Yessir! -
"Bring Out Your Dead" Completion Build--ROUND 2 Is On!
Straightliner59 replied to Snake45's topic in WIP: Model Cars
Thank you, Vince! I'm looking forward to watching your tractor come together. It's looking good, so far! -
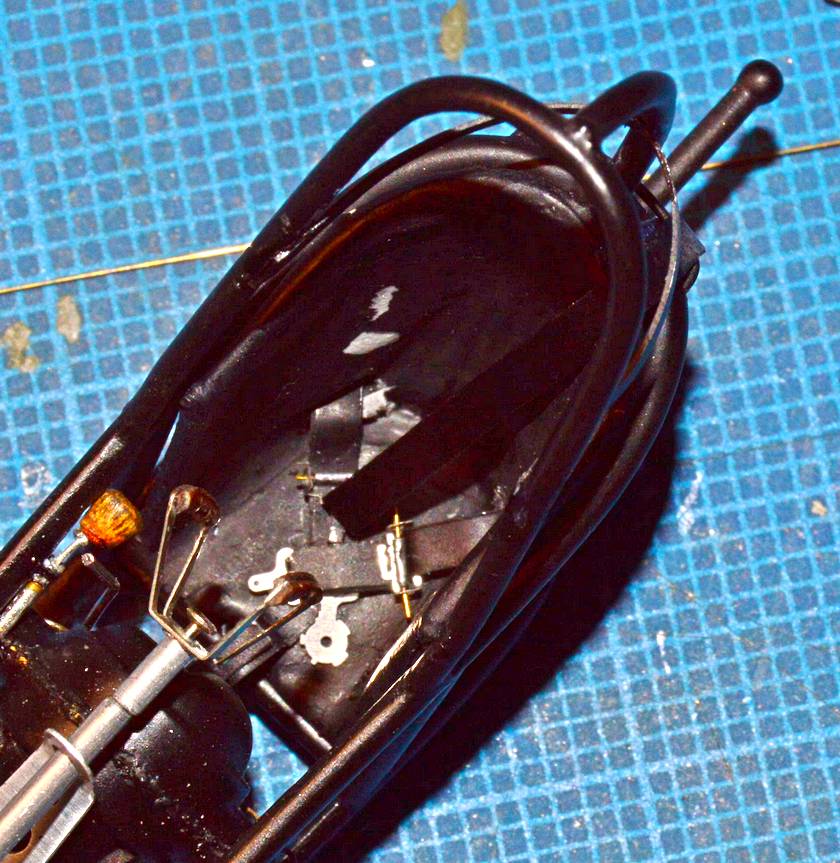
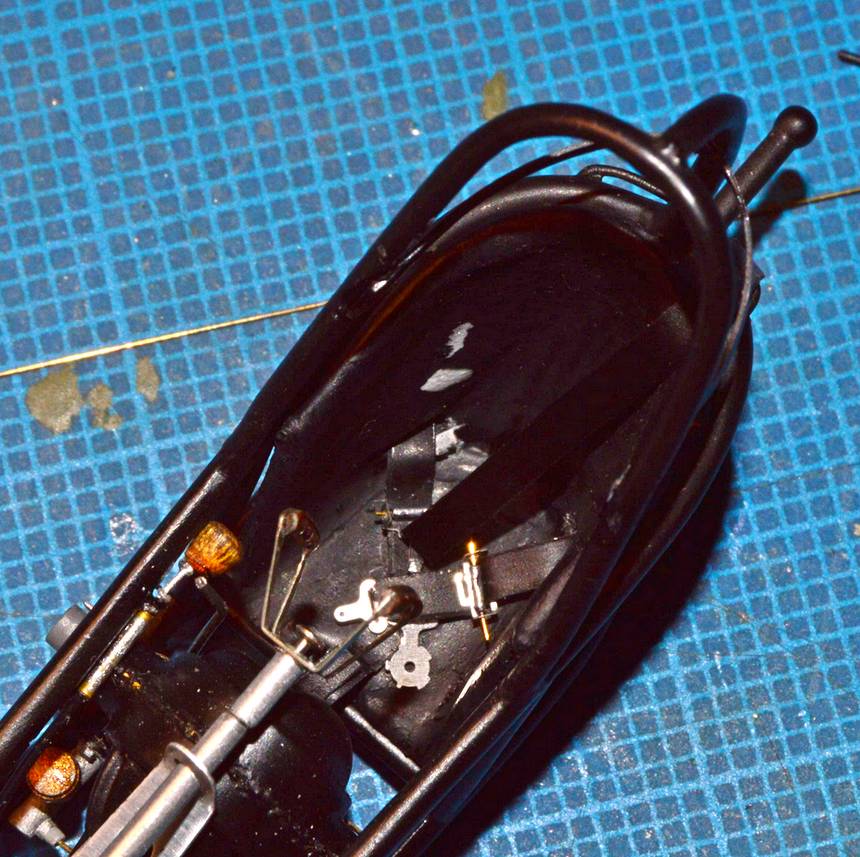
Quick update on harness installation. Still work to do! Hope to have this completed this weekend. Qs and Cs always welcome! Thanks for looking.
-
"Bring Out Your Dead" Completion Build--ROUND 2 Is On!
Straightliner59 replied to Snake45's topic in WIP: Model Cars
I've begun installing the harness. Detail Master's instructions could stand to be a bit more thorough, but, by studying photos of real assemblies, I think I figured it out. One recommendation I will make is to replace the photo-etched bars for the adjusters with brass rod--that makes things much easier! I still need to trim those. I also have touch up to do, along with installing the rest of the clasp assembly. I will also dry brush some highlights on the straps, once they are permanently installed and "posed". The shoulder harness in the photo is simply hanging there, as it still needs hardware.
-
Detail Master Racing Harnesses
Straightliner59 replied to Straightliner59's topic in Model Building Questions and Answers
Thanks! Usually, I fake it! Thought I'd try the full treatment, for once! Here's the progress...