Straightliner59
-
Posts
5,809 -
Joined
-
Last visited
Content Type
Profiles
Forums
Events
Gallery
Everything posted by Straightliner59
-
 Thank you, Stu! It's getting closer and closer.
 -
They are to give the car more "rollout", which i essentially a bit of leeway, with the starting line beam. The front motorcycle tires and wheels had such a small profile, that the beam didn't always "see" them. The plate made for a larger "target". I hope that clarifies it, some.
-
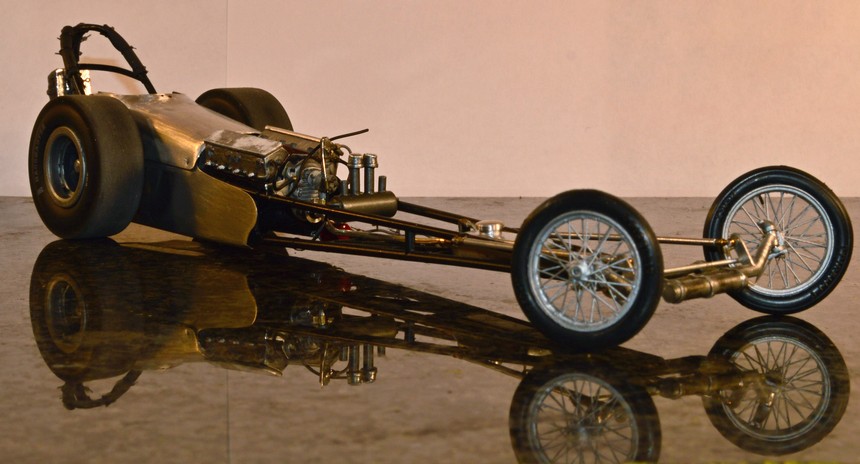
If I can do daily updates, that means I am making progress! I got the drag link all put together and installed. I still need to paint the "hardware", but, this is otherwise done. I had a couple of spokes break away from the outer rim, on this side. I figured the easiest way to fix that was to put on a "rollout" plate. Next up is mopping up behind myself, and beginning the induction setup. I really feel like it's the Enderle injectors that will totally "make" this dragster. It's getting closer...

-
"Bring Out Your Dead" Completion Build--ROUND 2 Is On!
Straightliner59 replied to Snake45's topic in WIP: Model Cars
Thanks, Snake! -
Thanks, JC. They are definitely better than those abominations that come in the box(es)!
-
"Bring Out Your Dead" Completion Build--ROUND 2 Is On!
Straightliner59 replied to Snake45's topic in WIP: Model Cars
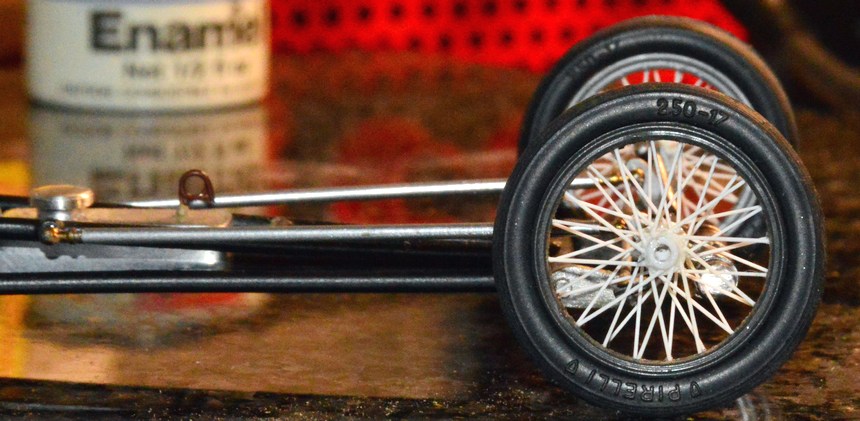
They're done!
-
Painted, tires installed. I cut a divot in the end of a piece of .75" aluminum rod, as a tool to help slip the tires onto the wheels, after assembly. I didn't want to find out what might happen, if I had tried to "wrestle" them on. I'll get them permanently mounted before I hit the sack, I think...hope!
-
The wheels are built, except for joining the wheel halves, and finishing them. I was thinking about using Alclad, but, I may go with metalizer, instead, to avoid extra coats (the undercoat for Alclad). I think they'll work!
-
"Bring Out Your Dead" Completion Build--ROUND 2 Is On!
Straightliner59 replied to Snake45's topic in WIP: Model Cars
Just a bit of clean up, then join the halves, and get some sort of finish on them. But, it's on all four wheels!
-
Chevy Nova Race Car
Straightliner59 replied to zakdoggi's topic in WIP: Other Racing: Road Racing, Land Speed Racers
I like that! A lot! My first car was a '63 four door, with a 194. I really loved that car. I bought a 283 that I was going to build, and put in it, but never got around to finishing the engine... Looking forward to watching this come together. -
Those are excellent! I really should learn more about using my mill, by making more chips!
-
Thank you, kind sir. I'm halfway done with the other rim, now. Should finish that, tomorrow, then, I can fire up my recently-ducted spray booth and airbrush, and shoot some paint on these babies. I'll likely go with Alclad, but, will look around and see what other possibilities I might have.
-
I appreciate that, Bernard. I don't think I'm quite ready to try something like a production car body, yet, so, your method is perfect for things like that!
-
Ahhhh, Bernard. The finish is amazingly realistic (I may have to try it on something, once I get the digger done!). Dig your choice of wheels, too. Sweet lookin' Deuce, man!
-
Very nice work,JC! Enjoying this thread, for sure.
-
I mostly use FastStone to edit photos. I generally try to keep the files under 100K Like Tom mentioned, Irfanview is another good program. Both FastStone and Irfanview are free.
-
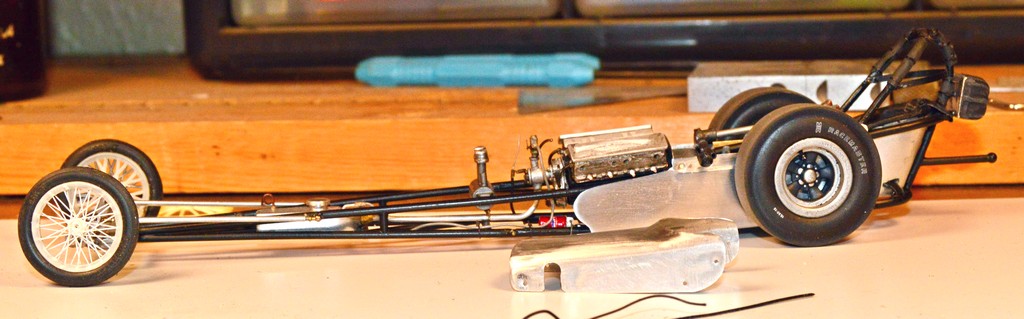
Halfway home on front wheel number two! I just hope it matches the first one! Maybe I can get her on the wheels, before the weekend's over.
-
If you highlight the text you want to quote, a small dialog window opens that says "quote this". Click that, and yer off to the races! Just like that! Aha! We have a convert! Time to start a crusade...
-
Good work. Love that color! Which orange did you use?
-
Early Ferrari Models 1949-1967
Straightliner59 replied to Gramps46's topic in General Automotive Talk (Trucks and Cars)
Now, if I just had a "gleaming alloy air-car" to go with that Barchetta... -
Both of those guys have excellent reputations! There's a guy on Ebay I buy metal from (6061dude). He's in Colorado Springs, which helps speed delivery, however, two weeks ago (3:00 AM, Monday), I ordered two aluminum bars. They were in my mailbox on Tuesday! Shipping has always been free on the small quantities I've bought, as well. The prices are pretty good, too. In case anybody is looking for brass or aluminum stock.
-
"Bring Out Your Dead" Completion Build--ROUND 2 Is On!
Straightliner59 replied to Snake45's topic in WIP: Model Cars
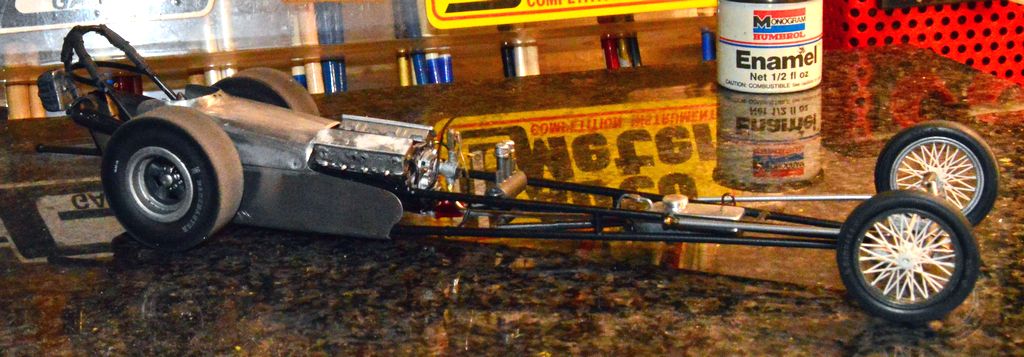
The body, the brakes and the slicks are on the car! I guess it's about time to build another front wheel, and get them painted and installed.
-
"Bring Out Your Dead" Completion Build--ROUND 2 Is On!
Straightliner59 replied to Snake45's topic in WIP: Model Cars
It's very cool! Nice work, Dave. -
Well, dang! OP was looking for .020". I thought maybe you'd found some! I know I have at least their .030" and .040"triangular rod. Thanks, Joe!
-
Link is broken. Plastruct or Evergreen?