Straightliner59
-
Posts
5,798 -
Joined
-
Last visited
Content Type
Profiles
Forums
Events
Gallery
Everything posted by Straightliner59
-

Western Star 4900 FA plow truck
Straightliner59 replied to BK9300's topic in WIP: Model Trucks: Big Rigs and Heavy Equipment
That, too, looks spot-on! I was driving Freightliners, at the time. They didnt have the foiled insulation. This thing is so fine, sir! -
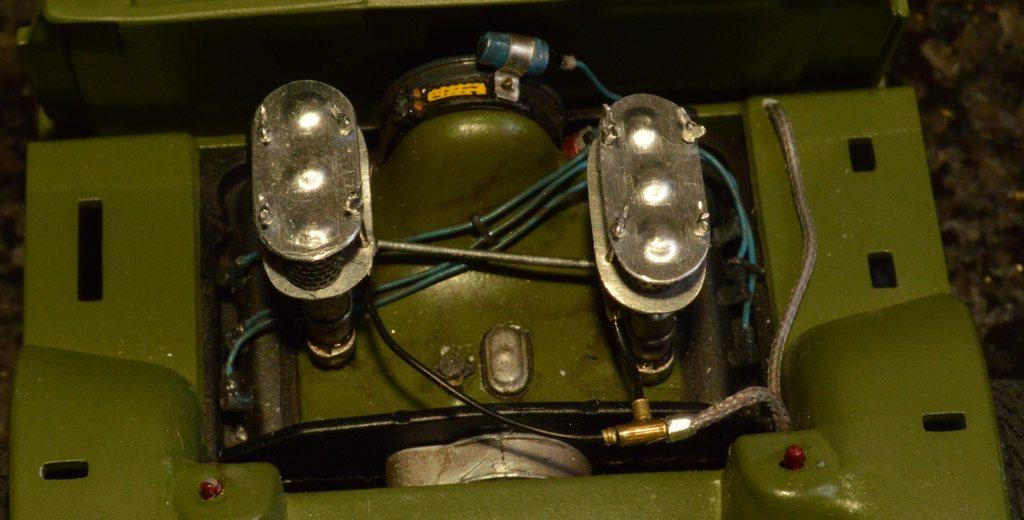
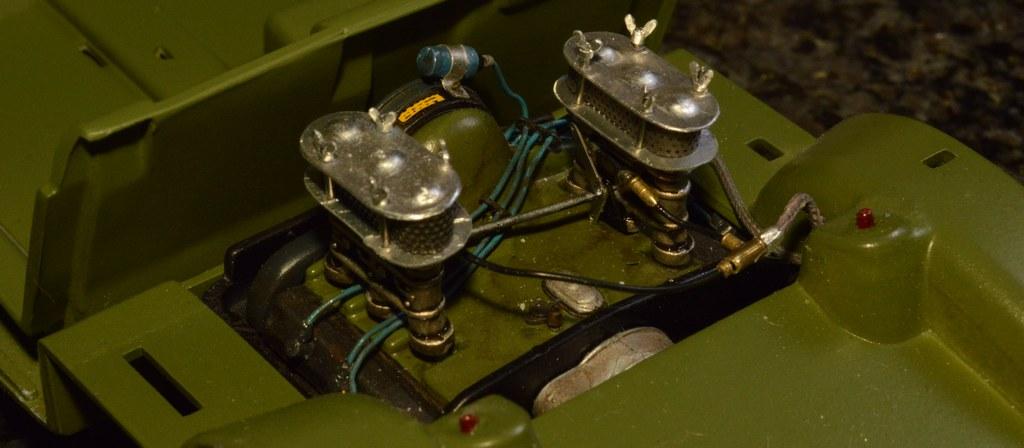
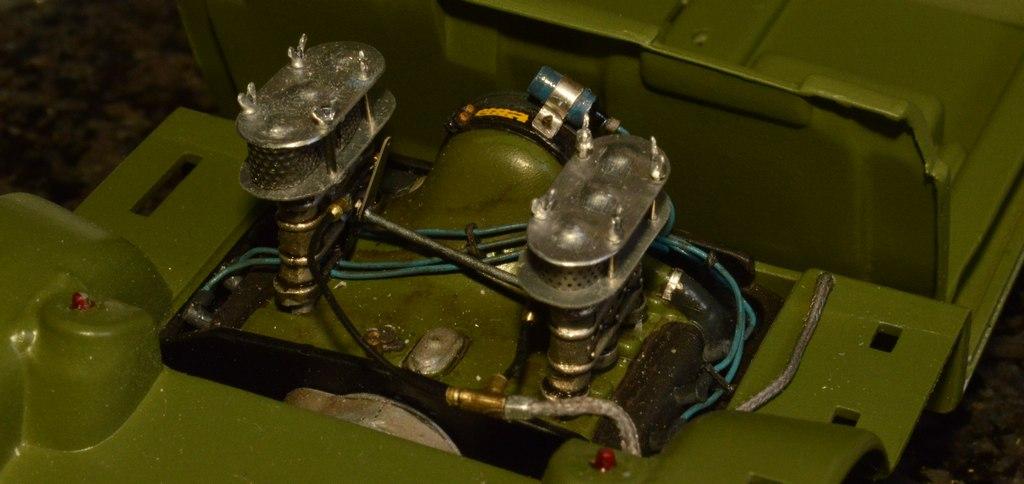
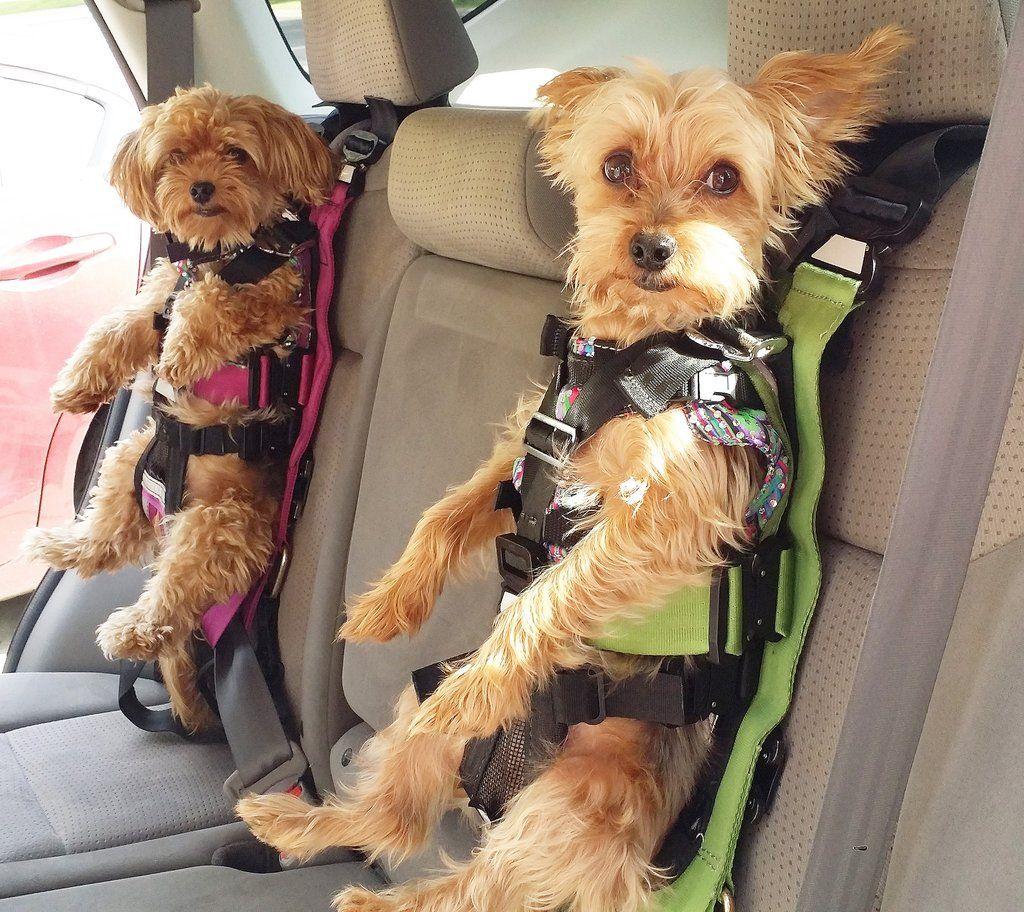
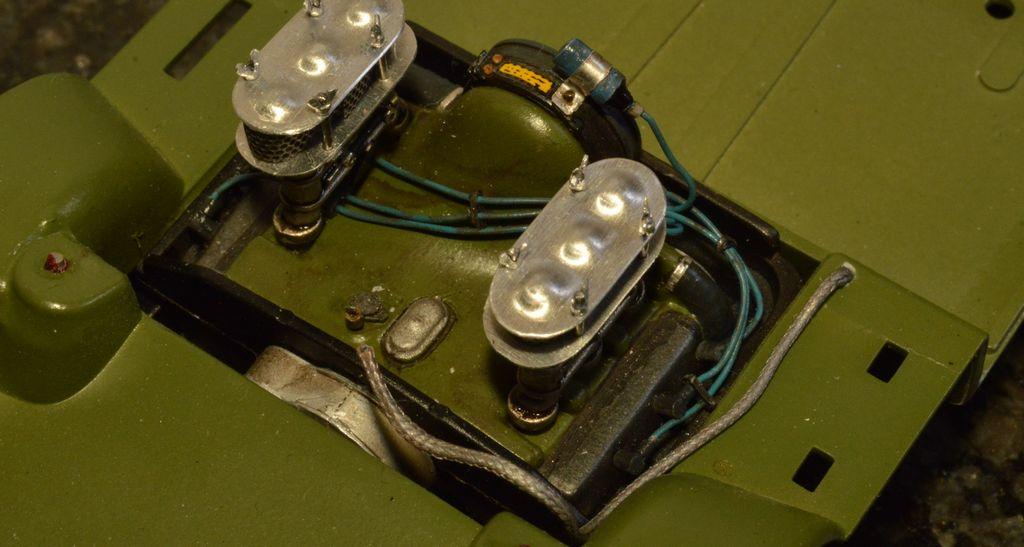
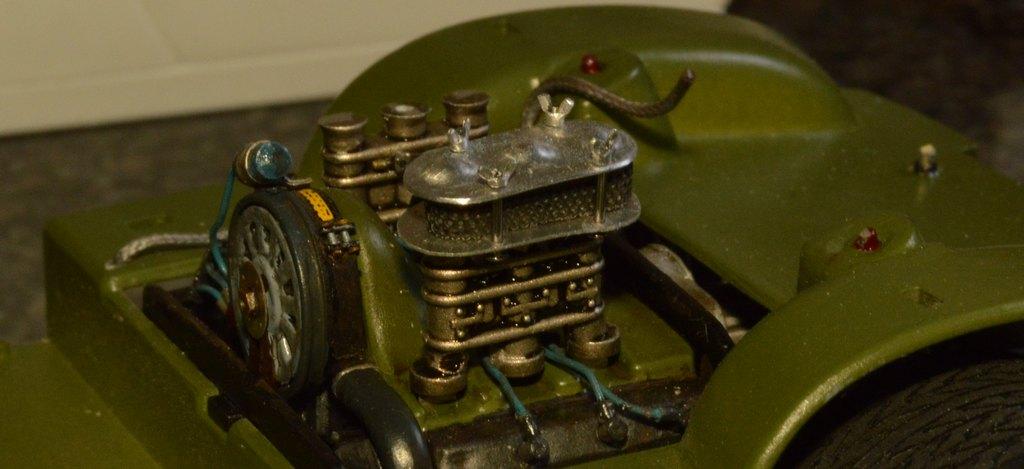
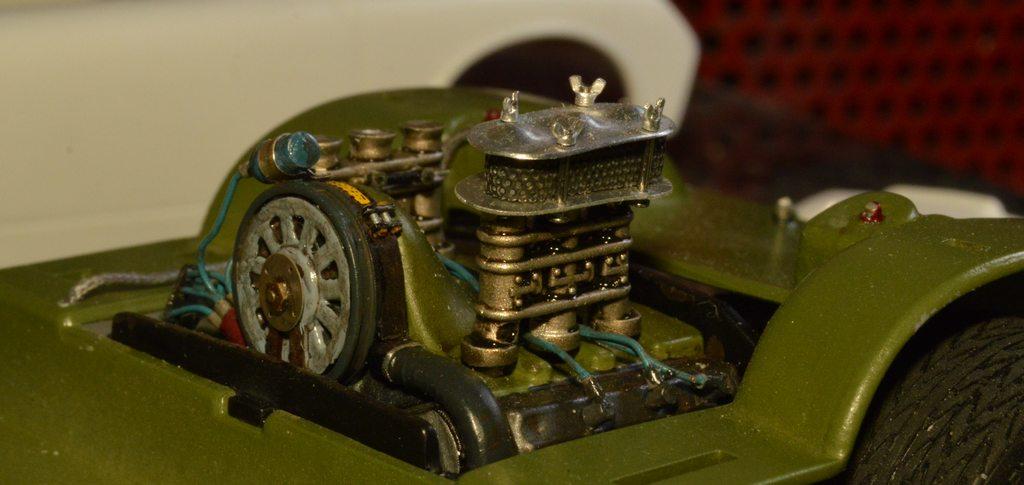
The interior floor unit is painted. I got the fuel lines installed. They're not close to perfect, but, they'll be tucked behind the rear bulkhead area thingie, never to be seen again! Next, after the seat's painted, I have to scratch up one of these harnesses. The friend I'm building this for has a little dog, and, she's gonna be riding along, I would assume. She might as well look like a racer. It doesn't look particularly comfortable, but, it looks about as safe as it could be. These pooches don't look thrilled!😂 Anyway...Thanks for looking!

-
Western Star 4900 FA plow truck
Straightliner59 replied to BK9300's topic in WIP: Model Trucks: Big Rigs and Heavy Equipment
Utterly fantastic work, Brian. Your choices of materials are excellent. All looks like it should. Even if it's not completely prototypical to the truck, the insulation could easily be a thermal blanket, applied later on. -
Yes, the tungsten-carbides are very brittle, but, you'll likely break them less frequently, as you get used to using them. I don't think you can ever really have too many drill bits, of any kind!😁I think I have about a dozen different pin vises, too.
-
drag car decal indentification
Straightliner59 replied to gtx6970's topic in Model Building Questions and Answers
Federal Mogul. -
Hose fitting??
Straightliner59 replied to 1593 Modelworks's topic in Model Building Questions and Answers
Thanks, Greg! -
Definitely good! I have old Hot Rod Magazines that have headers coated in white, light blue, yellow and orange, too!
-
Ford Pro Stock or Pro Street Kits?
Straightliner59 replied to PHPaul's topic in Model Building Questions and Answers
You might take a look at the '80s Monogram Pro Stockers. They have big tubs, ans A-arm front suspensions. T-birds would have the big Fords with dual carbs. -
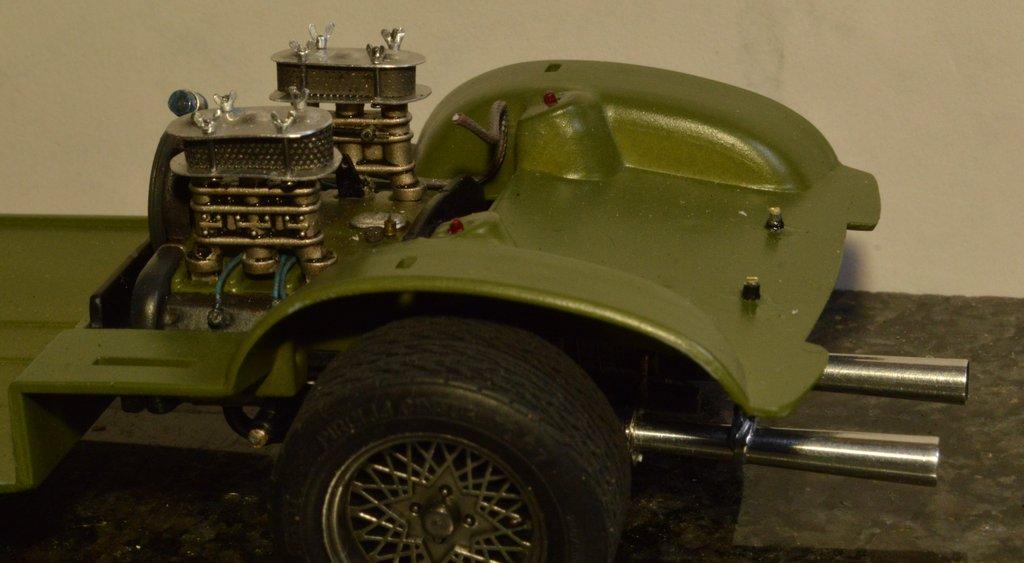
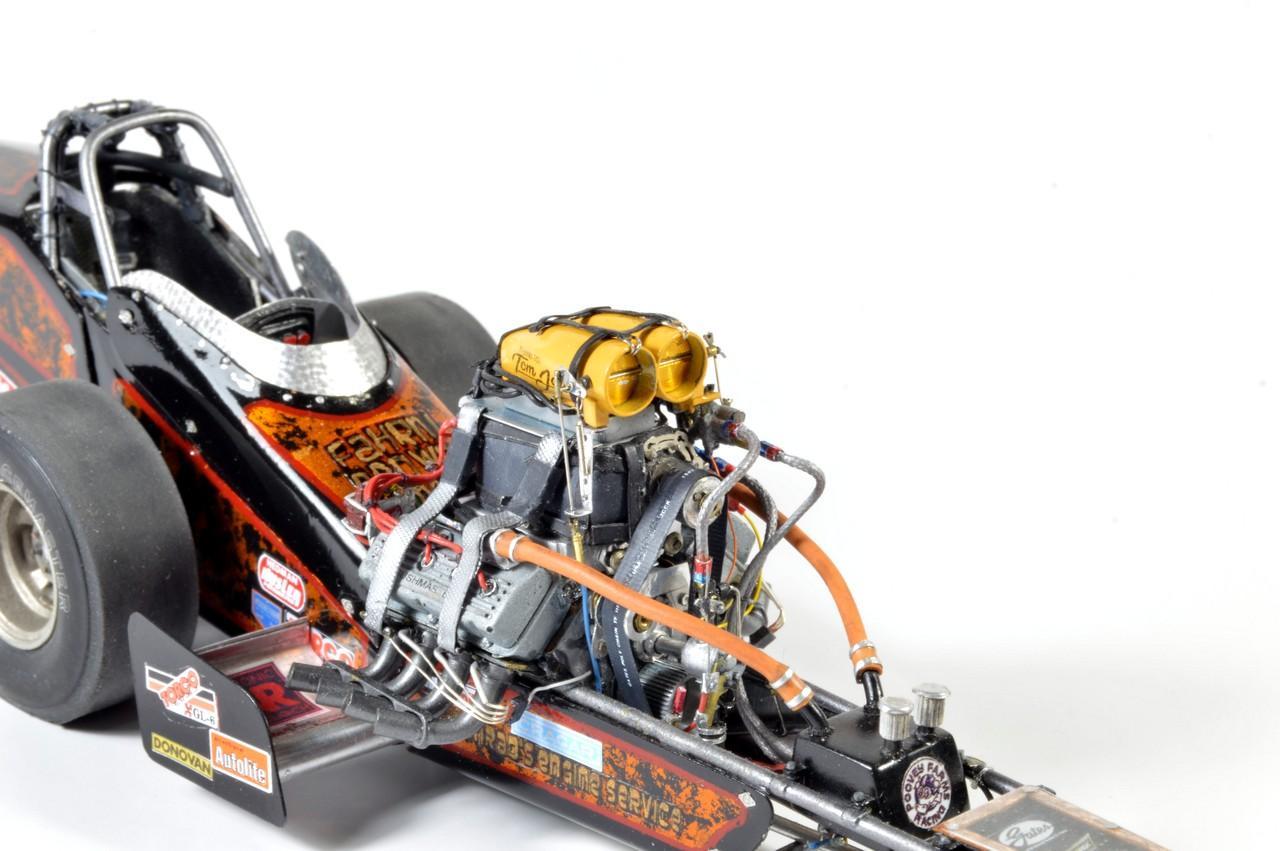
I got the other air filter unit assembled. Not much done, beyond that. Work is proceeding on...Thanks for looking!
-
Looks very cool! Its overall vibe is killer! Nice work.
-
Hose fitting??
Straightliner59 replied to 1593 Modelworks's topic in Model Building Questions and Answers
I've always said that "I'm a little slow, but I catch on."😄This whole pursuit is a constant work in progress! -
Western Star 4900 FA plow truck
Straightliner59 replied to BK9300's topic in WIP: Model Trucks: Big Rigs and Heavy Equipment
Most importantly, you will! -
Hose fitting??
Straightliner59 replied to 1593 Modelworks's topic in Model Building Questions and Answers
Maybe something like this?
-
Western Star 4900 FA plow truck
Straightliner59 replied to BK9300's topic in WIP: Model Trucks: Big Rigs and Heavy Equipment
Brian, I love the cab interior. Looks just like an office! Different equipment than any of mine have had, but, it looks as it should. Excellent work, sir! -
This is one of my favorite projects I've ever seen. Part of it, is that it reaches my childhood fascination with big construction equpiment. But, also, and moreso, it's just a fantastic bit of work! I assume it will need counterweight, if the boom's extended. What do you have in mind, for that?
-
Hose fitting??
Straightliner59 replied to 1593 Modelworks's topic in Model Building Questions and Answers
Indeed. I use a lot of that, too! I don't recall ever buying any aftermarket AN fittings. I have used hex fittings and nut/bolt/washer model RR castings, back before Evergreen and Plastruct started making hex stock. When I built this, some 30-odd years ago, I used wire insulation for the fittings. They're okay--or, were, then. Now I don't think I'd find them to be satisfactory!
-
Hose fitting??
Straightliner59 replied to 1593 Modelworks's topic in Model Building Questions and Answers
Over the last year, or so, I have started making my own. I couldn't, unless I had my Sherline equipment. Granted, those aren't standard, in most guys' shops. -
I use Super Clean. I like it, because, unlike bleach, it removes the lacquer undercoat, as well. You can leave kit parts in it, as long as you want, without harm. Some guys like Easy-Off in the yellow can. I've always felt like that leaves a residue to be dealt with. Purple Power will also work, but not as quickly as Super Clean.
-
At least if you make it to fit, you know it will fit! That's why we scratchbuild, right, Greg?
-
Thank you, Brian! It took a minute to get them figured out.
-
I agree, completely. I have bought a pretty fair amount of aftermarket stuff, across the decades. Other than wiring, photoetch, and maybe things like oil filters, because you always need good ones, I haven't used all that much of it. I get my joy from scratchbuilding. That's the most satisfying aspect of the hobby, for me!
-
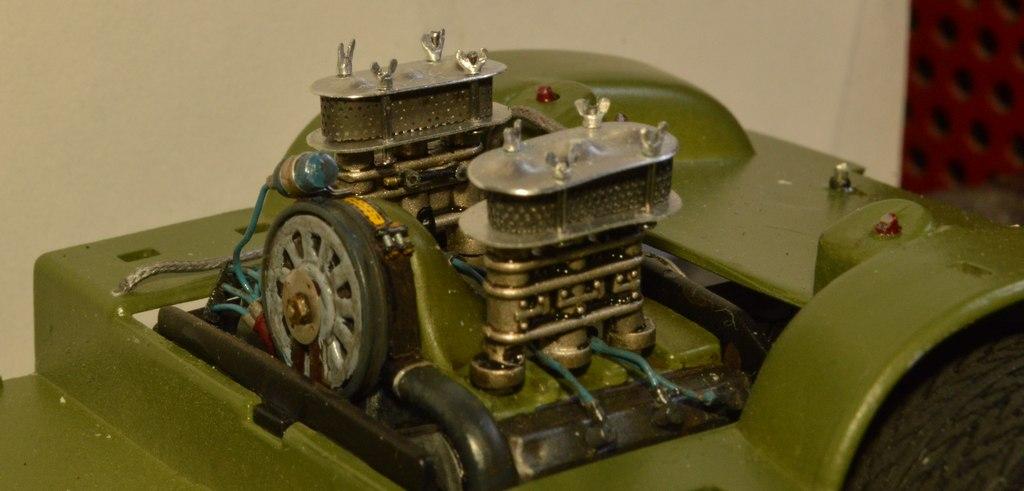
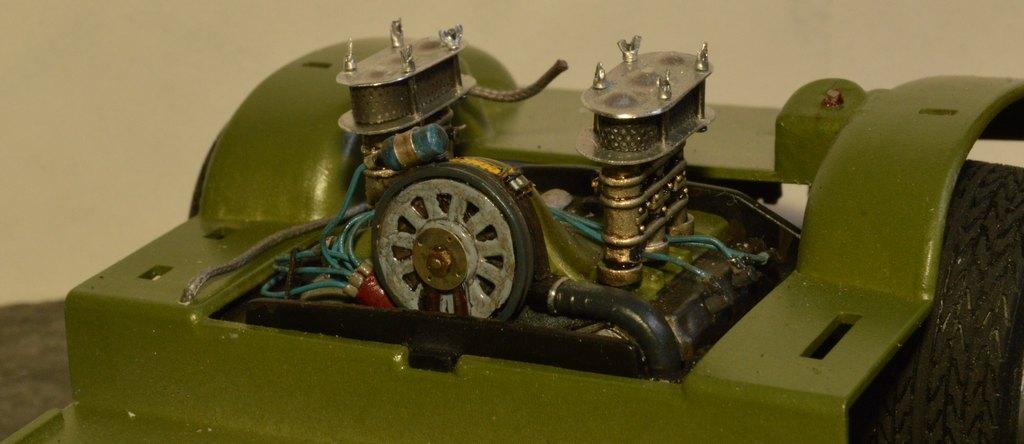
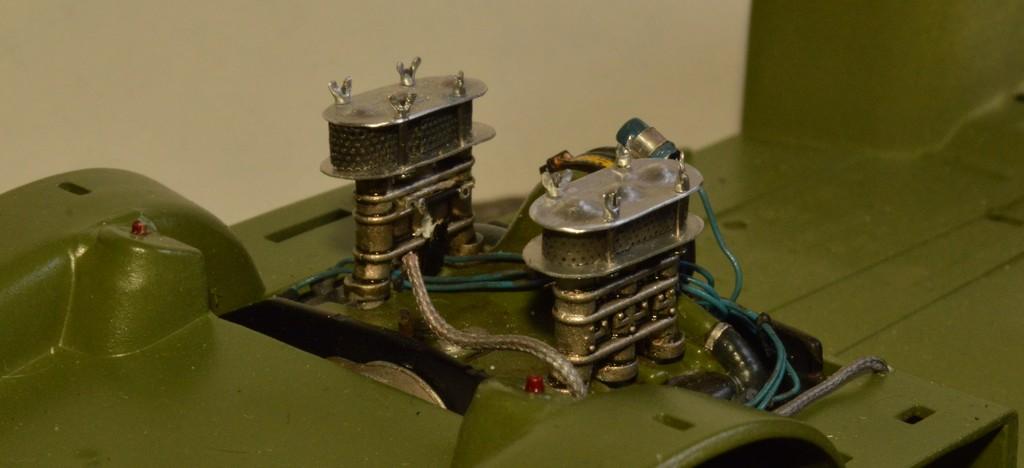
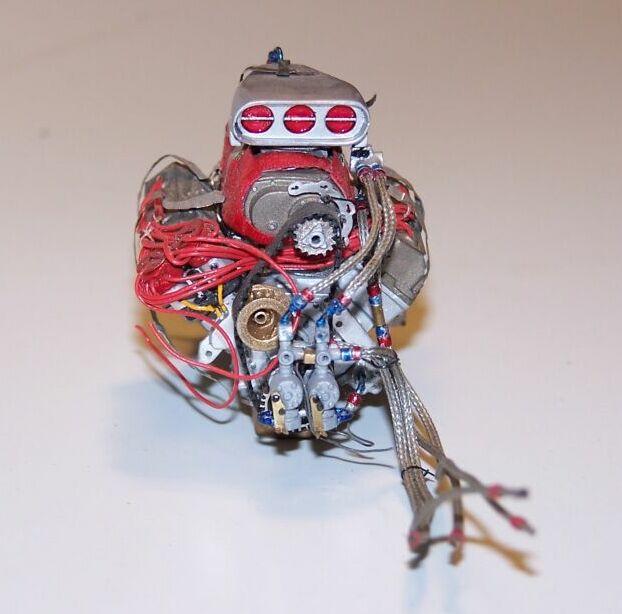
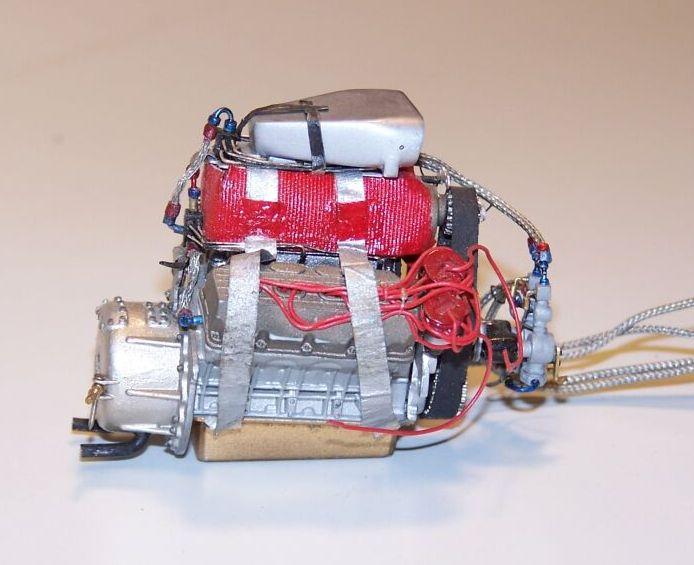
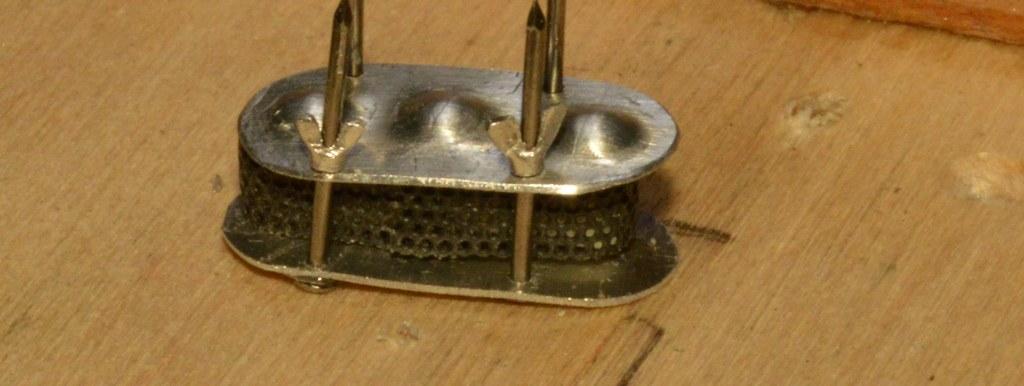
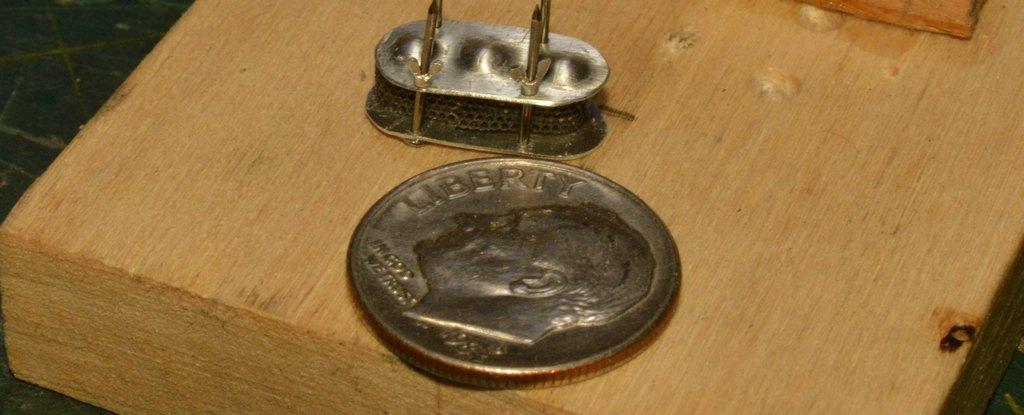
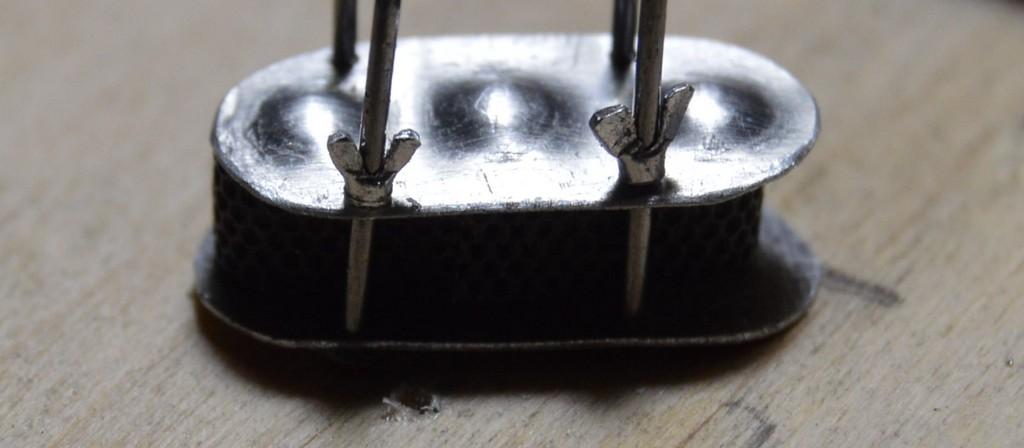
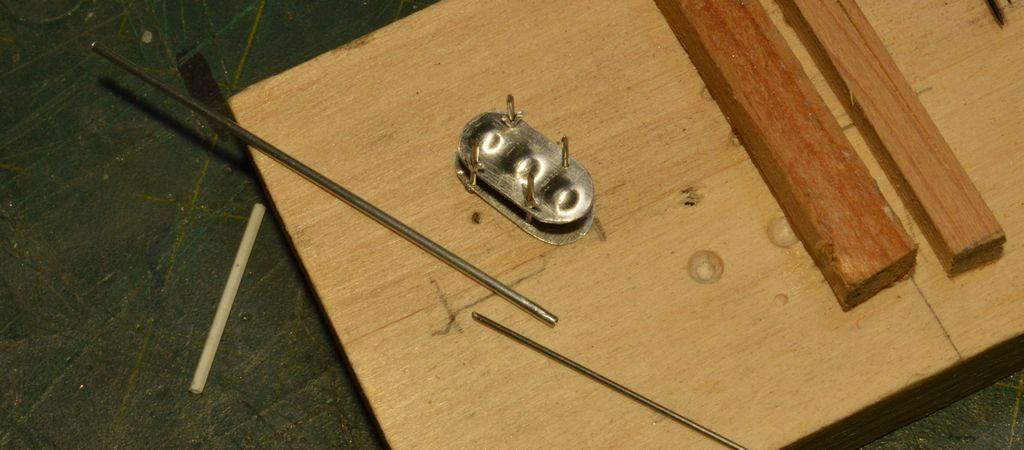
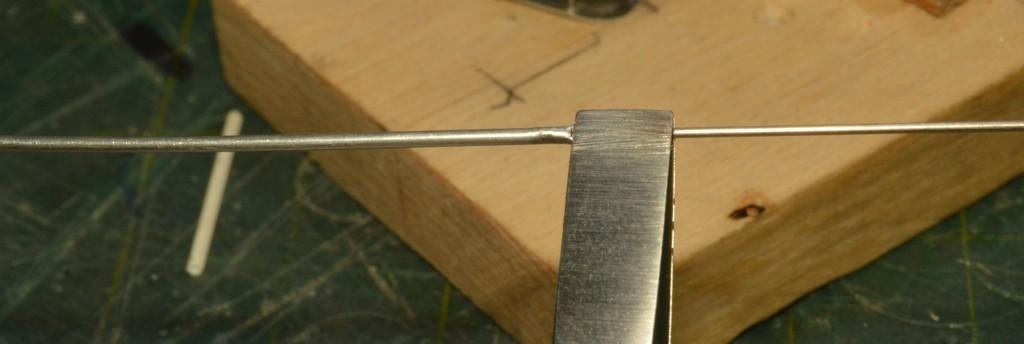
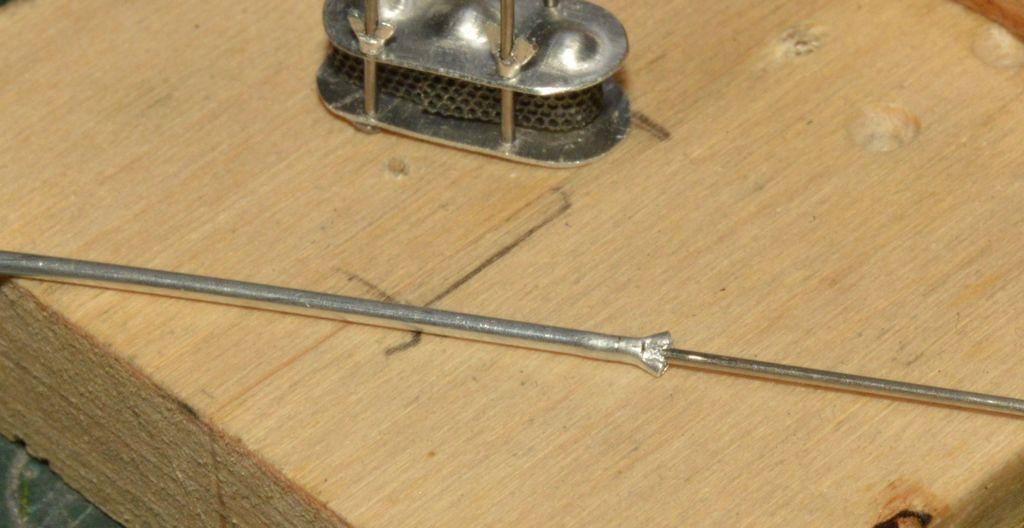
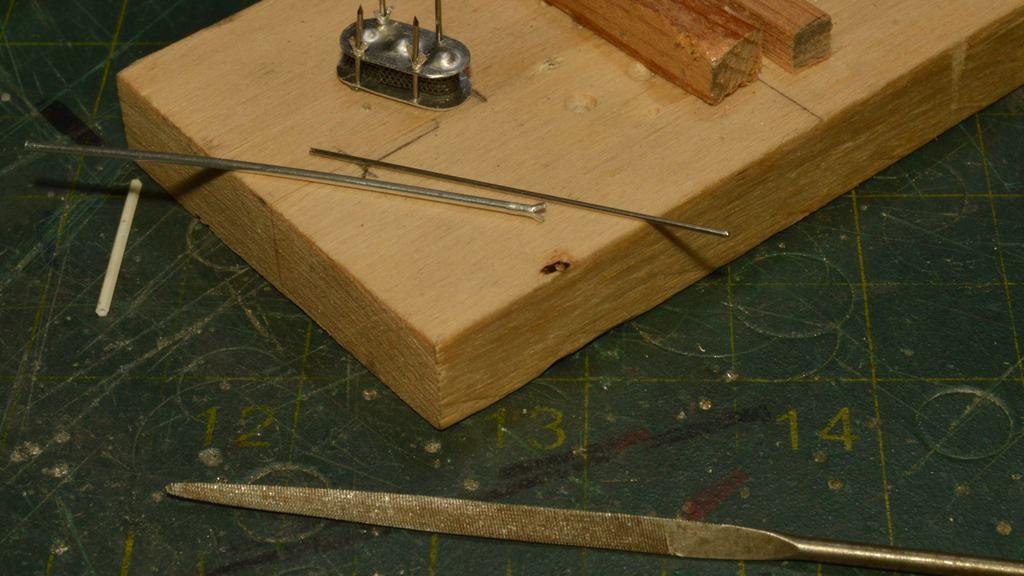
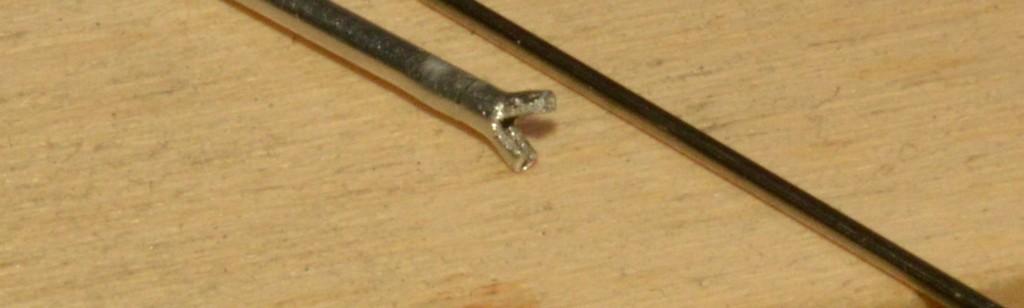
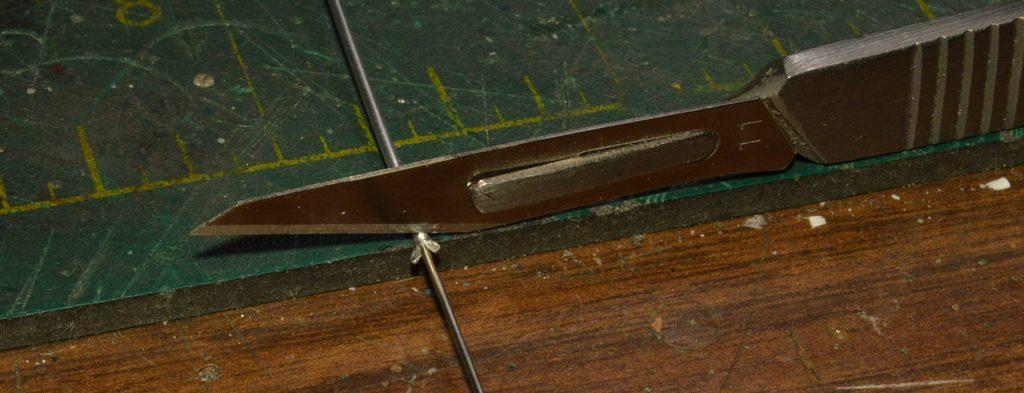
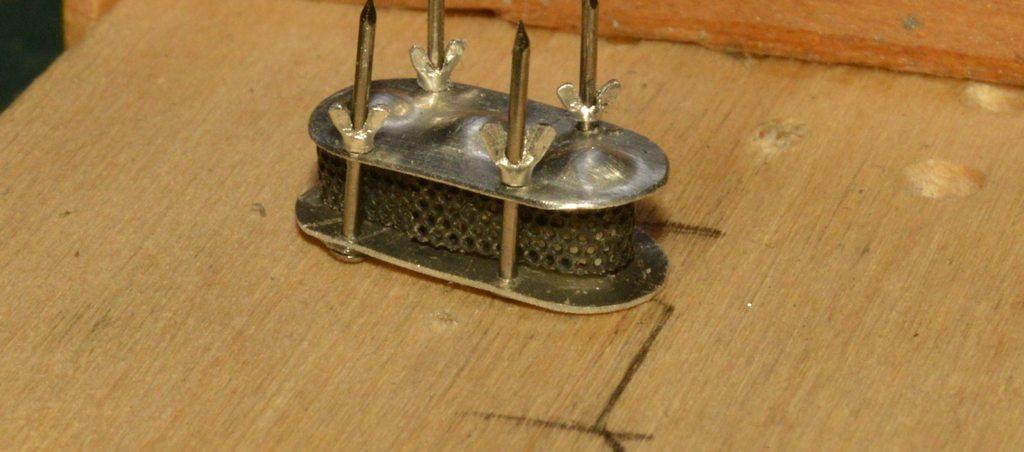
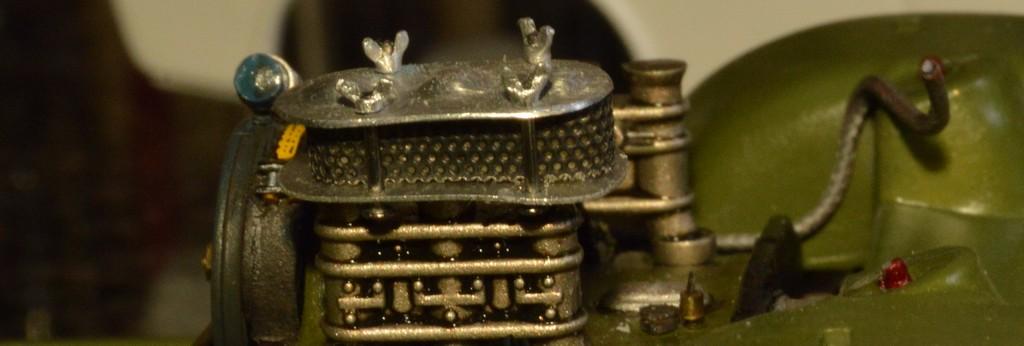
For a long time, I've wished I could make wing nuts. I've seen some aftermarket ones, but never really had an opportunity to buy any. Recently, somebody on this forum posted a link to the "easy Modeler's Room" YouTube channel. In one of his projects, he showed how he made wing nuts. I was pretty excited! I watched it again, and gave it a go, using some 1mm aluminum tube. I first bored it to accept the .024" music wire I would be using to make the wing nuts (my "bolts" are tiny brads, and are .023", in diameter). Next, I inserted the music wire into the tube, and crimped it. I flipped it, and crimped it, again. I then removed the music wire, and used a smaller than mini half-round file--it was small, and had the sharpest edge of any of my files. I used that to clean the middle from the now-crimped tube, forming the "wings". Next, I drilled the tube open, againg, re-inserted the music wire, and removed the nut from the tubing, using a scalpel. I like the scalpel, in this application, because the steel feels harder, and sharper, and, I feel, creates a cleaner cut. Finally, I cut the bolts to length, sanded them smooth, and slipped the nuts over them. I dabbed the nut/bolt interface with superglue. It took a few tries, to find a practical way to go about it. Once the frustration of that prcess worked itself out, I found myself having a lot of fun making these, and, it turned out to be pretty simple, too! In the first photo, the first nut I made was the one on the right. I determined they needed to be smaller, so I went at it again, and come closer. I think they look cool! Thoughts? Thanks for looking!
-
That much is true. Since I build mostly vintage racers, the decals are the perfect solution. I would think that someone could do raised black-letter decals using something similar to Archer's decals. That, however, wouldn't help in the recessed lettering department.
-
Yep. Generally, I sand off the sidewall derails and replace them with decals.
-
Awesome! Love the stance. Excellent choice of powerplant. Poseable front wheels are always best! Nice work, Elliot.