Straightliner59
-
Posts
5,805 -
Joined
-
Last visited
Content Type
Profiles
Forums
Events
Gallery
Everything posted by Straightliner59
-

1/16th Scale 1980 Reher-Morrison Pro Stock Camaro
Straightliner59 replied to Ian McLaren's topic in WIP: Drag Racing Models
It's cool looking, but, man, what a lot of work! -
The wing roots look much better! You're right. The tail alignment should be a simple fix. Good call, fixing them. It's always frustrating, when something you thought was worked out, shows up again, late in assembly. It'll usually cause me to lay off for a couple of days, because I'm afraid of what might happen, during disassembly.? Agreed too, that there are some things we just can't live with! Nice display cabinet!
-
Well, I appreciate that, David. I'm happy with the way it turned out! I'm looking forward to having the paint and decals on it, too--I tried something new, with my decals. It's a technique I first experimented with on the Nostalgia Fueler. I refined it a little, and used some gold leaf, as well. I think it'll look pretty cool! Thanks for your ongoing support, my friend!
-
Looking great, Niko! I really like your use of color, on the differential assembly. Well done!
-
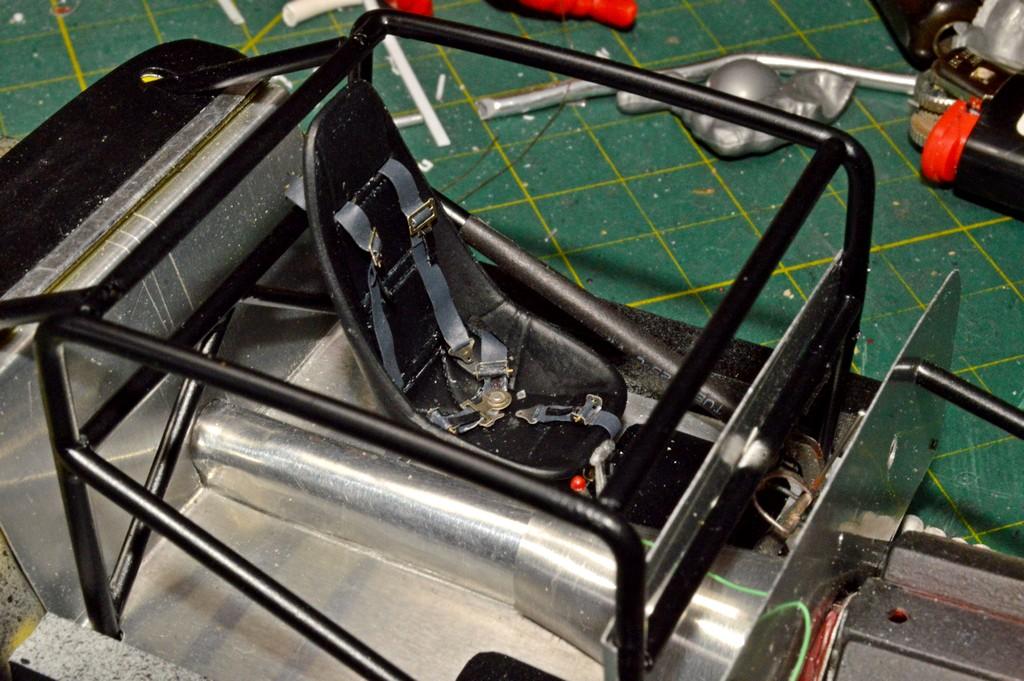
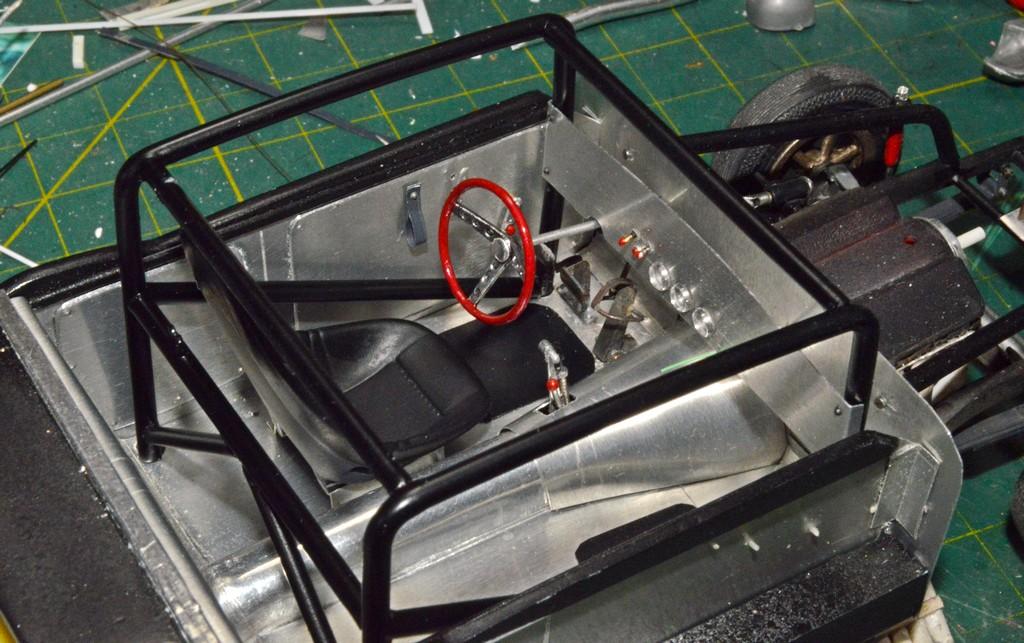
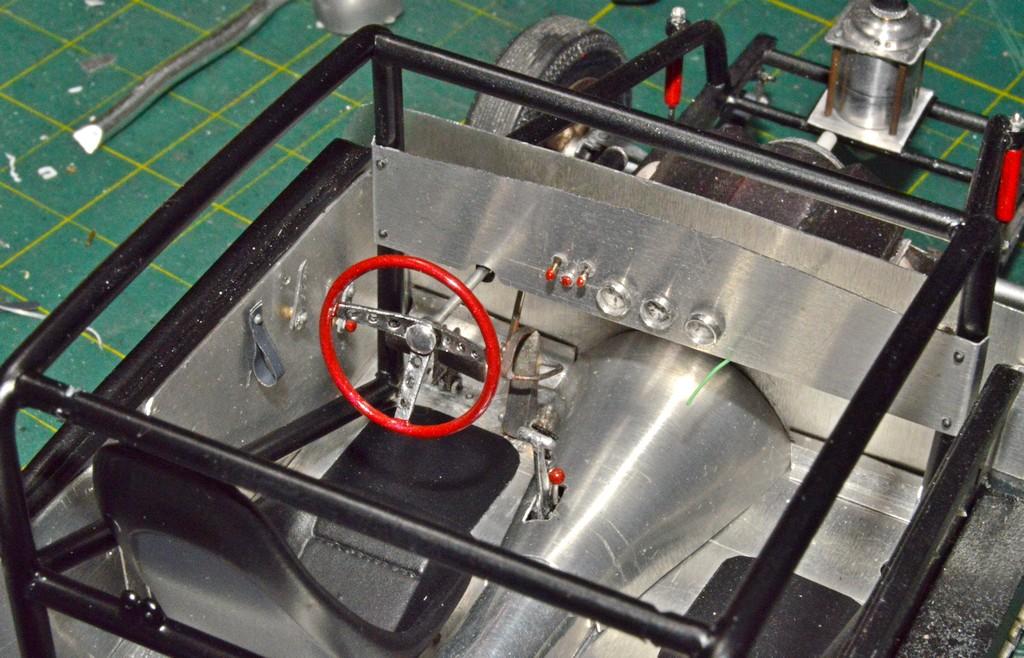
Thank you, Topher! It's been a lot of fun...so far!? Thanks so kindly, my friend! I'm sure it will show up a few more times, before it gets covered up.? The side panels are now cemented in place! I slit a length of heat-shrink, for the padding on the door bar. I slid the wheel into position, although it's a fair amount ahead of where it will be, finally. I also set the dash top in place. I guess it's about time to find some plug wire! Thanks for your comments. Thanks for looking!

-
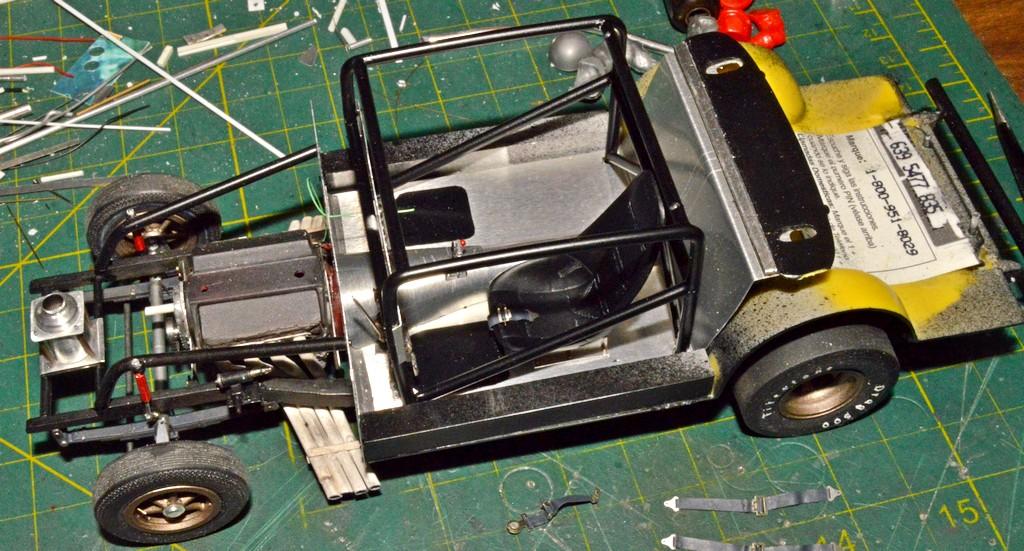
Here's the completed interior, with the body--it drops right on, with only a slight alignment, to get it home! I like using wine bottle foil for the harness straps, because it can be posed, which, I think, creates a more realistic look. After I shot these, I remembered to set the top of the dash in place. It had no effect on the fit, either. I guess up next will be installing the plug wires, so that I can install the steering column. Then, on to the fuel system... I know there's a lot more to do, before I get to the body, but, I do feel like I'm getting there! Comments and questions are always appreciated. Thanks for looking!
-
That is much appreciated, David! I ran out of time to get photos, but the interior's now finished. I just want to make another test-fit with the interior panels/body interface. It seems to have been fine, then, but, you know how these things go! Thanks for your kind words, sir.
-
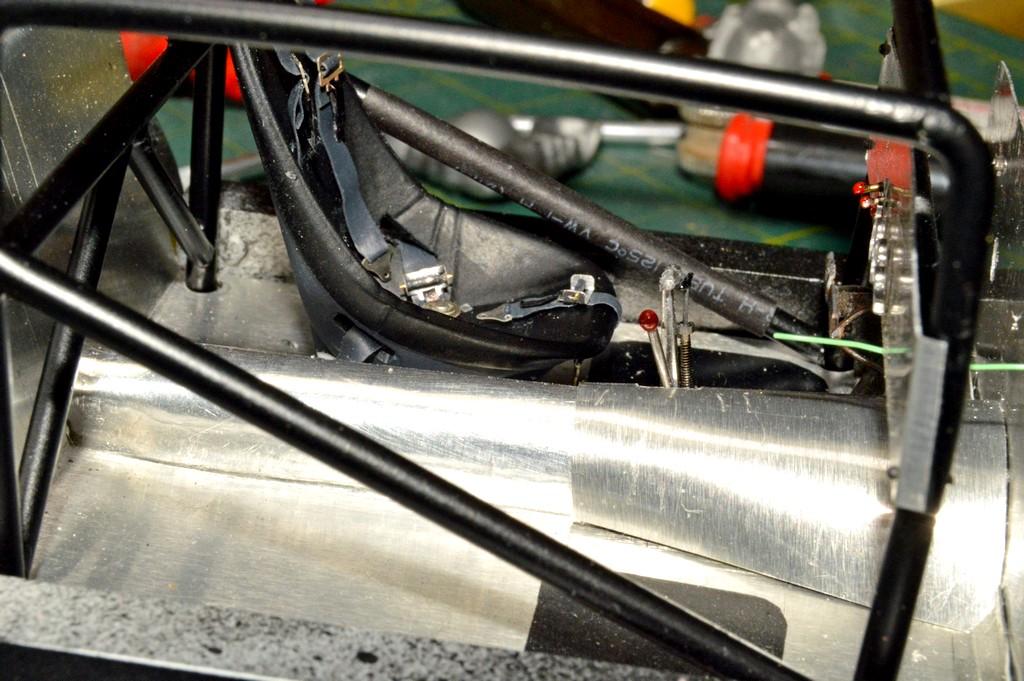
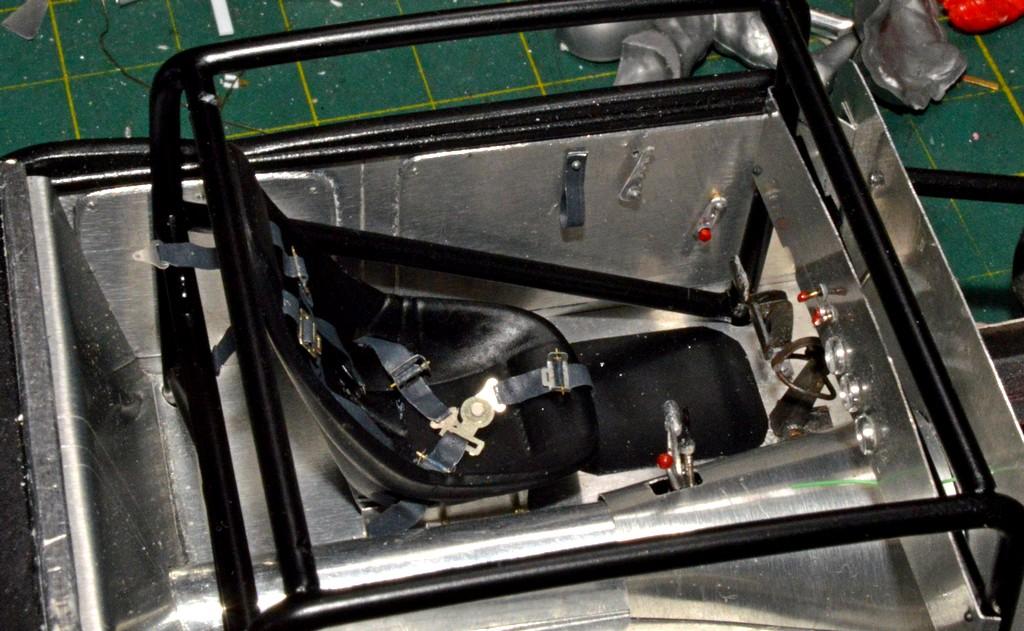
Thanks, Brian! It's getting closer, now. Once the power was restored, I was able to get all the belts installed. I'll do a little highlighting and shading on them, yet. The shoulder harnesses aren't attached to the cage, yet, because the cage, nor the door panels are glued in, yet. The cage will be soon, then the side panels, last. Before those can be cemented, I want to be sure the body will drop into place, with no obstruction from the panels and overall width of the assembly. Shouldn't be too long! Once the interior's done, odd as it may sound, I'm thinking that the plug wires will be next. Questions, comments and critiques are always welcomed. Thanks for looking!
-
Well, I got the belts assembled, and the seat installed, and took a few photos. Then, the power went out! Transformer in back gave up the ghost. So, the photos I had hoped to post are on my camera, awaiting the restoration of power. I had hoped to get the belts/harness installed today, but a lack of light has delayed things. They're supposed to have us up and running again, in a couple of hours. That should leave enough time...
-
Yes! That thing is an absolute gold mine of parts!
-
That's their old Parts Pack Harley. It was also packaged with a Honda in a "Grease" box.
-
A grand solution to the weight distribution problem! It's coming along, very nicely!
-
Thank you, Pierre! I'm sure you'll manage, just fine, my friend! However, if you can use any advice, just send a PM, and I'm always happy to help! Thank you, my friend. Your kind words and encouragement are always appreciated! Glad you like it, Trevor! I'm looking forward to seeing it with the decals on it. That's going to be a while, yet, but I think they'll really add to the cool factor! I think the harness will be next--maybe.? Thanks for your kind words, sir!
-
1/16th 1957 Corvette Super Gas 80's
Straightliner59 replied to Ian McLaren's topic in WIP: Drag Racing Models
Yes! The new grille is excellent! You're making great progress. -
Leave it to Grump!
-
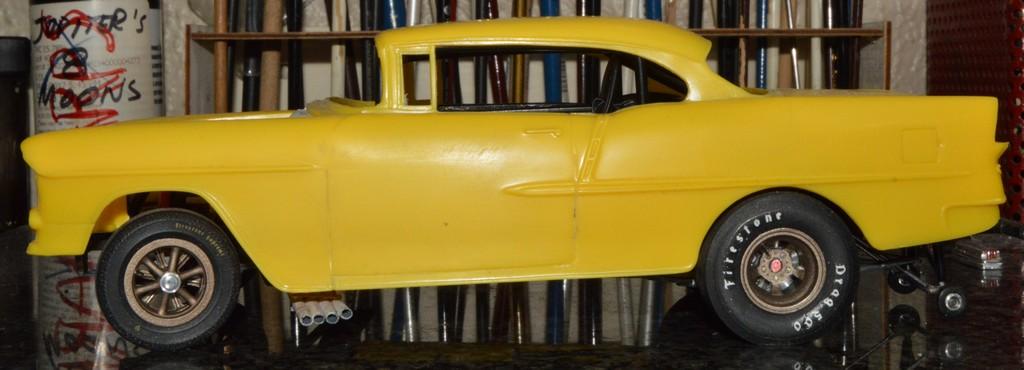
@Pierre Rivard, Here's the (almost) latest...I had to cut slots in the seat back, for the shoulder straps, as I had forgotten to do that, prior to paint. They're barely visible. They aren't in these photos. The interior is coming together. I'm pretty happy, with it! Here's how it looks, mocked-up. Thanks for looking!
-
Thanks for your kind words! That should be doable, I think. I used the front wheels from a Boot Hill Express, on mine, for the same reason, but, I didn't want to take the time. I'll be interested in seeing it come along!
-
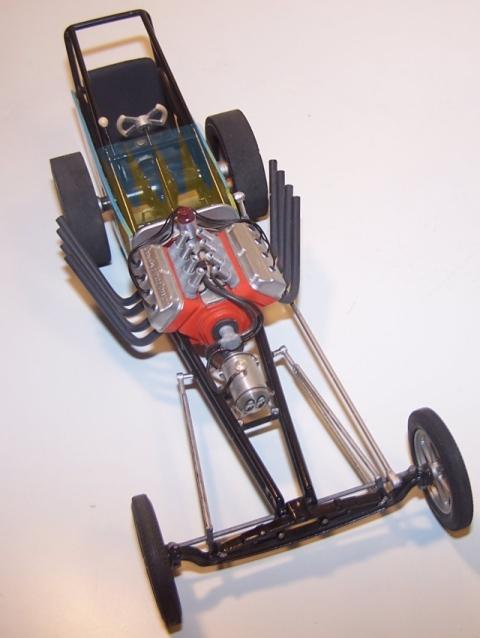
Vintage Nitro Front-Engined Dragster
Straightliner59 replied to OldNYJim's topic in WIP: Drag Racing Models
This is cool! Those wheels look much better! Nice work on the torsion shocks/arms, too. That engine looks kind of like a Donovan, given the early hemi heads. The block doesn't look quite right for an early Donovan, though. "Kansas" John Wiebe ran a beautiful, Donovan-powered long-wheelbased FE top fueler you might get some ideas and inspiration from: https://www.mlibhart.com/p660554854/h22F3465F#h22f3465f
-
Way cool! That's a neat old kit! I talked a guy out of one about 40 years ago. It was a bagger, but almost complete. I asked him if I could build it for him (he collected stuff, but wasn't a builder). Reluctantly, he let me have it. I cleaned it up, and put my own touch on it. I scratchbuilt the headers and made some aluminum injector stacks. I made a new seat back from balsa, 1/32" birch plywood and parchment paper, soaked with diluted white glue. The fuel tank is Detail Master. Fuel lines are MSC heater hoses. He wouldn't take it back. It, and a glue-bomb Long John fueled my love for old Monogram kits! A couple of these are double exposures I took one day, just messing around. I added the "Conrad's Engine Service" markings a couple of years ago.
-
That's brilliant, Greg! Simple and super-functional!
-
Thank you, my friend! Interesting you should ask! I just shot it with Krylon Satin Black. That made it the same color as the seat, so I wrapped a little Parafilm around the bottom, to keep the brackets clean, and shot flat clear on the seat. I am hoping to mount the dash, later! Thanks for checking in!
-
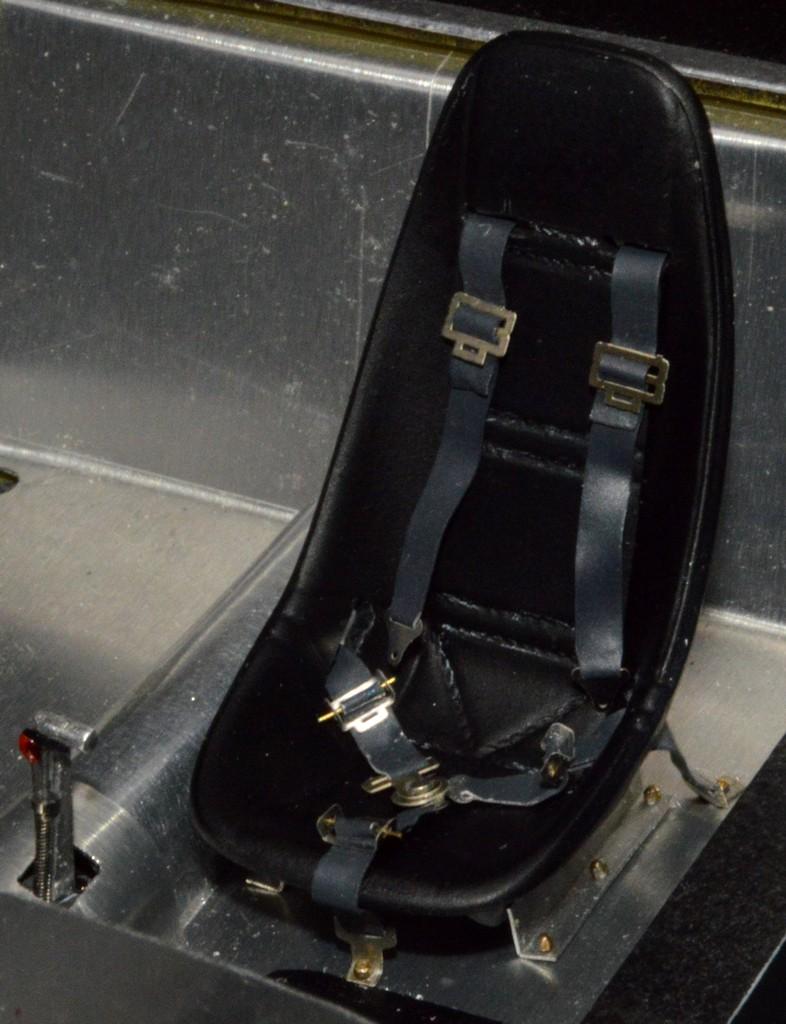
Spent some time fixing a couple of minor things--I moved the pedals forward a few inches (about 4"). I also drilled a couple of holes in the firewall for the throttle linkage and for the wiring. Moving the pedals forward led to extending the driver's side floor pad. The seat's painted, and the mounts attached. I added bracing to the rear of the cage, along with tabs for the harness. I started the lap belts, and have the wine bottle foil cut and painted, for the rest. It's coming along! Thanks for looking!
-
I hope you're taking another break. Profile shows last visit in January.
-
Thanks, Joe. I'll take a look at one. I have the Monogram kit because I saw it in a little collectible toy shop in downtown Anoka, MN, for $10. Back in the '80s, it was "all that"! ?
-
Thank you, Brian! I appreciate it. Yeah, that's one of the things I like about race cars, is that bare bones quality.