Straightliner59
-
Posts
5,803 -
Joined
-
Last visited
Content Type
Profiles
Forums
Events
Gallery
Everything posted by Straightliner59
-
 Got a few things, today. A couple of tins of Humbrol white, in flat and satin. A new tube of GS Hypo cement, a bottle of liquid nail monomer, and a very reasonably-priced Accurate Miniatures McLaren.
- 39,065 replies
-
- 1
-

-
- johan
- glue bombs
- (and 1 more)
-
1/16th Scale 1980 Reher-Morrison Pro Stock Camaro
Straightliner59 replied to Ian McLaren's topic in WIP: Drag Racing Models
Cool!- 32 replies
-
- 1
-
-
- scratchbuild
- 3d
- (and 1 more)
-
1/16th 1957 Corvette Super Gas 80's
Straightliner59 replied to Ian McLaren's topic in WIP: Drag Racing Models
It's coming along, nicely, especially considering it's not your main focus. I really love drag racers from the '60s, '70s and '80s, especially. Things like throttle stops made from a piece of 2"X4", stuff like that, make for very interesting details, on models! I'm much the same. Just because the car would be quick, doesn't mean we builders are in a race! I like your '57 'Vette, too. I love the way it sits.- 47 replies
-
- 1
-
-
- bbc 5speed
- ladder bar
- (and 1 more)
-
I got a roll of 1/8" dead-soft aluminum wire. I think it's going to be just the ticket, to make the curved bases for my injector stacks. I think Bruce Larson's Chevelle was the only car to run them, because they didn't work all that great. Still, it's a unique feature that looks cool, that I have always wanted to use. Engine setback requires it, on my Badman project, so...
- 39,065 replies
-
- 1
-
-
- johan
- glue bombs
- (and 1 more)
-
I had hoped to post these, this morning, but, by the time I finished wrestling these into place, I had to get to bed. I took these with my phone, before work. I have 1/32" brass tube (treated with blackener) that will slip over the wire posts, during final assembly. I still have three holes to drill in the tank, for return lines and the vent. I'm kinda liking it! Thanks for looking!

-
Thank you, my friend! Glad to see you, back. Hoping things stabilize a bit, for you.
-
Thank you, sir! I should have the tank and mounting done in the next few days. I hope!
-
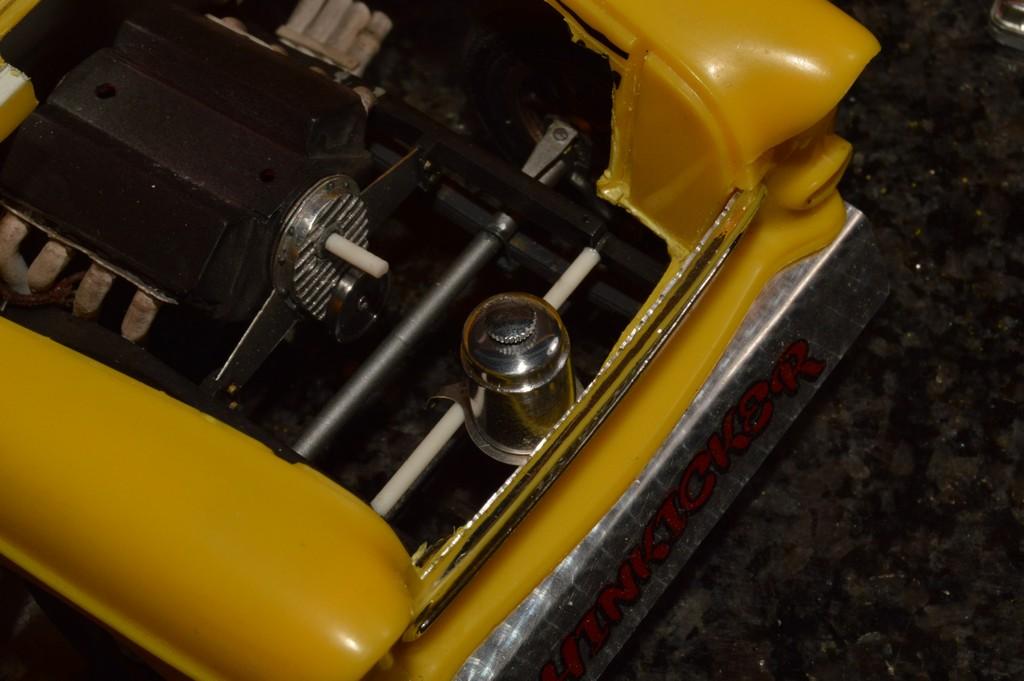
I glued the floor to the chassis, and the *firewall, as well (*although not yet, in these photos). I turned a bullet-shaped fuel tank from a piece of an old wind chime. As you can see, I plan to mount it, vertically. I added a crossmember behind the first one. That will mount one of Detail Master's Moon tank brackets to carry the tank. I'll be working out the upper mount and its support, next. It will need to appear to be able to open, in order to release the tank, in the real world. I hope to incorporate a bracket for a similar, yet smaller tank for the overflow, into the support/bracketry for the fuel tank. I rummaged through a box of watch parts, and found a stem winder that looks just right, on top of the tank! I also need to drill the tank for the vent, and a pair of return lines. I really like this tank, and its positioning! Thanks for looking!
-
I think we have the sluggish forum problems solved
Straightliner59 replied to Dave Ambrose's topic in How To Use This Board
You're an amazing man, Dave! I'm sure we all greatly appreciate your efforts. It's now 12;24 AM, MDT, and things are hanging, again. I'm using Chrome, now. I'll check with Firefox. If it's any different, I'll add to this post. Thanks, again! -
Very nice work on a very cool project! I love old, off-the-beaten-path kits. You're doing this one proud. Nice paintwork on the driver!
-
Stuff happens! ? Sometimes, it's even good! ? Thank you, sir! Thanks, James. I appreciate it! Earlier in the thread, I began to mill open the back of the grill from the Monogram '55 Chevy Street Machine kit. I got it all opened, except the ends, because I couldn't decide on a way to securely clamp the part to the table, so that I could mill open the ends (although that's maybe not entirely necessary). In the mean time, while rummaging through my "Big Drawer Of Sheet Metal And Screen Stuff", I ran across some perforated aluminum speaker grill that I had picked up off the floor at an insulation job we were doing. I knew it would be useful, some day. Now, 20-odd-years later, that day has arrived. I cleaned up the grill surround from the Badman kit, then cut out and trimmed a piece of the speaker grill to shape. I'll do some final curving to the grill, before installation. I had to tacky glue it in place, and stick the spoiler up there, just to see how it would look. I think it adds to the Altered look. What do you guys think? Thanks for looking!
-
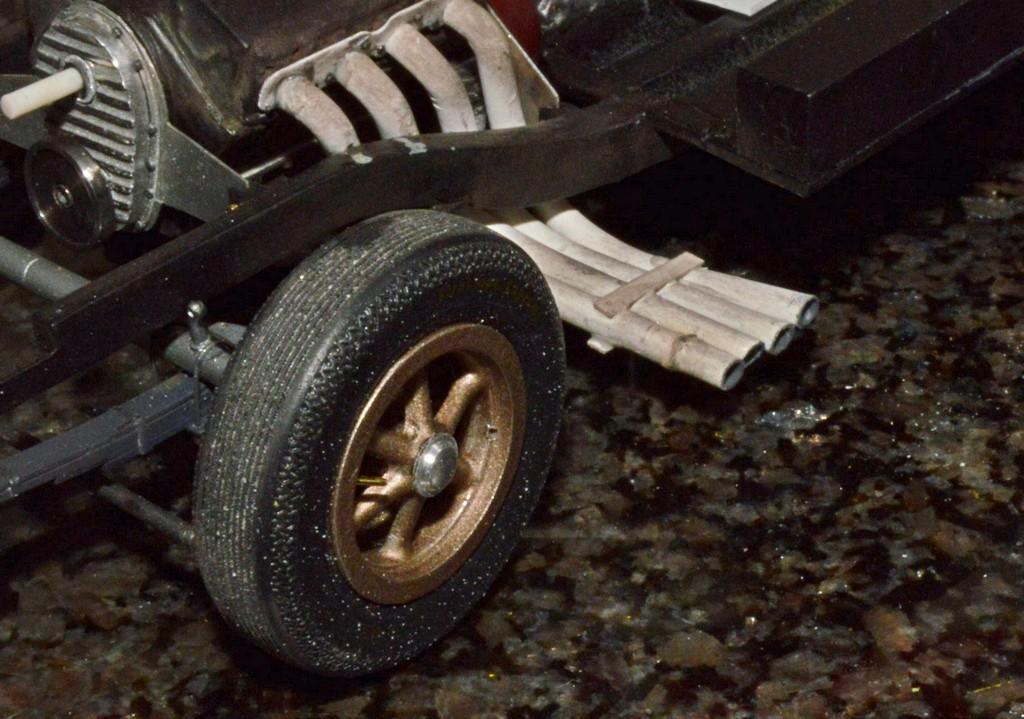
I finally got the left side headers done! Yay! I'm not sure how I did it, but, somehow, when I got to the last pipe's installation, it was much too short! Hmm, and harumph! So, I made up a story about what weekend warriors might do, if one of their pipes got mashed, or bent. Instead of cutting it cleanly and welding a new end section on, I cemented on a new end, and used some old Floquil model RR lacquer to create a weld bead, by creating tiny dabs with the fast-drying paint (even better if you use some of the thicker stuff, on the bottom). My late friend Dave Abell used the technique to hard face a blade and a ripper for an AMT bulldozer (it was gorgeous, and was in the late running for Best Of Show at GSL, in 1990). I've been dabbling with it, here and there, ever since I saw his effort. I haven't come close to the delicacy of his work, but, I think I'll go with this. I'm not sure where I'll go, next, but it may involve the fuel tank, as I have something I want to try, with that, which while not unique, is not common, either. Questions and comments are always welcomed. Thanks for looking!
-
Darker black for homemade decals?
Straightliner59 replied to BK9300's topic in Tips, Tricks, and Tutorials
I mostly wanted to note that there are free online converters. Yes, they are definitely the way to go! -
Darker black for homemade decals?
Straightliner59 replied to BK9300's topic in Tips, Tricks, and Tutorials
SVG is for "scaleable vectored graphics". That means that the resolution is the same, no matter what size you make it. Lines stay lines, not lines of pixels. -
I finally finished the left side headers. I didn't have time to get photos, yet, but will have some before I hit the sack, in the AM. Now, to figure what's next!
-
Darker black for homemade decals?
Straightliner59 replied to BK9300's topic in Tips, Tricks, and Tutorials
I've had decent results using online converters to SVG format. I use Blinggasm inkjet paper, which I really like, and it's less expensive than what the OP is using. -
Black Widow Barn Find
Straightliner59 replied to Pierre Rivard's topic in Stock Cars (NASCAR, Super Stock, Late Model, etc.)
I don't have any idea how I missed this beauty, Pierre! The tow rig is great, too. Fantastic work, my friend. And, as always, your presentation is wonderful! -
Thank you, kindly! I somehow screwed up something, doing the other side, but I think I can make it okay, anyway.? I need to get some flat white paint, dangit! Thanks, Tony! Trying to get them finished up!
-
Guided there by their GPS, undoubtedly!
-
Thanks, Roger! From a guy who knows cool drag cars, I'll take that
-
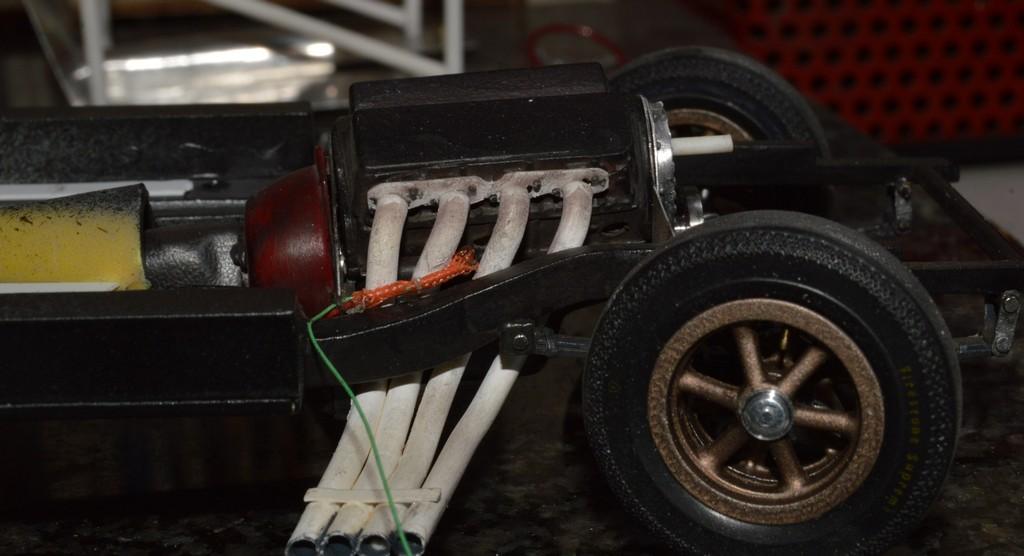
I finally got the right-side headers where I like them, and did a little weathering, to them. When I went to touch up the white, I discovered that I don't have any flat white. I ended up using some Humbrol gloss. I'm waiting on the flat coat to dry, then I will go over those spots with the pastels, again. About then, I realized that I hadn't left enough slack in the wiring to get it safely away from the header pipe, so, I snipped the wires, and slid a sheath of braided, weighted fishing line to represent heat resistant shielding. I couldn't find anything else that would fit, and look halfway right. It looks better, since I flowed some Vallejo dark grey wash into it, but I'm still not crazy about it. I'm really looking forward to starting the other side...unless I'm not! I am really happy with their positioning, though. Thanks for looking!
-
I don't need to tell you that I love and enjoy sheet metal work. That's beautiful!
-
Billy the Kid Demon Pro Stock
Straightliner59 replied to dragcarz's topic in WIP: Drag Racing Models
Thanks for posting that article! It's always a bummer, when you find reference that shows you that all the reference you thought you had, was erroneous. That's what I'd do, at this point in a project--just go with it. It all looks great! -
I'm sure it's been said, ad nauseum, but newer, better versions of a Maverick, AMX, and a Hornet, and a better '70 Chevelle would be great!
-
Thank you, David! They did work out, pretty nicely. Getting those bent and fitted was a matter of install, study alignment, remove, bend, install...I must have done it a hundred times! Startup can't happen until I build the injection setup!?