Straightliner59
-
Posts
5,808 -
Joined
-
Last visited
Content Type
Profiles
Forums
Events
Gallery
Everything posted by Straightliner59
-
Thanks, guys!
-
 I've got to where I feel that way, about everything. I'm tired of being treated like the lowest common denominator. "Because some people suck, we'll just treat everyone like they suck!"
 -
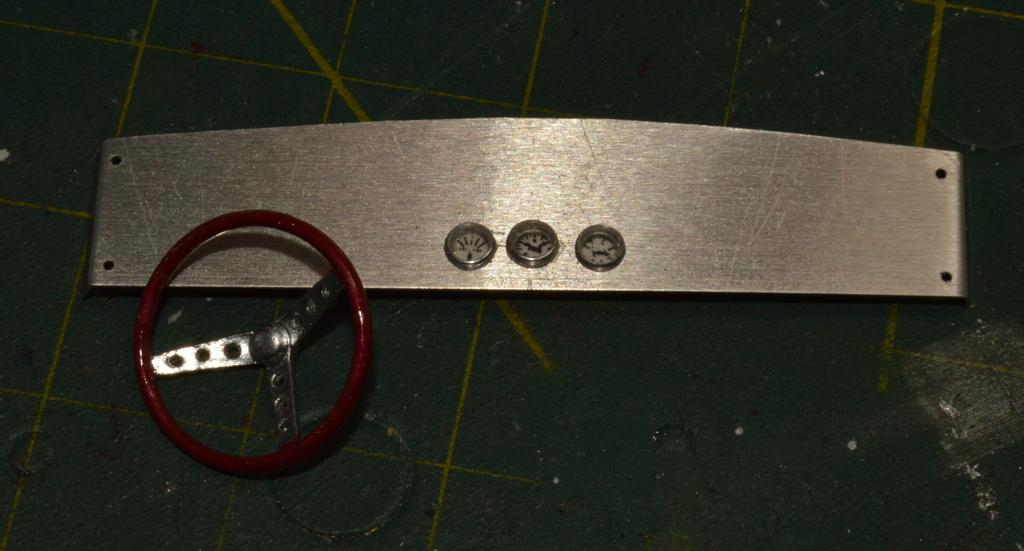
Thanks, DW. That would be a perfect place to use these! Here are some better photos. I got a couple of more things done. I Installed printed gauges to the back side of the dash, and punched some discs of clear sheet, to fit into the drilled holes for the gauges. Finally, I cut some very short lengths of 1/8" aluminum tube, for bezels for the gauges. I also added bolts to the driveshaft loop. Thanks for looking!

-
Man, that was a beautiful car!
-
It's hard to say. I don't sell much on Ebay (the last time was about seven years ago), but, sometimes a low opening price can get more than one party interested, and things can take off. I'd probably just wait and see what happens. May I ask what they're for?
-
Thank you, Paul. The driveshaft telescopes, once everything's permanently installed, that end will get pushed up to the transmission tail housing. I was playing around with my lathe, and wanted to see if I would be able to knurl the 1/16" tubing. It was finicky, so I became more determined! I didn't have any immediate use for it, so I just stuck it in the tranny. It will be a useful process, if I ever decide to build a hauler with spare gear, in it, or a car in a state of disassembly. Next time I pull it out, I'll take some photos of the tranny and the tailshaft. Thanks for your kind words, and your advice, because if I had been planning to leave it exposed, I would want to know that it wasn't correct!
-
Thanks, DW! I haven't finished the weathering on the driveshaft, yet. That will have to wait until its final installation, since it telescopes. Once the engine and trans are in, it'll snuggle right up to the tail of the tranny. That way, I can get it applied kind of evenly. Maybe I'll paint on some oily smears, on the ends! I knew I should have cut those exhaust pipes out! ?
-
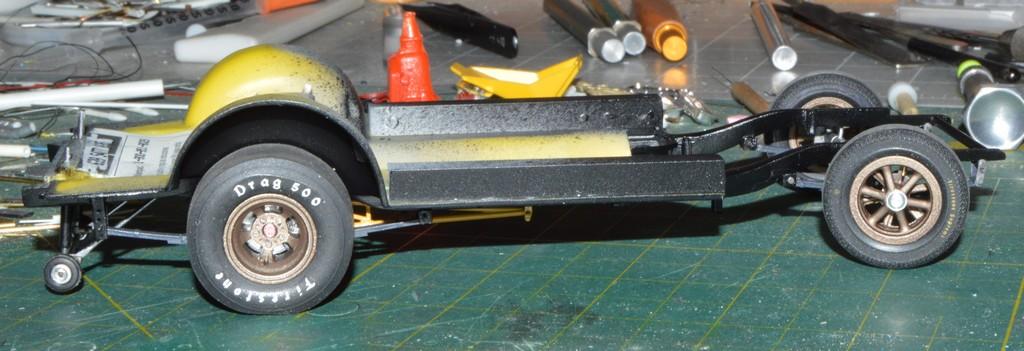
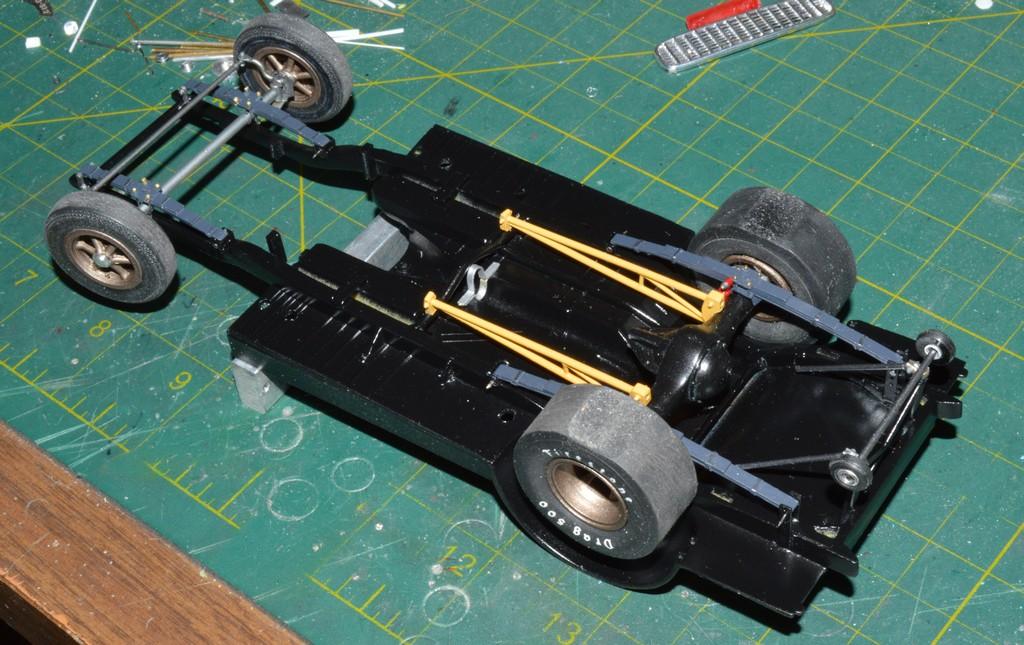
I did a little "wash and dust" to the chassis. The rear section of the driveshaft is cemented to the third member. The front section will just slip into place, once the engine and trans are installed. I also painted the trans in two different Testors Metalizer sprays. I'll do a bit of detail painting and light weathering on it, as well. There is no other reason for me to do any of this, than I feel like I need to do it!? It's kind of ridiculous. But, it's a helluva lot of fun! Your comments are always welcomed. Thanks for looking!
-
Holy mackerel, Trevor! That's beautiful! You've reset the wiper bar, to be sure.
-
1934 Bugatti Type 59
Straightliner59 replied to ModelcarJR's topic in WIP: Other Racing: Road Racing, Land Speed Racers
Nice! These are really cool little kits! I am planning on purchasing one of the 935 Porsches, before too awful long. -
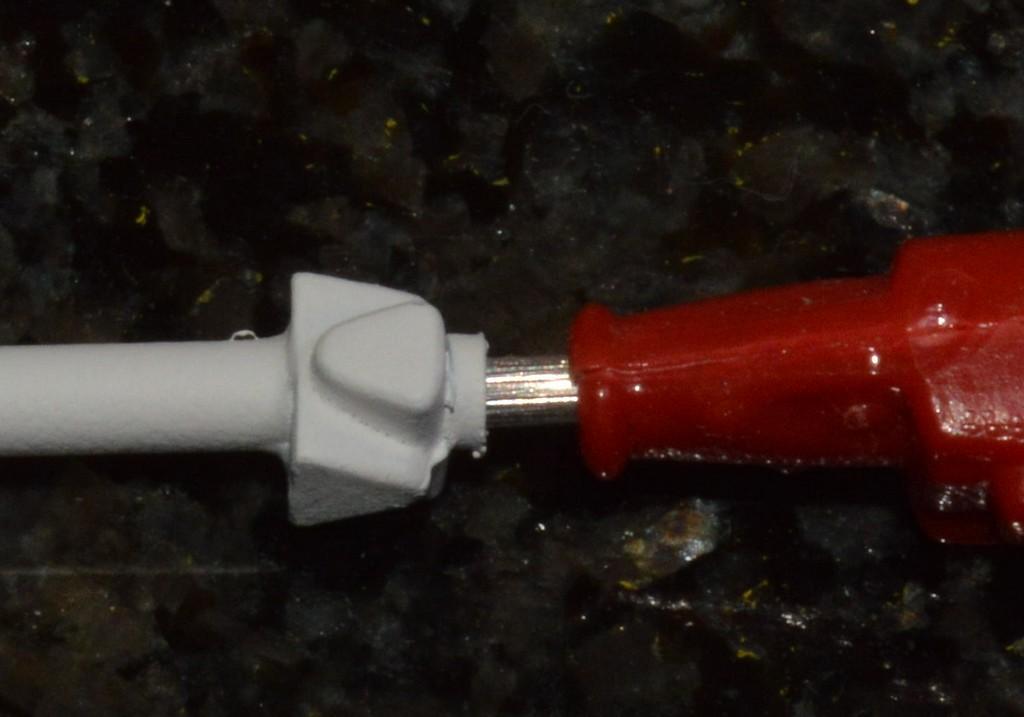
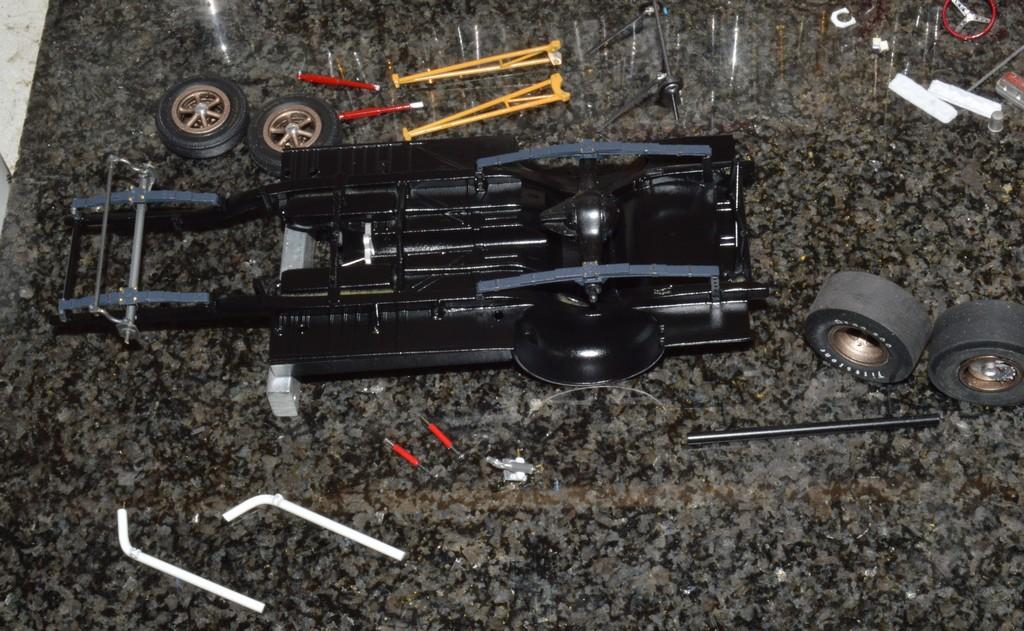
Thanks, Tony! I've been working on the driveshaft configuration. I'm not worried about the details on this, as I don't really plan on the underside of this being seen. I used some 1/8" and 3/32" aluminum tube to make the driveshaft. The u-joints came from an MPC Multi-Maverick (I think). 1/16" aluminum tubing plugs into the differential and the transmission . Just to see how it would look, for future reference, I used straight knurls to make splines on the output shaft. I did some slight weathering on the chassis, but forgot to take pictures. I also got the pushbar/rear bumper installed, but don't have photos of it, either. I'll try to get to those, tomorrow. Thanks for looking!
-
1962 Pontiac 421 SD F/SA circa 2024 edition
Straightliner59 replied to R. Thorne's topic in WIP: Drag Racing Models
Ron, this is looking great--really coming along! It's so nice to be able to cast your own parts--it can save us a ton of money! ?Keep up the fine work. Enjoying watching it come along! -
Thanks, my friend! It felt good, to get the wheels on it! I really like the look of those Firestone Supremes, on the front. I have a bit more work to do, under there, but, should be on to the interior in the next few days. Those headers for the FC are looking great!
-
Thanks, Bob! Glad the stance is good! The rear suspension is glued, now, so I can't adjust the height, any more. Appreciate it, Dan! I really enjoy doing little details--mostly because I have always liked that kind of stuff. As a kid, I remember just studying model train layouts, in hobby shops because I liked to find the little things that just added a bit more realism. Visual interest, I guess!?
-
I have seen some model RR radiator grilles/screens that look pretty dang nice. I couldn't tell you which ones, but I've seen 'em!?
- 599 replies
-
- 1
-

-
- open wheel
- jim clark
- (and 1 more)
-
Thanks, Trevor! I appreciate it! It should go together fairly easily, as the different assemblies are done. At least, it has, so far--we'll see if that holds!?
-
All this stuff is stuck together, now!? I have some details, and detail painting to do, then some light washes and dust. Then, I should be on to the interior! It's coming along...
-
Well-built and well-researched is always a winner. Even better when it looks this good!
-
Jaguar XK120 Race Car
Straightliner59 replied to Pierre Rivard's topic in WIP: Other Racing: Road Racing, Land Speed Racers
Yes, sir, my friend. It looks like it belongs! Thank you for those kind words! It's always nice when someone gets some good use from something we've shared! -
Jaguar XK120 Race Car
Straightliner59 replied to Pierre Rivard's topic in WIP: Other Racing: Road Racing, Land Speed Racers
Beautiful work, Pierre! The fuel cap is absolutely exquisite! -
Thank you, Terry! It's much appreciated. I may be able to get it on the wheels, tomorrow night. That always feels like a big step! Thanks for looking in!
-
Brass makes for excellent headers! Once they're aligned and soldered, they aren't moving. That durability really helps with test fitting, etc.
-
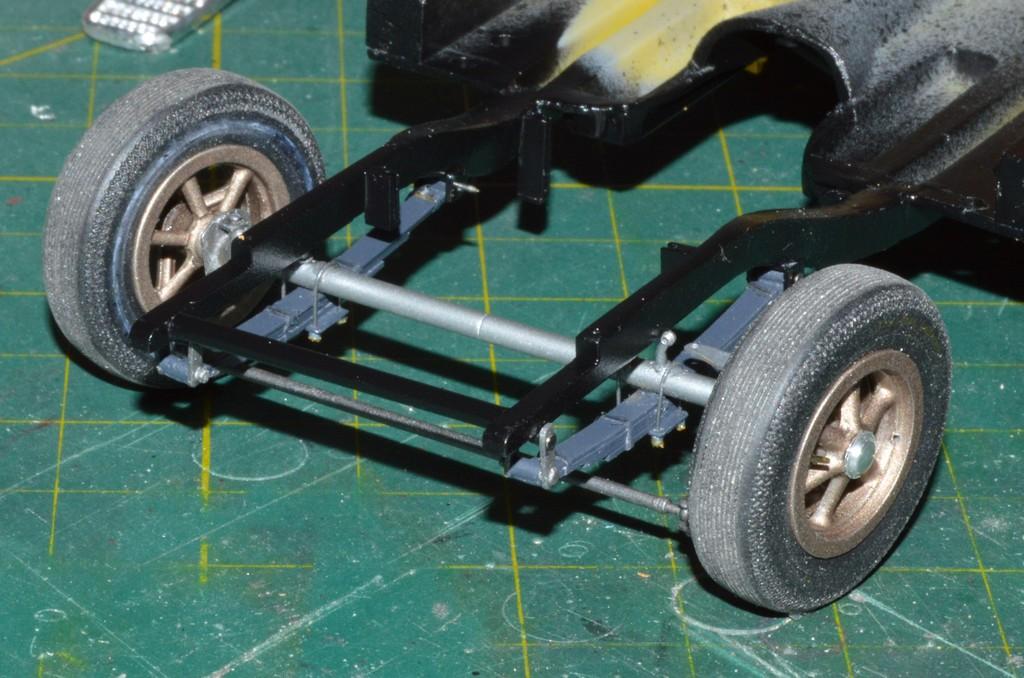
Thanks, Tony! Here you go! I'll probably shoot another coat of paint on the chassis, before I mount everything, I have a few things I want to tidy up, and a few that I want to dirty up (light dust). I'll go over the springs with India Ink wash, once the axles and springs are installed. I made the driveshaft loop from thin brass strip, and soldered it together. Shouldn't be too long, before it's on the wheels! Questions, critiques and comments are always welcomed. Thanks for looking!
-
why did round 2 switch tire brands
Straightliner59 replied to michelle's topic in General Automotive Talk (Trucks and Cars)
That is better than good news! Especially if we will see the parts packs, again. -
I have the Murphey's Rule III, and another one, made of thin (~.015"), clear strip, by Ivarule. I haven't even looked for one, in years. A quick search turns up these: https://excelblades.com/products/scalereferenceruler https://www.amazon.com/IIVVERR-Plastic-Triangular-Measure-Scale/dp/B08JK4TG89 https://www.printable-ruler.net/scale-rulers/ The last one has free downloads for printing. Unfortunately no sign of any Murphey's rules, although, they likely turn up on Ebay, from time to time.
- 1 reply
-
- 1
-