Straightliner59
-
Posts
5,805 -
Joined
-
Last visited
Content Type
Profiles
Forums
Events
Gallery
Everything posted by Straightliner59
-
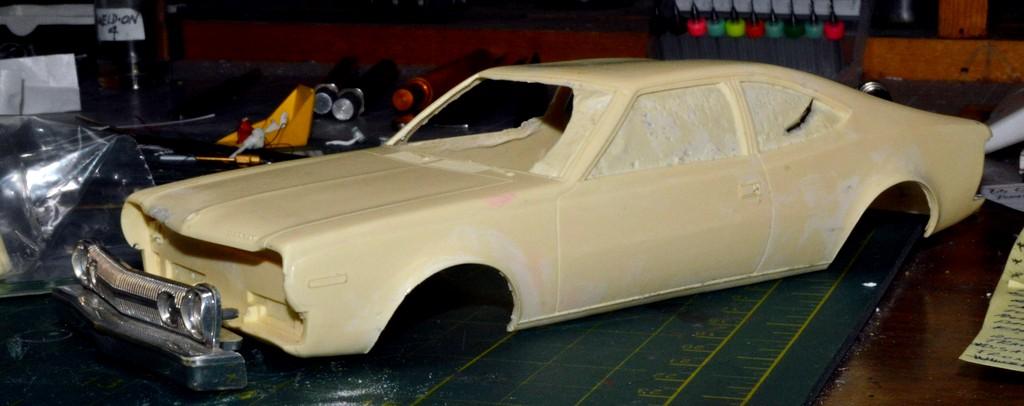
 Picked up this vintage resin Hornet, off Ebay. It has some issues, but, a lot of resin from the '80s/'90s did. The roof is sunk, is the main one. It's not slush-cast, though. Nor is it overly-thick. That's important! It was much more affordable than a promo, and I needed something to keep this grille/bumper I have, company. Poor thing's been hanging around here, all by itself, for at least a couple of decades!?? It'll likely become a curbside class drag racer.
- 39,066 replies
-
- 6
-

-
- johan
- glue bombs
- (and 1 more)
-
Unraveling The Snake Pit
Straightliner59 replied to Straightliner59's topic in WIP: Drag Racing Models
Thanks, Mike! You're most welcome. They aren't doing anyone any good, if they aren't seen!? -
Thanks so kindly, Pierre! It's getting there. I'm fiddling around with the steering box, now. Once that's done, I think I can start working out the engine mounting.
-
Thanks, David! A sigh of relief, for sure!? I've always wondered how we can test fit, and test fit, and test fit, then, all of a sudden, it doesn't fit!
-
Unraveling The Snake Pit
Straightliner59 replied to Straightliner59's topic in WIP: Drag Racing Models
Agreed! Easily the most comprehensive piece done on detailing a then-current fuel engine. I have a couple of deals on more modern fuel engines. Interestingly, while the components have changed over the decades, the basic setup is very similar. These three pages are from National Dragster, in the late '80s. The other bit is something I photographed in 2004, or so, at Brainerd, then published on the old StraightLineModeler website.
- 17 replies
-
- 3
-
-
- hawaiianfc
- detail
- (and 2 more)
-
Thank you, Ken. I appreciate that! I kind of wanted to set everything back together, and make sure it was still going to play nicely, together.? The package tray is now painted and installed to the "floor" pan. I added a trim strip of aluminum duct tape. Everything looks good, except for some minor tweaking, as necessary. Thanks for looking!
-
Great work, saving that body! I always thought these California Specials were way cool!
-
Glad to help!
-
You're welcome! It's certainly deserving! Unfortunately, no, on the '23 coverage. At least a couple of those chosen had me thinking, "Really?!"
-
Your Grand Prix is also in the Nordic Con coverage on page 10.
-
Yes!?
-
Thanks, Tony! I just looked at different images, online, and more or less copied them.
-
Thanks, David. Yes, there is! I can move it to any of the three locations! It actually changes the stance and look, too. I'll pick which one I like, best, before final assembly, then, I will glue it.
-
The Snake and Mongoose FCs? Yes. They were last released as a double kit, back in the late '80s(?), I think. I have an untouched Mongoose car, and all but the body of the Snake car, in that double kit box!
-
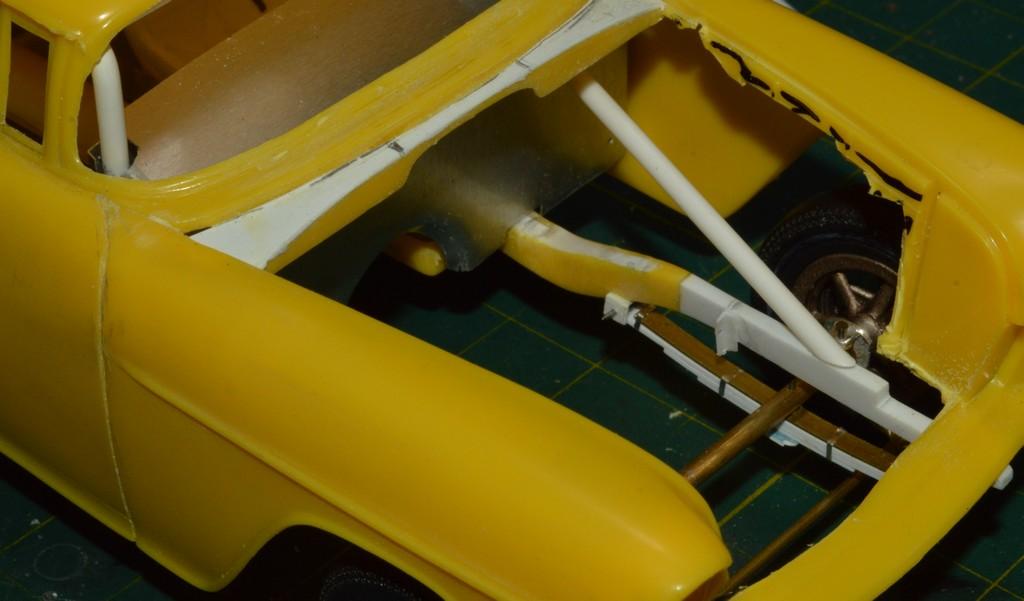
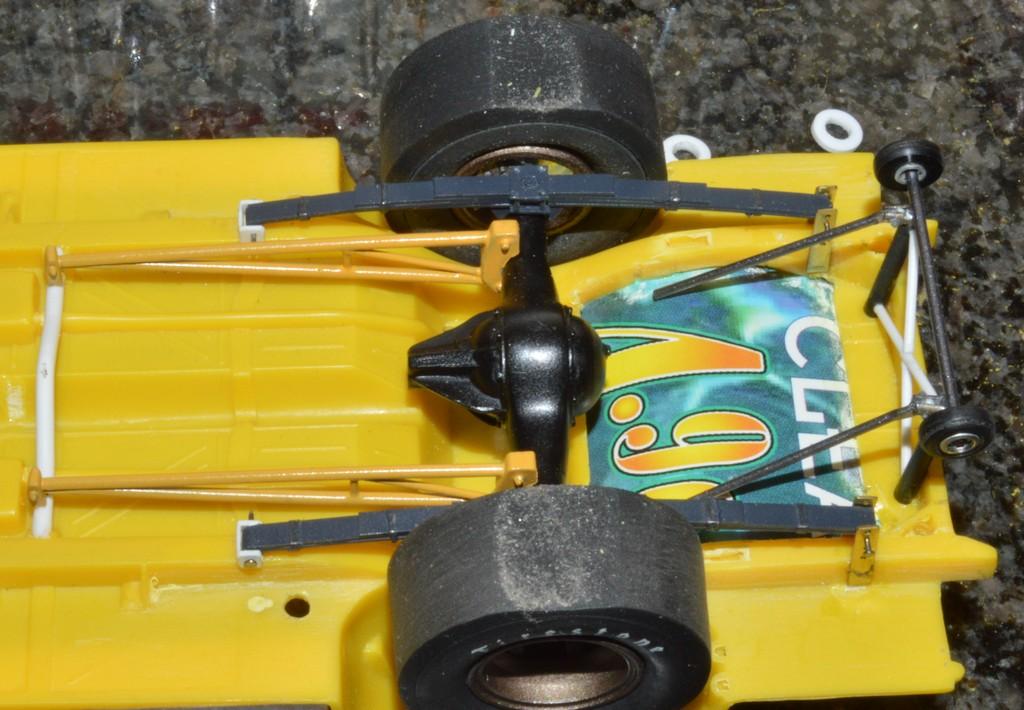
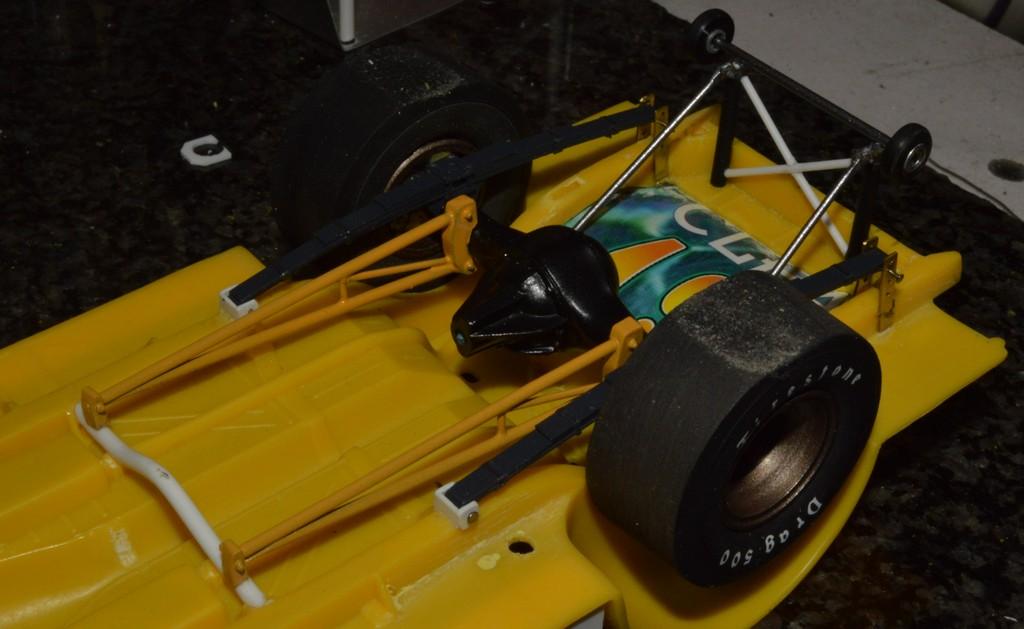
I think you're onto something!? Is there a diorama of Sunnyvale, in my future? Thanks, David! I added some bracing to the traction bars, and painted the tops of the interior door panels. I also got the cross-bracing between the down tubes for the wheelie bars. They might be a tad large, but, once they're painted black, they won't appear as pronounced. Thanks for looking!...
-
Killer work, Andy!
-
I finished the adjustable section of the wheelie bars. I've since added the cross-bracing to the down tubes. Those wont get painted until the chassis does. I'm currently weighing options for how I want to do the traction bars. The ones I made seem like they'd be a little flimsy. I'm deciding whether I want to build a new set, or just add some sort of "webbing", to these, to give them a bit more beef. Once those are done, I think I can get on to finalizing the engine location. Your comments are always welcomed. Thanks for looking!
-
Or, at this race, a C/Dragster. Back then, strips made a lot of their own rules, and, often, cars would be classified to fill a class, etc.
-
What did you see on the road today?
Straightliner59 replied to Harry P.'s topic in General Automotive Talk (Trucks and Cars)
I saw a Tesla pickup in the wild, tonight. No pictures, because, why would you?? Damned thing is uglier than Walter White's Aztec! -
A place we've all been!
-
I would think a dab of white glue, where the axles meet the chassis would do the trick. It could easily be removed, if that became necessary. I agree with Hakan--I glue mine during construction.
-
Thanks, Ian! They're pad printed AMT's. I'd guess they're in some of their kits, but don't know which ones. These are from their Firestone Supreme parts pack, which is one of the most reasonably priced ones! Some of them have insane prices!
-
Thank you, Pierre! I'm going with a solid purple. I'm definitely leaning toward a darker shade. I tried to bring the tone up, a little, on the color on the spoon. I am going to need to add a little more blue, into it, and maybe a dab of black. I'll get it dialed-in! At first, I wasn't thrilled with the color of the wheels, but, they've really grown on me! Thanks, Steve! I know it's going to look better than the one I built 50 years ago!? I appreciate your comments. It was stumbling across the photos on your thread that reminded me to have a look at these! Glad I saw them, too. They look right at home, on this thing!
-
These were on quite a few Gassers and Pro Stocks. I recall seeing at least a couple with pretty large tires, too. You're welcome! I thought I'd better mention it while I was thinking about it!? Thanks again, my friend!
-
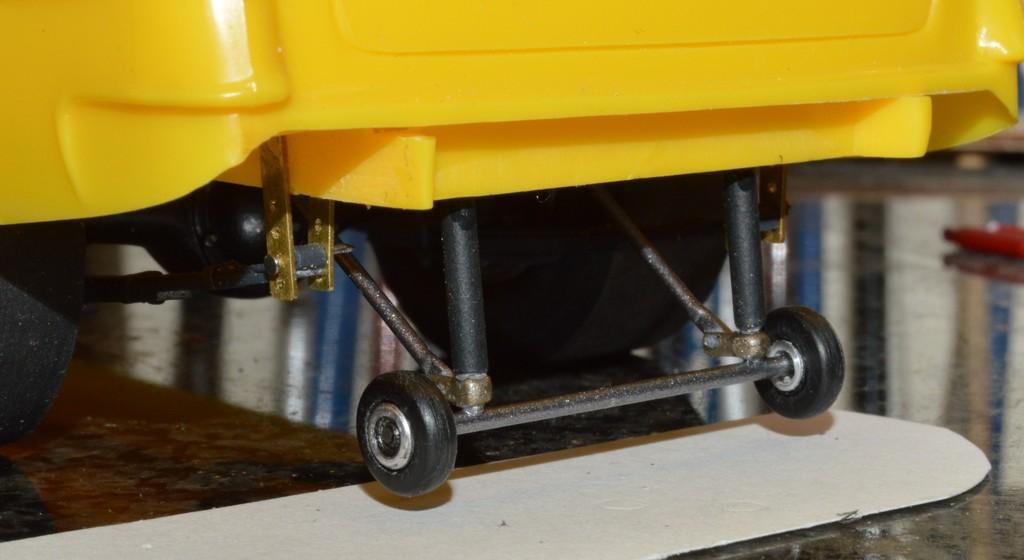
I've been working on the wheelie bar assembly. I like the vertical bars, on this car! There's still quite a bit to do, with them, but there's plenty done to get an idea of where they're headed. I turned the wheels from knitting needle aluminum, and the tires from Delrin. I may do them all over, again, as I was trying to get by with a piece of Delrin that was left from another project. I managed to make the second tire, but I could do a nicer one, starting with a bigger chunk of plastic! I think it looks cool, under there!