Straightliner59
-
Posts
5,809 -
Joined
-
Last visited
Content Type
Profiles
Forums
Events
Gallery
Everything posted by Straightliner59
-

Billy the Kid Demon Pro Stock
Straightliner59 replied to dragcarz's topic in WIP: Drag Racing Models
Beautiful work, getting that front end down, Roger! The grille looks great, too. May have to find one of those, for mine, as well. -
Unraveling The Snake Pit
Straightliner59 replied to Straightliner59's topic in WIP: Drag Racing Models
Here it is. It should be there, but, just in case:
- 17 replies
-
- 1
-

-
- hawaiianfc
- detail
- (and 2 more)
-
The aforementioned magnesium wheels...
-
Tribute to Snake45
Straightliner59 replied to bobthehobbyguy's topic in General Automotive Talk (Trucks and Cars)
Since I originally started this six years ago, and Snake liked it, I would be more than happy to share it in a "Bring Out Your Dead" tribute thread. I've been back working on it for a couyple of months, now, but, if you'd allow it...Here's our interaction about it: -
Hi, David. Those HRM wheels are really nice! I have a set for mine, as well. When I first started messing around with my Chaparral, I was looking for wheels, and found some old Cox slot car wheels that would have worked, decently, that were actual magnesium! Keep it rolling! It's looking good!
-
Thank you for your kind words, sir! I think the technique works well for the engine-turning. Next, I'll try it with a smaller dowel. I'm really happy with the new axle! I still need to solder on some shock mounts.
-
Thanks so kindly, Pierre! I think I'll save the actual working steering box for the dragster. Not sure I would be able to reach the wheel, in this one!? I'm pretty happy with the new axle. I failed to mention that I shaped the ends of the steering arms by tapping a small pin punch with a ball peen, while the brass rod was resting on an anvil. I little filing cleaned the ends right up. I then drilled them with a .6mm carbide bit. Today, I moved my clamping setup to the mill, and prepped a new piece of aluminum flashing for engine-turning. I used the same tool (3/32" dowel, wrapped with fine steel wool, and superglued in place). The mill works much better, due to the fact that I can run it at lower RPM. I now have a new spoiler! I plan to try it with the previously-mentioned toothpick, with the steel wool, before I dismantle the fixture. The pattern is still slightly larger than ideal, but it is uniform, and it looks beautiful! Comments are always welcomed. Thanks for looking!
-
Thanks, Ace! I like it much better than the first one!
-
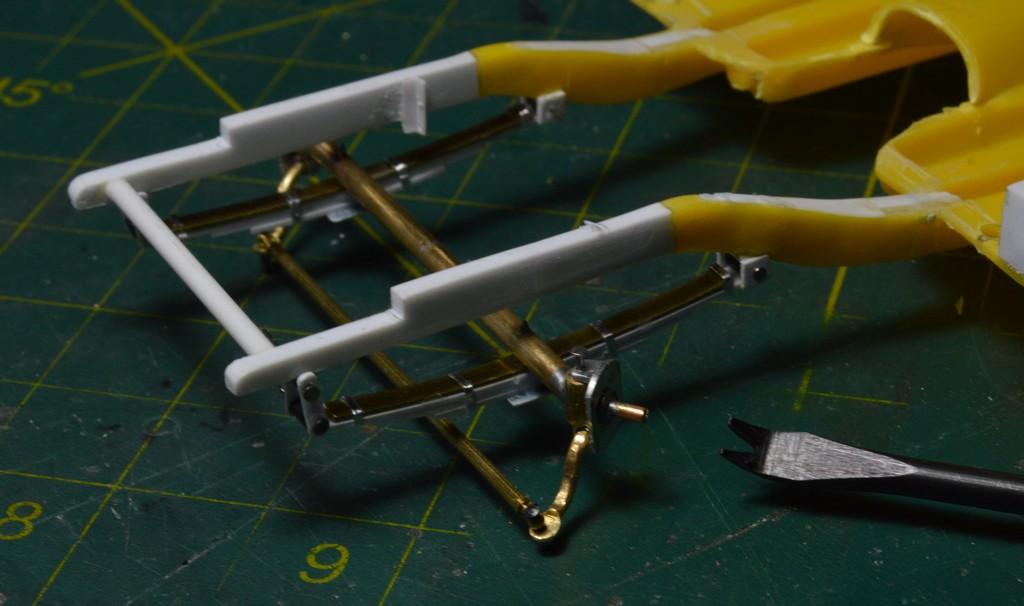
I got the new front axle made. Once I installed the steering arms, I put the spindles in the mill vise, and drilled through the arms. Now, the kingpin holds them in place! I soldered tiny washers to the axle shafts, on either side of the spindle body, to secure those. This axle is narrower, and everything looks better! It operates very smoothly, too! Here it is, sitting back on the wheels. Your comments are always welcomed. Thanks for looking!
-
Nice work, David! You got that body nice and smooth, too. This really is a neat kit. Of course, I have a thing for these old Mnogram kits!
-
Thank you, Topher. I appreciate that! I think with these old Monogram kits, you have to exercise, and accept some artistic license? They aren't at all perfect, but they're hella fun!
-
I think that may have been what I use on the dragster windscreen, now that you mention them. I think I used a mild abrasive, of some sort, with them, too. Don't recall what, though. I will have another look at them!
-
I may have to give it another go. I'm better equipped to do it, now. I was able to hand cut a working rack and pinion for a dragster in 1986, but, having the engine in back, that was a straight shot, from the butterfly to the box. That setup is very simple. I've had the thought for at least fifteen years, now, because I would really like to have one for my Surfers car.
- 190 replies
-
- 1
-
-
- scratch built
- brass chassis
- (and 1 more)
-
That looks great! Did you make a worm and sector, for it?? I only ask, because I've been trying.
-
Cue "Twilight Zone" theme.
-
I noticed the same thing! It really doesn't fit, at all, in any manner which is useable. Thankfully, I have my gravity feed brush which has a small cup permanently mounted. I think Badger makes a paint cup that has a curved tube. It seems like that might be a better option!
- 39,074 replies
-
- 1
-
-
- johan
- glue bombs
- (and 1 more)
-
That's definitely the way I would go, if it was just about a '55 Chevy! This is all about the Badman! See above!?
-
Clearing over decals?????
Straightliner59 replied to WillyBilly's topic in Tips, Tricks, and Tutorials
Not sure about maximum hardness, but, it's fairly quick, I would guess, since it's used on floors. Maybe a couple of hours? I've heard a lot of guys use foam brushes with it. I just use a big, fat, soft-bristled brush. The stuff flows, beautifully! -
Thank you, Francis! See, what happened, is I've eventually become pretty good at solving self-created problems!? Sometimes, thinking about how to do something, or make something actually keeps me lying awake, when I go to bed in the mornings.
-
I've tried too many methods for engine-turning to keep track of! The one that most satisfied me, I don't remember. It was whatever I used to do the windscreen on my NTF car. I never had much luck with erasers--even coarse ones. As for the Badman, it just is what it is! A goofy, neat kit. You're right--I am certainly having to go farther out of the way to get it to where I want it to be, this time around!
-
Gosh, that's a lot! No wonder I couldn't remember! Thank you. Sorry, David!
-
’72 Dodge Demon Drag Racer 1/25 scale
Straightliner59 replied to AmericanMuscleFan's topic in WIP: Drag Racing Models
Exactly--whatever works!? -
Actually, I use the resistance unit, a lot, during construction! I like the iron for smaller details, because a droplet of solder on the tip will usually heat the joint enough to affix the parts--It really works well for tabs and such. I have an extra power unit. I think I got it for about $50. The tweezers can be pretty expensive, but a web search will turn up an article or two on building them. It looks pretty easy. I pieced my setup together f8nding separate components online, mostly on Ebay. I bought a cheap foot switch for about $10. It's definitely a worthwhile investment!
-
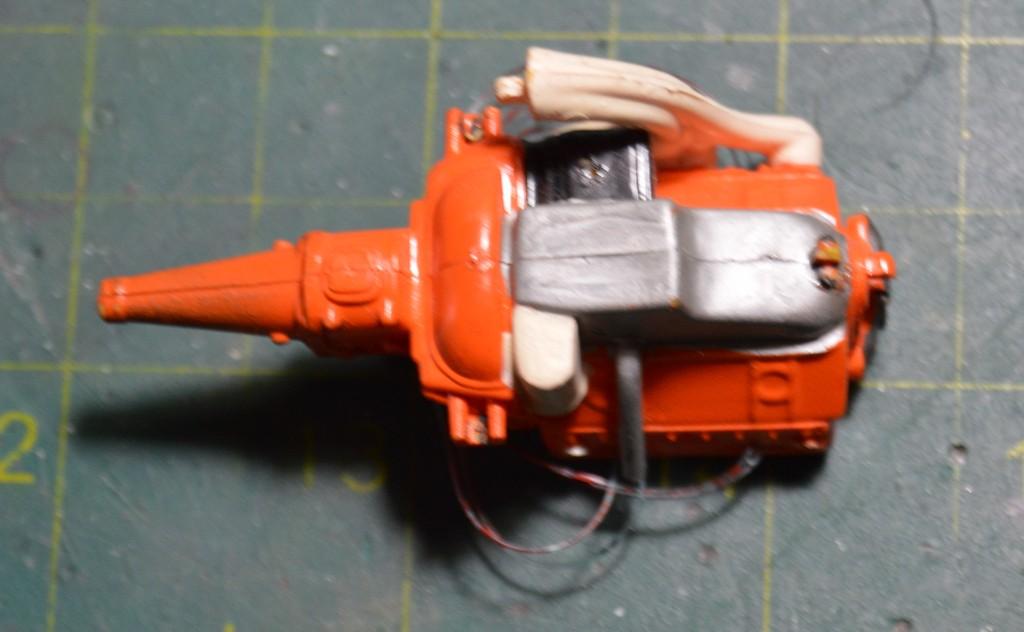
Thank you, sir! At least I feel like it's getting somewhere! Thanks, Ian. It worked out, very well. Total control, complete uniformity! I'm hoping I can manage the same with the injector manifold. First off, today, I want to share a few photos of what's left of my first Badman. This is right about 50 years old. As you can see, I used fishing line for the plug wires. Even then, I hated the look of thread, for plug wires, and was already searching for a viable alternative. Fishing line wasn't it! At least it was smooth. If I run across more of the engine parts, I may reassemble it, to display with the new model... Two of the things that I think are requirements, in order to maintain the model's identity are the engine badging on the fender/door area, and the spoiler on the front of the car. The badging's handled, leaving the spoiler. I want that big ol' expanse of aluminum to look a little snazzier, so, I'm back to playing around with engine-turning...again! As you can see on the test piece, I had varying degrees of success. The best, most consistent patterns were achieved using a 3/32" dowel (the smallest I have), wrapped with fine steel wool, and superglued in place. The two lower rows were done with this. It really looks beautiful. It's about 50% larger than I want. That means I need to find 1/16" dowels, or skewers, to see if I can create a better-sized pattern. I had some untested Model Factory Hiro foil that's pattern is intended to replicate engine-turned aluminum. I applied it to the plastic kit piece. As far as I'm concerned, it's a pretty hard fail. The pattern is too easily damaged, and, it just doesn't quite look like it ought to. I forgot to mention, in my last update, that I had cut and test-installed the side "glass". Work continues on the manifold. Thanks for looking!
-
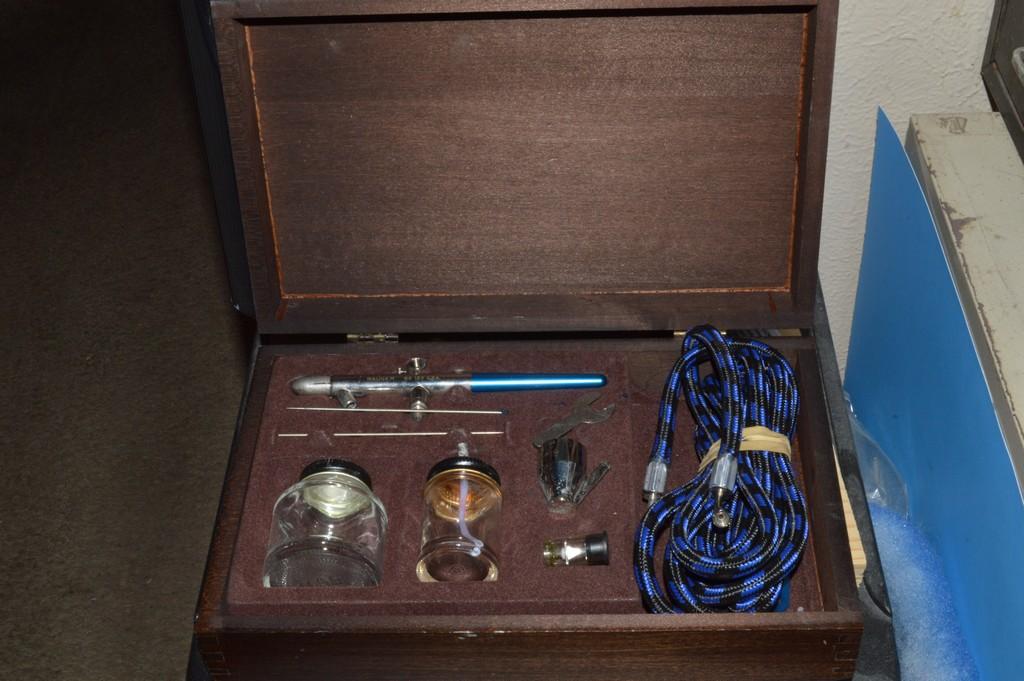
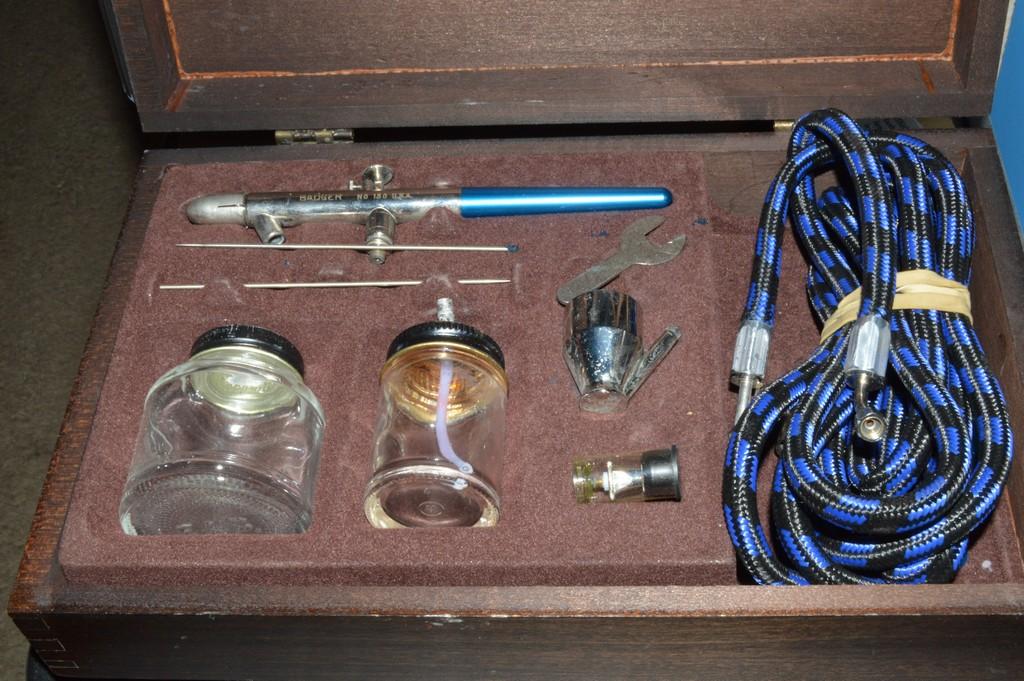
I've been wanting a different airbrush than my Badger 100G, so I'd have something with greater capacity. Got a great deal on this on Ebay. Right at $50, shipped. Works perfectly!
- 39,074 replies
-
- 4
-
-
- johan
- glue bombs
- (and 1 more)