StevenGuthmiller
-
Posts
15,086 -
Joined
-
Last visited
Content Type
Profiles
Forums
Events
Gallery
Everything posted by StevenGuthmiller
-
Okay, I guess that I misunderstood. I've also been using a lot of Duplicolor "Primer/Sealer". Seems to help with sealing things up nicely, and it's a lighter color of gray than the gray sandable primer, which is a plus for lighter paint colors. Steve
-

1962 Pontiac Catalina Custom Coupe
StevenGuthmiller replied to Peter Lombardo's topic in WIP: Model Cars
Now they're beginning to show up. Steve -
Model car related abbreviation?
StevenGuthmiller replied to 426 pack's topic in General Automotive Talk (Trucks and Cars)
Jees! What ever happened to actually speaking English?! Steve -
You didn't prime first? That's a large part of the problem right there. You're very lucky that you did not destroy the plastic. Steve
-
Thank you so much guys!! I was shooting for "absolutely speechless"! Steve
-
Don't worry about it David. Nobody can expect to know everything. That's why we are all here....to help. If the guys at the paint store can't even tell you what type of paint you are getting, I think that I would go another route. Seriously, give MCW a try. And no, there is no reason to wait that long between coats, but it should have no impact whatsoever on how the finish turns out. At least if you're using typical spray paint, regardless of the type. There is quite a learning curve to painting. All that you can do is ask for advice and try different techniques and materials. I've been painting model cars for nearly 50 years and I still have issues occasionally, and almost never end up with a perfect paint job. Steve
-
1962 Pontiac Catalina Custom Coupe
StevenGuthmiller replied to Peter Lombardo's topic in WIP: Model Cars
I'm on my desk top and I don't either. Nothing but "minus" symbols. Steve -
Why do you build models?
StevenGuthmiller replied to Oldmopars's topic in General Automotive Talk (Trucks and Cars)
Why do I build models? Easy answer for me. Because I love cars and I can't afford to own a warehouse full of 1:1 cars! My wife says that I have an "attention to detail" and I think that is a big part of it. I like fiddling with little stuff. Sorry to disappoint, but it's really no more complicated than that for me. Steve -
There's no need for any elaborate methods for getting the rims cut straight and uniform. All that is required is an Exacto knife, a razor saw, a ruler and some 100 grit sand paper. Cut your rim relatively straight with the razor saw and then get busy sanding! I just set the cut side of the rim down on the sand paper laid on a flat surface and sand away, checking the measurement periodically and just looking at it by eye until they all look the same. As you can tell in the above photo, the rims that I ultimately used were two different depths. I just trimmed all of them down close to the depth that I desired with an Exacto knife and then just sanded the rest of the way. The Torque Thrust part of the wheel just had the outer part of the rim trimmed off with an Exacto knife and then sanded flat to the next "step" of the rim. Steve
-
Thanks Niko! This is one of those kits that I never really expected to own either. Luckily for me, a neighbor of yours in Sweden, and fellow member of the board, offered this one to me in trade. I still thank him profusely for the opportunity to build this kit! I hope I can make him proud that he offered to me. Steve
-
Most likely. Enamels will usually just dissolve. Steve
-
Well, I don't think that takes much. The one on the box is pretty boring! Steve
-
That I don't know. You would probably need to contact Testors and Tamiya and inquire about print copies. Steve
-
I'll be watching. I traded one of these away quite recently. Sometimes I wonder if that was such a great idea. Steve
-
Paste toothpaste for polishing.
StevenGuthmiller replied to ewetwo's topic in General Automotive Talk (Trucks and Cars)
I used to use tooth paste as polish occasionally, but Novus polish takes any guess work out of it. Steve -
Thanks so much guys! I appreciate the kind comments. I was actually quite surprised at how much I enjoyed working on this project regardless of how involved it got. Steve
-
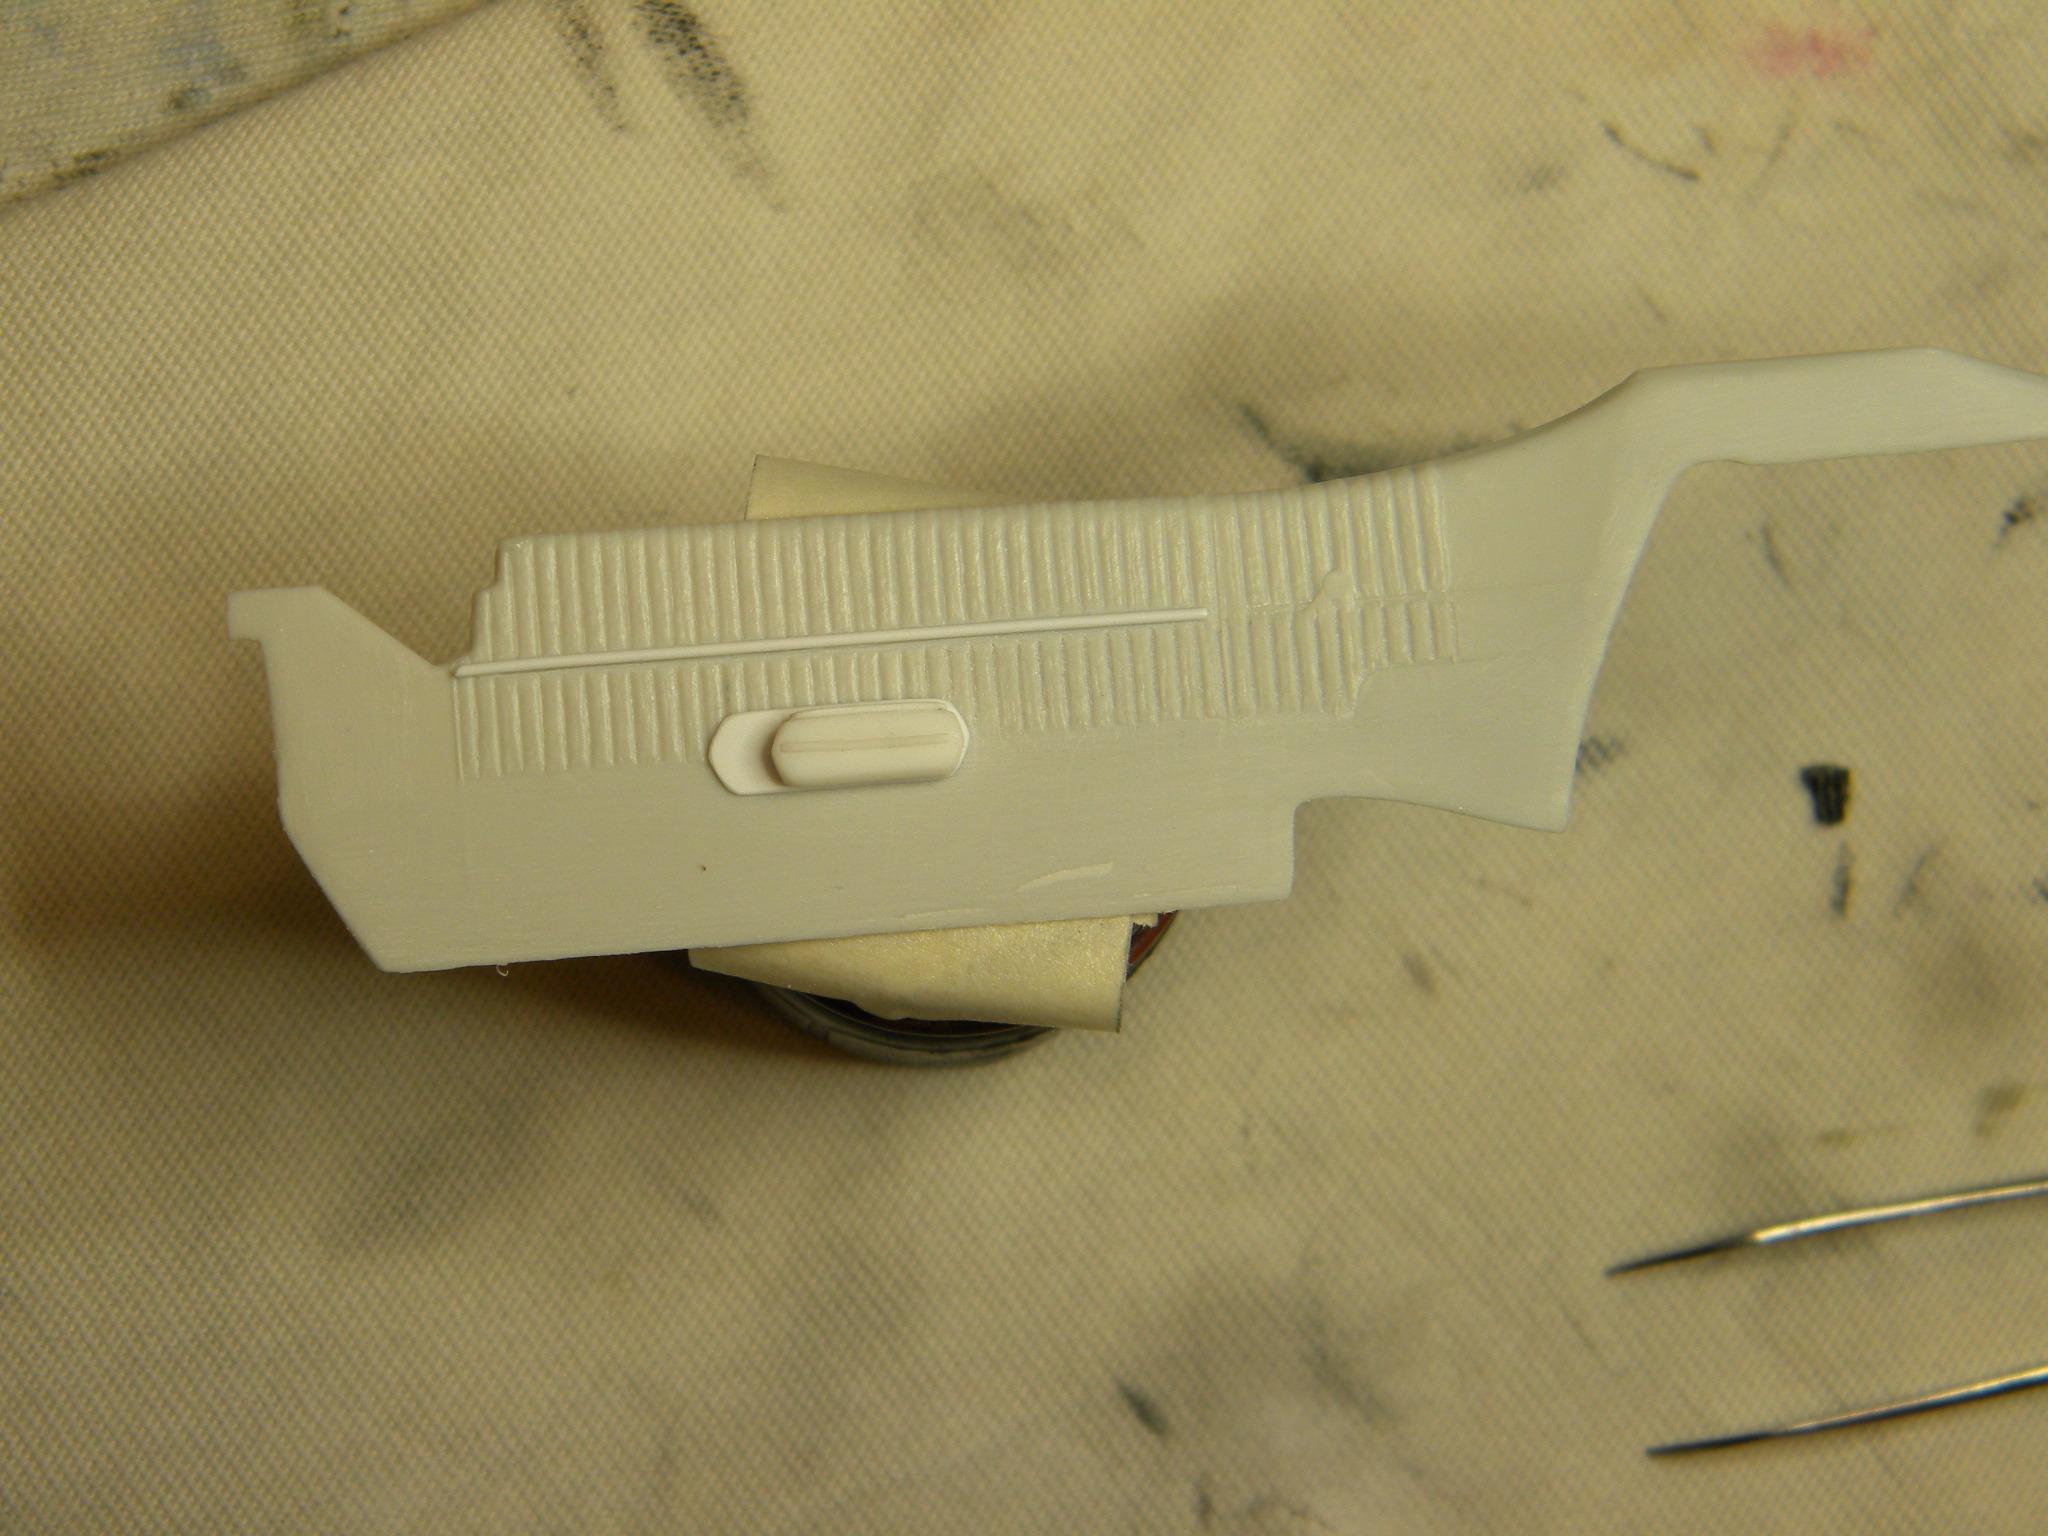
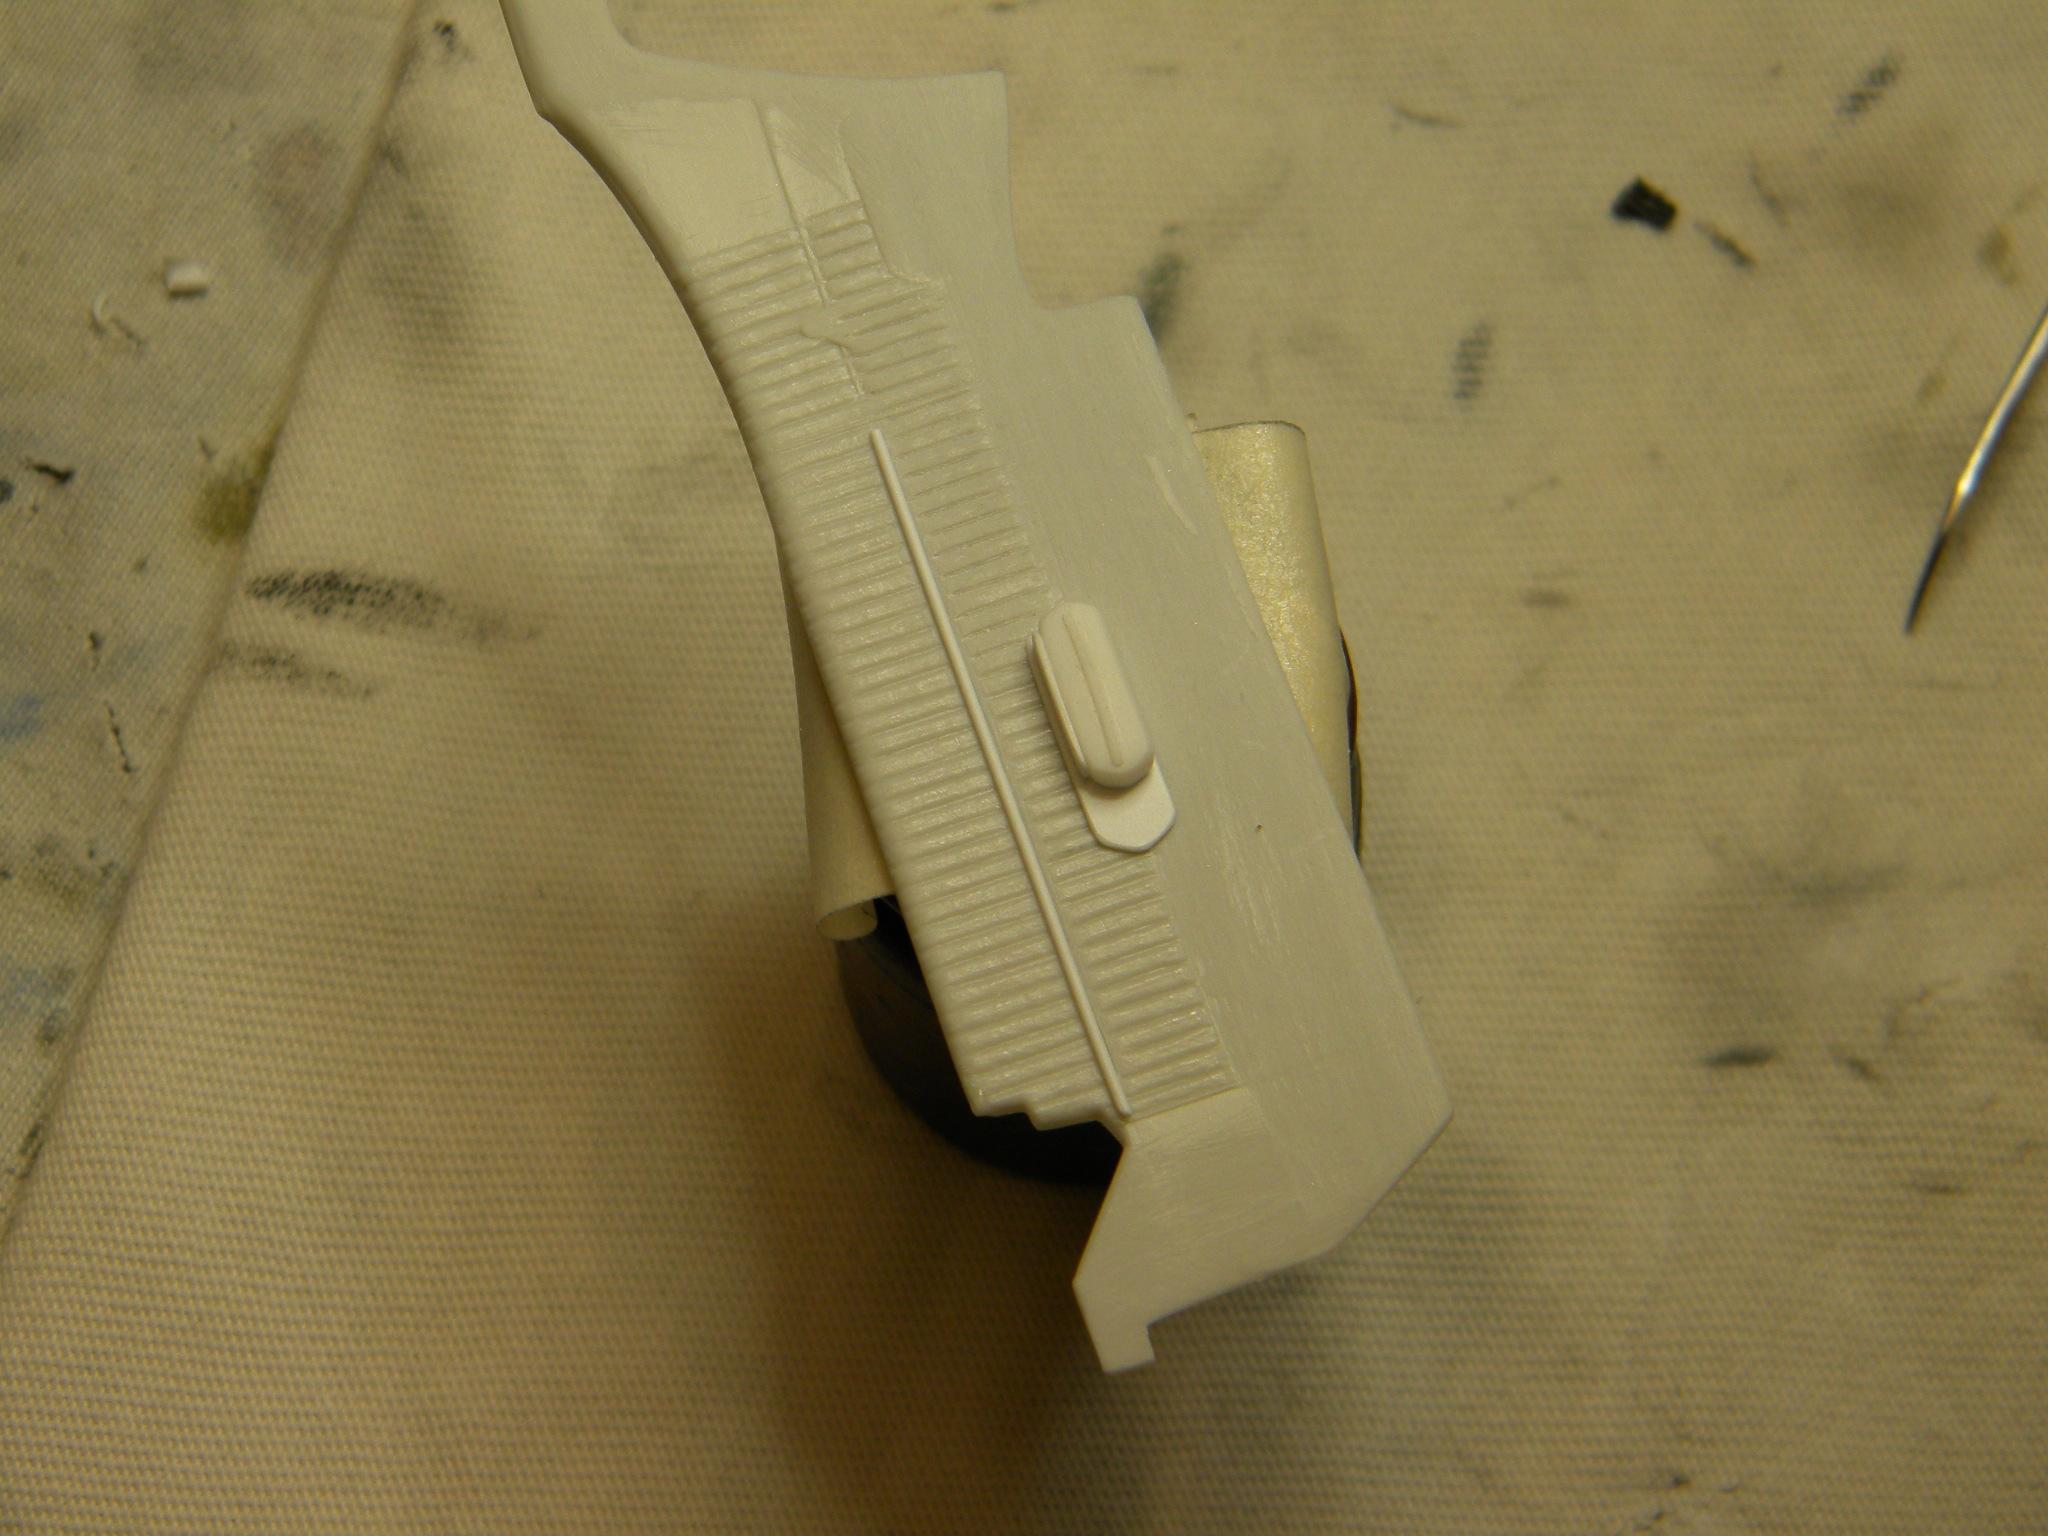
Spent the afternoon beginning the scratch building process of the arm rests. The door panels will be stripped of all detail except the pleats, and all trim will be replaced. Steve

-
Uh, no. A drywall subcontractor, delivery driver, and most recently, a valet! Steve
-
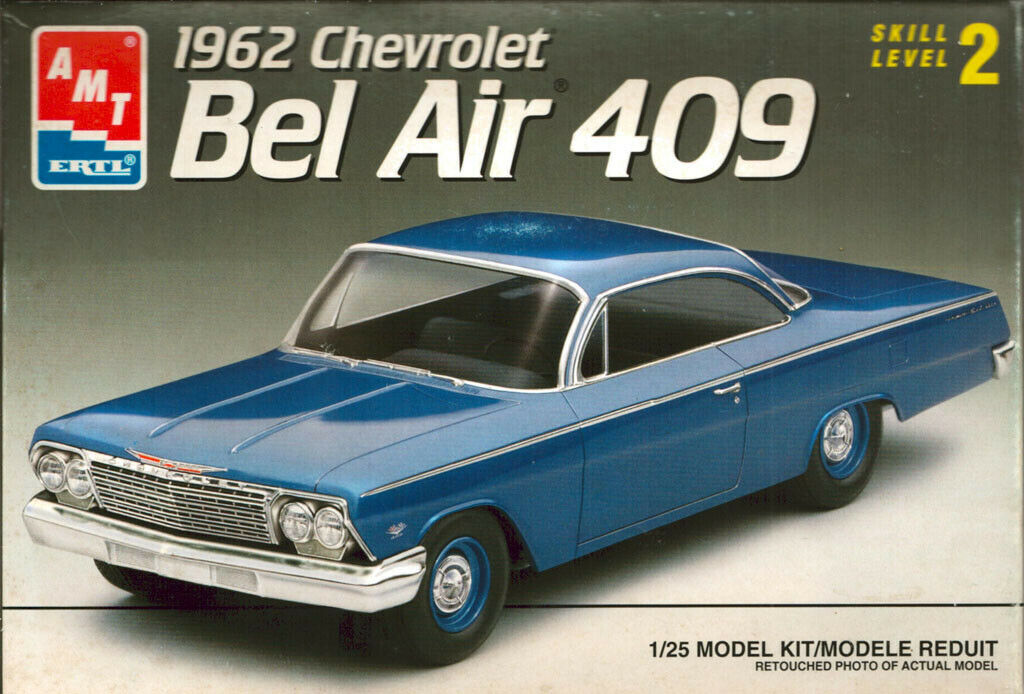
AMT 1962 Chevrolet Belair. Steve
-
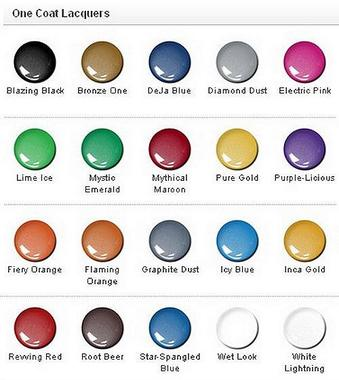
Testors enamels. Testors "One Coat" lacquers Testors "Model Master" car lacquers Tamiya Steve
-
The Other Magazine Forum
StevenGuthmiller replied to TarheelRick's topic in General Automotive Talk (Trucks and Cars)
Seriously? Wow, what a bunch of Nazis! I post there occasionally, but have not encountered any of these stupid rules. I just spend little time there because days can pass with no new posts. Steve -
Thanks guys! Actually I cut a thin piece of plastic from one of the interior door panels that I cut out and reshaped and used that. That's why it is exactly the same color as the body. Call it a model kit "skin graft". I would have used some styrene strip but it just seems so flimsy to me compared to the original kit plastic. Steve
-
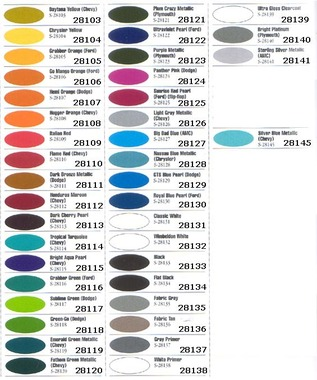
Model Car World. Here is the link. mcwautomotivefinishes.com If you click on the "paint" button under the catalog icon and then click on the "numerical list" button under Aerosol it will show a list of the colors offered in spray cans. Unfortunately there are no photographs or chips of the colors. You just have to wing it by description. I would guess that your best chances for a color close to the color you are after would be "Silver Green Metallic", "Light Green Metallic", "Light Lime Green Metallic", "Medium Lime Metallic" or possibly "Medium Green Metallic". There are also a half dozen turquoise shades that you could check out. Steve
-
MCW has a lot of really nice colors in spray cans for $15.00 each. This '62 Belair was painted years ago with an MCW rattle can. Steve
-
I just picked up a cheap set of small files on ebay years ago. Couldn't do without them now! One something like this for less than $20.00. While you're at it, pick up a set of dental tools. They work great for all sorts of tasks including scribing and body filler work. Steve