RancheroSteve
-
Posts
1,711 -
Joined
-
Last visited
Content Type
Profiles
Forums
Events
Gallery
Everything posted by RancheroSteve
-
Are you looking for a complete one? I have one that has some parts robbed out of it if that could work for you. Shoot me a PM if you want to work something out.
-
 Uh no - both charts state all blocks were black up until the '66 model year.
 -
Valve covers and air cleaner red? Block should be black. https://www.galaxieclub.com/Colors.html and https://www.falconparts.com/blog/ford-falcon-technical/ford-falcon-engine-colors/
-
I've been able to vacuform windshields using kit parts as bucks without melting the kit parts. Most of the heat goes into softening the vacuform plastic before it comes into contact with the buck, so relatively little heat is transferred to the buck.
-
Gunze Sangyo F1 kits
RancheroSteve replied to Bainford's topic in Model Building Questions and Answers
So I pulled my built-ups out of storage and shot a few quick photos. They were fun little builds for the time, but honestly I can't see paying the kind of prices they seem to be commanding now. Unless you absolutely need to have something of that vintage, I'd recommend the Hasegawa F1 and F3000 kits of the early nineties and the later Revell/Germany kits for that kind of stuff in 1/24.
-
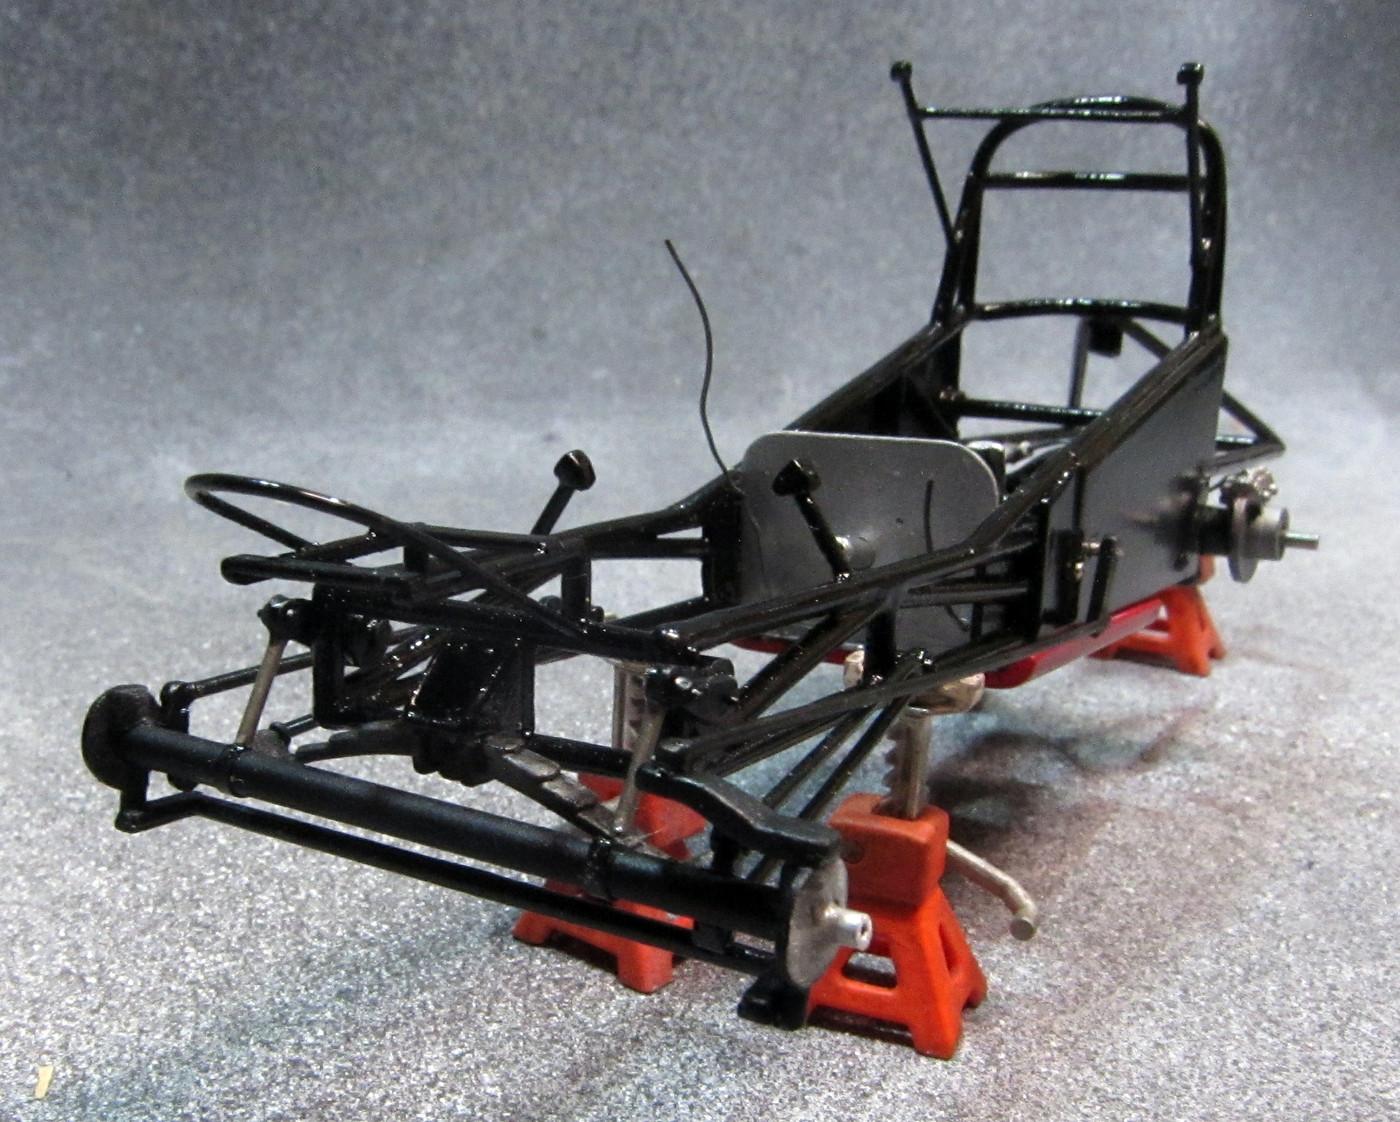
Front suspension and steering are installed; rear axle installed. Steering link isn't glued, as it will have to be removed to pass through the hole in the body. Not really visible here, but the interior is mostly complete. After I finish the wheelie bars I'll be able to drop the body on and it should start coming together.
-
Monogram and Revell Mustang IMSA Kits
RancheroSteve replied to GarryR's topic in Car Kit News & Reviews
I believe the Ron Fellows Sunoco Camaro (1997) was the last release of what started as the IMSA Mustang (then Camaro) tooling. -
AMT Deora custom pickup truck decal just need 1 piece
RancheroSteve replied to magicmustang's topic in Wanted!
Just an FYI - you can buy wood grain decal sheets from various vendors. Sometimes in the model train section if you have an LHS. -
Transmission question.
RancheroSteve replied to Classicgas's topic in Model Building Questions and Answers
Yes, that looks more like it! -
Transmission question.
RancheroSteve replied to Classicgas's topic in Model Building Questions and Answers
The unpainted one might be a Ford C4. -
Yes, all good now - thanks for asking. I'm back to making my usual slow but steady progress amidst life's distractions. Will post photos soon!
-
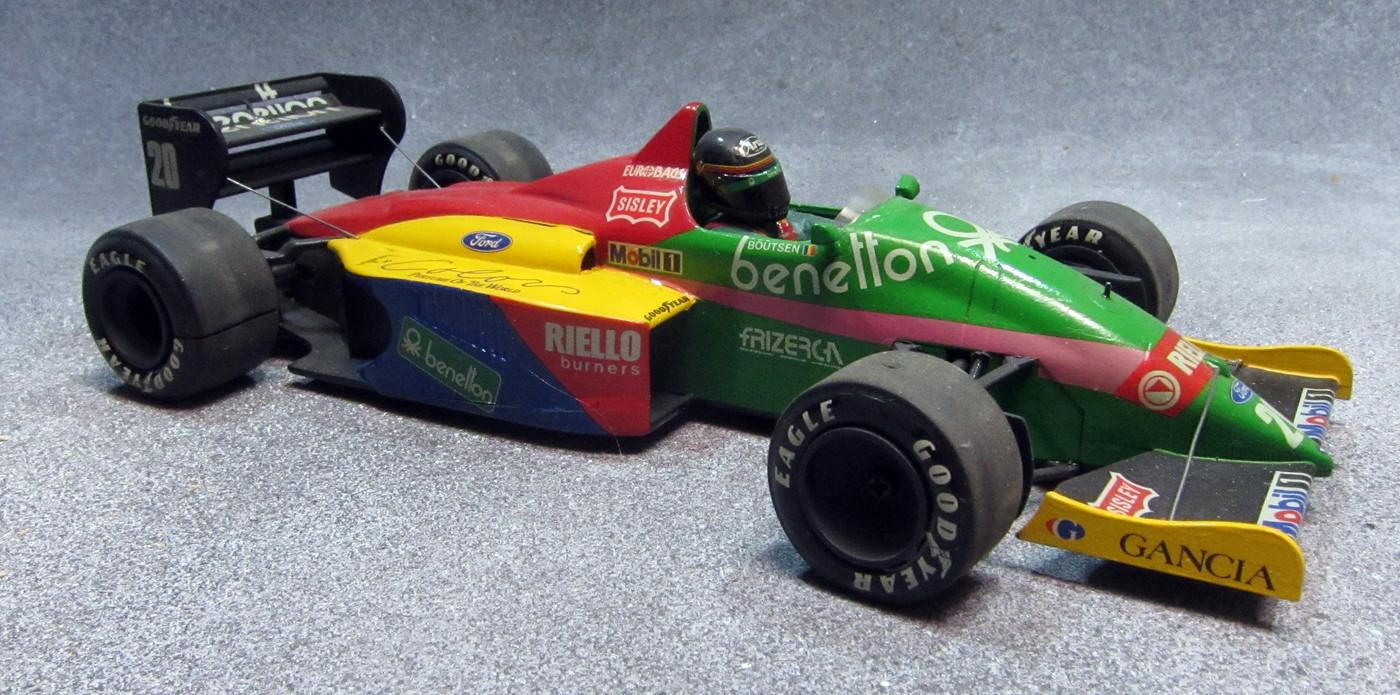
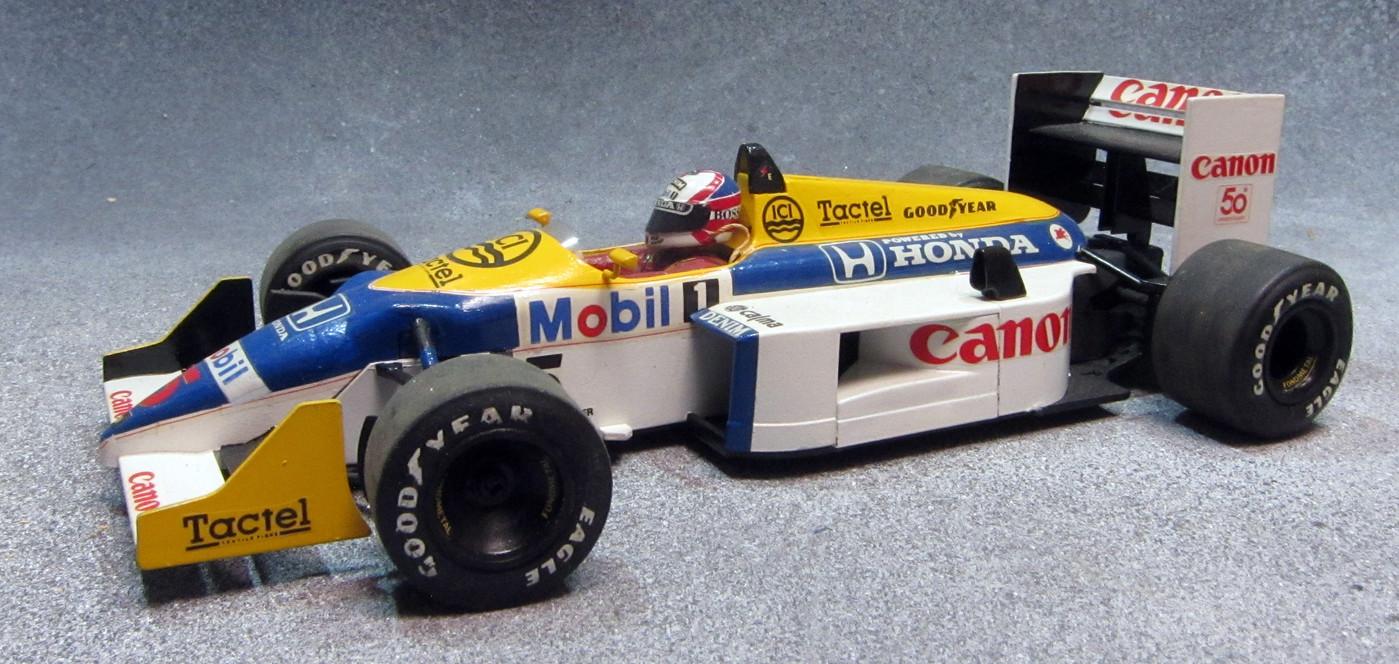
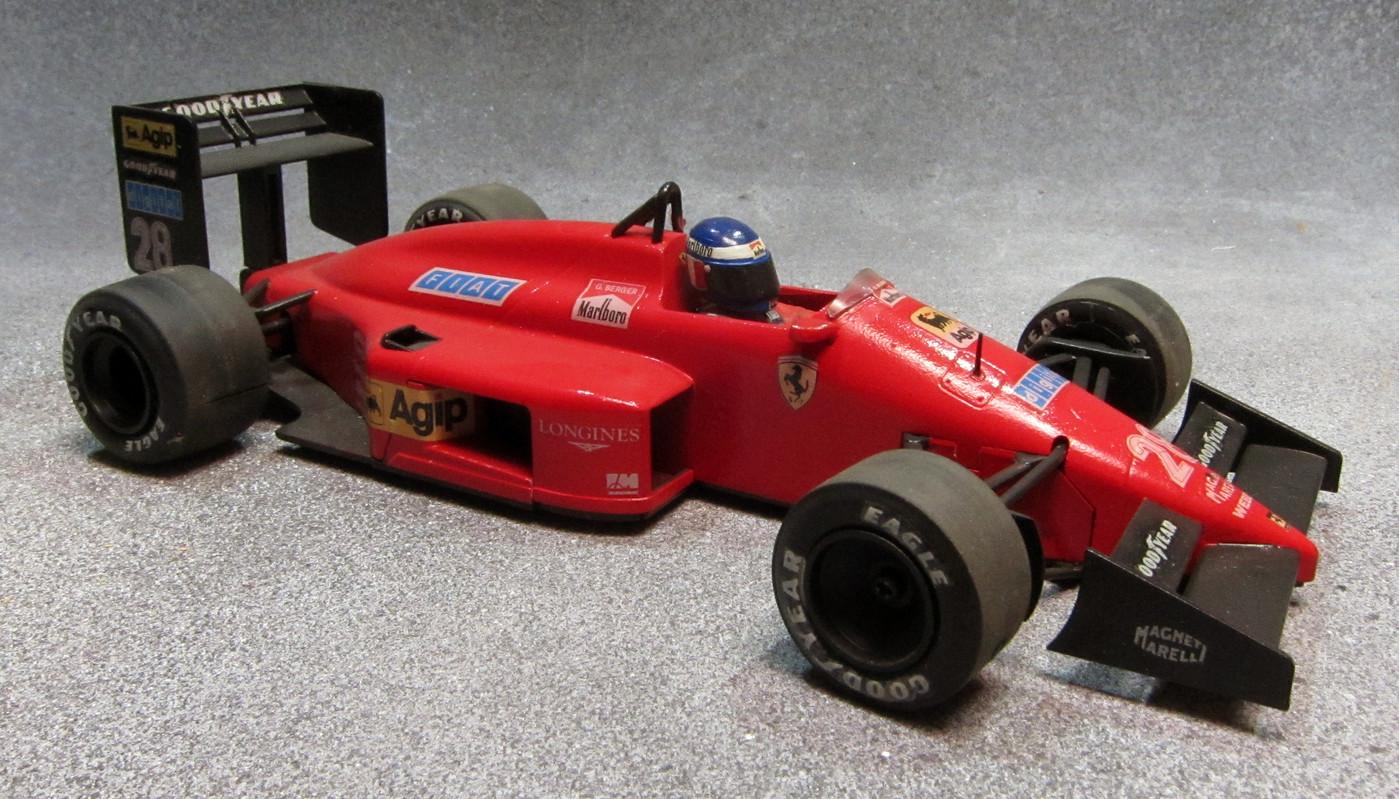
Gunze Sangyo F1 kits
RancheroSteve replied to Bainford's topic in Model Building Questions and Answers
I built a few - a Ferrari, Williams, and Benetton - back in the early 90s when I was just getting back into modelling. I'll try to dig up some photos. They are very simple curbside kits - intended to be motorized, I believe - but the proportions are decent. They are 1/24 to my eyes anyway. The tires are good, but the wheels are just generic dishes that attach with screws. There's no interior - just a shallow, slot car style driver. They're a fun and quick build, look good on the shelf, and probably the only 1/24 scale representation of F1 cars of that period. I imagine an ambitious builder could make something more detailed out of them. -
Just completed an excellent trade with Khils. A great guy to deal with.
-
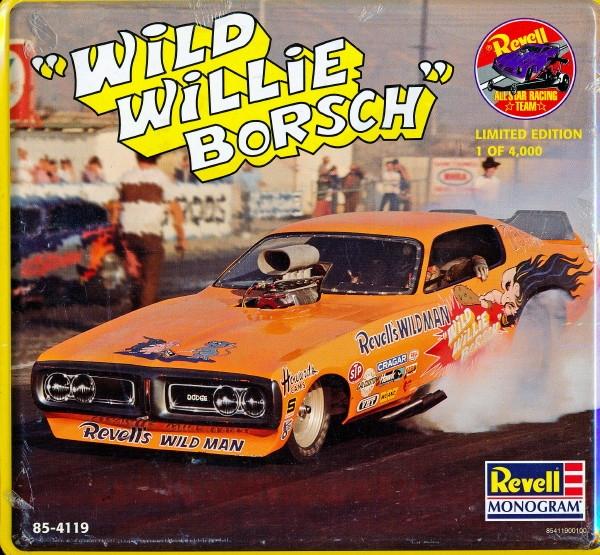
Wild Willie Borsch Charger funny car & tin box [please delete]
RancheroSteve replied to RancheroSteve's topic in Wanted!
Trade successfully completed. Thanks, Kevin! -
Nice of you to say that, but don't sell yourself short. I like to think that I've improved my skills by being ambitious and challenging myself. I rarely achieve everything I attempt, but I keep trying.
-
I'm not sure how accurate you're trying to get here, but bear in mind that the kit piece (if you find one) isn't really a correct representation of the real thing. Here's a shot of the restored car that I think shows it pretty well: And the version I made when I built the kit: Good luck with your build - looks like you're off to a good start!
-
Not sure if you were already aware, but the steering wheel on the Deora was a modified 60-something Oldsmobile unit. That wheel used to be available from the Modelhaus, but alas, no more.
-
I've got a hankering to acquire one of these: Preferably complete, but would also be interested in a partial kit, or even just the box if that's what you have. Lots to trade here - give me an idea of your wants and interests.
-
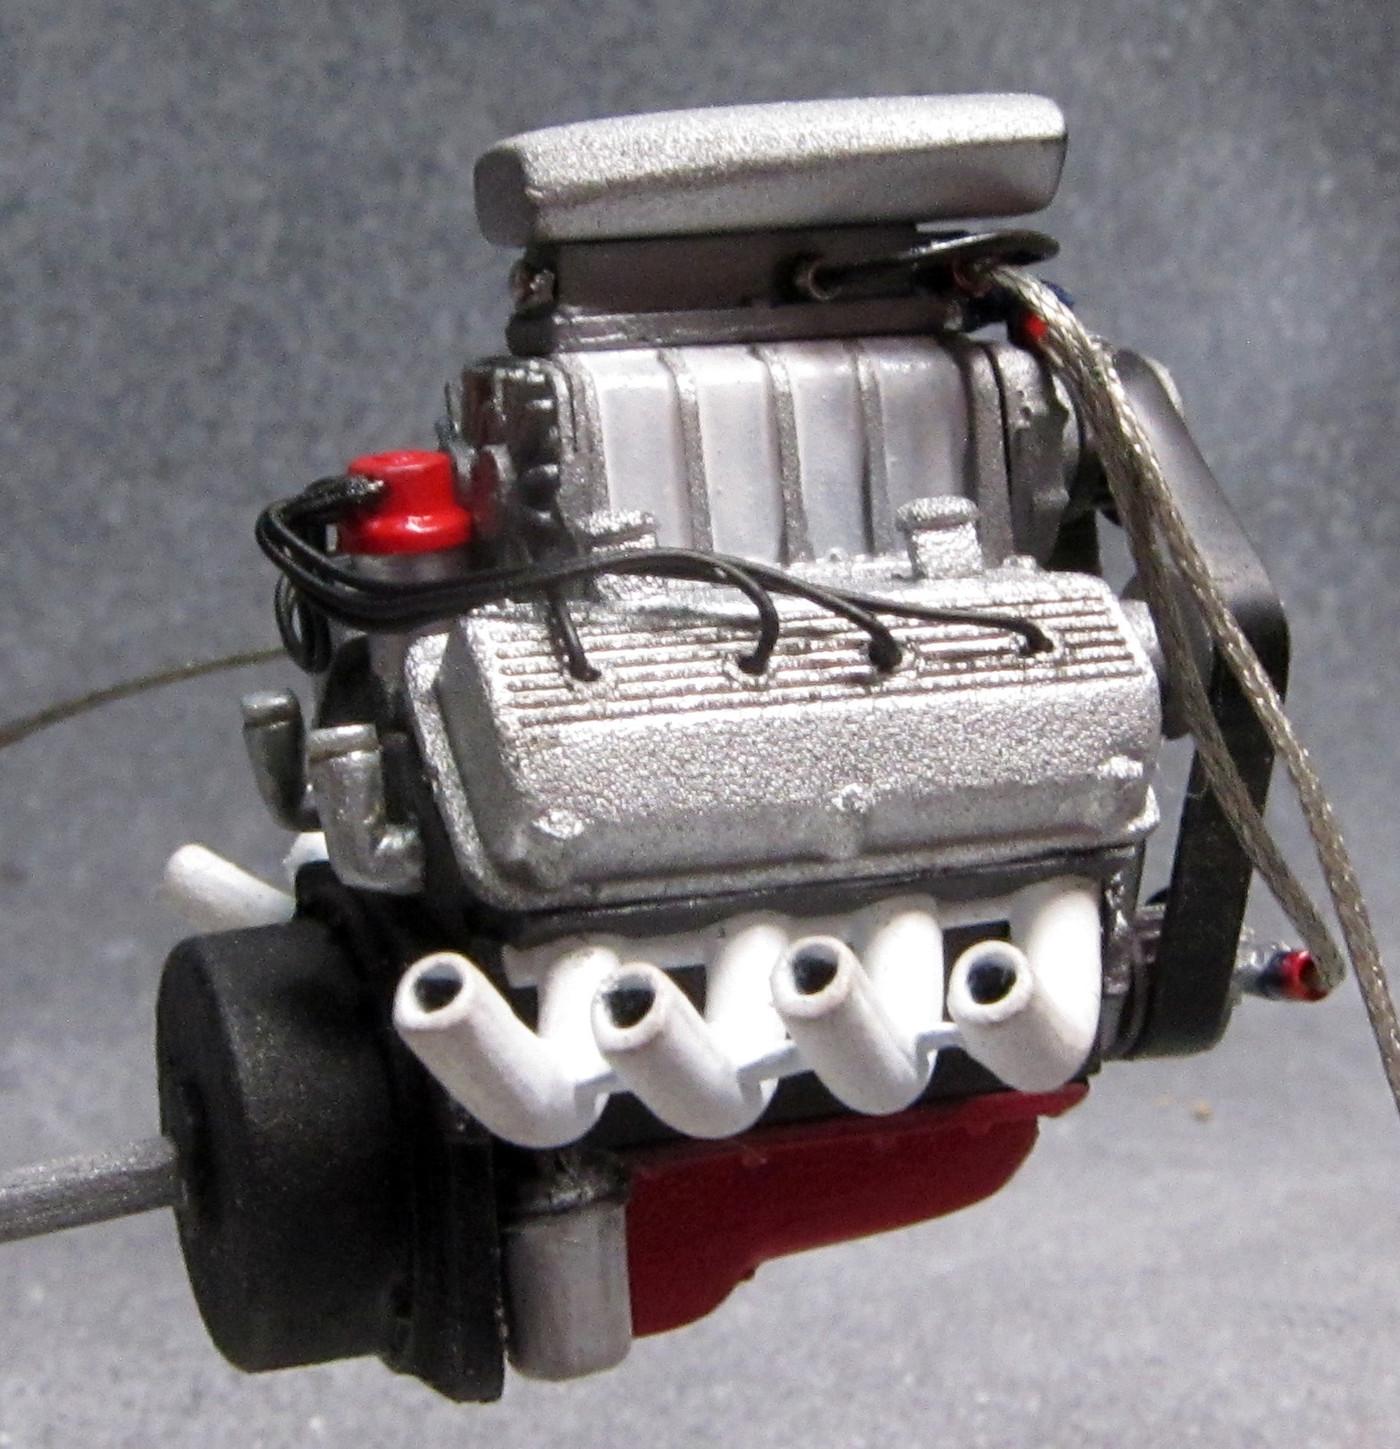
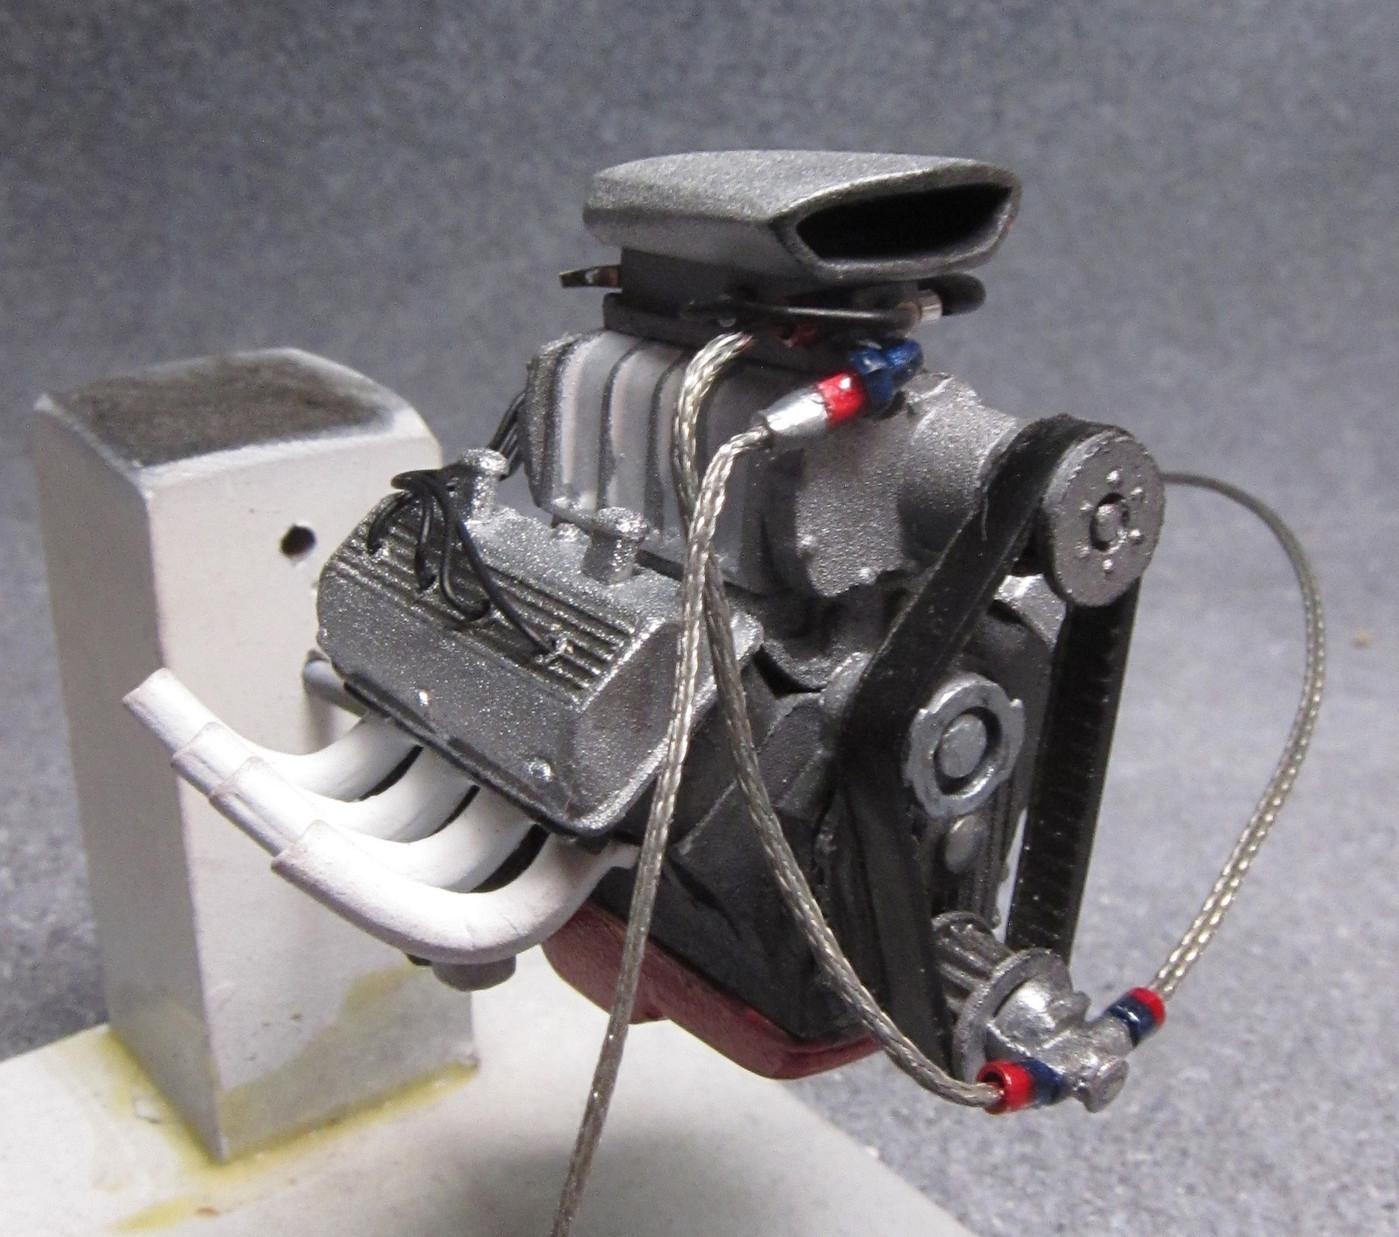
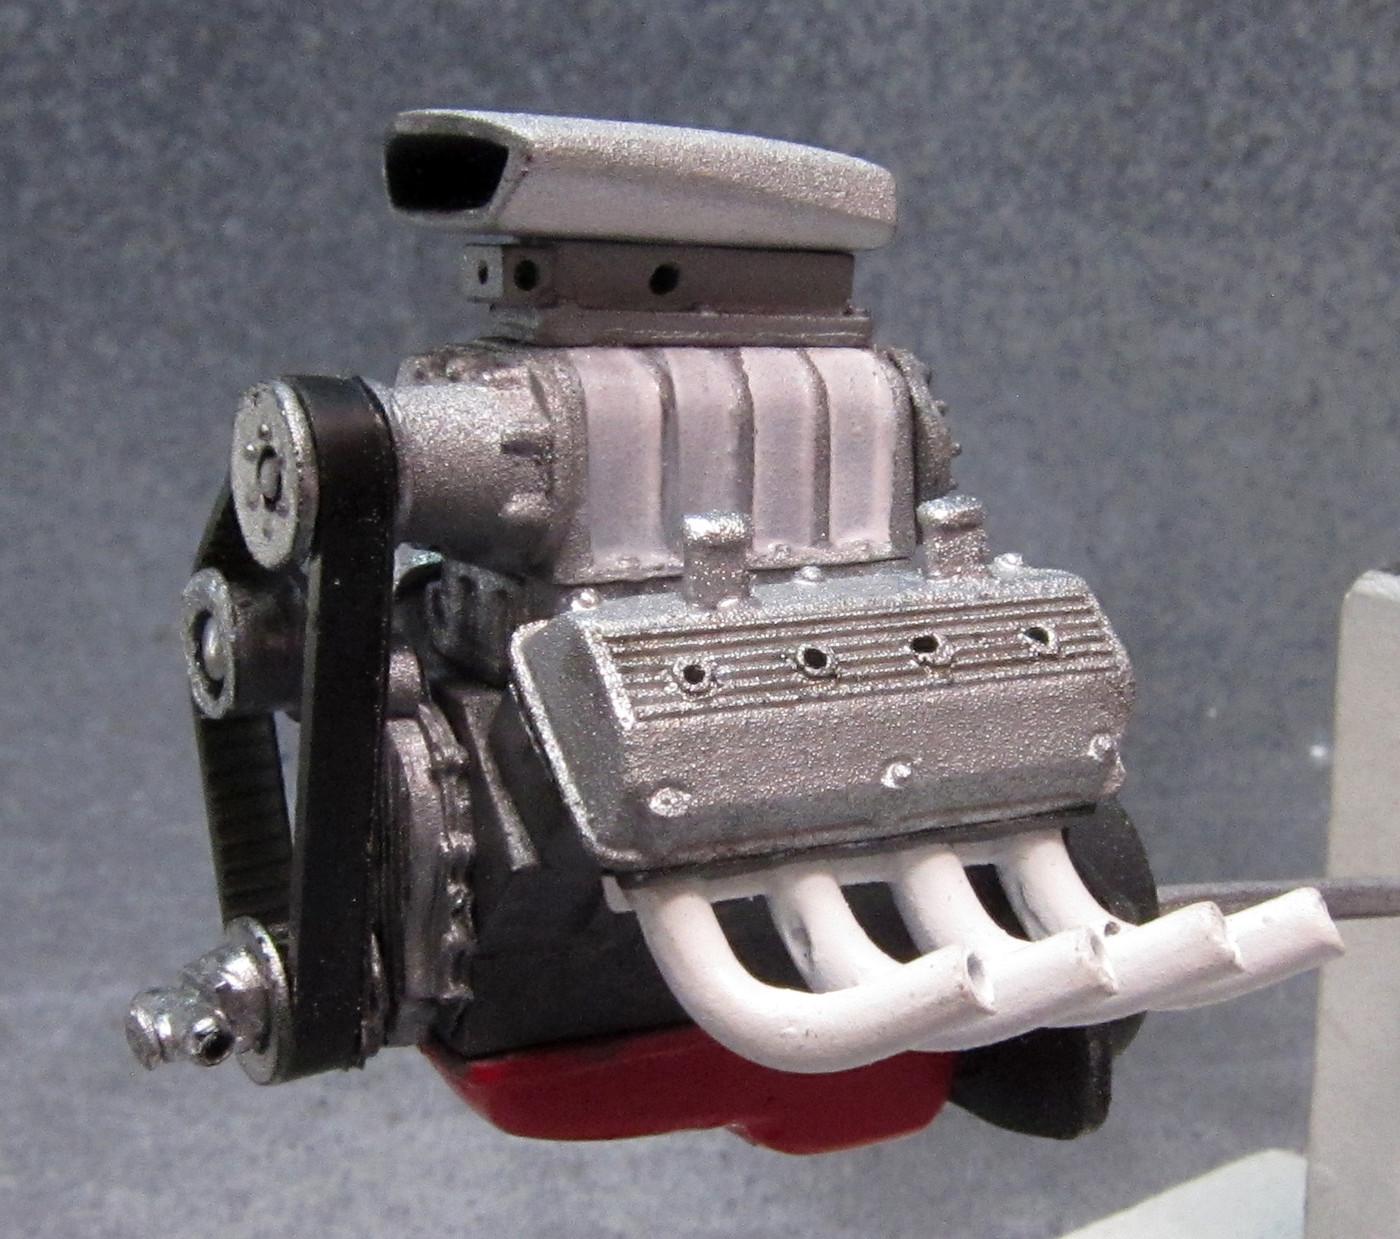
Finished wiring and plumbing the engine:
-
I've got all those publications - very helpful indeed for building correct replicas. Great work on the Fairlane!
-
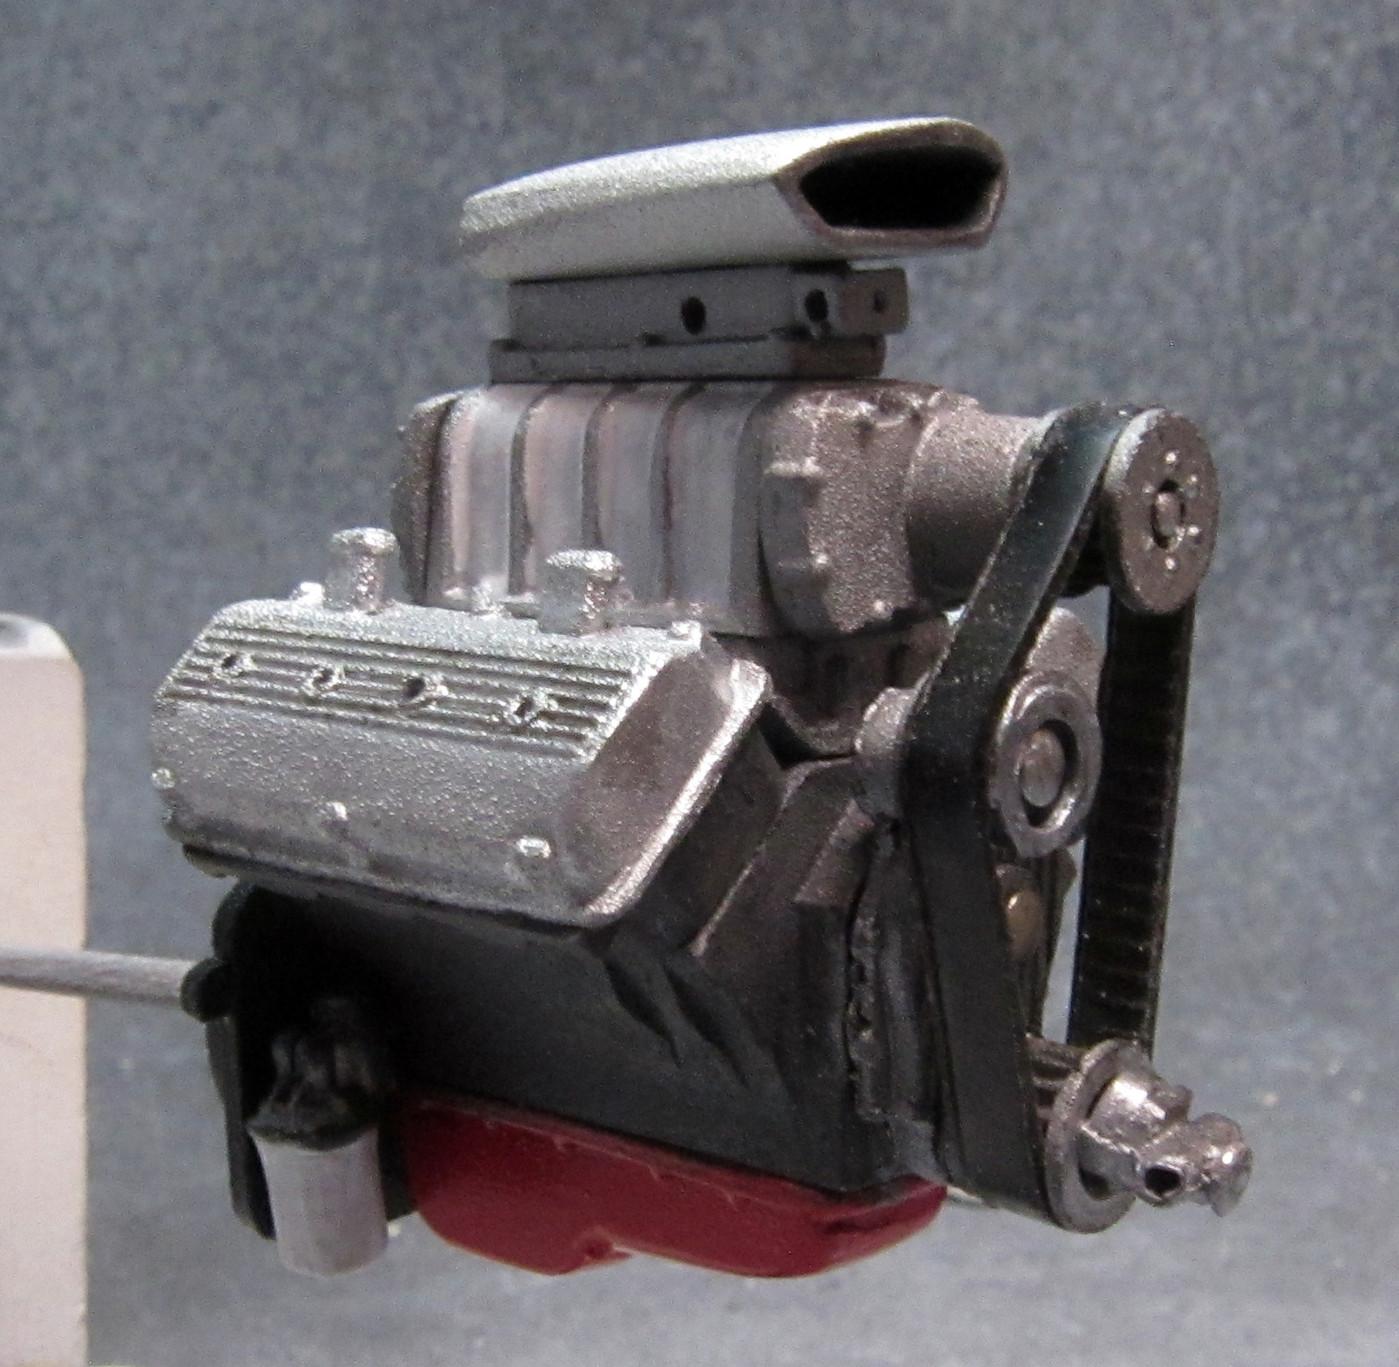
I managed to get most of the engine together. Front cover, oil filter, pulleys and belt, injector and scoop are from Speed City Resin. Wiring & plumbing might have to wait until this cast comes off.
-
Right - Iowa Shaker in 2006 according to Scalemates.
-
The Falcon was re-issued in Georgia Shaker, Daddy Warbucks and Wild Child versions around 2005.
-
Progress has ground to a near halt due to this:
-
Any Tips On Using Inkjet Decal Paper?
RancheroSteve replied to oldcarfan's topic in Model Building Questions and Answers
There should be a setting in your printer software for different types of paper. I use a Canon inkjet photo printer and the inkjet decal papers I've used specify that the printer needs to be set for glossy photo paper.